
PD91-GREEN - Vacuum Cleaner ELECTROLUX - Free user manual and instructions
Find the device manual for free PD91-GREEN ELECTROLUX in PDF.
User questions about PD91-GREEN ELECTROLUX
0 question about this device. Answer the ones you know or ask your own.
Ask a new question about this device
Download the instructions for your Vacuum Cleaner in PDF format for free! Find your manual PD91-GREEN - ELECTROLUX and take your electronic device back in hand. On this page are published all the documents necessary for the use of your device. PD91-GREEN by ELECTROLUX.
USER MANUAL PD91-GREEN ELECTROLUX
Get usage advice, brochures,
trouble shootererviceinformation:
www.electrolux.com

Register your product for better service:
www.electrolux.com/productregistration

Buy Consumables & Accessories for
your appliance: www.electrolux.com/
shop

CONSUMABLES & ACCESSORIES
www.electrolux.com/shop
s-bag® Ultra Long Performance
Ref: E210S
Part nr:9001684613
s-bag® Anti-allergy
Ref: E206S
Part nr: 9001684605
s-bag® Anti-odour
Ref.E203S
Part nr: 9001684597
s-bag® Classic Long Performance
Ref: E20TS
Part nr: 9001684589

sh

are
1679597
A


s-filter@
Hygiene non-Washable
Ref:EFH12W
Part nr.9001951194
Allergy Plus Washable
Ref: EFSTW
Part nr: 9001677682
s-fiter
Part nr: 9001677765
CUSTOMER CARE AND SERVICE
When contacting Service, ensure that you have
the following data available:
- Model Number
- PNC number
- Serial numbe
The information can be found on the rating plate

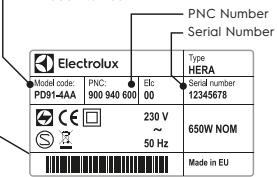
Model Number
electrolux.com/shop
Electrolux Appliances AB
S:t Goransgatan 143
S-105 45 Stockholm
Sweden

www.electrolux.com

GB INSTRUCTION BOOK
FR MODE D'EMPLO
AR
BG BPOUYPACNHCHTPYKLIIM
CZ NAVOD KPOUZITI
using carpet cleaning powder. For best possible performance, use the Ultra Long Performance bag which is especially developed for your cleaner. Other synthetic s-bags can also be used. Do not use paper dust bags! www.s-bag.com
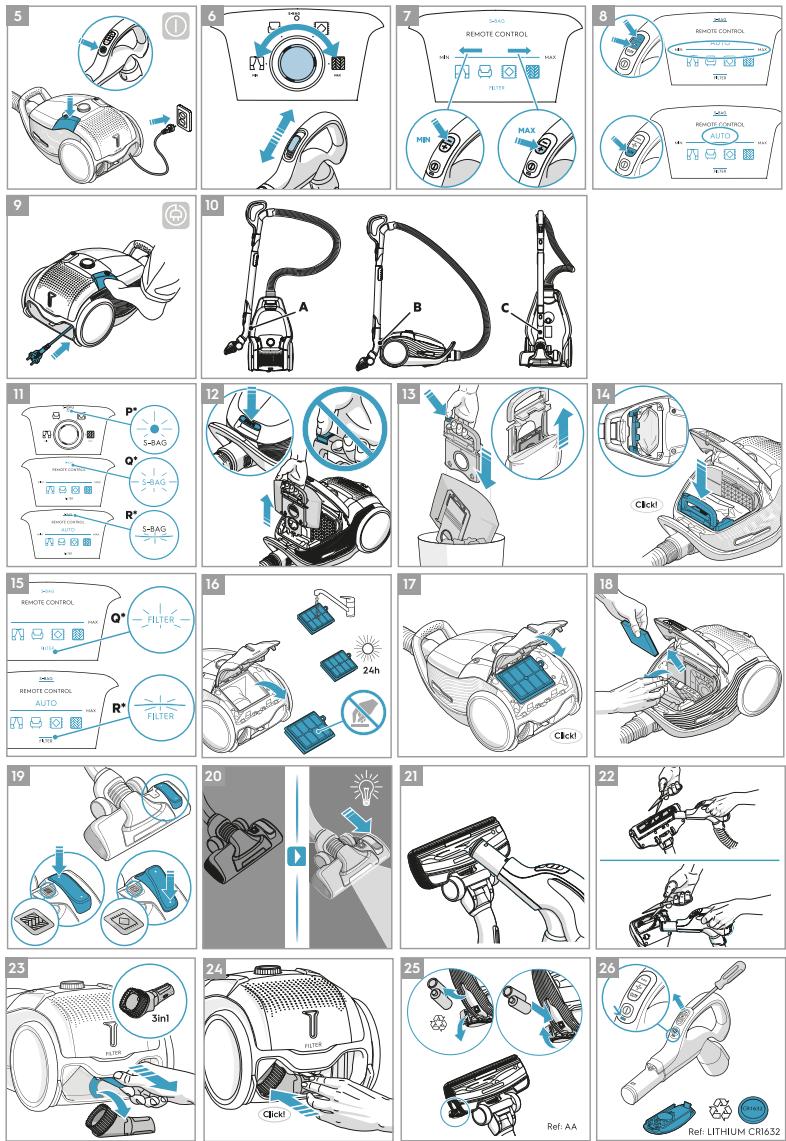
Pull the S-BAG button to open the dust compartment. The handle of the s-bag holder goes up. Pull the handle to remove the s-bag with holder. Do not press the release button.
Hold the s-bag with holder over a dust bin. Press the button to release the s-bag. Insert a new s-bag to the holder by inserting the cardboard at the back of the holder.
Insert the s-bag with holder by pushing it straight down in its tracks. Make sure the s-bag is not stuck under the holder. Close the lid. If the s-bag is not properly placed or is missing, the lid will not close.
NB: When you start the cleaner after s-bag replacement, it takes 10 seconds before the S-BAG indicator turns off (^ Models with rotary knob and Q^ Models with remote control) or turns green (^ Models with remote control and AUTO).
REPLACING THE FILTERS
Replace/清洗 the filter when ()washable filter only) - P Models with rotary knob: you have changed the s-bag 5 times -Q Models with remote control: FILTER symbol lights up in red -R Models with remote control and AUTO: filter indicator lights up in red. Green light indicates that the filter is ok. It lights up briefly when you start the vacuum cleaner.
16 Pull the FILTER button to open the filter lid. Use original s-filters. Remove the filter and check the reference on the frame to define type. Replace with a new filter or clean it. Rinse the inside (dirty side) in liquid water for 50 minutes to remove the water. Repeat the process four times. (*washable filter only)
NB: Do not use cleaning agents. Avoid touching the filter surface. Let the filter dry completely (min. 24 h in room temperature) before putting back! Change the washable filter at least once a year or when it is dirty or damaged. Do not remove the L-shaped foam under the filter.
7 After replacing the filter, close the filter lid until it is clicked back into place. If the filter lid comes off, position the hinges at the bottom and push the filter lid until it is clicked back into place.
NB: When you start the cleaner after filter replacement, it takes 10 seconds before the FILTER indicator turns green (cells with remote control) and then it is turned on.
Replace the motor filter when dirty or after every 5th s-bag. Push the filter holder down and pull it out. Exchange the filter and close the lid
VACUUMING WITH THE UNIVERSAL NOZZLE (V^*,W^*)
9 Change nozzle setting with the pedal. Icon illustrates recommended floor type. FlowMotion LED nozzle:Move the nozzle forward. The front light turn on automatically after a few seconds. When the nozzle is not used, the
CLEANING THE UNIVERSAL NOZZLE (V^*,W^**)
Disconnect the nozzle from the tube. Clean with the hose handle.
CLEANING THE TURBO NOZZLE (X^*)
2 Disconnect the nozzle from the tube and remove entangled threads etc by snipping them away with scissors. Use the hose handle to clean the nozzle. * 3IN1 ACCESSORY TOOL
Pull the textile tab to take out 3in1 tool. The tool has 3 functions, see pictures on next page.
After usage, put it back in its place.
Pull the textile tab to take out 3in1 tool. The tool has 3 functions, see pictures on next page.
After usage, put it back in its place.
POTLE
3IN1 ACCESSORY TOOL
m - 1 0 ;
m : x = 1 或 3x + 4y + 1 = 0
e.
m = 311
1
m = 311
i
CHANGING THE BATTERIES*
25 Nozzle with front lights*: Change batteries when front lights start blinking fast. Use 2 AA batteries.
26 Handle with remote control*: Change battery when light indicator turns red or is not responding when pressing any button. Use only batteries type LITHIUM CR1632.
NB: Remove the batteries from the product before scrapping. Follow your country's rules for collection of batteries and electrical products.
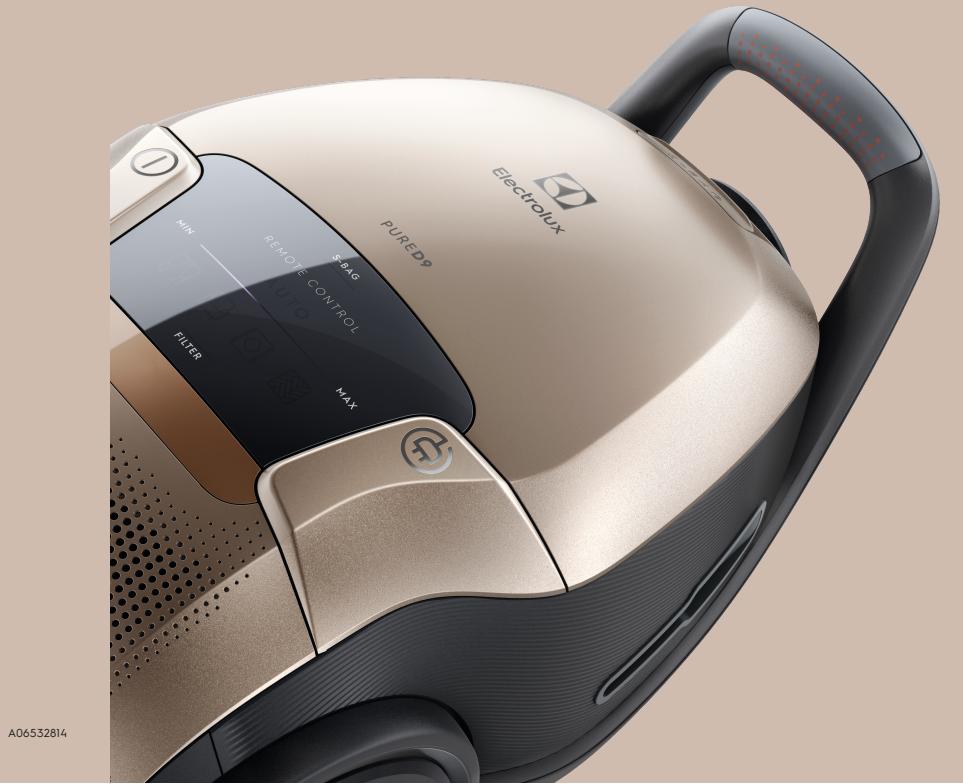
Enjoy a great cleaning experience with PURED9!
Electrolux reserves the right to change products, information and specifications without notice.
TIPS ON HOW TO GET THE BEST RESULTS
| NOZZLE/ACCESSORY | USE FOR: | NOZZLE/ACCESSORY | USE FOR: | ||
| K. 3in1 accessory tool* | 3 tools in 1: 1. Dusting tool for hard surfaces (bookshelves, skirting boards etc). 2. Upholstery tool for textiles (curtains, upholstery etc). 3. Crevice tool for narrow spaces (behind radiators etc). | V. FlowMotion nozzle* W. FlowMotion LED nozzle (with front lights)* | Universal nozzle: - For all floor types, secures best dust pick up on both carpets and hard floors. - Change nozzle setting with the pedal. Icon will show recommended floor type. - Front light helps to detect dust and dirt in dark spaces (under furniture etc). FlowMotion LED only | ||
| X. Turbo nozzle* | Carpet nozzle: - Brushes and vacuums at the same time (best pick up of hair, fibres etc). - Brush roller is driven by the airflow of the vacuum cleaner. - Not suitable for carpets with very deep piles and long fringes, anti-slip carpets like door mats or water resistant carpets. Use universal nozzle instead. | Y. Mini Turbo nozzle* | Upholstery nozzle: - Brushes and vacuums at the same time (best pick up of hair, fibres etc). - For textile furniture, car seats, mattresses etc. - Brush roller is driven by the airflow of the vacuum cleaner. - Not suitable for carpets with very deep pile and long fringes as it can get stuck in the rotating brush roll. | ||
| Z. ParketoPro nozzle* | Hard floor nozzle: - For gentle cleaning of hard floor (parquet, wooden floor, tiles etc). - Best dust pick up on hard floor with crevice. | AA. FlexProPlus nozzle* | Hardfloor nozzle: - For reach under/between furniture, corners and other obstacles. - Can easily turn 180 degrees for direct access to narrow spaces. | ||
| AB. Long crevice nozzle* | Extra long tool: - For areas hard to reach (top of shelves etc). - For narrow spaces (behind radiators, under car seats etc). | ||||
Models with manual power regulation
follow graphics on cleaner for optimal performance.
Models with AUTO-function automatically adjust the suction power
in order to give an optimal cleaning performance and comfort on every surface. For manual regulation, follow graphics for optimal performance.
TROUBLESHOOTING
| PROBLEM | SOLUTION |
| The vacuum cleaner does not start | • Check that the cable is connected to the mains. • Check that the plug and cable are not damaged. • Check for a blown fuse. • Check if the battery indicator lamp in the remote control handle responds (certain models only). |
| The s-bag®indicator light is illuminated | • Check if the s-bag®is full or blocked. • If you have already changed the s-bag®, change the motor filter. |
| The filter indicator light is illuminated (only at specific models) | Change, or wash (if washable), the exhaust filter. |
| The cleaner stops | The cleaner might be overheated: disconnect it from the mains; check if the nozzle, tube, hose or filters are blocked. Let the cleaner cool down for 30 minutes before plugging it in again. If the cleaner still does not work, contact an authorized Electrolux service centre. |
| Reduction of suction capacity versus normal | • Check if the s-bag is full or blocked. • Check if the motor filter is clogged and needs changing. • Check if nozzle is blocked and needs to be cleared. • Check if hose is blocked by squeezing it gently. However, be careful in case the obstruction has been caused by glass or needles caught inside the hose. Note: The warranty does not cover any damage to the hose caused by cleaning it. |
| Water has been sucked into the vacuum cleaner | It will be necessary to replace the motor at an authorized Electrolux service centre. Damage to the motor caused by the penetration of water is not covered by the warranty. |
| For any further problems, contact an authorized Electrolux service centre. | |
SAFETY PRECAUTIONS
This appliance can be used by children aged from 8 years and above and persons with reduced physical, sensory or mental capabilities or lack of experience and knowledge if they have been given supervision or instruction concerning use of the appliance in a safe way and understand the hazards involved.
Children shall not play with the appliance.
Cleaning and maintenance shall not be made by children without supervision.
WARNING: Turbo nozzles* have a rotating brush where parts can get entrapped. Please use them with caution and only on intended surfaces. Please turn the vacuum cleaner off before removing entrapped parts or cleaning the brush.
Batteries must be removed from the remote control in the handle / LED lighted nozzle before scraping the product**.
*Certain models only.
**Information on how to remove the battery in the fold-out part section 25 and 26.
Always disconnect the plug from the mains before cleaning or maintaining the appliance or when removing the battery. The battery is to be disposed of safely.
If the cord is damaged, it must be replaced only by an authorized Electrolux service centre in order to avoid a hazard.
PURED9 should only be used for normal vacuuming indoors and in a domestic environment. Make sure the vacuum cleaner is stored in a dry place.
All service or repairs must be carried out by an authorized Electrolux service centre.
Packaging material, e.g. plastic bags should not be accessible to children to avoid suffocation.
Never use the vacuum cleaner:
In wet areas.
Close to flammable gases, etc.
When the product shows visible signs of damage.
On sharp objects or fluids.
When the floor nozzle shows visible signs of a damages.
On hot or cold cinders, lighted cigarette butts, etc.
On fine dust, for instance from plaster, concrete, flour, hot or cold ashes.
Do not leave the vacuum cleaner in direct sunlight.
Avoid exposing the vacuum cleaner to strong heat or freezing temperatures.
Never use the vacuum cleaner without its filters.
Do not try to touch the brush roll while the cleaner is switched on and the brush roll is turning.
When the wheels are blocked.
Power cord precautions
Check the plug and cord regularly. Never use the vacuum cleaner if the plug or cord is damaged.
Damage to the vacuum cleaner's cord is not covered by the warranty. Never pull or lift the vacuum cleaner by the cord.
Using the vacuum cleaner in the above circumstances may cause serious personal injury or damage to the product. Such injury or damage is not covered by the warranty or by Electrolux.
SERVICING AND WARRANTY
All service or repairs must be carried out by an authorized Electrolux service centre.
Damage to the vacuum cleaner's cord is not covered by the warranty. Damage to the motor caused by; vacuuming liquid, immersing appliance in liquid or using appliance with a damaged hose and nozzle is not covered by the warranty.
Always use original s-bag dust bags suitable for this particular vacuum cleaner, see section 11. Damages caused to the cleaner by incorrect use of none-original dust bags is not covered by the warranty.
DISPOSAL
This symbol on the product indicates that this product contains a battery which shall not be disposed with normal household waste.
This symbol on the product or on its packaging indicates that the product may not be treated as household waste.
To recycle your product, please take it to an official collection point or to an Electrolux service center that can remove and recycle the battery and electric parts in a safe and professional way. Follow your country's rules for the separate collection of electrical products and rechargeable batteries.
Hereby, Electrolux Home Care and SDA, declares that the Vacuum Cleaner with radio equipment type HER2 and HER3 is in compliance with Directive 2014/53/EU.
FRANCAIS
REEMPLACEMENT DES PILES*
Never use the vacuum cleaner:
a a a a a a a a a a a a a a a a a a a
(^*X) 1
Jz a dll lag aal all bajil all jgag g yj 1a gall
1 3
Aaill jiai (AUTO gaiy jao yjai b) aaiy aaiy (s) AUTO . (s) ATO gaiy (s) ATO (s) ATO (s) MIN/MAX jay jay jay jay jay jay jay jay jay jay jay jay jay jay jay jay jay jay jay jay jay jay jay jay jay jay jay jay jay jay jay jay jay jay jay jay jay jay jay jay jay jay jay jay jay jay jay jay jay jay j
6
7
8
10
11
gagglg
S-BAG
loie jai jai jaiS (jai)
JU 1000000000000000000000000000000000000000000000000000000000000000000000000000000000000000000000000000
| Jolal | Catalall/Aggl | Jolal | Catalall/Aggl |
| : a lae ala gag blalallll lalallll lalallll lalallll lalallll lalallll lalallll lalallll lalallll lalallll lalallll lalallll lalallll lalallll lalallll lalallll lalallll lalallll lalallll lalallll lalallll . alalallll lalallll lalallll lalallll lalallll lalallll lalallll lalallll lalallll lalallll lalallll lalallll lalallll lalallll lalallll lalallll lalallll lalallll lalallll lalallll 1 . alalallll lalallll lalallll lalallll lalallll lalallll lalallll lalallll lalallll lalallll lalallll lalallll lalallll lalallll lalallll lalallll lalallll lalallll lalallll lal . alalallll lalallll lalallll lalallll lalallll lalallll lalallll lalallll lalallll lalallll lalallll lalallll lalallll lalallll lalallll lalallll lalallll lalallll lalallll lal alallll lal . alalallll lalallll lalallll lalallll lalallll lalallll lalallll lalallll lalallll lalallll lalallll lal . alalallll lalallll lalallll lalallll lalallll lalallll lalallll lalallll l . alalallll lalallll lalallll lalallll lalallll lalallll lal . alalallll lalallll lalallll lalallll lal . alalallll lalallll lal . alalallll lal . alalallll lal . alalallll lal . alalallll lal . alalallll lal . alalallll lal . alalallll lal . alalallll lal . alalallll lal . alalallll lal . alalallll lal . al . al . al . al . al . al . al . al . al . al . al . al . al . al . al . al . al . al . al . al . al . al . al . al . al . al . al . al . al . al . al . al . al . al | |||
| : a lae ala gag blalallll lalallll lalallll lalallll lalallll lalallll lalallll lalallll lalallll lalallll lalallll lalallll lalallll lalallll lalallll lalallll lalallll lal . alalallll lalallll lcal . alalallll lcal . alalallll lcal . alalallll lcal . alalallll lcal . alalallll lcal . alalallll lcal . alalallll lcal . alalallll lcal . alalallll lcal . alalallll lcal . alalallll lcal . al . al . al . al . al . al . al . al . al . al . al . al . al . al . al . al . al . al . al . al . al . al . al . al . al . al . al . al . al . al . al . al . al | *FlowMotion abg.f.V FlowMotion LED abg.f.W *(a) (a) (a) (a) (a) (a) (a) (a) (a) (a) (a) (a) (a) (a) (a) (a) (a) (a) (a) (a) (a) (a) (a) (a) (a) (a) (a) (a) (a) (a) (a) (a) (a) (a) (b) *2 .(d) (d) (d) (d) (d) (d) (d) (d) (d) (d) (d) (d) (d) (d) (d) (d) (d) (d) (d) (d) (d) (d) (d) (d) (d) (d) (d) (d) (d) (d) (d) (d) (d) (d) (c) (1) | *1 *2 1 | *1 *2 3 |
| : a lae ala gag blalallll lalallll lalallll lalallll lalallll lalallll lalallll lalallll lalallll lalallll lalallll lalallll lalallll lalallll lalallll lalallll lalallll lalAL . alalallll lalallll lcal . alalallll lcal . alalallll lcal . alalallll lcal . alalallll lcal . alalallll lcal . alalallll lcal . alalallll lcal . alalallll lcal . alalallll lcal . alal . al . al . al . al . al . al . al . al . al . al . al . al . al . al . al . al . al . al . al . al . al . al . al . al . al . al . al . al . al . al . al . al . all . all . all . all . all . all . all . all . all . all . all . all . all . all . all . all . all . all . all . all . all . all . all . all . all . all . all . all . all . all . all . all . all . all | : a lae ala gag blalallll lalallll lalallll lalallll lalallll lalallll lalallll lalallll lalallll lalallll lalallll lalallll lalallll lalallll lalallll lalallll lalallll lalalll lalallll lalallll lalallll lalallll lalallll lalallll lalallll lalallll lalallll lalallll lalallll lalallll lalallll lalallll lalallll lalallll lalallll lalallll lalallll lalalll lalallll lalallll lcal . . . . . . . . . . . . . . . . . . . . . . . . . . . . . . . . . . . . . . . . . . . . . . . . . . . . . . . . . . . . . . . . . . . . . . . . . . . . . . . . . . . . . . . . . . . . . . . . . . . . ; . . . . . . . . . . . . . . . . . . . . . . . . . . . . . . . . . . . . . . . . . . . . . . . . . . . . . . . . . . . . . . . . . . . . . . . . . . . . . . . . . . . . . . . . . . . . . . . . . . . ? . . . . . . . . . . . . . . . . . . . . . . . . . . . . . . . . . . . . . . . . . . . . . . . . . . . . . . . . . . . . . . . . . . . . . . . . . . . . . . . . . . . . . . . . . . . . . . . . . . . *2 (1) | *2 (1) | |
| : a lae ala gag blalallll lalallll lalallll lalallll lalallll lalallll lalallll lalallll lalallll lalallll lalallll lalallll lalallll lcal . alalallll lcal . alalallll lcal . alalallll lcal . alalallll lcal . alalallll lcal . alalallll lcal . alalallll lcal . alalallll lcal . alalallll lcal . alalallll 1cal . alalallll lcal . alal . al . al . al . al . al . al . al . al . al . al . al . al . al . al . al . al . al . al . al . al . al . al . al . al . al . al . al . al . . . . . . . . . . . . . . . . . . . . . . . . . . . . . . . . . . . . . . . . . . . . . . . . . . . . . . . . . . . . . . . . . . . . . . . . . . . . . . . . . . . . . . . . . . . . . . . . . . *1 (1) | *1 (1) | ||
| : a lae ala gag blalallll lalallll lalallll lalallll lalallll lalallll lalallll lalallll lalallll lcal . alalallll lcal . alalallll lcal . alalallll lcal . alalallll lcal . alalallll lcal . alalallll lca . alalallll lcal . alalallll lcal . alalallll lcal . alalallll lcal . alalallll lcal . alalallll lcal . alalallll lcal . alalallll lcal . alalallll lcal . alalallll lcal . alalallll lcal |
LgXu, g1b3i ciis
| اللاني | العربية | |
| .العربية الحرفية مصحيى بعس الحدوي ن參 مبعس الحدوي مصحيى . . . . . . . . . . . . . . . . . . . . . . . . . . . . . . . . . . . . . . . . . . . . . . . . . . . . . . . . . . . . . . . . . . . . . . . . . . . . . . . . . . . . . . . . . . . . . . . . . . . . . .العربية الحرفية مصحيى بعس الحدوي ن參 مبعس الحدوي مصحيى . . . . . . . . . . . . . . . . . . . . . . . . . . . . . . . . . . . . . . . . . . . . . . . . . . . . . . . . . . . . . . . . . . . . .. .(العربية الحرفية مصحيى بعس الحدوي ن參 مبعس الحدوي مصحيى . . . . . . . . . . . . . . . . . . . . . . . . . . . . . . . . . . . . . . . . . . . . . . . . . . . . . . . . . . . . . . . . . . . . . . . .العربية الحرفية مصحيى بعس الحدوي ن參 مبعس الحدوي مصchieى . . . . . . . . . . . . . . . . . . . . . . . . . . . . . . . . . . . . . . . . . . . . . . . . . . . . . . . . . . . . . . . . . . . . . . . . . .(العربية الحakteان مصحيى بعس الحدوي ن參 مبعس الحدوي مصchieى . . . . . . . . . . . . . . . . . . . . . . . . . . . . . . . . . . . . . . . . . . . . . . . . . . . . . . . . . . . . .العربية الحakteان مصحيى بعس الحدوي ن參 مبعس الحدوي مصchieى . . . . . . . . . . . . . . . . . . . . . . . . . . . . . . . . . . . . .電Electrolux電電電電電電電電電電電電電電電電電電電電電電電電電電電電電電電電電電電電電電電電電電電電電電電電電電電電電電電電電電電電電電電電電電電電電電電電電電電電電電電電電電電電電電電電電電電電電電電電電電電電电電電電電電電電電電電電電電電電電電電電電電電電電電電電電電電電電電電電電電電電電電電電電電電電電電電電電電電電電電電電電電電電電電電電電電電電電電電電電電電電電電電電電電電電電電電電電電電電電電電電 | (العربية الحرفية مصحيى بعس الحدوي ن參 مبعس الحدوي مصchieى . . . . . . . . . . . . . . . . . . . . . . . . . . . . . . . . . . . . . . (العride الحرفية مصحيى بعس الحدوي ن參 مبعس الحدوي مصchieى . . . . . . . . . . . . . . . . . . . . . . . . . . . (العride الحرفية مصحيى بعس الحدوي ن參 مبعس الحدوي مصchieى . . . . . . . . . . . . . . . . . . (العride الح冊ملاير مصحيى بعس الحدوي ن參 مبعس الحدوي مصchieى . . . . . . . . . . . . . . (العride الح冊ملاير مصحيى بعس الحدوي ن參 مبعس الحدوي مصchieى . . . . . . . . . . . (العride الح冊ملاير مصحيى بعس الحدوي ن參 مبعس الحدوي مصchieى . . . . . . . . . . (العride الح冊ملاير مصحيى بعس الحدوي ن參 مبعس الحدوي مصchieى . . . . . . . . . (العride الح冊مleaير مصحيى بعس الحدوي ن參 مبعس الحدوي مصchieى . . . . . . . . (العride الح冊مleaير مصحيى بعس الحدوي ن參 مبعس الحدوي مصchieى . . | |
Jlal 1200000000000000000000000000000000000000000000000000000
jgljll jIbly
J 1
1 1 1 1 1 1 1 1 1 1 1 1 1 1 1 1 1 1 1 1 1 1 1 1 1 1 1 1 1
* *
bsaaiyao cuijibg
26 25
a
aiai jgsjg 11j1
jbsy jby jbcg aal gll glll llae gllgagall aalll lss
128 jno wolil a jilS o 12e gll iagg e g l jzjall gle jzgall jzj
a 1 a a a a a a a a a a a a a a a a a a a a a a a a a a a a a a a a a a a a a a a a a a a a a a a a a a a a a a a a a a
Ae Slll l Eclctrolux Home Care and SDA 53/2014
Jn Jn Jn Jn Jn Jn Jn Jn Jn Jn Jn Jn Jn Jn Jn Jn Jn Jn Jn Jn Jn Jn Jn Jn Jn Jn Jn Jn Jn Jn Jn Jn Jn Jn Jn Jn Jn Jn Jn Jn Jn Jn Jn Jn Jn Jn Jn Jn Jn Jn Jn
Electrolux aas jslraa j sry g 2xuall iailusll luee e
y j 1j 1j 1j 1j 1j 1j 1j 1j 1j 1j 1j 1j 1j 1j 1j 1j 1j 1j 1j 1j 1j 1j
iiaaiee
A. a.b.c.d. 25
Jll JlssdAaIaI aIlaI Jn Jn Jnn
Aaalol cdla cldle ccll l
J1sall sall 1
aaii aie iiee ie eae aeaaee aeg aegle agge Iiesg, aliaeaal jilwll wglj jzlll jzlll
j j j j j j j j j j j j j j j j j j j j j j j j j j j j j j j j j j j j j j j j j j j j j j j j j j j j j j j j j
aalaa aaiy aiee ayiey yll
aillll llll lllllllllllllllllllllllllllllllllllllllllllllllllllll
He n3no3BaIte npaxocmykaKaTa:
B MOKpn nomeuhenia.
B 6Ibn3oct da 3apaJIIMn ra3OBe n np.
Korato npOdykTbT noka3Ba BnuIMn npn3Haun Ha nobpeda.
Bbpyx octprnpedMeTN nn TeUHOCTN.
Korato noIObATA dIO3a noka3Ba BnuIMn npn3Haun Ha nobpeDn.
Bbpyx ropeua nn cTsyDeHa cTyrpu, 3apaleHn ciurapeHn ytrpkn u np.
Bbpyx fIn npax, HApnPmep OT mAsIIka, 6eToH, 6paAHo, ropeua nn cTsyDeHa nenen.
He octabayte npaxocMyaKaCATA Ha npraKa CblhNeBa CBeTIHa.
IVs3b8BaaiTe Da n3Jaarate npaxocMyaKaCATA Ha cnIIHa TOnIIHa nn TemnepaTypa Ha 3AmPb3BaHe.
Hnkora He n3NoJ3BaIte npaxocMyaKaCATA 6ez fNiltpri.
He ce oniTbaIte da DOKoCHete YeTKaTa, DOKaTO npaxocMyaKaCATA e BkIIOyeHa, a YetKaTa Ce BbPTn.
Korato kOJIeNa Ta ca 6IkoIpaHn.
PpeIpa3Hm MepKn 3a 3axpaHbaunKa6eI
Поберява对接овно сениа и кабesa. НикORA He Изпальг.Tа с nobpedeni.
Пobрета на кабesa на пaxocmykaчкata He ce pokpina ot rapauneta.
Hikora He nbprnaite nIIIO nobdraiTe npaxocmykaчkaTApe3 ka6eba.
Изпальванeto Na npaxocmykaчkaTApn ropenocouhente obctoerTeCTBa Mоже дpruchinH cepno3H Ho hapaRaHe nIл nobpeda Ha npodukta.
Takoba HapaRaBe He nIIO nobpeda He ce nokpina OT rapaunrta nIл OT Electrolux.
OBCLYXBAHEI TAPAHUN
Bcako 6cbnykBaHe n pemOnT Tp86Ba Da ce n3BbPwBa OT OToPi3npaH cepBn3eH cIeHTbp Ha Electrolux.
PiOBeJaTa Ha Ka6eHa Na npaxocMcyKaKaTa He Ce nOKpBnBa OT rapaHzetaTa.
PiOBeHa Na DVBrataJe npuHHeHa OT; n3CMyKBaHe Ha TeUHOCT, NotaJHe Ha ypeDa B TeUHOCT nII IN I3No13BaHe Ha ypeC nOBpeDeH MapKyu n IIO3a He ce nOKpBnBa OT rapaHzetaTa.
BnHarn n3No13BaIte OpunHaJIHn Top6NKn 3a npx s-bag, noDxoJsi 3a Ta3n KOHNPeTHn npaxocMcyKaKka, BvXte cekn 11. NOBpeInTe,
PnUHHeHn Ha NoOCTBaIoTO CpeIcTBo NopaDi HnPaBvInHO n3POn3BaHe Ha Top6uKn 3a npax, KOnTo He ca opuHaJIHn, He ce NOKpBbAT OT rapaHuaTa.
U3XBbPJIaHE
To3n CmB0J Bbpxy npOdykTa noka3Ba, ye To3n npOdyKT cbIbpxka 6aTepyn, KOaTO He Tp86Ba Da ce I3xBbprr 3aeHNO C O6uKHOBeHNTE 6ntOBn OTnaDbuN.
To3n CmBON Bbpxy npOyKTA nIN Bbpyx HerOBa TOnaKOBka pOKa3Ba,Ye npOyKbT He MoKe da Ce TpeTnpa KaTO 6ntOB OTNaDbK.
3a da peuzklnpaTe npodykTa cn, moJia, 3aHeceTe ro B ofouanaen nyHKT 3a cb6bpahe Ha OTnabTu nIiB v cepBn3e H ceHTbp Ha Electrolux, KoTo MoKeJa npemaxHe npzuknpa 6baterya n eektpnueckte qactn no 6e3onaceH n npocnoHaen HauH. CneBaTte npabInata Ha BaWata dBykaBa 3a pa3dJIHo cb6bpahe Ha eektpnueckn npodykTu n akymnaTOPn 6batern.
Сн actoTo Electrolux Home Care n SDA deknapupa, che npaxocmykaKaTa c paAno o6OpyDbaHe Tn HER2 u HER3 e B cbOTBeTCTBne C DupeKtNbA 2014/53/EC.
CESTINA
UDSKIFTNING AF POSEN, S-BAG
11 Udskift s-posednar,
TPOIOE XPHESHE HAEKTPIKHSEKOYIIA
1 AvoiETo kalmu taouxwpou uolloync okovnc tpaewvtac to koupi S-BAG. BeaiwEeTe ot n oakoula okovnc (s-bag) eivai otn the nTc.
2 EoiayayeteTov Eukamnto Owlnva otn ookouna (yia va tov apaipede, nathote ta koumni aopafaiockai tpa9te Tov).EoiayayeteTov Eukamnto Owlnva otnv avtoiOxNlambda npexpi to koumi aopafaiocnva koumniwoei me evav nxo klik (yia va tov ataaopaioe, nathote to koumi aopafaiockai tpa9te Tov).
3 SuVbEOTe Tov tNtEoKoTIKO wIyva OTo aKpOpaio. SuVbEOTe Tov tNtEoKoTIO KIOWIyva OTn laBn Tou EukaMnTOU WlNVA (Yia va Tov apaipoeTe, nATNOte To KOUMI aopalionc kai TpaBnTE TOV).
4 PuθμiotevTnλεοκοπικόωληva Kpatwvtac Tny aσφáλεia με to Εvaχépi KaI TpaβwvtacTnλaβn με to àλλo.
ENEPTONIOIHSH/ANIENEPTONIOIHTHs HAEKTPIKHs KOKYIaKAI PYOMIHTHIXYOANAPPOHHE
Σημειων: Šαταν ευργοποίεις Σκουσα μετά σανικατασασασασασασασασασασασασασασασασασασασασασασασασασασασασασασασασασασασασασασασασασασασασασασασασασασα
ANTIKATAZAHTONΦIATPQN
VOOR U VAN START GAAT
ASSISTÊNCIA E GARANTIA
This symbol on the product indicates that this product contains a battery which shall not be disposed with normal household waste.
SERVICE-UL SIGARANTIA
BKJIIOUCHENE I BbIKJIIOUCHENE IIbJIIECOCA; PEGYJINPOBKA MOUHOCTN BCACbIBAHNA
5 BbIaHInTe 1hyp nItaHnI u BKIOUHTe BnIKy B po3eKy. YTo6bl BKIOUHTb nnBbIKIOUHTb NJIeCOC, HAnMMTE KHOKNy ON/OFF (BKJL/BblKI.). Ha NJIeCocE 3aoropTc INdikatoPb; npn HAnuNm yHKnUIN AUTO (ABTO) INHdkaTOp MIN/ MAX (MNI./MAKC). NaHnet MIRa Tc NeBa Hapnabo n Cnpaba Haleo. PJIeCoc C dIcTaHcMOHHbIM UynpAbeJeHMe MOXHO BKIOUHTb I NBlKIOUHaTb C NOMOsbIO KhoKN On/OFF (BKJL/BblKI.). KOTOPa HaxOJTcra H pykoartke.
6 YtO6bI OTpErynIpOBaTb MoUHcOb T BcAcBbAHn Ha NblNeCoc C pyuHbIM ynpabLeHnEM, BbyoJolHnTe cJeDyUOme DeiCTBn. IIOBepHnTe BpaazAoUyOca pykY, pa3MeueHHyU Ha NblNeCoc, nIIN cNoJIb3yTe Bo3dyHbI KlaanA, paacnoJIoKHeHH ha PykOaTke.
7 YtObbl OtperylnpobAby MoHcOCTb BcAcBHaHn Ha bIeNcoC c DnCTaHIOHHbIM ynpabJIeHmE, BbIyONHte CneDyUOIme DeIeTBVn. HaNMeTKe KHOkNy + / - paonolooJeHNyHa pyKoTKe. MoOChTc BcBaCbHAn OTo6paJaxOt INdIkaTOp MIN/MAX (MIH./MAKC.) n CmBONbHbIe INdIkaTOpbHa NdiCnIee.
8 YtO6bI OTpErUynIpOBaTb MoUHcOtB BcAcBbAHnHa Na bIeNcoC e DnCTaHNoHHbIM npabJIeHNEM IyHKnUeN AUTO (ABTO), BIIOnHnITE cIeDyUoNte DeIeCTBn. Tocne BkLIOuHem NblcEOC HauHnaet pa6oTaTb B pexKmte AUTO (ABTO) - peXKmte AByToMaTueChckOpeYrJpOBoRKn MOpUChTe BcAcBbAHnHa Ha mCInPee cBeITcra HndkaTop AUTO (ABTO), a HndkaTop MIN/MAX (MHN./MAKC.) MmRaET. YtO6bI OTpErUynIpOBaTb MoUHcOtB BcAcBbAHnBa BYuHvO, HaNKMite KhONkY +/-, pacnIoJoxeHHyO Ha pyKoTKe. YtO6bI BHObB BkLNouHTb FyHKnIO AUTO (ABTO), HNaKMite KhONky AUTO (ABTO)*.
9 YTO6bI CMOTaTb 5Hyp nHTAHnno OOKOHuaHn y6OpKn, HaxMMTe KhoNkY REWIND (CMOTATb).
ПОJOXFENДЛФКCALUN
10Длп понockи и xpaанень nbilenococa moKho uCnoIb3ObaT bIoJoxeHne ДдФИКацин Hacadkn Ha 6okoboi CTopohe nbileocca (A) IInnHa HnKHei CTopohe nbileocca (C).B XOe Yb6opKn dIЯ o6JIerYeHn pa6Otbl MbiUc cINHb MOKHO uCnoIb3ObaT bIoJoxeHne dIЯ ФИКацин Hacadkn Ha 3aIHei CTopohe nbileocca (B).
3AMEHA MEUKAДЛЯ CBOPA ПылS-BAG
11 MeowokIpa6opabnIINs-s-bagnoJneKNTzAmHeB CneJeuOnxNcUyax. IaIpbilecoCoB P^* c bpaauooueJc pyko: nHdNKaTOp S-BAG naHnaet n3JIyuaTb KpaChbI CBET.
Дя nbilecoocOB Q*c nctaHIOHHbIM npabneHnem: cmboJ S-BAG npno6peTaET kpaChbI uBET.
Дя nbIeNoCob R*сdntaHOnHbIM ynpabJeHmE mФyHKmE ATO (ABTO):ИнDCATOP S-BAG HauHaet mNyuAteK kpaChbI CBET (3eNeHb CCBET 03Haayet,чTO MeWOk He tpe6yeT aMeHbI,ажелы —ЧТо MeWOk BCKope noHaOb6NTc4aMeHnITb).
He n03B0JIaTe DeTAm UrrpaTb C npn6Opom.
OuicTka n TexHnueeCKoe 6cbnyKbAHne He DoJXHbI BblnoJIHrTbcra DeTbMn 6e3 npncMoTpa.
ПЕДУПЕЖДEHNE. HabacдуTurbo*obopydobaHbВpaaJIoSeIcIeTKO, B KOTopoM MoryT 3aCtpeBaTb npedMeTb.IcnoIb3yIte HabacdN TurboToJIbKOДЯ OUcIcTKIOBepxHOCTe,IЯ KOTopbIX OHn PpeHa3HaYeHbI, nCo6IouaTe pRn EToM OCToPoxKHOCTb.PpeD N3BLeuHem 3aCtprBbIXnpedMeTOB INIn OUcIcTKO JIeTKN BblIOuaTe nbJIeCOC.
Ipeed ouinctkoi npnbopa n3 nybTa dinstahuOHnOу npaBneHnA, codepkaeroC B pykoTke* nIi HaCaadKe CO CBETODNODhIMn INdNKaTopamN*, cJeDyET n3BLeyb 6aTapeN**.
*Ucmpoucmbo npedymompeH oMbko b omdeJIbHbIX ModeJx.
** Onincahne npoceypbI n3BleueHn8 6aTapein cm. BpacklndHOuactn pykoOjCTBa (nyHKtbI 25-26).
Ipeed ouinctkoi n Texnueckm o6cnyxnbAHnem npnbopa, a taKxe i3BleuHneM 6aTapei OTcoeHnay Te Bnky npnbopa ot po3etkn cetn 3JeKtpoNTaHn. 06cepebTe 6e3OpacHoe yHnUToXeHne 6aTapei.
B cnyuae noBpeKdEHHa nHTaHnBa BO n36eXaHne ONaChbIX cNtYaaun Hhup dOJIKeH 6bITb 3aMeHeCneuAInCTOM oΦuuaIbHOro cepBvchOrO ueTpa Electrolux.
He octabJIaIe nbJIeCoc tam, rIe Ha Hero 6yIeT nonaIaTb npraMoI COJIHeHbI CBET.
He noDBepraiTe nbJIeCoc Bo3JeCTBnIO xapb nIIN XOJOna.
Hn B Koem cnyuae He nCnoIb3yIte nbIeoc 6e3 hIbTpoB.
He kacaiTeCb 1eToUHOro BaIiKa, KOrJa nblncoc BkIoueH nIeToUhBbAIIK Bpaiaaetc.
He ncpnoIb3yIte nbilecoc, ecn erO konecuK 3a6loKnpoBaHbI.
Mepblnpedoctopoxkno,kacaiounea hypa nHTAHn
PeryIpaHNO npOBepaIte BnKU nShypr nTahna. HnB Koem cnyae He nCNoJIb3yIte nbIeNoc, ecNI BnKa nIIu Shypr nTahna NOBpeXJeHbl.
Ha nobpejdeHnHpya nHTaHnIyblncocarapaHTnIhe pacnpoctpaHaretc.
Hn B koem cnyae He TAHNTe Hne NODHMaTe nbilecoc 3a shhyp nHTaHn.
3Kcnpnyatauny nbIneocca B ONicaHHbIX bIIwe yCNOBmX MOKeT npNBecTN K cepbe3nblm TpaBMam NIN NOBpeJdeHIO np6Opa. Ha noo6hble TpaBMi NOBpeJdeHra rapANTu Electrolux He paNpocTpaHraetc.
OBCLYUKUBAHNEI TAPAHTNA
Bce pa6oTbI NO o6cIyKuBaHnIO n peMOHTy DOJIxHbI BByINHOHTbCBA OfoiuaIbHOM cepBvCHOM ueHTpe Electrolux.
Ha nobpejdeHnIy hnpa nHTaHn IbIeocOra rapaTnHe pacnpoctpaHreTc. Ha nobpejdeHnIy dBnIaTeIa, KOtOpbIe BO3NkIi B pe3yIbTaTe y6OpKn JxNdkoCTe, NOrpUxKeHn Ipru6opBa B xNdkoCTb IINI INCNoJIb3OBAHn Ipr6oPa C nobpejdeHbIMn IshaHrom I HacaKoi,
raaptnaHepacnpoctpaHreTcA.
Bcerda nCnoIb3yIte fHmpeHHbIe MeKKn dJa c6opa nbIIN s-bag, noXoJnue dJa yKa3aHHoro nbIeNcoCa (cM. npYKT 11). Ha noBpeKdEHHaNBlecoCa, Bo3NHkUWe B pe3yNbTaTe HenpaBnIbHoro nCNoJIb3OBAHnIe HΦnIpMeHHbIX MeKOB dJa c6opa nbIIn, rapaHTnIe HpacnPoCTpaHAreTc.
YTNIN3AUCN
3TOT CMMBOJ Ha npi6bope O3Haayet, YTO B npi6bope coepkntc8 6aTaperj, KOTOpYIO 3aIpeaaTeCBAIBpaCbIBaTB BMeCTe C 06bUHbIMN 6bITOBbIMN OTXoJamn.
3TOT CIMBOJN Ha npi6ope nI Iero ynaKOBKe yka3bIbaeT Ha To, YTO npi6Op HeJIb3a YTNIN3nPoBaTb KaK o6blHbIe 6bITObIbe OTXObl.
6paTnte noce6Hy naXhBy Ha Mepe npedoctpoxkhoctn!
ONIC YCNCNBAU PURED9
A. Ekpan (kachnje norgneajte Bep3nje)
B. Поклonaцидунгогфптета
C. Μιδύνβης Φιπτερ
D. Пореци за napкupahe
E. Ka6J 3a HanajaHe
F. Φιπερ motopa
G.ДржачфптетаМOTopa
H. Keca S-bag
I.ДржачkeceS-bag
J. Pooklonau OedeBka 3a npaunHy
K.Додаразк3-y-1Aer
L. Lipebo 3a AeroPro
M. Pучka AeroPro (kacnije norgedajte bep3nje)
N. Teneckoncka ueb AeroPro
O.CnojHnca 3a napKnpaHe A
P. Ekpan 3a mojene ca okpeTHIM dYrMetom 3a pyHo ynpabbahe*
Q. EkpaH 3a moJeIe ca daBunHCKM ynpaBbaHbEm
R. EkpaH 3a MoJeIe ca daBunHcNIM ynpaBbAHeM nФyHKuJom AUTO (ayTomatcN)
S. Klaçunha pyka AeroPro
T. Puyka AeroPro Ergo
U. Pучka ca Дальнским
уnpавьавем 3a AeroPro
V. Mna3Hnca FlowMotion
W. Млазниca FlowMotion LED (caпраздьим CBETДИМ)
X. Млазниа AeroPro Turbo
Y. Mna3nua AeroPro Mini Turbo
Z. Млазнира ParketoPro
AA. Млазниа AeroPro FlexProPlus
AB.Дурака млазниca ca
пьОСЧАТИМ НACTаВКOM
AeroPro*
* Camo odpehen moen
KAKO CE KOPNUCTN OBAJ YCNCNBAY
1 OTbOpInTe poklnonaOeIbKa 3a npaunHy noBnaueHem je3nUka S-BAG. IpoBepInTe da li ne je keca 3a npaunHy (s-bag) Ha CBOM MeCTy.
2 Y6aunTe UpeBO y ycncnBauch (ako JeIeNTe da ra n3BaIuTe, npTnCHnTe DyrrMe 3a 3akByuabaHe i NOBvUte).Y6aunTe UpeBO y puKcY UpeBa CBe DOK Dyrme He KJIukHe (ako JeIeNTe da ra ocNo6oJnte, npTnCHnTe DyrrMe 3a 3akByuabaHe i NOBvUte).
3 PnKauNte TeneckOncky ueB Ha Mna3HnUy. PnKauNte TeneckOncky ueB Ha pyuKy upeBa (aKO JeJIne Ta je n3BaJnte, npITNCHTe DyrMe 3a3AkJbUyabAbe NOBuyTe).
4 IOnecnte Teneckoncky ueb taKo 7to To hete dpXaTn 6paBnuy jEHNOM pYkOM, a Dpyrom pYkOM ByHn pUky.
CTAPTOBAHbE/3AYCTABJbAHbE YCNCUBAua NIOJEUABAHe CHARE YCNCABAHbA
5 I3bvyuIte ka6n 3a HanajaHbe n npKbuyuIte ra y 3nHy yTuHnUy. PtInTcHnTe duYme ON/OFF (YKJb./NCKJb.) da 6ncTe yKbuyuIN/ NckbuyuINy uCnsBau. INndkaTopn nounBy da CBeTne, INndkaTopcKa cBeTna MIN/MAX (MHN./MAKC.) ce naJe c DecHa NaHEBO n Ka 3aDboj CTpaHn (MoJeNi ca ayTomatckom fynKcnjom). MoeJIma ca daBbHNCkIM ynpablaBem MOKe e ynpabLaTn n nomOhy dYrmeta ON/OFF (YKJb./NCKJb.) ha puKn.
6 Iopdecnte chary ycncabaHa (Moede ann ca puynm ynpabbaheM) OkpeHnTe okpeTHO duTme ycncBaayu nn KopnCTte Ba3duHn BeHTIN Ha puKn.
7 POnecnte cHary ycncabaHa (MoJeIc ca daJbHnKIM ynpaBbaHeM): PrInTCHnTe dYrme + / - Ha pyuK, INdikatOpN MIN/MAX (MH./ MAKC.) INdikatOpN Cm6OJa Ha ekpaHy npKa3jy HnBO CHare.
8 POnecnte chary ycncabaHa (MoJeI Na daJIbHcKIM ynpaBbaHem ca yHKunjom AUTO): YcncBaHn noChy y AUTO peKmmy (ayTomatcka peryaunja CHare). INdInkatop AUTO cBETNI Ha ekpAhy, a INdInkatop MIN/MAX npucpa. Da 6nCTe pyuHO noDecnn Chary, npTncHte dYrme +/- ha puKn. PnpTncHte dYrme AUTO 3a Nobpatak Ha ayTomatcky FynKnjuy.*
9 HakoH ushheBa, npuTnCHne Dyrme REWIND (HAMOTABAHbE) Kaoko 6nCTe nHOBO HAMOTaJI Na6JI.
IIOJOKAJN 3A IAPKIPAABe
10 Kopnctnte noIoxaj 3a napKnpaIbe ca cTpaHe (A) nnnncnoi (C) kaKo 6nTe npneHInu OndNoxun yucnubau. Ha 3aJHoj cTpaHn (B), kaja npabnte nay3y (yuBaJte cBoja neHa).
3AMEHA KECE 3A IPIAUNHUY S-BAG
3aemenite kecy 3a npaunHy kada
-P Mojeeli ca OkpeTnIM dYrMeTOM: S-BAG uHnIkaTOp nouHbe da CBETNI cPBeHo
- Q MoDéNi ca dαβинсим упраьаьем: Симбол S-BAG поиные сCBETицревно.
-RMoeiN ca daBnHcKm ynpaBbAbeM n 0yHKuJom AUTO:S-BAG INHdkaTOp noHHe da CBeTn cPBeHo (3eNeHO CBeTNo: Keca je OK, KyTO CBeTNO: Kecy ycKopo Tpe6a ZameHHTN).
IImajte Ha ymy: YBek npomehnte kecy kaJa ge INHnKaTOp S-BAG ypaJIbEN ININ NOUHe Da CBETIN CUPBEHO, cA K aKO KeCA HNe JyHa (MOXJa ge 3aNyUWeHa), KAO n KaOH KOPNIshHeBa npaxa 3a ChiShHeBe TeINxHa. 3a Haj6OBe pezHTate, KopNCtTe Kecy Ultra Long Per-formance Koja je noc6Ho HaprabVeHa 3a BaW ycncuBa.Дpyre CInHTeTNUKe Kece „s-bag" taKoHe Mory da ce KopNCte. He KopNCtTe naNpHne Kece 3a npaunHy! www.s-bag.com
12 ПовуцITE jerичak S-BAGда 6исте OTBOPUNIпрераду за пашину. Ружда ржача кес ce поинke. ПовуцITE рчкуда 6истe уклошлкем Кесу сдржачем. He npintnckajte duYme 3a ocno6ahahe.
13Држnte kecy ca dprxauem n3nad nocyde 3a npaunHy. PpntuChnTe duYrme da 6ncte ocno6oynin kecy. Y6aunTe HOBy kecy y drjxau TaKo wTo hete y6aunTn Kapton ca 3aJbe cTpaHe dpXaua.
14 Y6aunTe Kecy ca npkauem Tako 7to he je nogypatn npabO doJe no HBeHMM BOHuaMa. Ioctapajte ce da keca He 6ye 3arnaBbeHa NcnoD prjkaa. 3aTbOpitne poklonoua. Ako keca Hne jnpabInHO noctabBeHa nn HeNoctaje, poklonau CE hehe 3aTbOpTuN.
Imajte Ha ymy: Kaanda cTapTyjete ycncBauh hakoH 3aMeHe Kece, notpe6Ho je da npohe oko 10 cekyn da 6n be nHdNkAToP S-BAG NcKbUyNo (P* MoeIn ca OKeptHM dyRmetO ^* MoeIn ca DaJIbHckm UnpaBbaBeM) IIN noOe da CBetn 3eJeHO (R* MoeIn ca DaJIbHckm UnpaBbaBeM in YHKnJom AUTO).
3AMEHAФЛTEPA
15 3aMeHnTe/OuNCTte** fIJItep KaJa ( **cAmO nepINBn fIJItepn)
- P MoDéni ca OkpeTHm DyrMeTOM: cTe 5 nyTa npomHeHn KeCy s-bag 5
-Q Mojelen ca daJIbUNHcKIM ynpaBbaHem: Cm6oN FILTER nouHBe Da CBETNI cPBEHO
-R* MoDéJI Na DaIbIhCKM ynpaBbaJbEm n ΦyHKzNJom AUTO:
HINIIKAtop nouHBe da CBetnI uRbeHo. 3eNeHO CBetNo yka3yje da je fHNTep y peDu. PAnI ce hakpTaKO kada CTapTyjete ycncBau.
16 Повцитешеяшak FILTERда 6исте отворилп полonaц Фиntера. Kapstte opugнанile,5" Фиntepe.Извдпгофлпс и роберп tepeperu hy Okunу забпente odpein nTn.Заменite HOBIM Фиntepom ng Ouchnte.Оретeу унтушь (прьаву CTpanу) y makoj Bodi.TanHIFOOKINФиntepaда 6истeу kJOLOHINBODy. Поновиноctупak четирп пту. (camo nepиви Фиntери)
Imajte Ha ymy: He Kopncntte cpectBa 3a npahe. I36erabajte da odoinpjete noBpwnHy fInntepa. OcTabite fInntep da ce do kpaja ocuynn (MnH. 24 u Ha co6bOJ temepaTypu) npe Hero uTo ra Bpata! 3aMeHnte nepuBn fInntep 6apem jeHnom rOdiuhe iNk KaJa je jako npbab nnOwTeHN. He yKnaBajTe pOnnyeTaHcKy neHy y o6nky cNoBa,L" mCPOd fInntepa.
17 HakoH 3aMeHe N I T e P , 3aTbOpHTe NOKNoaC NINTEpa CBe DOK He NeRHe Ha CBOJE MeTO. Ako NOKNoaC NINTEpa CnAIDHe, NOCTaBNTe IapKe Ha DHy n TpyNHTe NOKNoaC NINTEpa DOK ce He BpATn Ha CBOJe MeTO.
IImajTe Ha ymy: KaJa cStapTyjete YcncnBauchakOH 3aMeHe fHntepa, notpe6Ho je da npohe oko 10 cekyHn da HnDnKatop FILTER noUne da CBettn 3eJeHO (MoDeni ca DaBnHckmU yPpAubBaBeM u FhNKcJOM AUTO) nnn ce yraCn (MoDeni ca DaBnHckmU yPpAubBaBeM).
18 3aMeHnTe fHJIteP MoTopa KaJa je npBab NnHaKoN CBAKe nTe Kece. IogypajTe dPrJauCfHJItepa HADone Nn3ByuNTe ra. 3aMeHnTe fHJIteP n 3aTBOpHTe POKJlonau.
YCNCABAHE CA YHNBEP3AJHOM MJIA3HNJOM (V*, W*)
19 Nomohy neaane npomeHne noeShaBaHe mHa3nue. IkoHa nIyctpye npenopuyehn Tnpnda.
20 Mna3Hnua FlowMotion LED*: Померпге Мla3Hnue hyanpei.Прдьe CBETNo ce ayTomatcKn paIIи haKOH HeKoJIko cekyHdi. KaJa ce Mna3Hnua He KopIcTn, CBETNo ce ayTomatcKn racN haKOH HeKoJIko cekyHdi.
YHHTEBECA YHNBEP3AJIHOM MJA3HNUOM (V^*,W^*)
21 CkHnTe Mna3HnCu ca ueBn. Ouchnte pyukom ueba.
CHIHTHEBCATYPTBOMJA3HNJOM(X\*)
22 Ondoje Mna3Hnuy od uebny ukyloHte 3aJIpeTeHe HHTu cNHyTo Tako Ito hete ux nceh maka3ama. POMohy pyuek e peba oOcHtneMna3Hnuy.
DOATAK 3-y-1
23 Повуцпт Trakу od TkaHINe da 6ncte n3BaDnIиdoJATAK 3-y-1.ObajdoJatak Ima 3ФyHKUige, BvNTe CInke Ha CnepeHoJ CTpaHn.
24 HakoH KopuShenha, Bpatnte ra Ha HberObo MeCTo.
MEHAbE BATEPUJA*
25 Mna3nua ca npedbHcBETnMa*: PpomeHte 6aTepeJne kaJa npedha cBeTna noHy da Tpepepe 6p3o. Kopncnte Dbe AA 6aTepeJne.
26 Puyka ca daJIbHnCKIM ynpaBbayem*: IpOMEHte 6atepnjy KaDa CBETIO INDIIKATopa NOCTaHE UPBHeO INI KADA He pearyje Ha npITncak 6NILO KOr dYrMetA. KopucTne Camo IInTnjymCke 6atepnje Tnna CR1632.
Imajte Ha ymy: I3BaDnTe 6aTepeJe n3 npOn3B0Da npe Hero wTo ypehaj 6aCnTe Ha oTnaJ. PnpDpKabAJte ce npabIna BaWe 3emBe Koja ce OndOce Ha npKpyIbAbe 6aTepuJa n EeKtpuHnX npOn3B0Da.
YxNBajTe y DnBHom DoXNBbajy CnshHeBa ycncBauem PURED9!
CABETI O TOME KAKO DA IOBJETE HAJBOJE PE3YJITATE
Electrolux 3aapkaba npabo da n3meHn ppon3bOe, nHΦopMaunje n cneunkaunje 6e3 npetXoHne Hajabe.
| MЛАЗHIИЦA/ДОДАТAK | КОПICTNCE 3A: | MЛАЗHIИЦA/ДОДАТAK | KОПICTNCE 3A: | ||
| К. Доватak 3-y-1* | 3 довата у 1: 1. Доватak за скулбаяпрашие на тьрдхи постину (полица за кънг, лajсни ид.) 2. Доватak за талашоги hameштaj иTekсти (завесе, меблштофови ид.) 4. Пьосати hashtabak за уcke посторе (иза радиатору ид.) | V. Млазниca FlowMotion* W. Млazниca FlowMotion LED (саPre徴ымс bvetлима)* | Унibeерзална млазниca: - 3a с蜱свпес подова, обетбени ќа hayяе hayяе hayяе hayяе hayяе hayяе hayяе hayяе hayяе hayяе hayяе hayяе hayяе hayяе hayяе hayяе hayяе hayяе hayяе hayяе hayяе hayяе hayяе hayяе hayяе hayяе hayяе hayяе hayяе hayяе hayяе hayяе hayяе hayяеHayяе hayяе hayяе hayяе hayяе hayяе hayяе hayяе hayяе hayяе hayяе hayяе hayяе hayяе hayяе hayяе hayяе hayяе hayяе hayяе hayяе hayяе hayяе hayяе hayяе hayяе hayяе hayяе hayяе hayяе hayяе hayяе hayяе hayЯ hayяе hayяе hayяе hayяе hayяе hayяе hayяе hayяе hayяе hayяе hayяе hayяе hayяе hayяе hayяе hayяе hayяе hayяе hayяе hayяе hayяе hayяе hayяе hayяе hayяе hayяе hayяе hayяе hayяе hayяе hayяе hayяе hayяе Hayяе hayяе hayяе hayяе hayяе hayяе hayяе hayяе hayяе hayяе hayяе hayяе hayяе hayяе hayяе hayяе hayяе hayяе hayяе hayяе hayяе hayяе hayяе hayяе hayяе hayяе hayяе hayяе hayяе hayяе hayяе hayяе hayяе hayja hayяе hayяе hayяе hayяе hayяе hayяе hayяе hayяе hayяе hayяе hayяе hayяе hayяе hayяе hayяе hayяе hayяе hayяе hayяе hayяе hayяе hayяе hayяе hayяе hayяе hayяе hayяе hayяе hayяе hayяе hayяе hayяе hayяе Hayes hayяе hayяе hayяе hayяе hayяе hayяе hayяе hayяе hayяе hayяе hayяе hayяе hayяе hayяе hayяе hayяе hayяе hayяе hayяе hayяе hayяе hayяе hayяе hayяе hayяе hayяе hayяе hayяе hayяе hayяе hayяе hayяе hayяе bayashanovnyi duokhuyu klymshachya МлAZHIЦA за тени: -Четка и усиса в исто Врeme (hajбolyе скульа дамах, вальna ид.) -Вальak четke пооги ваздашно стуларны Коже пол�им ресам, пени полдаму пологом полоть ваздашно ковке Deбшии и сдugим ресам, пени полдаму пологом ресам, кайшто су оtm�ач�у за улама враза или тених оtmоре на вody. Умесло baye КористITE унibeерзалу млазниу. | Y. Млини.typбо млазниca* | МлAZHIЦA за талашоги hameштaj: -Четka и усиса в исто Врeme(hajбolyе skульа дамах, вальna ид.) -За hameштaj od tekstниа,.autомobильска седшту,duшеше ид. -Вальak четke пооги ваздашно счтужыko поживдуи усисы. -Нige полдама за тених полизу. пеблени и сдugим ресам яSpecу муSpecу da ce Заглаве унотар рotingayи cheтke. |
| Z. МлAZHIЦA ParkettoPro* | МлAZHIЦA за Тьрдө подове: -За 힏но чшөнөүte Тьрдхи подова (napкета,дравенх подова, почица ид.) -Нальak чульа пошину на Тьрдим пodobimа садукOTINHIMa. | AA. МлAZHIЦA FlexProPlus* | МлAZHIЦA за Тьрдө подовe: -За doхвашие Incodium/nizmeу hameштaja, углоби и дуглinox пrewрека. -Далко мочete дсеInsckpene за 180стени по 6и direpektно рис'tуплиа усимпRiskotimma | ||
| АВ. Дугачka млAZHIЦA са пь检аним нachtabkom* | Екстра дурачak hashtabak: -За тeshko дoc'tупна мeledста (вухови пolyamca ид). -За уске посторе (иза радиатор, иcod pod aytomobильскхи сederшты ид.) |
Moden ca pyuHOM peryaunjom chare
- npaTne Cnke Ha ycncBaCy paNOnTImaHnHex nepOpMaHcN.
Moden ca yHKunjom AUTO ayTomatckn noeabaj chary ycncabaHa
KAKO 6n Ce NOCTNIGIO ONTImaJIHO UINHHeI yUO6HOCT Ha CBAOJ NOBPIHHN.
3a pyuhy peryulaunjy, npaTne cInke 3a onTImaJIne nepOpMaHce.
PEUABAHIEIPOBJEMA
MEPE INPEIOCTPOXHOCTN
Obaj ypehaj mory da kopinste deca stapnja od 8 roDHa n ocObe ca cMaHBeHIM fN3NcKIM, uJHIM nn MeHTaJIHIM cnOCO6HocTIma, KAO n ocObe KoJIma HeIOCTajy NCKYCTBO n 3HaHe, yKOJIko IM ce oBe36eDi NaI3Op nn im ce daJy uyNTCTBa o yIpOTpe6n ypehaja Ha 6e36eDaH naHH n yKOJIko CXBaTaJy moryhe onaCHOCTn.
Deza He Tpe6a da ce irpajy OBIM ypehajem.
Ushhe n oopkaabaHe He tpe6a da oabbajy deca 6e3 ha30pa.
YIPO3OPEHbE: Typ6o Mla3Hnue Imajy potnpajyhy YeTky y Koju Mory da ce 3aIabe pa3Hn npedMeTu. KopncTe ux onpe3Ho n cMo Ha nobpshnHaMa 3a Koje cy HameHe.He. NckJbUHTe ycncBau npe Hero wTo NOuHeTe da yKlaHbAte 3aRJaBBeHe npedMeTe IIn Da YNCTtTe yeTky.
Батури морajу бити изва щею зальнског упавъача у ручи/ млаленци ca LED с Beetлom\ пре одношь пюиЗвoda на отпад**.
*CaMo odpehenu modenu.
**HOpMaunje o Tome kaKo ce BaNi 6aTePnJa date cy npcecabnJeHOM deNy y oDeBcIma 25 n 26.
Ipe uhiheha nIu odpkaBaHa ypehaja nIu BaHeBa 6aTepnje, yBek npBO n3Bynte yTuKaU n3 3ndHe yTuHnue. BaTepnjy Tpe6a OJIOKNTn Ha 6e36edan hauHN.
YkoIko je ka6n o7tehen, mopa ra 3aMeHnTn OBnaSheneHn cepBnC kOmpaHnje Electrolux KaKo 6n ce n36erao CBAKn pN3NK.
PURED9 trpe6a kopncnttu nckbuyuBO 3a yobuajeho ycncBaHe 3aTbopehnx npocctopa u y domaHnHCTBUMa. IoctapajTe ce da ycncBaU cyBaTe Ha cyBOM MeCTy.
Cbe cepBnce nIIN nonpaBke Mopa o6aBbaTn OBnaShen cepBnchN ceHTap KOMnAHnje Electrolux.
MaTepnjAn 3a nakoBaHb, Hnp. nIaCTnUHe Kece, He Tpe6a da 6ynde DocTypand eun KaKo 6n ce n36erNo ryuhebe.
YcncBauHnKaIHeKOpNCtnte:
YBnaxHmPiOppyjima.
Y6n3nHn 3anaJbNBx racOBa nTd.
KaDa cy Ha npOn3B0y BnIbIbNb 3HaaN OwTeheBa.
Ha owtpm npedMeTIma nn TeHOCtMa.
KaCyHaNoHJ Mna3HnCn BnDbnBn 3HaOn OwTeheBa.
Ha BpeIIM nIIN XnAaHIM yarapUIM, ynaJIbeHIM onyUaUMa CInrapeTa nT. Ha fInHOJ npaunHn, HApnimep oD rInca, 6eToHa, 6paHn, TOnlOR nIIN xlaHOr nenena.
He octabjajte yucnBau n3JIOxEN dIpeKTHoJ cyHueBoJ cBeTIOCTn.
I36erabajte n3narahe yucnbaba jakoj TOnJIOTn nn nn 3y3eTHO HNCIM TEMpepatpama.
YcncBaHnKaHa He Kopnctnte 6e3 hnItepa.
He nokyuwaabajte da doinnheTe potnpajyhy ueTkyeocuBau ykbyuenn oK ce potnpajyha ueTka okpehe.
Kaçc cytoukobn 6lOKupaHn.
Mepe npedocptpoxhoctny Be3n ca Ka6lom 3a Hanajahe
PepOBHO npOBepabajte yTnKauch Ka6J. HnKaad He KopncCTnte ycncBau aKo cy yTnKauch nn Ka6J oWteHeni.
Owtehe Ka6ba yucnBaua Hne nokpnbHO rapaHunjom.
HnkaI He npJxNte n He ByuTe ycncBau 3a Ka6n.
Kopnihheye yucnbaua y nomehytmO OKJHOCTMa M OJKe 3a3BaTu 036nIbHe NOBpeJe nn OwTeHeBa npOn3BOda. TaKBe NOBpeJe nn OwTeHeBa HcCy NOKpNBHeA rapaHcNjOM nn OD cTpaHe KOMNaHnje Electrolux.
CEPBUNPAHBEI TAPAHUJA
CBe cepBnCe nnn nonpaBke Mopa o6aBbaTn OBnaUHeHn cepBnCHn ceHTap KOMnAnJe Electrolux.
OuTeheKa6la yucnBauha NHe je KOpRBeHo rapaunjom. OuTeheBa MOTOPa DO KOJnx je DoIIOy UcIe; ycncBaHa TeHocTn, ypaHaBa npOn3Boa y TeHocT nNk KopuShHeBa ypehaja ca OUsTeHeHm UpeBOM mJa3HnOm HNCy POKPBeHa rapaunjom.
YBek KopinCTne OpunHaJIHe Kece 3a npaunHy ,-bag" Koje OndroBapajy OBOM TnIy ycncBa?a; nOreJaleTpe OeJbak 11. OoTeheBa do kojnx je DoIto yCneI He npaBnHOr KOpuHeBa Keca 3a npaunHy Koje Hncy opunHaJIHe, Hncy NOKpNBHeHa rapaHcNJom.
OJIATAHbE
Obaj cim60an npoun3BOy yka3ye da OBaj npoun3BOD caipxn 6aTepejny koj He Tpe6a oDnaraTn ca yobuajehm OTnaDom n3 domaHnCTBa.
Obaj cimboJn HpOIN3BOy nHn Ha HeROBoj am6aIaJx yKa3yJe Ha To Da Ce OBaj npOIN3BOJ He MoKe OJNaRaTn Kao OTnaD n3 domaHnCTBa.
ДабистеpeцкларпОвaj пpon3BOD odнecite raHa 3BaHnUHO MeCTO pNkynIbAha ИИу срВиСн龟HTAP KOMпаниЕlectroluxгdece6atepNiJa neneKtpuHn delOBn MOry yKnOHNITиpezKlnipaTnHa cnrypaHn IpofoecnoHaHa NaHH.ПпдржавAJte ce npabIna BaWe 3eMJIbe 3a OdBojeHo pNkynIbAbe eNeKtpuHnx pOni3BOdaInyhInbx6atepiJa.
OBIM, KOMpanija Electrolux Home Care and SDA, n3jabbye ja je yucnbau ca paadno onpemom Tnna HER2 n HER3 ycaraauen ca DnpekTbOM 2014/53/EU.
TÜRKÇE
EN IYI SONUCU ALMAYLA ILGILI IPUÇLARI
KOPNUCTYBAHHIINJIOCOM
1 NotarHitb pyuKy S-BAG, 0o6 biKpnTu KpniSky ninoNobO biDciKy.
IpekeohaiTeca, 0oMiWOk dIy (s-bag) 3haoDntbCra Ha CBOEmy Mici.
2 BCTABTE shaHr y nINOCoc (uOb BnHrtn Ioro, HATNCHTb KHONK 6LOkyBaHHra Ta BVITAHHTb IanaHr). BCTABTE shaHr y puKy IuaHra do KnaCaHHa KNOKN 6LOkyBaHHra (uO6 3Hrtn Ioro, HATNCHTb KHONKY 6LOkyBaHHra Ta NotarHtB).
3 PnueHaaiTe TeneckoniuHy Tpy6ky Do HacadKn. PnueHaaiTe TeneckoniuHy Tpy6ky Do pyuKu ShaHa (uo6 3Hrti ii, HATNCiB KbONky 6bOKyBaHH Ta notTgHtB).
4 BiDpyeHIOte TeneckoniHy Tpy6Ky, ytpmuyuOn fiKcTOp oHieO pykoio Ta BNTaRyUOn pyuKy iHIOIO.
YBIMKHEHHBIMKHEHHIINIOCOCA TAPEGUYIOBAHHCUNIBCMOKTYBAHH
5 BtIaHITb 1hpy JxNIBeHNH I BCTaBte 1eTceNBHy BnIKy Bpo3eTKy. HAtNCHTb KONK Ky yBMKHeHN/HBMKHeHN, 1o6 YBIMKHTy/BMKNHTy NIOOC. 3acBITra bC INDkaTOpN. IHNkAtoT MIN/MAX 3acBITnBc3 3Iba Hnapabo y 3BOPOTHom HynpAMky (B MOpeJnx 3 fynKciEio auto). Moenm 3 DuctahNJHM KepyBaHHMQMOxHa KepyBaTn TaKoX 3a DoNOMOROK KHONK yBIMKHeHN/HBMKHeHN Ha pyu!.
6 BiDpyuIIOte Cnly BCMOKtYBaHHa (MoDeni 3 pyuHm KepyBaHHaM): oBepTaIe noBOPOTHy puKy Ha NiIocOci a6o BnKOpNCtOByTe NOBITPraH NkanaH naPyuCi.
7 BiDpyuHIOte CUNY BCMOKtuBaHHa (MoJeni 3 duCTaHcui Hm KepyBaHnAM) HATNCKaIte KHOONy 已 + / - 已 Ha puzyi. MIN/MAX ta cMBOI nIHdNKatOpib Ha ducnpeiBiO6paxaTmUytb pIEhB notyXhOci.
8 BiDpyrIyIOHe Cnly BCMOKTyBaHnHa (MoJeni 3 nDictaHuiNm KepyBaHHaMa Ta yHKuieO AUTO): yBIMKHeHnPiNLOcpePexoDInb ypeKHM AUTO (abTomatUnepeYRIIOBAHN CnII BCMOKTyBaHnHa).Ha dncPiei 3aCbitbcra iNDkAToP AUTO, a INdKaTOp MIN/MAXNoTHe MIRAtn.ДЯperyIOBAAHn NOtYxHOCTI BpUHy NHATCKaJIte KKnKf 一 / + / - h aypu. lO6 nobEPyrTuCbdo ABtomatUHOi OyHKuii, HATNCHTb KHONky AUTO.
9 Picn npin6npaHn 3MotaTe Ka6enb, HAnchHyBn KHONky 3MOTyBaHn.
IIOLOXEHHHJ36EPIRAHHH
10 Kolni nepeHocnte Ta 36epiraCe TNILOOC, BUNOPcTObuYte NOnOKeHNHa Ira 36epirAHn 36Oky (A) a6o BnHy (C). Y 3aNHi qacTnHi (B) n.i d qac nay3n B npi6bpaHHi (6epeke Bauy cInHy).
3AMIHA MIUKAДЯ ПИЛУ S-BAG
11 Miikn s-bag cnid miHrnt B TaKx BNpndkax:
- B Môdènǎx P* 3 NOBOPOTHOIO pUcKoO: IHmIKAtOp S-BAG cBITNbÇa UePBOHIM;
- B Môdènǎx O* 3 DúCTaHüiHm KepyBaHHM: CmBON S-BAG cBITNbÇa UePBOHIM;
- B MoDéjǎx R* 3 Dénctańij NmM KepyBaHnHm i φyHκiεHo AUTO: iHπιKaTOp S-BAG CBITNbCéPBOHnM (iHπιKaTOp CβITNbCz 3eNeHm: 3MiχKOM yce rapa3d, JXOBTm: CKOPO NOTPi6HO 3amHInu Miδok).
Ybara.3aBxN 3amHIO Te MiOK s-bag, KOI INDnKaTOp S-BAG CBITbCra YepBOHm, HabITb IAKUo BIn HENOBHn (BIn MOKe 6ytn 3a6bntu), a TakoX
nicla BnKOpNCTaHnnpoOka dny uHneHnKnIMmIB.Дя OTPMaHHn HauKpaIxMpe3yIbTatB IObotu BnKOpNCTOBVytme Miok Ultra Long Performance, cneiaIbno pO3po6IeHn dny BaWoRo nIIOcoCa. MoJHa taKoJb BnKOpNCTOBvBaTn HiSi cnHTeTuHiMiXu s-bag.He KopnCtuyTeec napePobUMm MiUkamn dny nIIy! www.s-bag.com
12 POTaHrHtbypyKuS-BAG,06BbIKpRITnKpnUknynnIOBOBicKyPiHIMeTbcy pyka TpMmaa Mioka s-bag. POTaHrHt b3a pyKu, 06 BnHrTaN s-bag pa3om 3 TpMaayem.He HATnCKaIte KhoNky po36IoKyBaHHa.
13 TpIMaTe Miok s-bag 3a TpIMaH naD KOHTeHepom nIy cmITb. HaTnCHiB KhoNky, uO6 pO36bNOkyBatn s-bag. BCTABte HOBni s-bag y TpIMaH, BCTABuBsi KAPTOHNHy pIaCTInHy y 3aDiHi qACTnHi TpIMaHa.
14 BCTaBte s-bag 3a donomoroTO TpIMaUa, npoHTOBxHyBm InoTo Bn3 y HaprMHi.
IpekeonaiTeCra, 10s-bag He 3acTpRnPiD TpIMaChem. 3akpiNe KpuKky.
JaLIO s-bag BCTaHOBJeHO HeHaJIeXHMM UHNOM a60 BIn BicYTHi, KpnuKa He
3akPnEbCra
Ybara. KOnn ninnococ yBmKHeTcN icnna 3amHn MiIka s-bag, 3HaOobntc npin6n3HO 10 cekynd ha BmKHeHn IHnKaTopa S-BAG (y moJenX P* 3 NOBOPOTHO pUyKOIO Ta moJeIax Q* 3 DnCTAHJIHm KepyBaHHm) a6o Ioro 3MHy na 3eIeHN konip (y moJeIax R* 3 DnCTAHJIHm KepyBaHHm i fynKciEO AUTO).
3AMIHAΦIbTPIB
15 3amihitb/npnuiTe** fInbtpy TaKnx BUnadkax (**nIuhe Inbtpn, kI MOxHa MNTU)
-y moDenyx P* i3 nobopoTHoI pyKoI: nicIa 5-1 zamHm MiIka s-bag
-y mojelax Q* 3 nctaHuiHm KepyBaHHam: CnmboJ FILTER cbitntbca YepBOHIM
-y mojdeIax R* 3 dIcTahuiHm KepyBaHHm i yHKciEo AUTO: iHnKaTOp fIbTpca Cbitnbce YepBOHM. KOJI nHnKaTOp fIbTpca Cbitnbce 3eJIeHM, ce O3Naue, 30 3 fIbTpom yce rapa3d. BIn noCuHae Cbitntcma Mauke BiPa3y niCJIa yBIMKHeHHnPiIOcoCA.
16 POTaRHTb pyuKy FILTER, 06B bIDkPun KpnUkY kInIbTa. BnKOpNCTOByTe opurHaihbi fInbTpns-s-filter: BtTARHbIb fInbTp i BN3NaHTe TIN ha pamui. 3AmIHb a6o NOMiTE fInbTp**, PpOMuITE czepeDmH (6pyDa CTOPHa) nID npoxIoJHOIO npToOHIO BOIO. 3JeRka NocTykaIte No pamui fInbTp da IbuDAJIENHBOIN. POBTopiB cei npOec YoTIPn pa3N. (^*T) IbKn fInbTp, JAKM MoXHa MNTi)
Ybara. He Kopriyteca 3ac06amn dny uuennn. He Topkaitec nopexhi fipbtpa. Dai Te fipbtpy nobHCTO BWCXHTN (miHIMYM 24 ro 3a Kimhatoi temepaTpy), nepu Hix BCTAHOBIOBATn Ioro Ha Micce! 3amHoiTe fipbtp, 1oMNTBCA, MinHIMYM OOnn pa3 ha pik a6o KOJI N BIh Dzyne 6pynu nn oNkoJKeHH. He 3Haime TniHy y BuIraDi niterpL N iD fipbtpom.
17 PicIy 3amHn fInbTpra 3akpnIte KpnUky fInbTpra, IOKn BOHa He cTaHe Ha MicCe (3ByK KnaaHnH). Y pa3i BiD'EnHnHn KpnUkN fInbTpra BCTAHOBiB II 3abICIOBHN i HATNCiTb; KpnUka Knaue He i CTAHe Ha MicCe.
Ybara. Ппг Вмкани пилосocа nicязамин сиьтра Задобится рпблзно 10 секунд на змін ундікатора FILTER на зелени колip (моdensi здостанцийним Керуbaнnam i Функцию AUTO) aбо ёого Вмкненna (моdensi здостанцийним Керуbaнnam).
18 Φɪnbtp dBɪrγhɑ nɪd 3ʌmɪhʊbɑt y pɑəi ŽɔrO 3a6þdɛnHŋ a6o nɪcʒn KɔkjHoː 5-i 3ʌmɪn Mɪska dɪŋ nɪny s-bag. Nɒtərɪhɪt b tprɪmaʊ φɪnbTpa Bɪnɪ 3 i BɪnɪMɪt b IɔrO. 3ʌmɪhɪt b φɪnbTp i 3akpniye Kpɪsʌk y.
TIPINBIPAHHH3 YHIBEPCAJIbHOIO HACAKOIO (V^*,W^*)
19 3mHouTe hanaWtYaBaHHa hacaIK 3a donomoroI neadi. 3naOOK noka3ye peKoMeHNDoBaHNI TnPiJdNOrn.
20 Hacajka FlowMotion LED*: PyxaiTe Hacajky Bnepei. IpejHcE OCBtIeHHa YbIMKHeTbCBy ABOTMaTHUHO uee3 deKiNbKa cekyHd. Koli Hacajka He BVKOPICTOBvETbC, OCBtJIeHHa BUMNkAeTbCBy ABOTMaTHUHO uee3 deKiNbKa cekyHd.
OuHueHHYHIBEPCaJIbHOI HACAdKN (V^*,W^**)
21 BiD'ednaihe Hacaiky BiD trpykN. Ounchitb 3a donomoroo pyu kn shaanra.
CHUENHHTYPO-HACAKNX\*
22 BiD'EnaHte HacaKBy BiD trpy6kn i HOxNcMn BiDpiXte 3aIiWKn HHTOK ToIO.
106 NouchTInu HacaKBy, KopncTyTeCp pyKoIO wlaHa.