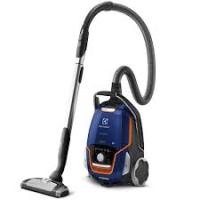
UltraSilencer Deepclean EL7060A - Aspirateur ELECTROLUX - Free user manual and instructions
Find the device manual for free UltraSilencer Deepclean EL7060A ELECTROLUX in PDF.
Download the instructions for your Aspirateur in PDF format for free! Find your manual UltraSilencer Deepclean EL7060A - ELECTROLUX and take your electronic device back in hand. On this page are published all the documents necessary for the use of your device. UltraSilencer Deepclean EL7060A by ELECTROLUX.
USER MANUAL UltraSilencer Deepclean EL7060A ELECTROLUX
deepcleanENGLISH IMPORTANT SAFEGUARDS When using an electrical appliance, basic precautions should always be followed, including the following:
READ ALL INSTRUCTIONS BEFORE USING THIS VACUUM CLEANER.
WARNING To reduce the risk of fire, electric shock, or injury:
• Do not use outdoors or on wet surfaces.
• Do not leave vacuum cleaner when plugged in. Turn off the switch and unplug the electrical cord when not in use and before servicing.
• Do not allow to be used as a toy. Close attention is necessary when used by or near children.
• Use only as described in this manual. Use only manufacturer’s recommended attachments.
• Do not use with damaged cord or plug. If vacuum cleaner is not working as it should, has been dropped, damaged, left outdoors, or dropped into
water, return it to a service center before using.
• Do not pull or carry by cord, use cord as a handle, close a door on cord, or pull cord around sharp edges or corners. Do not run vacuum cleaner
over cord. Keep cord away from heated surfaces.
• Do not use extension cords or outlets with inadequate current carrying capacity.
• Turn off all controls before unplugging.
• Do not unplug by pulling on cord. To unplug, grasp the plug, not the cord.
• Do not handle plug or vacuum cleaner with wet hands.
• Do not put any object into openings. Do not use with any opening blocked; keep free of dust, lint, hair, and anything that may reduce airflow.
• This vacuum cleaner creates suction and contains a revolving brushroll. Keep hair, loose clothing, fingers, and all parts of body away from openings
• Do not pick up anything that is burning or smoking, such as cigarettes, matches, or hot ashes.
• Do not use without dust bag or filter(s) in place.
• Belt pulleys can become hot during normal use. To prevent burns, avoid touching the belt pulley when servicing the drive belt. Allow it to cool.
• Use extra care when cleaning on stairs.
• Do not use to pick up flammable or combustible liquids such as gasoline, or use in areas where they may be present.
• Store your cleaner indoors in a cool, dry area.
• Keep your work area well lighted.
• Unplug electrical appliances before vacuuming them.
• Always turn off this appliance before connecting or disconnecting either hose, wand or motorized nozzle.
• Hold plug when rewinding onto cord reel. Do not allow plug to whip when rewinding.
• The hose contains electrical wires. Do not use when damaged, cut, or punctured. Avoid picking up sharp objects.
• Brushroll could suddenly restart. Unplug before servicing.
SAVE THESE INSTRUCTIONS FOR HOUSEHOLD USE ONLY To reduce the risk of electric shock, this appliance has a polarized plug (one blade is wider than the other). This plug will fit in a polarized outlet
only one way. If the plug does not fit fully into the outlet, reverse the plug. If it still does not fit, contact a qualified electrician to install the proper outlet.
Do not change the plug in any way.
This vacuum cleaner has a special thermostat that protects the cleaner in case of motor overheating. If the cleaner suddenly shuts off, push the on/off
switch off (O) and unplug the cleaner. Check the cleaner for a possible source of overheating such as a full dust bag, a blocked hose or clogged filter.
If these conditions are found, fix them and wait at least 30 minutes before attempting to use the cleaner. After the 30 minute period, plug the cleaner
back in and push the on/off switch on (l). If the cleaner still does not run, take it to a Electrolux Authorized Service Center for repair.
ENGLISH Thank you for choosing an Electrolux vacuum cleaner.
In order to be able to make the best possible use of
your UltraSilencer, we recommend that you begin by
reading through the instructions, and that you keep the
instruction manual for future reference.
Servicing Part Numbers
The UltraSilencer uses an Electrolux s-bag®.
Be sure to always replace the dust bag with a
genuine Electrolux s-bag®.
Replace the s-bag® even if it is not full (it could
be obstructed). Also replace after vacuuming
carpet-cleaning powder. Be sure to use only an
original Electrolux dust bags s-bag®.
EXHAUST FILTER Replacement Exhaust Filter EL012B, replace
approximately every 6 months.
MOTOR FILTER Replacement Motor Filer Assembly
(Ref. 2197012-01) Replace as needed.
accessories against the “Components and
COMPONENTS AND ACCESSORIES
A Hose handle release
B Telescopic release (either button)
2. Hose handle with controls
4. Dusting brush (stored in hose handle)
5. Crevice tool (stored in hose handle)
CAUTION: Do not leave cleaner plugged in and
unattended. Store cleaner in a cool, dry area.
9. Insert the hose into the canister until the catches
click to engage (press the catch buttons to release
the hose). Canister will not start without hose
10. Attach the telescopic wand to the hose handle so
that the catch clicks shut. Remove by pressing in
the release button and pulling the pieces apart.
11. Attach the power nozzle to the telescopic wand by
inserting the wand into the power nozzle until the
12. Step down on wand release pedal and pull the
pieces apart. Be sure to turn cleaner off before
removing or attaching the hose, wand or power
13. To rewind the cord press the cord rewinder button.
The cord will then rewind. (take hold of the plug to
prevent it striking you).
14. The “On/Off” button starts and stops the suction
motor on the canister. Push the button gently and
hold until the cleaner starts or stops. The cleaner
starts in the bare floor setting, with the power nozzle
brushroll off. Press the middle button, “Carpets/
Floors” to turn the brushroll on for carpets and off
for bare floors. The cleaner starts with maximum
suction power. Press the "suction control" button
to change the suction level higher or lower. There
are 5 suction levels altogether, which display on the
control panel of the canister. (Fig. 15)
FRANÇAIS DÉBALLER L’APPAREIL ET VÉRIFIER LECONTENUSORTEZ TOUT DU CARTON.
ENGLISH GETTING THE BEST RESULTS CAUTION: Use ‘Brushroll OFF’ setting for wood, tile, or other
hard-surface floors. Do not use ‘Brushroll ON’ setting for hard-
surface floors, as the brush roll could damage delicate surfaces.
Crevices, corners, etc.: Use the crevice tool (4).
Curtains, lightweight fabrics, etc.: Use the dusting brush (5).
Reduce suction power if necessary.
Frames, bookshelves, etc.: Use the dusting brush (5).
Upholstered furniture: Use the upholstery tool (6).
ENGLISH GETTING THE BEST RESULTS CAUTION: Use ‘Brushroll OFF’ setting for wood, tile, or other
hard-surface floors. Do not use ‘Brushroll ON’ setting for
hard-surface floors, as the brush roll could damage delicate
USING THE POWER NOZZLE The power nozzle is ideal for all types of carpeting
because of the deep cleaning brushroll. Turn off
brushroll when cleaning barefloors.
After connecting the power nozzle to the wand and
hose, turn on the canister and the brushroll for carpet
The cleaning height can be adjusted by pressing on
the height adjustment pedal located on the rear of the
hood (Fig. A).The height indicator will change from low
to medium to high as you make the adjustment. (Fig. C)
Use the lowest setting that still allows easy maneuvering
on the carpet. Release the handle by pressing down on
the handle release button (Fig. B).
Do not use the power nozzle on the fringes of rugs
without first turning off the brushroll.
Turn off the cleaner when it is not in use. Do not let the
power nozzle stand in one place while running for an
extended period as it could cause carpet damage. Avoid
running the power nozzle over the cleaner’s electrical
ENGLISH CAUTION: To reduce the risk of injury, unplug before
servicing–the brushroll could suddenly restart.
For service not described in this manual take to
Electrolux Authorized Service Center for repair.
REPLACING THE DUST BAG, S-BAG®
1. The dust bag must be changed when the s-bag
indicator light on control pannel is illuminated in red.
Always change the s-bag
when the indicator signal is
illuminated even if the s-bag
is not full (it may be
blocked) and after using carpet cleaning powder. Use
only Electrolux original s-bag
Open the dust bag compartment.
prevents dust leaking out.
5. Insert a new s-bag
by pushing the cardboard right
into the end of the groove in the insert.
Place the dust bag holder back into the dust
compartment and close the lid.
REPLACING THE EXHAUST FILTER
7. The exhaust filter must be changed when the filter
indicator light on control pannel is illuminated in red.
8. Open the filter lid by pushing the two buttons
simultaneously under the handle.
9 Lift out the filter and check the color of the frame:
Blue colored = Washable exhaust filter
Green or Gray colored = Non washable exhaust
filter (it must be replaced by a new one).
10. When the filter has been replaced, the filter lid can
be pushed back until the two buttons click in.
If the filter lid comes loose, restore it by
positioning the two hinges at the bottom and
push the filter lid back until both of the two
11. If your model is specified with a blue washable filter
rinse the inside (dirty side) in lukewarm tap water.
Tap the filter frame to remove the water. Repeat the
process four times. Let filter dry completly before
REPLACING THE MOTOR FILTER Replace the motor filter when dirty. Never use the
vacuum cleaner without filters.
12. Push the filter holder down and pull it out. Exchange
the filter and close the lid.
FRANÇAIS ATTENTION: Pour réduire le risque de lésion, dépriser
ENGLISH CAUTION: To reduce the risk of injury, unplug before
servicing–the brushroll could suddenly restart.
CLEANING THE HOSE The vacuum cleaner may automatically stop if there
is a blockage in the nozzle, wands or hose and/or if
the filter has become blocked. Disconnect the cord
from the outlet and allow the vacuum cleaner to cool
down for 20–30 minu tes. Remove the blockage,
and/or replace the dirty filter. Then restart the
1. Use a suitable blunt implement to clear the wands
and hose of blockages.
2. You can also sometimes clean the hose by
“massaging” it. You should, however, be careful
as there is a risk that glass or nails could have
become embedded in the hose.
NOTE: The warranty does not cover any damage to
the hose caused by cleaning it.
HOW TO REPLACE BELT (BELT STYLE EL097)
CAUTION: Unplug the cleaner before replacing belt.
Belt pulleys can become hot during normal use. To
prevent burns, avoid touching the belt pulley when
servicing the drive belt. Allow it to cool.
3. Flip power head over onto its top and remove the
four screws marked by numbers A, B, C, D in Fig.
3. Pull up and rotate forward to release the base
plate. (A snapping sound is normal.)
4. Lift out brushroll and remove old belt.
5. Place new belt around brushroll motor pulley.
6. Place other end of the belt around the brushroll.
Insert the belt end of the brushroll back into the
case, followed by the other end.
7. Reinstall the cover by “snapping” it back into place
and replacing the four screws.
Use GENUINE ELECTROLUX replacement belt
ATTENTION: Unplug the cleaner before replacing belt.
ENGLISH TROUBLESHOOTING AND CONSUMER INFORMATION CAUTION: To reduce the risk of injury, unplug before
servicing–the brushroll could suddenly restart.
TROUBLESHOOTING The vacuum cleaner does not start
1 Check that the cord is connected to the outlet.
2 Check that the plug and cord are not damaged.
3 Check for a blown fuse or tripped circuit breaker.
The brushroll stops spinning
2 Remove any obstructing objects from the brushroll.
3 Turn power back on.
The vacuum suddenly stops working
2 Unplug power cord from wall.
3 Check for blocked filters.
4 Check check hose wands and nozzles for
5 Replace filter or remove air path obstruction.
6 Allow 30 minutes for motor to cool before powering
Water has entered the vacuum cleaner
It will be necessary to replace the motor at an
authorized Electrolux service center. Damage to
the motor caused by the penetration of water is not
covered by the warranty.
If you can’t find accessories for your Electrolux
vacuum cleaner, please visit our website at
ENGLISH THE ELECTROLUX LIMITED WARRANTY Your Electrolux cleaner is warranted to be free from all defects in material and workmanship in normal household use for a period of two years. The warranty is granted only to the original
purchaser and members of his or her immediate household. The warranty is subject to the following provisions.
This warranty does not cover parts of the cleaner that require replacement under normal use, such as disposable dust bags, fans, filters, drive belts, light bulbs, brushroll bristles, impellers and
cleaning. Any damages or malfunctions caused by negligence, abuse, or use not in accordance with the Owner’s Guide are not covered by this warranty. Likewise, any defects or damages caused
by unauthorized service or the use of other than Genuine Electrolux parts is not covered.
Electrolux will, at its option, repair or replace a defective cleaner or cleaner part that is covered by this warranty. As a matter of warranty policy, Electrolux will not refund the consumer’s purchase price.
To register your warranty, please visit www.electroluxusa.com (USA), www.electroluxca.com (Canada) or fill out and return the attached warranty registration card.
To obtain warranty service you must return the defective cleaner or cleaner parts along with proof of purchase to any Electrolux Authorized Warranty Station. For the location of the nearest
Electrolux Authorized Warranty Station or for service information in the United States or Canada, please telephone toll free:
You may also visit us online at
www.electroluxusa.com (USA) or www.electroluxca.com (Canada)
FURTHER LIMITATIONS AND EXCLUSIONS ARE AS FOLLOWS:
Any warranty that may be implied in connection with your purchase or use of the cleaner, including any warranty of Merchantability or any warranty for Fitness For A Particular Purpose is limited to
the duration of this warranty. Some states do not allow limitations on how long an implied warranty lasts, so the above limitations may not apply to you.
Your relief for the breach of this warranty is limited to the relief expressly provided above. In no event shall Electrolux be liable for any consequential or incidental damages you may incur in connection
with your purchase or use of the cleaner. Some states do not allow the exclusion or limitation of incidental or consequential damages, so the above limitation or exclusion may not apply to you.
This warranty gives you specific legal rights. You may also have other rights which vary by state.
REGISTRATION Please register your new Electrolux home care product electronically by visiting www.electroluxusa.com (USA) or www.electroluxca.com (Canada) or use the included registration card.
Registering your new Electrolux product entitles you to the most up-to-date Electrolux product warranty and promotion information.15
FRANÇAIS LA GARANTIE LIMITÉE ELECTROLUX Votre aspirateur Electrolux est garanti exempt de tout vice de matière et de fabrication lors d’une utilisation domestique normale pendant une période de deux ans. La garantie est accordée à
The Electrolux Story
For more than 90 years, Electrolux has been
designing products with real people in mind. We
call it “thoughtful design” - which means that our
products are not only made to last, but are also
made for ease-of-use and peace-of-mind.
The “Thinking of you” promise from Electrolux
goes beyond meeting the needs of today’s
consumers. It also means we’re committed to
making appliances safe for the environment -
now and for future generations.
At Electrolux, we’re thinking of you.