
RMC-M110E - Multi-cooker Redmond - Free user manual and instructions
Find the device manual for free RMC-M110E Redmond in PDF.


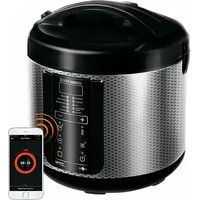
| Product type | Multi-cooker |
| Brand | Redmond |
| Model | RMC-M110E |
| Capacity | 5 L |
| Power | 800 W |
| Dimensions (L × H × D) | 30 × 25 × 25 cm |
| Weight | 4 kg |
| Power supply | 220-240 V, 50/60 Hz |
| Bowl material | Stainless steel with non-stick coating |
| Main functions | Rice cooking, soup, stewing, steaming, yogurt, baking, etc. |
| Automatic programs | More than 15 programs |
| Timer | Yes, with delayed start |
| Care and cleaning | Removable bowl, washable lid |
| Safety | Safety lock, overheat protection |
| Spare parts | Bowl, seal, valve, spoon, etc. |
| Repairability | Repairable by authorized service |
| Included accessories | Measuring spoon, cup, steam basket, etc. |
Frequently Asked Questions - RMC-M110E Redmond
User questions about RMC-M110E Redmond
0 question about this device. Answer the ones you know or ask your own.
Ask a new question about this device
Download the instructions for your Multi-cooker in PDF format for free! Find your manual RMC-M110E - Redmond and take your electronic device back in hand. On this page are published all the documents necessary for the use of your device. RMC-M110E by Redmond.
USER MANUAL RMC-M110E Redmond
Carefully read all instructions before operating and save them for future reference. By carefully following these instructions you can considerably prolong the service life of your appliance.
IMPORTANT SAFEGUARDS
- The manufacturer is not responsible for any failures arising from the use of this product in a manner inconsistent with the technical or safety standards.
- This appliance is intended to be used in household and similar applications such as: staff kitchen areas in shops, offices and other working environments; farm houses; by clients in hotels, motels and other residential type environments; bed and breakfast type environments.
- Before installing the appliance, check that the device voltage corresponds with the supply voltage in your home (refer to the rating plate or technical data).
- While using the extension cord, make sure that its voltage is the same as specified on the device. Using different voltage may result in a fire or another accident, causing the appliance damage or short circuit.
- The appliance must be grounded. Connect only to a properly installed wall socket. Failure to do so may result in the risk of electrical shock. Use only grounded extension cords.
STOP CAUTION! During use the appliance becomes hot! Care should be taken to avoid touching the housing, bowl, or any other metal parts while operating. Make sure your hands are protected before handling the device. To avoid possible burns, do not lean above the open appliance.
- Always unplug the device after use, before cleaning or moving. Never handle the plug with wet hands. Do not pull the power cord to disconnect from the outlet; instead, grasp the plug and pull to disconnect.
- Keep the power cord away from hot surfaces (gas or electric ovens) or sharp edges. Do not let the cord hang over the edge of a table or a counter.
STOP REMEMBER: damaging the cord may lead to a failure that will not be covered by the warranty. If the cable is damaged or requires replacing, contact an authorized service centre only to avoid all risks.
- Always keep the steam valve, pressure control valve, sealing ring on the inner lid, the condensate collecting container clean and efficient. Never plug in the appliance if any failures, blockage, deformation of the valve,
REDMOND
inner lid or sealing ring occur or with the filled condensate collecting container. If the sealing ring is replaced autonomously use only spare ring, included in set.
- When cooking food under pressure it is necessary to fill at least 1/5 of the bowl volume with water or other liquid.

Frying and baking under high pressure are strictly prohibited!
- To avoid clogging of the steam valve fill no more than 4/5 of the bowl volume with water and food. When cooking food, that swells in hot water or foams, fill no more than 3/5 of the bowl volume.

Never run the cooking programme under high pressure, if the lid is not properly fixed!
- Do not operate the appliance outdoors, to prevent water or any foreign object or insect from getting into the device. Doing so may result in serious damage of the appliance.
- Always unplug the device and let it cool down before cleaning. Follow the cleaning and general maintenance
guidelines when cleaning the unit.
- When opening the steam valve during or at the end of the cooking process the strong vertical hot steam may me released. Do not lean over the lid and do not place your hands over the holes of the valve when it is opened.
- When the pressure in the working chamber is increased the lid locking system is automatically enabled. Do not attempt to open the lid of the appliance without preliminary normalization of the pressure in the working chamber.
- At the end of cooking liquid dishes or purees allow the appliance to cool down for 10-15 minutes before the pressure release to prevent hot liquid emission through the steam valve.
- Open the lid of the appliance only holding by the plastic handle. Lift the appliance only by special handles on the sides of the housing, and only when it is unplugged.
- Never place the device on soft surfaces to keep ventilation slots clear of any obstruction.
• This appliance can be used by children aged from 8
years and above and persons with reduced physical, sensory or mental capabilities or lack of experience and knowledge if they have been given supervision or instruction concerning use of the appliance in a safe way and understand the hazards involved. Children shall not play with the appliance. Keep the appliance and its cord out of reach of children aged less than 8 years. Cleaning and user maintenance shall not be made by children without supervision.
- Keep the packaging (film, foam plastic and other) out of reach of children as they may choke on them.

DO NOT immerse the device in water or wash it under running water!

- Any modifications or adjustments to the product are not allowed. All the repairs should be carried out by an authorized service centre. Failure to do so may result in device and property damage or injury.
CAUTION! Do not use the appliance in case of any malfunctions.
Technical Characteristics
| Model | RMC-M110E |
| Power | 900 W |
| Voltage | 220~240 V, 50/60 Hz |
| Electrical safety | class I |
| Maximum volume | 4.8 L |
| Bowl coating | Daikin® non-stick (Japan) |
| Display | LFD, digital |
| Control | electronic |
| Protection | 4-level; |
| • steam-release valve | |
| • shutdown valve | |
| • thermal cutoff | |
| • pressure surge sensor | |
| Ready signal | yes |
Automatic Cooking Modes
| RICE/GRAIN | 3 modes |
| SOUP | 3 modes |
| BOIL | 3 modes |
| FRY | 1 mode |
| JAM/DESSERT | 5 modes |
| PILAF | 3 modes |
| OATMEAFL | 3 modes |
| BEANS | 3 modes |
| BAKE | 3 modes |
| GAME | 3 modes |
| POPGORN | 1 mode |
| STEW | 12 modes |
| STEAM | 12 modes |
| MULTI-CHEF | 1 mode |
Functions
| Reheat | up to 8 hours |
| Keep Warm function | up to 8 hours |
| Keep Warm function can be switched off in advance | yes |
| Time Delay | up to 24 hours |
| Contents | |
| Pressure and multitooker with bowl | 2 |
| Lid with steam valve | 2 |
| Steaming container | 2 |
| Measuring cup | 1 |
| Trivel | 1 |
| Stripping paddle | 1 |
| Serving spoon | 1 |
| Deep fry basket | 1 |
| "100 Recipes" book | 2 |
| Spare sealing ring | 2 |
| User manual | 1 |
| Service booklet | 1 |
| Power cord | 2 |
| The manufacturer may make changes to the design, parts or technical characteristics of the appliance, without prior notification, as part of the upgrading process. | |
Parts of the Appliance A1
| 1. Main section | 12. Switch of steam-release valve |
| 2. Detachable non-stick bowl | 13. Sealing ring |
| 3. Fixing bolt | 14. Lid handle |
| 4. LED control panel | 15. Steaming container |
| 5. Base with rubber feet | 16. Grille |
| 6. Carrying handles | 17. Serving spoon |
| 7. Power cord and plug | 18. Stirring padicle |
| 8. Removable lid | 19. Measuring cup |
| 9. Safety-valve exit | 20. Deep try basket |
| 10. Lid-locking lever | 21. Condensation tray (on the back panel of the appliance) |
| 11. Steam-release valve with safety cover | 22. Shutdown valve |
Control Panel A2
-
Automatic cooking mode buttons.
-
"COOK TIME" button.
-
Cooking time indicator. Shows the selected cooking times in automatic modes: "FAST", "NORMAL", "SLOW".
-
Display. Displays countdown timer for cooking / time delay / keep warm.
- The "TIMER / KEEP WARM" button sets the Time Delay; switches off the
Keep warm function.
-
The "REHEAT/CANCEL" button switches on and off the reheat function / cancels all settings / switches off the Keep Warm function / interrupts cooking mode.
-
The "MULTI-CHEE" button selects the manual cooking-time mode.
-
The 1 button devanes the time value / smoking time
-
The - button decreases the time delay / cooking time.
-
The "1" button increases the time delay time / cooking time.
- Product indicators in the STEAM and STEW automatic modes: "MEAT", "FISH", "VEGETABLES", "POULTRY".
I. BEFORE USE
Take the item and its parts carefully out of the box. Remove all packaging material and promotional stickers.

Do not remove the warning stickers, indicator stickers (if applicable) or the label with the serial number. The guarantee is no longer valid if the serial number is removed from the item.
REDMOND
Wipe the appliance with a damp cloth and rinse the bowl. Leave to dry. Clean the appliance completely before first use to avoid bad smells (see Care of the Appliance).
After transporting or storing at low temperatures, keep the appliance at room temperature for at least 2 hours before switching it on.
Place the appliance on a hard, even, horizontal surface so that the steam from the valve will not come into contact with wallpaper, decorative coverings, electronic devices or other items or materials which could be damaged by high humidity or temperatures.
Before use, make sure there are no chips or other defects on the outside or visible inside parts of the multicooker. There should be nothing caught between the bowl and the heating element.
II. USING THE MULTICOOKER
Opening/Closing the Lid
The lid seals hometically, allowing high pressure to build up inside the pressure and multicooker. When the pressure is higher than atmospheric pressure, the lid locks automatically. If, when cooking is complete, the lid does not open easily, this means that the pressure inside is still too high. Open the steam-release valve and wait for the pressure to fall.
To close the lid, release it and turn the locking lever clockwise as far as it will go. To open the lid, turn the locking lever counterclockwise as far as it will go and open the lid with the handle.
NOTE: Before opening the lid, make sure the steam-release valve is open and no steam is escaping from it.
The appliance heats up when it is working. Do not touch the metal part of the lid during and just after cooking. Always use the handle to open the lid.
Do not lift the appliance by the lid handle. Use the handles on the side of the appliance to lift and carry it.
Steam-Release Valve
The REDMOND RMC-M110F pressure and multicooker is equipped with a steam-release valve on the lid. By switching the valve switch to HIGH PRESSURE - valve closed or NORMAL PRESSURE - valve open, the appliance can be used in two different ways; with the valve closed, it works as a pressure cooker; with the valve open it works as a multicooker.
The clearance in the switch of the steam-release valve is not a defect.
After cooking under pressure, open the steam-release valve to normalise the pressure inside. When cooking dishes that do not require much liquid (pilot, etc.), the steam-release valve can be opened as soon as cooking is over. If liquids or purées are being cooked, let the appliance cool down for 5-10 minutes before opening the valve. Otherwise hot liquid may be released together with the steam.
NOTE: When opening the steam-release valve during or after cooking, there may be a sudden release of hot steam. Be careful.
Time Delay
When selecting an automatic cooking mode, you can set the Time Delay function from 1 minute to 24 hours in 1-minute intervals (default time delay - 2 hours).
-
After selecting the mode and cooking time, press the "TIMER / KEEP WARM" button. The Time Delay time will appear on the display. The hour indicator will flash.
-
Press the button to set the required hours, and then minutes (press the "TIMER / KEEP WARM" button again). To change the time quickly, press and hold down the "+" or "-" button.
-
A few seconds after setting the time delay, the figures on the display will stop flashing and the countdown timer will begin.
-
To cancel the settings, press the "REHEAT/CANCEL" button.
The Time Delay function is not available in FRY, POPCORN or BAKE, or when using the reheat function.
Avoid using the Time Delay function when the recipe involves ingredients with a short shelf-life.
When setting the time delay, remember that the selected mode and the cooking-time countdown only start when the appliance has reached the required temperature and pressure.
if the timer is set at 24 hours, the minutes cannot be changed.
Keep Warm
When a cooking mode is complete (as indicated by a signal and the mode indicator light going out), the Keep Warm function begins (the display shows the keep warm time in 1-minute intervals). This function can keep the temperature of a dish at 60-80°C for 8 hours.
The Keep Warm function can be interrupted by pressing the "REHEAT/CANCEL" button; the indicator light will go out and the appliance will switch to standby. If required, the Keep Warm function can be switched off by pressing the "TIMER/KEEP WARM" button (the "REHEAT/CANCEL" indicator light goes out). To switch the keep-warm function back on, press the "TIMER/KEEP WARM" button again.
Reheat
This will heat cold food to 60-80°C and keep it warm for 8 hours.
- Place the food in the bowl and place inside the appliance, making sure
- Close and lock the lid. Set the steam release valve to HIGH PRESSURE. Plug the appliance in.
- Press the "REHEAT/CANCEL" button. The indicator will light up and the reheat countdown will appear on the display in 1-minute intervals.
- To switch off the reheat function, press the "REHEAT/CANCEL" button (the indicator light will go out).
Appliance Protection System
The REDMOND RMC-M110E pressure and multicooker is equipped with a multiple protection system. When cooking under pressure, if the temperature or pressure inside the cooker exceed the required level, the cooking process will be delayed until the levels return to normal. If this does not happen within a certain time, the appliance will stop working.
The appliance is also equipped with additional overheating protection in FRY and POPCORN modes. If the appliance overmeats it will stop cooking and should cool down completely (approximately 15 minutes) before you can use either of these modes again. If "HH" appears on the display in FRY or POPCORN mode, it means the appliance is still too hot and the locking mode is on. This does not apply to other cooking modes.
Cooking Under Pressure
When the steam-release valve is closed, the appliance is hermotically sealed and high pressure builds up inside as it heats up. Water is boiled into steam at over 100°C and cooking time is more than halved. This, in conjunction with a restricted oxygen supply, means the food retains as many of its nutrients as possible.
General Rules for Cooking Under Pressure:
- There must be water or some other liquid in the pressure and multicooker bowl (at least 2 measuring glasses).
- Food cannot be fried in oil under pressure. If required, chopped vegetables can be lightly fried in a small quantity of oil or stock on the bottom of the pressure and multicooker in FRY mode with the lid open. Then add the remaining ingredients, add liquid, close the lid and continue cooking under pressure.
• The pressure and multicooker bowl should be filled to no more than 4/5 and no less than 1/5 full. When boiling food that swells or farms a
froth in hot water (spinach, rice, pulses, pasta, dumplings, etc.), do not fill the bowl more than 3/5 full to avoid clogging the steam valve.
REMEMBER: the appliance can break down if this is not done.
General Procedure for Using Automatic Programmes
- Prepare (measure out) the required ingredients and place them evenly in the bowl
- Place the bowl inside the appliance, making sure that it is straight and fits securely onto the heating element.
- Set the steam-release valve to the required settling:
- HIGH PRESSURE – pressure cooker (for RICE/GRAIN, SOUP, BOIL, IAM/DESSERT, PILAF, OATMEAL, BEANS, and GAME modes);
- NORMAL PRESSURE – multicooker (for FRY, BAKE, and POPCORN modes).
- Plug the appliance in.
- Select the cooking mode and product by pressing the relevant button (for the STEW and STEAM modes). The indicator lights up and the default cooking time starts to flash on the display (the cooking time does not include the time the appliance takes to reach the required temperature and pressure).
- Press the "COOK TIME" button to select the required cooking speed ("FAST", "NORMAL", "SLOW").
- To set the time delay, press the "TIMER / KEEP WARM" button. Use the "-" and "-" buttons to set the time.
- A few seconds after the setting is made, the display will stop flashing and start to work in the set mode. When the required temperature and pressure is reached, the countdown timer for the mode begins. There is no countdown timer in POPCORN mode.
- If not required, switch off the Keep Warm function in advance.
- If you are cooking under pressure, before opening the lid, carefully open the steam-release valve to normalise the pressure inside.
- To cancel all settings or interrupt the cooking process, press the "REHEAT/CANCEL" button at any time.
RICE/GRAIN (high pressure)
To cook rice, buckwheat and other cereals, use the automatic RICE/GRAIN mode, which has 3 settings to suit different recipes, types of products and cooking times. Default cooking time - 12 minutes.
The ingredients, without liquid, should fill the bowl no higher than the 2/5 level on the scale on the inside of the bowl.
SOUP (high pressure)
To make soups, use the automatic SOUP mode, which has 3 settings to suit different recipes, types of products and cooking times. Default cooking time - 50 minutes.
The ingredients, including the liquid, should fill the bowl no higher than the maximum level on the scale on the inside of the bowl.
BOIL (high pressure)
To boil meat, fish, vegetables, frankfurters, compotes, or to make fruit purees, use the automatic BOIL mode, which has 3 settings to suit different recipes, types of products and cooking times. Default cooking time - 20 minutes. The ingredients, including the liquid, should fill the bowl no higher than the maximum level on the scale on the inside of the bowl.
FRY (normal pressure)
The REDMOND RMC-110E pressure and multicooker has a special automatic FRY mode for cooking food (meat, vegetables, poultry, seafood) at normal pressure in a small quantity of oil or fat. The default cooking time in FRY mode is 20 minutes. For deep fat-frying use the special basket with detachable handle (provided).
NOTE: Do not close the lid when cooking in FRY mode. This could trigger the automatic safety lid-locking system (you will be unable to visually monitor
the frying process, stir the food or turn it over). If this does happen, stop cooking, wait for the appliance to cool down and open the lid. Cooking can then resume.
JAM/DESSERT (high pressure)
To make various jams and desserts, use the automatic JAM/DESSERT mode, which has 3 settings to suit different recipes, types of products and cooking times. Default cooking time - 22 minutes. The ingredients, including the liquid, should fill the bowl no higher than the maximum level on the scale on the inside of the bowl.
PILAF (high pressure)
To make different types of pilar, use the PILAF mode, which has 3 settings to suit different recipes, types of products and cooking times. Default cooking time - 20 minutes. The ingredients, without liquid, should fill the bowl no higher than the 3/5 level on the scale on the inside of the bowl.
OATMEAL (high pressure)
To make different types of milky cereals, use the automatic OATMEAL mode, which has 3 settings to suit different recipes, types of products and cooking times.
The ingredients, including the liquid, should fill the bowl no higher than the 2/5 level on the scale on the inside of the bowl. Default cooking time - 5 minutes. Use pasteurised skimmed milk when preparing cereals in the pressure and multicooker.
To avoid over-boiling the milk and to achieve the required results, complete the following steps prior to cooking:
- wash all grains (rice, buckwheat, millet, etc.) thoroughly until the water runs clear:
• rub some butter on the sides of the multicoaker bowl; - use precise proportions, measuring the ingredients according to the
recipe; always increase of decrease quantities proportionally - if using whole milk, dilute it with equal parts drinking water.
Milk and cereals can differ depending on where they were produced, and this can sometimes affect cooking results.
BEANS (high pressure)
To cook peas, beans, lentils and other types of pulses, use the automatic BEANS mode, which has 3 settings to suit different recipes, types of products and cooking times. Default cooking time - 40 minutes. The ingredients, without liquid, should fill the bowl no higher than the 3/5 level on the scale on the inside of the bowl.
BAKE (normal pressure)
To bake cakes, pies and puddings, as well as bake meat, fish and vegetables, use the automatic BAKE mode, which has 3 settings to suit different recipes, types of products and cooking times. Default cooking time - 30 minutes. The ingredients should fill the bowl no higher than the 2/5 level on the scale on the inside of the bowl.
GAME (high pressure)
To cook gamebirds (rich meats, large meat or poultry joints) or to make aspic jelly, use the automatic GAME mode, which has 3 settings to suit different recipes, types of products and cooking times. Default cooking time = 50 minutes. The ingredients, including the liquid, should fill the bowl no higher than the 4/5 level on the scale on the inside of the bowl.
POPCORN (normal pressure)
To make popcorn, use the special automatic POPCORN mode.
-
Pour the popcorn grains (without packaging) into the bowl no more than 200 grammes at a time.
-
Place the bowl inside the appliance, making sure that it is straight and fits securely onto the heating element. Close and lock the lid.
-
Remove the steam-release valve switch by pulling it upwards. Plug the
appliance in.
- Press the POPCORN button. The indicator will light up and in a few seconds the heating indicator will appear on the display as cooking begins. There is no countdown timer in this mode.
- When ready, the appliance emits a signal and "0000" appears on the display.
- Wait until the popping stops inside, then open the lid and remove the bowl of popcorn.
NOTE: When making popcorn, the appliance becomes very hot. Be careful. Use oven gloves.
STEW (high pressure)
To make stews, use the automatic STEW mode, which has 2 settings to suit different recipes, types of products and cooking times. The default cooking time depends on the chosen product ("MEAT", "FISH", "VEGETABLES", "POULTRY"). The ingredients, including the liquid, should fill the bowl no higher than the 4/5 level on the scale on the inside of the bowl.
STEAM (high pressure)
To steam vegetables, fish, meat, seafood, dietary and vegetarian dishes, or children's food, use the automatic STEAM mode, which has 12 settings to suit different recipes, types of products and cooking times. The default cooking time depends on the chosen product ("MEAT", "FISH", "VEGETABLES", "POULTRY"). When steaming, use the steaming container and grille (provided):
-
Pour 300-350 ml water into the bowl.
-
Prepare all the ingredients according to the recipe and place them evenly in the steaming container. Place the grille inside the bowl and place the container on top.
-
Follow the instructions in points 2-11 of the General Procedure for Using Automatic Programmes.
MULTI-CHEF (high/normal pressure)
If the automatic modes do not suit the purposes of a certain dish, you can use the manual MULTI-CHEF mode. It allows you to cook at both high and normal pressure, setting the cooking time at 2 to 99 minutes in 1-minute intervals. Default cooking time - 10 minutes.
The Ingredients, including the liquid, should fill the bowl no higher than the 4/5 level on the scale on the inside of the bowl.
- Measure out and prepare the ingredients according to the recipe. Place them in the bowl, and add water.
- Place the bowl inside the appliance and twist it slightly, making sure that it is straight and fits securely onto the heating element. Close and lock the lid.
- Switch the steam-release valve to HIGH PRESSURE or NORMAL PRESSURE as required. Plug the appliance in.
- Press the "MULTI-CHEF" button. The indicator lights up and the default cooking time starts to flash on the display.
- Press the "+" or "-" buttons to set the required cooking time.
- Follow the instructions in points 7-11 of the General Procedure for Using Automatic Programmes.
III. ADDITIONAL FUNCTIONS
- Making baby food
• Sterilising containers and cutlery
IV. ADDITIONAL ACCESSORIES
Additional accessories are not provided with this multicooker. You can purchase them and find out more about REDMOND products at www.multicooker.com or from our official dealers.
V. COOKING TIPS
Recommended steaming times
| Foods Weight, g/pca Water, ml | Cooking time, min | |
| Pork/beer fillet (out into 1.5-2 cm cubes) | 500 400 15/10 | |
| Matoes fillet (out into 1.5-2 cm cubes) | 500 500 25 | |
| Chicken fillet (out into 1.5-2 cm cubes) | 500 500 6 | |
| Meatballs/boxes 500 500 15 | ||
| Futs (filling 500 500 8 | ||
| Seafood mix (frozen) | 300 300 8 | |
| Potatoes (out into 4 places) | 300 300 8 | |
| Carrots (out into 1.5-2 cm cubes) | 300 300 8 | |
| Bowl (out into 4 places) | 300 300 17 | |
| Vegetables (frozen) | 300 300 3 | |
| Eggs | 5 pcs | 500.4 |
Please note, that these are general guidelines. Steaming time may vary, depending on the quality of the foods used and your personal preferences.
Cooking-programme spreadsheet (factory settings)
| ModeFast | Cooking time, min | Default time, min | TimeDelay | Ro-heat | ||
| Fast | Normal | Slow | ||||
| RICE/GRAIN | 8 | 12 | 16 | 12 | + | - |
| SOUP | 13 | 20 | 45 | 20 | + | - |
| BOIL | 18 | 20 | 45 | 20 | + | - |
| FRY | 70 | - | - | |||
| JAM/DISSERT | 13 | 22 | 30 | 22 | + | - |
| PILAF | 10 | 20 | 30 | 20 | + | - |
| OATMEAL | 3 | 5 | 10 | 5 | + | - |
| BRANS | 25 | 40 | 60 | 40 | - | - |
| BAKE | 26 | 30 | 35 | 30 | - | - |
| CAME | 15 | 30 | 45 | 30 | - | - |
| POFCORN | Set automatically | - | - | |||
REDMOND
| ModeFast | Cooking time, min | Default time, min | Time Delay | Ro-heat | |||
| Fast | No-mal. | Slow | |||||
| STPN | Mean 50 40 50 40 - + | ||||||
| Vegetables 15 20 25 20 - + | |||||||
| Poultry 20 35 45 35 - + | |||||||
| Fish 15 20 30 20 - + | |||||||
| SILAM | Mean 15 20 25 20 - + | ||||||
| Vegetables 6 13 12 10 - + | |||||||
| Poultry 9 10 15 20 - + | |||||||
| Fish 10 15 20 15 - + | |||||||
| MULTI-CHU | Set manually from 20 to 99 minutes | --- | |||||
VI. CARE OF THE APPLIANCE
Before cleaning the inside surface of the multicooker, make sure it is unplugged from the mains and has cooled down completely.
Before using the appliance for the first time, as well as to get rid of food odour after use, place a lemon inside for 15 minutes in BOIL mode.
Do not leave the multicooker closed with water in the bowl for more than 24 hours. Food can be stored in the bowl in the fridge and reheated using the Northeast function.
If the appliance is not used for a long period of time, make sure it is unplugged from the mains. The inside, bowl, inner lid, and steam valve should be kept clean and dry.
Before cleaning the appliance, make sure it is unplugged from the mains and has completely cooled down. Use a soft cloth and a gentle washing-up liquid. Be careful not to damage the rubber parts: this can affect the work of the appliance.
DO NOT use rough claths or abrasives to clean the appliance. Do not use any chemicals or other substances which are not recommended for items that come into contact with foodstuffs.
Clean the surface as required. Clean the bowl after each use. The inner aluminum lid and removable steam valve should be cleaned after each use. Remove any condensation that forms in the multicooker after each use. Clean the inside surface as required.
Clean the surface of the appliance with a soft kitchen cloth or sponge. Gentle cleaning substances can be used. Wipe the appliance dry to avoid leaving any watermarks or stains on the surface.
The bowl can be cleaned with a soft sponge and washing-up liquid, or in a dishwasher. For stubborn stains, pour warm water into the bowl and leave it to soak before cleaning. Always wipe the outer surface of the bowl dry before replacing it inside the multicooker.
Clean the inner surface of the lid after each use:
-
Open the lid, inside, in the middle, is the fixing bolt. Supporting the lid, unscrew the bolt (counterclockwise) and carefully separate the lid from the lever of the hinge mechanism.
-
Clean the inner surface of the lid and wipe it dry.
-
Replace the lid: align the hole in the centre of the lid with the screw on
the lever of the hinge mechanism (the lid-locking lever should be on the top) and, supporting the lid, screw on the fixing bolt (clockwise) as far as it will go.
For more rigorous cleaning, remove the sealing ring from the inner surface of the lid and dismantle the steam release valve.
-
Remove the valve switch on the outside of the lid by pulling it upwards.
-
Unscrew the protective cover on the inside of the lid.
-
Rinse both parts of the valve in warm water
-
Screw the protective cover back in place and push the valve switch lightly back into its socket to secure it.
-
The pressure-regulation shutdown value
-
The pressure-regulating shockdown valve is inside the bid. Carefully remove any dirt from the valve and sealing ring with a damp sponge or kitchen cloth.
The steam-release valve and shutdown valve should be cleaned after every use.
Clean the sealing ring on the inside of the lid as required: carefully remove the ring, rinse it in warm water and replace accurately.
The condensation tray at the back of the appliance should be cleaned regularly. Pull the tray down to remove it. Pour away the water, rinse the tray and replace.
If the instructions are followed carefully, there is very little chance of water, bits of food or waste getting inside the appliance. If there should be a significant build-up, however, this can damage the appliance. In this case, clean the inside surface.
The side walls, bottom and cover of the central temperature sensor (on the bottom, in the centre) can be cleaned with a dampened sponge or cloth. If you use a detergent, it must be wiped off completely to avoid smells when cooking. If there is anything caught in the recess around the central temperature sensor, remove it with tweezers without pressing on the cover of the sensor.
VII. BEFORE CONTACTING THE SERVICE CENTRE
| Error message on display | Possible problems. | Solution |
| E1 | Pressure sensor error | Deploy the appliance and let it cool down. Close the lot slightly if the problem has not been solved, contact an authorized service centre |
| E3 | System error, the control boxes or testing command may have malfunctioned | Contact an authorized service centre |
| E5 | Overloading | Deploy the appliance and let it cool down |
| Problem | Possible cause | Solution |
| Will not switch on | No power in the electrical supply | Check the voltage in your electrical supply |
| The lid does not close hermetically, steam escapes through the lid during cooking | The sealing ring in the lid is missing in crammed | Replace it accurately |
| The sealing ring in the cold dirty | Clear the ring | |
| The sealing ring is deformed | Replace it |
| Problem | Possible cause | Solution |
| The food takes tea long to cook | Unstable electrical supply | Check the voltage in your electrical supply |
| Something trapped between the boot and the heating element | Remove the item | |
| The hood is cracked | Replace it correctly | |
| The heating element is dirty | Unpulsed the appliance and let it cool down. Clean the heating element |
VIII. PRODUCT WARRANTY
We warrant this product to be free from defects for a period of 2 years from the date of purchase. If the appliance fails to operate properly within the warranty period and is found to be defective in material or workmanship, we will repair or replace it. This warranty comes into force only in case the purchase date can be proved with an original warranty service coupon containing a serial article number and accurate impress of the company of the seller. This limited warranty does not cover damage caused by the failure to use this product for its normal purpose or in accordance with the instructions on the proper use and maintenance of the product, or any kind of repair works. Do not try to disas semble the device and keep all package contents. This warranty does not cover normal wear of the device and its parts (filters, bulbs, non-stick coating, sealing rings, etc.).
Service life and the applicable product warranty period start on the date of purchase or the date of manufacture (if the purchase date cannot be established). You can determine manufacture date by the serial number on the identification label on the housing of the device. The serial number consists of 13 digits. The 6th and 7th digits of the serial number refer to the month, whereas the 8th digit refers to the year of manufacture.
Service life of the product, established by the manufacturer is 5 years from the date of purchase, provided that the appliance is used and maintained in accordance with the user manual and applicable technical standards.
Environmentally friendly disposal (WEEE)
The packaging, user manual and the device itself shall be taken to the applicable collection point for the recycling of electrical and electronic equipment. Do not throw away the electronic waste to help protect the environment.
Old appliances must not be disposed with other household waste but must be collected separately. Municipal disposal of recyclable wastes is free of charge. The owners of old appliances are required to bring it to a waste facility centre. With this little extra effort, you can help to ensure that valuable raw materials are recycled and pollutants are treated as appropriate.
This appliance is labelled in accordance with European Directive 2012/19/EU – concerning used electrical and electronic appliances (waste electrical and electronic equipment WEEE).
The guideline determines the framework for the return and recycling of used appliances as applicable throughout the EU.

Friture ( pression normale )
('VEES'), 'FISH' ('VIS'), 'VEGETABLES' ('GRDENTEN'), 'POLITRY' ('GEVO-
Popcorn (normale druk)
| RICE/GRAIN (ARROZ/CEREALS) | 3 regimes |
| SOUP (SOYA) | 3 regimes |
| BOLI (COZEDURA) | 3 regimes |
| FRY (ASSADURA/FRITURA) | 1 regime |
| JAM(DESSERT (COMPOTA/SOBREMESAS) | 3 regimes |
| PILAF (PAELHA) | 3 regimes |
| OATMEAL (APPA COM LEITE) | 3 regimes |
| BEANS (LEGUMES) | 3 regimes |
| BAKE (PASTELARIA) | 3 regimes |
| GAME (CAÇA) | 3 regimes |
| POPCORN (PIPOCAS) | 1 regime |
| STEW (GUISADO) | 12 regimes |
| STEAM (VAPOR) | 12 regimes |
| MULTI-CHEF (CHEFE DE COZINHA) | 1 regime |
Funcões
POPCORN (normalt tryk)
VI. VEDLIKEHOLD AV APPARATET
Tillagning under tryck
BAKE (normalt tryck)
Kaane avamine/sulgemine
- Despite intention besides that, considering constraints for the environment, so that is not feasible, or if you should be shaded as the right, do you think it
العَدَ لَمْتُ الْمَّحِيَةِ
[Non-Text]
"FRY", "POPCORV", "BAKE"
العربية
Health, health, health, health, health, health, health, health, health, health, health, health, health, health, health, health, health, health, health, health, health, health, health, health, health, health, health, health, health, health, health, health, health, health, health, health, health, health, health, health, health, health, health, health, health, health, health, health, health, health, health,
بِمْ لُست تَبَة لِكَلَ الْحِيَالِ. بِنَّدَ لَكَالَة نَشَّدَ لَجِازَ الْمَحْدَةٍ ١٥٦٠.

بناشأ لمر
قَد لِنْمُل
Reproduction, transfer, distribution, translation or other reworking of this document or any part thereof without prior written permission of the legal owner is prohibited.
Produced by Redmond Industrial Group LLC, USA
One Commerce Plaza, 99 Washington Ave, Ste. 805A,
Albany, New York, 12210
www.redmond.company
www.multicooker.com
Made in China
RMC-M110E-UM-3


- IMPORTANT SAFEGUARDS
- REDMOND
- CONTROL PANEL A2
- BEFORE USE
- USING THE MULTICOOKER
- OPENING/CLOSING THE LID
- STEAM-RELEASE VALVE
- TIME DELAY
- KEEP WARM
- REHEAT
- APPLIANCE PROTECTION SYSTEM
- COOKING UNDER PRESSURE
- GENERAL RULES FOR COOKING UNDER PRESSURE
- GENERAL PROCEDURE FOR USING AUTOMATIC PROGRAMMES
- RICE/GRAIN (HIGH PRESSURE)
- SOUP (HIGH PRESSURE)
- BOIL (HIGH PRESSURE)
- FRY (NORMAL PRESSURE)
- JAM/DESSERT (HIGH PRESSURE)
- PILAF (HIGH PRESSURE)
- OATMEAL (HIGH PRESSURE)
- BEANS (HIGH PRESSURE)
- BAKE (NORMAL PRESSURE)
- GAME (HIGH PRESSURE)
- POPCORN (NORMAL PRESSURE)
- STEW (HIGH PRESSURE)
- STEAM (HIGH PRESSURE)
- MULTI-CHEF (HIGH/NORMAL PRESSURE)
- ADDITIONAL FUNCTIONS
- ADDITIONAL ACCESSORIES
- COOKING TIPS
- CARE OF THE APPLIANCE
- BEFORE CONTACTING THE SERVICE CENTRE
- PRODUCT WARRANTY
- ENVIRONMENTALLY FRIENDLY DISPOSAL (WEEE)
- FRITURE ( PRESSION NORMALE )
- POPCORN (NORMALE DRUK)
- POPCORN (NORMALT TRYK)
- VEDLIKEHOLD AV APPARATET
- TILLAGNING UNDER TRYCK
- BAKE (NORMALT TRYCK)
- KAANE AVAMINE/SULGEMINE
Brand : Redmond
Model : RMC-M110E
Category : Multi-cooker