RCS-4446C2 - Chain saw RYOBI - Free user manual and instructions
Find the device manual for free RCS-4446C2 RYOBI in PDF.
| Brand | RYOBI |
| Model | RCS-4446C2 |
| Type | Gasoline chainsaw |
| Displacement | 44 cm³ |
| Rated power | 1.9 kW / 9500 rpm |
| Fuel tank capacity | 310 cm³ |
| Oil tank capacity | 210 cm³ |
| Guide bar length | 46 cm |
| Cutting length | 410 mm |
| Chain pitch | 8.26 mm |
| Chain gauge | 1.27 mm |
| Chain type | Carlton K1L-BL-72E (low kickback) |
| Drive sprocket | 7 teeth |
| Weight (without fluids, bar or chain) | 4.6 kg |
| Idle speed | 2700 – 3100 rpm |
| Maximum speed | 12000 rpm |
| Sound pressure level | 103 dB(A) |
| Sound power level | 113 dB(A) |
| Vibration front handle | 6.4 m/s² |
| Vibration rear handle | 7.0 m/s² |
| Fuel | Mixture of unleaded gasoline 87 octane + synthetic 2-stroke oil (50:1) |
| Spark plug | Champion RZ7C or NGK CMR7H (gap 0.64 mm) |
| Chain brake | Yes, integrated into front hand guard |
| Starting | Manual starter |
| Warranty | 24 months (parts and labor) |
Frequently Asked Questions - RCS-4446C2 RYOBI
User questions about RCS-4446C2 RYOBI
0 question about this device. Answer the ones you know or ask your own.
Ask a new question about this device
Download the instructions for your Chain saw in PDF format for free! Find your manual RCS-4446C2 - RYOBI and take your electronic device back in hand. On this page are published all the documents necessary for the use of your device. RCS-4446C2 by RYOBI.
USER MANUAL RCS-4446C2 RYOBI
Thank you for buying a Ryobi chainsaw.
Your new chainsaw has been engineered and manufactured to Ryobi's high standard for dependability, ease of operation, and operator safety. Properly cared for, it will give you years of rugged, trouble-free performance.

WARNING
To reduce the risk of injury, the user must read and understand the operator's manual.

IMPORTANT
Servicing requires extreme care and knowledge and should be performed only by a qualified service technician. When servicing use only identical Ryobi replacement parts. For safe operation, read and understand all instructions before using the chainsaw. Follow all safety instructions. Failure to follow all safety instructions listed below may result in serious personal injury.

WARNING
Carefully read through this entire operator's manual before using your new saw. Pay close attention to the Safety Rules and all Safety Alert Symbols including Danger, Warning, and Caution. These safety rules are for your safety and to prevent possible serious injury. If you use your saw properly and only for what it is intended,
you will enjoy years of safe, reliable service.

WARNING
Look for this symbol to point out important safety precautions. It means attention!!! Your safety is involved.

WARNING
The operation of any tool can result in foreign objects being thrown into your eyes which may result in severe eye damage. Before beginning tool operation, always wear safety goggles or safety glasses with side shields and a full face shield when needed. We recommend Wide Vision Safety Mask for use over spectacles or standard safety glasses with side shields.
Always wear eye protection.
READ ALL INSTRUCTIONS.
GENERAL SAFETY RULES

WARNING
The warnings, labels, and instructions found in this section of the operator's manual are for your safety. Failure to follow all instructions may result in serious personal injury. Safe operation of this tool requires that you read and understand this operator's manual and all labels affixed to the tool. Safety is a combination of using common sense, staying alert, and knowing how your saw works.
-
KNOW YOUR TOOL. Read the operator's manual carefully. Learn the saw's applications and limitations as well as the specific potential hazards related to this tool.
CHAINSAWS are designed for cutting wood only.
KICK-BACK MAY OCCUR WHEN THE NOSE OF THE GUIDE BAR touches an object or when the wood closes in and pinches the saw chain in the cut. The nose of guide bar contact in some cases may cause a lightning-fast reverse reaction kicking the guide bar up and back toward the operator. Pinching the saw chain along the top of the guide bar may push the guide bar rapidly back toward the operator. Either of these reactions may cause you to lose control of the saw which could result in serious personal injury. DO NOT rely exclusively upon the safety devices built into your saw. As a chainsaw user, you should take several steps to keep your cutting jobs free from accident or injury. -
With a basic understanding of kick-back, you can reduce or eliminate the element of surprise. Sudden surprise contributes to accidents.
- Keep a good firm grip on the saw with both hands when the engine is running. Place your right hand on the rear handle and your left hand on the front handle with your thumbs and fingers encircling the chainsaw handles. A firm grip together with a stiff left arm will help you maintain control of the saw if kick-back occurs.
- Make sure that the area in which you are cutting is free from obstructions. DO NOT let the nose of the guide bar contact a log, branch, fence, or any other obstruction that could be hit while you are operating the saw.
- Cut at high engine speeds. Always cut with the engine running at full speed. Fully squeeze the throttle trigger and maintain a steady cutting speed.
- Do not overreach or cut above chest height.
- Follow the manufacturer's sharpening and maintenance instructions for the saw chain.
English
GENERAL SAFETY RULES
- Use only replacement bars and chains specified by the manufacturer or the equivalent.
DO NOT OPERATE A CHAINSAW WITH ONE HAND. Serious injury to the operator, helpers, and/or bystanders may result from one-handed operation. A chainsaw is intended for two-handed use.
DO NOT OPERATE A CHAINSAW WHEN YOU ARE FATIGUED. Never operate a chainsaw when you are tired or under the influence of medication, drugs, or alcohol.
USE SAFETY FOOTWEAR. Wear snug-fitting clothing, protective gloves, and eye, hearing, and head protection devices.
DO NOT STAND ON ANY UNSTABLE SURFACE while using your chainsaw: that includes ladders, scaffolds, trees, etc.
USE CAUTION WHEN HANDLING FUEL. Move the chainsaw at least 50 feet (15 m) from the refuelling point before starting the engine.
DO NOT ALLOW OTHER PERSONS to be near the chainsaw when starting or cutting with the chainsaw. Keep bystanders and animals out of the work area. - DO NOT START CUTTING until you have a clear work area, secure footing, and a planned retreat path from the falling tree.
-
KEEP ALL PARTS OF YOUR BODY away from the saw chain when the engine is running.
ALWAYS CARRY THE CHAINSAW WITH THE ENGINE STOPPED AND THE BRAKE ENGAGED, the guide bar and saw chain to the rear, and the silencer away from your body. When transporting the chainsaw, use the appropriate guide bar scabbard.
DO NOT OPERATE A CHAINSAW THAT IS DAMAGED, improperly adjusted, or not completely and securely assembled. Be sure that the saw chain stops moving when the throttle control trigger is released.
TURNS OFF THE ENGINE before putting the chainsaw down. DO NOT leave the engine running unattended. As an additional safety precaution, apply the chain brake before putting down the saw.
USE EXTREME CAUTION when cutting small-size brush and saplings because slender material may catch the saw chain and be whipped toward you or pull you off balance.
WHEN CUTTING A LIMB under tension, be alert for spring-back so that you will not be struck when the tension in the wood fibres is released. -
KEEP THE HANDLES dry, clean, and free of oil or fuel mixture.
OPERATE THE CHAINSAW ONLY in well-ventilated areas.
DO NOT OPERATE A CHAINSAW IN A TREE unless you have been specifically trained to do so.
ALWAYS HAVE A FIRE EXTINGUISHER AVAILABLE WHEN USING CHAIN SAW.
Use guide bar cover during transport and storage.
The chain saw should always be used with correctly mounted spiked bumper.
FOLLOW THE SHARPENING and maintenance instructions for the saw chain.
USE ONLY THE REPLACEMENT GUIDE BARS and low kick-back chains specified for your saw.
DO NOT adapt your powerhead to a bow guide or use it to power any attachments or devices not listed for your saw.
SAVE THESE INSTRUCTIONS. Refer to them frequently and use to instruct other users. If you lend someone this tool, lend them these instructions also.
SPECIFIC SAFETY RULES

WARNING
The warnings, labels, and instructions found in this section of the operator's manual are for your safety. Failure to follow all instructions may result in serious personal injury.
GENERAL PRECAUTIONS
DO NOT CUT VINES and/or small undergrowth (less than 76mm 3 in.) in diameter).
MUFFLER SURFACES ARE VERY HOT during and after operation of the chainsaw; keep all body parts away from the muffler. Serious burns may occur if contact is made with the muffler.
ALWAYS HOLD THE CHAINSAW WITH BOTH HANDS when the engine is running. Use a firm grip with thumbs and fingers encircling the chainsaw handles.
- NEVER LET ANYONE USE YOUR CHAINSAW who has not received adequate instructions in its proper use. This applies to rentals as well as privately owned saws.
BEFORE YOU START THE ENGINE, make sure the saw chain is not contacting any object.
OPERATE THE CHAINSAW only in well ventilated areas.
English
SPECIFIC SAFETY RULES
PROPER CLOTHING FOR SAFETY
- Wear close-fitting clothing. Always wear heavy, long trousers, boots, and gloves. Do not wear jewellery, shorts, sandals, or go barefoot. Do not wear loose-fitting clothing, which could be drawn into the engine or catch the chain or undergrowth. Wear overalls, jeans, or leggings made of cut-resistant material or ones that contain cut-resistant inserts. Secure hair so that it is above shoulder level.
Wear non-slip safety footwear and heavy-duty gloves to improve your grip and to protect your hands.
Wear eye, hearing, and head protection when operating this equipment.
REFUELLING (DO NOT SMOKE!)
To reduce the risk of fire and burn injury, handle fuel with care. It is highly flammable.
Mix and store fuel in a container approved for petrol.
- Mix fuel outdoors where there are no sparks or flames.
- Select bare ground, stop the engine, and allow it to cool before refuelling.
- Loosen the fuel cap slowly to release pressure and to keep fuel from escaping around the cap.
- Tighten the fuel cap securely after refuelling.
Wipe spilled fuel from the unit. Move 15 m (50 ft.) away from refuelling site before starting engine.
- Never attempt to burn off spilled fuel under any circumstances.
BASIC PRECAUTIONS IN THE CUTTING/WORK AREA
Do not operate a chainsaw in a tree.
- Do not cut from a ladder: this is extremely dangerous.
- Keep bystanders and animals out of the work area. Do not allow other persons to be nearby during starting or cutting with the chainsaw.
NOTE: The size of the work area depends on the job being performed as well as the size tree or workpiece involved. For example, felling a tree requires a larger work area than making other cuts, i.e. bucking cuts etc.
PUSH AND PULL
The reaction force is always opposite to the direction the chain is moving. Thus, the operator must be ready to control the PULL when cutting on the bottom edge of the bar and the PUSH when cutting along the top edge.
NOTE: Your chainsaw has been fully factory tested.
It is normal to find some slight oil residue on the saw.
MAINTENANCE PRECAUTIONS
Never operate a chainsaw that is damaged, improperly adjusted, or is not completely and securely assembled.
Be sure that the saw chain stops moving when the throttle control trigger is released. If the saw chain moves at idling speed, the carburettor may need adjusting. Refer to "Operation-Adjusting Idling Speed" later in this manual.
If the saw chain still moves at idling speed after adjustment has been made, contact a Ryobi service dealer for adjustment and discontinue use until the repair is made.

WARNING
All chainsaw service, other than items in the operator's manual maintenance instructions, should be performed by competent chainsaw service personnel. If improper tools are used to remove the flywheel or clutch, or if an improper tool is used to hold the flywheel in order to remove the clutch, structural damage to the flywheel could occur which could subsequently cause the flywheel to burst and serious injury could result.
KICK-BACK
Kick-back is a dangerous reaction that can lead to serious injury. Do not rely only on the safety devices provided with your saw. As a chainsaw user, you must take special safety precautions to help keep your cutting jobs free from accident or injury.
NOTE: Refer to "Operation" later in this manual for added information on kick-back and how to avoid serious personal injury.
SAVE THIS MANUAL FOR FUTURE REFERENCE.
English
SYMBOLS
Some of the following symbols may be used on this tool. Please study them and learn their meaning. Proper interpretation of these symbols will allow you to operate the tool better and safer.
| SYMBOL | NAME | DESIGNATION / EXPLANATION |
| Safety Alert | Precautions that involve your safety. | |
| Read The Operator's Manual | To reduce the risk of injury, user must read and understand operator's manual before using this product. | |
| Wear Eye, Hearing, and Head Protection | Wear eye, hearing and head protection when operating this equipment. | |
| No Smoking | No smoking, sparks, or open flame. | |
| Operate With Two Hands | Hold and operate the saw properly with both hands. | |
| One Handed | Do not operate the saw using only one hand. | |
| Carbon Monoxide | Engines produce carbon monoxide which is an odorless, deadly poison. Do not operate in an enclosed area. | |
| Kickback | DANGER! Beware of kickback. | |
| Bar Nose Contact | Avoid bar nose contact. | |
| Wear Gloves | Wear non-slip, heavy-duty protective gloves when handling the chain saw. | |
| Petrol and Oil | Use unleaded petrol intended for motor vehicle use with an octane rating of 87 [(R + M)/2] or higher. This product is powered by 2-stroke cycle engine and requires pre-mixing petrol and 2-stroke oil. | |
| Keep Bystanders Away | Keep all bystanders and animals at least 15m away. |
English
SPECIFICATIONS
| RCS-3535C2 | RCS-4040C2 | RCS-4446C2 | |
| 35 cc | 40 cc | 44 cc | |
| Weight - No bar, chain, fuel or oil | 4.6 kg | 4.6 kg | 4.6 kg |
| Fuel tank capacity | 310 cm3 | 310 cm3 | 310 cm3 |
| Oil tank capacity | 210 cm3 | 210 cm3 | 210 cm3 |
| Bar lengths | 35 cm | 40 cm | 46 cm |
| Usable cutting lengths | 320 mm | 370 mm | 410 mm |
| Bar type | Carlton 14-10-N1-MHC UNB | Carlton 16-10-N1-MHC UNB | Carlton 18-10W-K1-HC-UNB |
| Chain pitch | 9.53 mm (0.375 inch) | 9.53 mm (0.375 inch) | 8.26 mm (0.325 inch) |
| Chain gauge | 1.27 mm (0.05 inch) | 1.27 mm (0.05 inch) | 1.27 mm (0.05 inch) |
| Chain type | Carlton N1C-BL-M-52E SK | Carlton N1C-BL-M-57E SK | Carlton K1L-BL-72E |
| Drive sprocket | 6-tooth | 6-tooth | 7-tooth |
| Engine displacement | 35 cm3 | 40.1 cm3 | 44 cm3 |
| Maximum engine power (ISO7293) | 1.7 kW / 10000 min-1 | 1.8 kW / 10000 min-1 | 1.9 kW / 9500 min-1 |
| Maximum engine speed with attachment | 12000 min-1 | 12000 min-1 | 12000 min-1 |
| Idling engine speed | 2700 - 3100 min-1 | 2700 - 3100 min-1 | 2700 - 3100 min-1 |
| Specific fuel consumption at maximum | |||
| engine power | 435g/kwh | 435g/kwh | 435g/kwh |
| Sound pressure level(ISO22868) | 103 dB(A) | 103 dB(A) | 103 dB(A) |
| Sound power level (ISO22868) | 113 dB(A) | 113 dB(A) | 113 dB(A) |
| Vibration (ISO22867) | |||
| - Front Handle | 6.4 m/s2 | 6.4 m/s2 | 6.4 m/s2 |
| - Rear Handle | 7.0 m/s2 | 7.0 m/s2 | 7.0 m/s2 |
| DESCRIPTION (Fig. 1) | |||
| 1. Front hand guard / Chain Brake | 10. Starter / fan housing | ||
| 2. Front handle | 11. Starter grip | ||
| 3. Cylinder cover | 12. Ignition switch | ||
| 4. Primer bulb | 13. Trigger release | ||
| 5. Choke knob | 14. Rear handle | ||
| 6. Clutch cover | 15. Throttle trigger | ||
| 7. Bar mounting nuts | 16. Chain oil cap | ||
| 8. Guide bar | 17. Fuel cap | ||
| 9. Low kickback saw chain | 18. Spiked bumper | ||
ASSEMBLY

WARNING
If any parts are damaged or missing do not operate this tool until the parts are replaced. Failure to heed this warning could result in serious personal injury.

WARNING
Do not attempt to modify this tool or create accessories not recommended for use with this tool. Any such alteration or modification is misuse and could result in a hazardous condition leading to possible serious personal injury.
NOTE: The chain saw has been fully factory tested. It is normal to find some slight oil residue on the saw. Read and remove all hang tags and store with the Operator's Manual.
See Figure 34-43.
Read the replacing the guide bar and chain section later in this manual.
English
OPERATION

WARNING
Do not allow familiarity with tools to make you careless.
Remember that a careless fraction of a second is sufficient to inflict serious injury.

WARNING
Always wear safety goggles or safety glasses with side shields when operating this tool. Failure to do so could result in objects being thrown into your eyes resulting in possible serious injury.

WARNING
Do not use any attachments or accessories not recommended by the manufacturer of this tool. The use of attachments or accessories not recommended can result in serious personal injury.
APPLICATIONS
You may use this tool for the purposes listed below:
Basic limbing, felling, and woodcutting
Removing buttress roots
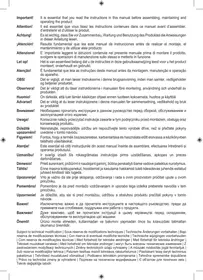
FUEL AND REFUELING
HANDLING THE FUEL SAFELY

WARNING
Always shut off engine before fueling. Never add fuel to a machine with a running or hot engine. Move at least 9 m. from refueling site before starting the engine. DO NOT SMOKE! Failure to heed this warning can result in possible personal injury.

WARNING
Check for fuel leaks. If any are found, correct them before using the saw to prevent fire or burn injury.
Always handle fuel with care; it is highly flammable.
Always refuel outdoors where there are no sparks and flames. Do not inhale fuel vapour.
- Do not let petrol or oil come in contact with skin.
- Keep petrol and oil away from the eyes. If petrol or oil comes in contact with the eyes, wash them immediately with clean water. If irritation is still present, see a doctor immediately.
Clean up spilled fuel immediately.
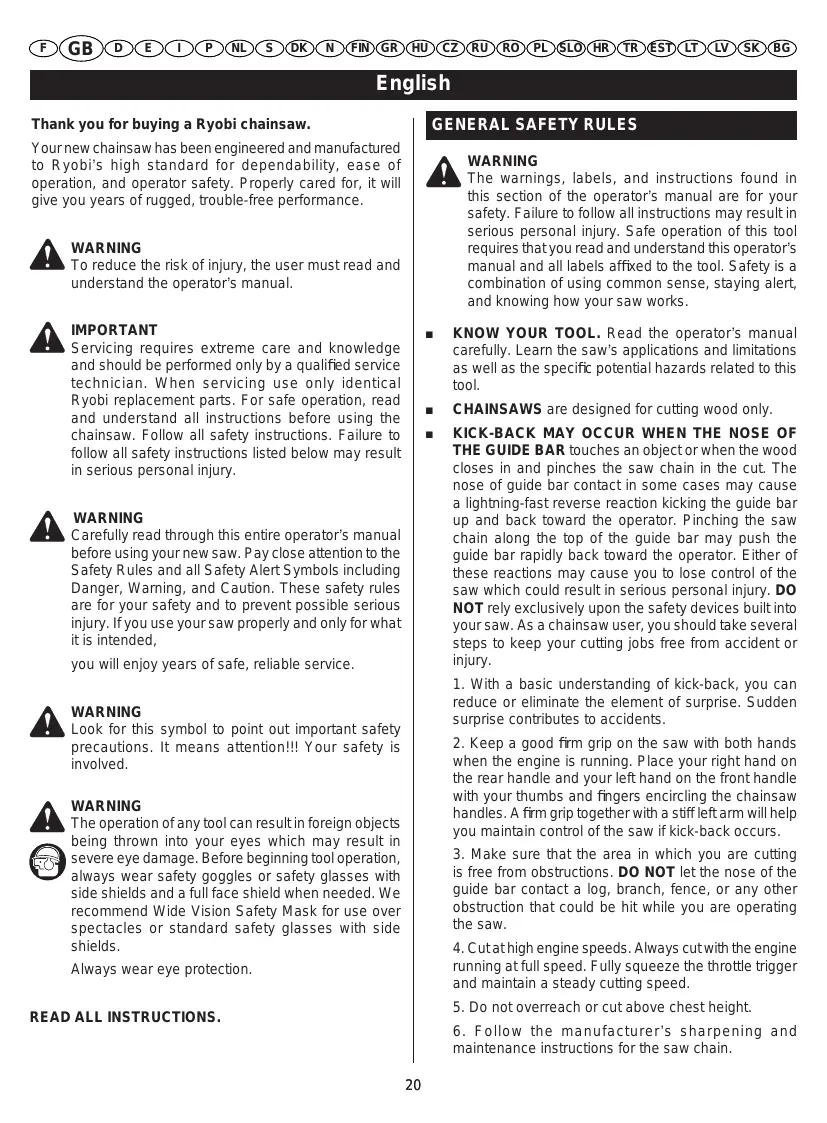
MIXING THE FUEL
This product is powered by a 2-stroke engine and requires pre-mixing petrol and synthetic 2-stroke oil. Pre-mix unleaded petrol and synthetic 2-stroke engine oil in a clean container approved for petrol.
This engine is certified to operate on unleaded petrol intended for motor vehicle use with an octane rating of 87 [(R + M) / 2] or higher.
- Do not use any type of pre-mixed petrol/oil from fuel service stations. This includes the pre-mixed petrol/oil intended for use in mopeds, motorcycles, etc.
Use synthetic 2-stroke oil only.
Mix 2% oil into the petrol. This is a 50:1 ratio.
- Mix the fuel thoroughly and also each time before refueling.
Mix in small quantities. Do not mix quantities larger than usable in a 30 day period. A synthetic 2-stroke oil containing a fuel stabilizer is recommended.
FILLING THE FUEL TANK (Fig. 2)
Clean surface around fuel cap to prevent contamination.
- Loosen the fuel cap slowly to release pressure and to keep fuel from escaping around the cap.
Carefully pour the fuel mixture into the tank. Avoid spillage.
Prior to replacing the fuel cap, clean and inspect the o-ring.
- Immediately replace the fuel cap and hand tighten. Wipe up any fuel spillage. Move 9m (30 ft) away from refueling site before starting engine.
NOTE: It is normal for the engine to emit smoke during and after the first use.
English
OPERATION
ADDING BAR AND CHAIN OIL (Fig. 3)
Use Ryobi Bar and Chain Oil. It is designed for chains and chain oilers, and is formulated to perform over a wide temperature range with no dilution required. Chain saw should use approximately one tank of oil per tank of fuel.
NOTE: Do not use dirty, used, or otherwise contaminated oils. Damage may occur to the oil pump, bar, or chain.
Carefully pour the bar and chain oil into the oil tank.
Fill the oil tank every time you fuel the engine.
Check the operating condition of the chain brake prior to each use.
Using the back of your left hand, engage the chain brake by pushing the chain brake lever/hand guard toward the bar while the chain is rotating rapidly.
- Reset the chain brake back into the RUN position by grasping the top of the chain brake lever/hand guard and pulling toward the front handle until you hear a click.

WARNING
If the chain brake does not stop the chain immediately, or if the chain brake will not stay in the run position without assistance, take the saw to an authorized service center for repair prior to use.
STARTING THE ENGINE (Fig. 6 - 10)
The starting method differs depending on whether the engine is cold or warm.

WARNING
Keep your body to the left of the chain line. Never straddle the saw or chain, or lean over past the chain line.
- Place the chain saw on level ground and ensure that no objects or obstructions are in the immediate vicinity that could come in contact with the bar and chain. To prevent rapid dulling of the chain, do not allow the bar and chain to contact dirt on the ground.
Hold the front handle firmly with your left hand and put your right foot onto the base of the rear handle.
To Start a Cold Engine:
Set the ignition switch to the RUN (1) position.
Make sure the chain brake is in the run position by pulling back on the lever/hand guard.
Fully press and release the primer bulb 4 times.
Pull choke knob all the way out to FULL CHEME (| + |) position.
Pull the starter grip until the engine attempts to start, but no more than 5 times.
Push choke knob to HALF CHOKE (1 - 1) position.
Pull starter grip until engine runs.
NOTE: Allow the saw to run in this position 15-30 seconds, depending upon the temperature.
Push the choke knob in to the RUN () position.

CAUTION
Failure to release partial throttle when chain brake lever is in the brake position will result in serious damage to the unit. Never squeeze and hold the throttle trigger while the chain brake is in the brake position.
To Start a Warm Engine:
Set the ignition switch to the RUN (1) position.
Make sure the chain brake is in the run position by pulling back on the lever/hand guard.
Fully press and release the primer bulb 4 times.
Pull starter grip until engine runs.
STOPPING THE ENGINE (FIG. 11-12)
Release the throttle trigger and let the engine return to idle. To stop the engine, move the ignition switch to the STOP (m) position. Do not put the chain saw on the ground when the chain is still moving. For additional safety, set the chain brake when the saw is not in use.
In the event that the ignition switch will not stop the saw, pull the choke knob out to the fully extended position (FULL CHOKE/ + ) and engage chain brake to stop the engine. If the ignition switch will not stop the saw when set to the STOP position, have the ignition switch repaired before using the chain saw again to prevent unsafe conditions or serious injury.
NOTE: When you are finished using the saw, always relieve tank pressure by loosening, then retightening, the chain oil and fuel mix caps. Allow the engine to cool before storing.
English
OPERATION
ADJUSTING IDLE SPEED (Fig. 13)
If the engine starts, runs, and accelerates, but will not idle, turn the idle speed screw "T" clockwise to increase idle speed.
If the chain turns at idle, turn the idle speed screw "T" counterclockwise to reduce the idle RPM and stop the chain movement. If the saw chain still moves at idle speed, contact an authorized service center for adjustment and discontinue use until the repair is made.

WARNING
THE SAW CHAIN SHOULD NEVER TURN AT IDLE. Turn the idle speed screw "T" counterclockwise to reduce the idle RPM and stop the chain, or contact an authorized service center for adjustment and discontinue use until the repair is made. Serious personal injury may result from the saw chain turning at idle.
PULL AND PUSH (Fig. 14)
The reaction force of the saw is always opposite to the direction the chain is moving. Thus, the operator must be ready to control the PULL when cutting on the bottom edge of the bar and the PUSH when cutting along the top edge.
NOTE: The chain saw has been fully factory tested. It is normal to find some slight oil residue on the saw.
KICKBACK PRECAUTIONS (Fig. 15 - 16)

WARNING
KICKBACK occurs when the moving chain contacts an object at the upper portion of the tip of the guide bar or when the wood closes in and pinches the saw chain in the cut. Contact at the upper portion of the tip of the guide bar can cause the chain to dig into the object and stop the chain for an instant. The result is a lightning-fast reverse reaction which kicks the guide bar up and back toward the operator. If the saw chain is pinched along the top of the guide bar, the guide bar can be driven rapidly back toward the operator. Either of these reactions can cause loss of saw control, which can result in serious injury.
Do not rely exclusively upon the safety devices built into the saw. As a chain saw user, you should take steps to keep your cutting jobs free from accident or injury. See General Safety Rules for more details.
PREPARING FOR CUTTING
PROPER GRIP ON HANDLES (Fig. 17)

WARNING
Never use a left-handed (cross-handed) grip or any stance that would place your body or arm across the chain line.

WARNING
DO NOT operate the throttle trigger with your left hand and hold the front handle with your right hand. Never allow any part of your body to be in the chain line while operating a saw.
PROPER CUTTING STANCE (Fig. 18)
Balance your weight with both feet on solid ground.
- Keep left arm with elbow locked in a "straight arm" position to withstand any kickback force.
- Keep your body to the left of the chain line.
- Keep your thumb on underside of handlebar.
WORK AREA PRECAUTIONS (Fig. 19)
Cut only wood or materials made from wood; no sheet metal, no plastics, no masonry, no non-wood building materials.
- Never allow children to operate the saw. Allow no person to use this chain saw who has not read this operator's manual or received adequate instructions for the safe and proper use of this chain saw.
- Keep everyone - helpers, bystanders, children, and animals, a SAFE DISTANCE from the cutting area. During felling operations, the safe distance should be a least twice the height of the largest trees in the felling area. During bucking operations, keep a minimum distance of 4.5m between workers.
Always cut with both feet on solid ground to prevent being pulled off balance.
- Do not cut above chest height as a saw held higher is difficult to control against kickback forces.
- Do not fell trees near electrical wires or buildings. Leave this operation for professionals.
Cut only when visibility and light are adequate for you to see clearly.
English
OPERATION
BASIC OPERATING/CUTTING PROCEDURES
Practice cutting a few small logs using the following technique to get the "feel" of using the saw before you begin a major sawing operation.
Take the proper stance in front of the wood with the saw idling.
- Accelerate the engine to full throttle just before entering the cut by squeezing the throttle trigger.
Begin cutting with the saw against the log.
- Keep the engine at full throttle the entire time you are cutting.
- Allow the chain to cut for you; exert only light downward pressure. Forcing the cut could result in damage to the bar, chain, or engine.
- Release the throttle trigger as soon as the cut is completed allowing the engine to idle. Running the saw at full throttle without a cutting load can result in unnecessary wear to the chain, bar, and engine.
Do not put pressure on the saw at the end of the cut.
FELLING TREES - HAZARDOUS CONDITIONS (Fig. 20)

WARNING
Do not fell trees during periods of high wind or heavy precipitation. Wait until the hazardous weather has ended.
When felling a tree, it is important that you heed the following warnings to prevent possible serious injury.
- Wear eye, hearing, and head protection (A) when operating this equipment.
- Do not cut down trees having an extreme lean or large trees with rotten or dead limbs, loose bark, or hollow trunks. Have these trees pushed or dragged down with heavy equipment, then cut them up.
Consider the distribution and weight of heavy limbs (B).
Clear out the undergrowth around the tree to be felled (C).
Do not cut trees near electrical wires or buildings (D).
Consider the direction in which the tree leans (E). - Check the tree for damaged or dead branches which could fall and hit you during felling (F).
Periodically glance at the top of the tree during the back-cut to assure the tree is going to fall in the desired direction.
- Keep all bystanders at a safe distance (G) (at least twice the height of the tree).
Prepare a path of safe retreat (H).
If the tree starts to fall in the wrong direction, or if the saw gets caught or hung up during the fall, leave the saw and save yourself!
Consider the wind direction before felling a tree.
- Do not fell trees near power lines or near buildings which could be struck by falling limbs or the tree itself.
The chainsaw operator should keep on the uphill side of the terrain as the tree is likely to roll or slide downhill after it is felled.
- Remove dirt, stones, loose bark, nails, staples, and wire from the tree where felling cuts are to be made.

WARNING
Do NOT fell trees near power lines or near buildings which could be struck by falling limbs or the tree itself.
PROPER PROCEDURE FOR TREE FELLING (Fig. 21 - 24)
- Pick your escape route (or routes in case the intended route is blocked). Clear the immediate area around the tree and make sure there are no obstructions in your planned path of retreat. Clear the path of safe retreat approximately 135^ from the planned line of fall (A).
- Consider the force and direction of the wind, the lean and balance of the tree, and the location of large limbs. These things influence the direction in which the tree will fall. Do not try to fell a tree along a line different from its natural line of fall (B).
- Cut a notch about 1/3 the diameter of the trunk in the side of the tree (C). Make the notch cuts so they intersect at right angles to the line of fall. This notch should be cleaned out to leave a straight line.
To keep the weight of the wood off the saw, always make the lower cut of the notch before the upper cut.
- Make the back-cut (D) level and horizontal, and at a minimum of 5 cm above the horizontal cut of the notch.
English
OPERATION
NOTE: Never cut through to the notch. Always leave a band of wood between the notch and back cut (approximately 5 cm or 1/10 the diameter of the tree). This is called a "hinge" or "hingewood" (E).
It controls the fall of the tree and prevents slipping or twisting or shoot-back of the tree off the stump.
On large diameter trees, stop the back cut before it is deep enough for the tree to either fall or settle back on the stump. Then insert soft wooden or plastic wedges (F) into the cut so they do not touch the chain. Drive wedges in, little by little, to help jack the tree over.
- As tree starts to fall, stop the chainsaw and put it down immediately. Retreat along the cleared path, but watch the action in case something falls your way.

WARNING
Never cut through to the notch when making a back cut. The hinge controls the fall of the tree: this is the section of wood between the notch and back-cut.
REMOVING BUTTRESS ROOTS (Fig. 25)
A buttress root is a large root extending from the trunk of the tree above the ground. Remove large buttress roots prior to felling. Make the horizontal cut (A) into the buttress first, followed by the vertical cut (B). Remove the resulting loose section (C) from the work area. Follow the correct tree felling procedure after you have removed the large buttress roots. Refer to "Operation - Proper Procedure for Tree Felling" earlier in this manual.
BUCKING (Fig. 26)
Bucking is the term used for cutting a fallen tree to the desired log length.
Cut only one log at a time.
Support small logs on a sawing stand or another log while bucking.
- Keep a clear cutting area. Make sure that no objects can contact the guide bar nose and chain during cutting: this can cause kick-back (A).
During bucking operations, stand on the uphill side so that the cut-off section of the log cannot roll over you.
Sometimes it is impossible to avoid pinching (with just standard cutting techniques) or difficult to predict which way a log will settle when cut.
BUCKING WITH A WEDGE (Fig. 27)
If the wood diameter is large enough for you to insert a soft bucking wedge (B) without touching the chain, you should use the wedge to hold the cut open to prevent pinching.
BUCKING LOGS UNDER STRESS (Fig. 28) (C) LOG SUPPORTED AT ONE END.
(D) LOG SUPPORTED AT BOTH ENDS.
Make the first bucking cut (E) 1/3 of the way through the log and finish with a 2/3 cut (F) on the opposite side.
As you cut the log, it will tend to bend. The saw can become pinched or hung in the log if you make the first cut deeper than 1/3 of the diameter of the log.
Give special attention to logs under stress (G) to prevent the bar and chain from pinching.
OVERBUCKING (Fig. 29)
Begin on the top side of the log with the bottom of the saw against the log; exert light pressure downward. Note that the saw will tend to pull away from you.
UNDERBUCKING (Fig. 30)
Begin on the under side of the log with the top of the saw against the log; exert light pressure upward.
During undercuting, the saw will tend to push back at you. Be prepared for this reaction and hold the saw firmly to maintain control.
LIMBING AND PRUNING (Fig. 31 - 32)
Work slowly, keeping both hands on the saw with a firm grip. Maintain secure footing and balance.
- Keep the tree between you and the chain while limbing. Cut from the side of the tree opposite the branch you are cutting.
- Do not cut from a ladder: this is extremely dangerous. Leave this operation for professionals.
- Do not cut above chest height as a saw held higher is difficult to control against kick-back.

WARNING
Never climb into a tree to limb or prune. Do not stand on ladders, platforms, a log, or in any position which may cause you to lose your balance or control of the saw.
English
OPERATION
- When pruning trees it is important not to make the flush cut next to the main limb or trunk until you have cut off the limb further out to reduce the weight.
This prevents stripping the bark from the main member.
- Underbuck the branch 1/3 through for your first cut (A).
- Overbuck the branch to drop it (B).
- Finish by cutting smoothly and neatly against the main member (C) so the bark will grow back to seal the wound.

WARNING
If the limbs to be pruned are above chest height, hire a professional to perform the pruning.
CUTTING SPRING POLES (Fig. 33)
A spring pole (A) is any log, branch, rooted stump, or sapling which is bent under tension by other wood so that it springs back if the wood holding it is cut or removed. On a fallen tree, a rooted stump has a high potential of springing back to the upright position during the bucking cut to separate the log from the stump.
Watch out for spring-poles; they are dangerous.

WARNING
Spring poles are dangerous and could strike the operator causing the operator to lose control of the chainsaw. This could result in severe or fatal injury to the operator.
MAINTENANCE

WARNING
When servicing, use only identical Ryobi replacement parts. Use of any other parts may create a hazard or cause product damage.

WARNING
Always wear safety goggles or safety glasses with side shields during power tool operation or when blowing dust. If operation is dusty, also wear a dust mask.
GENERAL MAINTENANCE
Avoid using solvents when cleaning plastic parts. Most plastics are susceptible to damage from various types of commercial solvents and may be damaged by their use. Use clean cloths to remove dirt, dust, oil, grease, etc.

WARNING
Do not at any time let brake fluids, petrol, petroleum-based products, penetrating oils, etc., come in contact with plastic parts. Chemicals can damage, weaken or destroy plastic which may result in serious personal injury.
LUBRICATION
All of the bearings in this tool are lubricated with a sufficient amount of high grade lubricant for the life of the unit under normal operating conditions. Therefore, no further lubrication is required.
REPLACING THE GUIDE BAR AND CHAIN (Fig. 34 - 43)

DANGER
Never start the engine before installing the guide bar, chain, drivecase cover, and clutch drum. Without all these parts in place, the clutch can fly off or explode, exposing the user to possible serious injury.

WARNING
To avoid serious personal injury, read and understand all the safety instructions in this section.
Always place the switch in the STOP "stop" position before you work on the saw.
Make sure the chain brake is not set by pulling the chain brake lever/hand guard towards the front handle to the run position.
NOTE: When replacing the guide bar and chain, always use the specified bar and chain.
Wear gloves when handling the chain and bar. These components are sharp and may contain burrs.
- Remove the bar mounting nuts using the combination wrench provided.
Remove the clutch cover.
- Remove the bar and chain from the mounting surface.
Remove the old chain from the bar.
- Lay out the new saw chain in a loop and straighten any kinks. The cutters (A) should face in the direction of chain rotation (B). If they face backwards, turn the loop over.
- Place the chain drive links (C) into the bar groove (D) as shown.
English
MAINTENANCE
Position the chain so there is a loop at the back of the bar.
Hold the chain in position on the bar and place the loop around the sprocket (E).
Fit the bar flush against the mounting surface so that the bar studs are in the long slot of the bar.
NOTE: When placing the bar on the bar studs (F), ensure that the adjusting pin (G) is in the chain tension pin hole (H).
- Replace the clutch cover (I) and bar mounting nuts (J).
- Finger-tighten the bar mounting nuts. The bar must be free to move for tension adjustment.
- Remove all slack from the chain by turning the chain tensioning screw (K) clockwise until the chain seats snugly against the bar with the drive links in the bar groove.
Lift the tip of the guide bar up to check for sag. - Release the tip of the guide bar and turn the chain tensioning screw 1/2 turn clockwise. Repeat this process until sag does not exist.
Hold the tip of the guide bar up and tighten the bar mounting nuts securely.
The chain is correctly tensioned when there is no sag on the underside of the guide bar, the chain is snug, but it can be turned by hand without binding. Ensure that the chain brake is not set.
NOTE: If chain is too tight, it will not rotate. Loosen the bar nuts slightly and turn the tension adjuster 1/4 turn counterclockwise. Lift the tip of the guide bar up and retighten the bar nuts securely. Ensure that the chain will rotate without binding.
ADJUSTING THE CHAIN TENSION (Fig. 44 - 46)

WARNING
Never touch or adjust the chain while the motor is running. The saw chain is very sharp. Always wear protective gloves when performing maintenance on the chain.
- Stop the engine before setting the chain tension.
Make sure the bar mounting nuts are loosened to finger tight. - Turn the chain tensioning screw clockwise to tension the chain.
NOTE: A cold chain is correctly tensioned when there
is no slack on the underside of the guide bar, the chain is snug, and it can be turned by hand without binding.
- Retension the chain whenever the flats on the drive links (A) hang out of the bar groove.
NOTE: During normal saw operation, the temperature of the chain increases. The drive links of a correctly tensioned warm chain will hang approximately 1.25 mm. out of the bar groove. The tip of the combination wrench can be used as a guide to help determine the correct warm chain tension.
NOTE: New chains tend to stretch; check the chain tension frequently and tension as required.

CAUTION
A chain tensioned while warm may be too tight upon cooling. Check the "cold tension" before next use.
CHAIN MAINTENANCE (Fig. 47 - 48)

CAUTION
Check that the switch is in the STOP "stop" position before you work on the saw.
Use only a low-kickback chain on this saw. This fast-cutting chain provides kickback reduction when properly maintained.
For smooth and fast cutting, maintain the chain properly.
The chain requires sharpening when the wood chips are small and powdery, the chain must be forced through the wood during cutting, or the chain cuts to one side. During maintenance of the chain, consider the following:
-
Improper filing angle of the side plate can increase the risk of severe kickback.
Raker (depth gauge) clearance (A). -
Too low increases the potential for kickback.
- Not low enough decreases cutting ability.
If the cutter teeth hit hard objects such as nails and stones, or are abraded by mud or sand on the wood, have an authorized service center sharpen the chain.
NOTE: Inspect the drive sprocket (B) for wear or damage when replacing the chain. If signs of wear or damage are present in the areas indicated, have the drive sprocket replaced by an authorized service center.
NOTE: If you do not fully understand the correct procedure for sharpening the chain after reading the instructions that follow, have the saw chain sharpened by an authorized service center or replace with a recommended low-kickback chain.
English
MAINTENANCE
SHARPENING THE CUTTERS (Fig. 49 - 52)
Parts of a cutter:
(A) Cutting corner
(B) Side plate
(C) Depth gauge
(D) Toe
(E) Gullet
(F) Heel
(G) Rivet hole
(H) Top plate
Be careful to file all cutters to the specified angles and to the same length, as fast cutting can only be obtained when all cutters are uniform.

WARNING
The saw chain is very sharp. Always wear protective gloves when performing maintenance to the chain to prevent serious personal injury.
Tension the chain prior to sharpening. Refer to Adjusting The Chain Tension.
Use a 1.6mm diameter round file and holder (not provided). Do all of your filing at the midpoint of the bar.
- Keep the file level with the top plate of the tooth. Do not let the file dip or rock.
Using light but firm pressure. Stroke towards the front corner of the tooth.
- Lift the file away from the steel on each return stroke.
Put a few firm strokes on every tooth. File all left hand cutters (A) in one direction. Then move to the other side and file the right hand cutters (B) in the opposite direction.
Remove filings from the file with a wire brush.

CAUTION
A dull or improperly sharpened chain can cause excessive engine speed during cutting, which may result in severe engine damage.

WARNING
Improper chain sharpening increases the potential of kickback.

WARNING
Failure to replace or repair a damaged chain can cause serious injury.
TOP PLATE FILING ANGLE (Fig. 53)
(A) CORRECT 30^ - file holders are marked with guide marks to align file properly to produce correct top plate angle.
(B) LESS THAN 30^ - for cross cutting.
(C) MORE THAN 30^ - feathered edge dulls quickly.
SIDE PLATE ANGLE (Fig. 54)
(D) CORRECT 80^ - Produced automatically if you use the correct diameter file in the file holder.
(E) HOOK - "Grabs" and dulls quickly; increases the potential of KICKBACK. Results from using a file with a diameter too small or a file held too low.
(F) BACKWARD SLOPE - Needs too much feed pressure; causes excessive wear to the bar and chain. Results from using a file with a diameter too large or file held too high.
MAINTAINING DEPTH GAUGE CLEARANCE (Fig. 55 - 57)
- Maintain the depth gauge at a clearance of 0.6mm . Use a depth gauge tool for checking the depth gauge clearances (A).
Every time the chain is filed, check the depth gauge clearance.
Use a flat file (B)(not provided) and a depth gauge jointer (C)(not provided) to lower all gauges uniformly. Use a 0.6mm depth gauge jointer. After lowering each depth gauge, restore original shape by rounding the front. Be careful not to damage adjoining drive links with the edge of the file. - Depth gauges must be adjusted with the flat file in the same direction the adjoining cutter was filed with the round file. Use care not to contact cutter face with flat file when adjusting depth gauges.
MAINTAINING THE GUIDE BAR (Fig. 58)

CAUTION
Make sure the chain has stopped before you do any work on the saw.
Every week of use, reverse the guide bar on the saw to distribute the wear for maximum bar life. The bar should be cleaned every day of use and checked for wear and damage.
Feathering or burring of the bar rails is a normal process of bar wear. Such faults should be smoothed with a file as soon as they occur.
English
MAINTENANCE
A bar with any of the following faults should be replaced:
- Wear inside the bar rails which permits the chain to lie over sideways;
Bent guide bar; - Cracked or broken rails;
Spread rails.
In addition, lubricate guide bars (with a sprocket at their tip) weekly. Using a grease syringe, lubricate weekly in the lubricating hole. Turn the guide bar and check that the lubrication holes (A) and chain groove are free from impurities.
CLEANING THE AIR CLEANER (Fig. 59 - 60)

CAUTION
Make sure the air cleaner is correctly placed in the air filter cover before reassembly. Never run the engine without the air filter, serious damage could result.
ADJUSTING THE CARBURETOR (Fig. 61 - 63) Before adjusting the carburetor:
Use a brush or compressed air to clean the starter cover vents.
Clean the air cleaner (A). Refer to Cleaning the Air Cleaner in the Maintenance section of this manual.
- Allow the engine to warm up prior to adjustment of engine idle speed.

WARNING
Weather conditions and altitude may affect carburetion. Do not allow bystanders close to the chain saw while adjusting the carburetor.
Idle Speed Adjustment
The idle speed adjustment controls how much the throttle valve stays open when the throttle trigger is released. To adjust:
- Turn idle speed screw "T" clockwise to increase idle speed.
- Turn idle speed screw "T" counterclockwise to decrease idle speed.
Make a test cut, then adjust the H needle for best cutting power, not for maximum speed. The H needle is restricted to 1/4 turn.

WARNING
THE SAW CHAIN SHOULD NEVER TURN AT IDLE. Serious personal injury may result from the saw chain turning at idle.
CLEANING THE STARTER UNIT (Fig. 62)
Use a brush or compressed air to keep the cooling vents (B) of the starter assembly free and clean of debris.
CARBURETOR ANTI-FREEZE MECHANISM (Fig. 64-65)
The chain saw is designed with a ventilation hatch on the right side of the cylinder cover which allows warm air to be supplied from the engine to the carburetor to help prevent icing under colder operating conditions. Operating the chain saw in temperatures from 32^ to 41^ ( 0^ to 5^ ) at times of high humidity may result in ice forming within the carburetor. This can cause the output power of the engine to be reduced and/or the engine to fail to operate smoothly. When operating under these circumstances, the chain saw should be placed in anti-freeze mode before use.
To switch to anti-freeze mode:
Place the ignition switch in the OFF (pro)position.
Remove the air cleaner cover (A).
Remove the air cleaner.
- Lift choke knob (E) up to remove from the cylinder cover (C).
- Loosen the five screws holding the cylinder cover in place. Remove the cylinder cover.
- Remove the icing cap (D) located on the right-hand side of the cylinder cover by pressing down on it with your finger.
Adjust the icing cap so that the "snow" mark faces upward, then return it to its original position in the cylinder cover.
- Replace the cylinder cover and reinstall screws to secure.
- Replace choke knob, air cleaner, and air cleaner cover.

WARNING
Always return the unit to normal operating mode if there is no danger of icing occurring. Continuing to use the chain saw in anti-freeze mode when temperatures have risen and returned to normal may result in the engine failing to start properly or in the engine failing to operate at its normal speed.
English
MAINTENANCE
CLEANING THE ENGINE (Fig. 66-67)
Clean the cylinder fins (B) and flywheel fins (A) with compressed air or a brush periodically. Dangerous overheating of the engine may occur due to impurities on the cylinder.

WARNING
Never run the saw without all the parts, including the drivecase cover and starter housing, securely in place.
Because parts can fracture and pose a danger of thrown objects, leave repairs of the flywheel and clutch to factory trained authorized service center personnel.
NOTE: If you notice a power loss with the gas-powered tool, the exhaust port and muffler may be blocked with carbon deposits. These deposits may need to be removed to restore performance.
CHECKING THE FUEL FILTER (Fig. 68)
Check the fuel filter (B) periodically. Replace it if contaminated or damaged.
REPLACING THE SPARK PLUG (Fig. 69)
This engine uses a Champion RZ7C or NGK CMR7H spark plug with 0,64 mm electrode gap. Use an exact replacement and replace every 50 hours or more frequently, if necessary.
Loosen the spark plug by turning it counterclockwise with a wrench (A).
Remove the spark plug.
- Hand thread the new spark plug, turning it clockwise. Tighten securely with wrench (B).
NOTE: Be careful not to cross-thread the spark plug. Cross-threading will seriously damage the cylinder.
INSPECTING/CLEANING THE SPARK ARRESTOR SCREEN AND MUFFLER EXHAUST PORT (Fig. 70)
The muffler is equipped with a spark arrestor screen. A faulty spark arrestor screen can create a fire hazard. Through normal use the screen can become dirty and should be inspected weekly and cleaned as required. Always keep the muffler and spark arrestor on the saw in good condition. The chain saw should always be used with correctly mounted spiked bumper.

WARNING
Muffler surfaces are very hot during and after operation of the chain saw. To avoid serious personal injury, keep all body parts away from the muffler.
- Allow the muffler to cool.
- Remove torx screw (E) and 8 mm. nuts (D) holding the muffler cover in place; remove muffler cover (C) and spark screen (A).
If dirty, clean the spark arrestor screen with a small wire brush. Replace the screen if it is cracked or otherwise deteriorated.
Remove the muffler (B).
Insert a flat blade screwdriver into the muffler exhaust vent to remove any carbon deposits.
Wipe away any carbon buildup on the muffler exhaust vent and the cylinder exhaust port at the same time.
Reinstall muffler, spark screen, and muffler cover.
Reinstall torx screw and nuts to secure.
INSPECTING AND CLEANING CHAIN BRAKE (Fig. 71-72)
- Remove the clutch cover and clean the chain brake components (A). Check wear on the brake band (C) and replace if worn or deformed. The band thickness should not be less than 0.6mm , or worn halfway through.
Always keep the chain brake mechanism clean and lightly lubricate the linkage (B).
Always test the chain brake performance after servicing or cleaning. Refer to Operating Chain Brake for additional information.
Check the chain catcher (D) and replace if damaged.

WARNING
Even with daily cleaning of the mechanism, the dependability of a chain brake to perform under field conditions cannot be certified. use proper cutting techniques.
STORING THE CHAIN SAW (1 MONTH OR LONGER)
- Drain all fuel from tank into a container approved for gasoline.
- Run the engine until it stops. This will remove all fuel-oil mix that could become stale and leave varnish and gum in the fuel system.
- Squeeze primer bulb several times to purge fuel from carburetor.
English
MAINTENANCE
Drain all bar and chain oil from tank into a container approved for oil.
Clean all foreign material from the saw.
Store it in a well-ventilated place that is inaccessible to children.
NOTE: Keep away from corrosive agents such as garden chemicals and de-icing salts.
Abide by local regulations for the safe storage and handling of gasoline. Excess fuel should be used in other 2-cycle engine powered equipment.
TROUBLESHOOTING
| Problem | Possible Cause | Solution |
| Engine will not start. [Make sure ignition switch is in the RUN (1) position.] | No spark. Engine is flooded. | Check spark. Remove air filter cover. Remove spark plug from cylinder. Reattach the spark plug wire and lay spark plug on top of cylinder with the metal part of plug touching the cylinder. Pull the starter grip and watch for spark at spark plug tip. If there is no spark, repeat test with a new spark plug. With the ignition switch OFF, remove spark plug. Move choke knob to RUN position (pushed in completely) and pull starter grip 15 to 20 times. This will clear excess fuel from engine. Clean and reinstall spark plug. Set ignition switch to RUN (1) position. Push and fully release primer bulb 4 times. Pull starter three times with choke knob at RUN. If engine does not start, move choke knob to HALF CHoke and repeat normal starting procedure. If engine still fails to start, repeat procedure with a new spark plug. |
| Engine starts but will not accelerate properly. | Carburetor requires “L” (Low Jet) adjustment. | Contact an authorized service center for carburetor adjustment. |
| Engine starts, then dies. | Carburetor requires “L” (Low Jet) adjustment. | Contact an authorized service center for carburetor adjustment. |
| Engine starts but will not run properly at high speed. | Carburetor requires “H” (High Jet) adjustment. | Contact an authorized service center for carburetor adjustment. |
| Engine does not reach full speed and/or emits excessive smoke. | Oil/fuel mixture incorrect. Air filter is dirty. Spark arrester screen is dirty. Carburetor requires “H” (High Jet) adjustment. | Use fresh fuel and the correct 2-stroke oil mix ratio. Clean air filter. Refer to Cleaning the Air Cleaner in the Maintenance section of this manual. Clean spark arrester screen. Refer to Cleaning the Spark Arresting Screen in the Maintenance section of this manual. Contact an authorized service center for carburetor adjustment. |
English
TROUBLESHOOTING
| Problem | Possible Cause | Solution |
| Engine starts, runs, and accelerates but will not idle. | Carburetor requires adjustment to idle speed. | Turn idle speed screw “T” clockwise to increase idle speed. Refer to Adjusting the Carburetor in the Maintenance section of this manual. |
| Chain turns at idle. | Carburetor requires adjustment to idle speed. | Turn idle speed screw “T” counterclockwise to decrease speed. Refer to Adjusting the Carburetor in the Maintenance section of this manual. |
| Air leak in the intake system. | Contact an authorized service center for a rebuild kit. | |
| Bar and chain running hot and smoking. | Chain oil tank empty. | Oil tank should be filled every time fuel tank is filled. |
| Chain tension is too tight. | Tension chain per instructions in Adjusting the Chain Tension in the Maintenance section of this manual. | |
| Oiler is not functioning. | Run at half throttle 30 to 45 seconds. Stop saw and check for oil dripping from guide bar. If oil is present, the chain may be dull or bar may be damaged. | |
| Clogged oil passages. | Remove the clutch cover and guide bar plate and clean oil passages with a stiff-bristle brush. | |
| Engine starts and runs, but chain is not rotating. | Chain brake is engaged. | Release chain brake. Refer to Operating the Chain Brake in the Operation section of this manual. |
| Chain tension is too tight. | Tension chain per instructions in Adjusting the Chain Tension in the Maintenance section of this manual. | |
| Guide bar and chain assembled incorrectly. | Refer to Replacing the Guide Bar and Chain in the Maintenance section of this manual | |
| Guide bar and/or chain are damaged. | Inspect guide bar and chain for damage. | |
| Drive sprocket teeth damaged | Contact an authorized service center for drive sprocket replacement. |
Deutsch
MEZCLAR EL COMBUSTIBLE
(E) Entalhe (F) Chassis
(G) Orificio do rebite
(H) Placa superior
BASISVOORZORGSGMAATREGELEN VOOR DE PLEK WAAR U WERKT
PLAATSING VAN DE HANDEN (afb.17)

WAARSCHUWING
OPTANKING (RYG ALDRIGI)
GEM DENNE INSTRUKTIONSBOG TIL SENERE OPSLAG.
Dansk
SYMBOLER
olje- ellr drivstoff.
■ BRUK KJEDESAGEN KUN I GODT VENTILERTE OMRÄDER.
■ Bruk ikke kjedesagens nár du stár OPPE i et tre, med mindre du er spesielt opplært til den jobben.
HA ALLTID ET BRANNSLUKKINGSSAPARAT I NÄRHETEN NÄR DU BRUKER KJEDESAGEN.
Dekk sverdet med sverdbeskyttelsen nár kjedesagen Transporteres eller ryddes bort.
Pase at den piggete stften alltid er riktig monter paskjedesagen.
FOLG INSTRUKSENE VEDRØRENDE FILING OG VEDLIKEHOLD AV DET SKARPE KJEDET.
■ BRUK KUN SVERD og tilbakeslagshemmende kjeder som anbefales av fabrikanten til deutsche kjedesagen.
IKKE MONTER et buet sverd på motorenheten og ikke bruk noe tilbehør som ikke er anbefalt for dette kjedesagens.
TA VARE PÁ DISSE FORSKRIFTENE. Se i dem regelmessig og bruk dem for à informere andere brukere. Dersom du läner bort dette verktyet, bør du ogsa läne bort bruskanvisningen som følger med.
SPESIELLE SIKKERHETSFORSKRIFTER FOR KJEDESAGER

ADVARSEL
FORHOLDSREGLER FOR VEDLIKEHOLD
Bruk akdri en kjedesag som er skadet, darylig innstilt aller...,\ ikke helt ellr riktig montert.
Pass p à kjeted slutter à rotere nár du slipper akselerasjonsbryteren. Hvis det skarpe kjeted gár rundt pá tomgang, kan det være påkrevet à juste forgasseren. Se avsnitet "Innstilling av tomgangshastighet" i davon bruksanvisningen.
KJEDET SKAL ALDRI GÅ RUNDT I TOMGANG.
VEDLIKEHOLD AV KJEDET (Fig. 47-48)

FORSIKTIGHETSREGEL
POLTTOAINEEN LISAAMINEN (ALTA TUPAKOII)
IPOAHNTIKA METPA SYNTHPHES
Mn xnpoioite iote eva aauoortpiovo tou exei uiooTei cetaia, exei puoIotelai ooc n dev exei ouapaooyonei pnooc n oomega.
OEsH TON XEPION (X.17)

PPOEIADONOIH2H
MnV avtipetye Tne tN theTuw xepiwv Tou pIpyapetai oTo npov EyxEpiidio (mnu ToTOteTneTe to aploTePO aC xepi OTnv Tiow AaBk taOdeEi aC xepi OTNV mpoativn) kAtoaye KcThe eon Tou 0epeve To oWu aC n To xepi aC oTnv Tpoxia Tns aluaibac.

NPOEIANOIOIHEN
Mny evpyoTouieTe Tn oKavdoAn eTIaXuvn
Me To aIopTePo Oac Xepi KAI mny kpaTATE
Tnv MnpOoiVn AaBn Me To dExi OAc Xepi.
PpooeTe V aun Bpiokote Ntoe OTnv
TPOxia Tnc AluoiDioc Evw xpnaioTouieTe to
AluoONPiOvo.
OeEH EPRAEIAE (x. 18)
PRECTETESNASLEDUJICIPOKNY
VŠEOBECné BEZPEČNOSTNI POKNY

UPOZORNENI
IpeDyIpeXeHHeN EpyIpyKdHn HnCTpyKuHn H3 NaCToJseO ra3JeIa pyKoBOcTbA IpeIOcTepeHaOT O HeCuaTbIX cIyuaEB. HecO6JIHOJIeHHe HnCTpyKuHn IO TeXHKe 6E0IaHcOHT MooKET IOBLeY TjKeJIbIe TpABMbI.
OBIIHE MEPbI 6E3OIIACHOCTH
HE INJINTE BeTKH KcyTapHNK TohBIIe 76 MM.
IOBEPXHOCTb TLYHNTEJI CHJbHO HAFPEBAETCBO BVpeMn nocpepaOToI.Bo H36eKaHne CnIbHbIX OxKOrOB He DOTpaHBaHTecb Do rJyHNTeJIa.
BCEJIJA DEPKHITE PABOTAOIIVO 6EH30IINJY OBEHMN PYKAMN. KpeIKo DEPKHTe 6eH30INJy, 0x6BaTHB pyOKTNIJIbIaAMN.
HHKOrIaHEIABAHTE IpyHM IIb3OBAtbCBEH3OIIINIOJ, He 03HaKOMHB HxC Heo6xoIMbIM paOouMn HnCTpyKIIyMn. 3Ta HnCTpyKIIpNMeHMa Ka K pPokaTHbIM φhPmAM, TAK H K TaCTbHM IOJIb3OBaTeIIM.
IIPEI3AIIYCKOM MOTOPA y6eHITecb, YTO IIINbHaIeNb HnUeHO He KacaETcJ.
PA6OTAHTE BEH3OINJIOI ToIbKO B XopoIIIO IIPOBETPnBaEMbIX MeCTax.
Pycckn
OCO6bIe IIPABHJIa TEXHNKBe30IaCHOCTN JJI CEINHbIX BEH30IIJI
IIOJIb3UHTECb AJEKBATHOJ OJEXJOH
He hajeBaIte IHHpOKyIOeJxNy. HajeBaIte JINHHbIe IIOITbIe 6pIOKNI, canOrn H nepaTKn. He paOToaIte B IIooptax, cahdJIaIInx, B 6HKyTePN H NcOchKOM. IIIPOKaI aOEJda MoKeT IIOaCTb B MOTOP, B IeNb H IN B BeTKH. PaOToaIte B KOMbHe3OHe, B JxNHCax H IN B JINHHbIX IIOITbIX 6pIOkAX. 3aKaJIbIbAte JINHHBe BOIOcBbBIIIE IIeU.
IJIaIyUHIEKOHTPOJIa3aHHCTpyMeHOTM H3aIHTbI pyK HAeBaIte HeCKOJIb3AIIyIOo6yBb Hpa6OHe NEp4aTKn.
Ipn pa6ote IIOJIb3yIteCb KAcKO H cpeCTBaAMH 3aIHTbI CJIyxa H 3peHHN
3AIIPABKA TOIJIINBHOTO BAKA (HE KYPNTb!)
BoI36eKaHHeIOKapa H OOKOROB 6yIbTeOCTOPOKHbIC TOIIINBOM.OHO OueHbJIeKBO BOCIIJaMeHReTc.
XpaHHTe H CMEIINBaIte TOIINBO B CIIeIIHaJIbHbIX KaHHCTpax IJI6EHIHa.
CmeHnBaIte H IpeJIHbAIte TOIIINBO Ha BO3IyXe, BdaJIH OT HcKp HOrH.
BbIbepHTe Cbo6oJHoe MeCTO, OCTaHOBTe MOTOp H JaITe eMy octbTb IpeE 3aIIpaBkoI.
MeJIeHNO BTBHTNITe KpbIiHKY TOJIINHBHO 6aKa, YTO6bI BbIyCTHTb IapbI IOJ DaJIeHNHe M YTO6bI TOJIINBO He BblIIOcB HApKyJ.
IocJIe 3aIIpaBKN KpeIIKO 3aBHTHTe KpbIIKy TOIIIBHO6aKa.
EcIN ToINBHaC Mecb pa3INIacb, BbITpHTe e c HnCTpyMehta. IocJIe 3anPABKIn ToINIBHOrO 6aKa yJaINTeCb He MeHee YMe Ha 15 MetPoB oT MeCTA 3anPABKn, IpexJcHe Yem 3ainyCKaTb Mobotp
HnKOrda He noJxHraTe pa3JIHBHyOcToJIHBHyOC mecb.
3OHA BAJIKI / PABOTbI: 3JIEMHTAPHbIE IPEIOCTOPOXHOCTN
He pa6oTaIe 6eH30nIIIO HaJepeBbIX.
He pa6oTaIe 6eH30nHIOH Ha JieCTHHue: 3TO OueHb onaCHO.
He noJinycKaIte NOCTOPOHHIX N KHBOTbIX K 30He pa6oTBi.BoBpeJIa3yNcaMOTopa Hpa6oTbI He pa3peJIaHTe HHKOMY HAXOJNTbCS PAJDM.
ПиMuEyaHHe: Pa3MepbI pa6OueY 3OHBi 3aBHCrt OT BnJa pa60t Hpa3MepOB IepeBa. HanPmep, npi BaJIke Jeca pa6OuaY 3OHa 6yET 6OJIbIe Yem IIpn paCINHIOBKe IOJIeHbEe.
BO3BPATHO-IOCTYNIATEJIbHAR TRA
Pa6oay cHla BcEgHa IpoTHBONIOJIOXHa HnIpaBJIeHNIO dBHKeHHa IIJIbHOI eIIH. IpiH pa6ote HnKHe CTOpHOH
6eH30IIJIbI TAHHTe ee HA CEBa, a IIpH pa6Ote BepXHei CTOpOH-OYTCEBIA.
ПиMueYaHHe: BeH3OIIJIa 6bIla IIIOJIHOCTbIO IIPOBepHa Ha 3aBOJe. Ha Hei MOrY OCTaTbCJIeJIb Cm3Kn.
MEPbI IPIEIOCTOPOXHOCTH IIPIH OBCJYKHBAHN
HnKoIa He pa6oTaIte cIomAHHO, He oTpeYIpOBAHHO, He IIOJIHO HIN HeIIpaBHLbHO co6paHHo 6eH30IIJIO.
OTnycTHB Kypok akceIepaTopa, y6eJIHTecb, YTO IIIBhaIeIIbIOHcTbIO ocTaHOBHuaIc. Ecln IIIBhaIe IpoIOJkaEaTe BpaIaTbc, oTpeYIHyPeIteKap6IopaTop.CM.pa3JeI“Pa6oBa- PeryIINpOBKa MauIbX oOboPOT."
EcIINIOscpepyIINPbOKNIIbHnaeIbI npOIOJIkaETBpaIaTbc8 Ha maIbIX 6OporTax, 6oPaITTeCB B IeHTp texHIueckoro 6ocIyJXBAHNr Ryobi H ne IIOJI3yIteCB 6eH3OJIIOI, IOKa He 6bIeT pOnI3BeJEN Heo6xOJIHMb peOMHT.

IPIEUYIPEXJEHNE
Bce pemOHThbIe paObToI, KpOME OINHcAHHbX B HacTOHcEM KPOKOJCTBE, IONJIbKb IBIOJIHrTcBc KBaIHnΦHcPOBaHHm CnEuaJIHcTm. II INCNOJIb3OBAHHn HEOJOXdJIHn HcTpyMeHTOB DJIy UJepKaHHM MAXOBHKa NIIH CcIeJIeHHN IIIN JyJepKaHHM MAXOBHKa MOTOP IA CHNTHg cIeJIeHHM MAXOBHK MOKET IOBpeJIITbcA, a MOTOP B3OpBATcH NIOJIbeTbKJEJIbIe TpaBMbI.
OTCKOK
OTCKOK 6EH30HIIbMoKet IOBJIeYb TReJcJIbe TpaBMbl. He HaJeIEcB ToIbKOHa BAaHIITbHe cpeJCTBa cAmO 6EH30HIIb. Bo I36EkaHHe HecJaCTbNcClyaEBn TpaBM, PInHHMaIte Heo6XoHMblMepeI IpEOJTOPOXHOCTh.
IIpMueaHne:3aIIOJIHHTeJbHOH INHΦOPMaIHNe 06 OTCOKaX 6eH3OHNJIbH MepaX H36eKaHnT Jx TpaBM cM. paJed Pa6Ora'.
XPAHHTE HACTOIIEE PYKOBIOCTBO IJIYIIOCEJEUYIOIIHX KOHCJIBTAIIH.
Pycckn
UCIOBHBIE OBO3HAUHNN
Ha HnctpymEnTe MOrY 6bIb yka3aHbI cJeIyIOUIne ycIOBhIE oO3NaueHn. 3aIOMHHte, Ka OHn BblIgIIT nTO Oo3HaayOT. IpaBnIbHOe IOHMnHHe 3THX yCIOBbIX oO3NaueHn oecneHHT 630NauchyIO nAdeKBaTHyO paOby HNCTpymENTom.
EXHNUECKNEXAPAKTEPNUKNI
| RCS-3535C2 | RCS-4040C2 | RCS-4446C2 | |
| 35 cm³ | 40 cm³ | 44 cm³ | |
| Вес (6e3 thousand, milliun m Macclá) | 4,6 kg | 4,6 kg | 4,6 kg |
| ЕмкOSTь толinglyного бака | 310 cm³ | 310 cm³ | 310 cm³ |
| ЕмкOSTь масл窥ого бака | 210 cm³ | 210 cm³ | 210 cm³ |
| Длина пинь | 35 cm | 40 cm | 46 cm |
| Длина расплaja | 320 mm | 370 mm | 410 mm |
| Тил пинь | Carlton 14-10-N1-MHC | Carlton 16-10-N1-MHC | Carlton 18-10W-K1-HC |
| Шаг пиньовицп | 9,53 MM | 9,53 MM | 8,26 MM |
| Коляя | 1,27 MM | 1,27 MM | 1,27 MM |
| Тил пиньовицп | Carlton N1C-BL-M-52E SK | Carlton N1C-BL-M-57E SK | Carlton K1L-BL-72E |
| Вedingшая зеведуka | 6 зубьев | 6 зубьев | 7 зубьев |
| Равочий объем пиндра | 35 cm³ | 40,1 cm³ | 44 cm³ |
| Номиналыя мочиость | 1,7 кВт / 10000 ob/Мин | 1,8 кВт / 10000 ob/Мин | 1,9 кВт / 9500 ob/Мин |
| Номиналыя сокорсть | 12000 ob/Мин | 12000 ob/Мин | 12000 ob/Мин |
| Сокорсть на малых оборотх | 2700-3100 ob/Мин | 2700-3100 ob/Мин | 2700-3100 ob/Мин |
| Осobьй расхов толinglyв | 435g/kwh | 435g/kwh | 435g/kwh |
| мakсималов'mор peжиме моторpa | |||
| Акystческоide дамлени (ISO22868) | 103 nb(A) | 103 nb(A) | 103 nb(A) |
| Акystческов мочиость (ISO22868) | 113 nb(A) | 113 nb(A) | 113 nb(A) |
| У探测ь висpaши (ISO22867) | |||
| - Иредия ружаяковka | 6,4 M/cek² | 6,4 M/cek² | 6,4 M/cek² |
| - 3адnia ручаяковka | 7,0 M/cek² | 7,0 M/cek² | 7,0 M/cek² |
OIIINCAHNE (Pnc.1)
1.3aIHTbI IITOK /TOPMO3 IIJIbHOIeII
2.Передnia руковая
3. KapTeP ⅢJIINIIpa
4. Гушистар_REра
5.ДрocceЛь
6. KapTeP IOIJIINIIHKNOB
7.BHHTyCTaHOBKNIIHHbI
8.ⅢInHa
9. ToHKa IIJbHa IeIb c MaJIbIM pHcKOM OTcKOKa
CBOPKA

IPEUYIPEXJEHNE
EcHIN B KOMIIeKTe He Xbataet DeTaIH, He IIOJIb3yIteB HNCTpyEMHTOM, IOKA He IOCTaHete ee. HecO6IoHeHne 3TOrpeDynpEKeHHn MOKET NOJIbeTb TKeJIbe TpaBMbl.

IPEUYIPEXJEHNE
He IIbTaTaeBc H3MeHnAeTb HnCTpyMeHT HnI npHcNoc6aJIbVabT K HeMy aKceCecaypIb, HepeKoMeHnObaHbIe H3rTOBHTeJEM. HIOIo6HbIe MoHdHkaHn H Ipeo6pa3OBAHH IpeIcTabJIyOT C6oBH NHePABUNHOe HcIOJIb3OBAHHe IHCTpyMeHTa H MOrYT Co3aTb OAnChbIe CHTyaHn, BeDyUHKe T KxJekIbIM TpaBMam.
IppmehaHe:BeH30nHla 6bIlaIOJIHOCTbIO IPOBepeHa Na 3aOJe. Ha HeN MOrT OcTATcBc JcEblcMa3KIN. IpOHTHe HnOPMauHIO NTOIINHHoCmeCN Ha 3THKETKe, 3aTeMCHMNITE ee HxapHInTE BmecTe C pyKOBODCTBOM IO KcIIyATAuIHIN.
Cm. phc. 34-43.
Cm. pa3JeJ "CMeHa IIJIbHOI IeII IN IIINHbI".
- KpbIIka cTape/BeHTHJIaIOHOHHbIe KaJIHO3N
- Pу钙а стапета
- BbIKJIouaTeJIb BKJI/BBIKJI
- KhoIIka pa36IoKnOboBKN Kypka
14.3aHnpykoTka - Kypok akceJIepaTopa
- Kpbiiika macJHaHO 6aka
- KpbiiIIka TOJIINBHorO 6aka
- Onopna 3y6aTaKa
PABOTA

IPEJYIIPEKJEHNE
OBJIaEB INHCTpyMeHTOM,HE terPte 6JINTeJbHOCTN. POMHHTe, YTO JOCTaTOHc cekYhbI HeBHMaHHa, YTO6bI JIOUYHTB TKeJeJyO TAPBMY.

IPIEUYIPEXJEHNE
Ipihpa6oTe c HnCTpyMeHTOM BceTgAnIOJIb3yIteCb 2aHITbIMN O'KAMH C 60KOBbIMn pOteKTOpAMn. IpiH hec6IoJeHH NTOr IOpABInaTexHNKn 6e3oHaacHOCTN NOCTOpOHHe IpeJMeTB MOrY IOnaTb B rJa3a bVb3aBt TB JKeJIeIb Ia3HbIe TpaMBI.

IPIEUYIPEXJEHNE
IIOb3yItecb ToIbKO peKOMeHIOBaHHbIMN HrOToBHTeJIeM DeTAlaMn H akCEccyApamM. HcIOb3OBAHne IpyTHN DeTaleH n AkceccyapOB BeTeK T TaKeJIbM TpABMM.
Pycckn
PABOTA
IIIPIMEHEHNE
PEYJINPOBKA CKOPOCTH (Pnc.13)
Ecln MOTOP 3aBOJNTc, pa6OtaeT n PA3rOHNETcH, HO HepejHTMaJIbX o6OpOTOB, NIOBepHHTe BHTM MaJIbX o6OpOTOB "T" BnPABO, YTO6bl J06BaBHt bOpOTOB.
EcIIN IINB IPOIOJIkaeT BpaAaTbCn Ha MaJIbIX OobOpTAX, IOBepHInTe BnHT "T" BIIeBO, YTObIcOkPaTnTb OobOpTbI H OCTaHOBnT IIeB. EcIIN IocJIpepyLIIOpKBn IeB IPOIOJIkae T BpaAaTbCn Ha MaJIbIX OobOpTax, OobATHeTcB B IeHTp TEXHnueckKOrO 06cJyXnBaHnI, YTObI bblIOHNITb Heo6xoJIMbIe HAcTpoKN, H Ne IIOJI3yIteCtB HHCTpyMeHrOM, IOKA OHN He 6yDyT BblIOJIHeHbI.

IIPDEUYIPEKJEHENE
IEIbHEIOJIxHA BPAATbCRA HA MAJIbIX OBOPOTAX.IOBopauHbaTe BnHT“T" IBEo,TOIb6cOKpatntbOobotbIOCTaHOBtB IeB,NIIINOBpaTIteCBIeHTpTexHHueCKrOTo 06cIyXKBaHHNJIHeoBXoJHMbIXpeYIpHOboK. HeIOJIb3yIteCBIHnCTpyMeHtOM,IOKaOH He 6yETer OTpeMOHTHPOBaH.IeNb,BpaIaHOaIcaHaMaJIbIX OOBOTAX,MOKET HaHeCTNH TaKeJIbe TpaMbI.
BO3BPATHO-IOCTYIIATEJIbHA TRA (Pnc.14)
Pa6ooya Cnla BceIg IpoTHBOHOJOKHa HApBaJIeHIOB DIIKHeHIN IIIbHOI eIIIN. IIpn pa6Ote HIXKeH cTOpOH OBeHONIIbI TaHHITE ee HA CEBA, a IIpn pa6Ote BepXHeI CTOpOH-O TCEB.
Pycckn
PABOTA
IIpHMeUaHHe: BeH3OJIHa 6bIJa IIOJIHOCTbIO IIPOBepHa Ha 3aBOJe. Ha Hei MOrYt OcTaTbCJeJIb Cm3KN.
IIPEyIIPEXJEHNEOTCKOKOB(Puc.15-16)

IPEUYIPEXJEHNE
OTCKOK IPOHcXOJHT, KOrJa BpaIaIOIIaIcIe NJIb KAcAetcTcpeJMeTaB BepxHeJtactn HocKa IIINHbI INI KOrJa DEpeBO 3aKHMaeTIEN Bo BpEmra pa6oTbI. KoJa BepxNJa YacTb HocKa IIINHbI KAcAetcTe DepeBa, DEpeBO 3aKHMaeTIEN b OCTanahBInHbAe ee Ha mRHOBeHne. IIpn 3tOM IIIHNHy pe3KO OT6PacbIbAe BBePx N HAIOJIb3OBaTeJIa. ToTOH TOAKKe, ecII INIbHae IIINb3aKHMaeTcBIOJIb HOCKa IIIHNbI, IIIHNy pe3KO OT6PacbIbAe B CTOpOHy IOJIb3OBaTeJIa. H B TOM H BpyROM CUYae MOKHO IOTepReB KOHTpOLJIb HAI INCTPymEHTOM INIOUHTB TjKeJIbe TpABMbI. He HaneHteCtBo TOLko HA cpeIcTBA 6e30NaacHocTh CaMORO INCTPymEHTa. BOI36eKaHHe HecuaCTbIX CUYaeB IN TpABM, NOE6OJIMHO IPIHHMaTb PA3JIYuHbe MEPb IpeIOCTOPOXHcTH. DOJOHNITbJIbHa nIHΦopMaIIg PIPBEDEHa B pA3Je "O6XiipabINla TeXHNKIs 6eONaChocTH" HACToIeero pyKOboDCTBA.
ПОДГOTOBК K PABOTE
IIIOJOXEHHE PYK (Pnc.17)

IPEUYIPEXKDEHNE
HnKoTgJa He MeHnIte OOnHcAHoe NIOJoxHe pyK (He 6epHTeBc 3a 3aJIHOO pyKOHTky JIeBOy pyKOi, a 3a IpeDJIHOO -IpaBOH) H36eRaTe BCTaBaTb Ha TpAeKToPnIIMbHoi

IPEДУПЕЖDEHNE
He naHMaIte Ha Kypok akceIepaTopa Ieboi pykoI n He IepKHTe IpepeHIOy pkyoTKy npaboi. IIpn paOBe HNKoRHa He BCTabaIte Ha TpaekToPHn nnbHou eIIIN.
PABOQUEIIOJIOXEHNE(Puc.18)
KpeIko cToIte Ha Horax Ha TBepDoI IOBepxHocTH.
IepxHTeJeByo pyky B HnprjKeHH Ha cJyau OTCKoka.
CToITe CJeBa OT IINHbI.
EoJIbIiHe IaJIbIbI IOJIxHbI OXBaTbIBaTb pyKoRTHN CHN3y.
PABOCHA 3OHA (Pnc.19)
BéH30nIIa IpeJHa3HaYeHe ToIbKO IJIpaCInIIOBKn IepeBa H IepeBaHHbIX H3JIeH. hepKbTe JIcHTbI, KaMHn H npOvte CToPOMATEpHaJIb.
■ HnKoIgHa He nDaBaHTeJeTAMIOJIb3OBaTbC86EH3OIIHIOJ. HnKOMy He nDaBaHTe IOJIb3OBaTbC86EH3OIIHIOJ,He
O3HaKOMHB C HAcTOIIMM pyKOBoJCTBOM I IpaBHJIaMH 6e3oIacHO pa6Otbl.
Держhte NOCTOPOHHHX (HOMOIIHKOB, NOCEHTHEJIe, JTei) H JxHBtBHX Ha BE30IACHOM PACCTOHHN OpaOchE 3ObH.Пир BAJIke Ieca 6e3OIIacHOpe pACTOHHe IOJIKHO bItb KaK MHHYM B DBa pa3a 6OJIbIe BBICOTb CBICOKH DepeBbEB B paOChE 3OHe. Пир paCINIOBKe pACTOHHe MeJy paOCHM NOJIKHO 6bITb He MEHbIe 4,5 M.
TO b He NoTepeTb paBHOBeCHe BO BpeMpa6Otbl, KpeIKo cToIte Ha Horax Ha yCTOHYHBOI NOBepxHOCTH.
HeIOINHMaIte6eHN3OINIIyBbIe yPOBnI:BcIyaeOTCKOKAee6yET TpyHNOyepKAtb.
- He BaJIHTe Iec B6JIHn IINHn 3JIeKTpOnepeJau H coOpjuKeHH. IIOpyuAaTe TaKHe pa6oTbI npOphiCCHOnHaJAM.
Pa6oTaIte 6eH3OIIIOI Ipn IOCTaTOUHOM OCEBIEHH, YTO6bI yCHO BnIeTB pe3yIbTat CBOeI pa6oTbI.
JEMEHTAPHBIE TEXHUNK PABOTbI
IpeKJHe Yem IIpHcTbYb K cepbe3HbIM pa6oTAM OTpa6oTaIte pa3JIuHbIe TeXHKnHa He6OJIbIIHx IIOJIeHbIX.
IpHMHTe IpaBnJIbHoe IOJIOKeHHe, BCTaHbTe HAnPOTHB 3aTOrTOBKN H IpeBcEHTe 6eH3OIIHy HaMaJIbE O6OpOTbl.
HaKMHTe Ha KypOK IO KOHua H daIte MoTOpy BpeMHa6paTb MaKcHMaJIbHyIO cKOpocTb IpeJHaUaJOM pe3Kn.
HaHHaTe paCINIOBky IIOJIeHbeB.
MotopIOJIKeHpa6oTaTbHaIOJIHOMpeKHMeBceBpeMpe3KN.
CzErKa HaJHMaIte Ha IIy,JaIYe IINbHOi IeII pe3atb caMO. HopcHpObaHae 6eONIIbI MoKet npHBecTH K IOJIOMKe IHHbI, IeII INI MOTOPa.
I O kOCHaHn paHIOBKn OTNcyTne Kypok akceJIepaTOPHa IaHTe MToPOy c6OpCHTb 6OpOTh. IIpn paOBe Ha XoIOCTOM XOJy HA IOJIHOckOPcTH IeNb, IHHa H MOTM MOrY TIpEJDeBpeMeHNO H3HOChTbCJ.
He haxhmaIte Ha 6eH30IIy B KOHc pacHHIOBKN.
BAJIKA JIECA-OIIACHBIE YCJIOBHA(Pnc.20)

IPEUYIPEKJEHNE
HeBaJIHTeIecBCHJIbHbIBeTeP HJIIN BbIOry. IIOJOKJIHTe,IOKA IIOROJa HAJIaIHTcRy.
Bo H36eKaHHe T8KeJIbIX TpaBM Bo BpeMa BaIKn DepeBa Heo6XoJIMo co6JIHOaTb CJeIyOIOHe IpaBNJa.
■Пн рабо-teпльзутесь каскои(A)И сpeДСТВамн 3aIHTbI cIyxa ИЗPEHЯ.
He BaJIHTe ChJIbHO HAcKIOHeHHbIe JepeBbI H 6OJIbIIHcJepeBBc rHIJIbIMn HJIN BbICOXIIHm BETKaMn,OTBaJIHbAOIIeC KOpOI HJIN C NytBIM CTBOJIOM. IpeKJDe Yem HX IIINITbCTPOTeJIbIy TrraydoJIxKeH IOITIOKHHTb HJIN IOTYHTbHX HA 3EMJIHO.
Pycckn
PABOTA
CJeIHTe 3a paacIOJOKeHHeM H BeCOM 6OJIbIIHX BeTOK (B).
PacHCTHTe XBOPoCT BOKpyIepeBa (C).
He BaJIHTe IepeBbI B6JIH3N JInHH 3JIeKTPoIIpeJaU H coopyKeHH (D).
YuHTbIaHTe, B KaKyIO CTOpOHy HAKJOHeHO JepeBO (E).
IpoBepTe,HTo6bHaJepeBeHe 6bJIIO HAJIOMJIeHHbIX HJIN cyxHXBETOK,MOryIINH yIaCTb BO BpeMBAJKn (F).
BoBpemBaJIKNIIOcMaTpHbAaIteHaBepxUknyJepeBa, CJeJnte, TTO6bI OHO yIaIbO B HjKHyO CTOpOHy.
- IepKHTe NIOCTOPOHHHx Ha 6e3OIIaHOM pacCToHHn (G) (KaK MHHMym B JBa pa3a 60JIbIe BBICOTbI DepeBa).
PaccuHTaIe, B KaKyO cTOpOHy OTXoHITb, KOrJa IpeBo 6yIET NaIaTb (H).
Ecln IepeBo NaHaIO PaIaTb He B Ty CTOpOHy HIN 6eHOnIIa 3aCtpraIb BO BPema IaENHn IepeBa, 6opcaIte HInJy n cnaiaIteBc!
IpeEaBaIKoIepeBa yUHTte HnPaBJIeHHe BeTpa.
He BaJInte JpeEBb B6JIH3I JINHH 3JIeKTPonepeJa H coOpyuKeHH, YTO6bI HN BETKN Hn cAmO JpeBO Ha HNX He yuaII.
■Пин Валke Na Kocorope cToHrte BCerIa BbIe DepeBa, T.K. IocJIe NaIeHHa OHO MoKET IIOKaTHbCByBHN3.
Y6HpaIte C MeCTa IINIEHNN OTOXIObl, KAMHH, KOPY, FBO3HN, CKpeIKN H IPOBOJIOky.

IPEUYIPEXJEHNE
HE BAJIHTE IepeBb B6JIH3I JINHHJIEKTPoIIeepaH coOpuyKeHH, YTObHi HN BETKN HNCAMO DEpeBOH NAHN Ye NaHJ.
TEXHINKA BAJIKN DEPEBBEB (Pnc. 21 - 24)
- PaccuHTaIte, B KaKYo CTOpOHy OTXOJIHtB, KOrJa IepeBO 6yIET PAIATb (HEcKOJIbKO HAnpABJeHn, cCIIH HameHeHHe O6yIET 3aHrTO). PaccuHTITE MeCTO B HeIOpcPECTBeHHO H6JI3OCTN OTe PecBa H IIPOBepbTe, YTObI Ha IYTH OToXOA He 6blIO pIeHNITCTBn. PaccuHTITE MeCTO B 135^ BOKpyr HameYeHNOI LInHH NIAJENH JepeBA (A).
- YuHTbBAIte cHJIy H NaIIpaBJIeHHe BeTpa, HaKJIIOH H paBHOBeCHe JepeBa, a TaKJSe pacIoJOKeHHe KpyIHbIX BeTOK. 3TH fakTOpbM OryT NOBJIInrTa H NaIpaBJIeHHe IaJeHHa DepeBa. He IIgTAirTeCb BaJIHT bJePoB B CTOpOHy, B KOTopyo OHO He MoKet YnaCTb eCTeCTBeHHbIM NyTEM (B).
- Bbipejte KJIHH BaJIKN Ha 1/3 IIHaMeTpca CTBOJa co cToPOhB, B KOTopyIO DepeBO IOJIHXO yIaCTb (C). Bbipe3bl KJIINH IOJIIXHb 6bTb IepNEHNKUyIaRbHb IJIHNH IIaIeHnIa DepeBa. KJIIN IOJIKeH 6bTb H3bTn3 CTBOJa, YTO6b OCBO6OJITb RopH3OHTaJIbHb IpOxOJ 6eH3OIIHJe. YTO6bl DEpeBO He 3aKaJIo 6eH3OIIHJy, NaYHHaTe BcERdA C HIXKHeRo BbIe3a.
- HameTbTe IprmyIO rOpH3OHTaJIbHyIO JInHHIO BaJIKN (D)
KaK MHHMym B 5 cm HaJ rOpH3OHTaJIbHbIM Bblpe3OM KJIHa.
Пинм ueHHe: HKOrIa He IIJIInTe Do KJIINHa. OctabbTe Yactb CTBOJa MEJxu IHHnBn BAJKn H KJIINOM (OKOIO 5 CM HIN 1/10 IaHameTpTa CTBOJa). 3Ta Yacb Ha3bIbAeTcYI "IIapHpom" (E). OHN KOHTpoJIInpyet NaJeHne IpeBa H IIpeIIaTCTByet HaKIOHy, CKIoJIbXeHHNo H CNOI3AHHO CTBOJa C INH.
IIpn BaJIke JepeBbE6 0JIbIHorO dHaMeTpa OCTaHaBJIbHbIte IINHHo BAJIKN paHbIe, IO NaIeHNJa DepeBa.3aTeM BcTaBJIaIe T B JINHIO BAJIKN JepeBbHHbIe HIN IIaIactMaCCobBle KJIINbJ (F) Tak, YTObI OHn He KacaJIHcB IIbHOBu IeIe. 3aOrOHnTe HN NotHXOBky, YTObI OHn Cpa6OtaJIHKp bYar.
- KorlaJepeBO NaYHHaEt PaIaTb, OcTaHOBHTe 6eH3OINIIy H cpaIy IIOJOKHTe ee Ha 3eMJIHO. OToIJIte B hAmueeHHyo CTOPOHy, IIPOBepHB, YTObI JepeBO He PaIaJIo B BAIIHY cTOPOHY.

IPIEduIPEKDEHNE
JIHHNA BaJIKN HNKOFa He DoJIXKHa JOXOINb JO KJIHnA IIIapHn KoHTPOJIpyET NaJEHHe JepBa: 3TO - cactb CTBOJa, OCTABIIaCHe He pONJIeHHoM MeJxUy KJIHNOM IJIHNIE BaJIKN.
OBPE3AHNE HECYIIHX KOPHEN (Pnc.25)
Hecyuhe KopHH - 30KpyuHbIe KopHH,OTXoJHIIHe OT CTBOLa K 3emJe. Obpe3aIte KpyuHbIe KopHH IpeEi BaJIKOJIpeBa.CJIaJIte CnauJaLTo gopHIOTaJIbHbI pa3pe3 (A) B KopHe, 3aTeM IepNeHkUJIpHO BeptHkaJIbHbI (B). YdaJIHTe BBype3aHNYO uactb (C) H3 pa6OueH 3Onbl. YdaJIINb HecyuHc KopHH, pInCTUYaIte K bAIke JpeBa. CM. pa3JeI "TexHnKa BaJIKN DepeBBe".
PACINJIOBKA (Phc.26)
BcH30nHly 6yIeT BeCTn Ha3aJ. BcIbTe rOTOBi K 3THM DaJIbeHmBIIpeEi H ha3aJ IN KOHTpOJIpyTE 6H30nHly.
OBPE3AHNE BETBEN I CUVbEB (Pnc. 31-32)
Pa6oTaHTe He cneIa, KpeIIO Kejpa 6eH3OIIy o6eHMn pykamn. BcerIa JepKHTe paBHOBeche.
-Держншев на paacctordHHHOTBKN, KOTOPYIO 6bpe3aTe. Пп рзke BetKN BCTabaiTe Ha npotHBIOJIOJXHyO CTOPHOI O TCBJOIA DepeBa.
He pa6oTaIe 6eH3OIIHIOH Ha IeCTHIIe: 3TO OueHb onaCHO. IopuyaIte TaKHe pa6oTbI IIpOpeCCHoHaJIaM.
HeIOHIMaIte6eHN30INyBbIIe ypOBHraPyH:BcIyaeOTCKOKAee6yIETpyHOnyIepKaTb.

IPEUYIPEXJEHNE
HnKOrJa He 3a6bpaTecb Ha DepeBo, YTObI 6Ope3aTb BteKN HnIIN POIIpaBHBnBaTb KpOHy. HnKOrJa He paObaIe 6eH30IOIHIOJ, CToHa JleCTHnIE, NOMoCTe, HOJIeHE HnIB HeYcSTOBm IOIOKeHHN, B KOTOpOM MOxHO IOTepaB paBHOBecHe N KOHTpoJIb 3a HHCTpyMeHToM.
-
IIpn 6ope3aHHn BetoK IpeBa He peKbTe BeTky cpa3y y CTBoJIa,OTpeKbTe ee chauJa C kpaO, YTO6bl cOKpATHTb Harpy3Ky. TorJa BeTka He CJIOMaETcH He HcIopTHT CTBoJI.
-
Chaajla cnJaIe pa3pe 3nH3y Na 1/3 nnAmetpa (A).
2.3aTeM OTpexbTe Cbepxu, YTo6bI BeTka yHaJa (B). - 3aTeM MOKHO OOKHuaTEbIHO OTpe3aTb Bety KBOJI CTBOJa (C), MeJIeHNO BBOJIA NIIbJIy IO IIeN, YTO6bi IIOUYHT BOHN's cpe3. TOrJa KOpa JepBa BOcCTaHOBHTCB.

IPIEUYIPEXJEHNE
EcHn BcTKn paCIOJKeHb BbIe ypoBHa rpyHn, octabTe 3Ty pa60Tu npOceCCHHOaHy.
PE3KA XJbICTOB (Pnc. 33)
XJIbICT (A) -3TO BeTka, BbIKOpueBaHHbI KopeHb IIN KyCT, HATnHytBn IOJd ABVIIeHNHeM dpyHM JepBeBOM. XJIbICT MOKeJ pe3Ko BbIIIpAMITcBc, eCJN OTpe3aTb JepKaaIeE 10epeBO. PeHbIOBAJIeHOrO JepBeA cuaTo BO3BpaIaTeC b BErTHKaJIbHOe POJOkeHHe, KOJa CTBoI OTpe3aOT OT Hero JO KOHHa. ByIbTe octOpokHb! XJIbICTb OnaChbl.

IPIEUYIPEXJEHNE
XJIbCTbMOryTJapHbTpa6OeRnBbIbeCTN 6eH30IIHJY H3-NIOE rO KOHTpOJ, YTO BeTe T JXeJIbIM NJaKe CMePTeJIbHM TpABmJ.
OBCJYXHBAHNE

IPIEUYIPEXJEHNE
B clyae pemOHa IIOJIb3yIteCb TOnIbKO mApOuHbIMN 3aIuaCTAHM Nyobi. IcNoJIb3ObaHne IIO6bIX dpyTHX 3aIuaCTMOKeJ tpeIctabIyIbTb ONaCHOCTb HIIIN NOBpeNTb IHCTpymEHT.

IPIEUYIIPEXKDEHNE
\Pi npa6oTe H pnp yJaIeHHH PbIbI cKaTbIM BO3JyXOM BcRJIg aIOJIbYIyTeC 3aIIITbIbIM OUYKAMc C 6OkoBbIMn IpoTeKTopAm. Pnp bIbIbXbIp6oTeax PaJIb3yIyTeCb TaKke 3aIIITbIM 3a6paIOM HIN pcEINpaTOPom.
OBIEE OBCJYKHBAHNE
HnKOrJa He Nolb3yITeCb pactBOpHTeJIaMm IJIaY ChcTKn IIaCTMaCCOBbXb XetaJI. BoJbIIHHCTBO IaCTMaCC MoKET NOBpeITbcTcO8bIbXb pactBOPHTeJIe. JIChraTHgrr3H, MaCLJia, JxRpa, PbIJIH n.T.I. Nolb3yITeCb YCHSTo TprrIKoN.

IPIEUYIPEXJEHNE
IIIactMaccobIe Ieta HNKoTgA He JIoJXhbl cOpHkacatbC TOpM03HOJIKIOcTBIO, 6eHHOM, HeTeIpoIpyKaTHm, eKHMn MacIaAMn H np. 3TN XHHKMAtcOdejPktBeIeCTBa, CnoCObIbe NOBpeITb, OcIa6HTb HIN pa3pyIHTB IIaTMcacy.
CMA3KA
Bce IIOIIHHHKn HNCTpyMeHTa 6bIIN CMA3aHbI Ha 3aBOJe BbyICOKaueChTBENHO CMA3KOH Ba Becb CpOK CJyJx6bI HNCTpyMeHTa B HopMaJIbHOM peKHMpepaOtBi. IHCTpyMeHT He HyJXJaTeCBy B DIOJIHOHNITEHbOH CM3Ke.
CMEHA IIIBHOI CEIIH HIIHHbI (Pnc. 34-43)
Pycckn
OBCJYXHBAHNE

OIIACHOCTb
HnKOrJa He 3aNyckaIte MoTOp, He yctaHOBb IHHy, IIbHyIOeNb, KaTep MToPoA n KApTeP cIeJIeHn. EcIn OOna H3 3THX IeTaJIeH Ne yctaHOBJIeHa, CIIeJIeHne MOKeT BbCKOHTb NIN B3OPBaTbcN HNaHeCTn TAgKeJIbe TpaBMbl.

IPEUYIPEXJEHNE
BoI36eJahHe TjaKeJIbIX TpaBM NIOHocTbIO H BHHMaTeJIbHO IpoOHTHe YcBOITe BCE npaBHJa texHHK6e3oNaCHOCTn, OIIHCaHHbIe B HaCToRIeM pa3Je.
Ipeen IIO60I OnpaHcN cTaBbTe BbIKIOuAteJIb B IOIOJKeHHe "O".
IOTaHHTe Ha ce6a pbYar TOPMo3a / 3aIHTHbI ΜHTOK, YTO6bI pa36JIbKpOBaTb TOPM3 ueHH.
IpiHMeUaHHe: PnI CmEHe IINJIbHOIeIIIN H IIINHbI POJI3yITecB ToJIbKO 3aIuaCTMaH, peKOMEHIOBaAHbIMN IHTOTOBITEJEM.
IIpn MaHnIyJIaIcx C eIbIO HIN IHHHOBcerIaIIOJIb3yIteCb IepyAtkAMH. 3TH JETAIIN OeHbOcTpIbe.
KOM6HHHPOBaHHbIM KJIHOUM H3 KOMIIJEkTA cHHMHTe KpeIeXHbIe BnHTbI IHHbI.
CHMHITe KapTe IIOIIHHHKNOB.
CHHMMTe IHHHy H cIeIb.
CHMMTe cTapyU IOIIb C IINHbI.
PacnpabTe HObyIO pIbHyIO ueB nCLOKHTe ee TJIe. 3y6A(A) JOXHHb CMOTpeTB HnIpaBJIeHNn BpIeHnna (B).EcIn OHN CMOTpT BdpTyHO cToPOHy, nepeBepHIte pIbHyIO ueB.
YctaHOBHTe BeDyIe 3BeHbI eIIIN (C) Ha peJIbc IIHHbI (D) KaK IokaHa HpNc.38.
IeIb IOnJxHa 06pa3OBbIBaTb NtJIIO C3aIN HnHbI.
IpnpejKbBaIeIbHaIHHHe,HaIeHbTe ee HaBeNyUHO 3Be3IOUky(E).
ПОпразы TeинHy,ЧтобblTbIpyнДЛЖы BOHTN BДИHHyIOIpope3b YIeHTpeIIHHbI.
IIpMueaHne: HaeBeaIHHy Ha IIITbIpy (F), IIOpeBtTe, YTO6bI pyERIHPBOOUBHyI PAIEc (G) BXOHNJ B OTBePCTHe OCN HATJAeKHNJI TEHN (H).
YcTaHOBHTe Ha MeTo KApTeP IOnIINHHKOB (I) H KpeIeXHbIe BnHTbI IHHbI (J).
3aTbHHTe BpyHyIO KpeENKHe BnHTbI. IIINHa JIoJXHa HMeTb BO3MOxHOCT bBnITaTbCpH peryJInPObKe HATJXeHNI cIIIN.
HATIHTHEIIbHyIOIeINB,IOBOPaUHBAI BHN3 3aTJHKN (K) BnPaBO, IIOKAIeINIOJIHOCTbIO He cIJeT BeJyIMM 3BEHbMM HA peJIbC IIHHJI.
IIOHNHMTe HOCOK IHHbI, YTO6bI IPOBepHTb, YTO IIeINb He
IPOBHCaET.
IIOBTOPJIte 3Ty OIEpaHIO, NOKa He HcYe3HeT CBO6OJHbI XoJ.
IpnIepKHBaH HOCOK IHHbI, KpeIko 3aTaNHTe ee KpeIeXhIe BNHTbl.
Ecni HnHJXKeH IIOCKoCTH IINHHI HET IPOBcAHINI N IeBH MOKHO Cbo6OJHo IPOBepHyT pyKOH 3NaHT OHaTHyTA IpaBbHbO. TopMOI IIbHOB IeHN JOJIeK Hen OITyIuHEn.
IpMmeyaHHe: EcIn IeNb IpeTeHyTa, OHa He CMOKeT IIpoBopauBaTbc. CJIeRka OTNtYCTne BnHTbI INHbI INOBepHNTe peryIHpOuCyHbI BnHT HATyKeHNe Ha YeTbeTpB 6obopoA BIEBo.IPiJepKXBaa HOCOK IIINbI, KpeIKo 3aTHnBe e KpeEckhIe BnHTbI. IeNb JIoJXKa cBOoDIOHO IIpoBopauBaTbc.
PEYJIMPOBKA HATXKEHNAEIN (Pnc.44-46)

IPDEUYIPEXKJEHNE
HnKoJa He TporaIte H He peryIpyrTe PIIbHyO IeB npiaobaoiem MoTope. IeBb oeyb cOtpA.IPi6ocJyXkBaHHN 6h30nblb BcERda POJIb3yIteCb 3auHtBHMn NepUkatKamH.
IpeKJe Yem peYJIHPOBAtB HATJKeHHe IeIIH, OCTaHOBHTe MOTOp.
KpeIeJHbIe BHTbI IHHbI IOJIJKHbI OTKpyuHBaTbcBpyuHyIO.
IIOBepHnTe BnHT peryIHpOBKn HATaJKeHnIeIIN BnPaBO, YTObI HA TAYTb IINlbHYU eIIb.
IpuMeaHue: EcnHa HnHexhempe6pe ⅢnHb Het IpoBnCaHnH XoJIoDHyO ueIb MoKHO CBO6oDHO npObepHyt pyKOH,3HAuHT, OHa nAtraHYta IpaBilHbO.
EJINBEyIe3BeHbA(CBHCaHTHaHHKHeIIIOCKOCTTH IIHHbI,IEIbHEo6XoHMHOHTAHHTyB.
IIpHmeyaHne:BoBpeMraPabToIeIbHarPeBaETc. IpaBnIbHO HATaHTyTbeIroPruYe BEdUyHe 3y6bIeIeN MOrYT pOBuCaTb Cn3yHa 1,25 MMOT ePbCa bIHHbI.JIpyIOBepKIN DOniCyTHMO rIOpBuaHnI ROpYaeIeN MOKHO HCIOJIb3OBA Tb KOHUn KOM6HInPOBaHOrO KLIHOa.
IpmeHne: HoBbIe IeN MOryT pactrHaBtcb. PeryJIaRHO npOpeBte HataJxKeHne IeN nPi np Heo6XoJIMoCtH NIOITrHBAIte ee.

IPEIOCTEPEXEKHE
EclnIeB HATHyra TOpayu, OHa MoKet 3aKaTbCy octbHyB. IpeJ pAoToi npObeprte HataKeHne xoJIOnOUIeIN.
OBCLIYKINBAHNEIENP(Puc.47-48)

IPEIOCTEPEKHEHNE
IpeJIIO60JI OIEpaIIeH CTaBbTe BbIKIOUaTeJIb B IIOLOKeHHe "CTOIT".
Pycckn
OBCJYXHBAHNE
Pa60TaiTe TOJIbKO IeINHm C MaJIbIM PnCKOM OTCKOKA. IIPI npaBnHOM 06cIyKhbAHnn 3Ta 6bIcTpOpeKyuJuaIe BCOKaIIaET OAnCHoCTb OTKOKA.
ДяpoBHOH H6bICTpo pe3KHN Heo6XOHNMO IpaBnIbHO 06cJyKHBaTb IIINbHyU ΚeIIb.
EcIIH OHIIJKN BbIXOJYr H3MeJIbYeHHbIMH,ecJIH IIpH pa6oTe Ha cKaTOp HnO CnIbHO JABITb HIN ecIH OH peKET ToIbKO cONOH cSTOPBo, IeIIb CJIeIyET 3aTOUHTb. Bo BpeMg O6cIyJKBaHHa IeII NObpaIaJIte BHNMaHHe Ha cJIeIyIOJIne MOMETb:
HeippaBHbHbIyTOJI 3aTOUKN 6OKOBHH 9eIIIN yBeJIHNBaET ONaCHOCTb OTCKOKA.
3a3op orpaHnHTeJI rJy6HHbI (A):
- YEM 60JIbIe JIOΦT OgrpaHnHTeJIe Iy6HHbI, TeM 60JIbIe ONaCHOCTb OTCKOKa.
- peryIINPOBka Ha cJIINIIKOM MaJIeHbKYIO TlYbHNY cHINKaET KaYeCTBO pe3KN.
Ecl 3y6bI hNIIb HAcKoUHJI Ha TBePbIe IpeImTeI (RbO3Hn HIN KAMHI) HIN H3OCHINb OT rpyH IN PeCKa Ha DepeB,OTdAte TcHb HA 3aTOky BΦHpMeHHb II HeTp texHNueckoro OcbJyKbAHBaH.
IpHmueaHne: Ipn yctahOBke ueHN Ha MeTo InpOBepaHTe II3Hoc I paOoOee cocToTOnHe BevUeJn 3Be3OuKn (B).EcNn 3Be3OJvKa NOpBpeJHa Hn Hn 3BOHIIeA, 3aMeHrTe ee B fHpMehHom IeHTpe TeXHHeCKOrO o6cIyKbAHnn.
IpHmueaHHe:ecnBbHeIOJIHOCTbIOIOHOJAHIOO6bCHeHHyIO HNKe IpoJeDpy 3aTOUKNcIeN,OTdAbaiTe cIeNb B 3aTOKYBΦHPMeHNbIIEHTcpTexHJcECKoRO6cLyKbHAnHn HJI 3aMeHRe ee Ha IeNb MJIbIM PCHOMOTCKOA.
3ATOYKA 3YbBEB (Pnc.49-52)
OmmcaHne 3y6a:
(A) Pe3eI (B) KpaI
(C)OrpaHnHTeJIbIy6HHbI (D)IOJIOIIBa
(E) BbIeMka (F) Ka6JyK
(G)OTBepCTHeIJIaKJIeIIKN (H)BepxHNKpaI
3aatayHbaiTre BCE y68b IOJ OINHM yIOM H Na OINHaKOByU OINHy.ToJIbKO OINHOpOINbIE 3y68b o6ecneuat 6bIcTpyo pe3ky.

IPEUYIPEXJEHNE
IeHbOeHbOcTpa. IpnI o6CJyKJBAHHH cIeHH BcERJaIOJIb3yIteB paOoHMn IepuATkAMn. 3To IOMoKET H6EkaTb TpABM.
Ipeep3atoqukoi HnatryHnTe eBn. JIa 3Toro CneJyHe HnCTpyKuHNm H3 pa3JeLa “PerylnpOBka HatjXeHHa nenn”
IIOJIb3yIteCb KpyTJIbIM HAIJIbIbHIKOM JHAmEeTpOM 1,6 MM (BHE KOMIIIEKTA).3aTaUHBAITe 3y6bI IO cepeJHHe IHHbI.
- IepxHTe HAnIIbHnK Ha yOpBHe BepxuHK pe3aKa. He NaJIIOHJTe HAnIIbHnK H He BpaIaHTe HM.
CJerKa HaxmHa Ha HnHbHk, TOHTe B cTOpHy IpeJeHrO yIa 3y6a.
IodHMaIte HAnHJIbHNK Ha 06paTHOM IpoxOJe.
ПюйнтЕ habильнКOMKaжьд рeЗАп NOHeckоькopo3.TочнтЕ сеBA(A)ИВОДИНу TУЖСТОРOHy.3aTeMToUHtE cIpyroг StToPOHbI, cnpaba(B), ИВ оБpaTHyOCTOPOHy.
YdaJIHTe IIbIb c HAnHJIbHnKa MeTaJIInueckoI IeTKoI.
IPEIOCTEPEXEHNE
IIIOXO 3aTOUeHHa HIN 3aTIbHbIaC6 IeH, MOKET IOBbICHTb O6OpOTb MOtOp PaIp pa6ote HcIIOPTHTb erO.
IpyHPEKDEHNE Iprn pioxon 3aToKe ne
A IPEJUYIPEXJEHNE
Bo H36exKaHHe T8KeJIbIX TpaBM 3aMeHnTe HIN peMOHTpyIe IOBpeKJDeHHyIO HIIbHyIO ueIb.
YTOJI 3ATOUKN OT BEPXHEO KPAJ (Pnc.53)
(A) 30^ IPIPABNJLHBA3ATOKA-JEprKABKN HAIJIbHKOB HMEOT OTMeTKIJIpABNJLHOYCTaHOBKN yJLa 3aTOUKH OTOHOCTeJIbHO BEPxHEO KpaJ.
(B) MEHEE 30^ - Для посячим расиловки .
(C) BOJIEE 30^ - ToHKaJ peKyuIaI pIOcKocTb 6bIcTpo TUYHITc.
YTOJI 3ATOUKN OT BOKOBOTO KPAJ (Pnc.54)
(D) 80^ IPIPABNJIbHAJ -TOT yTOrIIOJyuaeTcR,ecIN BCTaBHTB BJePkaBky HAIINJIbHIK IIpaBNIbHOrO JHaMeTpTa.
(E) KPIOK - Βeπληετ 3a ΣερεBo Μ𝑏ιCτρο TyιΠτсα, yβελινηBaet ΘαπaHocθt ΘΤΚΟκa. ΠΟγλuετς πρι HΠΟΙλ3OBaHHnHaIIhNbHKa MaIJO ΜιλΜΕTpα ΜΙΙι πρ CΙΙΙΚΟΜΗΝΚΟΙ ΜΟΤΑHOBKE.
(F) TYIIOH YTOJI - Tpe6yET cJIHIIKOM 6OJIbIOH cJIbI bIOBIXeHHa, BDeT K IIpeJXDEBpeMHOMU 3HOCU IIHNbI HcIIIN. IOnyuaTeCpI INcIOJIb3OBAHHn HAnIHbHHKa 6OJIbIHO dHaMeTpA INI INPc cJIHIIKOM BbICOKOH IOCTaHOBKe.
OGPAHNUHTEJIN TJYBHNHbI (Pnc. 55-57)
3a3op orpaHnHTeJIgIy6HbI(A):0,6MM.IoJIb3yHTecb IIyIOM IJII pOBepKn orpaHnHTeJIe.
IpoBepaTe 3aOp orpaHHTeJe rIy6HbI nocJe KaKDo 3aTOUKN eHN.
IIIb3yytecb IIOCKHM HAnIIbHbIKOM (B) (HeIOCTABJIeH B KOMJIeKTE) IN TOUJIbHOIN IIAHKOH (C) (HeIOCTABJIeHa B KOMJIeKTE), YTO6bI BYBPOBHRT BcE ORPAHIVTJIeJI.
Pycckn
OBCJYXNBAHNE
IIOJIb3yITeCb HAIINJIbHKOM Ha 0,6 MM. BbIpOBHHB BCE orpAHnHITeJI, INIIaIte IM N3HaJauJIbHYU FOpMy, T.e. 3aKpyrIHTe Hx CnpeHN. He NOBpeHtE BeYuIHe 3BeHbKaPcE HAIINJIbHKa.
OrpaHnHTeINrIy6hHbIOJIxHb6bITbBbIPOBHeHb IIOCKHM HAnIIbHbHKOM B TOMKe HAnpABJHEHH, YTO IN CMeXHbIE 3y6bA.IpnBbIPaBHbAHHH OrpaHnHTeJrIy6HbHb IIOCKHN HAnIIbHbNK He OJIxKHe KacaTbc3y6beB.
OBCLIYKINBAHNE IIHHbI (Pnc.58)

ПЕДОCTЕРЖЕНИ
IpeJzJe cem 06cIyKHBaTb 6eH3OIIHy y6eHITecb, YTO IIIBhaIeIbIOJIHOCTbIO OCTaHOBJHa.
IpeBopauHbAitte IHHy KaJHyo HeJeIHO, YTO6bI paBHomepHO paIpcJIeJIHTb I3Hoc Ha 06e ee CTOpOHbI NIOJIHTb cPOK ee CUYKbI. IocJIe KaJIOTo HcIOJIb3OBAHnIy CHTHe IHHy, npOBepHTte EHI3OC IIeJOCTHOCTb.
HepoBocHTn HbEMKHa peIbcse IHHbI -cIeCTTbIe ee HOpMaJIbHOrO h3HOca.3TH HEPoBocTH cJeIyET 3aUnIIaTB HauJIbIKOMKAK TOJIbKO OHIOBNIHCB.
IIHHy cJIeIyET MeHrTb:
ecJIN H3HOC peJIbca He IIO3BOJIaTeIeII JepKaTbcr Ha HEM;
ecJIN OHa IIOHryIaCb;
ecJH peJIbc paTpeckaIcH IIIN cIJOMaJIcH;
ecJIH peJIbcbI pa3bexaJIHcB.
Cma3bIaIe IHHy KaKJyHO HeJeJIHO Yepe3 cIeIuaJIbHO npEuyCMOTpeHoe DIAI 3TOrO OTBepCTHe.IpeBopauHbIte IHHy II npOBepIe, YTo6bI B OTBepCTnX (A) H na peJIbcIe He 6bIIO grpI.
CHCTKA BO3JYIIIHOFOHJIbTPA(Pnc.59-60)

IPEIOCTEPEXEKHE
Ipejke yem yctHaBJIbBaTb Ha mecTo BCE JeTaIIH, npoebTp, TtO6bI Bo3JUHHbI ΦHbTp 6bl npabHbHO yctAHOBJIe Ha cBOeM mceTe. HkORJa He 3aNcKaIte MOTOP 6303JUHHoro ΦHbTppa. OH MOKET NOBPeIHbTcR.
PEYJINPOBKA KAPBIOPATOPA (Pnc. 61-63)
Ipeep uHcTkOu KaPbOpaTopa:
OuHCTHTe BeHTNJIaIIOHHbIe JkaJIHO3n KpbIiKN cTapepa IIETKOH HJIN CKaTbIM BO3IyXOM.
IpoHCTHTe BO3JyHHbI ΦHJIbTp (A). Cm. pa3JeJ "HcTka BO3JyHHoro HJIbTpra".
IpepepeylnpOBKMOaBIXo6OpOTOBaHTeMOTopy IopapobTaTHeCKOJIbKOcekyHd.

IPEUYIPEKJEHNE
IoroHbIe H reorpaohueckHe yCIOBnM OMyr TBINrTa h pa6Otu KAp6HopaTo.Bo BpEma peryHPOBKn KAp6HopaTo He IOnIyckaHTe NocTOPOHHX 6JIH3Ko K6eH3ONIIe.
PeryInpOBKa MaJIbIX o6OpOTOB
PeyIInpOBKa Kap6IpaTopa IIO3BOJIaTeH N3MeHHTb yTOI OTKpbITTH 3acJOHNKH INPH OTNIyUeHHOM KypKe akCeJIepaTopa.
PeylnpOBka:
TTO6bIyBEJIHHTCBKOPoCTB BpeKHMe MAJIbIX O6OpOTOB, IOBepHNTE BnHT 3aMeJIeHHN“T”BnPaBO.
TTO6bI cH3HTbpeKHM MaJIbIX 06OpOTOB,IOBepHHTe BHHT "T" BJEBO.
IpnOH3BeHITpeO6Hyo paCINIOBky, 3aTeM oTpErpyHpyTe BHT peKHMa 60JIbIXN 6OBOTOB "H", IJIA HAn6OJeI npOH3BOHITeJIbHOpa6OTb (Ho He JIA MaKCHMaJIbHOcKOpCTS). BHTpeKHMa 60JIbIXN 6OBOTOB HeJIb3IHOBepHyTB 60JIbIIe YcEM Ha YcTBePTb 6OBOTa.

IIPDEUYIPEKJEHENE
JIENBHEIOJIXHA BPAIiAtbC HAMAJlbIX OBOPOPAT.JIeN,BypaiaouaencaHaMaJIbIXOBOPOPAT,MOKETNaHeCTnTJAeJIbeTpaMbIy.
NUCTKA IPOCCEJIa (Pnc.62)
YHCTHTe BEHTNJLIQUHOHNbIe JKAJIHO3N KAPTepa cTApTepa IETKOJ HJIN CKAtBIM BO3dYXOM.
MEXAHN3M IIOIOTPEBA KAPBIOPATOPA (Pnc.64-65)
BeH3OIIJIa HmeeT BeHTNIIJIOHHbI JIOK cIpaBa OT 6IOka IIINHnpa, KOTOpB IIOJaT OropyH B03JxO T MOtopoA K Kap6iopatopy, YTObI pyIOBTBpATnB 3aMeP3aHne Pn pa6oTe B xOLOHbY xcIOBHX. Pn pa6oTe Pn TEmNepaType BO3Jxu O t 0^ IO 5^ n CnIbHO BIAJXHOCTn B kap6iopatope MoKet 6op3AOBtbcJe. 3To MOKeT pInBEcTH K 3aMeJIoEHNO MOpTu NIOOMke. Pn pa6oTe B TAKHX NOOrDbIX yCIOBHX bIbOpaIte peKHM NoIOrpeBa Kap6iopatopa.
Bb6op pexkma noIogpeBa kap6oopaTopa:
IocTaBbTe BbIKJIIOuAteJIb B IOJIOKeHHe CTOII “O”.
CHHMHTe KpbIiKy OITJeJIeHn BO3NyIIHOrO φHJbTpA(A).
CHMHTe BO3dyIHHbI HJIbTp.
IoiHMMrte IpoocceJIb (E), YTO6bI CHrTb KpbHkYuIHHJpa (C).
口 TBHHTHEIPTB HHTTOB,JIepkaIINXIIJINHIp.CNHMMTE KpbIKUYIINHJa.
CINMMITEJIOK(D)cnpabaHa6IIOkeIJIINHpa,HaJXABHaHErO.
IpepeBepHneIIOK,HTO6bIa HJIINCb “Snow” 6bJIa cBepxy IyCTAHOBINTe EHO MA CECTo.
UcTaHOBHTe KpbIiKy IINJIHHJaHa MeCTO H 3aBHHTHe IYrTb DePKaIIHX ee BHTOB.
Pycckn
OBCJYXHBAHHE
YcTaHOBHTe Ha MeTo IpOceJIb H KpbIiKy BO3dYIIIHOrO _H II I P

IPEUYIPEXJEHNE
EcJH HET ONaCHOCTH 3aMep3aHHN, BcERJa CTABbTe JIOK B HopMaJIbHOE IIOJoxHe NHE ("Sun").EcJH IOJIb3ObaTbc6eH3OINJIoB bpeXHMe IIOIorpeBa KAPbOpatopA B TeIIyHO IIOrOy, MOTOP MoKet pa6OtaHB HeOpMaJIbHO.
NUCTKA MOTOPA (Pnc.66-67)
PeyIaIAPHO YIeHTHepe6pa 6IOka IJIHIIHIIpa(B) H MxOBIkA MOTOPA(A) CKaTbIM BO3XyOM HJI ΜEΚΟ. JIpy3b Ha 6IOke IJIHIIHIOB MOKET bYBa3bTb OIaONCHy IINepERpE MoTOpA.

IPEJYIPEXKDEHNE
HnKoIgA He 3aNyckaiTe MToP6eH30nJIbI,ecJIn Kakaar-Jin6o DeTajb He yctahOBJIeBA. B YactHOCTn, He 3aNyckaiTe erO 6e3 KapTeBOP MToPra HcTapePA. JEtajn MOyT cIOMaTBc H bICKOHTb H3 MToPora. PeMOnTHpyrE MAxOBHK H cIeJIJIeHe TOJbKO B fHpMeHHOM IeHTpe TExNHueCKOrO o6cIyXHBAHIN.
IphmeaHHe: ecJH 3aMeYeH cnaI MOIOHOCTH 6eH3OINJIbI, BO3MOxHO BbIXJOIOHoe OTBcPCTHe IINI rIyIHTJIb 3a6HTbI rapbIo. OUnCTHte 6eH3OINJIY ot rapH, YTObI OHa cCHOBA paOToJa C npExKHei MOIOHOCtBHo.
IIPOBEPKA COCTOHHN TOJIINBHHOI ФИЛТРА (PnC.68)
PeryIaRHO IIOBepRHeToIINIBHbIy HIIbTp (B).EcJIn OH 3acOpEn HIN IOBpeKJeH,3aMeHnTe ero.
CMEHA CBEH (Puc.69)
Motop pa6oTaet Ha cBeue TnHa Champion RZ7C Hn NgK CMR7H C 3a3Opom 3eKtpoJb0 6,64 MM. MeHne CbeU kKaJbIe 50 Yacob pa6OtBu H, IIpH Heo6xOJHMocTH, YaIe Ha cBeUy TOrO Je TnHa.
BbIeBHnHTe CBEuy KJIIOUOM, IOBOPaYHBAa ee BJIeBO (A).
CHHMMTe cBeyu.
BcTaBbTe HOByO CBeyu B OTBepCTHe N 3aBePhHrTe ee BIIpaBO pyKoI. 3aTeM TyTO 3aTHiHrTe ee KJIHOUM (B).
Пимецни: слдп'te 3a Tem, YTO6bI He 3aKOpOTHb KOHTaKtBcBEuH; 3TO MoKeT cepbe3HO IOBpeHTb HnCTpyMeTH.
IIPOBEPKA/CHCTKA CETKINCKPOOTPAKATEJI INIJYHHTEJI (Pnc.70)
TMyHtTeIb HMeET HcKpOyIaJIbIIbAIOIoYIO cTeKy. HcNOpEHHaIcTeKa HcKPOTpKaTeIeJ MoKet bIb3BaTb IOXApK. JAnKe IprHOPMaJIbHOM HcIOJIb3OBAHH INCTpyMeHTa cTeKa MoKet 3a6BtCBe. Ee CJeIyTe IPOBepARb KaKJyIO HeJeIHO Ipr HneooDINMOCTH NcHTtB. IOnIEpKJBaITe TMyHtTeIb HcTeKy
HCKpoOTpaKaTeJI B paOoyem COCToHHN.
BcerIa IpoBepaTe IpaBnIbHyO yctaHObKy OIOpHOI 3y6uATKn.

IPIEduIPEKDEHNE
NoBepxHocstbIyUHTeJIa CIIbHO HArpeBaETc BO BvEma H Nocle paOboTb. Bo H36ExaHHe TpaBM He IotparHaBauTecBo IyUHTeJIa.
JaITe rJyHHTeJIIO octbITb.
CHNMHTE BNTC CIOJIOI TOLOBKOK (E) H RAIKH Ha 8 MM (D), DEPKaIIIE KpbIbIKy rJIyIITeJI. CHMNHTE KpbIbIKY (C) nctKY hCKPOOTpKaTeJI(A).
Ecn cetKa nckpOoTPaKATEIgpr3Haa, ouHCTHTe ee metaJIINueCKOIIETOKOr. Ecn cetKa nckpOoTPaKATEI npOBaHa IIN HcNOpHeA, 3ameHITe ee.
CHHMMTeTJYIHTeJIb(B).
Плочкотовerte chnmtte rapb uepe3 BeHTHINHOHHbe JauHOHN.
CHMHTe rapb c BEHTHJIIOHOHHbIX JkaIHO3N IJIyIHHTeJIa H3 BbIXIOHOrO TOBepCTHn IJIHHJpa.
YcTaHOBHTeHa MeCTO rJyHHTeJIb, cetKy HcKpOoTPaXaTeJIa N KpbIHKy rJyHHTeJIa.
3aBHTTE BHT CIOJIOIJOIBKOHNraKN.
OCMOTP IN CHCTKA TOPMO3A INJIbHOI CEIIIN (Puc. 71-72)
CHMMITE KapTep cueIJIeHn I IpOuHCTHe TeaJIH TOpMO3A IIIBHOJ ueII (A).IpoBepbTe cTeENb H3HOIIeHHOCTHIOIObI TOpMO3a (C) H,ecJIn OHa CNIBHO H3HOIIeHa HIN DeOpMnPOBaHA, zAmEHNTe ee. ToIIINHa TOpMO3HOIIOCSbIOJXHa 6bITb He MeHbIE 0,6 MM, t.e. OHa HE JOJXHa 6bITb H3HOIIeHa 6OJIbHE YcHAnIOJBOHNH.
ПлдерхнваiteчсOTуTOPmo3aIIHbHOIcIIHICJIeKCa cMa3bIaIteIⅢapHnр TOPmo3a(B).
IIOcIe YIcTKn HII pEMOnTa BceIa IpoBepRte pa6Ory TopMo3a.CM. JIOJIHNHeIbHyIO IHΦOpMaIHO Bpa3Je "Pa6Ota TopMo3a IIHbOH cIeHI."
I PpOBePrrTe COCToHHe yJIOBHTeJIa 1eII (D) H 3aMeHrTeero,ecIIH OH IOBpeKdEh.

IPEUYIPEKJEHNE
Даже пгн Exждневенчстke Мexанзma HEBO3MOKHO rapaHTNPOBaTьфФeKTINHOCb TOPmo3aВ pa6oTe. Co6JIHOaIte HnCtpyKcIIH IO pacInIOBKe.
XPAHEHNE BEH3OIIJIbI (MECEI JIOJIbIIE)
CJIeTe BCE TOJINHBO H3 6aKa B KaHnCTpy JIA 6eH3Ha.
JaIte MOTopy Iopapobatb,IOka OH cAm He ocTaHOBHtC. 3TO IO3BOJMeT IOJIHOCTbIO BBHAtb OCTaIIeecr TOINHBO, YTObI OHO He ocTaBnIO JInIKOro OcAka B CnCTeM.
HaxmHe HeckoJIbKO pa3 Ha rpyuCy cTApTepa, YTO6bl BbIHbI H3 Kap6HpOpaTopo OCTaTK TOIIJIBa.
Pycckn
OBCJYXHBAHHE
CneHTe Bce MacJIO IJIa IIHHbI H IeIIIN B KaHHcTpy IJIa MacJa.
TtTaTeJIbHO OYHCTHTe 6EH30HNJy.
XpaHHTe ee B cyXM, IIPOBcTpBaEMOM IOMeIeHHN, BHe IIpeJeIOB IOcraaemocTH JeTei.
IIpMneUHHe: HeJePKHe 6eB3OHNJy pJIOM c eIKHMBeIeCTBaMH, TaKHM Na KaC aIOBbI XHMKaTbI HJnpaMOpAaKHBauHOa COJIb.
CJIeJyIe CTaJIaPTAM ISO IMecTHbIM IpPABIWAM XpaHeHnI RTOPOUero.CIHTOE TOJIINBO MOKHO NcIOJIb3OBaTbB INpyTHX HNCTPYMeHTax C IBYXTaKTHbIM TOMOPOM.
Pycckn
CAMOCTOJTEJBHOE YCTPAHEHNE
CITIT TOATE INSTRUCTIUNILE.
MÁSURI DE SIGURANTA GENERALE

AVERTISMENT
Avertismentele si instructiunile continu in aceastà sectiune a manualelui deutilizare sunt destinate sαν protejeze. Nerespectarea uneia+dentre aceste məsuri poate provoca raniri corporale grave.Pentruautilizacestaparatineplinosa siguranta,citişiintelegeti prezentul manuale deutilizare,diasesemenea,toate etichetele lipite pe aparat.Siguranta estoechestione du bunsim, de vigilentá sdcunoastereaferastrului dumneavoastracu lant.
KARBURAATORI SEADISTAMINE (Joonised 61-63)
Enne karburaatori seadistamist:
SANUMALASLENKIS (54. att.)
(D) PAREIZS 80^ - Tads lenkis veidojas, ja jus ivietojat rokturi piemerocta diametra vili.
(E) AKIS - lestrgst koka un atri nodilst, palielina ATSITIENA varbubtu. Tads rodas, ja lietojat parak maza diametra vili vai to turat parak zemu.
(F) SLIPUMS UZ AIZMUGURI - Kedes kustibai nepieciesamais speks nevajadzigi pieaug, kede un vadikla paaragli noletojas. Tads rodas, ja lietojar parak liela diametra vili vai to turat parak augstu.
DZILUMA IEROBEZOTAJU ATSTARPE (55.-57. att.)
KEDES VADIKLAS APKOPE (58. att.)

BRIDINAJUMS
PRECIATAJTE SI VSETKY POKNY.
VSEOBECNBEZPECNOSTNEPOKNY

UPOZORNENIE
Upozornenia, stíky aPokyny uvedené v tejto casti námovu slúzia pre vaśu bezpečnost. Nedodrzanie vsetkychPokynov moze spósobit vázne zranenia. Pre bezpećné použivanie tohto naradia si pozorne prećitajte tento námov o obzámáme sa so všetkymi stītkami pripevněmi na naradí. Zachovanie zdravého Rozumu, opatrnosti adoğan znalost naradia su podmienkou bezpečnosti.
OBOZNÁMTE SA DÖKLADNE SO SVOJÍM NÁRADIM. Precítajte si pozorne námod na použitie. Oboznámte sa s použivaním pily, jej obmedzeniami a smožnými nebezpečenstvami špecifikými pre toto náradie.
RETAZOVé Pilv su urçéné len na rezanie dreva.
KED SA SPIOCKA VODIACEJ LISTY DOTKNE NEJAKEHO PREDMETU ALEBO KED SA RETAZ ZAKLIESNI V REZE, MOZE DOJST K SPATNEMU RAZU. Dotyk spicyk vodiacej listy s inym predmetom mozu v urcitych priapodoch sposobit rchyle yvmrstenie vodiacej listy smerom hore a dozadu k pouzivatefovi. Zakliesenenie refaze v hornej casti vodiacej listy moze sposobit prudky pohyb vodiacej listy smerom k pouzivatefovi. Obidve tieto reakcie mozu sposobit stratu kontrony nad naradim, co moze viest k vaznemu zraneniu. NESPOLIEHAJTE sa len na bezpechostnene pvky refazovej pily. Pri obluhe refazovej pily je potrebne podniknuf urcite kroky na zabranenie vzniku urazov alebo zraneni pri rezacich pracach:
Casti clanku refaze:
3APEKIIAH HAPE3EPBOAPA (IA HE CE IYIII)
3a da ce ORpaHHH OHN aOHcOHTa OT IOXkap H 3rApHH, BHHMaBaHte Ipn pa6ota c rohpBOTo. ToBa e H3KJIOUHTeJIHO 3aJIAMH IPOjYKT.
CmecBaIteHcbxpaHbAaTe rohpBOTo BcI,PipeBnHe3a6eH3HH.
CmecBaHTe H cIIbAte TepHBOTHa OTKpHTO,JaIeUOT HCKPH H IJIaMbK.
I36epTe YHCT yuaCTbK, CnpeTe IIBHrAteJIa H ro ocTabeTeJa H3CTHHe, IpEiHa ra 3apeHITe.
BabHObpa3BnIteKaIaUcKaTa,3aJa ce H3NpyHeHaJIraHaTeTo HJa He ce pa3CnIe RopHBOTOKOJIOHeJ.
3aBHTeTe Iobpe KaIauKaTa Ha pe3epBoapacne 3apeKdahe.
Почистете Манншата, по се разсиалг roрнв. Ппедд Ка псөтete мангатял, отдалчete се ha 15 M от мacrтOTO, кьлөтсөс тьлнлр eрбоара с rolрнв.
HnKora He TpIbIgBaIte Da rOpHTe pa3cnIIaHO rOpHBO.
3OHA HA PRA3AHE/PABOTEH yACTbK: OCHOBHIIPEIIIA3HNMEPKH
He pa6oTeTe C BepHxHHa TpHOH, KaueHH Ha IbPBO.
He pa6oTeTe C cepHxHHa TpHOHa CTbJI6a: ToBa e HKJIOHTeJIHOI OAnCHO.
BcHKn cTpaHUnHJIna JxHbOTnH Tp6BaJa ca H3BbH pa6OHTnHa yucTaBk. He IIO3BOJIaBAte Ha HNKOro Ja ce Ipn6JIHXKaBA Do TPhOHa, KORAto FO BKINOHVaBe HIN peKete C Hero.
BeJexka: IIIOHTa Ha pa6oTHnryuactbK 3aBCHOn O Tpa6oTata, KOrTo Ie Ce H3BbPbBa, KaKTo N OT BHCouHnHa
H aIbPBOTo HnO NT CTOBA, KOIT Oe Ce o6pa6oTBA. HAnpHMeP npH NOBaJIaHE Na IbPBO Ce H3NCKBA HIO-ROJAM pa6oTeH yuactbK, OTKoJIKOtO 3a JpyTH JeHOCTH KaTO pa3TryINBaHe.
HATNUK N TEGJEHE
Потьнбоведоста снla виогн e споска,образна на Вьртеньeto habeBERATA.ЗатOBaТРБа ДвИHMABATEc TEJIINTEJIHATA CNJIA,KORATOpeKete cДОЛПИЯ рБб habeBERATA,ис HATNCKA,KORATOpeKete c rOрнATERauct Na IIIHATA.
BeIeKka: TpnoHbTe MmHaJI IIbJIHN a6pNHI H3IIITBAHn.
Bb3MOxHc e IIO HeRo Ia HMa OCTaTbIu OT MacJIo.
IIPEIIA3HNMEPKNIIPIHIOIDPbXKA
HnKora He pa6oTeTe c TpHoN, KOITe HeH3npaBeH, JIoIOpepyIpaH uacTHuHO HJIn HePiPaBnJIHO crIo6eH.
YBepeTe ce, Ye BepHra tCINHpA Ja ce BbptN, KOraTo OTyIChete TpHReHa cKOpocTt. Ako peKeIaTaBepHra ce Bbptn Ha Ipa3eH XoJ, MoKe Ja ce HAlOxH perJaX ha Kap6bypatop.A.BiKte Pa3dJI "PeIax Ha CBO6OHN HA"OT TOBA pKBKOIOCTBO.
Ako cJIeI perJaKa BePnRATA pIOJIbIXJXABa Ja ce BbPTH INPI npa3en XoI, o6bPheTe CE KbM oTOpH3Hapc cepBn3 Ha Ryobi H ne paOToTe c TPhOna, pIepNi da Ce h3BbPshn pemOTHTb.

IPIEUYIPEXJEHNE
BcNcHn NOpPaBKn IOn TPhOHa, c H3KJIIOUeHHe Na OHncAHnTe B yka3aHHTa 3a NODpBxKaHa pBKOBOIcTBOTo 3a yNoTpe6a, Tpr6BaJa ce N3bPbIbWAT ON KBAJIINHfHUnap TexNHk. A KOce H3NOJ3BaT He NOJXOJMy INHCTpyMeHTH, 3a Ja ce H3BaJIM AxMOBIKbT INH bTpKn, JOKATO Ce CBAJIA CbeHNHTeJIaT, TOBA MoKeJa IIOBpeJIM MAOBKH a ToH Ja ce OTKbCHE, Ipn KoeTo Ja ce npuYHHrT EeKK TeJeCHn NOBpeJi.
OTKAT
OTkaTbT IpeIcTaBJIyBa ONaCHO IpoTbHOBeHCTBHe, KOeTo MoKeJa IpruYHH TeKKn TeJeCn HOBpei. He pa3uHTaTe EINHCTBEHO Ha IpeIa3HNITE MexaHn3Mn Ha BEpHXHH TpHOH. EINHOpeMeHH C TOBA TpA6Ba Ja IpeIipHEMeTe KOHKpeTHN IpeIa3HN MePKn, 3 Ja H36ErHete ONaCHoCTTa OT 3JIOJyKn H npAHBaHH.
BleJekka: BnKte PazJIeH "HaunH na pa6Ota"OT pblKOBOCTBOTO 3a IOBEue HhOOPMaHna 3a OTKaTaN HaUNHHTE 3a IpeoTbPArTHaBE Na TeKxN TeJeCHN NOBPeJn.
3AHA3ETE HACTOIIOTO PbKOBOJCTBO 3A YIOTPBA,3A JAMOKETEH BbDEIEEJA CE KOHCYJITNATE CHETO.
Блгарский
CIMBOJH
HЯков OT NOOCYEHNEI NO-JOly CHMBOJIN MOAT Ja ce BnIaBbpy MaIIHHaT. Pa3yUeTe Hn H 3aONMeTe O603NaueHHeTO HM. KaTo 3aONMHTE npABHINO CHMBOLHTe, Ie MoKTe Ja n3IOJI3BaTe IIPOJyKTa IIO-6e3OJIacEH n eΦeKTHBeH NaHIn.
| СИМBOЛ | HA3BAHNE | ОБОЗHAUCHЕНИ / OБЯСHECHINE |
| Преупесенье | Овознaya воредиемерки, сбърastsим с Bavшиата 6ебочахост. | |
| Преочete ВИHMATEЛно льководстото за улотраза | За ѳ Избетене орадocstта OTеясяни по breasti, поеди ekсллогаатця тубва щ_PREочete и разучite рьководстото за улотраза. | |
| Носete предануочla, предануочнс crepondы за ушто и касka | Когато рабочITE с таши машени, посete предануочнс crepondы за очITE и ушто, както и касka. | |
| Пушиныто забра themselves | Забра themselves e за се пшии и за се рабOTиВ 6ллэост до Искрини otkrpIT Пламьк. | |
| Зават с дve рьце | Дръжte и рабочete с труноа с дve-teси рьце. | |
| Забраима с рабOTа с седа рькa | He рабOTe c trpoHA, kaTO ro ЛьржITE сamo c седа рьka. | |
| Вълегорден okсци | Двигател�е ИлүсУСКAT ВълегордEN OKCRII - ra3 6e3 Миризma, ковто може щ e смьртоюсен. He pabOTe c verigxHHa trpoHn B 3atbOpeHo nomeilechenie. | |
| ОTKAT | ОПАСHOCT! Падete ce ot OTkat. | |
| Контakт с ilshната | ВИHMавайе крагТ на ilshната ще Влиз a B KOHTAKT C IIpredmetH. | |
| Виаги Нoscete рькавии | По веMe на рабOTa с труноа посete ПьътIHn рабOTHI n рькавии, КонTO He ce xЛьзгAT. | |
| БehзINи МасLO | ИзIOЛЗвайе 6e3OJOBEн БeЗИN 3a ABTomOBиLIM, с OKТанOBO YИСLO 87 ([R+M]/2) Или п-ВИСКО. МашинATERA в рабOTHс ДытактВ ДыгатEL, пri с КовTo TprбБа ще се СмсETбЕЗИN I CINTEТЧУHо МасLO ЗАДытактВ ДыгатEL (В сытншени 2%). | |
| Дръжte стравочITE Лиca надалей | ВсИЧКСТРANUCHIN Лиca и КИВOTHIn TPRбБа щд STОТНЯ на разстовине най-малko 15 M OT рабOTнYuactьк. |
Блгарский
TEXHNUECKA INHΦOPMAIIHA
| RCS-3535C2 35 ky6. cm | RCS-4040C2 40 ky6. cm | RCS-4446C2 44 ky6. cm | |
| TeJIo - 6e3 Μινηа, Bερηγα, Γρρυθον Μαςλο | 4,6 kT | 4,6 kT | 4,6 kT |
| BmecThmocT ha pe3ερBoaρa 3a ropHBOTO | 310 cm3 | 310 cm3 | 310 cm3 |
| BmecThmocT ha pe3ερBoaρa 3a macλοτo | 210 cm3 | 210 cm3 | 210 cm3 |
| ДьлЖина ha ΜινηHATA | 35 cm | 40 cm | 46 cm |
| ДьлЖина ha ряЗанe | 320 mm | 370 mm | 410 mm |
| Тио Μινηа | Carlton 14-10-N1-MHC UNB | Carlton 16-10-N1-MHC UNB | Carlton 18-10W-K1-HC UNB |
| Звени ha bερнага | 9,53 MM | 9,53 MM | 8,26 MM |
| Дьлбочина ha 3aДВнжBaшпite 3Вена | 1,27 MM | 1,27 MM | 1,27 MM |
| Тио bερнага | Carlton N1C-BL-M- 52E SK | Carlton N1C-BL-M- 57E SK | Carlton K1L-BL- 72E |
| Водецzo 3b6No кoleло | 6 зb6a | 6 зb6a | 7 зb6a |
| Рабotingеобem | 35 cm3 | 40,1 cm3 | 44 cm3 |
| Hominahina moiHocst | 1,7 kW / 10000 oboproTa/MHN. | 1,8kW / 10000 oboproTa/MHN. | 1,9 kW / 9500 oboproTa/MHN. |
| Hominahina scokopt | 12000 oboproTa/MHN. | 12000 oboproTa/MHN. | 12000 oboproTa/MHN. |
| Скорost ha пазецхоя | 2700 - 3100 oboproTa/MHN. | 2700 - 3100 oboproTa/MHN. | 2700 - 3100 oboproTa/MHN. |
| Спесифчен paşхов noягнво прн makcmaJIna moiHocst ha ДВногATEЯ | 435g/kwh | 435g/kwh | 435g/kwh |
| Акystунно налгаганe (ISO22868) | 103 dB(A) | 103 dB(A) | 103 dB(A) |
| Сида на Шуma (ISO22868) | 113 dB(A) | 113 dB(A) | 113 dB(A) |
| Ниво на ВибрашпITE (ISO22867) | |||
| - П配电и дрьжka | 6,4 M/c2 | 6,4 M/c2 | 6,4 M/c2 |
| - Зади дрьжka | 7,0 M/c2 | 7,0 M/c2 | 7,0 M/c2 |
OIIICAHNE (pHr.1)
1.П配电ENп配电ДИЗТЕЛ /спнраЧКа на ВернгагаТA
2.Ппебпдлрьжка
3. KapTep Ha IJIINHbpa
4.Писковбалон
5. Craprep
6. CkopoctHa kyTna
7. BInr 3a MoHTnPaHe Ha IIHHaTa
8.ⅢInHa
9. BepHra c HnCKa CKJIOHHOCT KbM OTKaT
MOHTIPAHE

IPEUYIPEJKJEHNE
Ako Ima IinIcBaIIa Yact, He pa6oTeTe c MaIIHHata, IpIeN aI tce nOCTaJIbH BInPoCHATA Yact. IIpn HecnA3BaHe Ha TaIIN HcTpyKIIH MoKe Ia Ce IprIyHHT TeKKN TeJeChN NOBpeH.

IPEyIPEXJEHNE
He ce onHtBaIte Ja moHnHnHaPe MaIIHHaTa, KaKTo N da IIOCTabTe PInHnAJIeXHOCTN, KOHTO He ca OJIObEHN 3a yNtOpe6a. PIn pIoIObHN IIPOMeHN HMOHcHkAaHN MOKeJa Ce CTnHrNe Ho HENpABHnHa yIOnTpe6a JNa ce Ch3ZdAAT OAnACHyUCOBnA, KOHTO Da pINHnHrTeXKn TeJeChN NOBpeHn.
BeIeKka: TpnoHbT eMHaJI IIbJIHH fbaepuHn H3IITBaHna.
Bb3MOxH e Hn HeO Ja HMa ocTa bHOT MaJIO. IpOyTeTe eTHKeTa, CbP3aH c TOpHBOTo, cJeT ToBa r OcbaiTe H
- KapTep Ha CTapTepa / BeTHHJaIauHOHHN OTBOPH
- Pbyka ha ctaprepa
12.П配电ьсвупсканe/cинранe - ByToH 3a 6JIOKHaPe Ha TpHRepa
14.3aHa npbXka - TpHrep 3a ckopocTtA
- Kanaika ha pe3epBoapa 3a macJIoTO
- Kanayka ha pe3epBoapa 3a rohpBoto
18.Ct6HJIIN3HpauBpBx
IpiH6peTe c pIbKOIOCTBTO 3a yIIOtpe6a.
BnKTe 34-43.
BxKTe pa3JIeI "PoiMmaHa ha BepHrataHa Hn Ha IHHaTa" OTHACToIIO pIbKOBoIDCTBO.
HAUYH HAPABOTA

IPEyIPEXKeEHNE
IopnH cJIe KATO CBKNHE Ta pa60nte C mAnHHata, He ce p3aeeBaiHe. Te 3abpABaYte, Ye Hpn MHRe HbHNMaHHe MoKete Na oNCTpaJadTe Tekko.

IPEUYIPEJKJEHNE
IIO Bpeme Ha pa6o7a BHnHaTHrp6Ba Da HocHe TzeauTHH OuHla HnnppeJna3Hn OHNaLc bCtpaHnHH npEua3HN cepaHn. PII hncn3BaHe Ha ToBa YAka3HHe B OChte Bn MOrTa JnonaHdT yKJTeJa, KOHTa JpEIN3BnKAT cepHO3N OHn HapAHBaHH.
Блтарский
HAUHH HA PABOTA

IPEUYIPEKJEHNE
He H3noJ3BaIte npTyH qacTH n npHaJleXhOCTN oCbeH Te3n, KOINTo ca npEopbuaHn OT npOn3B0nHTeJIra 3a TaIN MaIIHHa. PIn H3noJ3BaHe Ha HeOIO6peHn qactH n npHaJleXhOCTH MoKe Ja ce pInuHHT EKKN TeJIeCHN NOBpeHn
IPNUJOXEHN
BepHHHnT TpHOH e IpeHa3HaueH Ja ce H3IOJ3Ba 3a CJIeIHOTO:
I3p3BaHe,IOBaaIHe Ha IbPBeTa H pa3TpYIIBaHe KaTo ⅢJIIO
H3p83BaHe HaJe6eJIIN KopeHH
TOPHBOI3APEXDAHEHAPE3EPBOAPA
BE3OIIACHA PABOTA C FOPHBOTO

IPEUYIPEJKDEHNE
IpeJH 3apeKJaHa He pe3epBoaPa BHnArn CnnpaTe IbHrataJI. HNKoRa He 3apeKJaTe MaHHaTAta, Ako BInrataJIeT e Oiue B DInbKeHne HIIA KOHe H e H3CTHnAI. OTpBIIHete Ce IIOHe Ha 15 MOT MAcTOTO, KbIeTO cTe IIJIHNJIpe3epBoaPa c RopHBO, IpeJH da NpycheTe BInrataJI. HE IYIHTET! Iprn HecnlaBaHe Ha Ta3n HnCTpyKuII Moke Ja ce IprnChnHt TeKKn TeJeCHn NOBpeJH.

IPIEUYIIPEXJEHNE
YBepete ce, Ye OT mAnHHaTa He H3THuA rOpHBO. Ako yctahOBITE H3THUHe, TpHOHT Tpr6Ba JAc ce peMOHTHpA, IIpeHn C Hero Ja MoKe OTHOBO Ja Ce pa6Oth, 3a Ja c H36erHe OAnCHOCTTa OT IOXkap H3IapAHN.
BbJeTe MHORO BHHMaTEJIHH C TropHBOTO -TO3H IpojyKT e H3KJIOUHTeJIHO 3aIIaJIHM.
BnHaHcMecBaIte H cHbIaTe rOpHBOTo Ha OTKpHTO, daJIeUOT hckPn H IJaMbK. He BdHbIaTe npHrTe OT rOpHBOTO.
BHHMaBaTe Ha KoxaTa Bn Ja He IOnaIHe 6eH3HN HIN MacIO.
BbIeTe OcO6EHO BHNMaTeJIH N OHTHe BN Ja He IIOJaHE 6e3HH Hn MacJIo. AKO B O'UHTe BN IIOJaHE 6e3HH Hn MacJIo, He3a6aBHO rH n3IIaKHeTe C YHCTa BOJa. AKO Ipa3HeHHeTo He IpemHHe, He3a6aBHO ce O6bPHeTe KbM Jekap.
BeHara cIb6epeTe pa3cnHaHOTo rOpHBO.
CMECBAHE HA TOPHBOTO
MaHnHaTa Bn pa60Th C IByTakTOB IBHrAteJI, IIIN KOITOr Tp8BaJa ce cMeCt 6eH3HH H CHTeTHUHO MacJIO 3a
JbYrtaTobN JbHrteJIIN.Cmecete 6e3oJIoBEN 6eHN H MacIO 3a JbYrTaTob JbHrteJI B YHCT cI, IpEbnHEn 3a cbXpaAHenne Ha 6eHNH.
IIBHATETJPTa6OHTNC6e3oJIbHO TROPBO,IpeINHa3aHueHO 3a ABTOMO6HJN, C OKTAHOBO YHCIO 87 ([R + M] / 2) HJN IO-BHCOKO.
He 33IOJI3BAIte CMeCN 6EH3H/HoPnBO, KOHTO ce IpoJdABAT No 6EH3HOCTaHIHNTe, IpeBnEHN eIHnCTBeHO 3A MOTUINKJIeTH, MOTONEIN II pJ.
I3IOJ3BaIte eINHCTBeHO cHHTeTHUHO macIO 3a IByTAKTOBn IBHrAteJIH.
CmeceTe 2 % MacJIO c 6eH3HHa, cboTHOIIeHHeTO e 50:1 (2%)
BceKn IIbT IIpeAn 3apeXdaHe cMeCeTe xy6aBo rOpHBoto.
CmecBaIte ropHBOTo B MaIKN KOJIHyEcTBA: He CmecBaIte ropHBO 3a IOBeYeOT MceeH HAnpei, CbIO Taka Bn IpeIOpBvBaMe Ja H3IOJI3BaTe CInHTeTHUHO MacJIO 3a JByTaKTOBn IBNaTeJIH, KoETo CbIbPka Cta6H.IIN3aTOP Ha ropHBOTo.

IIbJIHEHE HA PE3EPBOAPA C FOPHBO (qur.2)
I OuHcTePe3epBoapa OKoJIO KaIaYKaTa, 3a Ja He ce 3aMbpcn TropHBOTO.
BabHObpa3BnIteKaIaUkaTa,3aJa ce H3Ipyche HaJIraHaTeTo HJa He ce pa3ChIe rOpHBOTOKOJHOHe.
BHHMaTeJIHO I3CHIeTe rOpHBHaTa CmEc Bpe3epBoapa, KaTO BHHMaBaTe Ja He Ja pa3JIeTe.
IpeHIOHO 3aBHeTe KaHaKaTa, IOHCTeTeYIIbTHHeHHeTo HIOBepTe DaJIe BIObO cTcTOHHe.
I NocTabeTe BeJHara KaIauVkata H xy6aBo 3aTeHete c pka. IOnHCTe T haJIbHO, Ako HMa pa3cnIIHO rOpHBO. OITpbHHeTe ce IIHe Ha 15 M OT MAcToTO, KbJeTo CTpe IIHNIIpe3epBoapac rOpHBO, IIpeIN da NycHeTe JBHrataJIa.
BeJekka: IBHrAteJIr M0Ke Ja 3aIIyIHH, KOrato IycheTe MaIIHHaTa 3a IIbPbN IIbT H CJIeT TOBA.

1JNTbP + 20MJ =
2JIITpa + 40MJI =
3JIITpa + 60MJI =
4JIITpa + 80MJ =
5JIHTpa + 100MJI =
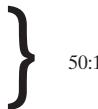
Блтарский
HAUHH HA PABOTA
CMA3BAHE HA BEPHATA HHA IIIHHATA (Фиг.3)
H3no13BaIte MacIo 3a BepHn H nnHn Ryobi, IpEJaHaNeHo 3a BepHn H macBoHNK 3a BepHn H c TaKaBa fOpMyla, KOrTo IO3BOJIbA eFeKTHBHa pa6Ota 6e3 pa3peJxJaHe Ipn ROJAM TemPipeAtypen HnaIaON. KoHcyMaIHTa Ha TpHOHa e Ipn6IbnTeIHO eINH pe3epBoAp macIo Ha eINH pe3epBoAp oRPNBO.
BeJekKa: He 13nOJI3BaIte octapeJIH, Beue H3nOJI3BaIIH nIHH aMbIpcEH mCaJa. Toba MOke JaIOBoeNe IO NOBpeBA B MaJIcEHaIPOIIa, IIHHATA IINH BepHrata.
BHHMaTeJIHO cHneTe MaJIoTO 3a IHHaTa H BePhraTa B pe3epBoapa 3a MaJIoTO.
IIbJIHepe3epBoaapacMacIOIprHBCaKo3apeJHaHe Ha pe3epBoaapcRHO.
H3IOJI3BAHE HA CIIHPAUKATA HA BEPHATA (fHr.4-5)
BceknIbT Ipeyn yIIOTpE6a IIPOBepBaIte H3IIpaBHOCTTa Ha cIInpaKaTaHa BepHgata.
C Trophata Yact Ha JIbBATA cH pKa BkJIHOye Te CINpaKATA Ha BepHATA, KaTO HATNCHETe IpeJINa3NEJI/CINpaKATA HAnPeJ, JOKaTO BepHrata Ce BbPTNc MaKCHMaJIHa ckopoCT.
BbPheTe cHnpaUkata Ha BepHrata, Kato dpbHHeTe npEaIaHTe/ cHnpaUkata KbM dpbXkata, JOKato yyeTe upaKaBaHe.

IIPDEUYIPEKXDEHNE
Ako cnnpaqukata He cnpe He3a6abHb BepHrata HnH AKO cnnpaqukata He cTOH cMOCTOHTeJHO B IyCHATO IIOJokHe, O6bPheTe c KbM OTOpH3npaH cEpBn3 3a II npBaKb, PpEIN OTHOBo Da IIpHcTbNITe KbM EKcIIIOaTauIN.
CTAPTHPAHE HA JBHATGEJI (qur.6-10)
MaIIHHaTa ce Iycka IIpo pa3JIyuH e HauHH B 3aBcHMoCT OTOBA JaJIIN JBHrAteJIeT e CTUdeH JIIN TOIIbJI.

IIPDEUYIPEKXDEHNE
CToIe BJIbO OT IIHHata. HnKORA He IpeKpaUbaIte TPhOHa HJN BepHrata; He ce HaJIbEcBaIte HaJI ZHHaHa JBINKHeHae BepHrata.
IocTabeTe TPhOHa Ha BbPxy paBHa IOBbpxHcT Hce yBepTe,Ye B 6JIH3OcT Mo MaIIHHaTa HMA HnKaKBn IpeMeTH HIN IpENITCTBnH, KOHTO Ja BJIa3AT B KOHTaKT C IIHHATA H BePrtA. 3aJa H36ErHeTe IpeKdEpbemHHTO H3bIbAAbe HA BePrtA, yBePeTe ce, Ye IIHHaTa H BePrtA He JOKOCBAT ZEMTA.
XbaHete 3npabO IIpeIhata IpbJka CJIbTa CHpKa H cTbHete C dcEHnKpaK bpxy ochoBaTa Ha 3aHaTa IpbJka.
CtaptnpaHep cTyeHdBnHaTeJ:
IocTaBeTe IpeKbCBAu BIOJOxKeHHe IYCKAHE (I).
YBepTe ce,Ye cInpaKaTaHa BepHaTa He e BKIOueHa KaTO IpIbIHeTe IpeJa3IeJIa/cInpaKaTa Ha3aJ.
HaTHcHete H OTnycHeTe 4 IIbTH IyCKOBn6aJIOH.
IocTaBeTe IpoceJIHaTAt KJIaIIa B 3aTbOpeHNo IIOJOKeHHe (1-1).
IpbHHepebKaTaHa cTApTepa,IOKaTO dBHrAteJIeT e roTOB Da TpbHne,HO He IOBueye O7 IIbTH.
IocTabeTe IpoceJIHaTa KJIaIIa B cpeJHo,IOJIy3aTBopeHO IOJOKeHHe (1).
IpbHHeTe pBcKaTa Ha cTapTepa,IOKaTo DnHrAteJIaT 3apa60TH.
BeJekKa:OCTabeTeJBnTateJaHa TPhOnaJa cE BpTrN, KaTo IpoCeJIHATA KIIaIe E B TOBa IOIoKeHHe, 3a OKIo 15-30 cekyHb N 3abNCHMOCT OT TMHePATypa.
HaKpa HaTncHe TOKpaIpOceJIHaTa KlaIa B IIOJIOKeHHe IYCKAHE (2).

BHIMAHHE
Ako He OTnycHeTe TPhRepa, 3aJa MoKe JBHrataJIrTa 3a 3apa2oTH Ha np3a3eHN XOJ pNRI BKJIOueHa CINp4uKaHa BepHrata, PnCKyBaTe JBHrataJIrTa JIe Ce IOBpeHn HnKORA He 3aTbPkaTe TPhRepa pNRI BKJIOueHa CINp4uKaHa BepHrata.
Ctaptnpahe npn TOnbI DBrHrataeI:
IocTabeTe IpeBkJIIOuBaTeJIa B IIIOJOKeHHe IYCKAHE (I).
YBepTe ce,Ye cInpaKaTa Ha BepHaTa He e BKJIOueHa KaTO IpIbIIHeTe IpeIINa3HTeJIa/cInpaKaTa Ha3aJ.
HaTHcHete H OTnycHeTe 4 IbTH NyCKOBn6aJIOH.
IpbHHeTe pBcKaTa Ha cTapTepa,IOKaTo DnHrAteJIaT 3apa60TH.
CINPAHE HA JBHATEJI (qur. 11-12)
OTnHcHete TpHepa 3a ckOpocTHa HocTabeTe BnHrataJIa pa60THn Ha pIa3EH XoJ. 3a Ja cnpTe IbHrataJIa, NocTabeTe npKeBcBaVa b IOLOJKeHHe CTOII """ He nocTabeJIte TPhOHa BbPxy 3eMItA, JOKaTo BepHrata ce BbPTn. 3a No- roJIIMa 6eOHaNACOHCT, BKJUohTe cInpaYkata Na BepHrata, KORAto HE H3NOJ3BaTe TPhOHa.
Ako IpeKbcbayt He cIpe TPhoHa, IpbIIHeTe JOKpaJ IpoceJIHATA KJIana (3aTbapHe/1) IN BKJIIOUe TcIIpaYkata HA BePHrATA, 3a Da cIpeTe DIBrATeJI. AKO IpeBKLIOvBaTeJIT HE cIHPa TPhoHa, KOrato ITOIOCTABITE B IOIOJKeHHe CTOII ("00", Tpr6Ba DA bJe peMOHTnpaH, IpeDi Na H3IOJI3BaTe TPhoHa OTHOBO, 3a Da He paOToHTE B OINACHN yCIOBnI N da He ce HApAHTE TeKko.
BeIeKka: Korato npHKJIOOHte paObTa c TPhOHa, H3NpyCHeTe HAIIRaHTo, KATO pA3BHeTc H cNeI TOBa 3aBHHeTe KanaVcKHe 3a MacIoTO H3 a ROPbOTO. OctaBeTe IbHrataJIa Ha3CTnHe, PpEHIa pPi6bepete TPhOHa.
Блгарский
HAUNH HA PABOTA
PEYJIMPAHE HA CKOPOCTTA (Фиг.13)
A KIO BHNHATeJIaT TpIbFA,pa6OHTu HcKOpBaHO He NOJbPka Ipa3eH XoJ,3aBbPTe BnHTa "T" IO YacOBHHKObATA cTpeJIa,3aJa YEbJIte Ipa3HHXoJ.
AkoBepHrataCe BbPTN IIpH IIpa3EH XoI,3aBbPteTe BnHTa “T”obpaTHO HA yacOBHHKOBaTa CtpeJIka,3aJa HamaJIHTe ckOPOCTTa Ida CIPTE AeIBXKeHHeTO Ha BepHrata.AKO H cIeI peJIaK BepHrata IIpoIbJIkAbaJa ce BbPtN IIpn Ipa3EH XoI,ObbPheTe Ce KbM OToPn3HpaH cepBn3,3aJa ce HanpaBHT Heo6XoIMHTe IIpnpabKN,He H3IOJ3BaJIte TPhOHa,IIpeIN Da e PemOHTPan.

IPEyIPEKJENHE
BEPNΓATA H3O6II0 HE TPR6BA J4CE BbPTN IPII PABOTA HA IIPA3EH XOJ. 3aBbPTeTe BnHTa 3a Ipa3en XoJ "T" o6paTHo Ha YacobHHKOBaTa CtpeJa, 3a Ja HamaJIte CkOpocCTta Ipn Ipa3eH XoJ nCpTe BEpHra, HJIce O6bPheTe KbM OTOph3Hpan cepBn3, 3a Ja Bn HapPaBrt Heo6XoJHMnte HAcTPOJKn. He I3No3BaJIte MaMHHaTA, IOKato He 6bJe IoppaBeHa. BepHra, KOToCe bBPTN IpiIpa3en XoJ, MoKeJa IpiuHH TeKKn TEleCNH NOBpeJi.
HATNCK H TEGJIEHE (pHr.14)
IpoTHBOeHCTBaIIaTc Hla BnHaHc c NocKa, ObaTaHa Na bBpTeHTo H a BePrtAra. 3aTOBA Tp6Ba DA BnHMabate C TEJIHTEJIHATA CHIA, KORATO peJxete c DoJIHHa p6 Ha BePrtAra, nC HATNCKA, Korato peJxete c rOpHata n Yact.
BeJexKa: TpHOBt eMHHaI IbJIHH fAbpHcH H3INITBaHn. B3MOxHO e IO HeO Ja HMa ocTaTbHOn OT MacIO.
IIPEIIA3HNMEPKN CPEIyOTKAT (Φn.r.15-16)

IINPEUYIPKEXDEHNE
OTkaTbT ce IOnIyUba, KORATo BbPrtIaTa ce BepHra BII3a B KOHTaKT C IIpeJDMET B ROPHata Yact Ha KpAa H IIINI KORATO IIbPBOTO 3aIIHHa BEPHATA IO BpMeHa pR3aHe. Korato ropHata YacT Ha IIHHATA BJe3e B KOHTaKT C IIpeJDMET, BepHata MoKeJa cBePxeB He roHa Na CPe 3a MnR. Toba BoJIo Do ChJIHO OTXBpbJIHe Ha IIHHATA Harope H ha3aD NBOcOKA KbM ONEpATOpA. CbIO Taka, Ako peKeJMaTAp EBERa 6bIe 3aIIHHa Ho pBoBa Ha IIHHATA, IIHHATA MoKe PnKo Da otCKOu KbM ONEpATOpA. B TakHbCaIyuae E b3bMOKHO da 3aIgByTe KOHTpOJI Ha IHNCTpyMeHTa H Na IOnIyUHTe TeKKO HapAHBaHe.
He pa3HTaTe eHHCTBeHO Ha IIpeIHa3HHTe MeaxH3M, c KOHTO pa3IOJIa MaIIHATA. BHe cbIIO Tp6Ba JIA IIpeIIINPHEMeTe pa3JNUHIMePKN, 3a Ja H36eHHTe PnCKa OTRIIOJIyKH HnapAHBaHIN. 3a NoBoeHuHOpMaIIu BHXTe "O6IIN IpaBnla 3a 6e30NaChOCT".
ПОДГOTOBКАЗРЯ3АЕ
HIOJOXEHNE HA P'bIETE (qur.17)

IPEDUYIPEXJEHENE
HnKora He o6pbIaIte IIOJIOKeHHeTo Ha pBtTe, OIIcHAnBa ToBA pKBOBOCTBO (He IOCTaBJIte IINbata PbKa BbPxy 3aJHATA IpBxKHa INJcHATA PbKA BbPxy IIpeHATA), H N368rBaHTe BCJAKBO IIOJIOKeHHe, KOEtIOIOCTaB TaIOTO H PbKaTa Bn HA IIbTn Ha BEpHrata.

IIPDEUYIPEKDEHNE
He HaTCKaIte TprHepa 3a ckopoCTTa C JIABaTa cn PbKa H He XbaaJIaTe IpeJHaTa IpJbXka C JIcHATA. BHIMABaIte La He InonaHete Ha IIbTa HA BepHrata, KORAto pa6OHTe C TPhoHa.
IIIOJOXEHHIPIH PABOTA (pHr.18)
CTbIeTe cTa6HIOBbpyTbPjaIOBbpxHOCT.
JIyBaTa pBka BnHaHr Tp6Ba Da e OIIbHaT, B rOToBHOCT Ja yIbPxN OTKaT.
CToITeBJIBOOTINHHTa.
PJIaIHTe Bn Tp86Ba Ia PnpIbPkAT OJInHata qact Ha npBxKHTe.
PABOTEH yUACTbK (pHr. 19)
Pejekete eJHHCTBEHOIbPBeCnHa I IbpeHN MATEpHaJIH. He pejekete IaMapHa, IIaTMcaca, KaMbHH HIN dpyrH CTPOHTJIH MATEpHaJIH.
Hnkora He ocTabraIte Dea Da H3noJ3Bat TPhOHa. He ocTabraIte Dpyo Iina H3noJ3Ba TPhOHa, IpEJa da Cte My daiN da IpOeHe HactoIIOTo PbKOBoJCTBO 3a YOpTpe6Ha da Cte My oCnrypHIn Heo6xOHNHn HnctpykTaK 3a HaIIbJHo 6e3onacha paOora T phOHa.
BcHcKnIpyrNIIuNIO(NOMOUIHHU,CTpaHUYHJIua,Ieua)HxHBOTTHTp8bAaTOCTaONHaONpeJeLEHOBE3OIIACHO PA3CTOHRHEoPAOTTHyUacTBk.IPiHIOBAJIHe HaIbPBO6E3OIAChOTOpa3OHTOHHeMHHHMymIbTAIBTHBHCQUHHTaHaHai-BHCOKOTOBpBOBbPAoTTHyUacTBk.IPi pR3aHe HaIbPBEHNTPYINTP8bAaCe cHsA3BA MmHHMaJIHO pa3CTOHRHeOT4,5MMeJxBCEKNpaOToHHK.
3aeme cta6HJHa IO3HnIg H CTbIeTe IO6pe Ha 3emrTa, 3a He I3ry6Hte paBHOBecHe IO BpEm Ha pa6ota.
He npbxte TpnoHa hBa HcOuHa hA ngpBnHnKoII, 3aIOTo Ie Bn e TpyNo da rO oBlaJeTe npH OTkT.
He ceehe TbPBeta, KOHTe c HAMPAT B 6H3OCT JO eJIeKTPoPiPoBOH n crpaJH. To3n THI JeHooCT Tpr6BaJa ce I3BtPbIa BA t IpOpeChOHAIhCTH.
Блгарский
HAUHH HA PABOTA
Pa6oTeTe C tPhOHa cAmO KOrATo HMa JIOCTaTbYHO CBETJIHnA II Do6pa BnIIMOCt, 3aJa BnKdTe Do6pe KaKBO npABnte.
OCHOBHA TEXHnKA HA PABOTA/P3AHE
3aJa ce 3a0n3Haescre TPhOHa,3aOnOpHeTe Ja peKxetere MaJIKN KIOHN,KaTO H3IOI3BaTe pa3JIHUNH TeXHKN,IpeJIN Da IIpHCTbIHTe KbM IIO-OTTOBOPHN 3aJaYN.
3aemeTe IpaBnIHO NOIOJKeHHe c JInCe KbM IbPBOTo H TPhOH Ha Ipa3eH XoJ.
IpeHJa 3aIOOHete Ja peKTe, BKIOUeTe Ha MaKCHMaJIHaCKOPoCT, KaTO HaTHcHete TPhRepa JOKpaJ.
3aioHeTe da pexKeTe, KaTo TpHOHbT e cpeIy IbPBOTo.
Ipe3 qIATO BpMe,IOkato pexeTe,IBHrAteJIaT Tp6Ba Da pa60TH Ha IIbJIHa MOIOCT.
Octabete TpnoHa Ia CbIpHIN “IJIaTa pa6oTa” H npocTo JekO HATNCHeTe HaJOny.IpnNo-ROJHM HATNCK CbIeCTByBa ONaCHOCT Ja IOBpeJITe IHHATA, BepHrata H DBHrataJe.
OtnycheTe IocTa, KOraTo IIpHKInOHHe C p3aHeTo, H octabeTe IBnIATEJHa pa6oTH Ha npa3eH XoJ. AkO octabITE TPhOHa JAp6oTH INp MaKCHMaJIHa CKOpOCT, 6e3Ja peXe, HMaPCK OT IppeJDeBPemEH N3HOCBaHe Ha BepHrata, IIHHATA nIBnIATEJea.
He ynpaJxHbAte HaTHcK Bbpxy TpHOHa B KpaJHa p3aHeto.
IIOBAJIaHE HA IbPBETA-OIACHN YCIOBnA (ΦHr.20)

IIPEDUYIPEKDEHENE
He ceyete Ibpbeta pH CNJIeB BHTbp N ROJIMBAIaXHOCT. HuaKaIte IO-6e3OanCHN KJIImaTHUHNYcIOBJIN.
ПИ ПИОВАЛНИЕ И ДБРУМНОЕ ВЕДЖИ分解HINCHTPYKIIHH,3aДЯнбгERHTe PNHKOBEROT TeKKNTeJecHI NOBPOJIEN.
Korato pa6oHTHe cTo3n HnCTpyMeH, HocTe IpeJnA3HN cpEdTb 3a OHTHe n yHInTe, KaKTOn H KAcKa (A).
He ceyeTe HaKIOHEn HbPBeTa HINr FOJIeMH IbPBeTa C HTHNI HIN MbPTBn KIOHN, C NaHnAJa KOpa HIN C KyXh CTBOJIOE. TeNl bPBeTa Tp6Ba Ja Ce cSbOprt HIN HtBNpNaT Ha 3eMa Tc NMOUHTa Ha TeKxA TeXnHa, CJeI KoETO da Ce HapeKaT.
O6bPHeTe BHHMaHHe Ha pa3IpeJeJIeHHeTo H TeJIOTo Ha roJIeMHTe KJOHN (B).
Pa3HCTeTe H3paTbUHTe OKOJIIO IbPBOTo, KoETo Iie ceyeTe (C).
He orchuaTe Ibpbeta, KOHTo ce HAMHpT B 6JH3OCT Do eJIeKToPiPoBOAn H cTpaDn (D).
O6bPHeTe BHMaHHe Ha IIOKKaTa, B KOrTo e HaKJIOHeHO
_b (E).
YBepete Ce, Ye IIbPBOTo HMa CcUYeHn HmMbptBN KIOHNOKHToMOratJaIaHaHTN Da Bn YdApTJ,OKaTO ceyTe (F).
IIO BpeMe HA p3aHe CJIeTe BbPxA Ha IIpbBOTo, 3a Ja cTe CHrpyHn, Ye Ie NaIe H bIpeBbIeHaT aNocKa.
BcNCHbHINHIIa Tp8ObaJa CToTHa 6e30NaCHO pa3CToHHne (G) (Ha-MAJIKO IBa IIbTH BHCouHHata Ha IbPBOTO).
IIpeBnIeTe B KaKaBa IocKa Iie ce OTIpbIHeTe, KOraTo IIpbBOTo TpIgHe Ia IaHa (H).
AkoIbpyOTo 3aIOUHeJaIaJaBIpYra IocOkaIINako TPhOHbTce3aIIHneIJIIN3axBaHe pIHpIAJAHETo,IIycheTe TPhOnHaIb3poCeOTdAHTe!
IpeHnJa 3aIOUHeTe Ja pexKeTe,ObbPheTe BHHMaHHe Ha IIOcOKaTa Ha Btba.
HeceyeteIbpbetaB6JIN3OCTIOEIEKTPoPBOIOHN crpaH, KOHTOMORATJa 6bJATacERaTHOTKIOHHOT camOTO JbPBO pHnIpaHETO.
Ako pa6oHTHe IO hakIOHeH yactbK, BnHaH cToIte HABICOKO, 3aIIO TO CbIeCTyBA OAncHOTPi OTCHaHETo Ch IbPBoTO Da ce H3TbpKaIA HIN IIb3He HaIoIy IO hAKJOHa.
IIBaJIeTe OT IbPBOTO BCHUKN OCTatbIIN, KAMbHNI, NapHeTa Kopa, IIPOHn, cKO6H IN KHIuN OT McCTOTO, KJIeTO IIe pexKete.

IPEUYIPEXJEHNE
HE ceuehe TbPBeta B 6JIN3OCT JO eJEKTPOIPBOJOH nCpaJAIN, KOHTO MOAT Ja 6bJat 3acERHaTH OT KIOHN JIIN OT cAMOTO IbPBO pRn PAJAdHeTO.
TEXHUKA HA IOBAJIHE HA IbPBETA (fur. 21-24)
- PpeBnHeTe B KaKbA IocOka Ja ce H3TeIInHe, KOraTo T bPBOTo 3aOnue He Ja PaJa (HIN HNKOJIko IocOKa, B CUYaJy e IIaHaPiHaHT PtTc oKaKe6 IokpHa).Pa3UnCTeY yAcTbKa B HEnoCpeCTBeHa 6Ii30ct OKIo I bPBoTO He ce YbePeTe, Ye HMA IpePIaTcTBnB A IocOKaTa, B KOATO cMraTae Ja ce H3TeIInHe. Pa3UnCTeT OToH yAcTbK Ha OKIo 135^ or PpeBnHeHaT JHHHa Na IaJaE (A).
- 06b_phe TE BHHMaHHe Ha cHJIaTa HIOcOKaTa HA B8Tbpa, Ha HAKIoHa H BepTHKaJlata Ha IbPBOTo, KAKTO H aPa3IOJIOKeHHeTo HA TLOMeHTe KIOHn. BcUKN Te3I AKTOPn OKa3Bat BInHJIeHe Bbpy NOcOKaTa H NaJaAHe H bPbOTo. He ce OINTBaIte Da NOBJIaTe IbPBO No JINHn, pa3JIuHaOT eCTecTBeHATA JINHn Ha JIAane (B).
- Hanpabete Ipope3 B IpbROTO Ha OKOIO 1/3 OT dHaMeTbpa Ha CTBOJa OT cTpaHaTa Ha najaHe Ha IbpbOTO (C). Hanpabete Ipope3Hte Taka, De Ia IpeChuAT JInnIra Ha najaHe IOI npAB bIgJI. Ipope3bT Tpr6Ba DA b6Je uHCT, 3a Ja MOKe TPhoHbT Da IpeMHHe XOpH3OHaJIoHO. BHnAHr 3aIOUBAITE C DOJINHn Ipope3, 3a Ja He 6b TpHoHbT Da 6bJe 3aTHCHAT IOI TeXeCETTA Ha IbpbOTO.
Блгарский
HAUH HA PABOTA
- HainpaBeTe paBEn XOpH3OHTaJIeN OTCnUaIIHT pa3pe3 (D), NaH-MaJIko Ha 5cm HaN XOpH3OHTaJIHnI IIpope3.
BeIeJka: HnKora He pKeTe Ipe3 Ipope3a. BnHar nOCTABRIte cAOT OlbPToMeky pa3Pe3a HOnCTuAIIHpa3E (OKOLO 5 cm mH 1/10 ot dAmetbpa h NaBPTo).
ToBa ce Hapnua "PAntha" (E). C Hea ce KOHTpOJInpa IpaIaHETo Ha IIbPbOTo H ce IpeOeTbPaTaBxa Xlb3raHe, H3NBAHBe HIn JIOIIIBAe KbM IIbHa.
IIpnIbpbeta cToJIaM IHaMaTeBpOTChuaHnTpa3pe3 He TaP6BaJa e TBpIe DbJb6OK N daIObeNe IO paIaNHeTO Ha IIbPBOTo HIN Do BpUbaHEO My KbM TbHa.CJeT OBa V pa3pe3IOCTaBeTe DbPbeHH NII pIacTMacoBH KJIHHOBe (F),HO63JaIOKocBatBepHrata.HaBnHTe TnNoIEka,3a Da 3AnOpHeTe aNObaHTe IbPBoTo. - Korato IbpbTO 3aIOHe Ja IaJa, BeIHa rCnpe TPhOHa H IO NOCTABETe Ha 3eMra. TbFHTe B IpeJbIeHATA Iocoka, KaTO BHHMaBaTe IIpbTO Ta He TpBfHe Ja IaJa KbM Bac.

IPEyIPEXJEHNE
OTochuaaHnT pa3pe3 He Tpr6Ba Ja DoocTHnHe IOn npope3. "PiHaTata" onpeJedI NaaHEno Ha IbPbTO: ToBA e qactTa o IbPbTO MeJdy npope3a H OToCHuaHnPa3pe3.
H3P3BAHE HA DEEJIIN KOPEHN (qnr. 25)
ToBa C MHO rOToIeMH KOpEHN, KOHTo H3IHHaT O TcBOJIa NaI IObPxHOCCTTA. IIpeHn DA oCteYeTe IbPbOTo, OTOptAHete Ie6EJIHHe KOpEHN. IIpBPO HAnpaBeTe XopH3OHtAJIen NIpope3 (A) B KOpEHa, CJIeI ToBa H BePTHKaJIe (B) IepneHJNKUApHrO. MaxHeTe H3P3AHaTa YAcT (C) O pABOTHnY yAcTbK. CJIeI KATO H3BaJIHTe Je6EJIHTe KOpEHN, pINCTbNETe KbM OTPR3BAHe Ha IbPbOTo. BInZe Ta3JeI "TexHHKa Ha NOBaJIaHe Ha IbPbETA" T BoT A bPkBoKOBJCTBO.
PA3TPYIIBAHE (PRA3AHE HA TPYIIH) (pHr.26)
TePMHbT "pa3TpYiBaHe" O3Haayaba Ja HapeKeTe IOBaJIeHOTO IbPBO Ha TpyIHn C JcJlaHa IbJIgHHa.
IbpeHHTe TpyHc peKaT IoeHHHNo.
IocTabeTe MaJIKNTe KIOHn Bbpy pa60THo MaIape HIN Bbpydpyr KIOH,3aJa rH cpeKeTe.
Pa60THHrB uYacTBk Tpr6Ba JAp a3HcTeH. YBepeTeCe, cHe HnKakBn IpeMeTH He MOrat Ja BbIa3T B KOHTAKC KpaHa HIIHATA HIN Ha BEprrata No BpeMe Ha p3aHe: TOBA MoKeJa IpeJH3BnKa OKat (A).
IIO BPEMe Ha pa3tpyUbaHe cToHte B rohpata YacT Ha TepeHa, Taka Ye TpyHte Ja He MOrat Ja ce H3tbpKaJIaT KbM Bac.
IIOHKeKOra He Moze JIe Ce 36Ege 3auuBHe Ha BepHrata (IpiH cTaNAPtrn TExNKHn Hpa3He) Ie TpyNo JIe ce npedBnHnHaKbJe Iue PAnDE OTRP3AHOTo Ib.PBO.
PRAHE HA TPyIN C KJIINH (pHr.27)
AkoIbHeptcIOCTaTbUHOIgAMINHaMeTbp,KoHTO nIO3BOJIABaJa cceIOCTABN KLIHN(B),6e3Ja ceIOKOcBa BepHata,HIIOJI3BaHTeKIIHH,3aJaIbPKeIte Ipope3a OTbOpEHnIaHI36ErHtEe 3aIIIMNaHEBaBepHata.
PRAHEIOIOnIOIbH (pHr.28)
(C) TPYIIN C IIOIIOPA OT EIDHHN KPAI
(D) TPYIIN C IIOIIOPA OT JBATA KPAR
Ha npabete IIpbbohauehen Ipope3 (E) Ha 1/3 ot IIbIJIHHHATA, cIeI TOBA BTOPH Ipope3 Ha 2/3 (F) OT pIpyrata CTpHa. IIpn py3aHe TpyIHTe Ie Ce oIbHAT. TPhoHbT MoKe J a IbJde 3aIIuHn HII 3aTHcHAT B IbPoTo, AKO IIpbBnT Ipope3 e Ha IOBee OTe EJHa TpTa oI dAmEtBpa.
O6bPheTe Oc06eHO BHNMaHHe Na TpyIN IOI OIIbH (G), 3aJa H36BerHeTe 3aIIINBaHe Na IIHHata N Ha Beprata.
PRAHE HA TPYIN OTTOPE (pHr.29)
3aOnuHete OT rOpHata uCTHa NtBpOTo, KaTO pExKete c OJInHaTATA cHT HaIIHATA. Pa6OTe C IeK hAHTCK HAOJY. BHIMABAITE, 3aIOTo TPhOHbT IIe Ce OTMeCTn HaneJI.
PRAHE HA TPyIN OTIOJY (pHr.30)
3aiohyeTe OTOJIHATA qacT Ha IbpbBOTO, KaTO peXKeTe c FopHaTa CtpaHa HA IIHHATA. Pa6OteTe C Jek HATcK Harope.
TpnohTtIe TgII INoCoka KbMaBac. BbJeTe NoITOTBeHn 3a TaKOBa DBNKeHne I npBxTe 3JpaBO TpNoHa, 3a Ja 3aIa3HTe KOHTpO.
H3P3BAHE HA KJOHN I KACTPEHE (pur. 31-32)
Pa6oTe 6aBHO HpBxTe TpHOna C DBe pIe. BnHaHn Tp6Ba Da Ia3HTpe paBHOBeche.
CtoTHe h a pactoHHe o KIOHa, KOTo peKTe. Korato ro peKTe, cToTHe o IpOTHBOIOJIOKHata cTpaHa ha CTBoJa.
He pa6oTeTe C bepnHKnTHr pnoH Ha cTbIb6a ToBa e H3KJIOuHTeJIHO OAnCHO.To3n TnIeHIOCT Tp86BaJa ce H3BbPIbHaTo pnoFechoHApHCTN.
He npbKTe TpHOnHa Na BnCOUHa HnTpBdHnKaII, 3aIIOTo Ie Bn e TpyHn Da rO bJaJeTe pH nOTkA.

IPEUYIPEKJEHNE
HInKOra He ce KaUbaIte Ha IIpbBO, 3a Ja pExKeTe HIN KAcTpHTe KJIOHN. He paOToTe c TPhOHa, KOrato Cte Bbpy CTbI6A, IIaIaTphiOpMa, KJIOH IN Jbpyro HectaHIIHO NIOJOKeHHe, IN pKOeTO pCKYBaTe Da 3ary6bnte paBHOBeCne H/IIH KOHTPOI HAI TPhOHa.
Korato kactpnte IIpbBeta, e BaXHO IIpbBO Ja OTpeKeTe KpaHa KJIOHa, 3a Ja HAMAJITE TerIOTO, H CIEI TOBA Ja HAIIpaBHTE fHHaJIHnO IOTe 3I IOIPOJbJIkeHHe Ha CTBOJa HIN Ha OCHOBHNKJIOH. Taka HMaJa ce pa3KbCa Kopata HA CTBOJa.
Блтарский
HAUH HA PABOTA
1.ПьрвНанпавete eинпюре3 OTДу Ha 1/3 ot Даметы(A).
2.После habпавete порец OTROpe,за дсвалг Te KJOHa (B).
3. HanpaBete ΦHnHaJIHHN OTepe3 IIO npObJIiKeHHe Ha CTBOJa (C), Kato JBnKJnte IIHHaTa 6abHo, Taka Yc cpzBaHToE Ta e IJIaIko. IIO To3H NaHHK KopaTa IIe Moke Ja Ce Bb3CTaHOBNi.

IPEyIPEXJEHNE
Ako KIOHHTe, KOHTO Tp8BaJa ce PoJKAcTPTaT, ce HAMHPaT IO-BHCOKO OT rPbIHHNBA BONK, KaCTpeHeto Tp8BaJa ce H3BtPIHn OT IpOFeCHOnHaJIHT.
H3PRAHE HA OfBHATN KJOHN (pur. 33)
OrbHATHe eJemeHTH (A) MoKeJa ca KaIOHN, YacTHUHO H3KOpeneHH bHObe IIN pIIaHKn, KOto Ca orbHATn OIpyTO IbPBO, Taka ye pRA3KO IIe CE H3npaBRT, KORAto IIN oTpeKeTe IIN MaXhe TE bPBoTO, KoTo Eri 8axBaHAJI. CbIeCTByBa cepHO3EN pNcK h3KOpeneHHr IIN Ha OTceYehOTO IbPBO da CeOCBO6OJI N Da 3aCTaHE B'BB PeTrKaIHO IIOJOKeHne PpR3aHe, 3a Da ceOTJeIH ON CTBOJI. BHIMabaIte -orbHATHe KIOHN Ca ONACHI.

IPEyIPEXJEHNE
OrbHaTHe KIOHc Ca OAnCH, 3aIOTo MoRat Da Bn Uyaprt N a 3a4y6nte KOHTpOJI NaI TpHOHa, Ipi KoETo DA IIpyUHTe TeKKn HII cmBpTOHOCHr TEJecHH NoBpeH.
IIODPbXKA

IPEyIPEXJEHNE
IpnnoJIOmHaJa ce H3nOJ3BaT eINHCTBHeO npHHaJIHHpe3EpBHn acTHn Ha Ryobi.AKo H3NOJ3BaTe dpyrN cAchT, TOBA MoJE da IprnUHHOnaCHoCTH INJ da IOBcE JO IOBpeBn I bPOjYkta.

IIPEUYIPEKDEHNE
BnHaHn HocTe 3aIHTn OuIIa HII OUIIa CbC cTpaHUnH INpeJlna3Hn ekpAHn, KOrATO pa6OITHe c eJIeKTPneCKo 6OpbyBaHe HIN KOrATO IOnHCTBaTe c Bb3dUnHa cTpyA. Ako pni pa6Ora ce BUnHa IpxA, HOCTe MACKa 3a IIInue.
OBIIIIOIDPbXKA
He NoIyHCTBaHTe IIaIactMacOBHTe YaCTH c pa3TBOPHTeJIH. IIOBeYTe IIIaCTMacOBH YacTH MoAT Ja Ce IIOBpeJrT OT pa3TBOPHTeJIH, IIpeJIlaRaHH B TbPcRbCKaTa MpeJa. H36bPwTe 3aMpcBaHHa, IIpxa, MacIoTO, Cma3KaTa n T.H. c UHTa KbPna.

IPEyIPEXJEHNE
HnKora He IOnyckaIte IIacTmacOBHTe YacTH Ja Bn3atB KOHTAKT CbC CInpaUHa TeHoCT, 6eH3HH, IpoJyKTN Ha HeΦTeHa OCHOBA, IPOHNHKBaII MCAJI H Ip. Te3H XHMuecKn IpoJyKTbIbPkAT BeIeCTBa, KOTHO MORAT DaIOBpeJrT, H3TbHrT HIN pa3pyIITI pIACtMacata.
CMA3BAHE
JaerepHTe Ha npOdyKTa ca cMa3aHn C n3BecTHo KOJIHyEcTBO BHCOKOKaKcTeCBHeBA cMa3Ka, NOCTaTByHO 3a CEJIHa JXBNOT Ha MaIIHHaTATA INH HOPMaJIHN yCIOBHa N eKCIIOaTaIIN. 3aTOBaMAIHHaTARMA HYJxA TO JOITLHInTe IHO cMa3BaHe.
IIOMHA HA IIIHHATA H HA BEPHATA (ΦHr. 34-43)

ONACHOCT
HnKora He NyskaJIte IbHrataJIy, IpEINa Jc tne HnHCTaIlnpaII INHHaTAt, BepHraTata, KapTePa Ha IbHrataJIy INCKOPoCTHaTATA KUYTHA. AKO eJNa OT Te3N YAcTHe He Ie NOCTaBeHa, 3b6HnHT MExaHN3bM MoKeJa 6bJe 13XbBpIEH INII Na ce OTKbCHe, KOeTO Ja IOBedeJo TEKKN TeJIeChN IOBpeIN.

IPEyIPEKJENHE
3aJaH36erHeTe OAnchocCTTa OT TeKKn TeIeChn NOBpeDIn, IpOcTeTete BHNMaTeJIHO INoBe pa3yUe TBCYNK IpaBILA 3a 6e3OnaHcOCT, ONHCaN H To3N pa3dJI.
IpeHJa IIpaBHTe KaKBOTo H Ja 6HIO C TPhOHa, BHNaHINocTaeHte IpeKbcBaA B INIOJIOKeHHe CTONI
YBepeTe ce, Ye BePnIraTa Ha cIIHpauKaTa He e BKJIouHeHa, KaTO npbIHeTe IpeJna3HTeJa/cIIHpauKaTa Ha3aJ.
BeJexka:KoratoIOIeHHeTe HnHaTa H BepHra,BnHaHn H3IOJI3BaIte IpeOpBuaHHOITPOHN3BOJHTeJIa HnHa H BepHra.
Korato 6opabnre C bepnata H c mHaata, hocete pbkAHH. Te3n qactn ca pexeiH MoKe Ia HMaT pexeiIpb6eta.
CbaIeTe MOHTaXHHTe BHHTOBe Ha IHHaTa C IOMOITa Ha IIpeIOCTaBEHHKOM6HHHpA KJIHOJ.
CbaJeTe cKOpocThaTa KyTHA.
CbaJIeTe IHHaTa H BepHraTa.
MaxheTe cTapaTa Bepnra ot IHHaTa.
CbHnTe HObata BePra Ha II pHMKa H nIipabete BCnuKHa 3aJIeTHeN eMeHTn. 3b6Ite (A) Tp8Ba Jca o6bPhaTH B Nocoka Ta Ha bPteHe Ha BePraTa (B). Ako ca 06bPhaTH B o6paTH Na OPOKA, 3aBbPteTe HapPaBeHATAOT BAC pHMKa.
IocTabete 3aBnBkBaIIHTe 3BeHa (C) B KaHaJIHTe Ha IIHHaTa (D),KaKTo e Ioka3aHO HaΦHr.38.
BepnraTata Tp86ba Ia 06pa3yBa yxo B 3aHaTa YacT Ha IIHHATA.
Блгарский
IIOJIPbJxKA
3aIpbjXTe BepHrata BbPxy IHHnHaTn H IpeKapaiTe IIpHMkata OKoJIO 3aBHNKBaIIOTO 3b6HO KoJIeIo (E).
HarlaCeTe IHHaTa TaKa, Ye IINΦTOBete Ja BJIa3aT B JbJIInr OTBOp OTbO pT3aJ.
BeJekka: Kofato nocTABTe IHHATA Bbpyx IHHPTOBete (F), yBepetce, eIypeYIHPaIIHITnIaIIe (G) ce HmHaPBA TOBpbaI HA CTBaIIaIIIN GoIT (H) Ha BEprirata.
IocTaBete o6paTHo KapTepa Ha cbeHHHTeJIa (I) H MOHTaXHHTe BHHTOBe (J) Ha IHHATA.
3aterHETe c pIbKa MOHTaXHnTe BHHOTe. IIHHATA Tp86BaJa MoKe Ja ce IbHNJ, 3a Ja ce peYIHpA oBtIaHeTo HaBepHrata.
OttbHete BepHrata, Kato 3abbpTHe BnHTa 3a 3aTgAHe Ha BepHrata (K) no cacOBHHKObATA cTpeJka, JOKATO BepHrata JIeR HeJeaiHO B IIHHATA, a 3BeHata Ha BepHrata BJIe3Hat npAbHIOB KAHaJa HA IIHHATA.
Повдгн electe npdнн Край Ha IIHHata, 3a Ja ce ybeprte, Ye BeHrata He ce BaII.
Ako MeJy BepHrata H IIHHATA HMA Xla6bHa,OTHyCHeTe Kpa Ha IIHHATA N 3aBnHTe TBeHTRA 3a peryIipane Ha 06TgAHeTo HA BepHrata CIOIOBHN O6OpOT No vacOBHKnOBaTcPteJa. IIOBTope Ta3N IpOeDypa, JOKATO OTcTaHHTe Xla6bHrata.
XbaHete KpaHa HINHaTa H 3paBO 3aTeHHeTe MOHTaKHHBnHT Ha HnHaTa.
BepHrata e npabHlHO 6oTeHata, KORATO HMA xla6HHa pInp OJIHHa p6b Ha IIHHata i KORATO e peryIHPaHa, HO MoKe Ja ce 3aBbPtC pKba, 6e3 Ja 3aIIbBa. YBepeCe, Ye cHnPaYkata Ha BepHrata HE bE KJIIOHeHa.
BeJekka:AkoBepHrataeIpeKaJIeHO3aTeHrHaT,HMaMa da ce BbptN.JEko pa3xJa6ete BnHTobete Ha ⅢHnHaTa H3aBbptTe BnHTa 3apeYIIpaHa OoTgAHeToC TeBbptO6obot obaTHo HAocOBHNKOBaTa CtePjka.XBaHeTe KpaHa IIHHATA H3pabo3AaTEHete MOtAKeHHa BnHT Ha IHHaTa. YBepeTe ce,Ye BepHratae Ce BbptN,6e3Ja 3aTbBA.
PERJAX HA OBTRAHAETO HA BEPHATA (HnR. 44-46)

IPIEUYIPEXJEHNE
HnKora He JOKocBaHTe H He peryIInpaTte BepHrata npH pa6otei DbHrataJI. BepHrata e MHOro octpa.
Korato H3bPbBaTe IIOIpykKa IO TPhOHa, BnHaHn HocTe IpeIIa3HN PbKaBUni.
CnpTe IINrAteJIa,IIpeIa Ia IIpHcTBIIHTe KbM perJax Ha 06TgAHeTo HA BepHrata.
YBepTeCe, Ye MoKeTe Ja pa3BHeTe MOHTaXHHTe BHTOBe Ha BePHrata CpbKa.
3aBbptTe BnHTa 3a peryJlnpaHe Ha onBbaHETo H a bepHrata IIO yacOBHHKOBaTa cTpeJIka, 3a Ja 3aTeHrHeTe bepHrata.
BeJexKa: B cTyJeHO cbCToHHe, BepHrata e npabHIO
obTeHATA, KORATO Hma Xla6HaPiN IOJIHHa Pb6 Ha
IIHHATA H KORATO e peryJIHpHa, HO MOKeJa ca ce 3aBbPTn C
pbKa, 63 Ja 3aJIbBa.
CTraIeBepHrata BceKINbT, KOraTO 3aIBHXBaIHTe 3BeHa(A)PiHaTPOJIOJIHHKaHaJI HaIIHHaTa.
BeJIeJka: TeMIIepaTpata Na BepHrata ce NOBHIIaBAIO BpeMe HA pa6Ota. 3aBnKbAIIIte 3BaHa pRi TOnIJaBepHra, KOtTo e IpaBJIHO o6TeHATA, iAnat c OKoIIO 1,25 MM IOJ KAnAHa HA IIHHATA. 3a Da OnPeJeJIHTe PpaBJIHHIO OITbH pRi TOnIJa BepHra, MOKeTe Ja H3IOJI3BaTE KpRa HA KOM6HINHPKlOu.
BeJekKa:HOBJNTeBepHnMORATdacepa3IyChat. IpoBepaBaItepeoBHO6O3raHetoHaBepHrTaH 3aTaeIaTe,KOATOe Heo6xOJIMO.

BHIMAHHE
Korato 3aTaraTe tonla BepHra, KoraTo ce oxlaJH, MoKeJa ce okaKe IpeKaJIeHo OoTeHata. IIPOBepete "OoTbRaHeTo Ha CTyJeHO" Ppei CJIeIbAaTaY yOnrpe6a.
IIOJPPbKKA HABEPHΓATA (Φn.r.47-48)

BHIMAHHE
IpeHnI npaBHTe KaKBOTOn I da6NIO c TPhOHa, npOBepere DaHH npeKbCBAuT e B IOJIOKeHHe "CTOII"
H3IOI3BAIte TPOHO CAMO C BEPHRA C HNCKA CKJIOHOCT KbM OTKAT. IINIpaBnIHa IOIIpBkKa ce OparAHuBa PCHKTOT OT OKTAt HA t3aH bP3006oOpHTa peKeJIHa BEPHRA.
Ochrgpe TeIobpa IIOIpbkka Ha BepHrata, 3a Ja MoKe Ja peke YHcTo H6bP30.
Bephrata Tp86ba da ce 3aOtH, KOrato cTbproTHHnTe ca mAJIKI npAoxoo6pa3HH, Ako Tp86ba da pRJIOxHte HATNCK pRJp3aHe nIh aKO peXe camo Ha eJHa cTpaHa. PnH nopIqDbbKka ha Bephrata o6bPheTe BHIMAHNE ha CneIHOTO:
IIpn JIOIbIbJIHa 3aTOUbaHe Ha cTpaHHHnpeB6ce IIOBHnabaOnaCHOCTTaOTOKaT.
Xla6HHaTa Ha orpaHHHTeJIHTe Ha JbJI6oHHaTa (A):
KojIKOIO TOI-IOJIma E xIA6HnHaTAt O HaPIAHHTe.IHTe, TOIJKOba NIOBEe Ce IOBIIHbA ONAHOCTTA O TOTKAT.
HObpaTHO, aK0 3aIaTe HeIOCTaTbYHa IbIbOuHHa, cHaMaJIbBa KaYeCTBOTO Ha p3aHeTO.
Ako 3b6uHTe BIA3AT B KOHTaKT C TBbPINI PpeIMTeN KATO IIHPOHN HINKAMbHN Hn CE N3HOcT OT KaITa H INcBka NO IbPBOTO, 3aTOyBaHeTo Ha BEpHrata TpRbOa Da ce H3BbPInB O oTOpINiHaN cepBn3.
BeIeKka: Korato OTHOBO NOCTaBte BepHrata, IPOBepTe NaJI 3aBNKBAUOTo 3bHO KOJIeIO (B) He e H3HOceHO INI NOBpeJeHO. Ako HMa IIpH3HaUN Ha H3HOcBe HINI HEn3IIpaBHOCT, Tp6Ba Jc Ce IOJMeHN BOTOpH3Panh CepBn3.
Блтарский
IIOJIPbJxKA
BeIeKka: Ako He cTe pa36paJIHn HAIJIHO ropeONHcAHATA IIpoJIeNHa 3a 3aTOUbaHe, BEpHTa HA TpHOHa TpObHa Ja 6bIe 3aTOUHeHa B OTOPIHpaCepBn3 HINIOIMeHeHa C BePHTa C HNKCA KJIOHNCTKbM OTkAT.
3ATOUBAHE HA 3'b6HTE (Fig.49-52)
OncaHHe na pexeunna 3b6:
(A) Pejkei p6
(B) CtrpaHnHa qact
(C)OrpaHnHTeJI HaIbJI6OuHHaTa
(D)Ппедна час
(E) MekJy3b6ne
(F) Πeτa
(G) HU
(H)TopHa cTpaHa
YBepete Ce, Ye BCHNU 3b6n ca 3aTOeH NIO eJHAKbB bTbJI Hdo eJHakBa BHCOuHNA, 3aIOTo cAmO IIpH paBH N 3b6n ce NoJIyaba 6b3PnHa na p3aHe.

IPEyIPEXJEHNE
Beprratae mHOrO octra. Pnir n3bIpIbAhe naIIOJIpbJka BnHarH nocTe pa6oTHn pbkABnIH. Taka Iue N36EHTeOnaHcO7Ta OT HApAHBaHHa.
- O6TeHHe BepHrata IIpeN 3aToUBaHe. 3aIOBue HeHΦopMaIIHbKe Ta3eJI "PerJaK Ha o6TgAHaTe Ho BaepHrata".
I H3noJI3BaJIte KpBJIa IIIIa c 4 MM B INHAmetbI p IINIOJbPjAteJI (npOJaBa ce OTJeJIHO). 3aTOUBAJIte 3b6Ite NOcpedata Na IIHHATA.
IIOJIpaBHeTe IINJaTaC rOpHn p6b Ha peKeiHaT a Yact. He octabYTe IINJaTa Ja ce HAKJOHN HJIN BByTH.
CJeK,HOIOCTOReHHaTHCKH3IIHeTeBIOcOKaHa IIpeDHHbIJIHa3b6a.
Повдгайтейнлaitа на Врьшaine.
H3HHJTe BCEKHNHKOJIKO CHINHINBHXEHHI. HIIHeTe BCHUKN 3b6nOTJBAO (A) B eHa NOCOKA.CJeT TOBa MHHete OTdpyrata CtpaHa H3HHJTe 3b6HTe OTJACHO (B) BOpaHa NOCOKA.
I3yHCTe 3aJIeIIHaJIHTe 3a IIHaTaOCTaTBuH C MeTaJIHa YeTKa.

BHHMAHNE
Пи Тьпа Ипгелд ЗлЕ 3аточена Бергма Рожда Кд се Дуун Ипекално Всока скорост НдИВага.TИР ПЗАн,КOTОД LAdoBЕДО NOIPOBPEKDAHETO MY.

IPEyIPEXJEHNE
JIoIto 3aToUbaHe Ha BepHrata IOBnHaBa OAnachOCTTA OT OKaT.

IPEyIPEXJEHNE
Ako He noJMeHnTe Hn He noPnabHte IOBpeHeta BepHra. n3laIaTe ce Ha pNcK OT TeKKn TeJeCnHIOpeHra.
bIbJI HA 3ATOUBAHE HA TOPHIN PbB (pim.53)
(A) IIPABHJIIEH 30^ - IIIOIbIpxaTeJIHTe HMaT MapKePH 3a IpaBNIHO IOIpaRBHBAHe Na IIaTa, 3aJa MOKteI Ja IIOUYHTe IpaBHIHHa bTbI IO OTHOIIeHHe Ha rOpHHa pb6.
(B) IIO-MAJtBK OT 30^ - 3a napeHn pa3pe3n
(C) IIO-TOJIIMOT 30^ -IpeKaJIeHO TbHKnT p6 6bP30 ce H3TbIIBA.
bIbJI HA CTPAHHATA YACT (ΦmR. 54)
(D) IPNABHJIENH 80^ - BrfI KoiTo ce o6pa3yBa, KOrato IocTaBHTe IIHa c IIpaBHNIIHn IHaMeTbP B IIIOJIOBpKATEJIa.
(E) KYKA - "3aKaaya" ΜbPBOTo H 6bP3O ce H3TbIIBa, ybeJIuHaBa pIcKa oT oTKaT. IIOLyBaCe IpiHIIa c IIpeKaJIeHO MaJIbK IIHaMeTbP HII pa3IOJIoKeHa TBbPJe HINCKO.
(F) IIIINPOK bTbJI - N3HCKBA TBbPde TQIIMa Cnla IIpn IbnKeHHe HAppei, BoDII NO IpeKoMEpHO 3HOCBaHe Ha IIHHata Na HBePrtA. IOpUyaba Ce IIpn IIHa c IpeKaJeHO TIOAM DnAmeTpB pI IN pa3IOJIOKeHa TBbPde BICOKO.
XJIABHHA HA OΓPAHNUHTEJIHTE HA ДьЛБОУHATA (ФИ.55-57)
IIOJIbPjkaIte Xla6HnHaTa Ha orpaHnHTe HnHa ⅡbJIoOuHnHa Ha 0,6 MM (A).Xla6HnHa Ta HOrpaHnCTeJIHe Tp8BaJa ca oepeJIin C bJIoKoMep.
CJIeBcRAKO 3aTOUBAHe Ha BepHrATo IPOBepBaHTe Xla6HHaTa Ha OgrpAHuHTeJIHTe Ha TbJI6OuHHaTa.
I3no3BaHte PIOCKa PIIla (B) (PnOJaBa ce OTJeIHO) H IINΦoBaII Nb16OKoMep (C) (PnOJaBa ce OTJeIHO), 3a Ja H3NIIHTE BCNVKn ORpaHVHTe JEAHbKBO. H3No3BaHTe Ib16OKoMepOT 0,6 MM.CJIe KATO H3NIIHNTe BcNVKn ORpaHVHTeJHa IIb16OuHATA, INpHaJIte N M PbBOHaJAHata FOpmA, KATO rN 3akPbTJHInTe OTnpeJ. BHmAbaiTa JE na IOBpeJITe CbceIHHTe 3aIBBHXBaIIH 3BEHa cPb6a Ha IIHJATA.
Tp6BaJa H3HJIHTe ORpaHHUHTeJIHTe Ha 1bJIbOCHHATAc IIOCKA IIJIa BIOKOCATA,B KJOTo CbcEJHNTe 3bIiCa HA3HIIJIeHNc KpbIgLIATA IIJIa.BHHMaBAITE IILOCKATAIIJIa He bJIe3e KOHTAKC JIINIEBATA cTPhAHa 3bIbHTe,IOKATO6pAbOTBeTAe ORpaHHUHTeJIHTe Ha BHCOUHATA.
IIODIJPbJKA HA IIIHHATA (pHr. 58)

BHIMAHNE
YBepete ce, Ye BepHratae cnpraJa, IIpeiHa JaN3BbPbBaTe KaBbATO H da e NIOIpbTkKa IIO TPhOHa.
CJIeBcKa pa6oTHa ceJIMHa o6bIaIte BePrrata, 3a MoKeJe Ia Ce I3HocBa eJHOBpEmeHo OTo I8BeTe cTpaHn Ia Ce OCHpyrMaKcMcaJHe JHBot. CJIe BcKa yIOTpeBaO NIOCTBaIte IIHHATA H IPOBpeBAIte DaJIH He E I3HOCHe IIN IOBpeJHa.
Блгарский
IIOJPTbXKA
Jepopmaunnte n p6yeta TaBpxy KaahnTaHa HnHnata ca ectctbeneTtATOT H3NocBaHeto. Te3n Jepektn Tprba BejHara JaDbatOTcPnaeh CnIIa.
IIHHaTa Tpr6Ba Da ce IIOMeHb B cJIeHNTe CJIyuaH:
aKOBbTpeIIHaTa NaCT Ha KaHaJIHTe Ce H3HOCn Do TaKaBa CTeINe, Ye BepHrata 3aIOUHe Ja ce O6pbIa HAcTpaHn,
aKOceOrbHe,
aKO KaHaJIHTe Ce HaNYKaT HJIN CUYIIT;
aKO KaHaJIInTe ce pa3JaIeYaT.
CbIIO Taka BcRAKe cEIMHua CMA3BaHTe IHHaTAt, KATO BKapate CMA3Ka B IpeINBHeHNHa 3a HeIITra OTbOp. ObIbPheTe IHHata N ce YBePeTe, Ye OTbOPnTe (A) H KaHaJIbT Ha BePHrata He ca 3aMbpcEHn.
IIOuHCTBAHE HA B'b3dYIIIHHa ΦHJTbP (ΦHr. 59-60)

BHIMAHHE
IpeHn da BbPheTe npyHrte YacTHn, yBepTe ce, ye B3JHyHHrT HJTbp e npaBnHO nOCTaBeH B rHe3dOTO cn. Hnkora He NycKaHTe DBrHrAteJIa 6e3 B3JyWeH HJTbp, TOBA MoKe J IOBpeHn DBrHrAteJIa.
PETJIAK HA KAPBYPATOPA (phr. 61-63)
IpeHn da npHcTBnHTe KbM perJiaK ha Kap6ypaTopa:
IIOHcTeTe BEHTHlaaHOnHHte OTBOPHa KaKapTepa Ha cTApTepa C YeTKa HJH CbC CbTeH Bb3dYX.
IIOHCTeTe Bb3JyHHnA HJTbp(A).BbKTe pa3JeJI “PiOHTBaHe Ha Bb3JyHHnA HJTbp".
IpeHn da npHcTBnHTe KbM peRJaX Ha npa3HnXoJ, octabete DBHrataJia nopaOTo HnKoJIKeCyHJH.

IPEUYIPEJKDEHNE
KImmatuHnHTe yCIOBnHa nHaDMOpckTaTa BHCouHHa MoTat JaNoBJIHTBpXy paOToTaHa KaKapbypaTopa. HeOnyckaTe BbHIINn IInua PnI TPhoHa, KOrato peryIHPate KAp6ypaTopa.
PerlaJxHa npa3HnXoJ
Пин Perлж Н паразних xoД мokerte Д пормение CTeHNTa Na OТВAPЯп He KaJIапа, KOrATo TpHReptс о TnIyche.
Perlaek:
3aBpTeBnHTa 3a IIpa3eH XoJ “T” IO YacOBHNKOBaTa CTpeJIka, 3a Jd yBeJIHyIte cKOpocTta Ha IIpa3eH XoJ.
3aBbptete BnHTa 3a npa3eH xoJ "T" o6patHO ha YacOBHHKOBATA cTeJIka, 3a Ja HamaJIHTe cKOpocTtHa npa3eH xoJ.
I3npo6BaHte KaK peKe, cJIe TOBa peYIHpAte Te JHKJbOpa 3a BcOKa MOHOCHT H, 3a Ja NIOIo6PHTe MOHOCCTT aPi r3aHe (He 3a peYIHpAte Ha MaKCHMaJIHATA CKOpCt). XIKJTbOpBT 3a BcOKa MOHOCCT MoKe Ja ce 3aBbPTa cAmO c HeTBpT o6OpOT.

IPEUYIIPEXJEHNE
BEPNITATA N3OBIHO HE TPRIBBA JDA CE BbPTN IPII PABOTA HA IIPIA3EH XOI. Bepnra, KOrTO ce BbPTN pni ppa3eh xoi, MoKe Ja pnpuHn TeKKn TeJcEsHH NOBpeHn
IIOuHCTBAHE HA CTAPTEPA (fur. 62)
BeTHIIaIIOHHHte OTBOPH (B) Ha KapTepa Ha cTApTepe ce IOUHCTBaT C YETKa HJIH cBc CfBCTeH Bb3JyX.
MEXAHN3bM IIPOTHB 3AMPb3BAHE HA KAPSEYPATOPA (phr.64-65)
BepnKHHT TpOH HMa BeHTHJIaIHOHHO KaJaupe, pa3IOLOKeHo OT IaCHATA CTPaHa HA KAPterpa Ha IIINIIHbPa, IpE3 KOeTO TOIJIHr B3dYx Ce IpxEBpIa OT IBNHATeJIa KbM KAP6bATopA, 3a Da ce H36eHne PNCKbT ot 3AmPb3BaHe npi pa6Ota B CTUDEHN YCIOBHNA. AKO H3IOI3BaTe TpOHa PnI TeMIIePAtPH Mekdy 0^ H 5^ H pNn BHCoka BlaXHocT, CbIeCTByBA pNCKOT 3aJIeDJIbaHe B KAP6pyaTopo. ToBa 6n IO BoIcIa Ha MoIOCHCTTa Ha IIIBHrAteJIa N/IIIN HeH3IIpABHO FyHKIOHHpHa. Korato Tp8BaJa H3IOI3BaTe TpOHa B TakkBa YCIOBHn, H36PeTe peKHMa IpOTNB 3AMpb3BaHe IpJIn 3ANOUBHe Ha pa6Ota.
3aДанз6epeTe peKHMa npoTHB 3ampb3BaHc:
IocTabete IpeKbcbaVa Bbpy CTOnI
1N3BaIeTe KaIaKa Ha KyTHaTa Ha Bb3dYHnHa φHITbP (A).
13BaTeBb3IyHnHnΦHnTbp.
Повингене Дросецна Клana(E),за яя ИЗвinteOT Kaпака на силлньpa(C).
Pa3BnIte IeITe BnHTa, KOHTO IbPkaT IIJIHHIBpa. CbaIe Te KaIIaKaHa IIJIHHIBpa.
Maxhete Kaanayeto (D), pa3noJIOjKeHO OTo IaChata cTpaHa Ha KAPTepa Ha IIINIIbpa, kaTo ro HATNCHeTe.
O6bPheTe ro TaKa, ye OTrope Ja H3JIe3e HaJIINcBT "Snow" (Chr), cJeI KoETo rO BbPheTe Ha MxCTo.
IIOCTABeTe KaIIaKa Ha IIINHbPa H 3aTeHHeTe BHHTOBete, KOHTO ITo IIbPkaT.
IocTabete oobpatHO IpocceHaTa KlaIa, Bb3DyHnHn HJIITbP h KaIaKa Ha Bb3DyHnHn HJIITbp.

IPEDUYIPEXJEHENE
BnHnB PbIaIte KaIaYeTo B HopMaJIHa IOn3HIIa (Sun" - CbIHe), Ako HMA pNCK OT 3aMPT3BaHE. Ako pa6oHTHe c TPhOHa BpeKHM IpOTHB 3aMPT3BaHe npHIO-BHcOKn TEMHepatypH, HMa pNCK DBNrAeJIrT Ja He MoKeJa BbPbN KAKTO Tp86Ba.
Блтарский
IIOJIPbJxKA
IIOUHCTBAHE HA JBHΓATEJI(φπr.66-67)
PénoBHO ONUHCTBaIte OTBOpHTe Ha IINIHbpa (B) H a maxOBnka (A) cBc TcBCTeH Bb3dUx HnI C YeTka. AKO B IINIHbpa HMa 3aMbpCBAHHN, TOBA MOKe Ja pRnHHN OAnCHO NpEPTPBAAH DAIBrATeJIa.

IIPDEUYIPEKXDEHNE
HnKora He nyskaite TpnoHa, ako yactHte He ca npabuHIO NOCTaBEN, OO6EHO KAPertbT Ha DBHrAteI Hn ha CTpepa. Bb3MoxHo e YactHte Na ce CuyyIIN OTXBpBkHT. MaxobIKbT H cbEHHHTeIAT ce pemOHTHpAe EJHHCTBeHO BOTOP3HpaH cepBn3.
BeIeKka: Ako yctaHOBHTe cna B MOUHOCCTTa Ha MaIIHHaTa, Bb3MOKcE noIYCKateJIHaT a Tpb6a HnI IyM03aIyUHHTeJrT Ja ca 3aIyUHeH OH TaTPyAJIH ce cakd. Tp8Ba da NoOHCTHTe Te3N OTJaAHHa, 3a Da MoKe IbIRaTeJrT Ja Bb3BbPHe IIbPBOHaJHaT a Cn MOUHCT.
IIPOBEPKA HA TOPUBHNAIJIITbP (pHr.68)
PEOBHOIOBOPBAHTe roHBnHnΦHITbP (B).IIOMeHeTe rO, aKO e 3aMbpeHn HIN IOBpeJeH.
IIOIMRAHA HA 3AIIAJHATA CBEII (qun.69)
Дигагелг На тазн Машлина paбOTи сьс заллна сБeИChampion RZ7C ИИ NgK CMR7H c pa3ctOнгп MeЖДeJELKTPOdHTe O 0,64 MM.Tp6Ba JЯ пОДмeHTe CbS cBeIIOT cbln Na HcBecK 50 Yac aPobTo HIn NIO-ueCTO,aKOceHaJIara.
Pa3BnIte CBeIHa o6paTHo Ha yacOBHkOBaTa cTpeJIka c IIOMOIHTa HA KJIIOU (A).
H3BaIeTe CBeIITa.
IIOCTABETe HOBATA CBEII B OTVBOPa H BAHTA N I 3aBNIte c pIbKa IIO YACOBHNKOBATA CTpeJIka.-HaKpaI a3TeHHeTe IO6pe c KJIou (B).
BeIeJka: BHHMABaIYe Ja He CbByPKeTe Ha KbCo CTapTePHOTO BbKe: MaIIHHaTa MoKe Ja IIOJIyUH cepHO3Ha IOBeda.
ПОВЕРКА / ПОЧИСТBAHEHA HCKPOFACHTEJHATA PEWETKA H HA3IIVCKATEJHATA TpBbA (qur.70)
H3nyckaTeJIHaTa Tpb6a HMa HckporacHTeJIHa peIeTKa. Ako HckporacHTeJIHaTa peIeTKa e IeIeKTHa, MoKeJa bB3HNKHe OAnCHOCT OT NOKap. PeIeTKaT a MOKe Ja ce 3aNyHH II pRn HopMJIHa YIOnTE6a. Tp6Ba JЯ I npObePBAte BcKa cEdMNHa I Da J IIOHCTBaTe, KORAto E Heo6xOJHMo. IIIyMo3aŋyIHIeTI R HckporacHTeJI Ta BInaHr Tp6Ba Ja ca B JIObO cBcTOAHHe.
YBepete ce, ye cta6nH3npaHHT Bpbx BnHaHn e IpaBnHO MOTHnpaH ha TpHOna.

IPEyIPEXJEHNE
ⅢyMo3aIyIuIHTeIaT ce HaropeIyIbNo BpeMe Ha n cIeP aPoTa C TpHOna. 3a Na ce H36eRHe OAnACHOCTTa OT EKKN HapaHbAHN, He JOKOCBaIte IyMo3aIyIuIHTeJIa
OctaBeTeIyMo3ar.IyIHTeJIa ce OxJaHn.
- Maxhete IIeCToRgPAMHnB HNT (E) H-MHImETPOPTBEIraKN (D), KOHTO IbPkst KaNkA Ha IyMo3arLyIHTeJI; MAXhETe KAnaKa (C) HCKPoracTeIHaTaepeIeTka (A).
Ako hckporaciteJIHaTapeIeTeKa e 3ambpchea, noHCTete c majka metaJIHa teyKa. IIOmeHete hckporacteJIHaTa peIeHTKa, aKO e HanyIcHaJI INI NobpeJedea.
CbaJIeTeIyMo3aIyIITeJIa(B).
IpekapaHTe IIOCKa OTBepTKa IIpe3 BeENTHJIauHOHHTe OTBOPH, 3a Ja IOHCTHTe HATpyNAHTe caKJH.
CbIIO TAKA MAXHETe CaJHITe OT BeHTHaIaIHOHHITE OTBOPH Ha IIyMO3aIyIIHITe I HA NTbIYcKaTeJIHaTATpB6a HaaIIINHtpa.
I OocTabete 6o4pHo IyMo3aIyIHTeI, HckporacnteHnHa peIeTka H KaIauTe Ho IIyMo3aIyIHTeJI.
3aterheTe BnHTOBeTe HraKHTe.
IIPOBEPKA IIOUHCTBAHE HA CINHPAUKATA HA BEPHIATA (ФИг.71-72)
I3BaIeTe KyTHeTa Ha cBeIHINHTe I INOHTe YeactHHe Ha cIIpaKATA Ha BepHATA (A). IIPOBepTe cTeIEHa HA H3HOBCaHE Ha cIIpaVHaTae JIeHTA (C) I NaIOMeHETe, Ako e MHOro H3xa6eHa IIN DeOpMHPaHa. Je6JIHaTata Ha He Tp8bA Ja e H3HOcHa IOBEue OT 50%
CnHpaYHHaT MEXaHN3bM BnHaTg Tp86BaJa e uHCT H JeKo Cm3BaJIte cBeJHHeHHeTo Ha cHpaYKaTa (B).
CneI peMOHT HIN IOHCTBAHe cHcTeMHO IPOBepBaIte yHKIOHNHPaHeTo HA cHpauKata Ha BEpHaTa.3a NObeHe HnΦopMaIIH BxKe pa3Je "Pa60ra CbC cHpauKata Ha BEpHaTa.
ПоверяbaHTe cSTOЯнHeTo Ha orpaHnUHTeJHa BePraTa (D) H ro IOdmeHete, aKo e Hen3IpaBeH.

IPEDUYIPEJKDEHNE
IopH I npH exeJHeBHO NOHCTBaHE Ha mExaHn3Ma Heb3MOxKHe Oa Ce rapaHTnpa HajeJXHOCCTTa Ha cPiHpKaHa Baeprata B yCIOBnHa paObaTc Cna3BaHte yka3aHnTa 3pa3He.
CbXPAHEHNE HA TPHOHA (3A IIOBEYE OT 1 MECEII)
I3cnHeteOctaHANOBTpe3epBOaporaTropHOBCbI,0o6pHe3aCbxpaHEHHa6EH3HN.
I Nychehet IBHrataJIa pa60TH,IOkATO cnpe. Taka Iue H3rOPG BCHUKOTo rOpHBO, KOeTO HNAe 6bMnOJa 3aCbXHE N da octABN CMoJIHCTaYtaJIa BtB BepHrtA.
Блгарский
IIOJIPbJxKA
3aJIECTBAITE HNKOLIObTbTN YCKOBINb 8aJOH,3aJa npOCHNTcEOTAHAOIbTOB KAP6ypatotaRopHO.
13CnHne octaHaIOTo MACIO 3a IIIHATA H BepHrata B CbI, OIO6peB 3a CxpaHHeH He MACIO.
IIOHCTeOCHOBHO TpHOHa.
Ipn6epete rHa npobetpno HneIOCTbHIO 3a JeHa MCTO.
BeJekKa:He octabTne TpHOHa B 6H3OcT Jo KOp03HN MaTePhaJIH Kato TpAHHCKH XHMHKaJIH HJIH COJIH 3a pa3mpaBaHe.
BnKte KaKBn Ca H3NcKbAHnTa Ha ISO N MeCTHHe paaHOpE16h, CbP3aHH cBc bXpaHEHeH To TpeTpaHETo HA rOpBHNBEIeCTBa. MoKeTe h3Nol3BaTe octHaIoto rOpHb 3a JpyTa MaIIHnA c DByrAKTO BnHraTeJ.
Блгарский
PA3PEIIABAHE HA IIPOBJEMH
GARANTIE - CONDITIONS
All Ryobi products are guaranteed against manufacturing defects and defective parts for a period of twenty four (24) months from the date stated on the original invoice drawn up by the retailer and given to the end user.
Deterioration caused by normal wear and tear, unauthorised or improper use or maintenance, or overload are excluded from this guarantee as are accessories such as battery packs, light bulbs, blades, fittings, bags, etc. In the event of malfunction during the warranty period, please take the NON-DISMANTLED product, along with the proof of purchase, to your retailer or nearest Authorised Ryobi Service Centre.
This warranty in no way affects your legal rights concerning defective products.
The above warranty is valid in the UK, the European Union, and Australia only. Outside these regions, a different warranty may apply. Please see your local dealer for warranty details.

GARANTIE - CONDITION
CE DECLARATION OF CONFORMITY
We declare in sole responsibility that the product: - to which this certificate applies, conforms to the basic health and safety requirements of the Machinery Directive 98/37/EC and other relevant directives, like EMC Directive 89/336/EEC and Outdoor Directive 2000/14/EC and Gas Emission Directive 97/68/EC, 2002/88/EC and 2004/26/EC.
To effect correct application of the health and safety requirements stated in the EEC directives, the following European and/or national standards and/or technical specifications were consulted: DIN EN ISO 11681-1:2004 / ISO 22868:2005 / ISO 22867:2004 / EN 55012 : 2002
We declare this product complies to the requirements of the Out Door Directive. 2000/14/EC.
| Measured Sound Power Level | 35 cc | 40 cc | 44 cc |
| 112 dB (A) | 112 dB (A) | 112 dB (A) | |
| Guaranteed Sound Power Level | 113 dB (A) | 113 dB (A) | 113 dB (A) |
| Date of issuance | 1 / 2007 |
This product has been assessed to conform to the Outdoor Directive 2000/14/EC by means of unit verification by SLG PRUEF-UND ZERTIFIZIERUNGS GMBH. BURGSTAEDTER STRASSE 20, D-09232, HARTMANNSDORF, GERMANY.
| Type | Engineering type licence No. (Issued by Intertek Deutschland GmbH) |
| RCS-3535C2 | 07SHW0980-01 |
| RCS-4040C2 | 07SHW0984-01 |
| RCS-4446C2 | 07SHW1029-01 |
Technical documents are kept by Homelite Far East Co., Ltd. 24/F, 388 Castle Peak Road, Tsuen Wan, N.T., Hong Kong.
Declared in Sep 2006 by Homelite Far East Co., Ltd.

AKCYTHUCECKO MOIHOCTH
$$ 1 1 2 \mathrm {D B} (\mathrm {A}) \quad 1 1 2 \mathrm {D B} (\mathrm {A}) \quad 1 1 2 \mathrm {D B} (\mathrm {A}) $$
TapaHTnpOBaHHbIyOPOBeHb
akCYTNUeCKOIMOIOHOCTN
$$ 1 1 3 \mathrm {D B} (\mathbf {A}) \quad 1 1 3 \mathrm {D B} (\mathbf {A}) \quad 1 1 3 \mathrm {D B} (\mathbf {A}) $$
Дага 1/2007
COOTHECTBNE Tpe6OBAHnHM IInpeKTHbMb 2000/14/EC 6bJIO pIPOBEH0 6oPo SLG PRUEF-UND ZERTFIZIERUNGS GMBH. BURGSTAEDTER STRASSE 20, D-0932,HARTMANNSDORF,IEPMAHNI.
| Тиц | № с缅дenteльства поверkn Тиц (BulgDanov Intertek Deutschland GmbH) |
| RCS-3535C2 | 07SHW0980-01 |
| RCS-4040C2 | 07SHW0984-01 |
| RCS-4446C2 | 07SHW1029-01 |
TEXINEKCAJ JOKEMTAHUN XAPHRCTB KOMIAMHI Homelite Far East Co., Ltd. 24/F, 388 Castle Peak Road, Tsuen Wan, N.T., TOKHOR.
3aJIbJIHcE COCTaJIbEO B CCHrIbpe 2006 r. KOMaIIHHomelite Far East Co., Ltd.

DECLARATIE DE CONFORMITATE
Declaram op proprie raspundere c acest produs est in conformitate cu ceritente privind sānātatea s i suguranta prevalzute in Direcita Magini 98/37/CE s i in alte Direcita aplicabile cum ar fi Direcitevele CEM 89/336/CEE, 2000/14/CE privind imelsile sonore, Direcita 97/68/CE privind imelsile de gaz, Direcita 2002/88/CE s 2004/26/CE.
Normele europene si/sau nationale si/sau specificatile tehnica urmatoare au fost consultatepentra aplica exigente in materie de sanotate si de siguranto formulate in directivele comunitare: DIN EN ISO 11681-1:2004 / ISO 22868:2005 / ISO 22867:2004 / EN 55012:2002
TerynHexeKATA JOKMENHTAUNI CE HAMPA a Homelite Far East Co., Ltd. 24/F,388 Castle Peak Road, Tsuen Wan, N.T., Hong Kong.
Демарита за с低调е ве утглесницеcenternburg 206r. or Homelite Far East Ltd.,Cord.
Machine: PETROL CHAIN SAW
Name of company: Homelite Far East Co., Ltd.
Address: 24/F, CDW Building,
388 Castle Peak Road,
Tsuen Wan Hong Kong.
Type: RCS-3535C2 / 4040C2 / 4446C2
Name/Title: Andrew Eyre
Vice President, Engineering
Signature: