
NT 30/1 Ap Te M - Vacuum Cleaner Kärcher - Free user manual and instructions
Find the device manual for free NT 30/1 Ap Te M Kärcher in PDF.
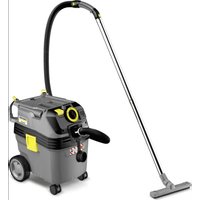


| Product type | Wet and dry vacuum cleaner |
| Brand | Kärcher |
| Model | NT 30/1 Ap Te M |
| Dust class | M (EN 60335-2-69) |
| Tank capacity | 30 L |
| Liquid filling volume | 15 L |
| Nominal power | 1200 W |
| Maximum power | 1380 W |
| Mains voltage | 220-240 V / 50-60 Hz |
| Protection type | IPX4 |
| Max. air flow (with 35 mm hose) | 150 m³/h (42 l/s) |
| Max. vacuum (with 35 mm hose) | 23,0 kPa (230 mbar) |
| Max. air flow (motor) | 266 m³/h (74 l/s) |
| Max. vacuum (motor) | 27,3 kPa (273 mbar) |
| Filtration surface (pleated flat filter) | 0,6 m² |
| Suction hose diameter | 35 mm |
| Suction hose length | 2,5 m |
| Mains cable length | 7,5 m |
| Typical operating weight | 12,8 kg |
| Dimensions (L x W x H) | 525 x 370 x 560 mm |
| Sound pressure level | 70 dB(A) |
| Hand-arm vibrations | <2,5 m/s² |
| Tool power outlet | Yes (25-2200 W EU) |
| Semi-automatic filter cleaning | Yes |
| Antistatic system | Yes |
Frequently Asked Questions - NT 30/1 Ap Te M Kärcher
User questions about NT 30/1 Ap Te M Kärcher
0 question about this device. Answer the ones you know or ask your own.
Ask a new question about this device
Download the instructions for your Vacuum Cleaner in PDF format for free! Find your manual NT 30/1 Ap Te M - Kärcher and take your electronic device back in hand. On this page are published all the documents necessary for the use of your device. NT 30/1 Ap Te M by Kärcher.
USER MANUAL NT 30/1 Ap Te M Kärcher
H. Jenner Chairman of the Board of Management
S. Reiser Director Regulatory Affairs & Certification
71364 Winnenden (Germany)
Tel.: +49 7195 14-0
Fax: +49 7195 14-2212
Winnenden, 2020/10/01
Technical data
Environmental protection 12
Intended use 12
Description of the device. 13
Symbols on the device 13
Safety devices 13
Preparation. 13
Initial startup 13
Operation 14
Transport 15
Storage 15
Care and service 15
Troubleshooting guide 16
Disposal 16
Warranty 16
Accessories and spare parts 16
EU Declaration of Conformity 17
Technical data 17
General notes

Read these original instructions and the enclosed safety notes no. 59562490 before using the device for the first time.
Proceed accordingly.
Keep both books for future reference or for future owners.
- If the operating instructions and safety instructions are not observed, the device can be damaged and dangers could arise for users and other persons.
- Notify the dealer immediately in the case of shipping damage.
- When unpacking, check the package contents for missing accessories or signs of damage.
Environmental protection

The packing materials can be recycled. Please dispose of packaging in accordance with the environmental regulations.

Electrical and electronic devices contain valuable, recyclable materials and often components such as batteries, rechargeable batteries or oil,
which - if handled or disposed of incorrectly - can pose a potential danger to human health and the environment. However, these components are required for the correct operation of the device. Devices marked by this symbol are not allowed to be disposed of together with the household rubbish.
Notes on the content materials (REACH)
Current information on content materials can be found at: www.kaercher.de/REACH
Intended use
- This wet/dry vacuum cleaner is designed to remove dry dirt and liquids.
- This device is suitable for vacuuming dry, non-flammable dusts that are harmful to health from machines and devices; dust class M as per EN 60335-2-69. Restrictions: No carcinogenic substances may be vacuumed.
- This device is suitable for commercial use, e.g. in hotels, schools, hospitals, factories, shops, offices, and rental companies.
Description of the device
Illustration A
1 Electrodes (2) suction hose port ③ suction hose Hose hook ⑤ Crevice nozzle 6 Air exit, working air ⑦ Suction head ⑧ Suction head lock (9) Recessed grip 10 Dirt receptacle 1 Steering roller ⑫ Air inlet, motor cooling air (13) Floor nozzle 14 Plug Suction pipe 18 Tool box end stop 17 Rubber sleeve, screwable 18 Fastening eyelet 19 Filter cover 20 Carrying handle ② Suction control (variable) 22 Tool adapter 23 Filter deducting button 24 Turn switch (25) Socket 26 Angle piece Floor nozzle holder (28) Suction pipe holder 29 Mains cable 30 Holder for angle piece 31 Filter frame 32 Flat fold filter (PES) 33 Filter deducting 34 Type plate
Symbols on the device
Dust class

WARNING: This device contains dusts that are harmful to your health. Emptying and maintenance, including removal of the dust bag, may only be performed by appropriately trained personnel wearing suitable personal protective equipment. Do not switch on until the entire filter system has been installed and the volume flow control functionality has been checked.
Safety devices
Monitoring of the flat fold filter
The device automatically switches off when operated without a flat fold filter.
Preparation
- Unpack the device and install the accessories. Illustration B
Initial startup
The device has 2 operating modes: 1 Industrial vacuum cleaner operation (power socket not used) 2 Dust removal operation (power socket used)
WARNING
Danger from dust that is harmful to your health
Respiratory sicknesses through inhalation of dust. Do not vacuum without correctly installed filter elements, otherwise a danger to health from increased fine dust emission is present.
ATTENTION
Risk of damage to the suction motor.
Never remove the flat fold filter when vacuuming.
- Connect the suction hose and attach a suction nozzle or connect to the dust generating device, depending on the operating mode.
Horn
The horn sounds when the air speed in the suction hose drops below 20m / s
Note
The horn reacts to a vacuum.
- Set the minimum flow rate (suction power) on the suction control of the tool adapter (infinitely adjustable) so that the horn stops.
Anti-static system
Static charges are discharged through the earthed connection nozzles. This prevents sparking and electric shocks with electrically conducting accessories (included in the scope of delivery).
Dry vacuuming
- For particularly dust-free dirt disposal when vacuuming small to medium quantities of fine dust, we recommend using a fleece filter bag with cap, order number 2.889-154.0 (5 pieces). The device is fitted with a fleece filter bag.
- For vacuuming large quantities of fine dust, we recommend using a dust bag with cable tie, order number 2.889-231.0 (10 pieces).
Note
All types of dust up to dust class M can be vacuumed with this device. The use of a dust collection bag (for order no. see filter systems) is required by law.
Note
The device is suitable for industrial extraction and a dust removal device for mobile operation for vacuuming dry, non-inflammable dusts with workplace limit values (AGW) greater than or equal to 0.1mg / m3
Installing the fleece filter bag
- Unlock and remove the suction head.
- Fit the fleece filter bag.
Illustration C
- Fit and lock the suction head.
Installing the dust bag
- Unlock and remove the suction head.
- Insert the dust bag (special accessories). Illustration D
- Pull the dust bag (special accessories) over the container. Ensure that the marking line is within the container and the ventilation hole is positioned on the back wall of the container.
- Fit and lock the suction head.
Wet vacuum cleaning
△DANGER
Danger from dust that is harmful to your health Respiratory sicknesses through inhalation of dust. No dusts harmful to health may be vacuumed when performing wet vacuum cleaning.
Installing the squeegees
- Remove the brush strip. Illustration E
- Install the squeegees.
Note
The structured side of the squeegees must face outwards. Note the different lengths of the squeegees.
Closing the suction connection
- Fit a plug exactly into the suction connection. Illustration F
- Push the plugs in until they engage.
Removing the fleece filter bag
- The fleece filter bag must always be removed when vacuuming wet substances.
- Unlock and remove the suction head.
- Pull the fleece filter bag on the flange up and out. Illustration G
- Seal the fleece filter bag with cap.
- Dispose of the used fleece filter bag in accordance with statutory regulations.
- Fit and lock the suction head.
Removing the dust bag
- The dust bag (special accessory) must always be removed when vacuuming wet substances.
- Unlock and remove the suction head.
- Fold up the dust bag (special accessory). Illustration H
- Take off the protective film and close the ventilation hole with a self-adhesive tab.
- Close the dust bag (special accessory) tightly with a cable tie underneath the opening.
- Take out the dust bag (special accessory).
- Clean the container inside with a moist cloth.
- Dispose of the dust bag (special accessory) in accordance with statutory provisions.
- Fit and lock the suction head.
General
- We recommend not using the "Semi-automatic filter dedusting" function button when vacuuming wet dirt with the crevice nozzle or upholstery nozzle (optional) when sucking mainly water out of a container.
- The device switches off automatically when the maximum fluid level is reached.
- When vacuuming non-conductive liquids (e.g. drill emulsion, oils and grease) the device does not automatically switch off when the container is full. The filling level must be continuously monitored and the container emptied on a timely basis.
- On completion of wet vacuum cleaning: Clean the flat fold filter using the dedusting function and let it dry. Clean the electrodes with a brush. Clean the container with a moist cloth and dry it off.
Clip connection
The suction hose is equipped with a clip system. All accessory parts with a nominal width of 35mm can be connected.
Illustration I
Operation
Switching on the device
- Connect the mains plug.
- Switch on the device at the turn switch.
Working with power tools
DANGER
Danger of electric shock
Risk of injury and damage.
The socket is only intended for direct connection of power tools to the vacuum cleaner. Any other use of the socket is prohibited.
- Plug the mains plug of the power tool into the power socket on the vacuum cleaner. The vacuum cleaner is in Standby mode.
- Switch on the device at the turn switch.
Note
The vacuum cleaner is automatically switched on and off with the power tool.
Note
The vacuum cleaner has a startup delay of up to 0.5 seconds and an after-running time of up to 15 seconds.
Note
See the Technical data for the permissible power rating of the power tool. 3. Remove the angle piece from the suction hose.
Illustration J
- Install the tool adapter on the suction hose.
- Connect the tool adapter to the power tool. Illustration K
- Set the minimum flow rate (suction power) on the suction control of the tool adapter (infinitely adjustable) so that the horn stops.
Note
For operation as a dust removal device for mobile operation (processing machine plugged into the vacuum cleaner) the integrated monitoring system must be adjusted to suit the connected processing machine (dust generator). This means that the user must be warned when the air speed in the suction hose drops below the minimum value of 20 m/s needed for suction.
Semi-automatic filter cleaning
Note
Activating the semi-automatic filter cleaning every 5-10 minutes extends the working time of the flat fold filter.
Note
The semi-automatic filter cleaning can only be switched on when the device is switched on.
- Close off the suction pipe or angle piece with your hand and press the semi-automatic filter cleaning button 5 times with the device switched on. The flat fold filter is then cleaned by a blast of air (pulsing noise). See illustration L.
Switching off the device
- Close off the suction pipe or angle piece with your hand and press the semi-automatic filter cleaning button 5 times.
- Switch off the device at the turn switch.
- Pull out the mains plug.
Each time after use
- Empty the container.
- Vacuum off the inside and outside of the device and clean with a moist cloth.
Storing the device
- Store the suction hose and mains cable as shown in the illustration.
Illustration M
- Store the device in a dry room and secure it against unauthorized use.
Transport
CAUTION
Failure to observe the weight
Risk of injury and damage
Be aware of the weight of the device during transportation.
- Close the suction connection, see wet vacuum cleaning.
- Remove the suction hose with floor nozzle from the support. Carry the device by the carrying handle and suction pipe.
- When transporting the device in vehicles, secure it to prevent it from slipping or overturning in accordance with the respective valid guidelines.
Storage
CAUTION
Failure to observe the weight
Risk of injury and damage
Be aware of the weight of the device during storage.
The device may only be operated indoors.
Care and service
DANGER
Danger of electric shock
Injuries due to touching live parts
Switch off the device.
Remove the mains plug.
Dust extraction machines are safety devices for the prevention or elimination of hazards according to the German DGUV regulation 1 (German accident prevention regulation, principles of prevention).
ATTENTION
Care agents containing silicone
These can attach plastic components.
Do not use care agents containing silicone for cleaning.
- You can perform basic maintenance and care work yourself.
- Clean the surface of the device and the interior of the container regularly with a moist cloth.
Replacing the flat fold filter
- Open the filter cover.
- Remove the filter frame.
Illustration N
- Remove the flat fold filter.
- Dispose of the used flat fold filter in accordance with statutory regulations.
- Remove any dirt deposits from the clean air side.
- Clean the filter frame and the supporting surface of the filter frame with a damp cloth.
- Fit the new flat fold filter. During insertion, ensure that the flat fold filter is flush on all sides.
- Insert the filter frame.
- Close the filter cover until it audibly latches into place.
Changing the fleece filter bag
- Close the suction connection, see wet vacuum cleaning.
Illustration F
- Unlock and remove the suction head.
- Pull the fleece filter bag on the flange up and out. Illustration G
- Seal the fleece filter bag with cap.
- Dispose of the used fleece filter bag in accordance with statutory regulations.
- Fit the new fleece filter bag.
- Fit and lock the suction head.
Changing the dust bag
- Close the suction connection, see wet vacuum cleaning.
Illustration F
- Unlock and remove the suction head.
- Fold up the dust bag (special accessories). Illustration H
- Take off the protective film and close the ventilation hole with a self-adhesive tab.
- Close the dust bag (special accessory) tightly with a cable tie underneath the opening.
- Take out the dust bag (special accessories).
- Clean the container inside with a moist cloth.
- Dispose of the dust bag (special accessory) in accordance with statutory provisions.
- Insert the new dust bag (special accessories). Illustration D
- Pull the dust bag (special accessories) over the container. Ensure that the marking line is within the container and the ventilation hole is positioned on the back wall of the container.
- Fit and lock the suction head.
Cleaning the electrodes
- Unlock and remove the suction head.
- Clean the electrodes with a brush.
- Fit and lock the suction head.
Troubleshooting guide
△DANGER
Danger of electric shock
Injuries due to touching live parts
Switch off the device.
Remove the mains plug.
Note
The device must be switched off immediately if a malfunction occurs (e.g. filter breakage). The malfunction must be eliminated before switching the device on again.
Suction turbine does not start up
- Check the socket and the power supply fuse.
- Check the mains cable, mains plug, electrodes and power socket on the device.
- Switch on the device.
Suction turbine switches off
- Empty the container.
- Fit the new flat fold filter.
- Dry the electrodes and the area around the electrodes.
Suction turbine does not switch on again after emptying the container
- Switch off the device and wait for 10 seconds. Switch the device back on.
- Clean the electrodes with a brush.
- Dry the electrodes and the area around the electrodes.
Suction force decreases
- Remove obstructions from the suction nozzle, suction pipe, suction hose or flat fold filter.
- Change the filled fleece filter bag.
- Change the filled dust bag (special accessories).
- Close off the suction pipe or angle piece with your hand and press the semi-automatic filter deducting button 5x with the device switched on.
- Correctly engage the filter cover.
- Replace the flat fold filter.
Escaping dust when vacuuming
- Check that the flat fold filter is correctly fitted and correct if necessary. Illustration O
- Replace the flat fold filter. The automatic switch-off mechanism (wet vacuum cleaning) does not trigger
- Clean the electrodes with a brush.
- Continuously monitor the filling level when vacuuming non-conductive liquids.
Horn sounds
- Set the minimum flow rate (suction power) on the suction control of the tool adapter (infinitely adjustable) so that the horn stops.
- The fleece filter bag must be replaced when it is full and the air flow drops below the specified minimum flow rate.
- The dust bag (special accessory) must be replaced when it is full and the air flow drops below the specified minimum flow rate.
- Replace the flat fold filter.
Semi-automatic filter cleaning not working
- Suction hose not connected. Semi-automatic filter cleaning does not switch off
- Contact Customer Service. Semi-automatic filter cleaning cannot be switched on
- Contact Customer Service.
Customer Service department
If the malfunction cannot be corrected, the device must be checked by the Customer Service department.
Disposal
At the end of its service life, the device is to be disposed of in accordance with statutory regulations.
Warranty
The warranty conditions issued by our relevant sales company apply in all countries. We shall remedy possible malfunctions on your appliance within the warranty period free of cost, provided that a material or manufacturing flaw is the cause. In a warranty case, please contact your dealer (with the purchase receipt) or the next authorised customer service site.
(See overleaf for the address)
Further warranty information (if available) can be found in the service area of your local Kärcher website under "Downloads".
Accessories and spare parts
Only use original accessories and original spare parts. They ensure that the appliance will run fault-free and safely.
Information on accessories and spare parts can be found at www.kaercher.com.
EU Declaration of Conformity
We hereby declare that the machine described below complies with the relevant basic safety and health requirements in the EU Directives, both in its basic design and construction as well as in the version placed in circulation by us. This declaration is invalidated by any changes made to the machine that are not approved by us.
Product: Wet/dry vacuum cleaner
Type:1.148-xxx
Currently applicable EU Directives
2006/42/EC (+2009/127/EC)
2011/65/EU
2014/30/EU
Harmonised standards used
ENIEC63000:2018
EN 55014-1:2017 + A11:2020
EN 55014-2: 2015
EN 60335-1
EN 60335-2-69
EN 61000-3-2: 2014
EN 61000-3-3: 2013
EN 62233: 2008
National standards used
The undersigned act on behalf and under the power of attorney of the company management.
H.Jenner Chairman of the Board of Management
S. Reiser Director Regulatory Affairs & Certification
Documentation supervisor:
S. Reiser
Alfred Karcher SE & Co. KG
Alfred-Karcher-Str. 28 - 40
71364 Winnenden (Germany)
Ph.: +49 7195 14-0
Fax: +49 7195 14-2212
Winnenden, 2020/10/01
Technical data
NT 30/1
Ap Te M
Electrical connection
Mains voltage V 220-240
Phase ~1
Power frequency Hz 50-60
Degree of protection IPX4
Protection class I
Nominal power W 1200
Maximum power W 1380
Power rating of the device socket W 25-2200 (EU)
Power rating of the device socket W 25-1200 (AU)
Device performance data
Tank content I 30
Fluid filling quantity 115
Air quantity (max.) with suction hose diameter 35 mm and length 2.5 m: 150 m³/h (42 l/s)
Depression (max.) with suction hose diameter 35 mm and length 2.5 m: 23.0 kPa (230 mbar)
Air quantity (max., suction motor): 266 m³/h (74 l/s). Vacuum (max., suction motor): 27.3 kPa (273 mbar)
Dimensions and weights
Typical operating weight: 12.8 kg. Length x width x height: 525 x 370 x 560 mm
Filter area of the flat fold filter: 0.6 m²
Diameter of the suction hose: 35 mm
Length of the suction hose: 2.5 m
Determined values in acc. with EN 60335-2-69
Sound pressure level LpA: 70 dB(A). Uncertainty KpA: 2 dB(A)
Hand-arm vibration value: <2.5 m/s². Uncertainty K: 0.2 m/s²
Mains cable
Power cord type: H07RN-F 3x1.5 mm²
Part number (EU): 6.650-665.0
Part number (AU): 6.650-727.0
Cable length: 7.5 m
Subject to technical modifications.
Contents
General remarks. 18
2006/42/EC (+2009/127/EC)
2011/65/EU
2014/30/EU
H. Jenner Chairman of the Board of Management
S. Reiser Director Regulatory Affairs & Certification
Responsible for documentation:
S. Reiser
Alfred Karcher SE & Co. KG
Alfred-Karcher-Str. 28 - 40
71364 Winnenden (Germany)
Tel.: +49 7195 14-0
Fax: +49 7195 14-2212
Winnenden, 2020/10/01
Technical characteristics
NT 30/1
Ap Te M
Electrical connection
H. Jenner, Chairman of the Board of Management
S. Reiser, Director Regulatory Affairs & Certification
71364 Winnenden (Germany)
Tel.: +49 7195 14-0
Fax: +49 7195 14-2212
Winnenden, 2020/10/01
Technical data
NT 30/1
Ap Te M
2006/42/EC (+2009/127/EC)
2011/65/EU
2014/30/EU
H. Jenner Chairman of the Board of Management
S. Reiser Director Regulatory Affairs & Certification
Documentation responsible:
S. Reiser
Alfred Karcher SE & Co. KG
Alfred-Karcher-Str. 28 - 40
71364 Winnenden (Germany)
Tel.: +49 7195 14-0
Fax: +49 7195 14-2212
Winnenden, 2020/10/01
Technical data
NT 30/1
Electrical connection
2006/42/EC (+2009/127/EC)
2011/65/EU
2014/30/EU
H. Jenner Chairman of the Board of Management
S. Reiser Director Regulatory Affairs & Certification
Winnenden, 2020/10/01
Technical data
NT 30/1
Electrical connection
Vacuum (max.) with suction hose kPa 23.0
with diameter 35 mm and length 2.5 m (mbar) (230)
H. Jenner Chairman of the Board of Management
S. Reiser Director Regulatory Affairs & Certification
71364 Winnenden (Germany)
Tel.: +49 7195 14-0
Fax: +49 7195 14-2212
Winnenden, 2020/10/01
Technical data
NT 30/1
Ap Te M
2006/42/EC (+2009/127/EC)
2011/65/EU
2014/30/EU
Chairman of the Board of Management
S. Reiser
Director Regulatory Affairs & Certification
Winnenden, 2020/10/01
Technical data
NT 30/1
Ap Te M
Electrical connection
Mains voltage V 220-240
Phase ~ 1
Mains frequency Hz 50-60
Protection type IPX4
Protection class
Nominal power W 1200
Maximum power W 1380
H. Jenner Chairman of the Board of Management
S. Reiser Director Regulatory Affairs & Certification
Authorized for documentation:
S. Reiser
Alfred Kärcher SE & Co. KG
Alfred-Karcher-Str. 28-40
D-71364 Winnenden (Germany)
Tel.: +49 7195 14-0
Fax: +49 7195 14-2212
Winnenden, 2020/10/01
Technical data
NT 30/1
Ap Te M
Electrical connection
Mains voltage V 220-240
Phase ~ 1
Frequency Hz 50-60
Protection class IPX4
Protection class I
Power effect W 1200
Maximum effect W 1380
Connected load appliance socket (EU) W 25-2200
Connected load appliance socket (AU) W 25-1200
Machine power data
Container capacity 30
Liquid volume 15
H. Jenner Chairman of the Board of Management
S. Reiser Director Regulatory Affairs & Certification
71364 Winnenden (Germany)
Phone: +49 7195 14-0
Winnenden, 2020/10/01
Technical data
NT 30/1
Ap Te M
Dust bag
Mount the dust bag
- Loosen the suction head and remove it.
- Place the dust bag.
Figure C
Dust emission during suction
2006/42/EC (+2009/127/EC)
2011/65/EU
2014/30/EU
Harmonized standards applied
EN IEC 63000:2018
EN 55014-1:2017 + A11:2020
EN 55014-2:2015
EN 60335-1
EN 60335-2-69
EN 61000-3-2: 2014
EN 61000-3-3: 2013
EN 62233: 2008
H. Jenner Chairman of the Board of Management
S. Reiser Director Regulatory Affairs & Certification
71364 Winnenden (Germany)
Tel.: +49 7195 14-0
Winnenden, 2020/10/01
Technical data
NT 30/1
Ap Te M
Electrical connection
2006/42/EC (+2009/127/EC)
2011/65/EU
2014/30/EU
Applied harmonized standards
EN IEC 63000:2018
EN 55014-1:2017 + A11:2020
EN 55014-2:2015
EN 60335-1
EN 60335-2-69
EN 61000-3-2:2014
EN 61000-3-3:2013
EN 62233:2008
Applied national standards
H. Jenner Chairman of the Board of Management
S. Reiser Director Regulatory Affairs & Certification
71364 Winnenden (Germany)
Tel.: +49 7195 14-0
Fax: +49 7195 14-2212
Winnenden, 2020/10/01
Technical data
NT 30/1
Ap Te M
Electrical connection
Mains voltage V 220-240
Phase ~1
Mains frequency Hz 50-60
- Replace the flat filter.
Chairman of the Board of Management
S. Reiser
Director Regulatory Affairs & Certification
Documentation officer:
S. Reiser
Alfred Karcher SE & Co. KG
Alfred-Karcher-Str. 28-40
71364 Winnenden (Germany)
Tel: +49 7195 14-0
Winnenden, 2020/10/01
Technical data
NT 30/1
Ap Te M
Electrical connection
| Vörgupinge V 220-240 | |
| Faas ~ 1 | |
| Vörgusagedus Hz 50-60 | |
| Kaitseliik IPX4 | |
| Kaitseklass I | |
| Nimivöimsus W 1200 | |
| Maksimaalne vöimsus W 1380 | |
| Seadme pistikupesa vöimsuseuhendusvärtus (EU) | W 25-2200 |
| Seadme pistikupesa vöimsuseuhendusvärtus (AU) | W 25-1200 |
Chairman of the Board of Management
S. Reiser Director Regulatory Affairs & Certification
Prepared by:
S. Reiser
Alfred Kärcher SE & Co. KG
Alfred-Karcher-Str. 28 - 40
71364 Winnenden (Germany)
Tel.: +49 7195 14-0
Fax: +49 7195 14-2212
Winnenden, 2020/10/01
Technical data
NT 30/1
Ap Te M
Power connection
Mains voltage V 220-240
Phase ~1
Mains frequency Hz 50-60
Protection class IPX4
Protection class I
Rated power W 1200
H. Jenner Chairman of the Board of Management
S. Reiser Director Regulatory Affairs & Certification
Winnenden, 2020/10/01
Technical data
NT 30/1
Ap Te M
Electrical connection
Mains voltage V 220-240
Phase ~ 1
Mains frequency Hz 50-60
Fuse type IPX4
Protection class I
Rated power W 1200
2006/42/EC (+2009/127/EC)
2011/65/EU
2014/30/EU
Chairman of the Board of Management
S. Reiser
Director Regulatory Affairs & Certification
Documentation administrator:
S. Reiser
Alfred Kärcher SE & Co. KG
Alfred-Karcher-Str. 28-40
71364 Winnenden (Germany)
Tel.: +49 7195 14-0
Winnenden, 2020/10/01
Technical data
H. Jenner Chairman of the Board of Management
S. Reiser Director Regulatory Affairs & Certification
Winnenden, 2020/10/01
Technical data
NT 30/1
2006/42/ES (+2009/127/ES)
2011/65/EU
2014/30/EU
H. Jenner Chairman of the Board of Management
S. Reiser Director Regulatory Affairs & Certification
Authorized for documentation:
S. Reiser
Alfred Kärcher SE & Co. KG
Alfred-Karcher-Str. 28 - 40
Winnenden, 2020/10/01
Technical data
2006/42/ES (+2009/127/ES)
2011/65/EU
2014/30/EU
Chairman of the Board of Management
S. Reiser
Director Regulatory Affairs & Certification
71364 Winnenden (Germany)
Tel.: +49 7195 14-0
Fax: +49 7195 14-2212
Winnenden, 2020/10/01
Technical data
NT 30/1
Ap Te M
Electrical connection
Mains voltage V 220-240
Phase ~ 1
Mains frequency Hz 50-60
Degree of protection IPX4
Protection class I
Rated power W 1200
Maximum power W 1380
Power connection value of the device (EU) W 25-2200
H.Jenner Chairman of the Board of Management
S. Reiser Director Regulatory Affairs & Certification
Winnenden, 2020/10/01
Technical data
NT 30/1
Ap Te M
Relevant EU Directive
2006/42/EC (+2009/127/EC)
2011/65/EU
2014/30/EU
Harmonized standards applied
EN IEC 63000:2018
EN 55014-1:2017 + A11:2020
EN 55014-2: 2015
EN 60335-1
EN 60335-2-69
EN 61000-3-2: 2014
EN 61000-3-3: 2013
EN 62233: 2008
National standards applied
H. Jenner Chairman of the Board of Management
S. Reiser Director Regulatory Affairs & Certification
Responsible for documentation:
S. Reiser
Alfred Kärcher SE & Co. KG
Alfred-Karcher-Str. 28 - 40
71364 Winnenden (Germany)
Tel.: +49 7195 14-0
Fax: +49 7195 14-2212
Winnenden, 2020/10/01
Technical data
NT 30/1
Ap Te M
Electrical connection
2006/42/EZ (+2009/127/EZ)
2011/65/EU
2014/30/EU
Applied harmonized standards
EN IEC 63000:2018
EN 55014-1:2017 + A11:2020
EN 55014-2: 2015
EN 60335-1
EN 60335-2-69
EN 61000-3-2: 2014
EN 61000-3-3: 2013
EN 62233: 2008
Applied national standards
H. Jenner Chairman of the Board of Management
S. Reiser Director Regulatory Affairs & Certification
Winnenden, 2020/10/01
Technical data
NT 30/1
Ap Te M
2006/42/EZ (+2009/127/EZ)
2011/65/EU
2014/30/EU
Applied harmonized standards
EN IEC 63000:2018
EN 55014-1:2017 + A11:2020
EN 55014-2: 2015
EN 60335-1
EN 60335-2-69
EN 61000-3-2: 2014
EN 61000-3-3: 2013
EN 62233: 2008
Applied national standards
The signatories are acting on behalf of and with the authorization of the management.
H. Jenner Chairman of the Board of Management
S. Reiser Director Regulatory Affairs & Certification
Person authorized for documentation:
S. Reiser
Alfred Kärcher SE & Co. KG
Alfred-Karcher-Str. 28-40
71364 Winnenden (Germany)
Tel.: +49 7195 14-0
Winnenden, 2020/10/01
Technical data
NT 30/1
Ap Te M
Chairman of the Board of Management
S. Reiser
Director Regulatory Affairs & Certification
71364 Winnenden (Germany)
Tel.: +49 7195 14-0
Fax: +49 7195 14-2212
Winnenden, 2020/10/01
Texvika oToixsia
NT 30/1
Ap Te M
HalekpiKn ouvdeon
| Táaŋ δiktúou V 220-240 | |
| Φáaŋ ~ 1 | |
| Σuxvótnτa δiktúou Hz 50-60 | |
| TÜnç προσταίας IPX4 | |
| Katzyopía προσταίας I | |
| Ovojaotíkni icos W 1200 | |
| Méviatn ioxúc | W 1380 |
| Tiún ioxúoç σύνδεοης πρiçac συοκειων (EU) | W 25-2200 |
| Tiún ioxúoç σύνδεοης πρiçac συοκειων (AU) | W 25-1200 |
Teioxieia 1oxuocoukeunc
Bknouehne yctpoicTba
- Bctabntb wTeNceIbHyIO BNJKy Bpo3eTKy.
- BkIIOHTb ycTPOHCTBO C NOMOUsbIO NOBOPOTHO nepeKlIOuHaTeJIa.
Pa6ota c 3JekTpnuecknMn nHcTpymeHTamN
ONACHOCTb
Onachocmb nopaxeHua 3neKmpuyeckum mOKOM
Onachocmbmpaemupoabaunu noepexdehu.
Po3emka npedha3hauhe ha monbko dna npraMo2o nOdoKIOHueHRA 3neKmpuueckux UHCmpyMeHMOe K nbinecocy. IIO6oe uHOe npumeHeue wmeNceBHOU po3emku HeonynCyMuMo.
- Bctabntb WTeNCEJbHyIO BNJKy 3NeKtpnueckoro HhCTpyMeHTa B Nblncoc. Nblncoc HaxoDNTcB peXmme OxndaHna.
- BkHouHt b yCTpoHcTBO c NOMOuBIO NOBOPoTHoro nepeKluOaTeIa.
Note
The device can be used with electric and pneumatic power tools.
Note
The start-up delay of the dust extractor is 0.5 seconds, and the run-on time is up to 15 seconds.
Note
The value of the connected load of the power tools is specified in the “Technical Data” section.
- Switch on the suction hose. Figure 1
- Insert the adapter for tools into the suction hose. 5. Connect the adapter to the power tool. Figure 2
- Set the minimum volume flow (for suction) on the suction regulator of the tool adapter so that the acoustic signal switches off.
Note
For work with a dust extractor in changing working conditions (the device being serviced is connected to the dust extractor), the built-in control system must be set to the connected device being serviced (manufacturer's specification). This means that when the minimum air speed required for extraction drops below 20 m/s in the suction hose, the user must be warned about this.
Semi-automatic filter cleaning
Note
Switching on filter cleaning every 5-10 minutes increases the service life of the flat pleated filter.
Note
The vacuum cleaner can only be used with the device switched on.
- Close the suction tube or hose with your hand, press the filter cleaning button 5 times for semi-automatic filter cleaning with the device switched on.
Filter cleaning occurs through pneumatic impact (pulsating sound).
Figure L
Switching off the device
- Close the suction tube or hose with your hand, press the filter cleaning button 5 times for semi-automatic filter cleaning.
- Switch off the device using the rotary switch.
- Pull the mains plug out of the socket.
The suction hose does not work
- Check the socket and the fuses of the electrical system.
- Check the power cord, mains plug, electrodes and the socket of the device. 3. Switch on the device.
The suction turbine switches off
- Empty the dust container.
- Install the folded filter.
- Moisten the electrodes and the area around the electrodes.
Do not start the suction hose.
- Turn off the device, wait 5 seconds, then turn it on again.
- Clean the electrodes with a brush.
- Sprinkle the electrodes and the area around them.
Suction power is weakening.
- Remove debris from the nozzle, suction hose, suction opening, and flat folded filter.
- Replace the filled filter bag made of non-woven material.
- Replace the full dirt bag (special accessories).
- Close the suction hose or elbow with your hand 5 times and press the filter cleaning button with the device turned on.
- Close the filter cover correctly so that it locks.
- Replace the flat folded filter.
Dust escapes from the device during cleaning.
- Check/correct the correct installation of the flat folded filter. Figure O
- Replace the flat folded filter.
Automatic shut-off (wet cleaning) does not work.
- Connect the electrical wires using the terminal block.
- When working with conductive liquid, constantly monitor the fill level.
The audible alarm sounds.
- Set (smoothly) the minimum volume flow rate (suction) on the suction power regulator of the instrument so that the audible signal turns off.
- If the filter bag made of non-woven material is full, as well as when the minimum air flow rate falls below the set level, the filter bag must be replaced.
- If the dust bag is full (special accessory), as well as when the minimum volume flow rate falls below the set level, the dust bag must be replaced.
- Replace the flat pleated filter.
Semi-automatic filter cleaning is not performed.
- The suction hose is not connected.
Semi-automatic filter cleaning does not stop.
- Contact a known service department.
Semi-automatic filter cleaning does not start.
- Contact a known service department.
Customer service
If the fault cannot be eliminated, the device must be sent to a service center for inspection.
Disposal
At the end of its service life, the device must be disposed of in accordance with legal requirements.
Warranty
In each country, the warranty conditions set by our sales companies apply. We will rectify possible faults of the device free of charge within the warranty period, provided that the fault is due to material or manufacturing defects.
In the event of a complaint during the warranty period, please contact the retailer from whom you purchased the device, or the nearest authorized customer service center.
(Address indicated on the reverse)
Additional information on the warranty (conditions) can be found in the service area on the local Karcher website under "Downloads".
The date of manufacture is shown on the type plate in the format MM/YYYY, where MM is the month of manufacture and YYYY is the year of manufacture, or in encoded form.
The encoded numbers have the following meaning:
Example: 30290
3 year of manufacture 0 century of manufacture 2 decade of manufacture 9 second digit of month of manufacture 0 first digit of month of manufacture
Thus, in this example, the code 30290 means the date of manufacture 09/(2)023.
H. Jenner Chairman of the Board of Management
S. Reiser Director Regulatory Affairs & Certification
Person responsible for document control:
S. Reiser
Alfred Kärcher SE & Co. KG
Alfred-Karcher-Str. 28-40
71364 Winnenden (Germany)
Tel.: +49 7195 14-0
Fax: +49 7195 14-2212
Winnenden, 2020/10/01
Technical specifications
NT 30/1
Item no.
Electrical connection
Environmental protection 142
Intended use 142
Onnc npncptpo 143
CnmboHa npicTrooi 143
3axnchi npictpoi 143
Плг罗вka 143
BbeDHH B eKcnnyatauio 143
KepyBaHHa 145
TpaHcnpotyBaHHra 145
36epiraHHa 145
Dorna Ta texHnHe 0cbnyroByBaHHa 145
DionomoraBpa3i HecnpaBHOcteI 146
Ytunisaia 147
TapaHTia 147
PpnilaT Ta 3anachi detani 147
Deklapaia npo BiinobiHicb cTahapam EC. 147
TexhihixapaKTepcntkN 148
Warranty terms

Before first use, familiarize yourself with the operating instructions and safety instructions No. 59562490, which are included. Follow them.
Keep the original packaging for future use or for the next owner.
Failure to follow the operating and safety instructions may lead to damage to the device and unsafe injury to the operator and other persons.
In case of transport damage, immediately inform the dealer.
- When unpacking the device, check its completeness and integrity.
Environmental protection
Packaging materials are suitable for recycling. Dispose of packaging in an environmentally friendly manner.

Electrical and electronic devices contain materials that are suitable for recycling and often components such as batteries, accumulators, or oil, which in case of

improper handling or improper disposal can pose a potential hazard to health and the environment. However, these components are necessary for reliable operation of the device. Devices marked with this symbol must not be disposed of with household waste.
Information on components (REACH)
Current information on components is available at: www.kaercher.de/REACH
Intended use
This appliance for wet/dry vacuuming is intended for vacuuming dry dirt and liquids.
- This device is intended for dry feed.
The device is intended for dry, non-flammable, non-toxic dust collection from machines and equipment; dust class M according to EN 60335-2-69. Restrictions: It is forbidden to use the device for collecting hot dust. The device is intended for commercial use, for example in hotels, schools, factories, shops, offices, and businesses.
Device description
Figure A
1 Electric motor 2 Suction hose 3 Suction pipe 4 Telescopic tube 5 Floor nozzle 6 Air outlet filter 7 Vacuum head 8 Head lock 9 Handle 10 Container for dirt 11 Guide 12 Filter for dry and wet vacuuming 13 Nozzle for crevices 14 Plug 15 Suction hose 16 Tool holder 17 Rubber coupling 18 Bracket 19 Filter cover 20 Carrying handle 21 Suction power regulator (without step) 22 Tool adapter 23 Filter cleaning button 24 Swivel castor 25 Socket 26 Cord 27 Hose holder 28 Suction hose holder 29 Mains cable 30 Cord holder 31 Filter frame 32 Flat pleated filter (PES) 33 Filter cleaning 34 Rating plate
Device symbols
Protection class

WARNING: The device may contain hazardous dust. Maintenance, including filter disposal, must be carried out only by qualified personnel in appropriate protective clothing. Do not operate the device without the filter system and without checking the function of the volume flow control.
Device protection
Checking the flat pleated filter
If the device is operated without the flat pleated filter, the device switches off automatically.
Preparation
- Unpack the device and install the accessories. Figure B
Commissioning
The device can operate in two modes:
1 Industrial dust vacuuming (without connecting to a socket); 2 Floor cleaning mode (using the socket).
Danger through electric shock for health or life
Contamination of harmful substances, caused by electric shock.
Do not operate the device without a filter element, because in this case there is a danger to health through the release of harmful fibers.
ATTENTION
Danger through electric shock
Danger of damage to the electrical cable. Do not pull the cable to move the device.
1. Connect the power cord to the mains socket, then turn on the device.
Sound signal
When the air flow in the operating mode is less than 20 m/s, a sound signal sounds.
Indicator
Signal of preliminary lowering of the risk.
- Set (smoothly) the minimum air flow level (for operation) on the air flow regulator of the instrument panel so that the sound signal is triggered.
Antistatic system
Static charges are discharged through the grounding of the exhaust pipe. Thus, sparking is prevented and protection against electric shock is ensured (included in the delivery set).
Cyxe np6npaHH
For collecting a large amount of dry debris, it is recommended to use a filter bag made of non-woven material with a cover, part number 2.889-154.0 (5 pcs). For cleaning with a filter bag made of non-woven material. For collecting a large amount of dry debris, it is recommended to use a container for cleaning with a cable tie, part number 2.889-231.0 (10 pcs).
Insert
These devices can be used for collecting all types of debris up to class M. The use of a container for debris (part number for ordering, see the filter system) is prohibited by law.
Insert
For vacuuming dry, non-flammable dust with exposure limit values (TLV) at the workplace not less than 0.1 mg/m³.
Installing the filter bag made of non-woven material
- Disassemble and remove the vacuum head.
- Place the filter bag made of non-woven material. Handle C
- Install and secure the vacuum head.
Inserting the container for debris
- Disassemble and remove the vacuum head.
- Insert the container for collecting debris (special accessory). Handle D
- HaniMiokIg 360py BiXoIB Ha pe3epByap (OdaTkoe oIaHaHHn). Notpi6Ho cniKyBatu, 56 MapkyBaJIbHi IiHII 3HaxoJInncB BCEpHi 6aka,a BeHTnlauiHn OTBip 6yB po3TaWoBaHn Ha 3aHni CTinCi 6aka.
- Install the locking bracket of the pliosos.
Water supply connection
DANGER
Danger due to sharp edges or respiratory diseases caused by dust.
During water supply connection, protect yourself with protective equipment for health.
Installation of main sponges
- Remove the protective caps.
Figure E
- Install the main sponges.
Instruction
The structured side of the sponges must be facing down. Pay attention to the different lengths of the sponges.
Closing the flushing socket
- Insert the plug into the flushing socket. Figure F
- Push the plug in until it stops.
3HATTg pInbtpyBaIbHoro nakeTy 3 HeTKaHOro Matepiany
PiJ qac 3bnpaHHB OBIoro nIy fiIbtpyBaIbHn nakET 3 HcTKaHO MaTepiany Tpe6a 3aBXdN 3HimaTn. 1. Po36nokyBatni i 3HrTn roJOBky nIIOcoca. 2. BntaTn fIbtpyBaIbHn naket i3 HeTKaHoromatepiAn,notrHyBwn Doropn. ManIOHOK G 3. TepmetuHo pInbtpyBaIbHn naket i3 HeTKaHOro MaTepiAn KOBNaUKOM. 4. BnKOpNCtAHn fJIbtpyBaHbN naket 3 HEtKaHOro MaTepiany yTuNi3yBaTn BiIDNoBIDHO Do DiIOuNX npunnciB. 5. BcTaHOBtI i 3aFikCyBaTn rOIOBky nINOCoca.
3HimahnMiKaJdJIa CMITT
PiJvac36npanHBOIORO ninyMiWOk dIycmITTcneJIaJIbHe npuJaT) Tpe6a 3aBXdN 3Himatn. 1. Po36JNOkyBaTu i 3HrTu rOIOBky nIIOcoca. 2. BiirHytn kpa iMiIka dIra 36opy BiXoIb (IOaTkoBe o6naHaHHa). ManHOK H 3. 3HATN 3axnchy nibky i 3akpntu BEHTNJIciHNIOTBip JINIKOHO HAKJaKOHO. 4. 耘蒙尼诺3akpntnMiokdny36bopyBixoib (cneiaJIbHe npuaIaIaI) HIXyote TBOPy 3a DONOMORIO KaebnbOi CTJKN. 5. BntaTmMiwokIJIa36opy BiXoIIB (IOdaTKOBe 06naHaHH). 6. OuHCTnTb 6ak 3cepeDHHBONTOI RaHJipKOIO. 7. Ytni3yBaTNI MiWOK dNRA 360py BiXOiB (doaTKoBe oNaHaHn) BiINOBiDHO Do YHHNX npinnCIB. 8. BctaHOBtI i 3aFikCyBaTn rOJOBKy nJIOcoca.
3araJIbHa iHΦopMaia
PiJ yac 3bnpaHnBaONorO nIy 3a DonomoroUo UJIINHHOI HacaKn YN HacaKn DnM'Knx Me6nB (Oni), a TAKoX y BUNaKax, KOJN 3 KOHTeHepa nepeBaXHO BCMOKTyEcBcR BOJa, peKOMeHNyETbcR He HATnCKatn KhoNky FyHKciI «TOnyABTomTuHHe OunuHnHaFbTa}. - Y pa3i docarHeHH MaKcMaJIbHOro pIBHa piINnH npunctpi ABTomaTHNO BmMkaeTbcr. -Плчас роботи 3 He npobidHIMpiHAMn (HaPnKJaD, pINHa DЯ OXJIOxKeHHN iДчac CBepdiHH Ta MaCTuJa) y pa3i HanOBHeHHa KOHTeHepa npctpiH He BmNKAcTbcra. PibeHb 3AnOBHeHH NOBHeH NoCTiHNO KOHTpOJIbOBAtncA, a 3 KOHTeHepa Heo6xIDHO CBOcHachO BuaIaTn BMICT. - Picra 3aBepseHn BONOrO np6npaHH: BIKoHaTn OuNSeHH nNoCKOrO cKnAdyactoro fIInbTp a IBCyUnTI NOrO. ONuCTn EneKtpOn 3a DonOMOrO uITKn. ONuCTn KOnTeHep 3a DonOMOrO BOJOrO rAHyipKN Ta BNCyUnTI.
Knincobe 3'eHaHHa
YCMOKTyBaJIbHn IJNaHr OCHaIeHn CnCTeMoIO KInCOBOrO 3'EDHaHHa. MoKyTb NiKIIouyATncb 6yDb-RAI npiJaIDr 3 HOMIaJIbHIM BHYTpIiHIM DiAMetpOM 35 MM.
ManiHokI
KepyBaHHa
YbIMKHeHH npncTpoIO
- Bctabntn utencceIbHy BnIky Bpo3eKy.
- YbIMKHyTn npncpti3a donomoroIO nobopoTHoro nepemkkaHa.
Po6ota 3 eJektpoiHctpymeHTamn
△HE6E3NEKA
Safety precautions when using electric current
Safety precautions for injury and damage.
The socket is intended for direct connection of the electric power tool to the vacuum cleaner.
Any other use of the socket is not permitted.
- Insert the plug of the electric power tool into the vacuum cleaner. The vacuum cleaner is in operating mode.
- Press the switch using the rotary knob.
Indicator
The vacuum cleaner turns on and off with the electric power tool automatically.
Indicator
The delay of turning off the vacuum cleaner is up to 0.5 seconds, and the delay of turning on is up to 15 seconds.
Indicator
The reduced power of the electric power tool is indicated in the section «Technical characteristics».
- Remove the cover from the accessory compartment. Figure J
- Install the adapter for the tool on the accessory compartment.
- Connect the electric power tool. Figure K
- Set the (main) minimum pressure level of the air supply (when servicing the regulator, the air supply pressure of the instrument should be set so that sound signals are triggered).
Indicator
For operation and maintenance of the device under changed operating conditions (e.g., the device being serviced is tilted to the floor), the control system must be installed on the device being serviced (manufacturer's instruction). It is indicated that if the minimum liquid level required for maintenance is below 20 m/s, the user must be warned about this.
Filling the automatic filter
Indicator
Cleaning the filter every 5-10 minutes increases the service life of the flat folded filter.
Indicator
Cleaning the filter with the automatic device is possible only with the cleaning device.
- Close the service hose or elbow and press the automatic filter cleaning button 5 times. The cleaning of the flat folded filter occurs due to a pneumatic impact (pulse sound).
Figure L
Turning off the device
- Close the service hose or elbow and press the automatic filter cleaning button 5 times.
- Turn off the device using the rotary switch.
- Pull the plug out of the socket.
After use
- Container contents.
- Clean the device outside and inside with a vacuum cleaner and check it with a damp cloth.
Storage of the device
- Store the vacuum hose and power cord as shown in the figure.
Figure M
- Store the device in a dry room, protected from unauthorized use.
Transportation
CAUTION
Improper
Risk of injury or damage during transportation by vehicles. Protect the device.
- Close the vacuum opening, see "Vacuuming".
- Pull out the vacuum hose from the nozzle and from the holder. To carry the device, hold it by the handle and the vacuum hose. 3. During transportation in vehicles, secure the device according to the regulations to prevent slipping and tipping.
Storage
CAUTION
Improper
DANGER
Keep the device away from moisture.
Store the device only in dry rooms.
Maintenance and technical service
DANGER
Danger of electric shock
Injuries can result from touching live parts.
Switch off the device.
Pull out the mains plug.
The turbine does not start
- Check the fuse and the circuit breaker.
- Check the power cable, the mains plug, the socket and the device.
- Switch on the device.
The turbine switches off
- Empty the container.
- Install the filter cassette.
- Moisten the area with a damp cloth.
Do not start the turbine while the container is wet.
- Turn off the device and wait 5 seconds. Turn the device on again.
- Clean the filter with a brush.
- Dry the sector and the area with a damp cloth.
The moisture indicator changes color.
- Remove the cassette from the wet chamber, the wet tube, the wet hose, or the flat cassette.
- Replace the filled filter bag with a new one made of non-woven material.
- Replace the filled bag with a new one (special accessory).
- Close the wet tube or hose by pressing the button 5 times on the semi-automatic filter.
- Correctly fix the filter cover.
- Replace the flat cassette filter.
The moisture indicator is at the bottom.
- Check/correct the correct installation of the flat cassette filter. The arrow points...
- 3amHHTn nIocKn cKaJauactN pIbTp.
Automatic shutdown (when cleaning the filter)
- Clean the electric filter with the help of a brush. 2. During operation of the device, monitor the fill level.
Sound signal
- Set (smoothly) the minimum air flow level (suction power) on the suction power regulator of the instrument handle so that the sound signal is activated.
- When the filter is clogged and the average air flow rate is exceeded, the filter must be replaced.
- If the dust bag (special accessory) is full, and also in case of a decrease in the air flow level below the set level, the dust bag must be replaced.
- Replace the filter cleaning plate.
Press the automatic cleaning button - it does not work
- The suction power regulator is not turned on. Press the automatic cleaning button - it does not work
- Contact the service department.
Press the automatic cleaning button - it does not start
- Contact the service department.
Service department
If you have any questions or problems, please contact our service department.
Warranty
In accordance with the statutory warranty provisions, the warranty period begins at the time of purchase.
Warranty
In every country, the warranty conditions set by the responsible sales organization apply. We will rectify any malfunctions of the device free of charge within the warranty period, provided that the cause of the malfunction is due to material defects or manufacturing errors. In the event of a claim within the warranty period, please contact your dealer or the nearest authorized customer service center with your proof of purchase.
(See address on the back)
Further information on the warranty (if applicable) can be found in the service area of the local Karcher website under 'Warranty'.
Accessories and spare parts
Only use original accessories and original spare parts, as they guarantee safe and uninterrupted operation of the device.
Information on accessories and spare parts can be found at www.kaercher.com.
H. Jenner Chairman of the Board of Management
S. Reiser Director Regulatory Affairs & Certification
Person responsible for documentation: S. Reiser
Alfred Kärcher SE & Co. KG
Alfred-Karcher-Str. 28 - 40
71364 Winnenden (Germany)
Tel.: +49 7195 14-0
Fax: +49 7195 14-2212
Winnenden, 2020/10/01
Technical characteristics
| NT 30/1 Ap Te M | ||
| Еlektrочne piДк nullочьня | ||
| Hарuya мерекi | V 220-240 | |
| Фаза ~ | 1 | |
| Частota мерекi | Hz 50-60 | |
| Стуниь засcentу | IPX4 | |
| Клас засcentу | I | |
| HomінальнаnotужпICTь | W | 1200 |
| МakсимальнаnotужпICTь | W | 1380 |
| СтохиваяnotужпICTь pozesтki | W | 25-2200 |
| пристpoю (EU) | ||
| СтохиваяnotужпICTь pozesтki | W | 25-1200 |
| пристpoю (AU) | ||
1 Mode of operation for industrial dust (contact is not active) 2 Disinfection mode (contacts are active)
WARNING
Danger to health from hazardous dust
The dust particles may be harmful to health when inhaling dust.
Do not operate the device without the filter element, otherwise there is a risk to health from the release of large quantities of dust.
ATTENTION
Danger to health from inhaling dust
Risk of injury from the rotating fan. Never remove the flat filter during operation.
- Connect the vacuum cleaner hose depending on the operating mode to the device with suction nozzle or connect it to the dust generation source.
The horn sounds when the air speed in the compressed air line drops below 20 m/s.
Note
The horn does not respond to vacuum.
- Set the minimum air flow (suction power) on the suction regulator of the instrument air supply (infinitely adjustable) so that the horn stops.
Antistatic system
Through the grounding cable, static charges are discharged. In this way, the formation of sparks and current surges on electrical conductors is prevented (in the delivery set).
Dry cleaning
For cleaning machines with low to medium amounts of dust, the use of a textile filter bag with a closing cap, part number 2.889-154.0 (5 pcs.), is recommended. The device is equipped with a textile filter bag. For cleaning large amounts of dust, we recommend using a disposal bag with a cable tie, part number 2.889-231.0 (10 pcs.).
Note
With this device, all types of dust up to dust class M can be extracted. The use of a dust collection bag (part number -EK. Filter systems) is prescribed by law.
Note
As a dust extractor for extraction and as a decontamination device for mobile equipment, the device is suitable for extracting dry, non-flammable dusts with occupational exposure limit values (AGW) greater than or equal to 0.1 mg/m³.
Mounting the textile filter bag
- Remove and disassemble the suction head.
- Place and lock the suction head.
Installation of the extraction hose
- Unlock and remove the suction head.
- Place the extraction hose (special accessory). Figure D 3. Select the extraction hose (special accessory) onto the reservoir. Follow the marking on the reservoir, and align the opening with the corresponding notch on the reservoir.
- Place and lock the suction head.
Wet vacuuming
DANGER
Danger of injury or health hazard from dust when inhaling dust particles due to vacuuming of dust.
When wet vacuuming, do not vacuum dust that is hazardous to health.
Mounting the rubber lips
1. Remove the brush strip. Figure E 2. Mount the rubber lips.
Instruction
The vacuum cleaner must only be used for its intended purpose. Pay attention to the different functions of the vacuum cleaner.
Inserting the hose for vacuuming
- Insert the hose connector completely into the vacuuming opening. Figure F
- Insert the hose connector until it clicks into place.
Removing the textile dust bag
- When vacuuming dry dirt, the textile dust bag must be removed. 1. Unlock and remove the vacuum head.
- Pull the textile dust bag upwards out of the holder.
Figure G
- Press the locking lever on the dust bag holder.
- Dispose of the used textile dust bag in accordance with local regulations.
- Insert and lock the vacuum head.
Removing the dust bag for fine dust
- When vacuuming dry dirt, the fine dust bag (special accessory) must be removed.
- Unlock and remove the vacuum head. 2. Pull the fine dust bag (special accessory) upwards. Figure H
- Remove the protective cover and close the ventilation opening with the self-sealing flap.
- Remove the dust bag for extraction (special accessory) with the hose connection for the cable under the floor. 5. The extraction bag (special accessory).
- After cleaning the reservoir with a damp cloth.
- Remove the dust bag for extraction (special accessory) according to the regulations.
- Place and lock the suction head.
Position
- When using wet vacuuming, the filter for cleaning water or the filter for cleaning the tank (ON), respectively when the water level in the reservoir is reached, it is recommended not to press the button of the function "Automatic cleaning of the filter".
- When the maximum level is reached, the device switches off automatically.
- During continuous operation (e.g. when vacuuming, oil and grease), the device does not switch off when the reservoir is full. The filling level must be checked continuously and the reservoir must be emptied completely. After wet cleaning: Place the surface filter with the function for cleaning the filter, let it dry. Place the electrical socket. Clean the reservoir with a damp cloth and dry it.
Connection with hose
The suction hose is connected to the system with a hose. All accessories with a nominal diameter of 35 mm can be connected.
Figure 1
Maintenance
Switching on the device
- Connect the plug.
- Switch on the device at the main switch.
Working with electrical tools
DANGER
Danger of electric shock
Danger of injury and damage. The contact is intended only for direct connection of electrical tools to the vacuum cleaner. Any other use of the contact is inadmissible.
- Insert the plug of the electrical tool into the vacuum cleaner socket. The vacuum cleaner is set to Standby mode.
- Switch on the tool using the switch on the tool.
The vacuum cleaner switches on and off automatically with the electrical tool.
Note
The vacuum cleaner starts with a delay of up to 0.5 sec. and stops with a delay of up to 15 seconds.
Note
Rated power of connected electrical tools, W. Technical data. 3. Removing the dust bag from the vacuum cleaner.
Figure 1
- Mount the tool adapter to the vacuum cleaner.
- Attach the tool adapter to the electrical tool. Figure K
- Set the minimum air flow (suction power) on the suction power regulator of the tool adapter (infinitely adjustable), as shown in the figure.
Instruction
For operation as a filter for mobile operation (processing device installed on the vacuum cleaner), the monitoring device must be coordinated with the connected processing device (vacuum cleaner). This means that when the minimum air speed required for measurement is not reached, the consumer must be warned at 20 m/sec.
Automatic filter cleaning
Instruction
Activating the filter cleaning every 5-10 minutes increases the service life of the flat filter.
Instruction
The automatic filter cleaning can only be activated when the device is switched on.
- Switch on the suction hose, respectively the exhaust part with the handle. Press the button for automatic filter cleaning. The flat filter is thus cleaned with the air pulse (pulsation, jet). Figure L
Switching off the device
- 1. Switch on the suction hose, respectively the exhaust part with the handle. Press the button for automatic filter cleaning. 2. Switch off the device from the mains. 3. Remove the plug.
Special use
1. Empty the water tank. 2. Clean the device from the inside by suctioning and rinsing with clean water.
Storing the device
- Store the suction hose and the power cable as shown in Figure M. Figure M
- Store the device in a dry place and protect it from improper use.
Non-observance of the instructions
Danger of injury and damage when transporting. Observe the instructions on the device.
- Close the suction valve, wipe with a damp cloth.
- The suction hose must be connected with the correct dose from the device. For the device, follow the instructions for the device and for the suction hose.
- When transporting in vehicles, secure the device against slipping and overturning in accordance with the instructions.
Storage
Non-observance of the instructions
Danger of injury and damage when storing. Observe the instructions on the device.
The device must be stored only in dry rooms.
Rack and surface
DANGER
Danger of electric shock
Use the device.
Select the target.
The machines for dust extraction must be equipped with devices to prevent the escape of dangerous dust in accordance with Regulation
1, issued by DGUV (German regulation for the prevention of accidents, basic principles of prevention).
WARNING
Use only original spare parts for maintenance.
Plastic parts may be damaged.
For cleaning, do not use aggressive cleaning agents.
- You can perform the maintenance work yourself.
- Clean the surface of the device regularly and the inside of the reservoir with a damp cloth.
Flat filter removal
- Open the filter cover. 2. Remove the filter frame. Figure N
- Dispose of the used filter in accordance with legal regulations.
- Remove the filter from the housing for clean air.
- Place the frame of the filter, as shown for installing a filter with a damp cloth.
- Install a new flat filter. Make sure the flat filter fits tightly on all sides.
- Place the filter frame.
- Close the filter flap; it should click into place.
Remove the filter bag made of textile material.
- Close the exhaust outlet. See wet cleaning. Figure F 2. Unlock and remove the suction head. 3. Remove the filter bag from the motor protection. Figure G
- Close the filter flap with the filter bag removed.
- Dispose of the used textile filter bag in accordance with local regulations.
- Install a new textile filter bag.
- Install and lock the suction head.
Remove the dust bag.
- Turn off the vacuum cleaner, see wet vacuuming. Figure F 2. Unlock and remove the suction head. 3. Pull out the dust bag (special accessory). Figure H
- Remove the protective grille and close the ventilation opening with the self-sealing valve.
- Close the dust bag (special accessory) tightly with the cable strap under the opening. 6. Remove the dust bag (special accessory).
- Clean the outside of the reserve tank.
- Remove the waste bag (special accessory) according to the regulations.
- Install a new waste bag (special accessory). Figure 10. Insert the waste bag (special accessory) over the reserve. Ensure the marking line is on the reserve, and the ventilation opening is positioned on the reserve tank.
- Install and lock the suction hose.
Connecting the power cord
- Unlock and remove the suction hose.
- Connect the power cord to the mains.
- Install and lock the suction hose.
Help in case of malfunction
DANGER
Danger of electric shock
Parallel operation before carrying out any work on the device
Disconnect the device.
H3bpaune uencena.
YKa3aHue
Ako hacmbtu nopeda (hanp. cunbahe Ha fumbpa), ypebtmmpaeea da ce u3knouu He3abaeNo. Ppedu noemopno nyckaene Eeknloamaua mpe6ea da ce omcmpahu noepedama.
BcmykaTeJnHaTa Typ6nHa He pa6oTu
BCMyKaTeJIHaTa Typ6Hb OTHOB He cpa6oTba
- N3KJIIOUeTe ypeDa n N3aKaIte 5 ceKyHnB. BkJIIOUeTe ypeDa OTHOBO.
- Nounctete eJektpoDnte c Yetka.
- Iocyuete eNektpoDHTn 3OHaTa OKJIO TxA.
CnnaTa Ha BcMyKBaHe OTCJa6Ba
- OToCTpaHete 3anyuBaHnraT oT BcMyKaTeJIHaTa IIO3a, BcMyKaTeJIHaT a Tpb6a, BcMyKaTeJIHnA Mapkyu nnIIOCKNqIITbp.
- CmeHeTe nJIHaTa qNJITbPHa TOp6nUka OT TEKCTnNEH MaTePnAJ.
- CmeheTe nblHaTa TOp6nUka 3a OTnaIbUc (CneuJaHa npHaadJeKHOCT).
- 3anywe Te BCMykateJIHATA Tpb6a,pecn. OrbHaTaT auct C pbKa n npn BKNIOUeH ypei HaTNCHeTe 5 nbTu 6yToHa 3a NOLyABTomATuHNOuNCTBaHe Ha dntbpa. 5.ФИКСИРаTeпраВиЛноКANаКаНФИЛТьр.
- CmeheTe NOBbpxHOCTHnHaHbHaT pntTp.
N3n3aHe Ha npax npn 3acMyKBaHe
- Remove/Replace the filter correctly. Place it on the flat filter. Figure O
- Replace the flat filter.
The automatic shut-off (wet vacuuming) does not react.
- After the electric cables.
- Always check the hose for blockages and the electrical cables for damage.
Trigger the float.
- Set the minimum air flow (suction force) on the suction force regulator of the tool adapter (infinitely adjustable) so that the float shuts off.
- The float ball is made of sticky material and must be replaced when the minimum air flow is reached.
- The float ball for wet vacuuming (special accessory) and the minimum air flow must be replaced.
- Replace the surface filter.
The filter cleaning function does not work.
- The inlet hose is not connected.
The filter cleaning function does not switch off.
- Service message.
The function for automatic cleaning of the filter cannot be switched on.
- Service message.
Service
If the fault cannot be rectified, the device must be checked by the service department.
Disposal
At the end of its service life, the device must be disposed of as waste in accordance with the applicable laws and regulations.
Warranty
In every country, the warranty conditions issued by our authorized distributor apply.
Possible malfunctions of your device will be repaired free of charge within the warranty period, provided they are due to material or manufacturing defects. In the event of a warranty claim, please contact your distributor or the nearest authorized service center, presenting the proof of purchase.
(Address, incl. telephone)
The full warranty information (if any) can be found on the page "Service" in the local Karcher website under "Extras".
Accessories and spare parts
Use only original accessories and original spare parts to ensure safe and trouble-free operation of the device.
Information on accessories and spare parts can be found at: www.kaercher.com.
Declaration of Conformity with the EU
With this declaration, we confirm that the machine described below, in terms of its design and construction, as well as in the version placed on the market by us, complies with the relevant essential health and safety requirements of the applicable EU Directives. This declaration becomes invalid if the machine is modified without our consent.
Product: Vacuum cleaner for wet and dry vacuuming Type: 1.148-xxx
Applicable EU Directives
2006/42/EC (+2009/127/EC)
2011/65/EU
2014/30/EU
Applicable harmonized standards
EN IEC 63000:2018
EN 55014-1:2017 + A11:2020
EN 55014-2:2015
EN 60335-1
EN 60335-2-69
EN 61000-3-2:2014
EN 61000-3-3:2013
EN 62233: 2008
This declaration of conformity is issued under the sole responsibility of the manufacturer.
H. Jenner
Chairman of the Board of Management
S. Reiser
Director Regulatory Affairs & Certification
71364 Winnenden (Germany)
Tel.: +49 7195 14-0
Fax: +49 7195 14-2212
Winnenden, 2020/10/01
Technical data
NT 30/1
Article number
Electric welding
Safety Instructions 158
Introduction 158
Contents 159
Safety precautions for operation 159
Declaration of conformity with EU standards 159
Technical data 160
Safety instructions

Before starting the device, read these instructions carefully and keep them for future reference.
Follow the safety instructions with number 59562490. Act accordingly.
To avoid damage, keep the instructions in a safe place.
- After the instructions, the device may be used only with the safety instructions and in accordance with the safety regulations. If the instructions are lost, contact the manufacturer. If the device is damaged or has missing parts, do not use it.
Protecting the environment

Do not dispose of materials improperly. Dispose of materials safely to protect the environment.

When handling or disposing of electrical and electronic components, be careful
to protect the environment.
The device is intended for use with materials and batteries, accumulators, and also with waste containers. In this case, the waste containers must be emptied before use. This device must not be used together with rotating brushes.
Regulations for waste electrical and electronic equipment (REACH)
Information on the substances contained in the device can be found at: www.kaercher.de/REACH
Intended use
This device is intended for vacuuming dry, non-flammable dusts and liquids.
This device is intended for vacuuming dust, chips, and liquids from construction machinery and construction sites; it complies with safety class I of EN 60335-2-69. Note: Do not vacuum up toner dust. This device is intended for commercial use, e.g., in hotels, schools, workshops, factories, offices, and rental businesses.
Device description
Figure A
1 Suction hose 2 Suction tube 3 Suction tube handle 4 Filter bag 5 Filter bag holder 6 Suction head 7 Suction head lock 8 Suction head gasket 9 Suction head cover 10 Container 11 Carrying handle 12 Air inlet 13 Filter 14 Filter retainer 15 Suction tube holder 16 Parking position 17 Rubber gasket 18 Wheel 19 Castor 20 Suction tube holder 21 Suction tube holder (accessory) 22 Parking position 23 Suction tube holder 24 Accessory holder 25 Socket 26 Plug 27 Filter bag holder 28 Suction tube holder 29 Cable 30 Cable holder 31 Suction tube 32 Filter bag (PES) 33 Suction tube 34 Filter bag
Device labels
Safety instructions

WARNING: This device contains hazardous substances. For proper disposal and technical safety, including the removal of the battery, only qualified personnel should perform these tasks. This device must not be disposed of with household waste.
Safety devices
Inserting the filter bag
The filter bag is inserted automatically.
- The curves of the switch are formatted. The image in
Take into account
The curves of the switch are shown below:
1. General switch contact (socket for connection) 2. Switch contact (socket for connection)
EXPERT
Check the switch contacts for damage.
Check the switch contacts for damage and replace if necessary.
The switch element is formatted. If the switch is damaged, contact the manufacturer for repair.
ATTENTION
Check the device
Check the switch for closure. During the switch, the device must be disconnected from the power supply.
- After the switch has been turned off, check the switch for proper operation or replace the switch if necessary.
High voltage signal
The switch has a high voltage signal of 20 m/s.
Hycay
Dibibicmbik cuhan mepic Kbcimfkaayan bepeidi.
- KypaI aanTepinH copy Kywi peTteriWine (UeKci3 aiHbImaIbI) Dbl6bICTbIK CnHaJI TbIHbI W 60lbI KaJybi ywIH eH a3 KeIem WbIFbIHbI (Copy Kywi) opHaTbIHbI3.
ANTnctaTnKaIbIK Kyne
CtataKanbI 3apTapt Kepre KocblraH Kockblw apkblnbl bIapblnabl. Byn 3neKtp etkiiru KepekJapaTapbl naDanaHraH Ke3de WkbHHbH WbIFybi MeH 3JeKTP TorbIHbH cofyBH aIbH aIaBl.
KypraK copy
KiukeHTaJxHe opTaJaMa MeIeepDeri yCaK WaHbI copy Ke3iHde WaHcbI3 NaCTAHydbI 60nDbIpMAY yuH TbIfb3DaBfU KAcNarfbI 6ap fNIm3EINH Cy3ri nakEtIH naDalaHydbI YCbHAmbl3, Tancbipbc Hempi 2.889- 154.0 (5 daHa). KypbIFbI fNIm3EINH Cy3ri naketimeH xa6DbkTaNfA.H. YIken MeIepeDi Iy cak WAnDbI copy ywiH Ka6enb 6aIIamacbi 6ap KeDere XapaTy CEMKeciH naIdaIaNHydi YcBiHaMbI3, TaIcbipbc HEmipi 2.889- 231.0 (10 daHa).
Hycay
Eyn KypblfnbHbIH Kemeimeh wahHbIH 6apnbIK mypneipm Waa H knacbHa deuih xuHayra bonaDb. WaH xuaaumbH KanmbI (mancbipbc Hemipi ywiH cy3ai xyueepin kapaHbI) naudanahy 3aH 6oubHwa manal eminei.
Hycay
KypbIfbl Kymbic opHbIHbH wekmi mHahepi (AGW) 0,1 M/M3 -deh acambih KpyraK xhaBaimbH waHapdbl copyra apHaJIraH XblXbIMaNbl Kymbic neH eHepkocinmik wahcopfbuW pemHde kapaMObI.
Флнзелин cy3ri naketih ophaTy
- CopatbH 6acbH aWy xHe any. 2.ФинзелIH cy3ri naKeTIH 6eKiTiH3.
Cyper C
- CopaTbH 6acBHy OPhATy XaHe cbipt EtKisIn 6eKiTy.
- Remove the cap and pour.
- Place the container (container-cap) on a flat surface. Figure D
- Place the container (container-cap) on the container body. Check that the gasket is correctly seated inside the container cap, and that it is properly positioned on the container rim.
- Replace the cap and tighten it securely.
Pour the liquid
CAUTION
This product contains a caustic substance. Avoid contact with skin and eyes. When pouring, use protective gloves and goggles.
Installing the spare parts
- Place the supplied spare part as shown. Figure F
- Do not use excessive force.
Take the spare filter
When replacing the filter, first remove the old filter by pulling it out. 1. Remove the cap and pour.
2. Pull the filter out of the housing. Figure G 3. Insert the new filter into the opening. 4. Press the filter down until it clicks into place. 5. Replace the cap and tighten it securely.
Take the container-cap
Before starting work, read the safety instructions (necessary measures) carefully. 1. Turn off the device and unplug it. 2. Read the safety instructions (necessary measures) carefully. 3. Remove the protective cover and perform the test yourself and inform us in writing. 4. Compare the safety instructions (necessary measures) with the cable voltage and inform us. 5. Follow the safety instructions (necessary measures). 6. Clean the container with a damp cloth. 7. Follow the safety instructions (necessary measures) for the protective equipment. 8. Check the device's operation and external condition.
Safety instructions
Before starting the device, check that the device is properly grounded or connected to a grounding system (PE) or that the water in the container is clean. The automatic washing function is started by pressing the button. - If the device is not working properly, the device is still under voltage. - The device must be disconnected from the power supply before cleaning. - The container must be cleaned with a damp cloth. Do not use abrasive cleaners. Do not clean with a steam cleaner.
Device description
The device is supplied with a power cord. The nominal voltage is 35 V, 60 W, sufficient for all necessary measures.
Figure 1
Handle
Power cord
- Connect the power plug.
- Connect the power cord to the device.
Operation with electrical appliances
Warning
Electric shock hazard warning
There is a risk of electric shock and fire. The device must only be connected to electrical outlets with a grounding contact. The device must not be used at maximum load.
- Connect the power plug of the device to the outlet. The outlet must be in good condition.
- The device is intended for cutting grass.
Instruction
The electric trimmer is intended for cutting grass and weeds.
Instruction
The trimmer has a cutting width of 0.5 seconds and a maximum cutting time of 15 seconds.
Instruction
Check the cutting attachment of the electric trimmer for technical defects.
- Follow the safety instructions. Figure J
- Replace the cutting attachment with the safety attachment.
- Attach the cutting attachment to the electric trimmer.
Figure K
- To ensure safe operation (without risk of injury), the cutting attachment must be replaced at least once a year (cutting attachment).
Instruction
For cleaning, the trimmer must be switched off and the cutting attachment must be removed. To do this, use the locking pin (supplied) to lock the cutting attachment. This safety instruction must be followed to avoid injury.
Dispose of the device properly.
5-10 minutes before use, shake the bottle well to mix the contents.
The liquid medicine can be taken with a spoon or mixed with a small amount of food.
- Press the bottle or tube with your hand, and press the pump 5 times to prime the spray. After that, the medicine is ready to use (see figure W).
Figure L
Cleaning the pump
- Press the bottle or tube with your hand, and press the pump 5 times to prime the spray.
- Clean the pump with a damp cloth. 3. Rinse with clean water.
After priming
- Empty the container. 2. Wash the sprayer with warm soapy water, inside and out.
Storing the pump
- Store the pump in a cool, dry place away from direct sunlight.
Figure M
- Do not place the pump near heat sources and protect it from unauthorized access.
Before starting any work, make sure the device is turned off.
- After purchasing the device, carefully read the instructions.
- Do not install the device near heat sources. To install the device, place it away from heat sources.
- When installing the device, be careful not to damage the cables or pinch them.
Storage
Before starting any work, make sure the device is turned off.
The device is intended for household use only.
Maintenance and technical service
Device
Installation device
Close the shutters before operating the device.
Install the device.
The device must be installed on a flat surface. The packaging machines DGUV 1 (German safety regulations for presses and printers) must be observed, or the device must be installed with appropriate safety guards.
CAUTION
Do not install the device near flammable materials.
Installation near flammable materials is possible. To install the device near flammable materials, you must take precautions.
Ensure that technical service and maintenance are performed by qualified personnel. Do not place the device or container near heat sources.
Remove the device from the packaging.
- Remove the device carefully.
- Remove the device and set it aside. Figure N
- Remove the device from the packaging. 4. Dispose of the packaging in accordance with local regulations.
- Bring the device into a clean environment.
- Place the device on a stable and level surface.
- Place the device on a flat surface. During operation, ensure that all parts of the device are in proper condition.
- Place the device on a stable surface.
- Cy3ri KaKaNaFbH XaybIn, on ectiTeiHdeiOpHbHa Tycyi KepeK.
Флнзелнсугri naKeTiH aybIcTbIpbIbI3
Akaynap Ke3iHderi KEmek
KAYIN
ToKneH 3bIKbIMdaJy Kayni
Kephey kyuiHde myprah 6eIwEkeMpEm 6aunhbc Ke3iHdezi 3akbimdap
KypbIINfbHbI eWipjH3.
Jeninik uemekepi0emkaaH uifapbn anbHb3.
Hycay
Eeep aay nauda 6oNa (Mbicn: Cy3z icmeH uikKaH 6oNa), KpybInrBnIb depey eWipy KepeK.
Kauma icke kocap anobihda akaynbik koubinybi KepeK.
CopaTbH Tpy6nHa KymBic icTeMeiDi
- Po3eTka MeH caKaTHdbIpfbIu 3JIeKTp Ti36erIH TeKcepiH3.
- Xeni Ka6eniH, Kyat aWacbH, 3JeKtpoTapbl JxHe KpybInfbHbH p03EtKaCbH TeKcepiH3.
- KypblrblHbI Kocy.
Copy turbinas again
- Empty the containers.
- Check the valve with the letter.
- Dry the electric motor and the place around the electric motor.
After emptying the container, do not put the copy turbine back in.
- Open the dryer and wait 5 seconds. Remove the dryer.
- Clean the electric motor with a brush.
- Dry the electric motor and the place around the electric motor.
Water for washing
- Check the filters, the filter tips, and the filter washers or the letter valves.
- Replace the filter pack that has passed its service life.
- Replace the membrane (if necessary) intended for the filter that has passed its service life.
- Press the water pump or with the button, and press the automatic water cleaning button 5 times while the dryer is running.
- Close the water tap firmly.
- Replace the valve with the letter.
- Check the text for spelling errors.
Figure O
- Correct the spelling of the word.
Automatic selection (highlight) is not required.
- Electrodes are grounded.
- Check the electrical connections for correctness.
Fast signal is not available.
- To calculate the fast signal and its magnitude, set the minimum value (threshold) to the lowest possible.
- If the connected word is found, and the meaning and the minimum value are correct, it should be used.
- If the symbol (character) intended for the cursor is found, and the meaning and the minimum value are correct, it should be used.
- Correct the spelling of the word.
Automatic word selection is not required.
- The threshold is not set.
Automatic word selection is not performed.
- Notify the service about the device.
It is possible to use the device without registration.
- Notify the service about the device.
Contact the service for device repair.
If it is faulty, contact the service center for repair.
Utilization
After the product has reached the end of its service life, it must be disposed of in accordance with the regulations.
Warranty
The warranty terms of the distributor apply. In case of material or manufacturing defects, we will repair them free of charge within the warranty period. If you have any questions regarding the warranty, please contact the seller or the authorized service center.
(For household use only)
For warranty service, the device (if available) must be presented with the receipt or the warranty card from the website "Kukteyner". The date of purchase must be indicated in the format MM/YYYY, where MM is the month and YYYY is the year.
- In case of damage or loss, the serial number is located on the device: 30290
Manufactured: 0, Production date: 2, Product number: 9, Serial number: 0, First production number: 0, Therefore, the number 30290 corresponds to the production date 09/(2)023.
Required and additional accessories
Do not use any required or additional accessories other than those specified, as they may pose a safety risk and cause damage to the device.
Spare parts and accessories for the appliance can be found on the website www.kaercher.com.
Declaration of Conformity
We hereby declare that the machine described below complies with the relevant basic safety and health requirements of the EU Directives, both in its basic design and construction as well as in the version placed on the market by us. This declaration shall cease to be valid if the machine is modified without our prior approval.
Product: Wet and dry vacuum cleaner
Type: 1.148-xxx
Applicable EU Directives
2006/42/EG (+2009/127/EG)
2011/65/EU
2014/30/EU
Applied harmonised standards
EN IEC 63000:2018
EN 55014-1:2017 + A11:2020
EN 55014-2: 2015
EN 60335-1
EN 60335-2-69
EN 61000-3-2: 2014
EN 61000-3-3: 2013
EN 62233: 2008
Applicable standards
The application and impact of these standards are described in the instructions.
H. Jenner Chairman of the Board of Management
S. Reiser Director Regulatory Affairs & Certification
Documentation representative:
S. Reiser
Alfred Kärcher SE & Co. KG
Alfred-Karcher-Str. 28 - 40
71364 Winnenden (Germany)
Tel.: +49 7195 14-0
Fax: +49 7195 14-2212
Winnenden, 2020/10/01
Technical data
www.kaccher.com/REACH
Use as directed
a1 = 2
a 1 < a 2 < a3 and
3.
6.
1.ubjlaa
a. | x,y| = 1
.2
U (s) 100
13 4.
5. (sla jzlo) jalj all jil
aaiill Jawl pS>JkW bIy
.(s>1g>1o)ylaill no aalll s>16
aJbawla JdUo oclgll a7.
8. Lb(s|jlo)JJJnJalssJusJal
.aaagaiJIgU
9. (slaol) laol no m alalss
a>la]0gD
10. sclgl (s)j>1 j0
y. aagg gaggll jda jaaill lae gge
.0cgllll 100000000
11. aiolg lalw wJ W.
Therefore, j_L = j_L (k + 2)
Therefore, a_1 = (2 - 3)/2 = -3/2, a_4 = (5 - 7)/2 = -5/2
__SUPPIMER__
b > 4
(a)
4
__SUPPIMER__
__SUPPIMER__
42
1001 8099 10011 25
100
a n > | a n| an = 1
J 1
1.
U (S) 100
a 2 = | a 1| ,| a2| = 1
3.
.

(1) : a ≥ 0\ : b ≥ 0\
| A | 165 | ... |
| a | 165 | ... |
| a | 165 | ... |
| a | 165 | ... |
| a | 166 | ... |
| a | 166 | ... |
| a | 166 | ... |
| a | 166 | ... |
| a | 166 | ... |
| a | 166 | ... |
| a | 166 | ... |
| a | 166 | ... |
| a | 166 | ... |
| a | 166 | ... |
| a | 167 | ... |
| a | 167 | ... |
| a | 167 | ... |
| a | 167 | ... |
| a | 168 | ... |
| a | 168 | ... |
| a | 168 | ... |
| a | 169 | ... |
| a | 169 | ... |
| a | 169 | ... |
| a | 169 | ... |
| a | 169 | ... |
| ### | ### |
According to EN 60335-2-69, the device must be used with the correct filter system. The filter system must be checked before use. The device must be used with the correct filter system.
Filter systems
| Flachfaltenfilter (PES) * Flat pleated filter (PES) * Filtré plat à pris (PES) * | Vliesfiltertüte, 3-lagig * Fleece filter bag, triple layered * Sachet filtré en tissu non tissé à 3 épaisseurs * | Entsorgungsbeutel Disposal bag Sachet d'élimination | |
| Bestellnummer Order No. Numéro de référence | 6.907-662.0 2.889- | 154.0 2.889-231.0 | |
| Menge Quantity Quantité | 1 | 5 | 10 |
| Normalstäube Normal dust Poussières normales | x | x | x |
| Feinstäube Fine dust Poussières fines | x | x | x |
| Abrasive Stäube Abrasive dust Poussières abrasives | x | x | x |
| Flüssigkeiten, nasser Schmutz Liquids, wet dirt Liquides, saletès humides | x |
- Dust class M, retention capacity ≥ 99.9%
- Dust class M, retention ≥ 99.9%
- Dust class M, retention ≥ 99.9%

THANK YOU!
THANK YOU! THANK YOU! THANK YOU!

Register your product and benefit from many advantages.
www.kaercher.com/welcome


Rate your product and tell us your opinion.
www.kaercher.com/dealersearch
Alfred Kärcher SE & Co. KG
Alfred-Karcher-Str. 28-40
71364 Winnenden (Germany)



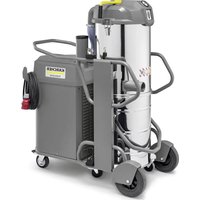
- TECHNICAL DATA
- GENERAL NOTES
- ENVIRONMENTAL PROTECTION
- NOTES ON THE CONTENT MATERIALS (REACH)
- INTENDED USE
- DESCRIPTION OF THE DEVICE
- ILLUSTRATION A
- SYMBOLS ON THE DEVICE
- DUST CLASS
- SAFETY DEVICES
- MONITORING OF THE FLAT FOLD FILTER
- PREPARATION
- INITIAL STARTUP
- WARNING
- ATTENTION
- HORN
- NOTE
- ANTI-STATIC SYSTEM
- DRY VACUUMING
- INSTALLING THE FLEECE FILTER BAG
- ILLUSTRATION C
- INSTALLING THE DUST BAG
- WET VACUUM CLEANING
- △DANGER
- INSTALLING THE SQUEEGEES
- CLOSING THE SUCTION CONNECTION
- REMOVING THE FLEECE FILTER BAG
- REMOVING THE DUST BAG
- GENERAL
- CLIP CONNECTION
- OPERATION
- SWITCHING ON THE DEVICE
- WORKING WITH POWER TOOLS
- DANGER
- ILLUSTRATION J
- SEMI-AUTOMATIC FILTER CLEANING
- SWITCHING OFF THE DEVICE
- EACH TIME AFTER USE
- STORING THE DEVICE
- ILLUSTRATION M
- TRANSPORT
- CAUTION
- FAILURE TO OBSERVE THE WEIGHT
- STORAGE
- CARE AND SERVICE
- DANGER OF ELECTRIC SHOCK
- CARE AGENTS CONTAINING SILICONE
- REPLACING THE FLAT FOLD FILTER
- ILLUSTRATION N
- CHANGING THE FLEECE FILTER BAG
- ILLUSTRATION F
- CHANGING THE DUST BAG
- CLEANING THE ELECTRODES
- TROUBLESHOOTING GUIDE
- HORN SOUNDS
- CUSTOMER SERVICE DEPARTMENT
- DISPOSAL
- WARRANTY
- ACCESSORIES AND SPARE PARTS
- EU DECLARATION OF CONFORMITY
- CURRENTLY APPLICABLE EU DIRECTIVES
- HARMONISED STANDARDS USED
- NATIONAL STANDARDS USED
- ELECTRICAL CONNECTION
- DEVICE PERFORMANCE DATA
- DIMENSIONS AND WEIGHTS
- DETERMINED VALUES IN ACC. WITH EN
- MAINS CABLE
- CONTENTS
- TECHNICAL CHARACTERISTICS
- MACHINE POWER DATA
- DUST BAG
- MOUNT THE DUST BAG
- FIGURE C
- DUST EMISSION DURING SUCTION
- APPLIED NATIONAL STANDARDS
- POWER CONNECTION
- APPLIED HARMONIZED STANDARDS
- REISER
- TEXVIKA OTOIXSIA
- BKNOUEHNE YCTPOICTBA
- PA6OTA C 3JEKTPNUECKNMN NHCTPYMEHTAMN
- ONACHOCTB
- THE SUCTION HOSE DOES NOT WORK
- THE SUCTION TURBINE SWITCHES OFF
- DO NOT START THE SUCTION HOSE
- SUCTION POWER IS WEAKENING
- DUST ESCAPES FROM THE DEVICE DURING CLEANING
- AUTOMATIC SHUT-OFF (WET CLEANING) DOES NOT WORK
- THE AUDIBLE ALARM SOUNDS
- SEMI-AUTOMATIC FILTER CLEANING IS NOT PERFORMED
- SEMI-AUTOMATIC FILTER CLEANING DOES NOT STOP
- SEMI-AUTOMATIC FILTER CLEANING DOES NOT START
- CUSTOMER SERVICE
- TECHNICAL SPECIFICATIONS
- WARRANTY TERMS
- PACKAGING MATERIALS ARE SUITABLE FOR RECYCLING. DISPOSE OF PACKAGING IN AN ENVIRONMENTALLY FRIENDLY MANNER
- CURRENT INFORMATION ON COMPONENTS IS AVAILABLE AT: WWW.KAERCHER.DE/REACH
- THIS APPLIANCE FOR WET/DRY VACUUMING IS INTENDED FOR VACUUMING DRY DIRT AND LIQUIDS
- DEVICE DESCRIPTION
- FIGURE A
- DEVICE SYMBOLS
- PROTECTION CLASS
- DEVICE PROTECTION
- CHECKING THE FLAT PLEATED FILTER
- COMMISSIONING
- SOUND SIGNAL
- INDICATOR
- ANTISTATIC SYSTEM
- CYXE NP6NPAHH
- INSERT
- INSTALLING THE FILTER BAG MADE OF NON-WOVEN MATERIAL
- INSERTING THE CONTAINER FOR DEBRIS
- WATER SUPPLY CONNECTION
- INSTALLATION OF MAIN SPONGES
- FIGURE E
- INSTRUCTION
- CLOSING THE FLUSHING SOCKET
- HATTG PINBTPYBAIBHORO NAKETY 3 HETKAHORO MATEPIANY
- HIMAHNMIKAJDJIA CMITT
- ARAJIBHA IHΦOPMAIA
- KNINCOBE 3'EHAHHA
- KEPYBAHHA
- YBIMKHEHH NPNCTPOIO
- PO6OTA 3 EJEKTPOIHCTPYMEHTAMN
- △HE6E3NEKA
- FILLING THE AUTOMATIC FILTER
- TURNING OFF THE DEVICE
- AFTER USE
- STORAGE OF THE DEVICE
- TRANSPORTATION
- MAINTENANCE AND TECHNICAL SERVICE
- THE TURBINE DOES NOT START
- THE TURBINE SWITCHES OFF
- DO NOT START THE TURBINE WHILE THE CONTAINER IS WET
- THE MOISTURE INDICATOR CHANGES COLOR
- THE MOISTURE INDICATOR IS AT THE BOTTOM
- AUTOMATIC SHUTDOWN (WHEN CLEANING THE FILTER)
- PRESS THE AUTOMATIC CLEANING BUTTON - IT DOES NOT WORK
- SERVICE DEPARTMENT
- DRY CLEANING
- MOUNTING THE TEXTILE FILTER BAG
- INSTALLATION OF THE EXTRACTION HOSE
- WET VACUUMING
- MOUNTING THE RUBBER LIPS
- INSERTING THE HOSE FOR VACUUMING
- REMOVING THE TEXTILE DUST BAG
- FIGURE G
- REMOVING THE DUST BAG FOR FINE DUST
- POSITION
- CONNECTION WITH HOSE
- MAINTENANCE
- WORKING WITH ELECTRICAL TOOLS
- FIGURE
- AUTOMATIC FILTER CLEANING
- SPECIAL USE
- NON-OBSERVANCE OF THE INSTRUCTIONS
- RACK AND SURFACE
- FLAT FILTER REMOVAL
- REMOVE THE FILTER BAG MADE OF TEXTILE MATERIAL
- REMOVE THE DUST BAG
- CONNECTING THE POWER CORD
- HELP IN CASE OF MALFUNCTION
- YKA3AHUE
- BCMYKATEJNHATA TYP6NHA HE PA6OTU
- BCMYKATEJIHATA TYP6HB OTHOB HE CPA6OTBA
- CNNATA HA BCMYKBAHE OTCJA6BA
- N3N3AHE HA NPAX NPN 3ACMYKBAHE
- THE AUTOMATIC SHUT-OFF (WET VACUUMING) DOES NOT REACT
- TRIGGER THE FLOAT
- THE FILTER CLEANING FUNCTION DOES NOT WORK
- THE FILTER CLEANING FUNCTION DOES NOT SWITCH OFF
- THE FUNCTION FOR AUTOMATIC CLEANING OF THE FILTER CANNOT BE SWITCHED ON
- SERVICE
- DECLARATION OF CONFORMITY WITH THE EU
- APPLICABLE EU DIRECTIVES
- APPLICABLE HARMONIZED STANDARDS
- SAFETY INSTRUCTIONS
- PROTECTING THE ENVIRONMENT
- REGULATIONS FOR WASTE ELECTRICAL AND ELECTRONIC EQUIPMENT (REACH)
- DEVICE LABELS
- INSERTING THE FILTER BAG
- TAKE INTO ACCOUNT
- EXPERT
- HIGH VOLTAGE SIGNAL
- HYCAY
- ANTNCTATNKAIBIK KYNE
- KYPRAK COPY
- ФЛНЗЕЛИН CY3RI NAKETIH OPHATY
- CYPER C
- POUR THE LIQUID
- INSTALLING THE SPARE PARTS
- TAKE THE SPARE FILTER
- TAKE THE CONTAINER-CAP
- HANDLE
- POWER CORD
- OPERATION WITH ELECTRICAL APPLIANCES
- FIGURE K
- DISPOSE OF THE DEVICE PROPERLY
- FIGURE L
- CLEANING THE PUMP
- AFTER PRIMING
- STORING THE PUMP
- FIGURE M
- DEVICE
- INSTALLATION DEVICE
- DO NOT INSTALL THE DEVICE NEAR FLAMMABLE MATERIALS
- REMOVE THE DEVICE FROM THE PACKAGING
- ФЛНЗЕЛНСУГRI NAKETIH AYBICTBIPBIBI
- AKAYNAP KE3IHDERI KEMEK
- KAYIN
- COPY TURBINAS AGAIN
- AFTER EMPTYING THE CONTAINER, DO NOT PUT THE COPY TURBINE BACK IN
- WATER FOR WASHING
- FIGURE O
- AUTOMATIC SELECTION (HIGHLIGHT) IS NOT REQUIRED
- FAST SIGNAL IS NOT AVAILABLE
- AUTOMATIC WORD SELECTION IS NOT REQUIRED
- IT IS POSSIBLE TO USE THE DEVICE WITHOUT REGISTRATION
- CONTACT THE SERVICE FOR DEVICE REPAIR
- UTILIZATION
- REQUIRED AND ADDITIONAL ACCESSORIES
- DECLARATION OF CONFORMITY
- USE AS DIRECTED
- THEREFORE, J_L = J_L (K + 2)
- SUPPIMER
- THANK YOU
- THANK YOU! THANK YOU! THANK YOU
- WWW.KAERCHER.COM/WELCOME
Brand : Kärcher
Model : NT 30/1 Ap Te M
Category : Vacuum Cleaner