MSC 100N - Scale Kern - Free user manual and instructions
Find the device manual for free MSC 100N Kern in PDF.


User questions about MSC 100N Kern
0 question about this device. Answer the ones you know or ask your own.
Ask a new question about this device
Download the instructions for your Scale in PDF format for free! Find your manual MSC 100N - Kern and take your electronic device back in hand. On this page are published all the documents necessary for the use of your device. MSC 100N by Kern.
USER MANUAL MSC 100N Kern
natural_image
Metal L-shaped metal bracket with angled ends, isolated on white background (no text or symbols)
KERN MSC
Version 1.4 07/2025
Betriebsanleitung
natural_image
Three black-and-white icons: triangular warning triangle with exclamation mark, person reading a book, and open book with letter 'i' (no text or symbols beyond basic symbols)
natural_image
Simple line drawing of a horizontal beam with two flanged ends and a central support (no text or symbols)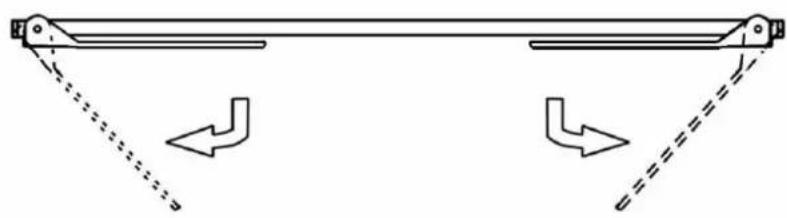
natural_image
Diagram of a mechanical linkage system with dashed and solid arrows indicating motion direction (no text or symbols)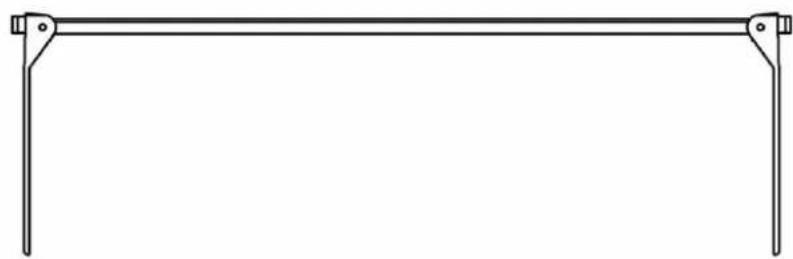
natural_image
Simple line drawing of a horizontal beam supported at both ends (no text or symbols)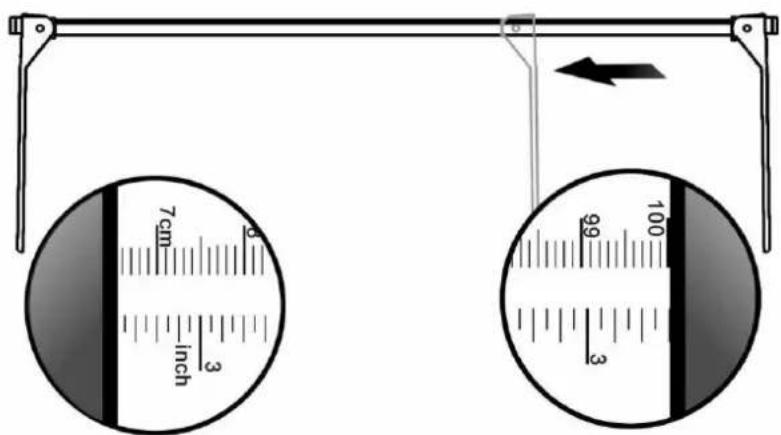
text_image
7cm inch 99 3 100text_image
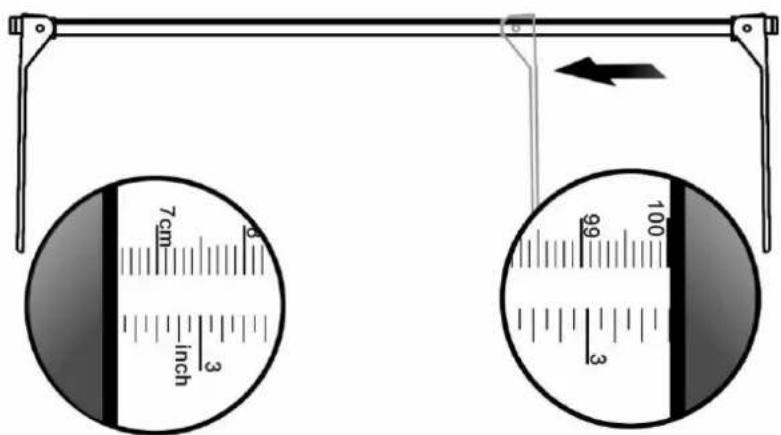
Diagram illustrating hand tool positioning and movement, showing step ① to step ② with directional arrows and a magnified inset.text_image
Illustration showing a person lying on a horizontal bar with an inset magnified view of the measurement scale.1.1 Tolerances body height measuring rod 13
2 Declaration of conformity 14
2.1 Explanation of the graphic symbols.... 14
3 Appliance overview 15
4 Basic Information (General).... 16
4.1 Specific function.... 16
4.1.1 Indication 16
4.1.2 Contraindication.... 16
4.2 Proper use.... 16
4.3 Non-intended product use / contraindications 16
4.4 Warranty 17
4.5 Monitoring of Test Resources.... 17
4.6 Plausibility check 17
4.7 Reporting serious incidents.... 17
5 Basic Safety Precautions.... 18
5.1 Personnel training 18
5.2 Preventing contamination 18
5.3 Preparation for use.... 18
5.4 Safety Instructions 18
6 Unpacking/installing.... 19
6.1 Testing upon acceptance 19
6.2 Packaging / return transport 19
6.3 Scope of delivery.... 19
6.4 Wall mounting....19
7 Body height measurement.... 20
8 Servicing, maintenance, disposal 22
8.1 Cleaning / disinfecting 22
8.2 Sterilisation 22
8.3 Servicing, maintenance 22
8.4 Disposal....22
1 Technical data
| KERN | MSC 100N |
| Measuring range | 7.5 – 100 cm |
| Readability | 1 mm |
| Tolerance | ± 5 mm |
| Dimensions (D x H x W) mm | 1020 x 290 x 50 mm |
| Temperature range | +10°C ... +40°C |
| Storage temperature | - 20°C ... + 60°C |
| Net weight | approx. 700 g |
| Admitted as medical product as per (EU) 2017/745 | Category I with measuring function |
1.1 Tolerances body height measuring rod
| Measured value (cm) | Tolerance (cm) |
| 7.5 - 100 | ± 0.5 |
2 Declaration of conformity
The current EC/EU Conformity declaration can be found online in:
www.kern-sohn.com/ce
2.1 Explanation of the graphic symbols
The height meters fulfill the requirements of the regulation for medical products (EU) 2017/745
Unique product identification
Is a medical device
SN WD 20xxx
Designation of the serial number of every device, applied at the device and on the packaging.
Number here as example
Identification of the manufacturing date of the medical product.
2023-09
Year and month here as example
„Attention observe accompanying document“, or „Follow operating instructions“
Manufacturer identification of the medical product including address
+60°C
Temperature limitation indicating the upper and the lower limit (storage temperature on packaging)
-20 °C
Temperature indication as example
10^ / 40^
Temperature limitation in the application indicating the lower and the upper limit (Allowable ambient temperature)
Temperature indication as example
Information
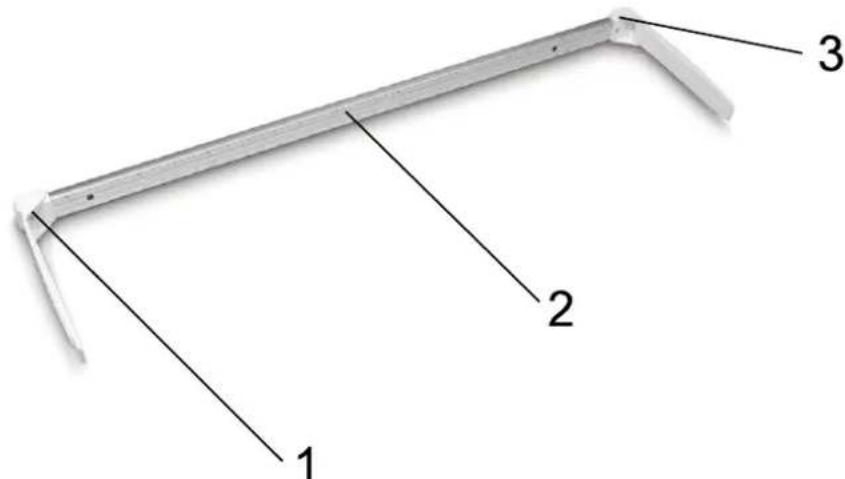
3 Appliance overview
text_image
1 2 3- Fixed stop
- Measuring rod
- Movable stop
4 Basic Information (General)

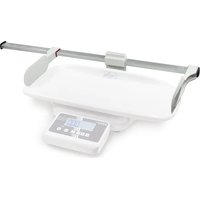
This height measuring rod is provided to determine the body height in the medical practice and for medical control, examination and treatment according to medical product regulation (EU) 2017/745.
4.1 Specific function
4.1.1 Indication
Medical Height Rod:
Indication:
• Determination of body height in the medical field
Use:
- For the infant size height rods, the baby is carefully placed between the head and footrest, and the markers are pushed against the body.
4.1.2 Contraindication
No contraindication known.
4.2 Proper use
This body height measuring rod is used to determine de height of babies resting on back in medical treatment rooms. This height measuring rod is suitable to detect, prevent and survey diseases.
Ensure that the body height measuring rod may only come into contact only with uninjured skin.
The body height measuring rod should be checked for correct condition prior to each utilization by a person familiar with proper operation of the measuring rod.
4.3 Non-intended product use / contraindications
 | Non-intended use of the optional body height measuring rodThe body height measuring rod may only be assembled as specified in the operating instructions.The structure of the body height measuring rod may not be modified. This may result in incorrect measuring results safety-related defects as well as destruction.The body height measuring rod may only be used according to the described conditions. Other areas of use must be released by KERN in writing. For more details please see the user manuals of the body height measuring rod. |
4.4 Warranty
Warranty claims shall be voided in case:
- Our conditions in the operation manual are ignored
- The appliance is used beyond the described uses
- The appliance is modified or opened
- Mechanical damage or damage by media, liquids, natural wear and tear.
• Non correct implantation or assembly.
4.5 Monitoring of Test Resources
For body height measuring rods, we recommend a metrological examination of the accuracy of the measuring rod, however, this is not mandatory as the determination of human body height involves rather large, intrinsic inaccuracies.
4.6 Plausibility check
Please make sure that the measurement values computed by the appliance are plausible and are allocated to the respective patient, before storing and using the values for further purposes.
4.7 Reporting serious incidents
All serious incidents appeared related to this product must be reported to the manufacturer and the responsible authority of the member state where the user and/or the patient are residents.
„Serious incident“ that means an incident which directly or indirectly had, could have or could have had one of the following consequences:
the death of a patient, a user or another person,
the temporary or permanent fatal deterioration of the health status of a patient, a user or other persons,
- a serious danger for public health.
5 Basic Safety Precautions
 | → Carefully read this operation manual before setup and commissioning, even if you are already familiar with KERN balances. |  |
5.1 Personnel training
The medical staff must apply and follow the operating instructions for proper use and care of the product.
5.2 Preventing contamination
In order to avoid crossed contamination (fungal disease,...) the parts coming into contact with the patient must be cleared regularly.
Recommendation: After every application which could have a potential contamination as consequence (e.g. direct contact with the skin).
5.3 Preparation for use
- Check the body height measuring rod for damage before any use
- Do not use the appliance on slippery surfaces or in facilities with risk of vibration
- If possible, the product must remain in its original packaging for transportation purpose. Should this not be possible, make sure that the product is protected against damage
- The body height measuring rod may only be used by a qualified person.
5.4 Safety Instructions
- Observe operating instructions.
- When shifting the caliper gauge, ensure that the baby does not come to any harm.
- Reliable values of body height measurements are only achieved if the heel, back and head are aligned in a straight line.
- Do not leave a baby unattended.
- When shifting the caliper gauge make sure that neither the hands nor the feet of the baby are resting on the measuring rod.
- If a measuring flap exists, ensure that this will be folded-in after every use as otherwise there exists risk of injury.
- To prevent risk of injury, ensure that the measuring flap is returned to folded-in position after each use.
- Clean and disinfect body height measuring rod at regular intervals
- To achieve correct height measuring, we recommend that you involve a second person.
6 Unpacking/installing
6.1 Testing upon acceptance
Check the packaging, as well as the body height measuring rod for external damage, right after having received.
6.2 Packaging / return transport
Keep all parts of the original packaging for a possibly required return. Only use original packaging for returning.
6.3 Scope of delivery
• Body height measuring rod
- Operating instructions
6.4 Wall mounting
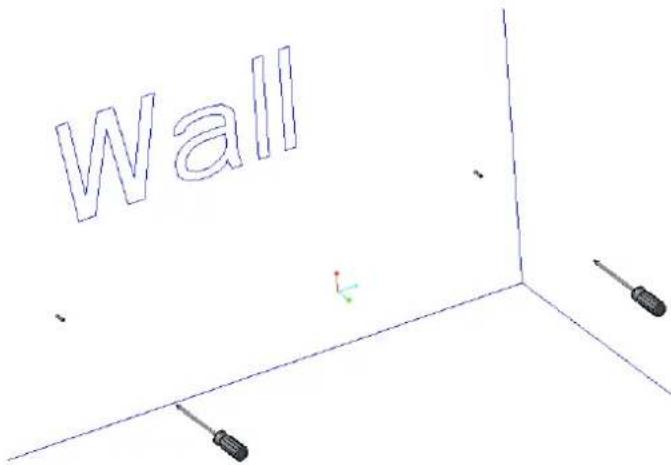
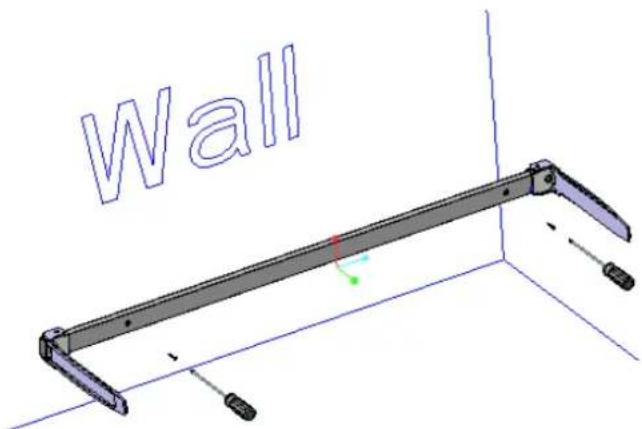
- Mark two holes on the wall according to the hole positions on the measuring bar then drill two holes in the wall at these positions. Make sure that the two holes are at the same height.
text_image
Wall- Press the dowels into the holes.
natural_image
3D mechanical assembly diagram labeled 'Wall' with no visible text or symbols on the structure itself- Screw the measuring bar to the wall.
7 Body height measurement
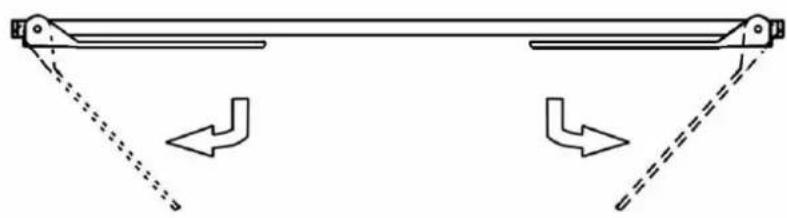
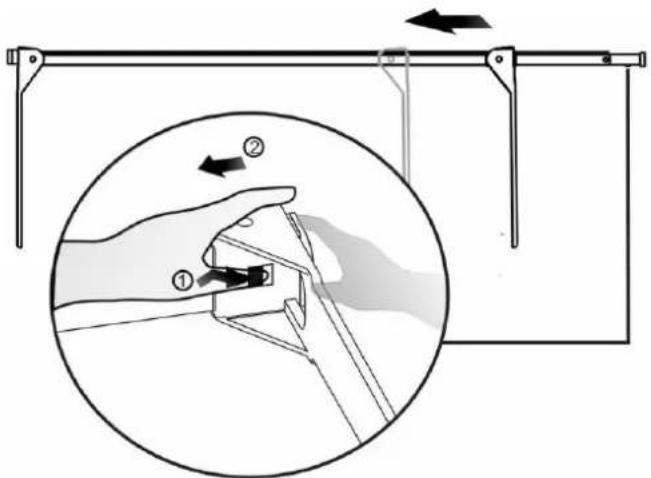
→ Open measuring flap, as shown on illustration.

natural_image
Simple line drawing of a horizontal beam with two flanged ends and a central support (no text or symbols)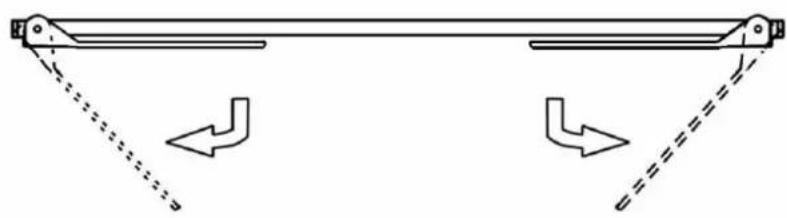
natural_image
Diagram of a mechanical linkage system with dashed and solid arrows indicating motion direction (no text or symbols)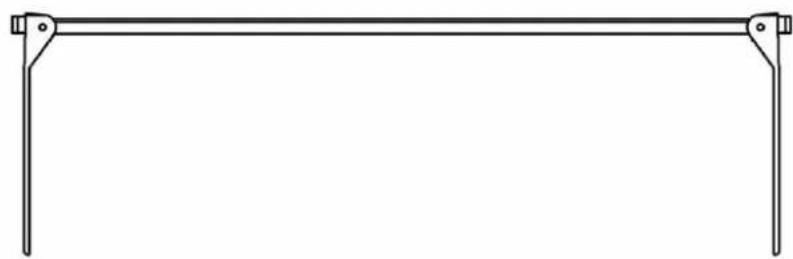
natural_image
Simple line drawing of a horizontal beam supported at both ends (no text or symbols)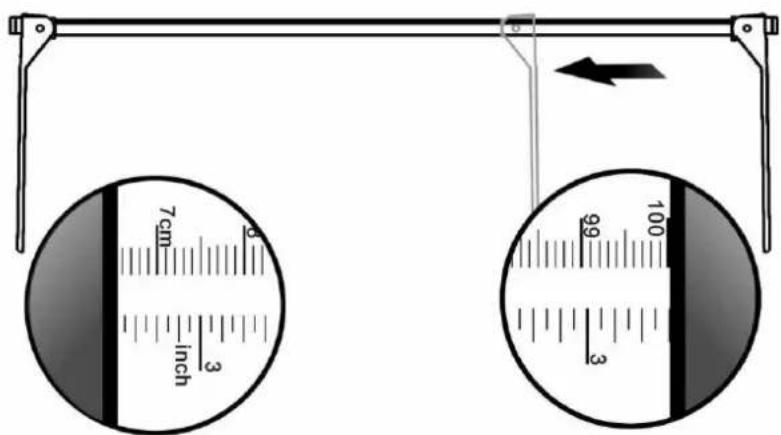
text_image
7cm inch 99 3 100Fixed stop
Movable stop
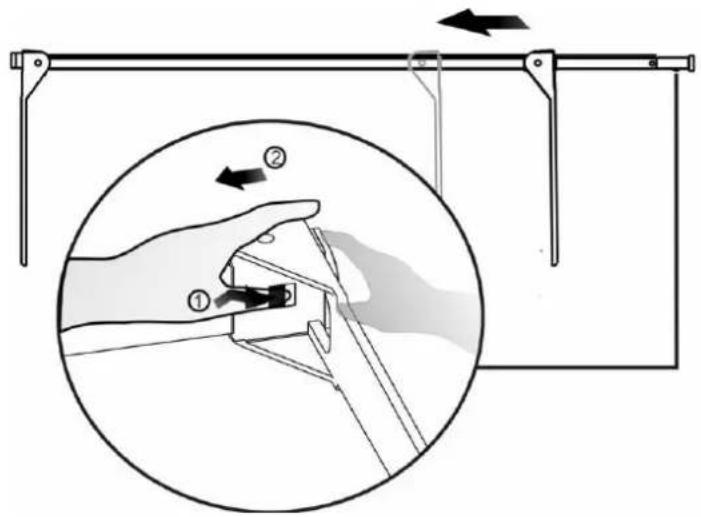
text_image
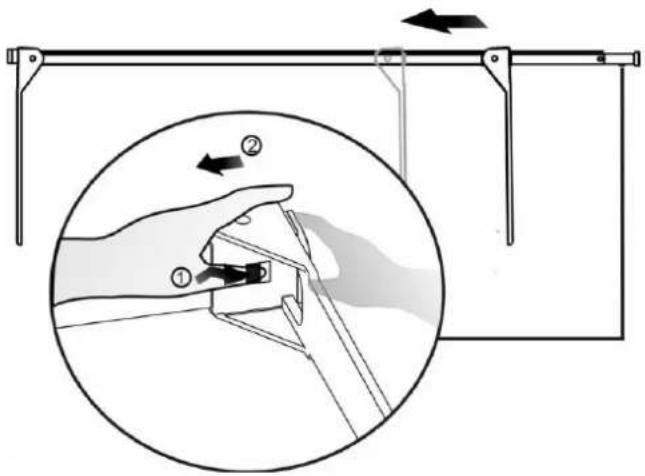
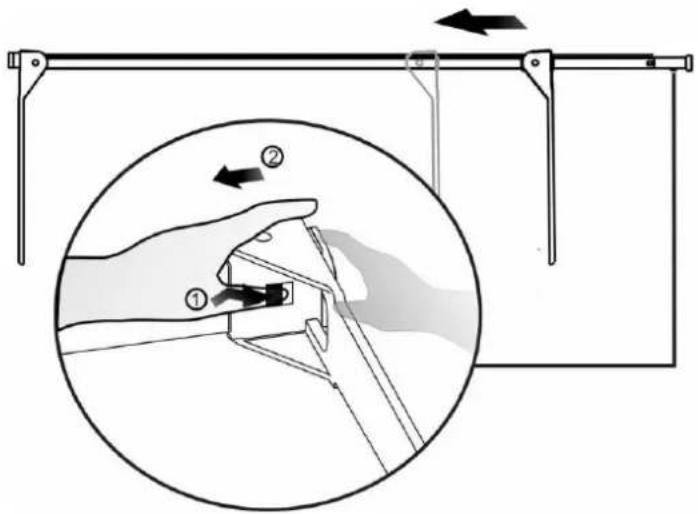
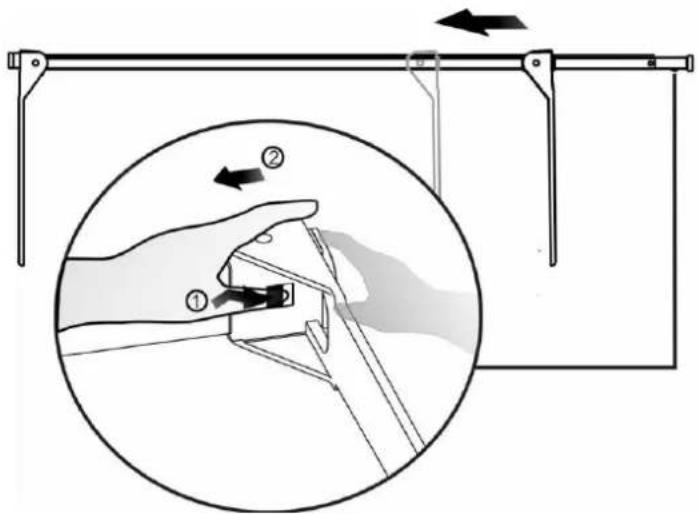
Diagram illustrating hand tool positioning and movement, showing step ① and step ② with directional arrows and a magnified inset of the hand holding a tool.⇒ To move the stop, loosen the clamping by pressing the black button [1].
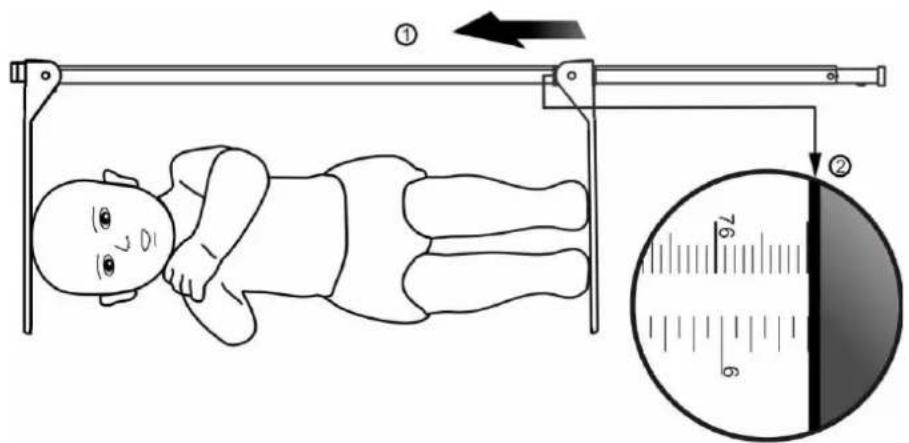
text_image
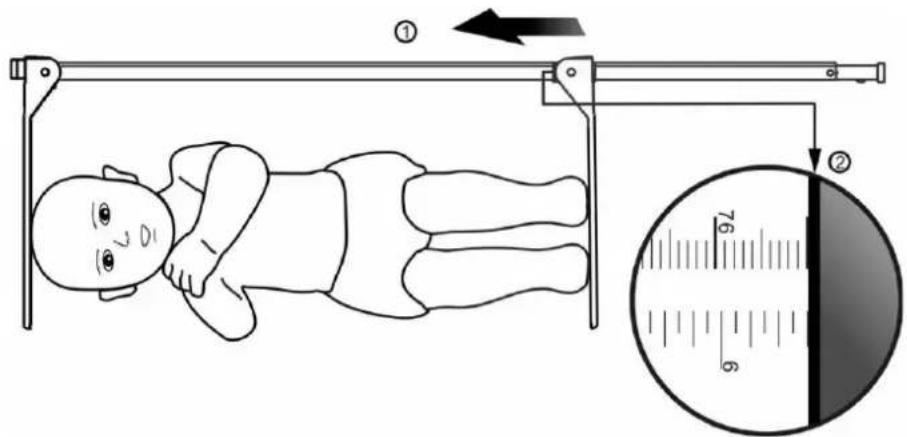
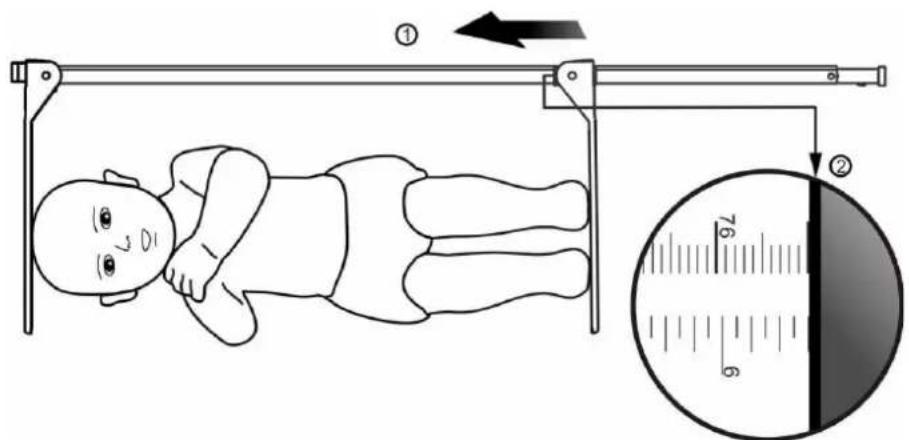
Illustration showing a person lying on a horizontal bar with an inset magnified view of the measurement scale.→ Position the baby in a way that the head touches gently the fixed stop.
→ Shift caliper gauge acc. to fig. till the heel stop.
→ Read body height on red marking.
 | ⇒ Do not leave the baby unattended.⇒ When shifting the caliper gauge, make sure that no harm is done to the baby and that its hands and feet do not rest on the measuring rod.⇒ Press the baby’s knees gently onto the weighing pan. |
 | A correctly exercised height measurement will achieve an accuracy of up to 5 mm. |
8 Servicing, maintenance, disposal
8.1 Cleaning / disinfecting
Clean the body height measuring rod with household detergent or a commercially available disinfectant, e.g. 70% isopropanol.
We recommend a detergent suitable for wiping disinfection. Please follow manufacturer's instructions.
Do not use abrasive or aggressive cleaners such as spirits or alcohol or similar as they might damage the high-quality surface.

Do not spray the body height measuring rod with disinfectant, just wipe it.
→ Remove dirt immediately
8.2 Sterilisation
Sterilization of the device not allowed.
8.3 Servicing, maintenance
The appliance may only be opened by trained service technicians who are authorized by KERN.
8.4 Disposal
Disposal of packaging and the body height measuring rod must be carried out by owner-operator according to valid national or regional law of the location where the appliance is used.
Table des matières
text_image
Warning symbols and icons: triangular warning triangle with exclamation mark, person reading a book, open book with letter 'i'text_image
Diagram illustrating hand tool positioning and movement, showing step ① to ② with directional arrows and a magnified inset of the handle mechanism.text_image
Illustration showing a person lying on a horizontal bar with an inset measuring the 76/65 scale, labeled with positions ① and ②.natural_image
Simple line drawing of a horizontal beam with two flanged ends and a central support (no text or symbols)
natural_image
Diagram of a mechanical linkage system with dashed and solid arrows indicating motion direction (no text or symbols)
natural_image
Simple line drawing of a horizontal beam supported at both ends (no text or symbols)
text_image
7cm inch 99 3 100text_image
Diagram illustrating hand tool positioning and movement, showing step ① and step ② with directional arrows and a magnified inset of the handle mechanism.text_image
Illustration showing a person lying on a horizontal bar with an arrow indicating direction and a magnified view of the measurement scale.natural_image
Simple line drawing of a horizontal beam with two flanged ends and a central support (no text or symbols)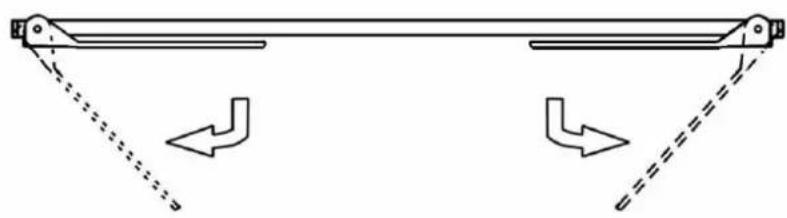
natural_image
Diagram of a mechanical linkage system with dashed and solid arrows indicating motion direction (no text or symbols)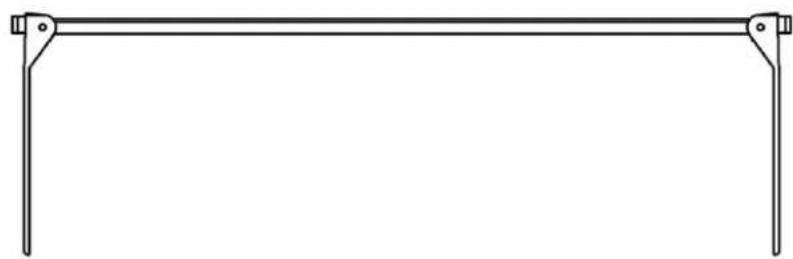
natural_image
Simple line drawing of a horizontal beam supported at both ends (no text or symbols)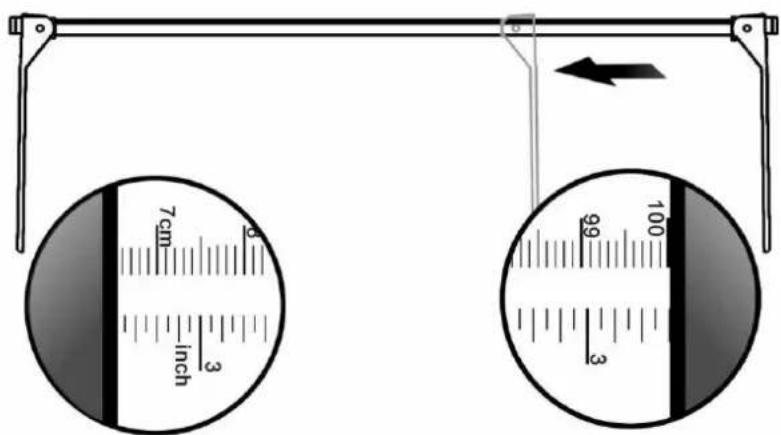
text_image
7cm inch 99 3 100text_image
Diagram illustrating hand tool positioning and movement, showing step ① and step ② with directional arrows and a magnified inset of the handle mechanism.text_image
Illustration showing a person lying on a horizontal bar with an inset magnified view of the measurement scale.natural_image
Three black-and-white icons: warning triangle, person reading a book, and open book with 'i' (no text or symbols)6.2 Emballage / returntransport
Alle dele af den originale emballage bør bevares af hensyn til eventuel returtransport. Til returtransport anvendes kun den originale emballage.
6.3 Leveringsomfang
text_image
Diagram illustrating hand tool positioning and movement, showing step ① to step ② with directional arrows and a magnified inset.text_image
Illustration showing a person lying on a horizontal bar with an inset magnified view of the measurement scale.8.1 Rengøring/desinficering
text_image
Diagram illustrating hand tool positioning and movement, showing step ① to step ② with directional arrows and a magnified inset.text_image
Illustration showing a person lying on a horizontal bar with an arrow indicating direction and a magnified view of the measurement scale.natural_image
Three black-and-white icons: warning triangle, person reading a book, and open book with 'i' (no text or symbols)
natural_image
Simple line drawing of a horizontal beam with two flanged ends and a central support (no text or symbols)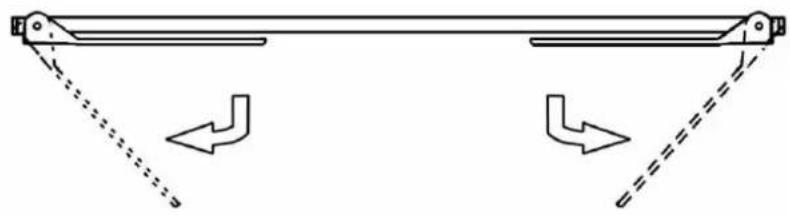
natural_image
Pure mechanical diagram showing a lever system with two curved arrows indicating rotational motion (no text or symbols)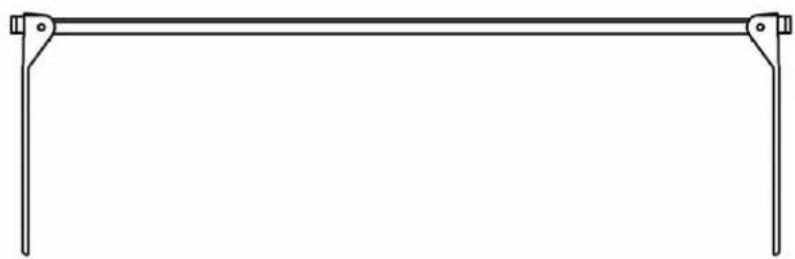
natural_image
Simple line drawing of a horizontal beam supported at both ends (no text or symbols)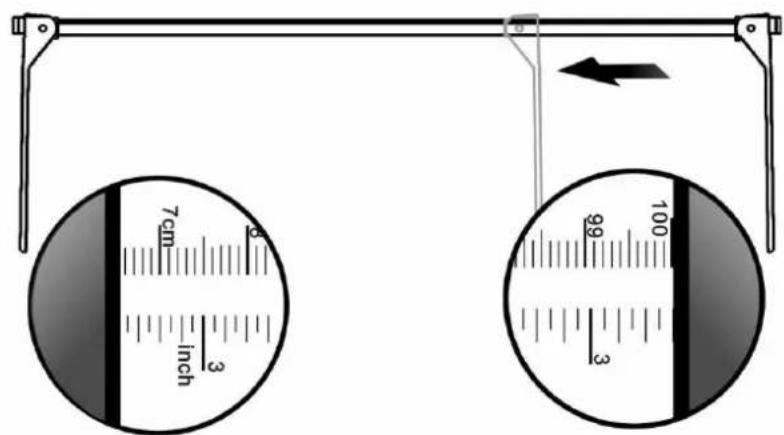
text_image
7cm inch 99 3 100text_image
Diagram illustrating hand tool positioning and movement, showing step ① to step ② with directional arrows and a magnified inset.text_image
Illustration showing a person lying on a horizontal bar with an inset magnified view of the measurement scale.natural_image
3D mechanical assembly diagram labeled 'Wall' with no readable text or symbols on the structure itselfnatural_image
Simple line drawing of a horizontal beam with two flanged ends and a central support (no text or symbols)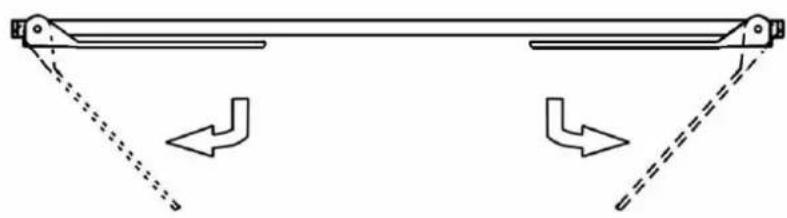
natural_image
Diagram of a mechanical linkage system with dashed and solid arrows indicating motion direction (no text or symbols)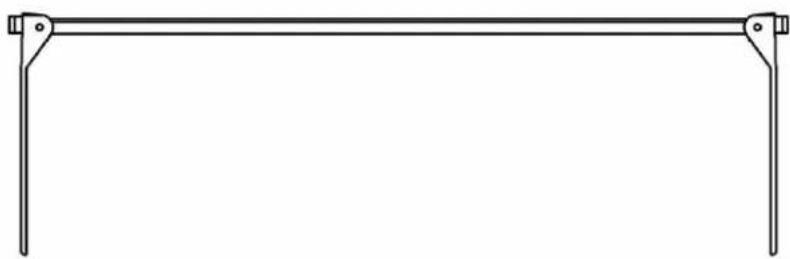
natural_image
Simple line drawing of a horizontal beam supported at both ends (no text or symbols)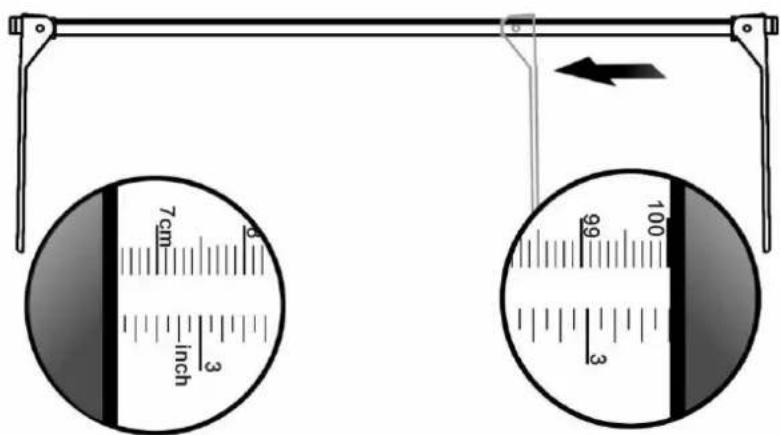
text_image
7cm inch 99 3 100text_image
Diagram illustrating hand tool positioning and movement, showing step ① to step ② with directional arrows and a magnified inset.text_image
Illustration showing a person lying on a horizontal bar with an inset magnified view of the measurement scale.natural_image
Simple line drawing of a horizontal beam with two flanged ends and a central support (no text or symbols)2.
natural_image
Diagram of a mechanical lever system with dashed and solid arrows indicating motion direction (no text or symbols)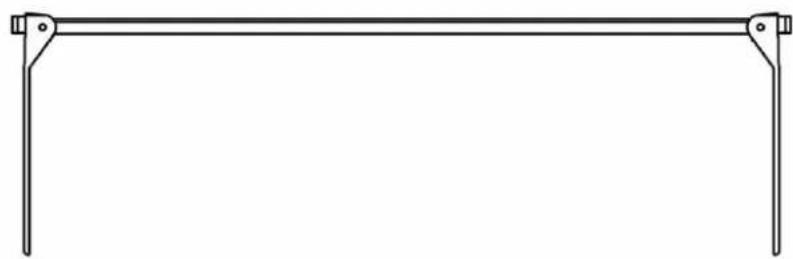
natural_image
Simple line drawing of a horizontal beam supported at both ends (no text or symbols)3.
text_image
7cm inch 99 3 100text_image
Diagram illustrating hand tool positioning and movement, showing step ① to step ② with directional arrows and a magnified inset.text_image
Illustration showing a person lying on a horizontal bar with an inset magnified view of the measurement scale.natural_image
Simple line drawing of a horizontal beam with two flanged ends and a central support (no text or symbols)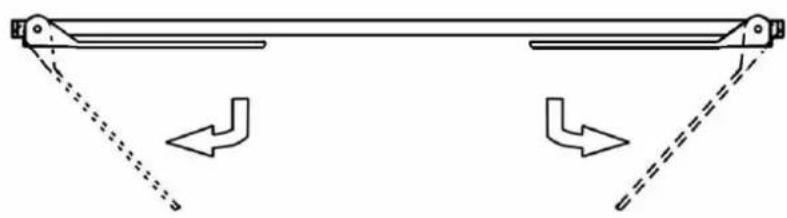
natural_image
Diagram of a mechanical lever system with dashed and solid arrows indicating motion direction (no text or symbols)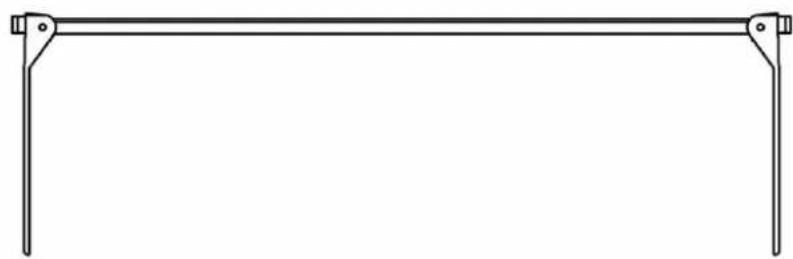
natural_image
Simple line drawing of a horizontal beam supported at both ends (no text or symbols)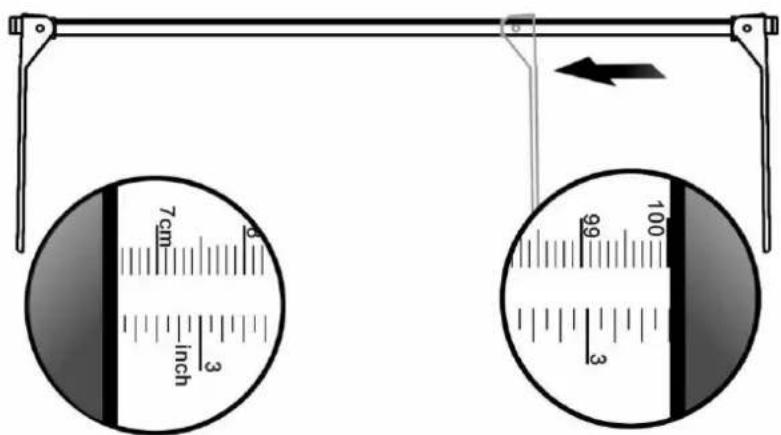
text_image
7cm inch 99 3 100text_image
Diagram illustrating hand tool positioning and movement, showing step ① to step ② with directional arrows and a magnified inset.text_image
Illustration showing a person lying on a horizontal bar with an inset magnified view of the measurement scale.natural_image
Three black-and-white icons: warning triangle, person reading a book, and open book with 'i' (no text or symbols)„Obratite pozornost na popratni dokument“ ili „Pridržavajte se uputa za upotrebu“

natural_image
Simple line drawing of a horizontal beam with two flanges (no text or symbols)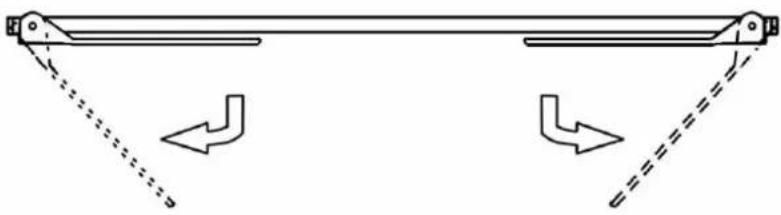
natural_image
Diagram of a mechanical lever system with two curved arrows indicating motion direction (no text or labels)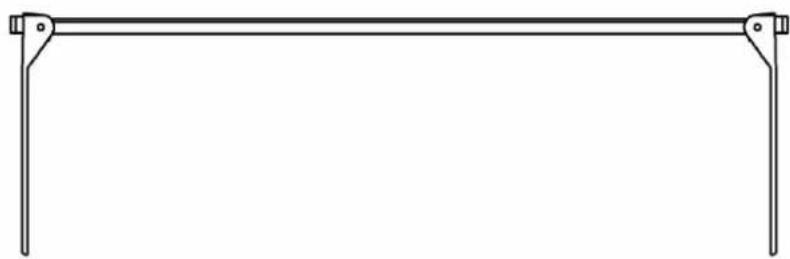
natural_image
Simple line drawing of a horizontal bar with two vertical supports at both ends (no text or symbols)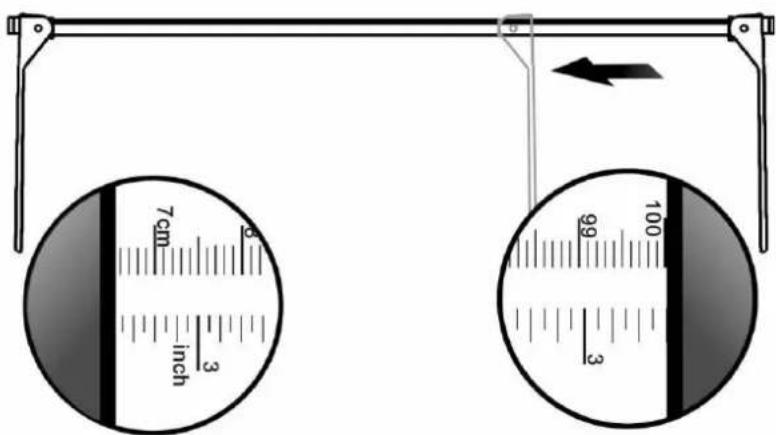
text_image
7cm 6 3 inch 99 100 3text_image
Diagram illustrating hand tool positioning and movement, showing step ① to step ② with directional arrows and a magnified inset.→ Za pokretanje ograničnika otpustite blokadu pritiskom črnog gumba [1].
text_image
Illustration showing a person lying on a horizontal bar with an inset magnified view of the measurement scale.→ Postavite dijete na takav način da bi njegova glava ležala do fiksnog ograničnika.
→ Pokretajte mjerni klizač do stopala, kao što je prikazano.
→ Pročitajte visinu crvenom oznakom.
 | ⇒ Ne ostavljajte bebu bez nadzora.⇒ Pazite da prilikom pomicanja mjerne čeljusti ne ozlijedite bebu i da se njezine ruke i stopala ne nalaze na mjernoj šipci.⇒ Nježno pritisnite bebina koljena na pliticu za vaganje. |
 | Ispravnim mjerenjem postiže se preciznost rezultata mjerenja do 5 mm. |
8 Servisiranje, održavanje i zbrinjavanje
natural_image
Three black-and-white icons: warning triangle, person reading a book, and open book with letter 'i' (no text or symbols beyond basic symbols)
natural_image
Simple line drawing of a horizontal beam with two flanged ends and a central support (no text or symbols)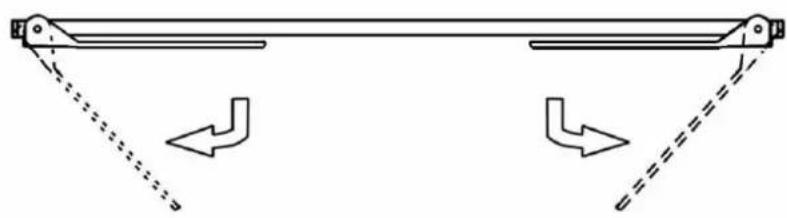
natural_image
Diagram of a mechanical linkage system with dashed and solid arrows indicating motion direction (no text or symbols)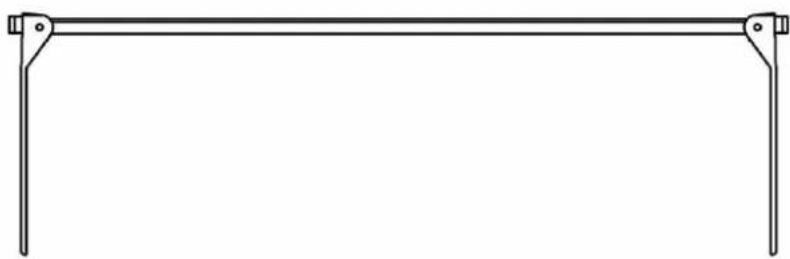
natural_image
Simple line drawing of a horizontal beam supported at both ends (no text or symbols)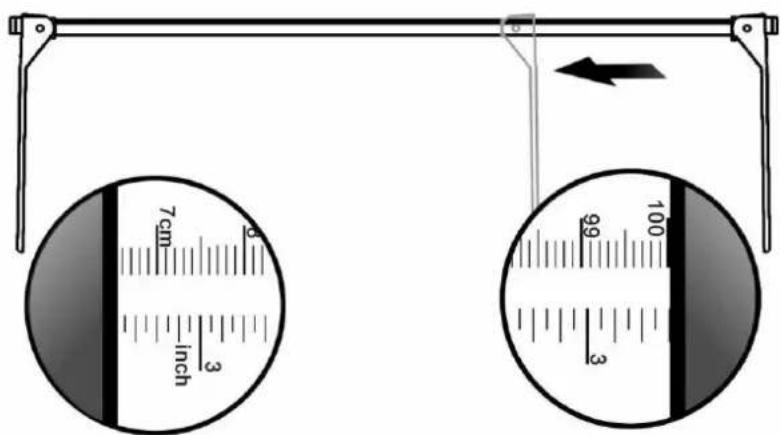
text_image
7cm inch 99 3 100text_image
Diagram illustrating hand tool positioning and movement, showing step ① and step ② with directional arrows and a magnified inset.text_image
Illustration showing a person lying on a horizontal bar with an arrow indicating direction and a magnified view of the measurement scale.natural_image
Three black-and-white icons: warning triangle, person reading a book, and open book with letter 'i' (no text or symbols beyond basic symbols)
Medicinos prietaiso pagaminimo data
natural_image
Simple line drawing of a horizontal beam with two flanged ends and a central support (no text or symbols)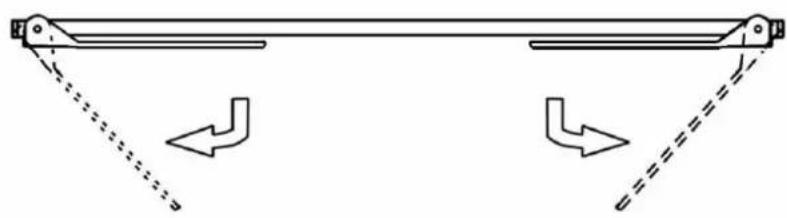
natural_image
Diagram of a mechanical linkage system with dashed and solid arrows indicating motion direction (no text or symbols)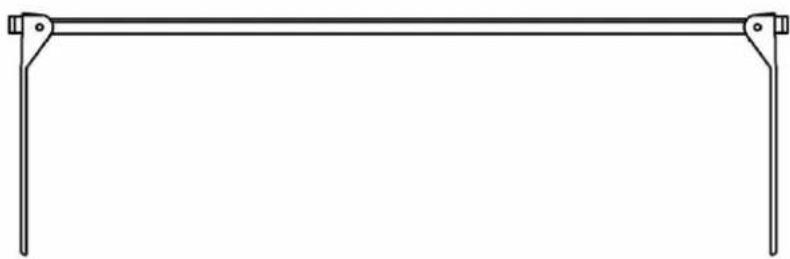
natural_image
Simple line drawing of a horizontal beam supported at both ends (no text or symbols)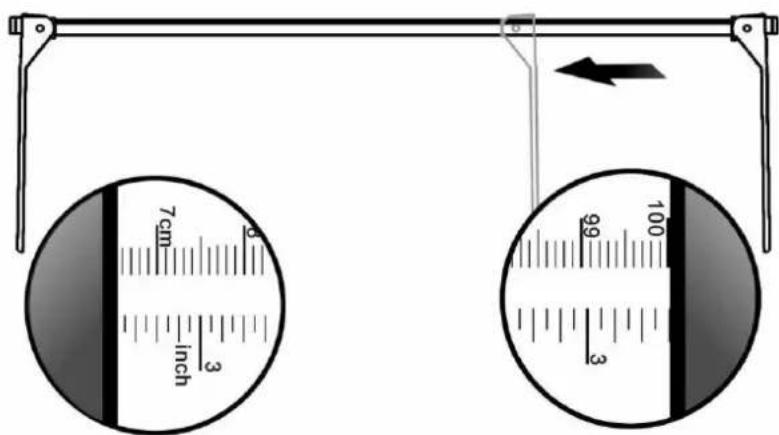
text_image
7cm inch 6 3 99 3 100text_image
Diagram illustrating hand tool positioning and movement, showing step ① and step ② with directional arrows and a magnified inset of the handle mechanism.text_image
Illustration showing a person lying on a horizontal bar with an arrow indicating leftward movement, alongside a magnified view of the measurement scale.natural_image
Simple line drawing of a horizontal beam with two flanged ends and a central support (no text or symbols)
natural_image
Diagram of a mechanical linkage system with dashed and solid arrows indicating motion direction (no text or symbols)
natural_image
Simple line drawing of a horizontal beam supported at both ends (no text or symbols)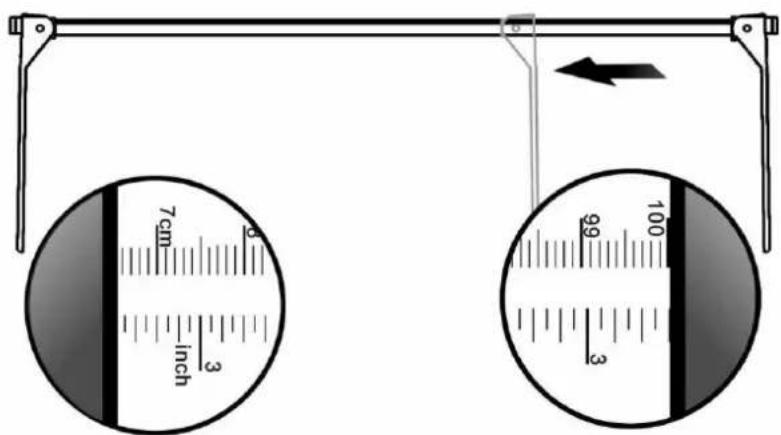
text_image
7cm inch 99 3 100text_image
Diagram illustrating hand tool positioning and movement, showing step ① and step ② with directional arrows and a magnified inset.text_image
Illustration showing a person lying on a horizontal bar with an inset magnified view of the measurement scale.text_image
Warning symbol, warning triangle, person reading a book, and open book with 'i' icontext_image
Diagram illustrating hand tool positioning and movement, showing step ① to step ② with directional arrows and a magnified inset.text_image
Diagram illustrating a person lying on a horizontal bar with an inset showing a measurement scale and pointer indicating 76/6.6 Utpakking/montering
6.1 Kontroll ved mottak
natural_image
Simple line drawing of a horizontal beam with two flanged ends and support notches (no text or symbols)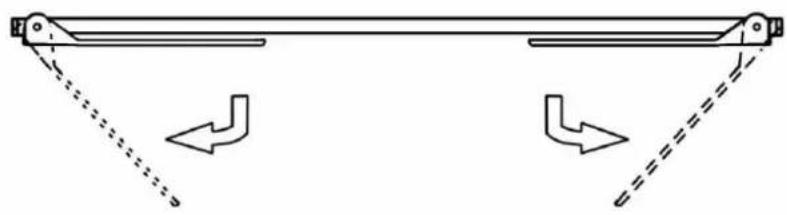
natural_image
Pure mechanical diagram showing a lever system with dashed arrows indicating motion direction (no text or symbols)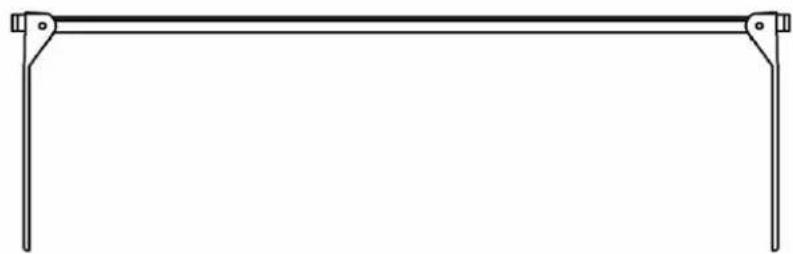
natural_image
Simple line drawing of a horizontal beam supported at both ends (no text or symbols)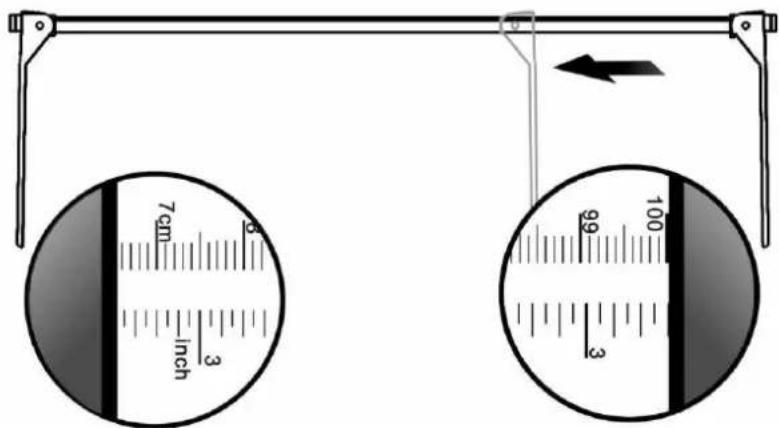
text_image
7cm inch 6 3 99 100 3Fast måletunge
Bevegelig måletunge
text_image
Diagram illustrating hand tool positioning and movement, showing step ① and step ② with directional arrows and a magnified inset.text_image
Diagram illustrating a person performing a physical exercise on a horizontal bar, with an inset showing a measurement scale.⇒ Plasser barnet på en slik måte at barnets hode ligger ved den faste måletungen.
natural_image
Three black-and-white icons: warning triangle with exclamation mark, person reading a book, and open book with 'i' (no text or symbols beyond basic icons)natural_image
Simple line drawing of a horizontal support structure with two side supports (no text or symbols)
natural_image
Diagram of a mechanical lever system with dashed and solid arrows indicating motion direction (no text or symbols)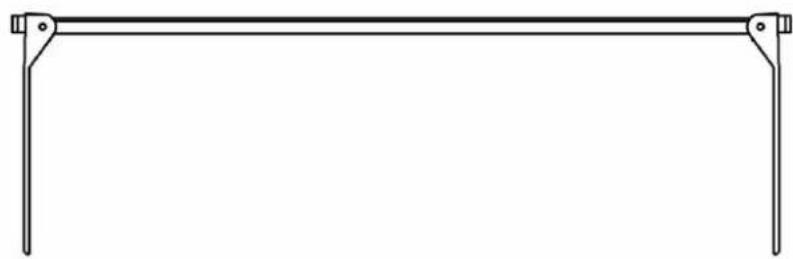
natural_image
Simple line drawing of a horizontal beam supported at both ends (no text or symbols)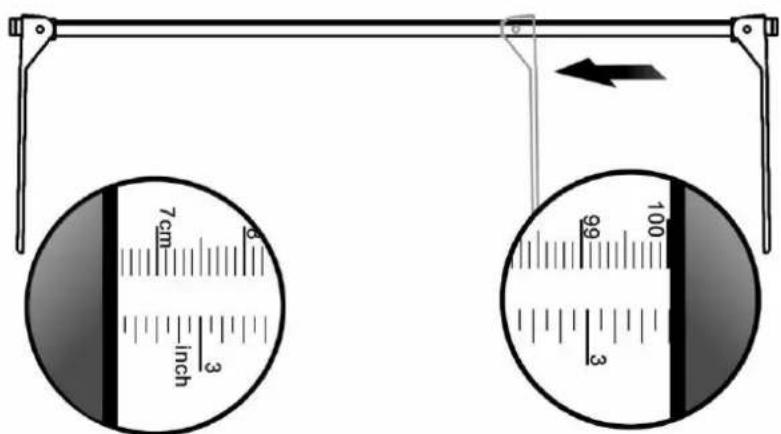
text_image
7cm inch 8 3 99 100 3Limitador fixo
Limitador deslizante
text_image
Diagram illustrating hand tool positioning and movement, showing step ① to step ② with directional arrows and magnified detail view.text_image
Illustration showing a person performing a horizontal bar on exercise, with an inset magnifying the measurement scale.natural_image
Simple line drawing of a horizontal support bar with two side extensions (no text or symbols)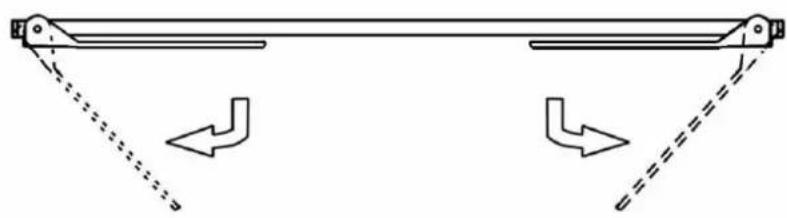
natural_image
Diagram of a mechanical lever system with dashed and solid arrows indicating motion direction (no text or symbols)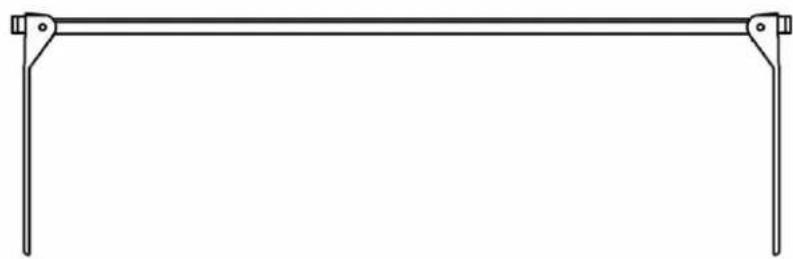
natural_image
Simple line drawing of a horizontal beam supported at both ends (no text or symbols)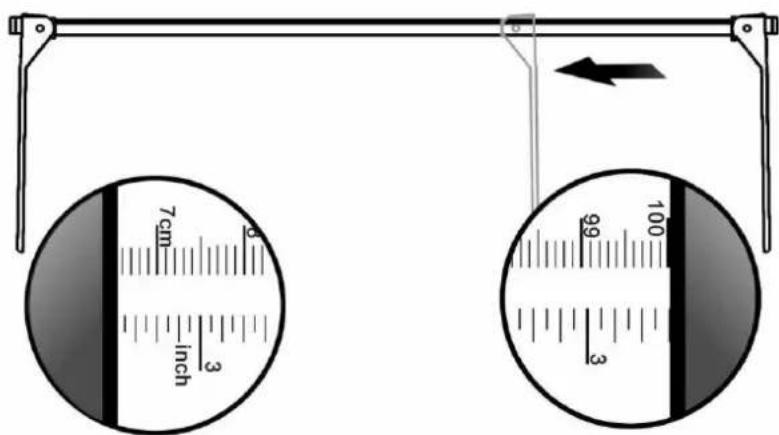
text_image
7cm inch 6 3 99 3 100text_image
Diagram illustrating hand tool positioning and movement, showing step ① to step ② with directional arrows and a magnified inset.text_image
Illustration showing a person lying on a horizontal bar with an inset magnified view of measurement scale reading 76 and 6.natural_image
Simple line drawing of a horizontal beam with two flanged ends and support notches (no text or symbols)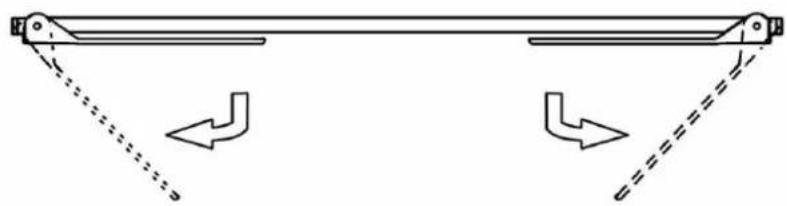
natural_image
Pure mechanical linkage diagram without any text, numbers, or symbols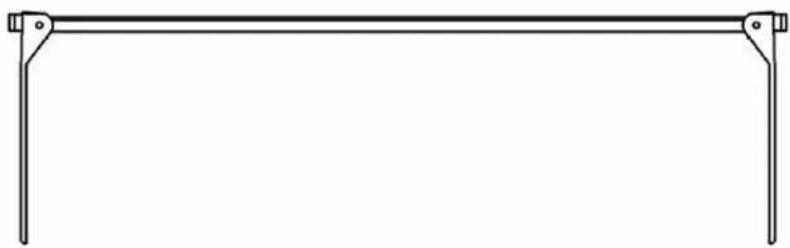
natural_image
Simple line drawing of a horizontal beam supported at both ends (no text or symbols)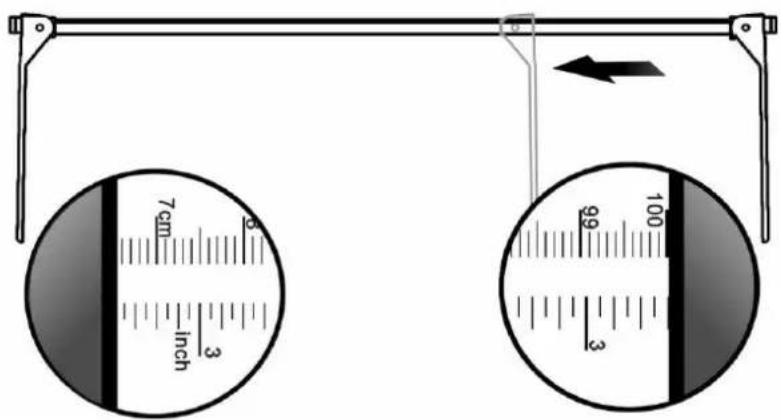
text_image
7cm inch 99 3 100Limitator fix
Limitator mobil
text_image
Diagram illustrating hand tool positioning and movement, showing step ① to ② with directional arrows and a magnified inset of the hand holding a tool.text_image
Illustration showing a person lying on a horizontal bar with an arrow indicating direction and a magnified view of the measurement scale.6 Uppackning/Installation
6.1 Leveranskontroll
natural_image
Simple line drawing of a horizontal beam with two flanged ends and a central support (no text or symbols)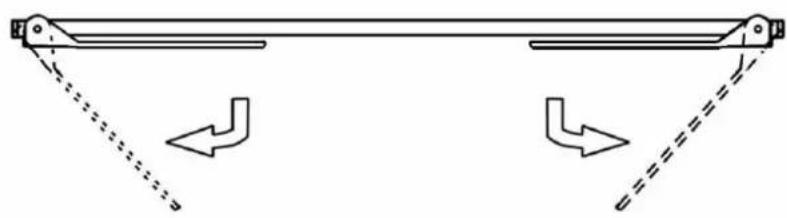
natural_image
Diagram of a mechanical linkage system with dashed and solid arrows indicating motion direction (no text or symbols)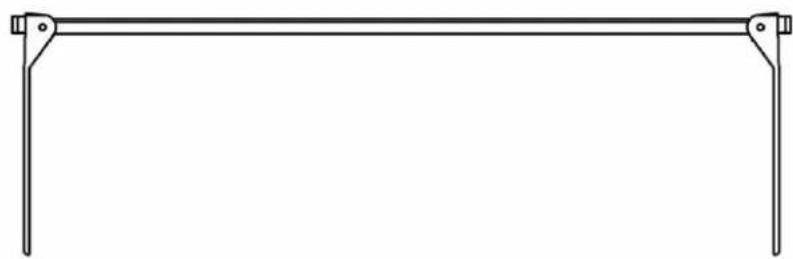
natural_image
Simple line drawing of a horizontal beam supported at both ends (no text or symbols)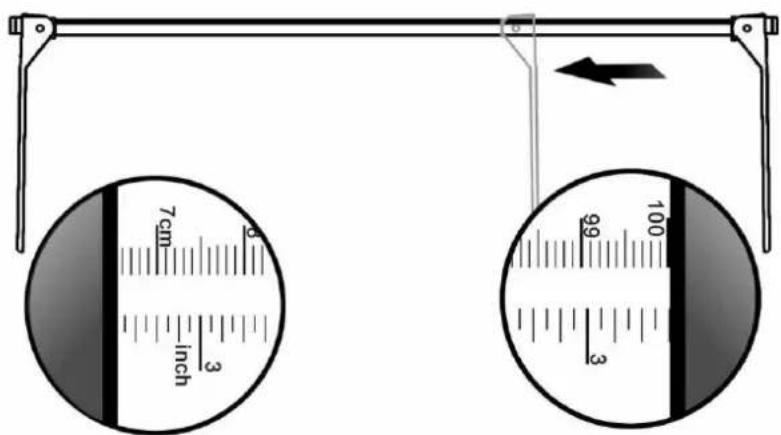
text_image
7cm inch 99 3 100text_image
Diagram illustrating hand tool positioning and movement, showing step ① to step ② with directional arrows and a magnified inset.text_image
Illustration showing a person lying on a horizontal bar with an inset magnified view of the measurement scale.8.1 Rengöring/desinficering
natural_image
Simple line drawing of a horizontal support bar with two side supports (no text or symbols)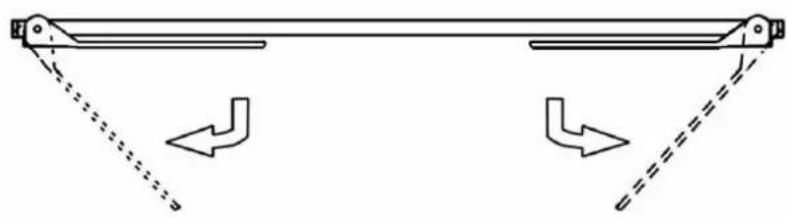
natural_image
Diagram of a mechanical lever system with dashed and solid arrows indicating motion direction (no text or symbols)
natural_image
Simple line drawing of a horizontal beam supported at both ends (no text or symbols)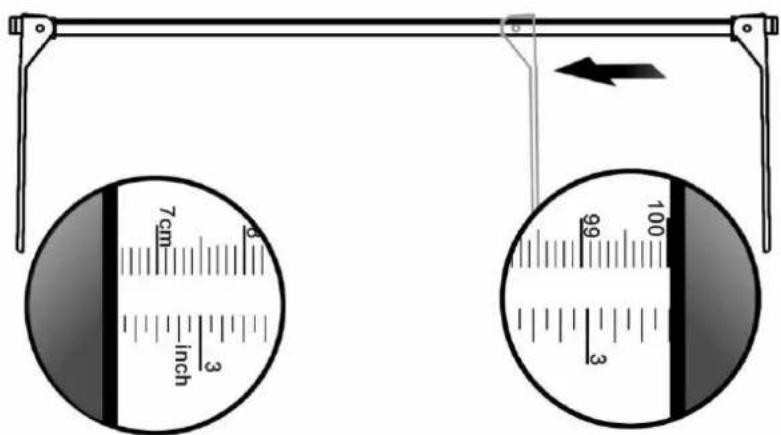
text_image
7cm inch 99 3 100Pevný oddel'ovač
Posuvný oddel'ovač
text_image
Diagram illustrating hand tool positioning and movement, showing step ① to step ② with directional arrows and a magnified inset.Ak chcete presunúť blokádu, stlačte čierne tlačidlo [1].
text_image
Illustration showing a person lying on a horizontal bar with an inset magnified view of the measurement scale.natural_image
Simple line drawing of a horizontal support structure with two side supports (no text or symbols)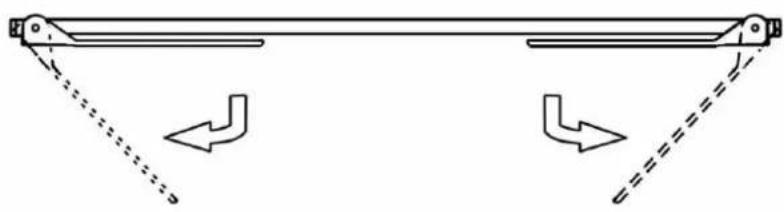
natural_image
Pure mechanical linkage diagram without any text, numbers, or symbols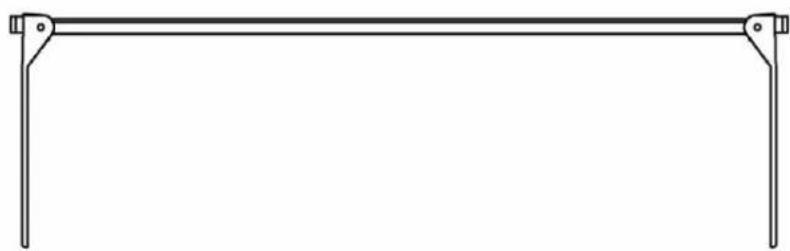
natural_image
Simple line drawing of a horizontal beam supported at both ends (no text or symbols)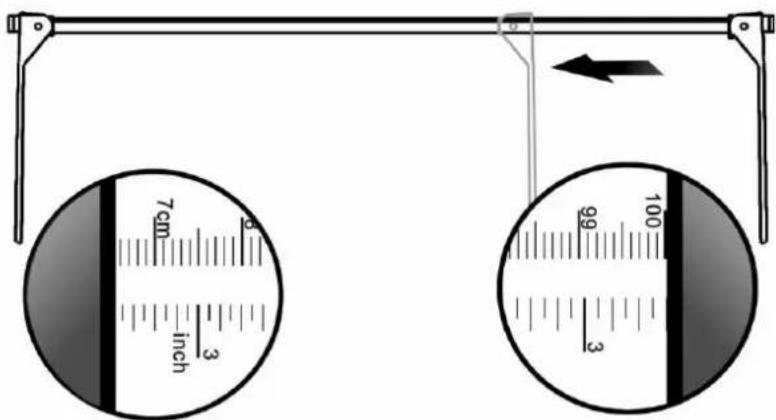
text_image
7cm inch 6 3 99 3 100text_image
Diagram illustrating hand tool positioning and movement, showing step ① to step ② with directional arrows and a magnified inset.→ Za premikanje ograničnika sprostite blokado s pritiskom na črni gumb [1].