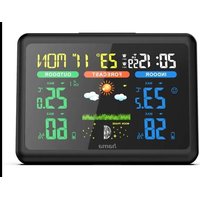
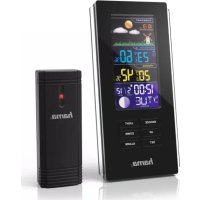
EWS Intro 186301 - Weather Station HAMA - Free user manual and instructions
Find the device manual for free EWS Intro 186301 HAMA in PDF.
| Product type | Wireless weather station |
| Brand | Hama |
| Model | EWS Intro 186301 |
| Base station power supply | 2 LR6/AA batteries (3.0 V) |
| Measuring station power supply | 2 LR6/AA batteries (3.0 V) |
| Indoor temperature measurement range | 0 to 50 °C (32 to 122 °F) |
| Outdoor temperature measurement range | -20 to +60 °C (-4 to +140 °F) |
| Measurement increment | 0.1 °C |
| Radio frequency | 433 MHz |
| Maximum range | ≤ 30 m |
| DCF radio-controlled clock | Yes (base station) |
| Alarm function | Yes, 2 alarms |
| Snooze function | Yes |
| Temperature trend display | Yes (rising, stable, falling) |
| Min/max values memory | Yes |
| Time zone setting | Yes (from -12 to +12) |
| Weekday languages | German, French, Spanish, Italian, English |
| Cleaning | Slightly damp non-linting cloth, no harsh detergent |
| Safety | Do not open, do not expose to moisture, use recommended batteries |
| Repairability | Entrust to a qualified technician |
Frequently Asked Questions - EWS Intro 186301 HAMA
User questions about EWS Intro 186301 HAMA
0 question about this device. Answer the ones you know or ask your own.
Ask a new question about this device
Download the instructions for your Weather Station in PDF format for free! Find your manual EWS Intro 186301 - HAMA and take your electronic device back in hand. On this page are published all the documents necessary for the use of your device. EWS Intro 186301 by HAMA.
USER MANUAL EWS Intro 186301 HAMA
text_image
DATE MONTH 12-4 DAY 11:59 40 MT 22.1 18.0 hamaOperatingInstructions
Bedienungsanleitung
Moded'emploi
Instruccionesdeuso
Gebruiksaanwijzing
Istruzioniperl'uso
Instrukcjaobsługi
Használatiútmutató
Manualdeutilizare
Návodkpoužití
Návodnapoužitie
Manualdeinstruções
Bruksanvisning
natural_image
Vertical column of black rectangular blocks with no text or symbols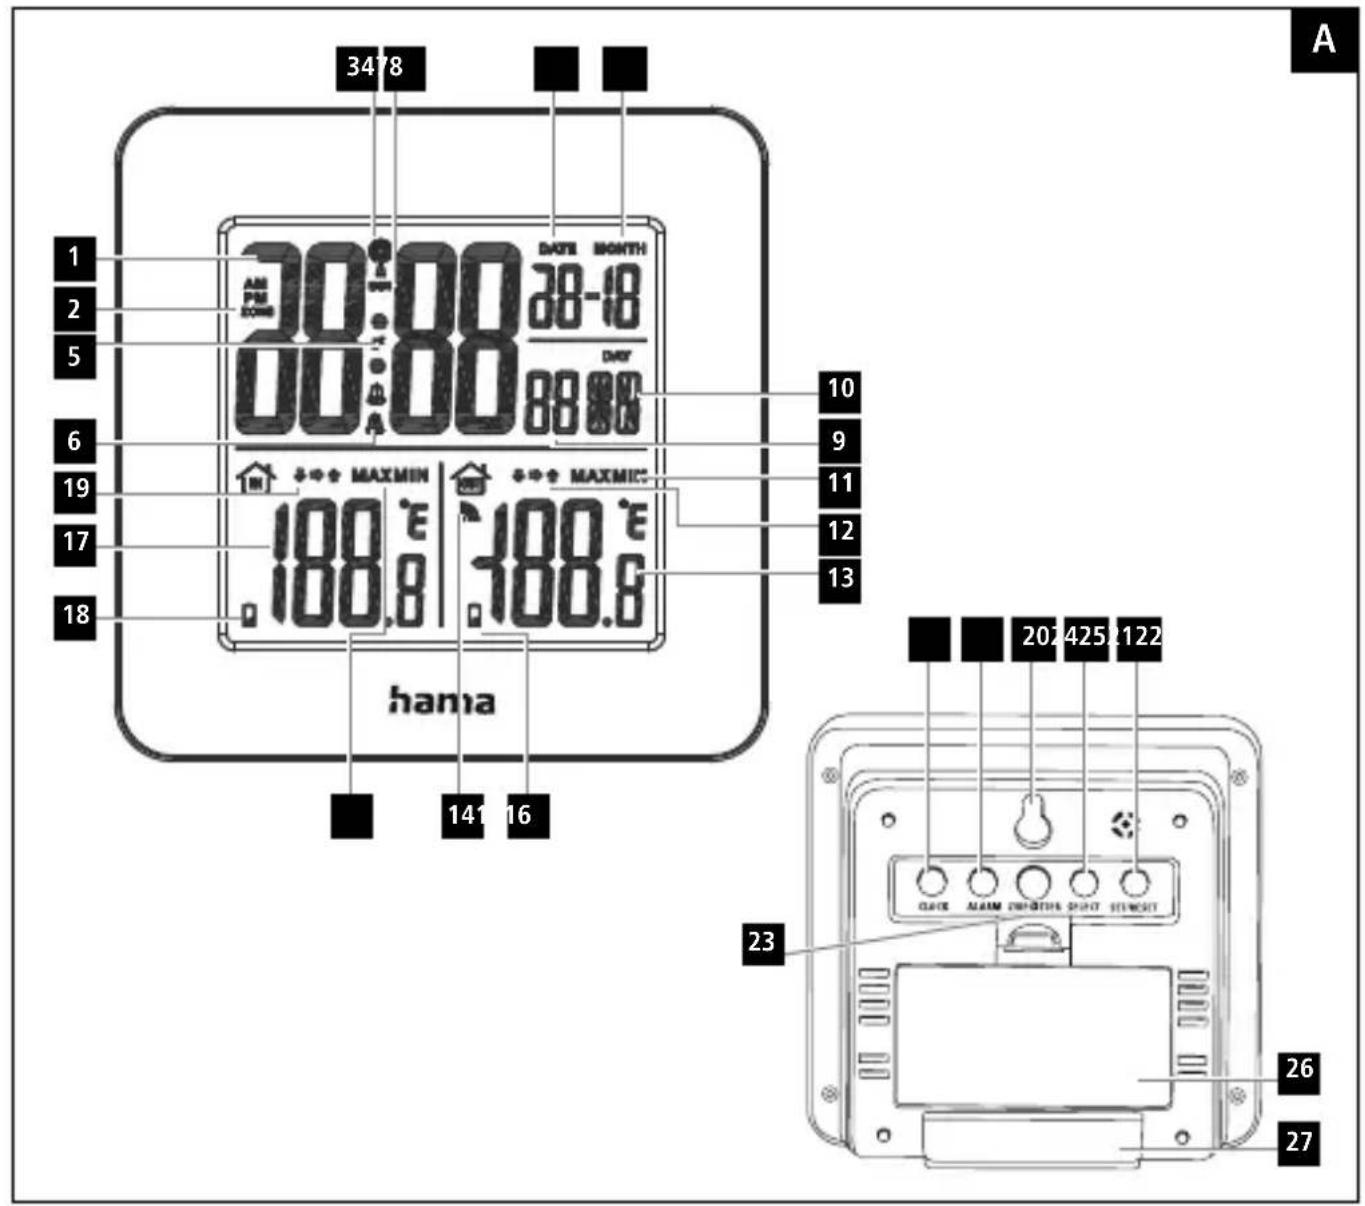
text_image
34/8 1 2 5 6 19 17 18 30:00 DATE MONTH 38-18 00:00 DAY 88.88 MAXMIN 188.8 188.6 hama 10 9 11 12 13 141 16 20:425 122 23 26 27 DATE MAIN INTESTING DUTS HI/WEET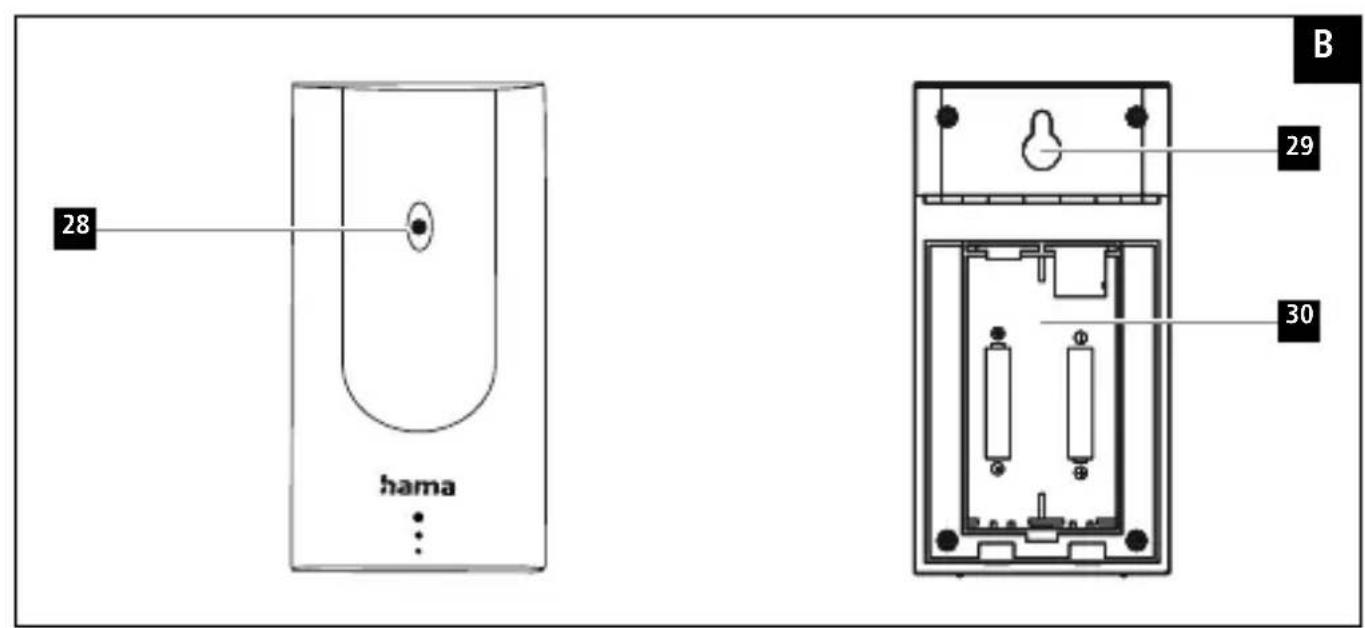
text_image
28 hama B 29 30ControlsandDisplays
ABasestation
1.Time
2.Timezonedisplay
3.DCFradiosymbol
4.Displaysummertime
5.Snoozesymbol
6.Alarm1,Alarm2
7.Day
8.Month
9.Seconds
10.Weekday
11.Maximum/minimumoutdoortemperaturevalue
-
Displayofoutdoortemperaturetrend
-
Outdoor temperature
14.Sensorradiosymbol
- Batterycapacityofsensor
16.Maximum/minimumindoortemperaturevalue
17.Indoortemperature
-
Batterycapacity of weather station
-
Displayofindoortemperaturetrend
-
Recessforwallmounting
-
CLOCK button = settings/confirms the setting
22.ALARMbutton=display/setalarmmode
23.Z/Registerbutton=manualsearchforradiosignal/interrupts thealarm/Register
- SELECTbutton =selectsorstopsthealarm/retrievesthemaximum/minimum valuesstored/setsthetemperatureunit
25.SET/RESETbutton=increasesorlowersthesetting/reset
26.Batterycompartment
27.Base
BMeasuringstation
28.StatusLED
- Recessforwallmounting
30.Batterycompartment
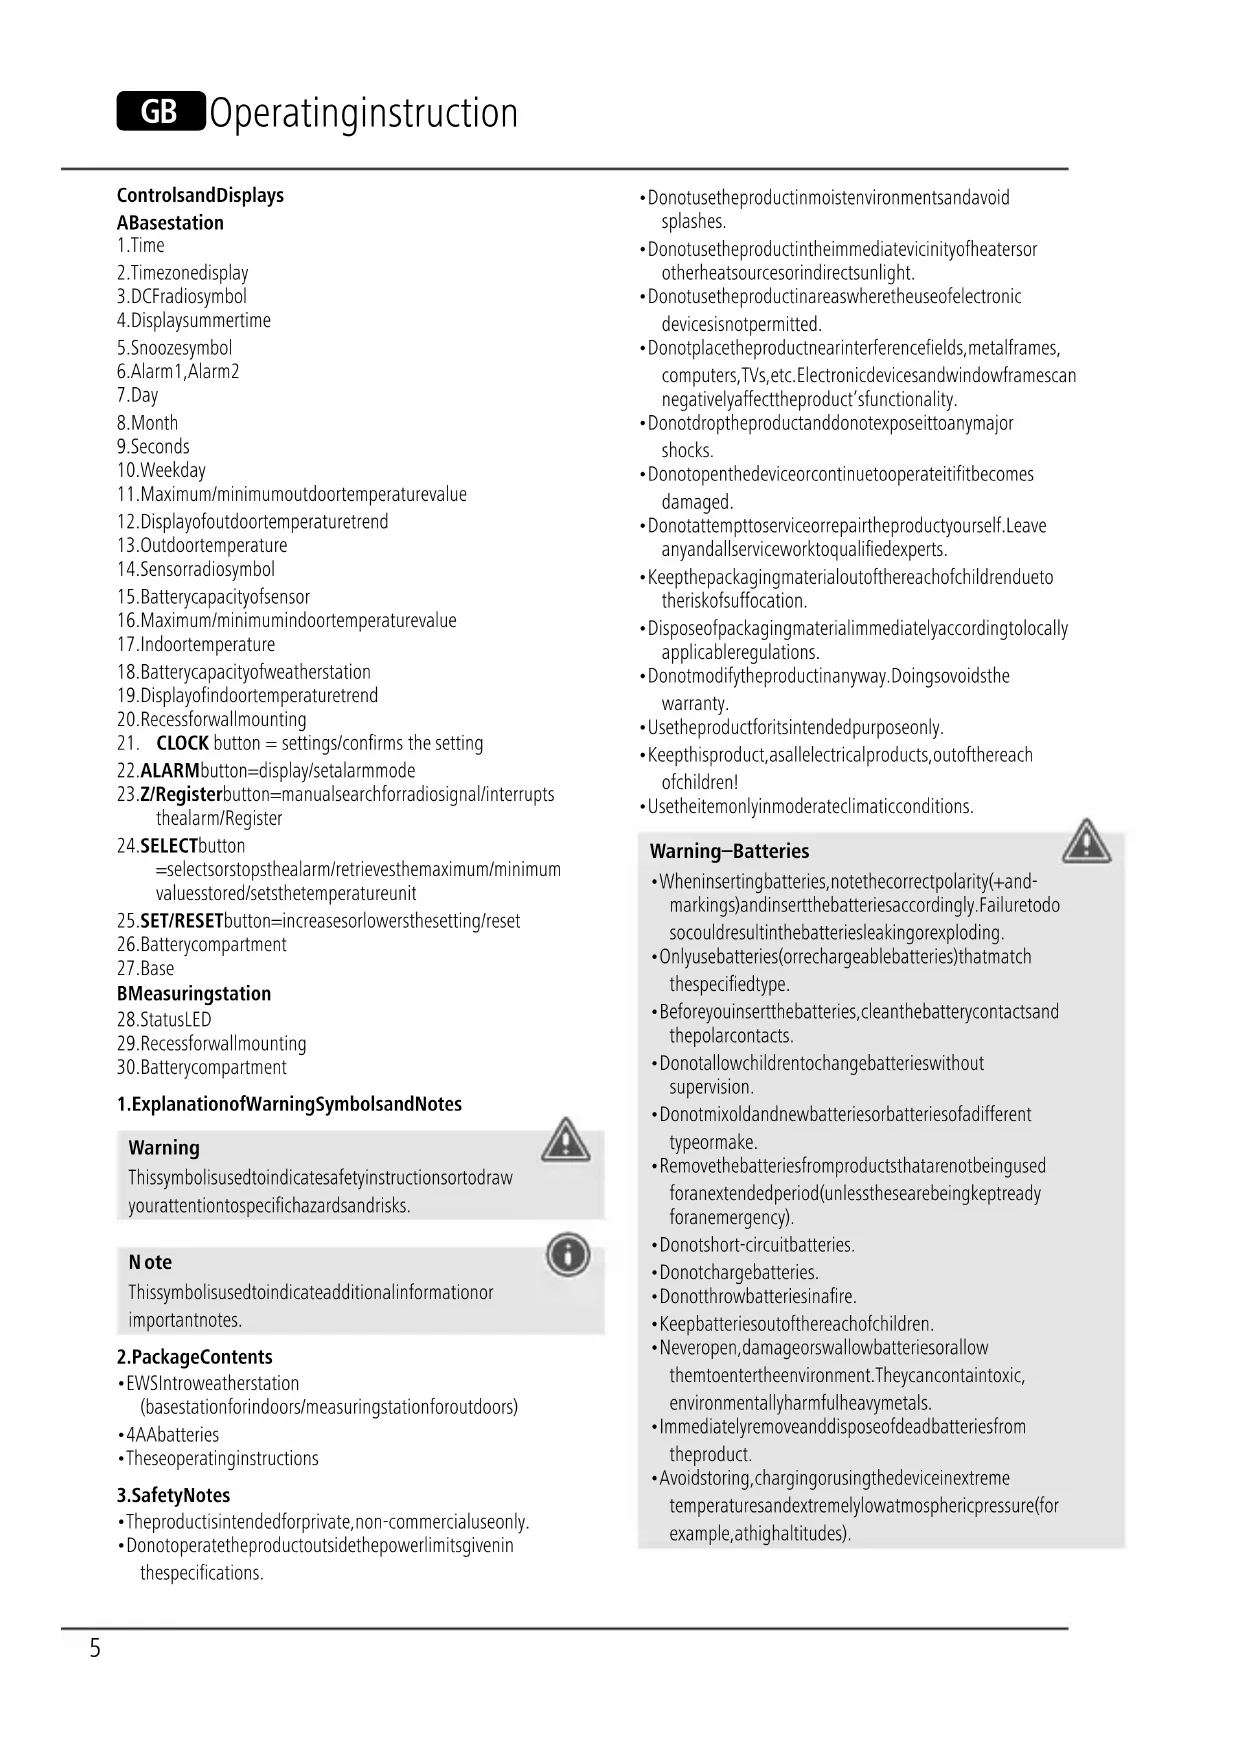
1. ExplanationofWarningSymbolsandNotes
Warning
This symbol is used to indicate safety instructions to draw your attention to specific hazards and risks.

Note
This symbol is used to indicate additional information or important notes.

2.PackageContents
• EWSIntroweatherstation (basestationforindoors/measuringstationforoutdoors)
• 4AAbatteries
• Theseoperatinginstructions
3.SafetyNotes
• The product is intended for private, non-commercial use only.
- Donotoperatetheproductoutsidethepowerlimitsgivenin thespecifications.
- Donotusetheproductinmoistenvironmentsandavoid splashes.
- Donotusetheproductintheimmediatevicinityofheatersor otherheatsourcesorindirectsunlight.
- Donotusetheproductinareaswheretheuseofelectronic devicesisnotpermitted.
- Donotplacetheproductnearinterferencefields, metalframes, computers, TVs, etc. Electronicdevicesandwindowframescan negatively affect the product's functionality.
- Donotdroptheproductanddonotexposeittoanymajor shocks.
- Donotopenthedeviceorcontinuetooperateitifitbecomes damaged.
- Donotattempttoserviceorrepairtheproductyourself.Leave anyandallserviceworktoqualifiedexperts.
- Keep the packaging material out of thereach of child rendueto therisk of suffocation.
- Disposeofpackagingmaterialimmediatelyaccordingtolocally applicableregulations.
- Donotmodifytheproductinanyway.Doingsovoidsthe warranty.
- Usetheproductforitsintendedpurposeonly.
- Keep this product, as all electrical products, out of there each of children!
- Usetheitemonlyinmoderateclimaticconditions.
Warning-Batteries

- Wheninsertingbatteries, notethecorrectpolarity(+and-markings) and insertthebatteries accordingly. Failure to do socould result in the batteries leakingorexploding.
- Onlyusebatteries(orrechargeablebatteries)thatmatch thespecifiedtype.
- Beforeyouinsertthebatteries,cleanthebatterycontactsand thepolarcontacts.
- Donotallowchildrentochangebatterieswithout supervision.
- Donotmixoldandnewbatteriesorbatteriesofadifferent typeormake.
- Removethebatteriesfromproductsthatarenotbeingused foranextendedperiod(unlessthesarebeingkeptready foranemergency).
- Donotshort-circuitbatteries.
- Donotchargebatteries.
• Donotthrowbatteriesinafire.
- Keepbatteriesoutofthereachofchildren.
- Neveropen, damageorswallowbatteriesorallow themtoentertheenvironment. Theycancontaintoxic, environmentallyharmfulheavymetals.
- Immediately remove and dispose of dead batteries from the product.
- Avoidstoring, chargingorusingthedeviceinextreme temperaturesandextremelylowatmosphericpressure(for example,athighaltitudes).
4. Getting Started
4.1 Insertbatteries
Note
Beforeuse, ensure you insert the batteries in themeasuring station first and then the base station.

Measuringstation
- Openthebatterycompartment(30)andremovethecontact breaker.
- Thenclosethebatterycompartmentcover.
- ThestatusLEDlightsup.
Basestation
- Openthebatterycompartment(26)andremovethecontact breaker.
- Thenclosethebatterycompartmentcover.
4.2Replacingthebatteries
Note-Replacingthebatteries
- Notethatthestationshavetoberesynchronisedeach timeafteryouchangethebatteriesinthemeasuringor basestation.
- Todothis, removethebatteries from the other station and then reinsert them, or changethem as required.

Measuringstation
- If the symbol(nexttotheoutdoortemperature(13))is displayed, replacethetwoAAbatteriesofthemeasuringstation withtwonewones.
- Openthebatterycompartment(30),removeandproperly disposeofthedeadbatteriesandinsert
- twonewAAbatterieswiththecorrectpolarity. Thenclosethe batterycompartmentcover.
Basestation
- If the symbol(nexttotheindoortemperature(17))is displayed, replacethetwoAAbatteriesinthebasedevice withnewones.
- Openthebatterycompartment(26), removeandproperly disposeofthedeadbatteriesandinserttwonewAAbatteries withthecorrectpolarity. Thenclosethebatterycompartment cover.
5. Installation
Note-Installation
- Were recommend initially placing the base and measuring stations in the intended locations without installing them and making all these settings described
- Onlyinstallthestationsoncetheappropriatesettingshave beenmadeandastablewirelessconnectionisestablished.
6.Operation-todo.

Note
- Thewirelesstransmissionrangebetweenthemeasuring stationandbasestationisupto30minopenspaces.
Note
- Beforeinstallation,ensurethatwirelesstransmissionwill notbedisruptedbyinterferenceorobstacleslikebuildings, trees,vehicles,high-voltagelines,etc.Toavoidtransmission interference,donotoperateadjacentwirelessdeviceson thesamefrequency (433MHz).
- Before the final installation, ensure that there is sufficient reception between the intended installation locations.
- When installing themeasuring station, ensure that it is protected from direct sunlight and rain.
• The international standard height for measuring air temperature is 1.25m(4ft) above ground.

Warning
- Buyspecialorsuitableinstallationmaterialfromaspecialised dealerforwall-mounting.
- Ensure that no faulty ordamaged parts are installed.
- Neverapplyforceduringinstallation. This could damage the product.
- Beforeinstallation,ensurethatthechosenwallissuitablefor theweighttobemounted,andmakesurethatthereareno electricalwires,water,gasorotherlinesattheinstallation siteonthewall.
- Donotmounttheproductabovelocationswherepersons mightlinger.

5.1 Basestation
- Usethebase(27)topositionthebasestationonalevelsurface.
• Alternatively, you can install the basestation on a wall using the opening (20) on the back.
5.2 Measuringstation
- Youcanalsopositionthemeasuringstationonaleveloutdoor surface.
- Were recommend installing themeasuring station securely on an outdoor wall using therecess(29).
• Installananchor, screw, nail, etc. inthewallofyourchoice. - Hangupthebase/measuringstationusingtheopening(29) intendedforthispurpose.
6.Operation
6.1 Connectiontothemeasuringstation
- Whenthebatterieshavebeeninserted, thebasestation automaticallysearchesforaconconnectiontothemeasuringstation andtotheradiosignal.

Note
- The first search forthemeasuring station cantakeupto 3 minutes; these search for the radiosignal cantakeupto 7 minutes.
- If the basestation receives nosignal from themeasuring station, it automatically begins to search for the radiosignal after 3 minutes.
Note
- Therespectivesymbolswillflashduringtheconnection attempts: connectiontothemeasuringstation, connectiontotheDCFsignal
- Donotpressanybuttonsduringsetup. Otherwise, values may not be transmitted correctly and there is a risk of value errors and in accuracies.
- Donotchangethelocationofthebasestationduringthe searchprocesses.
• The process is completed when the indoor (17) and outdoor (13) measurement data is displayed.
6.2 Basic and manual settings
AutomaticsettingusingtheDCFsignal
When the base station has been switched on for the first time and successful transmission has been established between the base station and themeasuring station, the clock will automatically search for the DCF signal. During these search, ther radiosymbol

flashes.
DisplaySearchfortheDCFsignal

Flashingdisplay
Active

Constantdisplay
Successful—signalisbeingreceived
NodisplayInactive
- Ifthestationstilldoesnotreceiveasignal,pressandholdthe Z/Registerbutton(23)forapproximately3secondstostart themanualsearchfortheDCFsignal.TheDCFradiosymbol(3) beginstoflash.
Note—Timesettings
- Thesearchprocesscantakeupto 10 minutes. If thesearch fails, itendsandisrepeatedatthenextclockhour. The DCF radiosymbol(3) goesout.
- Inthemeantime, however, you can set the time and the datemanually.
- TheclockautomaticallycontinuestosearchfortheDCF signalonadailybasis(between2amand4amandbetween5amand6am). If the signalisreceived successfully, the manuallysettimeanddateareoverwritten.
Note-Summertime
Theclockautomaticallyswitchestosummertime.
DST
appearsonthedisplayaslongassummertimeisactivated.
Manualsettings
- PressandholdtheCLOCKbutton(21)forapproximately3 secondstomakethefollowingsettingsoneaftertheother:
• 12or24-hourformat
- Weekdaylanguage(GE=German,FR=French, ES=Spanish,IT=Italian,EN=English)
• Timezone(from-12to+12hoursCET)


• Hour
• Minute
•Second
• Year
• Month
• Day
PresstheSET/RESETbutton(25)toselectyoursetting.PresstheCLOCKbutton(21)toconfirmyourentries.

Note-Timezone
• The DCF signal can be received over long distances, but always transmits the current Central European Time in Germany. Makes sure you account for the time difference in countries in other time zones.
- If you are in Moscow, the time is 3 hours later than in Germany. This means that you should set + 3 for the time zone. The clock then set the time automatically to 3 hours ahead after receiving the DCF signal or according to the manually set time.
Alarm
- PressandholdtheALARMbutton(22)forapproximately3 secondstosethetimeofthealarmdisplayed.Thehoursdisplay beginstoflash.
- PresstheSET/RESETbutton(25)toselectthehourforthe alarmtimeandconfirmyourselectionbypassingtheALARM button(22).Theminutesdisplaybeginstoflash.
- Repeat the process to set them minutes for the alarm time.
- Repeat the entire process to set these second alarm.
- If you donot make an entry for 25 seconds, you automatically exit these setting mode.
- PresstheALARMbutton(22)oncetodisplaythefirstalarm time.PresstheALARMbutton(22)oncemoretodisplaythe secondalarmtime.
- PresstheSET/RESETbutton(25)oncetoactivatethefirst alarm.PresstheSET/RESETbutton(25)oncemoretoactivate thesecondalarm.PresstheSET/RESETbutton(25)athirdtime toactivatebothalarms.
- Anactivated alarmis indicated by the respective symbol / on the display.
- PresstheSET/RESETbutton(25)repeatedlytodeactivatethe dailyalarm.Thealarmsymbol / isnotdisplayed.
- If the alarmist triggered, the alarms symbol is displayed and an alarm will sound.
- Press SELECT (24), SET/RESET (25), ALARM (22) or CLOCK (21)tostopthealarm. Otherwise, it will stop automatically after 2 minutes.
Note-Snoozefunction
- Whilethealarmissounding, presstheZ/Registerbutton (23)toactivatethesnoozefunction. Thesnoozesymbol andalarmsymbol / begintoflashonthedisplay. Thealarmsignalwillstopforapproximately5minutes, after whichitwillsoundagain.
- PresstheSELECTbutton(24)tostopthesnoozefunction andthealarm.

z^z
Temperature(Celsius/Fahrenheit)
- PressandholdtheSELECTbutton(24).
- PresstheSET/RESETbutton(25)tochoosebetween°Cand°F forthetemperaturedisplay.
- ConfirmyourselectionbypassingtheSELECTbutton(24).
- The weather station indicates atrendasthow the values for the outdoor temperature and room temperature are likely to develop over the next few hours.
| DisplayTrend | |
| Increasing | |
| Constant | |
| Decreasing |
6.3 Maximum and minimum temperature values
- Thebasestationautomaticallystoresthemaximumand minimumoutdoor/indoortemperaturevalues.
- PresstheSELECTbutton(24)todisplaythemaximumvalues. PresstheSELECTbutton(24)againtodisplaytheminimum values.
- Pressthebuttonathirdtimetogotothestandardview.
7. Care and Maintenance
Onlycleanthisproductwithaslightlydamp,lint-freeclothanddo notuseaggressivecleaningagents.Makesurethatwaterdoesnot getintotheproduct.
8.WarrantyDisclaimer
HamaGmbH&CoKGassumesnoliabilityandprovidesno warrantyfordamageresultingfromimproperinstallation/mounting, improperuseoftheproductorfromfailuretoobservethe operatinginstructionsand/orsafetynotes.
9.TechnicalData
| BasestationMeasuringstation | ||
| Powersupply | 3.0V2xAAbatteries | 3.0V2xAAbatteriesWerecommendusing AAlithiumbatteries fortheoutdoorsensorswhenoutdoortemperaturesare below0°C/32°F. |
| Measuringrange:Temperature | 0°C-50°C32°F-122°F | -20°C-+60°C-4°F-+140°F |
| Measurement increments | 0.1°C/32.2°F0.1°C/32.2°F | |
| DCFradio-controlledclock | YesNo | |
| AlarmfunctionYesNo | ||
| Max.transmitting power | 20.5μW | |
| Max.numberof measuringstations | 1 | |
| Frequency433MHz | ||
| Range≤30m | ||
10. Declaration of Conformity
CE Hereby, HamaGmbH&CoKGdeclaresthattheradio equipmenttype[00186301]isincompliancewith Directive2014/53/EU.ThefulltextoftheEU
declarationofconformityisavailableatthefollowinginternet address:www.hama.com->00186301->Downloads.
| Maximumradio-frequency powertransmitted | 0,021mW |
:www.hama.com ->00186301->Downloads.
86652Monheim/Germany
Service&Support

www.hama.com

+499091502-0
D GB
CE


PAP RaccoltaCarta