LunAqua Terra LED Set 6 - Lighting OASE - Free user manual and instructions
Find the device manual for free LunAqua Terra LED Set 6 OASE in PDF.
| Product Type | Low Voltage Outdoor LED Lighting Kit |
| Brand | Oase |
| Model | LunAqua Terra LED Set 6 |
| Category | Outdoor Lighting |
| Number of Included Lamps | 6 |
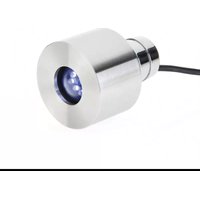
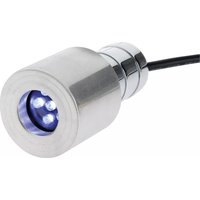
| Light Source Type | Integrated fixed LED (light-emitting diode) |
| Adapter Supply Voltage | 230 V AC |
| Output Voltage (lamp) | 12 V DC |
| Protection Rating (lamp) | IP68 (waterproof up to 1 m depth) |
| Protection Rating (power adapter) | IP44 (protected against water splashes) |
| Maximum Immersion Depth | 1 m |
| Lamp Diameter | 40 mm |
| Lamp Height (estimated) | 30 mm |
| Mounting Hole Diameter | 40 mm |
| Minimum Mounting Hole Depth | 20 mm |
| Lamp Housing Material | Stainless steel |
| Connection Distributor Material | Synthetic |
| Intended Use | Lighting of terraces, paths, stairs, verandas, squares, and pond lighting (underwater) |
| Walkover Resistance | Yes (pedestrians) |
| Maximum Ambient Operating Temperature | 45 °C (for optimal LED lifespan) |
| Maximum Number of Lamps per Distributor | 6 |
| Maintenance and Cleaning | Clean the diffuser with a damp cloth; remove rust spots immediately with a suitable product |
| Main Safety Instructions | Do not look directly at the light source; use exclusively with the supplied adapter; place the transformer at least 2 m from water; protect connections from moisture; use a 30 mA residual current device |
| Spare Parts and Repairability | Connection cables are not interchangeable; if damaged, the lamp or component must be replaced (not repairable) |
| Available Accessories | Extension cables and additional lamps from the Oase range |
Frequently Asked Questions - LunAqua Terra LED Set 6 OASE
User questions about LunAqua Terra LED Set 6 OASE
0 question about this device. Answer the ones you know or ask your own.
Ask a new question about this device
Download the instructions for your Lighting in PDF format for free! Find your manual LunAqua Terra LED Set 6 - OASE and take your electronic device back in hand. On this page are published all the documents necessary for the use of your device. LunAqua Terra LED Set 6 by OASE.
USER MANUAL LunAqua Terra LED Set 6 OASE
natural_image
Close-up of a black CD or DVD disc with a white circular ring and 'Oate:' logo, resting on a textured surface (no readable text beyond label)LunAqua Terra
GB Operating instructions
FR Notice d'emploi
natural_image
Product photo of a black electrical plug and several circular electronic components (no visible text or symbols)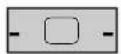
A
LAA0023
B
natural_image
Cross-sectional diagram of a mechanical or electrical component with internal channels and no visible text or symbolsLAA0024
C
natural_image
Diagram of a cable connection with a pressure sensor and motor, showing no text or symbolsLAA0025
Translation of the original Operating Instructions
Information about these operating instructions
Welcome to OASE Living Water. You made a good choice with the purchase of this product Lunaqua Terra LED.
Prior to commissioning the unit, please read the instructions of use carefully and fully familiarise yourself with the unit. Ensure that all work on and with this unit is only carried out in accordance with these instructions.
Adhere to the safety information for the correct and safe use of the unit.
Keep these instructions in a safe place! Please also hand over the instructions when passing the unit on to a new owner.
Symbols used in these instructions
The symbols used in this operating manual have the following meanings:

Risk of injury to persons due to dangerous electrical voltage
This symbol indicates an imminent danger, which can lead to death or severe injuries if the appropriate measures are not taken.

Risk of personal injury caused by a general source of danger
This symbol indicates an imminent danger, which can lead to death or severe injuries if the appropriate measures are not taken.

Important information for trouble-free operation.
Scope of delivery
| ☐ A | LunAqua Terra LED (quantity) Description | |||
| Set 6 Set 3 Solo | ||||
| 1 6 3 1 Light with connection cable | ||||
| 2 1 1 — Connector with 6 connection points | ||||
| 3 | 5 | 5 | — | Cover for connector |
| 4 | 1 | 1 | — | Plug-in transformer |
Intended use
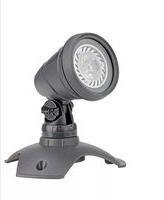
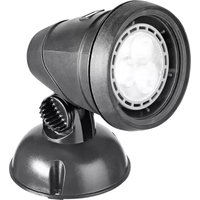
The lamps are used to illuminate patios, paths, stairs, conservatories, squares and the like. The lamps are water tight and as such also suitable for under-water operation (pond illumination). The lamps can be walked on.
The following restrictions apply to the unit:
The unit is only intended for private domestic use, not for commercial purposes or rental.
• Operation under observance of the technical data.
- Only connect the lamps through the connector.
- Only use the unit with the attendant plug-in transformer.
Unit configuration and function description
Each individual lamp includes a permanently fitted LED bulb and is operated with 12 V direct current.
The abbreviation LED stands for light emitting diode, denoting a lighting technology of an especially long operating life. It is distinguished by low power consumption and, as a result, high energy efficiency.
A total of 6 individual lamps can be connected to the supplied connector.
Safety information
Hazards to persons and assets may emanate from this unit if it is used in an improper manner or not in accordance with its intended use, or if the safety instructions are ignored.
This unit can be used by children from the age of 8 and by persons with physical, sensory or mental impairments or lack of experience and knowledge, as long as they are supervised or instructed on how to use the unit safely and are able to understand the potential hazards. Do not allow children to play with the unit. Do not allow children to clean or maintain the unit without close supervision.
Hazards encountered by the combination of water and electricity
- The combination of water and electricity can lead to death or severe injury from electrocution, if the unit is incorrectly connected or misused.
- Prior to reaching into the water, always switch off the mains voltage to all units used in the water.
Correct electrical installation
• Electrical installations must meet the national regulations and may only be carried out by a qualified electrician.
- A person is regarded as a qualified electrician, if, due to his/her vocational education, knowledge and experience, he or she is capable of and authorised to judge and carry out the work commissioned to him/her. This also includes the recognition of possible hazards and the adherence to the pertinent regional and national standards, rules and regulations.
- For your own safety, please consult a qualified electrician.
- The unit may only be connected when the electrical data of the unit and the power supply coincide. The unit data is to be found on the unit type plate or on the packaging, or in this manual.
- Ensure that the unit is fused for a rated fault current of max. 30 mA by means of a fault current protection device.
- Extension cables and power distributors (e.g. outlet strips) must be suitable for outdoor use.
- Protect the plug connections from moisture.
- Install the transformer at a minimum safety distance of 2m from the water.
- Only plug the unit into a correctly fitted socket.
Safe operation
- Never operate the unit if either the electrical cables or the housing are defective!
- Do not carry or pull the unit by its electrical cable.
- Route cords/hoses/lines in a way that they are protected against damage, and ensure that they do not present a tripping obstacle.
- Only open the unit housing or its attendant components, when this is explicitly required in the operating instructions.
- Only execute work on the unit that is described in this manual. If problems cannot be overcome, please contact an authorised customer service point or, when in doubt, the manufacturer.
- Only use original spare parts and accessories for the unit.
- Never carry out technical modifications to the unit.
- The power connection cables cannot be replaced. When the cable is damaged, the unit or the component needs to be disposed of.
- Keep the socket and power plug dry.
- Never look directly into the light source of the unit.
Symbols on the unit
The warning symbols on the unit have the following meaning:
Risk of personal injury if used incorrectly
Incorrect use of the unit can cause injury or damage to assets. Always read the instructions for use first.
The symbols on the unit relating to its use have the following meaning:
IP 68 Protection against the ingress of splash water. Suitable for permanent use under water up to a depth of 1 m.
IP 44 Protection against touching dangerous components with objects up 1 mm diameter. Splash-water protected on all sides.

Protection against contact by the insulated housing (protection class II).
Installation and connection
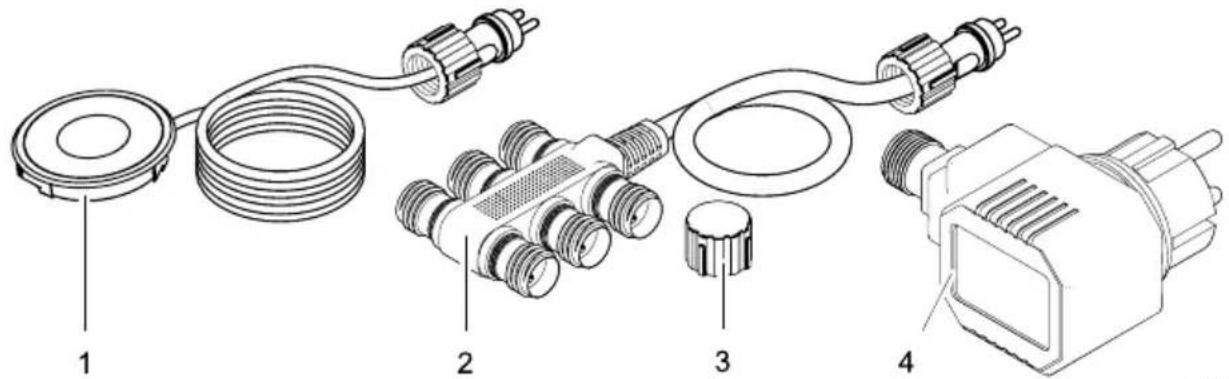
Mechanical installation
All dimensions in millimetres (mm).
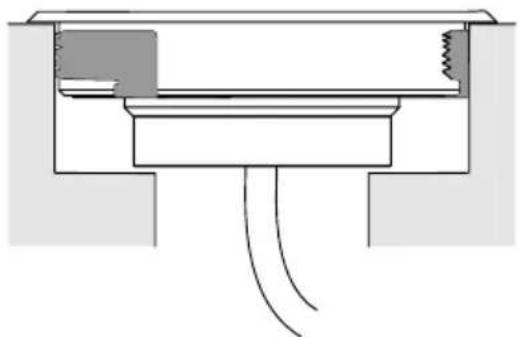
□ B
Installation information
- The lamps are fitted with installation clamps. No other fastening means are approved. They can be fitted into the floor, to the wall or ceiling consisting of rigid materials, such as stone, wood, plastics.
- The connection cables of the lights can be routed directly in the ground or in the sand/gravel bed. It might be advantageous to route the cables in a protective tube to prevent damage.
- Place the plug-in transformer and the connector at a place protected from the influence of weather.
How to proceed:
- Sketch the installation locations of the plug-in transformer, connector and individual lamps.
- Check that the cable lengths are sufficient for the planned installation. Extend the set, if necessary, with corresponding extension cables or additional lamps from the Oase accessories range.
- Mark installation holes and drill using a drill bit suitable for the individual base material.
Hole diameter for the lamp: 40 mm.
Depth of the hole: min. 20 mm.
Hole diameter for the connection cable: 20 mm.
- Lead the connection cable through the hole.
- Insert the lamp in the drilled hole such that the lamp makes contact with the installation surface. If necessary, slightly press the wings of the clamping spring against the housing using a screw driver.
Electrical installation
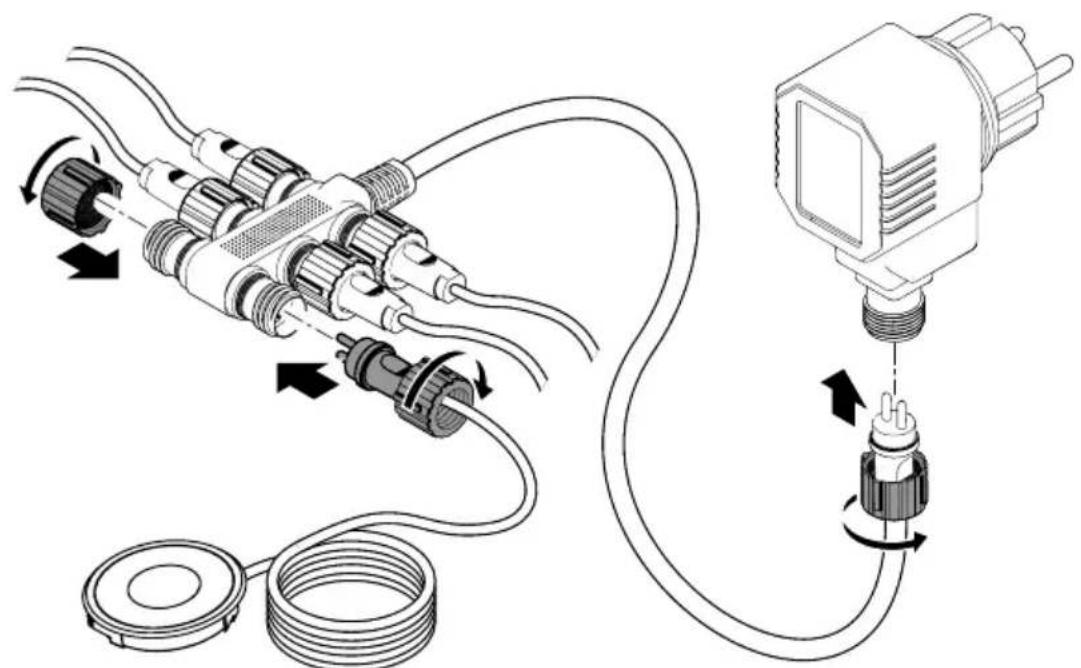
□ C
How to proceed:
- Route the lamp connection cables to the connector.
- Connect the plug of the individual lamps to the connector outputs, and secure each connection with the union nut. Hand-tighten the union nut (splash-water protection!).
- Close outputs, which are not used, by means of the protection cap (splash-water protection!).
- Connect the connection cable of the connector to the plug-in transformer. Hand-tighten the union nut (splash-water protection!).
- Install the transformer at a minimum safety distance of 2m from the water.
Operation

Attention! Sensitive electrical components.
Possible consequence: The unit will be destroyed.
Protective measure: Do not connect the unit to a dimmable power supply.

Note!
Note the following points to ensure the LED's maximum operating life:
- Avoid operating the lamps under direct sun radiation and at ambient temperatures above 45^ .
- Control the lamps using a timer or a photo-electric switch. Adhere to the instructions for use of the individual additional device!
Switching on: Connect plug-in transformer to the socket. The unit switches on immediately when the power connection is established.
Switching off: Disconnect the plug-in transformer.
Remedy of faults
| Malfunction | Cause | Remedy |
| None of the lamps is lit Plug-in transformer not connected | Connect plug-in transformer to the socket. | |
| Power supply interrupted Check power supply | ||
| Plug-in transformer has switched off as a result of excessive ambient temperature | Allow the plug-in transformer to cool down, select a different location | |
| Plug-in transformer is defective Replace the plug-in transformer | ||
| Connector is defective Replace the connector | ||
| One of the lamps is not lit | Power supply interrupted | Check connection cable. Replace lamp if defective |
| Connector corroded Clean connector | ||
| Bulb defective Replace lamps | ||
| Defective output at the connector Replace the connector |
Cleaning

Attention! Dangerous electrical voltage.
Possible consequences: Death or serious injuries.
Protective measures:
- Prior to reaching into the water, disconnect the power supply to all units used in the water.
- Disconnect the unit from the plug-in transformer prior to starting any work.
- Secure the unit to prevent unintentional switching on.
Clean the lamp screen occasionally using a moist cloth.
The lamp housing made of corrosion-resistant stainless steel may show initial easily removable rust. Remove the rust using a suitable cleaning agent.
Disposal
Support us in our endeavour to keep our environment intact, and adhere to the following disposal information!
| Use our return system for disposal. Always make electrical units unusable by cutting the cables! | Disposal with the household waste: |
| Lamp | Packaging |
| Connector | |
| Plug-in transformer |
Mekanisk installation
Mekanisk installation
Alla måttangivelser i millimeter (mm).
□ B