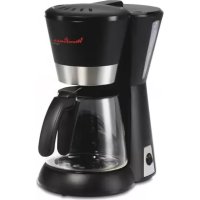
Majestuo FG883D10 - Coffee maker MOULINEX - Free user manual and instructions
Find the device manual for free Majestuo FG883D10 MOULINEX in PDF.
User questions about Majestuo FG883D10 MOULINEX
0 question about this device. Answer the ones you know or ask your own.
Ask a new question about this device
Download the instructions for your Coffee maker in PDF format for free! Find your manual Majestuo FG883D10 - MOULINEX and take your electronic device back in hand. On this page are published all the documents necessary for the use of your device. Majestuo FG883D10 by MOULINEX.
USER MANUAL Majestuo FG883D10 MOULINEX
natural_image
Line drawing of a modern air fryer with digital display and control buttons (no text or symbols)EXPLODED VIEW

text_image
A B C D E G F H 2 3 5 8 6 11 Start Stop 1 4 7 9 10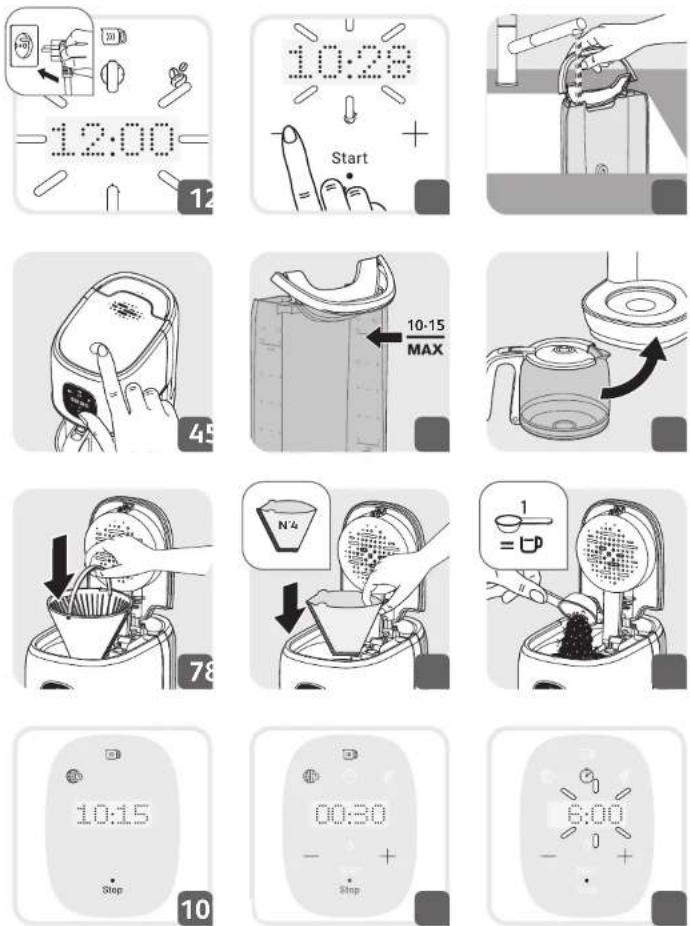

text_image
10:15 Stop 13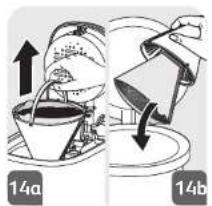
text_image
14a 14b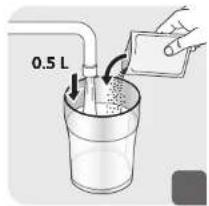
text_image
0.5 L
natural_image
Line drawing of a small electronic device with a lid and ventilation slots (no text or symbols)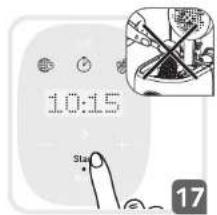
text_image
10:15 STU 17Please read the instructions for use carefully before using your appliance for the first time and retain them for future reference: Manufacturer cannot accept any liability for non compliant appliance use.
SAFETY INSTRUCTIONS
- This appliance is not intended for use by persons (including children) with reduced physical, sensory or mental capabilities, or lack of experience and knowledge, unless they have been given supervision or instruction concerning use of the appliance by a person responsible for their safety.
• Children should be supervised to ensure that they do not play with the appliance. - Do not use the appliance if the power cord or plug is damaged. The power cord must be replaced by the manufacturer, its after-sales service or similarly qualified persons in order to avoid danger.
- Your appliance is intended for domestic use inside the home only at an altitude below 2000m.
- Do not immerse the appliance, power cord or plug in water or any other liquid.
- Your appliance is designed for domestic use only.
-
It is not intended to be used in the following applications, and the guarantee will not apply for:
-
Staff kitchen areas in shops, offices and other working environments;
- farm houses;
- by clients in hotels, motels and other residential type environments;
- bed and breakfast type environments.
• Always follow the cleaning instruction to clean your appliance;
- Unplug the appliance.
- Do not clean the appliance while hot.
- Clean with a damp cloth or sponge.
- Never immerse the appliance in water or put it under running water.
- WARNING: Risks of injuries if you don't use this appliance correctly.
- WARNING: After using, do not to touch the keep warm plate, subjected to residual heat. Be sure to manipulate only the handle of glass jar during heating until cooling down.
- This appliance may be used by children of at least 8 years of age, as long as they are supervised and have been given instructions about using the appliance safely and are fully aware of the dangers involved. Cleaning and user maintenance shall not be made by children unless they are older than 8 and they are supervised by an adult.
- Keep the appliance and its cord out of reach of children under 8 years of age.
- This appliance may be used by persons with reduced physical, sensory or mental capabilities, or whose experience or knowledge is not sufficient, provided they are supervised or have received instruction to use the appliance safely and understand the dangers.
• Children should not use the appliance as a toy. - The coffee-maker shall not be placed in a cabinet when in use.
- Before plugging the appliance in, make sure that the power it uses corresponds to your electrical supply system and that the outlet is earthed.
- Any error in the electrical connection will negate your guarantee.
- Unplug the appliance when you have finished using it and when you clean it.
- Do not use the appliance if it is not working properly or if it has been damaged. If this occurs, contact an authorised service centre.
- All interventions other than cleaning and everyday maintenance by the customer must be performed by an authorised service centre.
- The power cord must never be close to or in contact with the hot parts of your appliance, near a source of heat or over a sharp edge.
- For your safety, only use the manufacturer's accessories and spare parts designed for your appliance.
- Do not pull on the cord to unplug the appliance.
- Never put your coffee jug in a microwave oven, on a flame or a electric cooking plates.
- Do not fill the appliance with water if it is still hot.
- All appliances are subject to strict quality control procedures. These include actual usage tests on randomly selected appliances, which would explain any traces of use.
• Always close the lid when running the coffee maker. - Do not brew coffee if the carafe already has coffee in it.
- To prevent any overflow, the carafe must be placed on the heated base of the coffee maker, otherwise there could be some overflow of hot water or hot coffee.
- The coffee maker becomes very hot during the infusion cycle. Please handle it with care.
- Do not disassemble the appliance.
- Do not use the jug without the lid.
- Do not pour hot water in the tanks.
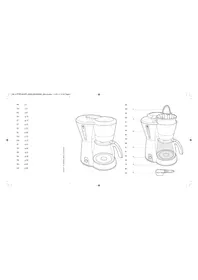
DESCRIPTION
A Lid
9 START indicator
B Control Panel
10 STOP indicator
1 Brewing/Keep warm indicator
11 ACTIVATE button
2 PROG button
C Heating plate
3 CLOCK button
D Water tank handle
4 AROMA button
E Removable water tank
5 Time display
F Filter holder
6 MINUS button
G Carafe
7 PLUS button
H Spoon
8 Descaling indicator
SETTING THE CLOCK/KEEP-WARM
- Place the coffee maker on a hard, flat surface.
- Plug the power cable into a 220 V - 240 V wall outlet.
- When you plug in the coffee maker for the first time, 12:00 appears and blinks on the screen. Fig. 1.
- Hour-12 blinks, means Hour to be set. Press—(6) or + (7) for the desired Hour, press (3) to confirm. Fig. 2.
- Minute- 00 turns to blink once Hour setting is done. Press—(6) or + (7) for the desired minute.
- The time appears. It is automatically confirmed after approximately 6 seconds or by pressing (3).
Note: Your clock is now set and will continue to display the current time even when your appliance is in standby mode. If you want to set the time again, press (3) button and repeat the steps above. If the unit is unplugged or if there is a power failure, the clock will return to 12:00 AM. The above instructions must be repeated to program the clock again. - The keep-warm period can be adjusted Fig.11.: Icon will light on and the count down time is displayed.
- Holding down (3) for 3 seconds, then (1) remains flashing on the display and time indicates 00:30.
- Pressing—(6) or +(7) to decrease or increase 30 min for keep-warm period.
- Please note that the 'keep warm' period can be adjusted for 30,60,90 or 120min.
Warning: increasing keep-warm period will consume more energies.
BEFORE USING FOR THE FIRST TIME
- Remove the stickers from the machine.
- Prior to first use, run your coffee maker without any coffee to rinse the circuit. Fill the water tank up to the maximum level and start a cycle by pressing on (11).
IMPORTANT: Your appliance has been designed to operate using only cold or warm water.
COFFEE PREPARATION
- Remove the water tank (E) and fill cold water. Fig. 3.
- Lift the coffee maker's lid (A) by pressing the lid button. Fig. 4.
- The number of cups is indicated by the water level indicator. Do not exceed 10-15 cups. Fig. 5.
- Place the carafe (G) closed on the heating base (C) by ensuring that it is properly in place in order to activate the mechanism that allows the coffee to flow. Fig. 6.
- Make sure that the filter holder (F) is well inserted. Fig. 7. Place filter paper into the filter holder (F). Make sure that the filter paper is fully open and properly in place in the filter holder. Fig. 8.
- Should some ground coffee be inadvertently poured into the water tank, refrain from starting the cycle and first clean the water tank.
- The ground coffee could otherwise block the water circuit.
- Add 1 spoonful (H) of ground coffee per cup in filter paper. Do not exceed 10 spoonfuls (70 g). Fig. 9.
- Close the lid (A).
- If the coffee maker is in standby, press • (11) to switch on, then Start (9) illuminates.
- Press • (11) to start the cycle, then Start (9) turns off and Stop (10) illuminates, ⑦ (1) is displayed on the screen.
- When the cycle is completed, the keep-warm feature automatically turns on for 30 minutes. (1) remains flashing on the display for the duration of the keep-warm period.
- To stop the coffee maker during the cycle, press • (11), then Stop (10) turns off and Start (9) illuminates.
Please note:
- The quantity of coffee in the carafe at the end of the cycle is less than the quantity of water poured into the water tank, since the ground coffee and the filter absorb approximately 10% of it.
OTHER FUNCTIONS
-DELAYED START (PROG)
Setting the time of the Delayed Start
- Your appliance features a delayed start program.
- Make sure that the clock is set to the correct time. If this is not the case, follow the instructions in the section SETTING THE CLOCK.
- Press (2) to set the automatic start time. The PROG icon will appear on the display. Fig. 12.
- Set the hour by pressing — (6) or + (7) and press ⏻ (2) to confirm, and the same way to set minute.
- The time setting is automatically confirmed after approximately 6 seconds or by pressing (2)
- Your coffee maker will start automatically at the programmed time. You can view the programmed time at any time by pressing (12).
- To cancel the delayed start, hold down (2) for 2 seconds.
- AROMA FUNCTION
Please note: The AROMA function draws out maximum flavor and aroma from your coffee thanks to longer infusion.
- Press the Ⓧ(4) before pressing Ⓧ(11) to start the AROMA mode.
• The AROMA indicator light turns on. Fig. 13.
• To cancel the AROMA mode, press the Ⓧ (4) again.
CLEANING
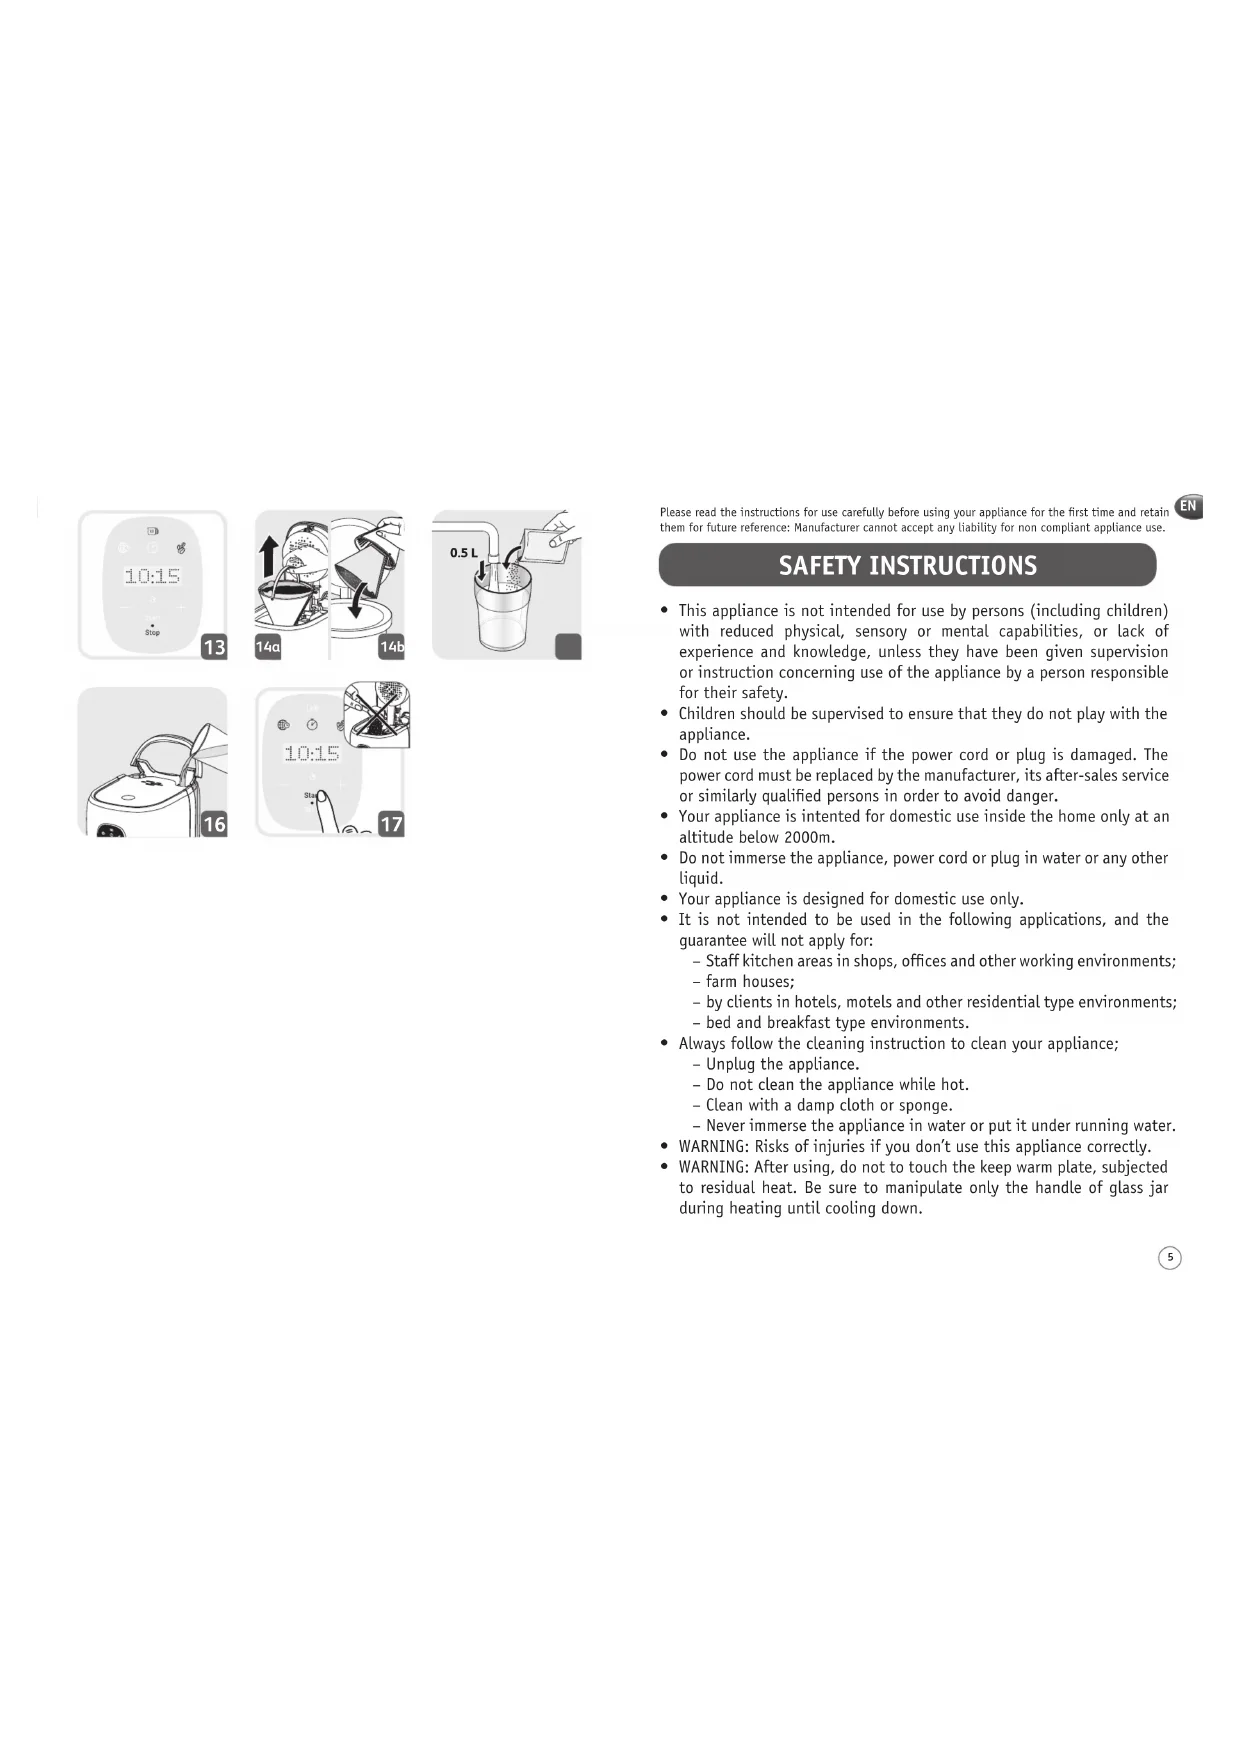
• To remove the used grounds, remove the filter and filter holder from the coffee maker. Fig. 14a.
- Discard the coffee grounds and the filter paper. Fig. 14b.
- Do not clean the appliance if it is still hot.
- Wash the removable filter holder using hot soapy water.
- Clean the coffee maker using a damp soft cloth or sponge. Never use abrasive or strong products on any part of your coffee maker.
- To clean the stainless steel parts of your coffee maker, moisten a soft cloth or sponge with hot water. Wipe them well using a dry cloth.
- For stubborn stains, use a cloth with some white vinegar.
- Do not immerse the appliance in water or under the tap.
- Do not put any parts except inner filter, carafe and spoon into dishwasher.
DESCALING
Why is descaling important?
- Limescale builds up naturally in your coffee maker. Descaling helps to protect the coffee maker, ensure a longer service life and consistently high-quality coffee over time. Limescale may permanently alter the appliance's performance.
When is it time to descale?
- The frequency of descaling depends on water hardness and the number of coffee cycles. (8) will light on to remind user that your machine requires descaling.
- If descaling is not required by user, press—(6) to cancel.
How to descale your coffee maker
- Use a descaling solution or 0.5L of white vinegar diluted in 0.5L of cold or warm water. Fig. 15.
- Pour the solution into the water tank. Fig. 16.
- Do not put any coffee in the filter and press • (11) to start the descaling cycle. Fig. 17.
- Please wait until the end of the cycle.
• To rinse the machine, start 2 complete 10-cup cycles with water, but without coffee. - Repeat the operation as needed.
The guarantee does not cover coffee makers that are inoperative or which run badly due to a lack of descaling.
TROUBLESHOOTING
PROBLEM SOLUTION
| The coffee does not infuse or the appliance does not turn on. | Make sure that the appliance is properly plugged into a functioning socket.The water tank is empty.There was a power failure.Unplug the machine, and then plug it in again.The clock time must be reset after a power failure.The automatic stop function has switched the appliance off. Turn off the appliance and then turn it on again to make more coffee. For more information, see the section "Coffee Preparation". |
| The appliance appears to leak. | Make sure that the water tank has not been filled beyond the maximum limit.Ensure that the water tank is not damaged. |
| The infusion requires lots of time. | It may be time to descale the appliance.For more information, see the section "Descaling". |
| The coffee is spilling from the filter holder or the coffee is flowing very slowly. | The coffee maker needs to be cleaned.There is too much coffee. We recommend using a measuring spoon per cup.The ground coffee is too fine (for example, the grind for expresso is not suitable for a filter coffee maker).Some ground coffee has become embedded between the filter paper and the filter holder.The filter paper is not open enough or is incorrectly positioned.Rinse the filter holder before inserting the filter paper so that the latter adheres to the damp sides of the filter holder.There is more than one filter paper in the filter holder.Make sure that the filter holder is fully inserted. |
| The coffee tastes bad. • The | The coffee grind is not suitable for your coffee maker.The proportion of coffee and water is incorrect. Modify it to suit your taste.The quality and freshness of the coffee are not optimal.The water is of poor quality. |
| The coffee does not flow. | Make sure that there is water in the water tank.The coffee flow system may be blocked. You can clean it by simply rinsing it with water. |
| The time is not correct. • | The timer is synchronised and depends upon your electrical network. If there is a difference, we recommend setting the time once a week to make sure that it is correct. |
If your appliance is still not running properly, please contact the customer service department for your country.
European directive 2012/19/UE on Waste Electrical and Electronic Equipment (WEEE), requires that old household electrical appliances are not thrown into the normal flow of municipal waste. Old appliances must be collected separately in order to optimize the recovery and recycling of materials they contain and reduce the impact on human health and the environment.

Environment protection first!
① Your appliance contains valuable materials which can be recovered or recycled.
Leave it at a local civic waste collection point.