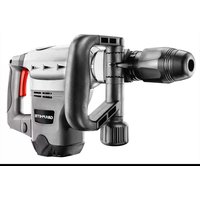
58G876 - Drill Graphite - Free user manual and instructions
Find the device manual for free 58G876 Graphite in PDF.



| Product type | Demolition hammer (rotary hammer) |
| Brand | Graphite |
| Model | 58G876 |
| Supply voltage | 230 V AC |
| Frequency | 50 Hz |
| Power input | 1200 W |
| Percussion frequency | 3350 min⁻¹ |
| Percussion energy | 15 J |
| Chuck type | SDS Max |
| Protection class | II |
| Weight (without accessories) | 6.7 kg |
| Year of manufacture | 2021 |
| Sound pressure level (LpA) | 89 dB(A) (K=3 dB(A)) |
| Sound power level (LwA) | 105 dB(A) (K=3 dB(A)) |
| Vibration acceleration (front handle) | 10.325 m/s² (K=1.5 m/s²) |
| Included accessories | Chisel, auxiliary handle, special wrench, grease container, dust shield, carrying case |
| Maintenance - Cleaning | Soft brush or compressed air; do not use water or chemicals |
| Maintenance - Transmission lubrication | Every 40 hours of operation; add approximately 30 g of high-temperature resistant grease |
| Maintenance - Carbon brush replacement | Replace if shorter than 5 mm; use original parts; have it done by a professional |
| Safety - Auxiliary handle | Must always be used; adjustable in position |
| Safety - Hearing protection | Require wearing hearing protection |
| Safety - Insulation | Class II insulation; hold by insulated handles when risk of contact with conductors |
| Intended use | Work on concrete, brick and similar materials; renovation, construction, carpentry, DIY |
| Applicable standard | EN 60745 |
Frequently Asked Questions - 58G876 Graphite
User questions about 58G876 Graphite
0 question about this device. Answer the ones you know or ask your own.
Ask a new question about this device
Download the instructions for your Drill in PDF format for free! Find your manual 58G876 - Graphite and take your electronic device back in hand. On this page are published all the documents necessary for the use of your device. 58G876 by Graphite.
USER MANUAL 58G876 Graphite
natural_image
Line drawing of a GRAPHITE GRAPDH electric drill press with handle and control panel (no text or symbols on device body)PL MŁOT WYBURZENIOWY
GB DEMOLITION HAMMER
DE ABBRUCHHAMMER
SR UPUTSTVO ZA UPOTREBU ..... 77
natural_image
Diagram showing a mechanical component with a chain attached to a circular target, labeled 'F' (no text or symbols on the diagram itself)INSTRUKCJA ORYGINALNA (OBSŁUGI)

MŁOT WYBURZENIOWY
58G876

CAUTION: BEFORE USING THE POWER TOOL READ THIS MANUAL CAREFULLY AND KEEP IT FOR FUTURE REFERENCE.
DETAILED SAFETY REGULATIONS
SPECIAL CONDITIONS REGARDING SAFETY OF DEMOLITION HAMMER OPERATION
- Use hearing protection measures during work. Exposure to noise may cause hearing loss.
- Use the power tool with additional handles supplied with the power tool. Loss of control may cause operator injury.
- Whenever tool can hit hidden electric wires during operation, hold the power tool only by insulated handles. Contact with electric wire may transfer voltage to metal parts of the power tool and cause electric shock.
- Use proper equipment to locate hidden power lines. Contact with live wires may cause fire or electric shock. Damage of gas installation pipe may cause explosion. Ingress to water line may cause electric shock and cause major property damage.
• Each time before connecting the power tool check the power cord, in case of damage hand over to authorized workshop for replacement. - When operating the power tool hold it in both hands while keeping stable body position. Keep the handles clean. Power tool is safer when held with two hands.
- When operating the power tool held high, stand firmly on the ground and ensure there are no bystanders below.
- Do not direct operating power tool at other persons or at yourself.
- If the replacement of the supply cord is necessary, this has to be done by the manufacturer or his agent in order to avoid a safety hazard.
CAUTION! This device is designed to operate indoors.
The design is assumed to be safe, protection measures and additional safety systems are used, nevertheless there is always a small risk of operational injuries.

123


45678


- CAUTION! Take special precautions.
- Read instruction manual, observe warnings and safety conditions therein.
- Device with class II insulation.
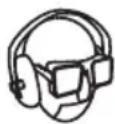
- Use personal protection measures (protective goggles, earmuff protectors, anti-dust mask)
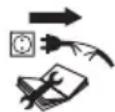
- Disconnect the power cord before starting maintenance or operation.
- Protect against rain.
- Keep the tool away from children.
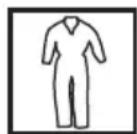
- Use protective clothing.
CONSTRUCTION AND USE
Demolition hammer is a hand-operated power tool with insulation class II. The tool is driven by single-phase commutator motor with rotational speed reduced with gear transmission. Power tools of this type are widely used for works in concrete, brick and similar materials. Range of use covers repair and building works, and any work from the range of individual, amateur activities (tinkering).

Use the power tool according to the manufacturer's instructions only.
DESCRIPTION OF DRAWING PAGES
Below enumeration refers to the device elements depicted on the drawing pages of this manual.
- SDS Max chuck
- Fixing sleeve
GRAPHITE
- Cover
- Switch
- Motor cover
- Additional handle
- Locking knob for additional handle
- Lubrication inlet plug
- Fixing screws
- Carbon brush cover
* Differences may appear between the product and drawing.
MEANING OF SYMBOLS

CAUTION

WARNING

ASSEMBLY/SETTINGS

INFORMATION
EQUIPMENT AND ACCESSORIES
- Chisel - 1 pce
- Additional handle - 1 pce
- Special key - 1 pce
- Grease container - 1 pce
- Dust cover - 1 pce
- Transport case - 1 pce
INSTALLATION OF ADDITIONAL HANDLE
Due to safety reasons always use additional handle when operating the demolition hammer.

Additional handle can be fixed at any point on the hammer casing circumference and features stepped adjustment of its position.

- Loosen the locking knob for additional handle (7).
- Rotate the additional handle (6) on the hammer casing circumference to the most comfortable position considering the work at hand.
- Pull the additional handle away from the hammer casing and set up in appropriate position (fig. A).
- Tighten the locking knob for additional handle (7) to fix it securely.
INSTALLATION AND REPLACEMENT OF WORKING TOOLS

The demolition hammer is designed to operate with working tools with SDS Max shanks. Clean the hammer chuck and working tool before installation. Apply thin layer of grease onto shank of the working tool.

Disconnect the power tool from power supply.
- Hold the fixing sleeve (2) of the SDS Max chuck (1) and overcome the spring resistance to pull it to the back.
- Insert working tool shank into the chuck and slide it to mechanical stop (it may be necessary to turn the working tool so it can reach appropriate position) (fig. B).
- Release the fixing sleeve (2), it will finally lock the working tool.
- If the fixing sleeve does not return to its default position, remove the working tool and repeat the whole operation.

Working tool is properly seated if it cannot be removed without pulling off the fixing sleeve. High efficiency of the demolition hammer operation can be achieved by using sharp and undamaged working tools.
DEINSTALLATION OF WORKING TOOL

Just after the operation is finished, the working tool may be hot. Avoid direct contact and use appropriate protective gloves. Clean the working tool after removal.
- Pull the fixing sleeve (2) to the back and hold.

- Remove the working tool with your second hand by pulling it to the front (fig. B).
SWITCHING ON / SWITCHING OFF
The mains voltage must match the voltage on the rating plate of the demolition hammer.
Switching on – press the switch button (4) and hold in this position.
Switching off – release pressure on the switch (4).
Do not use the demolition hammer when the switch is faulty.
HAMMER OPERATION, DEMOLITION
Hold the hammer firmly with both hands and switch it on. To achieve the best efficiency possible during operation, apply stable and moderate (not excessive) pressure on the demolition hammer (excessive pressure would lead to efficiency loss). The hammer is factory lubricated and is ready for operation. Demolition hammer filled with solid grease requires some time to heat up, depending on the surrounding temperature. New demolition hammer requires some time to work before it achieves full working efficiency. If the demolition hammer is not used for a long time, or operates in low temperature, allow the hammer to work with no load for 3-5 minutes.
Sharp working tools improve work efficiency. Ventilation holes with no dirt reduce risk of motor overheating.
During operation small quantities of grease may come up from between the working tool and tool holder. This is normal.
Disconnect the tool from power supply before starting any regulation, maintenance or repair.
- Soft brush or compressed air are best for cleaning the demolition hammer.
- Do not clean the hammer with water or chemical cleaning agents.
- Store the hammer in dry place, beyond reach of children.
- Keep ventilation holes of the motor unobstructed.
- Entrust replacement of power cord and other repairs only to authorized service workshop.
- In case of excessive commutator sparking have the technical condition of carbon brushes of the motor checked by a qualified person.
GEAR GREASING
It is recommended to check grease in the gear every 40 hours of the demolition hammer operation and filling up or changing grease according to needs.
- Unscrew the fixing screws and remove the cover (3).
• Use special key to unscrew lubrication inlet plug (8) (fig. C). - Refill or replace used grease, use a cloth to remove it.
- Fill the gear with new grease (approximately 30 g).
• Install lubrication inlet plug (8) and the cover (3).
When changing grease do not use more grease than approx. 30 g. Otherwise the demolition hammer will not work properly. After the supplied grease ends, use another available grease that is resistant to high temperature.
REPLACEMENT OF CARBON BRUSHES
Replace immediately worn out (shorter than 5 mm), burnt or cracked motor carbon brushes. Always replace both carbon brushes at a time.
- Unscrew fixing screws (9) and remove the motor cover (5) (fig. D).
- Unscrew the carbon brush covers (10) and remove worn out carbon brushes (fig. E).
- Remove any carbon dust with compressed air.
- Insert new carbon brushes (carbon brushes should easily move into brush holders) (fig. F).
• Install carbon brush covers (10) and the motor cover (5).
After the carbon brushes are replaced, start the hammer with no load and wait until the carbon brushes fit to the motor commutator.
Entrust replacement of carbon brushes only to a qualified person. Only original parts should be used.

All faults should be repaired by service workshop authorized by the manufacturer.
TECHNICAL PARAMETERS
RATED PARAMETERS
| Demolition Hammer 58G876 | |
| Parameter Value | |
| Supply voltage 230 V AC | |
| Current frequency 50 Hz | |
| Rated power 1200 W | |
| Impact rate 3550 spm | |
| Impact energy 15 J | |
| Chuck type SDS Max | |
| Protection class II | |
| Weight (w/o accessories) 6.7 kg | |
| Year of production 2021 | |
| 58G876 stands for both the type and designation of the machine | |
NOISE LEVEL AND VIBRATION PARAMETERS
Sound pressure Lp_A=89 dB(A) K=3 dB(A)
Sound power Lw_A=105 dB(A) K=3 dB(A)
Vibration acceleration (front handle) a_b = 10,325 ~m / s^2 K = 1,5 ~m / s^2
Vibration acceleration (rear handle) a_b = 13,304m / s^2K = 1,5m / s^2
nformation regarding noise and vibration

The following levels of emitted noise, such as emitted acoustic pressure LpA and acoustic power level LwA and measurement uncertainty K have been given in the instruction manual as defined in the EN 60745 standard.
The following vibration value (acceleration value) ah and measurement uncertainty K have been determined as defined in the EN 60745 -2-6 standard.
The vibration level provided in this instruction manual have been determined according to the measurement procedure as defined in the EN 60745 standard and can be used for comparison of power tools. This can be used for preliminary assessment of exposure to vibrations.
The provided vibration level is representative for main applications of the power tool. If the power tool is used for other applications or with other working tools, and if it is not sufficiently maintained, the vibration level may vary. The aforementioned reasons may increase the exposure to vibrations during the entire operating period.
In order to precisely estimate the exposure to vibrations, periods should be accounted for, in which the power tool is switched off, or when it is switched on, but not operated. Thus, the total exposure to vibration may prove considerably lower.
Additional safety measures should be taken to protect the user against effects of vibrations, such as: maintenance of the power tool and its working tools, ensuring proper temperature of the hands and proper organisation of work.
ENVIRONMENT PROTECTION
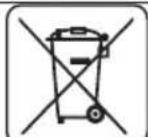
Do not dispose of electrically powered products with household wastes, they should be utilized in proper plants. Obtain information on waste utilization from your seller or local authorities. Used up electric and electronic equipment contains substances active in natural environment. Unrecycled equipment constitutes a potential risk for environment and human health.
Right to introduce changes is reserved.
"Grupa Topex Spółka z ograniczoną odpowiedzialnością" Spółka komandytowa with seat in Warsaw at ul. Pograniczna 2/4 (hereinafter Grupa Topex) informs, that all copyrights to this instruction (hereinafter Instruction), including, but not limited to, text, photographies, schemes, drawings and layout of the instruction, belong to Grupa Topex exclusively and are protected by laws accordingly to Copyright and Related Rights Act of 4 February 2004 (ustawa o prawie autorskim i prawach pokrewnych, Dz. U. 2006 No 90 item 631 with later amendments). Copying, processing, publishing, modifications for commercial purposes of the entire Instruction or its parts without written permission of Grupa Topex are strictly forbidden and may cause civil and legal liability.
GRAFISKÄS DALAS APRAKSTS
POSEBNI PROPISI O SIGURNOSTI
POSEBNI SIGURNOSNI UVJETI ZA ČEKIĆ ZA LOMLJENJE
REPLACEMENT DE BALAIS CHARBON

- INSTRUKCJA ORYGINALNA (OBSŁUGI)
- MŁOT WYBURZENIOWY
- 58G876
- DETAILED SAFETY REGULATIONS
- SPECIAL CONDITIONS REGARDING SAFETY OF DEMOLITION HAMMER OPERATION
- CONSTRUCTION AND USE
- DESCRIPTION OF DRAWING PAGES
- GRAPHITE
- MEANING OF SYMBOLS
- EQUIPMENT AND ACCESSORIES
- INSTALLATION OF ADDITIONAL HANDLE
- INSTALLATION AND REPLACEMENT OF WORKING TOOLS
- Disconnect the power tool from power supply.
- DEINSTALLATION OF WORKING TOOL
- SWITCHING ON / SWITCHING OFF
- The mains voltage must match the voltage on the rating plate of the demolition hammer.
- Do not use the demolition hammer when the switch is faulty.
- HAMMER OPERATION, DEMOLITION
- During operation small quantities of grease may come up from between the working tool and tool holder. This is normal.
- Disconnect the tool from power supply before starting any regulation, maintenance or repair.
- GEAR GREASING
- It is recommended to check grease in the gear every 40 hours of the demolition hammer operation and filling up or changing grease according to needs.
- When changing grease do not use more grease than approx. 30 g. Otherwise the demolition hammer will not work properly. After the supplied grease ends, use another available grease that is resistant to high temperature.
- REPLACEMENT OF CARBON BRUSHES
- Replace immediately worn out (shorter than 5 mm), burnt or cracked motor carbon brushes. Always replace both carbon brushes at a time.
- After the carbon brushes are replaced, start the hammer with no load and wait until the carbon brushes fit to the motor commutator.
- TECHNICAL PARAMETERS
- NOISE LEVEL AND VIBRATION PARAMETERS
- ENVIRONMENT PROTECTION
- GRAFISKÄS DALAS APRAKSTS
- POSEBNI PROPISI O SIGURNOSTI
- POSEBNI SIGURNOSNI UVJETI ZA ČEKIĆ ZA LOMLJENJE
- REPLACEMENT DE BALAIS CHARBON
Brand : Graphite
Model : 58G876
Category : Drill