USER MANUAL Chevron 37VC FLYMO
Chevron 34VC Chevron 37VC

GB Original Instructions
DE Übersetzung der Originalbetriebsanleitung.
FR Traduction du mode d'emploi original
NL Vertaling van de originele instructies.
NO Oversettelse av originaldriftsveiledningen.
Fl Alkuperäisen käyttoohjeen kaannös
SE Oversattning av originalbruksanvisingen
DK Oversat fra den originale driftsvejledning
ES Traducción de las instrucciones de empleo originales.
PT Traducao do manual de instruções original
IT Traduzione delle istruzioni per l'uso originali
HU Az eredeti hasznalatiutasitas forditasa
PL Tlumaczenie oryginalnej instrukcji obstugi
CZ Překlad originího námodu na provoz
SK Preklad originaleho navodu na obsluhu
SI Prevod izvirnih navodil za uporabo.
HR Prijevod originalih uputa za uporabu
LT Eksploatavimo instrukcijos originalo vertimas.
RU NpebeoD opnHnaJIbHOI INcTpkyuIN no 3KcnlyaTaUIN
EE Kasutamisjuhendi alguparandi tolge
LV Originalas lietošanas instrukcijastulkojums.
RO Traducerea instruantiunilor deutilizare originale.
GR Metaepaaon twv npwotutow odnyuw aeitoupyia
TR Original isletim kilavuzu cevirisi
GB 10 important information Read before use and retain for future reference
WICHTIGE INFORMATION DE Biete vor dem Benutzen des Gerates durchlesen und gut aufbewahren
RENSEIGNEMENTS IMPORTANTS FR A litre avant usage et a conserver pour reference ulterieure
BELANGRIJKE INFORMATIE NL Leest u deze informatatie voor het gebruik en bewaar ze voor toekomstige raadpleging
VIKTIIG INFORMASJON
NO Les bruksanvisingen nøye for bruk og oppbevar den for senere bruk
TÄRKEÄT TIETOA FI Lue tämä ennen käyttoa ja sailyta myohempaa tarvetta varten
VIKTIG INFORMATION
SE Läs anvisingarna före användningen och spara dem for framtida behov
VIGTIGE OPLYSNINGER DK Du bør lese brugsanvisingen for brug og gemme til senere henvisning
INSFORMACION IMPORTANTE ES Léase antes de utiliser y conservela como referencia en el futuro
INFORMAÇÖES IMPORTANTES
PT Leia antes de utilizes e guarde para consulta futura
INFORMAZIONI IMPORTANTI Leggere prima dell'uso e conservare per ulteriore consulazione
HU FONTOS INFORMÁCIO Használat elött olvassa el, és tartsa meg késöbbi felhasználásra
PL UWAGA Zapoznać sie ztreścia niniejszej instrukcji przydziem i zachowac są do dalszego uzytkowania urzadzenia
-
Cable Hook x 2
-
Screw x 2
-
Upper handle
-
Lower handle
-
Cable clip x2
-
Handle knob and nut x 2
7.Washer x 2
-
Handle Bolt x 2
-
Grassbox Upper
10.Grassbox lower
- Lower handle screw x 2
12 Height adjustment lever
-
Instruction Manual
-
Warning Symbols
15.Product rating label
D-INHALT
GB DO NOT use liquids for cleaning.
SE ANVAND INTE vatskor for rengoring.
DK BRUG IKKE vaeske til rengering.
GB For further advice or repairs, contact your local dealer.
If not used properly this product can be dangerous! This product can cause serious injury to the operator and others, the warnings and safety instructions must be followed to ensure reasonable safety and efficiency in using this product. The operator is responsible for following the warning and safety instructions in this manual and on the product.
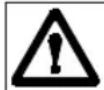
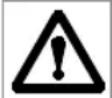
Explanation of Symbols on the product

Warning

Read the user instructions carefully to make sure you understand all the controls and what they do.

Always keep the product on the ground when operating. Tilting or lifting the product may cause stones to be thrown out.

Keep bystanders away. Do not operate whilst people especially children or pets are in the area.
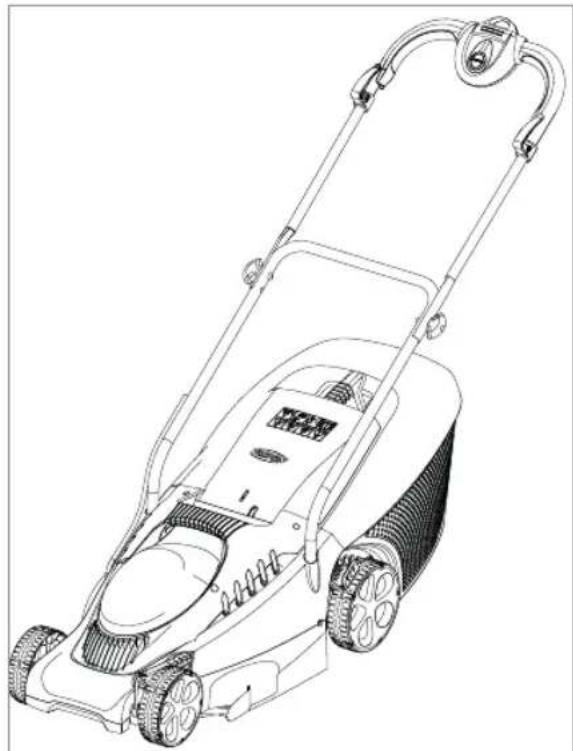
Beware of sharp blades - remove plug from mains before maintenance or if cable is damaged. Blades continue to rotate after the machine is switched off.
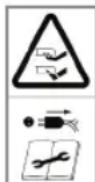
Keep the supply cable away from the blade.
General
-
This product may be used under supervision, or if instruction regarding the safe use of the product has been provided and the resulting dangers have been understood, by children aged 8 and above, as well as by persons with physical, sensory or mental disabilities or a lack of experience and knowledge. Children must not be allowed to play with the product. Cleaning and user maintenance must not be performed by children without supervision. The use of this product by young people under the age of 16 is not recommended.
-
Never allow children or people unfamiliar with the instructions to use the machine.
- Stop using the machine while people, especially children, or pets are nearby.
- Only use the product in the manner and for the functions described in these instructions.
- Never operate the product when you are tired, ill or under the influence of alcohol, drugs or medicine.
- The operator or user is responsible for accidents or hazards occurring to other people or their property. Electrical
-
The use of a Residual Current Device (R.C.D.) with a tripping current of not more than 30mA is recommended. Even with a R.C.D. installed 100% safety cannot be guaranteed and safe working practice must be followed at all times. Check your R.C.D. every time you use it.
-
Before use, examine the cable for signs of damage or ageing. If the cable is found to be defective, take the product to an Authorised Service Centre and have the cable replaced.
- Do not use the product if the electric cables are damaged or worn
- Immediately disconnect from the mains electricity supply if the cable is cut, or the insulation is damaged. Do not touch the electric cable until the electrical supply has been disconnected. Do not repair a cut or damaged cable. Replace it with a new one.
- Your extension cable must be uncoiled, coiled cables can overheat and reduce the efficiency of your mower.
- Keep cable away from product, always work away from the power point mowing up and down, never in circles.
- Do not pull cable around sharp objects.
- Always switch off at the mains before disconnecting any plug, cable connector or extension cable.
- Switch off, remove plug from mains and examine electric supply cable for damage or ageing before winding cable for storage. Do not repair a damaged cable, replace it with a new one. Use only genuine replacement cable.
- Always wind cable carefully, avoiding kinking.
- Never carry the product by the cable.
- Never pull on the cable to disconnect any of the plugs.
- Use only on AC mains supply voltage shown on the product rating label.
- Our products are double insulated to EN60335. Under no circumstances should an earth be connected to any part of the product.
Cables
If extension cables are used, these must comply with the minimum cross-sections in the table below: Voltage Cable length Cross section
220-240V/50Hz Up to 20 m 1.5 mm
220-240V/50Hz 20-50m 2.5mm
P. Mains cables and extensions are available from your local Approved Service Centre.
2. Only use extension cables specifically designed for outdoor use and which conform to one of the following specifications: Ordinary rubber (60245 IEC 53), Ordinary PVC (60227 IEC 53) or Ordinary PCP (60245 IEC 57)
If the short connection lead is damaged, it must be replaced by the manufacturer, its service agent or similarly qualified persons in order to avoid a hazard.
1.1. While using your product always wear substantial footwear and long trousers. Do not operate the equipment when barefoot or wearing open sand
2. Make sure the lawn is clear of sticks, stones, bones, wire and debris; they could be thrown by the blade.
3. Before using the machine and after any impact, check for signs of wear or damage and repair as necessary.
4. Replace worn or damaged blades together with their fixings in sets to preserve balance.
Use
- Use the product only in daylight or good artificial light.
- Avoid operating your product in wet grass, where feasible.
- Take care in wet grass, you may lose your footing.
- On slopes, be extra careful of your footing and wear non-slip footwear.
- Operate your product across the face of slopes, never up and down.
- Exercise extreme caution when changing direction on slopes. Walk never run.
- Make sure you always take up a safe and stable stance whilst working, especially on slopes. Do not use the
ENGLISH - 1
Safety
mower close to swimming pools or garden ponds.
8. Do not walk backwards when operating, you could trip.
9. Never cut grass by pulling the product towards you.
10. Switch off before pushing the product over surfaces other than grass.
11. Never operate the product with damaged guards or without guards in place.
12. Keep hands and feet away from the cutting means at all times and especially when switching on the motor.
13. Do not tilt product when the motor is running
14. Do not put hands near the grass discharge chute.
15. Never pick up or carry a product when it is operating or still connected to the mains supply.
16. Remove the plug from the mains :
- before leaving the product unattended for any period;
- before clearing a blockage;
before checking, cleaning or working on the appliance;
- if you hit an object. Do not use your product until you are sure that the entire product is in a safe operating
condition.;
- if the product starts to vibrate abnormally. Check immediately. Excessive vibration can cause injury.
Maintenance and storage
1. Caution: Do not touch rotating blade(s)
2. Keep all nuts, bolts and screws tight to be sure the product is in safe working condition.
3. Check the grassbox frequently for wear or deterioration.
4. Replace worn or damaged parts for safety.
5. Only use the replacement parts specified for this product.
6. Be careful during adjustment of the product to prevent entrapment of the fingers between moving blades and fixed parts of the machine.
17. Store in a cool dry place and out of reach of children. Do not store outdoors.
8. Allow the product to cool for at least 30 minutes before storing.
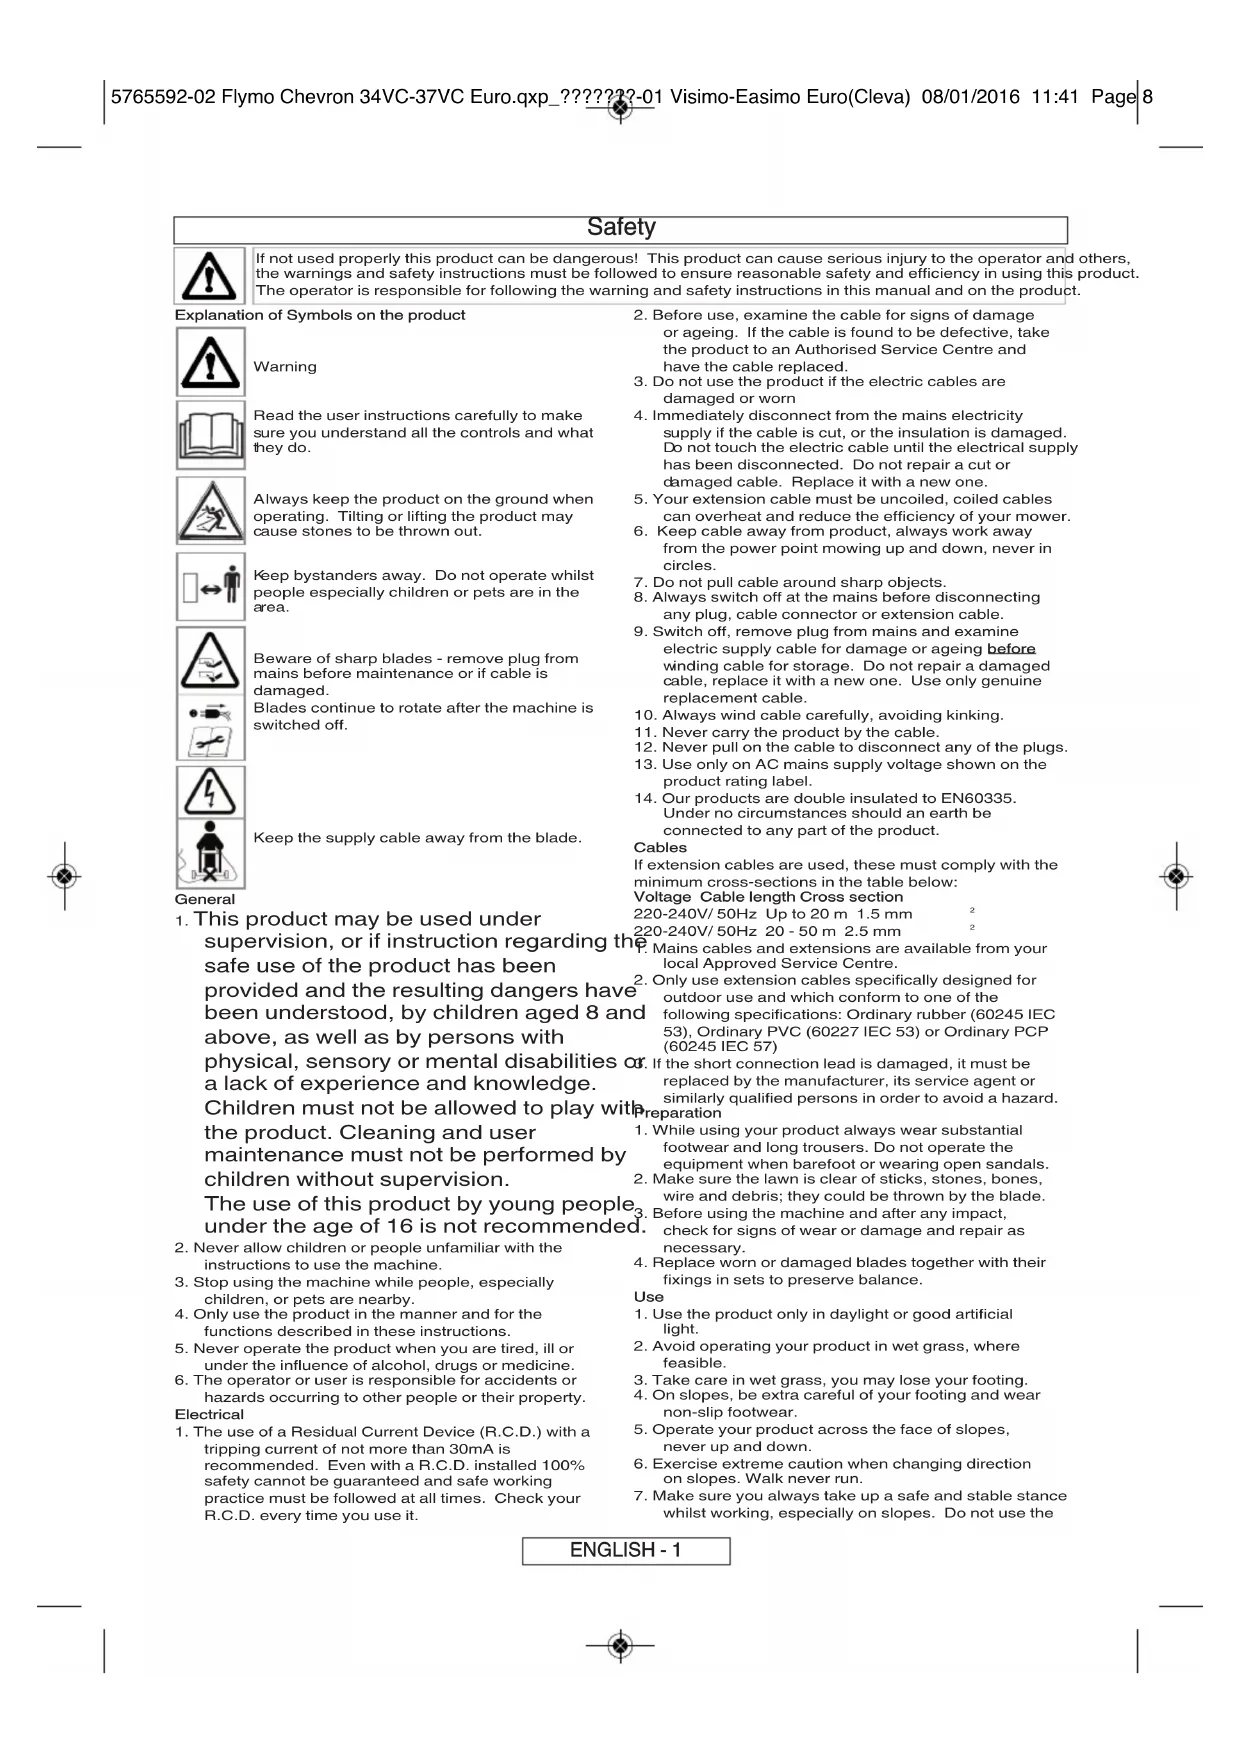
When received from the Manufacturer, the wheels are in a raised position. Do not switch on the product before removing from the raised position into position 5. (See fig A)
Assembly of Lower Handles to Lawnmower
-
Insert lower handles into the deck and push down (B1).
-
Using a pozi drive screwdriver insert the screws into the deck and handles and fully tighten (B2).
Assembly of Upper Handles to Lower Handles
- Ensure the upper handle is located correctly with the lock-off button on the switchbox uppermost.
- Insert the nut into the handle knob. (C1)
- Ensure the upper handle and the lower handle are aligned correctly (C2). There are two holes for upper handle height adjustment.
- Fit the bolt, washer and handle knob (C2). Tighten the handle knob.
- Repeat on the other side.
- Fit the cable to the handles with the clips provided.
See Contents page for position. Make sure the cable is not trapped between the upper and lower handles. Attaching the Cable Hooks (for storage of the mains cable)
- Insert the post on the Cable Hook through the hole in the Upper Handle (D1).
- Insert the smaller screw and tighten to secure (D2)
- Repeat on the other side.
Grassbox Assembly
Grassbox Assembly
- Locate the grassbox lid onto the grassbox by aligning the clips. Ensure all clips are correctly located before clicking into position (E)
Fitting Fully Assessed Grassbox to Lawnmower.
- Lift safety flap (F1)
- Make sure the discharge chute is clean and free from debris (F2)
-
Locate fully assembled grassbox onto 2 location points (F3) at the rear of the deck as illustrated in pic. G
-
Locate safety flap onto the top of the grassbox. Ensure the grassbox is securely located.
IMPORTANT! AFTER FITTING ENSURE NO GAP REMAINS BETWEEN THE SAFETY FLAP AND THE GRASSBOX.
- Removal is the reverse procedure.
- For larger areas of grass where grass collection is not required you can use your lawnmower without the grassbox. Ensure the Safety Flap is fully closed. The design of the safety flap permits the cut grass to be discharged downward behind the machine.
Cutting Height Adjustment
- Height of cut is adjusted by raising or lowering the wheels using the height adjustment lever (H)
There are five heights of cut on this product (20-60 mm).
Heights of cut:- 1 & 2 - low, 3 - medium, 4 & 5 - high
NOTE A medium height of cut is recommended for most lawns. The quality of your lawn will suffer and collection will be poor if you cut too low.
Starting and Stopping
To Start your Lawnmower
- Attach the extension cable to the back of the switchbox.(J)
- Form a loop in the cable and push the loop through the slot. (K)
- To secure, position the loop over the hook and pull the cable back through the slot (L).
- Connect the plug to the mains and switch on.
The switchbox is provided with a lock-off button (M1) to prevent accidental starting.
- Press and hold the lock-off button (M1) on the switchbox, then squeeze one of the Start/Stop levers towards the upper handle (N).
- Continue to squeeze the start/stop lever towards the upper handle and release the lock-off button (P).
NOTE - There are two start/stop levers fitted. Either one can be used for starting the lawnmower.
To Stop your Lawnmower
- Release the pressure on the Start/Stop lever.
ENGLISH - 2

Grassbox Full Window
-
As the grassbox fills up, grass will be visible through the window (Q).
-
When the window/grassbox is full it is time to empty the grassbox.
How to Mow
How to Mow
- Start mowing the edge of the lawn nearest to the power point so the cable is laid out on the lawn you have already cut.
- Mow twice a week during the growing season, your lawn will suffer if more than a third of its length is cut at one time.
Do Not Overload Your Mower
Mowing long thick grass may cause the motor speed to
drop, you will hear a change in the motor sound. If the motor speed drops you may overload your lawnmower which may cause damage. When mowing in long thick grass a first cut with the cutting height set higher will help reduce the load. See Cutting Height Adjustment.
Edging Comb (R1)
Enables cutting up close to walls and fences
Removing and Fitting the Blade
Switch off, wait until the blade has stopped rotating and disconnect from the mains electricity supply BEFORE attempting to remove or refit the blade.
Always handle the blade with care - sharp edges could cause injury. USE GLOVES.
Removing the Blade
S1 - blade bolt S2 - washer S3 - blade
- To remove the blade bolt, hold the blade firmly with a gloved hand and with a spanner, loosen the blade bolt by turning it anti-clockwise (S).
- Remove the blade bolt, washer and blade. (S)
- Inspect for damage and clean as necessary.
- In the event of a blade becoming difficult to remove, insert a screwdriver (T1) into the hole (T2) to lock the
drive, then use a spanner to loosen the blade bolt by turning the spanner anti-clockwise. Ensure the screwdriver is removed before attempting to turn on the machine.
Renew your metal blade after 50 hours mowing or 2 years whichever is the sooner - regardless of condition. If the blade is cracked or damaged replace it with a new one. Fitting the Blade
- Fit the blade to the shaft with the sharp edges of the blade pointing away from the shaft.
- Re-assemble blade bolt through the washer and the blade.
- Hold the blade firmly with a gloved hand and tighten the blade bolt firmly with a spanner. Do not over tighten.
Caring for your Lawnmower
Cleaning
USE GLOVES
- IMPORTANT: - It is very important that you keep your lawnmower clean. Grass clippings left in any of the air intakes or under the deck could become a potential fire hazard.
- Remove grass from under the deck with brush. (V1)
- Using a soft brush - remove grass clippings from all air intakes (V2), the discharge chute (V3) and the grass box (V4).
- Using a soft brush, remove grass clippings from the vision window (V5).
- Wipe over the surface of your lawnmower with a dry cloth (V6).
- IMPORTANT: Never use water for cleaning your lawnmower, as this could damage the lawnmower and invalidate the guarantee. Do not clean with
chemicals, including petrol, or solvents - some can destroy critical plastic parts.
Storing your Cable
- Your electric cable can be wrapped around the hooks to enable tidy and safe storage (W1).
Storing your Lawnmower:
- Store in a dry place where your lawnmower is protected from damage
- Loosen the wing knobs to enable the handles to be folded over the product (W2) ensuring that the upper handle is supported.
At the End of the Mowing Season
- Replace bolts, nuts or screws, if necessary.
- Clean your lawnmower thoroughly.
- Make sure that the electric cable is stored correctly to prevent damage.
Replacement Parts
Blade 34cm
Reference no.: FLY 066
Part no.: 577366490
Blade 37cm
Reference no.: FLY 067
Part no.: 579041990
Fault Finding Hints
Fails to Operate
- Is the correct Starting procedure being followed? See 'To Start your Lawnmower'
- Is the Power Turned On?
- Check the fuse in the plug, if blown replace.
- Fuse continues to blow? Immediately disconnect from the mains electricity supply and consult your Husqvarna Service Centre.
Poor Grass Collection
- Disconnect from the mains electricity supply.
- Clean the outside of the air intakes, the discharge chute and the underside of the deck.
- Raise to a higher height of cut. See Cutting Height Adjustment.
- If poor collection persists. Immediately disconnect from the mains electricity supply and consult your Husqvarna Service Centre.
Excessive Vibration
- Disconnect from the mains electricity supply.
- Check that the blade is fitted correctly?
- If the blade is damaged or worn, replace it with a new one.
- If vibration persists? Immediately disconnect from the mains electricity supply and consult your Husqvarna Service Centre.
Lawnmower becomes heavy to push
- Disconnect from the mains electricity supply.
- In long grass or uneven ground, the height of cut should be raised to a higher position. See Cutting Height Adjustment.
- Check that the wheels can rotate freely.
- If problem persists? Immediately disconnect from the mains electricity supply and consult your Husqvarna Service Centre.
ENGLISH - 3
Service Recommendations
- Your product is uniquely identified by a silver and black product rating label.
We strongly recommend that your product is serviced at least every twelve months, more often in a professional application.
- Awareness of the environment must be considered when disposing of 'end-of-life' product.
If necessary, contact your local authority for disposal information.
The symbol on the product or on its packaging indicates that the more detailed information about recycling of this product, please product may not be treated as household waste. Instead it shall bcontact your local council office, your household waste disposal handed over to the applicable collection point for the recycling of service or the shop where you purchased the product.
electrical and electronic equipment. By ensuring this product is disposed of correctly, you will help prevent potential negative consequences for the environment and human health, which could otherwise be caused by inappropriate waste handling of this product.
Guarantee and Guarantee Policy
If any part is found to be defective due to faulty manufacture within the guarantee period, Husqvarna UK Ltd., through its Authorised Service Repairers will effect the repair or replacement to the customer free of charge providing:
(a) The fault is reported directly to the Authorised Repairer.
(b) Proof of purchase is provided.
(c) The fault is not caused by misuse, neglect or faulty adjustment by the user.
(d) The failure has not occurred through fair wear and tear.
(e) The machine has not been serviced or repaired, taken apart or tampered with by any person not authorised by Husqvarna UK Ltd.
(f) The machine has not been used for hire.
(g) The machine is owned by the original purchaser.
(h) The machine has not been used commercially.
*This guarantee is additional to, and in no way diminishes the customers statutory rights.
Failures due to the following are not covered, therefore it is important that you read the instructions contained in this Operator's Manual and understand how to operate and maintain your machine:
Failures not covered by guarantee
Failures as a result of not reporting an initial fault.
Failures as a result of sudden impact.
Failures as a result of not using the product in accordance with the instructions and recommendations contained in this Operator's Manual.
Machines used for hire are not covered by this guarantee.
*The following items listed are considered as wearing parts and their life is dependent on regular maintenance and are, therefore not normally subject to a valid warranty claim: Blades, Electric Mains cable
Caution!
Husqvarna UK Ltd. does not accept liability under the warranty for defects caused in whole or part, directly or indirectly by the fitting of replacement parts or additional parts that are not either manufactured or approved by Husqvarna UK Ltd., or by the machine having been modified in any way.
Husqvarna AB, S-561 82 Huskvarna, Sweden
Declare under our sole responsibility that the product(s);
Designation.Lawnmower
Designation of Type(s)C340VC,C370VC
Identification of Series.... See Product Rating Label
Year of Construction....See Product Rating Label
Conforms to the essential requirements & provisions of the following EC Directives:
2006/42/EC, 2004/108/EC, 2000/14/EC, 2011/65/EU
based on the following EU harmonized standards applied:
The maximum A weighted sound pressure level L_PA at the operator's position, measured according to EN60335-2-77 is given in the table.
The maximum hand / arm vibration weighted value a measured according to EN ISO 20643 on a sample of the above product(s) is given in the table.
2000/14/EC: The Measured Sound Power Lw & Guaranteed Sound Power Lw values are according to the tabulated figures. Conformity Assessment Procedure..Annex VI
Notified Body. Intertek,
Knowlhill, Milton Keynes,
Bucks., MK5 8NL, England


| Type | C340VC | C370VC |
| Width of Cut (cm) | 34 | 37 |
| Speed of rotation cutting device (rpm) | 3700 | 3600 |
| Power (kW) | 1.4 | 1.6 |
| Measured Sound Power \( L_{WA} \) (dB(A)) | 94 | 93 |
| Guaranteed Sound Power \( L_{WA} \) (dB(A)) | 96 | 96 |
| Sound pressure \( L_{PA} \) (dB(A)) | 78.2 | 82.1 |
| Uncertainty \( K_{PA} \) (dB(A)) | 2.5 | 2.5 |
| Hand / arm vibration \( a_{vhw} \) (m/s2) | 1.79 | 2.7 |
| Uncertainty \( K_{thw} \) (m/s2) | 1.5 | 1.5 |
| Weight (Kg) | 10.8 | 11.2 |
ENGLISH - 4
herkömmliches PCP (60245 IEC 57)
220-240V/50Hz 20-50m 2.5mm
Officier technique responsible
Conserver la documentation technique
zit. Ensure the grassbox is securely located.
Bucks., MK5 8NL, England


Huskvarna, 22/01/2013
P. Lameli
Technisch Directeur
Houder van technische documentatione
| Type | C340VC | C370VC |
| Maiaibreedte (cm) | 34 | 37 |
| Toerental maaier (rpm) | 3700 | 3600 |
| Vermogen (kW) | 1.4 | 1.6 |
| Gemeten geluidsvermögen LwA (dB(A)) | 94 | 93 |
| Gegarandeerd geluidsvermögen LwA (dB(A)) | 96 | 96 |
| Geluidsdruk LwA (dB(A)) | 78.2 | 82.1 |
| Onzekerheid KwA (dB(A)) | 2.5 | 2.5 |
| Hand-armtrillingen avvw (m/s2) | 1.79 | 2.7 |
| Onzekerheid Kwv (m/s2) | 1.5 | 1.5 |
| Gewicht (Kg) | 10.8 | 11.2 |
NEDERLANDS - 4
Sikkerhet
Fault Tips on feilsøking Hints
Vil ikke starte
- Blur den riktige startprosedyren fulgt? Se "Slik starter du gresskipperen"
- Er strommen slatt pa?
- Sjekk sikringen i stopselet - skift ut hvis den har gatt.
- Sikringen fortsetter à gá?: Bryt forbindelse til hovedströmforsyning umiddelbart og kontakt ditt Husqvarna Servicesenter.
Myndighet. Intertek, Davy Avenue,
Knowlhill, Milton Keynes,
Bucks., MK5 8NL, England
Huskvarna, 22/01/2013
P. Lameli
Teknisk Direktor
Bucks., MK5 8NL, England


Huskvarna, 22/01/2013
P. Lameli
Teknisk direktor
Hällare für teknika dokument.
| Typ | C340VC | C370VC |
| Klippbredd (cm) | 34 | 37 |
| Varvtil på klippanordning (rpm) | 3700 | 3600 |
| Effekt (kW) | 1.4 | 1.6 |
| Uppmättljudeffekt \( L_{WA} \)(dB(A)) | 94 | 93 |
| Garanteradljudeffekt \( L_{WA} \)(dB(A)) | 96 | 96 |
| Ljudtryck \( L_{PA} \)(dB(A)) | 78.2 | 82.1 |
| Osäkerhet \( K_{DA} \)(dB(A)) | 2.5 | 2.5 |
| Hand- / armvibration \( a_{mw} \)(m/s2) | 1.79 | 2.7 |
| Öviss \( K_{ahw} \)(m/s2) | 1.5 | 1.5 |
| Vikt. (Kg) | 10.8 | 11.2 |
SVENSKA - 4
Sikkerhedsregler

Bemyndiget organ. Intertek, Davy Avenue,
Knowlhill, Milton Keynes,
Bucks., MK5 8NL, England
Huskvarna, 22/01/2013
P. Lameli
Overste techniske embedsmand
220-240V/50Hz 20-50m 2.5mm
Knowlhill, Milton Keynes, Bucks., MK5 8NL, England
Huskvarna, 22/01/2013
P. Lameli
Director General Tecnico
Bucks., MK5 8NL, England
Huskvarna, 22/01/2013
P. Lameli
Direto Tecnico
Responsavel pela documentacao专业技术


220-240V/50Hz 20-50m 2.5mm
Bucks., MK5 8NL, England


Huskvarna, 22/01/2013
P. Lameli
Bucks., MK5 8NL, England


Huskvarna, 22/01/2013
P. Lameli
Muszaki igazgatoh
Bucks., MK5 8NL, England


Huskvarna, 22/01/2013
P. Lameli
Pokyny k elektrickym souCASTM
Knowlhill, Milton Keynes, Bucks., MK5 8NL, England


Huskvarna, 22/01/2013
P. Lameli
Technicky reditel
Bucks., MK5 8NL, England


Huskvarna, 22/01/2013
P. Lameli
Technicky riaditel
Cesalj zarubove (R1)
Omogucije rezanje uz same zidove i ograde
Skidanje i postavljanje ostrica
Iskljucite, pricekajte da se ostrica prestane okretati i odspojite iz struje PRIJE nego pokušate skinuti ili namestiti ostricu. Uvjek postupajte krajnje oprezno s ostricom - ostri bridovi mogu uzrokovati ozljedu. KORISTITE RUKAVICE
Skidanje ostrice
S1-matica za ostricu S2-gumica S3-ostrica
- Da bistecsinulimaticuzaostricu,cvrstouhvatite ostrucsrukomurukaviciiskljucemza maticu opustite maticuostricleokrecuci u smjerupsuprotnom od kazaljeknatsatu (S).
- Odstranite maticu ostrice, gumicu i ostricu (S)
- Provjerite postoji li ostecenje i ocistite po potrebi.
- U slučaju da postane teško skinuti oštricu, umetnite odvjac (T1) u rupu (T2)da biste zakljucali pigeon, i
Bucks, MK5 8NL, England


Huskvarna, 22/01/2013
P. Lameli
Tehnicki direktor
Mjesto za cuvanje tehnicke dokumentacije.
| Vrsta | C340VC | C370VC |
| Širina reza (cm) | 34 | 37 |
| Brzina rotacije reznog uredeja (rpm) | 3700 | 3600 |
| Snaga (kW) | 1.4 | 1.6 |
| Izmjerena snaga zvuka Lwa(dB(A)) | 94 | 93 |
| Zajamčena snaga zvuka Lwa(dB(A)) | 96 | 96 |
| Zvučni tlak Lda(dB(A)) | 78.2 | 82.1 |
| Neodredenost Kda(dB(A)) | 2.5 | 2.5 |
| Vibracije ruke avn(m/s2) | 1.79 | 2.7 |
| Neodredenost Kshv(m/s2) | 1.5 | 1.5 |
| Težina (Kg) | 10.8 | 11.2 |
HRVATSKI-4
Saugumas
220-240V/50Hz 20-50m 2.5mm
Bucks., MK5 8NL, England
Huskvarna, 22/01/2013
P. Lameli
PekomeHdaaunnoTexnuechomyo6cIyKHBaHHIO
Baia raoHokocnHa oHOnsHaHNo HteHTnHpyeTc no cepe6pno-HehO 3TNKeTc C XapaKtpnCTNkAmn H3deJIA.
MbHACTOHTBHO peHOMEHyEM npOBdyTB TxHHeCHeO 6cIyHBAHn H3eJIINr NO KpaHHe Mpe HaHDbIg DBeHaDcaTb MecAueB 60Jee Yacto, eCNN h3eJIIne HcNoB3yETCR npoccecoHaBHO.
3aacha ble yactn
JIe3Bne 34cm
PernctpaunOHnHbH Homep:
Homep Ta:
FLY066
577366490
JIe3Bne 37cm
PernctpaunOHbHn HOpE:
HomepeTaJIa:
FLY067
579041990
PYCCHN-3
HΦopMaunno oxpane Okpykaioe cpebl
PnBb6paCbBAHm HdEINRA B KOHcpe cpoKa CJyKb6blcJeNyET
I03a6OTCH6 OxpaHcO HOpYKaOuOp Cpdu.
PnHeo6XDMOCTN CBAHNTeBcBaWe MeCTHO
aDMNHcTpaueNe, YTO6bI NpOHTbNfOpMaUHO 68tYNH3aUN.
CnBON HA N3eNIN HIN HA yNtKOBKe NOKaBbAeT, YTO 3TO HNEHIE HENL3B BbPacBaBtB BMeCTe C bTobBIM MycPOM. BMEcTo STOHO DOHNOHb6BbOTHO HO NpOxOuJIN cOpBHy NHTKDTyYTHINsauN 3NeKTpHeecORo HJETPOHHOT
060pyoobAHn.
06c0eHb, YTObI 3TO N3dEJIne 6bIIO BbIbpoWHO npabINbHbIM
06pa3OM,Bbl nOMeHE ppeDpTbpATNb IOTehuAIBHe
HeratBHBie NoCpeCTBnI DnOKpyHaHOUe CpeBls 3doPbBb
1IOKeI, YTO MOIO 6bl CnyHTBCr PN HeNPaBbHbOM OpaueHHN C
3THM H3dJIEM, Bbl6pOeHHbIM B bblTOBoMycop. JnR 6oane
NoDp6HOH HOpMaUN 6yTNH3AUHN 3TO RnDEJIN.
nOKaYlCTA,CBAHNTecB cOFCmOB BaIeTo MeCTHOcoBETA,
cUYK60 UdaENHb6blTOBOM Mycopnn m MarasIHOM, Tbe Bbl
npocpeHn 3TO n3deJIne.
TapaHTnI rapaHTnHa nOJIHTnKa
EcHn BO BpMn IapAHTNHO Tepnoa KaKaH-NIO Bo Detalb 6yET
BnHa HApTeHNO H3-3a HpePABINBOHO IROTOBENH,
KOMpanahu Husqvarna UK Ltd. Yepoe C2oBmCTMAPOB IN
ABTOPINBOAHhBx cepBnCHbx ueHTPOB BecCnIaTHo pmoBcEET ee
peMOHT NNI ZAMEHy DnKJNEHTa, PnYCLOBHN, TTO:
(a) O DePeHTe 5bIto CooocheHo HeNoOpECDTBeHHO
ABTOP130BAHHOMY Mactepy.
(b) Byder npdeBraBHeHO pKa3aTeIbCTBO nokynn npnbopa.
(c) JeBekrHe 6bl nolnye Hpe3yIbIteHnepaBnHoro IcnoJIb3OBAHn, He6peKnHOCTnHn HnpaBnBhoH peYInpOBKn np6oBa NotPe6IteIeM.
(d) HencpabHOCTb He cnyHnacb n3-3a 06bHHoro n3HOca
(e) Maunna He 6cIyHbAiaIacb, He pemOHnHOBaIacb, He pa3bnpaIacb HnH He b6IaN CnpOpHeaKaHMJIbO JIuOM, He ABTOPIsOBAHbIM KOMNaHnei Husqvarna UK Ltd.
(f) MaHnHa He 6bIa QdaHa BHaem.
(g) MaunHa BnreTc co6ctBeHHoc7bI nePBHHoro nokyntenr.
h) Maunha He hncnbo3oBacb B KOMMeepckcx ceJAX 3Ta rapaHTH RAJIETcI DOnONHeHmE K 3aOHbIM npabAM KIneHTA Hn B KaKoM Mepe Ho yMeHbAeT Ero 3aKHOHbIX npab.
HeNcnpabHocn, cnyuBbIeecn 13-3a HxKepeueCneHHbIX cnYHaeb, He NoOpbBaOTcA TcT npaHTne, NToTOMy BaHHO, YTo6B BblpOHtAn HHCTpykU, CopeKaHInCeB TcTOM PyKoBOdCTBe OepatopA HOnHAI, HAK paBoTa b CaBae
MaHINHO N OCUJCTBNTb 3a HeIyXoD. HenCnpabHocTH, He NOKpbIAeMbIe rapAHTne? 3aMeHa NIOHouEHbN INN OOBpeKdEHNb JIeBn.
- HenncpaHOBCTn, nolnyHbIe B pEyBtate nepoHaYbHbON HenncpaBbHOCTn, oKOTOPoN He 6blO cooo6LHeo.
HeinpaBHOCTN,nonyehHbIe BpeyIbTaTe BHeaHoro yda.
HEnCnpaBHOCTN,nonyehHBe BpezylbTaTe HeHCnoJIb3oBaHnI npOyRTaB COOTBTCTBVn C HHTpyHnIMN I peKoMeHdaZnMM,COpePkaUHMcB 3TOM PyKOBQdCTBe onepatopa.
*MaHnblc, cdaHbIe BHaEM, He NpKpbIbAOTc 3ToI rapAHTne.
CLeaYIOuHc HNHepeHcNEHbE aIeMeHTbl
paCCMATPbAoiTOc KAcTeA, NpDeaeKeHHbIe H3OcH, n CpOK
IX CnyKbI 3ABNCIT OT peryJrphoro yxoJa, CJeDObaTeJIbHO, OHNIbHO He RIAHOTc cyBeKeTAmIo POpJUHeCN
deIECTBtINHOro rapaHTnHOro TpeBoAHr: Ie3Bn, Ka6Bn,
3JIeKTponTAHN.
PnpdynpckdeHn HcmaHusqvna UK Ltd. He npHHMaet o63aTeBCTNO 3TOnrpaHTnno HcnpBaHcTBM, Bb3BaHHbIM BueOMnNnIy cactnHNO, pRMO nN KocBeHHO, yTaHOBHO dTeJaeN dyA
3aMeHbI NnDOnNHHeJIbHxDeTaeN, He h3rTOBtEHbIXnN He
yTBepJHdHbIX HcmaHne Hcsqvua UK Ltd., nN no MaunHe, KOtopar bbla N3MeHeHa KaKMM-1n6o cnco6OBm.
ДeКларачи COOTBETCTBЯ CTaHДapTAM БрoneйСКOrO Coo6uecTBA
Husqvarna AB, S-561 82 Huskvarna, Sweden
3aHbHemnoHaWHy NCHIOHTeBHyIO OTBETBEHHOCb, yTO n3dJIine (n3dJIINr):
MapKupobKa.....Lawnmower Ra3oHOKocnka
MapKInpoBkA Tnna... C340VC, C370VC
TnpeKyuero yctpOCTBa.....CM. 3TNKeTKy CTexHHeCHMN DaHHbIMN 3dEIN
TODn3rOToBJIeHHN..Cm.3TNKeTKyCTexHnueCKHMn DaHHbIMN H3JeHH
COOTBETCTBYET Heo6xOaHbIM Tpe6oBaHnM nNoJIOKeHHnM CNeDyUoNx DnpeKTHB EC:
2006/42/EC, 2004/108/EC, 2000/14/EC, 2011/65/EU
OCHOBIBaRbHa cIeMyoUxipmHeReMbIX COnBaOBHbX CTaHdaptax EbponeChoro Co03a:
220-240V/50Hz 20-50m 2.5mm
Bucks., MK5 8NL, England


Huskvarna, 22/01/2013
P. Lameli
Ulemtehnik
"Notified Body". Intertek, Davy Avenue,
Knowlhill, Milton Keynes,
Bucks., MK5 8NL, England
Huskvarna, 22/01/2013
P. Lameli
Tehniskas nodalas vaditajs
Bucks., MK5 8NL, England
Huskvarna, 22/01/2013
P. Lameli
Inginer sef
Poooioipoioc tunou/ov C340VC,C370VC
Npoosioipoc TcEiapac... ...AvatpeTe stiv nivaiklaXapaKtpiTikov npoiOvTC EToC katakeuNC ... AvatpeTe stiv nivaiklaXapaKtpiTikov npoiOvTC
Tip Gosterimi C340VC, C370VC
Kesme Cihazinin Tipi....Urun Degerlendirme Etiketine Bakn
Yapim Yili.. Urun Degerlendirme Etiketine Bakin
Bucks., MK5 8NL, England


Huskvarna, 22/01/2013
P. Lameli
Bas Teknik Sorumlu
(C1428ARP) Buenos Aires
Phone: (+54) 11 5194 5000
info.gardena@
ar.husqvarna.com
Armenia
Garden Lang
61 Tigran Mets
0005 Yereyan
Australia
Husqvarna Australia Pty.
Locked Bag 5
Central Coast BC
NSW 2252
Phone: (+61) (0) 24352 7400
customer.service@
husqvarna.com.au
GARDENA Belgium NV/SA
Brampton, Ontario L6T 4X3
Phone: (+1) 905 792 93 30
info@gardenacadada.com
Chile
Maquinarias Agroforestales
Ltda. (Maga Ltda.)
Santiago, Chile
Ayda, Chesterton
8355 comuna Las Condes
Phone: (+56) 2 202 4417
Dalton@maga.cl
Zipcode:7560330
Tomuoe Chil
Fernando, Chile
Axda, Valparafo, #01466
Phone: (+56) 45 323 126
Zincode:4789441
Zipcode:4766441
China
Husqyarna (China) Mac
Manufacturing Co., Ltd.
No. 1355, Jia Xin Rd.,
Ma Lu Zhen, Jia Ding Dist.,
Shanghai
201801
Phone: (+86) 21 59159629
Domestic Sales
www.gardena.com.cn
Colombia
Husgvarna Colombia S.A.
Calle 18 No.68 D-31, zone
Industrial de Montevideo
Bogota, Cundinamarca
Tel. 571 2922700 ext. 105
jairosalazar@
busqyarna.com.co
Costa Rica
Companja Exim
Eurojberoamericana S.A.
Los Colecios, Moravia.
Consumer Outdoor Proc
Consumer Outdoor Produce
Consumer Outdoor Products, 2016
Lautatarhankatu 8 B / PL 3
00581 HEL SINKI
info@gardena.fi
France
Husnyarna France
2653GennevillersCed.
France
http://www.gardena.com
N° AZUR:0810007823
info@papadopoulos.com.gr
Hungary
Pusqvarna Magyarorszag H
Ezred u. 1-3
1044 Budapest
Telefon: (+36) 1 251-4161
Aycliffe Industrial Park
Newton Aycliffe
County Durham
DL5 6UP
info.gardena@
husqvarna.co.uk
Italy
Husqvarna Italia S.p.A.
Via Como 72
23868VALMADBERA(LC)
Phone: (+39) 0341.203.111
Info@gardenaltalla.it
Japan
KAKUICHI Co., Ltd.
Sumitomo Realty &
Development Kojimachi
BLDG.,8F
5-1Nibappco
Chiyoda-ku
Tokyo 102-0084
Phone: (+81) 33 264 4721
m.ishibara@kaku-ichi.co
Kazakhstan
- AMEDL Ltd.
155/1.Tazbihaveyol Str.
050060Almaty
JP Schmidt
Abayavenue 3B
110 005 Kostanay
Korea
Kyung Jin Trading CO.,LTD.
107-4, SunDuk Bld.,
YangJae-dong,
Seocho-gu
Seoul. (zipcode: 137-891)
Phone: (+82) (0)2574-630
Kyrgyzstan
Alve Makl
ay,MoladayaGuardir,L3
720014
Bishkek
Style
Ludwig Husqvarna Labyija
Consumer Outdoor Product
Bakuzu jela 6
LY-1024Bina
info@busgvarpa.com
Buaian
UAB Huskyarna Lietuva
Consumer Outdoor Product
Atotijos,pl.77G
LTI52104Kour
centras@husvgyarna.it
Luxembourg
Magasins Jules Neu
39, rue Jacques Sta
Luxembourg-Gaspe
Case Postale No. 12
Luxembourg 2010
Phone: (+352) 40 14 01
api@neuberg.lu
Mexico
AFOSA
Ay Lopez Mateos Sur
Col. La Calma 45070
Zanopan Jallsco
Mexico
Phone: (+52) 33 3818-3434
inepa@afco.com.mx
Moldaya
ConveL S
290A Muncesti Str.
2002 Chisinau
Netherlands
Husqvarna New Zealand L
PO Box 76-437
Manukau City 2241
Phone: (+64) (0) 9 9202416
support.nz@husqvarna.co.nSuriname
Norway
GARDENA
Husqyarna Consumer
Outdoor Products
Salgskontor Norge
Kleveryeien 6
1540 Vestby
info@gardena.no
Peru
Husqyarna Peru S.A.
Jr. Ramón Cárcamo 710
Lima
Tel: (+51) 1 3320400 ext. 4
juan.remuzqo@
husqyarna.com
Poland
Husqyarna
Poland Spolka z o.o.
ul. Wysockiego 15 b
03-371 Warszawa
Phone: (+48) 22 330 96 00
gardena@husgvarna.com.l
Portugal
Husqvarna Portugal, SA
Lagoon - Albarraque
2635-595 Blo de Mouro
Tel.: (+351) 219228530
Fax:(+351)219228536
info@gardena.pt
Romania
Madex International Srl
Soseau Odalj 117-123
ORO 013603 Bucuresti, S1
Phone: (+40) 21 352.76.03
madex@jnes.ro
Russia / Pocsn
OOO XyckBapHa"
141400Mocko8chag 06n
XHUMH
yinua JIeHnHrpndckay
39.
BuahecLeHTP
X11/4512U0
TOMOHISUOQ02-01
http://www.gardena.ru
Sectio
Serbia
Denmark
[O]
Autoput 2a Novi Sad bb
11273 Belgrade
Phone: (+381) 118 48 88 1
miroslav.jejina@domel.rs H
Singapore
Hy-Ray PRIVATE LIMITED
40 Jalan Pemimpin
02-08 Tat Ann Building
Singapore 577185
Phone: (+65) 6253 2277
shiying@hyray.com.sg
Slovak Republic
Husqvarna Cesko s.r.o.
Türkova 2319/5b
$49 00 Praha 4 - Chodov
Bezplatná infolinka:
800154044
servis@sk.husqvarna.com
Slovenia
Husqyarna Austria GmbH
Consumer Products
Industriezele 36
4010 Linz
Tel.:(+43)732770101-90
consumer.service@
husqvarna.at
South Africa
Husqvama
South Africa (Pty) Ltd
Postnet Suite 250
Private Bag X6
Cascades, 3202
South Africa
Phone: (+27) 33 846 9700
info@gardena.co.za
Spain
Husqvarna Espana S.A.
C/ Basauri, n6
La Florida
28023 Madrid
Phone: (+34) 917080500
TOB XycbapHa YkpaIIHa
Byn.BacnIbKbcKa,34
o0ic 204-r
03022, KniB
TeI. (+38) 044 498 39 02
info@gardena.ua
Uruguay
FELISA
Entre Rios 1083 CP 11800
Montevideo-Uruguay
Tel: (+598) 22 03 18 44
info@felisa.com.uy
Venezuela