
MUZ5MM1 - Food Processor BOSCH - Free user manual and instructions
Find the device manual for free MUZ5MM1 BOSCH in PDF.
| Accessory Type | Multimixer with universal blade and slicing/shredding discs |
| Brand and model | Bosch MUZ5MM1 |
| Compatible appliances | Bosch food processors series MUMS2, MUMS4, MUM5 |
| Package contents | Multimixer, universal blade, reversible slicing disc thick/fine, reversible shredding disc coarse/fine, fine shredding disc, disc holder, pusher/graduated cup |
| Main functions | Grind, chop, mix, puree, emulsify, slice, shred, mince |
| Blade material | Stainless steel |
| Safety | Overload protection (forced break zone on disc holder shaft), lid lock preventing opening during operation |
| Cleaning | Manual cleaning of parts; do not use alcohol-based products, metal or abrasive objects; possible discoloration of plastics remove with edible oil |
| Maintenance | After use, clean immediately to prevent residue from drying |
| Spare parts | Replacement disc holder ref. 00088256 available via after-sales service |
| Number of discs | 3 reversible discs (slicing, coarse/fine shredding, fine shredding) offering 5 different sides |
| Container capacity | Approximately 1.5 L (estimate) |
| Weight | Approximately 0.8 kg (estimate) |
| Warranty | Parts with forced break zone not covered by warranty |
| Manual available | Free download as PDF on notice-facile.com |
Frequently Asked Questions - MUZ5MM1 BOSCH
User questions about MUZ5MM1 BOSCH
0 question about this device. Answer the ones you know or ask your own.
Ask a new question about this device
Download the instructions for your Food Processor in PDF format for free! Find your manual MUZ5MM1 - BOSCH and take your electronic device back in hand. On this page are published all the documents necessary for the use of your device. MUZ5MM1 by BOSCH.
USER MANUAL MUZ5MM1 BOSCH
text_image
QR code image containing encoded data, no visible human-readable text
| [de] | Scannen Sie den QR-Code oder besuchen Sie die Webseite, um die erweiterten Hinweise zur Benutzung zu öffnen. Dort finden Sie zusätzliche Informationen zu Ihrem Gerät oder Zubehör. |
| [en] | Scan the QR code or visit the website to open the Further Notices for Use. You can find additional information about your appliance or accessory here. |
| [fr] | Scanner le code QR ou visiter le site Web pour ouvrir les informations d'utilisation complémentaires. Vous y trouverez des informations supplémentaires concernant votre appareil ou accessoire. |
| [it] | Scansionare il codice QR oppure visitare il sito Web per indicazioni dettagliate sull'uso. Si trovano informazioni aggiuntive sull'apparecchio o gli accessori. |
| [nl] | Scan de QR-code of bezoek de website om de uitgebreide gebruiksinstructies te openen. Hierin vindt u meer informatie over het apparaat of toebehoren. |
| [da] | Scan QR-koden, eller besøg hjemmesiden, for at åbne de udvidede anvisninger om anvendelse. Der kan der findes yderligere oplysninger om apparatet eller tilbehøret. |
| [no] | Skann QR-koden eller besøk nettstedet for å åpne mer informasjon om bruken. Der finner du mer informasjon om apparatet eller tilbehøret. |
| [sv] | Scanna QR-koden eller gå till webbplatsen och öppna de utökade användningsanvisningarna. Där finns mer information om din apparat eller dina tillbehör. |
| [fi] | Skannaa QR-koodi tai vieraile internet-sivustollamme, jotta voit avata laajennetut käyttötiedot. Sieltä löydät laitetta tai varustetta koskevia lisätietoja. |
| [es] | Para abrir las indicaciones ampliadas sobre el uso, visite la página web o escanee el código QR. Allí encontrará más información sobre el aparato o los accesorios. |
| [pt] | Leia o código QR ou visite a página web para abrir as indicações avançadas relativas à utilização. Aí encontra informações adicionais sobre o seu aparelho ou acessório. |
| [el] | Σαρώστε τον κωδικό QR ή επισκεφτείτε την ιστοσελίδα, για να ανοίξετε τις διευρυμένες υποδείξεις για τη χρήση. Εκεί θα βρείτε πρόσθετες πληροφορίες για τη συσκευή σας ή τα εξαρτήματα. |
| [tr] | Ayrıntılı kullanım bilgilerine ulaşmak için QR kodu taratin veya web sayfasını ziyaret ediniz. Cihaz ve aksesuarlar ile ilgili ayrintılı bilgileri bu şekilde edinebilirsiniz. |
| [pl] | Aby uzyskać rozszerzone informacje na temat zastosowań urządzenia, należy zeskanować kod QR albo wejść na stronę internetową. Można tam znaleźć dodatkowe informacje na temat posiadanego urządzenia i akcesoriów. |
| [uk] | Щоб отримати докладніші вказівки з користування, зіскануйте QR-код або відвідайте сайт. Там ви знайдете додаткові відомості про прилад або приладдя. |
| [ru] | Чтобы узнать больше о пользовании, отсканируйте QR-код или зайдите на сайт. Там вы найдете более подробные сведения о приборе и принадлежностях. |
natural_image
Line drawing of a kitchen mixer with an upward arrow indicating motion (no text or symbols)A

natural_image
Technical line drawing of a mechanical device with an upward arrow indicating motion (no text or symbols)B
3

natural_image
Diagram of a mechanical device with a blue cylindrical component and a pointer inserted into it, showing a downward arrow (no text or symbols present)4

text_image
CLICK5
text_image
Diagram illustrating a mechanical process with labeled steps 1 and 2, showing hand positioning and fluid behavior in a container.6

natural_image
Illustration of a kitchen mixer with blue liquid droplets and a downward arrow indicating water level (no text or symbols)7

text_image
Diagram illustrating a mechanical or fluid processing setup with labeled components and directional arrows indicating flow or movement.8

text_image
CLICK9

text_image
Diagram illustrating a mechanical device with labeled components and directional arrows indicating motion or force.10

natural_image
Blue industrial fan or filter device with a cylindrical top and mechanical handle, showing internal flow direction (no text or symbols)The image is too blurry to recognize any text content.

natural_image
Diagram showing a cylindrical component with a downward arrow above it, mounted on a base (no text or symbols)12

natural_image
Blue electrical plug inserted into a square socket, with an arrow indicating direction (no text or symbols)The image is too blurry to recognize any text content.
text_image
Diagram illustrating a mechanical device with an ON/OFF operation, showing a hand operating the valve and a blue cylindrical component with an upward arrow.14
text_image
OFF offThe image is too blurry to recognize any text content.
natural_image
Illustration of a blue electrical plug with a circular socket inserted, showing a black arrow indicating direction (no text or symbols)16

natural_image
Two technical diagrams showing a blue industrial component with arrows indicating movement or assembly, no text or symbols present.The image is too blurry to recognize any text content.
text_image
Diagram of a blender with directional arrows indicating process flow or movement, showing material input and output.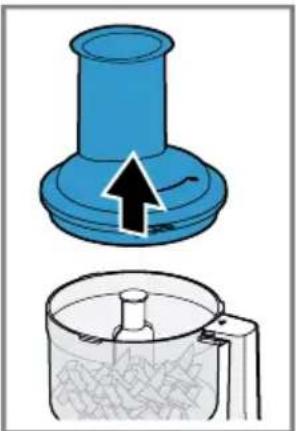
natural_image
Illustration of a blue mechanical component with an arrow indicating upward motion, and a close-up of a container filled with granular material (no text or symbols)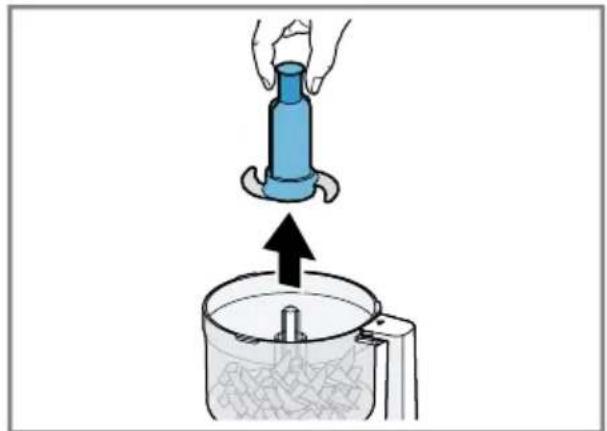
natural_image
Illustration of a hand pouring liquid into a container with an upward arrow (no text or symbols)18

natural_image
Illustration of a kitchen grater pouring blue granular material into a bowl (no text or symbols)The image is too blurry to recognize any text content.

natural_image
Diagram of a mechanical device with a blue cylindrical component and a lever mechanism, showing a downward arrow indicating motion (no text or symbols present)20

text_image
CLICKThe image is too blurry to recognize any text content.
natural_image
Illustration of a hand holding a circular device with a blue component, pouring liquid into a mechanical component (no text or symbols)22

natural_image
Illustration of a hand using a tool to press down a blue circular component into a container (no text or symbols)The image is too blurry to recognize any text content.

text_image
Diagram illustrating a mechanical assembly with labeled components and directional arrows, likely from an engineering or manufacturing context.24

text_image
CLICK26
text_image
Diagram illustrating a mechanical device with force application and directional arrows, showing fluid flow or force vectors.The image is too blurry to recognize any text content.
natural_image
3D rendering of a blue industrial filter or scrubber device with a circular inlet and handle, showing internal components and flow direction (no text or symbols)28
natural_image
Blue electrical plug inserted into a square socket, with an arrow indicating direction (no text or symbols)The image is too blurry to recognize any text content.
text_image
ON30

natural_image
Two-step diagram showing a blue vegetable being inserted into a cylindrical container, with arrows indicating the process (no text or symbols present)The image is too blurry to recognize any text content.

text_image
OFF off32

natural_image
Blue electrical plug with a circular socket inserted, showing a black arrow indicating direction (no text or symbols)The image is too blurry to recognize any text content.
natural_image
Illustration of a blue industrial machine with a cylindrical top and internal tank, showing fluid flow or material movement (no text or symbols)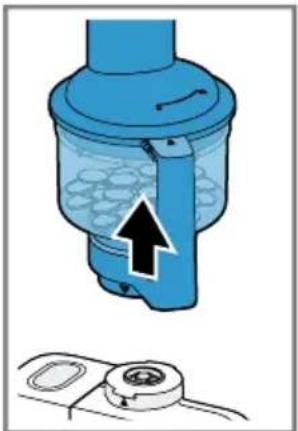
natural_image
Illustration of a blue cylindrical device with internal components and an upward arrow, alongside a separate close-up of a mechanical component (no text or symbols)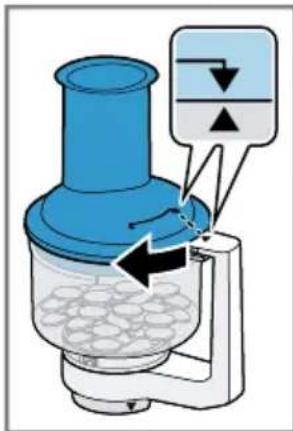
text_image
Diagram of a chemical reactor with labeled components and directional arrows indicating flow or movement
natural_image
Illustration of a blue mechanical component with an arrow indicating upward motion, and a close-up of its internal structure (no text or symbols)34

natural_image
Illustration of a hand placing a small object into a blue circular component, with an arrow indicating upward motion (no text or symbols)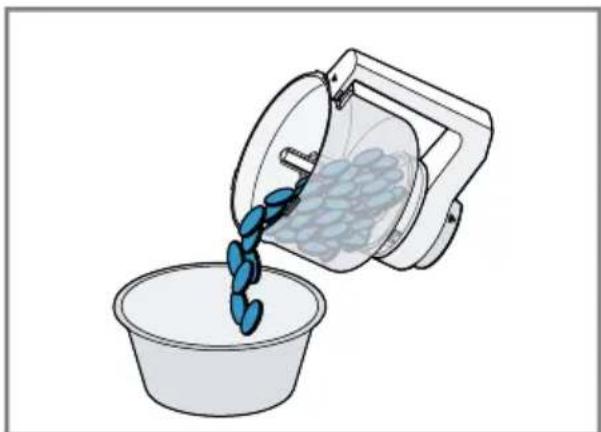
natural_image
Illustration of a container pouring blue liquid into a plastic bag (no text or symbols)36
 |  |  |  |  | |
 | |||||
 |  |  |  |  |  |
 |  |  |  |  |  |
 |  |  |  |  |  |
 |  |  |  | 1.↓2. |  |  |  | |
 |  |  |  |  100-375 g 100-375 g | 4 | 7 45-90 s | ||
 |  |  | [YBGC] 200-375 g | 4 | 7 60-120 s | |||
| [76BB] |  |  | ### | 3 | 5 90 s | |||
| 4 | 7 60-210 s | |||||||
| [TTT] | [GAAT] |  | 50-300 g | 4 | 7 7-30 s | |||
| ### | [###] | [###] | 50-100 g | 4 | 7 5-7 s | |||
 |  |  | 50-100 g | 4 | 7 20-90 s | |||
 | [###] | 5-10 g | 4 15-20 s7 | |||||
 |  |  |  MAX MAX |  1-4 1-4 |  1-7/M 1-7/M |
 |  |  | 500 g | 3 | 5 |
 |  | 500 g | 3 | 5 | |
 |  | 500 g | 3 | 5 | |
 |  | 500 g | 3 | 5 | |
 |  |  | 500 g | 2 | 3 |
 |  | 500 g | 2 | 3 | |
 |  | 500 g | 2 | 3 | |
 |  | 500 g | 2 | 3 | |
 |  | 500 g | 3 | 3 | |
 |  |  | 500 g | 4 | 7 |
 |  | 500 g | 4 | 7 |

1 Sicherheit
Observe the following safety instructions.
1.1 General information
- Read this instruction manual carefully.
- Observe the instructions for the base unit.
1.2 Intended use
Only use the accessories:
■ with a kitchen machine from the same series MUMS2, MUMS4, MUM5.
■ With genuine parts and accessories.
■ For cutting up, chopping, mixing, puréeing and emulsifying liquid or semi-solid food.
■ for cutting up, shredding and grating food.
1.3 Safety instructions

WARNING – Risk of cutting!
The cutting discs have sharp blades and edges.
▶ Only take hold of the cutting discs by the edge.
▶ Never touch the sharp blades and edges with bare hands.

WARNING – Risk of injury!
Rotating drives, tools or accessory parts may cause injury.
▶ Do not reach into the filling shaft.
▶ Only use the pusher to push down ingredients.
Improper use may cause injuries.
▶ Never assemble the accessories on the base unit.
▶ Only attach and remove accessories once the drive has stopped and the appliance has been unplugged.
- The accessories should only be used in the intended operating position.
2 Avoiding material damage
ATTENTION!
Improper use may cause material damage.
- Do not process food that contains hard components, e.g. bones, gristle or stones.
- Do not insert objects into the filling shaft or housing, e.g. wooden spoons.
▶ Before use, check the filling shaft and housing for foreign objects. - Do not apply great force with the pusher.
3 Unpacking and checking
Find out here what you need to note when unpacking the appliance.
3.1 Unpacking the accessories and parts
- Take the accessories out of the packaging.
- Take all other parts and the accompanying documents out of the packaging and place them to hand.
- Remove any packaging material.
- Remove any stickers or film.
3.2 Contents of package
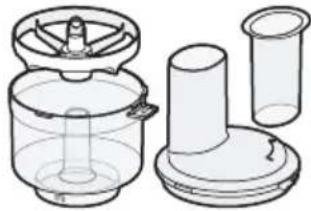
After unpacking all parts, check for any damage in transit and completeness of the delivery.
→ Fig. 1
A
Universal mixer
B
Universal blade
| C | Cutting discs |
| D | Disc holder |
| E | Accompanying documents |
3.3 Cleaning the accessories before using for the first time
- Clean all parts that come into contact with food before using for the first time.
→ "Cleaning and servicing", Page 22 - Put the cleaned and dried parts out ready for use.
4 Familiarising yourself with the accessories
4.1 Components
You can find an overview of the parts of your accessories here.
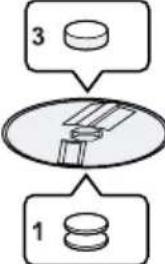
→ Fig. 2
| 1 | Base with handle |
| 2 | Container |
| 3 | Lid with integrated filling shaft |
| 4 | Pusher and measuring jug |
| 5 | Universal blade |
| 6 | Blade guard |
| 7 | Reversible cutting disc, thick/thin |
| 8 | Reversible shredding disc, coarse/fine |
| 9 | Fine grating disc |
| 10 | Disc holder |
4.2 Symbols
You can find an overview of the symbols used on your accessories here.
Symbol Description
| Do not reach into the filling shaft. | |
| Fit the lid ▼ and screw on securely ● | |
| Position marking for the lid | |
| Position marking for the base |
4.3 Overview of cutting discs
You can find an overview of the cutting discs and their purposes here.
| Designation | Use |
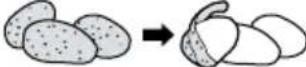
Reversible cutting disc, thick/thin  | Cutting food into thick or thin slices, e.g. fruit and vegetables.Marking:■ 1 = thick slices■ 3 = thin slicesNote: Not suitable for processing hard cheese, bread, rolls or chocolate.Tip: Only cut up cooked potatoes once they have cooled down. |
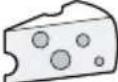
Reversible shredding disc, coarse/ fine  | Shredding food coarsely or finely, e.g. fruit, vegetables or cheese as Gouda or Edam.Marking:■ 2 = coarse side■ 4 = fine sideNote: Not suitable for processing nuts or hard cheese, e.g. Parmesan.Tip: Shred soft cheese with the coarse side only. |
| Designation | Use |
| Fine grat-ing disc | Shredding food medium-fine, e.g. raw potatoes or hard cheese such as Parmesan. |
 | |
| Note: Not suitable for processing soft cheese and cheese slices. |
4.4 Overload protection
The overload protection system prevents the motor and other components from being damaged through being overloaded.
If the disc holder is overloaded or blocked, its shaft will break at the predetermined breaking point.
Note: Spare parts with a predetermined breaking point are not covered by our warranty obligations. A new disc holder is available from customer service under order number 00088256.
4.5 Lid catch
The Multi Mixer can only be fitted on the appliance and operated if it has been fully assembled and properly closed with the lid. The lid cannot be opened if the Multi Mixer is still attached to the food processor.
5 Basic operation
5.1 Overview of base units
This accessory can be used with different base units.
You can prepare your kitchen machine as shown.
→ Fig. 3
| A | Kitchen machine from the MUMS4 or MUM5 series |
| B | Kitchen machine from the MUMS2 series |
5.2 Using the universal blade
-
Place the container on the base.
→ Fig. 4
Observe the recesses on the base. -
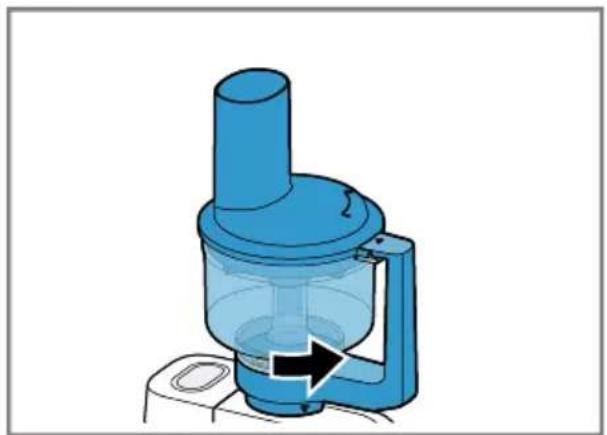
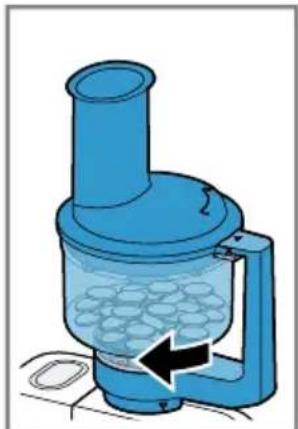
Rotate the container anticlockwise until it engages.
→ Fig. 5 -
Take the universal blade out of the blade guard and place the universal blade in the container. → Fig. 6
-
Add the food to the container. → Fig. 7
-
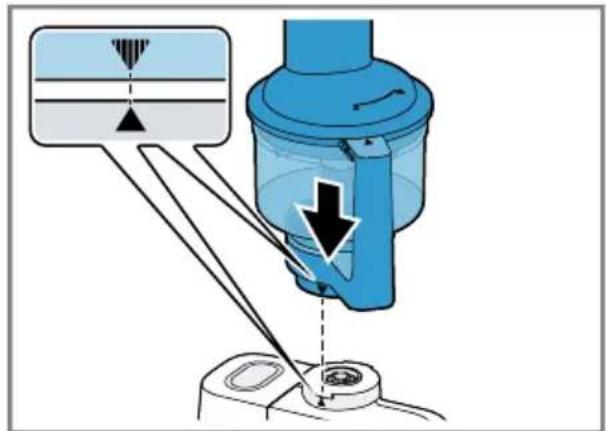
Place the lid on the container. → Fig. 8 Markings ▼ and must match up.
-
Rotate the lid anticlockwise until it engages. → Fig. 9 Markings ● and ▲ must match up.
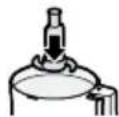
-
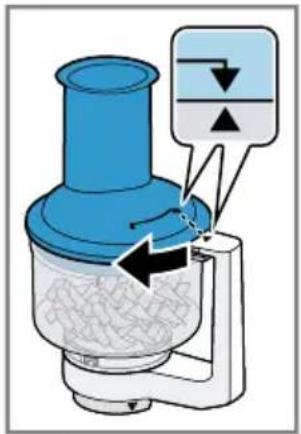
Place the Multi Mixer on the drive 3 as shown. → Fig. 10 Markings and must match up.
-
Push the Multi Mixer down and rotate anticlockwise until it engages. → Fig. 11
-
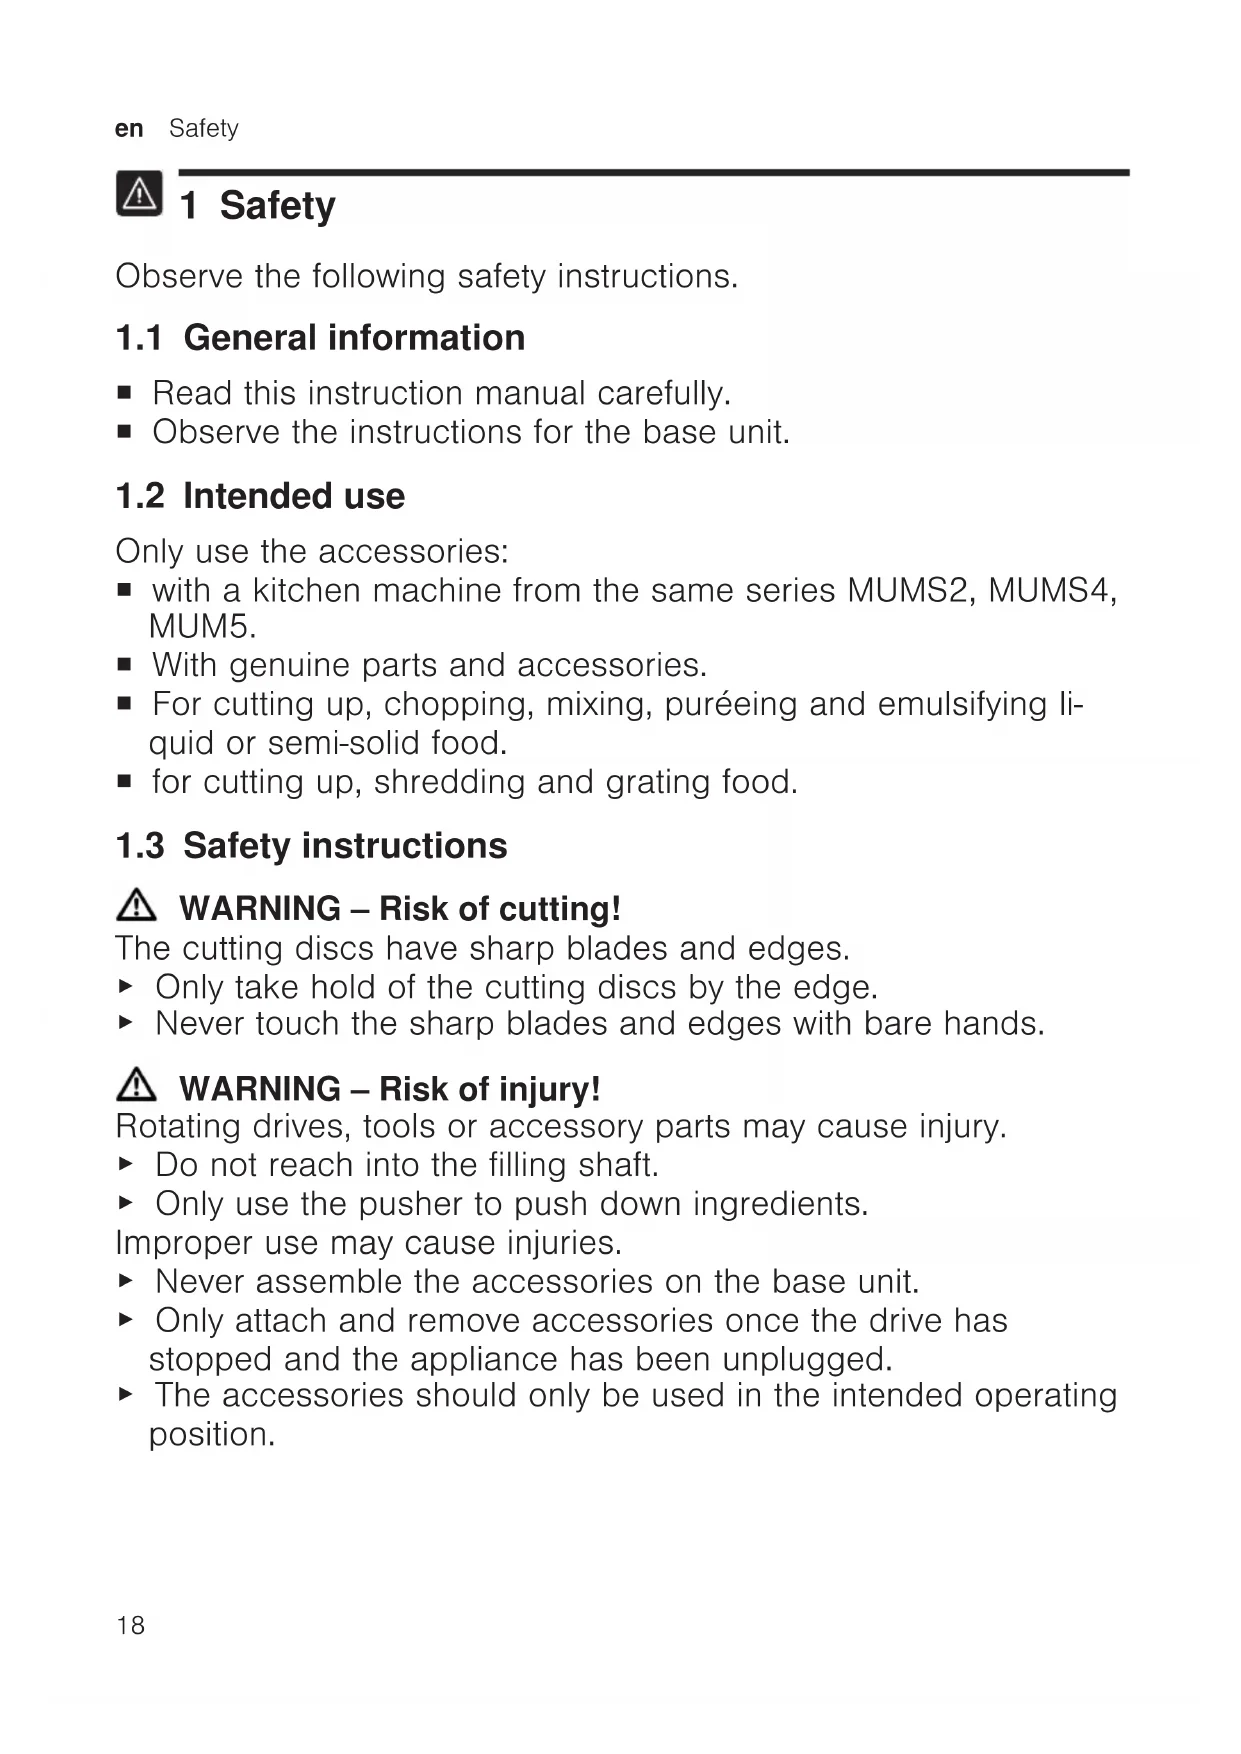
Insert the pusher into the filling shaft. → Fig. 12
-
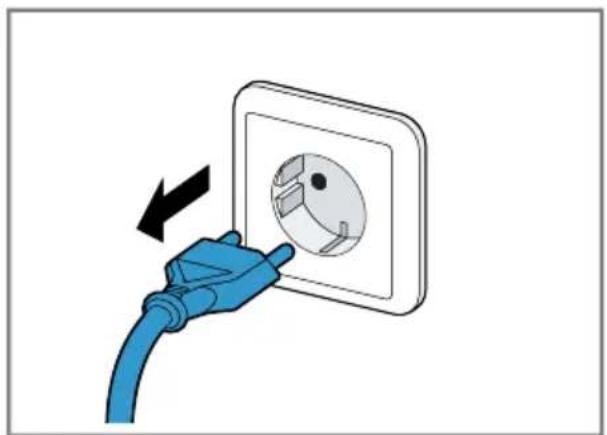
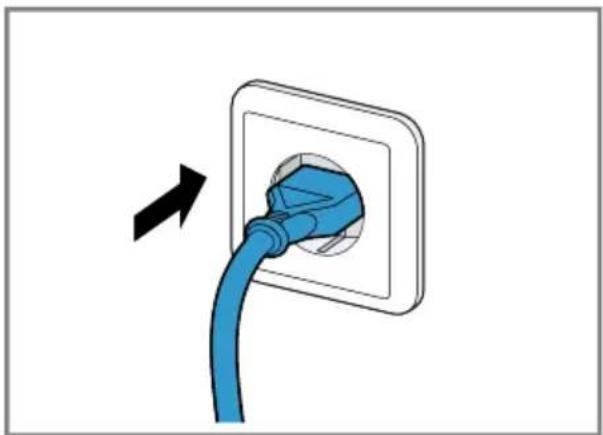
Insert mains plug. → Fig. 13
-
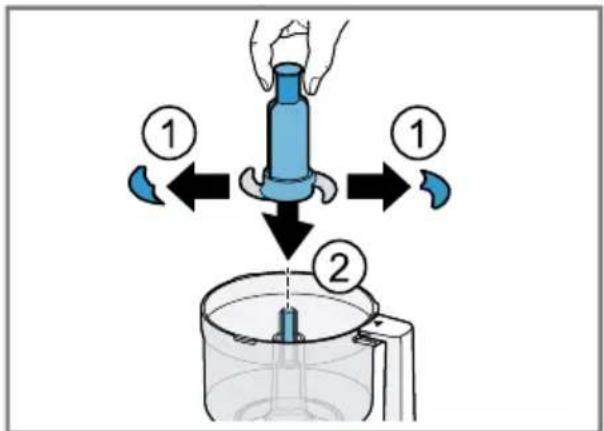
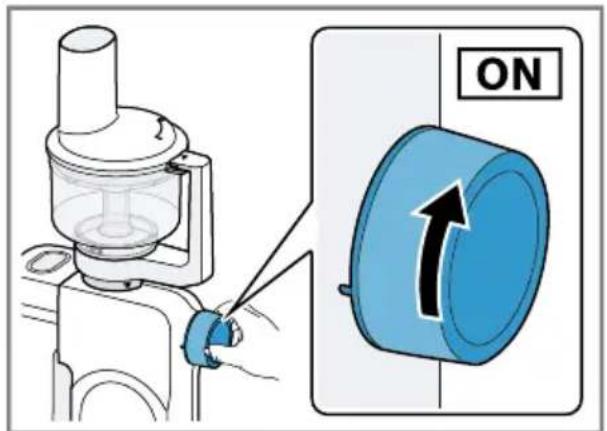
Set the rotary switch to the recommended speed. → Fig. 14 Process the ingredients until you achieve the required result.
-
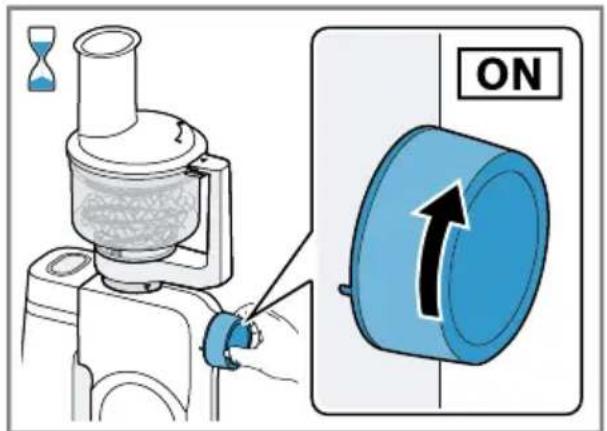
Set the rotary switch to off. Fig. 15 Wait until the appliance stops.
-
Unplug the mains plug. → Fig. 16
-
Rotate the Multi Mixer clockwise and remove. → Fig. 17
-
Rotate the lid clockwise and remove. → Fig. 18
-
Take the universal blade out of the container. → Fig. 19
-
Empty the container. → Fig. 20
Tip: Clean all parts immediately after use so that residues do not dry on.
5.3 Using the cutting discs
-
Place the container on the base. → Fig. 21 Observe the recesses on the base.
-
Rotate the container anticlockwise until it engages. → Fig. 22
-
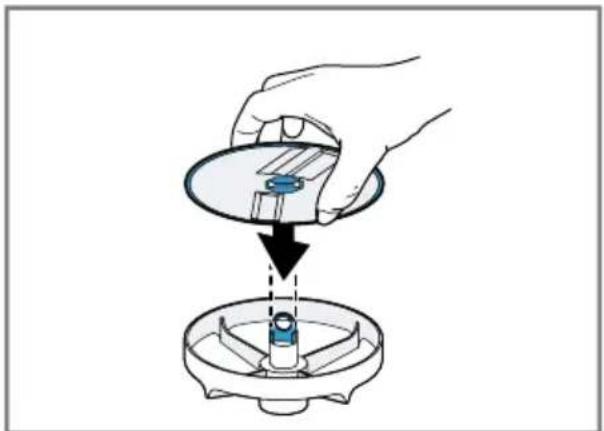
Take hold of the required cutting disc by the edge and fit onto the disc holder with the side you require facing up. → Fig. 23
-
Insert the disc holder with the cutting disc into the container. → Fig. 24
-
Place the lid on the container. → Fig. 25 Markings ▼ and must match up.
-
Rotate the lid anticlockwise until it engages. → Fig. 26 Markings ● and ▲ must match up.
en Cleaning and servicing
- Place the Multi Mixer on the drive 3 as shown.
→ Fig. 27
Markings ▼ and ▲ must match up.
- Push the Multi Mixer down and rotate anticlockwise until it engages.
→ Fig. 28
- Insert mains plug.
→ Fig. 29
- Set the rotary switch to the recommended speed.
→ Fig. 30
- Insert the food into the filling shaft and press down with the pusher, applying light pressure.
→ Fig. 31
- Stop processing when
– all food has been processed.
– the food in the container almost reaches the disc holder.
- Set the rotary switch to O off.
→ Fig. 32
Wait until the appliance stops.
- Unplug the mains plug.
→ Fig. 33
- Rotate the Multi Mixer clockwise and remove.
→ Fig. 34
- Rotate the lid clockwise and remove.
→ Fig. 35
- Take the disc holder with the cutting disc out of the container.
→ Fig. 36
- Empty the container.
→ Fig. 37
Tip: Clean all parts immediately after use so that residues do not dry on.
6 Cleaning and servicing
6.1 Cleaning products
Find out here what cleaning agents are suitable for your accessories.
ATTENTION!
Using unsuitable cleaning agents or incorrect cleaning may damage the accessories.
- Do not use cleaning agents containing alcohol or spirits.
- Do not use sharp, pointed or metal objects.
- Do not use abrasive cloths or cleaning agents.
6.2 Overview of cleaning
Clean the individual parts as indicated in the table.
→ Fig. 38
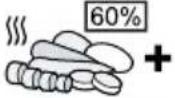
Tip: When processing food such as carrots, plastic parts may become discoloured. Remove discolouration with a soft cloth and a few drops of cooking oil.
7 Application examples
You can find application examples that have been specially developed for your accessory here.
7.1 Application examples for the universal blade
Observe the comments and figures in the table.
→ Fig. 39
7.2 Application examples for the cutting discs
Observe the comments and figures in the table.
→ Fig. 40
7.3 Sample recipe
You can find a sample recipe that has been specially developed for your appliance here.
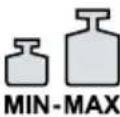
Note: Your model is equipped with a 4- or 7-level rotary switch depending on the features of the appliance. The
recommended speeds for the 4-level rotary switch are always shown in brackets in these instructions for use.
The ingredient quantities and processing times are tailored to the type of appliance. The appliance type can be found on the rating plate.
| Recipe Type Ingredients Processing | |||
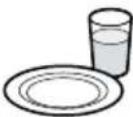
| Honey-apple mix-ture | CNUM40CNUM41CNUM50CNUM51CNUM51S | ■ 400 g forest honey(5 °C)■ 50 g apple cut intocubes (10 x 10 mm) | ■ Insert universal blade.■ Add the ingredients.■ Process for 5 secondsat setting 7 (4). |
| Honey cake with apples | Basic recipe:■ 3 eggs■ 60 g butter■ 100 g plain white flour■ 60 g ground walnuts■ 1 tsp cinnamon■ 2 tbsp vanilla sugar■ 1 tsp baking powder■ 1 apple | ■ Separate the eggs and whisk the egg whites until stiff.■ Beat the egg yolk with the sugar. Add the softened butter and 115 g of the prepared honey-apple mixture.■ Mix the rest of the ingredients in a separate bowl, add to the moist ingredients and stir in.■ Carefully fold in the beaten egg whites with a spatula.■ Line a rectangular loaf tin (35 cm x 11 cm) with greaseproof paper and add the prepared mixture.■ Peel the apple and cut into slices. Arrange the slices of apple on the cake.■ Preheat the oven to 180 °C and bake the cake for 30 minutes. | |
| Yeast dough | CNUM51T W | ■ 500 g flour■ 1 pinch salt■ 25 g fresh yeast or 7 g dried yeast■ 300 ml warm water | ■ Insert universal blade.■ Add water.■ Add the remaining ingredients.■ Process for 1 minute at setting 7 (4). |
