
MUMXL20W - Food Processor BOSCH - Free user manual and instructions
Find the device manual for free MUMXL20W BOSCH in PDF.


| Product Type | Food Processor |
| Brand | Bosch |
| Model | MUMXL20W |
| Power | 1000 W |
| Bowl Capacity | 3.9 L |
| Bowl Material | Stainless Steel |
| Included Accessories | Whisk, dough hook, blender, grater/slicer |
| Dimensions (L x D x H) | 280 x 250 x 300 mm |
| Weight | 7.5 kg |
| Power Supply | 230 V, 50 Hz |
| Main Functions | Kneading, whipping, mixing, blending, chopping, grating |
| Noise Level | 85 dB(A) |
| Safety | Safety lock, auto shut-off |
| Care and Cleaning | Removable parts dishwasher safe |
| Repairability | Repairability index: 7.9/10 |
| Warranty | 2 years |
Frequently Asked Questions - MUMXL20W BOSCH
User questions about MUMXL20W BOSCH
0 question about this device. Answer the ones you know or ask your own.
Ask a new question about this device
Download the instructions for your Food Processor in PDF format for free! Find your manual MUMXL20W - BOSCH and take your electronic device back in hand. On this page are published all the documents necessary for the use of your device. MUMXL20W by BOSCH.
USER MANUAL MUMXL20W BOSCH
natural_image
Close-up of a circular hole with two dark spherical objects embedded in a textured, granular surface (no text or symbols visible)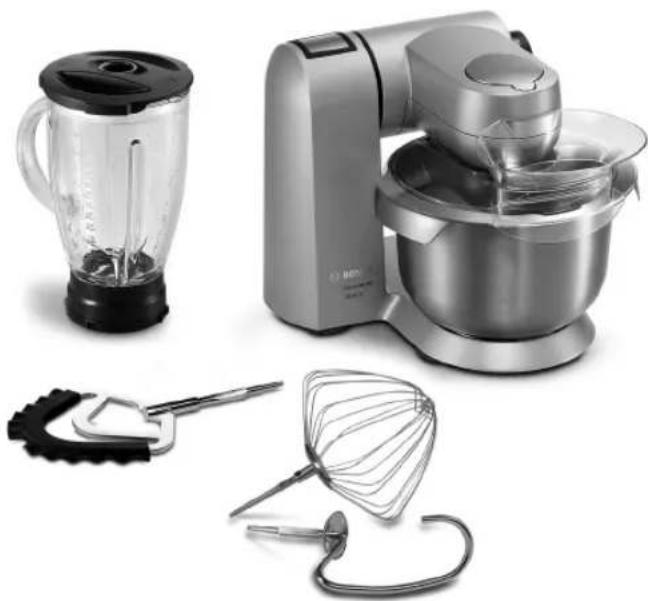
natural_image
Product photo of kitchen utensils including a blender, mixing bowl, whisker, and stand mixer (no visible text or labels)Register your new Bosch now: www.bosch-home.com/welcome
natural_image
Close-up of a textured, irregularly shaped rock or mineral surface with a central circular opening (no visible text or symbols)MUMXL...

BOSCH
1 Päckchen Backpulver
150 ml Milch
Congratulations on the purchase of your new BOSCH appliance. In doing so, you have opted for a modern high-quality domestic appliance. You can find further information about our products on our web page.
Contents
| For your safety | 17 |
| Overview | 20 |
| Operating positions | 20 |
| Operation | 21 |
| Cleaning and servicing | 23 |
| Troubleshooting | 24 |
| Application examples | 24 |
| Optional accessories | 27 |
| Instructions on disposal | 29 |
| Warranty conditions | 29 |
For your safety
Before use, read these instructions carefully in order to become familiar with important safety and operating instructions for this appliance.
If the instructions for correct use of the appliance are not observed, the manufacturer's liability for any resulting damage will be excluded. This appliance is designed for processing normal household quantities in the home or similar quantities in non-industrial applications.
Non-industrial applications include e.g. use in employee kitchens in shops, offices, agricultural and other commercial businesses, as well as use by guests in boarding houses, small hotels and similar dwellings. Use the appliance for processing normal quantities of food for domestic use. Do not exceed permitted maximum quantities (see “Application examples”).
This appliance is suitable for mixing, kneading, beating and cutting food. It must not be used for processing other objects or substances. Other applications are possible if the accessories approved by the manufacturer are used.
Use the appliance with original accessories only.
When using the accessories, follow the enclosed operating instructions. Please keep the operating instructions in a safe place. If passing on the appliance to a third party, always include the operating instructions.

General safety instructions
Electric shock risk
The appliance must not be used by children.
The appliance and its power cord must be kept away from children. Appliances can be used by persons with reduced physical, sensory or mental capabilities or lack of experience and knowledge if they have been given supervision or instruction concerning use of the appliance in a safe way and if they understand the hazards involved. Children shall not play with the appliance.
Switch off the appliance and disconnect from supply before changing accessories or approaching parts that move in use.
Connect and operate the appliance only in accordance with the specifications on the rating plate. Only use indoors. Do not use the appliance if the power cord and/or appliance are damaged.
Always disconnect the appliance from the supply if it is left unattended and before assembling, disassembling or cleaning.
Do not place the power cord over sharp edges or hot surfaces.
To prevent injury, a damaged power cord must be replaced by the manufacturer or his customer service or a similarly qualified person.
Only our customer service may repair the appliance.
Safety instructions for this appliance
Risk of injury
Risk of electric shock!
Do not insert mains plug until all preparations for working with the appliance are complete.
Never immerse the base unit in liquid or hold under running water.
Do not use a steam cleaner.
Do not adjust swivel multi-function arm while the appliance is switched on. Wait until the drive has come to a standstill.
Do not change tool/accessory until the drive is at a standstill – when the appliance is switched off, the drive continues running briefly.
Use only the rotary switch to switch the appliance on or off.
When the appliance is not in use, pull out the mains plug.
Before eliminating a fault, pull out the mains plug.
Risk of injury from the rotating tools!
While the appliance is operating, never place fingers in the mixing bowl. Attach the cover (12) before operating the appliance!
Keep hands clear of rotating parts.
Do not change tools until the drive has come to a standstill – when the appliance is switched off, the drive continues running briefly and stops in the tool change position/„Easy fill“-position.
Do not move multi-function arm until the tool is at a standstill.
Do not switch on the appliance until the blender has been screwed in all the way and the tool drive cover (7) has been attached.
Cover unused drives with drive covers.
Risk of injury from sharp blades!
Do not touch blender blades with bare hands. Clean them with a brush.
Risk of injury from sharp blades/rotating drive!
Never place fingers in the attached blender! Do not remove/attach the blender until the drive is at a standstill! Operate the assembled blender only and with the lid attached.
en
Risk of scalding!
If processing hot liquids, steam escapes through the funnel in the lid. Add a max. 0.75 litres of hot or frothing liquid.
Important!
Use the appliance with original accessories only.
When using the accessories, follow the enclosed operating instructions. Attach and use only one tool or accessory.

Explanation of the symbols on the appliance or accessory

Follow the instructions in the operating instructions.

Caution! Rotating blades.

Caution! Rotating tools.
Do not place fingers in the feed tube.

Safety systems
Start lock-out
See "Overview of the operating positions" table.
In pos. 1 the appliance cannot be switched on.
The appliance can be switched on in pos. 2–4 only:
- when the bowl has been inserted and rotated as far as possible or
– the tool drive cover (7) has been attached.
In Pos. 5 the appliance can only be switched on when the tool drive cover (7) has been attached.
The blender must be screwed in all the way. In pos. 6 the appliance cannot be switched on unless the mincer and adapter have been attached correctly (see mincer operating instructions).
Restart lock-out
If the power is interrupted, the appliance remains switched on but the motor does not start running again when the power is restored.
To restart the appliance, turn the rotary switch (3) to 0/off, then switch on the required setting.
Overload protection
If the motor switches itself off while the appliance is being used, the overload protection feature has been activated.
Possible causes:
- very large amounts of ingredients,
- appliance operated too long.
If a safety system is activated, see "Troubleshooting".
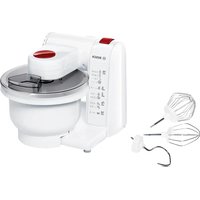
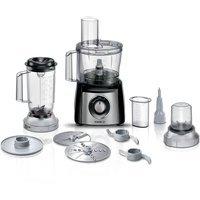
The operating instructions describe several models, see also overview of models (Fig. 1).


en
Overview
Please fold out the illustrated pages. Fig. A
Base unit
1 Release button
2 Multi-function arm
"Easy Armlift" – supports the simple and effortless operation of the multi-function arm (see "Operating positions").
3 Rotary switch
When the appliance has been switched off (0/off position), it automatically runs to the optimum position for changing the tools (tool change position). This position also facilitates filling the bowl with ingredients, as no ingredients can stick to the tools ("Easy fill" position). 0/off = Stop M = Instantaneous switching at maximum speed, hold switch for required blending duration. Settings 1–7, Operating speed: 1 = low speed – slow, 7 = high speed – fast.
4 Drive cover
To remove the drive cover, press on the front area and remove cover.
5 Drive for
- continuous-feed shredder ^ , - citrus press ^ and - grain mill ^* .
When not in use, attach the drive cover.
6 Drive for tools (stirrer, whisk, kneading hook) and mincer *
7 Drive cover
8 Drive for blender
When not in use, attach the blender drive cover.
9 Blender drive cover
10 Cord store
Cord store or automatic cord winder (depending on model)
Bowl with accessories
11 Stainless steel stirring bowl
12 Lid
13 Funnel
Tools
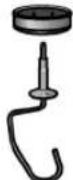
14 "Absolute" stirrer
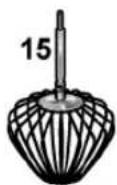
15 Solid metal whisk
16 Kneading hook „High performance“ with dough deflector
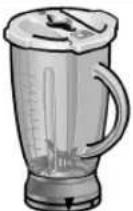
Blender \*
17 Blender holder with blade
18 Blender jug (glass)
19 Lid with feed tube
20 Funnel
* If an accessory is not included in the product package, it can be purchased via the trade or customer service.
Operating positions
Warning!
Before operating the appliance, attach the tool/accessory to the correct drive and in the correct position and place in the operating position according to this table. The multi-function arm must be engaged in each operating position.

Note:
The multi-function arm features the "Easy Armlift" function which supports the simple and effortless operation of the multi-function arm.
Setting the operating position Fig. B
- Press release button and move multi-function arm. Support movement with your ha
- Move multi-function arm until it engages in the required position.
Overview of the operating positions
| Position | Drive | Tool/Accessory | Operating speed | |
| 1 | * | - | ||
| 2 | 6 | 1-5 | ||
| 1-7 | ||||
| 1-3 | ||||
* Insert/remove whisk, stirrer or kneading hook. Add large quantities of ingredients.
en
| Position | Drive | Tool/Accessory | Operating speed | |
| 3 | 5 | 7 | ||
| 4 | 5 | 3-5 | ||
| 5 | 8 | 5-7 | ||
| 6 | 6 | 5-7 | ||
Operation

Risk of injury!
Do not insert mains plug until all preparations for working with the appliance are complete.
Warning!
Do not operate the appliance without an accessory/tool in the operating position. Do not operate the appliance empty. Do not expose appliance or accessories to heat sources. Parts are not microwave-safe.
- Before operating the appliance and accessories for the first time, clean thoroughly; see "Cleaning and servicing".
Preparation
- Place the base unit on a smooth, clean surface.
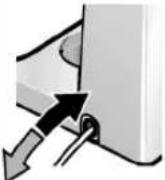
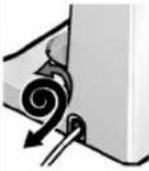
- Prepare cable (Fig. ①). a) Appliances with cord store: Pull out cable to the required length. b) Appliances with automatic cord winder: Pull out the cord in one go to the required length (max. 100 cm) and slowly release; the cord is locked. Reducing the cord length: Pull gently on the cord and allow it to roll up to the required length. Then gently pull the cord again and slowly release; the cable is locked.
Warning!
Do not twist the cord when inserting it. If the appliance features an automatic cord winder, do not insert the cord manually. If the cord jams, pull out the cord all the way and then allow it to wind up.
Bowl and tools

Risk of injury from rotating tools
While the appliance is operating, never place fingers in the mixing bowl. Attach the cover (12) before operating the appliance! Keep hands clear of rotating parts. Do not change tools until the drive has come to a standstill – when the appliance is switched off, the drive continues running briefly and stops in the tool change position. Do not move multifunction arm until the tool is at a standstill. For safety reasons the appliance cannot be operated in Pos. 2–4 until the bowl has been inserted and turned all the way or the tool drive cover (7) has been attached.
Warning!
Use bowl with this appliance only. Insert tools firmly into the drive until they lock into position.
"Absolute" stirrer (14)
for stirring dough, e.g. sponge mixture or mousse, and for folding in beaten egg whites or cream.
Solid metal whisk (15)
for whisking egg whites, cream and light dough, e.g. sponge mixture.
Kneading hook „High performance“ with dough deflector (16)
for kneading heavy dough and for folding in ingredients which are not to be cut (e.g. raisins, chocolate chips).


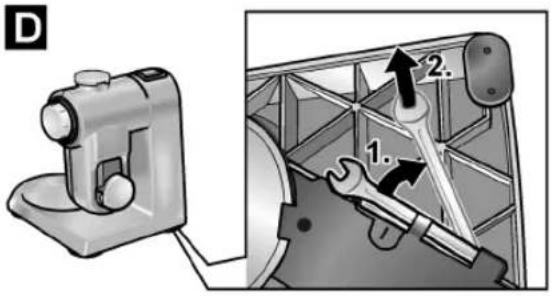
Important information concerning the use of the whisk Fig. D
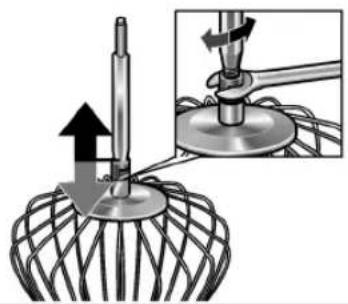
The whisk should just touch the bottom of the bowl in order to mix the ingredients thoroughly. The whisk can be positioned higher for large quantities.
Adjust the height of the whisk as follows:
- Remove mains plug.
- Press release button and move multifunction arm to position 1.
- Insert the whisk into the drive until the whisk locks into position.
- Hold whisk in place and loosen nut clockwise using enclosed key (on the base of the appliance).




en
- Set the whisk to the optimum height by rotating the whisk:
- Turn clockwise: Raise - Turn anti-clockwise: Lower
- Press release button and move multi-function arm to position 2. Check the height of the whisk and, if required, correct.
- When the height has been set correctly, press the release button and move the multi-function arm to position 1.
- Hold whisk in place and tighten nut anti-clockwise using enclosed key.
Working with the bowl and the tools Fig. E
- Press release button and move multi-function arm to position 1.
- Cover unused drives with drive covers.
- Insert the bowl:
- Tilt the bowl forwards and then set it down.
- Turn anti-clockwise until it locks into place.
- Depending on the process task, insert stirrer, whisk or kneading hook firmly into the drive until it locks into position.
Note: If using the kneading hook, first insert dough deflector, then the kneading hook (Fig. 1–4b). Note shape and position of the parts.
- Put the ingredients to be processed into the bowl.
- Press release button and move multi-function arm to position 2.
- Attach the cover.
- Insert the mains plug.
- Set the rotary switch to the desired setting.
Our recommendation:
- Stirrer: First mix at setting 1–2, then setting 3–7 as required
- Whisk: setting 7, mix in at setting 1
- Kneading hook: first stir in at setting 1, knead at setting 3
Adding more ingredients
- Switch off the appliance with the rotary switch.
- Attach funnel (Fig. 1–7).
- Top up ingredients through the funnel.
- Remove lid.
- Press release button and move multifunction arm to position 1.
- Add ingredients.
After using the appliance
- Switch off the appliance with the rotary switch.
- Remove mains plug.
- Remove lid.
- Press release button and move multi-function arm to position 1.
• Take the tool out of the drive. - Remove the bowl.
- Clean all parts, see "Cleaning and servicing".
Blender

Risk of injury from sharp blades/rotating drive!
Never place fingers in the attached blender! Do not remove/attach the blender until the drive is at a standstill! Do not switch on the appliance until the blender has been screwed in all the way and the tool drive cover (7) has been attached.

Risk of scalding!
If processing hot liquids, steam escapes through the funnel in the lid. Add a max. 0,75 litres of hot or frothing liquid.
Warning!
Operate the blender in the indicated operating position only.
Operate the assembled blender only and with the lid attached. Lid must be locked correctly. Do not operate blender when empty.
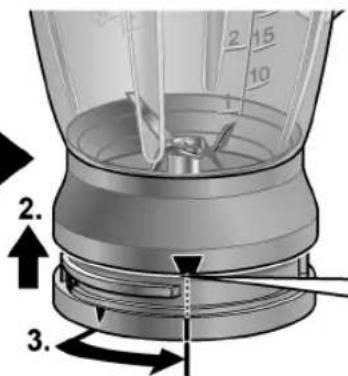
Preparation Fig. ©
Warning!
Never assemble the blender without the seal on the blender holder.
Putting the blender together:
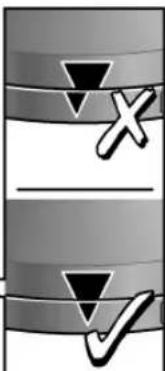
- Insert blender holder with seal into the blender jug, ensuring that the line is under the arrow.
- Attach blender holder by rotating it as far as possible to the right.








en
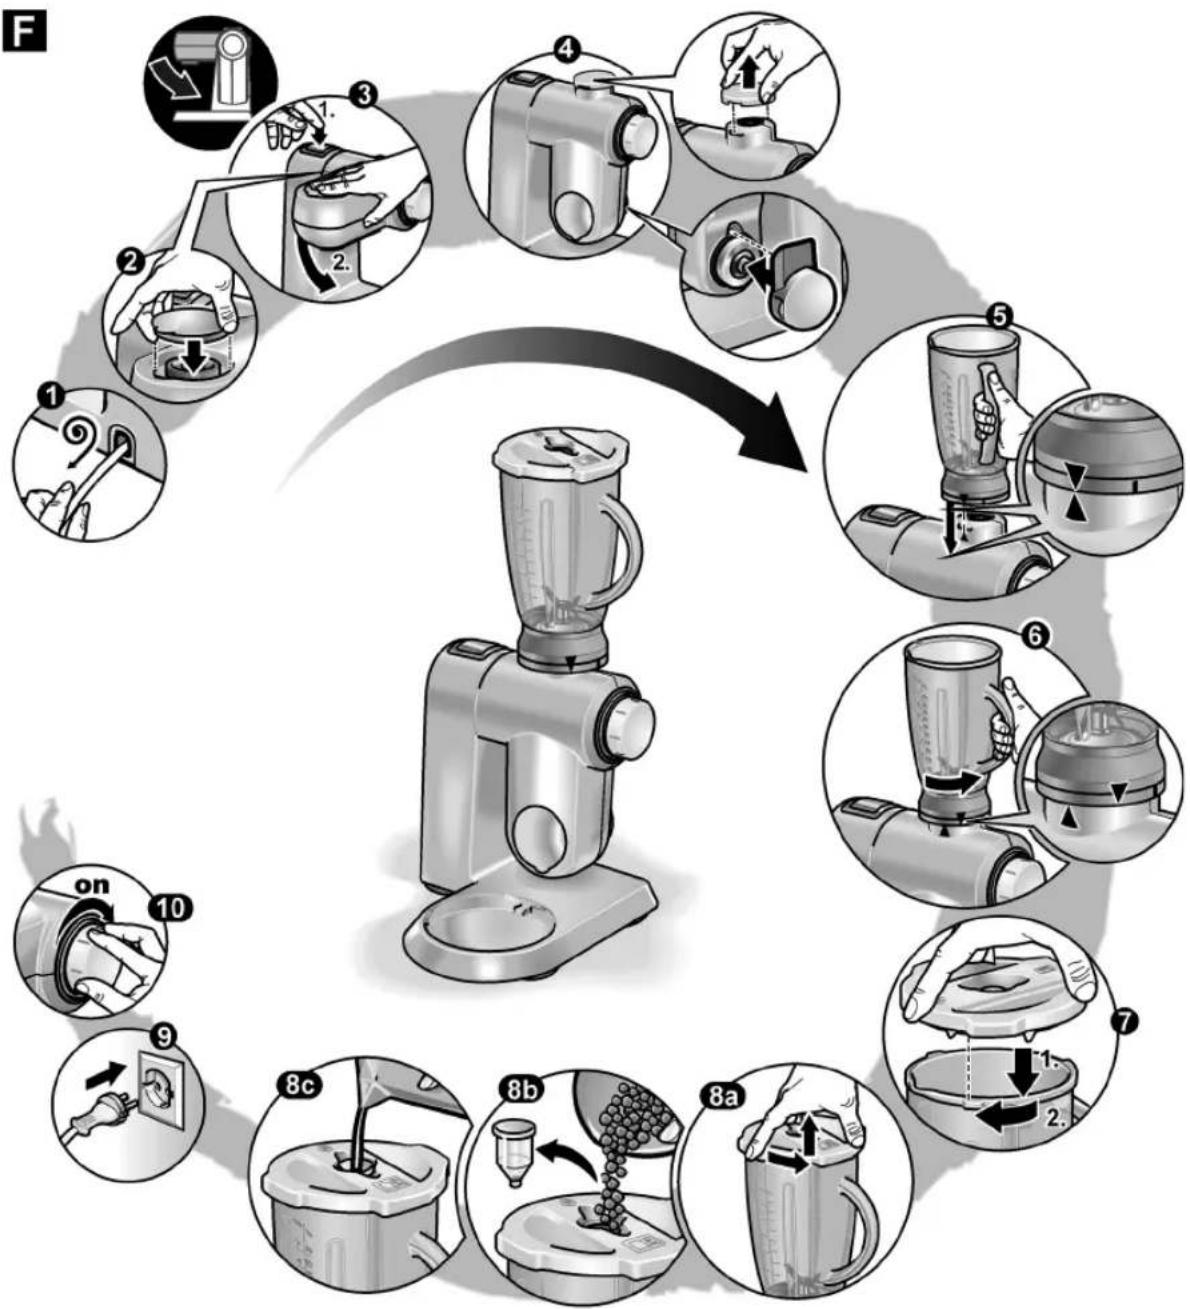
Working with the blender Fig. F
- Press release button and move multi-function arm to position 5.
- Cover unused drives with drive covers.
- Remove the blender drive cover.
- Attach blender jug (mark on the handle on mark on the base unit) and turn all the way in an anti-clockwise direction.
-
Add ingredients.
-
Maximum amount of liquid ingredients = 1.75 litres;
- Maximum amount of frothing or hot liquids = 0.75 litres;
-
Optimum processing amount of solid ingredients = 100 grams.
-
Attach the cover and turn anti-clockwise all the way into the blender handle. The cover must be locked in position.
- Set the rotary switch to the desired setting.
Adding more ingredients (Fig. F-8)
- Switch off the appliance with the rotary switch.
- Remove the lid and add ingredients
or
- remove the funnel and gradually add solid ingredients through the refill opening
or - pour liquid ingredients through the funnel.

Important information
When processing liquids/liquid ingredients, slowly increase the speed of the appliance in stages to prevent the food from shooting out.
After using the appliance
- Switch off the appliance with the rotary switch. Wait until the blade has come to a standstill.
- Remove mains plug.
- Rotate the blender in a clockwise direction and remove.
● Take the lid off the blender jug. Rotate the lid in an anti-clockwise direction and remove. - Clean all parts, see “Cleaning and servicing”.
Tip: It is recommended to clean the blender immediately after use.

Cleaning and servicing

Important information
The appliance requires no maintenance. Thorough cleaning protects the appliance from damage and keeps it functional.
Warning!
Do not use abrasive cleaning agents. Surfaces may be damaged.
Cleaning the base unit

Risk of electric shock!
Never immerse the base unit in water or place under running water. Do not use a steam cleaner.
- Remove mains plug.
- Wipe the base unit and drive cover with a damp cloth. If required, use a little detergent.
- Then dry the base unit.
Cleaning the bowl and tools
The bowl and tools are dishwasher-proof. Do not wedge plastic parts in the dishwasher, as they could be permanently deformed during the washing process!
Cleaning the blender

Risk of injury from sharp blades!
Do not touch blender blades with bare hands. Clean them with a brush.
Warning!
Do not wash blender holder in the dishwasher or leave it in water.
- Clean blender holder under running water.
- Lid, funnel and blender jug can be washed in the dishwasher.
Note:
Lid can be disassembled for cleaning.
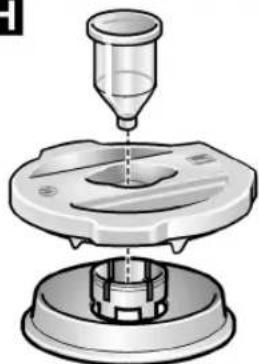
Fig. H
- Pull funnel upwards out of the lid.
- Press insert downwards out of the lid.



Tip: After processing liquids, it is often sufficient to clean the blender without removing it from the appliance. Pour a little water and washing-up liquid into the attached blender. Switch on the blender for several seconds (setting M). Pour out the water and rinse out the blender with clear water.
Troubleshooting

Risk of injury!
Before eliminating a fault, pull out the mains plug.
The multi-function arm must be engaged in each operating position. Initially try to eliminate the problem which has occurred with the help of the following information.
Fault
Appliance does not start.
Remedial action
- Check the power supply.
- Check the mains plug.
- Check multi-function arm. Correct position? Engaged?
- Screw on bowl all the way.
- Attach drive cover to unused drives.
- The safety lock is active. Switch appliance to 0/off and then back to the required setting.
Fault
Appliance switches off during use. The overload protection feature has been activated. Too much food was processed at one time.
Remedial action
- Switch off the appliance and pull out the mains plug.
- Leave the appliance to cool down for 15 minutes in order to deactivate the overload protection.
- Reduce processing quantity. Do not exceed permitted maximum quantities (see "Application examples").
- Switch on appliance again. If the motor still does not start, leave the appliance to cool down for a longer period (at least 1 hour).
Fault
While the drive was running, the release button was inadvertently pressed.
The multi-function arm moves up. The drive switches off, but does not stop in the tool change position.
Remedial action
- Set the rotary switch to 0/off.
- Move multi-function arm to position 2.
- Switch on appliance (setting 1).
- Switch off appliance again. Tool stops in tool change position.

Fault
Blender does not start working or stops during use, the drive is "humming". Blade is blocked.
Remedial action
- Switch off the appliance and pull out the mains plug.
- Detach the blender and remove the obstruction.
- Re-attach the blender.
- Switch on the appliance.

Important information
If the fault cannot be eliminated, please contact customer service.
Application examples
Whipped cream
200 g–1500 g
- Whip cream with the whisk for 1 12 to 4 minutes at setting 7 (depending on the quantity and properties of the cream).
- Follow instructions in the section "Important information for using the whisk" for adjusting the appliance to the amounts to be processed!

Egg white
2 to 12 egg whites
- Beat egg white with the whisk for 2 to 6 minutes at setting 7.
- Follow instructions in the section "Important information for using the whisk" for adjusting the appliance to the amounts to be processed!






en
Sponge mixture
Basic recipe
3 eggs
3–4 tbs. hot water
150 g sugar
1 packet of vanilla sugar
150 g flour
50 g cornflour
Baking powder if required
- Beat the ingredients (except flour and cornflour) with the whisk for approx. 4–6 minutes at setting 7 until frothy.
- Rotate switch to setting 1 and spoon in the sifted flour and cornflour within approx. 12 to 1 minute.
Maximum quantity: 2 x basic recipe
Cake mixture
Basic recipe
3-4 eggs
200–250 g sugar
1 pinch of salt
1 packet of vanilla sugar or peel from
12 lemon
200–250 g butter or margarine
(room temperature)
500 g flour
1 packet of baking powder
150 ml of milk
- Mix all ingredients with the stirrer for approx. 12 minute at setting 1, then for approx. 3–4 minutes at setting 5.
Maximum quantity: 2 ^1/2 x basic recipe
Short pastry
Basic recipe
125 g butter (room
temperature)
100–125 g sugar
1 egg
1 pinch of salt
A little lemon peel or vanilla sugar
250 g flour
Baking powder if required
- Mix all ingredients with the stirrer for approx. 12 minute at setting 1, then for approx. 2–3 minutes at setting 5.
From 500 g flour:
- Knead the ingredients with the kneading hook for approx. 12 minute at setting 1, then for approx. 3–4 minutes at setting 3.
Maximum quantity: 4 x basic recipe
80 g fat (room temperature)
80 g sugar
200–250 ml lukewarm milk
25 g fresh yeast or 1 packet of dried yeast
Peel of 12 lemon
1 pinch of salt
- Mix all ingredients with the kneading hook for approx. 1/2 minute at setting 1, then for approx. 3–6 minutes at setting 3.
Maximum quantity: 3 x basic recipe
Pasta dough
Basic recipe
500 g flour
250 g eggs (approx. 5x)
2–3 tbs. (20–30 g) cold water as required
- Process all ingredients for approx. 3–5 minutes at setting 3 until a dough forms.
Maximum quantity: 1,5 x basic recipe

Important information
When processing this dough with the original accessory for this appliance, use the accessory MUZ8NV1/2/3 only. The accessory MUZ8NS1 is not suitable.
Wholemeal mixed wheat bread
Basic recipe
325 g freshly ground wholemeal flour
325 g white flour Type 405
100 g rye flour Type 630
75 g liquid fermented dough
12 tbs. caraway
12 tbs. bread seasoning
12 tbs salt
1½ packets of dry yeast
450–500 ml warm water
- Process all ingredients into a dough for approx. 12 minute at setting 1, then for approx. 3 minutes at setting 3.
- Leave the dough to prove until it is double the size and knead again for approx. 1 min. at setting 3.
- Place dough in a greased loaf tin and leave to prove again, then bake.
Tip: Instead of freshly ground wholemeal flour, freshly ground spelt flour can be used.
Maximum quantity: 2 x basic recipe





en
Mayonnaise
Note: Mayonnaise can be prepared in the blender with whole eggs (egg white and egg yolk) only.
Basic recipe:
1 egg
1 heaped tsp. mustard
1 tbs. vinegar or lemon juice
1 pinch of salt
1 pinch of sugar
200–250 ml oil
Ingredients must be at the same temperature.
- Mix ingredients (except oil) for several seconds at setting 3.
- Switch the appliance to the highest setting, pour the oil through the funnel and blend until the mayonnaise emulsifies.
Maximum quantity: Double the quantity of the basic recipe.
Hot chocolate
50–75 g cooled cooking chocolate 12 I hot milk
Whipped cream and grated chocolate as required
- Cut cooking chocolate into pieces (approx. 1 cm) and chop up completely in the blender on setting 7.
- Switch off appliance and add the milk through the funnel. Mix for approx. 30 seconds at setting 7.
- Pour the hot chocolate into glasses and serve with whipped cream and grated chocolate as required.
Banana ice shake
2-3 bananas
2–3 heaped tbs. vanilla or lemon ice cream
2 packet of vanilla sugar 12 I milk
- Cut bananas into pieces and chop up in the blender for 5–10 seconds.
- When the appliance has come to standstill, add milk and ingredients and blend for approx. 1 minute until the mixture is frothy.

Fruit sundae
250 g fruit (e.g. strawberries, banana, orange, apple)
50–100 g sugar
500 ml cold water
Ice as required
- Peel fruit and cut into pieces
- Put all ingredients (except ice) in the blender and blend on setting 7 for approx. 1 minute.
- Serve with the ice cream
Sportsman's cocktail
2–3 oranges
1 lemon
1/2-1 tbs. sugar or honey
1 / 4 I apple juice
14 I mineral water and ice cube if required
- peel oranges and lemon, cut into pieces.
- Blend ingredients (except apple juice and mineral water) for approx. 30 seconds on setting 7.
- Add the apple juice and mineral water
- Blend briefly until the drink is frothy.
- Pour the cocktail into glasses and serve as required with ice cubes
Red fruit pudding
400 g fruit (pitted sour cherries, raspberries, black/red currants, strawberries, blackberries)
100 ml sour cherry juice
100 ml red wine
80 g sugar
1 packet of vanilla sugar
2 tbs. lemon juice
1 pinch of cloves (ground)
1 pinch of cinnamon (ground)
- 8 gelatine leaves
Soak the gelatine in cold water for approx. 10 minutes
● Bring all the ingredients (except the gelatine) to the boil - Dry the gelatine and melt in the microwave, but do not cook
- Blend hot fruit and gelatine on setting 5 for approx. 1 minute.
- Pour the red fruit pudding into small bowls rinsed out with cold water and refrigerate
Tip: Red fruit pudding tastes good with whipped cream or vanilla sauce


en
Sports drink
200 g honey (from refrigerator)
5 g cinnamon
200 g milk (from refrigerator)
- Put honey and cinnamon in the blender and blend at setting M.
- After 5 seconds add the milk and blend for 3 seconds.
Honey bread spread
50 g butter (from refrigerator) 200 g honey (from refrigerator)
- Cut butter into small pieces and put into the blender.
- Add honey and blend for 8 seconds at setting M.
Optional accessories
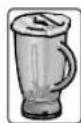
 | MUZ8ER3Stainless steel stirring bowl | Up to 3 kg of yeast dough or 3.5 kg of sponge mixture can be processed in the bowl. |
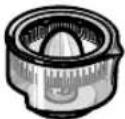 | MUZ8ZP1Citrus press | For squeezing oranges, lemons and grapefruits. |
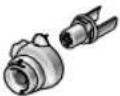 | MUZ8AD1Adapter | For attaching the mincer MUZ8FW1 and the pasta attachments MUZ8NV1/NV2 and NV3. |
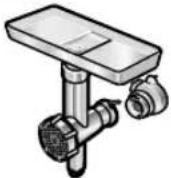 | MUZ8FW1Mincer | For cutting fresh meat for steak tartare or meat loaf. |
 | MUZ8LS4/5Perforated disc sets | For the mincer MUZ8FW1.Fine disc for pasties and spreads, coarse disc for sausages and bacon. |
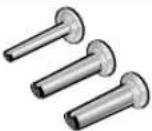 | MUZ8WS2Sausage attachment | For the mincer MUZ8FW1.For filling artificial or natural casings with sausage meat. |
 | MUZ8SV1Viennese whirl attachment | For the mincer MUZ8FW1.With metal template for 4 different pastry moulds. |
 | MUZ8RV1Grater attachment | For the mincer MUZ8FW1.For grating nuts, almonds, chocolate and dried bread rolls. |
en
 | MUZ8FV1Juicer attachment | For the mincer MUZ8FW1.For pressing soft fruit, except raspberries, tomatoes and rose hips, to a pulp. At the same time e.g. currants are automatically stemmed and pitted. |
 | MUZ8MX2Blender (glass) | For mixing liquid or semi-solid food, for cutting/chopping raw fruit and vegetables, for puréeing food. |
 | MUZXL...MUZXLVL1Continuous-feed shredder | For slicing cucumbers, cabbage, kohlrabi, radish; for shredding carrots, apples and celery, red cabbage, cheese and nuts; for grating hard cheese, chocolate and nuts.Set MUZXL... contains Profi Supercut reversible disc - coarse/fine, Asiatic vegetables disc, reversible shredding disc - coarse/fine, grating disc - medium-fine.Set MUZXLVL1 contains reversible slicing disc - coarse/fine, reversible shredding disc - coarse/fine, grating disc - medium-fine, Asiatic vegetables disc, potato pancake disc. |
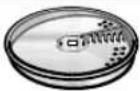 | MUZ8PS1Chipper disc | For the continuous-feed shredder MUZXLVL1.For slicing raw potatoes for chips. |
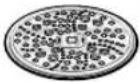 | MUZ8RS1Grating disc coarse | For the continuous-feed shredder MUZXLVL1.For grating raw potatoes, e.g. for potato pancakes or dumplings. |
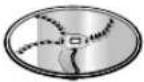 | MUZ8KP1Potato fritter disc | For the continuous-feed shredder MUZXLVL1.For grating raw potatoes for rosts and potato fritters, for cutting fruit and vegetables into thick slices. |
 | MUZ8AG1Asiatic vegetables disc | Slices fruit and vegetables into fine strips for Asian vegetable dishes. |
 | MUZ8KS1Gratering disc, fine | For grating hard cheese (e.g. Parmesan). |
 | MUZ8MM1Multi-mixer | For chopping herbs, vegetables, apples and meat, for shredding carrots, radishes and cheese, for grating nuts and cooled chocolate. |







en

MUZ8GM1
Grain mill
For grinding all types of grain (except maize), poppy seeds, linseeds, sesame, buckwheat, etc. Even herbs, spices and coffee can be ground.
If an accessory is not included in the product package, it can be purchased via the trade or from customer service.
Instructions on disposal

This appliance has been identified in accordance with the European directive 2012/19/EC on Waste Electrical and Electronic Equipment – WEEE.
The Directive paves the way for effective EU-wide withdrawal and utilization of waste appliances.
Please ask your dealer or inquire at your local authority about current means of disposal.
Warranty conditions
The guarantee conditions for this appliance are as defined by our representative in the country in which it is sold.
Details regarding these conditions can be obtained from the dealer from whom the appliance was purchased.
The bill of sale or receipt must be produced when making any claim under the terms of this guarantee.








fr
Sécurité anti-surcharge
3–4 eetlepels heet water
150 g suiker
1 pakje vanillesuiker
150 g meel
50 g zetmeel,
eventueel bakpoeder
200–250 g boter of margarine
(kamertemperatuur)
500 g meel
1 pakje bakpoeder
150 ml melk
450–500 ml warm water
AE United Arab Emirates,
Jebel Ali Free Zone – Dubai
Tel.: 04 881 4401
mailto:service.uae@bshg.com
www.bosch-home.com/ae
AL Republika e Shqiperise, Albania
AERTECH SH.P.K.
Rruga Qemal Stafa
Pallati i ri perball Prokuroris se
Pergjithshme
Hyrjā C Kati 10
Tirana
Tel.: 066 206 47 94
mailto:g.volina@aertech.al
HEATHERTON, Victoria 3202
Tel.: 1300 368 339
mailto:bshau-as@bshg.com
www.bosch-home.com.au
BA Bosna i Hercegovina, Bosnia-Herzegovina
"HIGH" d.o.o.
Gradačačka 29b
71000 Sarajevo
Info-Line: 061 100 905
Fax: 033 213 513
mailto:delicnanda@hotmail.com
European Trade Center Building,
5th floor
1784 Sofia
Tel.: 02 892 90 47
Fax: 02 878 79 72
mailto:informacia.servis-bg@
bshg.com
www.bosch.home.bg
+ 7 snt/min (alv 23%)
+ 17 snt/min (alv 23%)
FR France
BSH Electroménager S.A.S.
To arrange an engineer visit, to order spare parts and accessories or for product advice please visit www.bosch-home.co.uk
or call
*Calls from a BT landline will be charged at up to 3 pence per minute. A call set-up fee of up to 6 pence may apply.
GR Greece, Ελλάς
BSH Ikiakes Siskeves A.B.E.
Central Branch Service
17 km E.O. Athinon-Lamias &
Potamou 20
14564 Kifisia
Unit 1 & 2, 3rd Floor
North Block, Skyway House
3 Sham Mong Road
Tai Kok Tsui, Kowloon
Hong Kong
Tel.: 2565 6151
Fax: 2565 6681
mailto:bosch.hk.service@bshg.com
www.bosch-home.cn
HR Hrvatska, Croatia
BSH kućni uređaji d.o.o.
Kneza Branimira 22
10000 Zagreb
Tel:. 01 640 36 09
Fax: 01 640 36 03
mailto:informacije.servis-hr@
bshg.com
www.bosch-home.com/hr
www.bosch-home.com/hu
IE Republic of Ireland
BSH Home Appliances Ltd.
Unit F4, Ballymount Drive
Ballymount Industrial Estate
Walkinstown
Dublin 12
Service Requests,
Spares and Accessories
Tel.: 01450 2655
Fax: 01450 2520
www.bosch-home.co.uk
IL Israel,
C/S/B Home Appliance Ltd.
Uliel Building
2, Hamelacha St.
Industrial Park North
71293 Lod
Tel.: 08 9777 222
Fax: 08 9777 245
mailto:csb-serv@zahav.net.il
www.bosch-home.co.il
IN India, Bhārat,
BSH Customer Service Front Office
Shop No.4, Everest Grande,
Opp. Shanti Nagar Bus Stop,
Mahakali Caves Road, Andheri East
Mumbai 400093
IS Iceland
Smith & Norland hf.
Noatuni 4
105 Reykjavik
Tel.: 0520 3000
Fax: 0520 3011
www.sminor.is
IT Italia, Italy
www.bosch-home.com/it
IP Turebekov Yerzhan
Nurmanovich
Jangeldina str. 15
Shimkent 160018
Tel.: 0252 31 00 06
mailto:evrika_kz@mail.ru
LB Lebanon, ن لبنا
Teheni, Hana & Co.
Boulevard Dora 4043 Beyrouth
P.O. Box 90449
Jdeideh 1202 2040
Tel.: 01 255 211
mailto:Info@Teheni-Hana.com
LT Lietuva, Lithuania
Senuku prekybos centras UAB
Jonavos g. 62
44192 Kaunas
Tel.: 0372 12146
Fax: 0372 12165
www.senukai.lt
LU Luxembourg
General Serviss Limited
Bullu street 70c
1067 Riga
Tel.: 07 42 41 37
mailto:bt@olimpeks.lv
Elkor Serviss
Brivibas gatve 201
1039 Riga
Tel.: 067 0705 20; -36
Fax: 067 0705 24
mailto:domoservice@elkor.lv
www.servisacentrs.lv
MD Moldova
S.R.L. "Rialto-Studio"
ул. Щусева 98
2012 Кишинев
тел./факс: 022 23 81 80
mailto:bosch-md@mail.ru
ME Crna Gora, Montenegro
Elektronika komerc
UI. Slobode 17
84000 Bijelo Polje
Tel./Fax: 050 432 575
Mobil: 069 324 812
mailto:ekobosch.servis@
t-com.me
Unit F 2, 4 Orbit Drive
Mairangi Bay
Auckland 0632
Tel.: 09 477 0492
Fax: 09 477 2647
mailto:bshnz-cs@bshg.com
www.bosch-home.co.nz
PL Polska, Poland
SA Kingdom Saudi Arabia,
Bin Hamran Commercial Centr.
6th Floor 603B
Jeddah 21481
Tel.: 800 124 1247
mailto:service.ksa@bshg.com
www.bosch-home.com/sa
SE Sverige, Sweden
www.bosch-home.com/tr
4th floor, No. 112 Sec 1
Chung Hsiao E Road
Taipei ROC 100
Tel.: 02 2321 6222
mailto:Bosch@achelis.com.tw
UA Ukraine, Україна
gama-electronics.com
XS Srbija, Serbia
BSH Kućni aparati d.o.o.
Milutina Milankovića 11 ^4
11070 Novi Beograd
Tel.: 011 205 23 97
Fax: 011 205 23 89
mailto:informacije.servis-sr@
bshg.com
www.bosch-home.rs
ZA South Africa
BSH Home Appliances (Pty) Ltd.
15th Road Randjespark
Private Bag X36, Randjespark
1685 Midrand – Johannesburg
Tel.: 086 002 6724
Fax: 086 617 1780
mailto:applianceserviceza@
bshg.com
www.bosch-home.com/za

natural_image
Illustration of a metallic bowl with a side notch, labeled with the number 11 (no text or symbols on the bowl itself)


B

C

natural_image
Diagram of a mechanical component with arrows indicating direction (no text or symbols)
natural_image
Diagram of a mechanical component with a spiral arrow indicating motion, no visible text or symbols




natural_image
Mechanical diagram showing a tool interacting with a mesh-like structure, with an inset close-up of the component (no text or symbols)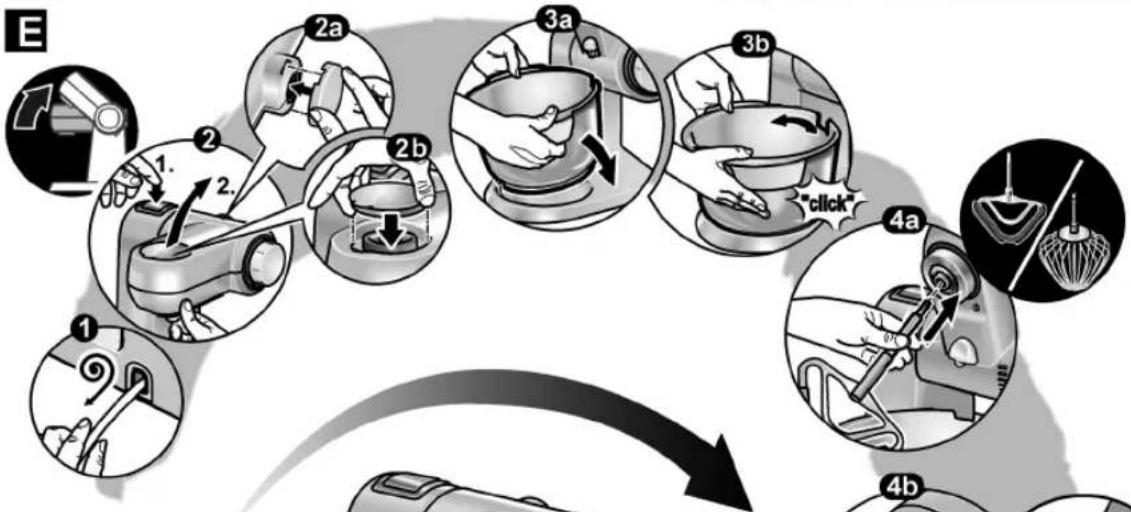
flowchart
graph TD
    A["Input Tool"] --> B["Step 1: Insert a tool"]
    B --> C["Step 2: Insert a hand"]
    C --> D["Step 3: Replace a brush with the brush and press"]
    D --> E["Step 4: Check a hand with the brush and press"]
    E --> F["Check the brush and press"]
    F --> G["Step 5: Replace a hand with the brush and press"]
    G --> H["Step 6: Check hand, press"]
    H --> I["Step 7: Check hand, press"]
    I --> J["Step 8: Check hand, press"]
    J --> K["Step 9: Check hand, press"]
    K --> L["Step 10: Check hand, press"]
    L --> M["Step 11: Check hand, press"]
    M --> N["Step 12: Check hand, press"]
    N --> O["Step 13: Check hand, press"]
    O --> P["Step 14: Check hand, press"]

natural_image
Illustration of a kitchen mixer with hand tools and a curved arrow indicating rotation (no text or symbols)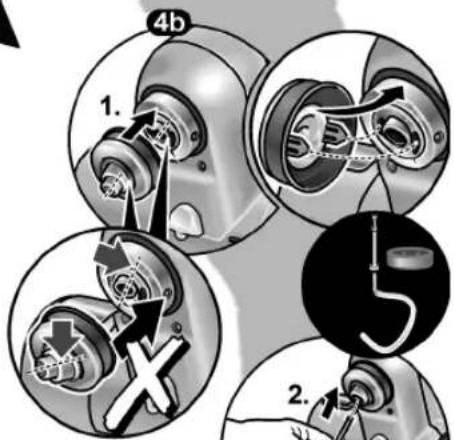


natural_image
Illustration of a mechanical component with no visible text or symbols

natural_image
Illustration of a mechanical device with a hand holding a tool, no visible text or symbols


flowchart
graph TD
    A["Raw Material Mixing"] --> B["Step 1: Cutting into a blender"]
    B --> C["Step 2: Stopping with hands using a blender"]
    C --> D["Step 3: Stopping with hand holding a blender"]
    D --> E["Step 4: Stopping with hand using a blender"]
    E --> F["Step 5: Stopping with a blender"]
    F --> G["Step 6: Stopping with hand using a blender"]
    G --> H["Step 7: Stopping with hand using a blender"]
    H --> I["Step 8: Stopping with hand using a blender"]
    I --> J["Step 9: Stopping with hand using a blender"]
    J --> K["Step 10: Stopping with hand using a blender"]
G

natural_image
Mechanical component diagram showing a knob and fan assembly (no text or symbols)→
H
natural_image
Cross-sectional diagram of a mechanical device with a funnel inserted into a base (no text or symbols visible)




| J |  | |||||
 |  |  |  |  | ||
| MUMXL10T | √ | √ | √ | √ | √ | |
| MUMXL10G | √ | √ | √ | √ | √ | |
| MUMXL20T | √ | √ | √ | √ | √ | |
| MUMXL20G | √ | √ | √ | √ | √ | |
| MUMXL20C | √ | √ | √ | √ | √ | |
| MUMXL40G | √ | √ | √ | √ | √ | |
 |  | Profi Supercut | ||||
 |  |  |  | |||
| MUMXL10T | ||||||
| MUMXL10G | ||||||
| MUMXL20T | √ | |||||
| MUMXL20G | √ | |||||
| MUMXL20C | √ | |||||
| MUMXL40G | √ | √ | √ | √ | √ | √ |










- Contents
- For your safety
- General safety instructions
- Electric shock risk
- Safety instructions for this appliance
- Risk of scalding!
- Important!
- Explanation of the symbols on the appliance or accessory
- Safety systems
- Start lock-out
- Restart lock-out
- Overload protection
- en
- Overview
- Base unit
- Bowl with accessories
- Tools
- Blender \*
- Operating positions
- Note:
- Setting the operating position Fig. B
- Operation
- Risk of injury!
- Warning!
- Preparation
- Bowl and tools
- Risk of injury from rotating tools
- "Absolute" stirrer (14)
- Solid metal whisk (15)
- Important information concerning the use of the whisk Fig. D
- Working with the bowl and the tools Fig. E
- Our recommendation:
- Adding more ingredients
- After using the appliance
- Blender
- Risk of injury from sharp blades/rotating drive!
- Preparation Fig. ©
- Putting the blender together:
- Working with the blender Fig. F
- Adding more ingredients (Fig. F-8)
- Important information
- Cleaning and servicing
- Cleaning the base unit
- Risk of electric shock!
- Cleaning the bowl and tools
- Cleaning the blender
- Risk of injury from sharp blades!
- Fig. H
- Troubleshooting
- Fault
- Application examples
- Whipped cream
- Egg white
- Sponge mixture
- Cake mixture
- Short pastry
- Pasta dough
- Wholemeal mixed wheat bread
- Mayonnaise
- Hot chocolate
- Banana ice shake
- Fruit sundae
- Sportsman's cocktail
- Red fruit pudding
- Sports drink
- Honey bread spread
- Instructions on disposal
- Warranty conditions
- fr
- Sécurité anti-surcharge
- AE United Arab Emirates,
- AL Republika e Shqiperise, Albania
- BA Bosna i Hercegovina, Bosnia-Herzegovina
- FR France
- GR Greece, Ελλάς
- HR Hrvatska, Croatia
- IE Republic of Ireland
- IL Israel,
- IN India, Bhārat,
- IS Iceland
- IT Italia, Italy
- LB Lebanon, ن لبنا
- LT Lietuva, Lithuania
- LU Luxembourg
- MD Moldova
- ME Crna Gora, Montenegro
- PL Polska, Poland
- SA Kingdom Saudi Arabia,
- SE Sverige, Sweden
- UA Ukraine, Україна
- XS Srbija, Serbia
- ZA South Africa
Brand : BOSCH
Model : MUMXL20W
Category : Food Processor