
Serie 6 MUMS6EW00 - Food Processor BOSCH - Free user manual and instructions
Find the device manual for free Serie 6 MUMS6EW00 BOSCH in PDF.


| Brand | Bosch |
| Model | Serie 6 MUMS6EW00 |
| Category | Food processor |
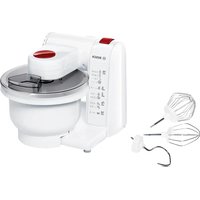
| Product type | Multifunction stand mixer |
| Motor power | 1200 W |
| Bowl capacity | 3.9 L |
| Speeds | 7 speeds + pulse function |
| Included accessories | Dough hook, whisk, beater, blender mixer |
| Bowl material | Stainless steel |
| Weight | 7.5 kg |
| Dimensions (W x D x H) | 22 x 35 x 28 cm |
| Power supply | 220-240 V, 50/60 Hz |
| Main functions | Knead, mix, whisk, blend, chop, puree |
| Safety | Automatic shut-off in case of overload, lockable lid |
| Maintenance and cleaning | Bowl and accessories are dishwasher safe, wipe motor with a damp cloth |
| Spare parts and repairability | Parts available through Bosch after-sales service, repairability index 8/10 |
| Noise level | 75 dB(A) |
| General information | 2-year warranty, estimated annual energy consumption 15 kWh |
Frequently Asked Questions - Serie 6 MUMS6EW00 BOSCH
User questions about Serie 6 MUMS6EW00 BOSCH
0 question about this device. Answer the ones you know or ask your own.
Ask a new question about this device
Download the instructions for your Food Processor in PDF format for free! Find your manual Serie 6 MUMS6EW00 - BOSCH and take your electronic device back in hand. On this page are published all the documents necessary for the use of your device. Serie 6 MUMS6EW00 by BOSCH.
USER MANUAL Serie 6 MUMS6EW00 BOSCH
Register your new device on MyBosch now and get free benefits:
bosch-home.com/welcome
Series | 6
MUMS6...
[en] Information for Use Universal kitchen machine 23
5

6


7

8

9

10


12


14


 |  |  |  |  | |
 | |||||
 |  |  |  |  |  |
 |  |  |  |  |  |
 |  |  |  |  |  |
 | 4-8°C |  | 200-1500 ml | 7 | 1-6 min |
 |  | 2-12 x | 7 | 4-6 min | |
 |  |  |  550-3500 g 550-3500 g |  | 30 s |
| 4 | 3-7 min | ||||
 |  |  350-2200 g 350-2200 g | [40K8] | 30 s | |
| 3 | 1-3 min | ||||
 |  |  |  250-750 g 250-750 g | [T2K6] | 30 s |
| 3 | 5-8 min | ||||
 |  |  350-1500 g 350-1500 g |  | 30 s | |
| 3 | 6-10 min | ||||
 |  |  350-1000 g 350-1000 g | [5ZS2] | 30 s | |
| 3 | 4-5 min |
Table of Contents
1 Safety 9
Further information and explanations are available online:

Table of contents
1 Safety.... 24
1.1 General information...... 24 1.2 Intended use.... 24 1.3 Restriction on user group..... 25 1.4 Safety instructions 25
2 Avoiding material damage...... 28
3 Environmental protection and saving energy.... 28
3.1 Disposing of packaging ..... 28
4 Unpacking and checking...... 28
4.1 Unpacking the appliance and parts 28 4.2 Contents of package...... 28 4.3 Setting up appliance 28
5 Familiarising yourself with your appliance.... 29
5.1 Appliance 29 5.2 Symbols.... 29 5.3 Rotary switch.... 29 5.4 Signal tone 29 5.5 Swivel arm and drives...... 29 5.6 Tools.... 30 5.7 Fine adjustment of beating whisk.... 30 5.8 Safety systems 31
6 Before using for the first time .. 31
6.1 Cleaning the appliance and parts before using for the first time.... 31
7 Basic operation ...... 32
7.1 Preparing the appliance...... 32 7.2 Processing ingredients with tools.... 32
7.3 Using instantaneous switching.... 32 7.4 Finishing processing 32 7.5 Using accessory drives...... 33
8 Cleaning and servicing...... 33
8.1 Cleaning products.... 33 8.2 Overview of cleaning...... 33
9 Special accessories .... 33
10 Application examples ...... 34 10.1 Sample recipe 34 11 Troubleshooting...... 35 12 Disposal...... 37
12.1 Disposing of old appliance ... 37 13 Customer Service...... 37 13.1 Product number (E-Nr.) and production number (FD)...... 37

1 Safety
Observe the following safety instructions.
1.1 General information
- Read this instruction manual carefully. ■ Please note the additional instructions when using supplied or optionally available accessories.
- Keep the instruction manual and the product information safe for future reference or for the next owner. ■ Do not connect the appliance if it has been damaged in transit.
1.2 Intended use
Only use this appliance:
■ with genuine parts and accessories. ■ for mixing, kneading and beating food. ■ for additional applications described in the instructions for accessories that are optional or come with the appliance. ■ under supervision. ■ for normal processing quantities and for normal processing times for domestic use. ■ in private households and in enclosed spaces in a domestic environment at room temperature. ■ up to an altitude of max. 2000 m above sea level.
Disconnect the appliance from the power supply when:
■ not using the appliance. ■ the appliance is unattended. ■ assembling the appliance. ■ taking the appliance apart. ■ cleaning the appliance. ■ approaching rotating parts. ■ changing tools. ■ confronted with a fault.
1.3 Restriction on user group
This appliance can be used by persons with reduced physical, sensory or mental capabilities or a lack of experience and/or knowledge if they have been given supervision or instruction concerning use of the appliance in a safe way and if they understand the hazards involved.
Do not let children play with the appliance.
Cleaning and user maintenance must not be performed by children.
The appliance must not be used by children. Keep children away from the appliance and power cable.
1.4 Safety instructions
⚠ WARNING – Risk of electric shock!
If the appliance or the power cord is damaged, this is dangerous.
▶ Never operate a damaged appliance. ▶ Never operate an appliance with a cracked or fractured surface. ▶ Never pull on the power cord to unplug the appliance. Always unplug the appliance at the mains. ▶ If the appliance or the power cord is damaged, immediately unplug the power cord or switch off the fuse in the fuse box.
▶ Call customer services. → Page 37
Incorrect installation is dangerous.
- Connect and operate the appliance only in accordance with the specifications on the rating plate.
Improper repairs are dangerous.
- Repairs to the appliance should only be carried out by trained specialist staff.
▶ Only use genuine spare parts when repairing the appliance.
If the power cord of this appliance is damaged, it must be replaced by the manufacturer, the manufacturer's Customer Service or a similarly qualified person in order to prevent any risk.
An ingress of moisture can cause an electric shock.
▶ Never immerse the appliance or the power cord in water or clean in the dishwasher.
▶ Only use the appliance in enclosed spaces.
▶ Never expose the appliance to intense heat or humidity. - Do not use steam- or high-pressure cleaners to clean the appliance. If the insulation of the power cord is damaged, this is dangerous. ▶ Never let the power cord come into contact with hot appliance parts or heat sources. ▶ Never let the power cord come into contact with sharp points or edges. ▶ Never kink, crush or modify the power cord.
⚠ WARNING – Risk of fire!
Intense heat may cause the appliance and other parts to catch fire.
▶ Never place the appliance on or near hot surfaces.
⚠ WARNING – Risk of injury!
Rotating drives, tools or accessory parts may cause injury.
- Keep hands, hair, clothing and utensils away from rotating parts. ▶ Only attach and remove tools and accessories once the drive has stopped and you have unplugged the appliance. Before changing tools or cleaning the appliance, switch off and disconnect it from the mains. ▶ Only use the tools when the bowl is inserted, the lid is fitted and the drive covers are in place. ▶ Never open the swivel arm during processing. Operating the appliance with damaged parts may result in injury.
- Parts which show cracks or other damage or do not fit correctly must be replaced with genuine spare parts.
⚠ WARNING – Risk of crushing!
Your hands and fingers could get caught.
▶ Do not reach into the bowl when lowering the swivel arm.
⚠ WARNING – Risk of suffocation!
Children may put packaging material over their heads or wrap themselves up in it and suffocate.
- Keep packaging material away from children. ▶ Do not let children play with packaging material.
Children may breathe in or swallow small parts, causing them to suffocate.
- Keep small parts away from children. ▶ Do not let children play with small parts.
⚠ WARNING – Risk of harm to health!
Soiling on surfaces may be harmful to health.
▶ Follow the cleaning instructions. - Clean surfaces which come in contact with food before each use.
2 Avoiding material damage
ATTENTION!
Improper use may cause material damage.
▶ Never use different drives at the same time. ▶ Never operate the appliance longer than necessary. - Do not operate the appliance at no-load. ▶ Never use genuine parts and accessories for other appliances. - Do not exceed maximum processing quantities. ▶ Before use, check the bowl for foreign objects and remove.
3 Environmental protection and saving energy
3.1 Disposing of packaging
The packaging materials are environmentally compatible and can be recycled.
- Sort the individual components by type and dispose of them separately.
4 Unpacking and checking
Find out here what you need to note when unpacking the appliance.
4.1 Unpacking the appliance and parts
- Take the appliance out of the packaging.
- Take all other parts and the accompanying documents out of the packaging and place them to hand.
- Remove any packaging material.
- Remove any stickers or film.
4.2 Contents of package
After unpacking all parts, check for any damage in transit and completeness of the delivery.
Note: The appliance comes with additional accessories depending on its features. See the instructions for the accessories to discover the further contents of the package.
→ Fig. 1
| A | Main unit with mixing bowl |
| B | Lid with integrated filling shaft |
| C | Flexible stirrer |
| D | Beating whisk |
| E | Kneading hook |
| F | Accompanying documents |
4.3 Setting up appliance
- Place the appliance on a stable, level, clean and flat work surface.
- Adjust the power cable to the required length.
- To shorten the cord, push it into the cord storage compartment.
- To lengthen the cord again, pull it out of the cord storage compartment.
- Do not insert the mains plug.
5 Familiarising yourself with your appliance
5.1 Appliance
You can find an overview of the parts of your appliance here.
→ Fig. 2
| 1 | Mixing bowl |
| 2 | Lid with integrated filling shaft |
| 3 | Ejector button for tools |
| 4 | Release button for swivel arm |
| 5 | Swivel arm |
| 6 | Rotary switch |
| 7 | Protective cover for drive 2 |
| 8 | Drive 2 |
| 9 | Protective cover for drive 3 |
| 10 | Drive 3 |
| 11 | Main drive |
| 12 | Cord storage |
| 13 | Grips for transporting |
| 14 | Drain hole |
| 15 | Recesses for bowl |
5.2 Symbols
You can find an overview of the symbols used on your appliance here.
| Symbol Description | |
| ▼ | Position marking on main drive |
| ▲ | Position marking on drive 3 |
Symbol Description
| ▼— | ■ | Fit the protective drive cover for drive 3 ▼and turn to secure |
5.3 Rotary switch
The rotary switch is used to start and stop processing and select the speed.
Symbol Function
| ○ Stop processing. | |
| Fold in ingredients at the lowest speed. | |
| 1 Process ingredients at low speed. | |
| 7 Process ingredients at maximum speed. | |
| M Process ingredients briefly at maximum speed. → "Using instantaneous switching", Page 32 |
5.4 Signal tone
In case of a malfunction or if a safety system switches off the appliance, a signal tone is output.
Possible malfunctions include the pivot arm not being correctly engaged or the appliance overheating.
→ "Troubleshooting", Page 35
5.5 Swivel arm and drives
Here you can find an overview of uses depending on the position of the swivel arm and drive.
If the release button is pressed, the swivel arm can be moved to the required position.
→ Fig. 3
| A | Preparation:■ Insert or remove bowl.■ Attach or remove lid.■ Insert tool in main drive or remove.■ Add greater quantities of ingredients to the bowl. |
| B | Main drive:Process ingredients with tools, e.g. with beating whisk. |
| C | Drive 2:Use accessories, e.g. Continuous feed shredder. |
| D | Drive 3:Use accessories, e.g. Blender attachment. |
| E | Main drive:Use accessories, e.g. Meat mincer. |
Note: The swivel arm features the EasyArm Lift function. This function supports upwards movement of the swivel arm.
5.6 Tools
You can find out everything you need to know about the different tools here.
Tools are equipped with a protective cap to protect the drive from soiling. The ejector button on the swivel arm makes removing the tools easier.
Tool Use
Kneading hook
■ Knead dough, e.g. yeast dough, bread dough, pizza dough, pasta dough, pastry dough. ■ Fold ingredients into the dough, e.g. seeds.
| Tool Use | |
| Beating whisk■ Beat whipped egg whites and cream (at least 30% fat).■ Mix light dough, e.g. sponge mixture. | |
 | Flexible stirrer■ Mix dough, e.g. short-crust pastry, cake mix, fruit flan.■ Fold ingredients into the dough, e.g. raisins, chocolate chips. |
5.7 Fine adjustment of beating whisk
Use the fine adjustment system to correct the distance between the bowl and the beating whisk.
Note: The beating whisk has been factory-set so that ingredients are mixed together perfectly.
Correcting tool adjustment
ATTENTION!
The appliance and tools can be damaged if a wrong tool setting is used.
▶ Never operate a tool that has not been set properly.
Requirements
■ The mains plug is not inserted. ■ The swivel arm is open. ■ The beating whisk is inserted. ■ The bowl has been inserted.
- Hold the beating whisk at the bottom with one hand and release the lock nut clockwise using a spanner wrench.
→ Fig. 4
- To change the setting, turn the tool in the desired direction.
→ Fig. 5
| Optimum setting | Distance to the bowl approx. 2.5 mm |
| Turn clockwise | Lift tool |
| Turn anticlockwise | Lower tool |
- Press the release button and push the swivel arm down until it engages.
- Check the setting.
- Press the release button and raise the swivel arm until it engages.
- Hold the beating whisk at the bottom with one hand and tighten the lock nut anticlockwise using a spanner wrench.
5.8 Safety systems
You can find an overview of your appliance's safety systems here.
Start lock-out
Start lock-out prevents your appliance from being switched on accidentally.
The appliance can only be switched on and operated if one of the following conditions is satisfied.
■ The swivel arm is correctly engaged in a horizontal position. ■ The swivel arm is correctly engaged in a vertical position and the protective drive cover or any assembled accessory is secured correctly.
Restart lock-out
Restart lock-out prevents your appliance from automatically restarting processing after a power failure.
The appliance is switched on again after a power failure. Processing cannot start again until the rotary switch has been set to ☐
Overload protection
The overload protection system prevents the motor and other components from being damaged through being overloaded.
Signal tone
In case of a malfunction or if a safety system switches off the appliance, a signal tone is output.
Possible malfunctions included the pivot arm not being correctly engaged or the appliance overheating.
→ "Troubleshooting", Page 35
6 Before using for the first time
Prepare the appliance for use.
6.1 Cleaning the appliance and parts before using for the first time
- Press the release button and raise the swivel arm until it engages.
- Turn the bowl clockwise and remove.
- Clean all parts that come into contact with food before using for the first time. → "Cleaning and servicing", Page 33
- Put the cleaned and dried parts out ready for use.
7 Basic operation
7.1 Preparing the appliance
- Press the release button and raise the swivel arm until it engages.
→ Fig. 6
- Place the bowl in the main unit.
→ Fig. 7
Use the recesses on the main unit.
- Turn the bowl anticlockwise until it engages.
→ Fig. 8
- Fit the lid onto the main drive until it engages.
→ Fig. 9
The filling shaft must face towards the front.
- Press the tool into the main drive until it engages.
→ Fig. 10
The protective cap a must cover the main drive completely.
- Add the ingredients to the bowl.
→ Fig. 11
- Press the release button and push the swivel arm down until it engages.
→ Fig. 12
7.2 Processing ingredients with tools
- Insert mains plug.
- Set the rotary switch to the required speed.
→ Fig. 13
- If wished, further ingredients can be added during processing using the filling shaft.
→ Fig. 14
To add greater quantities, switch off the appliance, open the swivel arm and transfer the ingredients to the bowl.
- Process the ingredients until you achieve the required result.
- Set the rotary switch to ○
→ Fig. 15
Wait until the appliance stops.
7.3 Using instantaneous switching
- Set the rotary switch to M and hold.
→ Fig. 16
√ The ingredients are processed at maximum speed.
- Release the rotary switch.
→ Fig. 17
√ The rotary switch springs to.
√ Processing stops.
Tip: Instantaneous switching is especially suitable when using the glass blender attachment.
7.4 Finishing processing
- Unplug the mains plug.
→ Fig. 18
- Press the release button and raise the swivel arm until it engages.
→ Fig. 19
- If the swivel arm does not open easily or there is a lot of dough on the tool, proceed as follows:
- Open up the swivel arm a bit and use a spatula or wooden spoon to push the dough off the tool.
- Open the swivel arm right up, remove the dough still remaining on the tool and only then take the tool off.
- Press the ejector button to release the tool and remove.
→ Fig. 20
Only ever press the ejector button with the swivel arm open or the tool may get jammed in the bowl.
- Take the cover off the main drive.
→ Fig. 21
- Turn the bowl clockwise and remove.
→ Fig. 22
7.5 Using accessory drives
Notes
■ Remove the cover to use accessories on drive 2 or 3. ■ Always close unused drives with the covers. ■ Please follow the instructions for the accessory.
- Lift the cover of drive 2 by the side opening and remove.
See Fig. 23.
- Fit the cover of drive 2 and press down firmly.
See Fig. 24.
- Turn the cover of drive 3 anticlockwise and remove.
See Fig. 25.
- Fit the cover of drive 3 and secure by turning clockwise.
See Fig. 26.
8 Cleaning and servicing
To keep your appliance working efficiently for a long time, it is important to clean and maintain it carefully.
8.1 Cleaning products
Find out here which cleaning products are suitable for your appliance.
ATTENTION!
Using unsuitable cleaning agents or incorrect cleaning may damage the appliance.
- Do not use cleaning agents containing alcohol or spirits.
- Do not use sharp, pointed or metal objects.
- Do not use abrasive cloths or cleaning agents.
8.2 Overview of cleaning
Clean all parts immediately after use so that residues do not dry on.
Tip: When processing food such as carrots, plastic parts may become discoloured. Remove discolouration with a soft cloth and a few drops of cooking oil.
Clean the individual parts as indicated in the table.
→ Fig. 27
9 Special accessories
You can buy accessories from the after-sales service, from specialist retailers or online. Only use genuine accessories as these have been specifically designed for your appliance. Accessories vary from one appliance to another. When purchasing accessories, always quote the exact product number (E no.) of your appliance. → Page 37
You can find out which accessories are available for your appliance in our catalogue, in the online shop or from our after-sales service.
www.bosch-home.com
10 Application examples
You can find application examples that have been specially developed for your appliance here.
Note: To ensure that the ingredients of yeast dough or sourdough with a high water content mix best, pour the liquid into the bowl first.
Observe the information and values in the table.
→ Fig. 28
10.1 Sample recipe
You can find a sample recipe that has been specially developed for your appliance here.
Recipe Ingredients Processing
| Heavy fruit cake ■ 3 eggs■ 135 g sugar■ 135 g margarine■ 255 g flour■ 10 g baking powder■ 150 g currants■ 150 g mixed dried fruitNote: Process max. 2 times the quantity at the same time. | ■ Insert stirring whisk.■ Add all ingredients except the dried fruit.■ Process for 30 seconds at setting 📄■ Then process for 3-5 minutes at setting 4.■ Select setting 🔒.■ Add the dried fruit within the next 30-60 seconds. |
11 Troubleshooting
You can rectify minor faults on your appliance yourself. Read the troubleshooting information before contacting after-sales service. This will avoid unnecessary costs.

WARNING
Risk of electric shock!
Improper repairs are dangerous.
- Repairs to the appliance should only be carried out by trained specialist staff. ▶ Only use genuine spare parts when repairing the appliance. If the power cord of this appliance is damaged, it must be replaced by the manufacturer, the manufacturer's Customer Service or a similarly qualified person in order to prevent any risk.
Fault Cause and troubleshooting
| The appliance is not working. | The mains plug of the power cord is not plugged in. ▶ Connect the appliance to the power supply. |
| The circuit breaker in the fuse box has tripped. ▶ Check the circuit breaker in the fuse box. | |
| There has been a power cut. ▶ Check whether the lighting in your room or other appliances are working. | |
| Appliance does not start processing. | Rotary switch is set incorrectly. ▶ Set the rotary switch to○before processing. |
| Appliance does not start processing or switches off during processing. | Processing quantity is too big or processing time was too long. ▶ Set the rotary switch to○ ▶ Reduce the quantity of ingredients. ▶ Allow the appliance to cool down to deactivate the overload protection device. |
| Appliance or accessory is blocked. ▶ Set the rotary switch to○ ▶ Remove the blockage. | |
| Swivel arm is not engaged properly or has become detached. 1. Set the rotary switch to ○ 2. Move the swivel arm until it engages correctly. | |
| Fault Cause and troubleshooting | |
| The swivel arm cannot be opened or closed because the tool is jammed in the bowl. | Drive is not in the parked position.1. Set the rotary switch to ○2. If the swivel arm doesn't close, remove the tool.3. Close the swivel arm until it is correctly engaged in the work position.4. Set the rotary switch briefly to 1and then back to ○√ The drive remains on for a short time until the parked position is reached. |
| The beating whisk touches the bowl or the ingredients are not mixed properly. | The distance to the bowl is not set correctly.► Correct the fine adjustment of the beating whisk. → "Fine adjustment of beating whisk", Page 30 |
12 Disposal
12.1 Disposing of old appliance
Valuable raw materials can be re-used by recycling.
- Unplug the appliance from the mains.
- Cut through the power cord.
- Dispose of the appliance in an environmentally friendly manner. Information about current disposal methods is available from your specialist dealer or local authority.

This appliance is labelled in accordance with European Directive 2012/19/EU concerning used electrical and electronic appliances (waste electrical and electronic equipment - WEEE). The guideline determines the framework for the return and recycling of used appliances as applicable throughout the EU.
13 Customer Service
Function-relevant genuine spare parts according to the corresponding Eco-design Order can be obtained from Customer Service for a period of at least 7 years from the date on which your appliance was placed on the market within the European Economic Area.
Note: Under the terms of the manufacturer's warranty, the use of Customer Service is free of charge.
Detailed information on the warranty period and terms of warranty in your country is available from our after-sales service, your retailer, or on our website.
If you contact Customer Service, you will require the product number (E-Nr.) and the production number (FD) of your appliance.
The contact details for Customer Service can be found in the enclosed Customer Service directory or on our website.
13.1 Product number (E-Nr.) and production number (FD)
You can find the product number (E-Nr.) and the production number (FD) on the appliance's rating plate.
Make a note of your appliance's details and the Customer Service telephone number to find them again quickly.
Index
1 Safety 55
Table of contents
1 Safety.... 71
⚠ WARNING – Risk of fire!
⚠ WARNING – Risk of injury!
⚠ WARNING – Risk of suffocation!
7 Operation at a glance
Table of contents
⚠️ WARNING – Fire hazard!
⚠️ WARNING – Risk of crushing!
Table of contents
1 Safety.... 102
1.1 General notes..... 102 1.2 Intended use 102 1.3 Restriction of user group.... 103 1.4 Safety instructions 103
2 Avoiding material damage...... 106
Table of Contents
Thank you for buying a Bosch Home Appliance!
Register your new device on MyBosch now and profit directly from:
- Expert tips & tricks for your appliance • Warranty extension options • Discounts for accessories & spare-parts • Digital manual and all appliance data at hand
- Easy access to Bosch Home Appliances Service
Free and easy registration – also on mobile phones: www.bosch-home.com/welcome
BOSCH HOME APPLIANCES SERVICE
Looking for help? You'll find it here.
Expert advice for your Bosch home appliances, help with problems or a repair from Bosch experts.
Find out everything about the many ways Bosch can support you: www.bosch-home.com/service
Contact data of all countries are listed in the attached service directory.
BSH Hausgeräte GmbH
Carl-Wery-Straße 34
81739 München, GERMANY
www.bosch-home.com
A Bosch Company

8001315272 (040325)
de, en, fr, it, nl, da, no, sv, fi
Valid within Great Britain:
Imported to Great Britain by
BSH Home Appliances Ltd.
Grand Union House
Old Wolverton Road
Wolverton, Milton Keynes
MK12 5PT
United Kingdom


- SERIES
- MUMS
- TABLE OF CONTENTS
- SAFETY
- FURTHER INFORMATION AND EXPLANATIONS ARE AVAILABLE ONLINE
- GENERAL INFORMATION
- INTENDED USE
- RESTRICTION ON USER GROUP
- SAFETY INSTRUCTIONS
- ⚠ WARNING – RISK OF ELECTRIC SHOCK
- ⚠ WARNING – RISK OF FIRE
- ⚠ WARNING – RISK OF INJURY
- ⚠ WARNING – RISK OF CRUSHING
- ⚠ WARNING – RISK OF SUFFOCATION
- ⚠ WARNING – RISK OF HARM TO HEALTH
- AVOIDING MATERIAL DAMAGE
- ATTENTION
- ENVIRONMENTAL PROTECTION AND SAVING ENERGY
- DISPOSING OF PACKAGING
- UNPACKING AND CHECKING
- UNPACKING THE APPLIANCE AND PARTS
- CONTENTS OF PACKAGE
- SETTING UP APPLIANCE
- FAMILIARISING YOURSELF WITH YOUR APPLIANCE
- APPLIANCE
- SYMBOLS
- ROTARY SWITCH
- SIGNAL TONE
- SWIVEL ARM AND DRIVES
- TOOLS
- FINE ADJUSTMENT OF BEATING WHISK
- CORRECTING TOOL ADJUSTMENT
- REQUIREMENTS
- SAFETY SYSTEMS
- START LOCK-OUT
- RESTART LOCK-OUT
- OVERLOAD PROTECTION
- BEFORE USING FOR THE FIRST TIME
- CLEANING THE APPLIANCE AND PARTS BEFORE USING FOR THE FIRST TIME
- BASIC OPERATION
- PREPARING THE APPLIANCE
- PROCESSING INGREDIENTS WITH TOOLS
- USING INSTANTANEOUS SWITCHING
- FINISHING PROCESSING
- USING ACCESSORY DRIVES
- NOTES
- CLEANING AND SERVICING
- CLEANING PRODUCTS
- OVERVIEW OF CLEANING
- SPECIAL ACCESSORIES
- APPLICATION EXAMPLES
- SAMPLE RECIPE
- TROUBLESHOOTING
- WARNING
- RISK OF ELECTRIC SHOCK
- DISPOSAL
- DISPOSING OF OLD APPLIANCE
- CUSTOMER SERVICE
- PRODUCT NUMBER (E-NR.) AND PRODUCTION NUMBER (FD)
- INDEX
- OPERATION AT A GLANCE
- ⚠️ WARNING – FIRE HAZARD
- ⚠️ WARNING – RISK OF CRUSHING
- THANK YOU FOR BUYING A BOSCH HOME APPLIANCE
- LOOKING FOR HELP? YOU'LL FIND IT HERE
Brand : BOSCH
Model : Serie 6 MUMS6EW00
Category : Food Processor