TID 18 - Screwdriver FESTOOL - Free user manual and instructions
Find the device manual for free TID 18 FESTOOL in PDF.

| Product type | Cordless impact screwdriver |
| Brand | Festool |
| Model | TID 18 |
| Rated voltage | 18 V |
| No-load speed (1st gear) | 1200 rpm |
| No-load speed (2nd gear) | 2000 rpm |
| No-load speed (3rd gear) | 3200 rpm |
| Maximum torque | 180 Nm |
| Tool holder | Hexagonal 1/4" (6.35 mm) according to DIN 3126 E |
| Weight (with BP 18 Li 6.2 Ah battery) | 1.7 kg |
| Compatible battery type | Festool BP 18 Li (18 V) |
| Sound pressure level | 97 dB(A) |
| Sound power level | 108 dB(A) |
| Vibration emission value | 24 m/s² |
| Lighting | Integrated LED |
| Belt clip | Yes, reversible mounting |
| T mode for self-tapping screws | Yes |
| Audible warning signal | Yes (low battery, overload, overheating) |
| Bluetooth function | Compatible with Bluetooth® battery (optional) |
| Forward/reverse | Yes, with center lock |
Frequently Asked Questions - TID 18 FESTOOL
User questions about TID 18 FESTOOL
0 question about this device. Answer the ones you know or ask your own.
Ask a new question about this device
Download the instructions for your Screwdriver in PDF format for free! Find your manual TID 18 - FESTOOL and take your electronic device back in hand. On this page are published all the documents necessary for the use of your device. TID 18 by FESTOOL.
USER MANUAL TID 18 FESTOOL
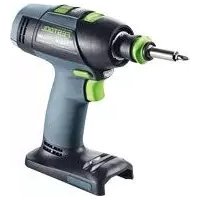
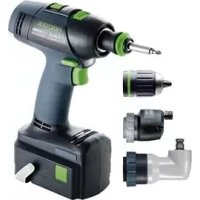
natural_image
Close-up of a black and green power tool with a cylindrical screwdriver (no visible text or symbols)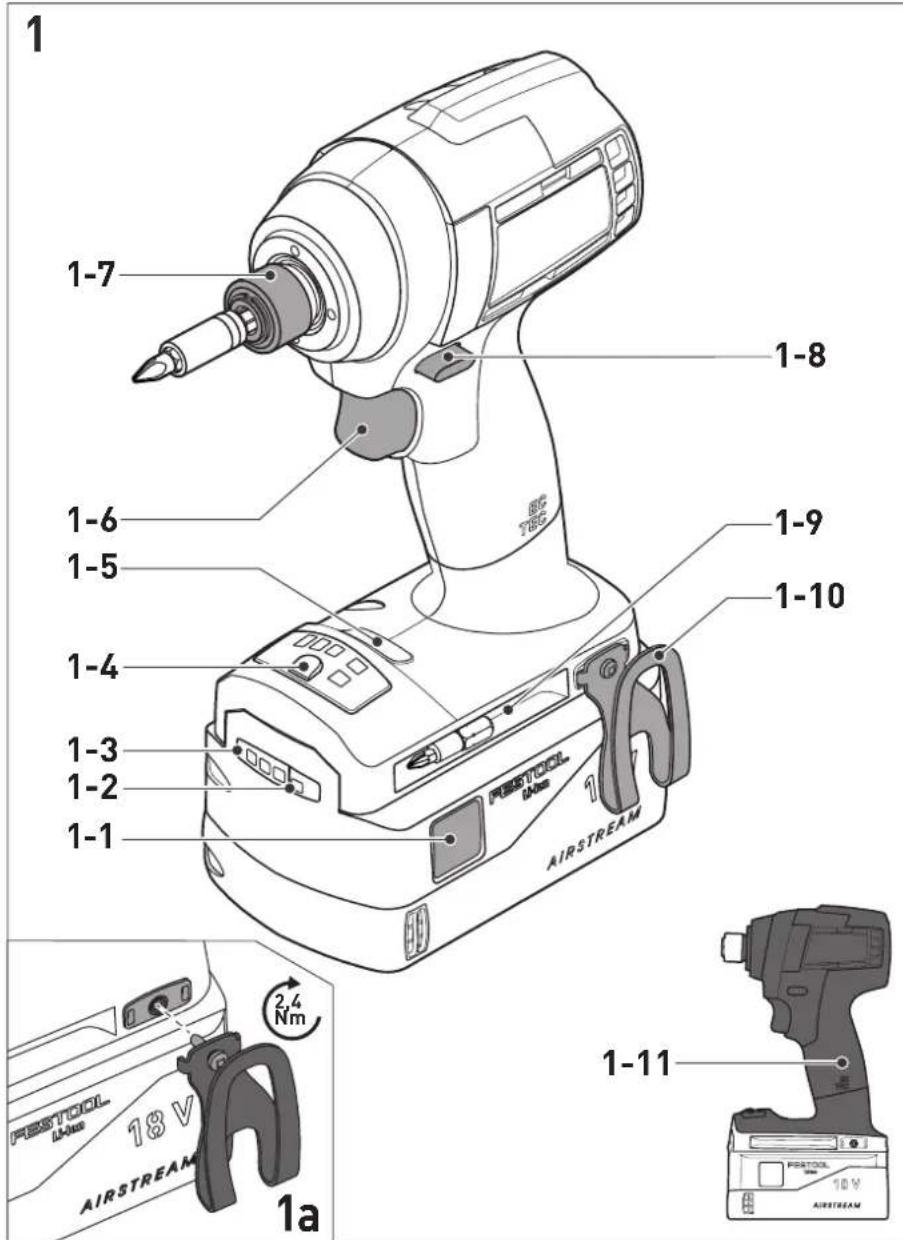

| Akku-Schlagschrauber | Seriennummer1) |
| Cordless Impact Driver | Serial number1) |
| Visseuse à chocs sans fil | N° de série1)(T-Nr.) |
TID 18 203192
de EG-Konformitätserklärung. Wir erklären in alleiniger Verantwortung, dass dieses Produkt allen einschlägigen Bestimmungen der folgenden Richtlinien einschließlich ihrer Änderungen entspricht und mit den folgenden Normen übereinstimmt:
en EC-Declaration of Conformity. We declare under our sole responsibility that this product is in conformity with all relevant provisions of the following directives including their amendments and complies with the following standards:
fr CE-Déclaration de conformité communautaire. Nous déclarons sous notre propre responsabilité que ce produit est conforme aux normes ou documents de normalisation suivants:
es CE-Declaración de conformidad. Declaramos bajo nuestra exclusiva responsabilidad que este producto corresponde a las siguientes normas o documentos normalizados:
it CE-Dichiarazione di conformità. Dichiariamo sotto la nostra esclusiva responsabilità che il presente prodotto e conforme alle norme e ai documenti normativi seguenti:
nl EG-conformiteitsverklaring. Wij verklaren op eigen verantwoordelijkheid dat dit produkt voldoet aan de volgende normen of normatieve documenten:
SV EG-konformitetsförklaring. Vi förklarar i eget ansvar, att denna produkt stämmer överens med följande normer och normativa dokument:
fi EY-standardinmukaisuusvakuutus. Va-kuutamme yksinvastuullisina, etta tuote on seuraavien standardien ja normatiivisten ohjeiden mukainen:
da EF-konformitetserklæring. Vi erklærer at have alene ansvaret for, at dette produkt er i overensstemmelse med de følgende normer eller normative dokumenter:
nb CE-Konformitetserklæring. Vi erklærer på eget ansvar at dette produktet er i overensstemmelse med følgende normer eller normative dokumenter:
Head of Product Development

Ralf Brandt
Head of Product Conformity
valid in combination with battery pack/
bar
| Range | Percentage (%) | |---|---| | 70-100% | 70-100 | | 40-70% | 40-70 | | 15-40% | 15-40 | | < 15% * | < 15% |Warning of general danger

Warning of electric shock

Read the operating instructions and safety instructions.

Wear ear protection.

Wear protective goggles.

Inserting the battery pack

Removing the battery pack

CE marking: Confirms the conformity of the power tool with the European Community directives.

Do not dispose of it with domestic waste.

Tip or advice

Handling instruction
2 Safety warnings
2.1 General power tool safety warnings

WARNING! Read all safety warnings, instructions, illustrations and specifications provided with this power tool. Failure to follow all instructions listed below may result in electric shock, fire and/or serious injury.
Save all warnings and instructions for future reference.
The term "power tool" in the warnings refers to your mains-operated (corded) power tool or battery-operated (cordless) power tool.
Follow the operating manual for the charger and the battery pack.
2.2 Tool-specific safety instructions for cordless impact screwdriver
- Hold the power tool by insulated gripping surfaces, when performing an operation where the cutting accessory may contact hidden wiring. Autting accessory contacting a "live" wire may make exposed metal
parts of the power tool "live" and could give the operator an electric shock.
- Use appropriate detection devices to look for any hidden supply lines or consult your local utility company. If the insertion tool makes contact with live cables, it can result in fire and electric shock. Damage to a gas pipe can lead to an explosion. Penetration of a water pipe can result in damage to property.


Wear suitable personal protective equipment: Ear protection and safety goggles.
- Hold the power tool firmly in your hand. Make sure the speed is adjusted correctly when screwdriving. Be prepared for high reaction torque, which can arise when working with the power tool.
- Do not use the power tool in the rain or in damp surroundings. Moisture in the power tool may cause a short circuit and burning.
- Wait until the power tool has come to a complete halt before placing it down. The insertion tool can get caught and lead to a loss of control of the power tool.
- Avoid unintentional activation. Carrying the electric power tool with your fingers on the on/off switch can lead to accidents. If you are not using the power tool, set the rotational direction switch/safety lock [1-8] to the centre position to lock the on/off switch.
- Do not use power supply units or third-party battery packs to operate cordless power tools. Do not use third-party chargers to charge the battery packs. The use of accessories not expressly authorised by the manufacturer can result in electric shocks and/or serious accidents.
- Only use tools and accessories which have been approved by Festool for this power tool. The use of tools or accessories which have not been approved may increase the risk of injury and seriously unbalance the machine. This may decrease the quality of the working results and accelerate wear on the power tool.
2.3 Emission levels
The levels determined in accordance with EN 62841 are typically:
Sound pressure level L _PA = 97 dB(A)
Sound power level L _WA = 108 dB(A)
Uncertainty K = 3 dB

CAUTION
Noise generated when working Risk of damage to hearing
▶ Use ear protection.
Vibration emission level a_h (vector sum for three directions) and uncertainty K measured in accordance with EN 62841:
$$ a _ {h} = 2 4 \mathrm{m} / \mathrm{s} ^ {2} $$
$$ K = 4 \mathrm{m} / \mathrm{s} ^ {2} $$
The specified emission levels (vibration, noise)
- are used to compare machines.
- They are also used for making preliminary estimates regarding vibration and noise load during operation.
- They represent the primary applications of the power tool.

CAUTION
The emission values may deviate from the specified values. This is dependent on how the tool is used and the type of workpiece being machined.
- The actual load during the entire operating cycle must be evaluated.
▶ Depending on the actual load, suitable protective measures must be defined in order to protect the operator.
3 Intended use
This cordless impact screwdriver is intended for driving in and tightening screws up to the specified maximum dimensions in metal, wood, plastics and similar materials.
Self-tapping drill screws are intended for use in metal.
It must be noted that speed is directly connected to torque. This means: The lower the speed, the lower the torque.
This power tool is intended for use with BP Festool battery packs of the same voltage class.

The user is liable for damage and accidents caused by improper and non-intended use; this also includes damage and wear caused by continuous industrial operation.
4 Technical data
Cordless impact screwdriver TID 18
Motor voltage 18 V
Number of gears 3 + T-mode
No-load 1st gear 1200 rpm
speed* 2nd gear 2000 rpm
3rd gear 3200 rpm
Max. torque 180 Nm
Reaction torque on the handle 10 Nm
Tool holder DIN 3126 E 1/4" (6.3 mm)
Tool holder dimension A [5] 9.5 mm
Max. screw size for softwood 8 x 220 mm
Weight (incl. battery pack 1.7 kg
BP 18 Li 6,2 AS) as per EPTA
procedure 01:2014
* Speed values based on fully charged battery pack.
Battery pack BP 18
Battery voltage 18 V
5 Parts of the machine
[1-1] Buttons for releasing the battery pack
[1-2] Capacity display button on battery pack
[1-3] Capacity display
[1-4] LED lamp
[1-5] Electronic speed selection
[1-6] On/off switch
[1-7] Locking sleeve
[1-8] Rotational direction switch and safety lock/transport lock
[1-9] Bit store
[1-10] Belt clip
[1-11] Insulated gripping surfaces (grey shaded area)
Accessories shown or described are not always included in the scope of delivery.
The specified illustrations appear at the beginning of the operating manual.
6 Commissioning
6.1 Belt clip [1-10]
The belt clip allows the power tool to be attached to work attire for brief periods. It can be attached to the right or left of the power tool using a screw [1a].
6.2 Switching on/off [1-6]
Press = 0N, release = 0FF
![FESTOOL TID 18 - Switching on/off [1-6] - 1](/content/2026/04/604180/images/3a3c9e2663222827f95d9c6da3b2a62860b0974d00d026078cef8a9ce4d8edb3.jpg)
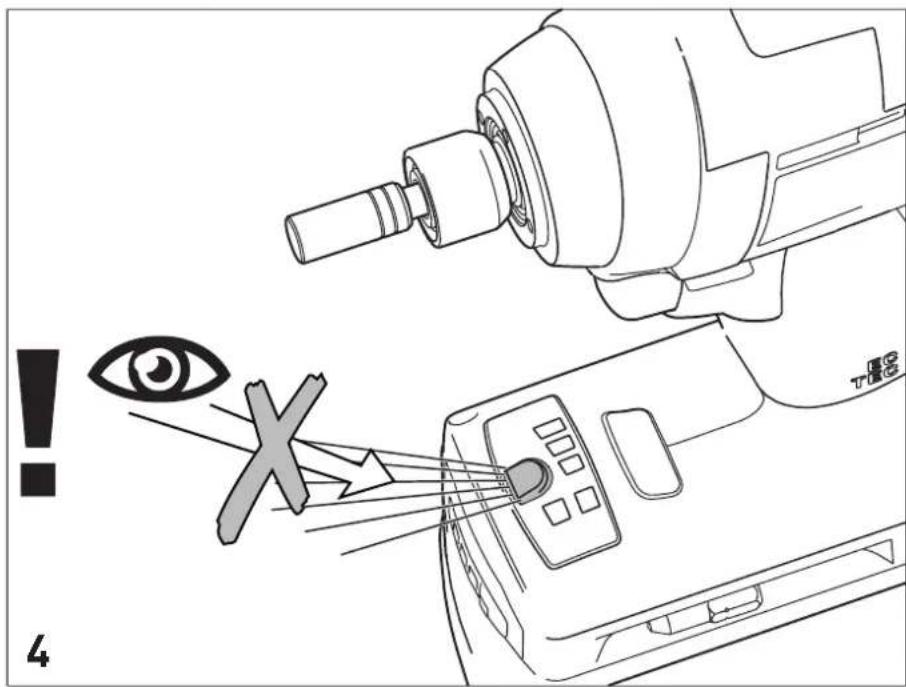
CAUTION
Risk of injury
▶ Do not look directly into the LED light. [4]
The LED light [1-4] lights up when the on/off switch [1-6] is pressed.
Set the rotational direction switch/safety lock [1-8] to the centre position to lock the on/off switch.
7 Battery pack
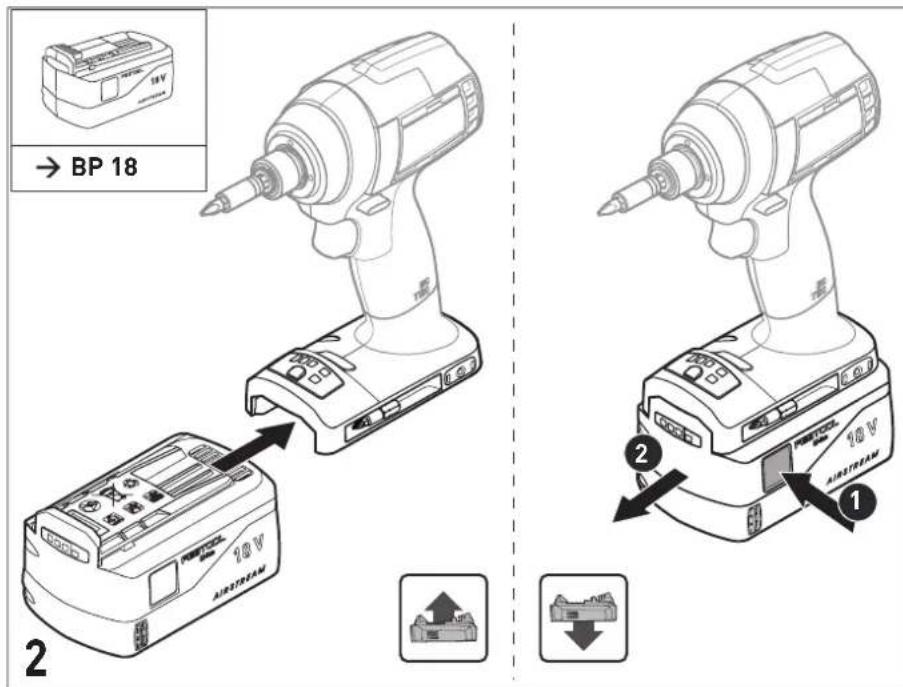
7.1 Changing the battery pack [2]
▶ Press both buttons at the same time [1-1] and pull the battery pack forwards and out of the device.
▶ Insert the new, fully charged battery pack so that it clicks into place on the bottom of the tool.
Follow the instructions enclosed with the charger in order to charge the battery pack.
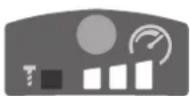
7.2 Capacity indicator
The capacity display [1-3] indicates the charge of the battery pack for approx. 2 seconds after the button [1-2] is pressed:
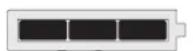
70–100%

40-70%
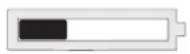
15-40%
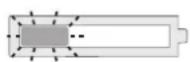
< 15%*
* Recommendation: Charge the battery pack before any further use.
Further information about the charger and battery pack with capacity indicator can be found in the corresponding operating manual.
8 Settings

CAUTION
Risk of injury
▶ Only adjust the settings when the power tool is switched off.
8.1 Changing direction of rotation [1-8]
- Switch to the left = clockwise rotation
- Switch to the right = counterclockwise rotation
8.2 Setting the speed/stroke rate
Once it has been switched on, the tool will automatically revert to the gear/mode that was last selected.
The T-mode is recommended when using self-tapping drill screws.
▶ Press the gear switch [1-5] as many times as necessary to select the desired gear/mode.

One speed LED is lit
= 1st gear

Two speed LEDs are lit
= 2nd gear
Three speed LEDs are lit
= 3rd gear
T-mode LED is lit
=T-mode
(i) Drive in some test screws first to check the correct gear setting.
8.3 T-mode
Operating mode for driving small self-tapping drill screws (< 5 x 20 mm) into sheet metal with wooden substructures. After drilling through the sheet metal, the speed is automatically reduced to enable safe screwdriving.
9 Tool holder, attachments

WARNING
Risk of injury
- Remove the battery pack from the power tool before performing any work on the power tool.
9.1 Compatible accessories
This power tool is compatible with commercially available tools with 1/4" hex shank, as per DIN 3126 type E 6.3. [5]

CENTROTEC accessories are not compatible with this power tool.
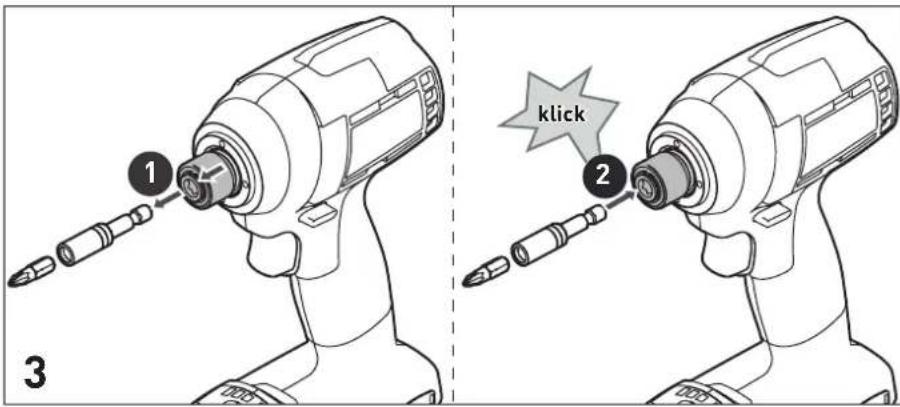
9.2 Changing tools [3]
▶ Pull the sleeve of the bit locking system forward to release the insertion tool.
▶ Remove insertion tool.
▶ Push the new insertion tool into the locking sleeve until it audibly clicks into place.
9.3 Changing the bit in the insertion tool [3]
▶ Remove the bit from the insertion tool.
▶ Insert a new bit into the insertion tool.
10 Working with the machine

WARNING
Risk of injury
▶ Only attach the power tool to the screw when it is switched off.
▶ Always secure the workpiece in such a manner that it cannot move.
- Keep hands away from the rotating insertion tools.

CAUTION
Risk of burns
Tool holder and tools can become very hot during operation!
▶ Wear protective gloves when changing the tools!
▶ Allow to cool before attaching to belt clip.
10.1 Bit store [1-9]
![FESTOOL TID 18 - Bit store [1-9] - 1](/content/2026/04/604180/images/8c53d7c90f3410f628c34c36b33a57fc92a1222975383832819446deec50ea6a.jpg)
WARNING
Risk of injury from metal cuttings in the bit store.
- Clean the bit store regularly and clear out metal cuttings.
Magnetic, to pick up bits.
10.2 Acoustic warning signal
Acoustic warning signals sound and the tool switches off in the following operating states:

peep
Battery empty/incompatible or tool overloaded.
- Charge/change the battery.
- Reduce the load on the tool.

peep
When pressing the on/off switch. Tool has overheated.
- Once it has cooled down, restart the tool.

peep peep peep
Tool is faulty.
- Contact the manufacturer to rectify the fault.
11 Service and maintenance

WARNING
Risk of injury, electric shock
▶ Always remove the battery pack from the power tool before performing any maintenance or service work.
▶ All maintenance and repair work that requires the power tool to be opened up should always be carried out by an authorised service workshop.

Customer service and repairs must only be carried out by the manufacturer or service workshops. Find the nearest address at: www.festool.co.uk/service
Always use original Festool spare parts. Order no. at: www.festool.co.uk/service
To ensure constant air circulation, always keep the cooling air openings in the motor housing clean and free of blockages.
Keep the contacts on the power tool, charger and battery pack clean.
12 Environment

Do not dispose of the device in the household waste! Recycle devices, accessories and packaging. Observe appli-national regulations.
EU only: In accordance with the European Directive on waste electrical and electronic equipment and implementation in national law, used power tools must be collected separately and handed in for environmentally friendly recycling.
13 General information
Imported into the UK by
Festool UK Ltd
1 Anglo Saxon Way
Bury St Edmunds
IP30 9XH
Great Britain
13.1 Bluetooth®
The Bluetooth ^® word mark and the logos are registered trademarks of Bluetooth SIG, Inc.; they are used by TTS Tooltechnic Systems AG & Co. KG, and therefore by Festool, under licence.
1 Symboles

Appuyer = MARCHE, relâcher = ARRÊT

ATTENTION
bar
| Range | Percentage | | ----------- | ---------- | | 70-100% | 70-100% | | 40-70% | 40-70% | | 15-40% | 15-40% | | < 15% * | < 15% * |bar
| Range | Percentage (%) | |---|---| | 70-100% | 70-100 | | 40-70% | 40-70 | | 15-40% | 15-40 | | < 15% * | < 15% * |natural_image
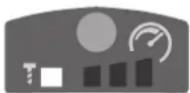
Four horizontal bars with black segments and a small circular icon below (no text or symbols)70-100%
40-70%
15-40%
< 15 % *
Premir = 0N, soltar = 0FF

CUIDADO
Perigo de ferimentos
Declaration of Conformity
We as the manufacturer Festool GmbH, Wertstraße 20, 73240 Wendlingen, Germany declare under our sole responsibility that the product(s):
Designation:
Designation of Type(s):
Serial number(s) 1):
Battery powered impact wrench
TID 18
203192
fulfills all the relevant provisions of the following UK Regulations:
S.I. 2008/1597
S.I. 2016/1091 ^4
S.I. 2017/1206 ^3)
S.I. 2012/3032
Supply of Machinery (Safety) Regulations 2008
Electromagnetic Compatibility Regulations 2016
Radio Equipment Regulations 2017
Restriction of the Use of Certain Hazardous Substances in Electrical and Electronic Equipment Regulations 2012
and are manufactured in accordance with the following designated standards:
• BS EN 62841-1: 2015
• BS EN 62841-2-2: 2014
BS EN 55014-1:2017 ^2)
BS EN 55014-2:2015 ^2)
• EN 300 328:2016 V2.1.1 ^3)
• EN 301 489-1:2017 V2.1.1 ^3)
• EN 301 489-17:2017 V3.1.1 ^3)
• BS EN IEC 63000:2018
1) in the specified serial number range (S-Nr.) from 400000000 - 499999999
2) valid in combination with battery pack BP 18 Li 5,2 AS, BP 18 Li 6,2 AS, BP 18 Li 3,1 C, BP 18 Li 4,0 HPC-AS
3) valid in combination with Bluetooth® battery pack BP 18 Li 5,2 ASI, BP 18 Li 6,2 ASI, BP 18 Li 3,1 Cl, BP 18 Li 4,0 HPC-ASI

Place and date of declaration: Wendlingen, 31.03.2021
Signed on behalf of and in name of Festool GmbH

Markus Stark
Head of Productdevelopment
i. V. Q. Boxndt
Ralf Brandt
Head of Productconformity