
MUZ9GM1 - Other kitchen appliances BOSCH - Free user manual and instructions
Find the device manual for free MUZ9GM1 BOSCH in PDF.
| Product type | Grain mill (food processor attachment) |
| Brand | Bosch |
| Model | MUZ9GM1 |
| Compatibility | MUM9 series food processor |
| Grinding mechanism material | Stainless steel conical burr |
| Hopper capacity | 750 g (max per load) |
| Maximum quantity per session | 2 kg (then 1 hour cooling) |
| Suitable grains | Wheat, rye, buckwheat, hulled barley, hulled oats, millet, spelt, rice |
| Excluded grains | Corn, poppy, soybeans, coffee |
| Grind adjustment | Adjustment ring: fine (clockwise) to coarse (counterclockwise) |
| Recommended speed | Maximum |
| Dimensions (approx.) | 15 x 15 x 20 cm |
| Weight (approx.) | 0.8 kg |
| Power supply | Via the food processor (no separate power) |
| Dishwasher safe | Yes, parts up to 60 °C |
| Manual cleaning | Warm water and mild detergent, no alcohol or abrasives |
| Safety | Do not insert fingers into opening; assemble only when stopped |
| Main spare part | Drive pivot (ref. 10018359) |
| Warranty | Standard Bosch (see terms) |
| Customer service (France) | 0 892 698 010 (€0.40/min) |
Frequently Asked Questions - MUZ9GM1 BOSCH
User questions about MUZ9GM1 BOSCH
0 question about this device. Answer the ones you know or ask your own.
Ask a new question about this device
Download the instructions for your Other kitchen appliances in PDF format for free! Find your manual MUZ9GM1 - BOSCH and take your electronic device back in hand. On this page are published all the documents necessary for the use of your device. MUZ9GM1 by BOSCH.
USER MANUAL MUZ9GM1 BOSCH
new device on MyBosch now and get free benefits:
bosch-home.com/ welcome
Grain Mill
MUZ9GM1
[en] User manual Grinding mill 11
3
4
5

6
7
natural_image
Illustration of a blue microscope being combined with a bowl, showing the process (no text or symbols present)8
natural_image
Illustration of a blue electrical plug inserted into a square socket, with an arrow indicating direction (no text or symbols)9
10
natural_image
Blue electrical plug with a circular socket inserted, showing a black arrow indicating left motion (no text or symbols)11
The image is too blurry to recognize any text content.
13
natural_image
Illustration of a blue cap with black arrows indicating upward motion, shown from two different angles (no text or symbols)The image is too blurry to recognize any text content.
 | √ | √ | √ | √ | √ |
 | √ | × | × | × | × |
15
Inhaltsverzeichnis
1 Sicherheit 6
For further information, please refer to the Digital User Guide.

Table of contents
1 Safety.... 12
1.1 General information...... 12
1.2 Intended use.... 12
1.3 Safety instructions 12
2 Avoiding material damage...... 13
3 Unpacking and checking...... 13
3.1 Unpacking the accessories and parts 13
3.2 Scope of delivery.... 13
3.3 Cleaning the accessory before using for the first time ..... 13
4 Familiarising yourself with the accessories .... 13
4.1 Components.... 13
5 Before using the appliance ..... 13
5.1 Assembling the accessory...... 14
5.2 Attaching the accessory to the base unit.... 14
6 Basic operation 14
6.1 Grinding grain.... 14
6.2 After using the appliance ..... 14
6.3 Disassembling the accessory.... 15
7 Cleaning and servicing...... 15
7.1 Dishwasher-safe components.... 15
7.2 Cleaning products.... 15
7.3 Overview of cleaning...... 15
8 Troubleshooting...... 16

1 Safety
Observe the following safety instructions.
1.1 General information
- Read this instruction manual carefully.
■ Observe the instructions for the base unit.
1.2 Intended use
Only use the accessories:
■ with a kitchen machine from the same series MUM9.
■ With genuine parts and accessories.
■ for grinding wheat, rye, buckwheat, husk-free barley, husk-free oats, millet, spelt and rice.
1.3 Safety instructions
Observe the following safety instructions.

WARNING – Risk of injury!
Rotating drives, tools or accessory parts may cause injury.
▶ Do not reach into the filling shaft.
Improper use may cause injuries.
▶ Never assemble the accessories on the base unit.
▶ Only attach and remove accessories once the drive has stopped and the appliance has been unplugged.
▶ Only use the accessories once fully assembled.
- The accessories should only be used in the intended operating position.
2 Avoiding material damage
ATTENTION!
Improper use may cause material damage.
- Do not insert objects into the filling shaft or housing, e.g. wooden spoons.
▶ Never use the appliance to grind corn, poppy seeds, soya beans or coffee beans.
▶ Never operate the appliance at no-load.
3 Unpacking and checking
Find out here what you need to note when unpacking the appliance.
3.1 Unpacking the accessories and parts
- Take the accessories out of the packaging.
- Take all other parts and the accompanying documents out of the packaging and place them to hand.
- Remove any packaging material.
- Remove any stickers or film.
3.2 Scope of delivery
After unpacking all parts, check for any damage in transit and completeness of the delivery.
→ Fig. 1
| A | Housing with setting ring |
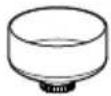
| B | Filling container |
| C | Accompanying documents |
3.3 Cleaning the accessory before using for the first time
- Clean all parts that come into contact with food before using for the first time.
→ "Cleaning and servicing", Page 15 - Put the cleaned and dried parts out ready for use.
4 Familiarising yourself with the accessories
4.1 Components
You can find an overview of the parts of your accessories here.
→ Fig. 2
| 1 | Filling container |
| 2 | Grinding ring |
| 3 | Grinding cone |
| 4 | Setting ring |
| 5 | Housing with setting ring |
| 6 | Discharge chute |
5 Before using the appli- ance
Prepare the base unit and the accessories for use.
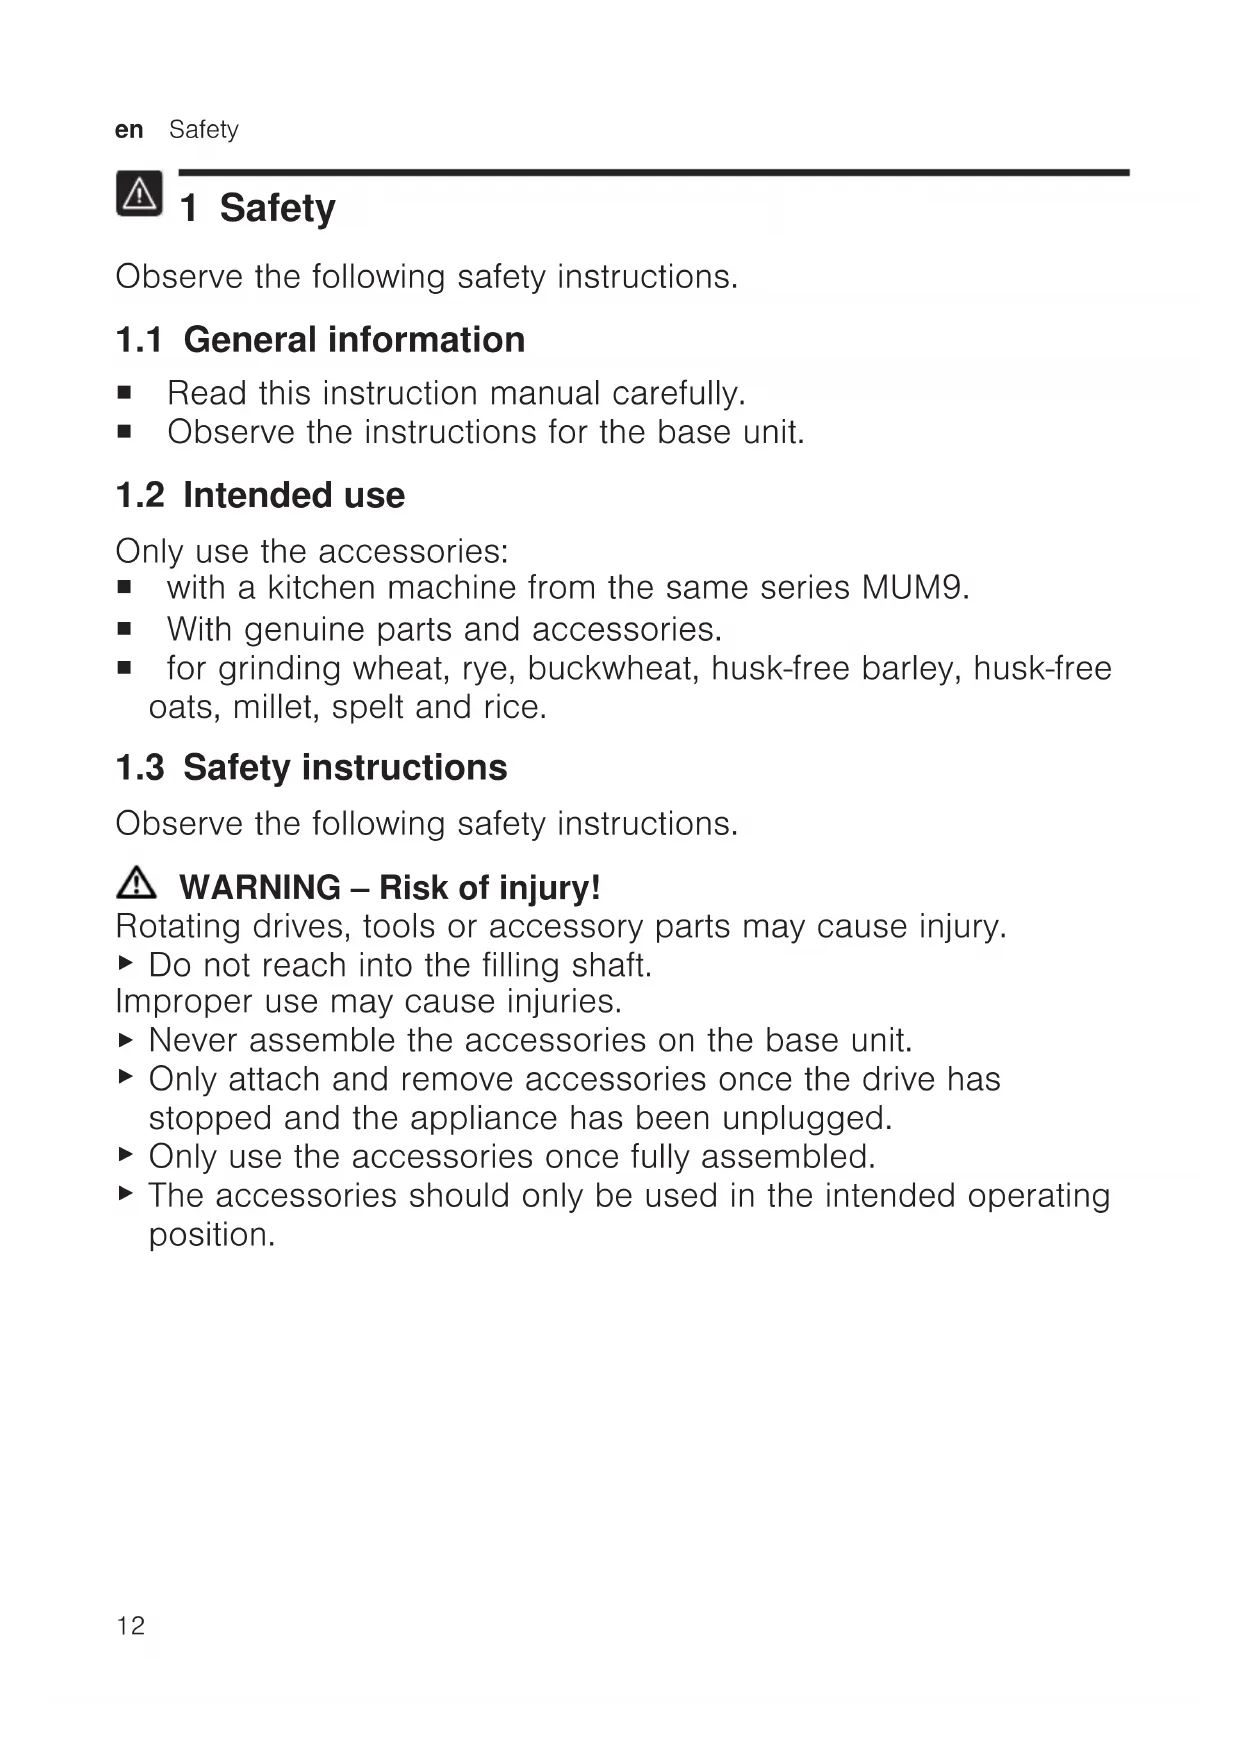
5.1 Assembling the accessory
-
Turn the setting ring so that the markings on the setting ring and housing line up.
→ Fig. 3 -
Place the grinding cone on the square shaft in the housing.
-
Insert the grinding ring and press down lightly. → Fig. 4
Note: To insert the grinding ring properly, make sure that the arrow marked on the grinding ring points to the markings on the setting ring and housing.
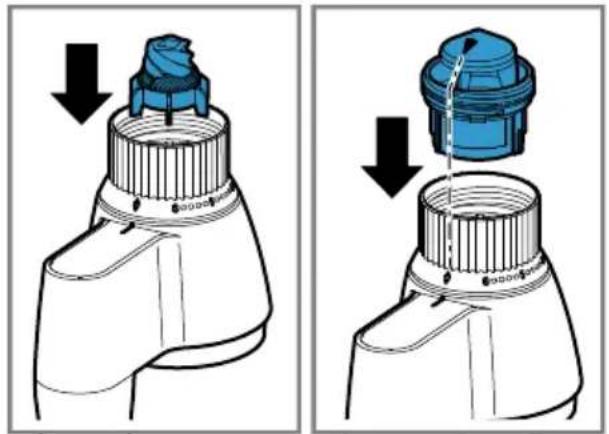
- Position the filling container and then turn the grinding ring clockwise into the grinding area marked on the setting ring. → Fig. 5
5.2 Attaching the accessory to the base unit
Requirements
■ The bowl is not inserted.
■ The bowl lid is not fitted.
■ The protective cover of the front drive is not fitted.
■ The power cable has the required length but is not yet inserted.
-
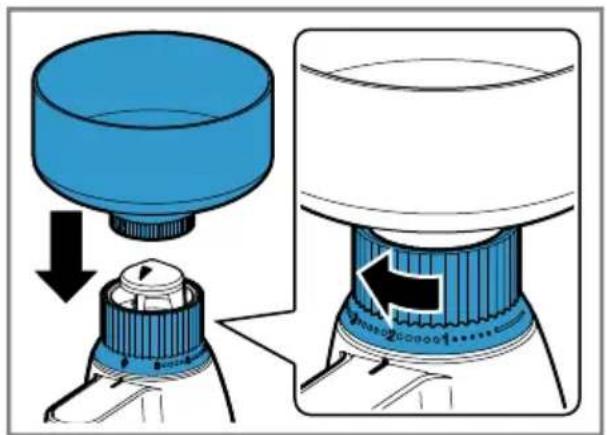
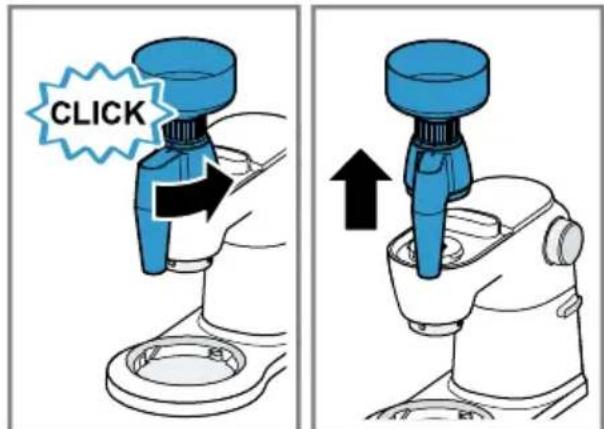
Place the accessory on the front drive of the food processor and secure by turning clockwise. → Fig. 6
-
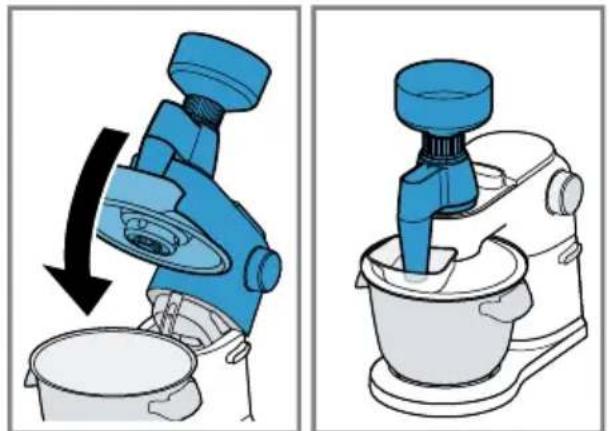
Press the Release button and move the swivel arm up.
-
Attach the cover with the filling shaft on the main drive and insert the bowl. → Fig. 7
-
Move the swivel arm down again. → Fig. 8
-
Insert the cover.
6 Basic operation
6.1 Grinding grain
- Place the grain in the filling hole.
Notes
- You can set the grinding level by turning the setting ring before or even during the grinding process. For a coarser grinding level, turn the setting ring anticlockwise. For a finer grinding level, turn the setting ring clockwise.
■ Please note that the grain to be processed must be dry and without stones. -
Observe the maximum processing quantity of 750 g. The markings on the filling container are for guidance and relate to wheat.
■ To prevent overloading the appliance, grind max. 2 kg in one grinding process. Afterwards, leave the appliance to cool down for at least one hour. -
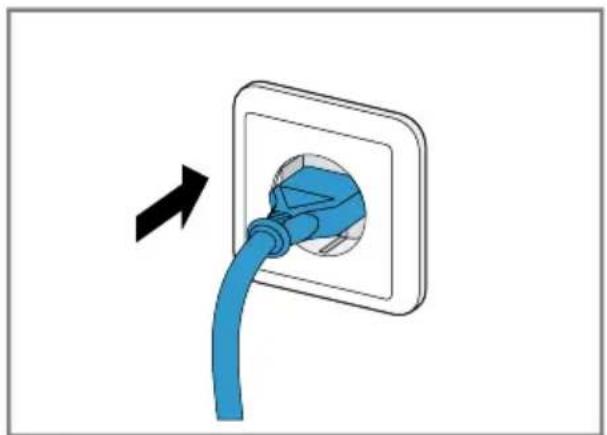
Insert the mains plug.
→ Fig. 9
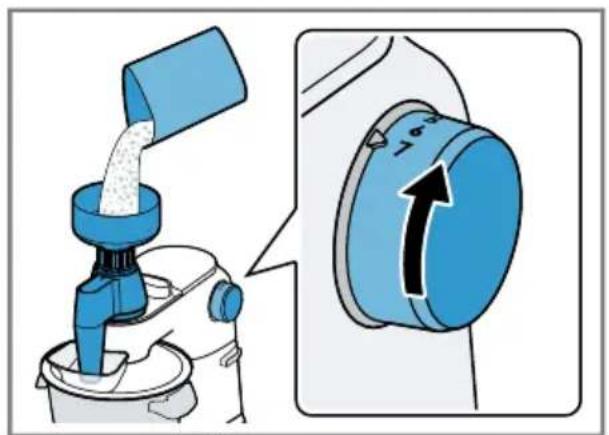
- Select the maximum speed setting for processing.
→ Fig. 10
6.2 After using the appliance
-
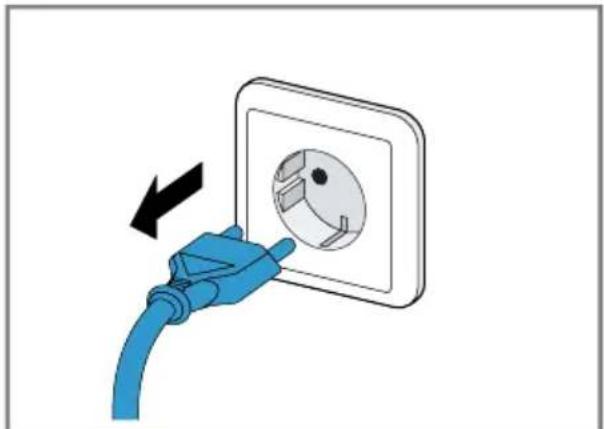
After using the appliance, switch it off with the rotary switch.
-
Pull out the mains plug.
→ Fig. 11
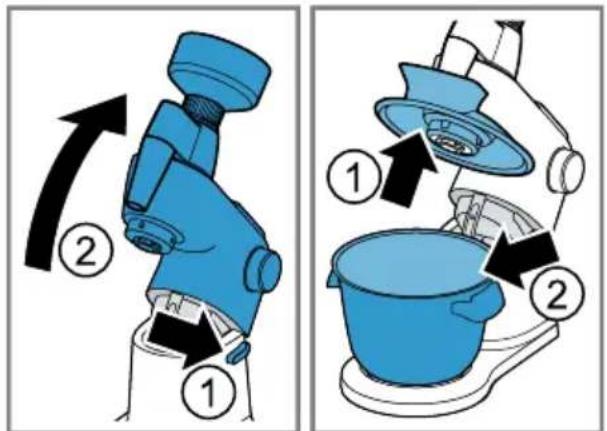
- Press the Release button and move the swivel arm up.
- Remove the bowl.
→ Fig. 7 - Remove the cover with the filling shaft from the main drive.
- Move the swivel arm back down, turn the accessory anticlockwise and remove.
→ Fig. 12
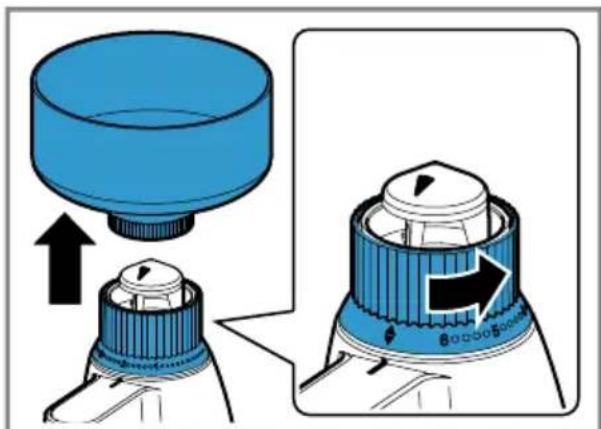
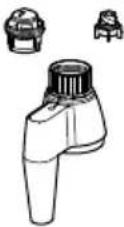
6.3 Disassembling the accessory
- Remove the filling container.
- Turn the setting ring anticlockwise until the markings on the setting ring and housing line up.
→ Fig. 13
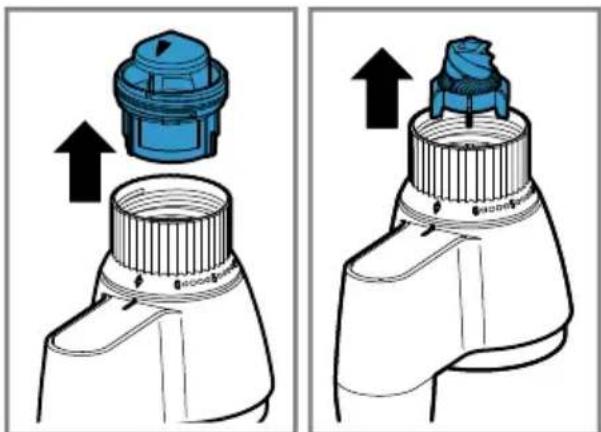
- Remove the grinding ring and the grinding cone.
→ Fig. 14
7 Cleaning and servicing
7.1 Dishwasher-safe components
Find out here which components can be put in the dishwasher.
ATTENTION!
Some parts may be damaged if they are put in a dishwasher.
▶ Only put dishwasher-safe parts in the dishwasher.
▶ Only use programmes that do not heat the water above 60 °C.
- Do not wedge plastic parts in the dishwasher.
7.2 Cleaning products
Find out here what cleaning agents are suitable for your accessories.
ATTENTION!
Using unsuitable cleaning agents or incorrect cleaning may damage the accessories.
- Do not use cleaning agents containing alcohol or spirits.
- Do not use sharp, pointed or metal objects.
- Do not use abrasive cloths or cleaning agents.
7.3 Overview of cleaning
Clean the individual parts as indicated in the table.
→ Fig. 15
8 Troubleshooting
You can rectify minor faults on your appliance yourself. Read the troubleshooting information before contacting our after-sales service. This will avoid unnecessary costs.
| Fault Cause and troubleshooting | |
| The grain mill is not working. | The grain mill is not assembled correctly.▸ Check whether the grain mill has been assembled correctly.→ "Assembling the accessory", Page 14 |
| An installed predetermined breaking point protects the drive from damage. The agitator paddle on the under-side of the housing will break at the predetermined breaking point if there are foreign objects in the grinder or if damp grain is ground.▸ To replace the agitator paddle, re-order from customer service quoting order number 10018359. | |
| The grinding result is not how you want. | The setting ring is not set to the grinding level required.▸ Set the grinding level required by turning the setting ring.→ "Grinding grain", Page 14 |
Table des matières
1 Sécurité.... 18
Indice
1 Sicurezza 24
Inhoudsopgave
1 Veiligheid.... 30
WAARSCHUWING – Kans op letsel!
6 De Bediening in essen- tie
6.1 Graan malen
Indholdsfortegnelse
Innholdsfortegnelse
1 Sikkerhet.... 42
1.1 Generelle merknader.... 42
1.2 Korrekt bruk 42
1.3 Sikkerhetsinstrukser 42
2 Unngå materielle skader...... 43
Sisällysluettelo
Tabla de contenidos
1 Seguridad 60
Índice
1 Segurança 66
İçindekiler tablosu
1 Emniyet.... 80
Spis treści
1 Bezpieczeństwo 86
Bmict
1 Безпека 92
Содержание
Central Service Contacts
AE United Arab Emirates, إِلَّعُوايَّة المتحدة BSH Home Appliances FZE Round About 13, Plot Nr MO-0532A Jebel Ali Free Zone - Dubai Tel.: 04 881 4401* mailto:service.uae@bshg.com www.bosch-home.com/ae *Sun-Thu 8am to 5pm (exclude public holidays)
AM AM Armenia, Ruwuunwu ZIG ZAG LLC Charenci str. 25 Yerevan 375025 Tel.: 010 55 60 10 mailto:service@zigzag.am www.zigzag.am
GB Great Britain
BSH Home Appliances Ltd.
Grand Union House, Old Wolverton Road, Wolverton
Milton Keynes MK12 5PT
To arrange an engineer visit, to order spare parts and accessories or for product advice please visit www.boschhome.co.uk Or call Tel.: 0344 892 8979*
*Calls are charged at the basic rate, please check with your telephone service provider for exact charges.
| GR | Greece, Ελλάς |
| BSH Ikiakes Siskeves A.B.E. | |
| Central Branch Service | |
| 17 km E.O. Athinon-Lamias & Potamou | |
| 20 | |
| 14564 Kifisia | |
| Τηλέφωνο: 210 4277 500,-701 | |
| mailto:nkf-CustomerService@bshg.com | |
| www.bosch-home.gr |
| IE | Republic of IrelandBSH Home Appliances Ltd.M50 Business Park, Ballymount Road Upper, WalkinstownDublin 12To arrange an engineer visit, to order spare parts and accessories or for product advice please call Tel.: 014502655*www.bosch-home.ie*Calls are charged at the basic rate, please check with your telephone service provider for exact charges |
| IS | Iceland |
| Smith & Norland hf. | |
| Noatuni 4 | |
| 105 Reykjavik | |
| Tel.: 0520 3000 | |
| www.sminor.is |
| IT | Italia, ItalyBSH Elettrodomestici S.p.A.Via. M. Nizzoli 120147 Milano (MI)Tel. 02 412 678 100mailto:info.it@bosch-home.comwww.bosch-home.com/it |
| JO | Jordan, الأردن |
| Diab Qawasmi & Sons Co. | |
| Khaled Ben Al-Waleed Street, Jabal Al Hussein (11121) | |
| P.O. Box 212292, Amman | |
| Tel.: 06 465 8505, -2650 | |
| Tel.: 79 110 3430 | |
| mailto:boschjo@yahoo.com |
| LB | Lebanon, لبنان |
| Teheni, Hana & Co. | |
| Boulevard Dora 4043 Beyrouth, P.O. Box 90449 | |
| Jdeideh 1202 2040 | |
| Tel.: 01 255 211 | |
| mailto:Info@Teheni-Hana.com |
| LU | Luxembourg |
| BSH électroménagers S.A. | |
| 13-15, ZI Breedeweues | |
| 1259 Senningerberg | |
| Tel.: 26349 811 | |
| Reparaturen: lux-repair@bshg.com | |
| Ersatzteile: lux-spare@bshg.com | |
| www.bosch-home.com/lu |
| MT Malta |
| Oxford House Ltd. |
| Notabile Road |
| Mrichel BKR 14 |
| Tel.: 021 442 334 |
| www.oxfordhouse.com.mt |
| NL | Nederland, Netherlands |
| BSH Huishoudapparaten B.V. | |
| Taurusavenue 36 | |
| 2132 LS Hoofddorp | |
| Storingsmelding/Onderdelenverkoop: | |
| Tel.: 088 424 4010 | |
| mailto:bosch-contactcenter@bshg.com | |
| mailto:bosch-onderdelen@bshg.com | |
| www.bosch-home.nl |
| NO Norge, NorwayBSH Husholdningsapparater A/SGrensesvingen 90661 OsloTel.: 22 66 05 54mailto:Bosch-Service-NO@bshg.comwww.bosch-home.no |
| NZ New ZealandBSH Home Appliances Ltd.Level 3, Air NZ Building, Smales FarmBusiness Park, 74 Taharoto Road, TakapunaAuckland 0622Tel.: +64 0800 245 700*mailto:aftersales.nz@bshg.comwww.bosch-home.co.nz*Mon-Fri 8.30am to 5pm (exclude public holidays) |
Thank you for buying a Bosch Home Appliance!
Register your new device on MyBosch now and profit directly from:
- Expert tips & tricks for your appliance
• Warranty extension options
• Discounts for accessories & spare-parts
• Digital manual and all appliance data at hand - Easy access to Bosch Home Appliances Service
Free and easy registration – also on mobile phones: www.bosch-home.com/welcome
BOSCH HOME APPLIANCES SERVICE
Looking for help? You'll find it here.
Expert advice for your Bosch home appliances, help with problems or a repair from Bosch experts.
Find out everything about the many ways Bosch can support you: www.bosch-home.com/service
Contact data of all countries are listed in the attached service directory.
Valid within Great Britain: Imported to Great Britain by BSH Home Appliances Ltd.

Grand Union House Old Wolverton Road Wolverton, Milton Keynes MK12 5PT
United Kingdom
8001155339 (010830)
de, en, fr, it, nl, da, no, sv, fi, es, pt, el, tr, pl, uk, ru, ar


- Grain Mill
- MUZ9GM1
- Inhaltsverzeichnis
- Sicherheit 6
- For further information, please refer to the Digital User Guide.
- Table of contents
- Safety
- General information
- Intended use
- Safety instructions
- WARNING – Risk of injury!
- Avoiding material damage
- ATTENTION!
- Unpacking and checking
- Unpacking the accessories and parts
- Scope of delivery
- Cleaning the accessory before using for the first time
- Familiarising yourself with the accessories
- Components
- Before using the appli- ance
- Assembling the accessory
- Attaching the accessory to the base unit
- Requirements
- Basic operation
- Grinding grain
- Notes
- After using the appliance
- Disassembling the accessory
- Cleaning and servicing
- Dishwasher-safe components
- Cleaning products
- Overview of cleaning
- Troubleshooting
- Table des matières
- Indice
- Inhoudsopgave
- WAARSCHUWING – Kans op letsel!
- De Bediening in essen- tie
- Graan malen
- Indholdsfortegnelse
- Innholdsfortegnelse
- Sikkerhet.... 42
- Unngå materielle skader...... 43
- Sisällysluettelo
- Tabla de contenidos
- Seguridad 60
- Índice
- İçindekiler tablosu
- Emniyet.... 80
- Spis treści
- Bmict
- Безпека 92
- Содержание
- Central Service Contacts
- Thank you for buying a Bosch Home Appliance!
- Looking for help? You'll find it here.
Brand : BOSCH
Model : MUZ9GM1
Category : Other kitchen appliances