
uRage SoundZbar 2.1 Unleashed - Soundbar HAMA - Free user manual and instructions
Find the device manual for free uRage SoundZbar 2.1 Unleashed HAMA in PDF.
| Product type | 2.1 soundbar with subwoofer |
| Brand | Hama |
| Model | uRage SoundZbar 2.1 Unleashed |
| Power supply | Mains: 230 V ~ 50 Hz, 0.4 A; Li-ion battery 7.4 V / 2550 mAh (18.87 Wh) |
| Battery life | ~7 h (Bluetooth), ~12 h (AUX) |
| Charging time | ~3-4 h |
| Max. music power | 100 W (soundbar 40 W, subwoofer 60 W) |
| Frequency response | Soundbar: 160 – 20000 Hz; Subwoofer: 20 – 160 Hz |
| Impedance | 6 Ω |
| Distortion (THD) | ≤ 0.5% (1K, 1W) |
| Connections | AUX input (3.5 mm), optical input, Bluetooth v2.1+EDR, NFC |
| Bluetooth profiles | A2DP, AVRCP |
| Bluetooth range | 10 m |
| Sound modes | Game, Music, Cinema |
| Bass adjustment | Rotary knob on subwoofer |
| Intended use | Indoor only, domestic use |
| Care and cleaning | Slightly damp, lint-free cloth, without abrasive detergent |
| Safety | Keep out of reach of children, avoid moisture and heat sources, do not open |
| Package contents | SoundZbar, subwoofer, 3.5 mm audio cable, mains adapter, user manual |
Frequently Asked Questions - uRage SoundZbar 2.1 Unleashed HAMA
User questions about uRage SoundZbar 2.1 Unleashed HAMA
0 question about this device. Answer the ones you know or ask your own.
Ask a new question about this device
Download the instructions for your Soundbar in PDF format for free! Find your manual uRage SoundZbar 2.1 Unleashed - HAMA and take your electronic device back in hand. On this page are published all the documents necessary for the use of your device. uRage SoundZbar 2.1 Unleashed by HAMA.
USER MANUAL uRage SoundZbar 2.1 Unleashed HAMA
uRage SoundZbar 2.1 Unleashed

natural_image
Pure geometric diagram of concentric circles with radial lines, no text or symbols present
natural_image
Pure technical line drawing of a rectangular frame with a small recessed slot (no text or symbols)Operating Instructions
Bedienungsanleitung
Manual de utilizare
Mode d'emploi
text_image
A 2 3 5 7 4 6 SOURCE MODE PAIR N OPT AUX 10 12 13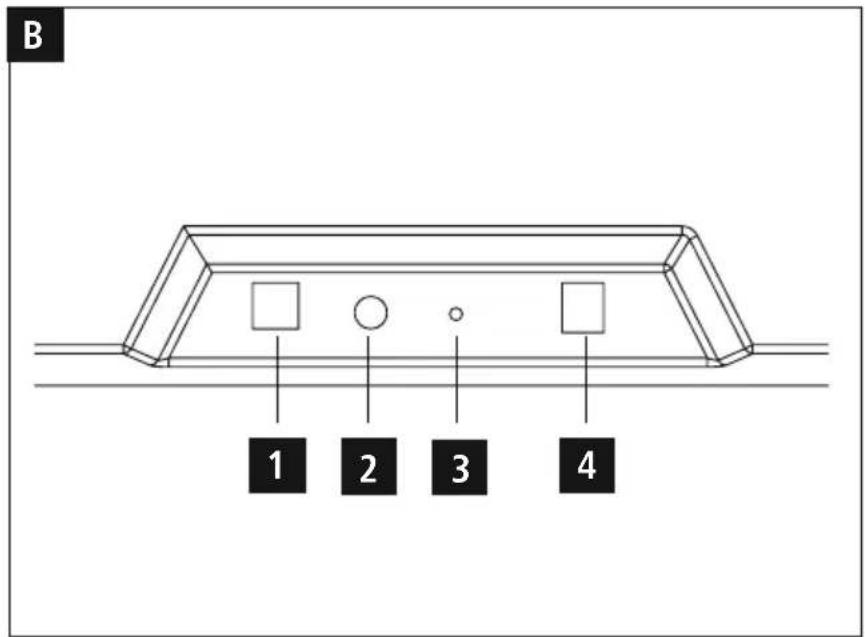
text_image
B 1 2 3 4
text_image
C 3 1 2Controls and Displays SoundZbar
- [POWER]
- [SOURCE] for selecting the input mode
- [MODE] for selecting the sound mode
- [PAIR] for interrupting the Bluetooth connection
- NFC interface
- [◀] Mute switch
- VOL +/-
- Optical input status LED
- AUX status LED
- Bluetooth status LED
- Gaming mode status LED
- Music mode status LED
- Cinema mode status LED
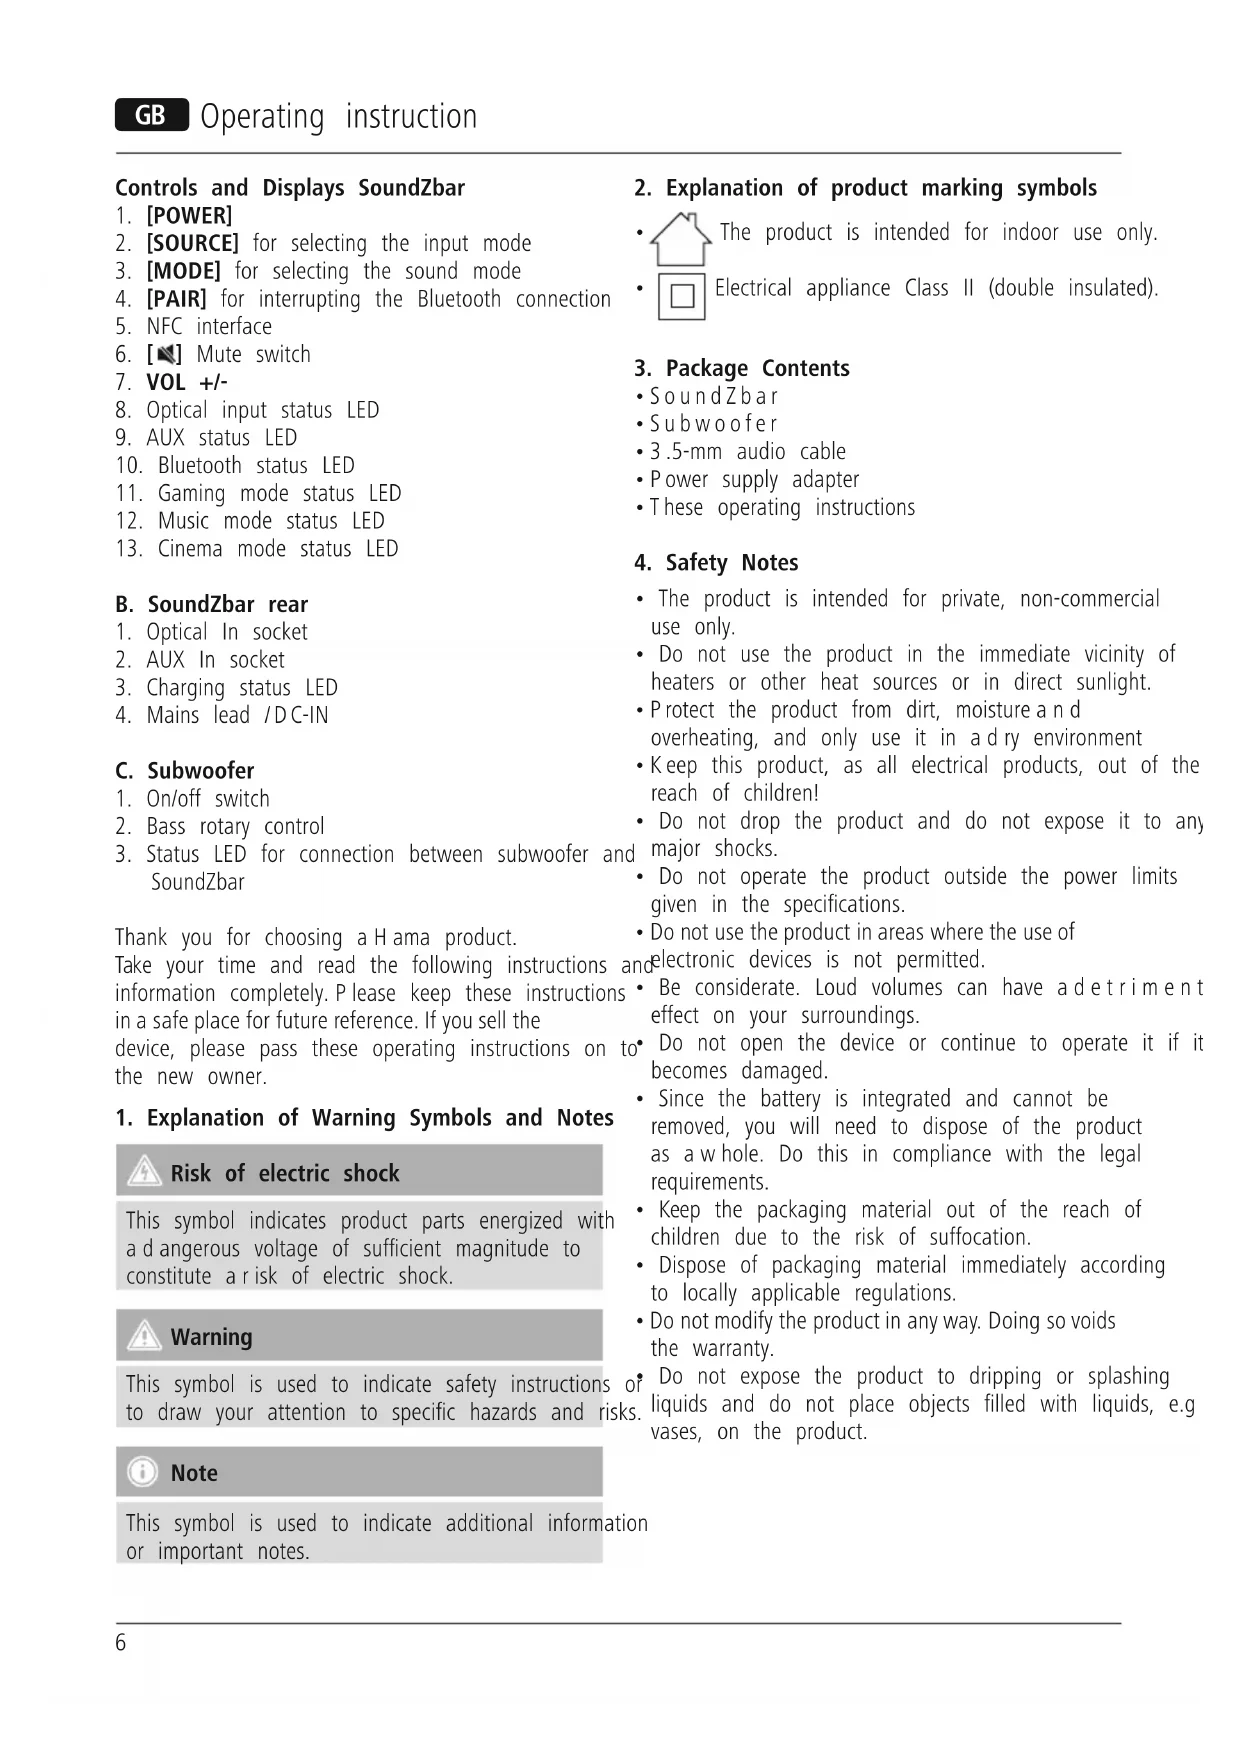
B. SoundZbar rear
- Optical In socket
- AUX In socket
- Charging status LED
- Mains lead /DC-IN
C. Subwoofer
- On/off switch
- Bass rotary control
- Status LED for connection between subwoofer and SoundZbar
Thank you for choosing a Hama product.
Take your time and read the following instructions an information completely. Please keep these instructions in a safe place for future reference. If you sell the device, please pass these operating instructions on to the new owner.
1. Explanation of Warning Symbols and Notes

Risk of electric shock
This symbol indicates product parts energized with a dangerous voltage of sufficient magnitude to constitute a risk of electric shock.

Warning
This symbol is used to indicate safety instructions or to draw your attention to specific hazards and risks.

Note
This symbol is used to indicate additional information or important notes.
2. Explanation of product marking symbols
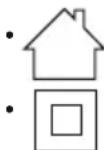
The product is intended for indoor use only.
Electrical appliance Class II (double insulated).
3. Package Contents
- SoundZbar
- Subwoofer
- 3.5-mm audio cable
• Power supply adapter
• These operating instructions
4. Safety Notes
- The product is intended for private, non-commercial use only.
- Do not use the product in the immediate vicinity of heaters or other heat sources or in direct sunlight.
- Protect the product from dirt, moisture and overheating, and only use it in a dry environment
- Keep this product, as all electrical products, out of the reach of children!
- Do not drop the product and do not expose it to any major shocks.
- Do not operate the product outside the power limits given in the specifications.
-
Do not use the product in areas where the use of electronic devices is not permitted.
-
Be considerate. Loud volumes can have a detriment effect on your surroundings.
Do not open the device or continue to operate it if it becomes damaged. - Since the battery is integrated and cannot be removed, you will need to dispose of the product as a whole. Do this in compliance with the legal requirements.
- Keep the packaging material out of the reach of children due to the risk of suffocation.
- Dispose of packaging material immediately according to locally applicable regulations.
- Do not modify the product in any way. Doing so voids the warranty.
Do not expose the product to dripping or splashing liquids and do not place objects filled with liquids, e.g. vases, on the product.

Risk of electric shock
- Do not open the device or continue to operate it becomes damaged.
- Do not use the product if the AC adapter, adapter cable or power cable is damaged.
- Do not attempt to service or repair the product yourself. Leave any and all service work to qualified experts.
5. Startup and Operation

Note
- The product is mains or battery operated. For mains operation, you merely have to connect the product to the mains supply (see Section 4.2). For battery operation, the product must first be fully charged (see Section 13).

Warning
- Connect the product only to a socket that has been approved for the device. The socket must be installed close to the product and must be easily accessible.
- Disconnect the product from the network using the power button – if this is not available, unplug the power cord from the socket.
- The electrical socket must always be easily accessible.
-
If you will not be using the product for a long period of time, disconnect it from mains power.
-
Connect the power cables of the SoundZbar and the subwoofer to properly installed power sockets.
- Press [POWER] (1) to switch on the SoundZbar.
- Press the on/off switch (1) to switch on the subwo
- The connection status LED (3) on the subwoofer begins to flash blue.

Note – Turning the radio on for the first time
it• ifThe SoundZbar and subwoofer, once switched on, will automatically connect to one another via Bluetooth.
• After successful connection, the connection status LED (3) on the subwoofer is constantly lit blue.
6. Bluetooth pairing
You can pair your terminal device with the SoundZbar via Bluetooth and use the SoundZbar as a playback device for audio signals.

Note -Bluetooth®
- Check whether your mobile device (smartphone, tablet PC. etc.) is Bluetooth capable.
Note that the maximum range for Bluetooth is 10 metres without obstacles such as walls, people, etc. - The Bluetooth connection may be disrupted by other Bluetooth devices/ connections in the vicinity.
- It is only possible to connect the SoundZbar to one terminal device.
- Note that compatibility depends on the supported Bluetooth profiles as well as the Bluetooth versions being used. (see Technical Data, operating instructions of the terminal device in use)
- Make sure that your Bluetooth capable terminal device is on and Bluetooth is activated.
- Activate the Bluetooth mode by repeatedly pressing [SOURCE] (2) on the SoundZbar.
- The status LED for the Bluetooth connection (10) begins to flash blue.
- Open the Bluetooth settings on your terminal device and wait until uRage SoundZbar appears in the list of Bluetooth devices found.
- Select the uRage SoundZbar in the list of available devices and wait until the SoundZbar is shown as connected in the Bluetooth settings on your terminal device. The status LED for the Bluetooth connection (10) is now constantly lit blue.
- Start and control audio playback using the controls of the terminal device.

Note -Bluetooth® password
- Some terminal devices require a password in order to connect to another Bluetooth device.
- If your terminal device requests a password for connection to the radio, enter 0000.
7. Bluetooth pairing via NFC
- Make sure that NFC is supported by your smartphone and activated.
- Activate the Bluetooth mode by repeatedly pressing [SOURCE] (2) on the SoundZbar.
- The status LED for the Bluetooth connection (10) begins to flash blue.
- Touch the NFC interface (5) on the SoundZbar with your smartphone.
- The status LED for the Bluetooth connection (10) now constantly lit blue.
- Start and control audio playback using the controls the terminal device.
8. Terminate Bluetooth connection
- Press and hold [PAIR] (4) for about 2 seconds to terminate the Bluetooth connection to your terminal device.
- The SoundZbar can now be connected to another terminal device (see Section 5).
9. Connection via Auxiliary Input
You can use the AUX analogue audio input to conn various terminal devices (for example, game console, smartphone, tablet PC, MP3 player, etc.) as well as older analogue sources (CD/DVD player etc.) to the SoundZbar and play their audio signals using the SoundZbar.

Note
- Switch off the SoundZbar before connecting a terminal device.
-
Do not bend or crush the cable.
-
Connect your terminal device to the AUX socket (2) on the SoundZbar using the included 3.5-mm audio cable (jack cable).
- Press [POWER] (1) to switch on the SoundZbar.
- Activate the AUX mode by repeatedly pressing [SOURCE] (2) on the SoundZbar.
- The status LED for the AUX mode (9) is constantly lit.
- Start and control audio playback using the controls of the terminal device.
10. Connection via optical audio cable
You can use the SoundZbar's digital audio input to connect your terminal device (for example, game console, TV set, etc.) and play its audio signals using the SoundZbar.

Note
- Switch off the SoundZbar before connecting a terminal device.
- Remove the protective caps from both ends of the optical signal cable before connection.
- Do not bend or crush the cable.
- Connect one end of the optical signal cable to the optical audio input (1) on the SoundZbar, the other end to the optical audio output on your terminal device.
^i Press [POWER] (1) to switch on the SoundZbar.
- Activate the OPT mode by repeatedly pressing S [SOURCE] (2) on the SoundZbar.
- The status LED for the OPT mode (8) is constantly lit.
- Start and control audio playback using the controls of the terminal device.
11. Sound modes
You can choose between three different modes for the playback of your audio signals:
Gaming mode activates more treble and bass for a better gaming experience.
Music mode activates a linear frequency response for powerful playback of a variety of music tracks.
Cinema mode activates an effect similar to surround sound, and brings out every sound detail.
- Press [MODE] (3) repeatedly to select the various sound modes.
- The Gaming mode status LED (11) is constantly lit if Gaming mode was selected.
- The Music mode status LED (12) is constantly lit if Music mode was selected.
- The Cinema mode status LED (13) is constantly lit if Cinema mode was selected.
12. Bass control
- Turn the rotary control (2) on the subwoofer to increase or reduce the bass.
13. Volume control
- Press [VOLUME] +/- (7) on the SoundZbar to increase or reduce the volume.
- Press [ ] (6) to mute the SoundZbar.
14. Using the SoundZbar in battery mode

Warning -Battery
- Use only the included power supply unit for charging.
- As a rule, do not use charging devices that are defective and do not try to repair them yourself.
- Avoid storing, charging or using batteries in extreme temperatures.
-
When stored over a long period of time, batteries should be charged regularly (at least every three months).
-
The SoundZbar has a rechargeable battery. The battery must be fully charged before using the device for the first time.
- Ensure that the SoundZbar is switched off before charging.
- Begin charging by connecting the included power supply unit to the mains lead (4) and to a p o w socket.
- The Charging status LED (3) is constantly lit gree during charging.
- It can take up to 4 hours to fully charge the battery.
- When the battery is fully charged, the Charging LED (3) will go out.
- Disconnect all cable and mains connections after

Hinweis - Charging/battery capacity
- It takes about 3–4 hours to fully charge the
- If the battery charge level is less than 10%, the Charging status LED (3) flashes red quickly. You will only receive this information if the SoundZbar is
15. Care and Maintenance
Only clean this product with a slightly damp, lint-free cloth and do not use aggressive cleaning agents.
16. Warranty Disclaimer
Hama GmbH & Co KG assumes no liability and provides no warranty for damage resulting from improper installation/mounting, improper use of the product or from failure to observe the operating instructions and/or safety notes.
17. Service and Support
Please contact Hama Product Consulting if you have any questions about this product. Hotline: +49 9091 502-115 (German/English) Further support information can be found here: www.hama.com
18. Recycling Information
Note on environmental protection:
After the implementation of the European Directive 2012/19/EU and 2006/66/EU in the national legal system, the following applies: Electric and electronic devices as wellas batteries must not be disposed of with household waste. Consumers are obliged by law to return electrical and electronic devices as well as batteries at the end of their service lives to the public collecting points set up for this purpose or point of sale. Details to this are defined by the national law of the respective country. This symbol on the product, the instruction manual or the package indicates that a product is subject to these regulations. By recycling, reusing the materials or other forms of utilising old devices/Batteries, you are making an important contribution to protecting our environment. use.
19. Declaration of Conformity
CE Hereby, Hama GmbH & Co KG declares that the radio equipment type [00113776] is in compliance with Directive 2014/53/EU. The full text of the EU declaration of conformity is available at the following internet address: on www.hama.com ->00113776-> Downloads.
| Frequency band(s) | 2.40GHz ~ 2.48GHz |
| Maximum radio-frequency power transmitted | 5mW EIRP |
- Technical Data
| Bluetooth® technology | Bluetooth® v2.1 + E D R |
| Supported profiles A2DP, A V R C P | |
| Frequency for Bluetooth® transfers 2.40GHz ~ 2 .48GHz | |
| Bluetooth® transfer power Max. 10 dBm | |
| Bluetooth® range 10 m | |
| Maximum number of paired devices 1 |
Performance
| Sound system 2.1 | |
| Frequency | SoundZbar frequency range: 160–20000 Hz |
| Subwoofer frequency range: 20–160 Hz | |
| Max. music output | Total 100 W |
| SoundZbar 40 W | |
| Subwoofer 60 W | |
| Impedance | 6 Ω |
| Distortion (THD) | ≤ 0.5% (1K, 1W) |
| Connections | 3.5-mm stereo plug AUX input |
| Optical input | |
| Power input | |
| Power supply | 230 V ~ 50 Hz 0.4 A |
SoundZbar battery
| Battery type | 7.4 V Li-ion min. 2550 mAh / 18.87 Wh |
| Charging time | ~3 -4h |
| Operating time | Via Bluetooth ~7 hVia AUX ~12 h(depending on volume and audio content) |
Dimensions (W x D x H) / W e i g h t
| Weight | Total 5.1 kg |
| SoundZbar 1.3kg | |
| Subwoofer 3.8kg | |
| Dimensions | SoundZbar 485 x68x72mm |
| Subwoofer 250 x 270 x 250 mm |
www.hama.com >00113776->Downloads.
www.hama.com ->00113776-> Downloads.
9. Verbinding via AUX-IN
www.hama.com ->00113776-> Downloads.
www.hama.com ->00113776-> Downloads.
86652 Monheim / Germany
www.hama.com
The Bluetooth® word mark and logos are registered trademarks owned by Bluetooth SIG, Inc. and any use of such marks by Hama GmbH & Co KG is under license. Other trademarks and trade names are those of their respective owners.
All listed brands are trademarks of the corresponding companies. Errors and omissions excepted, and subject to technical changes. Our general terms of delivery and payment are applied.