
SX300 - VCR KeepOut - Free user manual and instructions
Find the device manual for free SX300 KeepOut in PDF.
| Product type | HD video capture box |
| Brand | KeepOut |
| Model | SX300 |
| Dimensions | 140 x 70 x 23 mm |
| Weight | 115 g |
| Power supply | USB DC 5V / 2A |
| Max recording resolution | 1920 x 1080 (60p) |
| Video inputs | HDMI, Component (YPrPb), Composite |
| Video output | HDMI (pass-through) |
| Audio inputs | HDMI, RCA L/R, 3.5mm Microphone |
| Audio output | HDMI, 3.5mm Stereo |
| Storage | USB key (up to 2 TB), SD card (up to 64 GB) |
| Recording format | MP4 (H.264 video, AAC stereo audio) |
| Included software | ArcSoft ShowBiz (editing), driver for OBS streaming |
| Console compatibility | Wii U, Xbox 360, Xbox One, PS3, PS4 (HDCP disabled for PS4) |
| Compliance | EMC 2014/30/EU, LVD 2014/35/EU, RoHS 2011/65/EU |
| Maintenance | Clean with a soft, dry cloth |
| Safety | Do not open, avoid moisture and liquids |
| Spare parts | No user-serviceable parts |
| Repairability | Contact KeepOut technical support |
| Origin | Made in China |
Frequently Asked Questions - SX300 KeepOut
2015
/:7
/:31
/:11
/:00
/:00
/:0
Copy it to a USB key or SD card, plug it into the device and turn it on. The time will be updated.
User questions about SX300 KeepOut
0 question about this device. Answer the ones you know or ask your own.
Ask a new question about this device
Download the instructions for your VCR in PDF format for free! Find your manual SX300 - KeepOut and take your electronic device back in hand. On this page are published all the documents necessary for the use of your device. SX300 by KeepOut.
USER MANUAL SX300 KeepOut
ВЪВЕДЕНИЕ
| Location to capture | USB 2.0 Host, SD Card |
| Video input | Digital: HDMI |
| Analog: Component Video, Composite Video | |
| Audio input | Digital: HDMI |
| Analog: RCA L/R, 3.5mm MicroPhone In | |
| Note: Microphone without pass through for HDMI input | |
| Video output | Digital: HDMI (Pass-through from HDMI or Component or Composite Input) |
| Audio output | Digital: HDMI (Pass-through from HDMI or RCA L/R Input) |
| Analog: 3.5mm Stereo (Pass-through from HDMI or RCA L/R Input) |
Connectors applicable to video consoles
| HDMI | WiiU, Xbox 360, Xbox One, PS4 |
| Componentes | WiiU, Xbox 360, PS3 |
| Compuesto | WiiU, Xbox 360, PS3 |
Note: HDCP contents cannot be recorded

Extra Hardware
| Coding | Hardware H.264 encoder |
| User Interface | Capture button |
| Status LED indicator | |
| Dimensions | 140(L) × 70(W) × 23(H) mm |
| Weight | 115g |
Standards
| Storage | USB flash drive, Portable hard drive, SD card |
| Max Capacity: USB / 2T, SD / 64G | |
| Note: exFAT format is not compatible | |
| Resolution | Input:720 x 480 (60p), 720 x 576 (50p), 1280 x 720p (50p), 1280 x 720p(60p), 1920 x 1080 (50i), 1920 x 1080 (60i), 1920 x 1080 (24p), 1920 x 1080 (25p), 1920 x 1080 (30p), 1920 x 1080 (50p), 1920 x 1080 (60p) |
| Capture:720 x 480 (60p), 720 x 576 (50p), 1280 x 720p (50p), 1280 x 720p(60p), 1920 x 1080 (50i), 1920 x 1080 (60i), 1920 x 720p (24p), 1920 x 1080 (25p), 1920 x 1080 (30p), 1920 x 1080 (25p), 1920 x 1080 (30p) |
| Note: Upscaling is not supported | |
| Recording format | Video: MP4, Audio: AAC Stereo |
| Quality Recording | Max: 18Mbps@1080P 30fps |
| Recorded file | Max: 2GB / Per File, With RTC (Real Time Clock) |
| Recording Data | Max: 140MB / Minute, 8.4GB / Hour |
| Power | USB DC 5V / 2A |
Video capture application
| Software | Arcsoft Showbiz |
| Video Editing | Timeline / Storyboard edit, Split / Divide Scenes, Multi Trim Scenes ... |
| Video Export | Upload to YouTube |
| Portable Device: iPod, iPhone, iPod Touch, Apple TV, PSP, PS3, Xbox | |
| File: MPEG 1 / 2 / 4, WMV HD, Quicktime (MOV) ... | |
| Operating System Requirements | Windows 8 (32 / 64 bit), Windows 7 (32 / 64 bit), Windows Vista (32 / 64 bit) |
| CPU Requirements | Intel Core 2 Duo 2.8GHz, AMD Athlon 64X2 Dual Core 3.0GHz |
| Memory Requirements | 4 GB RAM |
| Graphic Card Requirements | VGA card with support for DirectX 10.0c or above |
СЪДЪРЖАНИЕ НА ПАКЕТА


natural_image
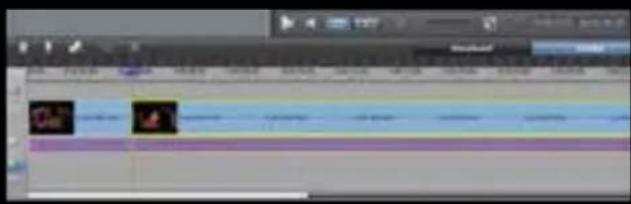
Screenshot of a video editing software interface showing timeline, preview window, and three small image thumbnails below (no readable text or symbols)
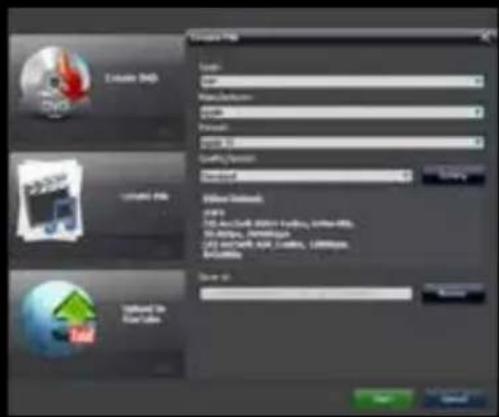
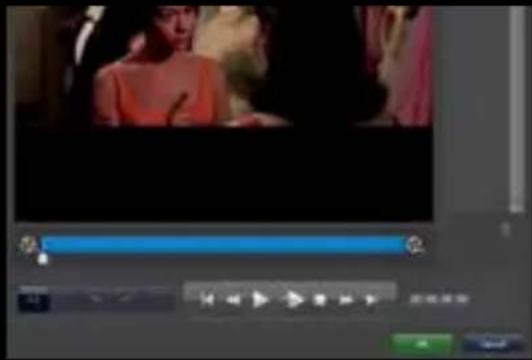
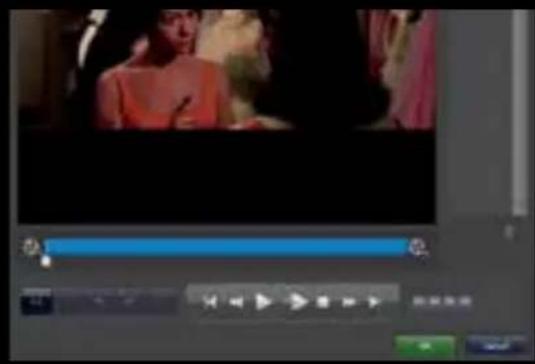
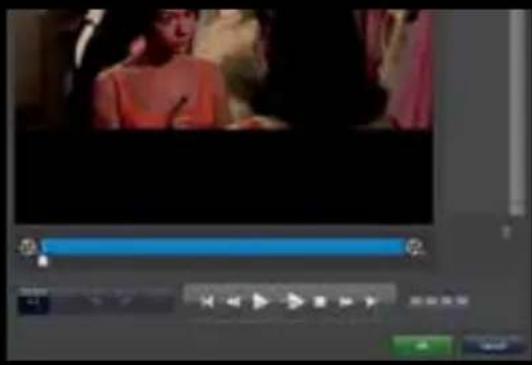
- You can combine two or more video in one, you just have to drag them into Showbiz.


И накрая, кликнете ОК.
| Location to capture | USB 2.0 Host, SD Card |
| Video input | Digital: HDMI |
| Analog: Component Video, Composite Video | |
| Audio input | Digital: HDMI |
| Analog: RCA L/R, 3.5mm MicroPhone In | |
| Note: Microphone without pass through for HDMI input | |
| Video output | Digital: HDMI (Pass-through from HDMI or Component or Composite Input) |
| Audio output | Digital: HDMI (Pass-through from HDMI or RCA L/R Input) |
| Analog: 3.5mm Stereo (Pass-through from HDMI or RCA L/R Input) |
Connectors applicable to video consoles
| HDMI | WiiU, Xbox 360, Xbox One, PS4 |
| Componentes | WiiU, Xbox 360, PS3 |
| Compuesto | WiiU, Xbox 360, PS3 |
Note: HDCP contents cannot be recorded
Extra Hardware
| Coding | Hardware H.264 encoder |
| User Interface | Capture button |
| Status LED indicator | |
| Dimensions | 140(L) × 70(W) × 23(H) mm |
| Weight | 115g |
Standards
| Storage | USB flash drive, Portable hard drive, SD card |
| Max Capacity: USB / 2T, SD / 64G | |
| Note: exFAT format is not compatible | |
| Resolution | Input:720 x 480 (60p), 720 x 576 (50p), 1280 x 720p (50p), 1280 x 720p(60p), 1920 x 1080 (50i), 1920 x 1080 (60i), 1920 x 1080 (24p), 1920 x 1080 (25p), 1920 x 1080 (30p), 1920 x 1080 (50p), 1920 x 1080 (60p) |
| Capture:720 x 480 (60p), 720 x 576 (50p), 1280 x 720p (50p), 1280 x 720p(60p), 1920 x 1080 (50i), 1920 x 1080 (60i), 1920 x 720p (24p), 1920 x 1080 (25p), 1920 x 1080 (30p), 1920 x 1080 (25p), 1920 x 1080 (30p) |
| Note: Upscaling is not supported | |
| Recording format | Video: MP4, Audio: AAC Stereo |
| Quality Recording | Max: 18Mbps@1080P 30fps |
| Recorded file | Max: 2GB / Per File, With RTC (Real Time Clock) |
| Recording Data | Max: 140MB / Minute, 8.4GB / Hour |
| Power | USB DC 5V / 2A |
Video capture application
| Software | Arcsoft Showbiz |
| Video Editing | Timeline / Storyboard edit, Split / Divide Scenes, Multi Trim Scenes ... |
| Video Export | Upload to YouTube |
| Portable Device: iPod, iPhone, iPod Touch, Apple TV, PSP, PS3, Xbox | |
| File: MPEG 1 / 2 / 4, WMV HD, Quicktime (MOV) ... | |
| Operating System Requirements | Windows 8 (32 / 64 bit), Windows 7 (32 / 64 bit), Windows Vista (32 / 64 bit) |
| CPU Requirements | Intel Core 2 Duo 2.8GHz, AMD Athlon 64X2 Dual Core 3.0GHz |
| Memory Requirements | 4 GB RAM |
| Graphic Card Requirements | VGA card with support for DirectX 10.0c or above |
OBSAH BALENÍ


natural_image
Screenshot of a video editing software interface showing a timeline with multiple video thumbnails (no readable text or symbols)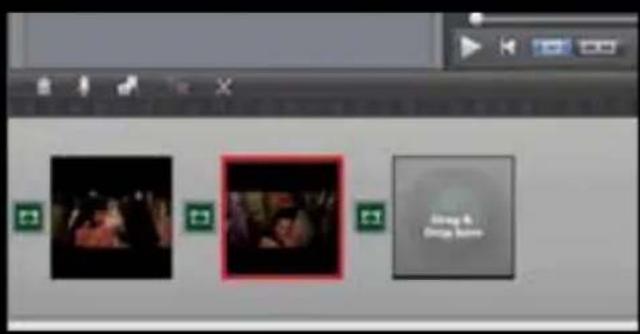

CS
IT9910 Grabber Device (HD)

| Location to capture | USB 2.0 Host, SD Card |
| Video input | Digital: HDMI |
| Analog: Component Video, Composite Video | |
| Audio input | Digital: HDMI |
| Analog: RCA L/R, 3.5mm MicroPhone In | |
| Note: Microphone without pass through for HDMI input | |
| Video output | Digital: HDMI (Pass-through from HDMI or Component or Composite Input) |
| Audio output | Digital: HDMI (Pass-through from HDMI or RCA L/R Input) |
| Analog: 3.5mm Stereo (Pass-through from HDMI or RCA L/R Input) |
Connectors applicable to video consoles
| HDMI | WiiU, Xbox 360, Xbox One, PS4 |
| Componentes | WiiU, Xbox 360, PS3 |
| Compuesto | WiiU, Xbox 360, PS3 |
Note: HDCP contents cannot be recorded

Extra Hardware
| Coding | Hardware H.264 encoder |
| User Interface | Capture button |
| Status LED indicator | |
| Dimensions | 140(L) × 70(W) × 23(H) mm |
| Weight | 115g |
Standards
| Storage | USB flash drive, Portable hard drive, SD card |
| Max Capacity: USB / 2T, SD / 64G | |
| Note: exFAT format is not compatible | |
| Resolution | Input:720 x 480 (60p), 720 x 576 (50p), 1280 x 720p (50p), 1280 x 720p(60p), 1920 x 1080 (50i), 1920 x 1080 (60i), 1920 x 1080 (24p), 1920 x 1080 (25p), 1920 x 1080 (30p), 1920 x 1080 (50p), 1920 x 1080 (60p) |
| Capture:720 x 480 (60p), 720 x 576 (50p), 1280 x 720p (50p), 1280 x 720p(60p), 1920 x 1080 (50i), 1920 x 1080 (60i), 1920 x 720p (24p), 1920 x 1080 (25p), 1920 x 1080 (30p), 1920 x 1080 (25p), 1920 x 1080 (30p) |
| Note: Upscaling is not supported | |
| Recording format | Video: MP4, Audio: AAC Stereo |
| Quality Recording | Max: 18Mbps@1080P 30fps |
| Recorded file | Max: 2GB / Per File, With RTC (Real Time Clock) |
| Recording Data | Max: 140MB / Minute, 8.4GB / Hour |
| Power | USB DC 5V / 2A |
Video capture application
| Software | Arcsoft Showbiz |
| Video Editing | Timeline / Storyboard edit, Split / Divide Scenes, Multi Trim Scenes ... |
| Video Export | Upload to YouTube |
| Portable Device: iPod, iPhone, iPod Touch, Apple TV, PSP, PS3, Xbox | |
| File: MPEG 1 / 2 / 4, WMV HD, Quicktime (MOV) ... | |
| Operating System Requirements | Windows 8 (32 / 64 bit), Windows 7 (32 / 64 bit), Windows Vista (32 / 64 bit) |
| CPU Requirements | Intel Core 2 Duo 2.8GHz, AMD Athlon 64X2 Dual Core 3.0GHz |
| Memory Requirements | 4 GB RAM |
| Graphic Card Requirements | VGA card with support for DirectX 10.0c or above |
PACKUNGSINHALT


DE
Installation PC-Treiber, um Streaming zu tun


| Location to capture | USB 2.0 Host, SD Card |
| Video input | Digital: HDMI |
| Analog: Component Video, Composite Video | |
| Audio input | Digital: HDMI |
| Analog: RCA L/R, 3.5mm MicroPhone In | |
| Note: Microphone without pass through for HDMI input | |
| Video output | Digital: HDMI (Pass-through from HDMI or Component or Composite Input) |
| Audio output | Digital: HDMI (Pass-through from HDMI or RCA L/R Input) |
| Analog: 3.5mm Stereo (Pass-through from HDMI or RCA L/R Input) |
Connectors applicable to video consoles
| HDMI | WiiU, Xbox 360, Xbox One, PS4 |
| Componentes | WiiU, Xbox 360, PS3 |
| Compuesto | WiiU, Xbox 360, PS3 |
Note: HDCP contents cannot be recorded
Extra Hardware
| Coding | Hardware H.264 encoder |
| User Interface | Capture button |
| Status LED indicator | |
| Dimensions | 140(L) × 70(W) × 23(H) mm |
| Weight | 115g |
Standards
| Storage | USB flash drive, Portable hard drive, SD card |
| Max Capacity: USB / 2T, SD / 64G | |
| Note: exFAT format is not compatible | |
| Resolution | Input:720 x 480 (60p), 720 x 576 (50p), 1280 x 720p (50p), 1280 x 720p(60p), 1920 x 1080 (50i), 1920 x 1080 (60i), 1920 x 1080 (24p), 1920 x 1080 (25p), 1920 x 1080 (30p), 1920 x 1080 (50p), 1920 x 1080 (60p) |
| Capture:720 x 480 (60p), 720 x 576 (50p), 1280 x 720p (50p), 1280 x 720p(60p), 1920 x 1080 (50i), 1920 x 1080 (60i), 1920 x 720p (24p), 1920 x 1080 (25p), 1920 x 1080 (30p), 1920 x 1080 (25p), 1920 x 1080 (30p) |
| Note: Upscaling is not supported | |
| Recording format | Video: MP4, Audio: AAC Stereo |
| Quality Recording | Max: 18Mbps@1080P 30fps |
| Recorded file | Max: 2GB / Per File, With RTC (Real Time Clock) |
| Recording Data | Max: 140MB / Minute, 8.4GB / Hour |
| Power | USB DC 5V / 2A |
Video capture application
| Software | Arcsoft Showbiz |
| Video Editing | Timeline / Storyboard edit, Split / Divide Scenes, Multi Trim Scenes ... |
| Video Export | Upload to YouTube |
| Portable Device: iPod, iPhone, iPod Touch, Apple TV, PSP, PS3, Xbox | |
| File: MPEG 1 / 2 / 4, WMV HD, Quicktime (MOV) ... | |
| Operating System Requirements | Windows 8 (32 / 64 bit), Windows 7 (32 / 64 bit), Windows Vista (32 / 64 bit) |
| CPU Requirements | Intel Core 2 Duo 2.8GHz, AMD Athlon 64X2 Dual Core 3.0GHz |
| Memory Requirements | 4 GB RAM |
| Graphic Card Requirements | VGA card with support for DirectX 10.0c or above |


- PWR - / 2A ισχύς 5VDC
εισόδου HDMI - 2 HDMI IN
σύνδεση YPBPR component video (DVD player, PS3 κλπ)

flowchart
graph TD
    A["Home Device"] --> B["LED Lighting"]
    B --> C["Audio System"]
    C --> D["Monitor"]
    D --> E["Display"]
    E --> F["Smart Speaker"]
    F --> G["Audio Receiver"]
    G --> H["Analog Display"]
    H --> I["Computer Monitor"]
    style A fill:#f9f,stroke:#333
    style I fill:#bbf,stroke:#333


EL


Thank you for choosing Keep Out's HD Gaming Video capture SX300.
PRODUCT DESCRIPTION
The portable solution for recording and sharing
The new HD gamer portable capture SX300 is the ultimate solution to record your best games in HD quality up to 1080p. Designed specifically for gamers and youtubers, its pocket size allows you to take it anywhere, with its USB and SD inputs you can connect a USB stick or SD card to capture your games without PC and later you can easily edit and upload them to the internet . The SX300 is compatible with different resolutions and includes HDMI input and component video for different video consoles. Its microphone connection will give you the possibility to comment your games in real time and at the same time be recorded. It includes free video editing software and streaming software with which you can edit or share your videos directly.
Discover the best tool to record your games!!!
TECHNICAL SPECIFIATIONS
Connections
| Location to capture | USB 2.0 Host, SD Card |
| Video input | Digital: HDMI |
| Analog: Component Video, Composite Video | |
| Audio input | Digital: HDMI |
| Analog: RCA L/R, 3.5mm MicroPhone In | |
| Note: Microphone without pass through for HDMI input | |
| Video output | Digital: HDMI (Pass-through from HDMI or Component or Composite Input) |
| Audio output | Digital: HDMI (Pass-through from HDMI or RCA L/R Input) |
| Analog: 3.5mm Stereo (Pass-through from HDMI or RCA L/R Input) |
Connectors applicable to video consoles
| HDMI | WiiU, Xbox 360, Xbox One, PS4 |
| Componentes | WiiU, Xbox 360, PS3 |
| Compuesto | WiiU, Xbox 360, PS3 |
Note: HDCP contents cannot be recorded
Extra Hardware
| Coding | Hardware H.264 encoder |
| User Interface | Capture button |
| Status LED indicator | |
| Dimensions | 140(L) × 70(W) × 23(H) mm |
| Weight | 115g |
Standards
| Storage | USB flash drive, Portable hard drive, SD card |
| Max Capacity: USB / 2T, SD / 64G | |
| Note: exFAT format is not compatible | |
| Resolution | Input:720 x 480 (60p), 720 x 576 (50p), 1280 x 720p (50p), 1280 x 720p(60p), 1920 x 1080 (50i), 1920 x 1080 (60i), 1920 x 1080 (24p), 1920 x 1080 (25p), 1920 x 1080 (30p), 1920 x 1080 (50p), 1920 x 1080 (60p) |
| Capture:720 x 480 (60p), 720 x 576 (50p), 1280 x 720p (50p), 1280 x 720p(60p), 1920 x 1080 (50i), 1920 x 1080 (60i), 1920 x 720p (24p), 1920 x 1080 (25p), 1920 x 1080 (30p), 1920 x 1080 (25p), 1920 x 1080 (30p) |
| Note: Upscaling is not supported | |
| Recording format | Video: MP4, Audio: AAC Stereo |
| Quality Recording | Max: 18Mbps@1080P 30fps |
| Recorded file | Max: 2GB / Per File, With RTC (Real Time Clock) |
| Recording Data | Max: 140MB / Minute, 8.4GB / Hour |
| Power | USB DC 5V / 2A |

Video capture application
| Software | Arcsoft Showbiz |
| Video Editing | Timeline / Storyboard edit, Split / Divide Scenes, Multi Trim Scenes ... |
| Video Export | Upload to YouTube |
| Portable Device: iPod, iPhone, iPod Touch, Apple TV, PSP, PS3, Xbox | |
| File: MPEG 1 / 2 / 4, WMV HD, Quicktime (MOV) ... | |
| Operating System Requirements | Windows 8 (32 / 64 bit), Windows 7 (32 / 64 bit), Windows Vista (32 / 64 bit) |
| CPU Requirements | Intel Core 2 Duo 2.8GHz, AMD Athlon 64X2 Dual Core 3.0GHz |
| Memory Requirements | 4 GB RAM |
| Graphic Card Requirements | VGA card with support for DirectX 10.0c or above |
PACKAGE CONTENTS
· SX300
- Remote Control
· Quick installation guide in multiple languages
· Installation CD
· AV adapter cable,
- USB power supply
- Usb cable
Note: Make sure that your packaging contains the items described above. If any item is missing or damaged, please contact your dealer.
Note: Make sure that your packaging contains the items described above. If any item is missing or damaged, please contact your dealer.
EN
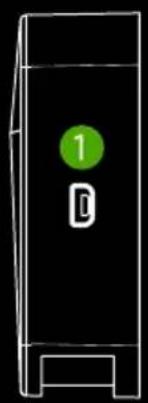
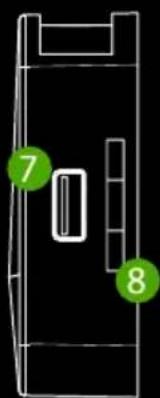
PARTS DESCRIPTION
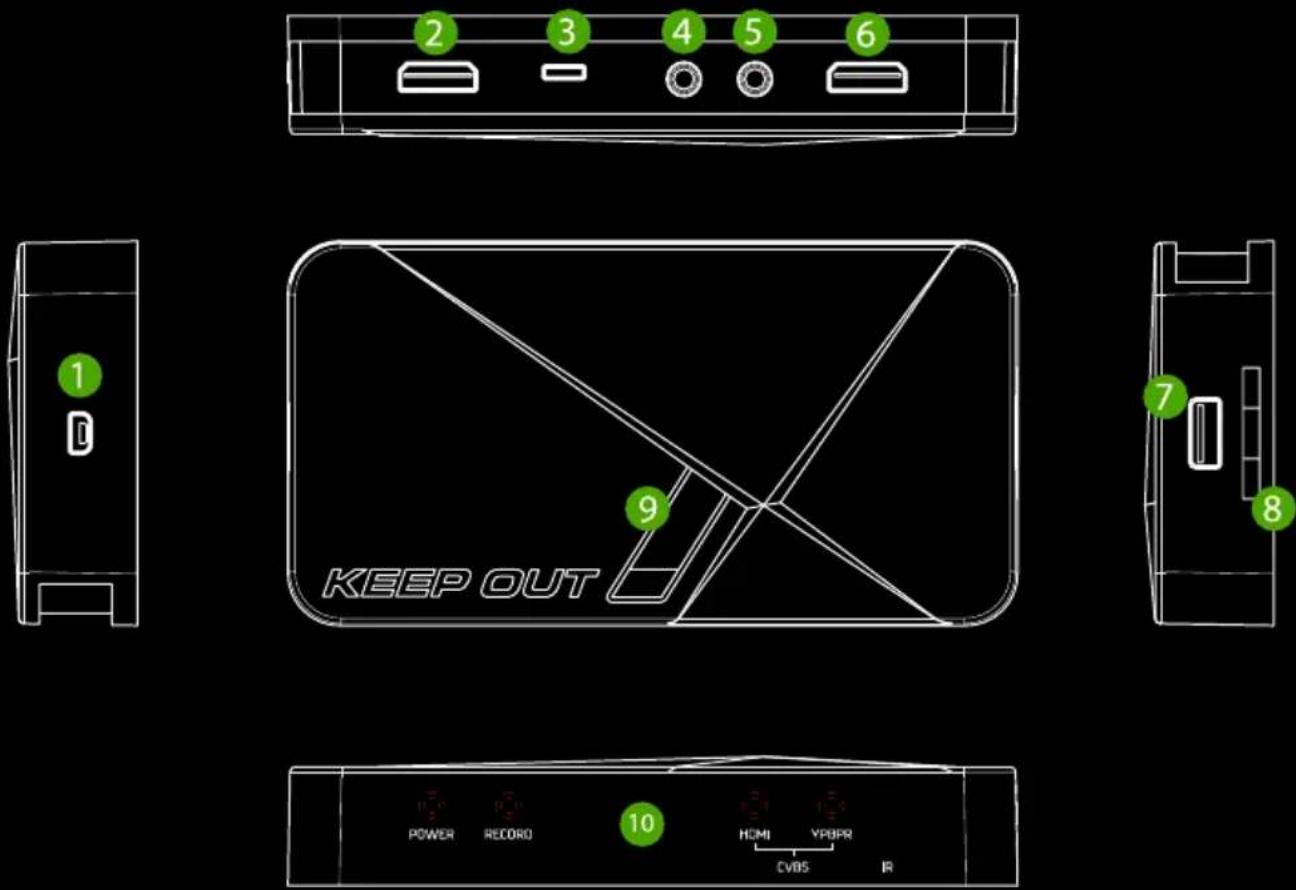

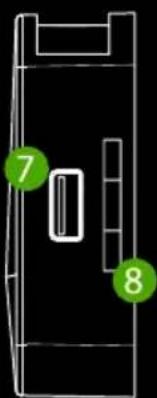
- PWR - 5VDC / 2A power input
- HDMI IN - HDMI input
- AV IN – Component input, Ypbpr or composite video input via adapter cable
- MIC - To connect a microphone and record voice comments when playing the game.
- LINEA OUT – Audio output.
- HDMI OUT- HDMI output
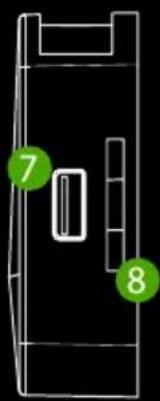
- HOST USB – USB input to connect USB stick to hard drive
- SD -SD card input
- Record Button - Press to record / stop recording
- Status Indicator LED - The indicator shows the operating status
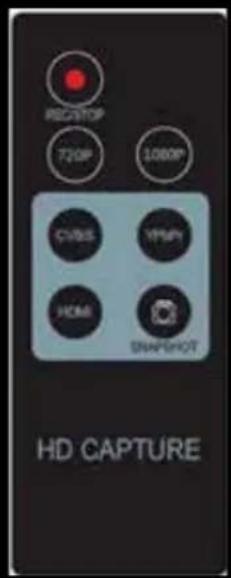
REMOTE CONTROL
REC / STOP button - Start and stop recording.
720P - Changes the recording resolution to 720P.
1080P - Changes the recording resolution to 1080P.
CVBS / YPbPr / HDMI - Selects video input
SNAPSHOT - Capture images.
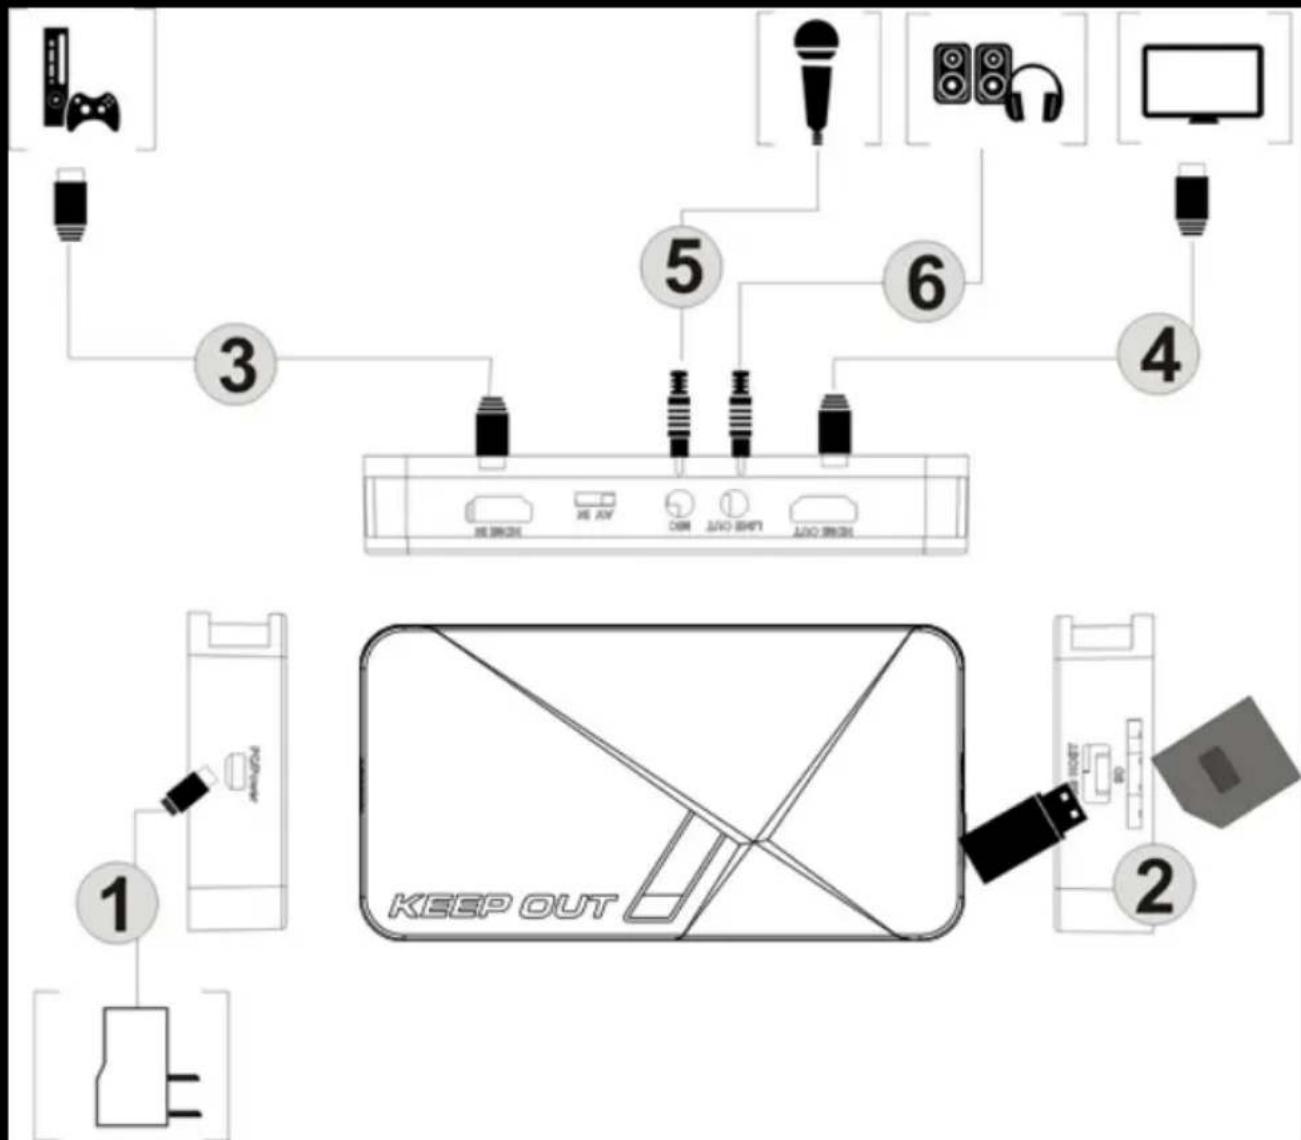
CONNECTIONS
This video capture has 3 input modes: HDMI, component, composite. And it will automatically recognize the video input source, there is no need to manually change the source. Never connect 2 or 3 source at the same time.
EN
HDMI CONNECTION
flowchart
graph TD
    A["1: Gaming Device"] --> B["2: USB jack"]
    B --> C["3: USB adapter"]
    C --> D["4: USB microphone"]
    D --> E["5: USB switch"]
    E --> F["6: Audio jack"]
    F --> G["7: USB shield"]
    G --> H["8: USB drive"]
    H --> I["9: USB output"]
    I --> J["10: USB device with CD/USB port"]

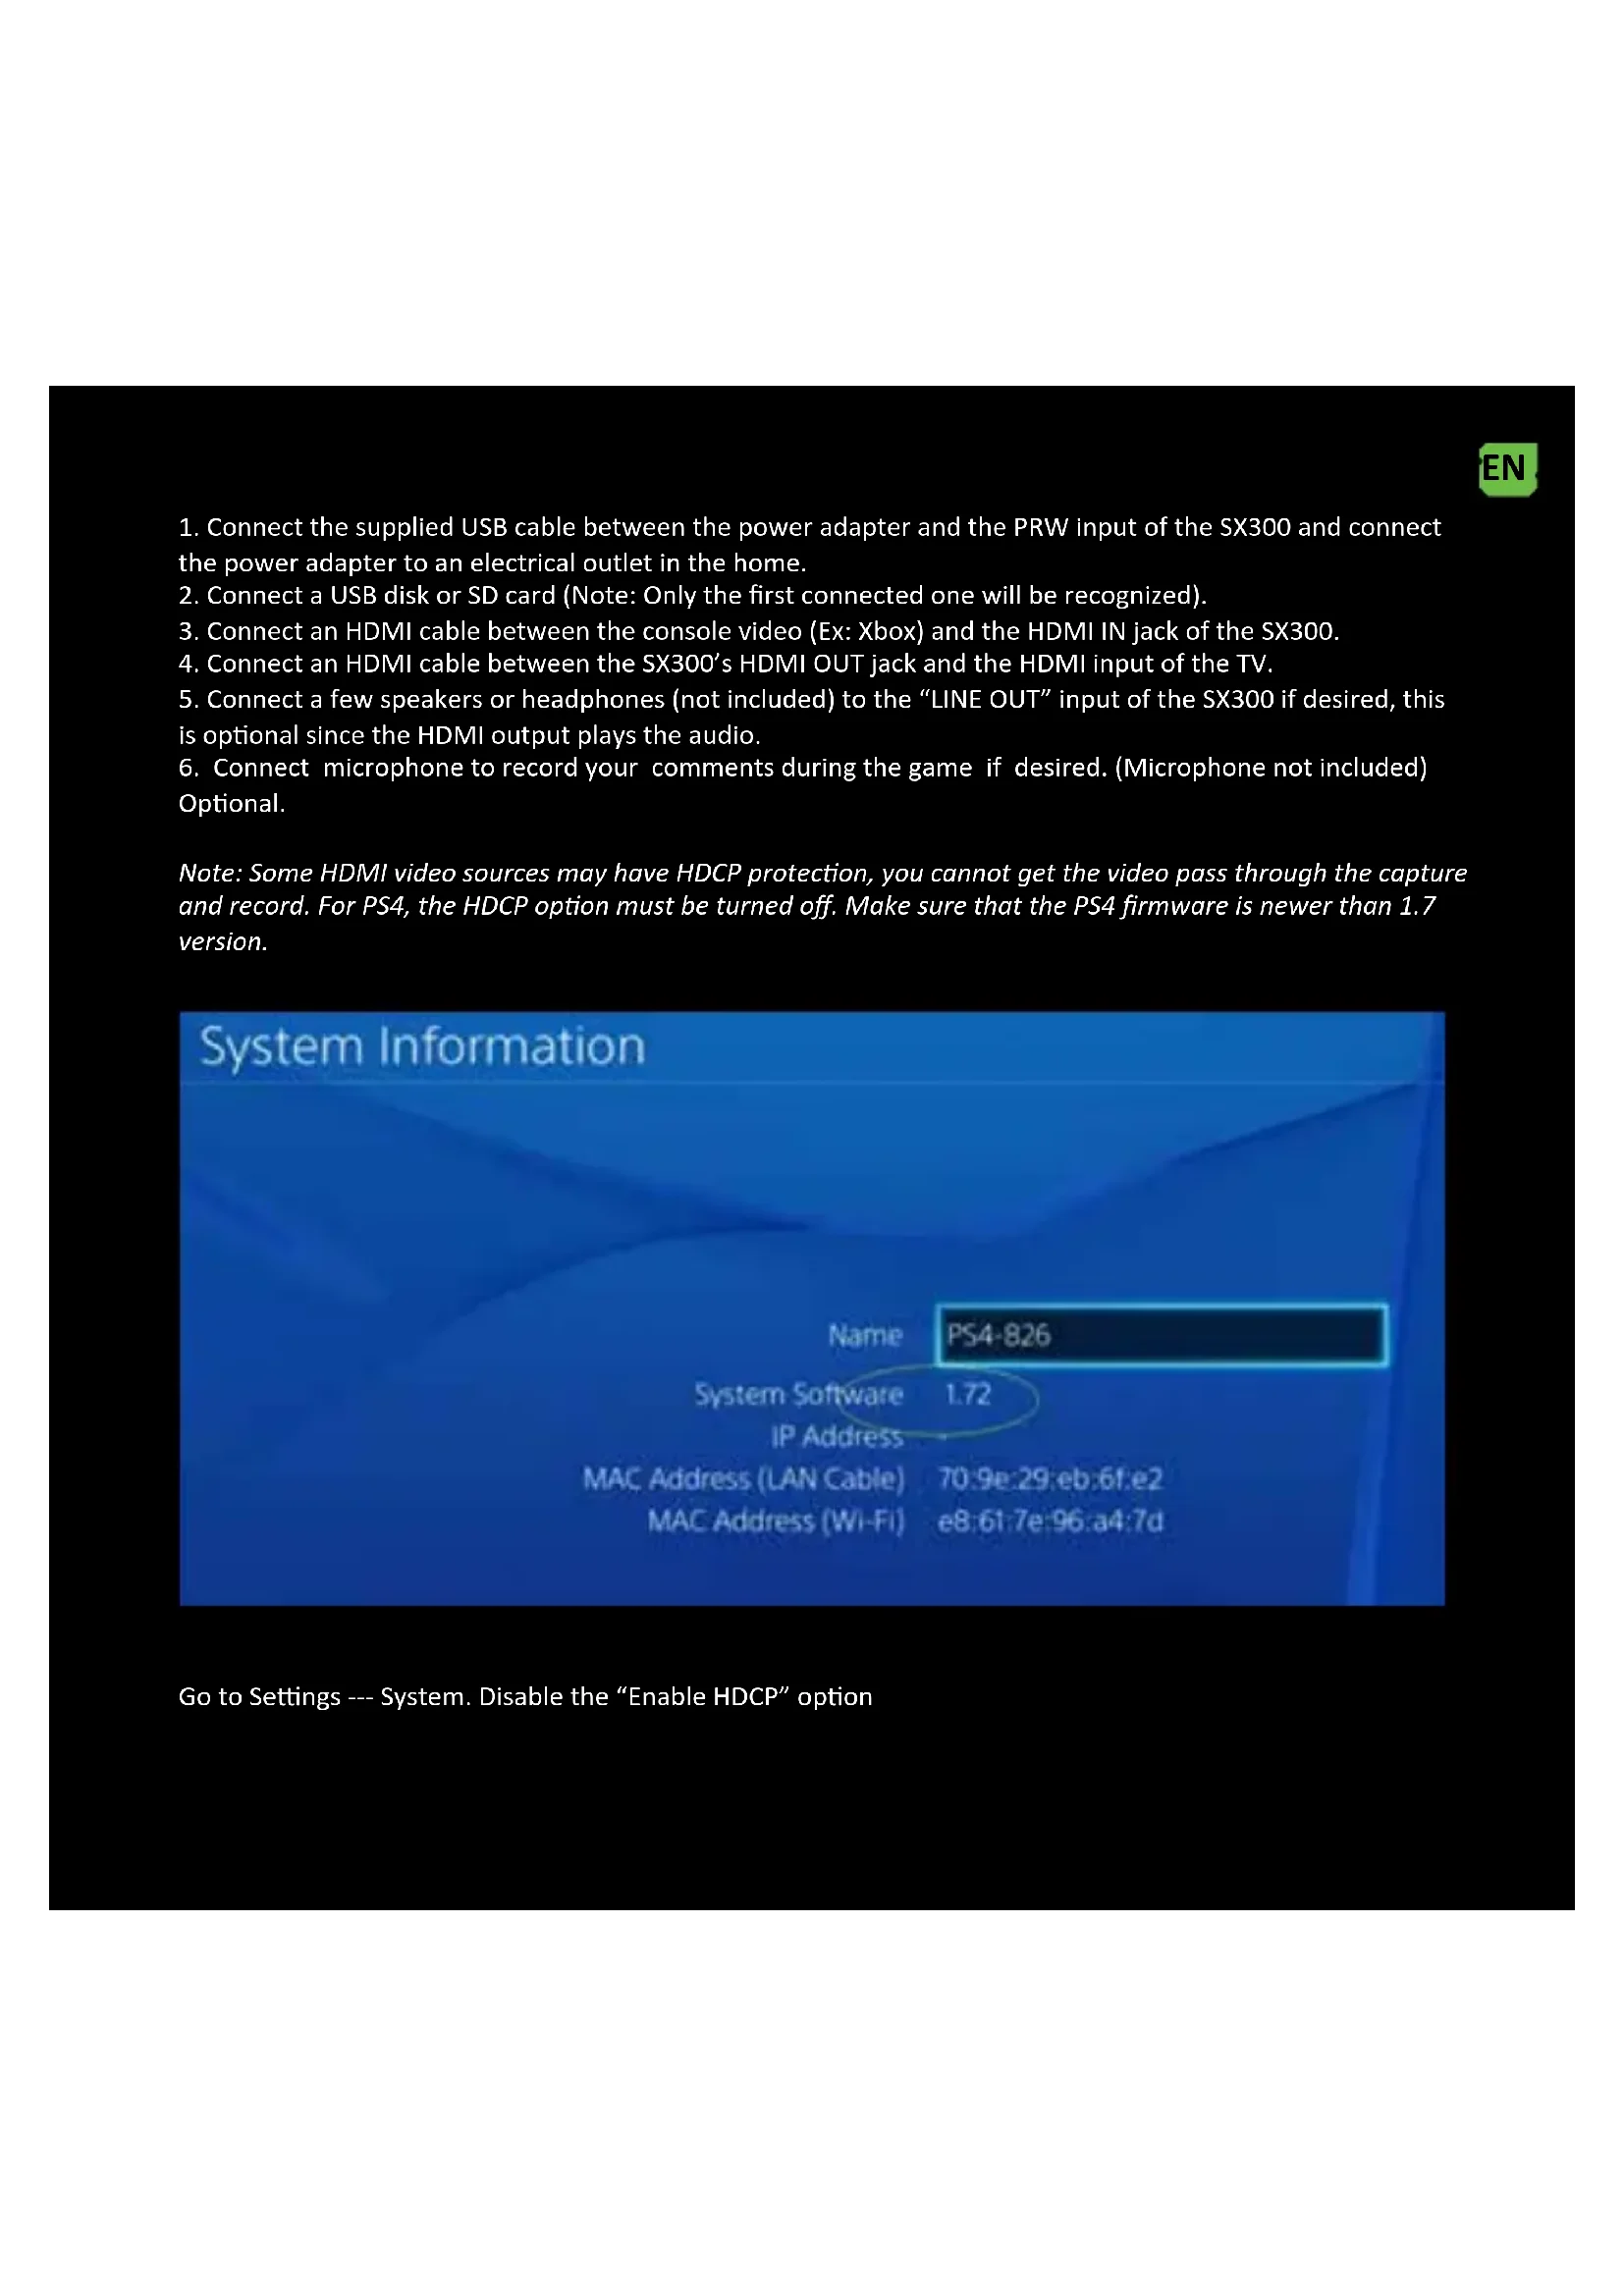
- Connect the supplied USB cable between the power adapter and the PRW input of the SX300 and connect the power adapter to an electrical outlet in the home.
- Connect a USB disk or SD card (Note: Only the first connected one will be recognized).
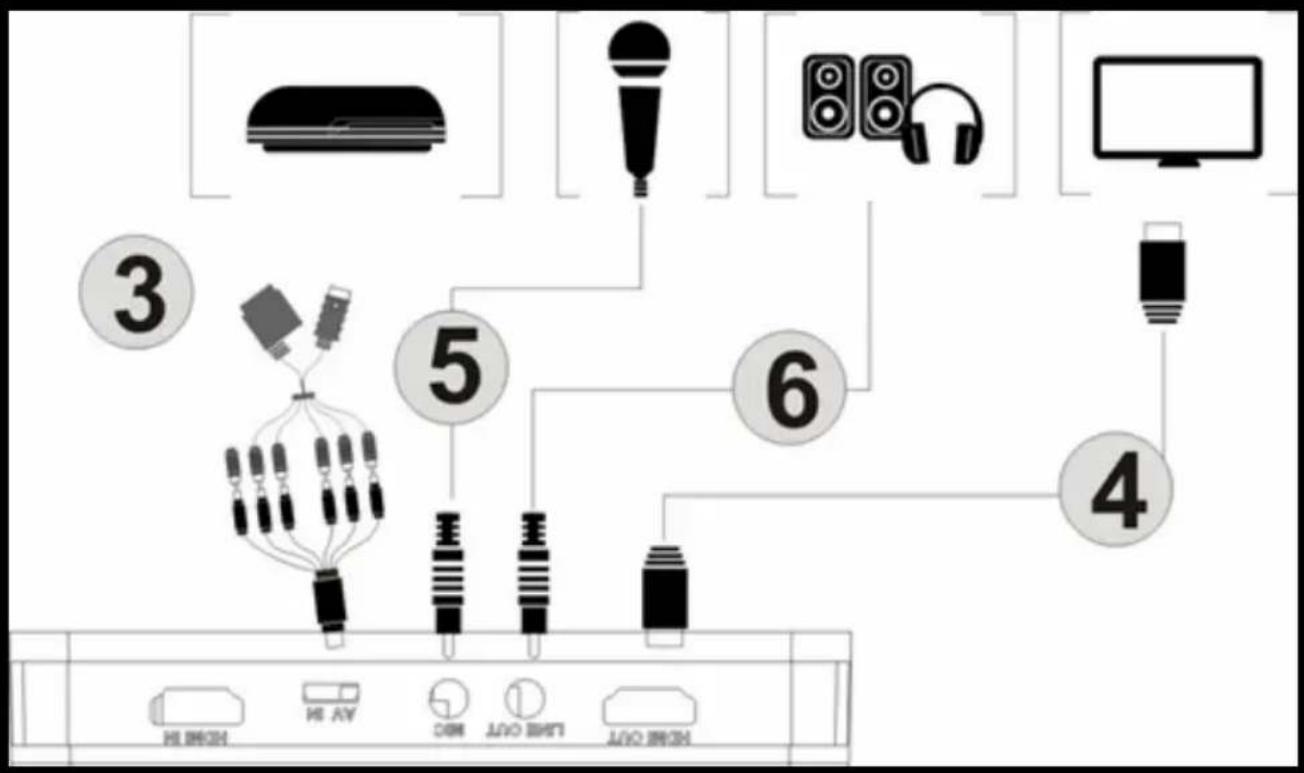
- Connect an HDMI cable between the console video (Ex: Xbox) and the HDMI IN jack of the SX300.
- Connect an HDMI cable between the SX300's HDMI OUT jack and the HDMI input of the TV.
- Connect a few speakers or headphones (not included) to the "LINE OUT" input of the SX300 if desired, this is optional since the HDMI output plays the audio.
- Connect microphone to record your comments during the game if desired. (Microphone not included) Optional.
Note: Some HDMI video sources may have HDCP protection, you cannot get the video pass through the capture and record. For PS4, the HDCP option must be turned off. Make sure that the PS4 firmware is newer than 1.7 version.
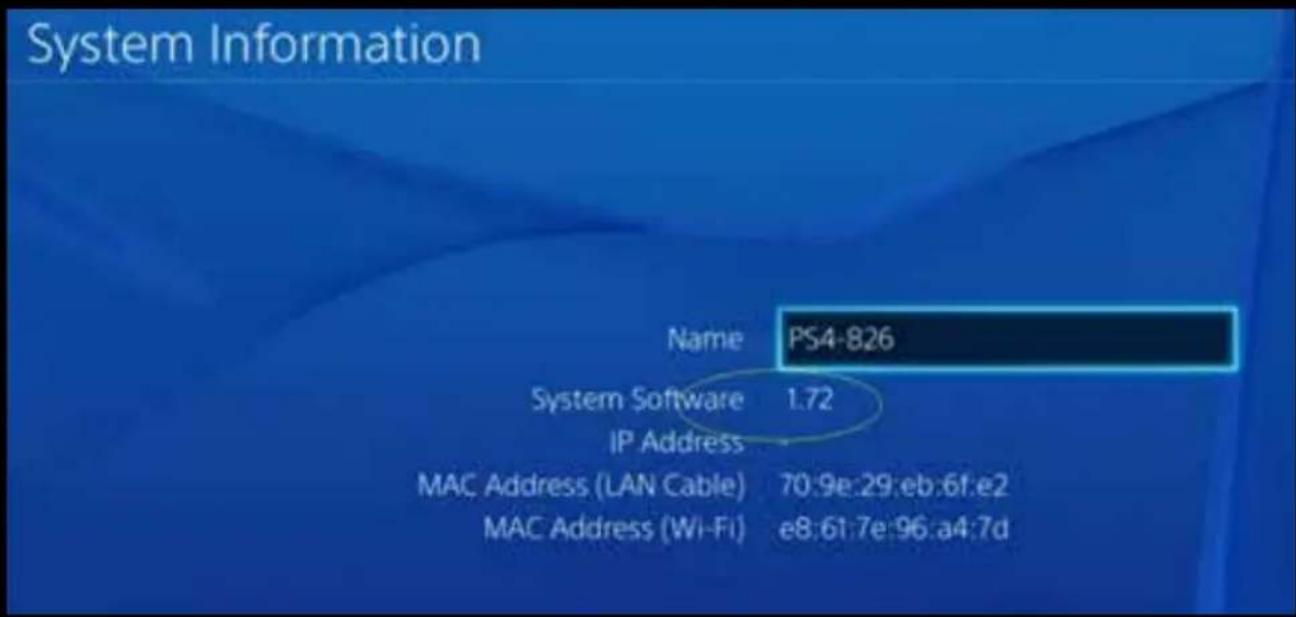
Go to Settings --- System. Disable the "Enable HDCP" option
EN
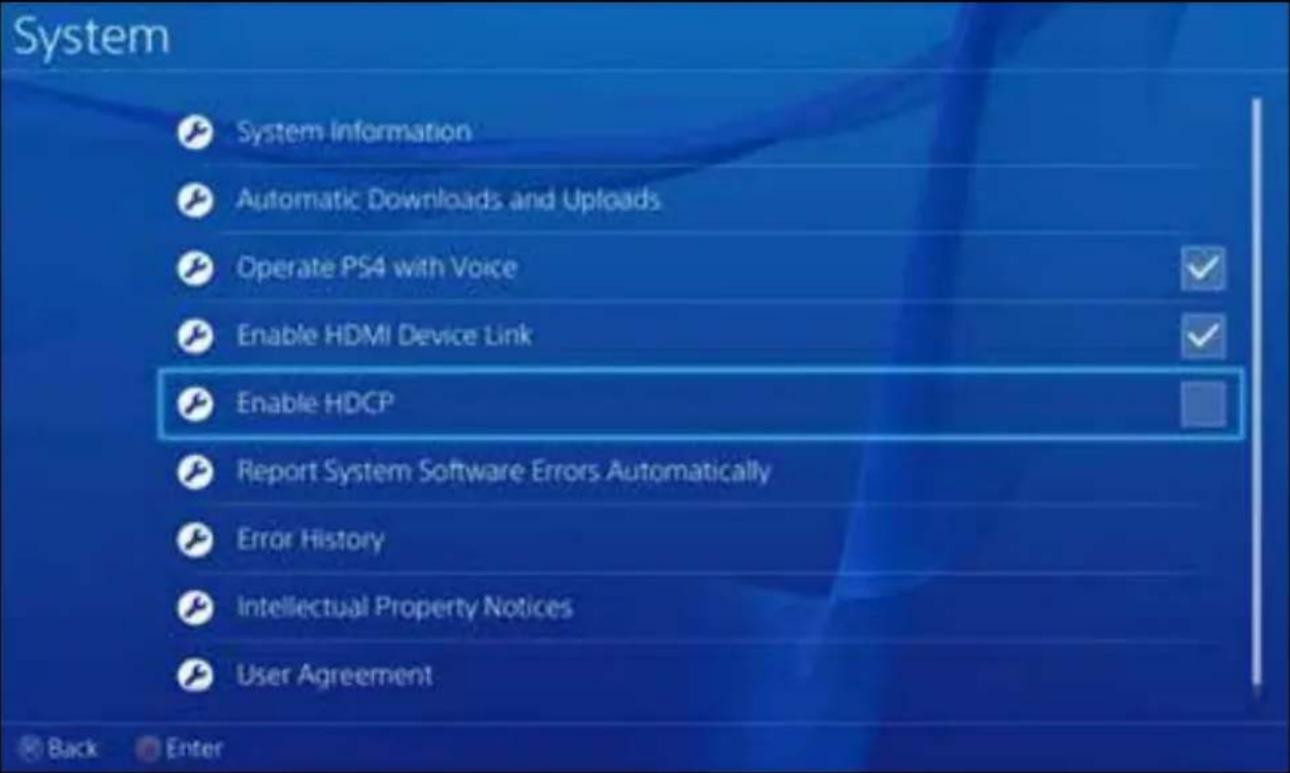
Note: Disable the HDCP option only for recording games, not for burning Bluray movie content.
YPBPR component video connection (DVD player, PS3 etc.)


flowchart
graph TD
    A["Home Device"] --> B["LED Lighting"]
    B --> C["Audio System"]
    C --> D["Monitor"]
    D --> E["Display"]
    E --> F["Smart Speaker"]
    F --> G["Audio Receiver"]
    G --> H["Analog Assistant"]
    H --> I["Radio Station"]
    I --> J["Radio Headset"]
    style A fill:#f9f,stroke:#333
    style J fill:#ccf,stroke:#333
- Steps 1 and 2 same as HDMI connection
- Use the supplied component video cable (red, blue, green) and connect it to the video console with its cables.
- Steps 4.5.6 same as HDMI connection
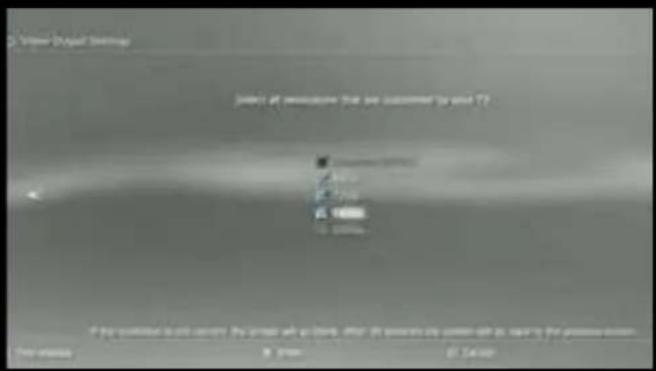
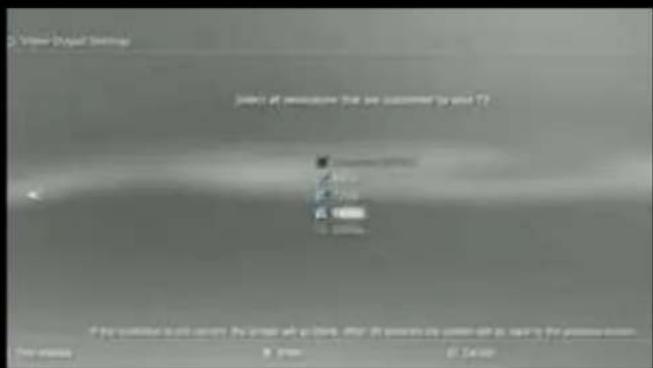
Note: To connect PS3, you also need to make the following settings: Go to the video output configuration settings ---, select "Component / D-Terminal"
EN
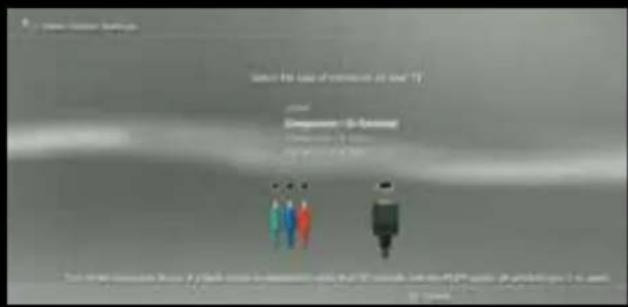

In the resolution setting, make sure that the "1080P" option is not checked, otherwise some game (eg GT5) cannot be recorded.
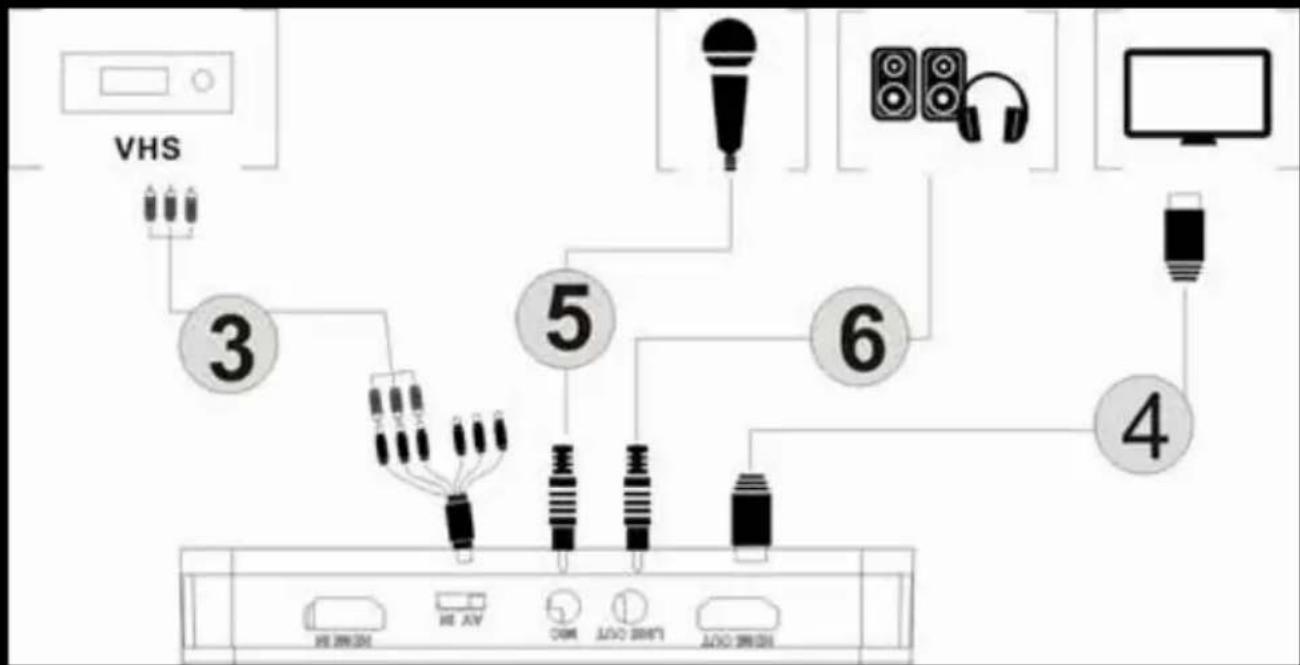
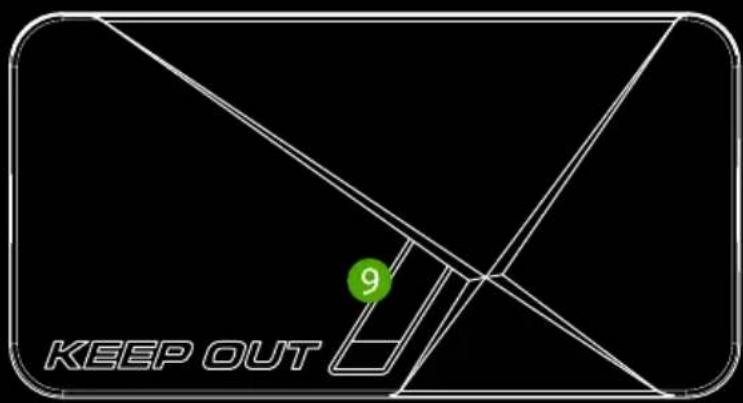
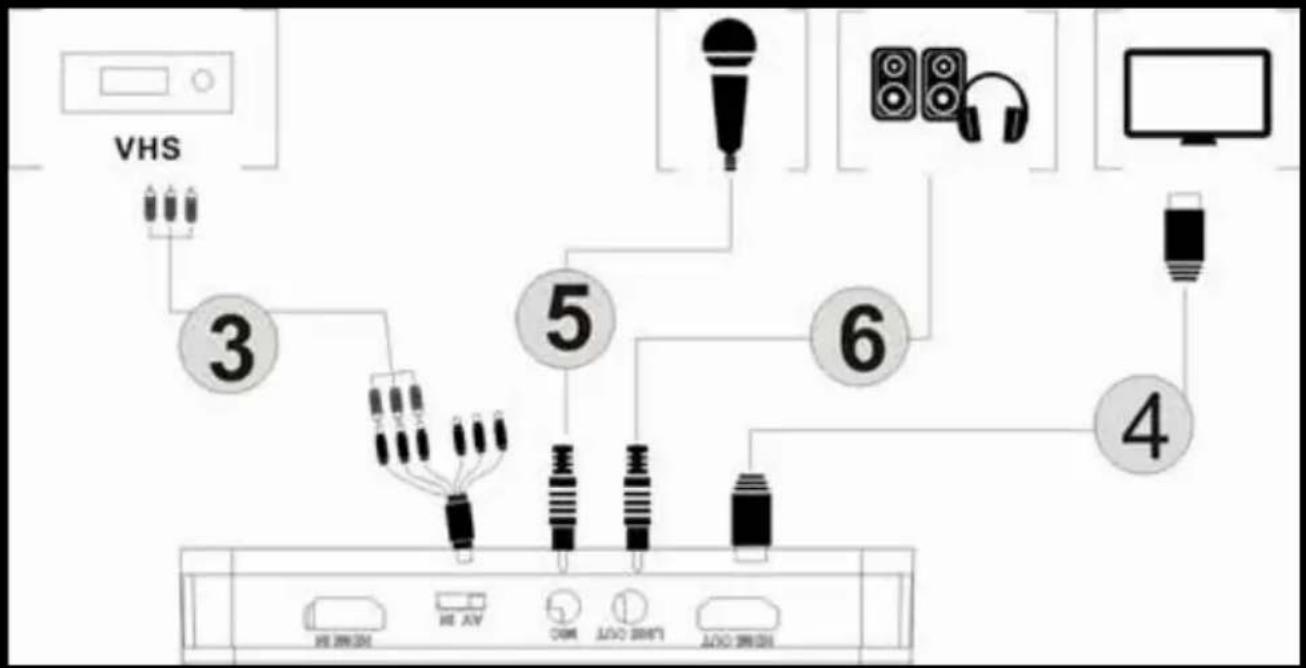
Composite video connection (like PS2, VHS, V8, Hi8, etc.)
flowchart
graph TD
    A["VHS"] --> B["3"]
    B --> C["4"]
    C --> D["5"]
    D --> E["6"]
    E --> F["7"]
    F --> G["8"]
    G --> H["9"]
    H --> I["10"]
    I --> J["11"]
    J --> K["12"]
    K --> L["13"]
    L --> M["14"]
    M --> N["15"]
    N --> O["16"]
    O --> P["17"]
    P --> Q["18"]
    Q --> R["19"]
    R --> S["20"]

- Steps 1 and 2 same as HDMI connection
- Connect composite video adapter (yellow video cable and red and white audio cable) and connect it to the video console with their respective cables.
- Steps 4.5.6 same as HDMI connection
Once all connected. You will see the blue power indicator lit steadily and the green video output indicator lit steadily. It means the device is ready to record.
To record the video is very simple --- press the record button, then you will see the recording indicator looks solid red, it means it is in the process of recording.
To stop recording, press the button again, you will see the indicator blinks for a few seconds and then turn off, it means the recording has been finalized, now you can extract your USB stick or SD card.
Note: Please do not remove the USB memory or SD card when the indicator is blinking. Recording will stop automatically if the USB flash or SD card does not have free space.
After stopping recording, connect the USB flash or SD card to the computer you will see the recorded files: for 1080P recording, the file will be Encode_1080P_1, for 720 or 480p recording, file will be Encode_1.
Each recording / stop operation will create a different recording file: Encode_1080P_1, Encode_1080P_2, Encode_1080P_3 ... and so on.
The maximum size per file will be around 1.95GB (about 15 minutes for 1080p video), when recording a video more than 1.95GB (15 minutes), files will be spread over 1 file, for example: if you record one 45 minutes of 1080p video using a click recording, you will see 3 files: Encode_1080P_1, Encode_1080P_1_1, Encode_1080P_1_2 ... etc.
Always remove the USB memory or SD card safely from your PC, otherwise you may lose the recorded information.
FIRMWARE UPDATE AND OTHER FEATURES
- Firmware upgrade: You may need to update the firmware of this device for some reason. Download the latest firmware available from the web. Copy the firmware file to the USB disk or SD card, turn off the device (power connector, unplug), Connect the USB memory or SD card to the device, turn on the power, the indicator will blink for 7 to 8 seconds, and when you change In green, will mean that the update is complete.
- After a long time using, you will see the number of the recording files become too large, for example Encode_1080P_234, but you want to start from Encode_1080P_0, to reset it hold down the record button (before turning on the device), Then connect the power connector to turn on the device, after 3 seconds, the file number will start from 0.
- Change the date: The date of the recorded file may not occur simultaneously with the local time. To change the device time, it is necessary to create a TXT file name "rtc_setup" enter your local time and date with the
EN
following format (for example 2015 July 31 11:00 AM):
2015
/:7
/:31
/: eleven
/:00
/: 00
/: 0
In case it is exactly the same format (first line are the years, second line are the months, etc., completion with /: 0, each line with boot “/”), and save it.
Then copy the rtc_setup file to an SD card or USB stick, plug it into the device and then turn it on, then the time will be adjusted.
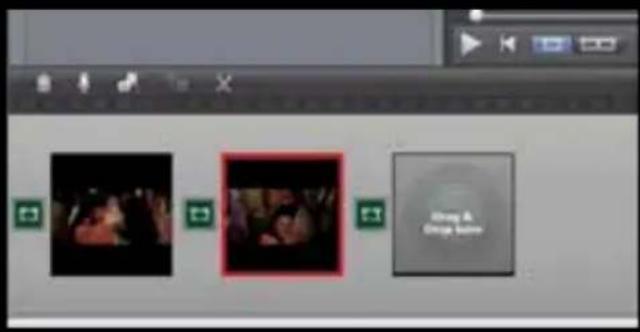
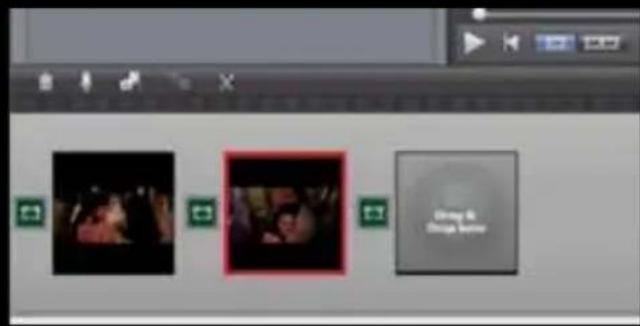
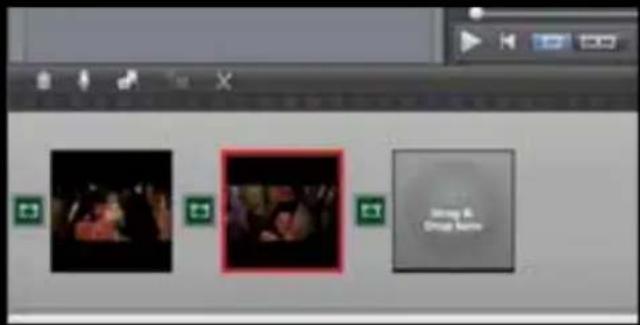
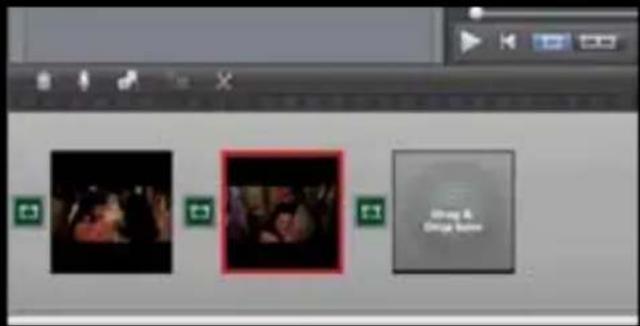
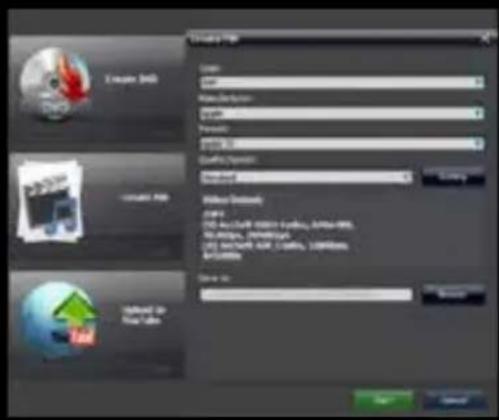
VIDEO EDITING
This device incorporates video editing software ArcSoft ShowBiz 3.5, you can edit the videos recorded with it.
Insert the included installation CD, run autorun.exe, and install the software.
Once installed run the software and you can see the environment of the software.
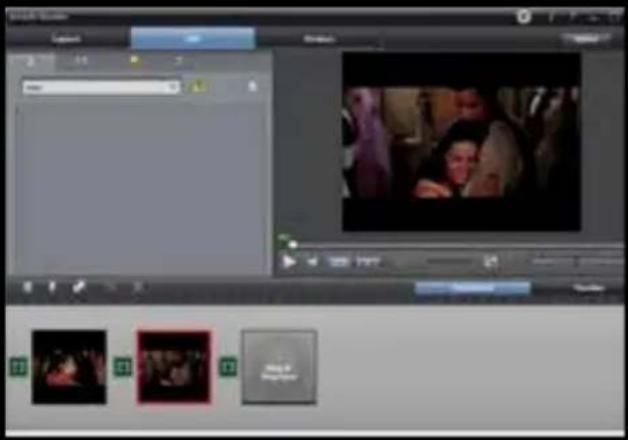

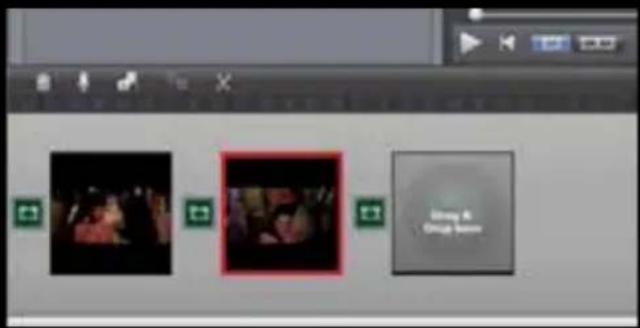
- You can combine two or more video in one, you just have to drag them into Showbiz.
EN
EN
Installation PC Driver to do Streaming
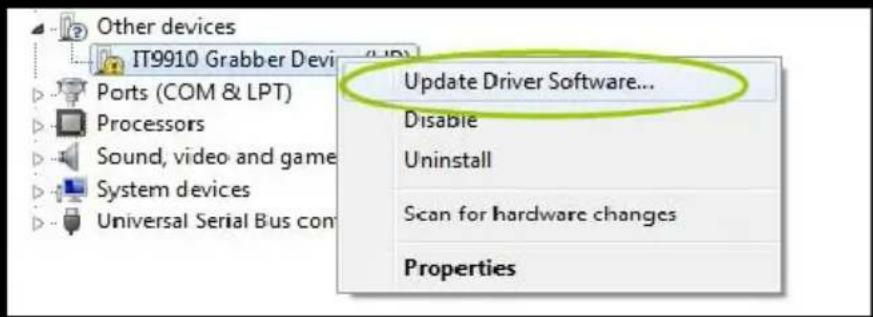
The first thing to do is to manually install the capture driver for our PC to recognize it.
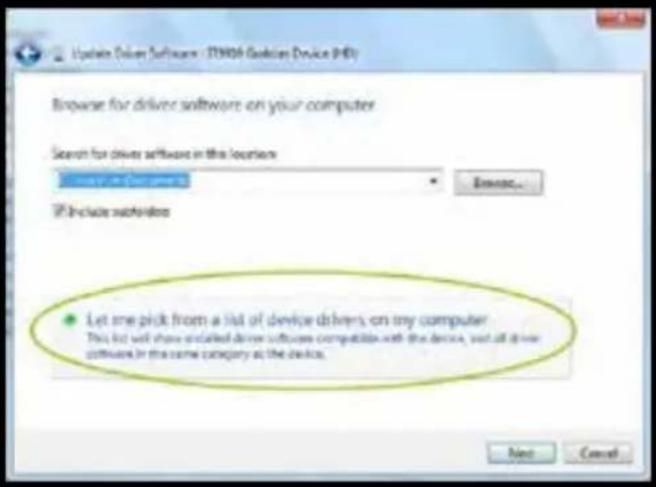
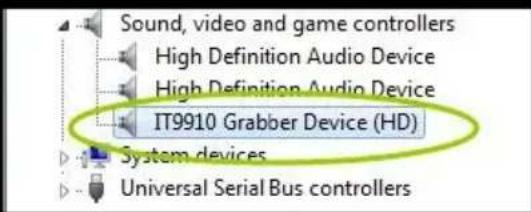
To do this we go to the Windows device manager and connect the video capture device to our PC, using the USB cable supplied. We will see that on other devices IT9910 Grabber Device (HD) appears as unknown device.


IT9910 Grabber Device (HD)
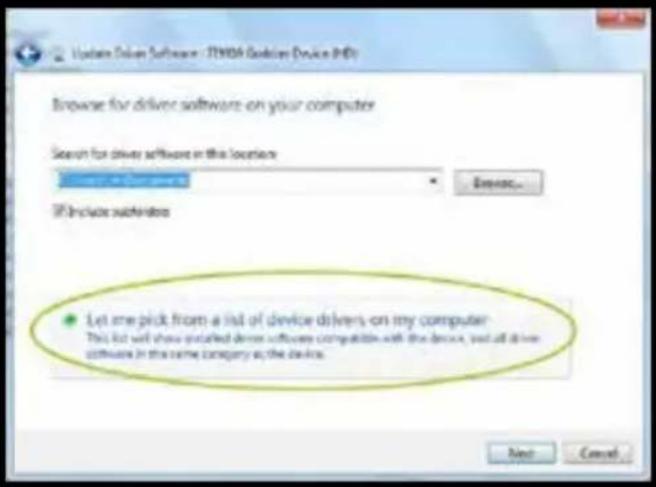
Right-click on IT 9910 Grabber Device (HD) and select Update Driver Software
Click on Search for driver software on your computer.
![Update Driver Software - [T100] Grabbox Devices (RDX) How do you want to search for driver software? • Search automatically for updated driver software Windows will search your computer and the Internet for the latest drive software for your device, create you or saved the feature in your device installation settings. • Browse my computer for driver software Local and local drive software regularly. Cancel](/content/2026/03/573279/images/97f381028bc97d9f260862cac5a6dfea2547c79a82adb8ecfe92cbf572dba8ba.jpg)


We click the Browse button and look for the path of our driver in the installation cd.
Note: Select the 32 or 64bit folder based on our processor and operating system.
Click the Next button.
Finally the driver was successfully installed.
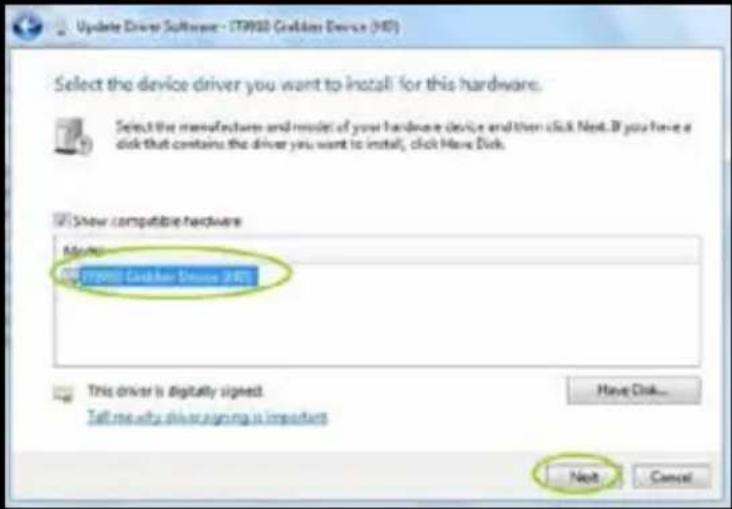
It should appear in device administrator installed correctly

OBS Studio to do Streaming
This video capture works with OBS, which is free and open source software with which you can record your videos and stream live.
Download OBS Studio from https://obsproject.com/ and proceed to installation.
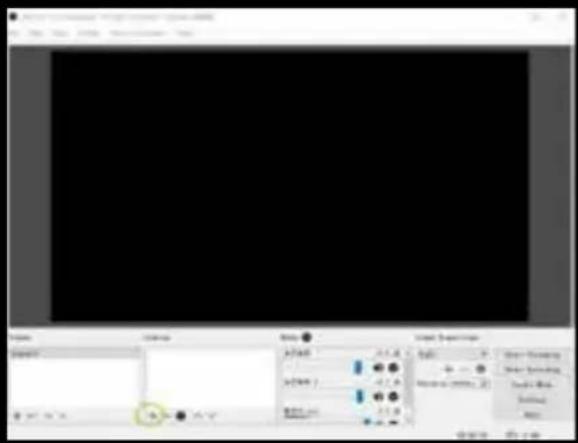
Once installed, run the application.
Then click in + Sources window.
EN

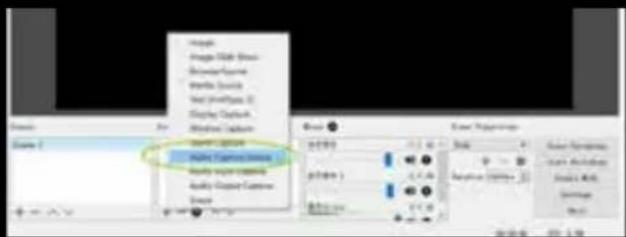
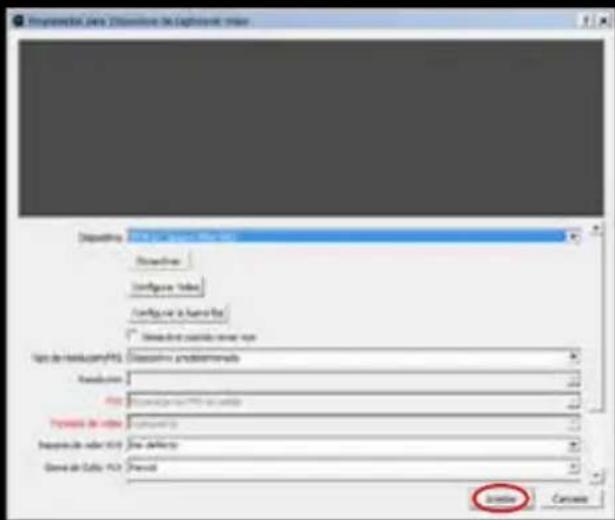
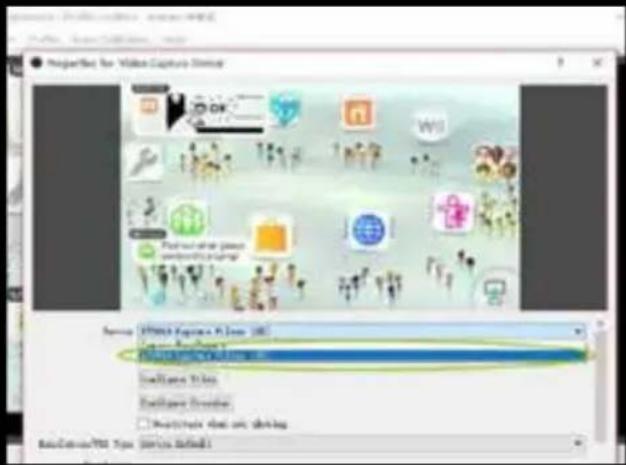
Click on Video Capture Device.
Click OK

Select in IT9910 Capture Filter Device (HD) and click OK if the video source will be HDMI.
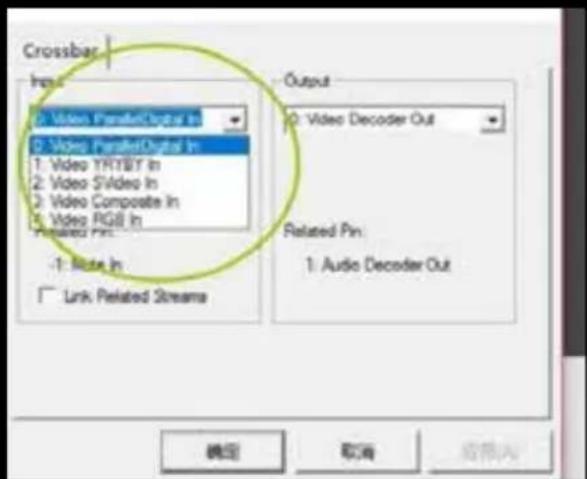
If the Video connection is not for HDMI, you must first click on the Configure fixed bar button.


Choose the corresponding entry in Input:
0: ParallelDigital In video for HDMI devices.
1: YRYBY In Video for Component Video Devices
3: Video Composite In for Devices with Composite Video


Finally, click OK.
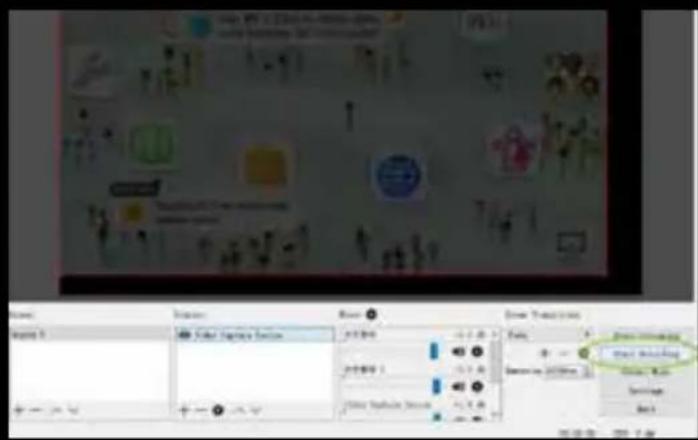
You need to restore OBS Studio after making one of these changes.
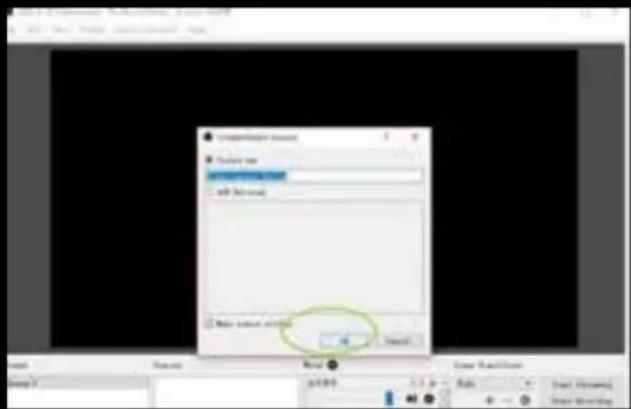
Once this is done we will have an image on our screen.
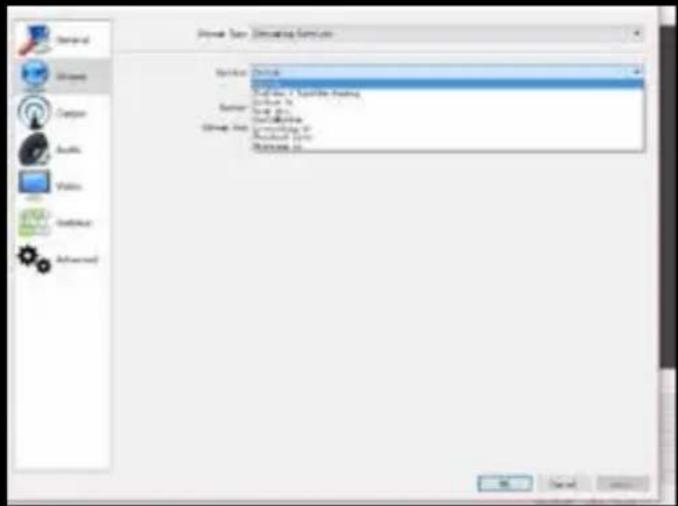
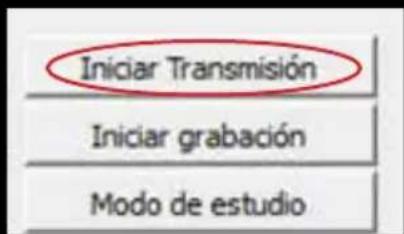
To stream, click the Settings button
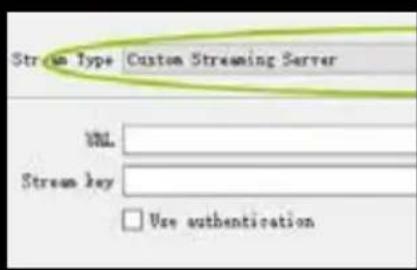
We click on Emission and select the service by which we want to transmit, and we enter the key of retransmission.
Note: You must register for the various services available, create a channel and obtain the retransmission key.
Once entered, click on the OK button.
EN
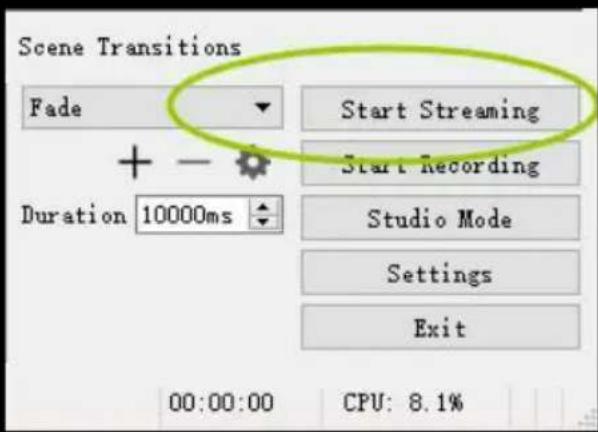
Finally we press the button Start Transmission to begin to emit and the same button to stop it.
For more information, see the OBS Quick Guide included in the installation CD.
TECHNICAL SUPPORT
Please visit our website www.keepoutgaming.com for more information on the installation and configuration of this product or write an email to the following address: support@keep-out.eu

Introducción
natural_image
Simple line drawing of a rectangular device with a green circular indicator labeled '1' and a white number '0' on its side (no text or symbols beyond the indicators)


ES
IT9910 Grabber Device (HD)
IT9910 Grabber Device (HD)
| Location to capture | USB 2.0 Host, SD Card |
| Video input | Digital: HDMI |
| Analog: Component Video, Composite Video | |
| Audio input | Digital: HDMI |
| Analog: RCA L/R, 3.5mm MicroPhone In | |
| Note: Microphone without pass through for HDMI input | |
| Video output | Digital: HDMI (Pass-through from HDMI or Component or Composite Input) |
| Audio output | Digital: HDMI (Pass-through from HDMI or RCA L/R Input) |
| Analog: 3.5mm Stereo (Pass-through from HDMI or RCA L/R Input) |
Connectors applicable to video consoles
| HDMI | WiiU, Xbox 360, Xbox One, PS4 |
| Componentes | WiiU, Xbox 360, PS3 |
| Compuesto | WiiU, Xbox 360, PS3 |
Note: HDCP contents cannot be recorded
Extra Hardware
| Coding | Hardware H.264 encoder |
| User Interface | Capture button |
| Status LED indicator | |
| Dimensions | 140(L) × 70(W) × 23(H) mm |
| Weight | 115g |
Standards
| Storage | USB flash drive, Portable hard drive, SD card |
| Max Capacity: USB / 2T, SD / 64G | |
| Note: exFAT format is not compatible | |
| Resolution | Input:720 x 480 (60p), 720 x 576 (50p), 1280 x 720p (50p), 1280 x 720p(60p), 1920 x 1080 (50i), 1920 x 1080 (60i), 1920 x 1080 (24p), 1920 x 1080 (25p), 1920 x 1080 (30p), 1920 x 1080 (50p), 1920 x 1080 (60p) |
| Capture:720 x 480 (60p), 720 x 576 (50p), 1280 x 720p (50p), 1280 x 720p(60p), 1920 x 1080 (50i), 1920 x 1080 (60i), 1920 x 720p (24p), 1920 x 1080 (25p), 1920 x 1080 (30p), 1920 x 1080 (25p), 1920 x 1080 (30p) |
| Note: Upscaling is not supported | |
| Recording format | Video: MP4, Audio: AAC Stereo |
| Quality Recording | Max: 18Mbps@1080P 30fps |
| Recorded file | Max: 2GB / Per File, With RTC (Real Time Clock) |
| Recording Data | Max: 140MB / Minute, 8.4GB / Hour |
| Power | USB DC 5V / 2A |
Video capture application
| Software | Arcsoft Showbiz |
| Video Editing | Timeline / Storyboard edit, Split / Divide Scenes, Multi Trim Scenes ... |
| Video Export | Upload to YouTube |
| Portable Device: iPod, iPhone, iPod Touch, Apple TV, PSP, PS3, Xbox | |
| File: MPEG 1 / 2 / 4, WMV HD, Quicktime (MOV) ... | |
| Operating System Requirements | Windows 8 (32 / 64 bit), Windows 7 (32 / 64 bit), Windows Vista (32 / 64 bit) |
| CPU Requirements | Intel Core 2 Duo 2.8GHz, AMD Athlon 64X2 Dual Core 3.0GHz |
| Memory Requirements | 4 GB RAM |
| Graphic Card Requirements | VGA card with support for DirectX 10.0c or above |
PAKENDIS


ET
ET
Paigaldamine PC Driver teha Streaming
IT9910 Grabber Device (HD)
Paremklöpsake IT 9910 Grabber seade (HD) ja valige Update Driver Software


OBS Studio teha Streaming

Select IT9910 Capture Filter seade (HD) ja vajuta OK, kui video allikas on HDMI.
Lõpuks vajuta OK.
Oja, klöpsake nuppu Settings


FR


| Location to capture | USB 2.0 Host, SD Card |
| Video input | Digital: HDMI |
| Analog: Component Video, Composite Video | |
| Audio input | Digital: HDMI |
| Analog: RCA L/R, 3.5mm MicroPhone In | |
| Note: Microphone without pass through for HDMI input | |
| Video output | Digital: HDMI (Pass-through from HDMI or Component or Composite Input) |
| Audio output | Digital: HDMI (Pass-through from HDMI or RCA L/R Input) |
| Analog: 3.5mm Stereo (Pass-through from HDMI or RCA L/R Input) |
Connectors applicable to video consoles
| HDMI | WiiU, Xbox 360, Xbox One, PS4 |
| Componentes | WiiU, Xbox 360, PS3 |
| Compuesto | WiiU, Xbox 360, PS3 |
Note: HDCP contents cannot be recorded
Extra Hardware
| Coding | Hardware H.264 encoder |
| User Interface | Capture button |
| Status LED indicator | |
| Dimensions | 140(L) × 70(W) × 23(H) mm |
| Weight | 115g |
Standards
| Storage | USB flash drive, Portable hard drive, SD card |
| Max Capacity: USB / 2T, SD / 64G | |
| Note: exFAT format is not compatible | |
| Resolution | Input:720 x 480 (60p), 720 x 576 (50p), 1280 x 720p (50p), 1280 x 720p(60p), 1920 x 1080 (50i), 1920 x 1080 (60i), 1920 x 1080 (24p), 1920 x 1080 (25p), 1920 x 1080 (30p), 1920 x 1080 (50p), 1920 x 1080 (60p) |
| Capture:720 x 480 (60p), 720 x 576 (50p), 1280 x 720p (50p), 1280 x 720p(60p), 1920 x 1080 (50i), 1920 x 1080 (60i), 1920 x 720p (24p), 1920 x 1080 (25p), 1920 x 1080 (30p), 1920 x 1080 (25p), 1920 x 1080 (30p) |
| Note: Upscaling is not supported | |
| Recording format | Video: MP4, Audio: AAC Stereo |
| Quality Recording | Max: 18Mbps@1080P 30fps |
| Recorded file | Max: 2GB / Per File, With RTC (Real Time Clock) |
| Recording Data | Max: 140MB / Minute, 8.4GB / Hour |
| Power | USB DC 5V / 2A |
Video capture application
| Software | Arcsoft Showbiz |
| Video Editing | Timeline / Storyboard edit, Split / Divide Scenes, Multi Trim Scenes ... |
| Video Export | Upload to YouTube |
| Portable Device: iPod, iPhone, iPod Touch, Apple TV, PSP, PS3, Xbox | |
| File: MPEG 1 / 2 / 4, WMV HD, Quicktime (MOV) ... | |
| Operating System Requirements | Windows 8 (32 / 64 bit), Windows 7 (32 / 64 bit), Windows Vista (32 / 64 bit) |
| CPU Requirements | Intel Core 2 Duo 2.8GHz, AMD Athlon 64X2 Dual Core 3.0GHz |
| Memory Requirements | 4 GB RAM |
| Graphic Card Requirements | VGA card with support for DirectX 10.0c or above |
Sadržaj pakiranja
· SX300
· Daljinski upravljač
· Vodič za brzo instaliranje na više jezika
- CD za instalaciju
· Kabel AV adapter,
· USB napajanje
· USB kabl
Napomena: Uvjerite se da vaš pakiranje sadrži stavke gore opisane. Ako bilo koji dio nedostaje ili je oštećen, obratite se dobavljaču.
HR
DIJELOVI OPIS


- PWR - 5VDC / 2A ulazna snaga
- HDMI IN - HDMI ulaz
- AV IN - Komponenta ulaz, YPbPr ili kompozitni video ulaz preko adapter kabel
- MIC - Za spajanje mikrofona i snimanje glasovne komentare kada igrate igru.
- LINEA OUT - Audio izlaz.
- HDMI izlaza za HDMI izlaz
- DOMAĆIN USB - USB ulaz za spajanje USB stick na tvrdom disku ulaz 8. SD SD kartice
- Record Button - Pritisnite za snimanje / zaustavljanje snimanja
- Status LED indikator - indikator prikazuje radno stanje
DALJINSKI UPRAVLJAČ
REC / STOP - pokretanje i zaustavljanje snimanja.
720P - Mijenja razlučivost snimanja 720p.
1080P - Mijenja razlučivost snimanja u 1080p.
CVBS / YPbPr / HDMI - Odabir video ulaz
Napomena: Onemogućite opciju HDCP samo za snimanje igara, a ne za spaljivanje Bluray filmskog sadržaja.
YPBPR component video connection (DVD player, PS3 etc.)


flowchart
graph TD
    A["Home Device"] --> B["LED Lighting"]
    B --> C["Audio System"]
    C --> D["Monitor"]
    D --> E["Display"]
    E --> F["Smart Speaker"]
    F --> G["Audio Receiver"]
    G --> H["Analog Assistant"]
    H --> I["Radio Station"]
    I --> J["Radio Headset"]
    style A fill:#f9f,stroke:#333
    style J fill:#ccf,stroke:#333
- Koraci 1 i 2 isto kao i HDMI priključak
- Koristite isporučeni komponentnog video kabela (crvena, plava, zelena) i spojite ga na video konzole sa svojim kablovima.
- Koraci 4.5.6 isto kao i HDMI priključak
Napomena: Za spajanje PS3, također je potrebno da bi sljedeće postavke: Idite na postavke video izlaza konfiguracije --- odaberite "Component / D-terminal"
HR
![Select the load of comments on user TV [ ] [ ] [ ] [ ] [ ] [ ] [ ] [ ] [ ] [ ] [ ] [ ] [ ] [ ] [ ] [ ] [ ] [ ] [ ] [ ] [ ] [ ] [ ] [ ] [ ] [ ] [ ] [ ] [ ] [ ] [ ] [ ] [ ] [ ] [ ] [ ] [ ] [ ] [ ] [ ] [ ] [ ] [ ] [ ] [ ] [ ] [ ] [ ] [ ] [ ] [ ]](/content/2026/03/573279/images/d7992a99f7930f3fa8a5aa6078c76585d1c1fb822a9bdcbebfe7b76c98fe6d2b.jpg)
U postavci rezolucije, pobrinite se da je "1080P" opcija nije uključena, u protivnom neka igra (npr GT5) ne može se snimiti.
Kompozitni video vezu (kao PS2, VHS, V8, Hi8, itd)
flowchart
graph TD
    A["VHS"] --> B["3"]
    B --> C["5"]
    C --> D["6"]
    D --> E["4"]
    E --> F["Monitor"]
    G["Audio System"] --> H["Main Audio System"]
    I["Audio System"] --> J["Main Audio System"]
    K["Audio System"] --> L["Main Audio System"]

- Koraci 1 i 2 isto kao i HDMI priključak
- Spojite kompozitni video adapter (žuti video kabel i crno i bijelo audio kabel) i spojiti ga na video konzole s njihovim kabelima.
- Koraci 4.5.6 isto kao i HDMI priključak
PROCES RADA
Nakon što svi povezani. Vidjet ćete plavi indikator napajanja lit stalno i zeleni video izlaz indikator upaljenu stalno. To znači da je uređaj spreman za snimanje.
Za snimanje video je vrlo jednostavna --- pritisnite gumb za snimanje, onda ćete vidjeti pokazivač snimanja izgleda crvena, to znači da je u procesu snimanja.
Za zaustavljanje snimanja, ponovno pritisnite gumb, vidjet ćete indikator treperi nekoliko sekundi, a zatim isključite, to znači da je snimanje dovršeno, sada možete izvući svoj USB stick ili SD karticu.
Napomena: Molimo vas da ne uklanjajte USB memoriju ili SD karticu kada indikator treperi. Snimanje će se automatski zaustaviti ako je USB flash ili SD kartica nema slobodnog prostora.


HR
INSTALACIJA PC VOZAČ UČINITI STREAMING
Prva stvar za učiniti je da ručno instalirati upravljački program za snimanje za naše računalo da ga prepoznaju. Da bi se to idemo na Windows upravitelju uređaja učiniti i spojite uređaj za snimanje videa na naše računalo pomoću USB kabela. Vidjet ćemo da je na drugim uređajima IT9910 Grabber uređaja (HD) pojavljuje se kao nepoznatu napravu.

Kliknite desnom tipkom miša na IT 9910 Grabber Device (HD) i odaberite Update Driver Software


To bi trebao pojaviti u administrator uređaja ispravno instaliran
DOBIVENA STUDIO UČINITI STREAMING
Ovaj video snimci radi sa OBS, koji je besplatan i open source softvera s kojim možete snimiti svoj video i streaming uživo.
Preuzimanje opservatorij Studio iz https://obsproject.com/ i nastavite instalaciju.
Jednom instaliran, pokrenite program.
Zatim kliknite na prozor + Sources.
HR

Kliknite na video uređaj za snimanje.
Kliknite U redu


Odaberite u IT9910 Capture Filter uređaja (HD), a zatim kliknite U redu, ako je video izvor će biti HDMI.
Ako je video veza nije za HDMI, najprije se morate kliknuti na Configure fiksne gumbima.


Odaberite odgovarajući ulaz u polje za unos:
0: ParallelDigital U spotu za HDMI uređaja.
1: YRYBY U Video za komponentni video uređaje
3: Video Composite In za uređaje s kompozitnim video
Na kraju kliknite OK.
Za streaming, pritisnite gumb Postavke
Mi kliknite na emisije i odaberite uslugu koju želimo prenijeti i ulazimo ključ retransmisiju.
Napomena: Morate se registrirati za razne usluge dostupne, stvoriti kanal i dobiti ključ retransmisija.
Na kraju pritisnemo gumb Start Prijenos početi emitirati i istu tipku za zaustavljanje.
Za više informacija, pogledajte OBS Brzi vodič na instalacijskom CD-u.
TEHNIČKA PODRŠKA
Molimo posjetite našu web stranicu www.keepoutgaming.com za više informacija o instalaciji i konfiguraciji ovog proizvoda ili pisati e-mail na adresu: support@keep-out.eu \~\~HEAD=pobj
BEVEZETÉS
| Location to capture | USB 2.0 Host, SD Card |
| Video input | Digital: HDMI |
| Analog: Component Video, Composite Video | |
| Audio input | Digital: HDMI |
| Analog: RCA L/R, 3.5mm MicroPhone In | |
| Note: Microphone without pass through for HDMI input | |
| Video output | Digital: HDMI (Pass-through from HDMI or Component or Composite Input) |
| Audio output | Digital: HDMI (Pass-through from HDMI or RCA L/R Input) |
| Analog: 3.5mm Stereo (Pass-through from HDMI or RCA L/R Input) |
Connectors applicable to video consoles
| HDMI | WiiU, Xbox 360, Xbox One, PS4 |
| Componentes | WiiU, Xbox 360, PS3 |
| Compuesto | WiiU, Xbox 360, PS3 |
Note: HDCP contents cannot be recorded
Extra Hardware
| Coding | Hardware H.264 encoder |
| User Interface | Capture button |
| Status LED indicator | |
| Dimensions | 140(L) × 70(W) × 23(H) mm |
| Weight | 115g |
Standards
| Storage | USB flash drive, Portable hard drive, SD card |
| Max Capacity: USB / 2T, SD / 64G | |
| Note: exFAT format is not compatible | |
| Resolution | Input:720 x 480 (60p), 720 x 576 (50p), 1280 x 720p (50p), 1280 x 720p(60p), 1920 x 1080 (50i), 1920 x 1080 (60i), 1920 x 1080 (24p), 1920 x 1080 (25p), 1920 x 1080 (30p), 1920 x 1080 (50p), 1920 x 1080 (60p) |
| Capture:720 x 480 (60p), 720 x 576 (50p), 1280 x 720p (50p), 1280 x 720p(60p), 1920 x 1080 (50i), 1920 x 1080 (60i), 1920 x 720p (24p), 1920 x 1080 (25p), 1920 x 1080 (30p), 1920 x 1080 (25p), 1920 x 1080 (30p) |
| Note: Upscaling is not supported | |
| Recording format | Video: MP4, Audio: AAC Stereo |
| Quality Recording | Max: 18Mbps@1080P 30fps |
| Recorded file | Max: 2GB / Per File, With RTC (Real Time Clock) |
| Recording Data | Max: 140MB / Minute, 8.4GB / Hour |
| Power | USB DC 5V / 2A |

Video capture application
| Software | Arcsoft Showbiz |
| Video Editing | Timeline / Storyboard edit, Split / Divide Scenes, Multi Trim Scenes ... |
| Video Export | Upload to YouTube |
| Portable Device: iPod, iPhone, iPod Touch, Apple TV, PSP, PS3, Xbox | |
| File: MPEG 1 / 2 / 4, WMV HD, Quicktime (MOV) ... | |
| Operating System Requirements | Windows 8 (32 / 64 bit), Windows 7 (32 / 64 bit), Windows Vista (32 / 64 bit) |
| CPU Requirements | Intel Core 2 Duo 2.8GHz, AMD Athlon 64X2 Dual Core 3.0GHz |
| Memory Requirements | 4 GB RAM |
| Graphic Card Requirements | VGA card with support for DirectX 10.0c or above |
CSOMAG TARTALMA
YPBPR component video connection (DVD player, PS3 etc.)


flowchart
graph TD
    A["Home Device"] --> B["LED Lighting"]
    B --> C["Audio System"]
    C --> D["Monitor"]
    D --> E["Display"]
    E --> F["Smart Speaker"]
    F --> G["Audio Receiver"]
    G --> H["Analog Assistant"]
    H --> I["Radio Station"]
    I --> J["Radio Headset"]
    style A fill:#f9f,stroke:#333
    style J fill:#ccf,stroke:#333


HU
IT9910 Grabber Device (HD)


Kattints a Video Capture Device.
Kattintson az OK gombra


| Location to capture | USB 2.0 Host, SD Card |
| Video input | Digital: HDMI |
| Analog: Component Video, Composite Video | |
| Audio input | Digital: HDMI |
| Analog: RCA L/R, 3.5mm MicroPhone In | |
| Note: Microphone without pass through for HDMI input | |
| Video output | Digital: HDMI (Pass-through from HDMI or Component or Composite Input) |
| Audio output | Digital: HDMI (Pass-through from HDMI or RCA L/R Input) |
| Analog: 3.5mm Stereo (Pass-through from HDMI or RCA L/R Input) |
Connectors applicable to video consoles
| HDMI | WiiU, Xbox 360, Xbox One, PS4 |
| Componentes | WiiU, Xbox 360, PS3 |
| Compuesto | WiiU, Xbox 360, PS3 |
Note: HDCP contents cannot be recorded
Extra Hardware
| Coding | Hardware H.264 encoder |
| User Interface | Capture button |
| Status LED indicator | |
| Dimensions | 140(L) × 70(W) × 23(H) mm |
| Weight | 115g |
Standards
| Storage | USB flash drive, Portable hard drive, SD card |
| Max Capacity: USB / 2T, SD / 64G | |
| Note: exFAT format is not compatible | |
| Resolution | Input:720 x 480 (60p), 720 x 576 (50p), 1280 x 720p (50p), 1280 x 720p(60p), 1920 x 1080 (50i), 1920 x 1080 (60i), 1920 x 1080 (24p), 1920 x 1080 (25p), 1920 x 1080 (30p), 1920 x 1080 (50p), 1920 x 1080 (60p) |
| Capture:720 x 480 (60p), 720 x 576 (50p), 1280 x 720p (50p), 1280 x 720p(60p), 1920 x 1080 (50i), 1920 x 1080 (60i), 1920 x 720p (24p), 1920 x 1080 (25p), 1920 x 1080 (30p), 1920 x 1080 (25p), 1920 x 1080 (30p) |
| Note: Upscaling is not supported | |
| Recording format | Video: MP4, Audio: AAC Stereo |
| Quality Recording | Max: 18Mbps@1080P 30fps |
| Recorded file | Max: 2GB / Per File, With RTC (Real Time Clock) |
| Recording Data | Max: 140MB / Minute, 8.4GB / Hour |
| Power | USB DC 5V / 2A |
Video capture application
| Software | Arcsoft Showbiz |
| Video Editing | Timeline / Storyboard edit, Split / Divide Scenes, Multi Trim Scenes ... |
| Video Export | Upload to YouTube |
| Portable Device: iPod, iPhone, iPod Touch, Apple TV, PSP, PS3, Xbox | |
| File: MPEG 1 / 2 / 4, WMV HD, Quicktime (MOV) ... | |
| Operating System Requirements | Windows 8 (32 / 64 bit), Windows 7 (32 / 64 bit), Windows Vista (32 / 64 bit) |
| CPU Requirements | Intel Core 2 Duo 2.8GHz, AMD Athlon 64X2 Dual Core 3.0GHz |
| Memory Requirements | 4 GB RAM |
| Graphic Card Requirements | VGA card with support for DirectX 10.0c or above |
CONTENUTO DEL PACCO
ò ved


| Location to capture | USB 2.0 Host, SD Card |
| Video input | Digital: HDMI |
| Analog: Component Video, Composite Video | |
| Audio input | Digital: HDMI |
| Analog: RCA L/R, 3.5mm MicroPhone In | |
| Note: Microphone without pass through for HDMI input | |
| Video output | Digital: HDMI (Pass-through from HDMI or Component or Composite Input) |
| Audio output | Digital: HDMI (Pass-through from HDMI or RCA L/R Input) |
| Analog: 3.5mm Stereo (Pass-through from HDMI or RCA L/R Input) |
Connectors applicable to video consoles
| HDMI | WiiU, Xbox 360, Xbox One, PS4 |
| Componentes | WiiU, Xbox 360, PS3 |
| Compuesto | WiiU, Xbox 360, PS3 |
Note: HDCP contents cannot be recorded
Extra Hardware
| Coding | Hardware H.264 encoder |
| User Interface | Capture button |
| Status LED indicator | |
| Dimensions | 140(L) × 70(W) × 23(H) mm |
| Weight | 115g |
Standards
| Storage | USB flash drive, Portable hard drive, SD card |
| Max Capacity: USB / 2T, SD / 64G | |
| Note: exFAT format is not compatible | |
| Resolution | Input:720 x 480 (60p), 720 x 576 (50p), 1280 x 720p (50p), 1280 x 720p(60p), 1920 x 1080 (50i), 1920 x 1080 (60i), 1920 x 1080 (24p), 1920 x 1080 (25p), 1920 x 1080 (30p), 1920 x 1080 (50p), 1920 x 1080 (60p) |
| Capture:720 x 480 (60p), 720 x 576 (50p), 1280 x 720p (50p), 1280 x 720p(60p), 1920 x 1080 (50i), 1920 x 1080 (60i), 1920 x 720p (24p), 1920 x 1080 (25p), 1920 x 1080 (30p), 1920 x 1080 (25p), 1920 x 1080 (30p) |
| Note: Upscaling is not supported | |
| Recording format | Video: MP4, Audio: AAC Stereo |
| Quality Recording | Max: 18Mbps@1080P 30fps |
| Recorded file | Max: 2GB / Per File, With RTC (Real Time Clock) |
| Recording Data | Max: 140MB / Minute, 8.4GB / Hour |
| Power | USB DC 5V / 2A |

Video capture application
| Software | Arcsoft Showbiz |
| Video Editing | Timeline / Storyboard edit, Split / Divide Scenes, Multi Trim Scenes ... |
| Video Export | Upload to YouTube |
| Portable Device: iPod, iPhone, iPod Touch, Apple TV, PSP, PS3, Xbox | |
| File: MPEG 1 / 2 / 4, WMV HD, Quicktime (MOV) ... | |
| Operating System Requirements | Windows 8 (32 / 64 bit), Windows 7 (32 / 64 bit), Windows Vista (32 / 64 bit) |
| CPU Requirements | Intel Core 2 Duo 2.8GHz, AMD Athlon 64X2 Dual Core 3.0GHz |
| Memory Requirements | 4 GB RAM |
| Graphic Card Requirements | VGA card with support for DirectX 10.0c or above |
VERPAKKINGSINHOUD
· SX300
• Afstandsbediening
- Snelle installatiehandleiding in meerdere talen
· CD Installatie
· AV-adapterkabel
· USB-voeding
· USB-kabel


NL
Installatie PC Driver te doen Streaming


Te streamen, klikt u op de knop Instellingen
We klikken op de Emissie en selecteer de service die we willen overbrengen, en we de sleutel van doorgifte.
| Location to capture | USB 2.0 Host, SD Card |
| Video input | Digital: HDMI |
| Analog: Component Video, Composite Video | |
| Audio input | Digital: HDMI |
| Analog: RCA L/R, 3.5mm MicroPhone In | |
| Note: Microphone without pass through for HDMI input | |
| Video output | Digital: HDMI (Pass-through from HDMI or Component or Composite Input) |
| Audio output | Digital: HDMI (Pass-through from HDMI or RCA L/R Input) |
| Analog: 3.5mm Stereo (Pass-through from HDMI or RCA L/R Input) |
Connectors applicable to video consoles
| HDMI | WiiU, Xbox 360, Xbox One, PS4 |
| Componentes | WiiU, Xbox 360, PS3 |
| Compuesto | WiiU, Xbox 360, PS3 |
Note: HDCP contents cannot be recorded
Extra Hardware
| Coding | Hardware H.264 encoder |
| User Interface | Capture button |
| Status LED indicator | |
| Dimensions | 140(L) × 70(W) × 23(H) mm |
| Weight | 115g |
Standards
| Storage | USB flash drive, Portable hard drive, SD card |
| Max Capacity: USB / 2T, SD / 64G | |
| Note: exFAT format is not compatible | |
| Resolution | Input:720 x 480 (60p), 720 x 576 (50p), 1280 x 720p (50p), 1280 x 720p(60p), 1920 x 1080 (50i), 1920 x 1080 (60i), 1920 x 1080 (24p), 1920 x 1080 (25p), 1920 x 1080 (30p), 1920 x 1080 (50p), 1920 x 1080 (60p) |
| Capture:720 x 480 (60p), 720 x 576 (50p), 1280 x 720p (50p), 1280 x 720p(60p), 1920 x 1080 (50i), 1920 x 1080 (60i), 1920 x 720p (24p), 1920 x 1080 (25p), 1920 x 1080 (30p), 1920 x 1080 (25p), 1920 x 1080 (30p) |
| Note: Upscaling is not supported | |
| Recording format | Video: MP4, Audio: AAC Stereo |
| Quality Recording | Max: 18Mbps@1080P 30fps |
| Recorded file | Max: 2GB / Per File, With RTC (Real Time Clock) |
| Recording Data | Max: 140MB / Minute, 8.4GB / Hour |
| Power | USB DC 5V / 2A |
Video capture application
| Software | Arcsoft Showbiz |
| Video Editing | Timeline / Storyboard edit, Split / Divide Scenes, Multi Trim Scenes ... |
| Video Export | Upload to YouTube |
| Portable Device: iPod, iPhone, iPod Touch, Apple TV, PSP, PS3, Xbox | |
| File: MPEG 1 / 2 / 4, WMV HD, Quicktime (MOV) ... | |
| Operating System Requirements | Windows 8 (32 / 64 bit), Windows 7 (32 / 64 bit), Windows Vista (32 / 64 bit) |
| CPU Requirements | Intel Core 2 Duo 2.8GHz, AMD Athlon 64X2 Dual Core 3.0GHz |
| Memory Requirements | 4 GB RAM |
| Graphic Card Requirements | VGA card with support for DirectX 10.0c or above |
ZAWARTOŚĆ PACZKI


PL
PL


Na koniec kliknij OK.
| Location to capture | USB 2.0 Host, SD Card |
| Video input | Digital: HDMI |
| Analog: Component Video, Composite Video | |
| Audio input | Digital: HDMI |
| Analog: RCA L/R, 3.5mm MicroPhone In | |
| Note: Microphone without pass through for HDMI input | |
| Video output | Digital: HDMI (Pass-through from HDMI or Component or Composite Input) |
| Audio output | Digital: HDMI (Pass-through from HDMI or RCA L/R Input) |
| Analog: 3.5mm Stereo (Pass-through from HDMI or RCA L/R Input) |
Connectors applicable to video consoles
| HDMI | WiiU, Xbox 360, Xbox One, PS4 |
| Componentes | WiiU, Xbox 360, PS3 |
| Compuesto | WiiU, Xbox 360, PS3 |
Note: HDCP contents cannot be recorded
Extra Hardware
| Coding | Hardware H.264 encoder |
| User Interface | Capture button |
| Status LED indicator | |
| Dimensions | 140(L) × 70(W) × 23(H) mm |
| Weight | 115g |
Standards
| Storage | USB flash drive, Portable hard drive, SD card |
| Max Capacity: USB / 2T, SD / 64G | |
| Note: exFAT format is not compatible | |
| Resolution | Input:720 x 480 (60p), 720 x 576 (50p), 1280 x 720p (50p), 1280 x 720p(60p), 1920 x 1080 (50i), 1920 x 1080 (60i), 1920 x 1080 (24p), 1920 x 1080 (25p), 1920 x 1080 (30p), 1920 x 1080 (50p), 1920 x 1080 (60p) |
| Capture:720 x 480 (60p), 720 x 576 (50p), 1280 x 720p (50p), 1280 x 720p(60p), 1920 x 1080 (50i), 1920 x 1080 (60i), 1920 x 720p (24p), 1920 x 1080 (25p), 1920 x 1080 (30p), 1920 x 1080 (25p), 1920 x 1080 (30p) |
| Note: Upscaling is not supported | |
| Recording format | Video: MP4, Audio: AAC Stereo |
| Quality Recording | Max: 18Mbps@1080P 30fps |
| Recorded file | Max: 2GB / Per File, With RTC (Real Time Clock) |
| Recording Data | Max: 140MB / Minute, 8.4GB / Hour |
| Power | USB DC 5V / 2A |
Video capture application
| Software | Arcsoft Showbiz |
| Video Editing | Timeline / Storyboard edit, Split / Divide Scenes, Multi Trim Scenes ... |
| Video Export | Upload to YouTube |
| Portable Device: iPod, iPhone, iPod Touch, Apple TV, PSP, PS3, Xbox | |
| File: MPEG 1 / 2 / 4, WMV HD, Quicktime (MOV) ... | |
| Operating System Requirements | Windows 8 (32 / 64 bit), Windows 7 (32 / 64 bit), Windows Vista (32 / 64 bit) |
| CPU Requirements | Intel Core 2 Duo 2.8GHz, AMD Athlon 64X2 Dual Core 3.0GHz |
| Memory Requirements | 4 GB RAM |
| Graphic Card Requirements | VGA card with support for DirectX 10.0c or above |
CONTEÚDO DO PACOTE


YPBPR component video connection (DVD player, PS3 etc.)


flowchart
graph TD
    A["Home Device"] --> B["LED Lighting"]
    B --> C["Audio System"]
    C --> D["Monitor"]
    D --> E["Display"]
    E --> F["Smart Speaker"]
    F --> G["Audio Receiver"]
    G --> H["Analog Display"]
    H --> I["Computer Monitor"]
    style A fill:#f9f,stroke:#333
    style I fill:#ccf,stroke:#333


PT


| Location to capture | USB 2.0 Host, SD Card |
| Video input | Digital: HDMI |
| Analog: Component Video, Composite Video | |
| Audio input | Digital: HDMI |
| Analog: RCA L/R, 3.5mm MicroPhone In | |
| Note: Microphone without pass through for HDMI input | |
| Video output | Digital: HDMI (Pass-through from HDMI or Component or Composite Input) |
| Audio output | Digital: HDMI (Pass-through from HDMI or RCA L/R Input) |
| Analog: 3.5mm Stereo (Pass-through from HDMI or RCA L/R Input) |
Connectors applicable to video consoles
| HDMI | WiiU, Xbox 360, Xbox One, PS4 |
| Componentes | WiiU, Xbox 360, PS3 |
| Compuesto | WiiU, Xbox 360, PS3 |
Note: HDCP contents cannot be recorded
RO
Extra Hardware
| Coding | Hardware H.264 encoder |
| User Interface | Capture button |
| Status LED indicator | |
| Dimensions | 140(L) × 70(W) × 23(H) mm |
| Weight | 115g |
Standards
| Storage | USB flash drive, Portable hard drive, SD card |
| Max Capacity: USB / 2T, SD / 64G | |
| Note: exFAT format is not compatible | |
| Resolution | Input:720 x 480 (60p), 720 x 576 (50p), 1280 x 720p (50p), 1280 x 720p(60p), 1920 x 1080 (50i), 1920 x 1080 (60i), 1920 x 1080 (24p), 1920 x 1080 (25p), 1920 x 1080 (30p), 1920 x 1080 (50p), 1920 x 1080 (60p) |
| Capture:720 x 480 (60p), 720 x 576 (50p), 1280 x 720p (50p), 1280 x 720p(60p), 1920 x 1080 (50i), 1920 x 1080 (60i), 1920 x 720p (24p), 1920 x 1080 (25p), 1920 x 1080 (30p), 1920 x 1080 (25p), 1920 x 1080 (30p) |
| Note: Upscaling is not supported | |
| Recording format | Video: MP4, Audio: AAC Stereo |
| Quality Recording | Max: 18Mbps@1080P 30fps |
| Recorded file | Max: 2GB / Per File, With RTC (Real Time Clock) |
| Recording Data | Max: 140MB / Minute, 8.4GB / Hour |
| Power | USB DC 5V / 2A |

Video capture application
| Software | Arcsoft Showbiz |
| Video Editing | Timeline / Storyboard edit, Split / Divide Scenes, Multi Trim Scenes ... |
| Video Export | Upload to YouTube |
| Portable Device: iPod, iPhone, iPod Touch, Apple TV, PSP, PS3, Xbox | |
| File: MPEG 1 / 2 / 4, WMV HD, Quicktime (MOV) ... | |
| Operating System Requirements | Windows 8 (32 / 64 bit), Windows 7 (32 / 64 bit), Windows Vista (32 / 64 bit) |
| CPU Requirements | Intel Core 2 Duo 2.8GHz, AMD Athlon 64X2 Dual Core 3.0GHz |
| Memory Requirements | 4 GB RAM |
| Graphic Card Requirements | VGA card with support for DirectX 10.0c or above |
CONTINUTUL PACHETULUI


YPBPR component video connection (DVD player, PS3 etc.)


flowchart
graph TD
    A["Home Device"] --> B["LED Lighting"]
    B --> C["Audio System"]
    C --> D["Monitor"]
    D --> E["Display"]
    E --> F["Smart Speaker"]
    F --> G["Audio Receiver"]
    G --> H["Analog Display"]
    H --> I["Computer Monitor"]
    style A fill:#f9f,stroke:#333
    style I fill:#ccf,stroke:#333


RO
RO


| Location to capture | USB 2.0 Host, SD Card |
| Video input | Digital: HDMI |
| Analog: Component Video, Composite Video | |
| Audio input | Digital: HDMI |
| Analog: RCA L/R, 3.5mm MicroPhone In | |
| Note: Microphone without pass through for HDMI input | |
| Video output | Digital: HDMI (Pass-through from HDMI or Component or Composite Input) |
| Audio output | Digital: HDMI (Pass-through from HDMI or RCA L/R Input) |
| Analog: 3.5mm Stereo (Pass-through from HDMI or RCA L/R Input) |
Connectors applicable to video consoles
| HDMI | WiiU, Xbox 360, Xbox One, PS4 |
| Componentes | WiiU, Xbox 360, PS3 |
| Compuesto | WiiU, Xbox 360, PS3 |
Note: HDCP contents cannot be recorded
Extra Hardware
| Coding | Hardware H.264 encoder |
| User Interface | Capture button |
| Status LED indicator | |
| Dimensions | 140(L) × 70(W) × 23(H) mm |
| Weight | 115g |
Standards
| Storage | USB flash drive, Portable hard drive, SD card |
| Max Capacity: USB / 2T, SD / 64G | |
| Note: exFAT format is not compatible | |
| Resolution | Input:720 x 480 (60p), 720 x 576 (50p), 1280 x 720p (50p), 1280 x 720p(60p), 1920 x 1080 (50i), 1920 x 1080 (60i), 1920 x 1080 (24p), 1920 x 1080 (25p), 1920 x 1080 (30p), 1920 x 1080 (50p), 1920 x 1080 (60p) |
| Capture:720 x 480 (60p), 720 x 576 (50p), 1280 x 720p (50p), 1280 x 720p(60p), 1920 x 1080 (50i), 1920 x 1080 (60i), 1920 x 720p (24p), 1920 x 1080 (25p), 1920 x 1080 (30p), 1920 x 1080 (25p), 1920 x 1080 (30p) |
| Note: Upscaling is not supported | |
| Recording format | Video: MP4, Audio: AAC Stereo |
| Quality Recording | Max: 18Mbps@1080P 30fps |
| Recorded file | Max: 2GB / Per File, With RTC (Real Time Clock) |
| Recording Data | Max: 140MB / Minute, 8.4GB / Hour |
| Power | USB DC 5V / 2A |
Video capture application
| Software | Arcsoft Showbiz |
| Video Editing | Timeline / Storyboard edit, Split / Divide Scenes, Multi Trim Scenes ... |
| Video Export | Upload to YouTube |
| Portable Device: iPod, iPhone, iPod Touch, Apple TV, PSP, PS3, Xbox | |
| File: MPEG 1 / 2 / 4, WMV HD, Quicktime (MOV) ... | |
| Operating System Requirements | Windows 8 (32 / 64 bit), Windows 7 (32 / 64 bit), Windows Vista (32 / 64 bit) |
| CPU Requirements | Intel Core 2 Duo 2.8GHz, AMD Athlon 64X2 Dual Core 3.0GHz |
| Memory Requirements | 4 GB RAM |
| Graphic Card Requirements | VGA card with support for DirectX 10.0c or above |
OBSAH BALENIA
· SX300
• Dial'kové ovládanie
- Stručný návod na inštaláciu v niekol'kých jazykoch
• Inštalačné CD
• Kábel AV adaptér,
· Napájanie USB
• USB kábel


- PWR - 5V / 2A príkon
Vstup HDMI - 2. HDMI IN
YPBPR component video connection (DVD player, PS3 etc.)


flowchart
graph TD
    A["Home Device"] --> B["LED Lighting"]
    B --> C["Audio System"]
    C --> D["Monitor"]
    D --> E["Display"]
    E --> F["Smart Speaker"]
    F --> G["Audio Receiver"]
    G --> H["Analog Assistant"]
    H --> I["Radio Station"]
    I --> J["Radio Headset"]
    style A fill:#f9f,stroke:#333
    style J fill:#ccf,stroke:#333


SK
SK
Inštalácia PC Driver robit' Streaming
IT9910 Grabber Device (HD)

OBS Studio robit' Streaming
Nakoniec kliknite na tlačidlo OK.
| Location to capture | USB 2.0 Host, SD Card |
| Video input | Digital: HDMI |
| Analog: Component Video, Composite Video | |
| Audio input | Digital: HDMI |
| Analog: RCA L/R, 3.5mm MicroPhone In | |
| Note: Microphone without pass through for HDMI input | |
| Video output | Digital: HDMI (Pass-through from HDMI or Component or Composite Input) |
| Audio output | Digital: HDMI (Pass-through from HDMI or RCA L/R Input) |
| Analog: 3.5mm Stereo (Pass-through from HDMI or RCA L/R Input) |
Connectors applicable to video consoles
| HDMI | WiiU, Xbox 360, Xbox One, PS4 |
| Componentes | WiiU, Xbox 360, PS3 |
| Compuesto | WiiU, Xbox 360, PS3 |
Note: HDCP contents cannot be recorded
Extra Hardware
| Coding | Hardware H.264 encoder |
| User Interface | Capture button |
| Status LED indicator | |
| Dimensions | 140(L) × 70(W) × 23(H) mm |
| Weight | 115g |
Standards
| Storage | USB flash drive, Portable hard drive, SD card |
| Max Capacity: USB / 2T, SD / 64G | |
| Note: exFAT format is not compatible | |
| Resolution | Input:720 x 480 (60p), 720 x 576 (50p), 1280 x 720p (50p), 1280 x 720p(60p), 1920 x 1080 (50i), 1920 x 1080 (60i), 1920 x 1080 (24p), 1920 x 1080 (25p), 1920 x 1080 (30p), 1920 x 1080 (50p), 1920 x 1080 (60p) |
| Capture:720 x 480 (60p), 720 x 576 (50p), 1280 x 720p (50p), 1280 x 720p(60p), 1920 x 1080 (50i), 1920 x 1080 (60i), 1920 x 720p (24p), 1920 x 1080 (25p), 1920 x 1080 (30p), 1920 x 1080 (25p), 1920 x 1080 (30p) |
| Note: Upscaling is not supported | |
| Recording format | Video: MP4, Audio: AAC Stereo |
| Quality Recording | Max: 18Mbps@1080P 30fps |
| Recorded file | Max: 2GB / Per File, With RTC (Real Time Clock) |
| Recording Data | Max: 140MB / Minute, 8.4GB / Hour |
| Power | USB DC 5V / 2A |
Video capture application
| Software | Arcsoft Showbiz |
| Video Editing | Timeline / Storyboard edit, Split / Divide Scenes, Multi Trim Scenes ... |
| Video Export | Upload to YouTube |
| Portable Device: iPod, iPhone, iPod Touch, Apple TV, PSP, PS3, Xbox | |
| File: MPEG 1 / 2 / 4, WMV HD, Quicktime (MOV) ... | |
| Operating System Requirements | Windows 8 (32 / 64 bit), Windows 7 (32 / 64 bit), Windows Vista (32 / 64 bit) |
| CPU Requirements | Intel Core 2 Duo 2.8GHz, AMD Athlon 64X2 Dual Core 3.0GHz |
| Memory Requirements | 4 GB RAM |
| Graphic Card Requirements | VGA card with support for DirectX 10.0c or above |
PAKET İÇERİĞİ


TR
TR


AKIŞ YAPMAK IÇIN OBS STUDIO
Finally we press the button Start Transmission to begin to emit and the same button to stop it.
For more information, see the OBS Quick Guide included in the installation CD.
TECHNICAL SUPPORT
Please visit our website www.keepoutgaming.com for more information on the installation and configuration of this product or write an email to the following address: support@keep-out.eu
Do not expose to direct sunlight and other heat sources.
Do not handle liquids near or on the unit.
Never spill liquid of any kind on the unit.
Do not place the unit near devices that generate magnetic fields.
Do not place heavy objects on top of the unit
POWER SUPPLY
Use only our adapter, output voltage 5VDC / 2A.
Disconnect the power supply when the weather is stormy, thunder or lightning.
Disconnect the power supply, when no one is home or not in use for a long time
Keep the power cord out of the reach of children or physical or mechanical.
TEMPERATURE
Do not place the unit near a radiator or heater.
If the unit is suddenly moved from a cold to a warm place, unplug the power cord for at least two hours.
MOISTURE
Do not expose the machine to rain, moisture or place near water.
Make sure the interior is dry and cool.
VENTILATION
Keep openings free.
Make sure the drive has enough space for ventilation around.
Never cover the device.
Markenname: KEEP OUT GAMING
Modell Nr: SX300
Gelves (Sevilla), Spain.
Website: www.approx.es

EC DECLARATION OF CONFORMITY
We declare under our sole responsibility that the product:
Brand name: KEEP OUT GAMING
Model no: SX300
Product description: HD VIDEO CAPTURE
The measurements shown in this test report were made in accordance with the procedures given in the:
- EMC DIRECTIVE: 2014/30/EU
- LVD DIRECTIVE: 2014/35/EU
- RoHS DIRECTIVE: 2011/65/EU
To which this declaration is based on with full conformance to the following European norms and standards:
- EN 55024: 2010/A1:2015
- EN 55032: 2012
- EN 61000-3-2: 2014
- EN 61000-3-3: 2013
- EN 60950-1:2006+A11:2009+A1:2010+A12:2011+A2:2013
- IEC62321: 2013
Signed Nov 04, 2016

natural_image
Simple curved line drawing without any text, numbers, or symbolsJose Luis Ruiz Gómez
Managing Director
KEEP OUT GAMING.
ADD: Polígono Industrial Guadalquivir
Gelves (Sevilla), Spain.
Website: www.approx.es

Marca comercial: KEEP OUT GAMING
Referencia: SX300
Gelves (Sevilla), Spain.
Website: www.approx.es

DÉCLARATION DE CONFORMITÉ CE
Marque: KEEP OUT GAMING
Gelves (Sevilla), Spain.
Website: www.approx.es

Safety, Maintenance and Recycling Instructions
- Caution: Never open the device, the internal parts are danger, electrical shock.
- Do not install this unit near water, for example, in a wet basement, in an unprotected outdoor installation or in any area classified as a wet.
- Do not insert objects of any kind into this unit through openings as they may touch voltage points and short out parts that could result in fire or electric shock. Do not spill any liquid on the unit.
- Be sure to connect the connectors to the respective outputs of the device to be connected.
- Clean the product with a soft and dry cloth.
- Follow local regulations for disposing of the product.
Keep Out is a registered brand of Approx Iberia. S.L. C/Tecnologia 5, PO Box 15, 41120 Gelves, Sevilla (Spain). Keep Out is not associated to any manufacturer. All brands and registered trademarks are the property of their respective owners and are used for descriptive purposes only. Made in China
Soporte técnico/Technical support/ Support technique/ Technischer Support: support@keep-out.eu
El contenido de esta guía está sujeto a errores tipográficos The content of this guide is subject to typographical errors Le contenu de ce guide est sujette à des erreurs typographiques Der Inhalt dieser Anleitung unterliegt typographische Fehler

keepoutgaming.com
- ВЪВЕДЕНИЕ
- СЪДЪРЖАНИЕ НА ПАКЕТА
- OBSAH BALENÍ
- CS
- IT9910 Grabber Device (HD)
- PACKUNGSINHALT
- DE
- EL
- PRODUCT DESCRIPTION
- TECHNICAL SPECIFIATIONS
- PACKAGE CONTENTS
- REMOTE CONTROL
- CONNECTIONS
- EN
- FIRMWARE UPDATE AND OTHER FEATURES
- VIDEO EDITING
- Installation PC Driver to do Streaming
- OBS Studio to do Streaming
- TECHNICAL SUPPORT
- Introducción
- ES
- PAKENDIS
- ET
- Paigaldamine PC Driver teha Streaming
- OBS Studio teha Streaming
- 100%
- 75%
- 50%
- 25%
- FR
- Sadržaj pakiranja
- DALJINSKI UPRAVLJAČ
- HR
- PROCES RADA
- INSTALACIJA PC VOZAČ UČINITI STREAMING
- DOBIVENA STUDIO UČINITI STREAMING
- TEHNIČKA PODRŠKA
- BEVEZETÉS
- CSOMAG TARTALMA
- HU
- CONTENUTO DEL PACCO
- VERPAKKINGSINHOUD
- NL
- Installatie PC Driver te doen Streaming
- ZAWARTOŚĆ PACZKI
- PL
- CONTEÚDO DO PACOTE
- PT
- CONTINUTUL PACHETULUI
- RO
- OBSAH BALENIA
- SK
- Inštalácia PC Driver robit' Streaming
- OBS Studio robit' Streaming
- PAKET İÇERİĞİ
- TR
- AKIŞ YAPMAK IÇIN OBS STUDIO
- POWER SUPPLY
- TEMPERATURE
- MOISTURE
- VENTILATION
- Markenname: KEEP OUT GAMING
- EC DECLARATION OF CONFORMITY
- Brand name: KEEP OUT GAMING
- Product description: HD VIDEO CAPTURE
- Marca comercial: KEEP OUT GAMING
- DÉCLARATION DE CONFORMITÉ CE
- Safety, Maintenance and Recycling Instructions
Brand : KeepOut
Model : SX300
Category : VCR