
BLV 36240 Battery - Blower Kärcher - Free user manual and instructions
Find the device manual for free BLV 36240 Battery Kärcher in PDF.



| Product Type | Cordless blower/vacuum |
| Brand | Kärcher |
| Model | BLV 36240 Battery |
| Dimensions (L × W × H) | 1290 × 230 × 449 mm |
| Weight (without battery) | 4.7 kg |
| Rated voltage | 36 V |
| Battery type | Kärcher Battery Power 36 V (not included) |
| Air speed (blowing) | Average 225 km/h, max 275 km/h |
| Air speed (vacuuming) | Average 172 km/h, max 208 km/h |
| Shredding ratio | 10:1 |
| Collection bag volume | 45 L |
| Guaranteed sound power level | 104 dB(A) |
| Sound pressure level (blowing) | 88.6 dB(A) |
| Sound pressure level (vacuuming) | 88.9 dB(A) |
| Total vibration (blowing) | 3.2 m/s² |
| Total vibration (vacuuming) | 4.1 m/s² |
| Vibration uncertainty | 1.5 m/s² |
| Functions | Blowing, vacuuming and shredding |
| Safety devices | Thermal protection, guard grill, quick lock |
| Maintenance and cleaning | Clean with a damp cloth, do not use solvents |
| Spare parts and repairability | Kärcher original parts, repair by authorized service center |
Frequently Asked Questions - BLV 36240 Battery Kärcher
User questions about BLV 36240 Battery Kärcher
0 question about this device. Answer the ones you know or ask your own.
Ask a new question about this device
Download the instructions for your Blower in PDF format for free! Find your manual BLV 36240 Battery - Kärcher and take your electronic device back in hand. On this page are published all the documents necessary for the use of your device. BLV 36240 Battery by Kärcher.
USER MANUAL BLV 36240 Battery Kärcher
H. Jenner Chairman of the Board of Management
S. Reiser Director Regulatory Affairs & Certification
71364 Winnenden (Germany)
Tel.: +49 7195 14-0
Fax: +49 7195 14-2212
Winnenden, 2018/09/01
Contents
General notes. 17
Safety instructions 17
Intended use 22
Environmental protection. 22
Accessories and spare parts 23
Scope of delivery 23
Safety devices 23
Symbols on the device 23
Description of the device 23
Installation 24
Operation 24
Transport and storage 25
Care and service 25
Troubleshooting guide 26
Warranty 26
Technical data 26
EU Declaration of Conformity 27
General notes
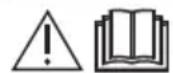
Read these safety instructions, these original instructions, the safety instructions provided with the battery pack, and the original instructions supplied with the battery pack/standard charger before using the device for the first time. Act in accordance with
nal instructions, the safety instructions provided with the battery pack and the original instructions supplied with the battery pack/standard charger before using the device for the first time. Act in accordance with
them. Keep the booklets for future reference or for future owners.
In addition to the notes in the operating instructions, you also need to take into consideration the general safety regulations and accident prevention guidelines applicable by law.
Safety instructions
Hazard levels
DANGER
- Indication of an imminent threat of danger that will lead to severe injuries or even death.
WARNING
- Indication of a potentially dangerous situation that may lead to severe injuries or even death.
CAUTION
- Indication of a potentially dangerous situation that may lead to minor injuries.
ATTENTION
- Indication of a potentially dangerous situation that may lead to damage to property.
General safety instructions
DANGER • Severe injuries through a lack of concentration when working. Do not use the device when under the influence of drugs, alcohol, or medication, or when you are tired.
WARNING • Read all safety warnings and all instructions.
Failure to follow the warnings and instructions may result in electric shock, fire and/or serious injury. Save all warnings and instructions for future reference. The device is not intended for use by children, persons with restricted physical, sensory or mental abilities or persons unfamiliar with these instructions. The age of the operator may be limited by local restrictions. Ensure that all protective devices and handles are correctly fitted, securely fastened and in good condition.
- Before operation, make sure the device, all control elements, and safety devices are working properly. - Never use the device if the on/off switch on the handle does not switch on and off correctly. - Check the housing for damage each time before using the device. - Replace worn or damaged parts as a complete set to maintain the correct balance. - Keep children and other persons out of the work area while you are using the device. - Make sure that the ventilation openings are free of deposits. - Objects can be blown by the airflow over a considerable distance. Inspect the work area thoroughly for objects such as stones, broken glass, nails, wires or strings, and remove these before using the device.
Risk of injury due to ejected material. Do not operate the device on paved surfaces or gravel. Operate the device only on a firm, level surface and in the recommended position.
CAUTION: Familiarize yourself with the controls and the correct use of the device.
- Wear full hearing protection when using the device. The device is extremely loud, and can cause permanent hearing damage if you do not strictly follow the instructions on exposure, noise reduction and hearing protection. - Wear full eye protection when using the device. The manufacturer strongly recommends wearing a full face mask or fully closed safety goggles. Normal glasses or sunglasses will not protect you from thrown objects. - Risk of injury when loose fitting clothing, hair or jewellery are sucked into the device's air intake. Tie long hair back above shoulder level.
- Wear long, heavy trousers, sturdy shoes and well-fitting gloves when working with the device. Do not work barefoot. Do not wear any jewellery, sandals or short trousers.
ATTENTION: The device operator is responsible for accidents with other people and their property.
Note: Regulations may restrict the use of this device in some regions. Seek advice from your local authorities. Have damaged or illegible warning signs on the device replaced by the authorised Customer Service department. Before using the cordless blower vacuum, use a rake and broom to remove any contamination.
Safe operation
DANGER: Operation in explosive atmospheres is prohibited.
WARNING: Maintain a minimum distance of 15 m from persons and animals. Stop the device when any persons or animals enter this area. Keep your face and body away from the supply port. Make sure the feed chamber is empty before starting the device. Do not keep your hands or other body parts in the feed chamber, the chute, or in the vicinity of other moving parts. Do not use the device if there is a danger of lightning. You need an unobstructed view of the work area in order to be able to recognise any potential dangers. Use the device only under good lighting conditions. Do not run but rather walk when working with the device. Do not walk backwards. Avoid an abnormal pos
ture, keep a stable, safe footing and maintain your balance.
- Never use the device with defective protection devices or absent safety devices, such as an installed debris catcher. Immediately stop the device and check for damage or identify the cause of the vibration if the device has been dropped, hit, or vibrates abnormally. Have damage repaired by the authorized Customer Service or replace the device. In the event of an accident or malfunction, immediately switch off the device and remove the battery pack. The device may not be put back into service until it has been checked by an authorized Customer Service centre. Risk of injury on rotating parts. Switch the motor off, remove the battery pack and make sure that all moving parts have stopped moving:
Before leaving the device unattended. Before you remove blockages or clean the pipe. Before you check the device after it has been hit by a foreign object. Before checking, maintaining or working on the device.
CAUTION: The operation of similar tools in the environment increases the risk of hearing damage and the likelihood of
failing to hear potential hazards, e.g. people entering your work area. Do not make any changes to the device, and only use accessories and spare parts recommended by the manufacturer.
Note: Only operate the device at appropriate times. Please also observe local regulations and directives. When operating early in the morning or late in the evening, other people may be disturbed.
Safe operation of cordless blower
CAUTION: Danger to health due to inhalation of dust. Wear a respiratory mask when working with the device. Moisten dusty surfaces to reduce dust impact. Do not operate the device near an open window. Never direct the blower nozzle at people or animals.
ATTENTION: Damage to the device if waste is sucked into the air intake. Do not place the blower on or near loose waste.
- Never insert objects into the blower pipes.
Note: Use the extension of the nozzle so that the airflow can be close to the ground and work effectively.
Safe operation of cordless vacuum cleaner
WARNING: Risk of injury if the cordless aspirator in suction mode is only used with the upper suction pipe. You must connect the upper and lower suction pipe together before using the device for the first time. Risk of injury due to waste being flung about. Never use the cordless vacuum cleaner without the collecting bag installed. Before operation, make sure that the collecting bag is in good condition and is completely closed.
- Risk of injury and damage to the device. Do not vacuum sharp or larger objects with the device, such as glass shards, stones, bottles, cans, or metal parts. - Fire in the collecting bag. Do not vacuum burning or smoldering objects, such as cigarettes, ashes from fireplaces or grills. - Serious injuries due to rotating impeller blades. Keep body parts away from rotating parts. Turn off the motor, and wait for the blades to stop turning before opening the suction flap, or attaching or replacing the pipes, or opening or removing the collecting bag. - Switch the motor off, remove the battery pack, and make sure that all moving parts have completely
stopped before you remove a blockage.
ATTENTION: Blockage in the suction pipe. Do not hold the suction pipe directly in the debris heap. Move the device from one side to the other from the outside of the suction material.
- Keep the motor higher than the intake end of the suction pipe. - Material accumulation due to material again emerging from the suction port. Make sure that no material accumulates in the flow area.
Safe transport and storage
WARNING: Switch the device off, allow it to cool down, and remove the battery pack before storage or transportation.
CAUTION: Risk of injury and damage to the device. Secure the device against movement or falling down during transport.
ATTENTION: Remove all foreign bodies from the device before storage or transportation.
- Store the device in a dry, well-ventilated location out of the reach of children. Keep the device away from corrosive substances such as garden chemicals. - Do not store the device outdoors.
Safe servicing and care
WARNING: Turn off the motor, make sure all moving parts
have fully stopped, and remove the battery pack before inspecting, cleaning, or servicing the device. Service and maintenance work on this device require special care and knowledge and may only be performed by appropriately qualified personnel. Take the device to an authorized Customer Service department for maintenance. Ensure that the device is in a safe condition by regularly checking that all bolts, nuts, and screws are screwed tight.
- Switch the motor off, remove the battery pack, and make sure that all moving parts have completely stopped before you remove a blockage.
CAUTION: Only use accessories and spare parts and attachments that are approved by the manufacturer. Only original spare parts, original accessories, and original attachments ensure fault-free and safe operation of the device.
ATTENTION: Clean the product with a soft, dry cloth each time after use.
Note: You may only perform the adjustments and repairs described in these operating instructions. Contact your authorized Customer Service department for other repairs.
- Have damaged or illegible labels replaced by an authorized Customer Service center.
Residual risks
WARNING
- Certain residual risks remain present, even when the device is operated in the prescribed manner. The following dangers can be present when using the device: Vibration can cause injuries. Use the correct tools for the job, use the handles provided, and use the lowest required speed to complete the job.
- Noise can cause hearing injuries. Wear hearing protection and limit the duration of exposure.
- Risk of injuries from hurled objects that may escape from the blower pipe due to the air pressure, if the collecting bag is not properly secured or is damaged. Always wear eye protection.
Risk reduction
CAUTION
- Using the device for longer periods can cause poor circulation in the hands due to vibrations. A general period of use cannot be set, because this depends on several influencing factors:
- Personal tendency to suffer from poor circulation (frequently cold fingers, tingling sensation in the fingers)
Consequently, cold fingers, tingling sensation in the fingers.
- Low ambient temperature. Wear warm gloves to protect your hands.
- Holding the device too tightly hindering blood circulation.
- Continuous operation is more harmful than operation interrupted by work breaks. You should see a doctor if using the device regularly and for lengthy periods of time, and in the event of repeated occurrences of symptoms such as tingling in the fingers or cold fingers.
Intended use
△WARNING
The device is not intended for use by children, persons with restricted physical, sensory or mental abilities or persons unfamiliar with these instructions.
The device is intended for outdoor use only. The device may only be used in a dry, well-lit environment. - The device is designed for blowing away and vacuuming light debris such as leaves, grass and other garden waste. The device is used to suck in and shred dirt and leaves, and to store them in the collecting bag. Any other use, e.g. sucking in water or other fluids, is prohibited.
Environmental protection

The packing materials can be recycled. Please dispose of packaging in accordance with the environmental regulations.

Electrical and electronic appliances contain valuable, recyclable materials and often components such as batteries, rechargeable batteries or oil, which - if handled or disposed of incorrectly - can
pose a potential threat to human health and the environment. However, these components are required for the correct operation of the appliance. Appliances marked by this symbol are not allowed to be disposed of together with the household rubbish.
Notes on the content materials (REACH)
Current information on content materials can be found at: www.kaercher.com/REACH
Accessories and spare parts
Only use original accessories and original spare parts. They ensure that the appliance will run fault-free and safely.
Information on accessories and spare parts can be found at www.kaercher.com.
Scope of delivery
The scope of delivery for the appliance is shown on the packaging. Check the contents for completeness when unpacking. If any accessories are missing or in the event of any shipping damage, please notify your dealer.
Safety devices
CAUTION
Missing or modified safety devices
Safety devices are provided for your own protection.
Never modify or bypass safety devices.
Safety switch
The safety button is triggered by the fixing screw on the protective grid. This prevents the user from injuring himself on the fan wheels and mulching blades when the suction pipe is removed.
Symbols on the device
| Read the operating instructions and all safety instructions before operating the device for the first time. | |
| Always wear suitable eye protection and hearing protection when working with the device. | |
| Do not subject the device to rain or moist conditions. | |
| Danger due to flung objects. Keep spec-tators away from the work area. | |
| Rotating fan wheels. Keep hands and feet away from the openings while the device is in operation. | |
| The guaranteed sound level specified on the label is 104 dB. | |
| Setting for speed regulation. |
| a b | Slider for suction pipe. Lock open = suction pipe is unlocked; lock closed = suction pipe is locked. |
| Pull: Quick-release catch | |
| Vacuuming operations | |
| Blowing mode |
Description of the device
The maximum amount of equipment is described in these operating instructions. Depending on the model used, there are differences in the scope of delivery (see packaging).
See graphics page for illustrations Illustration A
① Guide rollers ② Nozzle for blower pipe ③ Lower suction pipe ④ Upper suction pipe ⑤ Battery pack unlocking button ⑥ Type plate ⑦ Motor casing ⑧ Motor casing locking pin ⑨ Unlocking button for blower pipe ⑩ Slider for suction pipe ⑪ Eyelet for carrying belt ⑫ Latch for protective grid ⑬ Fixing screw for protective grid ⑭ Protective grid ⑮ Front handle ⑯ Speed regulation ⑰ Rear handle ⑱ Trigger ⑲ Selector switch for blower / suction mode ⑳ Connecting piece ㉑ Upper blower pipe ㉒ Lower blower pipe ㉓ Adapter for collecting bag ㉔ Collecting bag ㉕ Battery Pack Battery Power 36V ㉖ Quick Charger Battery Power 36V ㉗ Carrying belt (optional)
Rechargeable battery pack
The device can be operated with a 36 V Kärcher Battery Power battery pack.
Installation
Installation of blower / suction device
The following describes the installation of the complete blower and suction device. If the device is to be operated only as a blower or suction device, the corresponding steps are omitted during assembly.
- Allow the blower pipe nozzle to click into place in the lower blower pipe.
Illustration B
- Push the lever down and snap the blower pipe into the adapter of the guide rollers in the desired position.
Illustration C
- Allow the lower blower pipe to click into place in the upper blower pipe.
Illustration D
- Click the blower pipe in place in the motor casing. The blower pipe unlocking button must audibly click into place.
Illustration E
△WARNING
Movement of the fan wheels and mulching blades Incision injuries
Wear protective gloves.
Keep your fingers away from the fan and mulching blades.
- If it is not necessary to mount the suction pipe, the protective grid must be installed. Install the protective grid if necessary.
Illustration F
a Place the protective grid on the opening of the motor casing.
b Tighten the protective grid fixing screw until it clicks audibly.
The safety button has tripped.
- Allow the lower suction pipe to click into place in the upper suction pipe.
Note
The upper and lower suction pipe can no longer be detached from each other.
Illustration G
- Open the protective grid.
Illustration H
a Unscrew the fixing screw on the protective grid.
b Open the protective grid.
- Click the suction pipe in place in the motor casing.
Illustration I
a Pull out the motor casing locking pin as far as possible.
b Insert the suction pipe into the motor casing.
c Insert the motor casing locking pin and check that it is correctly seated in the holder.
- Lock the suction pipe with the slider.
Illustration J
- Secure the protective grid on the suction pipe. Illustration K
a Fold the protective grid onto the suction pipe.
b Insert the clip of the latch into the adapter of the protective grid.
c Push the latch down.
- Install the collecting bag, see chapter Installing the collecting bag.
Installing the collecting bag
Depending on the desired operating mode, the collecting bag can either be hooked into the eyelet on the suction pipe or into the eyelet on the blower pipe.
- Install the collecting bag.
Illustration L
a Pull the collecting bag on the adapter over the connecting piece. b Allow the adapter to click into place. c Hook the tab of the collecting bag into the eyelet on the suction pipe or, in the case of operation without a suction pipe, into the eyelet on the blower pipe.
Hooking the carrying belt
- Hook the carrying belt into the eyelet on the handle, making sure the quick release is accessible at all times.
Illustration M
Operation
WARNING
Risk of injury due to incompletely assembled device
Only operate the appliance once it is fully assembled and functional.
CAUTION
Risk of injury from objects flying about
Wear safety goggles and suitable protective gloves for all work with the device.
Control elements
The cordless aspirator has the following control elements:
- A speed control lever to regulate the speed of the airflow steplessly.
- A selector lever to switch between the blow and suction modes.
- A slider for locking / unlocking the suction pipe to connect the suction pipe to the motor casing or to separate it from the motor casing.
- A blower pipe unlocking button to separate the blower pipe from the motor casing.
Inserting the battery pack
ATTENTION
Dirty contacts
Damage to the device and battery
Check the battery mount and the contacts for soiling and clean them as necessary before inserting the battery.
Illustration N
- Push the battery into the mounting in the device until it audibly latches into place.
Switch on the device (suction mode)
CAUTION
Risk of injury from flying parts and hearing damage due to noise
Always wear eye and hearing protection.
WARNING
Risk of injury due to loss of control
Always hold the device with both hands on the provided handles.
- Insert the battery pack, see chapter Inserting the battery pack.
- Start the device.
Illustration O
a Set the selector lever to suction mode.
b Press the trigger.
The device starts up.
c Use the speed regulation to adjust the amount of airflow.
Switch on the device (blower mode)
CAUTION
Risk of injury from flying parts and hearing damage due to noise
Always wear eye and hearing protection.
△WARNING
Risk of injury due to loss of control
Always hold the device with both hands on the provided handles.
- Insert the battery pack, see chapter Inserting the battery pack.
- Start the device.
Illustration P
a Set the selector lever to blower mode.
b Press the trigger.
The device starts up.
c Use the speed regulation to adjust the amount of airflow.
Remove the collecting bag
△WARNING
Movement of the fan wheels and mulching blades Incision injuries
Wear protective gloves.
Keep your fingers away from the fan and mulching blades.
- Switch off the device.
- Remove the battery pack, see chapter Removing the battery pack.
- Remove the collecting bag.
Illustration Q
a) Take the tab of the collecting bag off the eyelet. b) Push the adapter down. c) Pull the collecting bag off the connecting piece.
Emptying the collecting bag
△ WARNING
Movement of the fan wheels and mulching blades can cause incision injuries.
Wear protective gloves.
Keep your fingers away from the fan and mulching blades.
- Switch off the device.
- Remove the battery pack, see chapter "Removing the battery pack".
- Remove the collecting bag, see chapter "Remove the collecting bag".
- Open the zipper on the collecting bag and empty the contents.
Illustration R
Removing the battery pack
Note
During longer work breaks, remove the battery pack from the device and secure it against unauthorized use.
- Pull the battery pack unlocking button in the direction of the battery pack.
Illustration S
- Press the battery pack unlocking button to unlock the battery pack.
- Remove the battery pack from the device.
Finishing operation
- Remove the battery pack from the device (see Chapter Removing the battery pack).
- Clean the device (see Chapter Cleaning the device).
Transport and storage
- Switch off the device.
- Remove the battery pack, see Chapter Removing the battery pack.
- Remove the collecting bag, see chapter Remove the collecting bag.
- Remove the suction pipe.
Illustration T
a Open the latch for the protective grid. b Unlock the suction pipe with the slider. c Pull out the motor casing locking pin as far as possible.
WARNING
Movement of the fan wheels and mulching blades
Incision injuries
Wear protective gloves.
Keep your fingers away from the fan and mulching blades.
Take the suction pipe off the motor casing.
- Remove the blower pipe.
Illustration U
a Press the blower pipe unlocking button. b Take the blower pipe off the motor casing.
Care and service
Cleaning the device
WARNING
Uncontrolled startup
Risk of injury
Remove the battery pack from the device during work breaks and before carrying out any service or care work.
ATTENTION
Incorrect cleaning
Damage to the device
Clean the device with a damp cloth.
Do not use solvent-based cleaning agents.
Do not immerse the device in water.
Do not clean the device with a hose or high-pressure water jet.
- Switch off the device.
- Remove the battery pack (see chapter Removing the battery pack).
- Clean the exterior of the device with a soft, dry cloth or with a brush.
Illustration V
Removing blockage
Note
Do not try to remove the fan or mulching blades. If removal of the mulching blades or fan is required, contact an authorised Customer Service centre.
WARNING
Movement of the fan wheels and mulching blades: Incision injuries
Wear protective gloves.
Keep your fingers away from the fan and mulching blades.
- Switch off the device.
- Remove the battery pack, see Chapter "Removing the battery pack".
- Remove the collecting bag, see Chapter "Remove the collecting bag".
- Remove the suction pipe.
Illustration T
a) Open the latch for the protective grid.
b) Unlock the suction pipe with the slider.
c) Pull out the motor casing locking pin as far as possible.
WARNING
Movement of the fan wheels and mulching blades: Incision injuries
Wear protective gloves.
Keep your fingers away from the fan and mulching blades.
d Take the suction pipe off the motor casing.
- Remove the blower pipe.
Illustration U
a Press the blower pipe unlocking button. b Take the blower pipe off the motor casing.
- If necessary, remove any blockage from the pipes.
- If necessary, remove any blockage in the adapter.
- If necessary, remove any blockage from the connecting piece.
- Clean the openings of the motor casing.
Troubleshooting guide
Malfunctions often have simple causes that you can remedy yourself using the following overview. When in doubt, or in the case of malfunctions not mentioned here, please contact your authorised Customer Service.
As the battery pack ages, even if it is looked after, its capacity reduces such that the full run time will no longer be reached when fully charged. This does not indicate a defect.
| Fault Cause Rectification | ||
| The device does not start up | Battery pack is not inserted correctly. | ● Push the battery pack into the mounting until it latches into place. |
| Battery pack is empty ● Charge the battery pack. | ||
| Battery pack is defective. ● Replace the battery pack. | ||
| Safety button did not trip during assembly. | 1. Unscrew the protective grid fixing screw once again. 2. Tighten the protective grid fixing screw until a clicking sound is heard. The safety button has tripped. | |
| The device stops during operation | The battery has overheated | ● Stop working and allow the battery to cool down to normal battery temperature. |
| Motor has overheated | ● Stop working and allow the motor to cool down. |
Warranty
The warranty conditions issued by our relevant sales company apply in all countries. We shall remedy possible malfunctions on your appliance within the warranty period free of cost, provided that a material or manufacturing defect is the cause. In a warranty case, please contact your dealer (with the purchase receipt) or the next authorised customer service site.
(See overleaf for the address)
Technical data
| Device performance data | ||
| Nominal voltage | V | 36 |
| Average air speed of cordless blower | km/h | 225 +/- 10 % |
| Maximum theoretical air speed of cordless blower | km/h | 275 +/- 10 % |
| Average air speed of cordless suction device | km/h | 172 +/- 10% |
| Maximum theoretical air speed of cordless suction device | km/h | 208 +/- 10 % |
| Mulch ratio | 10:1 | |
Collecting bag volume 45
Dimensions and weights
Weight (without battery pack) kg 4.7
Length x width x height mm 1290 x
230 x
449
Determined values in acc. with EN 50636-2-100
Sound level LpA Cordless blower dB(A) 88.6 Sound level LpA Cordless blower/vacuum dB(A) 88.9
Uncertainty KpA dB(A) 3
Total vibration value for cordless blower/vacuum m/s² 4.1
Uncertainty K m/s² 1.5
Subject to technical modifications.
Vibration value
△WARNING
The specified vibration value was measured using a standard test procedure and may be used to compare devices.
The specified vibration value may be used in a provisional assessment of the load. Depending on the way the device is used, the vibration emission can deviate from the specified overall value during the current use of the device.
Device with a hand-arm vibration value >2.5 m/s2 (see chapter Technical Data in the operating instructions)
CAUTION Uninterrupted use of the device for several hours can lead to numbness.
- Wear warm gloves to protect your hands. - Take regular breaks from work.
EU Declaration of Conformity
We hereby declare that the machine described below complies with the relevant basic safety and health requirements in the EU Directives, both in its basic design and construction as well as in the version placed in circulation by us. This declaration is invalidated by any changes made to the machine that are not approved by us.
Product: Cordless blower/vacuum
Type: 1.444-17x.x
Currently applicable EU Directives
2006/42/EC (+2009/127/EC)
2014/30/EU
2000/14/EC (+2005/88/EC)
2011/65/EU
Harmonised standards used
EN 60335-1:2012+A11:2014+A13:2017
EN 50636-2-100:2014
EN 55014-1: 2017
EN 55014-2: 2015
EN 50581:2012
Conformity evaluation procedure used
2000/14/EC and amended by 2005/88/EC: Appendix V
Sound power level dB(A)
Measured: 102.3
Guaranteed: 104
The signatories act on behalf of and with the authority of the company management.
H. Jenner
Chairman of the Board of Management
S. Reiser
Director Regulatory Affairs & Certification
71364 Winnenden (Germany)
Ph.: +49 7195 14-0
Fax: +49 7195 14-2212
Winnenden, 2018/09/01
Table of contents
General remarks. 27
2006/42/EC (+2009/127/EC)
2014/30/EU
2000/14/EC (+2005/88/EC)
2011/65/EU
H. Jenner Chairman of the Board of Management
S. Reiser Director Regulatory Affairs & Certification
Responsible for documentation: S. Reiser
Alfred Kärcher SE & Co. KG
Alfred-Karcher-Str. 28 - 40
71364 Winnenden (Germany)
Tel.: +49 7195 14-0
Fax: +49 7195 14-2212
Winnenden, 01/09/2018
Indices
H. Jenner Chairman of the Board of Management
S. Reiser Director Regulatory Affairs & Certification
71364 Winnenden (Germany)
Tel.: +49 7195 14-0
Fax: +49 7195 14-2212
Winnenden, 01/09/2019
Contents
Reducing risks
△CAUTION
Chairman of the Board of Management
S. Reiser
Director Regulatory Affairs & Certification
71364 Winnenden (Germany)
Tel.: +49 7195 14-0
Fax: +49 7195 14-2212
Winnenden, 2018/09/01
2006/42/CE (+2009/127/CE)
2014/30/UE
2000/14/CE (+2005/88/CE)
2011/65/UE
Chairman of the Board of Management
S. Reiser
Director Regulatory Affairs & Certification
Documentation manager: S. Reiser
Alfred Kärcher SE & Co. KG
Alfred-Karcher-Str. 28 - 40
71364 Winnenden (Germany)
Tel.: +49 7195 14-0
Fax: +49 7195 14-2212
Winnenden, 01/09/2018
Indices
General information 72
Safety instructions 72
2006/42/EC (+2009/127/EC)
2014/30/EU
2000/14/EC (+2005/88/EC)
2011/65/EU
Chairman of the Board of Management
S. Reiser
Director Regulatory Affairs & Certification
Winnenden, 01/09/2018
Contents
General notes 83
2006/42/EC (+2009/127/EC)
2014/30/EU
2000/14/EC (+2005/88/EC)
2011/65/EU
Chairman of the Board of Management
S. Reiser
Director Regulatory Affairs & Certification
71364 Winnenden (Germany)
Tel.: +49 7195 14-0
Fax: +49 7195 14-2212
Winnenden, 2018/09/01
Contents
General notes 93
2006/42/EC (+2009/127/EC)
2014/30/EU
2000/14/EC (+2005/88/EC)
2011/65/EU
Applied harmonised standards
EN 60335-1:2012+A11:2014+A13:2017
EN 50636-2-100:2014
EN 55014-1:2017
EN 55014-2:2015
EN 50581:2012
Chairman of the Board of Management
S. Reiser
Director Regulatory Affairs & Certification
71364 Winnenden (Germany)
Tel.: +49 7195 14-0
H. Jenner, Chairman of the Board of Management
S. Reiser, Director Regulatory Affairs & Certification
Authorized for documentation: S. Reiser
Alfred Kärcher SE & Co. KG
Alfred-Karcher-Str. 28 - 40
D-71364 Winnenden (Germany)
Phone: +49 7195 14-0
Fax: +49 7195 14-2212
Winnenden, 2018-09-01
Contents
General instructions 113
H. Jenner, Chairman of the Board of Management
S. Reiser, Director Regulatory Affairs & Certification
Documentation officer: S. Reiser
Alfred Kärcher SE & Co. KG
Alfred-Karcher-Str.28-40
71364 Winnenden (Germany)
Puh.: +49 7195 14-0
Remove the safety lock
DANGER
Risk of injury from the safety lock and the blades
Injuries from cuts
Wear protective gloves.
Keep your fingers away from the safety lock and the blades.
- Switch off the device.
- Remove the battery. See chapter Removing the battery. 3. Remove the safety lock, see chapter Removing the safety lock
- Open the lock's cover and secure the contents.
Figure R
Removing the battery
Indication
H. Jenner Chairman of the Board of Management
S. Reiser Director Regulatory Affairs & Certification
71364 Winnenden (Germany)
Tel.: +49 7195 14-0
Fax: +49 7195 14-2212
Winnenden, 2018/09/01
Contents
General warnings. 135
2006/42/EC (+2009/127/EC)
2014/30/EU
2000/14/EC (+2005/88/EC)
2011/65/EU
H. Jenner Chairman of the Board of Management
S. Reiser Director Regulatory Affairs & Certification
Winnenden, 01/09/2018
General instructions. 145
Safety instructions for the equipment. 145
Use as intended. 153
Environmental protection. 153
Accessories and spare parts. 153
Scope of delivery. 153
Protective devices. 153
Symbols on the device. 153
Description of the device. 154
Installation. 154
Operation. 155
Transport and storage. 156
Maintenance and servicing. 156
Troubleshooting. 157
Table of Contents 157
Technical Specifications 157
Declaration of Conformity with EU Standards....158
General Instructions
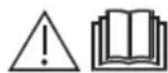
Before first use
Before using the device, it is necessary to familiarize yourself with the safety instructions, the original operating instructions, as well as the attached safety instructions and the original operating instructions for the battery pack / standard charger. Act in accordance with them. Keep the documentation for future use or for the next owner. In addition to the instructions contained in the operating instructions, also observe general legal regulations on safety and accident prevention.
Safety Instructions
Degree of danger
DANGER
- Indication regarding an imminent danger that will lead to serious injury or death.
WARNING
- Indication regarding a potentially dangerous situation that could lead to serious injury or death.
CAUTION
- Indication regarding a potentially dangerous situation that may lead to minor injury.
ATTENTION
- Warning regarding a potentially dangerous situation that may result in material damage.
- If the suction pipe is not installed, it is necessary to install a protective grille. If necessary, install a protective grille. Figure F
a Install the protective grille on the opening of the engine housing. b Tighten the screws of the protective grille by hand. The safety switch will activate.
6. Insert the lower suction pipe into the upper suction pipe.
Note
The upper and lower parts of the suction pipe can no longer be separated from each other.
Figure G
- Open the protective grille.
Figure H
a Start the screws of the protective grille. b Open the protective grille.
8. Insert the suction pipe into the engine housing and secure it.
Figure I
a Pull the safety plug of the engine housing as far as possible. b Insert the suction pipe into the engine housing. c Insert the safety plug into the engine housing and make sure it is correctly installed in the locking device.
- Lock the suction pipe with the slide regulator.
Figure J
- Attach the protective grille to the suction pipe.
Figure K
a) Attach the protective grille to the suction pipe. b) Insert the locking bracket into the latch of the protective grille. c) Press the latch down.
- Install the dust collector, see chapter Installing the Dust Collector.
Installing the Dust Collector
Depending on the required operating mode, the dust collector can be attached either to the suction pipe or to the blow pipe.
- Install the dust collector.
Figure L
a) Place the dust collector onto the adapter pipe. b) Secure the adapter with the clamp. c) Hook the dust collector's loop over the suction pipe or over the blow pipe, depending on the operating mode without the suction pipe.
Attaching the Belt
- Attach the belt over the handle so that the quick-release buckle is accessible at all times.
Figure M
Controls
WARNING
Danger of injury from moving parts
nonhocmbo c6paHno ycmpoucmea
Operate the device only when it is fully assembled and functional.
CAUTION
Danger of injury from flying objects
During any work on the device, use protective goggles and appropriate protective gloves.
Control elements
The battery-powered vacuum cleaner has the following control elements:
- Lever for adjusting the rotation speed of the main brush and the air flow speed. Lever for switching between vacuum cleaner and blower modes.
- Release button for the suction tube. To connect the suction tube to the motor housing, press the release button. To disconnect the tube from the motor housing, press the release button.
Installing the battery
WARNING
Charged contacts
Before installing the battery, check the compartment and contacts for contamination and clean if necessary.
Figure N
- Insert the battery into the holder until it clicks.
Switching on the device (vacuum mode) CAUTION
Danger of injury from rotating parts. Hearing damage due to noise.
Always use the complete set of protective equipment for eyes and ears.
WARNING
Danger of injury due to loss of control.
Always hold the device with both hands on the provided handles.
- Insert the battery block, see chapter Installing the battery. 2. Switch on the device.
Figure O
a Set the switch lever for vacuum mode. b Press the device switch. The device starts. c Adjust the air flow power with the rotation speed regulator.
Switching on the device (air blower mode)
CAUTION
Danger of injury from rotating parts. Hearing damage due to noise.
Always use the complete set of protective equipment for eyes and ears.
WARNING
Danger of injury due to loss of control.
Hold the device firmly with both hands using the provided handles.
- Insert the battery pack, see chapter Installing the battery. 2. Switch on the device.
Figure P
a Set the air volume switch. b Press the device switch. The device starts.
c Adjust the air flow rate with the speed regulator.
Removing the dust container
WARNING
Moving blades of the fan and rotating knives
Cuts
Wear protective gloves.
Keep your fingers away from the fan and rotating knives.
1. Switch off the device. 2. Remove the battery pack, see chapter Removing the battery pack. 3. Remove the dust container.
Figure Q
a Remove the dust container lid with a screwdriver. b Press the latch. c Remove the dust container from the spout.
Emptying the dust container
Keep fingers away from the vacuum and the mulching knives.
Cuts
Wear protective gloves.
Keep fingers away from the vacuum and the mulching knives.
1. Turn off the device. 2. Remove the battery pack, see chapter Removing the battery pack. 3. Remove the debris bag, see chapter Removing the debris bag. 4. Unzip the debris bag and empty it.
Figure R
Removing the battery pack
Note
During long breaks in work, remove the battery pack from the device and protect it from unauthorized use.
- Press the battery pack release button in the direction of the battery pack. Figure S
- Press the battery pack release button to release the battery pack.
- Pull the battery pack out of the device.
Finishing work
- Remove the battery pack from the device (see chapter Removing the battery pack).
- Clean the device (see the chapter Cleaning the device).
Transport and storage
1. Switch off the device. 2. Remove the battery pack, see the chapter Removing the battery pack. 3. Remove the dust container, see the chapter Removing the dust container. 4. Remove the suction tube. Figure T
a Open the latch of the protective grille. b Unlock the suction tube using the slide switch.
c Pull out the fuse. The motor housing can now be removed.
WARNING
Lower blades of the fan and the mulching blades
Cuts
Wear protective gloves.
Keep your fingers away from the fan and the mulching blades.
d Remove the suction tube from the motor housing.
- Remove the blower tube.
Figure U
a Press the unlock button of the blower tube. b Remove the blower tube from the motor housing.
Care and maintenance
Device layout
APPENDIX
Non-rechargeable start
Danger of priming
Before carrying out any maintenance and care work, remove the battery from the device.
ATTENTION
Incorrect cleaning
Device damage
Clean the device with a damp cloth.
Do not use cleaning agents
containing solvents.
Do not immerse the device in water.
It is forbidden to clean the device with a jet of water or a high-pressure jet.
1. Switch off the device. 2. Remove the battery pack (see chapter Removing the battery pack). 3. Clean the surface of the device with a dry cloth or brush.
FIGURE
Removing the filter
Warning
Do not attempt to remove the filter or the shredding blades. If the filter or shredding blades need to be removed, contact an authorized service center.
WARNING
Removing the fan cover and shredding blades
Cuts
Wear protective gloves. Keep your fingers away from the fan and shredding blades.
Turn off the device.
- Remove the battery pack, see chapter Removing the battery pack.
- Remove the dust container, see chapter Removing the dust container.
- Remove the suction tube. Figure T
a Open the latch of the protective grid. b Unlock the suction tube using the slide switch.
c Pull out the protective plug from the housing. The blades can now be removed.
WARNING
Removing the fan cover and shredding blades
Hope3bI
Use protective gloves.
Keep fingers away from the ventilator and rotating parts.
Remove the suction hose from the engine housing.
- Remove the blower hose.
Figure 1
a Press the release button of the blower hose.
b Remove the blower hose from the engine housing.
- If necessary, clean the hoses.
- If necessary, clean the hoses.
- If necessary, clean the hoses.
- Clean the openings in the engine housing.
Troubleshooting
Most malfunctions have simple causes, so with the help of a careful inspection they can be fixed by yourself. In case of doubt or occurrence of faults not described here, contact an authorized service center.
With increased service life, the capacity of the battery unit will decrease even with good maintenance, as a result of which even with a full charge, the full operating time will no longer be guaranteed. This is not a defect.
The release date is displayed on the factory plate attached to the device.
The digits have the following meaning:
Example: 30190
3 year of release 0 decade of release 1 year within decade 9 month of release 0 first digit of month 0 second digit of month
Thus, in this example, the code 30190 indicates the release date 09/(2)013.
Technical specifications
Chairman of the Board of Management
S. Reiser Director Regulatory Affairs & Certification
Winnenden, 2018/09/01
Chairman of the Board of Management
S. Reiser
Director Regulatory Affairs & Certification
Documentation authorized representative: S. Reiser
Alfred Kärcher SE & Co. KG
Alfred-Karcher-Str. 28 - 40
Winnenden, 2018/09/01
Table of contents
General notes 180
Safety instructions. 180
Intended use 185
Environmental protection 185
Accessories and spare parts. 185
Scope of delivery. 185
Safety devices 185
Symbols on the device. 185
Description of the device 186
Assembly. 186
Operation 187
Transport and storage 188
Safe transport and storage
△WARNING · Before storage or transport, switch off the device, let it cool down, and remove the battery pack.
CAUTION Risk of injury and damage to the device. During transport, secure the device against movement or falling.
Transport and storage
Switch off the device.
- Remove the battery pack, see the chapter Removing the battery pack.
- Remove the dust bag, see the chapter Removing the dust bag.
- Disassemble the suction tube.
- Figure T
Figure T
2006/42/EC (+2009/127/EC)
2014/30/EU
2000/14/EC (+2005/88/EC)
2011/65/EU
Chairman of the Board of Management
S. Reiser
Director Regulatory Affairs & Certification
Person authorized to compile the technical file: S. Reiser
Alfred Karcher SE & Co. KG
Alfred-Karcher-Str.28-40
71364 Winnenden (Germany)
Tel.: +49 7195 14-0
2006/42/EC (+2009/127/EC)
2014/30/EU
2000/14/EC (+2005/88/EC)
2011/65/EU
H. Jenner Chairman of the Board of Management
S. Reiser Director Regulatory Affairs & Certification
Documentation administrator: S. Reiser
Alfred Karcher SE & Co. KG
Alfred-Karcher-Str. 28 - 40
71364 Winnenden (Germany)
Tel.: +49 7195 14-0
Relevant EU Directive
2006/42/EC (+2009/127/EC)
2014/30/EU
2000/14/EC (+2005/88/EC)
2011/65/EU
Harmonized standards applied
EN 60335-1:2012+A11:2014+A13:2017
EN 50636-2-100:2014
EN 55014-1: 2017
EN 55014-2: 2015
EN 50581:2012
Procedure applied for conformity assessment
2000/14/EC as amended by 2005/88/EC: Annex V
Acoustic power level dB(A)
Measured: 102.3
Guaranteed: 104
The signatories act on behalf of and with the authorization of
H. Jenner Chairman of the Board of Management
S. Reiser Director Regulatory Affairs & Certification
Responsible for compiling the technical documentation: S. Reiser
Alfred Karcher SE & Co. KG
Alfred-Karcher-Str. 28 - 40
71364 Winnenden (Germany)
Tel.: +49 7195 14-0
Fax: +49 7195 14-2212
Winnenden, 2018/09/01
Contents
2006/42/EC (+2009/127/EC)
2014/30/EU
2000/14/EC (+2005/88/EC)
2011/65/EU
71364 Winnenden (Germany)
Tel.: +49 7195 14-0
Fax: +49 7195 14-2212
Winnenden, 01.09.2018
Contents
General notes 223
Safety notes 223
2006/42/EC (+2009/127/EC)
2014/30/EU
2000/14/EC (+2005/88/EC)
2011/65/EU
Applied harmonized standards
EN 60335-1:2012+A11:2014+A13:2017
EN 50636-2-100:2014
EN 55014-1:2017
EN 55014-2:2015
EN 50581:2012
H. Jenner Chairman of the Board of Management
S. Reiser Director Regulatory Affairs & Certification
Authorized representative for documentation: S. Reiser
Alfred Kärcher SE & Co. KG
Alfred-Karcher-Str. 28 - 40
71364 Winnenden (Germany)
Tel.: +49 7195 14-0
Fax: +49 7195 14-2212
Winnenden, 1.9.2018.
Table of Contents
General notes 233
Safety notes 233
Intended use 238
Environmental protection 238
Accessories and spare parts 239
Scope of delivery 239
Safety devices 239
Symbols on the device 239
Description of the device 239
Montaza. 240
Operation 240
Transport and storage 241
2006/42/EZ (+2009/127/EZ)
2014/30/EU
2000/14/EZ (+2005/88/EZ)
2011/65/EU
Applied harmonized standards
EN 60335-1:2012+A11:2014+A13:2017
EN 50636-2-100:2014
EN 55014-1:2017
EN 55014-2: 2015
EN 50581:2012
H. Jenner Chairman of the Board of Management
S. Reiser Director Regulatory Affairs & Certification
Documentation officer: S. Reiser
Alfred Karcher SE & Co. KG
Alfred-Karcher-Str. 28 - 40
71364 Winnenden (Germany)
Tel.: +49 7195 14-0
Winnenden, 2018/09/01
Table of contents
General information 2
Safety instructions 244
Intended use 250
Environmental protection 251
Accessories and spare parts 251
Scope of delivery 251
Device description 251
Symbols on the device 251
Maintenance
Transport and storage
Repairs and maintenance
Help in case of damage
Warranty
Technical data
EU declaration of conformity
General instructions
Before first use of the device, read the safety instructions, the original operating manual, the instructions for the battery, the safety instructions and the original operating manual for the battery/standard charging device. Follow them accordingly. Keep the manuals for later use or for the next owner. In addition to the instructions in the operating manual, you must also follow the general safety and disposal regulations.
Safety instructions
Hazard levels
DANGER
- Warning
- Immediate danger,
- which may lead to
- serious injury or
- death.
DANGER
- Warning of an imminent dangerous situation, which may lead to serious injury or death.
WARNING
- Warning of a potentially dangerous situation, which may lead to serious injury.
CAUTION
- Warning of a potentially
- dangerous situation, which
- may lead to
- material damage.
General safety instructions
WARNING: Read the instructions before operating without concentration. Do not use the tool if you are under the influence of narcotic substances, alcohol, or medications, or if you are tired.
ADJUSTMENT
- Read the safety instructions and instructions. Skip
If the safety instructions and instructions are not followed, you may receive an electric shock and/or serious injuries.
Keep all safety instructions and instructions for future use. The tool is not intended for use by persons with reduced physical, sensory or mental capabilities, or by persons who are not familiar with these instructions. Local regulations may impose age restrictions on the operator. Make sure that all guards and handles are correctly and securely attached, and are in good condition. Before working, make sure that the tool, all operating elements and safety devices
function correctly.
Never operate the tool if the switch does not turn on and off properly. Before each use, check the housing for damage.
- Replace worn or damaged parts with original spare parts to maintain balance.
- Keep children and bystanders away from the work area while operating the tool. Make sure that the ventilation openings are free of obstructions. The air flow may blow objects over a considerable distance. Before use, check the main work area for objects such as stones, broken glass, nails, wire or moisture, and remove them. Risk of injury from ejected material. Do not operate the tool above a hard base or a filled surface.
- Operate the tool only on a stable, level surface and in the recommended position.
SAFETY
Familiarize yourself with the operating elements and the correct use of the tool. When using the tool, wear hearing protection. The tool has an extremely loud sound and can cause permanent hearing damage if you do not strictly follow the instructions for its use, adjustment of the tool, and hearing protection. When using the tool, wear
WARNING: Read the instructions carefully before using the device. It is mandatory to wear a face mask or goggles on all sides. Standard or safety glasses do not protect against high-speed objects. - Danger of entanglement with loose clothing, hair, or jewelry in the air intake. Keep clothing and hair away from the intake. - When working with the device, wear clothing, safety gloves, safety shoes, and proper protective equipment. Do not work barefoot. Do not wear loose clothing, sandals, or shorts.
WARNING
- The operator of the device is responsible for accidents involving other people or their property.
Note: In some regions, the use of this device may be restricted by regulations. Consult the competent authorities in your area.
- Replace damaged or illegible warning labels on the device with authorized service parts. - Before
Use the battery-powered device for inspection and testing; discharge the battery completely before storage.
Safe operation
DANGER: Operation is prohibited in areas where there is a risk of explosion.
WARNING
Keep a minimum distance of 15 m from people and animals. Stop the device when a person is in this zone. Keep your head and body away from the discharge outlet. Make sure the discharge outlet is empty before
starting the device. Do not point the nozzle or other parts of the body at the discharge outlet, the collection bag, or near other moving parts. Do not use the device when there is a risk of lightning. You need an unobstructed view of
the work area to recognize potential hazards. Use the device only in good lighting. When working with the device, do not run, but walk. Do not walk backwards. Maintain a stable body position,
ensure a firm, stable stance and maintain balance. Never use the device with defective or missing safety devices, such as a mounted collection bag. If the device is dropped, hit, or becomes unbalanced, stop it immediately and check for damage, or have the vibration dampers installed. Have repairs performed by authorized service or replace the device.
- In case of malfunction or improper use, switch off the device and remove the battery. The device may only be put back into operation after it has been checked by authorized service. • Risk of injury from rotating parts. Switch off the motor, remove the battery, and make sure all moving parts have come to a complete stop.
- First use the device without adjustment.
- First use the device to remove the blocking dimensions, so that the device can be used.
- First check the device, especially if it has been hit by something.
- Before use, check the work on the support of the device according to the regulations.
- Working with power tools in a dusty environment increases the risk of accidents. It is possible that you may not notice potential dangers, e.g., people entering your work area. Do not make any modifications to the device and use only original and spare parts recommended by the manufacturer.
Note: Work with the device only at appropriate times. In connection with this, observe local regulations and customs. Working early in the morning or late in the evening may disturb other people.
Starting the device
Never modify or bypass safety devices.
Safety cut-out
The safety cut-out is activated by the protective grid. This prevents damage to the consumer working parts of the fan and the blades, if the suction pipe is dismantled.
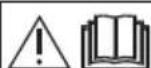
Before putting the device into operation, read and follow the operating instructions and the safety instructions.
①Blower tube ②Intake hose ③Upper suction hose ④Lower suction hose ⑤Battery compartment cover
(6)Type plate ⑦Motor housing ⑧Screws for motor housing ⑨Hose compartment cover ⑩Suction hose holder ⑪Carrying strap ⑫Quick-release fastener for protective grille ⑬Screws for protective grille ⑭Protective grille ⑮Carrying handle ⑯Speed selector ⑰Carrying handle ⑱Blower nozzle ⑲Blower nozzle for vacuuming/blowing mode ⑳Nozzle ㉑Upper hose for blowing ㉒Lower hose for blowing ㉓Dust bag adapter ㉔Dust bag ㉕Battery Battery Power 36V ㉖Charging device for fast charging Battery Power 36V ㉗Carrying strap
Battery
The device can operate with one 36 V Kärcher Battery Power battery.
Assembly
Assembling the blower/vacuum device
The assembly of the complete blower/vacuum device is described below. If the device is used only as a blower or only as a vacuum, the corresponding steps can be skipped during assembly.
1. Insert the upper suction hose into the lower suction hose. Figure A
- Press the upper suction hose into the lower suction hose until it engages.
Figure C
3. Insert the lower suction hose into the upper suction hose.
Figure D
4. FIX THE AIR INTAKE PIPE TO THE ENGINE BODY. THE BUTTON IS BLOCKED ON THE AIR INTAKE PIPE FOR THE ENGINE.
Figure E
APPENDIX
Movement on the working wheels of
the fan and on the shredding knives
is prohibited.
Wear protective gloves.
Keep your hands away from the fan and the shredding knives.
5. If there is to be mounted a suction pipe, the protective grid must be mounted. If necessary, mount the protective grid.
Figure F
a Place the protective grid on the opening of the engine body. b Tighten the screw of the protective grid until it is secured.
The pre-switch is activated.
6. FIX THE LOWER SUCTION PIPE INTO THE UPPER SUCTION PIPE.
Note
The upper and lower suction pipes cannot be separated from each other.
Figure G
- Open the protective grille.
Figure H
a. Unscrew the fastening screw of the protective grille. b. Remove the protective grille.
8. FIX THE INTAKE PIPE INTO THE ENGINE HOUSING.
Figure I
a. Press the fixing housing of the engine as far as possible. b. Place the intake pipe into the engine housing. c. Place the fixing pin of the engine housing and check that its position in the upper part is correct.
9. Lock the intake pipe with the flow regulator.
Figure J
- Secure the protective grille onto the intake pipe.
Figure K
a. Slide the protective grille onto the intake pipe. b. Place the quick-release fastener bracket into the adapter of the protective grille. c. Press the quick-release fastener down.
- Mount the exhaust collection hose. See Chapter Mounting of the exhaust collection hose.
Mounting of the exhaust collection hose
Depending on the working conditions, the exhaust collection hose can be attached either to the intake pipe or to the exhaust pipe.
- Mounting the collection bag. Urgya L
a Insert the collection bag into the adapter on the housing. b Fix the adapter. c Hook the collection bag's plate onto the suction tube, or when working without a suction tube, onto the blow tube.
Attaching the accessory
- Attach the accessory first into the handle opening, then make sure that the quick-release mechanism can be accessed at any time. M
Maintenance
△WARNING
Risk of injury from improper use
Work with the device only if it is properly assembled and functional.
△CAUTION
Risk of injury from ejected objects
When operating the device, wear protective goggles and protective gloves.
Maintenance elements
The blower/vacuum device requires maintenance of the following elements:
- Speed control knob for safe speed regulation of the air flow.
- Switch lever - for switching between blow mode and vacuum mode.
- Blocking/unblocking button for the suction hose required for connection, respectively disconnection of the suction hose with/from the motor housing.
- Button for unlocking the suction hose for extraction for separating the suction hose from the motor housing.
Installing the rechargeable battery
WARNING
Charging contacts
Instructions for the device and the rechargeable battery: Before installation, check the condition of the rechargeable battery and the charging contacts, and if necessary, clean them.
Figure N
1. Insert the rechargeable battery into the slot until it clicks into place.
Switch on the device (suction mode)
DANGER
Risk of injury from rotating parts and from hearing damage due to noise.
Wear hearing protection for ears and eyes.
WARNING
Risk of injury due to loss of control.
Switch off the device before removing the risk of injury from the rotating parts.
- Install the rechargeable battery, see chapter "Installing the rechargeable battery".
- Switch the device on.
Figure O
a Install the nozzle for blowing. Attach the accessory. The device starts. Adjust the air flow rate with the rotary knob.
Switch on the device (air blowing)
DANGER
Danger of injury from rotating parts and from damage to hearing due to noise. Wear hearing and eye protection.
WARNING
Danger of injury from the rotating nozzle.
Use the device only with the nozzle intended for the respective application.
- Install the rechargeable battery, see chapter "Installing the rechargeable battery".
- Switch the device on. Figure P
a Install the nozzle for blowing. Attach the accessory. The device starts. c Adjust the air flow rate with the rotary knob.
Empty the dust bag
MAINTENANCE
Cleaning the working parts of the vacuum cleaner and the shredding blades
Safety instructions
Wear protective gloves.
Keep your hands away from the vacuum cleaner and the shredding blades.
1. Switch off the appliance. 2. Remove the battery, see chapter "Removing the battery". 3. Empty the dust bag. See chapter "Emptying the dust bag".
a Open the flap of the dust bag and the catch. b Empty the container. c Remove the dust bag from the holder.
Emptying the dust bag
MAINTENANCE
Cleaning the working parts of the vacuum cleaner and the shredding blades
Safety instructions
Wear protective gloves.
Keep your hands away from the vacuum cleaner and the shredding blades.
- Switch off the appliance. 2. Remove the battery, see chapter "Removing the battery". 3. Empty the dust bag, see chapter "Emptying the dust bag".
- Remove the dust bag for collecting dust. Figure R
Removing the battery pack
Warning
In case of prolonged non-use, remove the battery pack from the device and store it in a dry place. Improper use is not allowed.
1. Press the battery pack release button in the direction of the arrow on the battery pack. Figure S 2. Press the battery pack release button to release the battery pack. 3. Remove the battery pack from the device.
Maintenance
1. Remove the battery pack from the device (see Chapter Removing the battery pack). 2. Clean the device (see Chapter Cleaning the device).
Transport and storage
1. Switch off the device. 2. Remove the battery pack, see Chapter Removing the battery pack. 3. Empty the dust bag, see Chapter Emptying the dust bag. 4. Disassemble the suction tube. Figure T
a Open the fasteners of the protective grille. b Release the suction tube with the telescopic tube. c Press the catches on the motor housing as far as possible.
WARNING
Moving parts of the motor and the shredding blades
Wear protective gloves. Keep your hands away from the motor and the shredding blades. d Remove the suction tube from the motor housing. 5. Disassemble the exhaust tube.
Figure U
a Press the release button on the exhaust tube. b Remove the exhaust tube from the motor housing.
Pressure on the device
△PENDyUNPEXDEHNE
Uncontrolled starting
Danger of tearing
When operating and before maintenance and repair work, disconnect the battery from the device.
WARNING
Remove the intake pipe from the engine housing.
5. Remove the exhaust pipe.
Filter
Clean the filter for the exhaust pipe. b Remove the exhaust pipe from the engine housing.
- Remove any possible blocking objects from the pipe.
- Remove any possible blocking objects from the filter.
- Remove any possible blocking objects from the cover.
- Open the cover of the engine housing.
Many faults can be remedied by yourself with the help of the following instructions. If you are not sure or the faults are not described here, please contact the authorized service.
With increasing age, the capacity of the rechargeable battery decreases, so that even with a full charge the maximum operating time is no longer reached. This is not a defect.
H. Jenner Chairman of the Board of Management
S. Reiser Director Regulatory Affairs & Certification
Documentation: S. Reiser Alfred Kärcher SE & Co. KG Alfred-Kärcher-Str. 28 - 40 71364 Winnenden (Germany) Tel.: +49 7195 14-0 Fax: +49 7195 14-2212 Winnenden, 2018/09/01
Contents
General notes 256
Safety instructions 256
Intended use 261
Environmental protection 261
General safety instructions
H. Jenner Chairman of the Board of Management
S. Reiser Director Regulatory Affairs & Certification
71364 Winnenden (Germany)
Tel: +49 7195 14-0
Winnenden, 2018/09/01
Safety notes
Safety notes 266
Safety notes 266
www.kaercher.com/REACH
Accessories and spare parts
Use only original accessories and original spare parts. They ensure safe and faultless operation of the device.
S. Reiser Director Regulatory Affairs & Certification
Authorized representative for documentation: S. Reiser
Alfred Kärcher SE & Co. KG
Alfred-Karcher-Str. 28 - 40
71364 Winnenden (Germany)
Tel.: +49 7195 14-0
Fax: +49 7195 14-2212
Chairman of the Board of Management
S. Reiser
Director Regulatory Affairs & Certification
Documentation manager: S. Reiser
Alfred Karcher SE & Co. KG
Alfred-Karcher-Str.28-40
Scope of delivery 294
Intended use 294
Delivery scope 294
Safety devices 294
Symbols on the device 295
Description of the device 295
Assembly 295
Operation 296
Transport and storage 297
Table of Contents 297
Troubleshooting 298
Warranty 298
Technical Specifications 298
Declaration of Conformity with EU Standards 299
General Instructions
Before First Use
Please familiarize yourself with these safety instructions, the original operating instructions, the safety instructions that accompany the battery block, as well as the original operating instructions for the battery block / standard charger. Follow them accordingly. Keep the documents for future use or for the next owner. In addition to the instructions in this operating manual, observe the general statutory regulations on safety and accident prevention.
Safety Instructions
Danger Levels
DANGER
Indicates an imminent danger that will directly lead to serious injury or death.
△WARNING
Indicates a potentially dangerous situation that could lead to serious injury or death.
△CAUTION
Indicates a potentially dangerous situation that can cause serious injury.
WARNING
Indicates a potentially dangerous situation that can cause material damage.
General safety instructions
DANGER: Incorrect operation can cause serious injury. Do not use the device under the influence of drugs, alcohol, or medication, or when tired.
WARNING
Familiarize yourself with all safety instructions and manuals. Failure to follow safety instructions and manuals can lead to electric shock and/or serious injury. Keep all safety instructions and manuals for future use.
- Not intended for use by children or persons with limited physical, sensory or
mental capabilities, or persons unfamiliar with these instructions. Local regulations may restrict the operator's age.
- Make sure that all protective devices, deflectors and handles are properly and securely attached. Before use, check that the device, all controls and safety devices are working properly. Do not operate the device if the switch does not turn on or off reliably.
- Before each use, check the housing for damage.
- Replace damaged or worn parts with original spare parts to maintain safety. During operation, keep children and other persons away from the work area. Make sure that ventilation openings are not blocked.
Objects can be thrown at high speed. Before using the device, carefully check the work area for foreign objects.
Never use the device near flammable materials, liquids, metal objects, sparks, brushes, or rags. In case of unexpected ignition of nearby objects, immediately remove them.
Danger of injury from thrown material. Do not use the device on brushed surfaces or grass. Operate the device only on solid, level surfaces and in the recommended position.
WARNING! Familiarize yourself with the control elements and the principles of safe operation of the device.
Wear full hearing protection while using the device. The device is designed for two hands and may cause permanent hearing damage if you do not follow the instructions, use ear protection, and protect your hearing. Wear full hearing protection during use of the device.
The manufacturer strongly recommends wearing a full face mask or a full face shield. Regular glasses or sunglasses do not protect you from thrown objects. Danger of injury from
inhalation of exhaust gases, hair, or clothing getting caught in moving parts. Tie long hair back and keep it above shoulder level.
For work with the device, wear long pants, boots, and gloves. Do not work barefoot. Do not wear jewelry, loose clothing, or ties.
WARNING: The device is not intended for use by persons (including children) with reduced physical, sensory, or mental capabilities, or lack of experience and knowledge, unless they have been given supervision or instruction concerning use of the device by a person responsible for their safety.
Note: In some regions, local regulations may restrict the use of this device. For additional information, contact your local authority.
- Damage Unreadable warning labels on the device must be replaced by authorized service personnel. - Use of the device without a guard is dangerous and may cause injury.
DANGER
Operation
Use of unsafe attachments is prohibited.
WARNING
- Keep a safe distance
- Warning: 15 m away from people
- Turn off the device,
- if anyone enters
- the zone. - Keep the device and
- body away from the door
- body away from the door
Kyiv. Before starting the machine, make sure that the camera is working. Do not touch your hands or other parts of the body in the camera area while the moving parts are in operation. Do not
use the device without the impact protection guard.
- To avoid potential hazards, a safety zone must be established around the work area.
Use the device only with proper
lighting. When working with the device, do not run, only walk. Do not lean over. Keep
the device stable during operation, watch your footing
and maintain balance. Never use the device with damaged safety attachments or without the required attachments, such as the guard (or) the switch. If
the device is damaged or shows signs of malfunction, if it falls, receives a shock, or exhibits abnormal behavior, turn it off and remove the battery. Do not return the device to service until it has been checked by an authorized service center. Safety of moving parts: turn off the device, remove the battery, and make sure all moving parts have completely stopped.
- Before storing the device, remove the battery.
- Before starting, check the plug or insert the pipe.
- Check the device after it has come into contact with a foreign object.
- Before checking, cleaning, or performing work on the device.
WARNING
Use of standard tools
Improper use can increase the risk of injury and the possibility of missing a potential hazard, which may lead to an accident in your work area. Do not make any modifications to the device and use only accessories and spare parts recommended by the manufacturer.
Instructions: Use the device only outdoors. Please keep away from flammable materials and liquids. Keep children and other people away.
Movement of the fan blades and adjustment
Start
Stop
Wear protective gloves.
Keep fingers away from the fan and moving parts.
5. If it is necessary to install an exhaust hose, install a protective grille. If necessary, install a protective grille.
FIGURE F
Install the protective grille on the opening of the housing.
Tighten the mounting screw until it is fully seated. Then, secure the protective cover.
- Insert the lower discharge collector into the upper discharge collector.
Figure
The flexible hose cannot be removed from above or below; it is secured in place.
Figure B
- Open the protective grille.
Figure H
a) Tighten the mounting screw on the protective grille.
b) Open the protective grille.
- Insert the flexible hose into the pump housing.
Figures
a) Insert the pump housing into the filter housing.
b) Insert the flexible hose into the pump housing.
c) Insert the pump housing flange and ensure it is correctly installed in the fixing device.
- Secure the flexible hose with the clamp.
- Close the protective grille on the humidifier pipes.
a. Place the protective grille on the humidifier pipe.
b. Insert the retainer clip into the hole of the protective grille.
c. Press the lever.
- Install the battery block (see chapter on installing the fuse for the blower).
Install the fuse for the blower.
Depending on the selected operating mode, the collection container for condensate can be tilted towards the outlet manifold or towards the blow-off pipe.
- Mount the collection container.
a. Pre-tighten the container for collection through the adapter on the manifold.
b. Place the manifold in position.
c. Insert the container insert for condensate into the outlet manifold or, in case of operation without humidifier pipe, into the blow-off pipe.
- Before starting work, make sure that access to the device is possible at any time.
WARNING
CONTROL
WARNING
Danger of injury through incorrectly assembled device
Work with the device may only be carried out by persons who are in a properly assembled and working condition.
WARNING
Danger of injury from parts that are moving
During any work on the device, use protective goggles and gloves.
Control elements
The aspirator has the following control elements:
Suction power regulator for continuous adjustment of the suction air flow. Switch for turning the device on and off. - Slider for connecting/disconnecting the suction hose to the device housing or for removing it from the device housing. - Button for releasing the suction hose from the device housing.
Installing the aspirator
ATTENTION
Dirty contacts
Remove the battery compartment cover. To remove the battery, turn the device over and, if necessary, clean the contacts on the battery and the device.
Figure N
- Insert the battery into the compartment and secure it until it clicks into place.
Turn on the device (operating mode).
CHECK
Risk of injury to hands and damage to hearing due to noise.
Use personal protective equipment and hearing protection.
WARNING
Risk of injury due to loss of control.
Hold the device with both hands.
- Remove the battery from the compartment, see section "Installing the battery".
- Turn off the electrical device.
Figure O
To install the valve, switch the device to ventilation mode. Press the device switch. The device starts up. Use the air flow rate adjustment to regulate the amount of air flow.
Turn on the device (ventilation mode)
WARNING
Unsafe operation may cause injury to body parts and hearing damage due to noise.
Use the complete set of personal protective equipment for eyes and respiratory organs.
CAUTION
Risk of injury through the control lever
Always operate the device with both hands.
1. Disconnect the battery, press the button for battery installation. 2. Turn off the electrical device.
Figure P
To install the valve, switch the device to ventilation mode. Press the device switch. The device starts up. Use the air flow rate adjustment to regulate the amount of air flow.
Remove the cover
CAUTION
Movement of fan blades and rotating parts
Wear protective gloves. Keep fingers away from the fan and rotating parts. 1. Turn off the device. 2. Disconnect the battery, press the button to remove the battery block. 3. Remove the cover. Figure Q
To empty the dust bag, press the release button and remove the dust bag from the device.
Empty the dust bag
MAINTENANCE
Cleaning the dust bag and filter
Always wear protective gloves. Keep your fingers away from the fan and filter. 1. Switch off the device. 2. Remove the battery pack (see chapter "Removing the battery pack"). 3. Remove the dust bag (see chapter "Emptying the dust bag"). 4. Open the dust bag and empty the contents. Figure R
Removing the battery pack
Instructions
Before any work on the device, remove the battery pack and protect it from unintentional use.
- Press the battery pack release button on the battery pack. Figure S
- Press the battery pack release button to release the battery pack.
- Remove the battery pack from the device.
End of operation
1. Remove the battery pack from the device (see chapter "Removing the battery pack"). 2. Clean the device (see chapter "Cleaning the device").
Transport and storage
- Switch off the device. 2. Remove the battery pack (see chapter "Removing the battery pack").
- 3HATN roJOBky nINOCoca (nB. rnaBy BnMiTb MiOOK dNBAIOBOy.
4.3HIMITb BnycknKoJeKTop
MaJIHOHOK T
a BiDkPnTe 1uTOK 3acyBkn. b BidkpnIte BCMOKTyBaJIbHy Tpy6ky 3a. donomoroIO NOB3yHka. C BntarHitb Kopnyc Dbruryha fikcaTopa kHaJaJI.
△NONEPEDXEHH
Pyx eHmuaopHX Knic ma MyIbUyBaHHa nonameu
Nopizu
OdaHimb 3axuChi pykaueku.
Tpumaime nanbui nodani bi eemunamopa ma Mynbuyoux ne3.
d 3HimItb Bnyckn KojekTop 3 Kopnycy DBNyHa.
5.3HIMiTb Tpy6y nobITpoyBKN.
MaJIIOHOKU
aHaTnCHyTN KHOKNy po36NoKyBaHHB BmNKaay npncTpOIO. b BnmiTb HargHItaIbHy Tpy6y 3 KopnyCy DnBryHa.
Oorna TaTexHicHe 06cnyroByBaHHa
OuunenH npncpo
Uncontrolled start
Safety precautions
Before starting work and before carrying out maintenance work, disconnect the battery from the device.
WARNING
Incorrect cleaning
Damage to the device
Clean the device with a soft, dry cloth.
Do not use aggressive agents or solvents.
Do not immerse the device in water.
Do not expose the device to direct water jets or high pressure.
- Turn off the device. 2. Remove the battery pack (see chapter on battery pack removal). 3. After each use, wipe the device surface with a soft, dry cloth or a brush.
Illustrations
Troubleshooting
Specifications
If the fan or pump is damaged, contact an authorized service representative.
WARNING
Removal of fan blades and pump impeller
Procedure
Put on protective gloves. Keep fingers away from the fan and pump blades. 1. Disconnect the plug. 2. Remove the battery block. 3. Remove the head of the attachment (DVB) by turning it counterclockwise. 4. Remove the outlet collector.
Figure 1
a Open the latches.
b Disconnect the flexible tube using pliers.
c Pull the housing of the fan fixator upward. WARNING
Removal of fan blades and pump impeller Procedure
Put on protective gloves. Keep fingers away from the fan and pump blades.
d Remove the outlet collector from the fan housing.
5. Remove the ventilation tube. Figure 2
a Press the disassembly button to turn off the device. b Pull the pressure tube out of the fan housing.
6. If necessary, remove the tube plug. 7. If necessary, remove the battery block. 8. If necessary, remove the nozzle plug. 9. Clean the openings of the fan housing.
Troubleshooting
Faults are often simple to fix; you can fix them yourself with the help of the instructions below. If in doubt or in case of unspecified faults, contact an authorized service center.
The battery pack's service life depends on proper maintenance. As a result, its service life may be shorter if it is fully discharged and then left unused for a long time. This is not a defect.
Declaration of Conformity
2006/42/EC (+2009/127/EC)
2014/30/EU
2000/14/EC (+2005/88/EC)
2011/65/EU
Harmonized standards applied
EN 60335-1:2012+A11:2014+A13:2017
EN 50636-2-100:2014
EN 55014-1:2017
EN 55014-2:2015
EN 50581:2012
Applied conformity assessment methods
2000/14/EC, 2005/88/EC
Measured sound power level, dB(A)
Measured: 102.3
Guaranteed: 104
Person authorized to compile the technical file, acting on behalf of and under the authority of the management.
H. Jenner
Chairman of the Board of Management
S. Reiser
Director Regulatory Affairs & Certification
Person responsible for documentation: S.
Reiser (S. Reiser)
Alfred Karcher SE & Co. KG
Alfred-Karcher-Str. 28 - 40
71364 Winnenden (Germany)
Tel.: +49 7195 14-0
Fax: +49 7195 14-2212
M. BiHHeHdEh, 01.09.2018
Table of contents
Safety instructions 299 Safety instructions for the operator 300 Intended use 307 Protective equipment 307 Required accessories 307 Maintenance schedule 307 Safety devices 307 Installation 307 Commissioning 308 Operation 309 Cleaning and maintenance 310 Troubleshooting 310 Storage 311 Technical data 311 Declaration of conformity with EU standards 312
Safety instructions
Read these instructions carefully before starting the device.
In addition to the safety instructions in these operating instructions, also read the safety instructions for the device, the safety instructions for the battery, the safety instructions for the charger, and the safety instructions for the battery charger/standard charger.
Follow the instructions. Keep these documents for future reference or for future owners. If the device is passed on, include the safety instructions and the operating instructions.
Safety instructions for the operator
Safety instructions for the operator
Safety instructions for the operator
Safety instructions for the operator
- Safety instructions for the operator
WARNING
- Do not use the device if it is damaged or malfunctioning.
ATTENTION
- Do not use the device if the power cord is damaged or malfunctioning.
WARNING
Do not use the device if the material is damaged or malfunctioning.
Technical safety instructions
The device may have sharp edges or other characteristics. If you are injured, burned, or in an emergency, do not panic.
NOTE: Follow all safety rules and instructions.
Follow the instructions and safety precautions to avoid electric shock and/or other hazards.
Keep all safety instructions for future reference.
The device is not intended for use by persons (including children) with reduced physical, sensory or mental capabilities, or lack of experience and knowledge, unless they have been given supervision or instruction concerning use of the appliance by a person responsible for their safety.
- Keep all guards and safety devices in place and in good working order, and check them regularly.
- During operation, keep the device, all control elements and safety
The device must be used only for its intended purpose. If the device is not used correctly or is misused, the manufacturer is not liable.
- Do not use the device if the housing is damaged. - To avoid injury, do not use if broken or damaged. - When starting the device, keep children and other people away.
- Do not exceed the maximum permissible load. - It is possible to injure yourself or others if you use the device incorrectly. Do not use the device if there are cracks, chips, or other damage. - Dispose of used materials properly.
Place the device on a stable, level surface. Only operate the device when it is properly assembled and in good condition.
WARNING: Familiarize yourself with the device's operation and correct use. When using the device, keep your hands away from moving parts. The device can produce high temperatures and if you are sensitive to heat, take precautions to avoid burns and injury. When using the device, keep your hands away from hot surfaces. Use protective gloves or tools to handle hot parts. Protect yourself from burns caused by hot parts or steam.
- There is a risk of injury if the device falls, is dropped, or is damaged. Do not use the device if it is damaged.
When using the device, keep your hands dry and do not touch it with wet hands. Do not use the device if it is damaged. Do not use the device if the cord or plug is damaged.
ATTENTION
The device must be operated by adults or by persons who have been instructed in its use.
Instructions: The procedures described in this manual must be followed. Consult a qualified specialist if necessary. Any safety or warning labels on the device must be replaced with official labels.
- Before cleaning, unplug the device and let it cool down.
Do not use the device.
CAUTION: The device must be used only for the intended purpose.
WARNING: Keep a distance of at least 15 cm between people and animals. Do not point the device at eyes. Do not place the device and its accessories in water. If the device gets wet, wipe it with a dry cloth.
Do not install the device in places where it may be exposed to water, moisture, or other liquids. Only use the device if it is in good condition. To identify damaged parts, a visual inspection is necessary. Do not use the device if it is damaged. Do not use the device with other devices. Do not cover the device. Do not place the device on unstable surfaces; place it on a flat and stable surface.
If the device is damaged, or if the power cord or plug is damaged, do not use the device. Do not use the device if it has been dropped, if the housing is cracked, or if it has been exposed to water or other liquids. Contact an authorized service center for repair or adjustment. If the device overheats or if the device emits smoke, unplug it immediately.
Do not touch the battery. The device should only be used with the original power adapter.
To obtain a new battery, unplug the device, remove the battery, and dispose of all batteries properly:
Do not dispose of the device with household waste. Do not dispose of the device in fire or incinerate it. Do not dispose of the device in water. Do not dispose of the device with other waste.
WARNING: The use of non-original accessories or batteries may cause damage to the device and void the warranty. Do not use the device with unauthorized accessories.
Do not expose the device to extreme temperatures and use it only in a well-ventilated area.
Do not use the device near flammable materials or liquids.
CAUTION: Use the device only with the original power adapter. Do not use the device with other power adapters. Do not use the device with a damaged power cord or plug. Do not use the device with a damaged battery.
Battery safety instructions
WARNING: Failure to follow these instructions may result in injury. Do not use the device with a damaged battery.
- To reduce the risk of fire, use only the recommended battery type. Do not use the device in a damp environment. Do not expose the device to rain or moisture.
WARNING: If the battery is leaking, avoid contact with the liquid. If it gets on your skin or clothing, wash it off immediately. If it gets in your eyes, rinse with water and seek medical help.
Do not expose the battery to high temperatures.
Use the battery only for its intended purpose to avoid damage and fire hazard.
Battery disposal
CAUTION: If you use a battery that has been in a fire or in a high-temperature environment, there is a risk of explosion. Do not use such batteries. There is also a risk of explosion if the battery is damaged. Do not use a battery that has been dropped or hit. There is a risk of explosion and fire. Do not short-circuit the battery with metal objects such as wires, tools, or other metal parts. Do not expose the battery to water or moisture.
Do not use the battery if it is swollen, leaking, or has a strange odor. Do not use it if it has been damaged by impact. Do not disassemble, puncture, or crush the battery. If the battery is damaged, do not use it and contact the manufacturer. Do not use the battery if it has been exposed to high temperatures or fire.
WARNING: Do not bend the battery. Do not place the battery near a heat source. Do not use the battery if the outer casing is damaged.
Do not place the battery in a high-temperature environment. Do not use the battery if it has been exposed to high temperatures.
Do not use the battery if it has been dropped or damaged.
Safe storage and maintenance
CAUTION: To store or maintain the battery, remove it from the device. WARNING: There is a risk of explosion and fire. Do not store the battery in a place where it can be damaged or exposed to high temperatures.
WARNING
Remove the battery from the device before storage or maintenance. Keep the battery away from children and store it in a cool, dry place. Do not store the battery in a humid environment. Do not store the battery in direct sunlight.
Safe technical service and maintenance
CAUTION
Remove the battery from the device before disposal.
The device must not be disposed of with normal household waste, but must be disposed of separately at an appropriate collection point for recycling of electrical and electronic devices. This device is subject to the European Directive 2012/19/EU and must not be disposed of with unsorted municipal waste. For proper disposal, contact your local waste disposal operator. - Do not dispose of batteries, rechargeable batteries, and lamps in the device. - Before disposal, remove the battery from the device and dispose of it separately. Dispose of the device at an authorized collection point for electrical and electronic devices. Only use original accessories, original spare parts, and original detergents. Using other accessories, spare parts, and detergents can cause damage and void the warranty.
Using non-original accessories, spare parts, and detergents can cause damage and void the warranty.
CAUTION: Before any work on the device, disconnect it from the power supply.
This device is not intended for use by persons with reduced physical, sensory, or mental capabilities, or lack of experience and knowledge, unless they have been given supervision or instruction concerning use of the appliance by a person responsible for their safety. Children should be supervised to ensure that they do not play with the device.
Have repairs performed only by an authorized customer service.
Safety instructions
WARNING
For information on the substances contained in the device, see: www.kaercher.com/REACH
Accessories and spare parts
Only use original accessories and original spare parts. They ensure that the device is safe and reliable.
For information on accessories and spare parts, visit www.kaercher.com.
Warranty
The warranty conditions issued by our responsible sales company apply. We will repair potential malfunctions of your device free of charge within the warranty period, provided that such malfunction is caused by a material or manufacturing defect. In case of warranty claim, please contact your dealer or the nearest authorized customer service center.
Protective equipment
The final assembly of the protective casing is complete.
The protective casing protects you from danger.
The protective casing must not be opened or disassembled.
Safety instructions
Safety instructions must be followed when operating the protective casing. This device must not be used in explosive atmospheres or in the presence of flammable liquids.
Components of the structure
| Падалану салдуна НУСКУЛБИКТБI ЖЕпЕ 6арнык kayіnci3діК HУСКУЛAPын OKынБИЗ. | |
| Курсылбимен жуmbic icTeу кезінde арнык кe3 Бен ecту мУшесін Коргайтын Куралдарны Киінiz. | |
| Курсылбими канSBIP hemecse bɪnfal жafданapfa ушьipatпанbɪз. | |
| Тастаган зattap kayin тэнірedi. Бakсылayшьларны жуmbic aɪMaftынан алыс устаныз. | |
| Анhalмалы кенидөтіштет. Курсылбими куMbICbl Ke3iHne KOЛыныз бен Meн оясынды санылayлардан алыс устаныз. | |
| Жалсырмада керсетінгдіьSCB Кысынын KaIIДi DeHreii 104 dB. | |
| Анhalын жилirih pettey. | |
| aMbIK = copy kxbipb16ekitlmereH, bMbIPMa kxa6bIK = copy kxbipb16ekitilmreH. | |
| TapMbI3:Жыдам ка6y | |
| Copy peximi | |
| Yprny peximi | |
Structure assembly
This device can be assembled to the maximum configuration. See the corresponding assembly instructions for possible options (see figure).
See the graphic representation, Figure A
1 Discharge hose 2 Suction hose connector 3 Hot water hose 4 Cold water hose 5 Battery charging socket 6 Control panel 7 Motor tube 8 Housing locking lever 9 Suction hose release button 10 Hot water hose connector 11 Audible signal 12 Protective casing outlet 13 Protective casing locking lever 14 Protective casing 15 Air filter 16 Digital display 17 Rear handle 18 Exhaust 19 Suction/Blow mode switch 20 Assembly 21 Cold water hose 22 Hot water hose 23 Battery contacts 24 Battery contacts 25 Vacuum battery 26 Battery charging indicator 36 Audible signal
*Optional
Battery charging
The device can be operated with a 36 V Karcher battery.
Operation
Level/coupling installation
The level and coupling can only be installed by qualified personnel. If a level or coupling is damaged or defective, replace the parts immediately during installation.
- Attach the level coupling to the lower level coupling.
Figure B
- Press against the direct level and attach the level coupling to the appropriate index marks.
Figure C
- Attach the lower level coupling to the upper level coupling.
Figure D
- Attach the level coupling to the actuator housing. The level coupling must be attached so that the release lever is visible.
Figure E
REMOVAL OF THE KEY AND KEY SWITCHES
Actuator
Screws
Remove the actuator cover.
Remove the screws from the key and key switches.
5. Replace the water filter, if the filter is dirty. Replace the filter if it is dirty.
Figure F
a. If the filter is dirty, remove the filter housing. b. If the filter is dirty, remove the filter and replace it with a new one. c. Dispose of the old filter.
- Install the new water filter into the filter housing.
Note
Do not interchange the hot and cold water filters.
Figure G
- Check the filter housing.
Figure H
a. If the filter housing is damaged, replace it. b. If the filter housing is cracked, replace it.
- Install the filter into the filter housing.
Figure I
a. If necessary, remove the filter housing for cleaning. b. Install the filter into the filter housing. c. After cleaning the filter housing, reinstall it and check for leaks.
- Install the water filter with the arrow pointing upward.
Figure J
- Remove the top cover of the cube.
Figure K
a. Remove the top cover of the cube.
b. Pull out the top cover completely.
c. Remove the black base.
- The red indicator and the cap are removed, the white indicator and the cap are removed.
Remove the red indicator and cap
The red indicator and cap are removed. The red indicator and cap are removed. The red indicator and cap are removed. The red indicator and cap are removed.
- Remove the red indicator and cap.
Figure L
a. Pull the red indicator and cap upward to remove them. b. Remove the adapter. c. The red indicator and cap are removed. The red indicator and cap are removed. The red indicator and cap are removed.
Remove the base plate
- Remove the screws that secure the base plate, then remove the base plate.
Figure M
Remove
There is a risk of injury from the rotating parts of the device.
Do not touch the rotating parts while the device is in operation.
WARNING
There is a risk of injury from moving parts.
When handling the device, be careful not to get your fingers or clothing caught in the moving parts.
Control elements
The accumulator is difficult to access due to the control elements:
A switch for switching the device on and off without contact. - A switch for switching between charging and discharging modes. The discharge button is used to lock/release the discharge button for inserting or removing the discharge button from the housing. - The charging button is used to release the charging button from the housing.
Accumulator installation
ATTENTION
Initial operation
Before commissioning and accumulator installation, read the safety instructions and operating manual carefully and follow them.
Figure N
- Secure the battery with the locking mechanism before use.
Turning off the device (copy mode)
CAUTION
Before turning off the device, make sure to save all necessary data. There is a risk of losing unsaved data.
Follow the correct shutdown procedure to avoid damaging the device or losing data.
EXPERT
Turning off the device from the control panel
Turn off the device using the two buttons on the control panel.
1. Press the power button and wait for the device to turn off.
- Turn off the device.
Figure O
a Press the direct copy mode button. b The device will turn off. Turn off the device. c The signal lamp will turn off after the device has completely shut down.
Turning off the device (auto power off mode)
CAUTION
Before turning off the device, make sure to save all necessary data. There is a risk of losing unsaved data.
Follow the correct shutdown procedure to avoid damaging the device or losing data.
Install the device in accordance with the manufacturer's instructions.
1. Do not install the battery in reverse polarity. 2. Do not connect the device to the power source.
Figure P
a. Adjust the device to the desired operating mode. b. Press the device button. The device will turn on. c. Adjust the device to the desired temperature using the regulator.
Remove the battery from the device
Charging the battery and replacing the brushes
Parts
Remove the protective cap.
Install the brushes into the device from the bottom.
- 1. Turn on the device. 2. Do not install the battery in reverse polarity, do not install the battery in reverse polarity.
- Remove the battery from the device.
Figure Q
Remove the battery cover by pressing the latch. Do not press the battery terminals. Remove the battery cover and the battery.
Removing the battery cover
DESCRIPTION
Charging the battery and the battery charger
Charger
Do not short-circuit the battery terminals.
Remove the battery from the charger and the battery charger.
- Do not dispose of the battery. 2. Remove the battery from the charger, then remove the battery from the charger.
- Remove the battery cover, then remove the battery cover.
- Remove the battery cover, then remove the battery cover.
Figure R
Remove the battery
Huskay
Remove the battery from the device before cleaning it with a dry cloth.
1. To disconnect the battery, pull the battery connector away from the battery.
Figure 5
2. To disconnect the battery, press the battery connector latch. 3. Remove the battery from the device.
Troubleshooting
- Remove the battery from the device (see Figure 5: Remove the battery).
- Remove the device cover (see Figure 6: Remove the cover).
Cleaning and storage
- 1. Turn off the device. 2. Remove the battery, see Figure 5: Remove the battery.
- Remove the SIM card and memory card, see Figure 7: Remove the SIM card and memory card.
- Remove the rear cover. Figure 7
a. Remove the screws from the rear cover. b. Carefully lift the rear cover. c. If necessary, remove the antenna and the connector.
EXPERT
Replacement of the antenna connector
Parts
Copy of the control unit.
The control unit and keys are installed by the manufacturer.
d Copy of the control unit housing and installation.
- Installation of the control unit.
Figure U
a Press the control unit activation button. b Install the control unit housing.
Service and technical maintenance
Installation
DANGER
Disconnect the power supply before any work.
Pencil removal key
Remove the batteries and install new ones, observing the polarity.
ATTENTION
Do not use force.
Installation and commissioning
Remove the battery cover. The battery cover is secured with screws.
Remove the battery cover.
The battery cover is attached to the device with screws. To remove it, unscrew the screws.
- Remove the battery cover. 2. Remove the battery (remove the battery).
- Clean the battery cover with a dry cloth or brush. Do not use water.
Disposal
Instructions
If the device is damaged or the battery is leaking, contact the manufacturer. If the battery is leaking or the device is damaged, contact the manufacturer immediately.
WARNING
Battery and battery cover
Parts
Contact the manufacturer.
Remove the battery and battery cover from the device.
- Remove the battery cover. 2. Remove the battery, remove the battery.
- Remove the battery and cover, remove the battery and cover.
- Remove the cover.
Type T
a. Remove the cover from the main body. b. Remove the cover with the hook and key. c. If possible, remove the main body from the standard.
EXPERTS
Replacement keys and pads
Main body
Screws
Remove the main body cover.
Remove the screws from the replacement keys and pads.
d. Remove the cover from the main body.
- Remove the upper cover.
Type U
a. Press the upper cover release button. b. Remove the upper cover from the main body.
- If necessary, remove the covers from the buffer.
- If necessary, remove the pads from the buffer.
- Remove the oil filler cap and pour in the required amount.
- Check the crankcase oil level.
Oil change intervals
Oil change intervals depend on operating conditions.
If the oil becomes contaminated
replace it. If the oil level drops or if you notice any leaks, contact the service center. If the oil pressure warning light comes on
stop the engine immediately and do not operate it until the cause is found. Do not use the machine.
| Kate Ce6e6i XoIо | ||
| Kурьлгы жуmbic icteme'di | АKKумларop кинагы дурбс салынбаган. | ● АKKумларорды орныа ТУСКЕнше устышka салынбд. |
| АKKумларop кинагын 3арды кOK. | ● АKKумларop кинагын 3ардотay. | |
| АKKумларop кинагы akayны. ● АKKу | Муларop кинагын aybICTын. | |
| Kayinci3dk Kockblshы Краctыру Ke3iHde icke Кocblmaran. | 1. КорваIC TOpbIHbIN 6ekITkiS 6урандаын kaNTадAN 6ураны.2. СаTKaHdpy TOpbIHbIN 6ekITkiS 6урандаын сыrt etin 6ekITilReHre DeiH KaTы 6ураны.3. Kayinci3dk Kockblshы icke Кocblndы. | |
| Kурьлгы пайдану ke3iHde TOKтайды | АKKумларop кинагы Кь3ын KeTTI ● | KуmbICTы TOKtaTBIn, Akkумларot TempepaTypacby KaNbIITbI 6onFaHsa KytiHiz. |
| Ко3raNTbl Kь3bIn KeTTI ● KymbICTbI | ТOKТыВIN, КОЗТКыШТы cyblTBnB13. |
Lubrication
Use only the lubricants specified in the lubrication chart. If materials or lubricants other than those specified are used, the warranty may be voided. If you have any questions about the lubrication chart, contact your dealer or authorized service center. (See the section on recommended lubricants)
The machine is equipped with a label showing the date of manufacture. The serial number is located as follows:
Serial number: 30190
Date of manufacture: 0 1 0 2 0 1 3
Thus, this serial number 30190 corresponds to the date 09/02/2013.
Technical specifications
| Курьлfbын Texнокалык сидахамары | ||
| Hominaэды керney V 36 | ||
| Акку мелаяторы урley | km/h | 225 +/- 10 % |
| Курьлfbысын optaша aya | ||
| Жылданыfы | ||
| Акку мелаяторы урley | km/h | 275 +/- 10 % |
| Курьлfbысын Teориялбік eн | ||
| Жогары | ||
| Акку мелаяторы copy | km/h | 172 +/- 10% |
| Курьлfbысын optaша aya | ||
| Жылданыfы | ||
| Акку мелаяторы copy | km/h | 208 +/- 10 % |
| Курьлfbысын Teopиялбік eн | ||
| Жогары ayaЖылданыfы | ||
| Мульчни koэффциendeHTI | 10:1 | |
| Коксic кинагылkan калемi | I | 45 |
| Θлшемері мен салмагь | ||
| Салмагь (аKKумларTopЖинагынсыз) | kg | 4,7 |
| Y3bHдыгьх eнix 6иiktiri | mm | 1290x230x449 |
| EN 50636-2-100 стандартына сайкесecentелinetiH ман degр | ||
| Дыбic KысыmbiHьн Deнгey LpAАKKумларTopы урleyКурылбсы | dB(A) | 88,6 |
| Дыбic KысыmbiHьн Deнгey LpAАKKумларTopы copy Курылбсы | dB(A) | 88,9 |
| БелRICi3diK pA | dB(A) | 3 |
| Шу Deнгey LWA + БелRICi3diK WLa | dB(A) | 104 |
| АKKумларTopы урleyКурылбсынжалны дipin мэни | m/s2 | 3,2 |
| АKKумларTopы copyКурылбсынжалны дipin мэни | m/s2 | 4,1 |
| БелRICi3diK | m/s2 | 1,5 |
Technical specifications are subject to change without notice.
The machine is intended for use in commercial and industrial applications, for example in hotels, schools, hospitals, factories, shops, offices and rental businesses. The machine may only be operated by trained personnel who have been authorized by the operator. The machine may only be used with the correct voltage and frequency as stated on the rating plate.
Chairman of the Board of Management
S. Reiser Director Regulatory Affairs & Certification
The machine is intended for use in commercial and industrial applications, for example in hotels, schools, hospitals, factories, shops, offices and rental businesses. The machine may only be operated by trained personnel who have been authorized by the operator. The machine may only be used with the correct voltage and frequency as stated on the rating plate.
H. Jenner Chairman of the Board of Management
S. Reiser Director Regulatory Affairs & Certification
Authorized representative for documentation: S. Reiser
Alfred Kärcher SE & Co. KG
Alfred-Karcher-Str. 28 - 40
71364 Winnenden (Germany)
Phone: +49 7195 14-0
Fax: +49 7195 14-2212
Winnenden, September 1, 2018

THANK YOU!
MERCI! DANKE! GRACIAS!

Register your product and benefit from many advantages.
www.kaercher.com/welcome


Rate your product and tell us your opinion.
www.kaercher.com/dealersearch
Alfred Kärcher SE & Co. KG
Alfred-Karcher-Str. 28-40
71364 Winnenden (Germany)
Tel.: +49 7195 14-0
Fax: +49 7195 14-2212
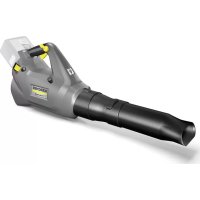
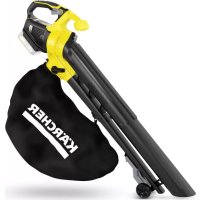
- CONTENTS
- GENERAL NOTES
- SAFETY INSTRUCTIONS
- HAZARD LEVELS
- DANGER
- WARNING
- CAUTION
- ATTENTION
- GENERAL SAFETY INSTRUCTIONS
- SAFE OPERATION
- SAFE OPERATION OF CORDLESS BLOWER
- SAFE OPERATION OF CORDLESS VACUUM CLEANER
- SAFE TRANSPORT AND STORAGE
- SAFE SERVICING AND CARE
- RESIDUAL RISKS
- RISK REDUCTION
- INTENDED USE
- △WARNING
- ENVIRONMENTAL PROTECTION
- NOTES ON THE CONTENT MATERIALS (REACH)
- ACCESSORIES AND SPARE PARTS
- SCOPE OF DELIVERY
- SAFETY DEVICES
- SAFETY SWITCH
- SYMBOLS ON THE DEVICE
- DESCRIPTION OF THE DEVICE
- SEE GRAPHICS PAGE FOR ILLUSTRATIONS ILLUSTRATION A
- RECHARGEABLE BATTERY PACK
- INSTALLATION
- INSTALLATION OF BLOWER / SUCTION DEVICE
- ILLUSTRATION B
- ILLUSTRATION C
- ILLUSTRATION D
- ILLUSTRATION E
- ILLUSTRATION F
- NOTE
- ILLUSTRATION G
- ILLUSTRATION H
- ILLUSTRATION I
- ILLUSTRATION J
- INSTALLING THE COLLECTING BAG
- ILLUSTRATION L
- HOOKING THE CARRYING BELT
- OPERATION
- CONTROL ELEMENTS
- INSERTING THE BATTERY PACK
- DIRTY CONTACTS
- ILLUSTRATION N
- SWITCH ON THE DEVICE (SUCTION MODE)
- SWITCH ON THE DEVICE (BLOWER MODE)
- RISK OF INJURY FROM FLYING PARTS AND HEARING DAMAGE DUE TO NOISE
- ILLUSTRATION P
- REMOVE THE COLLECTING BAG
- MOVEMENT OF THE FAN WHEELS AND MULCHING BLADES INCISION INJURIES
- ILLUSTRATION Q
- EMPTYING THE COLLECTING BAG
- △ WARNING
- MOVEMENT OF THE FAN WHEELS AND MULCHING BLADES CAN CAUSE INCISION INJURIES
- ILLUSTRATION R
- REMOVING THE BATTERY PACK
- DURING LONGER WORK BREAKS, REMOVE THE BATTERY PACK FROM THE DEVICE AND SECURE IT AGAINST UNAUTHORIZED USE
- ILLUSTRATION S
- FINISHING OPERATION
- TRANSPORT AND STORAGE
- ILLUSTRATION T
- MOVEMENT OF THE FAN WHEELS AND MULCHING BLADES
- ILLUSTRATION U
- CARE AND SERVICE
- CLEANING THE DEVICE
- UNCONTROLLED STARTUP
- INCORRECT CLEANING
- ILLUSTRATION V
- REMOVING BLOCKAGE
- TROUBLESHOOTING GUIDE
- WARRANTY
- TECHNICAL DATA
- DIMENSIONS AND WEIGHTS
- DETERMINED VALUES IN ACC. WITH EN
- VIBRATION VALUE
- DEVICE WITH A HAND-ARM VIBRATION VALUE >2.5 M/S2 (SEE CHAPTER TECHNICAL DATA IN THE OPERATING INSTRUCTIONS)
- EU DECLARATION OF CONFORMITY
- CURRENTLY APPLICABLE EU DIRECTIVES
- HARMONISED STANDARDS USED
- CONFORMITY EVALUATION PROCEDURE USED
- SOUND POWER LEVEL DB(A)
- TABLE OF CONTENTS
- INDICES
- REDUCING RISKS
- △CAUTION
- APPLIED HARMONISED STANDARDS
- REMOVE THE SAFETY LOCK
- FIGURE R
- REMOVING THE BATTERY
- INDICATION
- GENERAL INSTRUCTIONS
- DEGREE OF DANGER
- FIGURE G
- FIGURE H
- FIGURE I
- FIGURE J
- FIGURE K
- INSTALLING THE DUST COLLECTOR
- FIGURE L
- ATTACHING THE BELT
- FIGURE M
- CONTROLS
- INSTALLING THE BATTERY
- FIGURE N
- SWITCHING ON THE DEVICE (VACUUM MODE) CAUTION
- FIGURE O
- SWITCHING ON THE DEVICE (AIR BLOWER MODE)
- FIGURE P
- REMOVING THE DUST CONTAINER
- FIGURE Q
- EMPTYING THE DUST CONTAINER
- FINISHING WORK
- LOWER BLADES OF THE FAN AND THE MULCHING BLADES
- FIGURE U
- CARE AND MAINTENANCE
- DEVICE LAYOUT
- APPENDIX
- NON-RECHARGEABLE START
- FIGURE
- REMOVING THE FILTER
- REMOVING THE FAN COVER AND SHREDDING BLADES
- TROUBLESHOOTING
- THE RELEASE DATE IS DISPLAYED ON THE FACTORY PLATE ATTACHED TO THE DEVICE
- EXAMPLE
- TECHNICAL SPECIFICATIONS
- SWITCH OFF THE DEVICE
- FIGURE T
- APPLIED HARMONIZED STANDARDS
- ADJUSTMENT
- FUNCTION CORRECTLY
- SAFETY
- STARTING THE DEVICE
- SAFETY CUT-OUT
- BATTERY
- ASSEMBLY
- ASSEMBLING THE BLOWER/VACUUM DEVICE
- MOVEMENT ON THE WORKING WHEELS OF
- THE FAN AND ON THE SHREDDING KNIVES
- FIGURE F
- MOUNTING OF THE EXHAUST COLLECTION HOSE
- ATTACHING THE ACCESSORY
- MAINTENANCE
- MAINTENANCE ELEMENTS
- INSTALLING THE RECHARGEABLE BATTERY
- SWITCH ON THE DEVICE (AIR BLOWING)
- EMPTY THE DUST BAG
- EMPTYING THE DUST BAG
- MOVING PARTS OF THE MOTOR AND THE SHREDDING BLADES
- PRESSURE ON THE DEVICE
- △PENDYUNPEXDEHNE
- UNCONTROLLED STARTING
- FILTER
- SAFETY NOTES
- DANGER LEVELS
- MOVEMENT OF THE FAN BLADES AND ADJUSTMENT
- START
- FIGURE B
- FIGURES
- INSTALL THE FUSE FOR THE BLOWER
- CONTROL
- DANGER OF INJURY THROUGH INCORRECTLY ASSEMBLED DEVICE
- DANGER OF INJURY FROM PARTS THAT ARE MOVING
- INSTALLING THE ASPIRATOR
- TURN ON THE DEVICE (OPERATING MODE)
- CHECK
- RISK OF INJURY TO HANDS AND DAMAGE TO HEARING DUE TO NOISE
- RISK OF INJURY DUE TO LOSS OF CONTROL
- TURN ON THE DEVICE (VENTILATION MODE)
- UNSAFE OPERATION MAY CAUSE INJURY TO BODY PARTS AND HEARING DAMAGE DUE TO NOISE
- RISK OF INJURY THROUGH THE CONTROL LEVER
- REMOVE THE COVER
- MOVEMENT OF FAN BLADES AND ROTATING PARTS
- CLEANING THE DUST BAG AND FILTER
- INSTRUCTIONS
- END OF OPERATION
- MAJIHOHOK T
- △NONEPEDXEHH
- PYX EHMUAOPHX KNIC MA MYIBUYBAHHA NONAMEU
- MAJIIOHOKU
- OORNA TATEXHICHE 06CNYROBYBAHHA
- OUUNENH NPNCPO
- UNCONTROLLED START
- ILLUSTRATIONS
- SPECIFICATIONS
- REMOVAL OF FAN BLADES AND PUMP IMPELLER
- SAFETY INSTRUCTIONS FOR THE OPERATOR
- TECHNICAL SAFETY INSTRUCTIONS
- NOTE: FOLLOW ALL SAFETY RULES AND INSTRUCTIONS
- KEEP ALL SAFETY INSTRUCTIONS FOR FUTURE REFERENCE
- DO NOT USE THE DEVICE
- BATTERY SAFETY INSTRUCTIONS
- BATTERY DISPOSAL
- SAFE STORAGE AND MAINTENANCE
- SAFE TECHNICAL SERVICE AND MAINTENANCE
- PROTECTIVE EQUIPMENT
- COMPONENTS OF THE STRUCTURE
- STRUCTURE ASSEMBLY
- BATTERY CHARGING
- LEVEL/COUPLING INSTALLATION
- FIGURE C
- FIGURE D
- FIGURE E
- ACTUATOR
- REMOVE THE RED INDICATOR AND CAP
- REMOVE THE BASE PLATE
- REMOVE
- ACCUMULATOR INSTALLATION
- TURNING OFF THE DEVICE (COPY MODE)
- EXPERT
- TURNING OFF THE DEVICE (AUTO POWER OFF MODE)
- REMOVE THE BATTERY FROM THE DEVICE
- REMOVING THE BATTERY COVER
- DESCRIPTION
- REMOVE THE BATTERY
- HUSKAY
- CLEANING AND STORAGE
- REPLACEMENT OF THE ANTENNA CONNECTOR
- SERVICE AND TECHNICAL MAINTENANCE
- DO NOT USE FORCE
- DISPOSAL
- BATTERY AND BATTERY COVER
- PARTS
- TYPE T
- EXPERTS
- REPLACEMENT KEYS AND PADS
- MAIN BODY
- TYPE U
- OIL CHANGE INTERVALS
- LUBRICATION
- THANK YOU
- MERCI! DANKE! GRACIAS
- WWW.KAERCHER.COM/WELCOME
Brand : Kärcher
Model : BLV 36240 Battery
Category : Blower