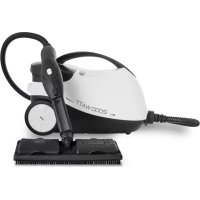
Ecogenic LV1700 - Steam cleaner SOLAC - Free user manual and instructions
Find the device manual for free Ecogenic LV1700 SOLAC in PDF.



User questions about Ecogenic LV1700 SOLAC
0 question about this device. Answer the ones you know or ask your own.
Ask a new question about this device
Download the instructions for your Steam cleaner in PDF format for free! Find your manual Ecogenic LV1700 - SOLAC and take your electronic device back in hand. On this page are published all the documents necessary for the use of your device. Ecogenic LV1700 by SOLAC.
USER MANUAL Ecogenic LV1700 SOLAC
natural_image
White and black vacuum cleaner with attached power strip, no visible text or symbols on bodyLIMPIA VAPOR
INSTRUCCIONES DE USO
STEAM CLEANER
INSTRUCTIONS FOR USE
NETTOYEUR VAPEUR
MODE D'EMPLO
Solac is a registered Trade Mark
Fig. 1
text_image
Technical diagram of a vacuum cleaner with numbered parts for identificationFig. 2
text_image
Technical diagram of a welding torch with numbered parts labeled 1 through 5Fig. 3
natural_image
Line drawing of two different types of electric vacuum purifiers connected by wires (no text or symbols)Fig. 4
natural_image
Technical line drawing of a handheld tool and a cylindrical component (no text or symbols)


Fig. 5
natural_image
Line drawings of various types of welding tools including a tool, bracket, and base (no text or labels)Fig. 6

Fig. 7
natural_image
Line drawing of a hairdryer with a base and handle (no text or symbols)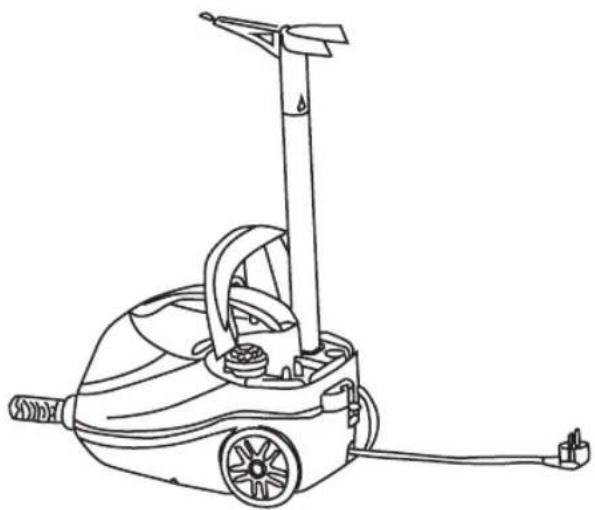
natural_image
Line drawing of a portable air purifier with handle and wheels (no text or symbols)Fig. 9 Fig. 8
natural_image
Line drawing of a handheld spray gun with a spring attached (no text or symbols)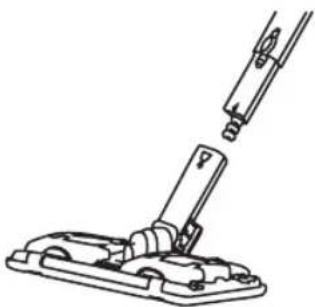
natural_image
Technical line drawing of a mechanical clamp or bracket assembly (no text or symbols)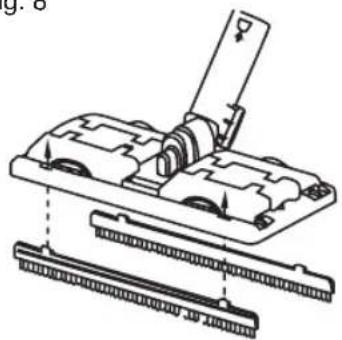
natural_image
Technical line drawing of a mechanical assembly with no visible text or symbolsESPAÑOL ES
Many thanks for choosing to purchase a SOLAC brand product.
Thanks to its technology, design and operation and the fact that it exceeds the strictest quality standards, a fully satisfactory use and long product life can be assured.
Read these instructions carefully before switching on the appliance and keep them for future reference. Failure to follow and observe these instructions could lead to an accident.
SAFETY ADVICE AND WARNINGS
· Never leave the appliance unattended while in use.
. This appliance shall not be used by children.
This appliance can be used by people with reduced physical, sensory or mental capabilities or lack of experience and knowledge if they have been given supervision or instruction concerning use of the appliance in a safe way and understand the hazards involved.
- Keep the appliance and its cord out of reach of children
This appliance is not a toy. Children should be supervised to ensure that they do not play with the appliance.
- Steam must not be directed towards equipment containing electrical components, such as the interior of ovens.
Do not use the appliance if it has fallen on the floor, if there
are visible signs of damage or if it has a leak.
Do not use in swimming pools containing water.
- Disconnect the appliance from the mains when not in use and before undertaking any cleaning, maintenance or filling task.
. The water filling inlet must not be opened during operation.
Do not force open the safety cap; make sure the appliance is completely depressurized prior to opening.
The temperature of the accessible surfaces may be high when the appliance is in use.
- If the connection to the mains has been damaged, it must be replaced, take the appliance to an authorised technical support service. Do not attempt to disassemble or repair the appliance by yourself in order to avoid a hazard.
This symbol means that there is a danger of scalding
- Ensure that the voltage indicated on the rating label matches the mains voltage before plugging in the appliance.
- Connect the appliance to a base with an earth socket withstanding a minimum of 16 amperes.
- The appliance's plug must fit into the mains socket properly. Do not alter the plug. Do not use plug adaptors.
- Check that the surface to be cleaned can resist steam cleaning.
ENGLISH EN
- The appliance must be used and placed on a flat, stable surface.
- Do not cover the appliance with objects that may interfere the proper operation of the security valve/s.
- Do not use the appliance in association with a programmer, timer or other device that automatically switches it on.
- Do not use the appliance if the cable or plug is damaged.
- If any of the appliance casings breaks, immediately disconnect the appliance from the mains to prevent the possibility of an electric shock.
- Do not force the power cord. Never use the power cord to lift up, carry or unplug the appliance.
- Check the state of the power cord. Damaged or tangled cables increase the risk of electric shock.
- Supply cord should be regularly examined for signs of damage, and if the cord is damaged, the appliance must not be used.
- Do not use or store the appliance outdoors.
- Do not leave the appliance out in the rain or exposed to moisture. If water gets into the appliance, this will increase the risk of electric shock.
- Do not touch the plug with wet hands.
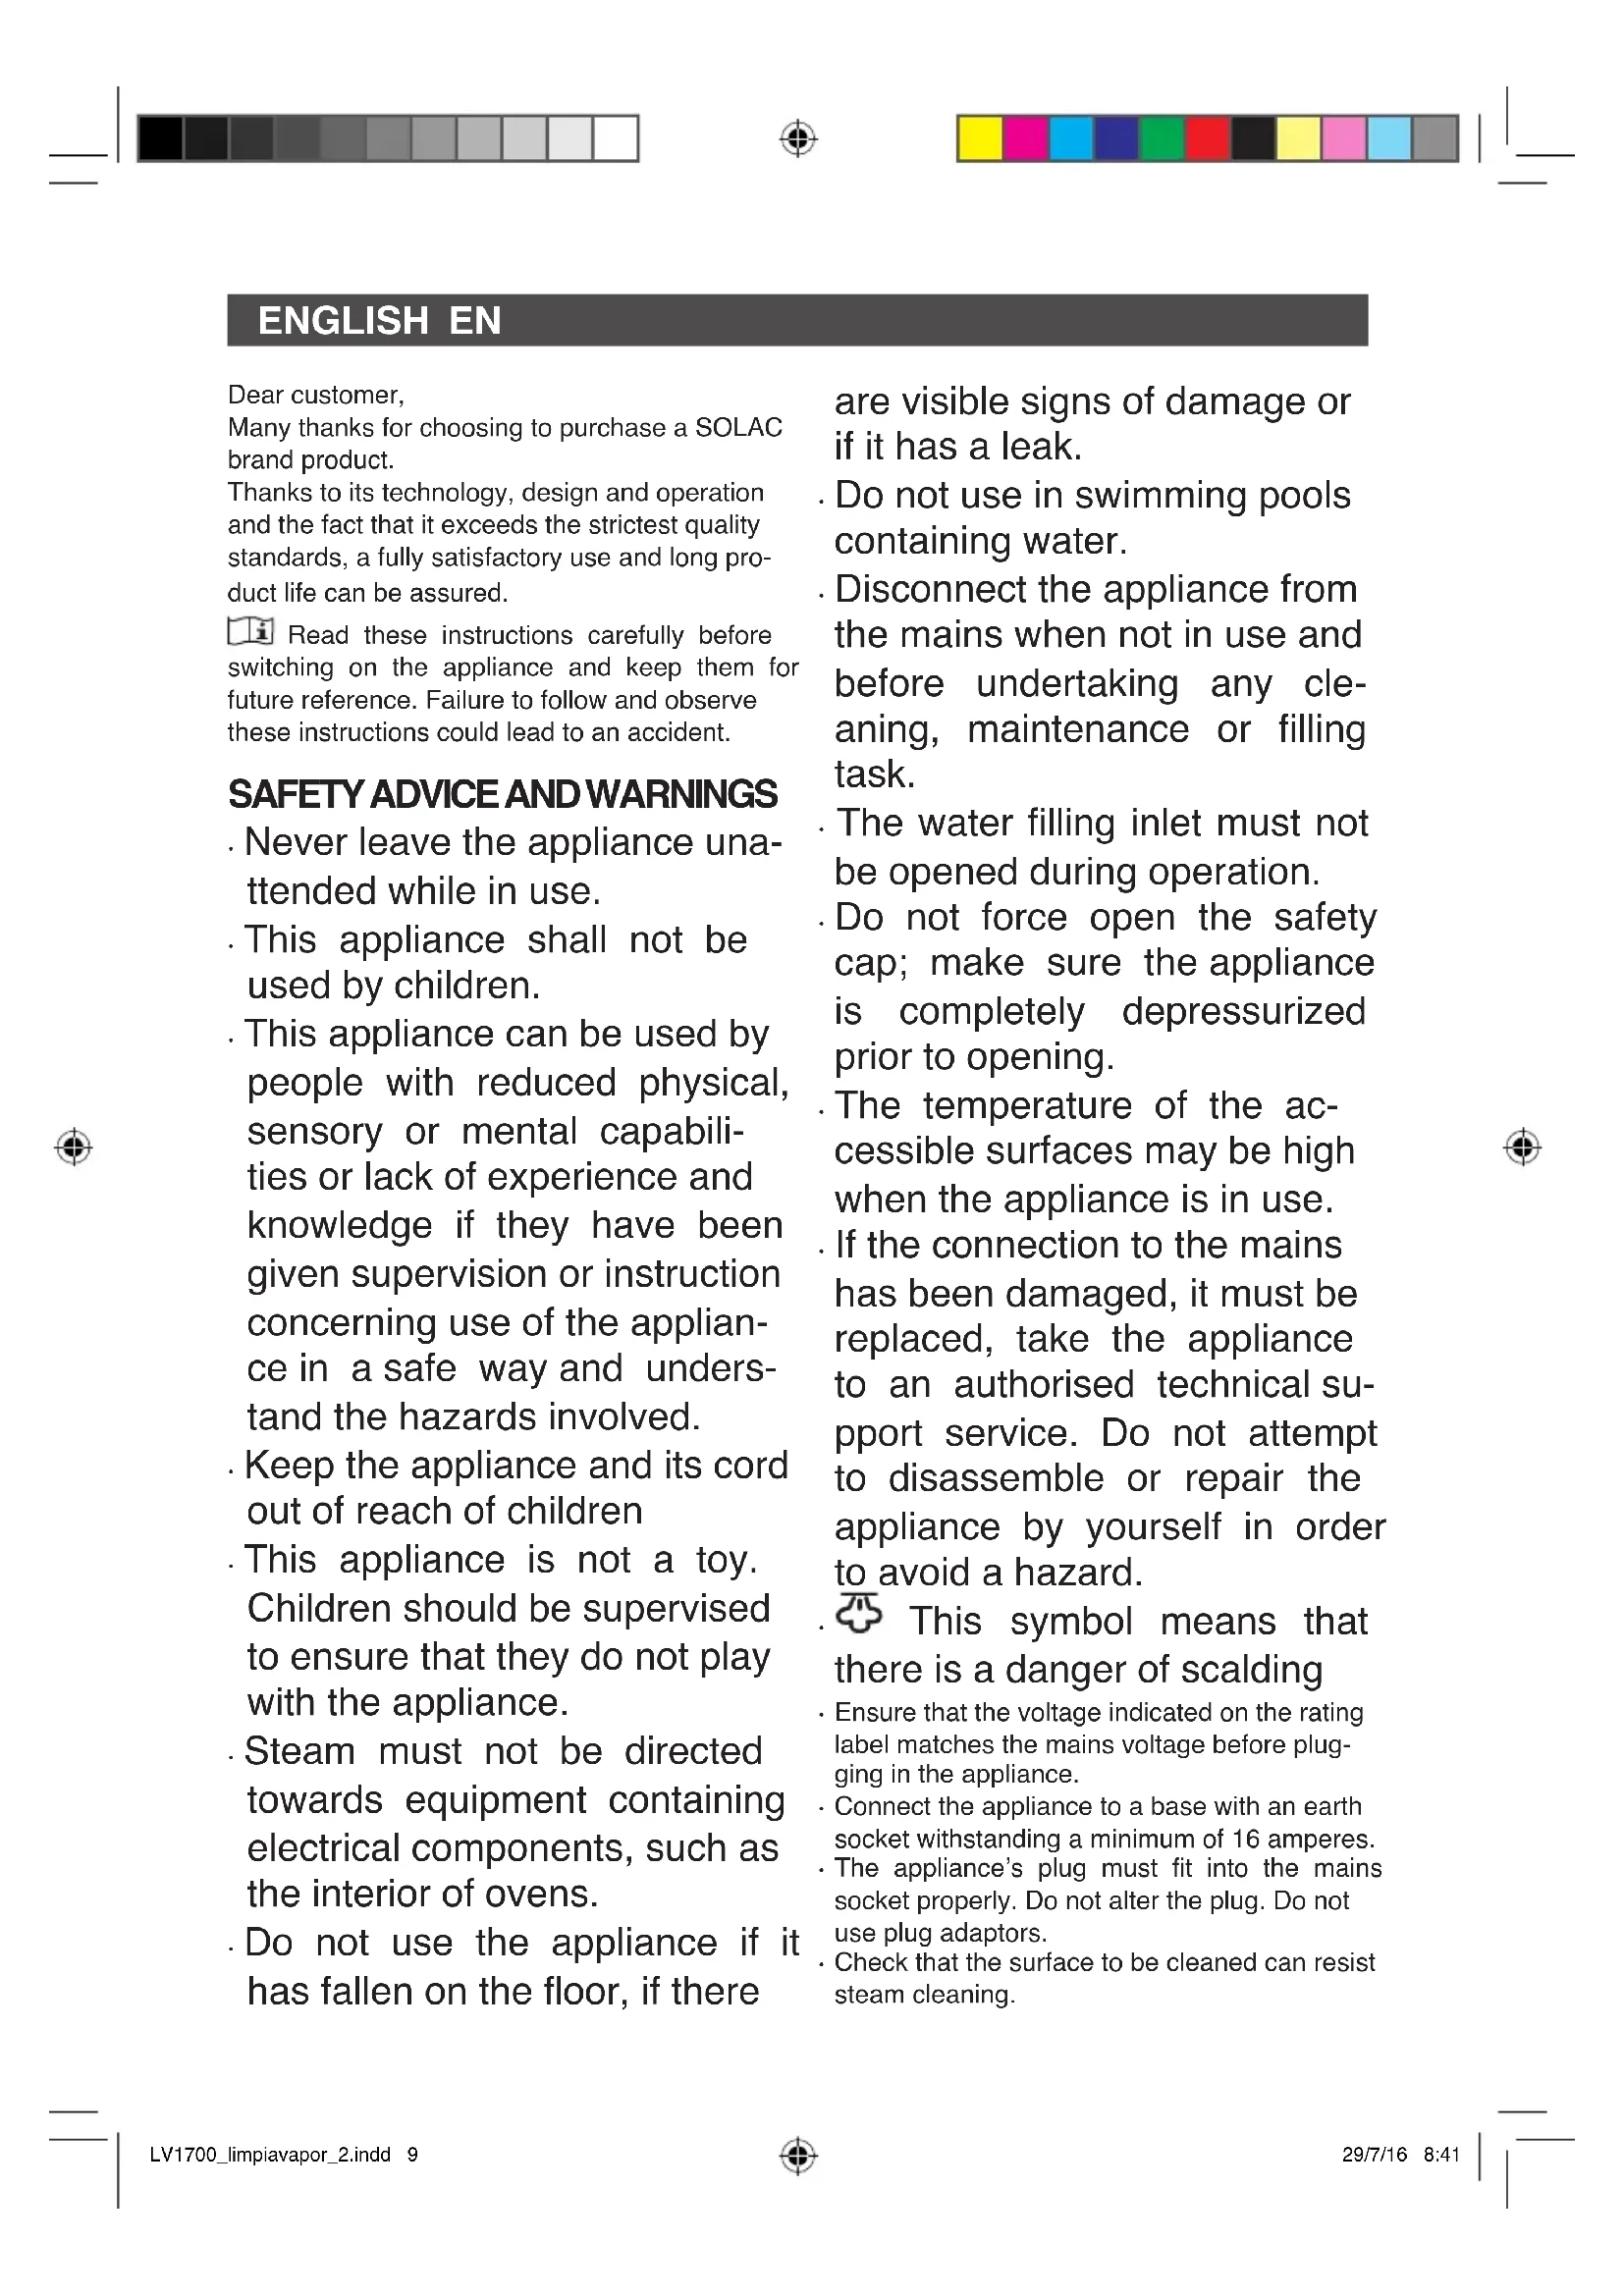
STRUCTURE OF UNIT (FIG.1)
1 Soft pipe
2 Unit
3 Steam gun
4 Handle
5 Led light
6 Cover
7 Safety valve
8 Wheel
9 Power switch
10 Power plug
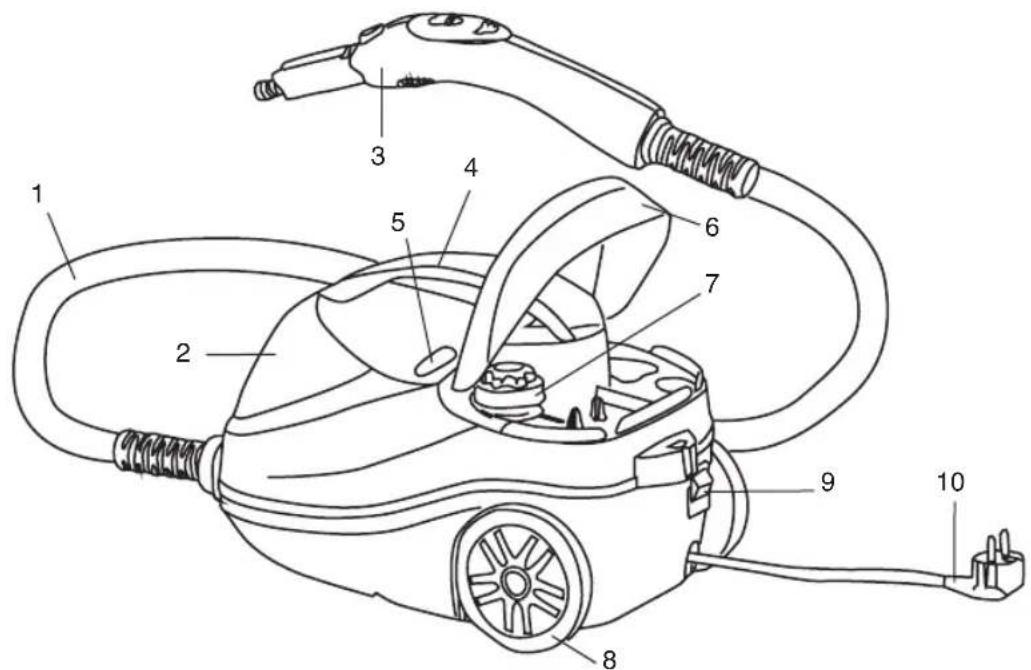
STRUCTURE OF STEAM GUN (FIG. 2)
1 Steam nozzle
2 Accessory lock
3 Adjust button
4 Children lock
5 Steam press button
USE AND CARE:
- Fully unroll the appliance's power cable before each use.
- Do not use the appliance if its accessories are not properly fitted.
- Do not switch the appliance on without water.
- Do not use the appliance if the on/off switch does not work.
- Do not move the appliance by pulling on the power cord or the hose.
- Use the appliance handle/s, to catch it or move it.
- Do not use the appliance if it is tipped up and do not turn it over.
- This appliance is for household use only, not professional, industrial use.
- Store this appliance out of reach of children and/or persons with physical, sensory or reduced mental or lack of experience and knowledge.
- Do not store the appliance if it is still hot.
- Only use water with the appliance. Do not add aromas, alcohol or detergents as this may damage it.
- It is advisable to use distilled water, especially if the water in your area contains clay or if it is "hard" (containing lime or magnesium).
- Make periodical checks on the safety cap,
- Check that the safety cap is screwed on tightly before switching on the appliance.
- Before each use, make sure that the product valve/s are not blocked.
- Do not use the appliance on any part of the body of a person or animal.
SERVICE:
- Make sure that the appliance is serviced only by specialist personnel, and that only original spare parts or accessories are used to replace existing parts/accessories.
- Any misuse or failure to follow the instructions for use renders the guarantee and the manufacturer's liability null and void.
INSTRUCTIONS FOR USE
Before use:
- Make sure that all the product's packaging has been removed.
- Prepare the appliance according to the function you wish to use:
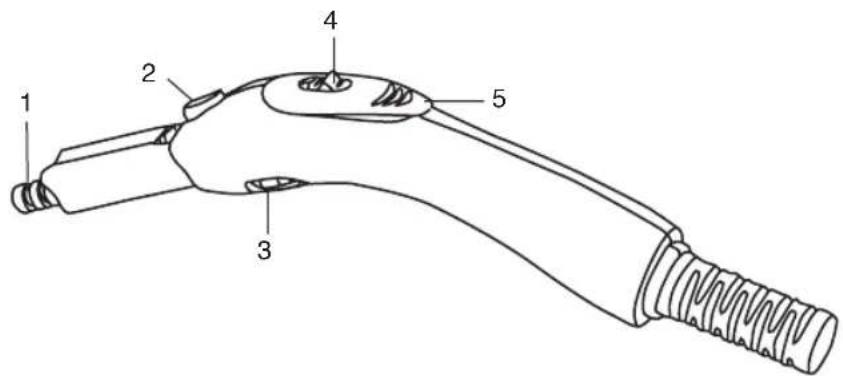
- You can install the cord rewinder on the back of unit and assemble the power cord on it. (FIG.3)
- The steam gun can be put on the handle.
You can use ribbon to fixed easily. (FIG.3)
EN
INSTRUCTION USING FOR ACCESSORIES
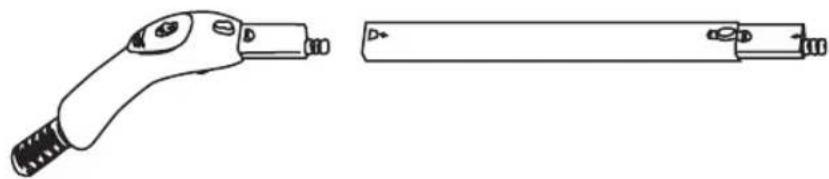
1. Extension tuve (Fig.4)
Assemble the extension tube if the steam cleaner is to be used to clean floor or high place windows or difficult to reach areas. To do this, push the open end of the tube into the steam gun until the release button of the steam gun clicks into place. And one or two extension tube if required. Press in the appropriate the release button and pull the tubes apart with a download movement to take the extension tube off.
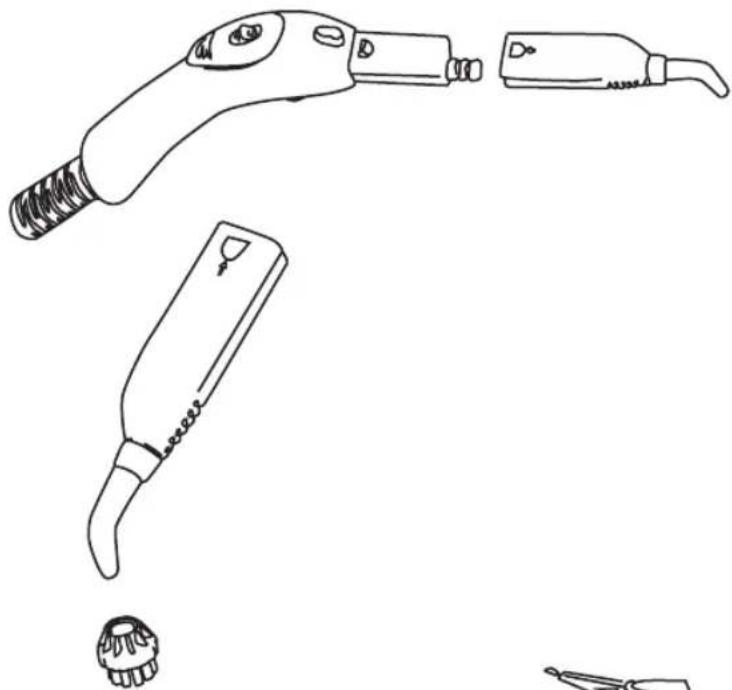
2. Big nozzle (Fig.5)
This nozzle makes it possible to clean hard to reach places such as corners, joints and toilets with ease. Simple push the bent nozzle firmly into the gun directly.
3. Round brush (Fig.6)
The metal and nylon round brush are pushed Firmly into the big nozzle until there is a sound. Even the most stubborn dirt can be removed. e.g. blinds, central heating radiators etc.
Please use small mental brush. Thenylon brush is suitable for heavystaining on less sensitive materials such as stainless steel. Simply pulling it off with a downward movement can remove it directly.
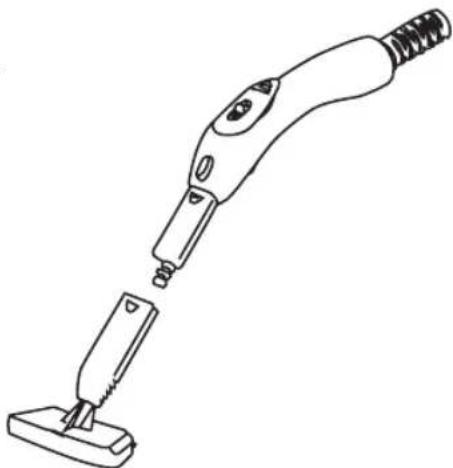
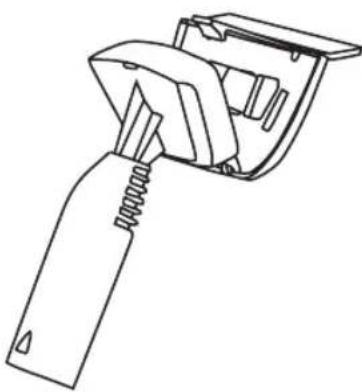
4. Ironing brush (Fig.7)
To iron the cloth, sofa etc, put the white ironing towel on the ironing brush and connect with steam gun. Besides, you can fixed the extension tube in the hole by open the back cover to put the clothes hanger on the extension tube. And you can put the clothes directly.
5. Window brush (Fig.8)
To clean window, mirrors, or tiles those which with smooth surface objects, please use the window brush which is with rubber blade combined withbrush sprayer to clean. When installed,knot on two prominent part ofthe hook on to the glass scraper, then put the whole cover of glass brush to ironing, issued a "clicking" sound, then installation is complete.
When ironing the cloth, you can put the extension tube in the hole of the unit, than put on the hanger on it.

If temperature is lower than 0^ , please do use this product to clean glass
6. Floor brush (Fig.9)
Floor brush nozzle to the end of extension tube. Ensure that nozzle clicks into place on assembly. The floor brush is ideal for cleaning washable wall and floor coverings. It may be used with or without the towel. Pressure on the inner side of the holder, open the clips to hold the towel.
Add the carpet glider if you need to clean the carpet.
Or add the brush if you need to clean the geostrophy etc.
FILLING WITH WATER:
- You must fill the water compartment before turning on the appliance.
- Do not force open the safety cap; make sure the appliance is completely depressurized prior to opening.
- Remove the steam pressure pressing steam release button (5)
- Slowly unscrew the safety cap (7) by pressing down and turning in the anti-clockwise direction to enable the remaining steam that might be in the boiler
- Fill the compartment with cold water.
- Pour in water using the measuring cup and funnel supplied. The steamer's maximum capacity is 1,5 litres.
- Screw on the safety cap (7) by pressing down and turning in the clockwise direction to the end.
- Check that the safety cap is screwed on tightly before switching on the appliance.
USE:
- Unroll the cable completely before plugging it in.
- Take the length of cable required out of the housing.
- Connect the appliance to the mains.
- Turn the appliance on, by using the on/off switch.
• The pilot light (5) comes on. - Leave to heat up for a few 6 Minutes.
- Wait until the pilot light (5) has gone out which will indicate that the appliance has reached an adequate temperature.
- During the appliance's use the pilot light (5) will come on and off automatically, indicating the heating elements are working, and therefore maintaining the desired temperature.
STEAM FLOW CONTROL:
- The appliance has a FIG 2 control knob that allows to get the control of the steam flow.
EN
ONCE YOU HAVE FINISHED USING THE APPLIANCE:
- Turn the appliance off, using the on/off switch.
- Allow the appliance to cool down.
- Clean the appliance.
CARRY HANDLE/S:
- This appliance has a handle on the upper part of the body, which facilitates comfortable transportation (c).
PARKING POSITION:
- This appliance has a parking positions for comfortable and straightforward storage.
- To make use of the horizontal parking hook the rigid tube's hook onto the hook that is to be found on the lower part of the appliance (Fig. 3).
SAFETY THERMAL PROTECTOR:
- The appliance has a safety device, which protects the appliance from overheating.
- If the appliance turns itself off and does not switch itself on again, disconnect it from the mains supply, and wait for approximately 15 minutes before reconnecting. If the machine does not start again seek authorised technical assistance.
CLEANING
- Disconnect the appliance from the mains and allow it to cool before undertaking any cleaning task.
- Clean the equipment with a damp cloth with a few drops of washing-up liquid and then dry.
- Do not use solvents, or products with an acid or base pH such as bleach, or abrasive products, for cleaning the appliance.
- Never submerge the appliance in water or any other liquid or place it under running water.
- Then dry all parts before its assembly and storage.
HOW TO DEAL WITH LIME SCALE INCRUSTATIONS:
- For the appliance to work correctly it should be kept free of limescale or magnesium incrustations caused by the use of hard water.
- To prevent this kind of problem, we recommend the use of water with low lime or magnesium mineralisation.
- However, if it is not possible to use the kind of water recommended above, you should periodically remove the limescale from the applan-
ce:
- Every 6 weeks if the water is "very hard".
- Every 12 weeks if the water is "hard".
- A specific anti-lime scale product should be used on this kind of product.
- Homemade solutions are not recommended in the decaling of this appliance, such as the use of vinegar.
CLEANING THE BOILER
- Check that appliance has cooled down (wait at least 3 hours after disconnecting the appliance).
- Do not force open the safety cap; make sure the appliance is completely depressurized prior to opening.
- To empty the boiler unscrew the cleaning cap (5) in an anti-clockwise direction
- Fill the boiler with approximately 1000 ml of water and add the selected anti-lime scale product.
- Leave the product to act for approximately 30 minutes.
- Shake vigorously and empty fully.
- If necessary repeat this procedure.
ANOMALIES AND REPAIR
• Take the appliance to an authorised technical support service if product is damaged or other problems arise. Do not attempt to disassemble or repair the appliance yourself as this may be dangerous.
For EU product versions and/or in case that it is requested in your country:
ECOLOGY AND RECYCLABILITY OF THE PRODUCT
- The materials of which the packaging of this appliance consists are included in a collection, classification and recycling system. Should you wish to dispose of them, use the appropriate public recycling bins for each type of material.
- The product does not contain concentrations of substances that could be considered harmful to the environment.

This symbol means that in case you wish to dispose of the product once its working life has ended, take it to an authorised waste agent for the selective collection of Waste from Electric and Electronic Equipment (WEEE).

This symbol means that it is important to
EN
read the operating instructions.
This symbol means that user must to consult instructions thoroughly before use.
This appliance complies with Directive 2014/35/EC on Low Voltage, Directive 2014/30/EC
on Electromagnetic Compatibility, Directive 2011/65/EU on the restrictions of the use of certain hazardous substances in electrical and electronic equipment and Directive 2009/125/EC on the ecodesign requirements for energy-related products.
FRANÇAIS FR
Cher Client,
STRUCTURE DE L'UNITÉ (FIG.1)
STRUCTURE OF STEAM GUN (FIG. 2)
DELEN VAN HET APPARAAT (AFB.1)
STOOMPISTOOL (AFB. 2)
HANDVAT(EN) VOOR VERPLAATSEN:
STRUKTURA JEDNOTKY (OBR.1)
KONTROLA WYPŁYWU PARY:
NIEPRAWIDŁOWOŚCI I NAPRAWA
what we do, we do well
Español / ES
English / EN
Français / FR
Deutsch / DE
Português / PT
Italiano / IT
Nederlands / NL
Česky / CS
Polski / PL
Slovenský / SK
българск / BG
Română / RO
العربية / AR
Model: LV1700
Rated Power: 220-240V\~
50/60Hz
2000W
www.solac.com