
Assistent E4KM12BM - Food Processor ELECTROLUX - Free user manual and instructions
Find the device manual for free Assistent E4KM12BM ELECTROLUX in PDF.
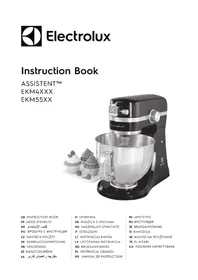



| Product type | Food processor |
| Brand | Electrolux |
| Model | Assistent E4KM12BM |
| Power supply | mains (voltage and frequency as per rating plate) |
| Number of speeds | 10 speeds + pulse function |
| Bowl capacity | Stainless steel bowl, capacity suitable for recipes in the manual |
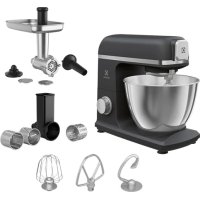
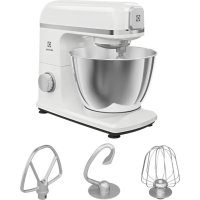
| Included accessories | Metal whisk, flat beater, SoftEdgeBeater™, dough hook, meat grinder, slicer/grater, PerfectRiseLid™ |
| Main materials | Stainless steel bowl, accessories with non-stick coating, recyclable plastic |
| Main functions | Whisk, beat, knead, grind, slice, grate, mix |
| Indicator light | Operation indicator and speed selector backlight (blue LED) |
| Safety system | Shutdown if selector is left on when plugging in; motor arm lock; anti-slip feet |
| Maintenance and cleaning | Bowl, flat beater, dough hook, SoftEdgeBeater™ and PerfectRiseLid™ dishwasher safe; metal whisk, grinder and slicer/grater hand wash; motor cleaned with a damp cloth |
| Safety instructions | Never immerse the motor; do not use by children; turn off and unplug before cleaning or changing accessories |
| Beater height adjustment | Possible via a screw on the motor arm (flat-head screwdriver) |
| Multi-accessory adapter | Allows fixing the grinder and slicer/grater |
| Household use | For indoor and domestic use only |
Frequently Asked Questions - Assistent E4KM12BM ELECTROLUX
User questions about Assistent E4KM12BM ELECTROLUX
0 question about this device. Answer the ones you know or ask your own.
Ask a new question about this device
Download the instructions for your Food Processor in PDF format for free! Find your manual Assistent E4KM12BM - ELECTROLUX and take your electronic device back in hand. On this page are published all the documents necessary for the use of your device. Assistent E4KM12BM by ELECTROLUX.
USER MANUAL Assistent E4KM12BM ELECTROLUX
WE'RE THINKING OF YOU
Thank you for purchasing an Electrolux appliance. You've chosen a product that brings with it decades of professional experience and innovation. Ingenious and stylish, it has been designed with you in mind. So whenever you use it, you can be safe in the knowledge that you'll get great results every time.
Welcome to Electrolux.
Visit our website to:

Get usage advice, brochures, trouble shooter, service information: www.electrolux.com

Register your product for better service: www.electrolux.com/productregistration

Buy accessories and consumables for your appliance: www.electrolux.com/shop
CUSTOMER CARE AND SERVICE
When contacting Service, ensure that you have the following data available:
- Model Number
- PNC number
- Serial number
The information can be found on the rating plate.
ENGLISH
Thank you for choosing an Electrolux product. In order to ensure the best results, always use original Electrolux accessories and spare parts. They have been designed especially for your product. This product is designed with the environment in mind. All plastic parts are marked for recycling purposes.
COMPONENTS
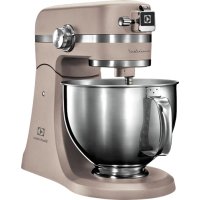
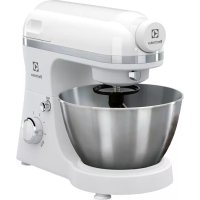
A. Motor head (tiltable) B. Speed selector C. Housing D. Tilt head locking lever E. Working light F. Attachment hub G. Attachment shaft H. Stainless steel bowl I. Bowl clamping plate J. Non-slip feet
K. Power cord L. Wire whip M. Coated flat beater N. SoftEdgeBeaterTM O. Coated dough hook P. Meat grinder Q. Slicer/Shredder R. PerfectRiseLidTM S. Pulse function*
- Certain models only
Picture page 2-4
GETTING STARTED
1 Unpack all parts and remove all packaging material. Before first use, wash all parts that will come into contact with food. The wire whip, dough hook, flat beater, and slicer/shredder should only be washed by hand in warm soapy water. The bowl, flat beater, dough hook, SoftEdgeBeater™ and PerfectRiseLid™* are dishwasher-proof. Clean the motor unit with a damp cloth.
Shredder should only be washed by hand in warm soapy water. The bowl, Flat beater, Dough hook, SoftEdgeBeater™ and PerfectRiseLid™* are dishwasher-proof. Clean the motor unit with a damp cloth.

Caution: Never immerse the motor unit in water! Let all parts dry thoroughly.
2 Place the appliance on a flat surface. Tilting the Motor head up: Move the Tilt head locking lever to "Unlocked" with one hand, tilt the Motor head up with the other hand. Once in up position it locks. Warning: Keep fingers and hands away from areas with movable parts. 3 Move Speed selector to "OFF". Place the Stainless steel bowl on the bowl clamping plate. Move the bowl clockwise to lock into position. Warning: Never operate appliance with the attachments wire whip, Flat beater, Dough hook or SoftEdgeBeaterTM unless the bowl is in place, and the motor head is down. Place an attachment on the Attachment shaft: Align the slot at the top of the attachment with the pin on the Attachment shaft. Push the attachment up and turn it counterclockwise until the pin is locked into position. To remove the attachment, move it clockwise and pull off. 5 Tilting the Motor head down: Move the Tilt head locking lever to "Unlocked" with one hand, tilt the Motor head down with the other hand. Insert the plug in the main socket. 6 Move the Speed selector from "OFF" to desired speed (1-10). Once mixing is complete, turn the Speed selector to "OFF" and unplug the appliance. 7 Work light and Power indicator light: If the appliance is plugged in and a speed is selected, a blue LED lights up around the Speed selector. A working light will also light up over the working area. If the Speed selector is moved to "OFF", the working light will automatically shut off after 3 min. 8 Note: If the Speed selector is already turned on before the appliance is plugged in, both the blue Speed selector LED light and the Working light will flash OFF and ON to let you know the Speed selector has been left on. Turn the Speed selector to "OFF" and the lights will stop flashing. Then resume operating normally.
OTHER FUNCTIONS
9 How to use the coated SoftEdgeBeater™ tool: The SoftEdgeBeater™ is perfect for creamy mixtures and toppings. The silicone edges of the beater gently wipe the sides of the bowl, helping to incorporate all the ingredients in the mixture and to ensure even consistency throughout the mixing process. 10 Note: Do not use the coated SoftEdgeBeater™ with heavy mixtures such as dough; use the dough hook tool instead. For hard ingredients like dry fruits, shells, or bones, use the coated flat beater instead.
11 How to use the PerfectRiseLid™:
The PerfectRiseLid™ isolates and helps to build up the humid environment for the dough to rise in proper condition.
Covering the bowl with the PerfectRiseLid™ keeps the dough from drying out, preventing the formation of a crust on the surface of the dough, which inhibits the proper rising of the dough and results in a poorer baking result.
12 How to use the Pulse function:
If the machine is set to speed 1/P, you can temporarily stop the machine by pressing the "PULSE" button on the speed selector. Pressing it again will start the machine for 1.5 seconds. If you press continuously, the machine will work as long as you keep the button pressed.
13 Attachment hub: The appliance comes with a built-in multipurpose attachment hub. Read and carefully follow the instructions that come with each attachment for correct and safe use.
14 Adjusting the attachment shaft: The appliance is adjusted at the factory so that the flat beater clears the bottom of the bowl. If the flat beater hits the bottom of the bowl or is too far away from the sides, you can adjust it correctly. See 14 for further instructions.
15 Turn the speed selector to "OFF" and unplug the appliance. Tilt the motor head back. Use a slotted point head screwdriver to adjust the screw. Turn counterclockwise to raise the attachment shaft, turn clockwise to lower it.
HOW TO USE THE MEAT GRINDER
16 Insert the grind screw (B) into the grinder housing (A). Place the knife (C) over the square shaft at the end of the grind screw. Place the grinding plate (D) (medium or coarse) over the knife. Tighten the ring (E) by hand until the meat grinder is secured.
Note: Do not over-tighten the ring.
17 Open the attachment hub lid on the stand mixer. Fit the power shaft of the attachment in the attachment hub socket on the stand mixer. Rotate the attachment back and forth if necessary. Tighten the attachment hub knob until the attachment is fully fastened.
Caution: Before attaching accessories, turn off the appliance and unplug it.
18 Place the food tray over the grinder housing. Cut raw meat into small pieces and place it on the food tray. Plug in the appliance and turn the speed selector to the desired speed (recommended speed: 6-8). Feed the meat into the feed chute by using the pusher.
Caution: Do not put your fingers or other utensils in the feed chute.
Note: Meat should not contain bones, muscles or skin.
HOW TO USE THE SLICER/SHREDDER*
19 How to use the Slicer/Shredder: Choose a Slicer or a Shredder knife (Medium or Course). Insert the shaft (square end) of the selected Knife into the Slicer/Shredder housing so the shaft fits into square hub socket. Secure the Knife by pulling the Locking handle downwards.
Caution: The blades and inserts are very sharp!
20 Assemble the Slicer/Shredder in the Attachment hub. Place a container under the attachment. Cut the food into small pieces. Plug in the appliance and turn the Speed selector to desired speed (recommended speed: 8).
21 Feed the food into the Feed chute by using the Pusher. When finished using your attachment, turn off the appliance and unplug it. Close the Attachment hub lid and tighten the Attachment hub knob.
CLEANING AND CARE
22 Unplug the appliance. We recommend that the wire whip, meat grinder and slicer/shredder is washed by hand in warm soapy water.
The bowl, Flat beater, Dough hook, SoftEdgeBeater™ and PerfectRiseLid™ are dishwasher-proof.
Clean the motor unit with a damp cloth. Caution: Never immerse the motor unit in water! Let all parts dry thoroughly.
23 Do not use abrasive cleaners or scouring pads when cleaning the appliance.
Enjoy your new Electrolux product!
SAFETY ADVICE
Read the following instruction carefully before using the appliance for the first time.
- This appliance shall not be used by children. Keep the appliance and its cord out of reach of children.
- Care shall be taken when handling the sharp cutting blades, emptying the bowl and during cleaning.
- Appliances can be used by persons with reduced physical, sensory or mental capabilities or lack of experience and knowledge if they have been given supervision or instruction concerning use of the appliance in a safe way and if they understand the hazards involved. Children shall not play with the appliance.
- The appliance may only be connected to a power supply whose voltage and frequency comply with the specifications on the rating plate!
- Never use or pick up the appliance if
- the supply cord is damaged,
- the housing is damaged.
- If the appliance or the supply cord is damaged, it must be replaced by the manufacturer, its service agent or similarly qualified person, in order to avoid hazard. Always place the appliance on a flat, level surface.
- Always disconnect the appliance from the supply if it is left unattended and before assembling, disassembling or cleaning.
- Appliance is for indoor use only.
- Do not immerse the appliance, cord or plug in water or any other liquid.
- Do not let cord hang over edge of table or counter, do not let cord contact hot surface, including the stove.
- Never use accessories or parts made by other manufactures not recommended or sold; may cause a risk of injury to persons.
- Make sure the motor has completely stopped before disassembling and cleaning.
- Avoid contact with moving parts. Contact could result in injury! Do not use other tools or utensils during the appliance usage.
- Do not leave this product out of your sight when it is running.
- Ensure all loose matters and your clothes/accessories are kept away while using this product.
- Never process boiling liquids (max 90°C ).
- Do not use this appliance to stir paint. Danger, could result in an explosion!
- Never operate appliance with the attachments wire whip, flat beater or dough hook unless the bowl is in place.
- This appliance is intended for domestic use only. The manufacturer cannot accept any liability for possible damage caused by improper or incorrect use.
TROUBLESHOOTING
| PROBLEM | POSSIBLE CAUSE | SOLUTION |
| The motor slows down during operation. | Amount of dough may exceed maximum capacity. | Remove half and process in two batches. |
| Dough may be too wet, it sticks onto the side of the bowl. | Add more flour, 1 tablespoon at a time until the motor speeds up. Process until dough cleans the side of the bowl. | |
| The motor does not work. The appliance is not connected to the mains. Make sure to plug in the appliance before operation. | ||
| The appliance vibrates/ moves during operation. | The rubber feet are wet. Make sure the rubber feet at the bottom of the unit are clean and dry. | |
| It is normal for heavy loads (e.g heavy dough, cheese). | Remove half and process in two batches. | |
| The attachment scrapes the Stainless steel bowl during operation. | The height of the attachment shaft is incorrect. | Adjust the height of the attachment shaft. |
| The Working Light and Power indicator light flashes on and off. | The Speed selector has been left turned on. Turn the Speed selector to "Arrest". | |
DISPOSAL

This symbol on the product indicates that this product contains a battery which shall not be disposed with normal household waste.
This symbol on the product or on its packaging indicates that the product may not be treated as household waste. To recycle your product, please take it to an official collection point or to an Electrolux service center that can remove and recycle the battery and electric parts in a safe and professional way. Follow your country's rules for the separate collection of electrical products and rechargeable batteries.
Electrolux reserves the right to change products, information and specifications without notice.
RECIPES
| WHISKING FUNCTION QUANITITIES AND PROCESSING TIMES | |||||
| Ingredients Quantity Unit | Time | Speed | |||
| Cream 2.1~6.1 dL 60~80s 8~10 | |||||
| Egg-white 1.2~2.4 dL At least 100s 8~10 | |||||
| Method | |||||
| Use the wire whip tool. | |||||
| BEATING FUNCTION QUANTITIES AND PROCESSING TIMES (MIXING LIGHT DOUGH (E.G: CAKE DOUGH)) | |||||
| Recipe Ingredients Quantity Unit Time Speed | |||||
| Cake sponge | Flour | 6,0 | dL | 200~230s | Medium setting(5~6setting) |
| Margarine | 1,5 | dL | |||
| Sugar | 1,7 | dL | |||
| Baking powder | 1,0 | tsp | |||
| Chocolate cake | Flour | 8,0 | dL | 300~360s | Medium setting(4~6setting) |
| Egg | 4,0 | pcs | |||
| Butter | 2,0 | dL | |||
| Sugar | 1,7 | dL | |||
| Vanilla Sugar | 2,0 | tsp | |||
| Sour cream | 1,0 | dL | |||
| Nougat raw mixture | 100 | g | |||
| Baking soda | 3,0 | tsp | |||
| Method | |||||
| The butter should be soft not hard. Stir the soft butter with sugar until creamy. Add the eggs one after another. While stirring, add the sour cream and vanilla sugar. Finally stir in the flour together with baking soda.Note: Use the SoftEdgeBeaterTM tool for creamier results. | |||||
| Butter Cake | Flour | 3,0 | dL | 200~230s | Medium setting(4~6setting) |
| Margarine | 1,5 | dL | |||
| Sugar | 1,7 | dL | |||
| Fresh egg | 3 | pcs | |||
| Baking powder | 1,0 | tsp | |||
| Method | |||||
| Place all ingredients in the bowl, and mix them, till it is ready.Note: Use the SoftEdgeBeaterTM tool for creamier results. | |||||
| Chocolate butter cream frosting | Semi-sweet chocolate chips | 2,3 | dL | 200~230s | Medium setting(4~6setting) |
| Butter, softened | 1,15 dL | ||||
| Sifted confectioners' sugar | 4,6 | dL | |||
| Milk | 5 | tsp | |||
| Vanilla extract | 0,5 | tsp | |||
| Method | |||||
| Melt chocolate chips over hot water; stir until smooth. Set aside; cool 15 minutes.We recommend to use the SoftEdgeBeaterTM tool instead of the coated flat beater tool.In large bowl, beat butter until creamy. Gradually add confectioners' sugar, alternately with milk. Add melted chocolate and vanilla; beat until smooth. | |||||
HOOKS FUNCTION QUANTITIES AND PROCESSING TIMES
| Recipe Ingredients Quantity Unit Time Speed | |||||
| Yeast dough* (bread) min. Quantities | Flour 6,0 dL | 350~380s | Low setting (max. 2 setting) | ||
| Water 2,0 dL | |||||
| Sugar 2,4 dL | |||||
| Margarline 1,0 tbs | |||||
| Salt | 1,0 tsp | ||||
| Dry Yeast | 2,0 tsp | ||||
| Method | |||||
| Assemble the coated dough hook to mix the ingredients. Place all the ingredients into the bowl and knead until satisfactory. Cover the bowl with the PerfectRiseLidTM** and let it rise. | |||||
| Yeast dough* (Pizza dough) max quantities | Wheat flour | 16,0 | dL | At least 480s | Low setting (max. 2 setting) |
| Water 4,0 dL | |||||
| Oil | 1,0 dL | ||||
| Fresh egg | 2,0 pcs | ||||
| Salt | 3,0 tsp | ||||
| Sugar 2,0 tsp | |||||
| Dry Yeast | 1,0 tbs | ||||
| Method | |||||
| 1. In a container mix half of the yeast with the salt and the sugar and set aside; 2. In the bowl add the remaining yeast with the water and the oil; 3. This dough should be mixed with a whire whip tool, at minimum speed until a smooth mixture is obtained; 4. Add into the bowl the fresh eggs and the preparation set aside in point 1 (the yeast mixed with salt and sugar). The speed should be increased to medium. 5. Add half of the flour gradually. When the dough acquires a bigger volume and consistency change the tool to the coated dough hook tool. 6. Add the rest of the flour and continue mixing. At this point you will need to monitor the input power of the machine, so that it doesn't exceed setting 2. The dough should be mixed until it releases completely from the interior surface of the bowl. 7. Cover the bowl with the PerfectRiseLidTM** and let it rise. | |||||
*Do not exceed Speed 2 when preparing yeast dough. This may damage the machine.
Illustration page 2-4
FIRST USE
1. Before using the appliance for the first time, clean it thoroughly.
: *TMPerfectRiseLid
PULSE" will beep lightly and then start.
*poilll aoe plo
(C)(A)(B)(D)
ailll bpa 1 a1 jblj
jlll llll gie plalb ayiy yie Igaiy yiau Cya aill yaiy yaiy yaiy yaiy yaiy yaiy yaiy yaiy yaiy yaiy yaiy yaiy yaiy yaiy yaiy yaiy yaiy yaiy yaiy yaiy yaiy yaiy yaiy yaiy yaiy yaiy yaiy yaiy yaiy yaiy yaiy yaiy yaiy yaiy
10
150 1
j 1
(8:4)
!Electrolux

Electrolux jge g, ciai iis puiu gill jai l Juaaal jai. Electrolux gia jiai jai 15 Clele ge aie yjll e jai gic bial gial iiae ggrgai Laiy Cauo y ydi tale!
L
aball Js .K
sL
Jilao Jiaowu jilu.M
*SoftEdgeBeater.N
jie 0
PerfectRiseLid .R
(a)
c.
j k + 1j k
e 1
J 1
__SUPPIMER__
23 He non3BaIte a6pa3nBHN nouchTbaIIN npenapatNI INI nIbpo r6bn npn nouchTaHe Ha ypea.
HacnaTe ce Ha cBor HOB npOyKT ot Electrolux!
YKA3AHNIA 3A B6E30PACHOCT
Пючete седнITE ИНСТPyкци BнИмаTeлно пpeи 3a ИЗпОЛЗВaTe урEDA 3a ПьРВИ ПьT.
3a6paHeNo e n3noI3BaHeTo Ha To3n ypei OT deua. IpbjTe ypeia n Ka6ena My daJeu OT IOCTbN Ha Deua. - Tp6Ba Da ce BnMaBa npu pa60Ta c octpn peXeun octpneTa, n3npa3BaHe Ha Kynata I no BpeMe Ha NouchTbaHe. - YpeiTe MoIa 6bIaT I3NoI3BaHn OT IuCa C HamaJIeHN φ I3NueCKn, ceTINBHI n yMCTBeHn Bb3MOxHocTn IuI Nua 6e3 OINT IIO3HaHnA, cAmO aKO Te ca IoI Na6IIOJeHne IuI 6bIaT INHcTpKtupAHn OTHOcHO 6e3OJaCHaTa yNOrpe6a Ha ypeDa n Bb3MOxInTe pUCKOBe. - Deuata He Tp6Ba Da cn nIgpaT cypeJa. To3n ypeI Tp86Ba Da Ce CBbp3Ba CaMo KbM N3tOuHnK Ha eNeKTp03aXpaHBaHe, YneTo HappeXeHne N yeCToTa CbOTBeTcTBaT Ha CneUΦnKaunTe Ha TabeIkata C daHH! - Hukora He u3noI3BaIte n He BdIraIte ypeJa, aKO 3axpaHbauJrT Ka6eJI nn KopnycBTe NOBpeDeH. - Ako ypei bT nnn 3axpaHbauT Ka6e e nobpeDeH, TOn Tp8Ba da 6bJe cMeHeN ot npOu3BODnTeT, HerOB cepBn3eH areHT nnn IIne C aHaIOrnUHa KBaIInKauTna, 3a da ce n36erHe onaCHOCT. Bunhar noctabraye ypea Bbpxy paBha nobbpxHOCT. BnHaHn n3KnUoyBaIte ypeDa ot 3axpaHbAHeTo, aKo e octaBeH 6e3 HaI3Op, KaKTOn I npEi crNo6BaHe, pa3rno6BaHe nII NOuCTBaHe. - ypeBt e camo 3a n3noJ3BaHe B domaun yCIOBnA. He notanayte ypeda, ka6ena nn nceena BbB BOa nn npyra TeuhoCT. He octabraye ka6ena da bucn ha p6a ha maca nn nnot, na3eTe ka6ena ot donnp c ropeuIN NOBbpxHOCTN, BKJIIOHTeJHOr TOTBapcKa neka. - HnKora He n3noI3BaIe npHaJIeJXHocTn IInu qactn, Ynnto npOn3BODiTEn IInu TnOBe He ca npenOpbuaHn, B npOTuBeH clyuaMOraT da HaCTbIaT TeJeCHn NOBpeHn. - Празда постыпг Te KbM pa3rno6BaHe n nouchTbaHe, yBepTe ce, ue eNeKtpoDvBnraTeJrE cnpaHnblHo. - ɪЗбягbaïte контakт с dBижец ce quactn. Toba може ддове до habаняBaHe! He n3рлзВaIte npуги inhctpymehTu iln пибори по ВсpeMe Ha n3рлзВaHe Ha ypeDa. He n3nyckaTe ypeDa ot no nglei no BpeMe Ha eknploatauia. - YBepete ce, ye no BpeMe Ha n3noJ3BaHe Ha npOyKta HAOKOIO HAma HAcuHnBeueCTBa n dpexn/aKcecoapn. - HnKora He o6pa6oTbaIe BpIu TeuHocTn (MaKc. 90°C). - He pa36bpykBaIte 6oI cypeIa. OnacHocT, MoKe da IIOBeIe Do ekCpNo3nIa! - HnKora He n3noJ3BaIe ypea c npkaueHn TeJeHn 6bPkakn, nlockaTa 6bPkakna nn KyKaTa 3a TcTo, oCBeH aKO KynaTa He e noCTaBeHa Ha MAcTo.
To3n ypeE npedHa3HaueH cmo 3a 6ntoBa ynoTpe6a. IpOn3B0dnteIaT He MoKe Da IoeMe KaKBaTO n da e OTROBOPHOCT 3a BepoAHTHO IOBpeKdaHe pInuHEnO OTHnpaBnHNO nn HnOdoJIO n3NoJ3BaHe.
OTCTPAHRAHE HA HEN3IPABHOCTN
| СИМПТOM | ПРИЧИHA | PESUHEME |
| Моторвт намалива Temnotо по врeme на paбoting. | КоличесвOTO ТECTО моче за над��ши Мaksимални Кадцитet. | Изba'dete паловината и пюседраite на два п'tи. |
| ТECTOTо моче за[eпразалени Влажно и за залень върху сънatingа на кунatinga. | Добavenote nobeche 6braшно, по 1 льжиca,doeskoTо MOTOPВТ увелочи Temnoto.Pprod'bIXeTe,doKATO TECTOTO ce поостп остенда на кунatinga. | |
| Моторвт не paбoting.УрedingТ He eSBырзан КьмЕlektro3axpaHbHeTo. | Вкlioчete урedesв контakta п徳и paбoting. | |
| УрedingВибрира/движи се по врeme на paбoting. | ГуменITE крачета са Влажни.Прobерete дали | гуменITE крачета надьНOTо на урedesв счости и сухи. |
| HopmaIHO 3a roлamedЗарождаме (нанр.rolamedКOLINcEeSTBO TECTO, сирehe). | Изba'dete паловината и пюседраite на два п'tи. | |
| ПриstавkaTA нанданвka кунatura OT Нерьждаема CTOMANA NO papeMe на paбoting. | ВиcoUnHATA Na Зakpenвшия вал e NeTochna. | Harlacete BINO ChINA Na ZAKpenBaшяя вал. |
| СbvETlinHnata Иndinkaцnia 3a paбoting на урedeni CBvETlinHnAT INDInKaTOp на зхсанванeto започbat Дa MIRAT. | СelenkTopВТ на скорoctи e Вкlioчeн.Завретe | сelenkTopa Na скорoctи на поэция "Спиран". |

This symbol on the product indicates that the product must not be disposed of with normal household waste.
This symbol on the product or on its packaging indicates that the product may not be treated as household waste. To recycle the product, take it to an official collection point for electrical and electronic equipment or to an Electrolux service center, which can also recycle the battery and electrical parts safely and professionally. Follow your country's regulations for separate collection of electrical products and rechargeable batteries.
Electrolux reserves the right to change products, information, and specifications without prior notice.
RECIPES
QUANTITIES AND TIMES FOR DISASSEMBLY
| Съставки Колиchestва Мерна сд-ца Врeme Скорост | ||||
| Сmetана 2.1~6.1 д. 60~80сек. 8~10 | ||||
| Белтык 1.2~2.4 д. Поне 100 сек. 8~10 | ||||
| Пробот正常使用 | ||||
| Изponлбайтей телегасыралka. | ||||
QUANTITIES AND TIMES FOR DISSOLUTION (NOT FOR SOFT DOUGH (E.G., CAKE DOUGH))
CLEANING AND MAINTENANCE
SAFETY PRECAUTIONS
Before first use of the device, carefully read the following instructions.
- The appliance must not be used by children. Keep the appliance and its power cord out of reach of children. Be careful with sharp blades when emptying. Also be careful during washing and cleaning.
- The appliance may be used by persons with reduced physical, sensory or mental capabilities or lack of experience and knowledge only under supervision or after receiving instructions concerning safe use and understanding of the hazards involved.
- Children must not play with the appliance.
- The device may only be connected to a socket with voltage and frequency corresponding to the technical data table! Do not use the device if the power cord or housing is damaged. For safety, damaged devices or power cords must be replaced by the manufacturer, service agent or similarly qualified person. Always place the device on a flat, horizontal surface.
- Always disconnect the device from the mains when leaving it unattended and before assembly, disassembly and cleaning.
- The device is intended for indoor use only. Do not immerse the appliance, power cord or plug in water or any other liquid. Do not let the power cord hang over the edge of a table or counter, and do not let it come into contact with hot surfaces.
- Never use accessories or parts from other manufacturers unless they are recommended; this may lead to injury.
- Wait until the motor has completely stopped before removing and cleaning.
- Avoid contact with moving parts. Such contact may cause injury. Do not use other tools or kitchen appliances while the appliance is in operation. Do not leave the appliance running unattended. Loose objects, clothing, jewelry/accessories must not be near the running appliance.
- Never heat liquids (temperature must not exceed 90°C). Do not use this appliance for mixing paint. This is dangerous and may
lead to an explosion!
The appliance must not be operated with accessories such as wire whisk, flat beater for whipping or dough hook unless the lid is installed. This device is intended for household use only. The manufacturer is not responsible for possible damage resulting from improper use.
TROUBLESHOOTING
Figures, pages 2-4
STARTING UP

Before first use: Unplug the appliance from the power supply. Wash the bowl, kneading hook*, and whisk* thoroughly in warm soapy water. Rinse and dry. The bowl, flat beater, dough hook, whisk, SoftEdgeBeater™*, and PerfectRiseLid™* can be washed in the dishwasher. Wipe the motor unit with a damp cloth. Caution: Do not immerse the motor unit in water! Let all parts dry completely. 2 Place the appliance on a flat surface. Raise the mixer arm: With one hand press the arm release button to the "UNLOCK" position, with the other hand lift the mixer arm up. It will lock in the upper position. Caution: Keep fingers and hands away from moving parts. 3 Turn the speed control to "OFF". Insert the bowl from the front onto the base with a slight twist. Turn the bowl clockwise until it locks. Caution: Do not use the appliance with attachments such as the whisk, flat beater, dough hook, or SoftEdgeBeater™* unless the bowl is properly installed and the mixer arm is lowered. 4 Attach the attachment: Align the shaft of the attachment with the socket on the arm. Push the attachment upward and turn it counterclockwise to lock it. To remove the attachment, turn it clockwise and pull it out. 5 Lowering the mixer arm: With one hand press the arm release button to the "UNLOCK" position, with the other hand lower the mixer arm down. Plug the appliance into the power outlet. 6 Turn the speed control from "OFF" to the desired speed (1-10). After finishing mixing, turn the speed control back to "OFF" and unplug the appliance from the power outlet. 7 Work light and speed indicator: When the appliance is plugged into the power outlet, the speed dial lights up blue. The work light also turns on, illuminating the work area. When the speed dial is in the "OFF" position, the work light automatically turns off after 3 minutes. 8 Note: If the speed dial is already turned on before the appliance is plugged in, the speed indicator and work light will flash to remind you that the speed dial is on. Turn the speed dial to "OFF", the indicators will stop flashing. Then turn on the appliance as usual.
FUNCTIONS
9 Using the SoftEdgeBeater™*:
The SoftEdgeBeater™ is ideal for mixing light mixtures such as egg whites.
The silicone edge gently scrapes the sides of the bowl, ensuring all ingredients are evenly mixed during mixing.
10 Note: The SoftEdgeBeater™ is not intended for heavy mixtures such as dough; for that, use the special dough hook. For thick ingredients such as dried fruits, nuts, or seeds, use the flat beater. 11 Using the PerfectRiseLid™:
The PerfectRiseLid™ 3010e is designed to create the necessary level of foam. By using the PerfectRiseLid™ lid, you prevent the liquid from drying out and the formation of a dry crust on the surface of the liquid, which would cause the liquid to rise and negatively affect the baking result.
12 Selection of speed*:
The appliance's operating speed is set to 1/P. You can temporarily stop the appliance by pressing the "PULSE" button on the speed selector. Pressing this button again will restart the appliance for 1.5 seconds. When the button is pressed continuously, the appliance will operate as long as you hold the button down.
13 Attachment hub: The appliance is supplied with a built-in multifunctional attachment hub.
Please carefully follow the instructions that come with each attachment for correct and safe use.
14 Adjusting the attachment height: The appliance is factory-set so that the whisk is just above the bottom
of the bowl. If the whisk is too far from the bottom or touches it, you can adjust it. See point 14
15 Turn the speed selector to "OFF" and unplug the appliance from the mains. Remove
the whisk. Using the screwdriver with a flat blade, turn the screw. Turn it counterclockwise to raise the whisk, and clockwise to lower it.
HOW TO USE THE MEAT GRINDER*
16 Insert the meat grinder screw (B) into the meat grinder body (A). Place them (C) on the square drive shaft of the meat grinder. Place the cutting blade (D) (fine or coarse) onto them. Tighten the ring nut (E) clockwise until the meat grinder is fixed in place.
Note: Do not overtighten the ring nut.
17 Open the hub cover on the mixer. Insert the attachment drive shaft into the hub slot on the
mixer. If necessary, turn the attachment back and forth. Turn the hub ring clockwise until the attachment is fully fixed. Caution! Before attaching accessories, switch off the appliance and unplug it from the socket.
18 Place the food pieces into the meat grinder body. Push the meat with the pusher onto the small pieces and
Do not use the device for a long time. Insert the device plug into the socket and turn the power switch to position 6-8. Press the product with the help of the pusher.
Warning! Do not put your fingers or other objects into the pusher column.
Note. The meat should not contain bones, meat and skin.
USING THE DEVICE FOR CUTTING/SHREDDING*
19 To use the device for cutting/shredding: select the disc for cutting or for shredding (medium or coarse). Insert the shaft (square end) of the selected disc into the housing of the cutting/shredding device so that the shaft enters the square hole of the bushing. Lock the disc
by turning the locking handle.
Warning! The disc and the inserts are very sharp!
20 Install the cutting/shredding device into the bushing of the nozzle. Place the container under the device.
Cut the product into small pieces. Insert the device plug into the socket and turn the power switch to position 8.
21 Press the product into the pusher column using the pusher. After finishing using the device
turn off the device and unplug it from the socket. Close the lid of the nozzle bushing and pull the handle of the bushing
of the nozzle.
22 Pull the plug out of the socket, remove the nozzle. The meat grinder and the cutting/shredding attachment are recommended
to be washed immediately after use.
23 Do not immerse the device in water or other liquids. The device is not intended for commercial use.
MNTN BpyHy B TePiN MInbHIN BOiD.
Hauy npocky hacanky rayok-miunky nng ticta SoftEdgeBeaterTM Ta PerfectBisel idTM MOxHa MHTV
IaIy,IIocKy IacuKy,ra-OK Muaunky dH Nc, SotLgeBeuter TaFecctiSeLiMoXHaMnHy nOcydomnHi MaunHi.
1 + u/1 - u/1 = ( 1 + u) u1 < u/1 = u
Ipopttb MOTOpHn 6LOK BOJoroIO raHupKOIO. O6epeXHO: He 3aHypouTe MoTOPHN 6NoK y BODy!
3auekaite,doKn Bci deTani NOBHCtIO BnCOxHyTb.
23 He 3aactocobyite a6pa3nBhi 3ac06n Ta MoayanKn dnyuHnna.
IOPADNI ⅢOIO TEXHIK N B3NEKN
YBaXHo npoHTaIe ci iHcTpyKzii nepei nepuIM BnKOpNCtAHnM npuJa.
-ДiTЯмЗаборонкОристуВатисяцmприладм.36epiraiteприлад ta Ka6eNBdo HbOTo yMiCux,HeDocxKnXdIaTei. - Bydte obepexhi npi noBxehHi 3 roCTpMn pixyumn ne3amn, npi 3BilbHeHHi yaSi Ta Ni d Yac OunueneHry. -ДITЯМВIKOMBID8pOKIBIO6bAM3OBmExeHIMNΦi3nUHMN,ceHCOPHMn a6o NCNXiuyHMMOxKlNbBOCTaMnYHeIOCTaTHIMDOCBiDOMI3HaHHaMNOxHa BVKOpNCTOByBaTn npuJaIINSePiHaNGaOMaO pIcIgOTpMaHnIHCTpyKciI CTOCOBHO6e3He4Horo KOpNCyBaHnI npuaDM3aymOBn,I0BOHNpO3YMIOTb BiINOBIHi pN3nKn. -ДiTЯн He можна Гатия i3 npnilaIOM. - Пилад можна пдкюати лше дджерета ehepronoctаань, Hanpyra ta chactota яково вдповдаюс спцифikaцiam, уka3anm Ha tablinuci 3 texhiHIMn daHIMn! 3a6opohraTbca BnKOpncToBvBaTu a6oPiHimatn npnla, kIoo nookdoKeHo shhyp KInBleHnq KOpnyc. - Y BUNaDky noIskOJKeHnI npIaNy a60 IHNpy JKNBJIeHHN IOro MaE 3amIHNT N Bnpo6nK, Ioro cepBicnI ueTp a60 iHsa KBaIiΦIKOBaHa oc6a, Ioo 3anO6irTn HeuacHomy BUNaDky. 3aBxDn p03MiuyTe npuad Ha piBHi rOpN3OHTaIbHi NOBepxHi. 3aBxDn BIDKIOUaTe npuaB iD JXepeLa eIeKtpoNocTaaHna, kIo BIn 3aIIuWBC8 6e3 HaJy Ta nepei 3bnpaHHm, po3bnpaHHm Ta YIuHeHHm. - Iuwe dIy BnKOpCTaHHa 3a MeXaMn npMiuSeHHe. He 3aHypioTe npina, Ka6eIb nn BnIky Ka6eIy y BODy nn iHsy piuHy. - ПильнуITE, сб Кабель He 3BncaB uepe3 край Stony chpo6oyoi nobepxhi, a taKox He TOpKaBcIdo rapaynx nobepxHoHb, HanpuklaIdo pIITN. He BnKOpCTOBuYTe npUaIaIy IeTani, BuroTOBJIeHI IHsIMN BInpo6HnKaMn, 3a BnHrTkOM BUnaIaKiB, KOJI TaKe npUaIaIy IeTani peKOMeHIOBaHi cy pO3IOBCIOJxUOTbcra HaIoIO KOMpaHIEo. lChyE pn3IK OTPMaHHa TpaBM. -Перед тим як розьратуй чістптіnpилад,пepeКонайТecя,цoДВИгн NOBHiCTU 3уПИНИВСЯ. He doTopkaTecsDoTeaIe, 0p yxaOTbcra. Ce MoKe npu3BecTu Do OTPMaHn TpaBMn! He BnKOpncToByte iHsi iNcTpymEnTu abo npuaIaIyPi d quac KopnCTyBaHn npilaIaDM.
He 3aIIshaiTe npnilad 6e3 nargy niD yac po60tN. -Пдчаскористуваимяпрладом,сддкуITE,a6иВci He3akpinleni npedmetn,a TaKoJx Ondr/aKceCyapn 3HaxOdiNcB noDani BiD npuIady. 3aboponeho haNBaTu y Mikcep KnIpyi piHn (MaKcImaJIbHa TeMnepaTypa He NobHHa nepeBnuSyBaTu 90°C He BnKOpNCToBvIe npuIad Ira 3MiUyBaHna fap6n. Lc He6e3neuHo mOke npn3BeCTn Do Bu6yxy! Hikon He KopnCTyIeTcB npnaDom 3 npneHaHOIO dpoTOBOIO 36NBauKOIO, PnaCKOIO MiuaKIO a60 raykom dIraTicTa 6e3 HaneJHo BCTaHOBHeHOI yAoi. - Пплад пизнayен BИКЛIOUHо ДЯ ДOMaшього ВИКОпСТаHHЯ. Виpo6нК He BiДПОВIДa€ 3a можлИВу ШКODY, спрчИнeHy HeHaJIeЖНim ч И HeпpaВиьнм ВИКОпСТаHHЯМ.
UCYHEHHH HENOLADOK
The symbol on the product indicates that it cannot be disposed of with normal household waste.
The symbol on the product or its packaging indicates that it cannot be classified as household waste. For disposal of the product, send it to the official collection point or to the Electrolux service center, which can safely and professionally carry out the disposal and recycling of the appliance and its electrical components. Follow the rules of your country regarding separate collection of electrical products and batteries.
Electrolux reserves the right to make changes to products, information, and specifications without prior notice.
ACCESSORIES
Express Slicer & Grater
Ref: ACCESSORY ES
PNC: 900167219/6
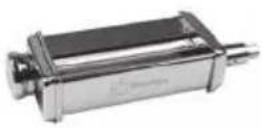
Pasta Roller
Ref: ACCESSORY PR
PNC: 900167221/2
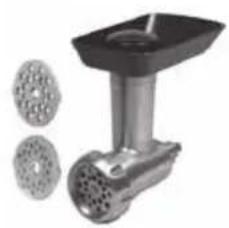
Meat Grinder
Ref: ACCESSORY MG
PNC: 900167220/4
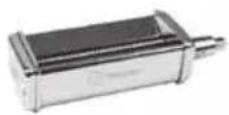
Spaghetti Cutter
Ref: ACCESSORY PSC
PNC: 900167230/3
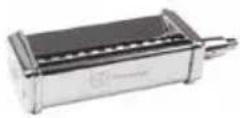
Tagliatelle Cutter
Ref: ACCESSORY PTC
PNC: 900167747/6
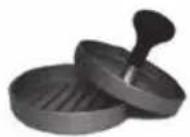
Burger Press
Ref: EHP 01
PNC: 900168373/0
3483 E EKM4XXX EKM55XX 02 03 0518
Share more of our thinking at www.electrolux.com
electrolux.com/shop

Electrolux Floor Care AB
S:t Goransgatan 143
S-105 45 Stockholm
Sweden
- WE'RE THINKING OF YOU
- CUSTOMER CARE AND SERVICE
- ENGLISH
- COMPONENTS
- PICTURE PAGE
- GETTING STARTED
- OTHER FUNCTIONS
- HOW TO USE THE PERFECTRISELID™
- HOW TO USE THE PULSE FUNCTION
- HOW TO USE THE MEAT GRINDER
- HOW TO USE THE SLICER/SHREDDER
- CLEANING AND CARE
- SAFETY ADVICE
- READ THE FOLLOWING INSTRUCTION CAREFULLY BEFORE USING THE APPLIANCE FOR THE FIRST TIME
- DISPOSAL
- ILLUSTRATION PAGE
- FIRST USE
- TMPERFECTRISELID
- POILLL AOE PLO
- L
- SUPPIMER
- YKA3AHNIA 3A B6E30PACHOCT
- ПЮЧETE СЕДНITE ИНСТPYКЦИ BНИМАTEЛНО ПPEИ 3A ИЗПОЛЗВATE УРEDA 3A ПЬРВИ ПЬT
- RECIPES
- CLEANING AND MAINTENANCE
- SAFETY PRECAUTIONS
- BEFORE FIRST USE OF THE DEVICE, CAREFULLY READ THE FOLLOWING INSTRUCTIONS
- FIGURES, PAGES
- STARTING UP
- FUNCTIONS
- IOPADNI ⅢOIO TEXHIK N B3NEKN
- YBAXHO NPOHTAIE CI IHCTPYKZII NEPEI NEPUIM BNKOPNCTAHNM NPUJA
- ACCESSORIES
Brand : ELECTROLUX
Model : Assistent E4KM12BM
Category : Food Processor