Kit Auto Culla Elite - Car seat PEG PEREGO - Free user manual and instructions
Find the device manual for free Kit Auto Culla Elite PEG PEREGO in PDF.
| Product Type | Car Seat / Carry Cot |
| Brand | Peg Perego |
| Model | Kit Auto Culla Elite |
| Group | 0 (0-10 kg) |
| Approval | UN/ECE R44/04, universal category |
| Usage | Transporting children from birth to 10 kg in reclined position |
| Installation | On rear seat, perpendicular to direction of travel |
| Vehicle Belt Type | Approved 2 or 3-point safety belts (R16) |
| Child Restraint System | Integrated 3-point harness with crotch buckle |
| Shell Material | Plastic with shock-absorbing polystyrene inserts |
| Cover | Removable fabric, hand washable (do not use solvents) |
| Included Accessories | Car kit (metal connectors), three-point reducer mattress |
| Maintenance | Clean plastic parts with a damp cloth; dust fabric; do not use solvents; protect from weather |
| Safety | Polystyrene shock absorption; 3-point harness; attachment via car kit to vehicle seat belts |
| Repairability | Original Peg Perego spare parts; contact after-sales service |
| Serial Number | Under the base of the carry cot; useful for after-sales service |
| Recommendations | Do not use without cover; do not modify the device; replace after a violent accident |
| Manufactured by | Peg Perego SpA, ISO 9001 certified |
Frequently Asked Questions - Kit Auto Culla Elite PEG PEREGO
User questions about Kit Auto Culla Elite PEG PEREGO
0 question about this device. Answer the ones you know or ask your own.
Ask a new question about this device
Download the instructions for your Car seat in PDF format for free! Find your manual Kit Auto Culla Elite - PEG PEREGO and take your electronic device back in hand. On this page are published all the documents necessary for the use of your device. Kit Auto Culla Elite by PEG PEREGO.
USER MANUAL Kit Auto Culla Elite PEG PEREGO
Thank you for choosing a PegPerego product.
Product characteristics
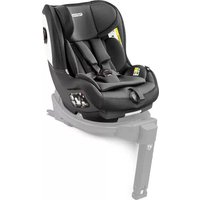
Car bassinet unit-auto, Group 0, "Universal" category
- The Car bassinet unit is approved under regulation UN ECE R44/04 for children weighing from 0-10 kg. It is suitable for installation on the majority of vehicle seats, but not all.
- The Car bassinet unit can be properly installed if the vehicle's use and maintenance manual states that it is compatible with "Universal" Group 0 restraint systems.
The Car bassinet unit is classified as "Universal" in compliance with stricter approval criteria than previous models that do not have this label. - The device can only be used on vehicles with 2 or 3 rear seats fitted with 2- or 3-point safety belts, approved in compliance with UN ECE R16 or equivalent regulations.
- For any questions or further information on installing the Car bassinet unit in specific vehicles, contact the manufacturer or the retailer.
IMPORTANT
- "Car bassinet unit" (Group 0) must be fitted perpendicular to the vehicle's normal direction of travel.
- Do not fit Car bassinet unit on vehicle seats that face away or sideways with respect to the normal direction of travel of the vehicle.
- The item is given a serial number.
WARNING
IMPORTANT: Read these instructions carefully and store them in the holder provided throughout the lifecycle of the product. The child's safety could be put at risk if these instructions are not followed.
It could be dangerous to leave your child unattended.
Assembly and preparation of the item must be carried out by adults.
- Do not use the product if there are missing or broken parts.
- Before use make sure that all of the attachment mechanisms are connected properly.
- Do not insert fingers into the mechanisms.
- Do not use near heat sources, open flames or dangerous objects that are within reach of the child.
- It could be dangerous to use accessories which are not approved by the manufacturer.
- Make sure the belts fastening the Car bassinet unit to the vehicle are always taut and adjust the straps securing the child.
- Never twist the belts.
- Replace the item if it undergoes significant strain in an accident or shows clear signs of breakage or deformation.
- The safety device should not be modified by users in any circumstances.
- Do not use in vehicles with the backrest in the raised position.
- Carefully follow the instructions supplied by the manufacturer of the child restraint system.
- Never leave a child alone and unsupervised in a car, not even for a short time. The temperature inside the vehicle can change rapidly and become dangerous for the child inside.
If using a second-hand product, make sure it is a recent model, comes with instructions, and is fully functional in all parts. An obsolete product may not conform to safety standards, due to natural ageing of materials and updating of regulations. If you have any doubts, contact the manufacturer's customer service centre. - Do not remove or change the white polystyrene part to the sides of the bassinet as this is an important safety element.
- Do not use the Culla Elite if it has broken or missing parts or if it has been subjected to violent stress in an accident, as it may have suffered structural damage that is not visible yet extremely dangerous.
The Car bassinet unit must always be secured with the vehicle's safety belts, even when the child is not present. In the event of sudden braking, it could injure the occupants of the vehicle. - When travelling in vehicles, never hold the child in your arms and never put him/her anywhere but in the Car bassinet unit. In the event of sudden braking, even at low speeds, the child would be flung forward.
Take particular care to make sure that luggage or other objects are not located where they may injure the child in the Car bassinet unit in the event of an accident.
- Do not leave the Car bassinet unit in vehicles exposed to the sun. Some parts might heat up and be harmful to the delicate skin of the child - check before placing the child in the seat.
Make sure that the Car bassinet unit is not obstructed by any moving parts of the vehicle's seat or by one of the doors.
- Do not use the Car bassinet unit without its fabric covering, which cannot be replaced with one not approved by the manufacturer since it is an integral part of the Car bassinet unit and the safety system. If replacing it, use an official spare part.
- Culla Elite was designed for use with the polystyrene shock absorber supplied with the "CULLA ELITE CAR KIT". For correct installation, follow the instructions in this user manual.
WARNING: do not remove when the Culla Elite is being used in the car.
Take care when adjusting the mechanisms (handle, backrest) with the child present.
Instructions for use Car Kit
How to fit the safety harness
IMPORTANT: during car travel, our mattress with a 3-point harness can be used.
IMPORTANT: In vehicles, always keep the backrest in the horizontal position.
1 Unbutton the hood and foot muff (if present) completely (fig_a) and remove them both (fig_b). Raise the backrest and pull out the mattress (fig_c). Open the two zips and remove the inner lining (fig_d).
2 Insert the 4 polystyrene sections inside the Culla Elite, and position them as shown in the figure.
WARNING: every piece must be inserted in its position and cannot be replaced by another. Do not force the pieces into place to avoid breaking the polystyrene.
3 Place the inner lining back into position, fitting the base over the backrest.
4 Insert the mattress, which comes with 3 belt openings, and fit it over the backrest.
5 3-POINT SAFETY HARNESS: Pass the leg divider straps through the slot in the mattress pad (fig_a) and the slots in the shell (fig_b) so that they come out on the other side (fig_c).
6 Place the straps side by side so as to be able to fasten them correctly to the shell (fig_a)
Thread the two ends of the straps into the slots in the mattress and the shell (fig_b).
7 Hook them onto the clips on the back of the shell, as shown in the figure.
8. Straps correctly fastened under the shell (fig_a) To finish fastening the straps, overlap the tongues (fig_b) and insert them into the crotch strap buckle until you hear it click (fig_c).
Attachment in vehicles with safety belts
ATTACHING THE BASSINET UNIT IN VEHICLES: It is possible to install the bassinet unit in cars if there are 3 rear seats with 3 safety belts. The central one can be 3-point or a lap belt.
We recommend positioning the bassinet unit on the vehicle's rear seats with the end for the child's head above the central seat.
9 Car bassinet unit fitted in a vehicle with a lap belt.
10 Car bassinet unit fitted in a vehicle with a 3-point belt.
11 The Car bassinet unit can also be positioned in the centre of a 3-person rear seat, using the two outer safety belts (fig_a). It cannot be positioned as in fig_b because it can only be secured in vehicles using safety belts that come from opposite sides.
12 Position of the Car bassinet unit on a 2-person rear seat. The Car bassinet unit can be positioned with the child's feet on either side of the vehicle. If the seat of the vehicle inclines, towels can be used to provide a horizontal surface.
13 Take the rear seat belt, fold it as shown in the figure (arrow_a) and insert it in the slot of the car kit's metal fastener (arrow_b).
14 Insert the red lever on the metal fastener of the car kit inside the folded belt (arrow_c). Move the metal fastener as near as possible to the seat in order to enable it to be fastened to the Carrycot (arrow_d).
15 Hook the car kit connector to the ring on the Carrycot and pull firmly on the belt to ensure the Carrycot fits as well as possible to the seat.
Repeat the same operations on the other side of the Carrycot.
16 Car Carrycot installed in the car.
17 UNFASTENING THE CARRYCOT FROM THE CAR: press the control button on the connector to loosen the belts, as shown in the figure. Unhook the fastener of the car kit connector from the ring on the Carrycot.
IMPORTANT: the car kit can remain fastened to the seat belts of your car. The car kit fastener can easily be attached to or removed from the ring on the Carrycot (point 13).
IMPORTANT: do not leave the car kit fastened onto the vehicle's safety belt when this is being used by an adult.
How to put the child in the Car bassinet unit
18 3-POINT SAFETY HARNESS: loosen the straps by pressing on the buckle (fig_a) and pulling them (fig_b). Repeat the operation for both straps.
19 Press the red button (fig_a) and release the straps from the leg divider (fig_b).
20 Place the baby in the bassinet. Overlap the tongues (fig_a) and insert them into the crotch strap buckle until you hear it click (fig_b).
21 The child must be securely fastened in the Car bassinet unit. If the straps are loose, tighten them by pulling on the end. The straps must be as tight as possible to protect the child in the event of an accident. Leave a minimal amount of play (the width of a finger between the harness and the child's chest).
22 REMOVE THE STRAPS: To remove the straps from the shell of the Car bassinet unit, pass the buckles of the leg divider through the slots under the shell and pull them through (fig_a). To remove the strap fasteners from under the shell, release them from the clips and pass them through the slots (fig_b).
23 Store the instruction manual behind the mattress as shown.
Serial numbers
24 Information about the production date of Car bassinet unit can be found under the base.
Product name, production date and serial number (fig_a).
Car Kit:
- Approval label (fig_b).
- Harness production date (fig_c). In the event of problems with the product, these details will be of use to customers.
Product cleaning
- This product requires a small amount of maintenance. Cleaning and maintenance must only be carried out by adults.
- Keep all moving parts clean and if necessary lubricate them with light oil.
- Clean the plastic parts periodically with a damp cloth. Do not use solvents or similar substances.
- Brush the fabric parts to remove dust.
- Do not clean the polystyrene shock absorbing device with solvents or other similar products.
- Protect the product from atmospheric agents: humidity, rain or snow. Extended exposure to sunshine can cause colour changes in many materials.
- Store the product in a dry environment.
How to read the approval label
This paragraph explains how to interpret the approval label (the orange one).
- The top of the label displays the trademark of the manufacturing company and the name of the product.
- 0-10 kg Y means that the product is approved for children from birth up to 10 kg in weight and that it is fitted with a 3-point safety harness.
- The letter E in a circle indicates the European approval mark and the number indicates the country that issued the approval (1: Germany, 2: France, 3: Italy, 4: Netherlands, 11: Great Britain and 24: Republic of Ireland).
Approval number: if it starts with 04, this indicates the fourth amendment (the one currently in force) of Regulation R44.
Reference standard: UN ECE R44/04.
- Production serial number: on issue of approval, each bassinet unit is given its own unique number.
PegPerego S.p.A.
PegPerego SpA adopts a quality management system certified by TUV Italia Srl in accordance with the ISO 9001 standard. PegPerego can make changes at any time to the models described in this publication for technical or commercial reasons.
PegPerego after-sales service
If any parts of the item get lost or damaged, only use genuine PegPerego spare parts. For any repairs, replacements, information on the products and sales of genuine spare parts and accessories, contact the PegPerego Assistance Service and state the serial number of the product, if present.
tel.0039/039/60.88.213
e-mail assistenza@pegperegogo.com
website www.pegperegco.com
All intellectual property rights on the contents of this manual are property of PegPerego S.p.A. and are protected by the laws in force.
FR_Français
HNCtpyKcnnn no nCnoJb30BaHnIO Kit Auto
kak ycmaHaBnubambpeMeHb 6e3onachocmu
BHIMAHHE!BoBpemnoe3oKaHaABTOMO6nne MoXHO NcNoJb3OBaTb Haaw MaTpaC TpExTOueHbIMN POEMHmN.
BAXKHO! CnHka cnDehBa aBTOMo6uNx Bcerda DOJXHa 6bItb yCTaHOBNeHa TOlbKO B rOpN3OHTaNbHOM NOIOXKeHN.
1 NonHoctbIOOTcTeHNITeKaIIOHOHmMyOHTyDnHOR(npN HAnHHN) (PNC.a) IN CHNIMTEHX (PNC.b).PiOnHHMNTe CnNHKUY BbTAHTNE MaTpac (PNC.c).PaCtERHNTe DBe MOHNINCHNIMTE BHTPEHNOO6OBHKY (PNC.d).
2 BCTaBbTe 4 nonnctnpoNoBle yactn BHyTp b Culla Elite n pacnoNooKHTe Nx Tak, KaK noka3Ho Ha pncyHke. BHIMAHHE! Kkdaa deTaIb dnXHa 6bItb ycTaHOBeHa cBOe MeTO n He MoKet 6bITb 3aMeHeHa dpyrO. He npinaraaTe CNly nA ycTaHOBKn DeTaNen Ha MeTo, UTo6bl He cNOMaTb NoNtCTpON.
3 HaHeHbTe BHyTpEHHIOO 6NkBky 6paTHO, yCTaHOBnOB OCHOBaHHe Ha CnNHKy.
4IIOXHTBHyTpMaTpaC3OTBepCTnMnDnpeMHnHaDeHbTeeroHaCNHky,
5 TPEXTOUYHbI INPEMEHB6E3OINACHOCTN: IpoJeHbTe noHC BCTaBKn dIra pa3neHn HOr B npope3b MaTPaCa (pnc_a) n B npope3n paMb (pnc_b) TaK, YTO6bl NoC BbIe HapyKy (pnc_c).
6 Pa3meCTIte pemHn npaannelbHo dny nnpabunbHoro KpeIeHHK Kopnycy (pnc_a).
PpOyCTnTe KOHcBpeMHeYepe3 npope3n B MaTpace n B Kopnyce (pnc_b).
7 3akpennteix Ha 1tbpx c6pbathoH CTOpOHyKa, KaK NOKa3aHO Ha pucyHke.
8 IpaBnIbHoe 3aKpePnIeHne peMeIKOB Ha dHnIe KOpNyca (pnc a).
Дя OkOHaTeBbHOrO 3aKpeNHeHЯ pemHЯ HANOIXte
R3bUKN DpyT Ha pyra (pnc_b)И BCTAAbbTe 3aCTeKky JAMOK
В РпЖуHa pemeshke pa3dEJInteH HoI Do UeJIyKa
(pnc_c).
PpucoeduneHue K abmomo6uIc nomousbio pemHe 6e3onacHocmu.
KPEIIEHNEIIOIBKNABTOMOBNIIE:3aDHee CnEHeBaeBTOMOBNIA(Ha TpN MeCTa)OCHAeHO 3peHMAM6e3oNaCHOCHTINPnueHcMeHTpaJIbHOe MeCTo MOKeT IMeTBkA KIIneEBO,TAK NIOAChOHpeMBe.JIIOJIbKaMOKeT 6blTBnpcoeDInHeHaK ABTOMOBNIIO B O6Ox CNYaX.
Cobetyem yctahabnubTaIbky Ha 3aJHee cUHe b TaK, YTObblrObapeBcHApNXoDlnacbHaueHTpaNbHOe MeCTO.
9 PaCIOJIOXeHHe ABTO-JHOJIbKa B aBTOMO6Hne C IORCHbIM pEMHE.
10 PacnonoXeHne ABTOJIIOJBKa BA BtOMO6nne c TpexToUeyHbIM PEMHEM.
11 Kpome toro, ABTO-NIObka MOKeT paCNOJARbCR no CEHTpy TpEXMeCTHO 3aHrero CnDEHbC INCNOB3OBAHHEM DByX BHeWHIX PEMHRe 6e3oNAcHOCtN (PNC_a). ABTO-NIObKa HJIb3paCNOIarTa KaHa PNC_b, NOTOMy YTO erO MOKHO fIKCINPOBaTb B ABTOMOBUte TohBc C NOMOuBko PEMHei, OpeHTnpOBaHHbIX B pa3HbIe CTOpOHbI.
12 YctaHObKa ABTOJIIObKa Ha IByXMeCTHOM 3aIDHE mHeBc.OTeIeHneJIIOJbKn ABTOJIIObKa, B KOTOpOM paONaraiOTc HOrn pe6eHka, MOKeT bItb HAnpaBNeHO KaK B ODHy, TaN B DpyFyTO CTOPOHb.
ECIN CINHeBb AYROMOBnA paCNONOKeHb C HAKHOHOM, TO DnCOnaHaNr ROpN3OHTaNbHO NOBepXHOCTM MOKHO NOJNOJKTb NOI JIOBky NONOTHe.
13 Bo3bMNTe peMeHb 3aJHeRo cIeHbN a NcOKeTte rak, KaK nok3aHaHo n pCvHke (CTpeKNa_a), a3aTEM BCTAbBe T uEiB metaJIuMEckoN npRkKn ABTOKOMnNEkTa (CTpeKNa_b).
14 BctabBe KpaChbI pbUaJok MeTaNIIueckO npAekn ABTOKOMNJIeKaT B CNOXKeHHb peMeHb (CTpeKa_C).
PnPTAHNTeMaTALINHecKyIO pRAnKy KaK MoXHO 6NIMKe K CnDEHbO, YTOB6IbONrYb DaNbHeNWee CoeHNHeHc C ABOTONJIbKOJ (CTpeJIka_d).
15 CoeINHInTe KOJIbO aBToJIOJIbKn C coeINHInTeIem ABTOKOMJIeKTA N C CNIOI HaTaNITE pemeHb, 4TO6bl aBTOJIOJIbKa MAcCNMaJIbO BSN3KO npnneraN K cNiDeHbIO. IOBTOPIne TKe ONEpaIcN CpyrO CTOpOHbI aBTOJIOJIbKn.
16 ABToIIOJIbKa 3aKpePnneHa B aBTOMO6nne.
17OTCOEINHEHNEABTOIIOJIbKNOT ABTOMOIBNJAAKMMTEpeYIpNOBQHyIO KHOJkyHa COeINHInTeJe, KaK NOKa3aHO Ha PnCyHKe, YTObI OcnAbNtB peMHN. OTcENITe KPOyOK CoeINHInTeJIa ABTOKOMJIeKTA OT KOJIbCaABTOIIOJIbKN.
BHIMAHHE! ABTOKOMNKeT MOKeT BcERda OCTaBaTaBcR COeINHeHHbIM C pEMHm BAwero ABTOMO6nJr. OoctaToHO 6yET npocTOrO DnBeHnE, YTO6bl COeINHHTb NnOTcoEINHtB nPRAKKy ABTOKOMNKeKaTAt ON KOBa ABOIIOBkIn (NYKT 13).
BHUMAHNE! He octabnIte aBtOMo6nIbHbI KOMNJIeK TnpCTeRHTbIM pemHem 6e3OnaCHOCTu
abTomo6nla, KOrda peMeHb nCNoIb3yeTc B3pocnblm.
Kak pacnoJoxkumb pe6eHka B AboJIOJIbKa
18 TPEXTOUYHbI PEMEHb 5E3OJNACHOCTN: ocna6bTe JAMKn, HaxBa Ha npKkY (pnc_a), n ydInnHte nx (pnc_b). NaHHyO onepaunIO HeoBXoJIMo NOBTopNTb dIra OBeNX JAMOK.
19 HaxMMTE Ha KpaCHyIO KHONKy (pnc_a) n OTCOeINHHTe JAMKNO T BCTABKN Ia pa3JeHnH Hor (pnc_b).
20 Pa3MeCTIe pe6eHka B aBTOMoBnIbHOJ IIOJIbKe. HAnOJKHe Ia3bUKN Ipyr Ha Ipyra (pnc_a) N BCTABTe 3aTeKky JIaMK B IprKaKy Ha pemeUke pa3dEnITeR HoN Do UIeNHa (pnc_b).
21 Pe6eHOK donxhen 6bItb xopoio 3akpenne BHytpn ABTOIIOhka. Ecn peMHN ocna6JeHbl, yMeHbWITE dINHy nAMOK, NOTAHyB pemHn 3a KOHcbl.
IJIa 630NaCHOHTpeBcKa B Cnyae ABapn, pemHn OJIKbI 6bTb HATyHb KaK MOxHO CnJIbHee. OCTabTe pe6EHKBO3MOXHOCTb INrpatb (33Op TOnUINHO B naneu MEXdy pEMHEN TOPCOMpeBcKa).
22 YIANITE PEMHNJIIOJIbKIN: nIa CHTnA PEMHe C pAmbl ATOJIIOBka, npOeHbTe pIaKky BCTABKn dIra pa3deneHHN HOR B OTBepCTNa HnIXKHe yactn paMbI N CHIMITE ee (pnc_a).YTObI OTCoeiHNITb KpeJIeHHN IaMKoCHN3y paMbI, CHIMITE INC OcEe N npOeHbTe B COOTBeTCTByUHnE OTBepCTnR (pnc_b).
23 XpaHnTe pyKOBoCTBO NOb3OBaTeJIra 3a MaTpacOM, KaK nOKa3aHO.
CepnHbIe Homepa
24 Bn3y ba3bI ABTO-JIOJIbKa HaxOJITcN INHOpMaun O daTe N3ROTOBneHnA.
Ha3BaHHe yCTpOiCTBa, dAra erO n3rOToBHeHn I cepNnHbI HOMep (pnc_a).
Kit Auto:
- Ta6nuka ceptnuikauun (pnc_b);
-ДанИЗТОВЛЕНЯ ремн(aPc_c);
3a INHOPMaui NOnAIO6nTc NOnb3OBaTeIIO B Cnyae KaNX-Ni6o IPO6nEM C yCTpOINCTBOM.
UncTka n3dennr
Baue n3dene HxkdaetcB hecnoxHOM yxoJe. Oepaun
YCTKN yXOda DOJIKHbI BblIOHNHTb TOnbKO B3POCJIbe.
- PekomeHnyeTc CoepkataB YnCTOTE BCE DnBnKuIneCayactn, pN HEOxOIMOCTe CmXbTe IN JERKIM MaCNOM.
- PepnoDnueckn Ouyuatae TnaCTMaCCOBBe DeTaN BnaJHOI TpAIKoH, He Nolb3yITeCb paCTBOpNTeAMN CXOHNbIMN BeUeCTBaMn.
-Nouchntte uetKoTkaHbIe yactn,HTObyaJIITb nbJb.
He nCTte ynapoNOrnloAouOueyctpoNCTBO nNoJIcTnpOJa pactBOpNTeIMMnnCXOHyIMNC HMMBeueCTBaM.
3aunTne H3dene OE aTMocphipehBix OcakOB - BODbl CHera nIIN DOxHJIOCTOHNHn IPOoONKIneNBnHOBepKeHHOCB CONHeHBM LyuAM MOKeT Bb3BaTb CBETOBBe H3MeEHNEH MHOHNMATEpNAIOB.
XpaHNTe 3dEneB C yxOM MeCTe.
KaK uTatb Ta6JnUky ceptnfokaun
B 3TOM npaparpafe Mbl obbAChm, KaK YHTaTB TaBnky ceptnphiKaun (TaBnUka opaHxBeBO rBeta).
Habepxy 3nkeKyn yka3aHa Mapka fnpmbi npou3BODnten HaaBHe YCTPOINCTBa.
0-10Kr Y O3HaAeT, YoY cTpoOCTBO ceptnuHnpoBaHO dIaTeTeC pOKeHnBIE, Becm Do 9 Kr, nTO OHO o6OpyDObAHo TpExTOeHbM PEMHE M630NaCHOCTN.
- BykBa E B Kpyre: yka3bIaEeHa To, YTO daHHaR MapKa ceptnФuIupOBaHa B EC, a HOMep o6o3HaueT cTpaHy, bIdabUUYo ceptnФuKAt (1: TepMaHna, 2: ΦpaHua, 3: NtAIny, 4: HndepNaHdb, 11: BEnko6pTuHnN u 24: UnpaHnN).
Homep ceTnФkaUIMTO,OTOHaHuaHaTeC H04, O3HaHaet YeBepTupeJaKUIO (HbHeJeIeCTBtuUuYUO) HOPMAuNBHO Tpe6oBaHHR44.
HopMaTnBHO-cnpaBOHbIe DOKyMeHTbl: UN/ECE R44/04.
CKB03HON cepHHbH HOMep npOyKaT: nepcoHaJIbHbI dJa KaJDo IIOhBKn -Nocne BInycka cepTnΦHKaTa KaJDoe KpeCLO DOJIKHO IMTe CBOI CO6CTBeHHbH HOMep.
PegPerego S.p.A.
B Kompani PegPerego SpA BHepeha cnCTema ynpabneHn KaueCTBOM, ceptnuunpoBaHHa TUV Italia Srl no ctaanapTy ISO 9001. Kompani PegPerego IMeET npABO BHOCNTB IIO6oM MOMeHT N3MeHENB MOJEN, OINCAHNbIe B HACTOJIeM N3dAHN, IIO pnuHHaM TEXHNueCKOrO INN KOMMepueCKOrO XapakTepa.
CJYKBAOBCLJYKBAHNA PegPerego
B cnyaue ytepn nnn npn aKceccyapOB, npmehnre ToIbKO fnpMeHHbe 3aapanhbe qactn npom3BOCTBa KOMnAnn PegPerego.ДЯ BblOpHHeHpeMOHTa, 3aMeHbI 3aapanChbix qacteN INOnyueHn INΦopMaunn 06 yctpoiCTBe 6paauTebc B cnyk6y nocneipnoDaXHoro 06cnyxnbHnna PegPerego, coo6uIN, npn erO hannn, cepnHbIn Homep npodKyta:
Cpok cnjxkb: 3 roda
TapaHTnHbI cpoK:12 MecaueB
ten.: 0039/039/60.88.213
e-mail assistenza@pegperegco.com
caNTB INHTepHete:www.pegperegco.com
U3ROTOBUTeJIb: PegPerego S.P.A.
(Per Perero C.I.A.) Adec: Via de Gasperi 50 - 20862
ARCORE (MB), Italy (Bna de Facnepu 50,
Ha3Ba Bnpo6y, DaTa BnroTOBneHHra Ta cepHnHn Homep (MaI. a).
ABTOMO6ijbHm KOMnneKT:
- CeptniKauinHa Ta6nUka (MaI.b).
-ДаТВИROTOВЕнгpeMHHOICNTeMn(MaJI.C)
Ypa3i BnHKnHeHH npo6nem i3 Bnpo6om 1r iHopmaia CtaHe y HaroDi KopncTyBaueBi.
UHnHa Ta DOrJa
3axuataB iD HerOu: BOn, DOny aBo chiry; TpmbaHn I be3nepebpHn BnIIB RCKpaBO COHnHO CBTNa MoKe np3BeCTo 0MHI KOnbOp yPiHx MaTepiAIB; 36epirATn Ue npOdyKT B CyXOMy MiCi. Yac BiD uacy CHCTNTN BCI nlaCTMACOBI Detani BOLOrOIO TKaHHIO. He BVKnOpNCTOByBaTN PO3UnHHNKn ABO aHaONOriHi npOdyKT N HsueHH; TpIMATN BCI METAEBI YaCTNH CYXMn DnT 3AnobiraHn Kopo3II; TpIMATN pyXOMI YaCTNH B YcCTOTI (MexAhImn peYyKoBaHH, MexAHmN 6LOKyBaHH Ta IH.) i BInhMM BiD nIyI nICKy; 3MaUyBaTN CBITNM MaunHHM MactINOM. B pazi Heo6xijHOCTi.
JHKuHTaTn cepTuΦikauiHy Ta6nuy
- yIbomy po3diM Nn NORCHIMO, kYHTaTn cepTnΦiKauiHy TabniuKy (nomapahueBa etKeTka).
YBepxHnI qactNIi Ta6NtIK HaHeceHO TOBaHn 3HaK BInpo6HnKa Ha3By BInpo6y.
0-10 kg Y - Bka3ye Ha Te, 10 Bnpi6 ceptnikobHn dIaTeB aroio do 10 Kr ta obnadHaHn 3-TouKOBm pemeHem.
IitepaE y KpykyeKy: ce CMBON EbponeckbKOI ceptnphiacii, a BIDNOBIDHNI HOMep Bk3aYe Ha KpaiHy, kA Bnada ceptnphiKat Ha ue Bnpi6 (1:HimeuHa, 2: Opania, 3: Itania, 4: HidepaHdn, 11: Benika BpntaHra Ta 24: IpnaHn).
HomepceTnphiKa:KIOoBINnoHaetc304,to ueyteBepTa nonpaBaK pernaMeHTy R44 (uHHa 3apa3).
3aTocobvbaHn cTaHdapr: UN/ECER44/04.
IopnKOBH NHomeB Bnpo6y:IHnBiydyaian3ye KOKHN nnaBaJIbHn 3ac16 -nicra BuaaHi cepTnkiKaTy KOHN Bnpi6 No3HaayeTbcR BlaCHHM HOMepom
PegPerego S.p.A.
B komnaHnn PegPerego SpA Bhepeha cntema ynpabIeHN KaucTeBOM,ceTpHnupoBaHHa TUV Italia Srl no cTahdapTy ISO 9001. PegPerego B 6yb-kyn lac MoKe B HOCNTMHI NO MOJeH, BKa3AHNX B daHIN IHCTpyKuII, 3TexHiHnx abO KomepuiHnx npuHN.
PegPerego Cepbic
Hkiy npuibhaHoro BAMTOBapy PegPerego nowkoDnncb a6o 3ary6bnncb detani,3iINCHOHTe peMOHT
abo 3amHy nIwe opnIHbHMn 3aNaCHHMu qactHaMn PegPerego. Y pa3i Heo6xHocTpeMOHTy, 3aMIHN DeTaneN, OTPMaHHH IHOPMaui II pO npdyKTn Ta aKCEcyAPN, 6yNb Nacka, 3JXJIcB 3 IOKaJIbHMm DCtPn6'IOTOPOM PegPerego B YkpaIIH (3 cepiHNM Homepom npodykTy Ta rapaHTHMM TaHOHOM)
TeN. +38 (050) 32-69-131, (050) 32-65-682, (044) 574-95-41
eNEKTPoHHa nowTa info@amigotoys.com
a6o 3 cepbichoi cnvX6o PeqPerego B Itani
tel.0039/039/60.88.213
-mail assistenza@pegperegoo.com
to internet www.pegperegco.com
Yci npaba iHTeneKtyaJIbHOI BNaCHOCTI, NO'B3aHI 3 BMICTOM zuBOro noci6Hnka 3 ekCnlyatau, HaneKaTb KOMnaiHII PegPerego S.p.A. i 3axnuehiHHm 3aKOHodABCTBOM..
EL_Eλληνικα
Zac euyapiotoue nou eIaTe eva npoiov PegPerego.
XapaktnpioTikα npoiovtoCnpt-μπεμπε Culla Elite -auto, Oupaδa 0, kaTnyopía "Universal"
To Iopr-muie Culla Elite, autokivntou eivai yekkojevo oupuva je tov kavoviojou UN/EC E4R4/04 ia naia jia Bapoc ano 0-10 kg. KaataaNo yia topeyauutepo iepocTwv kaiouTuW autokivntuv, aia axi yia ola.
To IopT-muTe Culla Elite autokivTuou mtopei va tonoBETnOei ouota eav oTO exyepidio xponc kai ouvnponcn Tou oxynatoc avapepetai noupatotnta uoutnjata oukypanctanUniversal"Quadac 0.
To Npntmu Culla Elite autokivntou exe taevounbe otnv katnyopia Universal ovpuvo me kantnpia eypionc nio auotnpa oe oxen ma nponyoumeva movtea ta onoia dev diaetou autiv tvv evoei.
H Culla Elite mtopei va xpaniopoinoi mov oe oxnataou diaaetovu niow kaioqa 2 n 3 thoeov Econioieevov me cwoec aopaiaeic 2 n 3 onuiuiv, o i oioec eoyouv ekpiel oukpua v me tvkavoiog UN/ECE R16 n ooduvagau kavoviouc.
Σε περπτωη αμφβολιν, ὑ γία περιαθερες πλροαρορείς έχετικά με τη στερώνιου Γροτ-μεμηίνη Culla Elite autokivntou Επανω Εε διδικό αχήματα, απεύθυθείτο Θογ kataokéuaotn ἡ ΘΟΥληπή.
A ΣHMANTIKO
To Iopnt-muepuellle Eitee autokimntou, oua0a 0, npenei va ekataotaeia kato npoc tn popa tnc nopeiac.
Mny EykaBIOATE To NpO-1nEUNe Culla Elite autokivntou enawo oe Kbiogata yupioeva oe avriEtn kateuBuvon anT npopaTnc nopepiaic n Eykapoiia npoc Tnv ouvnnpopa npoeia tou oxmuac.
To pioov auto diaTei oeiapko apiou (serial number).
IPOEIADONOIH2H
ZHMMANTIKO:diabaoTe npooeKTiakautc tic odnyiec kai tic otiv EIokn 0eyn ia oAn tn diapkeia znc tou
Ipoiovtoc.H aopaleia tou naioou oa mnpouoe va teoie 0 Kivduvo eav dev akolouohote Tc ondyie autec.
Mntopei va eivai enikivouvo evaepoete to naoi oac xwpi Eπβλεη.
Oi epyaieocuvapaooyonc kai npoetoiiaoc tou npoiovtocipentie va ekteauovtai anEynaikec
MynxpoaiouoieTo npoiEv av npouoiacemu npnau Eiouv n evai onaueva.
Pniv ano th xpon Baeaiweite oio oynxavio ouwdeoc evai ouvveovowot.
Mny 16ayet ta daxtu a uo aouc npxavioouc
Mny to xponoiouoite kovta oe ninyec 0epuotntac, eueoopec poyoc nikivoua avitikejeva oia onioia niopel va qaeoi to naic ie ta xepia tou.
Mnpoei va eivai enikivnu n xpion ecapntmuatow nou dev exouv TIV Eyipion Tou kataokceuaotn.
BeBaiWgeite oni iuavtec yia th otepeoan Tou npTmu Culla Elite autokivntou oto oxma eiva naVta tevtwuevoi kai puOmuote autooc nou mlokaopov to naidi.
MnV OtpipoyupicETNEOTOCIaVTEC
- Suviotai va avtikaiotate to nopT-umte Culla Elite autokntou, otiv nepiwnon tou exei unoBn0eOE utepBoAke nieoeKata ngiaekia evoc atuxuatoC exei epuaveic evdeiec staojatoc nnapaopooong.
Hdiataen aoapaleiac dev npenei va tponoioeirai oe kajia nepimwn ano to xpnotn.
Mn xpoiaonoeiote oto autokivnto e tyn nataon onkwuevny.
Akoouhote auotnpa tic onnyie, Tou napexovta anio tov kataakeuaotn Tou ouotmuoc oukykpatnonc Tou paiou.
Mny apnveTe To naiDi xwpi cuae npo autoKivnto akoua yia ouvtoxo xpviokdeltaTna. H eowtepiN Berpokpaia Tou oxnatoc opei aqviKa v aalaei Kai va yivei Enikivnuy ia To nai Di oTo eepiko.
Eav to pioov evai metayepiaevo,betaaiweite oivai eva mvteaoopatnc kataokeunc otuovdeetai ano onyick cai otivai nnpwc letoupyikoe. Eva napwxnevo npoiov miopei va uvi evai oubaato lowytnc quoknyc ypanoc twv uikwai tnc avaveowcn twv kavoviouw. Se nepittwnq aipboaw, etikovwmoTE ME TO KETPO unootnpiec tou kataokeuaotn.
Mny apapei e n aalete to Aueko tunqa anio Iauotupolia ota miva tou npotmuite kaow anoteel avanooatao tuetaouoetnaiocaaepiac.
Mn xpoaipoiote to npct pneine evnapouiae
Oanaia n npou aeinovn eav exei uooetbetaie c ieae ie atuyna viat niopoie va exei uooote i eapetika etikivouc un opate c nue c ony kataokeun tou.
To IopT-muEunuCulla Elite autokivntou npenei va Otepeewetai navta ie TWCvEc aipkaleiac tou oxmuatoc, akun kai otav dev kabelai to naidi. 2e nepittwn anotouou oevapiaqatoc. 8a mupoea de pokaLoei Tpaumatioouc OTOC EMBATEC TOU oxmuatoc.
KataTn diapkeia twv taioiwv me to autokivnto unv kpatate note otnv aykai to nai kalnu to bace note eaw an to npotmuie autokivtou. 2e nepintwn anotopou oevapiaatocakounkai me yauanl taxutnta, to naidi utopei va neoei me ukoia mnpoota.
- PioooeTe 1iaitepa tic anoakeuec n avtikeeueva nou npopoov va npokaaleouv tpaumatioouc oTo naiDi I eoa oTo NoptIneutie autokivntou eepintwn atuxnpatoc.
Mny aonvete To npotunepu Culla Elite autokivnou OTO oxnua uno Tnv ekgeon Tou naiou, opiaque mepn Tou utopouv va unepoeauavoukai va blambdaouv To euaiothto δepua Tou naioiu, elevetipnuva baleto Taiai.
IpooeTe to Nopt-muEmu Culla Elite autokivntou va unnpapauevei nlokapioevo ano eva kivto epoc tou kaiaqatoC n ano pia npota.
Mny xnpoiioite to Nopt-muEulla Elite autoXmTou xwpc Tnv upaouattn enevouon, n enevouon autn dev npoei va atikataoatei ano aan nn yekepiuev ano tv kataokevaotan kauc anoteai avatoaatao tpeoc tou npoiovtc kai nnc aqaleicac, z e pittwnavtikataota onc xnpoiioieote evy wiao avtaalaktko.
To Culla Elite exi axediatoi ie ouotma anoBoe nCipokouongn atio nouotupolaoiou unapxe oTO KITAUTO CULLA ELITE. Beaiowite yia ton owot ouvapuooyon auqwua me autc tic onyic xphoc. IPOOEIOIOIH2H: mny apapeitai otav to Culla Elite xpnojonoiei t oto autokivnto
Pooexe 1iaitepa otav ktealeite epyaicpcpuoianctwu mXavioWv (xepoAaBn, pAnTn) npoucia Tou naiio.
odnyiec xponc kit auto -nwc oa tooote noe tN ZwviTa aovapaleac
ZHMANTIKO: Tn diapkeia taEoiou e autokivnto, mtopei va xpnaiuonointheta to otpwma mac me Zwn
LooUSSWLSUwSsIaIaIwssIaIbIy
Jalll Jabll lgc aas
a0 aig gaiill 1o gai 1o gao 1o
gSx 2a caii g ai jai jai aai iai
JgL1j. jglUJ gUJ gUJ gUJ gUJ
a111 a5 j01 0cLw0jLwJ
1g>1c2g>11 81 jj-11g>11 g>11j
aolwI ego aic li j 1 Jabll
13]g aogaoaogajgwslojz4cils1l Jabllyyspaasx
a b SU
g>LogI 100
ggi gii 1
Culla Elite
.
g Culla Elite
aJyWwOgIgCjzwooO
LacLaiaeLwIooa
Lla 21 g aLi c Lao jio o b
y
aIbIg 0 aIyall aIyall 0 gJzll
(b)
oJgssal g aLs aill bail yolmo 7
(a o jssll) ailll l 123 ab y a j 8
0jssll) 0jssll iaii11 giaia jia11 bJus
i j 1
C. (c)
jLo81 aojai abwgl oJy
3) Culla Elite
100 100 100 100 100 100 100 100 100 100 100 100
100 200
.
g o aJwJ gJ 11 gJg Jn Jn Jn
Jnagwai jao Jalali g wjll
Culla Elite 9
3 5s pJzabgog g Jg Culla Elite 10
.bla
3 J, s, a1s1 100 Culla Elite 200; S 11
<2g(a0gall) 1 L31 JLo81 jolalw,blai
a a b Lc Culla Elite
jLalil joljaihwlg: Jaa oJwll
Culla Elite 12
pLo8J JdJg
15
Culla Elite
Culla Elite
Jalnl Jgj 15g j21 jn jz jz jz
J 1 Jg
Culla Elite 21
aJlI JU j0 gJ eall oJ 1jio sJg
Culla Elite 2
Lulal yie go uu Culla Elite aai
CULLA ELITE CAR KIT"
1.11 1
.
1uoloc 1jLjLjLjLjLjLj
(gbll,dejll)
pssuiwul
Kit Auto
jLoxl p1j> 5j d.
aJl aJl pJiW jL Jj slj pl
Lai
a 1
(a) [5] JolSJI (2>g 1j0xal jolgg lbljj
1111111111111111111111
(d.L5JJI) aIJIJIJIJIJIJIJIJIJIJIJIJIJIJIJIJIJIJIJIJIJIJIJIJIJIJIJIJIJIJIJIJIJIJIJIJIJIJIJIJIJIJIJIJIJIJIJIJIJIJIJIJIJIJIJIJIJIJIJIJIJIJIJIJIJIJIJIJIJIJIJIJIJIJIJIJIJIJIJIJIJIJIJIJIJIJIJIJIJIJIJIJIJIJIJIJIJIJIJIJIJ
Ls Lg. Culla Elite J1s 2
Ji
LgJiJiJiJiJiJiJiJiJiJi
J 1 J 1 J 1 J 1 J 1 J 1 J 1 J 1 J 1 J 1 J 1 J 1 J 1 J 1 J 1 J 1 J 1 J 1 J 1 J 1 J 1 J 1 J 1 J 1 J 1 J 1 J 1 J 1 J 1 J 1 J 1 J 1 J 1 J 1 J
Jiu ouiS jao aoww ouijlwo s w bgi ow dajglg Jaelljgs
10g jgsj g oolg g g 4g 4g 4g 4g 4g 4g 4g 4g 4g 4g 4g 4g
jI JdS JIbJIiabJIgCwS UgsxuSy jIoslaaiUurg 1
JL S WJyJN JI gA Caaq d8 321 L JLa Jaoaagusds y
j89 gJgOgauB gDgWg JdJ4y DcWn Jooa uu Ugaxo Su
LJJyJyJyJyJyJyJyJyJyJyJy
(aJsw)Jgwoofoaooogjyooogj08
g(bJs) JzjgsyI ldlilj,ldaasS sOuJJy S y
Sds sdo ds jolg lgsjgdoa aod aLgdaa Ssw gjw
C. (c)
jai jyos 4 jggs sloggsd Jail
Lg 315145 Lg2g2g2 g:logg2g2g20gJgl
aaijgi jgawg aayssas s waii ojgsy gai gaae 3
aLb
sglui dusu uugg ggs auc Juaa jssk w 10jg8d gwh
SsSjJi jySs
100 9
10
.
1 1
1245 10g 10g 10g 10g 10g 10g 10g 10g 10g 10g 10g 10g 10g 10g 10g 10g 10g 10g 10g 10g 10g
aai gai jgi yj jy jai aai oai oai jai b jki
12
jg0 jg jg jg g Caww sSs glu 52s jg w sg
aJg jI gj 100000000000000000000000000000000000000000
法一. 完全顺
13
2g(b-)g≥cSj
Jg Jg Jg Jg Jg Jg Jg Jg Jg Jg Jg Jg Jg Jg Jg Jg Jg Jg Jg Jg Jg Jg Jg Jg Jg Jg Jg Jg Jg Jg Jg Jg Jg Jg Jg Jg Jg Jg
(c_0kω)
Sloj jol jil gwi d yu wauo caww uolgi 4s lgl sgl
( d - d( a + b) ) + s - s = 20
- ≤ ≥ ≤ ≤ ≤ ≤ ≤ ≤ ≤ ≤ ≤ ≤ ≤ ≤ ≤ ≤ ≤ ≤ ≤ ≤ ≤ ≤ ≤ ≤ ≤ ≤ ≤ ≤ ≤ ≤ ≤ ≤ ≤ ≤ ≤ ≤ ≤ ≤ ≤ ≤ ≤ ≤ ≤ ≤ 15
(9)Jgao gji jgyj 41jgi Jao Ssu gug jiao li uasu
CulwolowSooJiu
SjSjSjJoo Swoo jb slj Jolno
CwIolawcagjgjgj2djjgJoo 16
gjgljgljglj> Ssw jS j17
JwJwLWysS JwsJbJgJusdsJsw
joo 1
SgS aabw g y sln g dawy jw wsl saaas
S 1 1 1 1 1 1 1 1 1 1 1 1 1 1
Sjoo cIab jI oLg dI ggsOJg8dUs Jolb jIabbl
a0000000000000000000000000000000000000000000
g j 1 1 g j g j g j g j
sbsgjy jz d g zc uo ojjw ydo 4g y
j1.0g2i 2y0 23wglg2g 24
Soslaow
ds Culla Elite
cIbIol dIe Iy Jy DyJy CULLA ELITE (SgdsC"ol yd
a 1
Ldu 1J, gswoslaalgds Culla Elite jI g:Jda
JgdsWls JSGsGdJgJg(jw,diws)Lg Cw g Czabjol
aaii gljss
92g
jol jgo wai ogsx
(dJ5) 1s1jLdsjg jS jI ggs (cJ5)
yIbI JgI Cog Dg Culla Elite nggJnJnJnJnJnJnJnJnJnJnJnJnJnJnJnJnJnJnJnJnJnJnJnJnJnJnJnJnJnJnJnJnJnJnJnJnJnJnJnJnJnJnJnJnJnJnJnJnJnJnJ
Ls
g ju 1 g 1j g 2g o gao caggo jdu 4a j:
a 1 a 1 a 1 a 1 a 1 a 1 a 1 a
a do a jw wJy
3
2
4
L
Saa SaaLbcllojI1leabowsslaa:slab3- jol 5
joo jy jw jai w jw gjc (b_1Jw) 4gj gslkswg(a_JsW)
(c.√S△)
Jauo 49j 1 jai gai 1 d jy J 6
(a_)
gjgl jg gaiol jai Ssclabda 4ds gaj qaggi .
SjLjegg Ssw jegy b1 lal jl
jla jao sl ooggbu ggbny aJy SbI y Jsswblcabi
.05aowl al ao yga xyn ylu y Ll
SjWy jy sl ay jy gla caw . Jlggsy jy Rggy syl
jao ay Gxnn ylu y Iy nnnn ydy jy Ogoss
.
SjRjg: tcboloo yjy Nj, gjolgc yjy DjLgaxo .
.
.
.
aalbll aIb0cJg a
All of the intellectual property rights for the contents of this instruction manual belong to PegPerego S.p.A. and are protected by the laws in force.

F10020011289