
RVC1220IG - Vacuum Cleaner RYOBI - Free user manual and instructions
Find the device manual for free RVC1220IG RYOBI in PDF.
User questions about RVC1220IG RYOBI
0 question about this device. Answer the ones you know or ask your own.
Ask a new question about this device
Download the instructions for your Vacuum Cleaner in PDF format for free! Find your manual RVC1220IG - RYOBI and take your electronic device back in hand. On this page are published all the documents necessary for the use of your device. RVC1220IG by RYOBI.
USER MANUAL RVC1220IG RYOBI
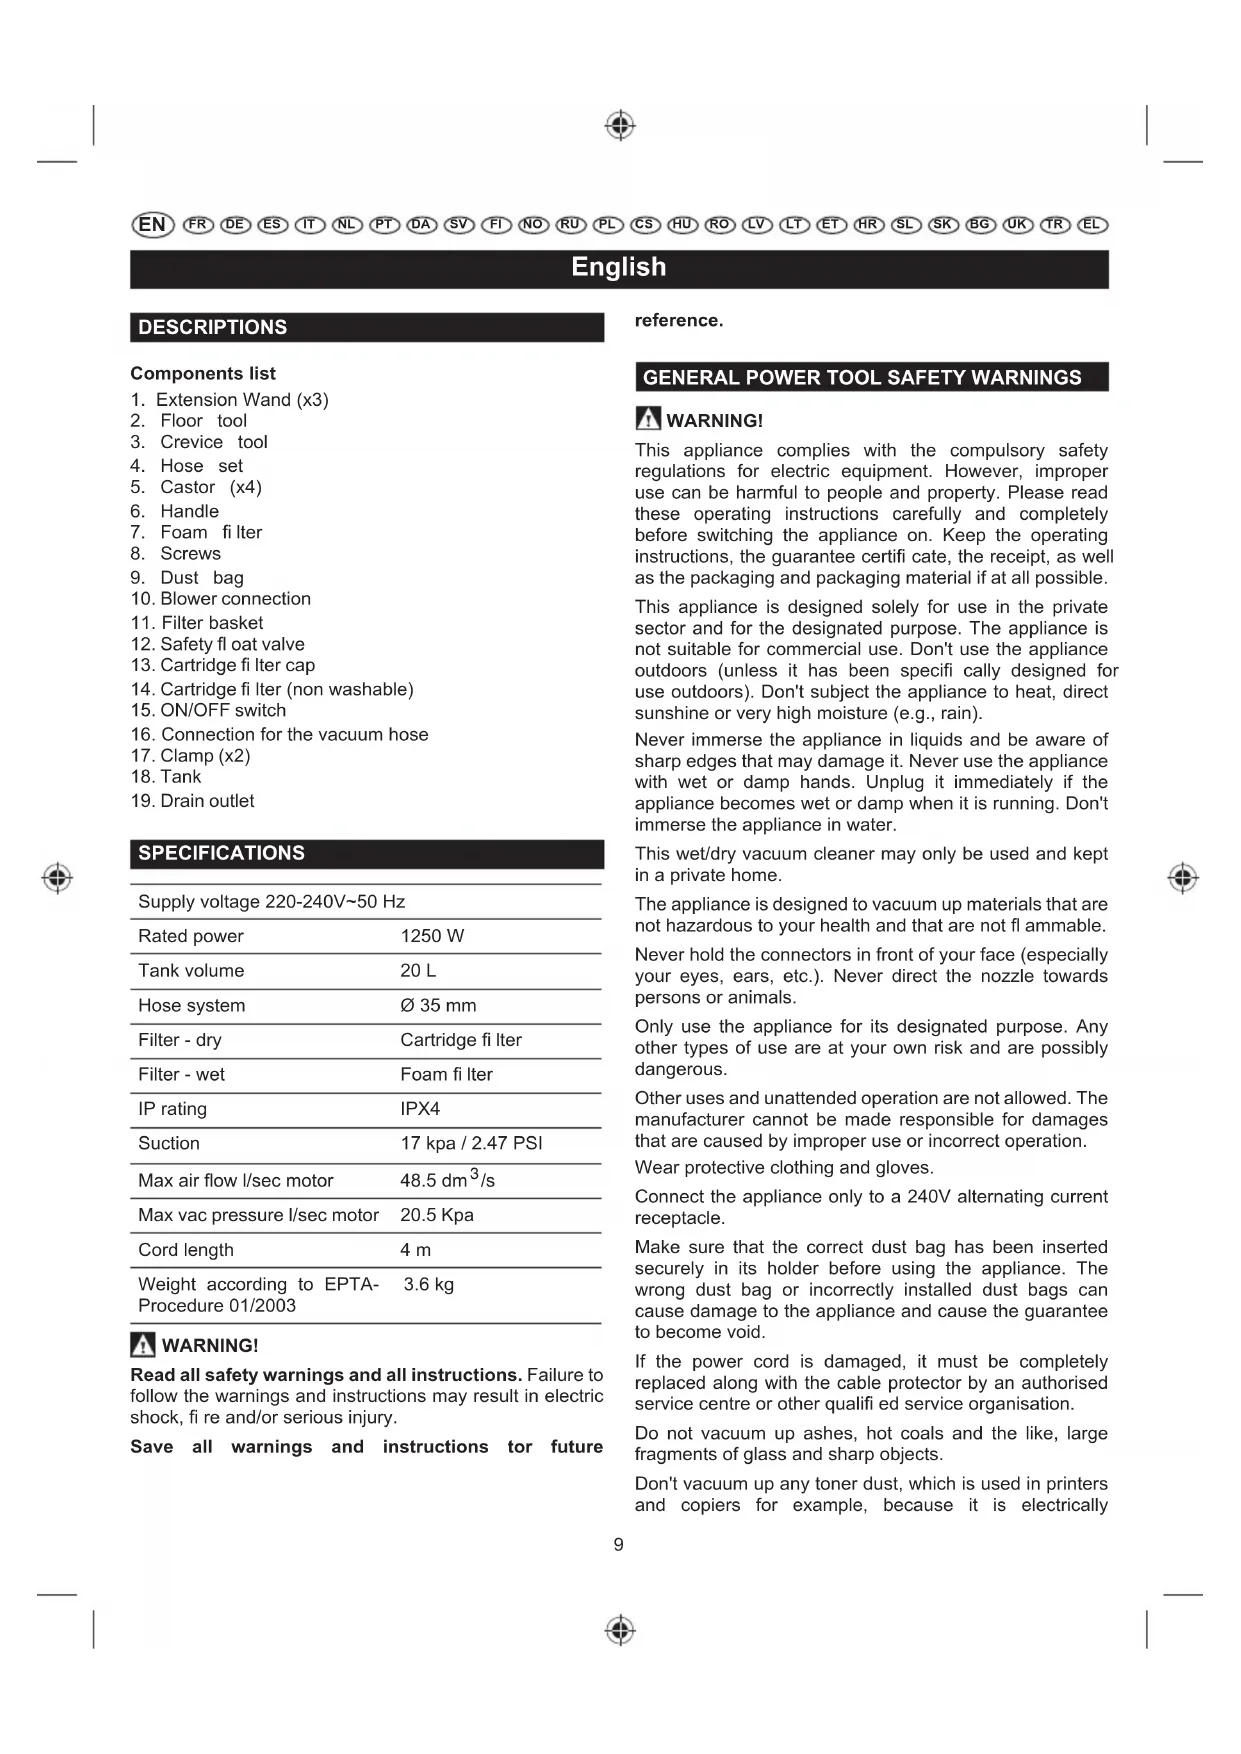
- Extension Wand (x3)
- Floor tool
- Crevice tool
- Hose set
- Castor (x4)
- Handle
- Foam filter
- Screws
- Dust bag
- Blower connection
- Filter basket
- Safety float valve
- Cartridge fi Iter cap
- Cartridge filter (non washable)
- ON/OFF switch
- Connection for the vacuum hose
- Clamp (x2)
- Tank
- Drain outlet
SPECIFICATIONS
| Supply voltage 220-240V~50 Hz | |
| Rated power | 1250 W |
| Tank volume | 20 L |
| Hose system | Ø 35 mm |
| Filter - dry | Cartridge fi I ter |
| Filter - wet | Foam fi I ter |
| IP rating | IPX4 |
| Suction | 17 kpa / 2.47 PSI |
| Max air flow l/sec motor | 48.5 dm3/s |
| Max vac pressure l/sec motor | 20.5 Kpa |
| Cord length | 4 m |
| Weight according to EPTA-Procedure 01/2003 | 3.6 kg |
WARNING!
Read all safety warnings and all instructions. Failure to follow the warnings and instructions may result in electric shock, fire and/or serious injury.
Save all warnings and instructions tor future
reference.
GENERAL POWER TOOL SAFETY WARNINGS
WARNING!
This appliance complies with the compulsory safety regulations for electric equipment. However, improper use can be harmful to people and property. Please read these operating instructions carefully and completely before switching the appliance on. Keep the operating instructions, the guarantee certifi cate, the receipt, as well as the packaging and packaging material if at all possible.
This appliance is designed solely for use in the private sector and for the designated purpose. The appliance is not suitable for commercial use. Don't use the appliance outdoors (unless it has been specified cally designed for use outdoors). Don't subject the appliance to heat, direct sunshine or very high moisture (e.g., rain).
Never immerse the appliance in liquids and be aware of sharp edges that may damage it. Never use the appliance with wet or damp hands. Unplug it immediately if the appliance becomes wet or damp when it is running. Don't immerse the appliance in water.
This wet/dry vacuum cleaner may only be used and kept in a private home.
The appliance is designed to vacuum up materials that are not hazardous to your health and that are not flammable.
Never hold the connectors in front of your face (especially your eyes, ears, etc.). Never direct the nozzle towards persons or animals.
Only use the appliance for its designated purpose. Any other types of use are at your own risk and are possibly dangerous.
Other uses and unattended operation are not allowed. The manufacturer cannot be made responsible for damages that are caused by improper use or incorrect operation.
Wear protective clothing and gloves.
Connect the appliance only to a 240V alternating current receptacle.
Make sure that the correct dust bag has been inserted securely in its holder before using the appliance. The wrong dust bag or incorrectly installed dust bags can cause damage to the appliance and cause the guarantee to become void.
If the power cord is damaged, it must be completely replaced along with the cable protector by an authorised service centre or other qualified service organisation.
Do not vacuum up ashes, hot coals and the like, large fragments of glass and sharp objects.
Don't vacuum up any toner dust, which is used in printers and copiers for example, because it is electrically
English
conductive. In addition, it is possible that it will not be completely filtered out by the filter system of the wet/dry vacuum cleaner and can be released into the air via the exhaust fan.
Never vacuum fl ammable or poisonous liquids like petrol, oil, acids, or other volatile substances.
Don't vacuum up liquids that are hotter than 60^ or any poisonous or flammable dusts.
Never lay the appliance on its side. Pay particular attention to a horizontal position and adequate stability on stairs.
Always unplug the appliance after use and before cleaning or changing the fi Iters or accessories.
Only trained specialists may make repairs on electric equipment. Improper repairs could result in considerable danger to the user.
Do not store the appliance directly beside a hot oven or radiator.
Children, disabled persons, and the aged are often not aware of the dangers that can result from handling electric appliances. The above mentioned persons and untrained persons must never work with this electrical appliance.
When cleaning or removing the appliance, always switch it off. Pull the plug out of the receptacle, if you are not going to use the appliance for an extended period of time. Never pull on the cable to unplug the appliance, rather pull on the plug itself. Also, remove any special accessories from the appliance.
Always keep the appliance clean. Don't use any solvents or cleaners that may damage or be harmful to the appliance or user.
Never leave the appliance switched on unattended. If you leave the work area, switch the appliance off or unplug it from the receptacle (don't pull the cord, but use the plug).
In order to protect children from electric household appliances, make sure that the cable can't cause children to stumble and don't give children access to the appliance.
Never use the appliance when you are under the influence of medication, alcohol or drugs, if you are currently under medical care, or if you are tired.
Check the appliance and the power cord regularly for any possible damage. Don't use damaged appliances.
Don't try to repair the appliance yourself. Always use an authorised technician for repairs. Always have faulty power cords replaced immediately by the manufacturer or a qualified service organisation. Use the same type of cable in order to prevent any danger of electric shock and injury.
Only use original spare parts and accessories. Non approved parts or third-party accessories may be a possible source of danger and cause the guarantee to become void.
Check the float often.
If you notice liquid leaking from your appliance, switch it off immediately and unplug it.
Do not submerge the appliance in water. Make sure that water is not spilled on the appliance.
When disposing of the wastewater, make sure that you observe any legal regulations.
Only store the appliance in a safe and dry location outside the reach of children.
Please also pay particular attention to the following "Special Safety Rules".
This appliance is not intended to be used or cleaned by persons with reduced physical, sensory or mental capabilities, or lack of experience or knowledge, unless they have been given instructions concerning the safe use of the appliance by a person legally responsible for their safety. They should be supervised whilst using the appliance. Children shall not use, clean or play with this appliance, which when not in use should be secured out of their reach.
Children should be supervised to ensure that they do not play with the appliance.
If the supply cord is damaged, it must be replaced by the manufacturer, its service agent or similarly qualified persons in order to avoid a hazard.
Electrical power should be supplied via a residual current device (RCD) with a tripping current of not more than 30 mA.
Only use a weather proof extension cord. Check the extension cord before every use for damage. Always uncoil the extension cord during use because coiled cords can overheat. Damaged extension cords should not be repaired. They should be replaced with an equivalent type.
WHEN USING BLOWER FUNCTION:
Direct air discharge at work area only - never at people or animals.
Do not use blower as a sprayer in wet mode. Wear a dust mask and protective eye wear.
WARNING
Always switch off and unplug the machine from the electrical outlet before assembling, opening, emptying the dirt container, before connecting/disconnecting the attachments, or carrying out maintenance or troubleshooting checks.
IMPORTANT!
English
If the hose or tools are blocked, switch off the cleaner and remove the blockage(s) before re-starting your machine.
IMPORTANT!
Cleaning filters and replacing them regularly maintains vacuum performance. Vax recommends that your filters should be checked, cleaned and replaced periodically.
DAMAGE TO THE VACUUM CLEANER CAUSED AS A DIRECT RESULT OF NOT ADHERING TO THE GENERAL SAFETY INFORMATION AND THE INSTRUCTIONS IN THIS USER GUIDE INVALIDATES THE WARRANTY.
PLEASE KEEP THESE INSTRUCTIONS FOR FURTHER USE.
SPECIAL SAFETY RULES
Never vacuum up hot ashes, pointed or sharp objects. Never use the appliance in damp rooms.
Don't use the appliance without a dust bag (an exception is wet vacuuming or with the cartridge fi liter). Make sure that the dust bag is inserted into the appliance correctly.
When using the appliance, make sure that no hair, clothing, or members are drawn in.
Keep the vacuum cleaner away from heat sources such as radiant heaters, ovens, and so on.
DISPOSAL INFORMATION
The appliance contains electric and electronic components and may not be disposed of as household garbage.
The local and currently applicable legislation must be observed unconditionally.
SPECIFIED CONDITIONS OF USE
The appliance is suitable for picking up dry, non-flammable dust and liquids.
This appliance is designed solely for use in the private sector and for the designated purpose. The appliance is not suitable for commercial use. Don't use the appliance outdoors (unless it has been specifically designed for use outdoors). Don't subject the appliance to heat, direct sunshine or very high moisture (e.g., rain).
Any other use is considered as improper use. The manufacturer accepts no liability for any damage resulting from such use. The risk for such use is borne solely by the user.
Proper use also includes proper operation, servicing and repairs as specified by the manufacturer.
EC-DECLARATION OF CONFORMITY
We declare under our sole responsibility that the product described under "Technical Data" fulfills all the relevant provisions of the directives 2011/65/EU (RoHs), 2014/35/EU, 2014/30/EU and the following harmonised standards have been used:
EN 60335-1:2012/A2:2019
EN 60335-2-2:2010/A1:2013
EN 62233:2008
EN 55014-1:2017
EN 55014-2:2015
EN 61000-3-2:2014
EN 61000-3-3:2013
EN IEC 63000:2018
Winnenden, 2020-05-25

Branko Lenger
Senior Vice President, Engineering and Quality - Asia, Engineering Commercial Product Development Authorized to compile the technical file.

Techtronic Industries GmbH
Max-Eyth-StraBe 10
71364 Winnenden
Germany
PACKAGING CONTENT
See Fig. 2 - Fig. 4
Carefully unpack the contents of the box.
Hold the two clamps, which hold the upper section in its position and fold them upwards.
Loosen the clamps, remove the upper section, and remove the contents from the tank.
Please check the parts using the components list to make sure they are complete and that there has been no damage in transport.
If any parts are missing or damaged, then please contact your dealer immediately.
ASSEMBLY
- Ensure that the power cord is disconnected from the power outlet.
- Undo the clamps. (Fig. 2)
- Lift the top section off the tank. (Fig. 3)
- Remove the contents from inside the tank. (Fig. 4)
English
- Turn the tank upside down, and insert the casters on to the four feet of the tank.
- Ensure that they are mounted correctly. Do not over tighten.(Fig.5)
- Insert the handle into the slots on the power head and pressure into place. (Fig. 6)
- For dry vacuum cleaning, install the supplied cartridge filter and dust bag. (Fig. 7, Fig. 8)
- For wet vacuum cleaning, install the supplied foam filter. (Fig. 9)
- Replace the top section on the tank. (Fig. 10)
- Align the top section with the clamps and snap into place by applying pressure until clamps click. (Fig. 10)
- Insert the large end of the hose into the front inlet of the tank and turn to lock. (Fig. 11)
- Fit the required accessory on to the suction tube. (Fig. 12)
OPERATION
DRY VACUUMING
WARNING
Ensure that you read, understand, and apply the safety instructions.
Reminder: DO NOT vacuum hazardous substances. The use of an incorrect dust bag will invalidate the warranty.
- Ensure that the power cord is disconnected from the power outlet.
- Ensure that the cartridge filer is completely mounted.
- Ensure that the filter is inserted all the way. (Fig. 13) Verify that the dust bag is installed to the inside of the tank. (Fig. 8)
- Replace the top section on the tank, and secure it in place using the clamps. (Fig. 10)
- Insert the larger end of the hose into the front inlet on the tank and lock it in place. Push the required attachment on to the free end of the hose or extension. (Fig. 12)
- Plug the power cord in to the power outlet.
- Turn the motor on by flipping the switch to the "I" (ON) position. (Fig. 14)
- Once you have finished vacuuming, flip the switch to the 'O' (OFF) position and unplug the power cord from the power outlet. (Fig. 15)
WARNING
DO NOT USE THE CARTRIDGE FILTER FOR WET OR SHARP MATERIALS.
DO NOT USE DUST BAG FOR LIQUID VACUUMING.
WET VACUUMING
WARNING
- Ensure that you read, understand, and apply the safety instructions. Reminder: DO NOT vacuum hazardous substances.
- Ensure that the power cord is disconnected from the power outlet.
Ensure that the tank is clean and free of dust and dirt. - Remove the cartridge filter and dust bag, and install a foam filter over the filter basket and place the top section back on the tank. (Fig. 9) DO NOT use the cartridge filter for wet or sharp materials.
- Fit the desired nozzle to the vacuum hose. (Fig. 12)
- Ensure that the switch is in the 'O' (OFF) position before plugging the power cord into the power outlet.
- Turn the motor on by flipping the switch to the "I" (ON) position. (Fig. 14)
- After use, flip the switch to the "O" position (Fig. 15) and unplug the power cord, then empty and dry the tank. (Fig. 16, Fig. 17)
WARNING
The foam filter must be removed after wet vacuuming, and a cartridge filter must be installed before dry vacuuming again.
IMPORTANT!
When vacuuming large quantities of liquids, do not immerse the nozzle completely in the liquid; leave a gap at the tip of the nozzle opening to allow air inflow.
The machine is fitted with a float valve that stops the suction action when the container reaches its maximum capacity. You will notice an increase in motor speed.
When this happens, turn off the machine, disconnect from power supply, and drain the liquid into a suitable receptacle or drain. To continue vacuuming, refit the container with the drain cap. After wet vacuuming, turn the machine off and remove plug from power supply.
Empty the container, clean and dry the inside and outside before storage.
BLOWER OPERATION
This Wet/Dry Vac has blowing capabilities.
To use the blower feature follow the instructions listed.
WARNING
Always wear safety goggles before using blower.
Keep bystanders clear from blowing debris.
Wear a dust mask if blowing creates dust that might be inhaled.
EN FR DE ES IT NL PT DA SV FI NO RU PL CS HU RO LV LT ET HR SL SK BG UK TR EL
English
- Insert the large end of the hose into the blower connection in the top of the motor housing. (Fig. 18)
- Fit the crevice tool to the vacuum hose. (Fig. 19)
- Ensure the power switch is turned off and plug in the power supply.
- Turn the motor on by flipping the switch to the "I" (ON) position. (Fig. 14)
- The unit will now blow through the vacuum hose and can be used to clear obstructions within the hose.
- Once you have finished operation, flip the switch to the 'O' (OFF) position and unplug the power cord from the power outlet. (Fig. 15)

WARNING
If after a few seconds the hose continues to be blocked, turn off the unit and clear the hose manually.
MAINTENANCE
INSTALLING AND CLEANING THE DRY FILTER
Note: Unplug machine from the power outlet before performing maintenance.
Installing Dry Filter
- Install the dry filter over the filter cage with the flat end of the fiiter towards the vacuum power head. Carefully push fiiter in until it stops against the power head. (Fig. 20 & 21)
- Place filter retainer on top of cartridge filter over the raise lip and tighten down by turning retainer clockwise, do not overtighten. (Fig. 22 & 23)
Removing And Cleaning Dry Filter (THIS FILTER IS NOT WASHABLE)
- Unlock and remove the filler retainer by turning retainer handle anti clockwise.
- Carefully hold and pull the dry filter up for removal. (Fig. 24)
- Clean the cartridge filler by gently tapping or brushing dirt off. For optimal performance it is recommended to regularly change this filler depending on level of use (e.g., 3-6 months).
- Install cleaned or new filter into place as instructed above.
INSTALLING AND CLEANING THE FOAM FILTER
Note: Unplug machine from the power outlet before performing maintenance.
Installing Foam Filter
Follow instructions to remove dry dust filter first before changing to foam filler.
Carefully slide foam filter down over the filler cage making
sure the whole cage is covered. (Fig. 9 & 25)
Cleaning Foam Filter
Carefully remove foam fi lter. (Fig. 26)
Use a mild soap and water solution to wash foam fiiter and rinse with clean water. (Fig. 27)
Allow fi Iter to air dry before installing and using again.
SYMBOLS

CAUTION! WARNING! DANGER!
V Volts
Hz Hertz

Alternating Current
W Watts

Please read the instructions carefully before starting the machine.

Class II equipment

Recycle

Do not dispose of electric tools together with household waste material.
Electric tools and electronic equipment that have reached the end of their life must be collected separately and returned to an environmentally compatible recycling facility. Check with your local authority or retailer for recycling advice and collection point.

European Conformity Mark
English
FREQUENTLY ASKED QUESTIONS
WARNING!
To reduce the risk of personal injury, unplug the cleaner before performing maintenance/troubleshooting checks.
Problem Cause Solution
| The appliance doesn't work. No power. | Functional fault in the power cord, switch, or motor. | Check the power supply. |
| Have the damaged part checked by quali ed personnel or replace it. | ||
| Tank is full of liquid. | Empty the tank. | |
| Dust is escaping from the motor cover. | The dust bag is missing or damaged. | Put in a dust bag or replace it. |
| Low suction power and high motor speed / vibrations. | Dust bag is full. | Replace the dust bag. |
| Suction nozzle, hose, or tank inlet is blocked.. | Check the suction nozzle, hose, and tank inlet for obstructions. |
Français
DESCRIPTIONS
Listedescomposants
Winnenden, 2020-05-25

Branko Lenger
Senior Vice President, Engineering and Quality - Asia, Engineering Commercial Product Development
QUESTIONS FReQUEMMENT POSEES

AVERTISSEMENTI
Winnenden, 2020-05-25

Deutsch
Branko Lenger
Winnenden, 2020-05-25

Branko Lenger
Senior Vice President, Engineering and Quality - Asia, Engineering Commercial Product Development
Autorizzato para recopilar la ficha的技术ica.

Techtronic Industries GmbH
Max-Eyth-StraBe 10
71364 Winnenden
Germany
Espanol
Winnenden, 2020-05-25

Branko Lenger
Senior Vice President, Engineering and Quality - Asia, Engineering Commercial Product Development Autorizzato a costituire la documentazione tecnica.

Techtronic Industries GmbH
Max-Eyth-StraBe 10
71364 Winnenden
Germany
INFORMATIE OVER AFVALVERWERKING
Winnenden, 2020-05-25

Branko Lenger
Senior Vice President, Engineering and Quality - Asia, Engineering Commercial Product Development
LET OP! WAARSCHUWING! GEVAAR!
V Volt
Hz Hertz
Wisselstroom
W Watt

Winnenden, 2020-05-25

Branko Lenger
Senior Vice President, Engineering and Quality - Asia, Engineering Commercial Product Development
Winnenden, 2020-05-25

Branko Lenger
Senior Vice President, Engineering and Quality - Asia, Engineering Commercial Product Development
OFTE STILLEDE SPORGSMAL

ADVARSELI
Winnenden, 2020-05-25

Branko Lenger
Senior Vice President, Engineering and Quality - Asia, Engineering Commercial Product Development
Winnenden, 2020-05-25

Branko Lenger
Senior Vice President, Engineering and Quality - Asia, Engineering Commercial Product Development Valtuutettu laatimaan tekinen tiedosto.

Techtronic Industries GmbH
Max-Eyth-StraBe 10
71364 Winnenden
Germany
PAKKAUKSEN SISALTO
Katso kuvaas 2-4.
Winnenden, 2020-05-25

Branko Lenger
Senior Vice President, Engineering and Quality - Asia, Engineering Commercial Product Development
OFTE STILTE SPØRSMÄL

ADVARSELI
Pnp6op npedna3nueH nnyb6pKn HeBocnJaMeHReMbx MaTePnAIOB, He npedctabIoux OnaCHOCTn dIy 3DOpOBb.
3anpeaaetcA depkaTb coeHHeHHn nepeJnIoum (oco6eHHo neped rna3amu, yama n T.d.). 3anpeaaetc HapapBJIaTB cONIO B CTOPOHy IIODeN JKNBOTbIX.
IcnoB3OBaTb TOnbko No npMOMy Ha3NaeHnO. BblnpHnMaete Ha ce6ra nck 3a IIO6be dpyrne fOpmbiNCNOJb3OBaHn, NOCKONbky OHN NOTEHuaNBHO ONaCHbl.
Dpyrhe BapnaHTbI NcNoJIb3OBAHnI pa6oTa 6e3 npncyTCTBnI OepaTopa He donyckaHOtca. Ipon3BOIDNTJIb HE MOKeT 6bITb IpNBLeueH K OTBeTCTBeHHocTN 3a yuep6, NOHeceHHb BCJeCDTBne HeHaJNeXkae nn HnpabunbHOJ 3KcnnyatauN.
Pycckn
IcnoJIb3yIte 3aIITHyIOeJMy I nepeHaTKn.
IopKnHuaaTe np60p TOnbko K po3eTke 240 B nepemehoro Toka.
IpepeHcnoJb3ObaHnem np6opa npoBepbTe HndexHoCTb yCTaHOBKn nbIEBOrO MeuKa B dEpKataTe. HenoXoJn nbIEBOm MEwOK nIn erO HeKoppeKTHa YcTaHOBKa MoKET npBeCTn K noIOMke np6opa n CHaTIO C rapaHTnn.
B cnyae noBpeKdHnI hyp nHTaHnI Heo6xOdHm0 3aMeHnTb ceJIHKOM, BmecTe C ka6eJbHbIM npoTeKTOpOM B aTOpN3OBaHHOM cepBnCHOM ueHTpe nn DpyrO KbaJInΦuNPoBaHHo OcClyKbAioSeOpraHn3aun.
3anpeaaetcnaIneocntbnenen,ropaueyrrn ananorunhble MaTePnaHb, a TaKke Kpynhbe Kyckn CTekna nOCTpbIE npedmetbl.
3anpeaaetc nIeocntb TohepyIO nIbIb, npmeHemyIO, Hnnpimep, B npHTepax INKOnIpOBaIbHbI annapatax no npunHe ee 3JeKtponpOBOHOCTN. Kpome TORO, cyueCTbyET BepoAHTOCTB TORO, yTO OHa He 6yDet ydepXINBaTcCnCTEmo fNtpaunn Nblncocca dIbnakHoI cyxoh y6Opkn 6ydet nonadTaB BO3dyx Ype3 BblrKaHOBeHTNJLTop.
3anpeaaetc npIeocntb BOCnIaMeHraIOUneecn IAOBNTbe KIOKCTN, TAKNE KAK 6eH3nH, MACNO, KNCOTbI IN DpyrHe JETyue BeuectBa.
3anpeaaetcnaeocntb KndKoCTn, TeMepaTpaKOTopbIX npebblaaet 60^ a TaKke IIO6yIO JDOBHTUIN BOCnIaMeHReMyIO bJIb.
3anpeaaetcctabntb np6op Ha 60k. Ctporo cneinte 3a TOpN3OHTaJbHbIM NIOXKeHNEM yCTOnuBOCTbO np6opapaHa nectnue.
Bcerda otKIOUaIte np6op ot cetn nHTAHn noCne IcNoJIb3OBAHn I nepeo OCHTKo nn 3ameHOI pIbTPOB INpHaADNeXHOCTeN.
K peMOHTy 3JIeKTPo06OpdyOBoHnI yDOnyCKaHTcTc TOnbKO 06ByeHHbIe CneuHaJIncTbI. HeHaJNeKaUmpeMOHT MoKeT PpeiCTabNtB cepbe3HyO yrpo3y dnn NOlb3OBaTeJI.
3anpeaaetcxaHnTb npnbop B HENOCpeDCTBeHHoB 6n3octn OT ropaye nnntbl nnpaDnataopa.
IETN,NIIuCA C OrpaHnueHHbIMN BO3MOXHOCTaMNI NOxNtBIE JIOJN YAcTo He NDoO3peBaIoT 06ONaCHOCTAX npn O6paUeHNn C 3NeKTPnuECKIMNPn6opamN. Bblweyka3aHbIe KaterOpnnLiu, a TaKKeHEnoIroTOBHeHbIe Nua He DonyckaOTcK pa6ote cDaHHbIM 3NeKTPponp6opom.
Pn BbINHHeHH OunchKn nn ydaeneHH npnbopa BCerda BbIKIOHauTe erO. Ecn Bbl He cobupaTecb NcNOJIb30BaTb np6Op B TeueHne dNITeJbHO BPemH, N3BJeKInTe BNky n3 po3ETKn. 3aIpeuaTcra THyTb 3a UHp NITaHn, BmecTo 3TORo HxHNo 6paTbcra CaMy BNky.Kpome TORO,OTcoEduHInTe BCE npHaadnHexHOCTN
OT np60pa.
IopdepxBaTe np6Op B uCTote. 3anpeuaetcnaonb30aBt b pactBopnte nn nctraune cpeCTba, cnocobHe HabpeDnB np6Opy nn noB3OBaTeNIO.
HnkOrda He octabJnTe BkIIOeHHbI np6Op 6e3 npncMOTpa. POKdA pa6Ouyo 3OHy, BBIKHOaHTe np6Op H BbIHMaTe BNky n3 po3ETK (TAHTE 3a BNKy, a He 3a shyp).
B ueJx 3aunbI DeTeoT 6bTOBbX 3neKtponpnp60pa3MeCTnTE uHyp TaKIM o6pa3OM, TTo6bI DeTn HeCNOTKNHcB oHero,a TaKke He NoDnyckaTe DeTee K np60py.
3anpeaaetcnoIb3oBaTb np6op noB03deIcTBnEM MeNKaMeHToB, aIKORON HAHAPKOTIKOB, a TaKKe ecN Bbl npoxOHTe Kypc neeHn Hn yCbTByeTe yCTanocTb.
PeryIpaHNo OcMaTpnaBaiTe np6Op nUHyp nHTaHne Ha npEaMeT NOBpeKdHn. NcnoJIb3ObaHne HeNCnpaBbIX np6OpOB He dOnyckaetca.
He nItaItecB BbIOJHrB peMOHT np6bopa camOCToTeNbHO. Bcerda 06paauTeCb K ABTOP3OBaHHbIM TexHnueckM CneuaJIncTaM. HeincpaBhble uHpyi NTaHn NOdNeXaT HeMeDNeHHo3 ameHe npou3BOuNTeLEM INN KBaINΦnUPOBaHHo8 o6clyKNaBauOeI opraHn3aQuE.NcnoJb3yIte wHyp aHaONrHuHOro Tnna BO n36exKaHne pNcKa nopaxKeHHa TOKOM NIT TaPMBbl.
IcnoIb3yIte TOnbKO opnHnHaNbHbIe n 3aNaChbIe Ietanu n npHaJnxKHOCTN. HeoO6peHbIe Ietanu n npHaJnxKHOCTN CTOpOHNX IpON3BOJNTeNeM MOrYT AIBTBCRA NOTeHcuaNbHbIM NCTOCHNKOM ONaCHOCTN, IN NCNoJIb3OBaHHe MOXET npNBECTN K CHrTNU C rapaHTNU.
Uacto npoepeTne nonnaBok.
Ecnn Bbl 3aMetnH, UTo n3 npmbopa BbIeKaet XKnKocTb, HEmeDHeHHo BbIKJIOHTe erO nOTCOeHNHTe OT pO3eTKN.
3anpeaaetcno pykaTb npnbop B body. He donyckaTe nonadnna BObl Ha np6op.
CnB OtpaBoTaHHo BObI DOJKeH OcyueCTBJIaTbcra Cco6JIIODeHHeM BcEx HOpMaTHBbIX Tpe6ObaHn.
XpaHntb np6op cneJyET B 6e3onachom cyxom MeCTe BHe DOcraemocTn OT DeTei.
Kpome Toro, 6paTne ocObe BHMaHne Ha Hnkeyka3aHHbte "CneunabHbIe npabuHa 6e3onacHOCTN".
DaHHoe yCTpoiCTBO He npedHa3HaueHo IIN NCNoIb3OBaHnI INOuNCTKN JIOdbMn C OprAHnueHHbIMn Qn3NueCKmN ININ YMCTBeHHbIMn CNOco6HOCTaMn ININ JIOdbMn C HeoCTaTOUHbIM ONbITOM IN 3HaHnAMyn. NckIoUeHneM RaBJeTcN cyuay, KOrda OHn 6bln 6obyeHbI NOb3OBaHIOYCTPOICTBOM JInC0m, OTBETCTBEHHbIM 3a INX
Pycckn
6e30nacHocb. TaKne IIOJN DOJXHbI 6bITb NOd HABJIODeHHeM Pn INCNOJb3OBaHn DAHHoro yCTPOcTBa. DeTn He DOJXHbI NCNOJb3OBaTb, OUnuTaB 3TO yCTPOcTBO INN INrpaTb c Hm. OHO DOJXHo XpaHHTbcB HEDOCTyNHOM DJIa DeTe MeCTe.
TeNdoJXHbIKOHToJnPOBaTbcra,TO6bI rapaHTnpoBaTb, TTO OH He npaOT C np6opom.
Pn noBpeJdeHn Ka6eJ 3neKtpoNTaHn, BO n36exKaHne noteHunalbHoro pncA,ero 3ameHy dOnJxeh OcyuecTBnTb npon3BODInTeB, cepBnchn aReHT nn DpyroE NIO COOTBeTCTByIOe KBAINΦNkaUN.
HnTaHne DoJxHo Noctynatb uepe3 yCTpOcTBO dΦepeHuaJIbHOI 3aunTbI (RCD),OTKnIOuAOUeecn npCnE ToKa CbIWe 30 mA.
Donyckaetc nCnONb3OBaHne TOnbKO BnaRoHenpoHHuaemoro ydNnHInTeJbHoro shHypa. Npeed KaKdbim nCnONb3OBaHNem npOBepraTe ydNnHInTeJbHbI uHyp Ha npEdMeT nobpeXdeHn. Bcerda packpyuBaTe ydNnHInTeJbHbI uHyp B npOceCE nCNoNb3OBaHn, NocOKlbky cKpyeHHbIe uHypbl MoryT nepepeBaTcR. NobpeXdeHHbI ydNnHInTeJbHbI uHyp peMoHTy He NoDnEeHT. ETo Heo6xOIMMO 3aMeHNTb Ha aHaNoTHyBn.
PNI NCIOJIb3OBAHIN ΦYHKUIN BO3DyXODyBKN:
IToK Bo3dyxa HnpaBnTb TOnbKO Ha pa6oyu 3OHy, N HIKoTa -Ha IIOdeN JKBOTbIX.
NcnoIb3OBAHHe BO3DyXoDyBKn B KaueCTBe paCnblnteIaBpeKIMe BnaJxHOy6OpKn He donyckaeTc. NcnoJIb3yIteNblne3aunTHyo Macky n 3aunTHbIe OOKN.
OCTOPOXHO
Bcerda BbIKHouaTe np6Op nOTcoeHNHnTe O pO3ETKn nepec6bpKo, oTkpbltnem, onyctOuHeHem KOHTHeHepa dna c6opa rpa3n, noDCoeUNHeHnEM/OTcoeUNHeHnEM npHaJNExKHocTei, npOBedeHnEM TexHnueCKoro 06cIyKINBaHHn INpOBepKN TexHnueCKORo COCTOHNHn.
BAXHOE 3AMEAHHEI
B cnyuae 3acopa IshaHra nIN INhctpyMeHTOB BbIKIOUHTe nbIeococ ydaJIInTe 3acop nepeD NOBTOpHBIM 3anyCKOM ycTPOINCTBa.
BAXHOE 3AMEAHHEI
PeryIpaHra Ounchka n 3aMeHa cIbtpoB o6ecneuBaet ONTImaIbHyIO npOn3BOUnteNbHOCTb nbInecoca. Vax peKomeHdyET nepNoDnueckn BblONHrTa NPOBepKy, Ounchky n 3aMeHy cIbtpoB.
IOBPEKDEHNE IbIIECOCA BCJECTBNE HECOJIIODEHNA OBUX YKA3AHN NO BE3ONACHOCTN INHCTPYKUN, INPECTABJENHHbIX B HACTOUEM
PYKOBOIDCTBE NOJb3OBATEJI, HE JBJARETCI TAPAHINHbIM CJUYAEM
COXPAHNTE DAHHYIO NHCTPYKUNIO JIJIADJIbHEINIEO IICNOJb3OBAHNA.
OCO6bIe IPNABUNA BE3ONACHOCTN
3anpeaaetc npieecocntb ropaHn nenen, 3aoctpeHHbI nn octpbie npedmetbl.
3anpeaetc nnojIb3OBaTb np6op BO BnaXhix NOMeueHnX.
3anpeaaetcnaonb30BaTbp6op 6e3 nbIeBoro Meuka (nckJIOUeHHeM ABnEETc BIAxHnA y6Opka nnpimeHeHne KapTpNdxHoro fnhtpa).PpOBepTe npabNJbHOCTb ycTaHOBKn nbIeBoro Meuka B np6ope.
B xode pa6oTbI C np6opom He donyckaIte nonaHaHnBa Hero B0NOC, ppeMToB OdExdbI n cacte Teta.
ДерхиTe npибор Ha paCCToHnO NT NCTOuHnKOB TENJa, TAKnx KaK paDnAToPbIe O6OrpeBaTeN, Neu n TaK danee.
HHΦOPMALIINOBYTNIIIN3ALINI
Pnp60 copcpeKNT 3JNEKtpueckne n 3JIeKTPoHHbIe KOMHOHeHTbI IN He NOJnEeKNT yTINN3aCmN BmecTe C 6bITOBbIMN OTXODAMN.
DeyCTByIOUe MeCTHOe 3aKoHOaTeIbCTBO DOJXHO CO6JIHOaTbCn HeyKOCHITbHO.
INCPOJb3OBAHNE
Pn6bopnoXoDNTJy6OpKn cyxOHNBOcNpameHReMoI bIIIN XKNDKOCTe.
Hactoun np6op npedha3aue HCKNHOteNbHO DnncnoB0aHnB YacTHOM cektope, B yka3aHHbIX ceJax. Pnp6p He noxOHT dJa KOMMepueckoro nCnoB0aHn. 3Kcnnyataun np6opa BHe nomeeHn He onyckaetc (ecn OH He npedHa3aueH DnncnoB0aHnBHE nOMEeHn). He noDBepraTe np6op BO3deICTBIO BBICOKHX TEMNEpatyp, npmblx COJIHeuHbIX nyey INOBIIeHHoB BlaxHoCTn (HaNPmep, doXd).
NcnoB3OBaHne np60pa B HbIX cEJx RaIeTcHHeHaDnHexaUIM. PpOn3BOInTeJIb He HecETOTBeTCTBeHHocTN 3a yueP6, NOHeCEHHb BCNECTBnTEKATO NcNoB3OBaHn. PnCK 3a NoO6Hb XapakTeP 3KcNpyatauH 6ep Ha Ce6nNoB3OBaTeJIb.
HaJnHexauee nCnoIb3ObaHne npednojaraet npabNlbyHyIO 3KcnpnyatauIO,06cnykBaHne n peMOHT B COOTBeTCTBUN CpeKoMeHdaUmaNn pOn3BOIDNTeJI.
Pycckn
DEKJIAPAUH O COOTBETCTBUN E3C
Mby 3aBJIaEM CO BCEI OTBETCTBEHHOCbH, YTO n3dJIeNIE, OINCAHHoe B pa3dene "TexHueckne XapaKTePncTNIKU", OTBeyaet BCEM COOTBeTCTByIOuIM NOJIOKeHNAM DInpeKTNB 2011/65/EU (RoHs), 2014/35/EU, 2014/30/EU IN COOTBeTCTByet CNeyUOuIM rapMOHn3IpuOBaHHbIM cTaHApTAm:
EN 60335-1:2012/A2:2019
EN 60335-2-2:2010/A1:2013
EN 62233:2008
EN 55014-1:2017
EN 55014-2:2015
EN 61000-3-2:2014
EN 61000-3-3:2013
EN IEC 63000:2018
Winnenden, 2020-05-25

Branko Lenger
Senior Vice President, Engineering and Quality - Asia, Engineering Commercial Product Development
ABTOPIN3OBaHHb COCTaBNTeNb TEXHnueckoI DOKyMeHTaun.

Techtronic Industries GmbH
Max-Eyth-StraBe 10
71364 Winnenden
Germany
CODEPXMOE YIAKOBKN
CM.pnc.2-4.
Akkypatho paacnakyte coedepkmoe kopo6kn.
YdepKnBaIteΦHKnpyUOuNE BepXHIOU Yactb 3aXIMbl DAHHOM NIOJKeHN IN CMECTNTE IN BBepx.
PakpoTe 3axmbl, CHMnTe BepxHIO qactb n3BJIeKeNTe coepKIMoe n3 pe3epByapa.
CbepbTeCb C nepeyHem KOMnoHeHTOB, y6eIITcB HAIINCH BCEx DeTaN N OTCyTCTBNN NOBpeKdEHN Pn TpaHCnOpTnPOBKe.
B cnyuae HeIOCTaHn nn NOBpeKDeHn KaKx-NN60 deTaeH NEMeHNHeHCOBcC NoCTaBUNOM.
CEOPKA
- Y6eHntecb B TOM, yTO uHyp nHTaHn OTCoeHHeH OT pO3eTKn.
-
PackpoTe 3axmbl. (PucyHok 2)
-
CHIMITEBepxHIOU qacb c pe3epByapa.(PucyHOK 3)
4.ИЗВЕКИТеcodepхИМоepe3eрБуар.(Pисунok 4)
5.пepeьернite pe3epByap n BCTaBbTe poJIKN B HOKKn pe3epByapa. - Hanaekno 3akpenTe nx. He nepetraBaTe. (PucyHok 5)
- BctabBte pykoTb B OTBepCTnB CNIOBOI rOIOBKn n npKmTe ee. (PucyHok 6)
8.ДЯ BBINOJIHENI cyXOy 6OpKn yCTaHOBNTe BXOJUne B KOMNJIeKT KapTpINJKHbI ΦINbTp IN bInBeBOmMeWOk.(PcCyHOK7,PcCyHOK8)
9.ДЯ BByINOJIHHeHNAIaxHOJ y6OpKn yCTaHOBnTe BXOJaUNB KOMNNEKT NeHHbI ΦnIbTp.(PncyHOK 9)
10.YCTaHOBnTe BepxHIOU qactb Ha pe3epByap.(PcCyHOK 10) - BbipOBHnTe BepxHOu qactb c nOd 3aXmbln 3akpoTe nx, HndabNB CBepxy do xapaKTEpHoro 9eNka. (PcCyHOK 10)
- Bctabte 7nHaH60bnm KOHcOMB npeDHee Bnyckhoe OTBepCTne pe3epByapa N nobepHnte erO, TTo6bl 3aФNKcnpoBaTb.(PucyHK 11)
- YcTaHOBnTe Heo6xOIMyH HacaIky Ha BCacbBaHO Tpy6ky. (PncyHOK 12)
3KcπIyATALUN
CYXARYBOPKA
A OCTOPOXHO
BHHMaTeIbHo 03HaKOMbTecb c HnHCTpyKunMn No 6e3oNaChOcTH n co6JIouaHTe nx.
Hanomunhahe: 3APLEUJAETCnBinecoctb onachhie BeueCTBa. NcnoJb3OBaHne HenoDxOJaero nbIeBOrO Meoka Bneyet 3a c6oB ChrTne C rapaHTnn.
- Y6eIntecb B TOM, yTO uHyp nHTaHnO TCOeINHeN OTo p03eTKN.
- Y6eHntecb B TOM, yTO KApTpUxKhBn 0JIbTp noJIHOCTbIO yCTaHOBJIeH.
- Y6eHntecb B TOM, qTO fHnIbTp BCTaBHeN Do KOHua. (PncyHOK 13) PpOBepBe, qTO6bI BHyTpN pe3epByapa 6bl yCTaHOBHeN PbJIeBOB MeWok. (PncyHOK 8)
- YcTaHOBnTe BepXHIOU Ha pe3epByap n 3aФнкCpyNe ee 3axmamn. (PucyHok 10)
- BcTaBbTe 60nHr KOHcOM B nepeDHee BnyckHOE OTBepCTne pe3epByapa n3aФNKcnpyIteero. YcTaHOBIne Heo6xOIMyH Hacaiky Ha CBO6OHN KoHeu 7nHaHra nn ydnnHInTeJN. (PncyHok 12)
- ПодсоeДинITE shHyр nHTaHЯ K 3neKtpuYeckoI po3eTke.
- BkIIOUHTe DnBraTeNb, nepeBeJa BbIKNIOHaTeJIb B noJIOXKeHne "I" (BKJI). (PncyHOK 14)
- 103aBepweHn y6opKn nepeBeDenTe BbIKIOHaTeJIb B
Pycckn
noJoxeHne "O" (BblKJI) n 3BNeKeNTe HHyp NITaHnna n3 po3etKn. (PncyHok 15)
A OCTOPOXHO
3ANPEUAAETCNOJb3OBATB KAPTPNIXHbIN ΦNJbTP INI YBOPKE BIAKHBIX ININ OCTPbIX MATEPNIAIOB.
HE ICNOJIb3yIte PbJIeBOm MEJOK BO BPEM BRAJKHOYBOPKN.
BIIAXHAR YBOPKA
OCTOPOXHO
- BHIMATEJIbHO O3HaKOMbTEcB C INHCTpyKUaMn NO 6e3oNaCHOCTN uCoBIOdaTe ux.
HaonmHaHHe: 3APELAETCn bIeocntb onachbIe BcctBa. - Y6eNTecb B TOM, yTO uHyp nHTaHn OTCoEdnHeH OT pO3eTKn.
Y6eIITecB YnCTOTE pe3epByapa N B OTCyTCTBn B HEM nbJIN n rpr3n. - N3BNEKNTe KAPTpNdxKhbI ΦnIbTp IN bJIeBOm MeWOK, NocJe Yero yCTaHOBnte NeHHbI ΦnIbTp NOBepx KOp3HNOHOrO fNtpa I NOMeCTnte BepXHOU Yoactb 6bpaTHo Ha pe3epByap. (PucyHOK 9)
3APPELAETCA HcnoIb3oBaTb KaTpndxHbI
fNtbp npu y6opke BnaXhIX NnOCTpbIX MaTePnaNoB. - YctaHOBNTe HxHHyIO HacaIky Ha BaKyHMbI WnAHI. (PncyHok 12)
- Npeed noocoeHHeHnem Hhypa nntAHnK 3neKtpnuecko po3eTke y6eNTecb B TOM,TO BBIKIIOHTaeJIb HaxODNTcB NOJIOKeHN "O"(BblKI).
- BkIIOHTe DnBraTeNb, nepeBeda BblKlIOHaTeNb B noIOXKeHne "I" (BKJI). (PucyHOK 14)
- Nocne nCnoB3OBAHnna nepeBeDnte BbIKNHOaTeNb B noIOXKeHne "O" (Pnc. 15) n oTcoEINHnTe uHyp nHTaHn, daJe e onyctoWnte n BbICyWnte pe3epByap. (PncyHok 16, PncyHok 17)
OCTOPOXHO
No 3aBepWeHn BnaXHo y6opKn Heo6xOuMo n3BneY neHHbI qnlbTp, n nepeHaJOM cyXoY6opKn Heo6xOuMo yCTaHOBNTb KapTpNDKhbI qnlbTp.
BAXKHOE 3AMEUAHNE!
B npoecce y6opkn 60nbuxx o6bemOB xndkocTei 3anpeaaetcnoHocTbNOrpykaTb HacaKy B xndkoc; octabte 3a3Op Mekny Kpaem HacaKn i xndkocTbDnO bceneueHn NOtoka BO3dyxa.
YcpoctBO OCHaaetcnonbKOBBIM KJanaHOM, npekpaaOIM BCacbHaHe np3aONHeHH KOHTeHepa.Bbl 3amTe yBENueHn CKOpocn pa60tbi
DnurataJIa.
B 3TOM cIyuae BbIKHOnHTe yCTpoiNCTBO, OTOceDNHInTe erO OT pO3ETKn I CnIeTne KxIDKoCTb B NOxDxOJaun pe3epByap nn KaHaJIaN3aCIO.ДЯ DAJIbHeJWe y6OpKn yCTaHOBInTe CINBHyU KpbIuKy Ha KOHTeHep. IIO 3aBePseHm BlaJHoY bOpKn OTKIIIOHTe yCTpoiCTBO n N3BNeKeInTe BUNKy n3 PO3ETKn 3NEKTPoNTaHn.
Ipepa3MeueHnem Ha xpaHeHne onyctoHTe KOHTeHep, OCHNTte N OcyuHTe BHyTpEHIO H BHeuHIO NOBepxHOCTb.
ФУнкUILBO3ДУXYOДУВКIN
DaaHbI nblncoc dnn BnaXHo n cyxO y6OpKn Ochaue H cyHKUneB03dyXoYBKN.
Pn nCnoB3OBAHm FyHKuN BO3DyXoYBKn CneDyIte yKa3aHHbIM HnCTpyKqIaM.
A OCTOPOXHO
IpeH Hauanom pa6oTb I Bcerda HaeBaIe 3aunTHbIe OCHN.
He donyckaIte nonaHaHn BbIyBaEMo Mycopa Ha okpykaIOx.
EcnB Xohe pa60Tb NODHMaetc nbInb, cnocobna nonactb B OpraHbI DbIXaHHN, INCNOJb3yTe nbIne3aunTHyO macky.
- BCTaBbTe ⅢJHaHr 60JIbIIM KOHcOM B coeINHeHne BO3dYxOyBKN Ha BepXHeN YacTn KOpNyCa DBrIraTeNIA (PncyHok 18)
2.ПодсоeДиHITe иeIeByIO HacaIky K IJIaHry.(PcCyHOK 19) - Y6eNTecb B TOM, yTO BBIKIOaTeNB NITAHN HaxoINTcB I NOIOXeHN BblKl., n BCTaBBte BUNKy B po3eTKy.
- BkIIOUHTe DnBraTeIb, nepeBeJa BblKlHOaTeIb B noJIOXKeHne "I" (BKJI). (PncyHok 14)
5.Бнok NaHHeT BbIyBaTb BO3dYx Yepe3 WnHaHr M MoKeT NcNoJIb3OBAtBcДЯ ПОчИСТКИ WnHaHra. - 10 3aBepueHn pa6oTbI nepeBeNTe BblKIOHateNB I noJoxKeHne "O" (BblKn) n 3BNeKeNTE uHyp nHTaHn n3 po3ETKn. (PncyHok 15)
A OCTOPOXHO
Ecn no npoWeCTBn HeckonbKnx CeKyHd WnaHr HnpOuHcTnCLra, BblKnIOUHTe 6NOK n npOuHcTnTe WnaHr BpyHyIO.
TEXHINCHECKOE OBCJNYKUBAHNE
YCTAHOBKA IN OUHCTKA CYXOFO NJIbTPA
PnmeuHHe:peed BbINONHeHem TexHneCKoro 06cnyKBAHNAOTCOeHNHTe yCTpoiCTBO OT pO3eTKN.
Pycckn
YcTaHOBka cyXoro qnIbTpTa
- YctaHOBnTe cyxOuΦnIbTp nobExkapKacaΦnIbTp aNIOCKIM KOHcOM K CnIOBOI rONOBKe nbJncocca. AkkypaTHo HaxmMaTe HaΦnIbTp Do tex nop, noka OH He ynpetc B CnIOByIO rONOBky.(PcyHOK 20 & 21)
- YcTaHOBnTe ΦKCaTOp Ha BepXHIO Yoactb KapTpNdxHOro FnbTppa, Nobepx CneuaJIbHoI KpOMKn I 3aKePnTe erO, BpaUaI NO yacOBOn cTpeKe, Ho He nepeTnBaHTe. (PucyHOK 22 & 23)
CHaTne n ouNcTka cyXoro 0nJIbTp a (DAHHbI INJIbTP HE MOETC)
- PackpoTe n CHIMnTe fHKCaTOp fNJIbTpA, Bpaaeraero pyKoTb npOTnB yacOBoi CTpeJIke.
- OctopoxHO BbITAHTE cyxOuΦnJIbTp BeptUKaJIbHO. (PcCyH0K 24)
- OuHCTIe KapTpNJXHbI ΦJIbTp, aKKypaTHO NOCTyAB No Hemy NaIbIeM IIN CMAxHyB rPra3b.ДЯ obecneueHry ONTImaJIbHO pa60tBi peKOMeHdyETcpeRyIaRPHo MeHrTa DaHHbI ΦJIbTp B 3aBnCmOCTn OT YACTOTbI NcNoJIb3OBAHnA (HaNPmEp,Yepe3 3-6 MecraIeB).
4.YcTaHOBnTe YHCTbI HOBBIΦHbTp Ha MecTo B COOTBETCTBm C HHTpyKlmaMn Bblie.
YCTAHOBKAIOUCHTKA NEHHOROΦNJbTPA
PnmeaHne:peed BbINONHeHem TexHueckoro 06cIyKBAHNAOTCOeHNHTe yCTPOiCTBO OT pO3eTKN.
YcTaHOBKa neHHoro qHbTppa
N3BNeKInTe cyxOn nbIeBOnΦnIbTp no NHCTpyKuH, nocJe Yero 3aMeHNTe neHHbIΦnIbTp.
AkkypaTHo HadeHbTe neHHbI ΦnIbTp Ha Kapkac ΦnIbTp, 3akpbIb erO ueNikOM. (PncyHok 9 & 25)
OuHCTKa neHHoro qnIbTpTa
AkkypaTHo n3BNeKeKnte neHHbI ΦnIbTp. (PncyHOK 26)
PpomOnTe neHHbI ΦnIbTpMbIbHbIM pactBopOM n OonoJocHte erO uHcToB BOoN. (PncyHOK 27)
Doxntecb BbcixaHna QnIbtpa DnAaIbHeuwe yCTaHOBKn NcONlb3OBAHNA.
YCNOBHbIE OBO3HAUHIN

BHIMAHNE! OCTOPOXKHO! OIACHO!
V
BolbT
Hz
Tepu

NepemennbI TOK
W BATT

Ipeed nCnoJb3ObaHnem npnbopa BHNMaTeJIbHO O3HaKOMbTecb C daHHoH INHCTpyKUne.

O6bpyoBaHne KnaCa II

NobTopHbI uKnI

3anpeaaetc Bb6paebibatb 3JIeKTPoHnHCTpyMeHTbI Bmecte C 6blTOBbIM Mycopom.
3JNeKtpnueckoe H3JKeKtpoHoe
obOpydoBaHne, BbIpa6oTaBWee CBoi
peCypc, DOJIKNHO yTINN3nPObaTbcra
OTDeNbHO B YcIOBnX CneuaJIbHorO
nepepa6atbIbAioUeero PpeDnPnTna.
YToCHnTE NoprOk yTINN3aCmN IN
MeCTOnHaxOXKeHnnyHKta npHeMa y
MeCTHbIX Bnacte NnN IOCTabUuKa.

3nak COOTBETCTBnE eBpOeNCKm CTaHdaptam
Pycckn
BONPOCbi N OTBETbi

OCTOPOXHO!
B ueJx cHxKeHHn pNcKa nOlyeHHn TpaBMbl OTKnIOuayte nbIeCoc ot ceTn nepeD BbINOnHeHHem TexHnueckoro 6cbnyKunBaHHn/npOBepKn TexHnueckoro COCTOHn.
| HeincpabHocThb Prinyhna Cnoco6 yctpaHeneH | ||
| Прибор He pa60taet. | ОсутCTByET ПИТаHne. | ПровьTe ИСTOUнК ПИТaHи. |
| HeincpabHocThb ShHypa ПИТaHи, | ОБразпteь K KBaJIINФицPoВаньHM | |
| БыклЮчATEЯ ПИДВIGATeЯ. | СпесиаLINCTam ДЯ ПрOBерКИЗамeHы | |
| Pe3epByap пон. | HeincpabHоДпЕТaЛ. | |
| ОпUCTOшITE pe3epByap. | ||
| Пыль ВыхODIT n3-ПОд КрБШКДВигаTeЯ. | ПыльевоМешOK OTCYTCTByET ПИП nobpeждeH. | Установite ПИП 3AMeHNTe ПыльевоМeшOK. |
| HeioCTaTochNar MOUHOCThB BCasblAHHЯ N BvICOKa SCKOPoCTb pa60tby / Bv6paunI DVBIGaTeЯ. | ПыльевоМeшOK 3aONHNeH. | Установite ПыльевоМeшOK Ha MeCTo. |
| Засор BCasblAJOUSeH HacdKN, | Осmotрпte BCasblAHOJU HacdKN,Шанг | |
| шална рИ NBI BXODHOrO OTBepCTnIpe3epByapa. | И ВPySCHoe OTBepCTne pe3epByapa HaPreDmet 3acopob. | |
Polski
OPISY
Listy.częsci
DEKLARACJA ZGODNOSCI WE
Winnenden, 2020-05-25

Branko Lenger
Senior Vice President, Engineering and Quality - Asia, Engineering Commercial Product Development
Polski
PROHLASENI O SHODE EC
Winnenden, 2020-05-25

Branko Lenger
Senior Vice President, Engineering and Quality - Asia, Engineering Commercial Product Development
Winnenden, 2020-05-25

Branko Lenger
Senior Vice President, Engineering and Quality - Asia, Engineering Commercial Product Development
Winnenden, 2020-05-25

Branko Lenger
Senior Vice President, Engineering and Quality - Asia, Engineering Commercial Product Development
Winnenden, 2020-05-25

Branko Lenger
Senior Vice President, Engineering and Quality - Asia, Engineering Commercial Product Development Pilvarots sastādīt tehnisko dokumentāciju.

Techtronic Industries GmbH
Max-Eyth-StraBe 10
71364 Winnenden
Germany
IEPAKOJUMA SATURS
Winnenden, 2020-05-25

Branko Lenger
Senior Vice President, Engineering and Quality - Asia, Engineering Commercial Product Development
Igaliotas sudaryti technine byla.

Techtronic Industries GmbH
Max-Eyth-StraBe 10
71364 Winnenden
Germany
PAKUOTÉS TURINYS
Zr.2-4 pav.
Atsargia iispakuokite deze.
Winnenden, 2020-05-25

Branko Lenger
Senior Vice President, Engineering and Quality - Asia,
Engineering Commercial Product Development
POSEBNA SIGURNOSNA PRAVILA
Nikada ne usisavajte vruci pepeo, siljaste ili ostre predmete.
Aparat nikada ne koristite u mokrim prostorijama.
Aparatne koristite bez vreice za prašinu (iznimkaje mokro usisavanje ili usisavanje suloznim filtrom).Provjerite je li vreica za prašinu pravilno umetnuta u aparat.
Winnenden, 2020-05-25

Branko Lenger
Senior Vice President, Engineering and Quality - Asia, Engineering Commercial Product Development
Ovlasten za ispunjavanje tehncke dokumentacije.

Techtronic Industries GmbH
Max-Eyth-StraBe 10
71364 Winnenden
Germany
SADRZAJ PAKIRANJA
Pogledajte sliku 2 - 4.
Winnender, 2020-05-25

Branko Lenger
Senior Vice President, Engineering and Quality - Asia, Engineering Commercial Product Development Pooblascen za pripravo tehniciene dokumentacije.

Techtronic Industries GmbH
Max-Eyth-StraBe 10
71364 Winnenden
Germany
VSEBINA EMBALAZE
Gleje sliko 2 - 4.
Winnenden, 2020-05-25

Branko Lenger
Senior Vice President, Engineering and Quality - Asia, Engineering Commercial Product Development
Hnkora He 3acmykbaTe 3anaIIMn nn OtpOBHn TeuHOCTN KaTo 6eH3nH, MacNo, KNCeJIHH nn DpyrN JeTJNBn BEUectBa.
He 3acmykBaIte TeuHocTn, KOInTo ca no-ropeu n ot 60^ nIO nTOPOBHN nIN 3anaNIM npaxOBe.
Hnkora He noctabnTe ypea HactpaH. O6pbaaTe CneuaHb BHMaHHe Ha XOpN3OHTaHTO NpOKeHne INoDxOJaTaCTa6nHocT Ha ypea, KOrATo ce DnKnTe NO CTbIbN.
BnHa n3KnOuBaIte ypea ot en. 3axpaHbaHeTo cnei ynoTpe6a n npde n oouCTBaHe nn CmHa Ha qntpTe nn npHaNDeXHOCTN.
Camo obyuHen cneuaHnCTn Morat da pemOnTnpaTeNEKtpuecko 60bOpYBaHe. HEnpabUNHnT peMOHT MOKe Da DOBeDe Do 3HaunTeHa OnaCHOCT 3a Notpe6nteJra.
He cbxpanhaBate ypeHa HenocpeCTBeHo Do ropeua cypHa nn paDnatop.
Deata, Xopata cybpejdaHnBb3pactHTe xopa yecTo He ca Harecho c onaCHOCTnte, KOtO MoarTa Da Bb3HNKHaT npa pa60a C eNEktpueckn ypeu. TopenocouHnte n Heo6yehn Iua HnKora He Tpa6Ba da pa60rT c To3n eNEktpueckn ypei.
BHHaHn n3KJIIOUHbAte ypeDa, KOraTo ro noocCTBaTe Hn np6bupate 3a cbxpaHHe. N3KJIOHcTe uencela ot KOHTaKaTa, aKO HMa Da n3NoJ3BaTe ypeDa 3a npOdbNknteHepnoD OT BpeMe. Hnkora He dbpnaTKe6eJa, 3a Da n3KIOUHTe ypeDa OT KOHTaKaTa, aPbHHeTecamra UenCeI. Ocbeh TOBa npEmaxHeTe BCNUKn CneuaHn npHaJNeXHoCTn OT ypeDa.
Binharn noDbpxkaTe ypeDa qnt. He n3noJ3BaIte pa3TbpOteN nn NOcCTBaUe npenapaT, KOITOMorat Da nobpejT nn da HABpejT Ha ypeDa nn notpe6nteJ.
Hnkora He octabryte ypea BkIIOuehen 6e3 Hau3Op. Ako HanycheTe pa6oTHaTa 30Ha, n3KIOUeTe ypea nnro pa3kaute ot KOHTaTe (He IbpaTe Ka6ena, a n3no3BaTe uence).
3a da npedna3nte decaata ot eJektpnueckn DomaknHcKn
ypei, yBepTe ce, ye Te He Morat da ce npenbHaT B Kaeba n He m daaTe DoctbNo ypeia.
Hnkora He n3non3BaTe ypea, Korato cTe noD Bb3deIcTBnTo Ha IekapCTBa, ankoon nn HapKOTn, aKO B MOMeHTa CTe nOd MeNCHKn rpnKn nAko cTe yMopeHn.
PpOBepaBtepeoBHOypeaN3axpaHbuaKabEn 3a B3MOxHNIOBpeu. He n3noN3BaTne NOBpeEHn ypeu.
He onntbaTe da pemOHnpate ypeDa camn. BnHarn n3noJ3BaIte ynbHOMOeH texHk 3a pemOHr. BnHarn noDMehnTe He3a6abHO HEn3npaBHnTe 3axpaHbauN Ka6eJI npn npOn3BOIDNTe NIN KBaInOpuH cepBn3. N3noJ3BaIte cbUra TnK6en, 3a da npedOTbPaTne OnaCHOCT OT TOKOB ydap n HapaHBAhe.
N3no3BaTe cAmO opnHaJIHn pe3epBHN qactn n npnaIeXHOCTn. HeoIOpeHnte Yactn nn npHaIeXHOCTn, ppeIOCTaBEHn OT TpeTn CTpaHn, Morat Da npEcdTabraBt Bb3MOxEH N3TOUHk Ha ONaCHOCT N da DOBeDat Do aHyIupaHe Ha rapaHcIyTa.
PpOBepaBae Te yecTo nonJaBbKa.
Ako 3a6eJKeIte n3TnUaHe Ha TeuHocT OT Baunr ypei, He3a6abHro n3KNIouTe n rO pa3KaueTe OT KOHTaTa.
He notanrIte ypea BbB BOda. YbepeTe ce, ye Bbpxy ypea He ce n3nBa BOda.
Korato n3xBpnaTe OTnabHnTe BOn, He 3a6paBnTe Da cna3BaTe BCnUKN 3aKoHOBN pa3npoe6n.
CbxpaHraBaTe ypeDa cAmo Ha 6e3oNaCHO n cyxo MRCTO, HeoCTbIHO 3a Deua.
Mon, o6bpheTc CneuaHb BHMaHne Ha CneHnTe "CneuaHn npabnna 3a 6e0nacnoct".
To3n ypei He e npedHa3Hauen Da 6bde H3NOJ3BaH IIN NOUcTBAH OT IINa C HAmaneH FNI3NueCKN, CETNBH NIN YMCTBeHH CNOCO6HOCTN IIN OT IINa, KOUTO HAMAT HEo6XODIMITE ONNT IN 3HaHN, OCBEH AKO CbIHTe He Ca INHCTpyKTIpaHN OTHOCHO 6e3ONACHOTIO IIN0J3BaHe Ha TO3N ypeD OT IINCe, HOceIo 3AKOHOBa OTROBOPHOCT 3a TExHATA 6e3ONACHOCT. Te Tp86Ba DA 6bDat NOI HAD3Op, DOKATO IIN0J3BaT ypeDa. He Tp86Ba Da CE DOnycka Deca Da IIN0J3BaT, DA NOUcTBAH IIN Da CN UrpaT C TO3N ype; KOrato ypeDbT He Ce IIN0J3Ba, ToI Tp86Ba Da 6bDe NoCTABAH Ha MAcTO, Do KOETO DeaTa HMaT DoCTbN.
Deuata Tpr6Ba Da 6bDat Hnd3npaBaan, 3a Da ce rapaHTnpa, ye He cn nIgparT cypeJa.
Ako 3axpaHbauT Ka6e n e nobpehen, Tpr6Ba da 6bde CmeHen OT npOn3BOuNTen, HerOB cepBn3EH
Българnia
PpeCTaBHTeI INN NOIO6HO KBAJIINΦHUNpaHO Jnue, 3a da ce n36erHat onachOCTnte.
YpeBbT Tp86Ba Da 6bDe 3axpaHbaH ype3 npekcbau 3a 3aunTHo n3KnIOuBAHe, nponyckaTOK He nobeeO t 30 mA.
N3no3BaIte camo ydbJxHTeJeH Ka6en, yctOuHb Ha atMoccepeHn BInnaHne. IpOBepaBte YeJbJkaBaUma Ka6en 3a NobpeDen ppei BcKa ynoTpe6a. BuHaRn pa3BnuBaIte YdbJXkAbaUma Ka6en npn pa60ta, 3aouTo Hepa3BnITe Ka6en Moat da nperpeT. NObpeHnTe ydbJxHTeHN H Ka6enn He Tp6Ba Da ce peMOHTnpa. Te Tpr6Ba Da 6bDaT NOMeHeH C eKBnuBaJIeHTeH TnI.
KORATOI3IIOJI3BATEΦYHKUJRA3AOBUYXBAHE:
IInpeKTHo n3nyckaHe Ha Bb3dyx cAmo B pa60thaTa 30Ha -HnKOra CpeUy Xopa nn JKNBOTHN.
He n3noJ3BaIe ypeJa 3a 06dyXbaHe KaTo npbckaKa B MOKbp peKIM. HocTe npotnBOpPaxoBa Macka N npedna3Hn OHHa.
A NPEyPExKDEHNE
BnHa n3KnHouBaIe MaunHaTa n 3BaJdaIte Ka6ena OT eJIeKTPuYeCKn KOHTaKT npEdu CrIIO6BaHe,OTbApRe He, n3npa3BaHe KOHTeHepa 3a MPcOTTu, npEdu CBp3BaHe/ pa3KaUBaHe Ha npucTAbKInTe NIN n3BbPwBaHe Ha npOBepK 3a NoDpBxKka NIN OTCTpaHraBaHe Ha HEn3npaBHOCTn.
BAXHO!
Ako MapkybT ININ HNCTpyMeHTnTe ca 3aDpbCTeHn, INKJIIOUcTe ypeDa 3a NOuNCTBaHe n OTCpaHete 3aDpbCTBaHETo/3aDpBcTBaHnra, PpeDN da CTapTnpate OTHOBO MaunHata.
BAXHO!
PeIOBHOTo NOHCTBaHe I NOIMHaTt Ha 0nITpnte NOIbPkAt epeKTHBHOCTTa HApaxOcMyKaUKaTa. Vax npenOpbYBa nepoNDuHa npOBepka, NoCHTBaHe I NOIMHa Ha BaUNTE 0nITpn.
IOBPEDA HA IPRAXOCMYKAUKATA,IPNCHHEKAATO IPRK PE3yJITAT OT HECNA3BAHE HAOBUATA HHΦOPMAU3A BE3ONACHOCT INHCTPYKUNTE B HACTOJTO PbKOBOCDTO 3A NOTPSEBNTJI, AHYNJPA TAPAHJYTA
CbXPAHBAITE PbKOBOCTBOTO 3A EKcIIOATAUHA CNYPHO MRCTO,3A DA MOXETDAFOIIN3BATENIO-KbCHO.
CNEUΦHIN PABUNA 3A BE3ONACHOCT
Hnkora He 3acmykbaTe ropeuza nenei, 3aoctpeHn nn octpn npedmetn.
Hnkora He n3no3BaTe ypea BbB bnaKn noMeueHn.
He n3noJ3BaIe ypea 6e3 Top6a 3a npax (c n3KIOUeHne Ha 3acMyKBaHe Ha TeuHOCTn INN C KaceTbYHna fINTbp). YBepTe ce, ye Top6ata 3a npax e NOCTABeHa npabInHo B ypea.
Korato n3noJ3BaTe ypea, ce yBepTe, ye Toi He 3acMykBA Kocata, dpexnte Bu nn Yactn OT TAX.
ДрьхтпрахocмукkaкаТдалeчOTИЗTOUHINHa TOПЛинСКАТОЛБЧИТНHarpeBaTeN,ФурнИДр.
NHΦOPMALI3A N3XBbPJIaHE
YpeIbT CbIbPka eNeKtpnueckn n eJekTpOHHN KOMnoHEHTn H He MoKe Da ce N3XBpJRA KaTO 6ntOB OTnAdbK.
MecTHOTO IN pnpIOXIMOB MOMEHTa 3aKHOdaTeJIcTBO Tp6Ba Da ce cna3Ba 6e3yCNOBHO.
ONPEDEJENYUCIOBNAHYNOTPEBA
YpeBt e noDxOJa3a Cb6npaHe Ha cyx, He3anannm npax n TeuHOCTn.
To3n ypeE npoeKtnpaH 3a ynoTpe6a eDInHCTBeHO B uactHna CeKTop n 3a onpeDeIeHOTo My npedHa3NaueHne. To3n ypeE He e noXoJ4u 3a TbproBcKa ynoTpe6a. He n3non3BaIte ypeA Ha oTKpIto (OCBEN Ako He e npedHa3NaueH cneuaHNO 3a TOBa). He n3naraiTe ypeA Ha TOnnHa, npka CnBHeBa CBETnHa Nm MHO BnCoka Bnara (Hanp. Dxk).
BceKn Dpyr BnD n3non3BaHe Ce npHema 3a HnnpaBnHa ynotpe6a. PpOn3BOJNTeJIr He Noema OTROBOPHOCT 3a KaKBInTO n da e UeTN, PpOn3TnHaUNOT Takaba YNOTpe6a. PnCKbT OT Takaba ynotpe6a ce Noema EINHCTBeHO OT notpe6nteJIra.
PpabnHaTa ynoTppeBa BkIIOUba CbIoo TaKa n npabnHaeknloatau, o6cnyXbaHe n peMOHTn, KaKTo eNocOeHo OT npOn3BOIDNTeJI.
DEKJIAPAUHARHO3ACbOTBETCTBNE
Hne DeKnapnape Ha CBOA NnHa OTROBOPHOCT, Ye npOdyKTB, ONIcAH B,TexHnueckn DaHHNOTROBApHa BCnKN CbOTBeTHn pa3nopei6n Ha nDpuKeTbNTe 2011/65/ EC (RoHs), 2014/35/EC, 2014/30/EC, nCe ca n3noJI3BaHN cNeIHNTE XapMOHn3npaHn CTaHdAPTN:
EN 60335-1:2012/A2:2019
EN 60335-2-2:2010/A1:2013
EN 62233:2008
EN 55014-1:2017
EN 55014-2:2015
EN 61000-3-2:2014
EN 61000-3-3:2013
ENIEC63000:2018
Блгария
Winnenden, 2020-05-25

Branko Lenger
Senior Vice President, Engineering and Quality - Asia, Engineering Commercial Product Development
YnblHOMOeHO JIue 3a CbCTabRe Ha TexHueckn

Techtronic Industries GmbH
Max-Eyth-Straße 10
71364 Winnenden
Germany
CbIbPxAHHe HA ONAKOBKATA
BnKΦnpya 2-4.
BHHMaTeJIHO pa3ONaKOBaIte CbIbPkaHHeTo Ha KyTnTa.
XBaHete DBeTe ⅢnKInTe, KOInTo 3aIbpxKat rOpHata qact Ha MRCTO, IN CTrBHeTe Harope.
Pa3xJa6Te ⅢnKHe, MaxHete TropHaT a cact n npemaxheTe CbDbpxKaHneTo OT KOHTeHepa.
PpOBepTe Yactnte CnpoeCnncbKa C KOMnoHeHTN, 3a Da Ce yBepnte, Ye pa3noJaIate C BCuKIn Te He ca NOBpeDeHn No BpeMe Ha TpaHCnOpTa.
Ako JnncBaT qactn nn mma nobpeHn TaKnBa, He3a6abHo ce CbpxkTe C Baunr dNtbp.
CTIOOBBAHE
- YbepeTe ce, ye 3axpaHbaunrKa6eI e n3KIOueH OT eJIeKtpnueckn KOHTaKT.
- Otkautee uinnknte. (Hr. 2)
- NobdHHeTe roHaTa YacT OT KOHTeHepa. (Phr. 3)
- PpemaxHeTe CbIbPkaHHeTo Ha KOHTeHepa. (ФИr. 4)
5.ObbHete KOHTeHepa c rOpHaTa qact HADony n noCTaBeTe KOJIeIcata Ha YETnpuTe KpaUeTa Ha KOHTeHepa. - YBepete ce, ye ca MOHTupaHn npabuHNo. He 3aTraTe npeKaaneHo MHoro. (ΦIr.5)
- NocTabete pkoBbATkata B rHe3daTHa 3aDbNkBaUaTa TnaBa n HaHTncHete,doKaTo Ra fHKcapTe Ha Macto.(Φn.6)
- 3a cyxo npaxocmyeHe MOHTnpaIte npedoctabehnKaceTbueH fntbnpu TOp6ata 3a npax. (fnr.7 Fnr.8)
- 3a MOKpo npaxocmyeHe MOHTnpaTe npedoctabeHn#nTbpOT nHa.(Nir.9)
- Nocabete OTHOBO rOpHata yact Bbpxy KOHTeHepa. (ФИ. 10)
11.Подравнete roрнataчac cbc uINKHTe n nHaTnCHTe,ДOKATOцpaKHaT HaMCTO.(ФИr.10)
12. BkapaIte rolemnna kpaHa MapkyuBa npedHna OTbOp Ha KOHTeHepa n rO 3aBbptTe, 3a Da rO 3aKJIIOHTe. (ФИr.11)
13. MoHTnpaTe Heo6xOIMMaTa PnHaIeXHOCT Ha Tpb6aTa 3a 3acMyKBaHe. (ФИr. 12)
PA5OTA
CYXO IIPAXOCMYEHE
I PENEYNPEXKDEHNE
YBepete ce, ye cTe npoeyn, pa36paHn npnlaTe nHCTpyKunnte 3a 6e3onacHOCT.
HanomHHe: HE 3acMyKBaIe onaChn BeuecTba.
N3noJ3BaHTo Ha HnpaBnHa Top6a 3a npax ue
anynipa rapaHqraTa.
- YbepeTe ce, ye 3axpaHbaunrKa6eI e n3KIOueH OT eJIeKtpnueckn KOHTaKT.
- YBepeTe ce, ye KaceTbHnT fHnTbp e MOHTnpaH HAnbJHo.
- YBepete Ce, Ye fHNTbPbTe BkapaH Dokpai. (ΦnR. 13) PpOBepete DaHn Top6aTa 3a npax e MOHTnpaHa BB BbTpseHocCTHa pe3epBoapa. (ΦnR.8)
- NocTaBete OTHOBOTOPHATA YAcT Ha KOHTeHepa I a KcpaTe Ha MCTO C NOMOuTa Ha UINKNTe. (10)
- BkapaIte no-rolemna KpaH a Mapkya B npednna OTBOP Ha KOHTeHepa n ro 3aBbptTe, 3a da ro 3aknouhTe. HATNCHTe Heo6xOImata npictabka Bbpxy CBO6oHNHa KaH a Mapkya nn yDblnxnten. (ФИ.12)
- BkHouTe 3axpaHbuaaKa6eB eJ.KoHTaKta.
- BkIIOUeTe DnuratEna, KaTo 3aBbptnte npEKBKIOUvBaTeNa HnO3uNra I(BKJI.).(ΦnR.14)
- Cnei KaTo npKIOHnTe c NoUcTbaHeTo, 3aBbPTeTe npEeKnIOuBaTeIHa No3Nua, O" (N3KJ.) n pa3KaHeTe 3axpaHbAunKa6en OT en. KOHTaTa. (ΦIr. 15)
I PENEYNPEXKDEHNE
HE N3I0JI3BAIte KACETbUHnA ΦNITbP 3AMOKPN INO OCTPN MATEPNAJIN
HE N3N0J3BAIHTE TOP5ATA 3A IIPAX 3A 3ACMYKBAHE HA TEUHOCTN
MOKPO IIPAXOCMYEHE
I PENEYNPEXKDEHNE
- Ybepete ce, ye cte npoejnl, pa36paui n npinaarate HcTpyKunTe 3a 6e3onacHocT. HanomHHe: HE 3acMykBaIte onachn BeueCTBa.
- Ybepete ce, ye 3axpaHbauNT ka6e n e nKJIIOueH OT
Блгария
eJIeKtpnHeckKIO KOHTaKT.
YBepete ce, ye pe3epBoapbTe YnCT N B Hero HrMa npax nnn Mpbcotna.
- PpemaxHete KacebUHHa QnITbP IN Top6ata 3a npax, MOHTpaIte QnITbP OT PAHa BbpxQnITbPnHRA KOW IN NOCTaBete OTHOBOPhpA TaacT Bbpx KOHTeHepa. (Phr.9)
HE n3non3BaIte KaceTbUHnA qnITbp 3a MOKpn nnoctpn MaTePnAIn. - MoHTnpaTe npednoHTaHaTa IIO3a KbM Mapkyua 3a 3acMyKBaHe. (ΦnR.12)
- Ybepete ce, ye npBeknIOuBaTeIe Ha no3nua "O" (N3KJI.), npEi Da BkNIOUte 3axpaHbaun Ka6eB eJeKTpnuueckn KOHTAKT.
- BkIIOUeTe DnuratEn, KaTo 3aBbptnte npEKBKIOUvBaTeNaNo3uNraI(BKJI).(Φnir.14)
- Cne ynoptpe6a 3abpTeTe npeBknOuBaTeNa Ha no3nua "O" (Φnr. 15), n3KnIOUeTe 3axpaHbAunna Ka6en n cne TOBa n3npa3HeTe n n3cyuWepe3epBoapa. (Φnr. 16 Φnr. 17)
I PENEYNPEXKDEHNE
Финтбрг OT пяпа Трябвда Ббдe npemaxhar cneД мokpo npaxocmyeHe, a KaceTbHnT Фиntьр Tрябвдда Ббдe мontиран OTHOBО npedn cyxo npaxocmyeHe.
BAKHO!
Korato 3acmykbaTe rolemn KOJNUeCTBa TeHOCtN, He notanrte IIO3aTa HANbHOB TeYHOCTTA; OCTaBeTe pa3cTOrHne MExy Bbpxa Ha IIO3aTa N TeYHOCTTA, 3a Da NO3BOJNTe PnTOK HA Bb3dyX.
MaunHata e cHa6deHac nonJaBKO KJanaH, KOITo Cnnpa CMyKATEHHTO DeIcTBne PnDIOCTTgAHe Ha MAKCImaHnKa nauTET Ha KOHTeHepa. Ie 3a6eJXte NOBuaBaHe Ha CKOpocTTa Ha DBuRatJIa.
Korato TOBa ce cnyu, n3KNIyHeMaunHaTa, pa3kayete 3axpaHbauinKa6eI OT en. KOHTaKaTn m3TOyTe TeuHocTTA B NOxOJaCbD NIN B KaHaJa.
3a da npoDbnJxnte NouchBaHeto, nocTabete OTHOBOKanaykata 3a n3TOUbaHe Ha KOHTeHepa. CneMOKpo npaxocMyuehe N3KNIOte MaunHaTa n 3BaTeUeNcena oT en. 3axpaHbAHeTo.
N3npa3Hete KOHTeHepa, noChTeTe N NOcCyWeTe OTBbTpE nOTBbH npEn CbxpaHeHne.
PABOTA C YPEDA 3A OБДУХBAHE
Ta3 npaxocmykaKa 3a MOKpo/cyxo NOHCTBaHe mHa ΦyHKUra 3a O6dyXbaHe.
3a da n3no13BaTe cyHKunraTa 3a o6dyXbaHe, cneDbaTe CbOTBeTHnte HcTpyKUn.
I PENEYNPKDEHNE
BnHaHn HocTe npEpa3Hn OuHna npn H3noJI3BaHe Haypeda 3a o6dyXbaHe.
Bn3KoCTOaHTe Nua Tp86Ba Da CTOr Danehe OT n3dyXBaHnte OTnaDbu.
Hocete macka npotnb npax, ako npn o6dyxbaheTo ce otJe npax, kOTo MoKe da 6bDe BmuaH.
- BkapaTe roIemnKpaH Ma Mapkya B cBeHNHeHneTo Ha BEHTnAToPA B rOpHaT aCt Ha Kopnyca Ha DBrIaTeJIa. (ФИr. 18)
- MoHTpaIte HNCTpyMeHTa 3a npoCenn KbM Mapkya 3a 3acMyKBaHe. (Фиг.19)
- YbepeTe ce, Ye npEeKJIIOHbATEIa 3a 3axpaHbaHeTo e N3KJIIOUeH IN BKLIOHcTe ypeDa B eJekTpueckn KONTaKT.
- BkIoueTe DnuratEn, KaTo 3aBbptnte npebKIOUbaTeNa HnO3nua (BKJ). (ΦnR.14)
- Cera ypeT ue o6dyXba npe3 cmykateHnmaPkyu MoKe da ce 3no13Ba 3a noocTbaHe Ha 3aDpbcTbaHe B Mapkyu.
- CneI KaTo npKKnUoyHte C Ta3n Oepaun, 3aBbptete npEKBKnUoyBaTeNa Ha No3uNra, "O" (V3KJI.) n pa3kaue Te 3axpaHbauu Nk6en OT en. KOHTaT. (ΦnR. 15)
I PENEYNPEXKDEHNE
Ako cnei HnKoNc KeynI MapkybT npOdbnkaBa da e 3aDpbCTeH, n3KnHcyte ypeHa n NouchTe Mapkya pbHNO.
PONAPbXKA
MOHTAKI NOUHCTBAHE HA CYXINJNTbP
3a6enexka: Ppei Da n3BbPnTe noDpBXka, n3KIOUeTe MaunHaT oEneKTPueeCKN KOHTAKT.
MOHTaX Ha cyxma fntbP
- MoHTnpaIte cyxN aHnTbp BbPxy KneTKaTa Ha HnTbpa, c NIOCKnK pKaH KbM 3aDbNKBaUaTa rnaBa Ha npaxOCMykaKata. BHMaTeNo HAtncHeTe HnTbpa, DOKaTO CTnHE Do 3aDnBnKBaUaTa rnaBa. (Hr.20 & Hr.21)
- NocTabete DbpxkaHa Hnntbpa Bbpxy KacetbHna HnTbp Ha NOBnuraPnRb6 n ro 3aterHe, KaTO 3aBbptnte Dbpxkau No nocoka Ha yacOBnKOBata cTpeIka; He ro 3atraTe npekaneHO Mhoro. (Fnr. 22 & Fnr. 23)
IpeMaxBaHe n noocTbaHe Ha cyxna qnntbp (TO3N ΦNJtbp HE MOKE DA CE MNE)
- OTKJIHOUyete n npemaxhete nbpxkaHa ha qnIITbpa, KATO 3aBbptNTe pbKoXBaTkata My NO NOCOKa o6paTHO Ha yacOBHNKObATA CTpeJIka.
- BHIMATEHNO XBAHETe IN dpbHHeTe cyxna fnnTbp, 3a da ro npemaxheTe. (ФИг. 24)
Българnia
3.ПочстeteKaceTbUHnФИТbpCЛeКОNotynBaHeи c NOMOHTaHaYETka.3aONTNMaJIHnPOnI3BOJNTeNHOCT cePpeOpbUbapeIOBHOdaCMeHrTeTO3nФИTpB 3aBnCmOcTOTCTeNEHTaHaYNOTpe6a(HanpImepHa 3-6 Meceua).
4. MoHTnpaIte NoCTeHnN HOB cHTbP cBnACHO HCTpyKUNTe no-rope.
MOHTAX I NOUICTBAHE HA ΦNITbPA OT IRAHA
3a6eIekka: Ppei Da n3BbpWte noDpBkka, n3KIOUcTe MaunHaTa OT eNEKTpuueckn KOHTaKT.
MONTaKHaΦnITbpaOTnHa
CneBaIte HNCTpyKuNTe,3a Da npemaxHete cyxna fntbp 3a npax, npedn da CmeHnte pfntbpa ot nHa.
BHMATEHNO nIb3HeTe fHTbpa OT nHa HADOny Bbpxy KneTkata fNTbpa, kaTo ce yBepnte, ye cnaTATA KneTkae nokpTa. (Fnr. 9 & Fnr. 25)
NouctBaHe Ha qntbpa ot nHa
BHHMaTeJHnOpemaxHeTeΦnTbpaOtnJaHa.(ΦnR.26)
I3non3BaIte MeK canyH N BOeH pa3TBOP, 3a da n3MnTe nITbpa OT nHa H ro n3nJaKHeTe C uHCTa BOda. (Phr. 27)
I3yakaTe fntbpt Ta n3cbxHe, npedn da ro MOHTnpate N da rno 3NONBATE OTHOBO.
CIMBOJN

BHIMAHNE! INPEyIPEKJDEHNE! ONACHOCT!
V HanpeKeHne
Hz
Xepu

PpOMeHJIbTOK
W
BatoBe

Ipooyete HNCTpyKUINTE BHIMATEJHO, npdAn da cTaptnape MaunHaTa.

ObopyBaHe ot KnaI

Peuzknpyema

He n3XbPnIe eNektpuecknTe HnCTpyMeHTn 3aeHNO c6ntoBn OTnabu.
EneKtpueecknte HNCTpyMeHTn n eNEKtpoHHTO obOpyDaHe, KOHTO ca DOCTnHaNN Kpaar Ha CBOB Xn3HEH ZKbJI, Tp6Ba Da ce cb6npaT pa3dEnHO n da Ce npedabat B cbopbXeHne 3a peuNKnPaHe, CbbMecTmO C eKOJOrnHnTE HopMN. 3a CbbETn OTHOCHO peuKNPapHeTo n nyHKta 3a cb6npaHe ce o6bPheTe KbMa BaUNTE MeCTHN BJaCTN Nn TbProBCKn npedCTaBNTen.

3HaK 3a CbOTBcTCTBnE C eBPonecknTe H3NCKBAHnA
Българnia
YECTO3ADABAHN BbIPOCS
NPEyPExKDEHNE!
3a da HamaInTe PnCKa OT fN3Uecko HapaHBAHe, N3KNIOyete ypeDa 3a NOuCTBaHe OKTakTa, npeDn Da N3BbPwIte npOBepKn 3a NoDpBkKa/OTcTpaHBAHe Ha Hen3npaBHOCTN.
| ПюбLEM Пишина Рецениe | ||
| Уреьт не павOTи. | HЯма 3axpaHbaHe. | Пюверete[elektro3axpaHbaHeTo. |
| Функционалha[HизправноCTВ зхранвашия Кабел,превл equivBaTeЛ идВигаTeЛЯ. | ПювeredеHTaЧASTТябБаДa 6ыдeпювeredиHaIIПОмЕнeHa OTКвалфицранСчжИтELI. | |
| Контунерьт eNBлЕн c TeuHocT. | Изпразнete Контейнера. | |
| ОТ калaka Na ДвигаTeЛЯ ИЗПИЗАп Pax. | Top6aTa 3a npax ЛИncBA ИПe e nobpeDeHa. | Посставete Top6a 3a npaxИПe NOмeHete. |
| Инstska symkaTeRelna MoUHOCr И Виска сKKОСТ Na ДвигаTeЛЯ/Вибраши. | Top6aTa 3a npax e NBлHA. | Пюdmehete Top6aTa 3a npax. |
| Смукaleннata ДЮЗа, МаркульТИИИОТВорьТ Na Контeyнера сa 6лokиран.. | Пюверete symkaTeHLaTA ДЮЗa, МаркуuaI OTBOPa Na KONTeyнера 3a 3aДрьСТВанЯ. |
yKpaIHcbKa MoBa
ONMC
Ipejik kOMnoheTrib
- NpOdBxByBaJbHa Tpy6ka (x3)
- Hacika nianiDnorn
- ⅢINHHa HacdaKa
- H6ip wJahriB
- Poink (x4)
- Puyka
- NoponoHOBn pIbTp
8.ΓBnHTN - Miok dny nny
10.3'εДнанняДЯ npOуВКИ - KowinK dfnbtpa
12.3anobixHHn nonlaBkoBn Knaan - Kpnska KaptpiDxHoro fInbTpa
14.3mHHn φiNbTp (He niDnae oUneHHIO)
15.ПеремкauуВIMKH./ВIMKH.
16.ПдкнчeyнгДЯВakуMHoroшlaHra - 3atnckaun (x2)
- Pe3epByap
- CnyckHn oTbip
CNEUIMIKAUJI
Hikon He BnKOpNCToByTe npncptpi, KOIN Bn nepe6yBaTe NiBnJnBOM NIKIB, ANKORoIIO a60 HApKOTIKIB, NiM MeNCHM HarJaDOM, a6o RkUO BN BTOMNJUCr.
Perynphno nepeBipraTe npncptpi i ka6enb XNBHeHHa Ha HaeBHicTb MoKlnBnx NoxKOJKeH. Hikon He BHKOpNCToByTe NoXKOJKeHn npncptpi.
He HamaraiTeCe pemOnTyBaTn npncTpien camocTiHNo. 3aBxJn 3BeptaIteCe Ido KBanidikOBaHoro nepcoHany aBTOPn3OBAHO CepbICHoro CEHTpy . NoWkoDjKeHi shHypi jKNBJeHHN cIi, 3amHHTn HeaHNO y Bnpo6Hnka a6o B aBTOPn3OBAHOMy CepbICHOMy CEHTpi. Dnra 3ano6irAHn py3NkU ypaXeHHN eJIeKtpuHmCtpyMOM Ta OTPMaHHr TpABM 3aBXJn BnKOpNCToByTe ToI camn TIN Ka6eHIO.
BnKOpNCToByTe TlIbKn OpriHaJIbHi 3anachi YactHn Ta npnaJra. BnKOpNCTaHHe CXBaJIeHx 3anachnx YactIn H a6o HeopRiHaJIbHoro npnaJaMoKe 6yTu DkepeJom He6e3neKn i npnbEcTn Do BTPaTI rapaHTII.
Perynpho nepebipyte Bilbny pyx nonna.
Kaio BN NOMITINBNTIK pIDHH 3 npCTPOHO HeraHO BIMKHITb NOro i BiDKNIOHTb NOro BiMpekei
He 3aHypoIte npncptpi y Body. Ipekeohntecra, zo Boda He notpannna Ha npncptri.
Pny ytni3aui CTiHnX BOd, nepekoHaTeCg, 0o BN DToTpMMyTeCb BiIDNoBIDnX npnnncib.
CniD 36epiratn npncpii TINbKn y cyxomy i 6e3neuHOMy Micui n03a DOcXHicTIO dITBM.
CniD TakoK 3BepHyTN Oco6JIbBy yBary Ha HacTynHi "Oco6JIbI npabnna 6e3neKn".
Ue npnla He npn3naeHn dIy BnKOpNCTaHH a6o OuNCTK OC6aMn 3 06mExeHmN φi3nHyHmN, CeHCOPHmN a6o po3ymOBmN 3di6HoCTaMn, a6o 6e3 DocBiNy Ta 3HaHb, kKIO TiNbKn IM He 6ynn HadaHI IHctpykui, IIO CTOCYIObC8 Be3neHoro BnKOpNCTaHH npnAdy 3 60ky Oc6n, UopDnHIO BiNObiJaIbHOI 3a IX 6e3NeKy.BoHi NobHHI 3haxOHTncn Pid CnoCTepexEHNmPiJ qac BnKOpNCTaHH npnCTPOU. DiTHHe NOBHHIBNKOpNCTOByBaTn, YnCTNTn a6o rpaTN 3 cIM nPnCTpoem, kKIO BIn HE BnKOpNCTOByETbcra, TO NOBHeH 3haxOHTncn PO3a ix DOcXHICTIO.
He Do3B0JNeTe DITAM rpatnc3 Bnpo6om.
Y pa3i noxkoJHHe Ka6eIIO XnBneHH NoIcIa 3amHInT; Ira 3b0rO 3BepHItbcrdo Bnpo6nka,areHTa 3 06cnyroByBaHH a6o KbaJIicIKOBaHoro cneuiJancta,io6 yHKHyTN He6e3neKn.
yKpaIHcbKa MoBa
KnBHeHH Mae NoCTaTuCA Yepe3 npucpii DnepepeHuiObaHoro 3axNcty 3i CTPYMOM cnpauBOHaHH He 6JIbWe 30 mA.
BnKOpNCTOByIte Nnue NOOBKyBa, 3axueneHn BID BnInBy atmocsephnx yMOB. Koxe npa nepeD BnKOpNCTaHHm nepebipraTe NOOBKyBaH Ha HABHcTb N0WKoNDKeHb. 3aBXn pO3MOTyIe NOOBKyBaH ni dac BnKOpNCTaHH, OckIbKn y 3MOTAHOmy CTaHI Bin MOxE neperpibatnc. N0WKoNDKeHn NOOBKyBaH He NiJRAe peMOHTy. Ioro cnId 3amIHn Ha aHaONiHn.
36EPEXKITbIIO IHCTPYKUIO IJI KOPNCTYBAHHB MAHBYTHbOMY.
CNEUJIbHI INPABUNA BE3NEKN
Hikonn He BCMOKTyIe rapyni nonin, 3aroctpeni a6o roctpi npedmetn.
Hikon He BnKOpncToByTe npucptiy BOJorux npMiuEHHX.
He Kopnctyntecr npnctroem 6e3Miuka dna 360py cmTTB ( BuHrTkOM e Bonore npnbupaHHra NnOcoCoM afo 3 BnKOpntaHHm KapTpiXhoro fInbtpy).PepeKaHaTeca,
MIO MIIOK DnRA 360py CmITRA BCTaBHeH N PnpCTPII npabNbHO.
Pn BnKOpncTaHH npcTpo, nepekoHaTeCg, 00BONOCs qOJr He BTaryEc y npcTpi.
TpmaTe nnnococ noanBid Dxpeen Tenna, TaKnx k iHpaueepBoHi o6irpiBaui, nehi Toio.
Winnenden, 2020-05-25

Branko Lenger
Senior Vice President, Engineering and Quality - Asia, Engineering Commercial Product Development Дозвина складання Тхично сайna.

Techtronic Industries GmbH
Max-Eyth-Straße 10
71364 Winnenden
Germany
BMICT YIAKYBAHH
INBITbMaJIIOHKn 2-4.
O6epeKHo po3nakyIe Bmict Kopo6kn.
Bi3bmitcra 3a φikcatopn, ytpmyotb BepxHcckio y npabnblHomy noIOXeHHi Ta niDjIMtB DorOpn.
Ocna6Te pfikcatopn, 3HIMITb BepxHIO ceKciIO Ta BuaIITb BMICT pe3epByapa.
Ipepeipe TaactnH BIDNobIDHO Do nepeiKy qactnH npictpo Ta nepekoHaTecb, 00 BOHN Bc y HABHOCTI Ta He nowkOJkeHi nD ac TpaHCnOpTyBaHH.
JaKuo 6yDb-kaYnH npncptoBicyTHi a60 nowkOxKeHi, HeraiHo 3BepHtbcr do nocTaahbHnka.
3БИPAHH
- Ipekeohntec, 0o dpit XNBnEHn BID'cHaHO BiD Jxepena XNBnEHn.
- BiDkpnIte 3aTnckaqi. (MaHIOHN 2)
3.Пдимить ВерхючасиMu EmhoCTi.(MaHIOHKM 3) - BnMItb BCE 3 eMHocTi.(MaJIIOHKn 4)
- NpeBepHtB EMHCTb i BCTaTe QOTnpu pONKu y OHTnpu HIXKN EMHOCTi.
- NpeekohaiTeecy npabunbHocTi BCTaHOBJIeHHa. He nepetaryte.(ManOHKn 5)
- BCTaBTe pyky B OTbOpn Ha MOTOPHOMy BiDciky i HATNCiHt, 06bN BOH 3aΦikCyBaIncr. (MaHOnKn 6)
8.ДЯ cyxoro npu6npaHn BCTaBTe 3mHHn φiNbTp iMiWOK dIg nJy.(MaHOnKn 7, MaHOnKn 8)
9.ДЯ BOJororo np6bpahnB BCTaBTe nHHN φiNbTp, kN BxOuTb Do KOMPJIeKTy.(MaHOnKn 9) - BcTaHOBiTb BepXHIO cekqio Ha pe3epByap. (MaHOnKn 10)
- NocTaBTe BepxHIO yactHy Ha MicIe I HATnCHiTb TaK, 06n 3atnckaui 3aikcyBaII. (MaJIOHKn 10)
12.BCTABTe 6JIbWn KHeu b WnaHry y nepeDnBvxid
EMHOCTI Ta NOBepHITb Do 6Kcauii. (MaHnHKn 11)
- BctaHOBITb Heo6xIDHy HacaIky Ha Tpy6Ky BCMOKTyBaHHra. (MaHIOHN 12)
ФУHKUIOHYBAHЯ
CYXE PIPBUPAHN
IIONEPEKENH
Bn noBHHI npOHTaTn, 3po3ymiTH BCI Bka3iBKn 36e3neKn Ta dOpumyBaTnc Hx.
HaraIyBaHH. 3A5OPOHOCTbC36npaTHn nnococom He6e3neuHi peoBHN. PpBnKOpncTahHI HnpiDaTHoro Mioka dny npaHTiHi 306OB'3aHn BTPaHaOTb cnly.
- IpekeohaiTeC, 0o dpit XnBneHH BID'edHaHO BiD xKepeNa XnBneHH.
2.ПepeKoHaItecR,3mHHnФiNbTp BCTaBneHO IOBHICTHO. - Npekeohntec, 0o fIbtp BCTaBneHo NOBHCTIO. (MaioHKn 13) Npekeohntec, 0o B EMHICTb BCTaHOBNEHO MioK dNnJy. (MaioHKn 8)
- BctaHObitb BepxHIO qactHy EMHOCTI Ha Micue i 3akpinitb II 3aTnCKaHaMn. (MaJIOHKn 10)
- BctabTe 6iIbIsh KIneCb IwnaHry y nepeDhi BnXid EMHocTi do fikcaii. HAdarHITb Heo6xIDHy hacaKny Ha dpyrN KIneCb IwnaHry abo Tpy6Kn. (MaJIOHN 12)
- BCTaBTe BnIKy Bpo3eTKy.
- YbIMKHTb DnBryH, nepemictnbun nepemukay B noJoxKeHHra "I" ON.(MaJIOnHKn 14)
- Picn 3aBepWeHH np6bnpaHn nepeBeDItb nepemKau y noNoKeHH "O" ("BmKHeHO") Ta BtIgHiTb wHyp 3 p0eTK KINBHeHH. (MaJIIOHKN 15)
IIONEPEKENH
HE BUKOPUCTOBYTE 3MIHHN ΦINbTP INPNI 3BUPAHHI BOJONX ABO FOCTPNX MATEPIANIB.
HE BIKOPNCTOBYTE MIUOK IINJY INI BOJIOROMY INPUBPAHHI.
BOIOTEPINIBPAHNA
IIONEPEJXEHH
- Bn noBHHI npOHTaTn, 3pOzMyITn BCI BkazIKN 36e3neKn Ta DToPmYBaTncn HNX.HaraDyBaHn. 3A5OPOHReTbCra 36npaTn nJIOOCOM He6e3neHi peoBHN.
2.ПepekoHaItecR,OoDpiTJxNBLeHHBID'EDHaHO BID DKepeNa JxNBLeHHra. 而 - 3HIMITb 3MIHHN ΦIbTp i MiWOk dny, BCTaHOIBiB HAD KOUHKOM dny φIbTp y NiHHN φIbTp i NOBepHtB BEPXHQUACTnHy EMHOCTI Ha Micce. (MaIOHKn 9)
yKpaIHcbKa MoBa
3A60POHOHReTbCBAKOpncTOByBaTN 3MiHHNΦJIbTp nn 36upanHH BONrnx a6o roctpnx MATEpiAnIB.
- BcTaHOBIb HacaIky 3 npopi33IO Ha BaKyyMn IHaHr. (MaJIOnHKn 12)
- NepekoHaItecb, 10 nepeMnKa4 3hAxOuTbc8 y noLoXeHHi "O" OFF, nepu HIX NiKJIIOUHTn Ka6eNb KINBHeHHa Do MepeKi.
- YbIMKHiTb DnBryH, nepemictnbwn nepemukay B noJoxKeHHra "I" ON. (MaJIOnHKn 14)
- Nicna BnKOpncTahnn nepeBeiItb nepemukay y noLoXeHHa "O" (Pnc. 15), BntraHtB shyp xNBUeHHa 3 po3ETKn, nicna qoro Bnnpoxhltb ta npocuWitb emHicTh. (MaJIHOHN 16, MaJIHOHN 17)
A NONEPEDXEHH
Pnicra BONorO npn6npaHHn iHHn fijbTp 3HIMITb, nepeC cyxM npn6npaHHm BCTAHOBiB 3MHNn fijnbp.
BAJKINBOI
Pn 36npaHni BENKOI KINbKOCTi piHn He 3aHypnoTe HacaKy B pIDHy NOBHCIO; TpMaHTe II Ha HeBENuKII BiCTaHI BiD pIDHn, 0o6n 3a6e3neHTn DoCTyn NobITpr.
Bupi6 0bnHaHn nonnaBkoBn Klnanahom, knn 3ynHHBCMOKtyBaHHa, KOJI pIBeHb HAnOBHeHH EMHocTi carae MaKcMMy. Bn BiDyTe, k WbNdkictb MOTopa 3ibIbwyETbcra.
Ytaki ciTyaui BmKHiB npncTpi, BiD'edHaTe noro BiD Mepeki XnBHeHH Ta 3JnIte pIDHy y BiIDNoBIDHy EMHicTB a6o KaHaJIa3aIIO. 106n npOoBxHTn npbupaHH, BCTAHOBiB KOHTeHep i3 KpNkoIO 3JnBy Ha Mice. Picra Bonororo npbupaHH BmKHiB npncTpi i BiD'edHaHTe BnKy BiD po3ETKn XnBHeHH.
BunopoxkHt b KOHTeHep, noHCTiTb Ta npocuHnTb Noro BCEpeDHHI Ta 330BHI.
PEKIM NOBITPOyBKN
Pnncoc dIy Bonororo/cyxoro npnbupaHry Wet/Dry Vac MoKe BnKOpNCTOBvBaTnCBAKOCTIOBtPOdyBKn
Uo6nCKopncTatncraieOyHKciIO,BkoHaiTeHaBeJeHi BkA3iBKn
A NONEPEJXEHH
Ipeed yBIMKHeHHm pexkmy HargHtAHnO 6OB'3KOBO HndraTe 3axNCHI OKyJpn.
CTOPOHHIMOCO6am CnID TpMaTncra NODani BiD CMITTA, 10BnDyBaETbcr.
OyaIte pecnipatop, kUo dUTTcTBOPOE nH, KIM MOKHa BUXHYTN.
- BcTaBte 6iIbIshn KiHeu b IaHry B OTrbip HarHiTaHHy y Bepxhi uactnHi Kopnycy Motopa. (MaioHKn 18)
- BcTaHOBiTb HacaTk y 3 npopiz310 Ha BaKyyMnH nnHaHr.
(MaJIIOHKn 19)
- NpekeohaiTeC, 0 no nepemkaay 3haxoindbcra y BmKHyTomy NOIOKeHHi, i BCTaBTE BNkky B po3ETky.
- YbIMKHiTb DnBryH, nepemictnbwn nepemukay B noJoxKeHHra "I" ON.(MaJIOnHKn 14)
- B cboMy pexnmi NOBITpRA BuDyBaTmETbCra 3i WnaHry, i B TAKN cnOci6 MoXHa BuDaJIHTn PpeDMETn, 3o 3actpyrrn B wnaHry.
- Picn 3abepenno po6oTn nepebeiNb nepemukay y noJoxeHH "O" ("BumKHeHO") Ta BntaHrHiTb uHyp 3 po3eTKn KINBneHH.(MaiohKn 15)
IIONEPEKENH
JaKuo JIahn nicna KINbKOx ckyHd po6oTH He npOuHuaetbcra, BIMKHiTb npNCpti Ta npOuHCTiTb Ioro BpyHy.
OBCNYTOBYAHH
BCTAHOBJIeHHRAUHcHcyXOToΦJbTPy
Pnmuitka: NepeO6cnyroByBaHHaBIDeHaHTe npncpti BId MepeXKINBJeHHa.
BcTaHOBJIeHH cyxoro pInbTpY
- BctaHObit cyxHn fInbTp HAD KOUHKOM dIa nIbtpy TaK, 0o6n INaACKOIO CTOPHOIO fInbTp 6yB HAnpaBJIeHn B 6ik MOTOPHOrO BiDcIKy. OBepeXHo HAtnckaIte Ha fInbTp, ax DOKN BIN He ynpetbcr B MOTOPHNI BiDcIK. (MaIIIOHN 20 & 21)
- BctaHOItb KpInnEnHn PhInbtpy nobepx KapTpduJy HAd KpOMKOIO i 3aTARHITb, npOBePTaOuN KpINNeHHa 3a roHNHHKOBHO CTPIKIO, aJe He 3aTAYrTe 3aHaITo cnJIbHo. (MaIOHKn 22 & 23)
3HATTA Ta ouHcHc cyXoro fIbtpy (UEHfJIbTP HE PNDATHN DnMNTT)
- Biikpyitb kpinneHHn npotn roHHNKOBOc cpiKn Ta 3HIMITb Noro.
- Bi3bmitbcra 3a Kopnyc pfinbtpy ta obepekHo BHTHITb Ioro. (Maiohkn 24)
3.OuNCTiB NOr, HecnIbHo NoCTyKaBUn no HbOMy a6o 3a DOnOMorO uToHKn. IJra ONTmAbHbOIEeKTHBHOCT peKOMeHNyETbcra perynapHO 3amHOBATn FInbTp y 3anExxHOcti BID iHTHeHCNBHOCTI BkOpNCtAHH (HaPnKNaD, 3 iHTepBaONM 3-6 mcaizIB) - BcTaHOBbO uHHeHn a6o HOBn 1p, DToPmUyOuHcHbAbeDeHnx Bnue iHCTpyKui.
BCTAHOBJIENHRA TAYIUNEHNIHHORO FJIbTPY
PnmuTka:peepo6cnyroByBaHHaBID'edHaTe npncptpi BId Mepekj KINBJeHHa.
yKpaIHcbKa MoBa
BctaHOBHeHHnHOro fInbtpy
Ipeed BCTaHOBJIeHHrnnHOro fInbTp y3HIMITcXnHfInbTp, DToPmUyNcH HabeHnx Bnue iHCTpyKciu
ObepeKHO HAdrHITb NiHHN fIbTp Ha KOWNK dna
fIbtpy i nepeKoHaHTecra, 10 KoWnk 3aKpntn NOBHiCTTO (MaJIHOHK 9 & 25)
YnueHHn iHHoro fInbtpy
06epexho 3himtb nHHn fInbtp (MaHOHKn 26)
Ppomnte nHHn pInbtp cnoaTky m'rkOMy MmBHOmy po3uHi, notim y uHCTI BOi (MaJIIOHKn 27)
Ipeed BCTAHOBHeHHaIteΦIbTp npocoxHyTn
CMMBOJN

YBAFA!IIOPEJXJEHH!HEBE3NEKA!
V BoJIbTu
Hz Tepu

3mHHnCTpyM
W BATTN

BydJaacka, yBaXHo npOHTaTe IHCptyKuio nepeI 3anyckom npOdykTy.

O6naHaHnHa KnaCy II

Ipepeo6ka

He BnKndaIte eNeKtpnHi iHCTpymEnTpa30m i3 no6yToBIMn BiXoDAMn.
EneKtpnHi iHCTpymeHTa eNeKtpoHHi npncTpoI, TepMin cnyk6n knx cnNIB, 3bnpaOtbcg OkpemTa nepedaOtbcg dna ekonorivho 6e3neuHO ytnlaiaui. 3a inOpmaicio CTOCBHO ytnlaiaui a60 Micub 360py 3BepaTeecn do MicceBoB BnaDn a6o Dnepa.

CbponeeBckn 3nak BiNobiHocti
yKpaIHcbka MOBa
NOWIMPEHI 3ANITAHH

NONEPEDXEHH
Uo6n 3MeHunr pN3NK TpaBMyBaHH, nepe o6cnyroByBaHHaM a6o nouYkom HecnpabHocTe Bi'd'edHynte npncptpi BID eNEKtpomepexi.
Winnenden, 2020-05-25

Branko Lenger
Senior Vice President, Engineering and Quality - Asia, Engineering Commercial Product Development
IIAHPOΦOPIE Σ ANOPPIH
H oukeun Tepiexie nektpika kai nektpoviké eaptnmuata kai evexetai va mnu tnpei va atoppiphei paiz e ta oikiaa atoppipmuata.
PéTIeIva Tnpéiα aTnappEKKλIa n IOxUouoA TOITIK vOoθεσia.
Winnenden, 2020-05-25
Eλληνικα

Branko Lenger
Senior Vice President, Engineering and Quality - Asia, Engineering Commercial Product Development
Egouoiobotn yia t ouvtan tou texvikou apxieiou.

Techtronic Industries GmbH
Max-Eyth-StraBe 10
71364 Winnenden
Germany
NEPIEXOMENO ΣYΣKEYAΩIA
Bλ. Σχnμα 2-4.
AIOUaKeuaOte TPOeKtikKa Ta TEPiExoEvA Tou Koutiou.
KpatnoTe Touc doo ophiKTnpeC, oI OTOIOI Kpatouv To Tavw Tmu aOn th ean Tou kai dIIawote Touc TPOC ta Tavw.
Xaapwote Touc opiyktnpes, aapaieote to nawtunkai ByaATE ta TepiexoEv aio to doxio.
EeYTe Ta aVtAAAakTikKa XoNoiMTOIOWvTaC Tov KATAOyo EApTnmuTuv yia va Bbaiwthei Oti dev Aitei KaTIO KA OTi Dev Evivc KATOA Znua kata n tetaopopa.
Eav katoia avtalaktka aeitouv n exouv utootei nmu, EIKOovnote aoeos Tov avTIpooWTOOc.
SYNAPMOAOHTsH
- Beβaiωθeite οTi To Kaλωδio TpOΦoδoiaç εivα Ατοσυνδεδεμένο Ατό Νγι πρία.
- AvoiTe Touc opiyKtnpeC. (xHua 2)
- Σηκωσετο το πάνω τμήμα από to δόχειο. (Σχήμα 3)
- ApaipéoTe Ta TepiexóEvα aTó To EωτepiKo Tou δoxεiou. (Σxjμa 4)
- AvatodoyupiTe To doxieo kai TOnToeTnOte Ta poDakia Ota Teoepa Toidia TnC doxiou.
- Beβaiωθeite οTi exouv Θερεωθεi καλ. Mny σφiyετιερβολικ. (Σχημα 5)
- Eoiayayete Tn AaBn OTIS UTOOxEs TNS KEpaAns Tpoqooiaac KAI TIEOTE Tn AaBn OTN ΘeON TNS. (Xnμa 6)
- Tia OTeYVo OKaouTIOu, ToTIOeTneTo TApexOevo 1IATPO KaOEtac KAI Tn OAKoula OKovns. (Xn7, Xn7a 8)
- Tia uypo aokouTIOa, toTIOeTnOte to TApexóEvO φIATPO aφpou. (Σxŋμa 9)
- 3avatoTtoeTnTo Tavw TuHua Tou doxieou. (XnHa 10)
- Euuypauiote to eavw tnae touc oiyknpes kai aopaiote to otn eoan touaokovtaieon ews
otou o i iY t kavouv kAIk. (Sigma 10)
- Eioayayete to eyaalo akpo tou eukamttou oWAnva otynu ppoativn eio do Tou doxeiou kai yupiote to oTo Kkieidomega.a. (Xnmu 11)
- Eφαρμοδε οτησια Στον σωλήνα αναρρόφησς. (Σχήμα 12)
AEITOYPTIA
KAOAPIEMA TEPEQN
IPOEIAOIOIHs
Bebaiwtheite oTI exTe diaaogeI, katavoonoeI KAI eapmuoeTIG odnyieacaaiaic.
YIeVUHJ: MHN SKOYNIZETE EMIKIVDuvEc ouoieC. H xPnAn aKaTAAANs oakouaG Kovns 0a akupwotv Eyyunon.
EN RYOBI WARRANTY APPLICATION CONDITIONS
In addition to any statutory rights resulting from the purchase, this product is covered by a warranty as stated below.
- The warranty period is 24 months for consumers and commences on the date the product was purchased. This date has to be documented by an invoice or other proof of purchase. The product is designed and dedicated to consumer and private use only. So there is no warranty provided in case of professional or commercial use. This warranty applies only on new products.
- There is a possibility to extend for a part of the range of power tools (AC/DC) the warranty period over the period described above using the registration on the www.ryobitools.eu website. The eligibility of products for extended warranty is clearly displayed in stores and / or on packaging and is contained within the product documentation. The end user is required to register his/her newly-acquired products online within 30 days from the date of purchase. The end user may register for the extended warranty in his/her country of residence if listed on the online registration form where this option is valid. Furthermore, end users must give their consent to the storage of their personal data that is required to be entered online. They must also accept the terms and conditions. The registration confirmation receipt, which is sent out by e-mail, and the original invoice showing the date of purchase will serve as proof of the extended warranty.
-
The warranty covers all defects of the product during the warranty period due to faults in workmanship or material at the purchase date. The warranty is limited to repair and/or replacement and does not include any other obligations including but not limited to incidental or consequential damages. The warranty is not valid if the product has been misused, used contrary to the instruction manual, or has been incorrectly connected to a power supply. This warranty does not apply to:
-
any damage to the product that is the result of improper or lack of maintenance
- any product that has been altered or modified
- any product where original identification (trade mark, serial number) markings have been defaced, altered or removed
- any damage caused by non-observance of the instruction manual
- any product not displaying the CE approval mark on the rating plate
- any product that has been attempted to be repaired by a non-authorised warranty service centre or without prior authorisation by Techtronic Industries
- any product connected to improper power supply (amp, voltage, frequency)
- any damage caused by external influences (water, chemical, physical, shocks) or foreign substances
normal wear and tear spare parts - inappropriate use, overloading of the tool
-
use of non-approved accessories or parts
-
Power tool accessories provided with the tool or purchased separately, including but not limited to screw driver bits, drill bits, abrasive discs, sand paper and blades, lateral guide, etc.
-
Components (parts and accessories) subject to natural wear and tear, including but not limited to service & maintenance kits, carbon brushes, bearings, chuck, SDS drill bit attachment or reception, power cord, auxiliary handle, transport carry case, sanding plate, dust bag, dust exhaust tube, felt washers, impact wrench pins & springs, etc.
-
For servicing, the product must be sent or presented to a RYOBI authorised service station listed for each country in the following list of service station addresses. In some countries your local RYOBI dealer undertakes to send the product to the RYOBI service organisation. When sending a product to a RYOBI service station, the product should be safely packed without any dangerous contents such as petrol, marked with sender's address and accompanied by a short description of the fault.
- A repair / replacement under this warranty is free of charge. It does not constitute an extension or a new start of the warranty period. Exchanged parts or products become our property. In some countries delivery charges or postage will have to be paid by the sender. Your statutory rights arising from the purchase of the product remain unaffected
- This warranty is valid in the European Community, Switzerland, Iceland, Norway, Liechtenstein, Turkey, Russia, and the United Kingdom. Outside these areas, please contact your authorised RYOBI dealer to determine if another warranty applies.
AUTHORISED SERVICE CENTRE
Any request or issue with the product can be addressed to your local authorised service centres (visit www.rybitools.eu) or directly to: Techronic Industries GmbH, Max Eyth Straße 10, 71364 Winnenden, Germany. Please state the serial number and product type printed on the label.
FR RYOBI CONDITIONS D'APPLICATION DE LA GARANTIE
Normal slid pa reservedele
Techtronic Industries.
EN RYOBI is a trade mark of Ryobi Limited, and is used under license.
71364 Winnenden, Germany
2021119v2