
GECM 1832 C Li BL - Electric mower EINHELL - Free user manual and instructions
Find the device manual for free GECM 1832 C Li BL EINHELL in PDF.
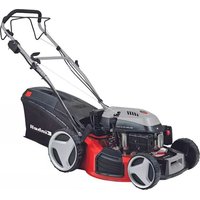
| Product type | Cordless electric lawn mower |
| Brand | Einhell |
| Model | GECM 1832 C Li BL |
| Cutting width | 32 cm |
| Cutting height | 25-65 mm, 5 positions |
| Grass bag capacity | 27 L |
| Weight | 9.6 kg |
| Operating voltage | 18 V |
| Motor speed | 3300 rpm |
| Protection type | IPX1 |
| Sound pressure level LpA | 76.5 dB(A) |
| Sound power level LWA | 85.2 dB(A) |
| Vibration at handle | 2.5 m/s² |
| Power supply | Li-Ion Power X-Change battery (not included) |
| Motor type | Brushless |
| Cutting height adjustment | Central, 5 positions |
| Functions | Foldable handle, fill level indicator, start lock |
| Maintenance and cleaning | Clean after each use; replace worn blade; do not clean with running water |
| Safety | Remove battery before maintenance; blade continues to rotate after shutdown; hearing protection recommended |
| Spare parts | Replacement blade part no. 34.054.53; other parts available at www.Einhell-Service.com |
| General information | Delivered partially assembled; battery and charger sold separately |
Frequently Asked Questions - GECM 1832 C Li BL EINHELL
User questions about GECM 1832 C Li BL EINHELL
0 question about this device. Answer the ones you know or ask your own.
Ask a new question about this device
Download the instructions for your Electric mower in PDF format for free! Find your manual GECM 1832 C Li BL - EINHELL and take your electronic device back in hand. On this page are published all the documents necessary for the use of your device. GECM 1832 C Li BL by EINHELL.
USER MANUAL GECM 1832 C Li BL EINHELL
EN Original operating instructions Cordless lawn mower
UK Opurihalha inctpynucia 3 ekcnlyataii AkymyIaTOPHa ra3OHOCapHa
When using the equipment, a few safety precautions must be observed to avoid injuries and damage. Please read the complete operating instructions and safety regulations with due care. Keep this manual in a safe place, so that the information is available at all times. If you give the equipment to any other person, hand over these operating instructions and safety regulations as well. We cannot accept any liability for damage or accidents which arise due to a failure to follow these instructions and the safety instructions.
Explanation of the symbols used (see Fig. 12)
Children are not allowed to use this equipment. Children are not allowed to carry out cleaning or maintenance. This equipment can be used by people with limited physical, sensory or mental capacities or those with no experience and knowledge if they are supervised or have received instruction in how to use the equipment safely and understand the dangers which result from such use. Children are not allowed to play with the equipment.
1. Safety regulations
The corresponding safety information can be found in the enclosed booklet.
Warning!
Read all the safety information, instructions, illustrations and technical data provided on or with this power tool. Failure to adhere to the following instructions may result in electric shock, fire and/or serious injury.
Keep all the safety information and instructions in a safe place for future use.
2. Layout and items supplied
2.1 Layout (Fig. 1/2)
- Switch bar lever
- Upper push bar
3a. Lower right push bar
3b. Lower left push bar - Carry-handle
- Grass catch basket
6.Wheel - Ejector fl ap
- Safety lock-off
- Right grass catch basket
- Left grass catch basket
- Catch basket cover
11a. Filling level indicator - Fastening screws
- Wing nut
- Cable clip
- Battery compartment cover
- Central cutting height adjustment facility
2.2 Items supplied and unpacking (Fig. 2)
Please check that the article is complete as specified in the scope of delivery. If parts are missing, please contact our service center or the sales outlet where you made your purchase at the latest within 5 working days after purchasing the product and upon presentation of a valid bill of purchase. Also, refer to the warranty table in the service information at the end of the operating instructions.
- Open the packaging and take out the equipment with care.
- Remove the packaging material and any packaging and/or transportation braces (if available).
- Check to see if all items are supplied.
EN
- Inspect the equipment and accessories for transport damage.
If possible, please keep the packaging until the end of the guarantee period.
Danger!
The equipment and packaging material are not toys. Do not let children play with plastic bags, foils or small parts. There is a danger of swallowing or suffocating!
Items supplied
- Cordless lawn mower
Grass basket
Assembly material
Original operating instructions
Safety information
3. Proper use
The lawn mower is intended for private use i.e. for use in home and gardening environments.
Private use of the lawn mower refers an annual operating time generally not exceeding that of 50 hours, during which time the equipment is primarily used to maintain small-scale, residential lawns and home/hobby gardens. Public facilities, sporting halls, and agricultural/forestry applications are excluded.
Important. Due to the high risk of bodily injury to the user, the lawn mower may not be used to trim bushes, hedges or shrubs, to cut scaling vegetation, planted roofs, or balcony-grown grass, to clean (suck up) dirt and debris off walkways, or to chop up tree or hedge clippings. Moreover, the lawn mower may not be used as a power cultivator to level out high areas such as molehills.
For safety reasons, the lawn mower may not be used as a drive unit for other work tools or toolkits of any kind, unless they have been expressly permitted by the manufacturer.
The equipment is to be used only for its prescribed purpose. Any other use is deemed to be a case of misuse. The user / operator and not the manufacturer will be liable for any damage or injuries of any kind caused as a result of this. Please note that our equipment has not been designed for use in commercial, trade or industrial applications. Our warranty will be voided if the
machine is used in commercial, trade or industrial businesses or for equivalent purposes.
4. Technical data
Operating voltage 18 V
Motor speed: 3300 min
Protection type: IPX1
Protection class: III
Weight: 9.6kg
Cutting width: 32 cm
Grass basket volume: 27 liters
Sound pressure level LDA .. 76.5 dB(A)
Uncertainty KD 3dB
Sound power level L_w .. 85.2dB(A)
Uncertainty K_WA 1.84 dB
Guaranteed sound power level L_WA ..87dB(A)
Vibration at the handlebars a: .. ≤ 2.5m / s^2
Uncertainty K: 1.5 m/s²
Cutting height adjustment: ...25-65 mm; 5 levels
Caution!
The equipment is supplied without batteries and without a charger and is allowed to be used only with the lithium-ion batteries of the Power X-Change series!
The lithium-ion batteries of the Power X-Change series are allowed to be charged only with the Power X charger.
Danger!
Sound and vibration
Sound and vibration values were measured in accordance with EN 62841.
Wear ear-muff s.
The impact of noise can cause damage to hearing.
Total vibration values (vector sum of three directions) determined in accordance with EN 62841.
The stated vibration emission levels and stated noise emission values were measured in accordance with a set of standardized criteria and can be used to compare one power tool with another.
EN
The stated vibration emission levels and stated noise emission values can also be used to make an initial assessment of exposure.
Warning:
The vibration and noise emission levels may vary from the level specified during actual use, depending on the way in which the power tool is used, especially the type of workpiece it is used for.
Limit the operating time!
All stages of the operating cycle must be considered (for example, times in which the electric tools are switched off and times in which the tool is switched on but operates without load).
Keep the noise emissions and vibrations to a minimum.
Only use appliances which are in perfect working order.
Service and clean the appliance regularly.
Adapt your working style to suit the appliance.
Do not overload the appliance.
- Have the appliance serviced whenever necessary.
- Switch the appliance off when it is not in use.
Wear protective gloves.
Residual risks
Even if you use this electric power tool in accordance with the instructions, certain residual risks cannot be eliminated. The following hazards may arise in connection with the equipment's construction and layout:
- Lung damage if no suitable protective dust mask is used.
- Damage to hearing if no suitable ear protection is applied.
5. Before starting the equipment
Art. No. 34.133.70 is supplied without a battery pack and without a charger.
The lawn mower is delivered partly assembled. The push bar and the grass basket must be assembled before using the lawn mower. Follow the instructions step by step and refer to the pictures when assembling.
Important! Required assembly parts (screws, cable guides, etc.) or functional parts (e.g. plugs, wrenches, etc.) can be found in the molded parts of the packaging or on the equipment.
Warning! Always remove the battery before making adjustments to the machine.
Push bar assembly (Fig. 3a - 3c)
Attach the right and left lower push bars (Items 3a / 3b) to the mower housing. Screw the upper push bar (Item 2) onto the two lower push bars (Items 3a / 3b). Use the cable clips (Item 14) to attach the motor cable to the lower right push bar (Item 3a) and the upper push bar (Item 2).
Make sure that the cable and cable clips do not obstruct the push bar when it is flipped over (see section 8).
Catch basket assembly (Fig. 4a - 4c)
Fit the two sides of the catch basket housing (Items 9 / 10) together. Ensure that all the plastic lugs engage correctly in the slits provided. Then fit the catch basket cover (Item 11) onto the assembled sides. Attach the catch basket to two hooks on the mower. Switch off the motor and wait until the blades come to a standstill before doing so. Lift up the ejector flap (Item 7) with one hand, hold the catch basket by its handle with the other hand and hang it from the top.
Filling level indicator
The catch basket is equipped with a fi lling level indicator (Fig. 2/Item 11a). It is opened by the airfl ow that the lawn mower generates during operation. If the fl ap closes during mowing, the grass collecting device is full and must be emptied. Clean the catch basket regularly.
Adjusting the cutting height (Fig. 5) Important!
Adjust the cutting height only when the battery has been removed.
Press the trigger (Item 16a) and set the height adjuster (Item 16) to the desired cutting height. The arrow on the trigger and the scale on the housing indicate the set cutting height. Release the trigger (Item 16a) and check that it is securely locked.
Before you start mowing, remove the battery and check that the blade is sharp and that its fasteners are not damaged. To prevent any imbalance, replace blunt and/or damaged blades.
EN
Charging the battery (Fig. 6)
- Take the battery pack out of the equipment. Do this by pressing the pushlock button.
- Check that your mains voltage is the same as that marked on the rating plate of the battery charger. Insert the power plug of the charger (17) into the socket outlet. The green LED will then begin to flash.
- Insert the battery pack (18) into the battery charger (17).
- In the section entitled „Charger indicator“ you will find a table with an explanation of the LED indicator on the charger.
The battery pack can become a little warm during the charging. This is normal.
If the battery pack fails to charge, check:
whether there is voltage at the socket outlet
whether there is good contact at the charging contacts
If the battery pack still fails to charge, send
the charging unit
and the battery pack
to our customer service center.
To ensure that items are properly packaged and delivered when you send them to us, please contact our customer service or the point of sale at which the equipment was purchased.
When shipping or disposing of batteries and cordless tools, always ensure that they are packed individually in plastic bags to prevent short circuits and fi res.
To ensure that the battery pack provides long service, you should take care to recharge it promptly. You must recharge the battery pack when you notice that the performance of the device drops. Never allow the battery pack to become fully discharged. This will cause it to develop a defect.
Battery capacity indicator (Fig. 7)
Press the button for the battery capacity indicator (A). The battery capacity indicator (B) shows the charge status of the battery using 3 LEDs.
All 3 LEDs are lit:
The battery is fully charged.
2 or 1 LED(s) are lit:
The battery has an adequate remaining charge.
1 LED fl ashes:
The battery is empty, recharge the battery.
All LEDs blink:
The battery temperature is too low. Remove the battery from the equipment, keep it at room temperature for one day. If the fault reoccurs, this means that the rechargeable battery has undergone exhaustive discharge and is defective. Remove the battery from the equipment. Never use or charge a defective battery.
Installing the battery (Fig. 8)
- Open the battery cover.
- Insert the battery pack in the mount.
- Close the battery cover by flipping the cover down
6. Operation
Caution!
Insert the battery directly before starting up the lawn mower and remove it each time your work is interrupted or completed.
Important!
To prevent the equipment switching on accidentally, the lawn mower is equipped with a safety switch (Fig. 9/Item 8) which must be pressed before the switching bar (Fig. 9/Item 1) can be activated. The lawn mower switches itself off when the switching bar is released. The start time can amount to several seconds. Repeat this process several times so that you are sure that the machine functions properly.
Caution! Never open the chute fl ap when the grass bag has been detached (to be emptied) and the motor is still running. A rotating blade can cause serious injuries!
Always carefully fasten the chute flap and grass basket. Switch off the engine before emptying the grass basket.
Always ensure that a safe distance (provided by the length of the long handles) is maintained between the user and the mower housing. Be especially careful when mowing and changing direction on slopes and inclines. Maintain a solid footing and wear sturdy, non-slip footwear and long trousers.
EN
Always mow along the incline (not up and down). For safety reasons, the lawn mower may not be used to mow inclines whose gradient exceeds 15 degrees.
Use special caution when backing up and pulling the lawn mower. Tripping hazard!
Tips for proper mowing
It is recommended that you overlap the mowing swaths.
Only use a sharp blade that is in good condition. This will prevent the grass blades from fraying and the lawn from turning yellow.
Try to mow in straight lines for a nice, clean look. The swaths should overlap each other by a few centimeters in order to avoid stripes.
The operating time of the rechargeable batteries and therefore the area in square meters that can be covered with a single battery charge is largely dependent on the state of the grass (e.g. density, moisture, height, cutting height, etc.) and the mowing speed (walking speed). To adjust the area coverage to your individual requirements, it is recommended that you mow the lawn more often, with a higher cutting height and at an appropriate speed. Frequently turning the equipment on and off while mowing will also reduce the amount of area that you can cover. If the operating time of the rechargeable batteries (area coverage) is still unsatisfactory in spite of the above measures, you can remedy the problem by using rechargeable batteries with a larger capacity (Ah).
How frequently you should mow your lawn is determined primarily by the speed at which the grass grows. In the main growing season (May - June) you will probably need to mow the lawn twice a week, otherwise just once a week. The cutting height should be between 4 - 6cm and the amount of growth before mowing again should be 4 - 5cm. If the grass is allowed to grow somewhat longer for whatever reason, do not make the mistake of cutting it back to the normal height in one go. This will harm the lawn. Never cut it back by more than half the height in one go.
Keep the underside of the mower housing clean and remove grass build-up. Deposits not only make it more difficult to start the mower; they decrease the quality of the cut and make it harder for the equipment to bag the grass.
Always mow along inclines (not up and down). You can prevent the lawn mower from slipping down by holding a position at an angle upwards.
Select the cutting height according to the length of the grass. Make several passes so that no more than 4cm of grass are cut at one time.
7. Cleaning, maintenance and ordering of spare parts
Danger!
Remove the battery before starting any cleaning work.
7.1 Cleaning
- Keep all safety devices, air vents and the motor housing free of dirt and dust as far as possible. Wipe the equipment with a clean cloth or blow it with compressed air at low pressure.
- Do not clean the lawn mower with running water, particularly with high-pressure water.
We recommend that you clean the device immediately each time you have finished using it.
Clean the equipment regularly with a moist cloth and some soft soap. Do not use cleaning agents or solvents; these could attack the plastic parts of the equipment. Ensure that no water can seep into the device. - For best results, clean the lawn mower with a brush or rag.
7.2 Maintenance
Worn out or damaged blades, blade mounts, and bolts should be replaced as a set by an authorized professional in order to keep the equipment in balance.
- Ensure that all mounting components (i.e. screws, bolts, nuts etc.) are always tightened so that the equipment can be safely operated at all times.
- Frequently check the grass catch assembly for signs of wear.
- Replace excessively worn or damaged parts immediately.
In order to ensure that you enjoy the equipment for many years to come, all screwed parts, as well as the wheels and axles, should be cleaned and lubricated.
- Keeping your lawn mower in good condition not only ensures a long lifespan and high performance, but also enables the equipment to thoroughly cut your grass with minimal effort.
The blade is subjected to more wear and tear than any other component. Therefore,
EN
routinely check the condition of the blade and make sure that it is tightly fastened. If the blade is completely worn out, it must be immediately replaced or ground sharp again. An excessively vibrating mower means that the blade is not properly balanced or has become deformed from striking an object. In this case, the blade must be repaired or replaced.
There are no parts inside the equipment which require additional maintenance.
7.3 Replacing the blade (Fig. 10-11)
Remove the rechargeable battery/batteries. For safety reasons, we recommend having the blade replaced by an authorized professional. Important! Wear work gloves! Only replace the blade with a genuine Einhell replacement blade, as this will ensure top performance and safety under all conditions.
- Undo the fastening screw (Item D).
- Remove the blade and replace with a new one.
- When fi tting the blade, make sure it is insta- talled in the right direction. The blade's air vanes must project into the motor compartment (Item E). The dome mounts provided on the equipment must be aligned with the punch holes provided in the blade (Item F).
- Then retighten the fastening screw with a wrench. The tightening torque should be approx. 25 Nm.
At the end of the season, perform a general inspection of the lawn mower and remove any grass and dirt which may have accumulated. At the start of each season, ensure that you check the condition of the blade. If repairs are necessary, please contact our customer service center. Use only genuine spare parts.
7.4 Ordering replacement parts:
Please quote the following data when ordering replacement parts:
Type of machine
Article number of the machine
Identification number of the machine
- Replacement part number of the part required
For our latest prices and information please go to www.Einhell-Service.com
Spare blade art. no.: 34.054.53
8. Storage and transport
Remove the rechargeable battery/batteries.
Storage
Store the equipment and accessories out of children's reach in a dark and dry place at above freezing temperature. The ideal storage temperature is between 5 and 30^ . Store the machine in its original packaging.
Transport
Fit the shipping protectors, if any.
- For easier transport and/or storage, open the wing nuts (Fig. 3b / Item 13) far enough to allow the push bars to be flipped together at this point. Take care not to damage the cable and the push bar tubes.
- Protect the machine from damage and the strong vibrations that can occur particularly when transporting in vehicles.
- Secure the machine against slipping and tipping over.
9. Disposal and recycling
The equipment is supplied in packaging to prevent it from being damaged in transit. The raw materials in this packaging can be reused or recycled. The equipment and its accessories are made of various types of material, such as metal and plastic. Never place defective equipment in your household refuse. The equipment should be taken to a suitable collection center for proper disposal. If you do not know the whereabouts of such a collection point, you should ask in your local council offices.
EN
10. Charger indicator
| Indicator status Explanations and actions | ||
| Red LED Green LED | ||
| Off | Flashing | Ready for use The charger is connected to the mains and is ready for use; there is no battery pack in the charger |
| On Off Charging | The charger is charging the battery pack in quick charge mode. The charging times are shown directly on the charger. Important! The actual charging times may vary slightly from the stated charging times depending on the existing battery charge. | |
| Off | On | The battery is charged and ready for use. (READY TO GO) The unit then changes over to gentle charging mode until the battery is fully charged. To do this, leave the rechargeable battery on the charger for approx. 15 minutes longer. Action: Take the battery pack out of the charger. Disconnect the charger from the mains supply. |
| Flashing Off | Adapted charging | |
| The charger is in gentle charging mode. For safety reasons the charging is performed less quickly and takes more time. The reasons can be: - The rechargeable battery has not been used for a very long time. - The battery temperature is outside the ideal range. Action: Wait for the charging to be completed; you can still continue to charge the battery pack. | ||
| Flashing Flashing Fault | Charging is no longer possible. The battery pack is defective. Action: Never charge a defective battery pack. Take the battery pack out of the charger. | |
| On On Temperature fault | The battery pack is too hot (e.g. due to direct sunshine) or too cold (below 0°C). Action: Remove the battery pack and keep it at room temperature (approx. 20°C) for one day. | |
EN
11. Troubleshooting
| Fault | Possible causes Remedies | |
| The motor fails to start | a) The connectors have become separated from the motorb) The mower is standing in high grassc) The mower housing is cloggedd) Battery is not correctly inserted | a) Have repaired by the Customer Service Centerb) Start in low grass or on an area that has already been mowed; change the cutting height if necessaryc) Clean the housing so that the blade moves freelyd) Remove the battery and reinsert (see 5.) |
| The motor performance drops | a) The grass is too high or too dampb) The mower housing is cloggedc) The blade is severely wornd) Battery performance decreasing | a) Correct the cutting height, change the electronics settingb) Clean the housingc) Replace the bladed) Check the battery performance and charge the battery if necessary (see 5.) |
| Cutting is irregular | a) The blade is wornb) Wrong cutting height | a) Replace or resharpen the bladeb) Correct the cutting height |
| Motor stops suddenly | a) Battery is overloadedb) Battery is empty | a) Switch the equipment off and on againIf this happens often, use a battery with higher capacity (Ah)b) Use a charged battery |
EN
Disposal

Power tools, rechargeable batteries, accessories and packaging should be sorted for environmental-friendlyly recycling.
Do not dispose of power tools and batteries/rechargeable batteries into household waste!
Only for EU countries:
According to the Directive 2012/19/EU on waste electrical and electronic equipment and its transposition into national law, power tools that are no longer usable, and, according to the Directive 2006/66/EC, defective or drained batteries must be collected separately and disposed of in an environmentally correct manner.
If disposed incorrectly, waste electrical and electronic equipment may have harmful effects on the environment and human health, due to the potential presence of hazardous substances.
Only for United Kingdom:
According to The Waste Electrical and Electronic Equipment Regulations 2013 (SI 2013/3113) (as amended) and the Waste Batteries and Accumulators Regulations 2009 (SI 2009/890) (as amended), products that are no longer usable must be collected separately and disposed of in an environmentally friendly manner.
The reprinting or reproduction by any other means, in whole or in part, of documentation and papers accompanying products is permitted only with the express consent of the Einhell Germany AG.
Subject to technical changes
EN
Service information
We have competent service partners in all countries named on the guarantee certificate whose contact details can also be found on the guarantee certificate. These partners will help you with all service requests such as repairs, spare and wearing part orders or the purchase of consumables.
Please note that the following parts of this product are subject to normal or natural wear and that the following parts are therefore also required for use as consumables.
| Category Example | |
| Wear parts* Carbon brushes, Battery | |
| Consumables* Blade | |
| Missing parts |
- Not necessarily included in the scope of delivery!
In the effect of defects or faults, please register the problem on the internet at www.Einhell-Service.com. Please ensure that you provide a precise description of the problem and answer the following questions in all cases:
Did the equipment work at all or was it defective from the beginning?
Did you notice anything (symptom or defect) prior to the failure?
What malfunction does the equipment have in your opinion (main symptom)?
Describe this malfunction.
FR
Danger!
Retirez le/les accumulator(s).
Stockage
Endast for EU-lander:
Tipode protection: IPX1
Paraoculars:
Paraoculars.
Paraoculars.
Paraoculars.
Paraoculars.
Paraoculars.
Svetita 2 ali 1 lucka LED
NepiopioTe to xpovo epyaiaic!
E6w npTei va laBeTE unOy m oac ola ta tmjata tou KukLou aeitoupyias (via napadeyia xpovouc kata tou onoiouc eival nanevo to nektpio epyaiao kai xpovuc kata tou onoiouc eivai avaumev o aAxa wopl cphiTio).
NepiopiTe Tnv 8noupyia Oopoukai Tc Sovnoic oTo EaXIO!
Na xpnouoieIe mOvo ouokevc oAoyn kaotaon.
Na ouvtnpeite kai va kaBapicETe TAKTikacn oukgeun.
Na npoosapuocTe OtnoukeunTov Tpno epyaiaac
IpooeEe va uyn unepopotwveTe Tn ouokevh.
Aphnte touakeun vexoewvca eeyxthetai o idiko texvitn.
Na anevpyoioite T oukeun otav dev tvxpnouoiite.
Na copate yavtia.
Ppooox!
Ytoaioevoikivovoi
Akounkai oepintwnomega kai kavovikcn xpionc autou tou nektpikou evaaleiou, vioatavrai navta opioevoi unoaleinoeiou kivduoi. O akouo0i kivduoi mopouv va napouiaotouv avaloyao ie to eloc kataokueicu kai to evtelo autou tou nektpikou epyaaleiou:
Evnpewon yia to eepic
25-65 mm; 5-stepenski
Paznja!
Uredaj se isporucije bez akumulatora i punjači sme da se koristi samo s litijum-jonskom akumulatorima serije Power X-Change!
Li-Ion baterije serije Power X-Change smeju da se pune samo s Power X punjačem.
Opasnost!
Buka i vibracije
Vrednosti buke i vibracija utvrdene su u skladu s normom EN 62841.
Nosite zašitu za sluh.
Buka moze da uticne na gubitak sluha.
Ukupne vrednosti vibracija (vektorskasuma triju pravaca) utvrdene su u skladu s normom EN 62841.
Navedene ukupne vrednosti vibracija i navedene vrednosti emisije buke su izmerene prema normiranom postupku kontrole i mogu da se koriste u svruh poredivanja jegnog elektraolata sa drugim.
5. Pre puštanja u pigeon
Art. br. 34.133.70 se isporučuje bez akumulatora i punjača.
Kosilica je prilikom isporuke montirana u delovima.Pre upotrebe kosilice za travu morate da montirate kompletnu drsku za guranje i korpu za sakupljanje. Postujte uputstva za upotrebu korak po korak i orijentirajte se prema slikama za vreme sastvljanja.
Napomena! Važne montažne delove (zavrtnje, vodice kabla, itd.) ili funkcionalne delove (npr. utiaka, kluč, itd.) možete da nadete u oblikovanim elementima pakovanja ili na ureduju.
Upozorenje! Pre Ngo sto pocnete da podesavate uredaj, uvek izvadite akumulator.
Montažá drěske za guranje (slika 3a - 3c)
Pričvrstite obe donje drške za guranje (poz. 3a / 3b) desno i levo na kučistu kosilice. Zavrtnjima spojite gornju dršku za guranje (poz. 2) s obe donje drške za guranje (poz. 3a / 3b). Pričvrstite vod motora s držacima kabla (poz. 14) za donju desnu dršku za guranje (poz. 3a) i za gornju dršku za guranje (poz. 2).
Preklapanje drske za guranje (vidi odomjak 8) ne sme da ometa kabli drzač kabla.
Montaža korpe za travu (slika 4a - 4c)
Spojite obe polovine kuciša korpe za travu (poz. 9/10). Pazite na to da svi plasticiñi zupci sednu ispravno ua za to predvidene utore. Potom gurnite gornji deo korpe (poz. 11) na vec montirane polovine. Korpa za travu se kaci na kosilici na dve kukice. Za to iskluče motor i pricekajte da nož za rezanje zaustavi. Poklopac otvora za izbicanje (poz. 7) podignite jegnom rukom, a drugom držite korpu na drsci i zakačite je odozgo.
Indikator napunjenosti
TOncHHeN K HcNoJIb3ObaHHbIM CmMbOJAM (cm.pnc.12)
- OnachoctbI -Дя УмнБшЕпЯOnaCHOCTN �лучТьТраMbIpyoHTITe pykoBOdCTBO NO эКСПИУАТацIM.
- Co6IIOdaIte IINCTaHcNIO!
- INPEyIINENHEHIE! Ipeep npOBeHNEM TexHHueCKORO 6cIyKbBAHnI N3BLeKeHTe aKKymJrTOp.PekuIe HOnI npOJNaOT BpaataBcNocIe BbIKIOUeyHdBirateTlA
- 3aunuatab yctpoiCTBO OT DeiCTBnI DOJN I BnI.
- TapaHTnPOBaHHbI yPoBeHb MOUHOCTN Wyma
- HAdIeKaaum oBpaOom yTnIn3npoBaTa aKHyMylrTop.
- TóIbkoДЯИСЮЛБЗОВАньВсУХNX NOMEUHENX.
- Hlaacc 3aunTbI
- XpaHnTe aKHyMylTOpbl ToIbKO B cyHXN NOMeueHnX npn TemnepaType ot +10°C Do +40°C. XpaHnTe aKHyMylTOpbl ToIbKO B 3apJHeHHOM COCTOHHN (MHN. 40%).
3a npeuaetcnaNoIb3OBaHne DaHHoro yCTpoNCTBa DeTbMn. 3a npeuaetc oUncTka n TexHnueckoe o6ClyKnBaHne DaHHoro yCTpoNCTBa DeTbMn. DaHHbIM yCTpoNCTBOM MOryT NOIb3OBaTbc JaIuca C OrpaHnueHHbIMn Fn3NueCKHMn,
CEHCOPHBIMNINYMCTBEHHbIMN CnOCO6HOCTaMNC HeoCTaTKOM ONbITA N3HaHNN, ECNI OHN HaxoJrTc NOI pncmOTpOM INI 6blN O3HaKOMJIeHbIC PpaBnJaMNIOLb3OBAHN Ipi6Opom N OCO3HaHT CB3aHHbIE C 3TNM ONaCHOCTN. DeTAM 3anpeaaetcN rpaTb C yCTPOINCTBOM.
1.Yka3aHHNoTexHnKe 6e3oNaCHocTH
Co0TBeTCTByUOuIe Uka3aHnna No TexHnke 6e3oNaCHOCTn HaxoJrTCB N npNIOKeHHbIX 6pOoiKpax!
PpeynpeHene!
O3haHOMbTeCb CO BcEMN yHa3aHNMaMn NO TEXHNKe 6e3oNaChOCTN, HNCTpyKuINMn, H3o6paKeHNMaM N TexHueChmMn
XapaHTepnCTnKaMn, KOTOpBie npNlaIaOTcK KaHOMy 3JeHTpUHeCCHOMy HcTpyMeHTy. HeTochHe c6bIKeHne yka3aHn,
CoepKaUxCBAeDyUoeyHCTpyKuM, MOHETnnpBeCTN KnpaKeHHNo3EKeTpueeCKM TOKOM,NOkApY(N)TJHeBIM TpaBMAM.
CoxpaHnTe Bce yka3aHnNo TExHHne 6e3oNaChOCTN HnHCTpyKuIN DnHcNoIb3OBaHNB 6yduem.
2. CoCTaB yCTpoIcTBA n COCTaB ynaKOBKn
2.1 Onncanhe ycTpoNCTBa (pnc. 1/2)
1.PykaBkIIOeHn
2. BepxHnBvduypa ykoTka
3a.Паразьнжня Вedyця рукогтka
3b. LEBaH NIXKHA BEdyua pyKoRtKa
4. Pukka dIa nepeHocKn
5. TpaBoc6bOpHHK
6. Honeco
7.KpbiHa BbIbOpa
8.нонпаблOKирOBКВКIOUeHIN
9. TpaBoc6opHnK cnpaBA
10. TpaBoc6bpHnK cIeBa
11. BepxHra Yacb TpaBoc6OpHHa
RU
11a. Yka3aTeJIb 3aNoJIHeHnI
12. KpeeKhBie BnHTbI
13.Баразшковая raika
14. DepkaTeJIb Ka6eJIa
15. Kpbuika aKKyMylTOpHOro OTceKa
16. LcHTpaIN3OBAHHe yCTpoIcTBpeRyIpOBKn BbICOTbl pe3Kn
2.2 CoCTaB KOMnJIeKta yCtpoiCTBa
IpoBepbTe KOMnEeTHo3dEInHa OCHOBaHNN OINcAHHOro 06bema NoCTaBN. IpiO bOpHyKeHN HeOcTaKa KOMNoHeTob o6paHTecb B Hau cepBnchb Yehtp NIM MaRa3HN, B KOtopom Bbl npNo6peH yCTPOiCTBO, He NO3dHee cHem B TeueHne 5-Tn paOChN dHen Nocle pno6peTeHN 3dEHN, PpeBraBB DeJeCTBnTehHyIO KBtAHuIO O nOKyHne. Obpatte BNImaHne Ha Tablncy C yka3aHmE rapaHTnHbIX cPOKOB B DOKyMeHTe C INHΦopMaUeO cEPBnCHOM 06ClyKHBaHN.
- OTKpoIte yynakOBky n BbIHbTe ocTOPOKHO n3 yynakOBkyyCTPOYCTBO.
- YdaJIte ypaKOBOCHbI MaTePnA1, a TaKHe npncnocoblenna 3aunTbI ycTpoNCTBa npu yaKaOBbIBaHHn I TpaHCnpTnPoBKe (pni HaJIyH).
PpOBepbTe KOMNIEKTHOCTb yCTPOJCTBa.
PpOBepeYcTpoIcTBoNnpHaJeHocTH HaHaJIuUe BO3NKUx npI TpaHCnOpTpOBoKne NOBpeKeHn.
CoxpaHnTe ynaKOBky no Bo3MOHHOCTn Do nCTeueHnI cpoKa rapaHTnHbIX 6ra3aTeJbCTB.
Onachoctb!
YcTpoCTBO H ynaKOBKa He ABJIAOTCA
dTeCKHMn HpyuHAmn! 3anpeueHo dTeAM
HRpaTb C nlaactNHOBBIMn NaKeTAMn,
PiEHHaMn H MeKLHMn dTeJAMn! OnaCHOCTb
3aHIOyAcTcB TOM, YTO OH NMOrYT
Ipornotb Hnn NnOrn6HybOT ydyubra!
06bem NOCTABH
Ta30HOKOCINKa cAkhMyJrTOPOM
TpaBoc6OpHNK
MoHTaXHHbIMATEpHnA
OpnHaJIbHoe pyKOBoDCTBO NO 3KCNyataaun
- Yka3aHnno TExHHke 6e3oNaCHOCTN
CTeneHb 3aunTbI: IPX1
Klacc 3aunTbI: .
Bec: 9,6 K
山nna cpe3a: 32 MM
O6bem TpaBoc6OpHnHa: 27IITPOB
YpOBeHbAaBHeHnIyMaL: 76,5D(A)
Norpewhoctb K. 3 DE
I3mepenHbI ypoBeHb MOuHocTn Wyma LwA: 85,2 d6(A)
IorpeuHocTB KwA: 1,84D6
TapaHTnpOBaHHbI yPOBeHb MOUHOCTN Wyma Lw: 87 dB(A)
Bn6paunHa wTaHRe a; 2,5 m/6
IorpeuHoctbK: 1,5m/c2
PerynipOBKa BbICToBcpe3a: 25-65 MM; 5 cTyneHH
Bhumahne!
yctpoCTBO NOCTABJIeTc863 aHHymyIaTOPOB n 3aprAnHO yCTPOCTBa. IVOnIb3ObAtb yCTPOCTBO MOHNO TOJbKO C IHTN-HoHHbIMn aHHymyIaTOpAMn cepu Power X-Change.
Литин-ноныаakумларotby cepи Power X-Change moKHOЗapЯктToIbKOcnomoцьyoctpoiCTBaPowerX-Charger.
Onachoctb!
UymbiNb6paun
NapameTpbi yMmOB Nb6paun 6bln n3Mepehbl B COOTBeTCTBnC HOpMaH EN 62841.
HcnoIb3yIte 3aunHTy opraHOB clyxa.
Bo3dEiCTBnE Wyma MoKeT BbI3BaTb Notepo Cnyxa.
Cymmaphoe 3naeHne BEniHbBnpaun
(cymmaBeKTopoB Tpex HappaIeHn)
onpeIeIeHO B COOTBcTCTBn c EN 62841.
PpBBeHbIe CymMaPbIe 3HaueHn Bn6paun
N npaMeTpbl EMMCCIN WyMa NOnyHeBIB
pe3yJIbTaTe PnmeHnE HCTaHApTHoro MeToDa
HCblTaHn MOrTy bItb HcNoJIb3OBAHb
dJa CpBaHnE OJHOrO 3NeKtpnKeCkOrO
NHCTpyMeHTA CDPYHM.
PnBedeHHbIe CymMaPbHBe 3HaHeHn Bn6paunn npaamTpbl 3MnCCmUyMa MOrTy TaKHe NCNoIb3ObaTbCnI nI npedBaHrTeNbHO OeHNu ypOBHaHarpy3Kn.
PpeynpeHne:
3HaueHnBn6paunn HypOBn Wyma Bo Bpemr 3Kcnnyataunn 3JIeKTPOnHCTpymEnTa MOryT OTNAtCBsO TnPnBeDeHHbIX 3HaueHnB 3AusbChMocTNOT CnOCoBa NcNoIb3ObaHNy cTpoCTBA, B YactHOCTNOT Bnda 06pa6aTbIBaEMoro n3dEInra.
OrpaHnHybTe BpEm pa60Tb!
Pn3OM Tpe6yeTcra yUHtBbAbaB BCE 3TaBb
paOboeRo cHnla (HaNPmep, Bpemr, KOrda
3JIeKTHpueeckn INHCTpyMeHT BbIHIOueH, H
Bpemr, KOrda OH BkIIOueH, Ho paObaet 6e3
hArpy3Kn).
Cbeinte o6pa3oBaHne WymOB n Bn6paun K MmHmMyM!
IcnoIb3yIteToIbHO6e3yHOpN3HeHHo pa60taOuJe yCTpoiCTBa.
PeyIpaHNo npoBOnTe texHuecKoe 06clnyHbAHnE nOChTy yCTpoHCTBa.
- Pnp pa6ote yuHTbIaIte oOc6eHHocTn BaJero ycTpoiCtBa.
He noDBepraTe yCTpOInCTBO nepepyKe.
- Pn Heo6xOJIMOCTH DaIe TnpOBepntb yCTpoCTBO CNEuaJIINCTam.
OTHIOUaIte yCTpoIcTBO,ecIN Bblero He IcNoJIb3yTe.
- NcnoIb3yIte nepaTHN.
Octopoxho!
OctaToHbIe ONaCHOCTN
AaHe B TOM cnyae,ecn HbI hncnoJb3yeTe OINcBIAeMbI 3JeKTPueChn INHCTpyMeHT B COOTBETCTBHN C npEHNCAHNEM,TO I TOrda BCERda OCTaerTc MeTo Dn pNCHa.HInHe npHBeDeH CNHCOH OCTatoUHbIX OAnCHOCTei, CB3aHHbIX C HOHCTpyHcHNe HAcTOnuero 3JeKTPueCHoro INHCTpyMeHTa:
RU
- 3a6oJIeBaHHeJeRkHX, B TOM cIyuae ecn He HcIOJIb3yETcA COOTBeTCTByHOuN peCnnpaTop.
- NopBepKdEHeNcLnyxA, B Tom cLyuae ecIn He nCIOJIb3yETcR COOTBeTCTByIooee CpeDCTBO 3aunTbI cLyxa.
5. IpepeBBODOM B3Hcnnyatauio
B KOMNENT NOCTABKN 34.133.70 He BXOJNT aHHyMyIaTOp N 3apHNoe yCTpOcTBO.
Ta3OHOKOCHIka NoCTaBJIeTcB YacTHUHO
Co6paHOM BHe. TpaHCnOPTnPOBOyHyo
pyKoHTKy I TpaOC6OpHN Heo6XoDMIO
CMoHTnPOBaT nepeD NcNoJIb3OBAHNEM
Ta3OHOKOCHIky. DByBINOJIHEnH MaOTHaJa
CJeNyIte INCTpyKuIN NoEChNPyTAaun War 3a
WaIaRm O npOEHTnpYTEcb Ha pNCyHKn.
Yka3aHHe! HyKhbIe DeTaJI NJI c6OpKn (BHTbI, HApBaJIIOUe KAbEJI N T.Д.) NII FyHKUHOHaJIbHBe 3JIeMeHTbI (HApIMep, UTeKePbI, KIOUH N T.Д.) MOrTy HaxOJTbcB VΦOpMOBaHbIX NOTKaX DJI yPaKOBKN IIN Ha UcTPOJCTBe.
IpeynpeKdene! Bcerda n3BneKaite ankymnyTop neped hactpoiKoi yctpoiCTBa.
MOHTAH Bedyue pyKoTHN (pnc.3a-3c)
3aKpeNTe o6e HnKHe Bedyuue pyKOHTN (no3.3a/3b) cnpaBn CneBaHa KOpnyce ra3oHOHocNI.KpKpyTNE BepxHIO BOyUO pyKoTHy (no3.2) K DByM HnKHM BeDyUHM pyKoTHam (no3.3a/3b).3aKpeNTe Ka6elb DBiratela c nmoouBo depKaTeNei Ka6elna (no3.14) Na npabOn HnXHeBedyue pyKoTHe (no3.3a) N HA BepXHeBedyue pyKoTHe (no3.2).
KabeiN depKaTeiN KabeiNe He DpIHHbI npEaTCTBOBaTb OTHNbIBaHIO Bedyuee pyKoAHTKn (CM.pa3den8).
MoHTaH TpaBoc6OpHNHa (pnc.4a-4c) CoeHHnIte DBe NoIOBUNHK KOpNyca TpaBoc6OpHNHa (no3.9/10).Y6eHNTEcb,TO BCE NlaTKnOBbIE BbCTybl IpaBUNbHO BOJIN B npdeCMTopeHHbIe na3bl.3aTeM yCTaHOBIne BEPxHIOu ChaTb TpaBoc6OpHNHa (no3.11) HA Co6paHNHe NOIOBHNH. TpaBoc6OpHNKpeHTCBa Hra3OHOKOCnIke Ha DBx KpOchK. JIg 3TOBO BVIKHOHTe DBrIaTeJIb NdoHNTEcb
ocTaHOBN peKyuIero HoHa. OndHpyKoH npnOHNMITE KpbIuHky Bb6poca (no3.7), a dpYroH pyKoB03bMITE TpaBOc6OpHNK 3a pyHy n yCTaHOBNTe erO CBepxv.
yKa3aTeB 3aONHeHn
TpaBoc6bOpHnK OcHaueH yHa3aTeIeM 3aONHeHHa (pnc.2, no3.11a). OH OTKpbBaetcN NOJ DeHCTBnEM NOTOKoB3dyxa, KOTOpB KocuHa c03JaET BO BpeMa p6Otbl. Ecln KpbUHa 3aKpbBAeTCBBO BpeMa Koc6bbl, 3TO O3NaUaAeT, YTO yNAbLIbAIOoE YeCTPOCTBO 3aONHeHO n Tpe6yEt ONOpoxHeHHa. PeryIapHO onOpXHHaTE TpaBoc6bOpHnK.
PerynpoBbBA Bicotb Cpe3a (pnc.5) BHMHHe!
PerynpoBb Ka BicOTb Cpe3a MoHeT npOn3BODnTbcra TOfbKO npN n3BLeueHHOM aKHyMnyTope.
PnBvBeHte B DeIeCTBne ToKATEIb (no3.16a) u yCTAHOBHTe YcTPOIcTBo peRyIINPOBKN BbICOTbl (no3.16) HA NyXHyIO BbICOTy pe3Kn. CTrpeNkHa ToKATeJIe N IkaHa Na Kopnyce Yka3bIBaHO Ha HAcTpoEHNy BbICOTy pe3Kn. OTnycTteToKATeJIb (no3.16a) nY6eIHTeCb, TTO OH NaDeEHHO 3aΦHKCInPOBaH.
Ipeep KoWeHnem N3BLeHNte AeKHyMylrTOp n 6beiNTecb, YTO peHcyuN INHCTpyMeHT ocTpbi, aero KpeHneHne H noBpeKdEnbI. Bo N36eKaHne dncBaHcA cneDeYET npOn3Bovntb 3aMeHy 3aTyHNeHHbIX (NII) NOBpeKeDeHHbIX peHcyuNX IHCTpyMeHTOB.
3apnka aHHymyIaTopa (pnc.6)
- N3BLeKHTe aKKyMnTOpHbN 6nOK n3 yCTpoiCTBa.IIra 3TOrO HaKMITE Ha fHKCNpyUOuyIO KnaBnUy (pnc.8/ no3.C).
- Y6eHNTecb TOM, YTO yHa3aHHoe HaФирмehHO TabIuHKe 3HaueHHe HAnpJxHHeNc CETn COOTBeTCTBYET IMeIOUeMyc 3HaueHIO HAnpJxHeNc CETn BCTabBte WtKepe 3apHOrO yCtpoiCTBa (17) B wTeNCeIbHyIO po3eTHy. 3eJIeHbI CBETOHNOd HAuyHT MfraTB.
- BCTaBbTe aKHyMnIaTOp (18) B 3apAHOe yCTPOcTBo (17).
4.Bpa3dene 一 _ H NnKAtOpb3apAnHO yctpoiCTBa" npBODNTc Ta6nIca C yka3aHHeM 3NaueHm CBeTOIOHOH INNkauu3apAnHOyCTpoiCTBA.
RU
Bo Bpem npocecca 3apdKn akKymyIaTOp MOKeT HEMHOro HaPeTBc.3To BnOIHe HopMaJIbHOe ABJIeHne.
Ecnn AHHyMylTOpHbI 6LoK He 3apHaetcH, HEOxOIMN pOBepuTB:
HaJIuHHe HaIpaJKeHnCeTnB 3JIeKTHpUeChOn po3eTke;
HaJIyueI IIOTHORO CoeINHeHnHa KOHTaKTax 3apdHOrO yCTpoNCTBa.
Ecnn aKHyMnIaTOpHbI 6IOK BCE eIe He 3apKaTeCn, npocb6a OTnpaBnTb
3apnHoe yctpoiCTBO
n aKHyMylTOpHbI 6IOK B Hau OTdeI OcbLyKbHaHna.
ДяообсессенипраиьногOTсынnpocHMobpaHTbcnBHaWOTdJI6cIyKHBaHnHINBMara3HH,BHOTOPOM6bINO npno6peTeHO yctpoCTBO.
PnOTCbIKe HnYTHN3aunn
AnHMyJrTOPOB, a TAKHe anHymyJrTOpHBIX
ycTpoiocTB ynaHyTe KaHdb(0e) n3 Hnx B
OTdeHbHnPiactHKnOBb Naket dJaTORO,
tO6bHn36eHaTb HopOTKOro 3AmbHaHNn
noKaapa.
Длгобсченидпintьногорсрака Слжь AkHyMЛЯТOPHOrO 6LOKa He06xODIMO обсчени耗经CBOEВРЕМEHNYЗapяну. 3To He06xODIMO OOCUSECTBЛТВОСБEHNO В Тс ExayK, KOrДа OTMeuAeTc CHINHEJIEN MoцhoCTN yctpoICTBa. HeOnyckaTe nonHORo pa3рда akHyMЛЯТOPHOrO 6LOKa.3To BeEDK NoBpeKdENHIO AkHyMЛЯТOPHOrO 6LOKa!
Hdkaa3apaaakmyntopa(pnc.7)
HaHMMTe KhoNky Hndnkaun 3apJa aHHyMnyTotaA).IVdNkATOp 3apJa aKHyMnyTotaB) nokaet Bam ypOBeHb 3apJa aKHyMnyTota npn nomoUs 3-x CBEToNDIOOB.
FopT Bce 3 CBeToaNoa:
AkkymyIaTOp noHocTbO 3apRKeH.
Topr2n1n1CBetoadno
OctaToHyb3apraaKHyMnyIaTopaDocTaToueH.
Muraer 1 cBeToaHoA:
AkkymyTop pa3prKeH, Heo6xOaMIO 3apAnTb ero.
MuraT BCE CBETOHOdbI:
TemnepaTypa aKkymyIaTopa HnHe HopMbI.
H3BLeKeHTe aKkymyIaTOp n3 yCTpoIcTba
n OCTaBBte B NOMeUeHH C KOMHaTHoH
temnpaTypoi Ha OdIN DeHb.EcIn OUsbKa
NoBTOpHTCa, aKkymyIaTOp nOHOCTbIO pa3pJKeH
n HeNCpBaEHN. N3BLeKeHTe aKkymyIaTOp
n3 yCTpoIcTBA.3anpeUeHo npOdoNHaTb
ncONoBzOBaTb HeNCpBaHBn aKKymyIaTOp n 3apJHaTb erO.
MOnTaH aKMyIaTopa (pnc.8)
OTKpoTe KpbIky aKHyMnyTota.
BcTaBBTe aKKMyIaTOp B KpeIeHne.
3aKpoTe n 3a6loKnpyTe KpbIshKy aKHymyTota.
6. Pa60Ta c ycTpoiCTBOM
OctoponHNO!
HeNoocpeDCTBeHHo Npeed BBODom ra30HOHOCNIIKN B 3KcNpyaTaunIO HeO6XODMO BCTaBnTb aKKyMnyTOp, a npn IIObOM nepepbIbe HIN pnp 3aBepseHN pa6Otbi N3BLeueb erO.
Octopokho!
Bo n36eKaHHe HepeDHaMepeHHoro BkUOeHnra 3a3OHOKoCNka OChaSeHa ycTpoCTBOM 6IoknPOBKn BkUOeHnna (pnc.9/ no3.8), KOtOpoe Heo6XoJMo HAnTa, npEJe Cem MOxHO 6ydtakNTbIPOBaTb pyKHy BkUOeHnna (pnc.9/ no3.1).PnO OTnycKaHNpyKn BkUOeHnra 3a3OHOKoCNka BkIIOuaeTCR. PycK yCTPoJCTBa MoKeT 3aHrTa HECKoJIbKO cekYnd. BblIOJNHte 3tn DeiCTBNHeCkoJbPa3,yTO6bI yDOCTOBepHTbCnB ppaBnIbHM fHHIOHINPOBaHN ycTpoCTBa.
IpeynpeKdHne! HnKorDa He OTHpbBaTe KpbIshny Bbl6poca npn ONOPOHHeHHnpncnoc6JeHHa dNc6opa TpaBbI n BCE ue pa6oTaIOeM dBHratae. BpaAioiNc HOH MOHET pNHBecTn H TpaBMam.
BceTda TuaTeJIbHo 3aKpeIJIraIe KpbIuKy Bbl6pOca H TpaBoc6OpHNI. IpeKJe cHmCnMaTb IN, HeoXIOIMBOBIIIOUHTb DBIRaTeJIb.
HeoOIOMO Bcerda co6IIOaTb 6e3oNachoe pacctOHaHne MeKdy KOpnyCOM HOka N OJIb3OBATeIeM, 3aDaHHOe HAnpaBIAIOUIMM UtaHramn. PnKoc6BeNIm3MeHEnHm
RU
HnpaBHeHnaDBNKeHnHaOTKocax nCHNoHax Tpe6yETcOOCo8aOCTOpOKHOCTb.CoxpaHnTe yToHBOE NIOHOHE, HadeBaTe OByb C HeCKoJIb3HO pHJHeHO NDOWBOI nDINHHbIE 6pIKn.
Bcerda kocnte nonepeckcIoha. Icxoia n3 coo6paKeHn 6e30NaChOCTn, HeIb3n HCIOJIb3OBaTb r3oHOKOCINky Ha cKIOHax C yKIOHOM Bblse 15 rpaDycob.
Co6HJaTe Oc6yO octOpOHocb npn DnKHeHN Ha3aN npn NOJrNBAHn ra3oHOKoCN. OnachOCTb cNOTKNYbcA!
Yka3aHHNo npabMbHOB Koc6e
PnKocb6peKOMeHdyETc8ObeCneYBaTb nepeKpbItNe DOpOKeK. NcNoIb3OaBt TOIbKO OCTpIe, IcIpaBHbIe HOx, YTObIc TcEbn TpaBbIe He pAcTpeNaIIncb, n Ra30H e NoJeHTeN.
T06bI do6ntbcA aKkypaTHoI CTPNKKN, H06XODIMO BECTn Ra3OHOKOCNUKY KaH MOKHO 60nee npAIMD dopOKHAM. PnI 3OTOM dopOKHN BCEda DoJIKNbI nepeKpbBaTcBHa Ha HECKOLbHO CaHTmTePOB, T06bI He OCTaBAInCb nONOCbl.
Bpempa60tbyakHymyIaTopa n,
cJeDoBaTeLbHO, npOn3BODnTEbHOCt b Ha
KbaDpaTHbMyMeTp NIOuaDN, KOTOPa BO3MOxHa
npO ONDOM 3aprJaekHyMlyTAOpTa, 3aBNCRT,
rAbaHBiM o6pa3oM, OT XapaKTepnCTNk Ra3oHa
(HanPnHMeP, PLOTHOCH,T BIAHXOCH,T DInHbI,
BbICOTb Cpe3a N T. d.) IN CKOPoCTn CHaWbAHnna
(COKoPcXxoDb6b).PeKOMeHdyETc
CTPMy rAOOH Yaupe, C BoJbWei BBICOTOI
Cpe3a N DOCTaTOuHO CHOPoCTbIO, QTO6bI
CHOPpeKTHPOBaT pON3BODnTEbHOCt b NO
PiOuaDi B COOTBETCTBN C INHNBnDaYabHbIM
Tpe6OBaHnMa. Yactoe BKNIOUChHe M
BbIKNoUeHne yCTPOJcTBNa BO BPemKoUeHnra
TaHKe CHINKaet npON3BODnTEbHOCTb.
EcNI, HecMToPr HA Bblweyka3aHHbie MEPbl,
3aprJa AKHymyJIaTOpa (npON3BODnTEbHOCTb
no PNOUaDi) He XBatae, peKOMeHdyETc
HCNoJIb3OBaTb AkHyMnyIaTOpb c 60JIbWei
EMKocTbHO(A-y).
HaCTota Kocb6bl 3aBnCt, KaI npAunIO,OT CHOPoCTN POCTa TpABbl Ra3OHa.Bo BPEMA OCHOBHOro POCTa (MaH-NHO) CkAsINBaHne OCyUeCTBnErcTc Dbpa3a B HeJeIIO, Bpyroe BPem -OOnH pa3 B HeJeIIO. Bbcota cpe3a DOJIKHA COCTABnIb OT 4 Do 6 cm, Tpaba
dOJIHKHa BbIpaCTaTb Ha 4-5 cm Do cIeJyUoJero Cpe3a.EcNI TpaBa rA0Ha BbIpcNa HEMHO 6OJIbHe, He cIeJyET cpa3y JKe NpOpe3aTb ee DO HopMaJIbHOB BbICOTbl. 3To BpeINr Ra3OHy. B TAKOM CUYae HIOJOra He cPe3aHTe TpaBy 6OJIee YEM HANoJOBHHy.
Heo6xOJHMO COePkaTb B HCTOTE HNHHIO TOPOHcy KOpCNIu N O63aTeBn ydaIbTb OTIOKeHn TpaBbl.OTIOKeHn 3aTpDnHOIT POnceC3aNpCKa,CHNHaOT KaueCTBO Cpe3a HapUaOH TbB6poc TpaBbl.
Ha cKnloha xIeMyET npOHaIbIbAtb
chauNBAeMyo DOpOHky NonepeK CKnIOHA.
CocKaIb3bIbAHnra3OHOKOCHm MOxHO
n36eKaTb, yCTaHOBv EE NOy YrIOM BBePx.
BbIbepHe BcOTy cpe3a B 3aBNCMOCHTN OT
fAnTnechoKdInHb TpaBraHOro NOKPOBA.
BbINOnHHe HeCKoJIbKO IpoxoDob TaK, YTObI 3a
Odn pa3 ChMaIocb He BoJee 4 CM TpaBraHOro
nOKpOBa.
7.OuNTHa,Texo6cnyHbAHne n 3aHa3 3anachbIX DeTaJIe
OnachOcTb!
IpeepBCEMn pa6oTaMn IO OUcNtKe Heo6xOyMoH3BLeYb aKHyMyJrTOp H3 yCtPoNCTBa.
7.1YnCTHa
He donyckaTe nonadHn PbInn I rpa3n Ha 3auuTHbIe npncoc6JIeHn, B BeHTnLIaIOHHbIe ueJIn H Ka Kopnyc DBHarateJI. PpOtpne YCTpoCTBO YNCToB BToUbIO HIN npOdyIte CkAaTbIM Bo3dYxOM NOD HN3KIM DaBLeHnEM.
3aIpeuaTcMbITbRaOHOKOCINky npToCHOH BODO, B YAcTHoCTH, NOD BbICOKHM DABJIeHNEM.
MblpeKOMeHMyem YCTNTb yCTPOIcTB HeNOCpeIcTBeHHo NocJIe KaJDoRo HcNoJIb3OBAHHa.
PeryIaRHO uHCTHe yCtPoNCTBO BnAHHoBBeTObO C He6OJIbSWM KOJNUeCTBOMKIOKOrO MbIa. He MCNoJIb3yIte uHCTTaeHcpeDCTBa HIN pAcTBOPuTEi, OH NMOrYpa3BeTbPiactMACCOBbIE DeTaIIyycToiCTBa.CJeIHTe 3a TEM, TTObblBHyTpbyctPoNCTBa He NoNaIaDa I BOa.
ДлЯчсTKIra3OHOKOCHINpeKOMeHdyeTCHNcNoJIb3OBAbT ueTkU INI TpAnHy.
RU
7.2TexHnuechoe 06cIyKHBaHne
Дя coхраеньбаалснрви
НоБХОДМОМЕТВИЗHОСЕНь ИЛ
Повржднь HOHД,.DepжATEЛи HOЖ
и 60ЛыВ ВКOMЛКЕТ,Eу pAOБТУdoJHKe
ВыINOLHЯТУПОЛHOMOчEHн CBNEHAJI.NCT.
Дябezэ�аСон pa6OТыс кocикоь BCE KpeeHbIe 3JIeMeHTbI (BnHTbI,uaHKnIT. D.) BcERda DOJIHbI b6Tb HaDeHKO 3aTRAHyTbI.
Heo6xOIMO qaue npOBeprTb npncnOC6JIeHne Ira c6oparBaHa haHaiHne pN3HaKOB n3HOca.
H3HOWeHHbIe NIN NOBpeKDeHHbIe DeTaJIIN noJIeKaT 3aMeHe.
ДяЯобспeyehняДЛТЕьHOrOspOKa CnyK6bI Heo6XoDmO OHNuTaB NCMa3bIBaTb BCE 3JIeMeHtBcpe3b60,a TaHKe KOJeca H OCH.
PeyrnapHb yXo3ra30hOKocnKoHe TlBko rapaHTnpyET dnteIbHbI cPOK Cnyk6bI N BbcOkyIO pOnsBOJNTeIbHOCTb, HO IobecNeuBaet TuaTeHoeN npOcToE cKaunBaHne TpaBbHa ra3OHe.
3JEMeHOM, KOtOpBn B HAn6oJIbWei CTENH NODBepHeH 13HOcy, RBAIeTcH HOH. PeryIaPno IpoBepRte COCTOHN HeKa a TaHOHe ERO KpeJIeHne. 3HOuEHHbI HOH HeOBxOdIMo Cpa3y He 3aMeHHTb HIN 3aTOUHTb.CIIuXOM CInbHa Bn6paunra3OHOKOCNIKN RAJIeTcN pIN3HaKOM HENpABnHbON BaIaNCHPOBKn HOHa INn erO deOpMaoun BCJeCTBn YeDapOB. B TAKOM Cnyae erO HeOBxOdIMo OTpeMOHTnpOBaT b HIN 3aMeHHTb.
BHTpyyctpoiCTBaHETHHKaHXN DeTaeH,HyKdaIOUHXCBA TExHHueCHOM 06cIyKbAHIN.
7.3 3aMeHa HoxHa (pnc.10-11)
N3BLeKHTe aKHyMnyTOp(-bl).NcXoJa n3 co06paKeHnI 6eONaChOCTn, peKOMeHdyETc npOyHTb 3aMeHy HOKeJ ABTOPi3OBAHHOMy cneuaHcyTc. OToPOxHO! CNeyEt H3BLeh6eONaCHyIO WTeNCeJIbHyIO BnIKy I3 po3eKn! NcNoIb3yTe paoOhne nepaTHKn! NcNoIb3yTe TToBJKO opINHaJIbHbIe HOH, taKaB INpOTnbHOM CNYae npn ONpeJeLEHbIX o6CToTaJIbCTBaX he rapaHTnpYOTc FynHKUHOHPOBaHHe N 6eONaCHOCTb.
Ia3aMeHbHOHa HEO6xO4nMo BbINOJHHTb CNeDyUoNHe DeCTBn:
- OTBnHTnte KpeEnHbI BnHT (no3.D).
-
CHIMITE HOK IN 3aMeHHTe ERO HOBbIM HOKOM.
-
Pn yctaHOBKe HOBOrHOHa cIeHITe 3a HAnpabJIeHemE rO MOHTaHa.JIOnaTHK HOHa DOJHKb6bTb HApapBHeB B MOTOpHoe OTJeHne (no3.E). IMeIOUncsKa KpeNeHHbIe WIIbI dOJIHKbIcOBNaDabC pIObHTbIMB HOKe OTBepCTnAMn (no3.F).
- 3aTeM npn nOmoUngraeHOrO KIOUca ChOba 3aTHeNTE KpeEnKbI BnHT. MoMeHT 3aTHeKn DOnJIeH CoCTaBJIaTb IpImepHo 25 H·M.
B KOHcE 3oHa BbInOJIHnTe OeUyIO npOBepHy ra3OHOCnIKN ydaJIte BCE cKONBwneCg octaTHN. Ipeep NauJOM KaJDOrO ce3OHa o63aTeJIbHO npOBepRrTe CoCTORHnE HoHa. Pn HoeBOxIMocTn peMOHa OBpaAaTIeB H aWy cepBcHUY moCTeCKyU. HcNoJIb3yTe TOLbKO opuHNaHbHie 3anaChbYe aCTN.
7.43aKa3 3anaChbIX DeTanei:
Pn3a3e 3aapanbix DeTaeH Heo6xOIMO yKa3aTb CJeDyUOpHe DaHHbe;
TnyctpojCTBa
Homep apTnKyla ycTpoiCTBa
- INeHTnΦHKaUHbHb HOMeP yCTpOJCTBa
Homep Heo6xOIMo3apachoi TaTI
AkyaIbIbIe IeHbI INHΦopMaIg HaxoJrTcHaCTpaHnue www.Einhell-Service.com
NapT.3anaacHoro Hoka:34.054.53
8. XpaHeHne n TpaHcnpOpTnpoBHa
ИЗвлеснтуаKKумлгтops(-bl).
XpaHeHne
XpaHnTe ycTpoiCtBO Iero npHaIeHXoCTN B TEMHOM, cyXOM, 3aunuEHNOM OT MOpO3a NHeIOCTyHOM dIJI DETeMecTe. ONImaIbHaI TEmpePaTyxaPHeHHcoCTaBJIaEROT5 do 30^. YcTPOICTBO DOJXHO xpaHtbcB OpINHaJIbHo yNAKOBKe.
TpaHcnoptnupOBKa
- YctaHOBtE TpaHcnpTnpoBOUHbIe 3aunTHbIe yCTpOINCTBa,ecN TaKOBbIE NMeIQTCr.
ДяЯблгсени TrpahcnpotpoBKN (NIN xpaHEN) OTBnHTNE 6apawKOBbIe raIKN (PNC.3b, no3.13) TaK,TObIb B 30m MeCte MOHO 6blIO CLOHNb BeDyUpy KHOATHy. CJIeNTe 3a TEm, TObIb NeOBpeuTb KaBeIb n TpykN BeDyUeepyKoRTHN.
RU
UcTPOINCTBO Heo6xOIMMo 3aunuatab ot NOBpeJKeHn IN CInbHO Bn6paun, KOToPbIe, BO3HNKaIOT, B YAcTHOCTN, pRn NepeBO3He ABTOMO6nIbHbIM TpaHCnOpTOM.
Heo6xOIMO npedoxpAHnTB yctpoiCTBOOT COCKaJIb3bIBAHNn INOpOKnDbIBAHN.
9. XpaHeHne
XpaHnTe yCTpoiCTBO I erO npHaIaJIeKHOCTN B TEMHOM, cyXOM nHeIoDBepKeHHOM BO3eCTBnIO MOpO3a, a TaKHe HeIOCTynHom dIaIeTe MeCTe. ONImalbHaT TeMnePaTypa XpaHnHa HaxoDITc MeJy 5 C n 30 C. XpaHnTe 3eKTPoIHCTpymeT B OpHInHaJIbHoYyNAkOBKe.
RU
10. INHINHaTOPbI 3apArdHO yCTpoiCTBa
3JIeKtpOnHCTpyMeHTbI, aKKMyTApHbIe 6aTapeN, pRnHaDJIeKHOCTN uYnaKOBky HUKNHO cdaBaTb Ha nepepa60Ky.
3aIpeueH0 yTnHn3npoBaT bIeKtpOnHCTpyMeHTbI aKKyMnyTopHbIe 6aTaepu/6aTaepuHKN C 6bITOBIM Mycopom!
ToIbKO dJa cTpaH-HeHOB EC:
B COOTBETCTBNN C EBPONEHCHO DNPEKTHBOI 2012/19/EU 06 OTPa6oTAHbIX 3eKTPueCHNX H 3NEKTOBHX Pn6opax H ee Pn6o6pa3OBAHm B HAHOHaLBHOE 3aHOHOaTeJIbCTBO B bIWEJH N3 yNtpe6LHeH N3EKTPOHNCTPymENTbl N B COOTBETCTBN C EBPoneHCKO DNPEKTHBOI 2006/66/EC DEΦeHHE H N IOTcYHXBUNe CBOB cPOK AHHMyTAPOpHbIE 6aTaPeIN 6aTaapeHK DOLKHbIO Co6HpTaBCa PA3dJIbHO N cDaBaTBcH Na nepePAOHTK.
Pn HnpabNbHOn yTIN3aun Otpa6oTaHbIe 3JeKTPnueckne n 3JeKTPoHbIe np6opbl MOryT OKa3aTb BpeHoe BO3dEChTBHe Ha OKpyKaUcYIO CpeDy N3OpOBBe YelOBeka H3-3a BO3MOHORO npCyTCTBn B Hx ONaCHbIX BeueCTB.
IepeneaTbBAHne IINI pOue BnDbI pa3MHoKeHNe DOkUMeHTaUNI COIpOBoDITeNbBIX INCTOB npOdyKcNII FpMbl, NOIHOCTbIO NIM HaCTuHNO, pa3peSeHNO pOn3BODNTb TOlbKO C OdHO3NaHOrO pa3peSeHNE Einell Germany AG.
CoxpaHReTc npaBO Ha TexHueChne n3MeHeHHn
RU
HΦopMaζηo cepBnCHOM o6cIyKHBaHH
Bo Bcex ctpaHax, yKa3aHHbIX B rapaHTnHOM CBnDETeNbCTBe, y Hac NMeIOCTcKOMNETeHTHbIE cepBnCHbIe napThepbI, KOHTAChbIe daHHbIe KOTOpbIX Bbl NaJdTe B rapaHTnHOM CBnDETeNbCTBe. OHN BcERda B Baewem pacnopRaeHEN nIpeWeHIn IIOb6X BonpocOB, CB3aHHbIX C 06ClyKNBaHNEM, HanPmEp, dIra pEmoHTa, NoCTaBN 3aNpacteN b 6bICTpon3HaUNBaOuixxC deTaJIe, a TaHOke npno6peTehn paCXoNDbIX MaTePnaIOB.
CneyetobHbMaHHeHaTo,HTOB3OMn3deLmCneDyoUeNEtALINnoDBepHeBIECTeTBEHOMYn3HOcYnnnH3HOcyBCBa3nCeknnyatauue/NcEduOune DetanTpe6yOTCBKaeeCTBe paCXoDhIx MaTePnaIIOB.
Ta3OHOKocapHa nIXOaNTb dIy DOMaWHbOrOBHKOPnCTaHHB DOMaHix yMObax,BDOMaWHbOMy CaNy.
Ta3OHOKCapHnIpyPiBaTHORO DomaUHbOro CaYy BBAkaIObTc TaKHM, pIHy BHKOpNCTAHJRAHX 3a3BnHNe He nepeBnUe 50 roHN iRi BHKOpNCTOBYtCB B OCHOBHOMy Dn DOJIy 3a TpaBO a6o ra3OHAMn, anE He B rPOMAdcbKnx MicuX, napXh, cnpTbHNx CnpOydx, a TaKOH He B ciNbcbkOMy I nicOBOMy ROCNOapCTBI.
Ybara! Yepe3 fi3nHy He6e3neKy dIa KopncTyBaVa ra3oHokocapKy He MoXHa
BHKOPNCOTByBaTN IJIaOBi3Kn KUyIIB, HBNONLTIB i cIarapHNIKB, IJIa CTprNHN Ta noPi6HeHH 6bp'AHIB aObEPHy Ha daxax a60 bBAkONHnx KOpOBax, a TAKOH IJIa ONUeHH (nponIKn) dopIKoH I BHOCTOpiDhOBuHa dJIa NOpDHEHH DepeB i HBNONLTOy.
KpimTORo,ra30HOKOCAPHy He MoKHb BnKOpNCTOByBaTHB RAKOCTI MOTNKIN I DnI BnPIBHOBaHHa HepiBHOCTe rpyHTy,HanpIKNaD, nI KpOTOBHX Hip.
3 MIPKyBaHb 6e3neKn Ra3oHoKocapky He cnid BnHOPICTOBYBaTn JK npNIBiND npNCTPII DnI IHuNX pOboOxh IHCTpymeHTB Ta Habopib IHCTpymeHTB 6ydb-RAKO TINy, 3a BNHTOMB BnJaKB, KOJIe ne pnpMo DO3BOJeHO BnPo6HkOM.
MaunHy cnid BNKOpNCTOByBaTH TINbKn 3rIHD 3 II npn3NaeHnM. HODHe iHne BnKOpNCTAHn HAunHH, IIO BVXoNDtB 3a BkA3aHI MKeHi, He BiNobiJaE III npn3NaeHnH. 3a HecnpaNBocti a60 TpaBM 6yB-koRTO Bny, Rki BHNKIn BhAcNiDOK BNKOpNCTAHn MaunHH He 3a npn3NaeHnHM, BiNobiJaIbHiCtB Hece He BnPo6NHk, a KopNCtBuA/onepapotop.
BpaxoByIte,6yIbJaIcHa,Te,io3a npn3haeHnHmHaWi npnlaHn He CHOHOJIOBaHI DJI BIVo6HnHOrO,peMICnHOrO nI pOMNCLOBO rACTOCyBAHH. MHe 6epem O H Ce6e JHOHNrapaHTi, JxUO npnlaD 3AcTOCOByTcBa H BIVo6HnHX,peMICnHux N I pOMNCLOBHX nIDPNHEMTBX,aTAKOH pR IN BIKOHAHI IHNX pnpivBnHnx Do cboRO po6it.
4. TexhiHi npametpn
Pobouha Hanpyra 18B
Yncno 6obopotIBDnryHa: 3300 xB
CTynih 3axncty: IPX1
Hlac 3axncty: .
Bara: 9,6 kr
山pina piaaHn: 32cm
06cra TpaBo36ipHnka: 27 nItpB
PibEnb 3ByKOBOrTOCHy LBA: 76,5D5(A)
Poxn6ka K. 3dE
BIMipraHH pIBeHb 3ByKOBoI NOTyHKHOCTi LwA: 85,2 d5 (A)
Poxn6Ka K: 1,84D
UK
TapaHTOBaHn pIBeHb 3ByKoBOi NOTyHKHOCTI W487 d6(A)
BibpaiaHa pyuia a. .. 2,5 M/ceR loxmbka K. 1,5 M/ceK
PeyIIOBAAHRA BUCOTKOCIHHA 25-65 MM;5-cTyniHactn
Ybara!
Pnctpi nocTaaebc863 aKymyIaTopa i63 3aprHoro npncTpoTa moKe BHKOPCTOBYBaTHCA Nlne 3 NiTI-iOHHMn akymyIaTOpam cepi Power X-Change!
JIITI-IONHI akymyIANTOpn cepii Power X-Change MOxYb 3apAJaTHaTNCr IINe 3a DOnOMorIO 3apAHO rnpCTPOO Power X-Charger.
He6e3neka!
Uymu Ta Bi6paia
NapaMeTpN uMIM Ta Bi6paui Bn3Haehi y BiINOBiHIOCTI 3 EbponeeCbKMM CTaHapTOM EN 62841.
Hocitb HabyuHNKn.
BnInb ymy moKe cTaH npuHHo BtpaN cnIyXy.
3araIbHI npaMeTpN KOINBaHb (CyMa BeKToPiy TpBox HnpanRMkax) BN3NaHei y BiIDNoBIOHocTi 3CbponeeCbHM CTaHapTom EN 62841.
Bka3ahi 3araIbHI 3haeHnB i6pauii i Bk3aHI 3haeHnI yMnOci TBMipAHI 3a HOpMOBaHM MToDOM KOHTPOIIO I MOHyTb BIKOPNCBOyBaTHC DnI NopIBHHN EJIeKTOIHCTpymEnTy 3 iHNIM.
Bka3aHi 3araIbHi 3haYeHnBi Ibpaui i Bha3aHI 3haYeHnIyMHOCTI TAKOH MOKytb BIKOpNCTOByBaTcN Ia InonepdHbOi OJIHK NabaHTaKeHHa
PonepeJHHeH:
3haeHHBbpauiTa uymnocti MoKytb nid
cac diHCHOEcknlyatauati eEnkTpoIHCTpyMeHTy
BiXnIaTncBID BKAa3aHnx 3HaueHb 3aIeJHO BiD
napaMeTpIB EKnlyatauii eEnkTpoIHCTpyMeHTy,
3OKpMa BiD TORO, kNBIuDeTani
obp6oJIbTeBCR.
He6e3neuHo!
DanHn eNekTpoHCTpymENT niD vac po60TN CTBOpIOE eNekTpOMaHIThe noJe. Lc NoJe 3a NEBHnx yMOB MoKe aKTHNBHO a6o NaCNBHO
BnHbTaHaΦyHKuIeMnHnximPaHtTib. 1063MeHunTHebe3neKvBaKnx a6o CmeptelhNx TpaBM Mn paIMo oc6am, kI MaOTb MeNCHi IMPaHtAtn, Do noaTHy poOToI 3 IHCTpyMeHTOM npOKOHcybTyBaTnc i3 CBOIM liHYUHm Iliapem Ta BnPO6HNKOM MeNCHX imLaHtTib.
3MeHuyTe Bi6pauiTo Ta yTBopeHHa WMy Do MIHimaIbHoro pIBH!
3actocobyntiibn6e3doraHHo yHKIOHyoI npnila.
PeryIpaHNO npoBODITb TexHnDorIaD npuIaDu Ta uNCTiB Ioro.
- Y3roDbTe CbiB CTnIb npaizi 3 po6toIO npHnay.
He nepeBaHTaKyIte npHa.
- Pn Heo6xioHocTi BiDaaBaTe npnaHa nepeBipky.
BmKaIte npnaI, RkUo BN Hm He KopnctyTeCra.
Hocitbpo6ojuykaBnci.
06epexno!
3aHHKOBI pH3HH
Habib npn HaleHHOMy BnHOpNCTaHHi daHoro eJENTPOIHCTPymeTa icHyOt b 3aAHHOBi pn3HNu.CiD paxyBaTHCb 3 HACTynHMn p3HNAmn, o6yMOBneHMn KOHCTpyHcIIO Ta BHOHOHaHm daHoro eJENTPOIHCTPymeHa:
-
YpaKeHHaJIeHb, JaIIO HeXTyBaTI NaJIeXHHMIM MaCKAMn-pecnipaTopamN, 3axNuOCHMMBID NUY.
-
YpaKeHnO npraHIB cnyxy, kIoo HextyBaTH nHaJIeKHMn 3acO6aMn 3axNcTy opraHIB cnyxy.
5. Npeed BBeDeHHBm B eHcNpyatauio
Bnpi6 3 aptnkynom 34.133.60 noctabnaetbc8e3 anymyntopa Ta zapndoro npnctpo.
Ta3OHOKocapHa YacTHKOB 36npaetbC8 MoMHT NocTabKn. NepeD BHKOpNCtAHNM Ta3OHOKocapKn Heo6xHNO BCTaHOBNTn pykU KepyBaHHa TpTAPo36bIPnK. DToPmYTeCb NOKpOKBHX IHCTpyKu3 3 EHCnPyataaJiTa opieHTyTEcA Ha 306paKeHenPiN ac 36ipKn.
UK
Ppimtka! Heo6xidi MoHTaKHi Detani (rBnHTn, Ka6eJIbHI HanpMaHNI ToO) a0f yHKIOHaJIbHI detani (HanpIKlaIad, WTeKePi, KIOHi ToO) MoKyTB ByTN pO3MIeHI y oOpMOBaHNX qactnHex ynaKOBKn a0 h npCTpoi.
3aTepeHHeHH! 3aBnD BnMaHTe anMyIaTOp nepeB BNKoHaHHM 6yDb-RHX HaJalwTyBaHb npHCTpO.
MOnTaHpyHKepeBaHHaMa.3a-3c) PnKpiniTb 6oDbipyHKepeBaHHa (no3. 3a/3b) npabopuy i libopuy BiD KopnyCy ra3oHOOCapKn.PnKpyTtB rHHTamN BepXHIO pyHu KepyBaHHa (no3.2) DIO DBOx HnHXiP yOeKepyBaHHa (no3.3a/3b).PiNeHaIte KaebIb DBInyHa 3a donomoroIO KaebIbHNx TpImaHiB (no3.14)do HnHBoI npaboI pyHu KepeBaHHa (no3.3a) i do BepXHBoI pyHu KepyBaHHa (no3.2). CklaadHIO pyHKepeBaHHa (dNb.p0zdi8.) He nobHHI nepeWkoJHaNT KaebI Ta KaebIb Hi TpImaHi.
MOHTAH Tpabo36ipHnHa (MaI.4a-4c) 3'edhaTe DbI NOOBHH KOpNcy TpaBO36ipHnHa (no3.9/10) paOm.IpeKoHaTecra,IO Bci INaCTHOBi fICCATOPn npABINbHO 3aFICyBaNcR y BiNOBIDHX na3ax. NOTIM BCTaHOBIT BepXH OACTHy TpaBO36ipHnHa (no3. 11) Ha BHe 3i6paHI NOOBHH. TpaBO36ipHnK KpiNTBCd DO xBOx raIK H Ra3OHOKocapu. Dla cboRO BUMKHITb DBvry H 3aueKaHTe, NOHN piaJbHH HIX 3yNNHTCBc. PHiHIMITb BiKnHDn mTOK (no3.7) OndieKO pyko, a IHoHO pyKoU oYTPMMyTE TpaBO36ipHnK 3a pyKy i 3akpinitb II 3Bepxy.
IHdkatop pIBH3anOBHeHH
Tpabo36bipnHK Ma e HdkKaTOp pIBH 3aONBHeHH (MaIOHOK 2 /no3.11a).Bih BIDkPnBaETbcra 3a paxyHOK NOTOHy NOITPR,CTBOPHOBAHoro ra3OHOCAPKO iNic paOboTI. RaIOUHTOK 3aRbAeTcRiNac KocIHn, Tpabo36bipnHK 3aONBHeHH I NOINHE 6Ty CNOPOXHeHH. PeryIrpHO OUnuaiTe TpaBO36bIPnHK.
PerynIOBaHHB BNCOTN HOCINH (MaIIOHOK 5) Ybara!
PeryIOBaHH BVCOTN KOCINH NOBHHO 3diCHOBaTNC TIlbKn npn BiKluOHeHOMy akymyltoPI.
HaTnCHITb Ha pyky (no3. 16a) i BCTaHOBITb
peryIaTOp BNCOTn (no3. 16) Ha notpi6Hy BNCOTy
KocIHHc. CtrIka Ha pyuJi Ta uKaHa Ha KOpNci
BkAzyOHTb Ha BCTaHOBJIeHY BNCOTy KocIHHc.
BiDnyCtITb pykHz (no3. 16a) i nepeKoHaTeCe, zo
BOHa hAdIIHO 3aΦIKCOBAHa.
Ipeed noatkom KociHHiaEHaHTe aKymaTOp I nepeKoHaTecr, zo piaalbHn iHCTpymEt roctprn, a noro KpinHeHn He nowkoHEni. 3amihT tyni Ta/a6o nowkoHEni pialaHb HcTpyMeHTn, o6b yHHyTu din6baIaHCy.
3apnHa aKymyTopa (MaHIOHO6)
- BnMIMtB aKymIaTOpHm 6LoK 3 npHcTPOIO. IaIbOro Heo6xIdHO HATNCHTN KHOINKy fikcaui (MaI.8/No3.C).
- Ipebeipte, uB iDnOBiAde MepEkeBa HAnpyra, 3a3HaHeHa NaCnpTTh Ta5nHui, HaBHHi MepeKeBri HApny3i BCTaBe 7tEnCeIbHy BNky 3apJHOro npNCTPO (17) B eENKTPnHy po3eTKy. 3eNeHc bITIOIO NOHE 6hHMATNI.
- BCTaBTe akymyIaTOp (18) y 3apAaHn npicTpri (17).
- Y nyHKTI, INHnKaTOp 3aprHOro npicTpOHO HabeDeHa Ta6nIa 3HaueHb CBiTIOJIOHO rHnKaTopa Ha 3aprHOMy npicTpoi.
Iiuc 3apAnk anMyJrTop MOKe TPOXn Harpitnc. Ondak ce HopMaJIbHO.
HKeNo He Bdaetbca 3apAaHTn aKymyIATOp, nepebiTe
- H E B pO3eTci MepeKeBa HAppyra.
CHN E HAJIeKHHKOHTaKT Ha 3apAaHIX KOHTaKTax.
Hko3apkaakymyIHTopaBCEue HEMOHNBA,MN POCNMO BAC,
Hadiclatn3apdHHnpctpi
Ta aHMyJrTOpHn 6bok B Hauy cnyKbTyexHuiHOi niTpPmHN.
AkymyIaTOp MaE DoCTaTHiI 3apA.
Bnmae 1 cbitioia
AkymnylTop po3pndkeHn, 3apdItb aKymyIaTOp.
Bci cbitiojno6nmaotb:
3aHaTTO Hn3bKa Temepatypa akymyIaTopa. 3HIMtB akymyIaTOp 3 npCTpOIO I 3aIIuIte aKymyIaTOp Ha doby npi KimHATNI TEMepatypi. RaHcNo HecnPabHCTb 3HOBy 3'ABNTBCA, akymyIaTOp 3aHaTIO pO3pRdNcBcI i noHKOJHeHH. 3HIMtB akymyIaTOp 3 npCTpOIO. PoiKoJHeHH akymyIaTOp 6Ibue He MoKHb BIKOPNCBOYBatn Ta 3apRdKaTH.
BCTAHOBJIeHHaKMyJrTopa(MaHIOHOK8)
BidkpiTe KpnuKny aKymyIaTopa.
BcTaBTe aKymyIaTOp y BiDciK.
3aKpHnTe KpnKy aKymIaTOpHOro BiDciHy, BiKnHyBwn II.
6. Eknnyatauia
06epeKHo!
BesnocepeHbOpnepeBBeDeHNrMa3OHOKacnB EKcNlyaTaUIO BCTaBTe aHyMylTOp IBmMaIte aHyMylTOp UOpa3y, KOINpo6To nepePnBaTbcra 60 npnnnHReTbcR.
ybara!
Дяларнг Hebaхогу yIMKHeHHra3OHOKocapka Ochaueta 6kkyBaHHm
yBIMKHeHHa(MALIOHOK9/NO3.8),AKN Heo6xHO HATNCHHT NpeD TMM,AK AKNYByBatn pykky BMnKaHHa(MALIOHOK9/NO3.1).Pn BIDnyckAHPi yPkN BMnKaHHra3OHOKocapKa BmHKaeTbC. Yac 3anyChy moKe cTAHOBNTi KInBa CekHy.DnKohaiTe CE npocc KiIbHa pa3IB,06nepeKoHaTHc,IO BaW npCTpi IpaHoe HaLeKHM YIHOM.
3acTepeHHeH! HikOn He BiKnPbAaTe BIDHNHn 10TH, KOH TpaO36ipHnK cnopOHnEbcaI dBHyBce IpaIOe.
06eTobN IHn MOHe npn3BeCTn Do TpaBM.
3aBKn peTeIbHO 3akpinJIte BiKnHn
tTOH Ta TpaO36ipHnK. Pn3HATTI nonepdHbOB BMKHITb DBNyH.
3aBKnDn DoTpmyTecb 6e3neHoi BiDCTahi
MIX KOpNycOM HOKa Ta KopNcTyBaChEM, 00
3a6e3NeUyTBcH HApRMHNmpyKamn. CnId
npoBnTn Ooc6bnBy oBepeKHiCt pn KocIHHI
3miH napPmky pyxHa cxnIax. PpeKohaiTeCn,
5O Bu NaJdHIO CTOITE, HocITb B3yTTHa
HeCNsbln NiDOWBi Ta Dobri uTahNI.
3aBxHn Kocitb nonepeK cxuLy. 3 MipkyBaHb 6e3neKn r3oHOKocapKIO He MOKHHa KocTn CxuNn NiK kYtOM 6JbIe 15 rpaDyciB.
Bybte Oco6blno 06epeKHi npny pyci ra3ohokocapkn 3aHIM xOdom i npn ii 6yckpuybaHHi. He6e3neKa cnTtncra!
Iopadn no npabHbHomy HocinHHO
PnCKOswBaHHi peKOMeHnyeTbcra npaioBATn NO3MmHO.
HocitbTilbKnTOCTpMMn,cnpaBHNMHOxKAMn,06HePbATNTPaBHNKINa3OHHeNOKOBtIB.106doCHTNCHCTORO3p3y,HanpaBnIteKocapKyKOMORA npmIoHO TPAeKTOpieHO.PnPcBOMyI pTaCPoTIT2abXdn NobHHnepeKpBnATNCHaKiBkCaTnMTePb,06He3aIIuAICNe3KoWeHiCMyI。
Hacpo60THaKymyIHTopa,aOTHe,iNLOUa ra3OHy B KBaIpaTHNX Metpax,kyMOHKHa o6pObHTn Ha OJHOmy 3apRdi aKymyIHTopa, 3AHAHOIO MipoO 3aJIeKHTb BiJ xd xapaHTepnCTNK ra3OHy (HanPNIaD,uiNbHOcT,BOJorocTi, DOBKNHH, BVCOTN KCIHNN...i WBNDKOCTI KOCIHNN (TEMny nepeCybaHH).Uo6 DoCrtTN ONTMAlbHOI npOyKTHBOCtI o6pObKnra3OHy yOnHHx PLoO,MI peKOMeHdyEMo KOCHTN ra3OH ChTlE,36JIbWo BOcTOO KCIHN i 3 BiJNOBIDHOO WBNkICTU. Yacte BMKAHH Ta
UK
BIMNKaHnI npNCTpOIO nIac KocIHnTAkOx
3HHKNe InpOdyKTbHcTb. JKaUo, He3BaHaOuH
Ha BnUe3a3NaHei 3axOdi, Yac pOBOTn
akymyIaTOpA (npOdyKTbHcTb 6Obp6Kn rA3OHy y
OHNHnpi NLOU) He 3aOBoJIbHM, NOIIINHTN
CtTuAzIO MOXHa WJXOM BHKOpNCaTHn
akymyIaTOpIB 6JIbWoI eMHOCTi (A-rod).
HaCTota CkOswyBaHnB O OCHOBHOMy 3aJIeKHTb BiD WbNIOKOciPoCTy Ra3OHy. Y nik BeretauiHOro nepioHy (TpabeHb - HcpBeHb) DbiHi Ha TINKeHb, iHaKHe pa3 Ha TINKeHb. BcOTa KocIHn NOBHHa CTaHOBHTn Bi4 4 Do 6 cm, a 3pOCTaHHn DO HAcTynHOrO KocIHn NOBHHo CTaHOBHTn 4-5 cm. JIK TIlbKn rA3OHN CTaHE TPOXn DOBWMn, He pO6tB NOMInK, ObpiAOH NiO BiPa3y Do HOPMaNBHOI BcOTn. Ue 3abdae WkoDN RA3OHy. IOTIM HIOHn He ObpiAte TpaBy 6Ibnse NOLOBHN BcOTn.
TpmaTe HnHnO qactHy KOpNcy KocapHn B YcTOTi i oob'RAKOBo BVdaJIaIYe 3aJINWK TpaBn. BiKnlaeHNy ycklaDHHoTb npocc 3anyChy, noripwTy bKiCTb KocHH a BNKnD TpaBn.
Ha cxnlaq piaIbHa dopiHka NOBHHa 6yTN npOHnadeHa nonepek cxnly. KOB3aHHra3OHOKOCAPKn MOHnA 3aNO6ITN, BCTaHOBBuHN ii nD haxInom Bpy. Bn6paHTe BNCOTY KOCHHB 3aJIeXHOCT BiD fakTHIOHOJ DOBHXHH RA3OHy. 3p06tB KINbKa npoxOIB, uo6 3a ODN PA3 byoBnDAJIeHO He 6IbIwe 4 cm RA3OHy.
7.OuHEnH,O6cIyroByBaHH Ta 3aMOBHeHH 3aNactH
He6e3neha!
Ipeep BnKoHaHHM 6yDb-RAkNX pObit 3 OunueHnBnMaTe akyMyJrTOp.
7.1 OuHnHn
TpHMaHTe 3axnChi npCTpoi,BeHTnlauiHi OTBOPn Ta Kopnyc DbnuRyHa y RAOMORA YNCTIiOMy CTAHI,3anO6iraOuHn KaONUeHHIO NIIy Ta 6pyD. PtoPnAte NpCTpiu NCToIO raHicIPHO a6o npOdyBaIte Ioro CTncEHM NOBITPmPi HN3bKHM TNCOM.
- Ra3OHOKOc4Hy He MoKHa OCHUByATn npOToHIO BOIOIO,OC6JIbIHO BIDBNCOHIM TICHOM.
Mn peKOMeHdyEm OChuSyBaTH npCTpiO npa3y nicn KOKHO BHKOpCTaHH.
Perylaepno npotnpaite npncptpi BOIoroIO raHupko. He BnKOpNCTOByTe MNOUc 3ao6b a6o pO3uHHNkO, OCHJIbKn BOHN MOKyTB NooKOJTH nlaCTNKOBi DeTalNi npCtpo. He Doynckaiote notpapanHnB BOIN BCEpeDHy npCtpoIO.
No moJINBOCTO ONUaIte ra3OHOKocapky 1tKAMn a6o raHicpamn.
7.2 Texhiye 06cnyrobyBaHHa
3HouenI a6o nookdKeHIOHJI,TPMaui HOKIBI 6OJTN NOBHNI 6yTN 3aMIHei B 36opi yNOBHOBaKeHM faxibem IIN 36peKeHHa 6alaHcy.
- PepekoHaItecA, 0o Bci KpiInJeHHa (6oJTHn, raHn ToO) 3abXdn UJIbHO 3aTReHYti, 0oBn MOrnn 6e3neHNO npauobatn 3 r3oHOKocapKHO.
- Yacto napeBipraTe raoHokocapky Ha npedmet 3HOCy.
3amHtB 3HOweHi a6o nowKdoHeHi deTaJI.
ДяЗбзпчнгТрвалогуТермHy CnyнВсВгHTОи Detani, a TAKOЖ KONEca i OCI cIiOuHCTNt, a NOTIM 3MaCTNTn MacJOM.
Peynnpnn DOrn3a raohokocapko He TbKn rapaHTye II DOBBOHCTb i npae3daTHcTB npoTfROM TpHBAnoro Yacy, aIe icnpnre d6aNtOBmy I JERKOMy KOCIHHO Baworo raoOHy.
HaibxCNHbHMdo3hOcyeMeHTOM 电HIX.PeyIaHPOnepeBipraTeCTAH HOxa,aTakOHnoKpInHeHHa.KeIO HIX 3HOseHN,HoROnpti6HOHeraiHO3AMHNTn aBO BiUNIfCyBaTH.NKIOra30HOKOCapHa HaMIPHO BIBpye,ueO3HaHae,IOHIX HePabINbHO 36aIahCOBaHN aBO deOpMOBaHN BHaCnIDOKyapIB.Ycbomy BnAADKy IHO nOTpi5HO BiDpMoHTyBaTHn aBO 3AmHHTN.
UcepeHHI npHCTPOH HemaE IHnHex DeTanei, 10 niDraIOTb 6cNryROByBaHHIO.
7.3 3aima H0ha (Ma1.10-11)
BnMItb aKymyIaTOp (aKymyIaTOp).3 MeTOO 6e3neKn MPeKOMeHdyEmo, 0o6 3amHy HOxIB 3diChIOBaB yNPOBHOaHEHn #XaIbeUb. O6eepHo! OJaRte pOboi pyKaBnKn! BnKOpCTOByIe TlBKn OpurHaJIbHi HOki, IHakue FyHKUioHaJIbHcIb I 6e3neKa He MoKyTb 6yTH rapaHToBAHI.
UK
063amHHTn HIK, BHKOHaHTe HAcTyNHIi
- BiDkpyTb KpiinBnI TBnHT (no3.D).
- 3HIMITb HIX i 3aMIHTb NORO HA HOBN.
- Pn yctahobci HoBOro HOka, 3BepHbYbary Ha HAprrMOK YCTaHOBH NHOa. JIoNaTI HOKa NOBHHI BnCTyNaTH y BiCk DnHyHa (no3. E). IChyoHi KpinnblHi fhiCatopn NobHHI 36iraTnca 3 OTBopAMn BHOki (no3.F).
- Ntim 3a donomorok raikoboro kIoua 3HOBy 3aTHiB KpiINbHn rBnHT. Moemr 3aTAYBaHH NOBHeH cTAHOBHTN 6JIn3bKO 25HM.
Hapnkiu ce3oHy npoeBeiB 3aaraBHH ornra30HOKOCAPKn Ta BndaJIb BCE hakOnuhecMIIT. Pepe NDaTHOM KOHNORO ce3oHy oob'RAKOBO nepeBipRte CTAH HOKa.y pao pemOHHTy 3BepHIbCn da Haworo BIDany OcNryOBvBAHnKnIEHtB.BINkopnCTOByTe TlbKnOpriHaJIbHi 3anactHn.
7.4 3amOBHeHH 3aNaChnx DeTaeN
Pn3aMOBHeHHi 3anaChnx DeTaeI Heo6xIDHO 3a3HaHTN TaKi dahi:
Tnpnctpo
Homep apTuKyI npIcTppoI
IdeHTnphiKauiHn HmOp npncTPOIO
Homep Heo6xio3anaohoyactHH AnTyalbHIuH Ta HOpmaUo Bm MoKeTe 3aHTn Ha Be6-ctopinu www.Einhell-Service.com
3anachn Hix No apt.: 34.054.53
8.36epiraHHa Ta TpaHcnpOpTybaHHa
BnMItb aKymyIaTOp (aKymyIaTOpn).
36epirahna
36epiraTe npnctpi i Ioro npnHaJeKHoCTi B TEMHOMy, cyXOMy, He3aMep3aOCHOMy Ta HeoCTynHOMy dIa DITEe. ONTHMaJbHa Te nmpatypa 36epiraAHHc TcAHOBHT bId 5^ do 30^. 36epiraTe npnctpi B opriHaJIbHi ynaHOBuci.
TpaHcnopTyBaHH
He BnndaTe eNeKtpnpnlaTn Ta akymyIaTOPhi 6aTaapei/6aTapeeKnB no6byToBe cmTTA!
Jnne dnn KpaH EC:
BiDnOBiDNo do EbponeNcBKOI DnpEHTNBu 2012/19/EU 10do BiXoDBE NpHOrO Ta eKTPOHORo
oblaDHaHHa Tii nepeTBOpHH B HauioHaJIbHe 3aKHOADCTBO EeKTHPOIHCTPymeHTN, kIbIbIe He
pndAtri Do BVnOpHcTAnHra, a ToKx BiIOBIDNO do EbponeNcBKOI DnpEHTNBu 2006/66/EC HecnpabHi
abo BiNPaupBoaHI akMyJToPHi 6ataei/6ataeKn NobHHI 3daBatnc OKpeMo iYtni3yBaTNC
ekOIOHIO OHICNTM CnOCO6OM.
Pn Hnpabnblhni ytnlisiacui BiDnpaBObahi eEeKtpuHt Ta eEeKtpoHti npilad MoHyTb MaTHI KIDINB BnIB Ha HABKOINHc cepedOBunTe Ta 3dopob' JIOHN Hepe3 MOXINBy HAHBHCtB He6e3neHHx peOBNH.
Ipeepky a6o IHWE PO3MHOKeHHaOKMEnTaaui Ta cynpOBdHyOnHX DOKMeHTIB Do npOdyuHci, a TAKOH BHTAY i3 DOHMeHTIB, donyckaiotbcra Iwne nicna OTPMaHnO dHO3HaHOrO d03BOJy BiD fipMN «Einell Germany AG»
Mn 3aJnHaemO 3a co6o npabo Ha BHeceHHaTexHvHnx 3mH.

EN Declaration of conformity: We declare conformity in accordance with the EU directive and standards for article
Subject to change without notice
Archive-File/Record: NAPR029112
Documents registrar: Landauer Josef
Wiesenweg 22, D-94405 Landau/Isar
* EN Cordless leve movre - HTRundeau a gacaton acummator - T Toscaea a batella - DA/No AKU-grassteissima - SV/Batteran griskiipapoe - SC Akumuratae sokaia - SK Akumuratae hokasa - ML Accugazmanema - ES Cortospeda a batella - PI Akukityadtnu hnounielidr - SL Akumuratae kismica zu travo - NU Akukitya-nighe - RG Maqintat d tns ungauen ot aculler - UL Kusokoroet at prpnto - PT Cora rean so mnrn HRESK Akumuratae koslta zse ruvr - SR Akumuratae koslta zse ruvr - PL Akumuratae koslta zse ruvr - TR Axud crim. 100000000000000000000000000000000000000000000000000000000000000000000000000000000000

Declaration of conformity
We, Einhell UK Ltd
Champions Business Park, First Floor Unit 10, Arrowe Brook Rd, Upton, Wirral CH49 0AB, United Kingdom
declare the conformity to UK standards and legislation was assessed for:
Cordless Lawn Mower GE-CM 18/32 C Li BL (Einhell)
UK legislation
Simple Pressure Vessels (Safety) Regulation
Electrical Equipment (Safety) Regulation
Radio Equipment Regulation
Personal Protective Equipment Regulation
The Ecodesign for Energy-Related Products and Energy Information Regulation
The Restriction of the Use of Certain Hazardous Substances in Electrical and Electronic Equipment Regulation
X Nolse Emission in the Environment by Equipment for use Outdoors Regulation
Annex V
X Annex VI
Noise:measuredL = 85,2 dB (A);guaranteed L_m = 87 dB (A)
P = kW; L/0 = 32 cm
Approved Body: TUV SUD Industrie Service GmbH (NB 0036)
Supply of Machinery (Safety) Regulation
Annex IV
UK Approved Body:
UKTE Certificate No.:
Standards: EN 62841-1; EN IEC 62841-4-3; EN IEC 55014-1; EN IEC 55014-2

Tom Chambers, Managing Director Einhall UK Ltd
Wirral, 2025.05.05
Archive-File/Record: NAPR029112
Art-No.:34.133.70 I-No.:21014
Subject to change without notice Wiesenweg 22, D-94405 Landau/lsar
Documents registrar: Landauer Josef
EH 05/2025 (01)
- Explanation of the symbols used (see Fig. 12)
- Safety regulations
- Warning!
- Layout and items supplied
- Layout (Fig. 1/2)
- Items supplied and unpacking (Fig. 2)
- EN
- Danger!
- Items supplied
- Proper use
- Technical data
- Caution!
- Sound and vibration
- Wear ear-muff s.
- Warning:
- Limit the operating time!
- Keep the noise emissions and vibrations to a minimum.
- Residual risks
- Before starting the equipment
- Warning! Always remove the battery before making adjustments to the machine.
- Push bar assembly (Fig. 3a - 3c)
- Catch basket assembly (Fig. 4a - 4c)
- Filling level indicator
- Adjusting the cutting height (Fig. 5) Important!
- Charging the battery (Fig. 6)
- To ensure that items are properly packaged and delivered when you send them to us, please contact our customer service or the point of sale at which the equipment was purchased.
- When shipping or disposing of batteries and cordless tools, always ensure that they are packed individually in plastic bags to prevent short circuits and fi res.
- Battery capacity indicator (Fig. 7)
- All 3 LEDs are lit:
- or 1 LED(s) are lit:
- LED fl ashes:
- All LEDs blink:
- Installing the battery (Fig. 8)
- Operation
- Important!
- Caution! Never open the chute fl ap when the grass bag has been detached (to be emptied) and the motor is still running. A rotating blade can cause serious injuries!
- Tips for proper mowing
- Cleaning, maintenance and ordering of spare parts
- Cleaning
- Maintenance
- Replacing the blade (Fig. 10-11)
- Ordering replacement parts:
- Storage and transport
- Storage
- Transport
- Disposal and recycling
- Charger indicator
- Troubleshooting
- Disposal
- Only for EU countries:
- Only for United Kingdom:
- Service information
- FR
- Stockage
- Endast for EU-lander:
- Svetita 2 ali 1 lucka LED
- NepiopioTe to xpovo epyaiaic!
- NepiopiTe Tnv 8noupyia Oopoukai Tc Sovnoic oTo EaXIO!
- Ppooox!
- Ytoaioevoikivovoi
- Evnpewon yia to eepic
- Paznja!
- Opasnost!
- Buka i vibracije
- Nosite zašitu za sluh.
- Pre puštanja u pigeon
- Upozorenje! Pre Ngo sto pocnete da podesavate uredaj, uvek izvadite akumulator.
- Montažá drěske za guranje (slika 3a - 3c)
- Montaža korpe za travu (slika 4a - 4c)
- Indikator napunjenosti
- TOncHHeN K HcNoJIb3ObaHHbIM CmMbOJAM (cm.pnc.12)
- 1.Yka3aHHNoTexHnKe 6e3oNaCHocTH
- CoCTaB yCTpoIcTBA n COCTaB ynaKOBKn
- Onncanhe ycTpoNCTBa (pnc. 1/2)
- RU
- CoCTaB KOMnJIeKta yCtpoiCTBa
- Onachoctb!
- 06bem NOCTABH
- Bhumahne!
- UymbiNb6paun
- HcnoIb3yIte 3aunHTy opraHOB clyxa.
- Cymmaphoe 3naeHne BEniHbBnpaun
- PpeynpeHne:
- OrpaHnHybTe BpEm pa60Tb!
- Cbeinte o6pa3oBaHne WymOB n Bn6paun K MmHmMyM!
- Octopoxho!
- OctaToHbIe ONaCHOCTN
- IpepeBBODOM B3Hcnnyatauio
- B KOMNENT NOCTABKN 34.133.70 He BXOJNT aHHyMyIaTOp N 3apHNoe yCTpOcTBO.
- IpeynpeKdene! Bcerda n3BneKaite ankymnyTop neped hactpoiKoi yctpoiCTBa.
- MOHTAH Bedyue pyKoTHN (pnc.3a-3c)
- yKa3aTeB 3aONHeHn
- PerynpoBbBA Bicotb Cpe3a (pnc.5) BHMHHe!
- 3apnka aHHymyIaTopa (pnc.6)
- Pa60Ta c ycTpoiCTBOM
- OctoponHNO!
- Octopokho!
- Yka3aHHNo npabMbHOB Koc6e
- 7.OuNTHa,Texo6cnyHbAHne n 3aHa3 3anachbIX DeTaJIe
- 7.1YnCTHa
- 7.2TexHnuechoe 06cIyKHBaHne
- 3aMeHa HoxHa (pnc.10-11)
- Ia3aMeHbHOHa HEO6xO4nMo BbINOJHHTb CNeDyUoNHe DeCTBn:
- 7.43aKa3 3anaChbIX DeTanei:
- XpaHeHne n TpaHcnpOpTnpoBHa
- XpaHeHne
- TpaHcnoptnupOBKa
- XpaHeHne
- INHINHaTOPbI 3apArdHO yCTpoiCTBa
- ToIbKO dJa cTpaH-HeHOB EC:
- HΦopMaζηo cepBnCHOM o6cIyKHBaHH
- TexhiHi npametpn
- UK
- Ybara!
- He6e3neka!
- Uymu Ta Bi6paia
- Hocitb HabyuHNKn.
- PonepeJHHeH:
- He6e3neuHo!
- 3MeHuyTe Bi6pauiTo Ta yTBopeHHa WMy Do MIHimaIbHoro pIBH!
- 06epexno!
- 3aHHKOBI pH3HH
- Npeed BBeDeHHBm B eHcNpyatauio
- Bnpi6 3 aptnkynom 34.133.60 noctabnaetbc8e3 anymyntopa Ta zapndoro npnctpo.
- IHdkatop pIBH3anOBHeHH
- PerynIOBaHHB BNCOTN HOCINH (MaIIOHOK 5) Ybara!
- 3apnHa aKymyTopa (MaHIOHO6)
- Bnmae 1 cbitioia
- Bci cbitiojno6nmaotb:
- BCTAHOBJIeHHaKMyJrTopa(MaHIOHOK8)
- Eknnyatauia
- 06epeKHo!
- Iopadn no npabHbHomy HocinHHO
- 7.OuHEnH,O6cIyroByBaHH Ta 3aMOBHeHH 3aNactH
- He6e3neha!
- OuHnHn
- Texhiye 06cnyrobyBaHHa
- 3aima H0ha (Ma1.10-11)
- 063amHHTn HIK, BHKOHaHTe HAcTyNHIi
- 3amOBHeHH 3aNaChnx DeTaeN
- 8.36epiraHHa Ta TpaHcnpOpTybaHHa
- 36epirahna
- TpaHcnopTyBaHH
- Jnne dnn KpaH EC:
- Declaration of conformity
- Cordless Lawn Mower GE-CM 18/32 C Li BL (Einhell)
Brand : EINHELL
Model : GECM 1832 C Li BL
Category : Electric mower