
5KES8557 - Coffee machine KITCHENAID - Free user manual and instructions
Find the device manual for free 5KES8557 KITCHENAID in PDF.
| Brand | KitchenAid |
| Model | 5KES8557 |
| Category | Fully automatic coffee machine |
| Color | Not specified (available in multiple finishes) |
| Product Type | Automatic espresso machine with grinder |
| Power Supply | 220-240 V ~ 50-60 Hz, 1450 W |
| Water Tank Capacity | 2.2 L |
| Bean Hopper Capacity | Approx. 250 g (estimated) |
| Pump Pressure | 15 bars (estimated) |
| Milk Frother | Integrated with milk container (models 5KES8557 and 8558) or milk tube (model 8556) |
| Beverage Types | Espresso, long coffee, cappuccino, latte macchiato, hot milk, hot water, ground coffee |
| Customization | Profile creation, intensity adjustment, coffee/milk/foam volume, temperature, preparation order |
| Display | Color touch screen (model 5KES8557) |
| Number of User Profiles | 4 profiles with customizable name |
| Cleaning Functions | Easy frother rinse, deep cleaning, descaling, 2-phase brewing chamber cleaning |
| Water Filter | Replaceable, lifespan ~50 L |
| Automatic Standby | Adjustable from 8 min to 8 h |
| Maximum Altitude | 2000 m |
| Weight | Approx. 12 kg (estimated) |
| Dimensions (W x D x H) | Approx. 35 x 40 x 40 cm (estimated) |
| Warranty | 2 years, specific conditions according to country |
| Spare Parts and Maintenance | Water filter, cleaning tablets, descaling product, parts available through authorized service center |
Frequently Asked Questions - 5KES8557 KITCHENAID
User questions about 5KES8557 KITCHENAID
0 question about this device. Answer the ones you know or ask your own.
Ask a new question about this device
Download the instructions for your Coffee machine in PDF format for free! Find your manual 5KES8557 - KITCHENAID and take your electronic device back in hand. On this page are published all the documents necessary for the use of your device. 5KES8557 by KITCHENAID.
USER MANUAL 5KES8557 KITCHENAID
5KES8556, 5KES8557, 5KES8558
OWNER'S MANUAL
EN Owner's Manual 2
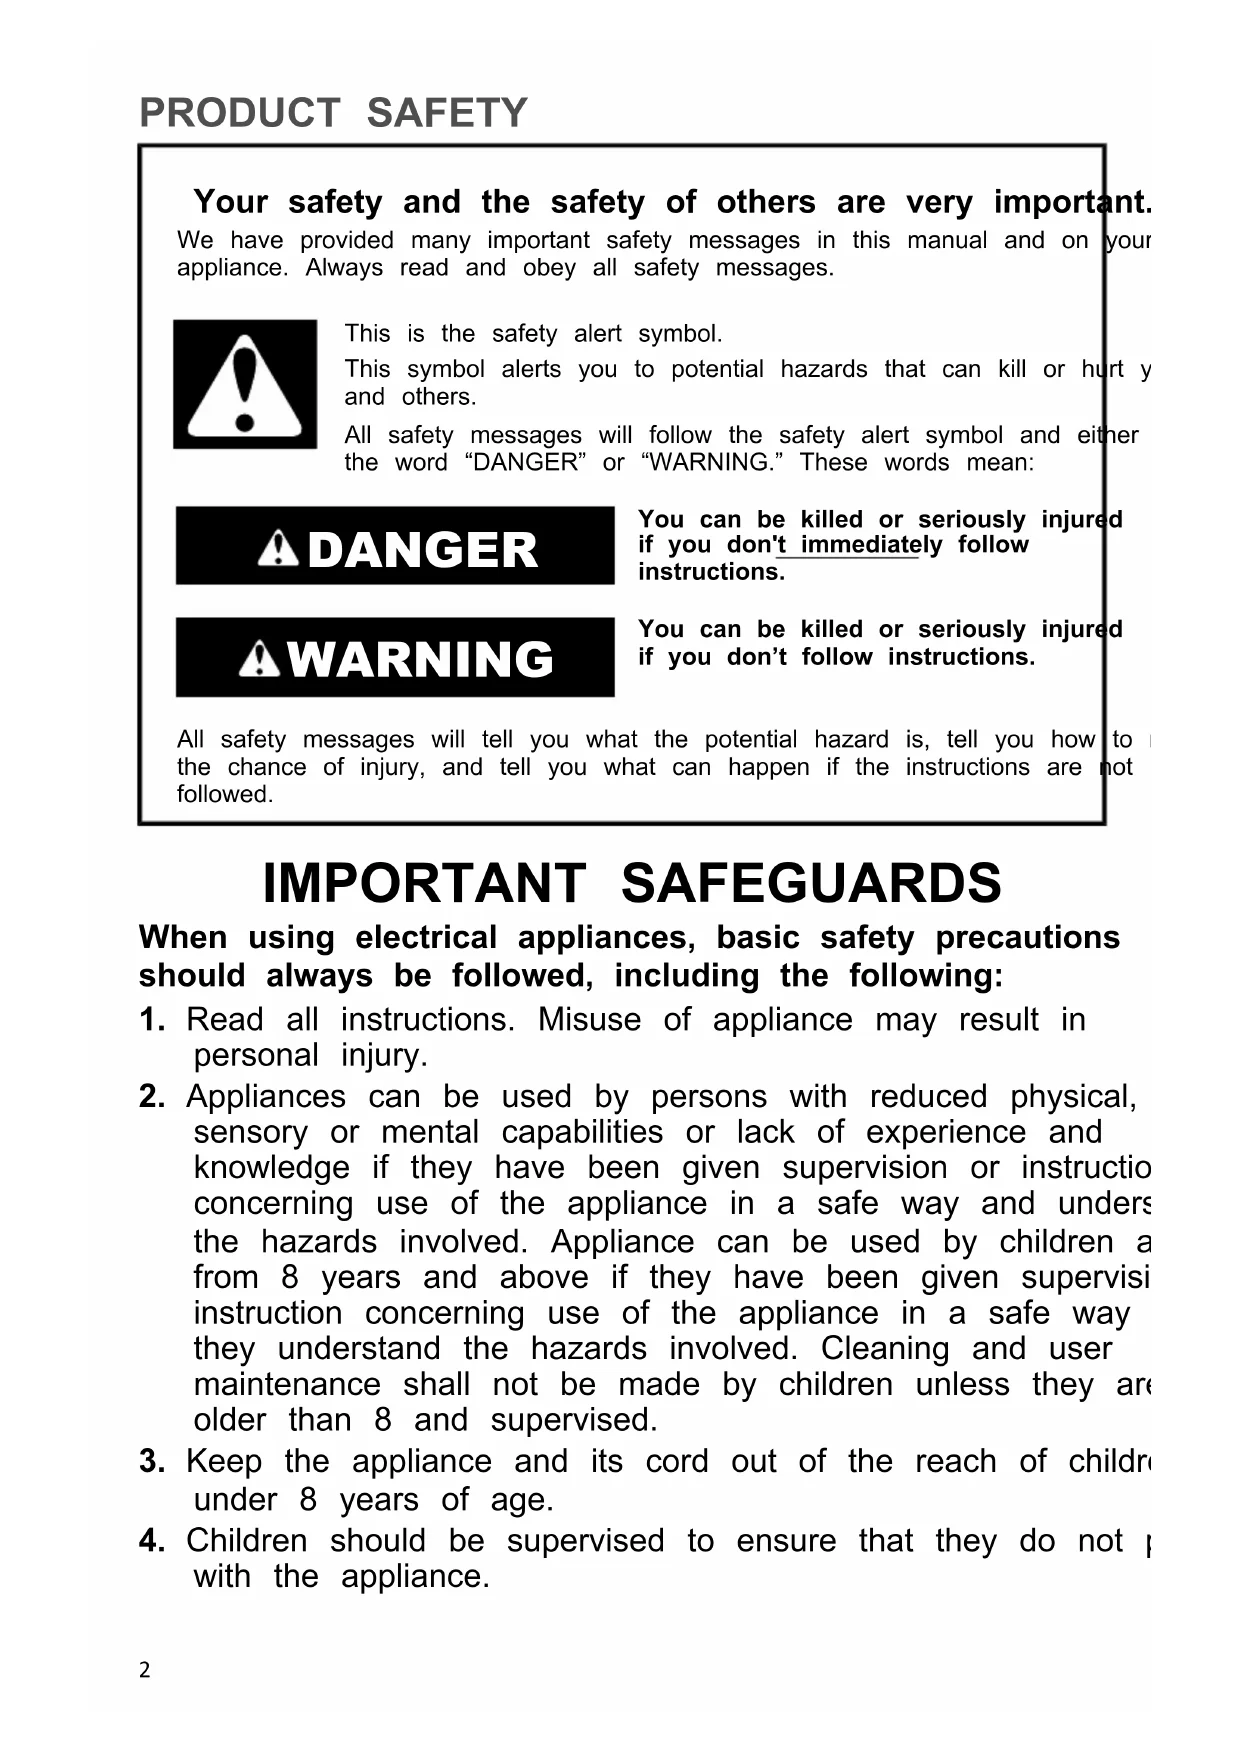
Your safety and the safety of others are very important.
We have provided many important safety messages in this manual and on your appliance. Always read and obey all safety messages.

This is the safety alert symbol.
This symbol alerts you to potential hazards that can kill or hurt y and others.
All safety messages will follow the safety alert symbol and either the word "DANGER" or "WARNING." These words mean:
DANGER
You can be killed or seriously injured if you don't immediately follow instructions.
WARNING
You can be killed or seriously injured if you don't follow instructions.
All safety messages will tell you what the potential hazard is, tell you how to the chance of injury, and tell you what can happen if the instructions are not followed.
IMPORTANT SAFEGUARDS
When using electrical appliances, basic safety precautions should always be followed, including the following:
- Read all instructions. Misuse of appliance may result in personal injury.
- Appliances can be used by persons with reduced physical, sensory or mental capabilities or lack of experience and knowledge if they have been given supervision or instruction concerning use of the appliance in a safe way and unders the hazards involved. Appliance can be used by children a from 8 years and above if they have been given supervisi instruction concerning use of the appliance in a safe way they understand the hazards involved. Cleaning and user maintenance shall not be made by children unless they are older than 8 and supervised.
- Keep the appliance and its cord out of the reach of children under 8 years of age.
-
Children should be supervised to ensure that they do not p with the appliance.
-
The necessary cleaning and maintenance meant to be performed by the user must not be carried out by child under direct supervision and older than 8 years.
- Do not touch hot surfaces. Use handles or knobs.
- Do not operate any appliance with a damaged cord or plug after the appliance malfunctions, or is dropped or damaged any manner. Return appliance to the nearest Authorised Service Facility for examination, repair, or electrical or mechanical adjustment.
- To protect against fire, electric shock, and personal injury do not immerse cord, plugs, or appliance in water or other liq Avoid spillage on the connector.
- Always attach plug to appliance first, then plug cord into the wall outlet. To disconnect, turn the appliance off then unplug from the wall outlet.
- Never attempt to carry the hot appliance. Spilled hot water/coffee may cause severe injuries or burns.
- Never leave the appliance unattended while it is in operat
- The use of attachments/accessories not recommended or s by KitchenAid may cause fire, electric shock, or injury to persons.
- Do not use the appliance outdoors.
- Do not let cord hang over edge of table or counter, or to surfaces.
- Do not place on or near a hot gas or electric burner, or heated oven.
- Turn the appliance off, (then unplug from the outlet when not in use, before assembling or disassembling parts and before cleaning. To unplug, grasp the plug and pull from the outlet. Never pull from the power cord.
- Do not clean the Fully Automatic Espresso Machine with abrasive cleaners, steel wool, or other abrasive materials.
- To avoid the risk of injury, do not remove the drip tray of the service door or remove the brew chamber during the I process.
- Use extreme caution when using hot steam.
-
Do not use appliance for other than intended use.
-
Irritation to skin or eyes can occur if they come into contact with the descending solution. Avoid skin and eye contact. Rinse or descaling solution with clean water. Obtain medical advice after eye contact.
- Damage to delicate surfaces can occur after contact with descending solution. Remove any splashes immediately.
- Allow the appliance to cool completely before putting on c taking off parts, and before cleaning the appliance.
- Refer to the "Care and Cleaning" section for instructions on cleaning the surfaces in contact with food.
- The heating element surface is subject to residual heat at use. Do not touch hot surface. Use handles.
- If the supply cord is damaged, it must be replaced by KitchenAid, its service agent or similarly qualified persons in order to avoid a hazard.
- The maximum altitude of use is 2000 m above sea level.
- The coffee machine must not be used in mobile installations such as boats, motor vehicles, trains etc.
- Use this coffee system only in standard household environments for making coffee, milk or tea beverages such as cappuccino, latte macchiato, etc.
- Any other type of use is not permitted.
- Do not use treated coffee beans with additives or caramel coffee beans.
- Do not fill liquids into the Bean Hopper or the powder ch
- Only fill the Water Tank with cold, fresh tap water. Do not deionised or mineral water.
- To avoid contamination of the water, use fresh water every day.
- The appliance shall not be placed in a cabinet when in use
-
Do not place removable parts such as the Water Tank, Dispenser, Service Door, Drip Tray or milk tank lid in the dishwasher or soak these parts in water or detergent. This cause damage to the parts, and sharp edges may appear.
-
This appliance is intended to be used in household and applications such as:
■ staff kitchen areas in shops, farmhouses, offices and working environments;
■ farmhouses;
- by clients in hotels, motels and other residential type environments;
bed and breakfast type environments.
SAVE THESE INSTRUCTIONS
For complete details on product information, instructions and videos, including Guarantee information, visit
www.kitchenaid.co.uk/product-tips,
www.kitchenaid.ie/product-tips, or www.KitchenAid.eu.
ELECTRICAL REQUIREMENTS

WARNING
Electrical Shock Hazard
Plug into an earthed outlet.
Do not remove earth prong.
Do not use an adapter.
Do not use an extension cord.
Failure to follow these instructions can result in death, fire, or electrical shock.
Voltage: 220-240 VAC
Frequency: 50-60 Hz
Power: 1450 W
NOTE: If the plug does not fit in the outlet, contact a qualified electrician or service person. Do not modify the plug in any way. Do not use an adapter.
Do not use an extension cord. If the power supply cord is too short, have a qualified or service person to install an outlet near the appliance.
The cord should be arranged so that it will not drape over the countertop or tabletop ' can be pulled on by children or tripped over unintentionally.

WARNING
Electrical Shock Hazard
Plug into an earthed outlet.
Do not remove earth prong.
Do not use an adapter.
Do not use an extension cord.
Failure to follow these instructions can result in death, fire, or electrical shock.
First, clean all parts and accessories (See "Care and Cleaning" section).
Place the Fully Automatic Espresso Machine on a dry, flat, and level surface such as counter-top or table. The ventilation slots must not be covered.
- Plug into an earthed outlet. Press the Main Power Switch on the side of the machi (to switch the machine off, press the Main Power Switch again).
- Model 5KES8557 and 5KES8558: The machine operates with a touch screen and touch buttons that can be used to select or navigate between menus.
OR
Model 5KES8556: The machine has a colour Display with only off-screen touch butt navigate between menus.
STANDBY TIME
By instructing your appliance to automatically switch itself off, you can cut down your e consumption. If this function is activated, your product switches off automatically after the preset time following the last action on the machine.
- You can set the Standby Time from 8 minutes to 8 hours.
PRODUCT USAGE
BREWING A DRINK
- Press the “ ” icon to enter the “Drinks” menu. Use the “<” or “>” icon to scroll through the different pages to find your drink.
- After selecting a drink you can personalise it by adjusting the settings (see "Personalising Drinks and Creating Profiles" section).
- Select "1x" option and single press the " " icon if you want to brew two shots. The machine automatically carries out two grinding cycles in sequence of the selected dr
- Press the "8" icon to brew one of your saved drinks. Slide the Dispenser spout up or down to adjust the height to the size of the cup or glass you are using.
BREWING COFFEE-BASED DRINKS
- Fill the Water Tank with tap water and fill the Bean Hopper with beans.
-
Press the “ 一 ” icon and select your coffee. You can adjust the settings to your preference by pressing the icon. Press the “” icon to start brewing the selected drink.
-
Fill the Water Tank with tap water and fill the Bean Hopper with beans. Remove the lid of the Milk Tank and fill the Milk Tank with milk. Always use milk coming directly fridge for optimal results.
- Model 5KES8557 and 5KES8558 only: Connect one side of Milk Tube to the Milk Tank lid, connect the other side of the Milk Tube to the side of the DispenserPress timed "select your coffee.
NOTE: Model 5KES8556, does not include a Milk Tank. To brew milk based drinks, remove the Milk Tube connector piece from one end of the Milk Tube, place hose end directly in container or container of your choice. See "Model 5KES8556 Milk Brewing and Cleaning section.
- You can adjust the settings to your preference by pressing the “ ” icon. Press the “ ” icon at any time to start brewing the selected drink.
- Directly after dispensing the milk, the "Easy Milk Rinsing" is performed. The machine forces steam through the internal milk system to rinse it quickly.
MODEL 5KES8556 MILK BREWING AND CLEANING
TIP: You can also use a regular milk carton to brew your milk-based drinks. Place the Tube directly into the milk carton.
NOTE: These can be changed individually and stored indefinitely, please see the "Personalising Drinks" section.
NOTE: After completion of the milk-based coffee beverage, the Display shows the message/instruction to rinse the frother. The frother should then be rinsed as soon as 1 but at the latest before switching off the machine. To do this, select and confirm the message/instruction on the Display.
NOTE: Model 5KES8556; Please insert milk hose connector back for any cleaning.
See "Care and Cleaning" section.
BREWING COFFEE WITH PRE-GROUND COFFEE
- Remove top Lid. Open Coffee Grounds Shaft (underneath the cover on the upper rig the machine), the Display shows Fill Coffee Grounds Shaft and Close grounds shaft.
- Add a level measuring Spoon of ground coffee. Close Coffee Grounds Shaft and Lid Display shows when the ground coffee is ready.
- Place a cup in the middle below the Dispenser outlet. Select the beverage from the options available on the screen. The machine will then begin to brew.
NOTE: When using "Coffee Grounds" mode, the shots cannot be adjusted.
dispensing HOT WATER
- Press the 念 icon to enter the Drinks menu and select "Hot Water" by pressing the icon.
- Press the icon to start dispensing hot water.
PERSONALISING DRINKS AND CREATING PROFILES
Within the drinks menu, the factory recipe settings can be changed individually and store indefinitely. The machine allows you to adjust the settings of a drink to your own preference and to save the adjusted drink in a personal profile. There are two ways to create a
1. Personalising your drinks:
Press the 出 icon.
Press the "icon to select your preferred drink.
■ After selecting a drink, you can see next screen for more settings to adjust.
■ Use the < or > icon to navigate different selection buttons depending on the type of drink to adjust strength, volume of coffee, milk and foam, temperature, the taste of the order of brewing milk-based drinks to your preferred level.
■ You can save these settings to your profile by selecting "on the screen and confirm it by pressing" "icon or press " icon to brew the personalized drink.
2. Creating a profile:
Press the 假 icon.
Select "Add profile".
Enter a name for the new profile and click on "Add New".
Select the newly created profile.
- Add drinks to the profile by selecting "Add Drink".
NOTE: In model 5KES8556, 4 user profiles are available, but you cannot create a personalised username. In model 5KES8557, 4 user profiles are available, and you can a personalised username. In model 5KES8558, 6 user profiles are available, and you can create a personalised username.
CARE AND CLEANING
For best results, regularly clean the Fully Automatic Espresso Machine and accessories.
IMPORTANT: Allow the appliance to cool completely before putting on or taking off part before cleaning the appliance.
NOTE: Do not use abrasive cleansers or scouring pads when cleaning the Fully Automat- ESPromo Machine, parts, or accessories. Do not immerse the Fully Automatic ESPromo Machine or cord in water or other liquids. None of the removable parts such as Drip 7 Bean Hopper, Lid, Water Tank, Brew Unit, Service Door, Dispenser, and Milk Tank Lid dishwasher-safe and should be washed by hand and thoroughly rinsed.
NOTE: All cleaning and maintenance programs can be selected and started in the Maintenance menu. If a message, instruction for cleaning or maintenance activity appear the Display, the program can be started directly through the message/instructions.
CLEANING THE FULLY AUTOMATIC ESPRESSO MACHINE
All cleaning and maintenance programs can be selected and started in the CLEANING "☑". If a message for a cleaning or maintenance activity appears on the Display, this p can also be started directly through the message.
- Select and confirm the message or select the " ” menu. Select the desired cleaning maintenance program and start.
- The machine starts the corresponding cleaning or maintenance process and displays instructions for additional actions. Follow the instructions in the Display up to the en program.
RINSING THE FROther: EASY MILK RINSING
After you make milk based drinks, the Display instructs you to rinse the frother. The done as soon as possible, but at the latest before switching off the machine.
- Select and confirm the instruction or in the " ” menu, select the menu option "Easy Milk Rinsing".
- Connect the supplied Milk Tube with one end to the Dispenser outlet and put the other end in the Drip Tray, and confirm on the Display.
- Place a sufficiently large container (≥ 0.5L) under the Dispenser outlet and confirm on the Display.
- The machine starts the rinsing process. As soon as the rinse cycle is ended, the m heats up and is then ready for operation again.
NOTE: Rinsing milk frother after each use is important to avoid milk build up.
CLEAN FROther: DEEP MILK CLEANING
- Select and confirm the message on the Display or On the “ ” menu, select the men "Deep Milk Clean".
- Put some milk cleaning system specific detergent and water in a container (at least 0.3L ). Please observe the instructions of the detergent manufacturer for the mix ratio.
- Follow the instructions on the Display up to the end of the program and confirm each time. The machine then heats up and is ready for operation again.
DESCALING
A message is shown on the Display when the machine has to be descaled. The desc program can also be started manually at any time. Beverages can still be drawn, but we recommend carrying out the cleaning program as soon as possible.
Descaling agents are known to stain the steel parts of the machine. Ensure that you have a large container under the brew unit to avoid splashing and spills. If stain occurs, make use of an oxalic acid or citric acid product to remove properly. When applying cleaner, rule out the grain and rinse properly after cleaning. For a nice shine, add stainless cleaner after cleaning.
- Select and confirm the instruction or press the “” icon and select the “Dscaling” by pressing the “” icon.
- Put a sufficiently large container (≥ 0.5L) under the Dispenser outlet. Follow the instructions on the Display up to the end of the program.
- The machine then heats up and is ready for operation again.
IMPORTANT: The running descending program must not be interrupted. Do not use vineg vinegar-based materials for descending, but use products recommended for fully automatic coffee machines. The filter (if present) must be removed from the Water Tank prior to of the descending program.
During descending, please follow exactly the sequence of the displays:
■ First pour in the corresponding amount of water up to the 0.5 L mark and then add descaler.
■ Do not in reverse order. Observe the instructions of the descaler manufacturer.
BREW UNIT CLEANING - 2-PHASE BREW UNIT CLEANING PROCESS
The brewing unit should be removed and cleaned under running water as needed and each cleaning program. Please do not use detergent, but only cold water.
-
Select and confirm the instruction. Empty the trays. Fill the Water Tank to max fill line (2.2 L). Place a sufficiently large container (≥ 0.5L) under the Dispenser outlet. Fo instructions on the Display up to the end of the first phase.
-
For the second phase open the Service Door on the right side of the housing (gen the unlocking device inside the handle upward, then carefully remove the Service D from the housing). Unlock brewing unit (press red switch upwards and rotate the ha and to the left until it locks).
- Grasp handle and pull the brewing unit straight out to remove. Clean the brewing u under cold, running water and then let it dry. Put a brew unit specific cleaning tabl the brew unit. Please observe the manufacturer's instructions of the cleaning tablet f usage. Follow the instructions on the Display up to the end of the program and co each time. The machine is ready for use again.
NOTE: Do not interrupt the cleaning programs while they are running.
EMPTY SYSTEM
This process empties the machine of any residual water and is recommended in case of term storage.
- Follow the instructions on the Display.
NOTE: Freezing residual water can damage the appliance. Avoid exposing the appliance temperatures below 32^ / 0^ . Empty the system when the appliance is not used for a period, prior to transport and when there is a risk of frost.
DISASSEMBLE AND CLEAN FROHER
From time to time, the frother must be disassembled completely and cleaned using water
- Remove the front cover plate from the Dispenser, gently pull the frother down and then out to the front and take it apart.
- Thoroughly clean the parts and put the frother back together. Insert the assembled frother back in the Dispenser.
- Reattach the cover plate to the Dispenser.
CHANGE WATER FILTER
The filter's effectiveness is used up after about 50 L of water has flowed through it.
A message/instruction to replace the filter appears on the Display.
- In the menu, select the Water Filter menu option. Select Yes so that the machi detects that a filter is currently inserted. Select "Replace Filter".
- Using the mounting aid at the end of the measuring Spoon, empty the Water Tank. Unscrew the old filter from its holder and throw the filter away.
- Using the mounting aid at the end of the measuring Spoon, screw the new filter int intended holder in the Water Tank.
- Follow the instructions on the Display up to the end of the program and confirm each time.
- The machine then heats up and is ready for operation again.
TERMS OF KITCHENAID GUARANTEE ("GUARANTEE")
Covering U.K. - Ireland - UAE
KitchenAid UK Limited Morley Way, Peterborough, Cambridgeshire PE2 9JB UK ("Guarantor") grants the end-customer, who is a consumer, a Guarantee pursuant to the following terms.
FOR U.K.:
The Guarantee applies in addition to and does not limit or affect the statutory warranty rights of the end-customer against the seller of the product. In summary, the Consumer Rights Act 2015 says products must be as described, fit for purpose and of satisfactory quality. During the expected lifespan of your product your legal rights entitle you to the following:
Up to 30 days: if your product is faulty, then you can get an immediate refund.
Up to six months: if your product can't be repaired or replaced, then you're entitled to a full refund, in most cases.
Up to six years: if your product does not last a reasonable length of time you may be entitled to some money back.
These rights are subject to certain exceptions. For detailed information please visit the Citizens Advice website www.adviceguide.org.uk or call 03454 04 05 06.
FOR IRELAND:
The Guarantee applies in addition to and does not limit or affect the statutory warranty rights of the end-customer against the seller of the product under the European Communities (Certain Aspects of the Sale of Consumer Goods and Associated Guaran Regulations 2003 (S.I. No. 11/2003)) and other enactments governing the sale of consumer goods.
FOR UAE:
The Guarantee applies in addition to and does not limit or affect the statutory warranty rights of the end-customer against the seller of the product.
1. SCOPE AND TERMS OF THE GUARANTEE
a) The Guarantor grants the Guarantee for the products mentioned under Section 1.b) which a consumer has purchased from a seller or a company of the KitchenAid-Group within the following countries: U.K., Ireland, or the United Arab Emirates (UAE).
b) The Guarantee period depends on the purchased product and is as follows:
Two Year full guarantee from date of purchase.
c) The Guarantee period commences on the date of purchase, i.e. the date on which a consumer purchased the product from a dealer or a company of the KitchenAid-Group.
d) The Guarantee covers the defect-free nature of the product.
e) The Guarantor shall provide the consumer with the following services under this Guarantee, at the choice of the Guarantor, if a defect occurs during the Guarantee period:
Repair of the defective product or product part, or
Replacement of the defective product or product part. If a product is no longer available, the Guarantor is entitled to exchange the product for a product of equal or higher value.
f) If the consumer wishes to make a claim under the Guarantee, the consumer has to contact the country specific KitchenAid service centres or the Guarantor directly at KitchenAid UK Limited Morley Way, Peterborough, Cambridgeshire PE2 9JB UK;
Email-Address U.K.: CONSUMERCARE. UK@kitchenaid.eu
Email-Address IRELAND: CONSUMERCARE.IE@kitchenaid.eu
Toll Free Number U.K. & IRELAND: 00 800 381 040 26
FOR UAE:
AL GHANDI ELECTRONICS.
POST BOX NO. 9098,
DUBAI, UNITED ARAB EMIRATES
Toll free number: +971 4 2570007
g) The costs of repair, including spare parts, and any postage costs (if applicable) for the delivery of a defect-free product or product part shall be borne by the Guarantor. The Guarantor shall also bear the postage costs for returning the defective product or product part if the Guarantor or the country specific KitchenAid customer service centre requested the return of the defective product or product part. However, the consumer shall bear the costs of appropriate packaging for the return of the defective product or product part.
h) To be able to make a claim under the Guarantee, the consumer must present the receipt or invoice of the purchase of the product.
2. LIMITATIONS OF THE GUARANTEE
a) The Guarantee applies only to products used for private purposes and not for professional or commercial purposes.
b) The Guarantee does not apply in the case of normal wear and tear, improper or abusive use, failure to follow the instructions for use, use of the product at the wrong electrical voltage, installation and operation in violation of the applicable electrical regulations, and use of force (e.g. blows).
c) The Guarantee does not apply if the product has been modified or converted, e.g. conversions from 120 V products to 220-240 V products.
d) The provision of Guarantee services does not extend the Guarantee period, nor does it initiate the commencement of a new Guarantee period. The Guarantee period for installed spare parts ends with the Guarantee period for the entire product.
e) FOR UAE ONLY:
Further or other claims, in particular claims for damages, are excluded unless liability is mandatory by law.
After expiry of the Guarantee period or for products for which the Guarantee does not apply, the KitchenAid customer service centres are still available to the end-customer for questions and information.
Further information is also available on our website:
For U.K. & Ireland www.kitchenaid.eu
For UAE: www.KitchenAid-MEA.com
Novissa Service Center
VEBO Genossenschaft
Haselweg 2
CH-4528 Zuchwil
Telefonnummer: 032 686 58 50
E-Mail-Adresse: service@novissa.ch
FÜR LUXEMBURG:
GROUP LOUISIANA S.A.
Novissa Service Center
VEBO Genossenschaft
CH-4528 Zuchwil
DRANKJES MET KOFFIE BEREIDEN
The Guarantee applies in addition to and does not limit or affect the statutory warranty rights of the end-customer against the seller of the product.
- AMBITO E TERMOS DA GARANTIA
HAEKTPIKEAATAITHSEIE

A\PPO\SOXH
Kivduvoç nλεκτροπληξiaç
OPOI THE EΓYHΣH ΕΚITCHENAID (“ΕΓYHΣH”
H KitchenAid Europa, Inc., Nijverheidslaan 3, Box 5, 1853 Strombeek-Bever, Belgium ("Eyyuntns") EKwpeI OTV TAIKO KATAVAAWTH, o oioicivai katavaawns,mu Eyyuonoupouc aokalououc opouc (eTropikn Eyyuon).
H Eyyunon Ioxuei EttTAEov twv kataotatikwv DkaiuMATW TCS Eyyunong TEAIKou katavaawth OE oxeon me ToV WAntn Tou Tpoiovto, ta otioa kai depiopici n tnpedaezi. Suovnttka, o Nooos Tepi TpOATAic Twv katavaawtw 2251/1994 (ap0po 5 Tepi Tns TTannc kai twv Eyyuaewv Katavaawtkwv ayawv Tou uTokeivta OE vOpikn Eyyun) TPOBETei OTa Tpoiovta Tpeivai otiw TepipovtalouqwvnKe, xwiic Eaattwata. TIO PAiaio TNS EKTIWWEvNc Diapkeias Zwns Tou Tpoiovtoc aac, Vovika oac DkaiuMata oac eTTPTouv va Tpobaivee OTA Eng:
Eav, oTo TIAIOIOXUOC TNC EITOPIKNG EYUNONS, n ETIOKeUN TO EATWATKOU TPOIOVOSI APKEI TEPIOOATEPc aTO EDAKATVE (15) epyaoues npecs, exTe To dikaiwpa TPOoovn avkataotaon Tou Poiovos, yio 0o0 diaotma diapkeei n ETTIOK
Tia toulaxiotov du etn: uvexnc npoxh texvikw utnpoeiwv ouvtipnongk eioKu, kaohc kai aepoan dia0e an avtaakikw kai aawv (ouptanpwpatikw) ayawv, ta otoia atainovtai yia tn xphon tou tpoivtoc, avaloya me tov xpnoansou.
Ews kai dekaeepic (14) nppooyiaek nepes atto ntpapdoan: 2 TEPiTTwoeis wAnon es aatoaacews (n.x. diaktuaka/ nektpoviko eptio), dikaiouote va avakaedeote nvi wAnon xwpiKupwoei kai xwpi aith
Ta oikaiwata Tnou oxeticovtae ie TnTtawaeig e aotostoeuvtokeivtae opievec eiaipoeic. Ta avalutike Tlnpopopieoxetikape 0a Ta Tnapatavw, Etiokepoite TN diaiktuakn totoebia Tou YIoupyiou Avantuengs KAI EETVduoeewv/Erkiq Ppaumateia Pooataiac Tou Katavaawtn ot n dieuovwn www.mindev.gov.gr n kaleote n ypamk katavaawtwv, oToV apio
VEDLIKEHOLD OG RENGJØRING
For best mulig resultat bør du rengjore den helautomatiske expressomaskinen og tilbehø regelmessig.
VIKTIG: La apparatet avkjoles helt focr du setter pa ell er tar av deler, og for du renjz apparatet.
1. UMFANG OG SKILMALAR ABYRGDARINNAR
WARUNKI GWARANCJI KITCHENAID (,,GWARANCJA”)
TYTO POKNY SI USCHOVEJTE
1. ROZSAH PLATNOSTI A PODMINKY ZARUKY
Macun Mah. Bati Bulvari ATB is Mrkz.
No:1 C Blok 49
Yenimahalle/ANKARA 06105
SSHYB Tarih/No: 27.07.2017 / 52253
+90 312 397 83 70
He BnKOpncToBvIe aAnTeP.
He BnKOpNCTOByTe NOIOBxkyBaIbHn IHyp.
HedotpmaHHaix iHctpyKci MoKe np3BecTu Do cMepti, noxexia6o ypaXeHH aEkeTpnuHm cTpyMOM.
Hanpyra: 220-240 B 3miHHoro ctpymy
Yactota: 50-60 T
NotyXHicTB: 1450 BT
IPIMNITKA. RaKo Bnka He BXoNTb y po3eTKy, 3BepHiTbcr Do KBaIicIKOBaHoro eNeKTprn a6o cepBichoro qaxiBzra. He Hamaaratecra MoNphiKyBaTu wTeNCelb y XODHn cnoci6. H BnKOpNCTOByuTe aAnTep.
He BnKOpNCTOByIte NOIOBKyBaJIbHm IHyp. JkUO IHyp XINBJeHn 3aHaTTo KOpOTKn, 3BepHiTbcrdo KBaIiΦIKoBAHO eNeKTpNa a6o cepBicHoro nepcoHany, Uo6 BCTaHOBTn po3eTKy no6n3y npnaady.
Hyp cnid po3TaOBOyBaTn TaKIM yHOM, 06 Bin He 3BiUyBaBCa 3 KpaO CTiIKn a6o CTIbHnCi, De Ioro MoKyTB NotarHyTN dITn a6o 3a HbOrO MoXHa nepeeHTncra.
ANONEPEDJKEHNA

Pn3nk ypaaxeHH eNeKtpnHm cTpyMOM
Pi'd'ednyte npnlaD do 3a3emnehoi po3eTkn.
He BndaJnTe 3a3eMJeHHra.
He BnKOpNCTOByTe aAnTep.
He BnKOpNcToBnyTe nOobKyBaIbHn IHyp.
HeodtpmaHnI cx iHctpyKci MoKe np3BecTn do cmepti, noxexi abo ypaXeHH eEeKtpuHm cTpymom.
Cnoatky nouuctbTe Bci qactnHn KOMPneKtyuOi (INB. po3diN «IorJraI yHsEHHa).
YctahOBiB noBHicTIO aBTOMaTHUHy ecnPeco-MaunHy Ha cyxy nIacky Ta piBHy NOBepxHIO, HAnpIKnaI, Ha cTINbHnIoo a6o cTIn. He 3akpBaIte BEHTnJIaIHi OTBOpN.
1.Пд'EDHyTe npnlaDo 3a3emIeHoi po3eTKn.HaTncHiB roNoBHn nepemHKauch XNBHeHa 6iHyni NaheI MaunH)U (Uo6 BmKHyTu MaunHy, iue pa3 HaTncHiB roNoBHn nepemHKauch XNBHeHHa.
2. Modeni 5KES8557 i 5KES8558. KepyBaHHa KaBOMaUNHO 3diChIOeTbcra 3a DonomoroTO ceHCOPHOrO ekpaHa Ta ceHCopHnx KHOON, rki TAKOX 3actOCOBYOTbcra dIЯ nepexody I MeHTo Ta Bn6opy napameTpIB.
ABO
MoeB 5KES8556. KaBOMaunHa oChaueHa KOJbOpOBm DnCpIeEM i OKpeMMN CEHCOPHMN KHOKNAMn DnA HabiraCiB MeHIO.
YAC OUYBAHH
HanaTyBaBn yac aBTOMaTHO BUMKHeHH npNCtpoo, MoXHa 3MeHUnTn CNOXnBaHH eHepri. RaIO qyHKUIO AKTNBOHaHO, pncTpI aBTOMaTHO BIMnKaETbcra Nicna OCTaH DII Ha HbOMy, KOJI MInHe BCTAHOBNeHn y cNCTeMI yac.
- Moxha Bn6paTn Yac OuyyBaHHa BiD 8 XBnHn Do 8 rOHN.
BVKOPNCTAHHBAHPOBy
ПРИГOTУBAHHЯ HANOIO
- Hatachitb 3aok, 06 BiKpntm MeHIO Hanoi'. I npokpyBaHHc ctopiHK i nowky HanoIO HatackaiTe 3HaKa6o
- Bn6paBn Hani, 3a 6axaHHm MoXHa 3miHtN Ioro HanaHTyBaHH (INB. po3diN «PepcoHaii3aui HanoiB i CTbOpEHn npoipinB»).
- Bn6epitb napametp 1x> i oINH pa3 HATNCHTb 3aouK, 06 npiroTyBaTn Dbi npucii Pnpctpii aBTOMaTHNO nocNiIOBHO BIKOHaE DBA cIKNn NOMEny dIra Bn6paHnx HanoIB
- Hatachitb 3NaO8, 06 npiroTyBaTH OINH 3i 36epexeHX hanoIB. 66 hanaHTyBaTH BnCOTy BiINOiDHO Do po3Mipy aAaKN a6o cKnHKn, nocyHbTe HocNK dncneHcepa Brop a6o BnN3.
ПИГOTУBAHHЯ KABOBUX HANOIB
- Hann Te Body B pe3epByap i HacnTe KaBOi 3epHa B KOHTeHep.
- Hatnchitb 3NaOe Bn6epitb KaOBn Hani. Napametpn MoXHa HanaTyBaTn, HatnCHyBm 3NaOe/. HatnchItb 3NaOe, o6 po3noatn npiroTyBaHHa Bn6paHoro HANOJ.
ПРИГOTУBAHHЯ HANOIB 13 MOJOKOM
- Hanne Te Body B pe3epByap i HacunTe KaBObi 3epHa B KOHTeHep. 3himiTb KpUkky KOHTeHepa DnA MOlOKa Ta 3aJIuTE B HbORO MOlOKo. DnA ONTImaJIbHOro pe3yIbTaTy 3aBXd NIKOPNCTOByte Do6pe OxJOnJxKeHe MOlOKo.
- Пише модeni 5KES8557 Ta 5KES8558:пд' endан Te Ondn KiHeCb Tpy6kn noaI MoNoka Do KpnuKoHTeHepa, a iHsni KiHeCb BCTaBTe B OTBip 360ky Ha dinCneHcepI. HAtv 3HaQOK i Bn6epiTB KaBOBn Hanii.
IPNMITKA. y moJIeI 5KES8556 HeMaE KOHTeHepa IJRA MOJOKa. Uo6 nprirotyBaTn Hanoi 3 MOJOKOM, BiE'edHaIte 3'EDHyBaU BiD Tpy6Kn NODaI MOJOKa Ta BCTaBTe Tpy6Ky
6e3nocepEnbO B PnAaKy 3 MoNOKOM YH IN HsN KOHTeHep, y Akomy BN 36epiraTe MOJ DInB. po3dIn
«Приноуваимаюь i3 MONOKOM y mojeni 5KES8556 ta ouhieneHHcntemn BiД 3aJIIMOJOKa».
- Параметри можна надауbatи, натувши 3нчok . Натисить 3нчok , поб розочати ппютува相关内容. HANOIO.
- Odpa3y nicra npirotyBaHHa HanoIO 3 MOLOKOM CnCTeMy cIiD npomTu BID 3aJIuKIB MoJoka. Pnpctpi nponyckaepnapyepe3 BHyTpiiHHi KOMNoHEHTN CnCTeMn, uO6 WBNIO OuchTITX BiD 3aJIuKIB MOJoka.
ПРИГOTУBAHня HANOIB 13 MOЛOKOM I OчицEHня KABOMAUHHN (MOДЕЛь 5KES8556)
IOPADA.ДяприrotybaHHЯ HanoiB i3 MOJOKOM MoXHa TAKOx BnKOpNCTOByBaTи MOnOKO 3BnauHoro KapTOHHoro naketa. BcTaBte Tpy6ky noaui MoJoka 6e3nocepeHbO B KApTOH naKeT i3 MONOKOM.
ПРИMITК. IX MOЖHA 3MiHOBaTN iHdNbIyalbHo Ta 36epiratn Ha3aBXKn. ДИВ. po3diN «Пер cohлizauя HanoiB».
PIMITKA. Iicn npiroTyBaHHa KaOBoro HanoIO Ha OCHOBi MoNoka Ha DInCnJIe 3'ABnE NOIdomHeHH / iHCTpyKzio npOMBaHHcniHOBau.CNIHOBau cnid npomntyKOMO WbUdwe abo xOua 6 nepeD BmKHeHHMaunH. UoB BVkoHaTn pOueDpy, BvBeptb i NiITBepDbTe NobIDOMHeHH / IHCTpyKzio Ha DInCnJIe.
ПРИMITК.у moDEJI 5KES8556 ДЯ OчишЕнь BCTaBTe Ha3aД 3'EDHyBaU Tpy6Kn DЯ MOnoka.(ДИВ.po3dIN «Догпд i ChuшeHHA»).
ПИГOTУBAHHЯ HANOIO 3 ПОЕPEDьо 3MEЛЕнx KABOBx 3EPEH
- 3HIMITb BepxHIO KPNsKy. BiDpNtTe BiDcK dIy MeJeHOi KaBn (po3TaUOByEcTbcr niD KPNkoIO npabOpuy Ta Bropi Ha Kopnyci MaunHH) i, DOTpMHyOuHc b IHCTpyKciH Na HacnInTe MeEnHy Kaby y BiDcK Ta 3akpnTe KPNsKy.
2.ДоаиTe MipHy loxky MeJeHoI KabN. 3aknite BiDcik dIy MeJeHOi kabN ta Kpnkcy. DInCnJIe I BIDo6pa3ntbCЯ NOBIDOMJehHry, KOJI N MeJeHa KaBa 6yde roTOBa. - NocTaBte yauKy nocepeHni nID HOCKOM dncnEhcepa. BnbepiTb Hanii i3 doctynHX I ekpaHI bapiANTIB. Picna zboro KAbOMaunHa noUHe npiroToyBaHHa KabN.
PpIMITKA. y pexmi npiroTyBaHnHaNoO 3 nonepdHbO 3MeJeHOi KaBn o6'Em nopuiypeYnIOeTbcra.
ПОДАЧА ГAPЯЧОВODN
- Hatncitb 3NaOKe, 06 BiKpnT MeHIO «Hanoi'. Bn6epitb nyHKT «Iapya Boda», HATNCyBUn 3NaOOK/.
- Hatnchitb 3HaoyokD, 0o6 HaHNTn rapaoyoi BODN.
Y MeHIO HanoiB 3aBOcBiN napaMeTpN peceNTIB MOxHa 3MiHOBaTN 3a BlnaCHIMN BNOObAHnMa Ta 36epiratN Ha3aBXKn. Y CnCTeMI MoxHa HanaSTyBaTN napaMeTpN Ha CMAkOM i 36epertN Hanii 3 OHOblenHMn HaJauSTyBaHHaMn B OcoBNCToM y npoPjNi. Pp MOxHa CTBOpHTN DbOMa cnOCo6aMn.
A
1. NepcoHaJIaIaIe HanoIb.
HaTnCHiTb 3HaYOK
HaTnchItb 3NaOOK√, Uo6 Bn6paTu Hani.
■Пися Вибору habою BiDObpa3ntbcs HacTyHnEkpaH,HaЯKOMy MoXHa HanaStyBaTn iHwi napametpn.
■HaTnCKaOuH 3NaOcK< a6o> 3aJexHo BiD TIny HanoIO nepExoDbTe Do pi3Hnx KhONC Bn6Opy, 0o6 HanaStyBaTN MiUHicTb, 06'EM KabN, MOLOKa Ta nIH, Tempeatpy, O nopAdoK npriroTyBaHHra HanoiB i3 MoIOKOM.
■ Li napametpn MoxHa 36epertn B npophi: TopKHitbcr Ha ekpaH 3NaUka NiTBePbTe DiIO, HATNCHyBUn 3HaOk a60 TopKHITbcr 3NaUka , 0o6 nprirotyBaTN nepcoHaJIi3OBaHm Hanii.
2. CTbOpeHH npoΦiHIO.
HaTnCiHb 3HaOK
■ Bn6epiB «ДодаТи npoФиь».
BBeItb Ha3By HOBO npophiIO Ta HATNCHTb KHOKNy «CTBOPNTU».
Bn6epitb uei npoipilb.
I OdaTe B npoipinb Hanoi. Iyra boro HaTnCHiB «OdaHn HaniR
IPIMITKA. y mojeni 5KES8556 doctyni 4 kopncTyBaCbki npophiini, ane nepcoHaJI3OBAhe im'a kopncTyBaCuHa He MoxHa CTBOpHTN. y mojeni 5KES8557 doctyni 4 kopncTyBaCbki npophiini, a TAKOX MOxHa CTBOpHTN nepcoHaJI3OBAHe im'a KopncTyBaCuA. y mojeni 5KES85 doctyni 6kopncTyBaCbkNx npophiinib, a TAKOX MOxHa CTBOpHTN nepcoHaJI3OBAHe im'a KopncTyBaCuA.
DOrJaI UnueHn
IЯнкраuxnx pe3ynbtaTIB peRyIaRHO uCTbTe nobHicTIO aBToMaTuHy ecnpco-MaunHy II KOMnJIeKTyUOci.
YB4A. Nepsh hix yctaHOBIOBATn 3HIMATn Detani abo YNCTUTn npua, daite My NobHicTIO OXOJHOHTN.
ПРИMITК. He BnKOpNCTOBuYTe a6pa3nBHi 3ac06n a6o JxopctKi ry6kn dIy NIIeHNNIOBHCIO aBTOMaTNUHO ecPecO-MaunH, II yactIN H a6o KOMnEKeTyUoynx. He 3aHypOHTe NOBHCIO aBTOMaTNUHY ecPecO-MaunHy a6o shHyp y BODy nIhwi pIDHN. KoDHy 3i 3H YAcTHN, k-OT NiDDOH, KOHTeHep IJRA KABOBHX 3epeH, KpiuKy, pe3epByap dIy BOHN, 3aBAPIOBaJIbHNI 6IOK, DBepura TdIg DOCTUY N OBCnyROvBaHH, DInCneHcep i Kpnkky KOHTeHepa dIy MoJOKa, He MOxHa MNTB NocydomnHi MaunHi. Ix Notpi6Ho MNTB Ta peTeNbHO BUNONICKyBatn.
ПРИМТК.У MEнЮ «ОбсnyroByBaHHЯ» можна ВибираTN ta 3anyckatn Bci nporpaMu Oчишеня n obcnyroByBaHHЯ.Якso Ha dinCnpei 3'ВNTbCЯ NOBIOMLeHHЯ,уka3IBKa 么do Oчишеня abo obcnyroByBaHHЯ,прогаму можна 3anyctHTN 6e3nocepeHbo B NOBIOMLeHHI / iHCTpyKcii.
YHSEHHI IOBHICTIO ABTOMATNUHOI ECNPECO-MALINHN
Yci nporpamn OunuHnry n 06cnyroByBaHHn MoxHa Bn6paTn Ta 3anyCTnB MeHIO «OunuHnra. RaNo Ha DnCnnei 3'BAITbcra NobiOMnEHn r odo OunuHn a6o 06cnyroByBaHHn, nporpamy MoxHa 3anyCTnB 6e3nocepeHbO B NOiOMnEHHI.
- Bn6epitb i nTBepe Te nobioomneHna 6o actyte MeHIO . Bn6epiB notpi6Hy nporpaMy ouHeneHH a6o o6cnyroBaHH Ta 3anyctiB ii.
2.Пистpii po3nouHe BiIDNoBIDHy npoceDpy ouHsEHHa6O obcnyroByBaHHa BIdobpaXaTIme iHCTpyKciI zoDo nOdaIbIux DiI. DToPmYteC8 Bka3IBOK Ha dinCnnei, 3aBepSeHHn nporpaMn.
ПРОМИBAHHЯ СПИHIOВАЧA: ПРОМИBAHHЯ ВID 3АЛИШКIB MOЛOKA
Iicra npiroToyBaHHa HanoiB i3 MoJOkom Ha dinCnJIe BiO6paXaetbcr Bka3iBka 0do npommbaHna cInHbaya. IIO npoueDpy cnId BnKoHaTn YkOMora WbNdwe a6o xOua 6 ne BmMKHeHHMaunHn.
- Bn6epitb i niTBepeTe iHCTpyKciIO a6o B MeHIO Bn6epiB nyHKT «PpOMBaHHa BiD 3aIIuKIB MoIoka>.
2.ПiД'ЕнайTe OdMH KIneIb Tpy6Kn IodaHi MoNoka Do po3'Emy DnCneHcepa, a iHsM KIh BCTaBTe B NiIDOn. ПiTbepDbTe DiHO Ha DnCnPei. - NocTaBTe DoCTaTHbO BeJIKn KOHTeHep (≥ 0,5 NiIpa) niD HocNK DiCneHcep Ta NiIDTBepDbTe DIO Ha DIncNneI.
- Maunha noyne npoceedpy npommbaHna. 0oiHo znknpommbaHHa 3akHHTbcra, Maunn noyne npoceedpy nporpiBaHHa 3HOBy 6yde roTOBa do po6OTn.
PIMITKA. Baxnbo npomBaTn cniHOBaY nicJy KOxHOrO BNKOpNCTaHH, 06 y cnCTeMi HAKONuYBaJInc 3aIIuKm MOJOKa.
OuHcEHn CInHOBaua: PETeJIbHE OunIeHHN BID 3AJIuKIB MOJOKA
- Bn6epitb i niTBepe Te nobIDomneHna dncnnei a6o B MeHIO . Dani HATNCHTb nyH MeHIO «PeteIbHe OunueHHaB 3aIIuKIB MoNOKa».
- 3aJIHnTe B KOHTeHep cneuaIbHn MmHn 3ac6 dJa OunueHHra CnCTemN BiD 3aJIuMoJOKa Ta BODy (UOHaMEnHe 0,3 nItpa). DToPmMyTEcR Bka3IBOK UoDo nponopci, HAdaHnx Bnpo6HnKOM MnHoro 3aco6y.
- BnKoHyTe Bka3iBKn Ha DnCnPeiT Ta NiTBePdJxuYe Te KoxeH Kpok, NOKn nporpama He 3aBepwntbcra. Picna Cboro MaunHa HarpiBaetbcra Ta 3HOBy 6yde roTOBa do po60Tu.
BVIDALEHHH HAKINY
Ha dncnnei 3'ABNTbcra NOBIOMLeHna npo HeobxidHictb BuaIeHHa HakuNy. Iporpamy BuaIaeHHa HakuNy MOxHa TAKOX 3anyCTnBpyHy B6yDb-yaKn Yac. Hanoi MoxHa Ha RotyBaTN, aJe MN peKOMeHdyEmo kOMORA SwbIDwe 3anyCTn nporpamy OunuenceHHa
BidomO, 3ac6n DnBnAeHn HaKny MoKyb 3aNHaTu nIyMa HcTaJeBHX KOMnoHeTAX Maunn. DnA 3anobirAHn Po36pn3kyBaHHo Ta po3nBaHHo NiD 3aBapOBaBnM 6nokom Notpi6Ho BCTaHOBHTu BeNKn KOHTeHep. KaIoo 3'ABNTbcr PnIaM; BnDaIITb II 3ac6bom Ha OCHOBi UaBJeBOi a60 JIMMOHHO KNCNOT. PicJra HaHeceHNr 3acc npOTpiTB NOBExHn Herpy6oTO TkaHNO TO Ta peTeNbHO cNoIOChITb. DnA 6ncky nicna OUnSeHHn npOTpiTB 3ac6bom DnA o6p6Kn HepXaBIIOO CTani.
- Bn6epitb i niTBePbTe IHcTpkyciio a6o TopKHiTbcra 3HaUka i Bn6epitb nyHKT «BnIaIeHHaHKIny», HaTncHyBUn 3HaUok
- ПocтавTe Велкий Контейнер ( ≥ 0,5 litpa) пд Носк диссентер. Дотримуитесь уka3iBOK на диспев do 3aВершени nporpamn.
- Picjra cboRo MaunHa HarpBaetbca Ta 3HOBy 6yde roTOBa Do po6oTn.
YBAG. Iporpamy BndaeneHHaKIny He MoXHa nepepbATN. Ira BndaeneHHaKIny M BnKOpNCTOByBATN IINe 3acO6n, peKOMeHIOBaHI IJRA NOBHICTHo aBTOMaTHUHX KaBOMaUNH, He OcET a60 3acO6n 3 OcTOM. FInbTp (AkuO Bin E) Heo6xIDHO BnHrTn 3 pe3epByapa I nepeD 3anyckOM nporpamN BndaeneHHaKIny.
IiD yac BvdaJIeHnHaKIny BnKOHyTe Bka3IBKn Ha DnCnJIeToUHO B 3a3HaYeHi nocniIOBHOCTi:
CnoayKa Hannte BiINObHy KInbKictb BOnn Do No3HaQKn 0,5 NiIpa, a notim do3aci6 dny BuaaneHHaKauny.
Y JozHOMy pa3i He BnKOHyTe ci di y 3BOpOTHomy npaKy. DToPmMyTecR Bka3i Bnpo6Hnka 3acoby dny BndaJeHHra HAKIny.
OuHJENH3ABAPIOBAJIbHOTo BLOKy-2-ETANHA IPOUEDyPA OUnIeHH3ABAPIOBAJIbHOTo BLOKy
3a noTpe6n Ta nepeK KOxHOIO nporpaMOIO OunueHna 3aBapIOBaIbHn 6nok cnId BnIMaTI npommbATn NiD npOTouHOIO BOIO. Mnte Ioro JnIwe XoNODHOIO BOIO IO 6e3 BnKOpNCtAHMnHOrO 3aco6y.
- Bn6epitb i niTBepeiHCTpyKciIO. CnpoxHITb nIDOnH. 3anOBHITb pe3epByap dIra BCdo MaKcImaJIbHOI BiIMiTkn (2,2 NiItpa). Po3micITb BeNkM KOHTeHep (≥ 0,5 IITpa) HocIKOM DnCHeHcepA. DToPmYTeCb yka3iBok Ha DnCnPeI Do 3aBepHennr nepWoro etany.
- Дя дуго etany BiДКиite DBePЯТа Дя ДocTyny i O6cIyROByBaHня npaBOpyu Ha Kopnyci (obepexHoNotarHITb Bropy npicTpiДя po3bOkyBaHHЯ BCEpeDnHi pyKu, Ni ChrO obepexHo 3HIMiTB DBepaTaNЯ DoCTyni o6cIyRObyBaHHЯ 3 Kopnycy). Po3bOkyTe 3abApIOBaJIbHn 6Jok (HaTusHITb YepBOHn NepemKauch Bropy i NOBepHIpy Ky Bropy Ta BnIBO, NOKN BOHa He 3aФikCyETbcra).
- Bi3bmitb 3a pyky n BnTgHITb 3abapOBaBHN6NOK, TpmaOOnNo rOro pIBHO. POMnTe 3abapOBaBHN6NOK nID XoIOnHOIO npOTOnHO BOIOIO n DaIte NOMy BnCOxHyTN. POKnaDITb cneuaIaNbHy Ta6NeTKy dIra OunSeHHB B 3abapOBaBHN6NOK. DOrtpmMyTEc IHCTpyKciu BnPo6HnKa Ta6NeTOK dIra OUnSeHHA. BnKOHyTe Bka3iBKn Ha DInCnPeiT a NiIDTBepJxNyTe KoxeH KpOK, NOK nporpama He 3aBepSnTbcr. KabomauHa 3HOBy rTo Do BnKOpNCtAHn.
PnIMtKA.He nepepBaIte nporpaMn OunueHHN iD qac ix BnKoHaHH.
CNOPOXHEHHCNCTEMN
Lpa npoeDpya BnKoHyEtbcra, KOJI noTpi6HO BuaanTu i3 CnCTeMn 3aunuKn BoHn a Tako BOHa peKOMeHDoBaHa B pa3i TpNBaIoro 36epirAHn.
1.ДotpmyTeC8 Bka3iBok Ha dincnJIeI.
PnIMtKA. PnCtpi MoKe 3a3HaTn NOKoJxHb, KaO BODa 3aNHTbcB CnCTeMi Ta 3aMep3He. YnKaIte BnNBy Tempeatypn HxKye 32^ / 0^ . CnpoxHItb CnCTeMy, KaO npCtpi He 6yde BnKOpNCTOBvBaTncr TpNBaIIh Yac, nepeD TpaHCnOpTyBaHHm Ta JkIo icHyE pN3NK 3aMep3AHHra.
PO3BnPAHHa TAYIeHHcPiHIOBAuA
Yac BiIy cHIOBau nOtpi6HO NOBHCTU PO3bupaTn Ta npOMBaTu BOIOU.
- 3HIMITb nepeHIO KPIuKy 3 DnCneHcepa, IereHbKO notraHHTb cniHOBauch DOHN3y, Notim ynepei po36epit b noRo.
- PetelbHO OunchbTe KOMnoHeHTn cniHOBaHa Ta 3HOBy 36epiB Noro. BCTABTe 6JOK cniHOBaHa B DnCneHcep.
- BcTaHOBIb IpeHIO KpuIky Ha dncHecep.
www.kitchenaid.eu/register:KitchenAid
1
1
2
()
3
-
-
-
-
-
-
-
-
-
-
-
-
-
-
-
-
-
-
-
-
-
-
-
-
-
-
- 1.
-
-
-
-
-
-
-
-
-
-
-
-
-
-
-
-
-
-
-
-
-
-
-
-
-
m = 311
jbslln laoic jail jial jia jai jali 0/uyi 32
- · = PA · PB
#
aall aaiiyaiy jaiy jai yaiy
1
.2
.3
clll
a 50
"jlll jlll" 1111111111111111111111111111111111
Aio 2
.3
.4
.5
(《孔》) KITCHENAID
L 1
y 2
abjw jiaai jbi .1
a
kill kill 10000000000000000000000000000000000000000000000000
1
KitchenAid 2000
ylll jlll qlll jlll l (d
aalalalalalalalalalalalalalalalalalalalalal
令 g( x) = ( 1 + ax) - ( 1 - ax) - 2ax
12.29
1
.30
J 31
.32
a
1
aaii aii jao gai
i 1 1 1 1 1 1 1 1 1 1 1 1 1 1 1 1 1 1 1 1 1 1 1 1

a 1 a 1
S APQ = S AQP + S_ QPQ

e 1
C
1 1
aagaaagag aeg
i 1
A
A 1
a a a a a a a a a a a a a a a a a a a a a a
1
8 j 1j 1000
a
y 1
8 8
.
.8 1 jj j j j j j j
jLj 4
15 15
8nJ 1
.6
1 1
j 1
[ \Leftrightarrow \frac{1 - k}{x} > \frac{\ln x}{x - 1} - \frac{\ln x}{x + 1}]
J 8
a
NOTES
NOTES
KitchenAid
©2024 All rights reserved.

- DANGER
- WARNING
- IMPORTANT SAFEGUARDS
- SAVE THESE INSTRUCTIONS
- OR
- STANDBY TIME
- PRODUCT USAGE
- BREWING A DRINK
- BREWING COFFEE-BASED DRINKS
- MODEL 5KES8556 MILK BREWING AND CLEANING
- BREWING COFFEE WITH PRE-GROUND COFFEE
- dispensing HOT WATER
- PERSONALISING DRINKS AND CREATING PROFILES
- Personalising your drinks:
- Creating a profile:
- CARE AND CLEANING
- CLEANING THE FULLY AUTOMATIC ESPRESSO MACHINE
- RINSING THE FROther: EASY MILK RINSING
- CLEAN FROther: DEEP MILK CLEANING
- DESCALING
- BREW UNIT CLEANING - 2-PHASE BREW UNIT CLEANING PROCESS
- EMPTY SYSTEM
- DISASSEMBLE AND CLEAN FROHER
- CHANGE WATER FILTER
- TERMS OF KITCHENAID GUARANTEE ("GUARANTEE")
- FOR U.K.:
- FOR IRELAND:
- FOR UAE:
- SCOPE AND TERMS OF THE GUARANTEE
- AL GHANDI ELECTRONICS.
- LIMITATIONS OF THE GUARANTEE
- e) FOR UAE ONLY:
- FÜR LUXEMBURG:
- GROUP LOUISIANA S.A.
- DRANKJES MET KOFFIE BEREIDEN
- A\PPO\SOXH
- OPOI THE EΓYHΣH ΕΚITCHENAID (“ΕΓYHΣH”
- VEDLIKEHOLD OG RENGJØRING
- UMFANG OG SKILMALAR ABYRGDARINNAR
- WARUNKI GWARANCJI KITCHENAID (,,GWARANCJA”)
- TYTO POKNY SI USCHOVEJTE
- ROZSAH PLATNOSTI A PODMINKY ZARUKY
- ANONEPEDJKEHNA
- ABO
- YAC OUYBAHH
- BVKOPNCTAHHBAHPOBy
- ПРИГOTУBAHHЯ HANOIO
- ПИГOTУBAHHЯ KABOBUX HANOIB
- ПРИГOTУBAHHЯ HANOIB 13 MOJOKOM
- ПРИГOTУBAHня HANOIB 13 MOЛOKOM I OчицEHня KABOMAUHHN (MOДЕЛь 5KES8556)
- ПИГOTУBAHHЯ HANOIO 3 ПОЕPEDьо 3MEЛЕнx KABOBx 3EPEH
- ПОДАЧА ГAPЯЧОВODN
- NepcoHaJIaIaIe HanoIb.
- CTbOpeHH npoΦiHIO.
- DOrJaI UnueHn
- YHSEHHI IOBHICTIO ABTOMATNUHOI ECNPECO-MALINHN
- ПРОМИBAHHЯ СПИHIOВАЧA: ПРОМИBAHHЯ ВID 3АЛИШКIB MOЛOKA
- OuHcEHn CInHOBaua: PETeJIbHE OunIeHHN BID 3AJIuKIB MOJOKA
- BVIDALEHHH HAKINY
- OuHJENH3ABAPIOBAJIbHOTo BLOKy-2-ETANHA IPOUEDyPA OUnIeHH3ABAPIOBAJIbHOTo BLOKy
- CNOPOXHEHHCNCTEMN
- PO3BnPAHHa TAYIeHHcPiHIOBAuA
- m = 311
- #
- clll
- (《孔》) KITCHENAID
- a
- aagaaagag aeg
- KitchenAid
Brand : KITCHENAID
Model : 5KES8557
Category : Coffee machine