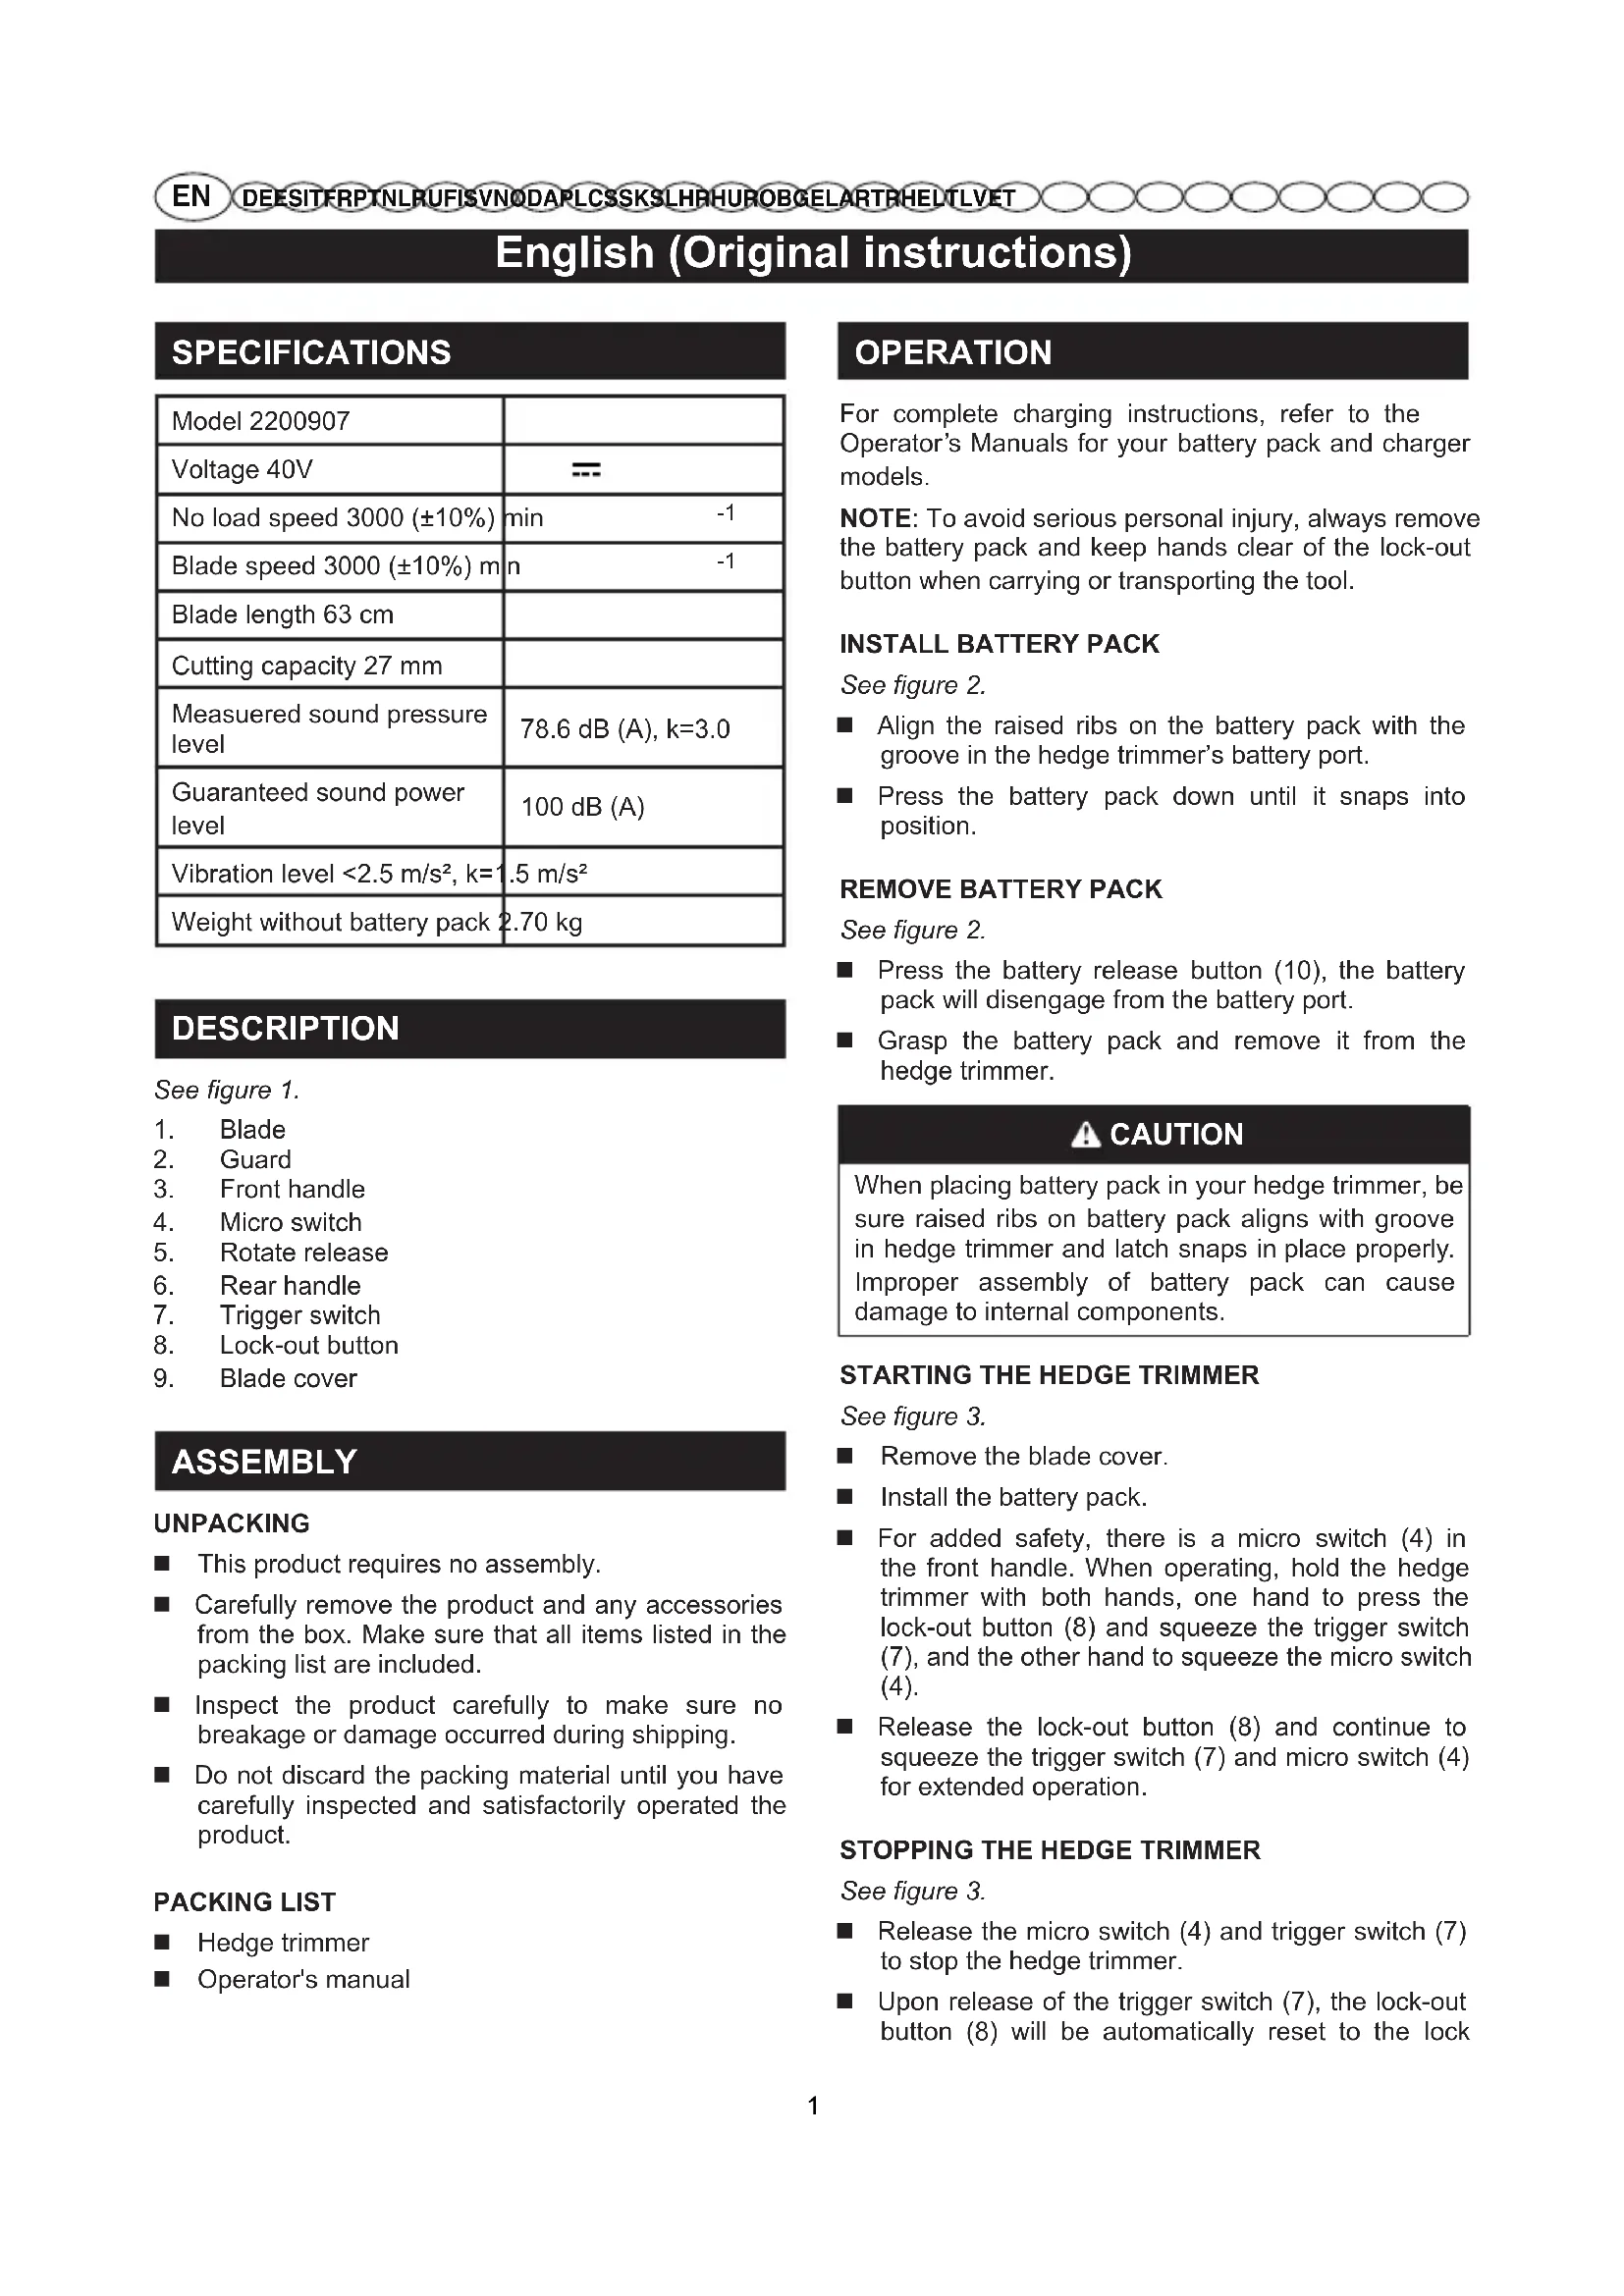
2200907 - Cordless electric hedge trimmer GREENWORKS - Free user manual and instructions
Find the device manual for free 2200907 GREENWORKS in PDF.
User questions about 2200907 GREENWORKS
0 question about this device. Answer the ones you know or ask your own.
Ask a new question about this device
Download the instructions for your Cordless electric hedge trimmer in PDF format for free! Find your manual 2200907 - GREENWORKS and take your electronic device back in hand. On this page are published all the documents necessary for the use of your device. 2200907 by GREENWORKS.
USER MANUAL 2200907 GREENWORKS
English (Original instructions)
SPECIFICATIONS
| Model 2200907 | |
| Voltage 40V | --- |
| No load speed 3000 (±10%) | min -1 |
| Blade speed 3000 (±10%) m | n -1 |
| Blade length 63 cm | |
| Cutting capacity 27 mm | |
| Measured sound pressure level | 78.6 dB (A), k=3.0 |
| Guaranteed sound power level | 100 dB (A) |
| Vibration level <2.5 m/s², k=1.5 m/s² | .5 m/s² |
| Weight without battery pack | 2.70 kg |
DESCRIPTION
See figure 1.
1. Blade
2. Guard
3. Front handle
4. Micro switch
5. Rotate release
6. Rear handle
7. Trigger switch
8. Lock-out button
9. Blade cover
ASSEMBLY
UNPACKING
This product requires no assembly.
- Carefully remove the product and any accessories from the box. Make sure that all items listed in the packing list are included.
Inspect the product carefully to make sure no breakage or damage occurred during shipping.
Do not discard the packing material until you have carefully inspected and satisfactorily operated the product.
PACKING LIST
Hedge trimmer
Operator's manual
OPERATION
For complete charging instructions, refer to the Operator's Manuals for your battery pack and charger models.
NOTE: To avoid serious personal injury, always remove the battery pack and keep hands clear of the lock-out button when carrying or transporting the tool.
INSTALL BATTERY PACK
See figure 2.
Align the raised ribs on the battery pack with the groove in the hedge trimmer's battery port.
Press the battery pack down until it snaps into position.
REMOVE BATTERY PACK
See figure 2.
Press the battery release button (10), the battery pack will disengage from the battery port.
- Grasp the battery pack and remove it from the hedge trimmer.
CAUTION
When placing battery pack in your hedge trimmer, be sure raised ribs on battery pack aligns with groove in hedge trimmer and latch snaps in place properly. Improper assembly of battery pack can cause damage to internal components.
STARTING THE HEDGE TRIMMER
See figure 3.
Remove the blade cover.
Install the battery pack.
For added safety, there is a micro switch (4) in the front handle. When operating, hold the hedge trimmer with both hands, one hand to press the lock-out button (8) and squeeze the trigger switch (7), and the other hand to squeeze the micro switch (4).
- Release the lock-out button (8) and continue to squeeze the trigger switch (7) and micro switch (4) for extended operation.
STOPPING THE HEDGE TRIMMER
See figure 3.
Release the micro switch (4) and trigger switch (7) to stop the hedge trimmer.
Upon release of the trigger switch (7), the lock-out button (8) will be automatically reset to the lock
English (Original instructions)
position.
Remove battery pack from the hedge trimmer.
USING THE ROTATING REAR HANDLE
See figure 4.
Place the hedge trimmer on a flat and even surface.
Make sure that you turned off the hedge trimmer.
Press the rotation lever (5) and begin turning the rear handle. Release the rotation lever and turn the handle 45 or 90 degrees to either side until it clicks into place and the lever locks in.
To turn the handle back to center, press the rotation lever again, turn the handle slightly, release the rotation lever and continue turning the handle until it locks into place.
OPERATING TIPS
- Do not force the hedge trimmer through heavy shrubbery. This can cause the blades to bind and slow down. If the blades slow down, reduce the pace.
- Do not try to cut stems or twigs that are larger than 15mm thick, or those obviously too large to feed into the cutting blade. Use a non-powered hand saw or pruning saw to trim large stems.
If desired, you can use a string to help cut your hedge level. Decide how high you want the hedge. Then, stretch a piece of string along the hedge at this height. Trim the hedge just above this guide line of string. See Figure 5. Trim the side of a hedge so that it will be slightly narrower at the top. See Figure 6. More of the hedge will be exposed when shaped this way, and it will be more uniform. If blades do become jammed, stop the motor, allow the blades to stop and remove the battery pack before attempting to remove the obstruction.
Wear gloves when trimming thorny or prickly growth. When trimming new growth, use a wide sweeping action, so that the stems are fed directly into the cutting blade. Older growth will have thicker stems and will be trimmed easiest by using a sawing movement.
DANGER
If blade jams on any electrical cord or line, DO NOT TOUCH THE BLADE! IT CAN BECOME ELECTRICALLY LIVE AND VERY DANGEROUS. Continue to hold the hedge trimmer by the insulated rear handle or lay it down and away from you in a safe manner. Disconnect the electrical service to the damaged line or cord before attempting to free the blade from the line or cord. Failure to heed this warning will result in serious personal injury or possible death.

WARNING
Clear the area to be cut before each use. Remove all objects such as cords, lights, wire, or string which can become entangled in the cutting blade and create a risk of serious personal injury.

WARNING
Avoid using solvents when cleaning plastic parts. Most plastics are susceptible to damage from various types of commercial solvents and may be damaged by their use. Use a clean cloth to remove dirt, oil, grease, etc. When servicing use only identical Greenworks Tools replacement parts. Use of any other parts can create a hazard or cause product damage.

CAUTION
Do not at any time let brake fluids, gasoline, petroleum based products, penetrating oils, etc., come in contact with plastic parts. They contain chemicals that may damage, weaken, or destroy plastics.
MAINTENANCE AND REPAIR
Battery units do not have to be plugged into an electrical outlet; therefore, they are always in operating condition. To prevent serious personal injury, always remove the battery and take extra precautions and care when performing maintenance, service or for changing the cutting blade.

WARNING
To prevent serious personal injury, remove the battery pack before servicing, cleaning, or removing material from the unit.
BLADE CARE
Lubricate the cutting blades after each use.
Periodically inspect the blades for damage and wear.
Always use the manufacturer's specified replacement blades.
English (Original instructions)
TO LUBRICATE BLADE
See figure 7.
Remove battery pack from hedge trimmer.
For easier operation and longer blade life, lubricate the hedge trimmer blade before and after each use. Before lubricating, remove the battery pack and lay hedge trimmer on a flat surface. Apply light weight machine oil along the edge of the top blade.
Occasionally, you should oil your hedge trimmer during prolonged use. Before oiling, stop hedge trimmer, remove battery pack, then oil. You then can resume trimming. Do not oil while hedge trimmer is running.
All of the bearings in this tool are lubricated with a sufficient amount of high-grade lubricant for the life of the unit under normal operating procedures. Therefore, no further lubrication is required.
WARNING
Do not attempt to modify this unit or create or mount any accessory not specifically recommended in this manual for use with this hedge trimmer. Any such alteration or modification is misuse and could result in a hazardous condition leading to possible serious personal injury.
WARNING
Examine hedge trimmer frequently to assure all parts are unbroken and securely attached. Make sure all screws and fasteners are securely tightened to prevent the risk of serious personal injury.
CLEANING THE HEDGE TRIMMER
WARNING
To prevent serious personal injury, remove the battery pack before servicing, cleaning, or removing material from the unit.
Remove the battery pack.
Clean the unit using a damp cloth with a mild detergent.
Do not use any strong detergents on the plastic housing or the handle. They can be damaged by certain aromatic oils such as pine and lemon, and by solvents such as kerosene.
- Moisture can cause a shock hazard. Wipe off any moisture with a soft dry cloth.
Use a small brush or the air discharge of a small
vacuum cleaner brush to clean the air vents on the battery pack housing and motor housing.
- Keep the air vents free of obstructions.
STORING THE HEDGE TRIMMER
See figure 8.
Clean the hedge trimmer thoroughly before storing. Store the hedge trimmer in a dry, well-ventilated place that is inaccessible to children. Keep away from corrosive agents such as garden chemicals and deicing salts.
Always place blade cover on cutting blades before storing. See Figure 8.
Store and charge your batteries in a cool area. Temperatures above or below normal room temperature will shorten battery pack life.
Store the battery pack where the temperature is below 27^ , and away from moisture.
- Never store batteries in a discharged condition. Wait for battery pack to cool and fully charge immediately.
All batteries gradually lose their charge. The higher the temperature, the quicker they lose their charge. If you store your unit for long periods of time without using it, recharge the batteries every month or two. This practice will prolong battery pack life.
English (Original instructions)
TROUBLESHOOTING
| PROBLEM | POSSIBLE CAUSE SO | LUTION |
| Motor fails to start when switch trigger and micro switch are depressed. | Battery is not secure. | To secure the battery pack, make sure the latches on the top of the battery pack snap into place. |
| Battery is not charged. | Charge the battery pack according to the instructions included with your model. | |
| Motor runs,but cutting blades do not move. | Hedger damaged. Do not use hedge trimmer. | Call for technical service. |
| Hedge trimmer smokes during operation. | Hedger damaged. Do not use hedge trimmer. | Call for technical service. |
| Motor hums, blades do not move. | Debris or other may be jamming the blades. | Remove battery, clear debris blockage from blades. |
HECKENSCHERE AUSSCHALTEN
Siehe Abb. 3.
MANUTENÇÂO E REPARAZÂO
MANUTENÇAO DA LÁMINA DO CORTASEBES
AVISO
3ANYCKTPNMMEPA-KYCTOPE3A
CM.puc.3.
CHIMMTE3aUHTbIyueXoJJe3BnJ.
YcTaHOBnTe 6aTapeIO.
Дя 60ьш经 6e30nacHOCTn TpIMMep-Kyctope3 OCHaueH MKNPOBbIKIIOuOteIeM (4)Ha nepeDHei pyKe.Bo BpempaobTbI DepKNTe TpIMMep oBeMNpyKaM:ODHOn pYKO HAXMaIte KONKy 6LOKIpOBKn (8)N KONky 3anycka (7),a Dpyro- MNKPOBbIKIOUoTeIb (4).
OTnyctnte KhoNky 6JIOKnpOBKn (8) n npOdoJXaTe DePkaTb HaxaTbIMn KhoNky 3aNycka (7) mMKPOBbIKHouateJIb (4) dIra dIInTeJIbHO pa60TbI.
Pycckn (IpebeOd opnHaJIbHbIX nHcTpyKcN)
OCTAHOBKA TPUMMPEPA-KYCTOPE3A
CM.puc.3.
OTnyctnte MKNPOBbIKHIOuHaTeJIb (4) IN KONKy 3anycka (7), UTO6bl OCTaHOBnTB TpIMMep-Kyctope3.
Iocne toro kak KhoNka 3anycka (7) 6ydt OTnyuSha, KhoNka 6nOKnpOBk (8) 6ydt ABTomatueckn 3a6JIOKnpObaHa.
CHIMMTE 6atapeo C tpmmepa-Kyctope3a.
NcIOnb3OBAHNE BPAUauOueCRAADHEpyk
CM.puc.4.
YcTaHOBInTe TpIMMep-KycTope3 Ha poBHOIIOCKOIOBepXHOCTN.
Y6eIITecb, YTO TpIMMep-KyCTope3 BblKnHoueH.
HaKmTe Ha pbUar BpaueHnra (5) n HauHnTe nobOpauHBaTb 3aHIOHO pyky. OTnyCTne pbUar BpaueHnra n NobepHnTe pyky Ha 45 nn 90 rpaDCOB B IIO6yIO CTOpOHy, yTO6bI OHa cTana Ha MeCTO CO UeJYKOM, a pbUar 3a6NknpoBaNCr.
Ytobb BepHytb pyky B ceHTp,CHOBa HaxMnte Ha pbiar BpaueHn, cnerka nobepHnte pyky, OCbo6oJnte pbiar BpaueHn n npdoJxKaTe NOBopaunBaTb pyky, noka OHa He BCTaHET Ha MecTO.
COBETbI NO IcNoJIb3OBAHNIO
He neperpykaTe HnCTpyMeHT, nbITaRc b6pe3aTb cnIshKOM rYcTBie KcyTbI. Je3Bne MOKeT cOrHyTbcr n 3ameNnTb xoD. Ecnn Ne3Bne 3ameNnre T CBOH xoD, o6pe3aTe MeJnEHHee.
He nbitaTecb 6pe3aTb BETK TOniHoi 6oJee 15 MM n npOyne cInuKOM KpyNbIe nopocn. OTe3aIte ToIcTbIe BETK pyHoi NIOI ON IIN ceKaTopom.
I OHeH TOHOn 6pe3Kn KcyTAPnHa peKOMeHdyETcN NOB3OBaTbCn BEpeBKO. OnpeDenTe HxHbI yPoBeHb 6pe3Kn.HaTHHTe BepeBky BDOb KcyTAPnKa Ha 3OM yPoBHe. Obpe3aTe KcyTAPnK npmo HAD HATHyTOB BepeBko, Ka Noka3Ho Ha pnc.5.Ope3aTe 6OKOBbie qactn KcyTAPnKa nO npmbim YrJlOM (cm.pnc.6).TOrda KcyTb6yDyT 6pe3aHbI POBHO. Ecnn ne3Bne 3akInHITcN, octahOBtne DBnraTeNB, DOXNTecb NOHOb OCTAHOBKn Ne3BnN CHMNTe 6atapeo, npexde yem OCBO60kDaTb Ne3Bne OT 3actPBAHX BETOK.
Pn 6pe3aHn KOIOUero KcyCTapHnKa HadeBaTe nepaTkn. Pn 6pe3aHN MoIOnOro KcyCTapHnKa deNaIte TpMMepom-KycTope3OM uNPOKe nBHXeHn, YTO6bl BcTK NonaDAnn npraMo NOJ ne3Bne. Pn cTpNXke B3pocNoRo KcyCTapHnKa,
Hao6oPOT, DeJaTe Bo3BpaTHo-NOCTynaTeJbHbIe DBNKeHHa, TAK KAK ERO BETK TOJIe.

ONACHOCTb
EcnI Ne3BHe TpMMepa-KyCTope3 KoCHyNoCb 3NeKTPn YecKO npOBOda, HE DOTPAINBAJTECb DO IIE3BnI! OHO MOKET BbITb NOHANPRAXKEHN. 3TO OUYHb ONACHO. Depxnte TpMMep-KyCTope3 3a OCHOBHyo n3OJInpOBaHHpykU N aKKypaTHo OTLOXKeT ero noanbwe. OTKnHouHTe nHTaHne 3aTeTORO 3NeKTPponPOBa, npExde yem BBiHMMaTb ero n3 ne3Bn. HecobnJeHne 3TORO npabnJa MoKet IOBneYb 3a CO60r TjXeJIbte TpaBMbl INI pInBeCTN K JeTaJIbHOMy NCxOy.

PNEUYNPEXKDEHNE
Ouetae pa6oyu 3ohy nepepa6oTo. YbnpaTe shHypbl nItaHnna, 3neKtponpOBOda n BepeBKn. OHN MOryt nonactb B Ie3BnE n npNBecTn K TjXeJIbIM TpaBMam.

PNEUYNPEXKDEHNE
HnkOrda He noIb3yItecb pactBOpnteYMaN DnA YnCTKn nIaCTMaccOBbIX DeTaneN. BoIbUnHCTBO nIacTMacc MOKeT NOBpeINbC8 O6bUHbIX pactBopnteNe. DnA yDaNHeNr TpRnKo. B Cnyae 3aMeHbI DeTaneN NOB3yIteCb ToIbKO opunHaJIbHbIMn 3aNaChbIMn qactAmn Greenworks. NcNoB3OBAHne IIO6bx Dpynx 3aNaChbIX qacte MoKeT ppeCTabNtB onaCHOCTb INN NOBpeNTb IHCTpyMeHT.

OCTOPOXHO
3anpeuetaTc 6pa6aTbIBaTb nlaCTMaCCOBBie DeTAN TOPMO3HOJ XnKoCTbH, BeH3NHom, HeFTe npOyKTAMn, eKIMM MaCJamn T. D. 3TN XmNKaTb COePjKaT BeJeCEtBa, KOToPbIe MOrY IcNoPTHT, Ocna6ntb nn pa3pyuNT bPiactMaCCy.
OBCLYKUBAHNE IN PEMOHT
OBCJYKBAHNE JE3BNA KYCTOPE3A

ПРЕДУПЕЖДEHNE
He 3a6bIbaIte, yTO aKKyMylTOpHbIe INHCTpyMeHTbI Bcerda roTOBbl K pa6ote, TAK KaK IX He Hado BKJIIOUaTb B CeTb. Bo n36exKaHne TjXeJIbIX TpaBM, npn O6cnykBaHN u CMeHe Jle3BnB Bcerda CHIMaIte 6atapeIO n 6ydbTe KpaHne 6dnteJbHbl.
Pycckn (IpebeO d opnHaJIbHbIX nHcTpyKcn)
A PENEYUNPEXKDEHNE
Bo n36eKaHne TReKeJIbIX TpaBM, nepeI peMOHTOM, uNCTKO IIN pa36OpKo INCHTpymEHTa CHImaTe C Hero 6aTapeIO.
OBCLNYKINBAHNEJI3BnA
Cma3bBaTeJe3BneNoCneKaJDoRo HcNoJIb3OBaHn.
Perynpho npOBepaTe n3Hoc u cenoctHOCTb Je3Bna.
Pn 3aMeHe nCNoJIb3yIe ToJIbKO peKOMeHdyEmble npOn3BOUInTeJEM Ne3BnI.
CMA3KAJIEN3BNA
CM.puc.7.
CHIMMTE 6aTapeo C TpMMepa-Kyctope3a.
ДябьшпрнstБODHTeBJHOCTNи pOndneHnCpOKa CnyKbIJe3BnI CMA3bIaIe erO Do n NocNeKaJdOro IcNoJIb3OBaHnI. NepeI cMa3KoN Je3BnI CHIMnTe 6aTaapeIO nNoJoxITE TpIMMep- KcyCTope3Ha poBHyIO nobepxHOCTb.HaHeCIte CBETnoe MOTOPHoe MaCNO Ha BepXHiN KpaJ Je3BnI, KaN POKa3aHo Ha pnc.7.
■Ipn Heo6xOIMOCtN CMa3bIBaHTe Je3BnB nepepbBax MExdy pa60ToB. B 3Tom cnUyae octahOBInTe TpMMMeP- KycTope3, CHMNTe 6batapeo n CMAKbTe Je3Bne. Iocne Cma3Kn npOdoJXaIte pa60Ty. HkOrda He Cma3bIBaHTe Je3BnE pa60TaIOUeTO TpMMMePa-KycTope3a.
CMA3KA TPUMMMEPA-KYCTOPE3A
Bce noiHnHnK nHcTpymeHTa cMa3aHbHa 3aBOe BbICOKoKaYeCTBeHHo CMA3KO, KOtopoJ DoCTaTOUHO Ha BeCb CpOK cnYk6bl NHCtpymeHTa B HopMaIbHOM peXmpe60tbl. HcHcTpMeHT He HyKdaETcB DOnONHHTeNbHO CMA3Ke.
A PENEYUNPEXKDEHNE
He nbItaTecb MoiΦnIpuBaTb HNCTpyMeHt Nyn yctaHaBnBaTb Ha Hero He peKOMeHDoBaHHbIe B HAcToaIe pyKOBoDcTBe akceccyapbl. Ndo6HbIe MoiΦnKaUu N ppeo6pa3OBAHn IpeIcTaBIAJOT Co60HnepaBnBHOe NCIOB3OBAHne IHCTpyMeHTa N MOrY T CO3DaTb OAnChbIe CNTyaUu, BeDuUne K TjXeJIbIM TpaBMam.
A PENEYUNPEXKDEHNE
PeyIpaH OcMaTpBauTe HcTpymeHT npOBepaTe cenoCTHOCTb erO deTaeN uX kpeNek. Bo n36ekaHne TaeJeBx TpaM, npOBepaTe 3aTakky Bex BnHTOB u KpeNek BCex deTaeJeu.
OuNCTKA TPHMMEPA-KYCTOPE3A
A PENEYNPEXXDEHNE
Bo n36ekahne TjkeBix TpaBM, nepei peMOHTOM, uNCTKO INI pa36bOPKo INHCTpyMeHTa CHImaTe C Hero 6atapeio.
CHIMMTE 6atapeio.
OuHCTnTe TpMMep-KyCTope3 TprIKoN CMOIOUM cpeIcTBOM.
He noJIb3yIteCb CNJIbHbIMN MOOcIMM cpeIcTBAMn IJRA YIcTkn IINactMaccoBOrO KOpNyCa n pyueK. OHmOryT NOBpeDNTbcr O T pa3NJuHbIX apOMaTIuecknx Macen, HApPImep, XBOHbIX INJN JIMMOHHbIX, a TAKKe OT pAcTBOpnteJe, HApPImep, OT KEPOcHa.
OcToPoxKHO! BnaxHoCTb MoKeT Bb3BaTb yAp TokOM. BbITnpaTe INHcTpymeHT MmRKOy cyXoTpIknO.
IINCTKNBEHTNIAUHOHBIXOTBepCTNI HA KOPnyce 6batapeHoro OTCEKa N KOPnyce DBnraTeNA NOJb3yNTecb 5eTOOKo INN NNOTOKOM BO3dyXOM N3 MaNOMOuHORO NblNEcOca.
CneHrTe 3a TeM, TTo6bI BEHTnIaIOHHbIE OTBepCTn HIKoRda He 3a6nbAJIncb.
XPAHEHIETPUMMMEPA-KYCTOPE3A
CM.puc.8.
Ipeed noctaHOBKOITpMMMepa-KyCTOpe3aHa XpaHHeH TuaTeJIbHO OOnCTHTe erO. XpaHNTe TpMMep-KyCTOpe3 B cyXOM npOBETpNBaEMOM NOMEueHN B HeoCTyHOM DnA DeTeN MecTe. He depKnte ero pRdOM C Kopp03nHbIMN BeueCTBaMn, TaKIMKaK CaIOBble XmIKaTbI INPa3MOPaXIBaUOuaCOnb.
IpeD nocTaHOBKO TpMMepa-Kyctope3a Ha xpaHHe BcERda HadeBaHTe HaJe3Bne 3aUNTHbIn YexoJ, KAK NOKa3aHO Ha pnc.8.
XpaHnTe n 3apjkaJte 6aTapeo B npoxJaHOM MecTe. TeMnepaTypb BiIe N Hnke KOMHaTHOH cokpaauhot cpoK cnjxkb6aTapeu.
XpaHnte 6aTaapeIO BCyXOM MeCTe npu TemnepaType He Bblue 27^
Hnkorda He xpaHnTe 6aTapeu B pa3pJxKeHHOM coCToHnn. Iocne nCnoJIb3ObaHnJaIe 6aTapee OCTbIb n cpa3y 3apJnTe ee.
CoBpemHeM6bapenTepeoCBOOEMKocTb.Yem Bblwe TemnepaTypa,Tem 6bictpee 6bapera Teparet CBOO EMKocTb.Pnp npdoonknteHOM npoctoe Tpmmepa-Kyctope3a 3apxkaTe 6batae KaxkbIe Mecu nn Dba.3To npodnT cpoek ee cnkykbI.
Pycckn (IpebeOd opnHaJIbHbIX nHcTpyKcn)
ПОИСК И YYSTPAHEHINE HENCПAPABHOCTEIN
TUOTTEEN TEKNISET TIEDOT
ANVANDA DET VRIDBARA BAKRE HANDTAGET
Se fig. 4.
VEDLIKEHOLD OG REPARASJON
VEDLIKEHOLDE HEKKSAKSENS BLAD

ADVARSEL
Glem ikke at batteridrevne verktøy alltid er klare til bruk sider de/DDRE trenger á kopies til stikkontakt. For à unngå alvorlige kroppsskader, ta alltid ut batteriet og vær meget pappasselig nár bladet vedlikeholdes eller skiftes ut.

ADVARSEL
VEDLIKEHOLDE HEKKSAKSEN

ADVARSEL
KONSERWACJA I NAPRAWY
KONSERWACJA LISTWY NOZOWEJ NOZYC DO ZYWOPLOTOW
OSTRZEJELENIE
gue zhe wge jia jiu jiu jiu
1
(5)10 9045454545
a a
122 27 jai jia jia jia jia jia jia jia jia jia jia jia jia jia jia jia jia jia jia jia jia jia jia jia jia jia jia jia
图
1
S ACD = S COD + S_ DCE
Türkçe (Original talimatlar)
TEKNIK ÖZELLLIKLER
nnn nnnn nn nnnn nn nnnn
nnnnnnnnnnnnnnnnnnnnnnnnnnnnnnnnnnnnnnnnnnnnnnnnnnnnnnnnnnnnnnnnnnnnnnnnnnnnnnnnnnnnnnnnnnnnnnnnnnnnnnnnnnnnnnn
n
.2
nnn nnon,(10) nnon nnneyny
1
#
n nn nnnnnnnnnnnnnnnnnnnnnnnnnnnnnnnnnnnnnnnnnnnnnnnnnnnnnnnnnnnnnnnnnnnnnnnnnnnnnnnnnnnnnnnnnnnnnnnnnnnnnnnnnnn
.0n9n
nnn nn n
.3
.
.ion nx 00n
(4) nnnn nn nnnn nn nnnn nn nnnn nn (7) nn nn nn (8) nn nn nn
(4) nnn nn yn
(7) pnn ann yin (8) nn nn nn nn nn nn nn nn nn nn nn nn nn nn nn nn nn nn nn nn nn nn nn nn nn nn nn nn nn nn nn nn nn nn nn nn nn nn nn nn nn nn nn nn nn nn nn nn nn nn nn nn nn nn nn nn nn nn nn nn nn nn nn nn nn nn nn nn nn nn nn nn nn nn nn nn nn nn nn nn nn nn nn nn nn nn nn nn nn nn nn nn nn nn nn nn nn
nnn nn D
.3
Tn (7)nn ann (4) n nn nn nn
(8) nyn (7) nn nn nn nn nn nn nn nn nn nn nn nn nn nn nn nn nn nn nn nn nn nn nn nn nn nn nn nn nn nn nn nn nn nn nn nn nn nn nn nn nn nn nn nn nn nn nn nn nn nn nn nn nn nn nn nn nn nn nn nn nn nn nn nn nn nn nn nn nn nn nn nn nn nn nn nn nn nn nn nn nn nn nn nn nn nn nn nn nn nn nn nn nn nn nn nn nn
n nn nn nn nn nn nn nn
#
| 200907 | |
| = 40 | 3000 |
| 3000 | |
| 630 | |
| 27 | |
| dB(A) 100 | |
| 2.70 |
#
1
.12n7
pn .2
nntnT.3
nnn .4
100 5
ninn nT.6
ann .7
nin7y7y7.8
an7n 10.9
777777777
n
nannn nnnn nn
yNTi.n09ipn nn nnnn nn nnnn nn nnnn nn
DINIOIINNNTNNTNNNNTNNT
n nn nnnnnnnnnnnnnnnnnnnnnnnnnnnnnnnnnnnnnnnnnnnnnnnnnnnnnnnnnnnnnnnnnnnnnnnnnnnnnnnnnnnnnnnnnnnnnnnnnnnnnnnnnnnnnnnnn
ynn (nxxin npinn)
#
00000000000000000000000000000000000000000000000000000
77777777
7
#
nnn nn nnnn nn nnnn nn nnnn nn nnnn nn nnnn nn nnnn nn nnnn nn nnnn nn nnnn nn nnnn nn nnnn nn nnnn nn nnnn nn nnnn nn nnnn nn nnnn nn nnnn nn nnnn nn nnnn nn nnnn nn nnnn nn nnnn nn nnnn nn nnnn nn nnnn nn
#
IN 17,1907 nion nx xin,ny nynnn nn nn
777 910
wnnnn nn
.7nni nnnn nn
y
.7
nnon ninnnvin
4
TNNI
120
ninn
90 45- n nn nn nn nn nn nn nn nn nn nn nn nn nn nn nn nn nn nn nn nn nn nn nn nn nn nn nn nn nn nn nn nn nn nn nn nn nn nn nn nn nn nn nn nn nn nn nn nn nn nn nn nn nn nn nn nn nn nn nn nn nn nn nn nn nn nn nn nn nn nn nn nn nn nn nn nn nn
107 111111111111111111111111111
,
nynnnny
Dn nn .nnn nn nnnn nn nn nn nn nn nn nn nn nn nn nn nn nn nn nn nn nn nn nn nn nn nn nn nn nn nn nn nn nn nn nn nn nn nn nn nn nn nn nn nn nn nn nn nn nn nn nn nn nn nn nn nn nn nn nn nn nn nn nn nn nn nn nn nn nn nn nn nn nn nn nn nn nn nn nn nn nn nn nn nn nn nn nn nn nn nn nn nn nn nn nn nn nn nn nn nn nn nn nn nn
1
n<51-
T
nnnnn nn nnnn nn nnnn nn nnnn nn nnnn nn nnnn nn nnnn nn nnnn nn nnnn nn nnnn nn nnnn nn nnnn nn nnnn nn nnnn nn nnnn nn nnnn nn nnnn nn nnnn nn nnnn nn nnnn nn nnnn nn nnnn nn nnnn nn nnnn nn nnnn nn nnnn nn
n nn nnnn nn nn nn nn nn nn nn nn nn nn nn nn nn nn nn nn nn nn nn nn nn nn nn nn nn nn nn nn nn nn nn nn nn nn nn nn nn nn nn nn nn nn nn nn nn nn nn nn nn nn nn nn nn nn nn nn nn nn nn nn nn nn nn nn nn nn nn nn nn nn nn nn nn nn nn nn nn nn nn nn nn nn nn nn nn nn nn nn nn nn nn nn nn nn nn nn nn nn nn nn
DNNY D
y 1
n
#
y 1n n nn nn nn nn nn nn nn nn nn nn nn nn nn nn nn nn nn nn nn nn nn nn nn nn nn nn nn nn nn nn nn nn nn nn nn nn nn nn nn nn nn nn nn nn nn nn nn nn nn nn nn nn nn nn nn nn nn nn nn nn nn nn nn nn nn nn nn nn nn nn nn nn nn nn nn nn nn nn nn nn nn nn nn nn nn nn nn nn nn nn nn nn nn nn nn nn nn nn nn nn
197
#
12
n nn nnnnnnnnnnnnnnnnnnnnnnnnnnnnnnnnnnnnnnnnnnnnnnnnnnnnnnnnnnnnnnnnnnnnnnnnnnnnnnnnnnnnnnnnnnnnnnnnn
#
yNn nnnn nn nn nn noon nn nn nn nn nn nn nn nn nn nn nn nn nn nn nn nn nn nn nn nn nn nn nn nn nn nn nn nn nn nn nn nn nn nn nn nn nn nn nn nn nn nn nn nn nn nn nn nn nn nn nn nn nn nn nn nn nn nn nn nn nn nn nn nn nn nn nn nn nn nn nn nn nn nn nn nn nn nn nn nn nn nn nn nn nn nn nn nn nn nn nn nn nn nn nn nn nn nn nn nn
nntxA
IN 17,190 197 nHON NX KIN,NNN NNN
nion
17
IN 100
IN IN N 1000000000000000000000000000000000000000000
n
nui n
.
n nn nnnnnnnnnnnnnnnnnnnnnnnnnnnnnnnnnnnnnnnnnnnnnnnnnnnnnnnnnnnnnnnnnnnnnnnnnnnnnnnnnnnnnnnnnnnnnnnnnnnnnnnnnnnnnnnnn
nnnnn nn jNONX
.8
iONN.IONN 197 107 107 107 107 107 107 107 107 107 107 107 107 107 107 107 107 107 107 107 107 107 107 107 107 107 1
图
.110nn
nHJn
C72-nn nnnnnnnnnnnnnnnnnnnnnnnnnnnnnnnnnnnnnnnnnnnnnnnnnnnnnnnnnnnnnnnnnnnnnnnnnnnnnnnnnnnnnnn
.1n 107n7nnn
JONN7 71110X 711111111111111111111111111111111111111111
Lietuviskai (Originaliu injstrukciju vertimas)
SPECIFIKACIJOS
All new Greenworks Tools machinery is supplied with a 2 year parts and labour warranty from original date of purchase. A 30 day warranty is available for machines used professionally as Greenworks Tools are designed primarily to be used by DIY consumers.
This warranty is non-transferable.
LIMITATIONS
This warranty applies only to defective parts/components and does not cover repairs due to:
- Normal wear and tear.
- Routine tune up or adjustment
- Damage caused by improper handling/abuse/misuse or neglect.
- Overheating due to lack of maintenance.
- Damage due to fittings/fasteners becoming loose/detached through lack of maintenance.
- Damage caused by cleaning with water
- Machines serviced or repaired by non-authorised Greenworks Tools service centres.
- Machines incorrectly assembled or adjusted.
- Damage caused by improper use of the machine.
- Damage caused by improper winterisation (pressure washers)
-
Items considered as consumable parts are not normally covered by the warranty, including but not limited to:
-
Batteries
Electric cables - Blade and blade assemblies
Belts -
Filters
-
Chucks and tool holders
-
Certain products may contain components such as engines, transmissions from an alternative manufacturer, these items will be subject to the appropriate manufacturer's warranty policy except where Greenworks Tools Europe GmbH agrees to underwrite any claims outside the said manufacturer's warranty period.
- Second hand goods are not covered under this warranty policy.
- The fitting of spares, replacements or extra components which are not supplied or approved by Greenworks Tools Europe GmbH.
Warranty
To claim a warranty on any product under this policy a proof of original purchase is required. Credit card statement do not qualify as sufficient proof of purchase. In the first instance of a warranty event occurring the consumer should return the product to the original place of purchase with their proof of purchase. The machine will be sent to our central service facility and an inspection made. If the machine be found to be at fault it will be repaired and sent back to the address of the consumer free of charge. Machines that retail for less than €100 euros including sales taxes will generally be replaced.
If the central service facility finds that machine is not found to be at fault then the consumer will be advised they will need to pay for the cost the repair.
This warranty policy is subject to change from time to time to accommodate the needs of new products. A copy of the latest warranty policy will be available at www.greenworkstools.eu.

Greenworks Tools garanti for hobbymaskinerGreenworks Tools in
GARANTIPERIOD
TapaHOnHHn npaBnHa Ha Greenworks Tools 3a camoDenHm MaHNH
NEPHOD HA TAPAHUNRA
Bcunn Maunn Ha Greenworks Tools ce npedoctabr c 2-rounha rapaunna 3a cepbnHa deHnoct n pe3epBN qactn, chntaHO OT daTata Ha 3akynbahe Ha npdykTa. PpeocTabra Ce camo 30-dHeBH a rapanu 3a npocecnohAnHO n3non3BaHne Maunn, 3auTo npodytme Ha Greenworks Tools ca npdHa3hauhen npedeimmo 3a kIneHTn, pa6oteHN cbc camoJeHH Maunnn. Hactoata rapaunua He moke da ce npexbprna.
OTPAHnueHHN
Hactoata rapaHcna e BaInHa cAmO 3a DepeKTHn qactN/ KOMnoHEHTn H He NOKPbA peMOHTn, NopoEHN OT: 1. HopMaIHO n3HOCBaHe n AmOpTn3aUa.
- PyTHHHH HAcTPOKKn IIN DeHOCn no perynpahe.
3.Пов体育场пчненOT He npabnno6opabHe/3IoynoTpe6a/ rpeuho n3NoI3BaHe nnpraBa Ha He6peXHocT. - IperpraBaHe npaDi NoWa NODpbXkKa
- NopBpei npaPi pa3Xna6eHn/pa3KaueHn cHaKn nNcKpeNtEnHn eIeMeHTN B CNEcCTBne Ha Noa PndpBxka.
- NOBpeH, npuHHeH B CJIeCTBHe Ha NoUcTBAHe C BOJa.
- MaunHH, 06cnyKbAHn Hn peMOHTnpaHn OT cepBn3n ceHTpOBe, KOTo He ca oTOpu3npaHn OT Greenworks Tools.
8.MaunHnKoTcaccrno6eHNnnpeynpaHn HnnpabuHNO. - NOBpeH, npoOeHn OT HenpaBnJIHO 6opabeHe c MaunHaTa.
-
NOBpei, nopoDeHn OT HnpaBnHIO 3aImBaHe (BOOcTpyK)
-
EInemEnH, KOnTo ce cCHTaT 3a KOHCymATNB, HO O6nKHOBHe He Ce NOKPBAt OT rapaHuaT, BKNIOUHTeJIHO (HO He camO):
BaTeepu
EneKtpueecknKa6eJN
- OctpneTn KOMNNEKTN OCTPneTa
Pembun
-ФИNTPn
- NaTpoHHnN nIbpxaun 3a HcTpymeHTn
-
HЯко npodykTN MoRAT da cbdbpxKAT KOMNoHEHTN (Hapmep DbrarateMn, TpaHCMncn) OT dpyrN pOn3BOJNTeN - 3a Te3n eIemEtN ca Bcna rapaHIOHNHTe ycNOBnHa CbOTBeTHn npOn3BOJNTeOcbH bClyaTne, Korato Greenworks Tools Europe GmbH ce cbfNaac Da noKpNe IeTe, KOtTO He ce nokpNBat OT rapaHIOHNHNE nepnoD Ha To3n npOn3BOJNTeN.
-
CToKn BVtopa ynoTpe6a He ce nokpmbat OT hacToaTa rapaHua.
- MoTHIpaHTo Ha pe3epBn YacTn, 3aMeCTBaUu ININ DOnbNHTeHN KOMNoHEHTN, KOTo He ca IpeOCTabeHn ININ ODo6peHn OT Greenworks Tools Europe GmbH.
Fapanzna
3a npedraBaHe h rapaHnoHnck 3a dahen npdykt Tpr6Ba da ce npdeocTabn Doka3aTeNTBO 3a nbpBOHaauHNO My 3aKnyBaHe.
N3BneueHnHTAOT KpeDTHnKAPTN He npdeCTabnBaT BAnHIO
Doka3aTeNTBO 3a 3akynBaHe. PnP nbpBOTb B3hKNBa HcNOBn,
No3BOBaIaO npdeRBABaH ra paHnOHe NCK,KnHeHTb Tpr6Ba Da
3aHece npOyKTa Ha MCTOTO Ha HeroBOTo NpboHOaHnHO 3aKnyBaHe,
KbTeTo Tpr6Ba Da npdeocTabn Doka3aTeNTBO 3a 3akynBaHeTO.
MaunHaata 6bDe n3npaTeHa Do hauinr IraBeH cepBn3eH ueHTbp,
KbTeTo 6bDe n3BbpuHa HnCneKuHa. Ako CE yCTaHOBn FapuH e
deΦeKt NO MaunHaTa, Ta 6bDe 6e3PiAtHO pemOHtnpaHa n
InnpateHa o6patHo ha aDpeca Ha KIneHTa. MaunHnte Ha na3apHa
ctOIOCT NO 100 Ebo (BKN.DaHbK npdoax6a) O6knHObeHo 6bDaT
NoDMehHN C HOBn.
Ako haunrT rnaBHe cepBn3eH ceHTbpeYcTaHOBN Za6pnuHn DepeKTo N O MaunHaT, KIneHTb Tse 6bJe yBeDomeH, Ye Toi Ue TprBa da 3annat pa3xOdnte No peMOHa Ha npOdyKTa.
HactoInte rapaHIOHH npaBnla MoT a 6bDat npomeHa n nepnoDnHO, 3a da 6bDaT aKtYanHO aadantnpaH N kM HOHT npodykTN. Konne Ha Na-AkTayHnTe rapaHIOHH npabnla e HAnuHO ha aDpec www.greenworkstools.eu.

Ioiitik yyyuno ng ouoke uuv maotopepaTOc Greenworks Tools
NEPIOAOEIGYHSEH
aaiy gaaag aaii aaiiaai
. www.greenworkstools.eu:

Greenworks Tools Kendin Yap Makinerleri Garanti Poligesi
GARANTI SURESI
n nn nnnn nnnn nnnn nnnn nnnn nnnn nnnn nnnn nnnn nnnn nnnn nnnn nnnn nnnn nnnn nnnn nnnn nnnn nnnn nnnn nnnn nnnn nnnn nnnn nnnn nnnn nnnn nnnn nnnn nnnn nnnn nnnn nnnn nnnn
Greenworks ynnn nn nnnn nn nnnn nn nnnn nn nnnn nn nnnn nn nnnn nn nnnn nn nnnn nn nnnn nn nnnn nn nnnn nn nnnn nn nnnn nn nnnn nn nnnn nn nnnn nn nnnn nn nnnn nn nnnn nn nnnn nn nnnn nn nnnn nn nnnn nn nnnn nn nnnn nn
n nn
111111111111111111111111111111
XW IN NnNnNnNnNnNnNnNnNnNnNnNnNnNnNnNnNnNnNnNnNnNnNnNnNnNnNnNnNnNnNnNnNnNnNnNnNnNnNnNnNnNnNnNnNnNnNnNnNnNnNn
Greenworks Tools Europe GmbH by wink
y
n 100 nnnnnnnnnnnnnnnnnnnnnnnnnnnnnnnnnnnnnnnnnnnnnnnnnnnnnnnnnnnnnnnnnnnnnnnnnnnnnnnnnnnnnnn
197n nyn 70
y nynn nn nnnn nnnn nnnnnnnnnnnnnnnnnnnnnnnnnnnnnnnnnnnnnnnnnnnnnnnnnnnnnnnnnnnnnnnnnnnnnnnnnnnnnnnnnnnnnnnnnnnnnnnnnnn
n .a. n .n .n .n .n .n .n .n .n .n .n .n .n .n .n .n .n .n .n .n .n .n .n .n .n .n .n .n .n .n .n .n .n .n .n .n .n .n .n .n .n .n .n .n .n .n .n .n .n .n .n . n . n . n . n . n . n . n . n . n . n . n . n . n . n . n . n . n . n . n . n . n . n . n . n . n . n . n . n . n . n . n . n . n . n . n . n . n . n . n . n . n . n . n . n . n . n . n.

"Greenworks Tools" buitines paskirties irenginiu garantijos taisykles
GARANTIJOS LAIKOTARPIS
EN EC DECLARATION OF CONFORMITY
Manufacturer: Changzhou Globe Co., Ltd.
Address: No. 65 Xinggang Rd., Zhonglou Zone, Changzhou, Jiangsu, China
Name and address of the person authorised to compile the technical file:
Name: Peter Soderström
Adress: Hjortronvagen 3, 555 93 Jonkoping, Sweden
Herewith we declare that the product
Category CORDLESS HEDGE TRIMMER
Model 2200907
Serial Number See product rating label
Year of Construction See product rating label
■ is in conformity with the relevant provisions of the Machinery Directive (2006/42/EC)
■ is in conformity with the provisions of the following other EC-Directives EMC Directive (2014/30/EU),
Noise Emission Directive (2000/14/EC amended by 2005/88/EC)
And furthermore, we declare that
The following (parts/clauses of) European harmonised standards have been used EN 60745-1; EN 60745-2-15; EN ISO 3744; ISO 11094; EN 55014-1; EN 55014-2
Measured sound power level 98.6 dB(A)
Guaranteed sound power level 100 dB(A)
Conformity assessment method to Annex V / Directive 2000/14/EC
Place, date: Changzhou, 08/11/2017
Quality Director
Signature: Ted Qu Haichao
Ted qu
Adresse: No. 65 Xinggang Rd., Zhonglou Zone, Changzhou, Jiangsu, China
Indirizzo: No. 65 Xinggang Rd., Zhonglou Zone, Changzhou, Jiangsu, China
Adresse: No. 65 Xinggang Rd., Zhonglou Zone, Changzhou, Jiangsu, China
Endereço: No. 65 Xinggang Rd., Zhonglou Zone, Changzhou, Jiangsu, China
Adres: No. 65 Xinggang Rd., Zhonglou Zone, Changzhou, Jiangsu, China
Ampes: No. 65 Xinggang Rd., Zhonglou Zone, Changzhou, Jiangsu, China
IIMn aDpec IInca, OTBeTCTBENHO 3a NOIROTOBky TexHnuecko JOKyMeHTaUIN:
DnpeKTop no KaueCTBy
EC-SÄNNÖSTEN NOUDATTAMINEN
Osoite: No. 65 Xinggang Rd., Zhonglou Zone, Changzhou, Jiangsu, China
Adress: No. 65 Xinggang Rd., Zhonglou Zone, Changzhou, Jiangsu, China
Adresse: No. 65 Xinggang Rd., Zhonglou Zone, Changzhou, Jiangsu, China
Adresse: No. 65 Xinggang Rd., Zhonglou Zone, Changzhou, Jiangsu, China
Adres: No. 65 Xinggang Rd., Zhonglou Zone, Changzhou, Jiangsu, China
Adresa: No. 65 Xinggang Rd., Zhonglou Zone, Changzhou, Jiangsu, China
Adresa: No. 65 Xinggang Rd., Zhonglou Zone, Changzhou, Jiangsu, China
Naslov: No. 65 Xinggang Rd., Zhonglou Zone, Changzhou, Jiangsu, China
Ime in naslov osebe, ki je pooblascena za sestavljanje tehnicne dokumentacije:
Ime: Peter Soderström
Naslov: Hjortronvagen 3, 555 93 Jonkoping, Sweden
Adresa: No. 65 Xinggang Rd., Zhonglou Zone, Changzhou, Jiangsu, China
Ime i prezime, i adresa osobe ovlaštene da sastavi tehničku datoteku:
Ime i prezime: Peter Soderstrom
Adresa: Hjortronvagen 3, 555 93 Jönköping, Sweden
Cim: No. 65 Xinggang Rd., Zhonglou Zone, Changzhou, Jiangsu, China
Adresa: No. 65 Xinggang Rd., Zhonglou Zone, Changzhou, Jiangsu, China
Ampes: No. 65 Xinggang Rd., Zhonglou Zone, Changzhou, Jiangsu, China
Ime n aDPEC Ha JnueTo, ynbHOMOeHO da cbCTaBn TexHnueckn qaJI:
Ume: Peter Soderström
Aapec: Hjortronvagen 3, 555 93 Jonkoping, Sweden
C hactoJeTo deKnapnpame, Ye npOdyKTbT
Kateropn 6E3XNUeH XPACTOPE3
MoeJ 2200907
CepneH Homep Bux eTuKeTa c HOMHaJIHnTe cToHocTn
TOnHa Ha npO3BODCTBO Bux etNKeTa c HOMHaJIHnTe CToHOCn
OTROBAPRA Ha CbOTBeTCTBaUHTe pa3nope6n Ha DnpeKTHBaTA OTHOCHO MaHINHTe (2006/42/EC)
OTROBAPaHa pa3nope6nte Ha cIeHNTe dpyrN dIpeKTHBn Ha EO 2014/30/EU (dIpeKTHBa 3a EMC),
Директуba 3a Шу mobиTe emncn (2000/14/EC, ИзмениоТ 2005/88/EC)
OcBeH ToBa IekJIapIpuMe,Ye
ca npinloxeHn cIeHNTe (uaCTn/KIay3n oT) eBpOnecknte XapMOHn3npaHn CTaHdapTu
EN 60745-1; EN 60745-2-15; EN ISO 3744; ISO 11094; EN 55014-1; EN 55014-2
I3mepeHo HnBO Ha yM 98.6 dB(A)
TapaHTnpaHO HnBO Ha shym 100 dB(A)
MeToI Ha OueHbAHe Ha CbOTBeTCTBnETo CbO6pa3Ho npInIOxKeHne V ot DnpeKtNbA 2000/14/EC
MЯсто, Дата: Changzhou, 08/11/2017
Iopnnc: Ted Qu Haichao
ДиpeкторKaueCTBO
Ovopa: Changzhou Globe Co., Ltd.
: No. 65 Xinggang Rd., Zhonglou Zone, Changzhou, Jiangsu, China
Ovopa kai dieuovon atouou eouoiobotnevou va ouvtalei tov texviko pakeo:
Ovouα: Peter Soderström
: Hjortronvagen 3, 555 93 Jonkoping, Sweden
Δia Tou Tnapovoc δηλωνouε ΘI TO Tpoióv
Karlnyopia A\YPMATO KONTIKO\PhiYTIK\OmegaN\PhiPAKT\Omega$ N
MovTeλo 2200907
Apiouc oepac . Bλ. EIKeTa a PpoivtoC
EtoKataoKeunC .BA. EtiKaTa a PpoioVtoc
Eivai ouwvo e Tc oxetikcs Pouttoeoeic ts Oyniaa unxavnatwv (2006/42/EK)
Changzhou,08/11/2017:
()
Ted qu
Uretici: Changzhou Globe Co., Ltd.
Adres: No. 65 Xinggang Rd., Zhonglou Zone, Changzhou, Jiangsu, China
No. 65 Xinggang Rd., Zhonglou Zone, Changzhou, Jiangsu, China:
yun yin nyn noinn nn nni
Peter Soderstrom: w
Hjortronvagen 3, 555 93 Jonkoping, Sweden:
N
n
2200907
1
y
(2006)
EMC (2014/30/EU) n"nn
(2000/14/EC n-2005/88/EC) yyn no"nn
:
Dnnn nn nn (7u Dnyo ,Dy) nnu wnu
EN 60745-1; EN 60745-2-15; EN ISO 3744; ISO 11094; EN 55014-1; EN 55014-2
dB(A) 98.6
dB(A) 100
2000/14/EC nnn / V noohn nn nnnn nn
Ted Qu Haichao:nnnn
08/11/2017,Changzhou:
nN
Ted qu
LT EC ATITIKTIES DEKLARACIJA
Gamintojas: Changzhou Globe Co., Ltd.
Adresas: No. 65 Xinggang Rd., Zhonglou Zone, Changzhou, Jiangsu, China
Adrese: No. 65 Xinggang Rd., Zhonglou Zone, Changzhou, Jiangsu, China
Personas, kas atbildigs par tehniska faila apkopošanu, vards un adrese:
Vards: Peter Soderstrom
Adrese: Hjortronvagen 3, 555 93 Jonkoping, Sweden
Aaddress: No. 65 Xinggang Rd., Zhonglou Zone, Changzhou, Jiangsu, China