
SE-DRF41M - Earphones PIONEER - Free user manual and instructions
Find the device manual for free SE-DRF41M PIONEER in PDF.
| Product type | Wireless digital headphone |
| Brand | PIONEER |
| Model | SE-DRF41M |
| Headphone type | Dynamic, closed-back |
| Drivers | 40 mm |
| Frequency response | 15 Hz - 22 000 Hz |
| Transmission distance | Up to 30 m in open area |
| Transmitter power supply | DC 5 V (AC adapter supplied) |
| Headphone power supply | DC 2.4 V (2 supplied Ni-MH AAA rechargeable batteries) |
| Battery life | Approximately 12 hours after full charge |
| Charging time | Approximately 6 hours (rapid charge) |
| Transmitter weight | Approx. 178 g |
| Headphone weight (without batteries) | Approx. 227 g |
| Earpad material | Polyurethane (leather finish) |
| Audio input | Stereo analog input (RCA) |
| Special functions | Auto standby mode, auto power off, auto mute |
| Included accessories | AC adapter, stereo audio cable (1 m), 2 Ni-MH AAA rechargeable batteries, 6.3 mm plug adapter, instruction manual, warranty card |
| Care and cleaning | Clean with a soft, dry cloth. Do not use solvents. |
| Safety | Do not expose to water or open flames. Use only the supplied adapter. |
| Operating temperature | +5 °C to +35 °C |
Frequently Asked Questions - SE-DRF41M PIONEER
User questions about SE-DRF41M PIONEER
0 question about this device. Answer the ones you know or ask your own.
Ask a new question about this device
Download the instructions for your Earphones in PDF format for free! Find your manual SE-DRF41M - PIONEER and take your electronic device back in hand. On this page are published all the documents necessary for the use of your device. SE-DRF41M by PIONEER.
USER MANUAL SE-DRF41M PIONEER
Digital wireless headphone system
Operating Instructions
Mode d'emploi
Bedienungsanleitung
EU Representative's:
Pioneer Europe NV
Haven 1087, Keetberglaan 1,
9120 Melsele, Belgium
http://www.pioneer.eu
CE
English:
Hereby, Pioneer, declares that this SE-DRF41M is in compliance with the essential requirements and other relevant provisions of Directive 1999/5/EC.
Suomi:
C NaCToJSeTo, Pioneer DeKnapipa, Ye To3n SE-DRF41M OTrObApHa OCHOBHTe N3NCKBaHnI N DpyrN CbOTBeTHn NOCTaHOBJIeHnI Ha DipeKtNbA 1999/5/EC.
Polski:
The lightning flash with arrowhead symbol, within an equilateral triangle, is intended to alert the user to the presence of uninsulated "dangerous voltage" within the product's enclosure that may be of sufficient magnitude to constitute a risk of electric shock to persons.
CAUTION
RISK OF ELECTRIC SHOCK DO NOT OPEN
CAUTION:
TO PREVENT THE RISK OF ELECTRIC SHOCK, DO NOT REMOVE COVER (OR BACK). NO USER-SERVICEABLE PARTS INSIDE. REFER SERVICING TO QUALIFIED SERVICE PERSONNEL.

The exclamation point within an equilateral triangle is intended to alert the user to the presence of important operating and maintenance (servicing) instructions in the literature accompanying the appliance.
D3-4-2-1-A1_En
WARNING
This equipment is not waterproof. To prevent a fire or shock hazard, do not place any container filled with liquid near this equipment (such as a vase or flower pot) or expose it to dripping, splashing, rain or moisture.
D3-4-2-1-3_A1_En
WARNING
Before plugging in for the first time, read the following section carefully.
The voltage of the available power supply differs according to country or region. Be sure that the power supply voltage of the area where this unit will be used meets the required voltage (e.g., 230 V or 120 V) written on the AC adaptor.
D3-4-2-1-4*A1En
WARNING
To prevent a fire hazard, do not place any naked flame sources (such as a lighted candle) on the equipment.
D3-4-2-1-7a_A1_En
Operating Environment
Operating environment temperature and humidity:
+5 ℃ to +35 ℃ (+41 ℉ to +95 ℉); less than 85 %RH (cooling vents not blocked)
Do not install this unit in a poorly ventilated area, or in locations exposed to high humidity or direct sunlight (or strong artificial light)
D3-4-2-1-7c*A1_EN
If the AC plug of this unit does not match the AC outlet you want to use, the plug must be removed and appropriate one fitted. Replacement and mounting of an AC plug on the power supply cord of this unit should be performed only by qualified service personnel. If connected to an AC outlet, the cut-off plug can cause severe electrical shock. Make sure it is properly disposed of after removal.
The equipment should be disconnected by removing the mains plug from the wall socket when left unused for a long period of time (for example, when on vacation).
D3-4-2-2-1a_A1_En
When using this product, confirm the safety information shown on the bottom of the unit.
D3-4-2-2-4_B1_En
When disposing of used batteries, please comply with governmental regulations or environmental public institution's rules that apply in your country/area.
D3-4-2-3-1_B1_En
WARNING
Do not use or store batteries in direct sunlight or other excessively hot place, such as inside a car or near a heater. This can cause batteries to leak, overheat, explode or catch fire. It can also reduce the life or performance of batteries.
D3-4-2-3-3_A1_En
Information for users on collection and disposal of old equipment and used batteries
(Symbol for equipment)

Symbol examples for batteries


Pb
These symbols on the products, packaging, and/or accompanying documents mean that used electrical and electronic products and batteries should not be mixed with general household waste.
For proper treatment, recovery and recycling of old products and used batteries, please take them to applicable collection points in accordance with your national legislation.
By disposing of these products and batteries correctly, you will help to save valuable resources and prevent any potential negative effects on human health and the environment which could otherwise arise from inappropriate waste handling.
For more information about collection and recycling of old products and batteries, please contact your local municipality, your waste disposal service or the point of sale where you purchased the items.
These symbols are only valid in the European Union.
For countries outside the European Union:
If you wish to discard these items, please contact your local authorities or dealer and ask for the correct method of disposal.
K058a_A1_En
Information to User
Alterations or modifications carried out without appropriate authorization may invalidate the user's right to operate the equipment.
D8-10-2_A1_En
Before making or changing the connections, switch off the power and disconnect the power cord from the AC outlet.
D44-9-3_A1_En
This product is for general household purposes. Any failure due to use for other than household purposes (such as long-term use for business purposes in a restaurant or use in a car or ship) and which requires repair will be charged for even during the warranty period.
K041_A1_En
Power source
If you are not going to use the system for a long time, unplug the AC adaptor from outlet. When removing the plug, grip the AC adaptor. Do not pull on the cord.
POWER-CORD CAUTION
Handle the power cord by the plug. Do not pull out the plug by tugging the cord and never touch the power cord when your hands are wet as this could cause a short circuit or electric shock. Do not place the unit, a piece of furniture, etc., on the power cord, or pinch the cord. Never make a knot in the cord or tie it with other cords. The power cords should be routed such that they are not likely to be stepped on. A damaged power cord can cause a fire or give you an electrical shock. Check the power cord once in a while. When you find it damaged, ask your nearest PIONEER authorized service center or your dealer for a replacement.
S002*A1En
Thank you for buying this Pioneer product. Please read through these operating instructions so you will know how to operate your model properly. After you have finished reading the instructions, put them away in a safe place for future reference.
01 Before you start
1-1 What's in the box
1 Digital cordless transmitter
2 Digital cordless headphones
3 Stereo Audio cable (1.0 m)
4 AC adaptor
5 AAA Rechargeable nickel-metal hydride batteries (2)
6 6.3 mm Plug adaptor
7 Operating instructions
8 Warranty Card
1-2 Names and Functions of Parts
1 Digital cordless transmitter
1 POWER/CHARGE Indicator
Lights green when operating; lights red when recharging.
2 DC IN jack
Connect the supplied AC adaptor to this jack. (Use only the supplied AC adaptor. Using adaptors with different plug polarities or other characteristics could cause malfunction.)
3 AUDIO IN jacks
Analog input jacks for connection to audio/video equipment such as a DVD player or TV.
4 Charging contacts
2 Digital cordless headphones
1 VOLUME +/- control buttons
Use to adjust the volume.
2 Self-adjusting headband
The headband automatically adjusts when you put the headphones on.
3 POWER indicator
Lights when the headphones are on.
4 POWER button
Press to turn on/off.
5 SIGNAL indicator
Lights steadily when communicating with transmitter.
6 Charging contacts
7 Ear pads
02 Getting started
2-1 Inserting the batteries
1 Remove the headphones' right (R) side ear pad in the direction of the arrow (see illustration 2-1.1).
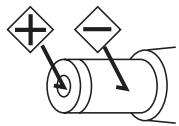
2 Confirm the "+" and "-" poles and insert the batteries as shown in illustration 2-1.2.
3 Replace the ear pad in its original position.
2-2 Charging the batteries
1 Connect the supplied AC adaptor to DC IN jack on the transmitter. Plug the adaptor into the wall outlet.
2 Mount the headphones on the transmitter so that the headphones' charging contacts align with the contacts on the transmitter as shown in illustration 2-2.2. When charging begins, the transmitter's POWER/ CHARGE indicator will light red. When charging is completed, the indicator will go out.
3 The rapid recharge function will allow complete charging within six hours. A full battery charge will allow the headphones to operate about twelve hours.

Note
Usage time may vary according to the temperature and other conditions.
- Do not place metal objects near the headphones' charging contacts, since dangerous electrical shorts or abnormal heating may result.
Notes on battery charging
- Battery performance is influenced by the surrounding temperature. Charge the supplied rechargeable batteries within a temperature range of 10 to 35 degrees celcius.
- Do not overcharge batteries. In order to protect batteries, do not repeatedly charge the batteries that are already fully charged.
- Batteries become slightly warm when charging. This is not a malfunction.
-
Use only the supplied AC adaptor with this unit. Using other AC adaptors may cause malfunction.
-
For your safety, only the supplied rechargeable batteries can be charged by this unit. Other types of rechargeable batteries and dry-cell batteries cannot be charged.
- Rechargeable batteries should be replaced with new ones when they last only a short time after recharging. New batteries can be ordered from your nearest Pioneer service center.
2-3 Connecting up
1 Connecting the transmitter to audio sources
Use the furnished audio cable to connect the transmitter's AUDIO IN jacks to the earphones output connector on a TV, portable audio player, or other audio playback component.
If the playback component's audio output utilizes a 6.3 mm headphone jack, use the furnished plug adapter.
2 Connecting the transmitter to AC adaptor
Connect the supplied AC adaptor to DC IN jack on the transmitter. Plug the adaptor into the wall outlet.
The transmitter's green indicator will flash for approximately five seconds, then switch to steadily lighted green, indicating that the transmitter has established communication with the headphones.

Note
- Use only the supplied AC adaptor. Using other adaptors with different plug polarity or other characteristics can cause product failure.
- Even AC adaptors with the same voltage and plug polarity can damage this product due to the current capacity or other factors.
03 Operation
3-1 Using the system
1 Turn on audio source component.
2 Press the POWER button on the headphones.
To turn ON the headphones, press and hold the POWER button. The POWER indicator will light green.
3 When power is turned ON, communication begins between the transmitter and headphones.
When communication is established between the transmitter and headphones, the SIGNAL indicator lights green and sound is produced from the headphones.
4 Adjust the volume.
Use the VOLUME + / - control buttons to adjust the sound volume as desired.
When the sound volume is set to its maximum output value, a beep sound will be heard from the headphones.
3-2 Transmitter standby mode
If no audio signal is input to the transmitter for five minutes, the transmitter will automatically enter the standby mode (the transmitter's POWER/CHARGE indicator will go out). When an audio signal is once again received by the transmitter, the standby mode will be automatically cancelled.
3-3 Auto power OFF function
When no signal is received from the transmitter, the headphones' SIGNAL indicator will go out and no sound will be produced from the headphones. If this condition continues for five minutes the headphones power will automatically turn OFF.
3-4 Auto mute function
If the distance between the transmitter and headphones exceeds the allowable transmission distance, the SIGNAL indicator will turn OFF and the headphones will be automatically muted. In this event, move closer to the transmitter.
3-5 When battery power becomes low
When the headphones' remaining battery power becomes low, the POWER indicator will begin flashing, and a beep sound will be heard once each minute. If this condition continues for five minutes, the headphones' power will automatically turn OFF. To use the headphones again you must recharge the batteries.
04 Additional information
Troubleshooting
If you run into any problems using this headphone system, refer to the following checklist. Incorrect operation may result in some problems. In addition, the problems may be caused by malfunctions on the components connect to this system. Should any problem persist, consult your nearest Pioneer service center or your dealer to carry out repair work.
When visiting your Pioneer service center for repairs, be sure to take both the headphones and transmitter.
| Problem | Remedy |
| No sound. Sound intermittent. | Check the connection between the AC adaptor and the wall outlet. Check the connection between the transmitter and the AV components. Check the headphone is turned on. Check the batteries are placed in correct polarities. Batteries are completely used up. Start playback after checking that the power is turned on for the TV or audio playback device used. Raise the headphones' sound volume. If no sound can be heard even after raising the sound volume, lower the volume and check other items. Shorten the distance between the headphones and transmitter. Check to be sure no other electronic device using the 2.4 GHz band is located near the headphones or transmitter. If such a device is present, move it as far as possible away from the transmitter and headphones. |
| Sound is distorted. | The sound volume control is set too high, or too low at the TV/AV or other playback source. Try adjusting the sound volume of the playback device. |
| The batteries will not charge. | Confirm that the headphones are placed correctly on the transmitter, and that the transmitter's POWER/CHARGE indicator lights red (page 5). Dry-cell batteries or rechargeable batteries other than the ones supplied are being used. Use only the supplied rechargeable batteries. The rechargeable batteries are exhausted. Replace them with new rechargeable batteries. Check whether the charging contacts are soiled, and clean with a cotton swab if necessary. Confirm that the rechargeable batteries have been installed with the +/- polarities in the correct orientation. |
Precautions
About use of headphones
During use of the headphones, if you sense an allergic reaction (rash, etc.), stop using the headphones immediately.
Listening at high volume
Listening to headphones at high volume for an extended period can result in hearing damage. Please be careful not to set the volume too high, especially when listening in a noisy environment.
Please also note that some sound may leak from the headphones when listening at higher volume levels.
Ear pads
The color of the ear pad material may fade with use.
Cleaning
Use a soft and dry cloth for cleaning. Use a soft cloth slightly moistened with mild detergent solution, if necessary. Do not use solvents such as thinner, benzene or alcohol as these may damage the surface.
About safety
- Do not drop, hit or otherwise expose the transmitter or headphones to strong shocks of any kind. This could damage the product.
- Do not disassemble or attempt to open any parts of the system.
Placement
-
Do not place the system in any of the following locations:
-
Location exposed to direct sunlight, in a car, near a heater, or other extremely high temperature locations.
- Dusty location.
- On an unsteady or inclined surface.
- Location exposed to large amounts of vibration.
- Bathroom or other high-humidity locations.
When something is wrong with the Product
- If any of the following symptoms appear, immediately cease use of the headphones, turn power to OFF, and consult your Pioneer Service Center:
- The headphones exhibits unnatural heating, smells, deformation, discoloration, etc.
- A foreign object enters the headphones.
Specifications
Transmitter TRE-D41M
Audio input
...... Analog input (RCA terminal L/R) x 1
Power source. DC 5 V
(from the supplied AC adaptor)
Transmission distance 30 m
(open area without obstructions;
the actual effective distance may vary depending on environmental conditions.)
Power consumption in standby mode.....0.3 W
Mass Approx 178 g
Headphones SE-DHP41M
Type Closed dynamic
Driver units. 40 mm
Playback frequency range 15 Hz to 22 000 Hz
Power source .DC 2.4 V
(supplied rechargeable battery x 2)
Ear pads ......... Polyurethane (leather finish)
Mass ....... Approx 227 g (excluding batteries)
Accessories
Stereo Audio cable (1.0 m) 1
AC adaptor (5 V 550 mA)
Rechargeable nickel-metal hydride battery (size AAA) 2
6.3 mm Plug Adaptor 1
Warranty card 1
Operating instructions (This document)

Note
Specifications and Designs are subject to possible modifications without notice due to improvements.
IMPORTANT

Cable audio stereo (1,0 m) 1
© 2011 PIONEER CORPORATION.
Cavo audio stereo (1,0 m) 1
WAARSCHUWING NETSNOER
2-2 Carregar as pilhas
Tia xwpeE kToC ts Eupwnaikns Evwons:
Eav eioe ie va aoppiyeaote c tiooekoe, eikoovnoe te e tic tonikc apxcs n to oouc to oipoc taov npoiovto kai evnepomegaite oxetiku e tnv oosnt mdo anoppyns touc.
K058a_A1_Gr
Pnnpoopoe yia tov XpnoTn
Alambdaes n troTTOIOIeI c Tou paymuToIOuVtai Xwpic Tnv katalnnn EosouoDotnO n Tropov va apaipoeouv to dikaiomega aTto xpnoT va xepiEeTai Tov eonlio.
D8-10-2_A1_Gr
Piv va kave t n aalaxete Tc ouvdeoeic, aTVEpyoioane Tn oukeun kai ByaTe to kaawio tropofooiaac atro tn vpica.
D44-9-3_A1_Gr
Auto to npoiov eivai yia yevikn oukakn xhnoi.
Onoiadnoote avetapkeia loywo npns tou ia okoovs aalouoc ktoa ouiakoo (owns n maepopp0eoun npion yia enxipnatikoofoyouc e eva eotatopio n xpion oe autokivnto n okaoos) noaataei eiokev thao xpeowei akoun kai katantv diapkeia tns eyyunoeos 0e 10x. K041_G
5 Evεiη ΣHMATO(SIGNAL)
Transmitter TRE-D41M
Zvukovy vstup
..... Analógovy vstup (RCA terminal L/R) x 1
Zdroj napajania. DC 5 V
(z dodaného siet'oveho adapéra)
Prenosová vzdialenost' 30 m
(otvorená plocha bez prekážok;
skutočná Účinná vzdialenost'sa može menit' v závislosti od podmienok prostredia.)
Spotreba energia v pohotovostnom režime 0,3 W
Hmotnost' . Pribl. 178 g
Sluchadla SE-DHP41M
Typ. Uzativorený dynamický
Ovladacie Jednotky. 40 mm
Frekvenčný rozsah
prehravania 15 Hz až 22 000 Hz
Zdroj napajania. DC 2,4 V
(dodaná nabijate'lá bátéria x 2)
U/sné násadky....Polyuretán (prevedenie koža)
Hmotnost' .Pribl. 227 g (bez batérii)
Príslušenstvo
Ipeed Tem, KaK BbINOJHHTb NJIu N3MeHHTb NOcOeDInHeHnra, BbIKJIOUHTb NITaHne N OTCoEINHHTb CteBOi ShHyp OT BbIXoDa HapJxKeHnA AC.
D44-9-3_A1_Ru
ДанhoeизделпгднэчсeroлгИнсольбовиньошххО3ЯнctВehhhxцelax.Вс lyuae BO3HnKHOBHeHHJIIO6O HeNCpabHbOCTN, CB3aHHoC HcnoIb3OBaHHem BdpyHX,HexeHN XO3ЯnCTBeHHbIX ceJAX (Taknx,KakДintelbHoeHcNoJIb3OBaHne B KOMMepuecknXцelxB pectopane ИlnB abTomO6HJe, IINHaKopa6Ne) n Tpe6yioSei peMOHTa,Tako peMOHT OcyuieCTBnaTeTcra 3a ПlaTy,Daxe B TeueHne rapaHTnHoro cpoka.
K041_A1_Ru
NCTOCHNK NITaHNA
Ecni BbI He co6bpaTeScb nOJIb3OBAbTcBcNCTeMoB BV TeueHne dIITeJIbHO rpeIOda BpeMeHN, OTcoEINHtE cTeBOJ aIaNTep nepeMeHHOro ToKa OT cTeBOJ po3ETKn. BbIHmAJ uTEnCeJIb n3 po3ETKn, 6epTEcB 3a cTeBOJ aIaNTep nepeMeHHOro ToKa. He TAHnTe 3a UHyp.
MEPbI INPEIOCTOPOXHOCTN INOOBPAUeHnC CETEBbIM SHHYPOM
ДерхиTe ceTeBOw шур 3a Вику. He BBITacknBaIte BUNKy, B3ЯВИncb 3a ShHyp, И НКOrda He kacaITeCb ceTeBOrO shHypa, ecIn BaUn pyKu BnaJxHbIe, TaK KaK 3To MOXeT npINBeCTN K KOPOTKOMY 3aMbIkaHNo nII NopaxKeHIO 3NeKTPnueCKIM TOKOM. He cTaBbTe anPapaT,пpeMtebl Me6eJIи T.D. Na ceTeBOU shHyp, He 3aJxMaIte erO. He 3aBra3bBaIte y3IOB Ha shHype n He CBra3bBaIte erO c DpyrIMn shHypaMn. CeTeBbIe shHypbl DOJIxHbI JnxKaTb TaK, uTO6bl Ha HIX HeNb3Я 6blIO HacTynITb. ПOBpeJDeHHbI CEteBOU shHyp MoXeT CTaTb PrnCHNO BO3NHKnHOBeHnRA NOxApa nII nOpa3ntb Bac 3NeKTPnueCKIM TOkOM. BpeMЯ OT BpeMeHi nPoBepaIte ceTeBOU shHyp. B cLnyae obHapyKeHnRA IOBpeJdeHnRA o6paTIteCB 3a ZameHoB V 6blJxuMn OphiuaJIbHbI CepBnChbl IeHTpФinPmbl PIONEER nII K BaWeMy dInJIepy.
S002*A1_Ru
2-1 YcTaHOBka 6aTapeek
1 Chmnte am6yupop HayshnkoB c npabOi (R) cTOpOHbI B HappaBJeHn, yka3aHHOM cTpeNkoi (cM. pncyHok 2- 1.1).
2 Пюверытполюса“+”и“-“иВставытбатуарейки,кak 3TO пoka3aHoHa рисунke 2-1.2.
3 YcTaHOBnTe am6yUHOp B erO n3HaayalbHoE NOJoxKeHne.
2-2 Повзарядka 6атAPEEK
1 ПодсоединITE прILAгьМВ KOMплжтЕ постаBNСеTeBOAадТерпеременHorO TOKa K rHe3dY DC IN ha nepeDAtUnke. BcTaBbTe BnIKy aДANTEpaВ ceTeByo po3eTKy.
2 YctaHOBHTe HayuHnKn Ha nepeTaTcHK TaKIM O6pa3OM, YTO6bI KOHTaKTbI DJIa NOd3aprAdkn Ha HayuHnKax COBnaLIc KOHTaKTamn Ha nepeTaTcNke, KaK 3To Noka3aHo Ha pncyHke 2-2.2. Korda NOd3aprAdka NaChHeTcR, INDnKaTOP POWER/CHARGE Ha nepeTaTcKe 6ydeT rOpetb KpacHbIM cBeTom. Korda NOd3aprAdka 3aBepuNTcR, INDnKaTOP nOracHet.
3ФункцябьICTpoи NOДЗардКИ NO3BOJЯET BbINONHITb NOJHyO NOДЗардКу 3a weCt b YacOB. ПОньI 3apI6baTapeeK NO3BOJЯET HayshHKam pa6OtaTb B TeueHne OKOJIo DBeHaDcaTn YacOB.

PpimmeaHne
BpeMg 3aBnCHMOCTN OT TeMIIepaTpyI IN npyHX ycIOBNI.
He pa3MeIaIe MeTaJIINueckne IpeIMetbIB6JIIN3KoHTaKTOBJIIaIO3apRAnHa HayIINHKax,IOCKOJIbKY 3TO MOKeT IIpNBecTHK OIIaCHbIM 3JIeKTPnueckHM KOpOTKM 3aMbIkaHHM HJIIn aHOpMaJIbHOMy HaIpeBaHHIO.
3ameuHnI IO nOd3apJKe 6aTaapeek
- OkpykaIOIIa TeMIIepaTpa OKa3bIbAeT BJIINHHe Ha pa6OuHe xapaKTepeNCTnKn 6aTaapeek. BbIOJIHHaTe IIOJ3apRkU Ky IIpHJIaRaEMbIX B KOMIIJEKe TIOcTaBKN aKKyMjIaTOPbIX 6aTaapeek B TeMIIepaTypHom IHaIIa3OHe ot 10 Do 35 rpaIycOB IeJIbCnI.
- He doynckaIte n36bIToHoi nepe3apJIKn 6aTapeek. B ueJx 3aIiNTbI 6aTapeek He BblIOJIHJe TIOBTOpHOI IOJ3apJIKN yKe IIOJIHOCTbIO 3apJKeHHbIX 6aTapeek.
- Bo Bpemra IIa3apJKN 6aTaapeiKn MoIyT cJIeRka HArpeBaTbC. To He YBJIaETc HIIIOJaIKoI.
CДaHHbIM yCTpoIcTBOM HcIIJIb3yIte TOJIbKO IIpHJIaIaEMbI B KOMIIJIeKTe IIOCTaBKN CeTeBOI aIaIITep IIepeMeHHORToKa. IcIIJIb3OBAHHe IpyrHX cTeBbIX aIaIITepOB IIepeMeHHORTO Toka MOKeT IIpNHBeCTN K HeIIJIaIKam B pa6Ote.
B ⅢeJIax o6ecIIeueHn 6e3OIIaIacHOCTn, TOJIbKO IIpHIJIaIaEaMbIe B KOMIIJIeKTe IIOCTaBKn aKKyMylIaTOPHbIe 6aTaapeiKN MOrYT IIO3apJxKaTbcraBd aHHOM yCTpoIcTBe. JpyrHe TNIbI aKKyMylIaTOPbIX 6aTaapee n cyXHX 3JIeMeHTOB IINTaHHI aIO3apJxKaTbcr He MOrYT. - AkkyjTOpHbIe 6aTapeKn CJJeJyEt 3aMeHrTa H a HOBbIe, KOJIa IIOcJIe IIOJ3apJIKN Hx 3apJa XbATAet TOJIbKO Ha KOPOTKn IepHOJ BpeMeHN. HoBbIe 6aTapeKn Bbl MoKeTe 3aKa3aTb B 6JIHKaIIeM cepBnCHOM IeHTpe KOMIIaHHPioneer.
2-3 Побъедиениe
Bb6op meCTa yCTaHOBKn
He pa3MeIaIte cHCTeMy B KaKOM-JIN6O H3 CJJeIyIOIIHX MecT:
-MecTa,IOIBePKeHHBIE BO3IeHCTBnHO IIpIMbIX JIyuei COJIHeuHO CBeTa,BaBTOMO6NIJE, B0JIN3N O6oRpeBAteJIbHBx yCtpoHCTB,a TaKKe MeCTa,IOIBePKeHHBIE BO3IeHCTBnHO Upe3MepHO BbICOKHX TeIIpepaTYP.
- 3aIIbJIeHHBIE MeCTa.
- Ha HeCTa6HJIbHbIX HJIH HaKJIOHHbIX IIOBepXHOCTx.
-MecTa,IIoDBeRKeHHbIe BO3JeIcTBHIO CNJIbHbIX Bn6pauiN.
-BAHHBIE KOMHaTbI HJIH IpyrHe MeCTa C BbICOKOBJIAJXHOCTbIO.
B clyuae nOBJIeHnB COCTOHNn3deJnaHOMaJIIn
B cIyuae IIOBJIeHnKaKHX-JIb6O H3 cJIeDyIOIIHX CHMITOMOB, HeMeJJIeHNO IIpeKpaTHTe 3KcIIJyataIHNO HayIHHKOB, BbIKJIIOHTe IINTaHne H O6paTHTeCb 3a KOHCsyJBtAciNeB CepBnchbI IeHTp KOMIIaHHN Pioneer:
- HayunHKn H3JyauOT HeecTeCTBeHHoe TeJIIO, 3aIaxN, Ha HNX HMeIOTc CJeIbI DeOpMaunH, O6ecUBeuBaHHn I T.Д.
-BHyTpB HayIIHHKOB IIPOHNK IOCTOPOHNNIpeIMeT.
TexHnueckne XapaKTepeNCTnKN IpepaTvnK TRE-D41M
AynOBxo.. AHaIOROBbI BxO (Pa3beM RCAJI(L)/II(R))x1
IcToUHnK IHTaHHN. 5BIOCTOaHHOROTOKa (OT IIpHJIaRaEMOROB KOMIIJEKeTIEIOCTaBKN ceTeBOrO aIaITepa IepemeHHOROTOKa)
PacCTOaHne IpeJaHn. 30 M (OTKpbItoe IIPOcTpaHcTBO 6e3 IIpeJIaTcTBn; peaJIbHOe 3ΦΦeKTHBHOe pacCToHHe MOKeT OTJInuATbcra B 3aBHCmOcTH OTKpyKaIOIInx ycIOBn.)
© 2011 PIONEER CORPORATION. All rights reserved.
© PIONEER CORPORATION, 2011.
Bce npaba zauniuhei.
PIONEER CORPORATION
1-1, Shin-ogura, Saiwai-ku, Kawasaki-shi, Kanagawa 212-0031, Japan / Japon
Kopnpaçna PaioHnp
1-1, CnH-Orgpa, CaBaa-Ky, r. KaBacKn, npeΦeKtypa KaHaraba, 212-0031, JnoHna
HmnpTep: OOO "ПИОHEP РС"
125040, Poccsia, r. MockBa, yI. PpaBbl, d.26 TeJ.: +7(495) 956-89-01
PIONEER ELECTRONICS (USA) INC.
P.O. BOX 1540, Long Beach, California 90801-1540, U.S.A. / Etats-Unis. TEL: (800) 421-1404
PIONEER ELECTRONICS OF CANADA, INC.
340 Ferrier Street, Unit 2, Markham, Ontario L3R 2Z5, Canada TEL: 1-877-283-5901, 905-479-4411
PIONEER EUROPE NV
Haven 1087, Keetberglaan 1, B-9120 Melsele, Belgium / Belgique TEL: 03/570.05.11
PIONEER ELECTRONICS ASIACENTRE PTE. LTD.
253 Alexandra Road, #04-01, Singapore / Singapour 159936 TEL: 65-6472-7555
PIONEER ELECTRONICS AUSTRALIA PTY. LTD.
5 Arco Lane, Heatherton, Victoria, 3202, Australia / Australie, TEL: (03) 9586-6300
PIONEER ELECTRONICS DE MEXICO S.A. DE C.V.
Blvd. Manuel Avila Camacho 138 10 piso Col.Lomas de Chapultepec, Mexico / Mexique, D.F. 11000 TEL: 55-9178-4270


- Pioneer Europe NV
- CE
- English:
- Suomi:
- Polski:
- CAUTION
- RISK OF ELECTRIC SHOCK DO NOT OPEN
- CAUTION:
- WARNING
- Operating Environment
- Information for users on collection and disposal of old equipment and used batteries
- Information to User
- Before making or changing the connections, switch off the power and disconnect the power cord from the AC outlet.
- Power source
- POWER-CORD CAUTION
- Before you start
- 1-1 What's in the box
- 1-2 Names and Functions of Parts
- Digital cordless transmitter
- POWER/CHARGE Indicator
- DC IN jack
- AUDIO IN jacks
- Charging contacts
- Digital cordless headphones
- VOLUME +/- control buttons
- Self-adjusting headband
- POWER indicator
- POWER button
- SIGNAL indicator
- Charging contacts
- Ear pads
- Getting started
- 2-1 Inserting the batteries
- 2-2 Charging the batteries
- Note
- Notes on battery charging
- 2-3 Connecting up
- Connecting the transmitter to audio sources
- Connecting the transmitter to AC adaptor
- Operation
- 3-1 Using the system
- Turn on audio source component.
- Press the POWER button on the headphones.
- When power is turned ON, communication begins between the transmitter and headphones.
- Adjust the volume.
- 3-2 Transmitter standby mode
- 3-3 Auto power OFF function
- 3-4 Auto mute function
- 3-5 When battery power becomes low
- Additional information
- Troubleshooting
- Precautions
- About use of headphones
- Listening at high volume
- Ear pads
- Cleaning
- About safety
- Placement
- When something is wrong with the Product
- Specifications
- Transmitter TRE-D41M
- Headphones SE-DHP41M
- Accessories
- IMPORTANT
- WAARSCHUWING NETSNOER
- 2-2 Carregar as pilhas
- Tia xwpeE kToC ts Eupwnaikns Evwons:
- Pnnpoopoe yia tov XpnoTn
- Piv va kave t n aalaxete Tc ouvdeoeic, aTVEpyoioane Tn oukeun kai ByaTe to kaawio tropofooiaac atro tn vpica.
- Evεiη ΣHMATO(SIGNAL)
- Sluchadla SE-DHP41M
- Príslušenstvo
- Ipeed Tem, KaK BbINOJHHTb NJIu N3MeHHTb NOcOeDInHeHnra, BbIKJIOUHTb NITaHne N OTCoEINHHTb CteBOi ShHyp OT BbIXoDa HapJxKeHnA AC.
- NCTOCHNK NITaHNA
- MEPbI INPEIOCTOPOXHOCTN INOOBPAUeHnC CETEBbIM SHHYPOM
- 2-1 YcTaHOBka 6aTapeek
- 2-2 Повзарядka 6атAPEEK
- PpimmeaHne
- 3ameuHnI IO nOd3apJKe 6aTaapeek
- 2-3 Побъедиениe
- Bb6op meCTa yCTaHOBKn
- B clyuae nOBJIeHnB COCTOHNn3deJnaHOMaJIIn
- TexHnueckne XapaKTepeNCTnKN IpepaTvnK TRE-D41M
- PIONEER CORPORATION
- Kopnpaçna PaioHnp
- HmnpTep: OOO "ПИОHEP РС"
- PIONEER ELECTRONICS (USA) INC.
- PIONEER ELECTRONICS OF CANADA, INC.
- PIONEER ELECTRONICS ASIACENTRE PTE. LTD.
- PIONEER ELECTRONICS AUSTRALIA PTY. LTD.
- PIONEER ELECTRONICS DE MEXICO S.A. DE C.V.
Brand : PIONEER
Model : SE-DRF41M
Category : Earphones