
SC 3 Upright EasyFix - Steam cleaner Kärcher - Free user manual and instructions
Find the device manual for free SC 3 Upright EasyFix Kärcher in PDF.
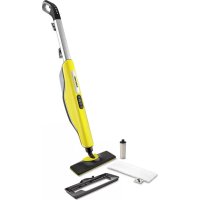



| Product Type | Steam mop |
| Brand | Kärcher |
| Model | SC 3 Upright EasyFix |
| Usage | Cleaning hard floors (tile, stone, PVC, laminate, sealed parquet) and refreshing carpets |
| Heating Power | 1600 W |
| Voltage / Frequency | 220-240 V ~ 50-60 Hz |
| Protection Class | I |
| Protection Type | IPX4 |
| Heat-up Time | 30 seconds |
| Continuous Steam Output | 40 g/min |
| Water Tank Capacity | 0.5 L |
| Weight (without accessories) | 3.1 kg |
| Dimensions (L x W x H) | 314 x 207 x 1185 mm |
| Steam Modes | 3: Wood (low), Carpet (medium), Tile/Stone (high) |
| Descaling Cartridge | Integrated, replaceable – saturation indicator light |
| Included Accessories | Floor nozzle, microfibre cloth (1 piece), carpet glider |
| Optional Accessories | Abrasive cloth, additional microfibre cloth |
| Cloth Maintenance | Machine wash at 60 °C max, without fabric softener |
| Safety | Safety valve, thermal fuse, non-slip handle, automatic pump shutdown if cartridge saturated |
| Water Hardness Adjustment | Yes (via RESET button) – 4 levels (I to IV) |
| Warranty | According to country conditions – contact Kärcher after-sales service |
Frequently Asked Questions - SC 3 Upright EasyFix Kärcher
User questions about SC 3 Upright EasyFix Kärcher
0 question about this device. Answer the ones you know or ask your own.
Ask a new question about this device
Download the instructions for your Steam cleaner in PDF format for free! Find your manual SC 3 Upright EasyFix - Kärcher and take your electronic device back in hand. On this page are published all the documents necessary for the use of your device. SC 3 Upright EasyFix by Kärcher.
USER MANUAL SC 3 Upright EasyFix Kärcher
| General notes | 11 |
| Intended use | 11 |
| Environmental protection | 11 |
| Accessories and spare parts | 11 |
| Scope of delivery | 11 |
| Warranty | 11 |
| Safety devices | 11 |
| Device description | 12 |
| Initial Start-Up | 12 |
| Installation | 12 |
| Operation | 12 |
| Important application instructions | 14 |
| How to use the Accessories | 14 |
| Care and service | 15 |
| Troubleshooting guide | 17 |
| Technical data | 17 |
General notes

Read these original operating instructions and the enclosed safety instructions before using the device for the first time.
Proceed accordingly. Keep both books for future reference or for future owners.
Intended use
Use the device only in private households for cleaning level hard floors (e.g. stone floors, tiles, PVC floors and sealed wooden floors such as parquet and laminate) that can withstand the high temperature, pressure and moisture of the device. Do not clean water-sensitive floor coverings such as untreated cork floors (the moisture could penetrate and damage the floor). With the carpet glider fitted, the device can be used for freshening short-pile carpets, runners etc. Detergents are not required.
Environmental protection

The packing materials can be recycled. Please dispose of packaging in accordance with the environmental regulations.

Electrical and electronic devices contain valuable, recyclable materials and often components such as batteries, rechargeable batteries or oil, which - if handled or disposed of incorrectly - can be a potential danger to human health and the environment. However, these components are required for correct operation of the device. Devices marked by symbol are not allowed to be disposed of together with the household rubbish.
Notes on the content materials (REACH)
Current information on content materials can be found at: www.kaercher.de/REACH
Accessories and spare parts
Only use original accessories and original spare parts. They ensure that the appliance will run fault-free and safely.
Information on accessories and spare parts can be found at www.kaercher.com.
Scope of delivery
The scope of delivery for the appliance is shown on the packaging. Check the contents for completeness when unpacking. If any accessories are missing or in the event of any shipping damage, please notify your dealer.
Warranty
The warranty conditions issued by our responsible sales company apply in all countries. We shall remedy possible malfunctions on your device within the warranty period free of cost, provided that a material or manufacturing defect is the cause. In a warranty case, please contact your dealer (with the purchase receipt) or the next authorized customer service site. (See overleaf for the address)
Safety devices
CAUTION
Missing or modified safety devices
Safety devices are provided for your own protection. Never modify or bypass safety devices.
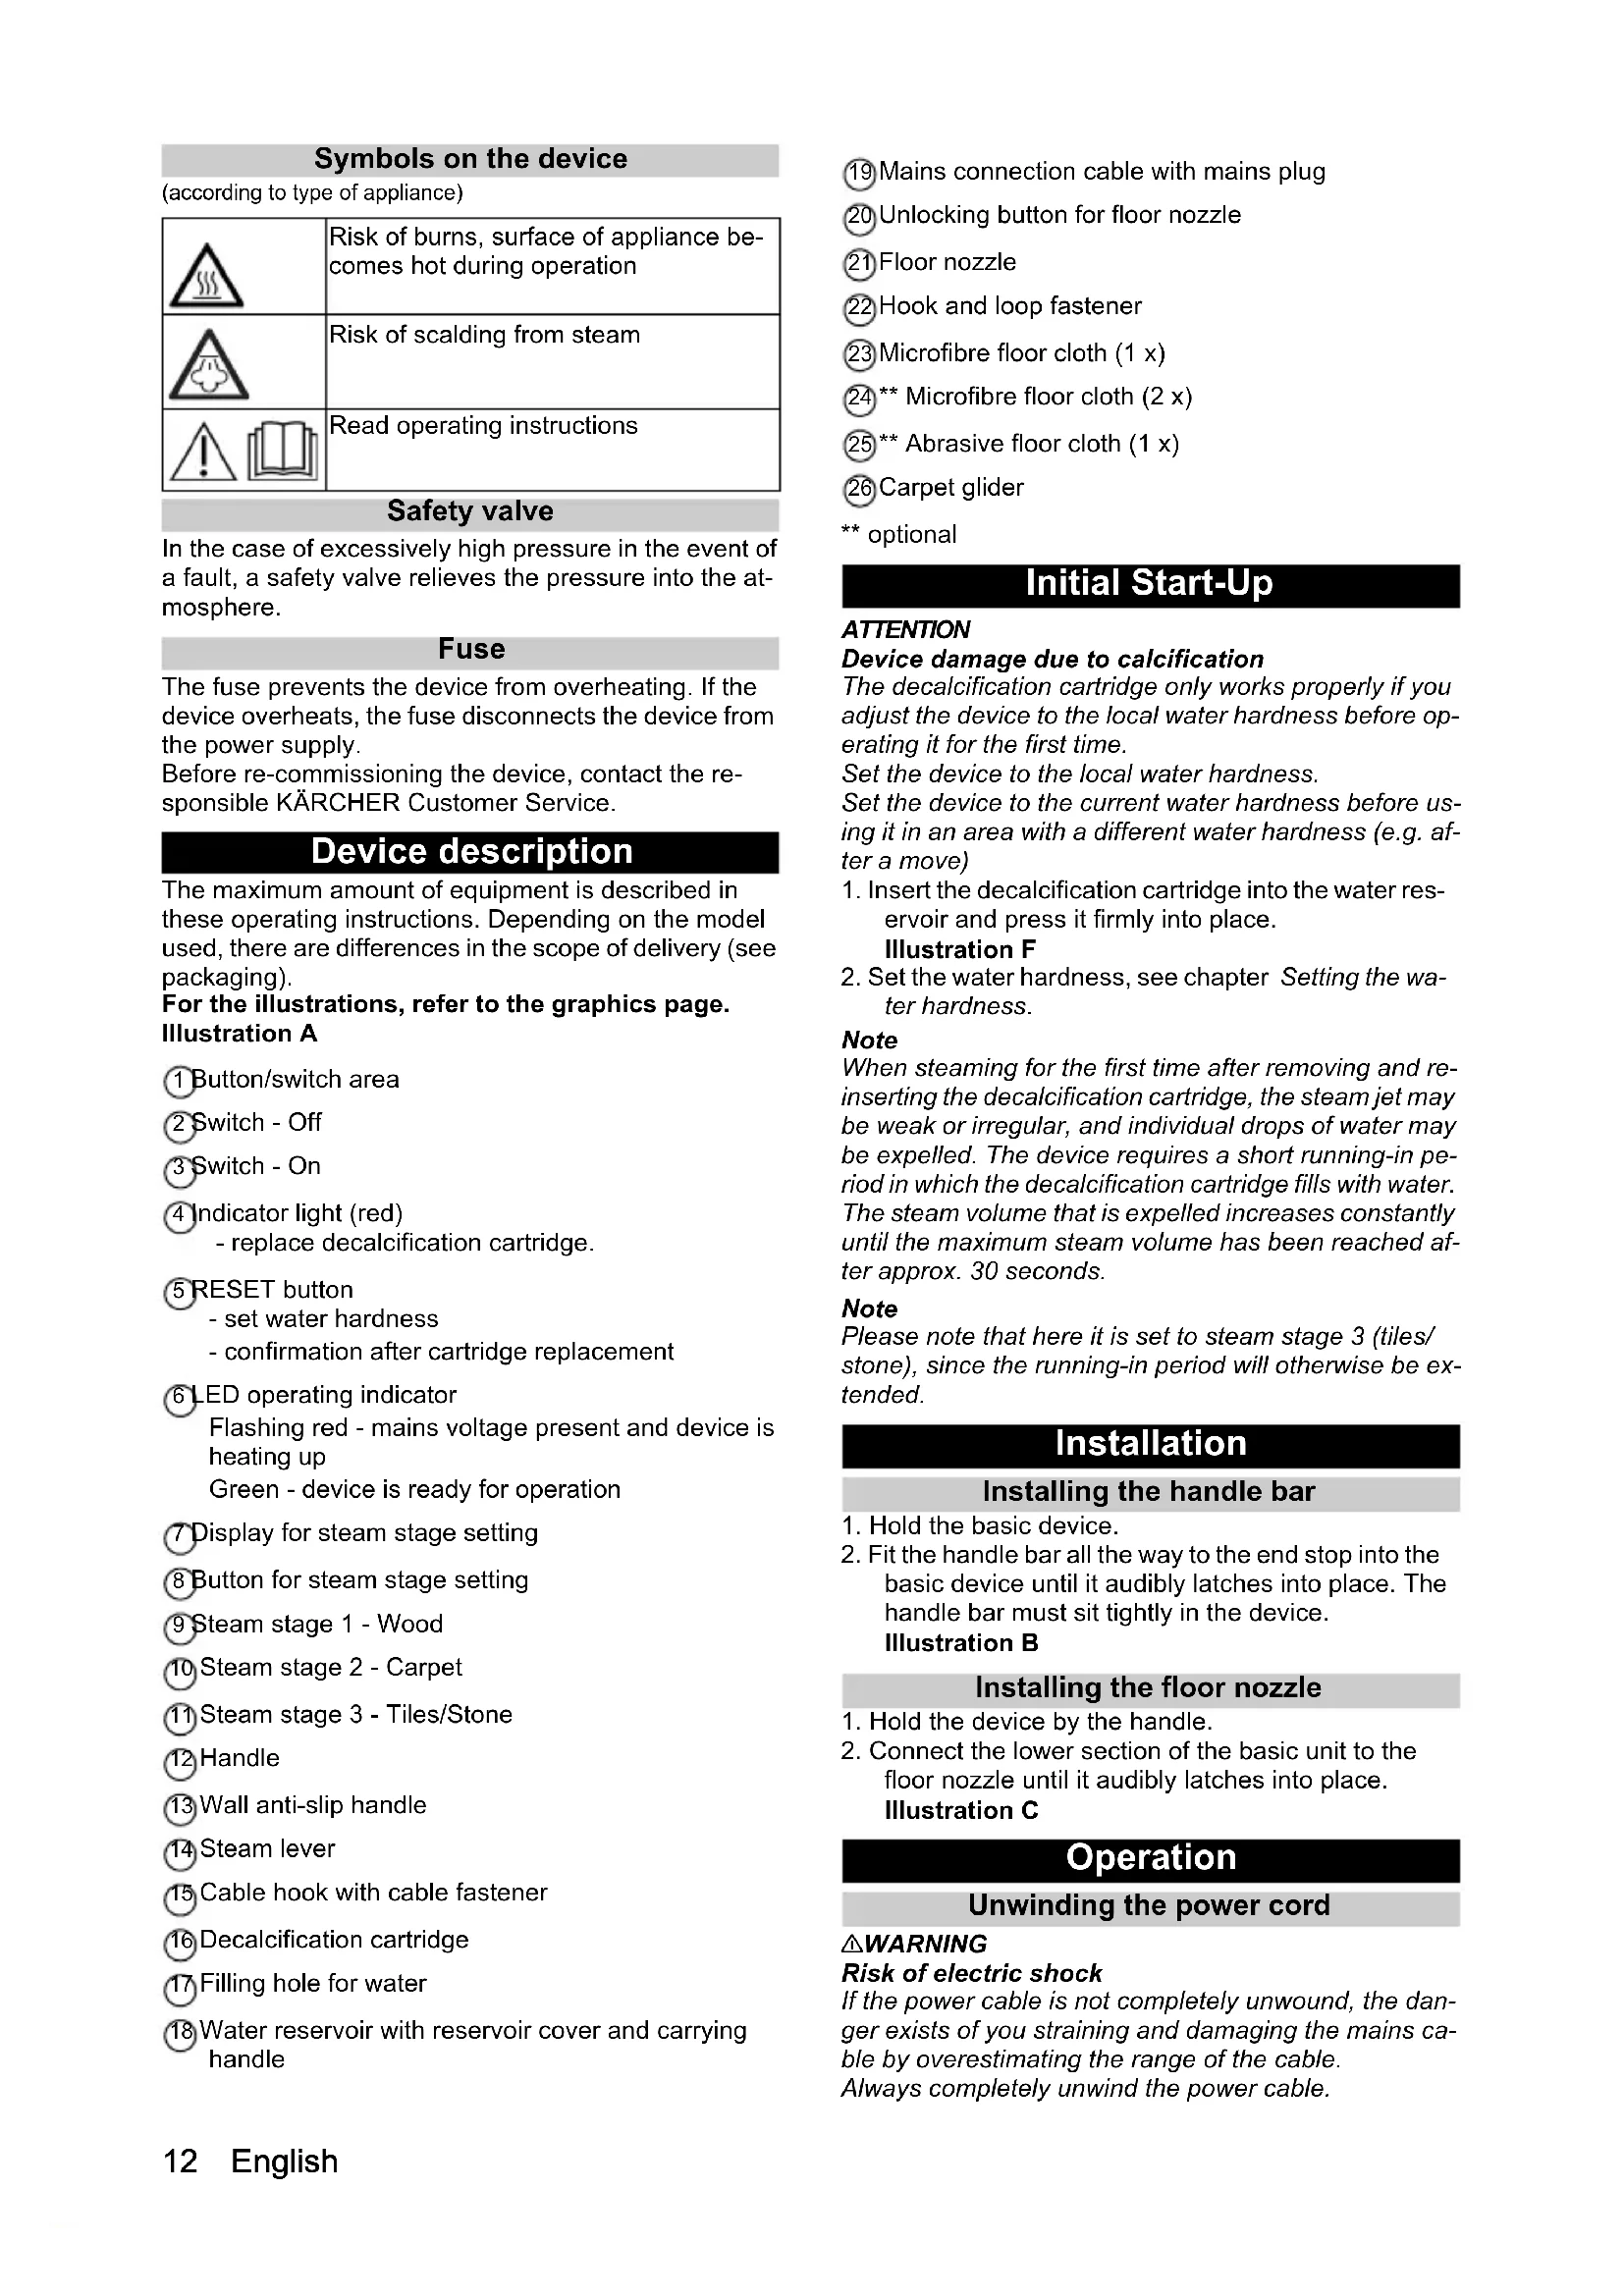
Symbols on the device
(according to type of appliance)
| Risk of burns, surface of appliance becomes hot during operation | |
| Risk of scalding from steam | |
| Read operating instructions |
Safety valve
In the case of excessively high pressure in the event of a fault, a safety valve relieves the pressure into the atmosphere.
Fuse
The fuse prevents the device from overheating. If the device overheats, the fuse disconnects the device from the power supply.
Before re-commissioning the device, contact the responsible KARCHER Customer Service.
Device description
The maximum amount of equipment is described in these operating instructions. Depending on the model used, there are differences in the scope of delivery (see packaging).
For the illustrations, refer to the graphics page. Illustration A
1 Button/switch area ② Switch - Off 3 Switch - On 4 Indicator light (red) - replace decalcification cartridge. RESET button - set water hardness - confirmation after cartridge replacement 6 LED operating indicator Flashing red - mains voltage present and device is heating up Green - device is ready for operation ⑦ Display for steam stage setting 8 Button for steam stage setting 9 Steam stage 1 - Wood 10 Steam stage 2 - Carpet (1) Steam stage 3 - Tiles/Stone 12 Handle (13) Wall anti-slip handle Steam lever 15 Cable hook with cable fastener Decalcification cartridge Filling hole for water Water reservoir with reservoir cover and carrying handle
19 Mains connection cable with mains plug 20 Unlocking button for floor nozzle 21 Floor nozzle 22 Hook and loop fastener 23 Microfibre floor cloth (1 x) (24) Microfibre floor cloth (2 x) 25** Abrasive floor cloth (1 x) 26 Carpet glider optional
Initial Start-Up
ATTENTION
Device damage due to calcification
The decalcification cartridge only works properly if you adjust the device to the local water hardness before operating it for the first time.
Set the device to the local water hardness.
Set the device to the current water hardness before using it in an area with a different water hardness (e.g. after a move)
- Insert the decalcification cartridge into the water reservoir and press it firmly into place. Illustration F
- Set the water hardness, see chapter Setting the water hardness.
Note
When steaming for the first time after removing and reinserting the decalcification cartridge, the steam jet may be weak or irregular, and individual drops of water may be expelled. The device requires a short running-in period in which the decalcification cartridge fills with water. The steam volume that is expelled increases constantly until the maximum steam volume has been reached after approx. 30 seconds.
Note
Please note that here it is set to steam stage 3 (tiles/stone), since the running-in period will otherwise be extended.
Installation
Installing the handle bar
- Hold the basic device.
- Fit the handle bar all the way to the end stop into the basic device until it audibly latches into place. The handle bar must sit tightly in the device. Illustration B
Installing the floor nozzle
- Hold the device by the handle.
- Connect the lower section of the basic unit to the floor nozzle until it audibly latches into place. Illustration C
Operation
Unwinding the power cord
WARNING
Risk of electric shock
If the power cable is not completely unwound, the danger exists of you straining and damaging the mains cable by overestimating the range of the cable. Always completely unwind the power cable.
Note
The lower cable holder can be rotated by 360° for removing the cable. The upper cable hook cannot be rotated.
- Turn the lower cable holder upwards.
- Completely remove the power cable from the cable hook.
- Fasten the cable in the fastener of the upper or lower cable hook to prevent it from being run over during cleaning work.
Illustration J
Filling water
The water reservoir can be filled at any time.
ATTENTION
Material damage through open reservoir cover or incorrectly seated or loose water reservoir
Liquid can escape and damage the floor covering if the reservoir cover is not correctly closed or the water reservoir is not correctly inserted into the device.
Take care to ensure that the reservoir cover is securely closed and the water reservoir is seated tightly in the device when the water reservoir is full.
ATTENTION
Damage to the device
Unsuitable water can block the nozzles.
Do not use condensation from the clothes dryer for filling.
Do not use collected rain water for filling.
Do not use cleaning agents or other additives (e.g. scents) for filling.
Note
The decalcification cartridge must be installed in the water reservoir when filling the water reservoir.
Filling the water reservoir directly on the device
- Hold the device.
- Open the water reservoir cover and fill the water reservoir with max. 0.5 L tap water, directly at the device.
Illustration G
- Close the reservoir cover.
Removing the water reservoir for filling
- Hold the device.
- Turn the lower cable hook upwards.
- Pull the water reservoir vertically upwards by the handle.
- Open the water reservoir cover and fill the water reservoir with max. 0.5 L tap water.
Illustration H
- Close the water reservoir cover.
- Insert the water reservoir and press downwards until it locks into place.
Switching on the device
ATTENTION
Device and material damage due to tipping over
The device can fall over and be damaged if inadequately secured during work breaks or storage. Liquid can also leak out and damage the floor covering in the process.
Position the device with the floor nozzle on a solid base, or the handle with the wall anti-slip protection in a vertical position on a solid wall.
ATTENTION
Device damage due to incorrectly set water hardness
The decalcification cartridge only works properly if the device is adjusted to the local water hardness. The device may calcify if the water hardness is set incorrectly. Adjust the device to the local water hardness before first operation, see chapter Setting the water hardness.
Note
When steaming for the first time after removing and reinserting the decalcification cartridge, the steam jet may be weak or irregular, and individual drops of water may be expelled. The device requires a short running-in period in which the decalcification cartridge fills with water. The steam volume that is expelled increases constantly until the maximum steam volume has been reached after approx. 30 seconds.
Note
Please note that here it is set to steam stage 3 (tiles/ stone), since the running-in period will otherwise be extended.
- Place the device on a firm surface.
Illustration I
- Insert the mains plug into a socket.
Illustration K
- Press the On switch.
Illustration L
- The LED operating indicator flashes red.
Illustration M
- The LED operating indicator lights up constant by green after approx. 30 seconds.
Illustration N
The device is ready for use.
Regulating the steam volume
The steam volume setting depends on the surface to be cleaned.
- Press the button with the direction arrows on the handle repeatedly until the desired steam stage is selected.
Illustration P
3 different steam stages are available:
| Tiles/stone - maximum steam stage | |
| Carpet - medium steam stage | |
| Wood - minimum steam stage |
Note
The maximum steam stage (Tiles/stone) is always selected when the device is switched on.
- Press the steam lever after setting the steam volume.
Illustration O
Refilling water
Note
The water level can be seen through the transparent fresh water tank.
When topping up the water, the decalcification cartridge remains secured in the device.
- Open the water reservoir cover and fill the water reservoir with max. 0.5 L tap water, directly at the device.
Illustration G or
- Remove the water reservoir, open the water reservoir cover and fill the water reservoir with max. 0.5 L tap water, see chapter Filling water.
Illustration H
Interrupting operation
ATTENTION
See the chapter Storing the device to prevent material damage during longer work breaks.
In order to save energy, we recommend that you switch off the device for breaks in operation of longer than 20 minutes.
- Press the OFF switch.
Illustration S
Switching off the device
- Press the OFF switch.
Illustration S
The device is switched off.
- Pull the mains plug out of the socket.
Illustration T
ATTENTION
Device damage due to water putrefaction
The water in the reservoir may putrefy if the device is not put into operation for more than 2 months.
Drain the water reservoir before longer breaks in operation.
- Drain the water reservoir.
Illustration U
Storing the device
ATTENTION
The floor covering can be damaged by moisture remaining on the floor cleaning cloth or floor nozzle/device after cleaning.
Remove the floor cleaning cloth/carpet glider and dry the floor nozzle/the device after finishing the floor cleaning work.
Do not place or store the device on heat-sensitive surfaces.
- Remove the floor cleaning cloth or floor cleaning cloth and carpet glider, see the chapter Floor nozzle and carpet glider.
Illustration D Illustration E
- Remove moisture from the floor nozzle/device.
- Wind the power cable around the upper and lower cable hooks.
Illustration V
- Store the device in vertical position on a solid base or on the wall.
Illustration I
- Store the device in a dry location that is protected from frost.
Important application instructions
Cleaning the floor areas
We recommend sweeping or vacuum cleaning the floor before using the appliance. This will clear the floor of dirt and loose particles before wet cleaning.
cleared of dirt and loose particles before the wet cleaning.
Cleaning coated or painted surfaces
ATTENTION
Damaged surfaces
Steam can loosen wax, furniture polish, plastic coatings, or paint and edge band from edges.
Do not direct the steam at glued laminated edges as the edge band may loosen.
Do not use the device for cleaning unsealed wood or parquet floors.
Do not use the device for cleaning painted or plastic coated surfaces such as kitchen or living room furniture, doors, or parquet.
How to use the Accessories
Floor nozzle
The floor nozzle is suitable for cleaning washable floor coverings, e.g. stone floors, tiles, and PVC floors, and also sealed wooden floors such as parquet and laminate.
ATTENTION
Damage due to steam effect
Heat and the effects of steam can lead to damage.
Check the heat resistance and steam effect on an inconspicuous area using a minimal volume of steam prior to use.
Steam clean sealed wooden floors using the correct, preset steam level, and do not remain in the same position on the floor for too long.
Note
Detergent residue or care emulsions on the surface to be cleaned can lead to streaks during steam cleaning, which will disappear however once these have been used several times.
CAUTION
Beware of burns to your feet
The floor nozzle/floor cleaning cloth heats up during steaming.
Hot water may drip out when pulling off the floor cloth.
Only operate or remove the floor nozzle/floor cleaning cloth with suitable footwear.
- Fasten the floor cleaning cloth to the floor nozzle. a Place the floor cleaning cloth with the hook and loop fastener pointing upwards on the floor.
b Place the floor nozzle onto the floor cleaning cloth, applying slight pressure.
Illustration D
The floor cleaning cloth will stick to the floor nozzle of its own accord due to the hook and loop fastener.
Micro fibre cloth
The microfibre floor cloth is suitable for cleaning stone floors and PVC floors, and also sealed wooden floors such as parquet and laminate. The microfibre floor cloth is also suitable for freshening carpets when used in conjunction with the carpet glider.
Abrasive floor cloth
The abrasive floor cloth is suitable for cleaning insensitive surfaces such as tiles or stone.
ATTENTION
Damage to floor coverings
The abrasive floor cloth can damage sensitive floor coverings and surfaces.
Do not use the abrasive floor cloth for cleaning wooden surfaces.
Do not use the abrasive cloth with the carpet glider.
Removing the floor cleaning cloth
- Place one foot on the bottom corner of the floor cleaning cloth and lift the floor nozzle up.
Illustration D
Note
Initially, the floor cleaning cloth's hook and loop fastener strip is very strong and cannot be removed from the floor nozzle easily. After the floor cleaning cloth has been used several times and washed, it is easier to remove from the floor nozzle and it has reached the optimum adhesion.
Removing the floor nozzle from the basic device
ATTENTION
Material damage due to an unstable device
Removing the floor nozzle makes the device unstable and it can tip over and damage the device and floor covering.
Do not remove the floor nozzle from the basic device after installation.
Remove the floor nozzle only when sending the device for servicing.
- Press the OFF switch
Illustration S
- Pull the mains plug out of the socket.
Illustration T
- Empty the water reservoir.
Illustration U
- Hold the device by the handle.
- Actuate the unlocking button on the floor nozzle.
- The floor nozzle releases from the device and can be removed.
Illustration W
- Store the device safely in a horizontal position.
Carpet glider
The carpet glider is used for freshening up carpets.
ATTENTION
Beware of damaging the carpet glider and carpet
Contamination on the carpet glider, as well as heat and moisture penetration, can result in the carpet being damaged.
Use the carpet glider only with a microfibre floor cloth on the floor nozzle.
Steam clean using only the correct steam stage when using the carpet glider (see the display indicator on the handle, carpet floor covering symbol - medium steam stage).
Prior to the application, also check the heat resistance and impact of steam on the carpet at an insignificant spot using the smallest steam volume.
Observe the cleaning instructions from the carpet manufacturer.
Prior to using the carpet glider, make sure that the carpet has been vacuumed and that stains have been removed.
Prior to use and following operating pauses, remove any possible water accumulation (condensate) in the device by evaporating the condensate into a drain (without floor cleaning cloth / with accessories).
In order to prevent too much moistening and to avoid the risk of damage due to temperature effects, do not direct the steam continuously onto one spot (maximum 5 seconds).
Do not use the carpet glider on deep-pile carpets.
Fastening the carpet glider to the floor nozzle
- For fastening the floor cleaning cloth to the floor nozzle, please refer to chapter Floor nozzle. Illustration D
- Using light pressure, allow the floor nozzle to slide into the carpet glider and engage there.
Illustration E
- Start cleaning the carpet.
Removing the carpet glider from the floor nozzle
CAUTION
Beware of burns to your feet
The carpet glider can heat up during the steaming process.
Do not operate or remove the carpet glider bare-footed or using open sandals.
Only operate or remove the carpet glider using suitable footwear.
- Press the strap on the carpet glider downwards using your toecap.
- Lift the floor nozzle upwards.
Illustration E
Care and service
Draining the water reservoir
ATTENTION
Device damage due to water putrefaction
If the device is not put into operation for more than 2 months, the water in the reservoir may putrefy.
Drain the water reservoir before breaks in operation.
- Press the OFF switch.
The device is switched off.
- Pull the mains plug out of the socket.
- Remove the reservoir cover.
- Drain the water reservoir.
The cartridge can remain in the water reservoir.
Illustration U
Replacing the decalcification cartridge
ATTENTION
Device damage and shortened service life
If the replacement intervals (indicator light) for the decalcification cartridge are not observed, there is a risk of device damage and the service life of the device may be shortened.
Observe the replacement intervals (indicator light).
Note
The replacement intervals depend on the local water hardness. Areas with hard water (e.g. III/IV) have a higher replacement interval than areas with soft water (e.g. I/II).
Indicator lamp at end of the run time
The "decalcification cartridge indicator light" indicates when the decalcification cartridge has to be replaced:
- The indicator light flashes 2 hours before the runtime expires.
Illustration R
- The indicator light flashes more quickly 1 hour before the run time expires.
- The indicator light and the LED strip on the device light up when the run time of the decalcification cartridge has expired. The floor covering symbols on the handle do not light up. The pump switches off automatically (no water steam) to prevent damage to the device.
Inserting the decalcification cartridge
ATTENTION
Device damage
There is a risk of damage to the device if the used decalcification cartridge is re-used.
Work carefully in order to prevent mixing up the cartridges.
Installation information
When steaming for the first time after removing and reinserting the decalcification cartridge, the steam jet may be weak or irregular, and individual drops of water may be expelled. The device requires a short running-in period in which the decalcification cartridge fills with water. The steam volume that is expelled increases constantly until the maximum steam volume has been reached after approx. 30 seconds.
Note
Removing the water reservoir makes it easier to remove and install the decalcification cartridge.
- Press the OFF switch. The device is switched off.
- Remove the reservoir cover.
- Remove the decalcification cartridge.
- Insert the new decalcification cartridge and press it firmly into place.
- Press the On switch.
The device is switched on.
- Press and hold the RESET button for 4 seconds. The "replace decalcification cartridge" indicator light goes out and the run time for the decalcification cartridge starts again.
Illustration Q
- Allow the device to heat up.
- Press and hold the steam lever for approximately 30 seconds to vent the decalcification cartridge.
Setting the water hardness
ATTENTION
Device damage due to calcification
Without a decalcification cartridge, the device may calcify if the water hardness is set incorrectly.
Always work with a decalcification cartridge.
Set the device to the local water hardness.
Set the device to the current water hardness before using it in an area with a different water hardness (e.g. after a move).
Note
Your water board or municipal utilities authority can provide information on hardness of tap water.
The water hardness is set using the RESET button. The water hardness setting is stored until a new setting (e.g. after a move) is made. The device is set to the highest water hardness (level IV) in the factory. The device indicates the set water hardness with flash pulses.
Water hardness levels and flash pulses
| Hardness range | °dH mm | ol/l Number of flash pulses | Interval between flash pulses | |
| I Soft | 0-7 0-1 | .3 1x 4 s | seconds | |
| II Medium | 7-14 | 1.3-2.5 | 2x | |
| III Hard | 14-21 | 2.5-3.8 | 3x | |
| IV Very hard | >21 >3.8 | 4x | ||
Note
The anti-calcification effect of the decalcification cartridge is activated as soon as the reservoir is filled with water and the device is put into operation. Lime in the water is absorbed by the granulate in the decalcification cartridge. Additional descaling is not required.
Note
The granulate in the cartridge can discolour on contact with water due to the mineral content in the water, which is no cause for concern and has no negative effects on the device, cleaning work or the functionality of the cartridge.
Note
Do not pause for longer than 15 seconds when setting as the device will otherwise be set automatically to the last selected water hardness or the highest water hardness set during initial start-up.
- Connect the mains plug.
- Make sure that the device is switched off.
- Hold the RESET button pressed and switch on the device.
Illustration Q
After approximately 2 seconds, the indicator light flashes and signals the current water hardness setting with the number of pulses.
- Release the RESET key.
The device is set to water hardness level IV at the factory and the indicator light therefore flashes 4 times in succession.
- You can cycle between the different water hardness levels by pressing the RESET button repeatedly until the desired water hardness level is reached.
- Once the desired water hardness level has been reached, press and hold the RESET button for 3 seconds to store the selected water hardness level. The indicator light for the water hardness lights up to confirm saving.
Care of accessories
(Accessories - depending on scope of delivery)
Note
The micro fibre cloths are not suitable for dryer.
Note
Observe the instructions on the washing tag when washing the cloths. Do not use any liquid softeners as this will affect the ability of the cloths to pick up dirt.
- Wash the floor cleaning cloths in a washing machine at a max. temperature of 60°C.
Removing the handle
ATTENTION
Device damage
The handle components can be damaged by repeated removal.
Do not remove the handle from the basic unit once it has been assembled.
The handle may only be removed from the basic device if the device is sent out for service purposes.
Troubleshooting guide
Malfunctions often have simple causes that you can remedy yourself using the following overview. When in doubt, or in the case of malfunctions not mentioned here, please contact your authorised Customer Service.
WARNING
Risk of electric shock and burns
Trying to eliminate faults while the appliance is connected to the mains or has not yet cooled down is always dangerous.
Remove the mains plug.
Allow the appliance to cool down.
No steam / little steam although there is water in the reservoir
The decalcification cartridge has not been inserted or has been inserted incorrectly.
- Fit the decalcification cartridge and/or check that the decalcification cartridge sits tightly in the reservoir and press in again if necessary.
The decalcification cartridge has been removed when filling with water and/or a new decalcification cartridge has been fitted
Always leave the decalcification cartridge in the water reservoir when filling with water. - Press and hold the steam lever constantly. The full steam output is reached after approximately 30 seconds.
The red "Replace decalcification cartridge" indicator light flashes but the device still functions correctly
Run time of the decalcification cartridge ends soon.
- Fit a new decalcification cartridge, see chapter Replacing the decalcification cartridge.
No steam despite sufficient water in the reservoir, the indicator light and LED operating indicator on the device light up continuously red, the floor covering symbols on the handle do not light up
Run time for the decalcification cartridge has expired
- Fit a new decalcification cartridge, see chapter Replacing the decalcification cartridge.
- If a new decalcification cartridge has already been fitted and this fault still occurs, the RESET button has probably not been pressed after replacing the decalcification cartridge. Press and hold the RESET button for 4 seconds after inserting the decalcification cartridge, see chapter Replacing the decalcification cartridge.
Technical data
| Electrical connection | ||
| Voltage | V | 220-240 |
| Phase ~ 1 | ||
| Frequency Hz 50-60 | ||
| Degree of protection IPX4 | ||
| Protection class I | ||
| Device performance data | ||
| Heating capacity W 1600 | ||
| Heating-up time Seconds 30 | ||
| Continuous steaming | g/min | 40 |
| Filling quantity | ||
| Water reservoir | I | 0,5 |
| Dimensions and weights | ||
| Weight (without accessories) | kg | 3,1 |
| Length | mm | 314 |
| Width | mm | 207 |
| Height | mm | 1185 |
Subject to technical modifications.
Clean paved surfaces
Abrasive grinding disc
The abrasive grinding disc is suitable for cleaning stubborn floor coverings, e.g. tiles and stone.
WARNINGS
- Press the RESET button.
The factory setting is at water hardness level IV, which means the indicator flashes 4 times in a row.
- Press the RESET button repeatedly to change the different water hardness levels until the desired water hardness level is reached.
- When the desired water hardness level is reached, keep the RESET button pressed for 3 seconds to save the selected water hardness level. The water hardness indicator flashes, confirming the save.
Appliance care
Cleaning the appliance
- Unplug the appliance before cleaning.
- Clean the lower part of the drum with a damp cloth until it is dry.
Images
Operation
Water inlet filter
WARNING
Signs on the surfaces
The appliance can be cleaned with a soft, damp cloth, mild detergents, and a little water.
Do not use abrasive cleaners or sharp objects as they may damage the surface.
Do not use the appliance to clean or dry animals or objects such as λ.
Do not use the appliance to clean or dry animals or objects such as π . Einnla kouicav, npctc n napke.
Use of accessories
Cleaning the floor
To connect the device to the water supply, use the supplied hoses, e.g., braided, rubber, and PVC, as well as sealed wooden surfaces such as parquet and laminate.
CAUTION
⑥ The indicator light indicates that the device is connected to the power supply and is heating up. The device is ready for use.
7 Steam quantity indicator 8 Steam quantity adjustment button (9) Steam quantity 1 - ironing board 10 Steam quantity 2 - carpet 11 Steam quantity 3 - tile/stone (12) Handle for protection against slipping 13 Handle 14 Steam supply button 15 Cable hook with cable fixator 16 Anti-scale cartridge (17) Filling opening for water 18 Water tank with handle for carrying (19) Power cord with plug 20 Unlock button for the soleplate (21) Soleplate (22) Connection - hose 23 Soleplate made of microfiber (1 pc.) (24) ** Soleplate made of microfiber (2 pcs.) 25 ** Abrasive soleplate (1 pc.)
First use
WARNING
Damage to the device due to scale formation
Optimal operation of the anti-scale cartridge is ensured only if the device is adjusted to the local water hardness before first use.
Adjust the device to the local water hardness.
Before reusing the device with water of a different hardness (e.g., after moving), adjust it to the current water hardness.
- Install the anti-scale cartridge into the water tank and fill with water.
Figure F
- Adjust the water hardness, see the chapter on water hardness adjustment.
Note
During the first steam treatment after removing and reinstalling the anti-scale cartridge, steam generation may be weak or uneven, and water droplets may appear. The device needs some time to fill the cartridge with water. The steam output gradually increases and reaches its maximum value after about 30 seconds.
Attention
Please note that a 3-stage (plug/socket) installation is required, otherwise the connection time will be longer.
Mounting
Installing the handle
- Hold the base unit.
- Insert the handle into the base unit until it locks with an audible click. The handle must fit properly into the device.
Figure B
Installing the accessory
1. Hold the device by the handle. 2. Connect the lower part of the device with the accessory until it locks with an audible click.
Figure C
Operation
Unwinding the power cable
WARNING
Risk of electric shock
If the power cable is not fully unwound, there is a risk of electric shock and damage to the power cable if the distance is incorrectly assessed.
The cable is completely laid.
Note
The convenient handle of the lower holder rotates 360°. The upper cable hook does not rotate.
- Turn the lower cable guide upward.
- Remove the cable completely from the cable hook.
- Secure the cable in the clip of the upper and lower hooks so that it does not interfere during cleaning.
Figure J
Water filling
The water tank can be filled at any time.
CAUTION
Material damage due to an unclosed lid or an unsecured water tank.
If the lid is not completely closed or the water tank is not installed correctly in the appliance, liquid can leak out and damage the floor covering.
Make sure that the lid of the filled tank is tightly closed and that the tank is securely fastened.
Device setup
When using water of unsuitable quality, the salt filter may become clogged. Do not fill the appliance with condensation water from a tumble dryer.
Do not fill with collected rainwater.
Do not fill with detergents or other additives (e.g., fragrances).
Caution
When filling the water tank, the filter for protection against limescale must not be in place.
Direct filling of the water tank on the device
1. Hold the device. 2. Open the lid and pour into the tank, without removing it from the device, max. 0.5 l of tap water.
Figure G
- Close the tank with the lid.
Removing the water tank for filling
1. Hold the device. 2. Turn the tank upside down. 3. Pull the tank for water vertically upwards. 4. Open the lid and pour max. 0.5 l of tap water.
Figure H
- Close the tank with the lid.
- INSTALL THE DEVICE ON A FLAT SURFACE AND SECURE IT.
Turning on the device
WARNING
Damage to the device and injury due to tipping over
Insufficient fixation of the device during operation and storage can lead to its fall and damage. Also, liquid leakage is possible, which will lead to damage to the floor covering.
Place the device with the nozzle down on a stable base and secure the handle against slipping in a vertical position.
WARNING
Damage to the device due to incorrect water hardness setting
The optimal cartridge performance for protection against scale is ensured only if the device is set to the local water hardness. If the water hardness is set incorrectly, scale may form in the device. Set the device to the local water hardness before first use, see the Water hardness setting section.
Note
During the first steam treatment after descaling and reinstallation of the anti-scale cartridge, steam generation may be weak or uneven, and water drops may appear. The device will need some time to fill the cartridge with water. The steam output gradually increases and reaches its maximum value after about 30 seconds.
Note
Make sure that the steam stage 3 (plate/stone) is set, otherwise the steaming time will be longer.
- Place the device on a stable base. Figure I
- Insert the mains plug into the socket. Figure K
- Press the "On" switch. Figure L
- The red operating indicator starts to light up. Figure M
- After 30 seconds, the green operating indicator lights up and stays on continuously.
Figure N
The appliance is ready for use.
Adjusting the steam quantity
The required amount of steam depends on the properties of the surface being ironed.
Press the button with the arrow symbols on the handle until the desired steam quantity is selected.
Figure P
Different steam quantity levels:
Damaged surfaces
The steam iron can damage velvet, wooden surfaces, plastic coatings, paint, or veneer on edges.
Do not direct steam at glued edges, as this may cause the veneer to come off.
Do not use the appliance for cleaning unvarnished wooden or parquet floors.
Do not use the appliance for cleaning surfaces that are painted or have a plastic coating, for example, kitchen and dining room furniture, wood, and parquet.
Accessories
Steam nozzle
The steam nozzle is intended for cleaning hard floor coverings, for example stone floors, ceramic tiles, hard floors made of PVC, as well as sealed wooden floor coverings, for example parquet and laminate.
CAUTION
Damage due to the effect of steam
High temperatures can cause damage.
Before use, it is necessary to check the heat resistance and the effect of steam in an inconspicuous place, using the minimum amount of steam.
For cleaning sealed wooden coverings, use only the specially provided steam power level and do not linger too long in one place.
Note
Residues of cleaning agents on the surface to be treated with steam can become the cause of streaks, which will disappear after a few applications.
CAUTION
Hot surfaces
During steam treatment, the nozzle and the floor cloth become hot.
When detaching the floor cloth, hot water may escape.
Use and remove the steam nozzle/floor cloth only in suitable footwear.
- Place the cleaning pad on the floor.
Insert the mop handle into the pad holder on top. b With slight effort, press the pad against the floor.
Figure D
Thanks to the hook-and-loop fasteners, the floor cleaning pad is securely attached to the mop.
Microfiber floor pad
The microfiber pad is suitable for cleaning hard floors such as stone, ceramic tiles, PVC, as well as lacquered wooden floors, for example parquet and laminate. The microfiber pad in combination with the sliding attachment for carpets is also suitable for refreshing carpets.
Abrasive floor pad
The abrasive pad is intended for cleaning hard floor coverings such as stone tiles.
CAUTION
Damage to the floor covering
The abrasive pad can damage sensitive floor coverings and surfaces.
Do not use the abrasive pad for cleaning wooden surfaces.
Do not use the abrasive pad together with the sliding attachment for carpets.
Removing the floor pad
- Place one foot on the floor pad and lift the mop handle.
Note
First, the floor nozzle can be removed and the nozzle can be put on the hook. After repeated use and washing of the nozzle, it easily comes off the hook and achieves optimal suction force.
Separating the floor nozzle from the base unit
CAUTION
Material damage due to instability of the device
When the floor nozzle is attached, the device becomes unstable, may fall and be damaged or damage the floor covering. After installation, do not remove the floor nozzle from the base unit anymore.
The floor nozzle may only be removed when sending the device for repair.
- Press the switch "On/Off" Fig. 2. Pull the mains plug out of the socket. Fig. 3
- Empty the dirt container. Fig. 4. Hold the device by the handle.
- Press the release button for the floor nozzle.
- The floor nozzle is separated from the device and can be removed.
Fig. 5
7. Place the device in a horizontal position in a safe place for storage.
The nozzle is designed for carpet illumination.
WARNING
Damage to carpets and sliding nozzles
Sliding nozzles, as well as high temperatures and humidity, can cause damage to carpets.
Use the sliding nozzle only together with the microfiber pad for the floor nozzle.
When using the sliding nozzle for carpets, perform dry cleaning only with the appropriate amount of detergent. The indication on the handle, the symbol with the carpet covering, indicates the average amount of detergent.
Before use, it is necessary to check the carpet's resistance to high temperatures and the effect of steam on an inconspicuous spot with a minimal amount of detergent.
Follow the care instructions from the carpet manufacturer.
Make sure that the carpet, before using the sliding nozzle, is free of dust and stains.
Before use and after breaks in work, remove the remaining water (condensate) from the device by blowing it out into the drain (without the floor pad/with accessories).
Do not direct steam continuously (no more than 5 seconds) to avoid excessive exposure to moisture and the risk of damage due to high temperature.
Do not use the sliding nozzle on carpets with high pile.
Attaching the sliding nozzle for carpets to the floor nozzle
- Attaching the floor pad to the floor nozzle: see the chapter on the floor nozzle. Figure D
- Insert the floor nozzle with light pressure into the sliding nozzle for carpets until it clicks into place. Figure E
Anti-slip pads for carpets with pads
CAUTION
Table edges
The anti-slip pad for the carpet may heat up during steam treatment.
Do not use or remove the anti-slip pad for the carpet with a vacuum cleaner or with open shoes. Use the anti-slip pad for the carpet only with suitable shoes.
INSTALLING THE ANTI-SCALE CARTRIDGE
WARNING
Device damage
When reinstalling a used anti-scale cartridge, device damage may occur. Do not allow the cartridge to be mixed up.
Installation instructions
During the first steam treatment after changing and reinstalling the anti-scale cartridge, steam generation may be weak or uneven, and water droplets may appear. The device will need some time to fill the cartridge. The amount of steam delivered gradually increases, and after about 30 seconds, delivery reaches its maximum.
Note
The anti-scale cartridge is easier to remove and install when the water tank is empty.
Device damage
Improper handling of the handle may damage its components.
After assembly, do not remove the handle from the base unit.
Removing the handle from the base unit is allowed only if the unit is being sent for service.
TROUBLESHOOTING
Most malfunctions have simple causes, so with the help of the following overview they can be eliminated independently. In case of doubt or if malfunctions not described here occur, contact an authorized customer service department.
WARNING
Danger of impact and burns
Eliminating malfunctions on a device connected to the electrical grid or disassembled device is dangerous.
Pull out the power plug.
Let the device cool down.
No or little steam, despite sufficient water in the tank.
The anti-scale cartridge is missing or incorrectly installed.
- Install the anti-scale cartridge and/or check that the anti-scale cartridge is securely installed in the tank; if necessary, press it again.
The anti-scale cartridge was removed while the tank was being filled with water, or a new anti-scale cartridge was installed.
Press the steam button several times.
Rotate the cable, the lower part can be turned 360 degrees. The upper lock for the cable does not rotate.
- Turn the lower cable clamp upward.
- Completely remove the cable from the clamp.
- Secure the cable in the upper and lower clamps so that the device does not press on it.
Filling with water
Water can be filled into the tank. ATTENTION
Material damage due to an unclosed lid or an incorrectly fitted tank.
The tank lid is incorrectly closed or the water tank is incorrectly placed in the device, which can lead to water leakage from the device and damage to the appliance.
After filling the water tank, close the lid properly and check that the tank is securely fitted in the device.
ATTENTION
Damage to the device
Use of unsuitable water quality can lead to clogging of the nozzles.
Do not fill with condensed water from a tumble dryer.
He filled the tank with water.
Do not add cleaning agents or other additives to the water (for example, aromatizers).
Indicator
During filling of the tank, the cartridge for protection against overflow must be inside it.
Filling the cartridge directly on the device
- Keep the device.
- Open the tank lid and pour into the tank directly on the device no more than 0.5 liters of tap water. Figure B
- Close the tank lid.
Removing the tank for filling
- Keep the device.
- Turn the lower nut on the cable upward.
- Push the water tank by the handle vertically upward.
- Open the tank lid and fill it with no more than 0.5 liters of tap water. Figure H
- Close the tank lid.
- Insert the water tank and press on it downward until it clicks.
WARNING
Connect the device to the mains via the adapter.
During operation or storage, insufficiently stable placement of the device may lead to its fall and damage. This can also cause various injuries and damage to the floor covering.
The device with the nozzle must be installed on a flat surface, and the handle with protection against burns must be held vertically, leaning against the wall.
WARNING
Damage to the device due to incorrect use of the brush
Optimal operation of the cartridge for protection against scale is ensured only if the device is filled with tap water. If tap water is used incorrectly, scale may form in the device.
Fill the device before first use with tap water, see the filling of hard water.
Note
During the first boil, after removing and reinstalling the cartridge for protection against scale, the steam output may be weak and uneven, and water drops may appear. The device needs some time to fill the cartridge with water. The amount of steam supplied gradually increases and reaches maximum after about 30 seconds.
Note
Attention! When installing the steam stage 3 (plate/stone), the response time increases.
- Place the device on a flat surface. Figure 1
- Insert the mains plug into the socket. Figure K
- The operation indicator light should blink once.
Figure M
- Approximately 30 seconds after the operation indicator light will turn steady green.
Figure N
The device is ready for use.
Steam quantity adjustment
The amount of steam is adjusted according to the surface to be ironed.
- Press the buttons with arrows on the handle until the desired steam level is selected.
Figure P
Several steam levels are available:
Do not leave or store the appliance on uneven surfaces.
- Press the button for descaling when necessary (see chapter "Descaling and cleaning").
Figure D
Figure E
- Bndaunntu Bonory 3 hacaikn dny niinor / npnctropo.
- Hamotatn Ka6eB JxNBHeHHa HxHHi i BepxHi raKn dIg Ka6eIIO. ManHOK V
- 36epiratni npicpti y BepTKaJIbHOMy noIOxehHi Ha TBepdi nobepxhi a6o 6iIra CTIN. ManIOHOK I
- 36epiratn npncptpi y cyxomy micui, 3axueneHomy BID MOp03y.
BaxnBi Bka3iBkn 0do BnKOpncTaHHa
OuHennnnoBepxhi nIIOI
Mn pekomehnye mo nepei BnKOpncTahHm npncptpoo Oocnttn niDnory BiHKOM a6o nnococom. Ce Do3BOJNTb BnDaIHTn 3 Hei 6pyd i BInbHi qacTkne peoBnH uoOuNueHHn napoio.
OuHHeHnOBepxohb i3 JaKoOpap6oBm a6o IHsIM NOKpTTaM
YBATA
Noukoδxeni noeepxhi
Iapa moxe po3uHmU bick, Me6neey nonimypy, cunmemuHi nokpumma ma fap6u, a makox HaKaNeiKu Ha Kpomkax.
He Hanpaenmu npay Ha 3akneehi Kpomku, ocknbku ce MoKe npu3eecmu do nowkodkeHHaKneOk.
He bukopucmooyamu npucpii dno ouuueHHa Hennakobahux depee'hux a6o napkemhux nio2.
He eukopucmoeyam npucpii dny ouuueHH naepxohb i3 nakoapabosum abo cunmemuHUM nokpummam, HanpuKnaed Me6nie dny Kxyohb i eimaneh, daepeu abo napkemy.
3actocybaHHOchaueHH
This floor cleaner is intended for cleaning floor coverings, such as stone floors, tiles, and floors made of PVC, as well as such coatings on wooden floors, such as parquet and laminate.
ATTENTION
Damage to the floor surface due to steam
High temperature and steam can cause damage.
Before use, test the heat resistance and resistance to steam on an inconspicuous area, applying a small amount of steam.
When cleaning varnished or painted floors, it is necessary to set the steam level for wood and not to leave the device in one place for too long.
Instructions
Protective gloves or safety glasses for protection against splashes during cleaning may lead to the formation of cracks, which, however, disappear after a short period of use.
CAUTION
Steam nozzle
The nozzle for this / attachment for this is not included when the device is delivered.
During removal of the attachment for this, hot water may drip.
Use and remove the nozzle for this / attachment for this only in the supplied container.
- Close the attachment for this before removing the nozzle for this.
Place the sanding sheet on the sanding pad and attach it to the sanding pad. b. Place the sanding sheet on the sanding pad, slightly stretching it.
Figure D
The sanding sheet for sanding is attached to the pad by means of the clamping mechanism.
Sanding sheet for sanding with microfibre
The sanding sheet for sanding with microfibre is intended for cleaning varnished, tiled and PVC floors, as well as such wooden floors coated with lacquer, such as parquet and laminate. In addition, the sanding sheet for sanding with microfibre is suitable for polishing tiles (together with the tile polishing attachment).
Abrasive sanding sheet for sanding
The abrasive sanding sheet for sanding is intended for cleaning unpainted floor coverings, such as tiles or stone.
WARNING
Damage to floor coverings
The abrasive sanding sheet for sanding can damage the floor covering and its surface.
Do not use the abrasive sanding sheet for sanding on wooden surfaces.
Do not use the abrasive sanding sheet together with the tile polishing attachment.
Replacing the sanding sheet for sanding
- Place the sanding sheet on the sanding pad and attach the sanding pad. Figure D
Insert
The nozzle for inflating tires is very important and difficult to remove from the valve. After prolonged use, the nozzle may stick to the valve and require additional effort to remove.
REMOVING THE NOZZLE FROM THE BASE DEVICE
WARNING
Material damage due to device malfunction
Removing the nozzle for inflating tires should be done with the device turned off; otherwise, it may fall and be damaged, or damage the tire tread.
After installing the nozzle for tires, it should no longer be removed from the base device.
The nozzle for inflating tires can only be removed if the device is being serviced.
- Press the "ON" button. Figure 5
- Pull the plug out of the socket. Figure 7
- Fold the hose for air. Figure 9
- Hold the device by the handle.
- Press the button to release the nozzle for inflating tires.
- The nozzle for inflating tires is removed from the device, after which it can be taken off. Figure 11
- Store the device in a dry place in the lying position.
Disposal
The order of washing the kettle can be improved by using the kettle's external surface.
ATTENTION
Descaling the kettle
Scale buildup in the kettle, as well as high temperature and water hardness, can lead to kettle damage.
Use descaling agents only with the aim of removing microorganisms and deposits.
When using descaling agents, strictly follow the appropriate steam power level (see instructions for use on the handle, symbol for descaling — medium steam power level).
Additionally, before use, check the kettle's resistance and its effect on the appliance with a small amount of water. Follow the instructions provided by the kettle manufacturer.
Make sure that before using the descaling agent, the kettle was cleaned with a vacuum and dried.
Before use and after each operation, thoroughly rinse the appliance with clean water (without the descaling agent / with additional rinsing) to remove any remaining descaling solution (condensate) from the device.
Do not leave the appliance running for an extended period (no more than 5 seconds) to avoid strong heating and the risk of damage due to high temperature.
Do not use descaling agents on kettles with high speed.
Attaching the descaling nozzle to the appliance
- Attach the nozzle to the appliance's steam outlet, see the nozzle head. Figure D
- With light pressure, insert and secure the nozzle for descaling into the kettle. Figure E
- Turn on the appliance.
Oniku Hie
The product may heat up during operation.
Do not use or store the device in damp places or in the open air.
Use and store the device only in a dry room.
- Press the device down onto the viewing clip. 2. Pin the clip. FIG. E
Technical maintenance
Water tank
ATTENTION
If the device is damaged due to water
If the device is not used for more than 2 months, the water in the tank may become stale.
Check the water tank regularly.
- Press the “ON” button, the device is switched on.
- Pull the plug out of the socket.
- 3HATN KpUkky 6aka. 4.Cnpoxn6ak DnB0n. Pn Cbomy KaptpnK MoKe 3aJnWatncB 6aKy DnB0n. MaJIOHOKU
3amHa KapTpndka JIJI 3axncty BiJ HauNny
YBAGA
NowokxHn npucmpo i ckopoeyn cmpky cnxy6u
Hedompumannihinimepeaniezamiu(iHoukaia KOHmpoIbHOJ lamno4ku)kapmuOka dny3axucmy eid HAKUNyMOKe npu3BecMu do nowkodxeHHn npucmpoMa ckopoyehnOcmpoky cnx6bu npucmpoio.
Dompumyeamucb impeeanie 3amiHu (iHdukaia KOHmpoIbHOI namnoquKU).
Bka3ieka
Impeanu 3amiu 3anexiamb iD jokpmkocmi Micueioo oodu. B peiaohax i3 kopcmikcmo bodu (Hapuknad, III/IV) Binbu mpueanu impean 3amiu, Hix e paiohax 3 M'koO eodoo (Hapuknad, I/II).
IHHkaia KOHTpObHOJ lamnB pa3i 3aBepueHHa cacy po60ty
Ipo Heo6xHicTh 3amHn KapTpndka Dn8 3axncty BiD HAKUNy CnHaJI3ye KOHTpObnha JAmna KaTprndka TAKUM YNHOM:
3a 2 roDHHo 3akHcHHeH yacy po60Tu KOHTPObHa NaMna noUHae 6nMaTn.
MaJIHOHOK R
3a 1 roDnHy do 3akHcHHeH yacy po60tn KOHTpoJIbHa lamna 6IImae Yactiwe. Kolnyacpo6toNkaptpnDkaDna3axnctyBid HAKNY 3aKiHyeHO,KoHTpOlbHa lamna nocTioHO CBiITbCRAePBOHm,AKICBtIOJIOHa CTrpuKa Ha npncTpoi.CmbOI NOKpTTIB iINrHnHa pykoarHe cBITbCra.HAcOC BmNAKAETBCA ABTomatnuHO (HemaepnoaInapu),063anobirn NOWKoDKeHHIO npncTPOIO.
YcTaHOBJIeHHaKapTpIaKa IaIra3axNCTy BiD HAKIny
YBAGA
NowkodkeHH npucmpoH
In case of repeated installation of the cartridge to protect against pressure, damage to the device may occur.
Do not allow the cartridges to be mixed up.
Installation indicator
During the first use after replacing and reinstalling the cartridge to protect the output, the steam output may be weak or uneven, and water droplets may appear.
The device needs some time to fill the cartridge with water. The amount of steam supplied gradually increases and approximately after
30 seconds, the steam supply reaches its maximum.
Indicator
Removing the water tank facilitates removal and installation of the cartridge to protect against pressure.
- Press the "ON" button. The device is turned on.
- Remove the tank cover.
- Remove the cartridge to protect against pressure.
- Insert the new cartridge to protect against pressure and press on it for a minute for fixation.
- Press the "OFF" button. The device is turned off.
- Press the RESET button and hold it for 4 seconds. The control lamp "Replace cartridge to protect against scale" goes out and a new countdown of the cartridge's working time begins.
Figure
- To remove air from the cartridge, press the steam supply button and hold it in the pressed position for about 30 seconds.
Adjusting water hardness
ATTENTION
Device clogging due to scale formation
If you use the cartridge to protect against scale and in case of incorrect adjustment of water hardness, scale may form in the device.
Always work with the cartridge to protect against scale.
Adjust the device to the hardness of the local water.
Before using the device in a region with different water hardness (for example, after moving), adjust it to the appropriate water hardness.
Instructions
Information about water hardness can be obtained from the water utility or municipal services.
Water hardness is adjusted using the RESET button. The water hardness setting is stored until new settings are needed (for example, after moving). The device is set by the manufacturer to the highest water hardness level (level IV). The device selects the appropriate water hardness with short pulses.
Water hardness levels and pulse counts
- Handle and operate the machine only at temperatures not exceeding 60°C.
REMOVING THE HANDLE
REMOVAL
Removing the attachment
Removing the attachment may damage the handle components.
After removing the handle, the base attachment is exposed.
Removing the handle from the base attachment is only allowed if the attachment is being serviced.
Troubleshooting
Faults often have a simple cause that can be eliminated independently with the help of the instructions below. If in doubt or in case of unidentified faults, contact the authorized service center.
WARNING
Risk of electric shock and burns
While the device is connected to the power supply or has not cooled down, do not attempt to fix faults.
Remove the mains plug.
Allow the device to cool down.
The device does not start because there is not enough water in the tank.
The cartridge is not installed correctly. Install the cartridge to protect against ink.
Install the ink protection cartridge and/or check that the cartridge is locked in the tank, and if necessary, lock it again. The ink protection cartridge may have been removed during refilling, or a new ink protection cartridge may have been installed. Do not remove the ink protection cartridge from the tank until it is time to refill. - Press and hold the pause button for a long time. After 30 seconds, maximum steam power will be reached.
Steam is present despite sufficient water in the tank, and the control lamp and light indicator of the operating state on the device are constantly lit red, and the symbols on the cover and in the instructions are not lit.
The ink protection cartridge is working.
Install a new ink protection cartridge, see the chapter on replacing the ink protection cartridge. - If a new ink protection cartridge has already been installed, but the error does not disappear, it is likely that the RESET button was not pressed after replacing the cartridge. After installing the ink protection cartridge, press and hold the RESET button for 4 seconds, see the chapter on replacing the ink protection cartridge.
Technical specifications
Electrical connections
| Hашира | V |
| Фаза ~ 1 | |
| Частota Hz 50-60 | |
| Стуниь засcentу IPX4 | |
| Клас засcentу I |
Operating characteristics of the device
- The indicator lights up for 30 seconds and then goes out.
Figure N
The curve of the steam output.
By measuring the temperature
The temperature measurement is carried out with a thermometer.
If the temperature is too high, the safety thermostat will trip.
Figure P
3 types of water:
| Taktai/Tac-JxorapbIbydehreIi |
| Kilalem-opTa bydehreIi |
| AfaaI-eHtemeHribydehreIi |
Cold
Dry, concentrated, and liquid water (in liters / pcs) are available.
These models are for reference and can be used as a basis.
Figure O
Filling with water
Cold
Water can be supplied by opening the water inlet valve.
During water use, the pump may be dry.
- Open the drain valve and fill with water up to max. 0.5 liters.
Figure G
Hot
Open the water valve, drain valve, and fill with max. 0.5 L of water, see "Filling with water".
Figure H
Emptying
ATTENTION
Condensate / drain trap closing
To prevent the trap from closing during the operation of the unit, check the «drain» sign and the cover.
To reduce energy consumption, do not leave the drain open for more than 20 minutes during operation.
- Open the drain valve. Figure 5
Draining
- Open the drain valve.
Figure 5
From these generators.
- Disconnect the plug from the electrical outlet.
Figure T
ATTENTION
Protection of the drain from clogging
The drain may become clogged with dirt, which may cause water to leak.
If the unit is not used for a long time, close the water supply valve.
- Cy 6aɪn 6ɔcaTy.
Cyper U
KypblfblHbI caTayra 6ynay
HA3AP AYdAPbIHbl
KoHdeHcammbiH/biFraJIObIH ece6iHeh MyJikmiH 3aKbIMdaHybl
Tasaan 6onraHHaH KeuiH, eedeH MamacbiHdaftbI Hemece eedeH canimamaBcHdaftbI/kypbunfbldaftbI bUNFaI eedeH Xabihh3akbIMdaybIMyMKIH.
Taaan 6onraHHaH KeuiH, eedeMaacbIH/Kinem Xa6dbfbH anbH macmaHb3 XeHe eede CanmamacbH/ KypblrBhl KyprAmblb3.
KypbIINbIHbI ce3immaI Ka6ammapra KoMaHbI3 Hemece caKaMaMaHbI3.
- EeH MaTacbIH HeMeCe eHeRe apHaJIFaH MaTaHbI XaHE KInem CbIPfBIMacbIH anbIN TAcTaHbI, «EeH canTAMacbI XaHe KInem CbIPfBIMacbI» 6enimH kapaHbI3.
CypT D
Cyper E
- EeH Ka6aTbHaH/KypbInfBldaH bInFaIaIbIaIbIbI3.
- KyaT Ka6eniH TeMeHri XaHe XKorapfbI Ka6enb inReKTepeHe opaHbI3.
Cyper V
- The poultry must be kept in a place protected from cats.
Cyper I
- The poultry must be kept in a place protected from birds of prey.
Instructions for use
Preparation of the product
Before using the product, consult a veterinarian or pharmacist for advice on use.
The product should be prepared only in accordance with the instructions.
Preparation of the product for oral administration or injection
ATTENTION
Closed packaging
This product, its packaging, plastic containers, or packaging must not be reused for other purposes.
If the packaging is damaged, do not use the product.
Do not use the product after the expiration date or if the packaging is damaged.
Do not use the product if it has been contaminated with water or moisture, or if the packaging is damaged.
Do not use the gas burner to heat the room, and do not use the gas burner, gas, or other appliances for heating the room, as this may cause carbon monoxide poisoning.
ATTENTION
This appliance is not intended for use by persons
It is possible to use the appliance with reduced physical, sensory or mental capabilities, or lack of experience and knowledge, if they have been given supervision or instruction concerning use of the appliance in a safe way and understand the hazards involved.
Children shall not play with the appliance. Cleaning and user maintenance shall not be made by children without supervision.
INSTALLATION
When the appliance is used in a room, it must be provided with adequate ventilation to prevent the accumulation of harmful gases. The room must have a window or an opening to the outside.
WARNING
DANGER
Do not use the appliance if the glass is damaged or broken.
Do not use the appliance if the power cord is damaged. It must be replaced by the manufacturer or a qualified person.
Do not touch the glass with wet hands and do not use the appliance with wet hands.
- Keep the appliance away from flammable materials.
Remove the protective film from the adhesive surface of the sticker.
b Remove the protective film from the adhesive surface of the sticker, then press it firmly.
Cyper D
Remove the protective film from the sticker and the adhesive surface of the confirmation label.
Remove the protective film from the micro sticker
The micro fiber cloth is intended for cleaning the surfaces of devices, phones, and PBX equipment, as well as for removing dust from the surfaces of monitors and lamps. It is also used for cleaning the adhesive surfaces of stickers and labels.
Abrasive material
Abrasive material is used for cleaning surfaces that are difficult to remove dirt from.
CAUTION
Do not use on painted surfaces
Abrasive material may damage painted surfaces or plastic.
Do not use abrasive material to clean wooden surfaces.
Do not use abrasive material together with cleaning agents.
Remove the protective film from the sticker
- Remove the protective film from the sticker and the confirmation label, then press them firmly.
Cyper D
Hycay
EH bacihda eedehe aphanraH wybepekmH bekimne macnacbl ani kemkinikmi mypde kaKcbI ycmanadbl XHe eed H KOHbIPmacbiHaH aepaXkbipambladbl. Kpn pem kondaHraH xe He xyraH coH, wSybepe edH KOHbIPmacbiHaH KaKcbI weuineDi, OHmaJIb6ekimy KywIne Kon keMkiinaeH.
Eden cantamacbH Heri3ri KypblrfaH WblfapbipbI3
HA3AP AYdAPbIHbl
KypbIrfbHbIMypaKaCbI3ObfBHa 6aunhaicmbi Mynikke KeinmpipinaeH 3ana
Edeh canmamacbH anbH macmarHa, Kypblrbl mypaKcb3 60bn H Kanadbl, Ka6bcBn KaNYbl MYMKIH XHe Kypblrbl MeH eedeHdi 3aKbIMdaybl MYMKH.
OphamKaHHaH KeuiH eDeH canImaMaCbIH Hei3zI KypblfbldaH wbIFapMaHbI3.
KypbIINfbiHbIKbI3Mem Kepcemy yuiiXi6epzeh Ke3de raha eedeH canmaMacbI aJIbIHbI3.
- ΘιργΚΟκχιλυH 6αςχινιδε3 Cyper S
- Keninik wtekepi anektp po3etkacbHaH wblrapbn anblhbl3.
Cyper T
- Cy 6aBbH 6ocatbHbI3.
Figure U
- Instructions for use.
- Before using the device, read the instructions.
- Use the device only for its intended purpose.
Figure W
- Store the device in a dry place when not in use.
Configuration for various devices
The configuration for the device allows the device to be adjusted.
ATTENTION
The configuration for the device and the settings in the device
The components in the configuration for the device, especially at high temperatures and humidity, may affect the device's settings. The device surface should only be cleaned with a soft, dry cloth. When handling the device, follow the instructions in this manual (see the attached instructions, the device manual for the device).
Before starting operation, check the device's operation at low and high temperatures and ensure it functions correctly.
Install the kinematic diagram in place of the cover.
Before starting the kinematic diagram, make sure the kinematic diagram is clean and free of any damage.
Before starting, if the kinematic diagram is not working properly, it may be necessary to replace it with a new one (with a different configuration/component).
To prevent the kinematic diagram from being damaged by high temperatures, do not place it in a location with high temperatures (e.g., near a stove).
Do not use the kinematic diagram for purposes other than those intended.
Do not replace the kinematic diagram with a different one.
- To replace the kinematic diagram with a different one, refer to the instructions for the intended kinematic diagram. Figure D
- To replace the kinematic diagram with a different one, remove the old one and install the new one. Figure E
- Start the kinematic diagram.
Remove the kinematic diagram from the intended one.
WARNING
CAUTION
During operation, the kinematic diagram may become hot.
By uemkacbIme HanaH aK HeMece auBik aAkkuiMde ewkaawah Kymbic icmemeh3 kHe anMaHbI3.
By zemkacbImen meK cukec kenemih aKKuimde Kymbic icmehi3 XHe anbHbI3.
- Kinemre aphanraH KOHdbIPMaHbIH TiIuecin 6TeHKe TymcbIfbImeH TeMeH 6acblb3.
- EdeHre apHaIraH KOHdbIpMaHbI Kofapbl KeTepeiH3. CypE
Kytim XeHe TexHnKaIbIK KbI3MeT Kepcety
Cy 6ariH 6ocaty
HA3AP AYdAPbIHbI
KypbIrfHbIH cyobIH mypbIn KanybiHaH 3aKbIMdanybl
KypbInf2 audah acmam yaKbimka kondaHbImmaumBH bonca, 6akmafb cydbn 6y3bnin bacmaybi MYMKIH. KypbInfHb naudanaHydarby 3aK ynicmepdeh 6ypbH, 6akmi bocambn KOKepek.
- AxbipatkbuTb Ewipy KaNbHa KOnbHbI3. By rehepatopb eupinreH.
- Keni Ka6einih ToKtaH aXbipaTbHbI3.
- BaKaKaNaFbH anbIn TactaHbI3.
- bIbIcTbI 6OcaTbIHbI3. Kaptnixk 6yJI Ke3e cy 6arbHa KaIa 6epei. Cypet U
KaKtbl XnHaKtay naTpoHbIn aybICtbipy
HA3AP AYdAPbIHbI
The device is designed for use with mercury thermometers.
To install the device, the protective cap must be removed.
The device is designed for use with mercury thermometers.
The protective cap has been removed.
Operation
The device must be held vertically when in use. The thermometer should be inserted into the device with the scale facing the operator.
Indicator
The indicator shows the correct position of the thermometer in the device.
- The thermometer is inserted into the device.
- The device is ready for use.
- The indicator lamp lights up when the device is in operation. If the device is not used for a long time, the indicator lamp may go out. The device should be stored in a dry place.
Replacing the thermometer
CAUTION
The device must be switched off before replacing the thermometer.
The thermometer can be replaced only when the device is switched off.
Pampohdaapbbyaybcmbipbn anmay ywiH,abauan JyMbIC icmeHi3.
1-de. KaKMah ma3apmyra apHaHrah Kapmpudjdi anMacmbipin, anMacmbipraHHan KeuiH bynay, 6y cypemi akwbn Hemece mpaKmbi eMeC bonybIMYMyKIH XHe JKeke cy mamubnapbi arbin Kemyi MymkIH. KaMbl XuHaKmay nampoHbCyMeH monmbipmMaBihwa, KpybIbHb a3 yaKbImKa kbldpbin any kepek. BydbHb epinae Hmeuepi 30 cekyhdman coH en Kofarpbi MaHHe KemneuiHwe, YHemi Kebeue bepeidi.
Hycay
Cyfa 6a2bH anbim macmay apkblbl, KaKMaH ma3apmyra aphanran KApmpudkiH anbim macman, aybcmbipyra 6oJadbl.
- AxbipatkbwTbI ΘiPy KaIInbHa KoBbHbI3. By rehepatopbI ewiipinreH.
- BaKaKaNaFbH anbH TaTaHbI3.
- KaTbIXHaKaTay NaTpoHbIH anbIbI3.
- KaHa KaKaTaH Ta3apTyFa apHaJfA H KapTpNdkiH CaJIbIHbI KHe OJ OPhbHa TYCKeHue 6acbHbI3.
- AkbipatkbiWtBi Kocy KaJIbHa KOJIbHbI3. By reHepaTopbi KocblJFaH.
- RESET Tymecin 4 cekyHd 6oynbHa 6acbin Tpyblb13.
KaKTbI JnHaKdTay natoPohbIH aybICTbipydbI bAckpy waMbI eWeDi, natoPohbDbI aybICTbipy Mep3IMiHiH XaHa ece6i 6actanaDbI.
Cyper Q
- KypblfBbHbH, Kbl3dbpblybiHa MymkiHik 6epiH3.
- KaTbI XINHaKTay NaTPOHbIHaH ayAHb I WbIFapy yWIn, 6y TetiriH wAMAmEH WAM. 30 cekyHd 6oNbHa 6acbin TypblHbI3.
Cydbin KePMeKTirih opHaTy
Connection to the poultry house is closed
It is possible to connect the poultry house to the water supply system only if the water quality meets the requirements. The water must be connected to the water supply system. The water must be connected to the ceramic filter. The water must be connected to the filter before use (e.g., after cleaning), and then the water must be connected to the filter.
Instructions
The water supply tap or the water supply system provides water to the poultry house. To adjust the water level, press the RESET button and then set the water level. The water level can be adjusted (e.g., after cleaning) by pressing the RESET button. The highest water level (level IV) is set in the poultry house. The set water level is indicated by the indicator light. The water level and the indicator light
Accessories
Accessories are available as optional equipment. If there are any accessories not listed here, contact the authorized service center.
WARNING
To avoid electric shock and fire
When adding water to the poultry house or when cleaning, unplug the device.
Remove the plug from the socket. Do not immerse the poultry house in water.
Do not use the device if the water is hot or if the water is cold/not hot.
Do not install the battery incorrectly or install it incorrectly.
Install the battery correctly and/or do not install the battery incorrectly. If the battery is installed incorrectly, it may cause a fire.
When the battery is installed incorrectly, do not use it and/or do not charge the battery incorrectly.
To avoid the risk of injury, install the device correctly. Wait. After 30 seconds, do not touch the hot surface.
«Cartridge for protection against injury
activation and testing
device, antiseptic liquid
cartridge replacement procedure.
- Remove the cartridge for protection against injury, then insert a new cartridge.
Do not wait for the liquid to run out, as the device and the indicator will continue to work, but the protection against injury will be reduced.
Cartridge replacement procedure
- Remove the cartridge for protection against injury, then insert a new cartridge. If the cartridge for protection against injury is not inserted correctly, the device may not work properly. After inserting the cartridge for protection against injury, wait 4 seconds, then insert a new cartridge.
Technical data
The device may not be adjusted correctly for water hardness.
The device is adjusted for water hardness at the factory and functions optimally. If the water hardness is not adjusted correctly, scale may form. Before first use, adjust the device to the water hardness of the location, see chapter. Adjusting water hardness.
Note
When first switching on and after each refill of the cartridge, the first spray may be weak or uneven and may leak individual drops. The device needs a short time to operate, during which the cartridge fills with water. The amount of spray increases gradually, until after about 30 seconds the maximum amount of spray is reached.
Note
Turn the steam control knob to steam level 3 (plates/cups), and in the opposite case the response time will be extended.
- Place the device on a stable surface. Figure I
- Plug in the power cord. Figure K
- Press the power switch. Figure L
- The indicator light will illuminate in blue. Figure M 5. Sec. 30 sec. The indicator light will illuminate in green for constant operation. The device is ready for use.
Adjust the amount of steam
The amount of steam is determined by the surface to be ironed.
- Press the buttons with arrows to adjust the steam flow direction until the desired steam level is selected.
Figure P
There are 3 different steam levels available:
| ПLOЧКИ/KaMbK - Мakсималha CTepeн Ha napa |
| КИПМ - Средна CTepeн Ha napa |
| ДърВесиHA - Най-NИСKa CTepeн Ha napa |
Note
After pressing the steam button, the maximum steam level (plates/cups) is activated. Adjust the amount of steam
Press the steam button.
Figure O
Adding water
Instruction
Water level can be observed through the transparent reservoir for clean water.
When filling with water, the float and the filter cartridge remain fixed in place.
- Open the reservoir tap and fill the reservoir with water directly from the tap with max. 0.5 l of water from the water supply.
Figure B
Close the water reservoirs, open the reservoir tap and fill with max. 0.5 l of water from the water supply, then close the water inlet.
Figure H
Operation
WARNING
Material damage due to condensation
To avoid material damage during prolonged operation, keep the device in a dry place.
To save energy, we recommend that during pauses in operation longer than 20 minutes, the device be switched off.
- Press the switch.
Figure S
Switching off the device
- The device is switched off.
Figure S
The device is unplugged.
2. Disconnect from the contact.
Figure T
WARNING
Risk of damage to the device due to water
If the device is not used for more than 2 months, the water in the reservoir may become dirty.
Before prolonged pauses in operation, empty the water reservoir.
- Empty the water reservoir.
U
Descaling the device
WARNING
Materials that may cause condensation
Following the instructions for use, the device may produce condensation.
Repeat the procedure for each cleaning session for the pod/attachment for the nozzles and adjust the dose rate.
Do not leave the device on an unstable surface.
- Remove the cover for the pod, resp. the cover for the pod attachment for the nozzles, main nozzle pod attachment for the nozzles.
Figure D
Figure E
- Remove the nozzle from the pod/dose.
- Guide the electrical cable around the lower and upper cable hook. Figure V
- Store the device in a vertical position on a stable base, resp. wall. Figure I
- Store the device in a dry and frost-protected place.
Important instructions for use
Cleaning the floor surfaces
Before using the device, check whether the floor is suitable for cleaning. This way, even with wet cleaning, the floor is freed from dirt and loose parts.
Device wear and service life
Failure to observe the replacement intervals (indicator control lamp) of the filter cartridge can lead to damage to the device and a shortened service life of the device. Observe the replacement intervals (indicator control lamp).
Instruction
The pressure for the hose depends on the hardness of the water at the source. Areas with hard water (e.g., III/IV) have a higher pressure for the hose than areas with softer water (e.g., I/II).
Control lamp - operating time
The required hose pressure for descaling the boiler cartridge is shown by the special device "Control lamp - descaling cartridge":
2 hours before the end of the operating time, the control lamp flashes. Fig. R
1 hour before the end of the operating time, the control lamp flashes significantly faster. If the operating time of the descaling cartridge has expired, the control lamp, as well as the indicator lamp, lights up continuously in red. The symbols for the water tank and the handle do not light up. The device switches off automatically (there is a beep), to avoid damage to the device.
Inserting the descaling cartridge
WARNING
Device damage
The device must be switched off before reinserting the descaling cartridge.
Work carefully to avoid spilling the cartridges.
Installation instructions
When first inserting the descaling cartridge and after reinserting it, the first discharge may be weak or uneven and individual water drops may leak. The device needs a short time to start working, during which the descaling cartridge fills with water. The amount of water discharged gradually increases until after about 30 seconds it reaches the maximum amount of water.
Note
The water tank light goes out during the removal and insertion of the descaling cartridge.
- Press the switch. The device is switched off.
- Remove the boiler.
- Remove the cartridge for descaling.
- Insert a new descaling cartridge until it clicks into place.
- Press the button. The device is switched on.
- Press and hold the RESET button for 4 seconds. The "Descaling cartridge" indicator light flashes during the cartridge operating time. Figure Q
- Let the device heat up.
- Press the start button. After 30 minutes, the descaling cartridge is empty.
Adjusting the water hardness
WARNING
The device can produce scale.
Without a descaling cartridge and with incorrect water hardness setting, scale can form in the device.
Work only with a descaling cartridge.
Set the device to the water hardness of your area.
Before using water with a different hardness (e.g., from a water softener), set the device to the current water hardness.
Note
The device is designed to automatically inform about the hardness of the water from the water supply network.
The water hardness is set with the RESET button. The water hardness setting is stored until a new setting is made (e.g., after a reset). The factory setting is for the highest water hardness (level IV). The device shows the set water hardness with pulses on the indicator.
Water hardness level | Indicator pulses
| Ниво на ТВьрдост | °dH mm | ol/1 Бpoi | Импунсан на Миганe | Иntерва- на Импунсан- е на Миганe | |
| I Me | ka 0-7 | 0-1,3 1x | 4 seкундii | ||
| II | сpeдиha | 7-14 | 1,3-2,5 | 2x | |
| III T | ьрда | 14-21 2,5 | -3,8 3x | ||
| IV | MHoro ТВьрда | >21 >3,8 | 4x | ||
Note
The action of the cartridge valve for descaling is activated when the reservoir is filled with water and the device is put into operation. The valve, which is filled with water, is placed in the housing and the cartridge for descaling. Thus, it is not necessary to additionally rinse the valve.
Note
The cartridge and the housing may change color over time, depending on the mineral content in the water. This discoloration is harmless and has no negative effect on the device, the rinsing process, or the functioning of the descaling cartridge.
Note
During the setting, do not make any pauses longer than 15 seconds, otherwise in some cases the device will be set automatically to the last set water hardness, respectively at the first start-up in operation - to the highest water hardness.
- Plug in the device.
- Make sure the device is switched off.
- Press and hold the RESET button and switch on the device.
Figure
After approx. 2 seconds the control lamp flashes and the device starts to count the pulses for the water hardness setting.
- Release the RESET button.
The adjustment of the device is carried out in accordance with the hardness of the water IV, and the control lamp lights up and goes out sequentially.
Risk of injury
Therefore a + 2 = 11, β + γ = 11,
270 u
α = x - 2/x < 0
Therefore, S' is perpendicular to BC.
.
102
4
The following are the main steps to be followed in order to achieve the desired result.
aJ 2.
a>la≥0
.3
a>la0gU
jaoall no jqJl Jauol 4.
auii aagg jj 15 biaol 5.
.6aJg jglj 6
a 2 > a 1 时
alw po all> jol Jsw jgj 7.
4
slllgl sllllpiaj jio
Sagjgblg 0.1u// aigwll lgl slw/ pia
Jg21
U/UL aagaaa/UL aaiaio 2g>90 U/SLaW/psio poXuui U
auii 100g
Sgmo pIxwU, bao cibull o 5uul po IxuW uic
∴ θ = 1.211
aaiis alia ssw lc slw/ pio po w
aJU a9 jc b2wll psio cuu
aag Jaaill jbl aJUll aog Jc aJUauu 1.
.
a>la|0gD
2.
LgJgJz
a 0 < | a 0| < a1
3.
4.97
p10/
a 4 > a 5 > a 6 > a 7 > a8 > ...
4
__SUPPIMER__
1
4
1.
a|la|o8S
Jusill alac 2b9
| ### | ### |
| ### | ### |
| ### | ### |
| ### | ### |
| ### | ### |
| ### | ### |
| ### | ### |
| ### | ### |
| ### | ### |
| ### | ### |
| ### | ### |
| ### | ### |
| ### | ### |
| ### | ### |
| ### | ### |
| ### | ### |
| ### | ### |
| ### | ### ### |
#
J 1
∴ S ΔAPQ = S ΔAQP + SΔPQQ
∴ S ΔACD = S ΔCOD + SΔBDO
Jia 15 J5
JILS JILS JILS JILS JILS JILS JILS JILS JILS
1
Jol5 Jc 11 / 15 23 dc 1w/0
J
__SUPPIMER__
4
14 × 20 = 5600
j_L > 1, i.e., 1 < j ≤ 2
Register your product and benefit from many advantages.
www.kaercher.com/welcome ★★★★★

Rate your product and tell us your opinion.
www.kaercher.com/dealersearch
Alfred Kärcher SE & Co. KG
Alfred-Karcher-Str. 28-40
71364 Winnenden (Germany)

2-2-SC-A5-GS
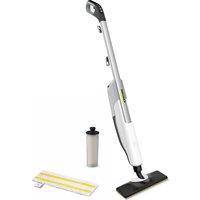
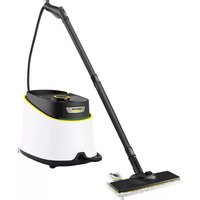
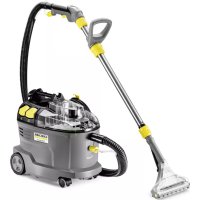
- GENERAL NOTES
- INTENDED USE
- ENVIRONMENTAL PROTECTION
- NOTES ON THE CONTENT MATERIALS (REACH)
- ACCESSORIES AND SPARE PARTS
- SCOPE OF DELIVERY
- WARRANTY
- SAFETY DEVICES
- CAUTION
- SYMBOLS ON THE DEVICE
- SAFETY VALVE
- FUSE
- DEVICE DESCRIPTION
- INITIAL START-UP
- ATTENTION
- DEVICE DAMAGE DUE TO CALCIFICATION
- NOTE
- INSTALLATION
- INSTALLING THE HANDLE BAR
- INSTALLING THE FLOOR NOZZLE
- OPERATION
- UNWINDING THE POWER CORD
- WARNING
- RISK OF ELECTRIC SHOCK
- FILLING WATER
- MATERIAL DAMAGE THROUGH OPEN RESERVOIR COVER OR INCORRECTLY SEATED OR LOOSE WATER RESERVOIR
- DAMAGE TO THE DEVICE
- FILLING THE WATER RESERVOIR DIRECTLY ON THE DEVICE
- ILLUSTRATION G
- REMOVING THE WATER RESERVOIR FOR FILLING
- ILLUSTRATION H
- SWITCHING ON THE DEVICE
- DEVICE AND MATERIAL DAMAGE DUE TO TIPPING OVER
- DEVICE DAMAGE DUE TO INCORRECTLY SET WATER HARDNESS
- ILLUSTRATION I
- ILLUSTRATION K
- ILLUSTRATION L
- ILLUSTRATION M
- ILLUSTRATION N
- REGULATING THE STEAM VOLUME
- ILLUSTRATION P
- ILLUSTRATION O
- REFILLING WATER
- INTERRUPTING OPERATION
- SWITCHING OFF THE DEVICE
- DEVICE DAMAGE DUE TO WATER PUTREFACTION
- STORING THE DEVICE
- IMPORTANT APPLICATION INSTRUCTIONS
- CLEANING THE FLOOR AREAS
- CLEANING COATED OR PAINTED SURFACES
- DAMAGED SURFACES
- HOW TO USE THE ACCESSORIES
- FLOOR NOZZLE
- DAMAGE DUE TO STEAM EFFECT
- BEWARE OF BURNS TO YOUR FEET
- MICRO FIBRE CLOTH
- ABRASIVE FLOOR CLOTH
- DAMAGE TO FLOOR COVERINGS
- REMOVING THE FLOOR CLEANING CLOTH
- ILLUSTRATION D
- REMOVING THE FLOOR NOZZLE FROM THE BASIC DEVICE
- MATERIAL DAMAGE DUE TO AN UNSTABLE DEVICE
- ILLUSTRATION S
- ILLUSTRATION T
- ILLUSTRATION U
- ILLUSTRATION W
- CARPET GLIDER
- BEWARE OF DAMAGING THE CARPET GLIDER AND CARPET
- FASTENING THE CARPET GLIDER TO THE FLOOR NOZZLE
- ILLUSTRATION E
- REMOVING THE CARPET GLIDER FROM THE FLOOR NOZZLE
- CARE AND SERVICE
- DRAINING THE WATER RESERVOIR
- REPLACING THE DECALCIFICATION CARTRIDGE
- DEVICE DAMAGE AND SHORTENED SERVICE LIFE
- INDICATOR LAMP AT END OF THE RUN TIME
- ILLUSTRATION R
- INSERTING THE DECALCIFICATION CARTRIDGE
- DEVICE DAMAGE
- INSTALLATION INFORMATION
- ILLUSTRATION Q
- SETTING THE WATER HARDNESS
- CARE OF ACCESSORIES
- REMOVING THE HANDLE
- TROUBLESHOOTING GUIDE
- RISK OF ELECTRIC SHOCK AND BURNS
- CLEAN PAVED SURFACES
- ABRASIVE GRINDING DISC
- WARNINGS
- APPLIANCE CARE
- CLEANING THE APPLIANCE
- IMAGES
- WATER INLET FILTER
- SIGNS ON THE SURFACES
- USE OF ACCESSORIES
- CLEANING THE FLOOR
- FIRST USE
- DAMAGE TO THE DEVICE DUE TO SCALE FORMATION
- FIGURE F
- MOUNTING
- INSTALLING THE HANDLE
- FIGURE B
- INSTALLING THE ACCESSORY
- FIGURE C
- UNWINDING THE POWER CABLE
- FIGURE J
- WATER FILLING
- MATERIAL DAMAGE DUE TO AN UNCLOSED LID OR AN UNSECURED WATER TANK
- DEVICE SETUP
- DIRECT FILLING OF THE WATER TANK ON THE DEVICE
- FIGURE G
- REMOVING THE WATER TANK FOR FILLING
- FIGURE H
- TURNING ON THE DEVICE
- DAMAGE TO THE DEVICE AND INJURY DUE TO TIPPING OVER
- DAMAGE TO THE DEVICE DUE TO INCORRECT WATER HARDNESS SETTING
- FIGURE N
- ADJUSTING THE STEAM QUANTITY
- FIGURE P
- ACCESSORIES
- STEAM NOZZLE
- MICROFIBER FLOOR PAD
- ABRASIVE FLOOR PAD
- REMOVING THE FLOOR PAD
- SEPARATING THE FLOOR NOZZLE FROM THE BASE UNIT
- FIG
- ATTACHING THE SLIDING NOZZLE FOR CARPETS TO THE FLOOR NOZZLE
- TABLE EDGES
- INSTALLATION INSTRUCTIONS
- TROUBLESHOOTING
- DANGER OF IMPACT AND BURNS
- NO OR LITTLE STEAM, DESPITE SUFFICIENT WATER IN THE TANK
- FILLING WITH WATER
- MATERIAL DAMAGE DUE TO AN UNCLOSED LID OR AN INCORRECTLY FITTED TANK
- INDICATOR
- FILLING THE CARTRIDGE DIRECTLY ON THE DEVICE
- REMOVING THE TANK FOR FILLING
- CONNECT THE DEVICE TO THE MAINS VIA THE ADAPTER
- DAMAGE TO THE DEVICE DUE TO INCORRECT USE OF THE BRUSH
- FIGURE M
- STEAM QUANTITY ADJUSTMENT
- FIGURE D
- FIGURE E
- BAXNBI BKA3IBKN 0DO BNKOPNCTAHHA
- OUHENNNNOBEPXHI NIIOI
- OUHHEHNOBEPXOHB I3 JAKOOPAP6OBM A6O IHSIM NOKPTTAM
- YBATA
- NOUKOΔXENI NOEEPXHI
- ACTOCYBAHHOCHAUEHH
- DAMAGE TO THE FLOOR SURFACE DUE TO STEAM
- INSTRUCTIONS
- SANDING SHEET FOR SANDING WITH MICROFIBRE
- ABRASIVE SANDING SHEET FOR SANDING
- REPLACING THE SANDING SHEET FOR SANDING
- INSERT
- REMOVING THE NOZZLE FROM THE BASE DEVICE
- MATERIAL DAMAGE DUE TO DEVICE MALFUNCTION
- DISPOSAL
- DESCALING THE KETTLE
- ATTACHING THE DESCALING NOZZLE TO THE APPLIANCE
- ONIKU HIE
- TECHNICAL MAINTENANCE
- WATER TANK
- IF THE DEVICE IS DAMAGED DUE TO WATER
- AMHA KAPTPNDKA JIJI 3AXNCTY BIJ HAUNNY
- YBAGA
- NOWOKXHN NPUCMPO I CKOPOEYN CMPKY CNXY6U
- BKA3IEKA
- IHHKAIA KOHTPOBHOJ LAMNB PA3I 3ABEPUEHHA CACY PO60TY
- MAJIHOHOK R
- YCTAHOBJIEHHAKAPTPIAKA IAIRA3AXNCTY BID HAKINY
- NOWKODKEHH NPUCMPOH
- INSTALLATION INDICATOR
- FIGURE
- ADJUSTING WATER HARDNESS
- DEVICE CLOGGING DUE TO SCALE FORMATION
- REMOVAL
- REMOVING THE ATTACHMENT
- THE DEVICE DOES NOT START BECAUSE THERE IS NOT ENOUGH WATER IN THE TANK
- STEAM IS PRESENT DESPITE SUFFICIENT WATER IN THE TANK, AND THE CONTROL LAMP AND LIGHT INDICATOR OF THE OPERATING STATE ON THE DEVICE ARE CONSTANTLY LIT RED, AND THE SYMBOLS ON THE COVER AND IN THE INSTRUCTIONS ARE NOT LIT
- TECHNICAL SPECIFICATIONS
- BY MEASURING THE TEMPERATURE
- COLD
- FIGURE O
- EMPTYING
- CONDENSATE / DRAIN TRAP CLOSING
- DRAINING
- FIGURE T
- PROTECTION OF THE DRAIN FROM CLOGGING
- CYPER U
- KYPBLFBLHBI CATAYRA 6YNAY
- HA3AP AYDAPBIHBL
- KOHDEHCAMMBIH/BIFRAJIOBIH ECE6IHEH MYJIKMIH 3AKBIMDAHYBL
- CYPT D
- CYPER V
- INSTRUCTIONS FOR USE
- PREPARATION OF THE PRODUCT
- PREPARATION OF THE PRODUCT FOR ORAL ADMINISTRATION OR INJECTION
- CLOSED PACKAGING
- THIS APPLIANCE IS NOT INTENDED FOR USE BY PERSONS
- DANGER
- CYPER D
- REMOVE THE PROTECTIVE FILM FROM THE MICRO STICKER
- ABRASIVE MATERIAL
- DO NOT USE ON PAINTED SURFACES
- REMOVE THE PROTECTIVE FILM FROM THE STICKER
- HYCAY
- EDEN CANTAMACBH HERI3RI KYPBLRFAH WBLFAPBIPBI
- KYPBIRFBHBIMYPAKACBI3OBFBHA 6AUNHAICMBI MYNIKKE KEINMPIPINAEH 3ANA
- CYPER T
- FIGURE U
- FIGURE W
- CONFIGURATION FOR VARIOUS DEVICES
- THE CONFIGURATION FOR THE DEVICE AND THE SETTINGS IN THE DEVICE
- DO NOT REPLACE THE KINEMATIC DIAGRAM WITH A DIFFERENT ONE
- REMOVE THE KINEMATIC DIAGRAM FROM THE INTENDED ONE
- KYTIM XEHE TEXHNKAIBIK KBI3MET KEPCETY
- CY 6ARIH 6OCATY
- HA3AP AYDAPBIHBI
- KYPBIRFHBIH CYOBIH MYPBIN KANYBIHAH 3AKBIMDANYBL
- KAKTBL XNHAKTAY NATPOHBIN AYBICTBIPY
- THE DEVICE IS DESIGNED FOR USE WITH MERCURY THERMOMETERS
- REPLACING THE THERMOMETER
- THE DEVICE MUST BE SWITCHED OFF BEFORE REPLACING THE THERMOMETER
- CYPER Q
- CYDBIN KEPMEKTIRIH OPHATY
- CONNECTION TO THE POULTRY HOUSE IS CLOSED
- TO AVOID ELECTRIC SHOCK AND FIRE
- DO NOT USE THE DEVICE IF THE WATER IS HOT OR IF THE WATER IS COLD/NOT HOT
- CARTRIDGE FOR PROTECTION AGAINST INJURY
- ACTIVATION AND TESTING
- THE DEVICE MAY NOT BE ADJUSTED CORRECTLY FOR WATER HARDNESS
- ADJUST THE AMOUNT OF STEAM
- ADDING WATER
- INSTRUCTION
- MATERIAL DAMAGE DUE TO CONDENSATION
- RISK OF DAMAGE TO THE DEVICE DUE TO WATER
- DESCALING THE DEVICE
- MATERIALS THAT MAY CAUSE CONDENSATION
- IMPORTANT INSTRUCTIONS FOR USE
- CLEANING THE FLOOR SURFACES
- CONTROL LAMP - OPERATING TIME
- INSERTING THE DESCALING CARTRIDGE
- ADJUSTING THE WATER HARDNESS
- RISK OF INJURY
- JUSILL ALAC 2B
- J
Brand : Kärcher
Model : SC 3 Upright EasyFix
Category : Steam cleaner