
SterilNatural 3in1 - Bottle sterilizer CHICCO - Free user manual and instructions
Find the device manual for free SterilNatural 3in1 CHICCO in PDF.
| Product type | Modular 3-in-1 electric steam sterilizer |
| Brand | CHICCO |
| Model | SterilNatural 3in1 (mod. 06782) |
| Power supply | 220-240 V~ 50/60 Hz, 600 W |
| Maximum capacity | 6 bottles of 330 ml (FULL SIZE configuration) |
| Configurations | FULL SIZE, COMPACT, MICROWAVE |
| COMPACTeco function | Yes, saves time and energy up to 25% |
| Cycle time (FULL SIZE) | Approximately 15 minutes (heating 10 min + sterilization 5 min) |
| Cycle time (COMPACT) | Approximately 9 minutes (heating 4 min + sterilization 5 min) |
| Cycle time (MICROWAVE) | 3 to 5 minutes depending on oven power |
| Sterilization maintained | Approximately 24 hours if lid is closed |
| Recommended descaling | At least once a week with water/white vinegar solution |
| Safety | Automatic shut-off, overheat protection, hot surface and boiling steam |
| Cleaning | Soft cloth; do not immerse the device (FULL SIZE/COMPACT configurations) |
| Compatibility | Chicco bottles and breast pumps; most other brands |
| Spare parts | Chicco accessories, contact consumer service |
| Repairability | Entrust to qualified personnel or Artsana S.p.A. |
Frequently Asked Questions - SterilNatural 3in1 CHICCO
User questions about SterilNatural 3in1 CHICCO
0 question about this device. Answer the ones you know or ask your own.
Ask a new question about this device
Download the instructions for your Bottle sterilizer in PDF format for free! Find your manual SterilNatural 3in1 - CHICCO and take your electronic device back in hand. On this page are published all the documents necessary for the use of your device. SterilNatural 3in1 by CHICCO.
USER MANUAL SterilNatural 3in1 CHICCO
- This product is destined for domestic use only, and must be used in accordance with the user instructions provided. Do not use for purposes other than those indicated (disinfecting feeding bottles, soothers and all breast feeding accessories). Any other use is to be deemed improper and therefore dangerous.
- The appliance is intended for indoor use only; do not leave it exposed to the sun, rain and any other atmospheric conditions.
- This appliance is not intended for use by children. Keep the appliance and the power cord out of the reach of children.
- Make sure that children do not play with the appliance.
- The appliance can be used by persons with reduced physical, sensory or mental capabilities, or with no prior experience or knowledge, provided that they are supervised by a person responsible for their safety or have been instructed on how to safely use the appliance and have understood the risks involved.
- In case the appliance is sold by the original owner or given to third party users, instructions for the safe use of the appliance must be provided to them, and they must have understood the hazards involved, by reading the user manual and in particular the safety warnings contained in it, which should always accompany the appliance.
- Warning: for safety reasons the appliance must always be connected to an electricity system which has efficient earthing connections.
- Only place the appliance on flat, level surfaces which are out of the reach of children.
- Never place the appliance directly on or near hot surfaces, hobs or hotplates, or on to delicate surfaces or surfaces that may be sensitive to humidity and/or heat.
- Never place objects or components directly on to the heating plate.
- Pay attention to the parts marked with the symbol which indicates that they may reach high temperatures during use.
-
When in use, the appliance becomes extremely hot as it produces boiling steam. Always take maximum care not to remove the lid from the appliance and/or to keep the arms and face well away from the steam outlet on the lid as the steam released could cause burns.
-
After completing the sterilising cycle, the water contained in the appliance and the upper surface may be very hot. Always take great care to prevent all risks of burns!
- Warning: wait for at least a few minutes at the end of each sterilising cycle before removing the lid and always do this carefully to prevent boiling steam or drops of extremely hot water from exiting the appliance and causing burns.
- Do not obstruct the steam outlet located on the upper part of the lid.
- Never immerse or wet the plug, appliance or power cable with water or other liquids.
- Do not pull on the power cable or the appliance to unplug the appliance from the mains.
- Check that the power cable is always unplugged from the mains socket and that the appliance is cold before moving it, cleaning it, storing it, doing maintenance work or in between warming cycles if left unattended.
- The cleaning and maintenance to be performed by the user must not be carried out by children and/or people with reduced mental capabilities or those lacking experience or the required knowledge.
These instructions are available on www.chicco.com
- Only place microwave-safe items/components to be disinfected in the appliance. If you have any doubts check with the manufacturer of these items/components whether they are microwave-safe.
- Do not place products containing nylon or metal in the microwave steriliser.
- Do not place the steriliser in traditional ovens.
- When using combination microwave ovens, check that the grill and/or crisp mode function are OFF. Also check that the grill is cold and that the crisp plate is not inserted in the oven.
- When the sterilisation cycle is over, always use suitable utensils for protecting your hands from heat to extract the steriliser from the microwave.
- Warning: wait for at least a few minutes at the end of each sterilising cycle before removing the lid and always do this carefully to prevent boiling steam or drops of extremely hot water from exiting the appliance and causing burns.
WARNING
- Do not leave the appliance, its accessories and any packaging materials (plastic bags, cardboard boxes, etc.) within the reach of children as they are not toys and can be hazardous.
- Before using the appliance, always make sure that neither the product nor its components are worn or damaged. If the appliance is damaged, do not use it and contact a qualified technician or your dealer.
- Immediately after the disinfection cycle, the objects inside the appliance are very hot. Always handle with the maximum care! Allow them to cool down before handling them.
-
Warning! If there is a power blackout while the appliance is working, the disinfection cycle may not have been completed. In this case, the disinfection of the products in the appliance might not be sufficient.
-
To disconnect the appliance from the power supply, always switch it off, moving the main ON/OFF switch to 0 (OFF) and disconnect the plug from the mains socket when the steriliser is not in use.
- Do not attempt to open or repair the appliance. The appliance can only be opened with special tools. The power cable must only be replaced with another identical power cable to the one supplied with the appliance; this operation must only be performed by expert technicians or by Artsana S.p.A.
- Do not place objects which are not suitable for hot disinfection inside the steriliser. Please check that the rated voltage on the steriliser (see indications on the plate under the appliance) corresponds to the mains voltage supply you intend to use.
- Connect the appliance to a mains socket that is easy to access.
- Never use the appliance without inserting the component holder rack first.
- Never use the appliance without water in the heating tank.
To carry out a sterilisation cycle, do not pour any other liquids other than drinking water into the container.
Artsana S.p.A. cannot be held responsible for damage to people and things should items/components non compatible with microwaves or hot sterilisation be placed in the appliance, or when it is connected to the mains supply in a way that does not conform with the legislation in force and/or the instructions provided on the plate present on the appliance or in the instruction manual. - If in doubt about the interpretation of the contents of this instruction manual, please contact your dealer or Artsana S.p.A.
SYMBOLS KEY


= equipment in compliance with the essential requirements laid down in the EC Directives in force.
=WARNING!
= user instructions
= please read the instruction manual
=forindoor use only
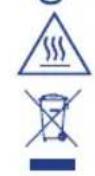
=WARNING! Hot steam
= Warning! Hot surface
= Do not dispose of this product as normal urban waste. Dispos of it according to the separate waste disposal regulations in force in your area
SterilNatural 3in1
Modular electric steam steriliser
Dear customer,
We thank you and congratulate you on your choice. The SteriNatural 3in1 modular electric steam steriliser adapts itself to the items to be disinfected occupying a small space in the kitchen thanks to the 3 configurations available: FULL SIZE, COMPACT and MICROWAVE.
It disinfects safely and securely with pure natural steam and no chemical substances, making it extremely convenient and easy to use.
The 3 configurations are compatible with all Chicco feeding bottles and breast pumps (the parts that can be subjected to hot sterilisation) and most of the other brands of feeding bottles and breast pumps on the market.
The COMPACTeco button (which can only be used in the COMPACT configuration) enables a saving of approximately 25% in time and energy.
By using the MICROWAVE configuration it is possible to disinfect objects more quickly.
Easy to use, it can contain up to six 330ml / 11 oz feeding bottles of all Chicco lines with the relative accessories (cap rings, teats and cups) in the FULL SIZE configuration, and up to two 330ml / 11 oz feeding bottles with the relative accessories for the COMPACT and MICROWAVE configurations.
The number of feeding bottles of brands other than Chicco that can be placed in the appliance may be lower than that indicated here.
Please read these instructions carefully before use and keep them for future reference.
DESCRIPTION (fig.1)
a) Cover
b) Rack unit
c) Motor body
d) Base
e) Heating plate / container
f) Appliance power cord with plug
g) Display and button area
g1) display
q2) cycle START/STOP button*
g3) COMPACTecobutton
h) Main ON/OFF switch
i) Detachable base for microwaves
WARNING: the START/STOP cycle button is not an OFF button. To switch the appliance OFF, simply press the main ON/OFF switch (g).
INSTRUCTIONS FOR USE
SETTING UP THE CONFIGURATIONS OF THE STERILISER
The steriliser can be assembled for use in three different configurations: FULL SIZE, COMPACT and MICROWAVE.
1) FULL SIZE (fig. 2)
For disinfecting up to six 330~ml / 1 oz feeding bottles of all the Chicco lines with the relative accessories.
It is assembled by placing the following components one on top of another in order on the base of the appliance (d): motor unit (c), rack unit (b) and lid (a).
2) COMPACT (fig. 3)
For disinfecting up to two 330ml / 11 oz feeding bottles of all the Chicco lines with the relative accessories or other small objects,
such as soothers.
It is assembled by placing the following components one on top of another in order on the base of the appliance (d): rack unit (b) and lid (a).
3) MICROWAVE (fig. 4)
For disinfecting up to two 330ml / 11 oz feeding bottles of all the Chicco lines with the relative accessories or other small objects, such for example soothers, even faster.
It is assembled by placing the following components one on top of another in order on the detachable base for microwaves (i): rack unit (b) and lid (a).
HOW TO PREPARE AND USE THE APPLIANCE
FULL SIZE and COMPACT configurations-APPLIANCE CONNECTED TO THE MAINS POWER SUPPLY
Always carefully wash and rinse the objects to be disinfected before placing them inside the steriliser.
Disinfecting TEATS:
- To reduce the risk of contaminating the teats with your fingers after sterilising them, it is recommended to fit them on the cap ring before placing them in the rack (b).
- Place the cups above the teats fitted on the cap rings in a slightly sloping position to allow the steam to enter the cups. Disinfecting FEEDING BOTTLES:
- In the FULL SIZE configuration: Place up to six 330 ml/11 oz feeding bottles of all the Chicco lines inside the motor body (c) in a vertical position with the neck facing down and the relative accessories in the rack unit (b).
- In the COMPACT configuration: Place up to two 330ml / 11 oz feeding bottles in a horizontal position, taking care not to obstruct the mouth of the bottle with the accessories so that steam can enter them freely.
WARNING: check that the accessories placed in the rack unit (b) do not prevent the lid from being closed properly (a).
Before you use the appliance for the first time, always perform an empty sterilising cycle with no feeding bottles or other accessories inside.
During the first disinfecting cycles, the appliance could release a slight odour. This is not a sign of malfunction or damage and should be considered absolutely normal.
1) Always place the appliance out of reach of children, on flat, level surfaces that are not sensitive to heat and/or humidity, and close to a mains socket that is easily accessible.
2) Remove the lid (a), rack unit (b) and the motor body (c) (fig. 5).
3) Place water in the heating plate/container (e) up to the water level mark indicated (fig. 6)
- Use in the FULL SIZE configuration: 150 ml
- Use in the COMPACT configuration: 150 ml
NB: The use of distilled water considerably reduces the formation of limescale on the heating plate.
4) Assemble the steriliser in the configuration you require (for assembly instructions please see the section "Setting up the configurations of the steriliser").
5) Place the objects to be disinfected inside the appliance (see the first paragraph of this section).
6) Connect the power cable plug (f) to the mains socket.
7) Move the main ON/OFF switch (h) to I (ON), then operate the display and button group (g) as follows:
TO SELECT AND ACTIVATE THE STERILISATION CYCLE IN THE FULL SIZE CONFIGURATION:
WARNING: NEVER start the sterilisation cycle in COMPACTeco mode when the appliance is being used in the FULL SIZE configuration.
a) Press the cycle START/STOP cycle button (g2). The red pilot
light of the START/STOP button (g2) (button on the left) will light up to indicate that the appliance is heating up and will remain lit for the entire duration of the sterilisation cycle. The steam icon (fig. 7) and the remaining time in minutes (12) will appear on the display (g1) at the end of the cycle.
NB: Heating up the water takes approximately 7 minutes while the sterilisation process takes approximately 5 minutes. b) The end of the sterilisation cycle is marked by an acoustic signal (5 beeps), the red pilot light of the cycle START/STOP cycle button going off (g2) (button on the left), the figures "00" appearing on the display (g1) and the steam icon disappearing from the display (g1). The light on the display (g1) remains lit for around 20 second after the end of the cycle. The display (g1) shows "00" until a button is pressed or the appliance is switched off. Then proceed carrying out the operations as indicated below (points 8; 9; 10).
TO SELECT AND ACTIVATE THE STERILISATION CYCLE IN THE COMPACT CONFIGURATION:
a) Press the COMPACTeco button once (g3) (button on the right) to activate the COMPACTeco mode. The white pilot light of the COMPACTeco button (g3) (button on the right) will light up, indicating that this function has been selected. The "ECO" icon (fig. 8) and the remaining time in minutes (9) will both appear on the display (g1) at the end of the cycle. At this point the configuration has been selected but the appliance is not yet heating up. NB: Heating up the water takes approximately 4 minutes while the sterilisation process takes approximately 5 minutes.
WARNING: by pressing the COMPACTeco button (g3) (button on the right) for the second time, the appliance returns to FULL SIZE mode, with the display (g1) indicating the relative time remaining in minutes (12).
b) Press the cycle START/STOP cycle button (g2) (button on the left) to launch the sterilisation cycle. The red pilot light of the START/STOP button (g2) (button on the left) and the white pilot light of the COMPACTeco button (g3) (button on the right) will light up. The steam icon will appear on the display (g1) indicating that the appliance is heating up in COMPACTeco mode.
b) The end of the sterilisation cycle is marked by an acoustic signal (5 beeps), the red pilot light of the cycle START/STOP button going off (g2) (button on the left), the figures "00" appearing on the display (g1) and the steam icon disappearing from the display (g1). The white pilot light of the COMPACTeco button (g3) (button on the right) will remain lit. The light on the display (g1) remains lit for around 20 second after the end of the cycle. The display (g1) shows "00" until a button is pressed or the appliance is switched off. Then proceed carrying out the operations as indicated below (points 8; 9; 10).
8) Switch the appliance off by moving the main ON/OFF switch (h) to 0 (OFF) and disconnect the power cable plug (f) from the mains socket.
9) Wait a few minutes before removing the disinfected objects from the appliance, again taking maximum care to prevent any boiling steam and drops of extremely hot water from leaking out and causing burns.
Always wash your hands thoroughly before touching the sterilised objects.
10) Before starting a new sterilisation cycle, always wait until the appliance has completely cooled down.
NB: disinfected items will remain sterile inside the steriliser with the lid (a) on for about 24 hours. If the lid (a) is removed during or after use, the disinfection status will be interrupted.
MICROWAVE configurations - APPLIANCE PLACED IN THE MICROWAVE

SAFETYWARNINGS WARNING!
Glass feeding bottles can only be sterilised in microwave ovens when this option is expressly declared in the product specifications. In case of doubt, please contact your dealer or the manufacturer.
- The times and powers indicated in the table STERILISATION TIMES AND POWERS must be strictly adhered to. Applying shorter times and weaker powers does not guarantee an effective sterilisation, while applying longer times and stronger powers could damage the steriliser together with its contents and the microwave oven itself.
The appliance is assembled by placing the following components one on top of another in order on the detachable base for microwaves (i), rack unit (b) and lid (a).
In the MICROWAVE configuration, place the objects to be sterilised inside the appliance as indicated for the COMPACT configuration (please see the first paragraph of the section "How to prepare and use the appliance. FULL SIZE and COMPACT configurations- appliance connected to the mains power supply.
1) Always carefully wash and rinse the objects to be disinfected before placing them inside the steriliser.
2) Pour 80~ml of water into the central part of the detachable base for microwaves (i) (fig. 10).
3) Place the objects to be disinfected inside the appliance (see the first paragraph of this section).
4) Close the steriliser lid (a) and place it in the microwave.
5) Set the power on the microwave following the instructions in the table below.
STERILISATION TIMES AND POWERS
| Minutes Watt |
| 3 1,000 W+ |
| 4 Between 600 W and 1,000 W |
| 5 Between 440 W and 600 W |
6) When the sterilisation cycle is over, always use suitable equipment to protect your hands from heat in extracting the steriliser from the microwave.
7) Wait for at least a few minutes at the end of each sterilising cycle, before removing the lid (a) and always do this carefully to prevent boiling steam or drops of extremely hot water from exiting the appliance and causing burns.
Always wash your hands thoroughly before touching the sterilised objects.
NB: disinfected items will remain sterile inside the steriliser with the lid (a) on for about 24 hours. If the lid (a) is removed during or after use, the disinfection status will be interrupted.
CLEANING AND MAINTENANCE
- Allow the appliance to cool down before handling it.
- Empty out any remaining water (fig. 9) taking care, in the FULL SIZE and COMPACT configurations, not to wet the plug and/or power cable (f).
- Dry the heating plate/container (e) or the detachable base for microwaves (i), motor body (c), rack unit (b) and the lid (a) with a soft cloth.
REMOVING LIMESCALE
When the steriliser is used, it is normal for deposits of limescale to form on the heating plate/container (e) or in the detachable base for microwaves. These can vary in size and intensity according to the hardness of the water used in the appliance. An excessive deposit of limescale could reduce the performance of the appliance and damage it over the long term.
It is therefore recommended that the appliance be descaled at
least once a week, or each time that deposits of limescale are found on the heating plate/container (e) or on the detachable base for microwaves.
- Pour 200ml of a solution composed of equal parts of white wine vinegar and water into the heating plate/container (e) or detachable base for microwaves (i).
- Leave it to work until the limescale has dissolved (approximately one night). Never switch the steriliser on when the container is being soaked in the water-white vinegar solution.
- Empty out the heating plate/container (e) or detachable base for microwaves (f).
- Remove any residue with a soft cloth and rinse several times, pouring 200ml of drinkable tap water into the heating plate/ container (e) or detachable base for microwaves (i) and empty out. Finally, dry the appliance carefully with a soft dry cloth before using it again.

WARNING: do not place the appliance under running water in its FULL SIZE and COMPACT configurations.
PROBLEMS AND SOLUTIONS
| Problem Possible Cause Solution | ||
| The steriliser is noisy. | Excessive limescale deposit on the heating plate/container (e). | Clean the heating plate/container (e) by removing the limescale with white wine vinegar (see the section "Removing limescale"). |
| The steriliser does not switch on. | There is no power. Check that there is power in the mains. | |
| The plug is not connected properly. | Verify that the plug has been connected properly and that it is in good condition. | |
| The main ON/OFF switch (h) is in the 0 (OFF) position. | Move the main ON/OFF switch (h) to 1 (ON). | |
| The feeding bottles are stained at the end of the sterilisation cycle. | Excessive limescale deposit on the heating plate/container (e) or detachable base for microwaves (i). | Clean the heating plate/container (e) by removing the limescale with white wine vinegar (see the section "Removing lime-scale"). |
| The symbol "HT" appears on the display | Not enough water inside the heating plate/container (e). | Place the correct quantity of water inside the heating plate/container (e) and restart the sterilisation cycle (please see the section "how to prepare and use the appliance"). |
| The symbol "FU" appears on the display The thermal fuse is broken | The appliance needs to be repaired. Only contact a qualified technician or Artsana S.p.a. | |
N.B. IMPORTANT: If none of the solutions indicated above solves the problem, please contact Artsana Customer Service.
TECHNICAL FEATURES
Codes 00007391000000
Model: 06782
Power:220-240V\~50/60Hz
Power:600W
Made in China

This product complies with the Directive 2012/19/EU.
The crossed bin symbol on the appliance indicates that the product, at the end of its life, must be disposed of separately from domestic waste, either by taking it to a separate waste disposal site for electric and electronic appliances or by returning it to your dealer when you buy another similar appliance. The user is responsible for taking the appliance to a special waste disposal site at the end of its life. If the disused appliance is collected correctly as separate waste, it can be recycled, treated and disposed of ecologically; this avoids a negative impact on both the environment and health, and contributes towards the recycling of the product's materials. For further information regarding the waste disposal services available, contact your local waste disposal agency or the shop where you bought the appliance.
Please refer to the specific regulations in force in the country of purchase, if any, with regard to the warranty against product defects. The warranty does not cover components subject to normal wear and tear.
Artsana S.p.A. reserves the right to change information described in this manual at any time and without notice.
The reproduction, transmission, copying, as well as the translation into another language, of any part of these instructions, are absolutely forbidden without the previous written authorization by Artsana S.p.A..
DECLARATION OF EC COMPLIANCE:
Artsana S.p.A hereby declares that this Chicco steam steriliser, model number 06782, complies with all the essential requirements and other provisions indicated in the EU Directives 2004/108/EC (electromagnetic compatibility), 2006/95/EC (electrical safety) and 2011/65/EU (RoHS). A full copy of the EC declaration can be requested from Artsana S.p.A. Via S. Catelli 1 - 22070 Grandate (Co) Italy.
AVERTISSEMENTS DE SECURITE AVERTISSEMENT!
DECLARATION CE DE CONFORMITE:
FOR AT VÄLGE OG AKTIVERE STERILISERINGSCYKLUSSEN I KONFIGURATIONEN FULL SIZE:
OBS: Start ALDRIG desinfektenscylkusses i tilstanden COMPACTeco, när apparatet anvendesi konfigurationen FULL SIZE.
BESCHRIJVING (afb.1)
Geproducesd in China

Dit product is conform de Richtlijn 2012/19/EU.
ANOETIPOHESTHIAMOPQHFULSIZE:
IPOSOXH:NOTE MHN EKKIVETE TOV KUKO anooteipomega, COMPACTecO otav n oukeun xpnaiouoitei at onn 1iauoppwon FULL SIZE.
a) Pntto Koumi ENAPEH/AYsH (START/STOP) Kukauo (g2). To Kokkivo aunaki Tou koumiou ENAPEHAYSH (START/ STOP) (g2) (apoteo Koumi) avaBei unodeikuvotac ot u okeun 0epaivetai kalapaevi avaqmu evo stoe pa kaO'oln tn diapkeia Tou kukau anootieipownc. 2tnv oovn (g1) eupaviTai to EIKOVIO atou (EK.7) KA O xpovoc nou atoueve OE Aen (12) EWC TO TEAC tou Kukauo.
JIIEHEHDA HACUNMBOLNTE


=ypcBt CbOTBeTCTBa Ha OCHOBHNTe I3NCKBAHNA pnpnoKIMnTe dIpKeTmBn EO
=BHIMAHHE!
=pbkOB0BCTBO3aynotpe6a
= npoueTeTe pboKOBOCTBOTO, 3a da Ce 3aNo3Haete Cyka3aHnTa 3a yIOTpe6a
=INKIOUHTeHHOaOMaIHHONoI3BaHe
=BHIMAMHNE!Fopea napa
=BHIMMaHHe!FopeaiaNoBbpxHOCT
=He n3xBpIaTe To3n npOyKT KATO 6bIKHOBEN 6HToB OTnAdbK. ToT p8Ba Na ce cb6npa pa3dEnHo, KaKTO ce u3NcKBa B neCTBaunite 3akOH
SterilNatural 3 B 1
Modylen elektpnie-cken napen stepnil3a-Top
YBaKaEMKNNHeHTN,
no3npabBnme Bn 3a Baunu n36op n Bn 6naoradpnm 3a nokykata. MoynnnrT enektpueckn ctepnnsatop SterilNatural 3B 1 ce HaraKa KbM npEeMeTne, KOTo TpaBa da ce ctepnnNpuat, KaTo 3aema Manko Macto B KyxHATA 6naorapeHne Ha Tpnte Bepcuu FULL SIZE, COMPACT n MICROWAVE.
Ie3HnΦekuipa 6bP30 n 6e3oNaCHO C uHCTa HATypaHa napa 6e3 HIKaKBn XIMUeCKN BCsCCTBa, KaTO yNOTpc6aTa My c N3KIOuHTenHO necha.
Tpnte BepCN Ca CbBmCTMn C BCuKu N IuWeta n NOMn 3a KbpMa (uaTne 3a ropeaa ctepnnnaucn) Ha Chicco n Ha no-roJaMa Ta qact OT uWetata n NOMnTe 3a KbpMa Ha npyTne MapKn, npednaraHn B TbproBCKata Mpeka.
Bytoh COMPACTeco (da ce n3non3ba cmo npn Bepcnr COMPACT) no3B0nraBa NKOHOMn do 25% Ha Bpeme n eHepn. Ocben ToBa, KaTo ce n3non3Ba Bepcnr MICROWAVE, e BB3MOxHo da ce cTepuun3npa oJe no-6bp30.
Jlecen 3a ynoptpe6a, Moke da noopepe do MaKcMym6 uuWeta 330 ml/11 oz ot BCNUCepn Ha Chicco cbc cbOTBeHTne npHauNexKHOCTN (npbCTehn, BuBepoHN uauKN) npn BepCnA TAPULL SIZE,do MaKcMym2 uuWeta 330 ml/11 oz cbc cbOTBeHTnTe npHaHaeXHoCTN 3a BepCnA COMPACT n MICROWAVE.
BpoT Ha ⅢuWcTaTa OT MapKn, pa3nUHr OT Chicco, KOnTO MoKTe Da NObepete BypeJa, MoKe Ja e NO-MaJIbK OT NOCOueHnB HAcTOrIcTO pBkOBODCTBO.
Ipeynynotpe6aBHMMATEHNO npooyete yTbTBaHETO r03ana-3e 3a 6bdeu cnpaBKn.
ONNCAHNE (fnr.1)
a) Kanak
b) Kacertka
c) LcHTpaHa qact
d)OchobaHa ypeia
e) HarpeBaTeHa nlaactHa / BaHnuKa
f)3axpaHbaaKa6enCwencen
g)DcnnneHa6yToHnTe
g1)dncnn
q2) 6ytoh START/STOP Ha LkKbIa*
3A DA N3BEPETE U 3ADENCTBATE LUKbJI 3A CTEPNJIN-3MPAHE PNP BEPCN FULI SIZE:
BHIMAHHE: HIKOTA HE cIapTnpaIe zKbIa de3Hn- fekzra B pekm COMPACTecO, koraTo ypeBt ce n3- non3Ba Bbb Bepcn Full SIZE.
a)HaTnCHete 6yToH START/STOP uKbI (g2).HepBHeHrCTeTINHe HnHnKATOp Ha 6yToH START/STOP (g2) (nB 6yToH) CBETBa,3a Da yKaKe,Ye UpeBt 3arPBA nCBEt NocToHn Ipe3 ueNn Kbl Ha deEHHFekuPaHe. Ha dncnle (g1) ce noRaBa NKoHaTa Ha npapa (fur.7) nOCTaBaUto BpcMe (12) do kpaHa uKnbla B MmHyTN.
3A6E1EKKA: 3aqrbaHeTo oThema OKONO 7 MNHyTN,OKaTO 3a de3nHfekuTara Ce Heo6xOIMN OKONO 5 MNHyTN. b) KpaTHa uKbIa 3a De3nHfekuTc Ce CnHann3npa OT 3BykOB CnHAI (5 nTbN),OT N3KnIOVAHETo HA CepBEHN BcETNIHEH INDnKATOP Ha 6yToH START/STOP LKbIg (g2) (N8B 6yToH),OT yKa3aHneto Ha DnCnIe (g1) "00" n OT N3Ne3BaHcTo OT DnCnIe (g1) HnKoHaTa 3a npa.CBeTIHaTa Ha DnCnIe (g1) CBeTI 3a OKONO 20 cekyHn CnE KpRa Ha UKbIa. DnCnIe (g1) NokaBa "00" do HAITCKaHcTo Ha 6yToH NIN N3KnIOVAHETo Ha ypeA. CnE TOBA npOdbJIkeTe, Kato N3BbPunTE onepaUNITE, KaKTo e NocOeHo no-dony (toqkn 8;9;10).
3A DA N3BEPETE U 3ADENCTBATE LUKbJI 3A CTEPNJIN-3MPAHE INPBEPCM COMPACT:
a)HaTnCHcTe BCnHbK 6yToH COMPACTeCo (g3) (DcChn8 6yToH), 3a da 3aJeIcTBatepeXIM COMPACTeCO. BJIATA cBETnHa Ha 6yToH COMPACTeCo (g3) (DeChn8 6yToH) CBETBa, KATO yKa3Ba, Ye Ta3n FyHKUIN e N3bpaHa. EJHOBPemEHIO C TOBA HA DcCnnEi (g1) Ce NOBBA INKOA "ECO" (ΦmR, 8) N OCTabaUOTO BPeme Do KpAHa ZIKbNA B MmHYtn (9). PnTOBa NOnoXeHne BepCnTa e N3bpaHa, HO ypebl Oue He 3aIprBa.
3A6E1EKKA: 3aRpaBaHTo OTHema OKONO 4 MNHyTN, DOKATO 3a De3nHfekUHTa Ca Heo6xOJMMN OKOJO 5 MNHyTN.
BHIMAHHE: kato HataChete BToPiBt 6ytoh COMPACTecO (g3) (deChnH 6yTOH), ypeIbT ce BpBua B peKIM FULL SIZE, c dncnnnei (g1), KOITo yka3Ba cbOTBeTHO TO OCTaBAUo BPeme B MmHyTN (12).
b)HaTnCHete 6yToH START/STOP nKbl (g2)(naB 6yToH),3a da ce CTaptnpa nKkblt 3a de3nHfeku, YepBeHNrCTeTTnHEH INI KAtop Ha 6yToH START/STOP (g2)(naB 6yToH) n 6eJIITCBEIINHe HnIKATOp Ha 6yToH COMPACTeco (g3)(deChnrt 6yToH) CBETBa. Ha nCIIe (g1) ce noHBBA uKoHATA 3a npa, Koeto yKa3Ba,YepeBt 3aqrPb B pexm COMPACTeco.
c) KpaT Ha ZnKbIa 3a DezHfekuIe Ce CnHann3npa OT 3ByKOB CnHAN (5 nbTn), OT n3KnIOVAHeTo Ha cepBeHH CBeTIINHEHnDnKAtoP Ho 6yTOH START/STOP ZnKbl (g2) (naB 6yTOH), OT yKa3AHnE To HA ducnnne (g1) "00" n OT n3ue3BaHeTo OT nCnIe (g1) Ha NKoHATA 3a npapa. BeHH TCBtNIHn HnKATop Ho 6yTOH COMPACTco (g3) (deChnT 6yTOH) npOdbNkaba Da CBETn. CBeTIINHATA Ha nCnIe (g1) CBTe 3a OKONO 20 cekHyn CleJ KpaHa zKbIa. DnCnIe (g1) noka3Ba "00" do HnatckAneto Ha 6yTOH nN n3KnIOVAHeTo Ha ypeA. CnED TOBA npOdbNkTe, KaTO NABbpWnte OIepaunnte, KaKTo e NOCOeHO NO-DOJIY (TOCKN8;9;10).
8)ИЗкючeteуpeda,kaTo IOCTaBte TnaBHHI INpeBknIOuBaTeON/OFF (h)Ha 0(OFF),иИЗbaTe IeIcena Ha 3axpaHbuaNka6en(f)OT KOHTaTa.
9)ИЗчakайтейнгклковMHуTN,прдДаИЗВадиTeДзИнфКИpaHITe ПрdmETN, KaTO BnHaR MHOTo BnMabATE 3a RopeцTa npa N KaKn Iopseua BODa, KOnTO MoKe Дд рпнHHATИЗgarHIN.
BnMaTeHNO N3MnIe pbueTe cn, npeDn da DOKOCBaTe De3NH-ΦCKUpaHNTnpdmetn.
10)Ppei Da n3Bbpinte HOB LKbI IIO De3HfKeLNA BnHaN 34aKaBbTe ypeBdT Da Ce OXnaHn HnBnHO.
3A5EENKKA:de3nHfekuHTaCe 3aNa3Ba 3a OKo 24 Haca BbB BtpeHHocTHa CtePmN3aTopa, Ako KaNAkBT (a) He Ce OTbAp. Ako KaNAkbT (a) 6bJe OTbOpEn No Bpeme Nn CneI yNotpe6a, NOdIbpxKaHTo Ha de3nHfekuHTa Ce HapyJaaBa.
BepcnmicOWAVE-YPEI,IOCTABEHBMIKPOBJIHOBA
PENEYIPEXDEHIN3ABE3ONACHOCT BHIMAHME!
-CTbKHeHHTe HWeTa MOrat Da Ce CTePNIN3Npuat B MIKpObHIOBa FpyHa, cAmO aKO e N3PnHO NOCOeHO B INCTpyKUInTe. PnCbMHeHHI npenOpBvAme Da ce CBpXeTe C nCTpn6yTopa IIN C PON3BODHTeN.
-CTPINKTHO cna3BaIte npoDbJXKNTeHOCCTT a MOnuHocCTTA, NOcoueHN Ha Tabenkata PNOBbIXKNTENHOCT N MOUHOCT HADE3UNFHEKUPAHE. No-MaIKaTa npoDbJXKNTeHOCCTN MoUHOCTMOKE Da He rapaHTnpaTeefKTINBA Hde3nHfekun, DOKATO NOdbIgra npoDbJXKNTeHOCCTN NO-RoJIemM MoUHOCTN 6xHa MOrnJa yBpeIAT CTEpININ3aTopa CbC CbDbpKaHHETO My I CaMaT a FyPha.
YpeBt ce crNo6Ba, KaTo Bbpxy NOpBnKHaTa OCHOBa 3a MKNpoBbHOBa cyPha (i) Ce NoCTabT NocJeOBaTeHNO KAcETKaTa (b) INaKaBt (a).
BbB BepcnaT MRCOWAVE noctabete npeMnte, KaKTo e nokaH0 3a BepcnaT COMPACT (BnK NpBn HaparpaHa pa3en "Nodomobka u Haun Ha ynompe6a Ha ype6a. Yped, cBbP3an KbM enekmuueckama MPexa - Bepcuu FULL SIZE u COMPACT").
1)Ppei Da nocTaBnTe PpeMeTnTe 3a De3nHΦeKuPaHe BCTepnI3atopA, Te BNHaT Tp8Ba Da ca BnMaTeJHO N3MTN IN3JIaKHATN.
2) Haneite 80 ml Boda B cHTpaHATA qCT Ha noBnKaHATA OHOBA 3a MKNPOBbHOBa fpyHa (i) (fVr.10).
3) NocTaBeTe BbTpE npCmTHe, KOTo Ue Ce De3HfckUpaT (BnX nbPBnna naparpaHa To3n pa3den).
4) 3aTbOpTe CtePunImaTopa Cbc CbOTBeTHnKanak (a) nTo NoCTaBETe B MKNPOBbHOBbATA fypHa.
5) Hactpoite MoUHocCTHa MmKpOBoHOBaTa cypHa cnopepeKIMITE, npenopbuaHH Ta6nucataNo-dony.
PPOJbJIJKNTELHOCT MOUHOCT HA DE3HNOEQUPAHE
| Mнуну Мошноct (W) |
| 3 1000 W+ |
| 4 Мени 600 W n 1000 W |
| 5 Мени 440 W n 600 W |
6) 3a da n3BaJNTe CTepnIN3aTOpA OT MKNpOBbNHOBata fypHa cIePnKJIyBaHe Ha ZIKbNa, BINHAr N3NON3BaIte NOxOJa3aunTHn CpeCTBa 3a pBuTe.
7) BHIMAHHe, 33aKaIte IIOHe HIKO KINHYT, INpei Da Max-Hete KaNaka (a) B KpaH NaKbJa, IN BHHaN N3BbPbBaTe BHMATENo TAn Oepaun, 3a Da HAMnTE pNCKa OT CnyauHo N3nn3aHe Ha Roepa napa nn KaKNr Opeua BODa, KOITOMorat da PnuyHNr M3raqHn.
BHNMaTeHNO 3MNITpe pUeTe CN, npEa Da DOKOCBaTe De3nH
3A6E1EKKA:de3nHfekuHTa ce 3ana3Ba 3a OKono 24 haca BbB. BtpeHHocTHa CTepnIM3atop, Ako KaNAkBT (a) He ce OTbapr. Ako KaNAkBT (a) 6bJe OTbOpEH NO Bpeme NIN CnED yNtpe6a, NoDbpxKaHTo Ha de3nHfekuHTa ce HApUba.
IOYNCBAHEI NOIDPbXKA
1.OctabeTe ypeDa da ce oxnaDi, npdei Da n3BbPunTe KaKBaTo n da e onepaun.
2.ИЗнелге ebentуална отая boda (Фг.9),КATO npn Bep
CnFULSIZEu COMPACTBnHmabate Da He MOKpTe uencea n/nn3axpaHbuaaKa6en(f).
3.Понсушete HarpeBaTeHnHaTа nactHnHa/BAHnUka (e) UeHTpanHata YacT (c), KaceTkata (b) nKanaka (a) c MeKa KbPna.
YbKaMaemblnNOKyNaTeNb,
6naorapnBac nno3dpabnaem co cdehaHbIM Bb6opom. NaPoboB 3neKtpueckm moynbHb Ctepunu3atop SterilNatural 3B1 npedymotpeH dnn de3nHfeknnpedmetOB,3aHmam HEMHO MeCTa Ha KxHHe, 6naorapA 3 KOhpypaumFULL SIZE, COMPACT MICROWAVE.
Ie3HnHnHpyET NcTbIM HAtypaHbHbIM NapOM,6e3NcNoJb3OBAHnY XmMnuecknx BceCTB 6bICTpbIM HaedxHbIM CnOCo6om, npnMaKcImaJIbHOM ydoCTBe pnpncOJIb3OBAHm.
3 KOHfUpyaunu COBmecTnMbI CO BcEMN 6bytIOuKaMn u CzexnBaTeJAMM MOnoKA (uaCTN, npedHa3NaueHHbIe IyraopaeI CTepnnnaa) npoun3BODCTBa Chicco n c 6onbWe yactbIO 6bytIOLOeK N CuexnBaTeNei MoNOKA DpyrNX IMeIOxxCB I npOdaKe Mapok.
KhoNka COMPACTeco (ucnoIb3yEmaT onIbKO b KOHpypaunn COMPACT) no3B0JAE T cKOHOMITb np6IIN3NTeNbHO 25% BpeMeHN nJIeKTPo3HePrrn.
PnncnoB3oBAHnn KOHpypaUNMICROWAVE,neHHpeKUINMOXETnpOcXoDHTb60nee6bCTpbIM CNOOC6OM.
IpocToB pnpmeHnM,MOKET BMeaTb MaKc.6 6yTBIOueK 330 m/11 yHcN BCex HnH Chicco C COOTBeCTByOuMMn AkceCyapAMn (KoNbca,Cockn CTakaHnuKn) B KOHpypaunFULL
SIZE, MaKc. 26yTbIIOUckn 330 mN/11 yHcN C COOTBeCTBHyOuIMM aKeceCyapAMn DnB BepCm COMPACT n MICROWAVE.
Hcno 6yTbIooek nprynx Mapok, He npOn3BODCTBa Chicco, KOTopble MOxHO pa3MeCTNTb B annapaT, MoXeT 6bITb MeHbWe yKa-3aHHOrO B HAcToAeM pyKOBOCTBe.
Ipeep nCnoB3oBAHnEM BHNMaTeNbHO npOHTne HactoUIO INCTpyKUIO Mepbl npEOCTOpOXHOCHTN COxpaHNTe e nn NOcNeDyUOxKOHcybTaun.
ONNCAHME (pnc.1)
a) Kpbliuka
b)Kop3nHa
c) LHeTpalbHbI KOpnyc
d) OchOBaHne annapaTa
e) HarpeBaTeBbHaN NOBepxHocTb/6aQOK
f) WHyp nItaHnC BvIkoN
g) rpynnn da nncnner c KhoNNKaMn
q1)Диспел.
q2) KhoNka START/STOP uKla*
q3) KONKa COMPACTeco
h)IaBHyBbIKIOuTeNbON/OFF
i) BbHMaemoe oCHOBaHne dIa MmKpOBONHOBNeu

BHHIMAHHE: KhoNka START/STOP uKna He bInonHa- et fynkui BBkiuohn. BkiuohaTe cTepnImaTOp C nmoosbIg IaBHoro Bkiuohatena ON/OFF (h).
MHCTPYKUINIIONCIOJIb3OBAHNIIO
CBOPKA KOHΦIγPAUIM CTEPNJIN3ATOPA
IpeycmTopeHbI trpna3nHbIe KOhpyaunncnoJb3oBaHnra Ctepnn3atopa:FULL SIZE,COMPACTuMICROWAVE.
1)FULL SIZE(pnc.2)
Длддзнфскгш МКС.66уьноч330m/11унчВсexин Chicco c coOTbetCTByuOMn Akceccyapamn.
C6opka npoun3BOUITc nyTEm pa3MeIeEHn B NocIeIOBaTeJIbHOCTn Ha OCHOBaHHe annapata (d): IeHTpaJIbHOrO Kopnyca (c), KOp3INHb (b) n KpbIuKn (a).
2) COMPACT (pnc. 3)
Длд ДзИнфкгм МКС. 2 6уТьIOUeK 330 MЛ/11 yHцN BCex ЛИнн ChICCO COOTBETCTBYIQUIMM AkCECCyApAMN IIN dpyrnx МELKNX П徳metOB, HanpIMeP COcOK.
C6OpKa npOn3BODNTcR NyTeM pa3MeueHn B NOcNeOBAteNBHOCTN Ha OCHOBAHne annapata (d): KpOHHb (b) N KpbIuKN (a).
3) MICROWAVE (pnc.4)
Длддзнф ekm MAcK.2 6byIIOueK 330 m/11 yHcN BCex JINHn Chicco C COOTBETCTBYUOMM Akceccyapam NIN dpynx MeJIKx npedmetOB, HApumep cocok.
C6opka npou3BOJNTcra, pa3Meuaa B NocJeOBaTeIbHOCtHa BbHIMaemoe OCHOBaHne IIN MKNpOBoIHOBON neyn (i):KOp3nHb (b) n KpbIkw (a).
IIOIROTOBKA INCIOJIb3OBAHNE ANIAPATA
KoHpyaUN FULL SIZE u COMPACT - ANIAPAT NOJ-KIOUHEK K 3NEKTPOCETU
IpepaHbHbHbHbHbHbHbHbHbHbHbHbHbHbHbHbHbHbHbHbHbHbHbHbHbHbHbHbHbHbHbHbHbHbHbHbHbHbHbHbHbHbHbHbHbHbHbHbHbHbH
Дзнфскгс COCOK:
- PekomeHnyeTcMOHTnPOBaTb COCKN Ha KONbca NepeJ IN NIO3IIOHOHPoBAHmE B KOp3INy (b) B UeJnx CHNKeHnpynCKa 3aqrpa-HeHHn IocJe De3INHfKeJIu.
-ПОЗИЦИМОНРОВАТСТAKHAнКИННадСССКAMN,MOHTINPOBAHнblIM HA KOLbIaX, B CJIERKa HAKIOHEHHOM NIOJOKEHn, TAKIM O6pa3OM, YTO6bI Nap MOr BOITN B CTAKAHNK
De3nHΦeKUa ByTbIOUeK:
-B konhunpyaun Full SIZE: Pa3mecntte MaKc. 6 6ytbnoeK 330 m/11 yuui BCex nnH Chicco BOBHytp ceHTpaIbHoro Kopnyca (c) B BEpTnKaJIbHOe noIOXeHne, c rOpNlWiKOM, o6paueHNbIM BHn3, n COOTBeCTBvIOUne aKCECCyApbl, paCNOIOXeHHbIe B KOP3HHe (b).
-B KOHfNpyaunu COMPACT: Pa3MeCTnTE MaKc. 2 6yTbIIOUKN 330 M/11 yHnB B Trop3OHTaNbHoe nONoXeHne, co6KnJa oCTOpOxHOCTb, yTObI He 3aKpbBaTb akCECCyapamn OTBepCTNe 6yTbIOUKN, TaKIM Opa3OM, yTObI CoEInCTBOBaT npoxOKeHNIO npa.

BHIMAHHE!npoepbTe,TO akceccyapbB KOp3nHe (b) He MewaIOT COOTBeTCTByIOUeMy 3aKpblTIO KpbIuKN (a).
IINNEPBOI NCIOB3OBAHIN PEKOMEHyCTC8O C7BHTBCN KIN CTEPIN3aUN, He pa3MeaJ aKaKne-Jn6o npeIMtBI BHYTPn annapata.
Bo BpMa nepBbix uKKnOB pa60Tb N3 annapata MoKeT DOHOcITcR JERKNI 3aIax, KOToPbH He yKa3bIbaET Ha HEnoJaKN, a ABHHeTC HOMaJIbHbIM RIBHeHM.
1) PacnonaraiTe annapat B HeDocTynHbix DnA DeTeN MecTax, TOnbKO Ha POBbIX N yCTOuYHBIX NOBcPxHOCTX, CTOnKHX K TeNny N/NN Bnare, pRdOM C 3NeKTPuecko Po3eTKo, DocTyHNOJ DnRA B3pocLoro YenOBeka.
2) CHIMNE KpbuKy (a), KOp3Hb (b) n UeHTpaBbHbK Kopnyc (c) (pnc.5).
3)3aeneTe Body B HArpeBaTeIbHyIO NobepxHocTb/6aQok (e)do DOCTNKeHn COOTBeTcTByIOueHaceuKn ypOBHn (PNC.6)
- IcnoIb3OBAHne KOHpypaunn FULL SIZE: 150 mn
- IcnoIb3ObaHne KOhpyaunu COMPACT:150 m
PIMMEUAHHE:Mcnonb3OBaHHe DnCTnIINpOBAHHO BObl 3Ha- uHTeBHo CHXKaET O6pa3OBaHHe HAKIN Ha HarpeBaTeBHO NOBepxHocTn.
4)ПОНЗBEДTE c60рку CTepuIN3aTopa BЖeJeaEMO KOnФИpypaUNI (ДЯ COOTBETCTByIOUeN c60pKN CM.pa3dJI "C60pKa KOnΦeUpyauu cmepuunuzamopa").
5) PacnonoxnTe npedMeTb, noDnHexaunne Ctepnnn3auu, BHTpN (cmnpBbni naparpaaf daHHoro pa3ena).
6) BCTaBbTe BnIky shHpy nITaHn (f) B 3JIeKtpuueckyUo po3ETky.
7)YCTAHOBITe rnaBHy BbIKIOUaTeNb ON/OFF (h)B noIoxKeHne
I (ON), 3aTeM HauMMte rpynny dncnner c KhoNkAMn (g) cneDyo- mO6pa3oM:
ДЛВБОРАИ AKТИВALUIM LUKKIA CTEРЛIM3ALUN B KOHФИΥPALUIM FULL SIZE:
BHMMAHNEI: HIKOgA He 3aynckaiTe uKJI De3nHfekuIN COMPACTeco npa6ote yctpoiCTBa B KOhpypaunu FULL SIZE.
a) Haxmnte KhoNky START/STOP kUkna (g2).Kpachn iHnkaTOp KhoNk START/STOP (g2) (neba KhoNka) 3aropaetc dny yKa3aHHnHarpeBa annapata n octaTeCBAKnOueHHbIM Ha npotXeHNB CBOE uKNa DCnHcckuHa DCnnee (g1) NOBnAETcN KhoNka npapa (pnc.7) n octabweec Bpem B MInHyTax (12) do 3abepeHnuaKna
IIPIMEHAHNE:ДЯ HarpeBa Tpe6yIOrCa npu6n3nteBHO 7 MmHyT, BTO BpemKaK DnA De3nHfekUIn Tpe6yIOrCA npu6n3nteBHO5MmHyTbI.
6) 3aBepueHne uKna de3nHfekuun CnRHaN3npyetc 3BykoBbIM CnRHaNOM (5 3ymmcphbix CnRHaNOB), BbIKUoyehnem KpaCHOto INdkaTopa KhoNk n START/STOP uKna (g2) (neBaan KhoNka), HINikauue Ha nucnnee (g1) "00" nncye3HObeHHnem Ha nucnnee (g1) NKoHKn npapa. lamnoouka dncnner (g1) octaetc BknoueHHOB TeueHne npnbni3ntelhNO 20 cekHy nocne 3aBepueHnra kKna. Ha nucnnee (g1) oTo6pakaetc "00" do HaxKaTH N KOHN II BbIKUoyehn aannapata. 3aTe m BblonHnte npnbedeHHbIe da-nee onepaun (n.8;9;10).
ДЛВыБОРАИ AKТУВALUМЦКЛА CTEРПЛМ3ALUNB KOHФИΥРALUM FULL COMPACT:
a) Haxmte OIN pa3 KhoNkY COMPACTeco (g3) (npabar KhoNka) dna akTbaCnpupeKIMa COMPACTeco. BeIbI INHdkKatop KhoKNi COMPACTeco (g3) (npabar KhoNka) 3aropaetc, yka3bBaBra Ha Bb6pOyHKuN. OJHOBPemEHHO Ha DnCnIee (g1) nOBJIaETcR IKOHKa "ECO" (Pnc.8) n OCTaBWeecr Bpema B MInHyTax (9) Do 3abepeHHe NcKnA. TaKIM o6pa3om, KOHfNpyaunr Ba6paHa, Ho annapaTe He HArpeBaETcR.
PIMMEAHHE: HArpeBa Tpe6yIOCT npn6nnteHbHO 4 MNHyT, BTOBpMa KaK DnA De3nHfekuN Tpe6yIOCT npn6n3t-TeHbHO5MNHTbl.
BHIMAHHE!:Hakimam BTOPO pa3 KhoNky COMPACTeco (g3) (npabar KhoNka),annapat Bo3Bpaa aetcB peKIM FULL SIZE, npn 30m Ha DCINee (g1) yka3bibaetc COOTBETCTBYIOOe OCTABIeec BpEMB MHyTax (12).
6) Haxmte KhoNky START/STOP LKna (g2) (neBaA KHONka) nIaYcKa LKna Ie3HfKeuMn. KpaChb nnHdkatop KhoNk START/STOP (g2) (neBaA KHONka) n 6BeBn Hdkatop COMPACTecO (g3) (npabA KhoNka) 3aropaIoTcR. Ha dncnnee (g1) noBnEeTcR IKoNka npa, yKa3bIbAOuHa HA To, YTO annapaHarpeBaetc B peXime COMPACTECO.
B) 3aBepueHHe NkJIa De3nHfekCn CnHaN3npyetc 3BykoBbIM CnHAIOM (5 3ymmephBx CNHAIIOB), BbKIOUeHEm KpaCHOro INnKaIopAp KHONK NsTART/STOP Lnkla (g2) (JeBaA KHONka), INnKaIauE Ha nucnne (g1) "00" nncyeHObeHEm Ha nucnne (g1) NKoHKn npap. beBn HnDkaTOp KHONK COMPACTecO (g3) (npabra KNOKKa) octaeTcB KIIuOeHHbM, JAMNoUka DnCnne (g1) OCTaeTc BKNUeHHoB TteHene Pp6bn3ntelbHo 20 ceKHy nocne 3aBepueHnur cNkna. Ha nucnnee (g1) oTo6paKaTeCn "00" Do Haxatn KhoNN KIN BbKIOUeHnA annapata. 3aTeM BblnnHtpe npBBeEHbE daane Oepaun (n.8;9;10).
8) BbKnIOuHTe annapaT, nepeBOg rIaBHyb BbIKIOuATenb ON/OFF (h) B noLoXeHne 0 (OFF) n BbIHMaB BNky uHypa NtAHH (f) n3 po3ETKn Toka.
9)NoDOKNITHeCKOJIbKO MmHyT Do N3BNeHEnIe3nHnUnpoBaHHbIX npEIMTeO, BcERda Co6IOJaOCTOpOXHOCTb BOTHouEHN BbXOJa rOpAChro napa I KanCJIb rOpACh BObl, KOToPbIC MOYrBb3BaTb OXKOrn.
XopoOo BBMOIte pyKn NpeD TeM, KaK KacaTbcr npOe3HOnuPPOBaHHbIX npeDMETOB.
10)peepBbIIOJIHeHEmHOBOrO LKJIaDe3NHOeKcUN,BCERda ndojnte noHOro OxJaxKeHn annapata.
PIMMEAHHE:Je3nHfekuBnHytpn CteepnIaToppaNoIepKJbAeTc np6bnnteBHO 24 yacob,ecn KpbuKa (a) He cHMaETc.Ecn CHrB KpbuKy (a) Bo BPema paBoTI annapata nnCp3y No OKOHnE e, xpaHeHne 6BytIOueK n AkceccyapOB Bnpde3nHfNpOBaHHOM BHe He rapaHTnpyETc.
KoHpypaMIMICROWAVE-APNAPATPA3MEUeHBMNKPOBOJHOBOIIEH
MEPbI IPEIOCTOPOXHOCTN BHIMAHINE!
CTekHbIe 6TyblIOoKMOXHO CTepnINIOBaT B MKNPOBOJHOBbIX Neayx ToJIbKO, eON ITO ppeyCMOTpeHO IN HNCTpyKUHMN. B Cnyae comHeHH, obaaainTecb K dIlepey mN IN N3rOToBNTeIO.
-TtataTeBHO npIepKuBaIteb yka3AHn BpeMeH N MOUHOCTN TabIuCbl BPEMr N MOUHOCTb DE3NHFOEKLIM. MeHbIeepBpMa N MOUHOCTb MOrTy He rapaHTnpoBaTb 000eKTHBHyIO De3NHfekLIO, B TO BpMa KAK BoJIbWee BpMa N MOUHOCTb MOrTy PpINBeCTN K NObpexJeHIO CTepNIJ3aTopa C ero CoepXIMbIMn CaMOI NeH.
C60pKa IPOU3BOOHTCRIyTEM pa3MeueHnB NOCIEIOBAteIbHOCTNa BbIHMaEmyO OCHOBy dIra MKNpOBIoHOBOIneu (i),KOp3HHb(b)N KpbIuKN(a).
B KOHfhypauMN MICROWAVE pa3meCTnre npedMeTb B COOTBeCTBm C yka3aHnMn Iy KoHfhypaunu COMPACT (cm.nepbbn naparpaP paDena "IpoeomoeKa u uonnb3oBaHue annapama. Annapam noocoeuHekmpocemu -KoHf2ypauuu FULL SIZE u COMPACT").
1) NpepaMeHemBHytpn CtePmN3atopa, npEmTb, noNekauue ne3HHo, noXkbI BcerTa TtateHoMbTbCn ononackBaTbC.
2)3aneIte 80 Mn BOBb B UeHTpaJIbHyU cAChT bBIHNMaEMOIOHOBOblnnMkPOBOJHOBOI neH (i)(pnc.10).
3) PacnoonoxnTe npedMeTb, noDnEkaune cTeepnnaaun, BHyTPn (cm.nepBbni naparpaq daHHoro pa3de).
4)3akpoTe cTeepmN3atop CneLuaJIbHOH KpbIkoJ (a) npaMeCTNTe ERO B MUKPOBOJHOBYIO ney.
5)3aAInTe MOUHOCbMbMKPOBONHOOJIneu B COOTBCCTBUN CpeXMMnN 13 pINBcDEHHOHNKKe Ta6nCbl.
BPEM N MOUHOCTb DE3HHEKLIIN
TEXHUNECKNEXAPAKTEPNCTNKN
ApTnKyI 00007391000000
MoeBb:06782
TnTaHne:220-240B\~50/60T
MoHocb:600Batt
CenahOBKntae

DahHoe n3dennne cooTBeTcTByET dupeKtMBe 2012/19/EU.
PnBBeHbHa np6ope CmBON nepeepKHyTo KOp3Nb 0603NaAeT,TO B KOHcCpKa CnykbBt OTo n3dene, KOTopoe cIeNyET CdaBaTB BYTNb OTdEnbHO OTDMaunHX OTxOOB, He- 06XoIMMo CdaTB BYNHKT C6opa BTOPcbpbJrnnpepeabotKn 3NeKtpueckoN n3NeKtpoHHo annapatypbl, nn CdaT npoDaBBy Pn NOKynke HOBOB kKBnBaNEHTHO annapatypbl. NolzOBaTeBHeCet OTBETCTBEHHocTb 3a CDAy pnp6pa B KOHcEero Cpoka CnykbBcB CnEuaNbHbE opraHN3aunC6opa.HaIIeKauHsCBTOBcBpBcBcNocJeUoae Cdaey CTaporo np6oPa Ha NOBTOPHoe NCNoJIb3OBAHne, nepepaOTky UytIN3aUIO 6e3 HAHeceHnue yUep6a Okpykaioe cpeDe NOMaer eCHNTb OTPuCaTeBHeO Bo3DcTBE Na Hee Hn Ha 3DopobBe IIOJe, a TAKKE CnOCObCTByET NoBTOPHOMy NCNoJIb3OBAHIO MaTePnaIIOB, n3 KOTopBX COCTOnI n3dene. Boone NDpOBoHE CBeDEHnO bMMeUuxCh CnOCoax C6opa Bb MoKeTe NOnyUHb o6paNBuWcB MeCTHyO CnykbBy BbIBOa 0TxOIOB INJKe B Mara3HH De BkYnnn n3dene.
Ira papaHTn B OTHoWeHn DeeKTOB H3dEINr, CMOTpTe CneUHkauHn HaUNOHbHbIX HOPMaTNBOB, INPmEHMeBIE BCTPaHe npno6peHn, rKe OH npeyCMToPeHbIpaHTn He paCNPocTpaHReTcHa H3HaUNBaEMble KOMNoHEtbl.
Artsana S.p.A. coxpaHЯET 3a co6oI npabo B nIO6oI MOMENT I Be3 npedynpeKdCHN H3MeHHTb TEKT HAcTOrAe NHCtpyKuIN NO EKCLNYATAUIN.
Kateropnueckn 3anpeeHNO BocnpoN3BedeHne, pacnpoctpaHHe, nepeneuataBHaHne, a TaKKe nepeBOD, B Tom uNCle qactHb, Na npyroJnBk HactoJeHnCTpyKm, 6e3 npedBapTeNbHorO nncbMeHHoro pa3peeHnco cToPOhArtsana S.p.A.
DEKJIAPAQUA COOTBETCTBNA EC:
Hactoam Artsana S.p.A 3aBnAeT O Tom, yTo DaHHbI cTeepnH3atop Ira NapoBoJ DeEHfckuM MapKn Chicco MoJ.06782 OTBeauet OCHOBHbIM Tpe6oBAHNm IN dpyTM COOTBeTCTBYIOUHM paCnpopjKeHNm, yCTaHOBJIeHHbIM JIpeKtINBaMn 2004/108/CE (JNEKTpOMaHHTNTHaCOBMeCTMOCTb) n 2006/95/CE (JNEKTpUcckar 6e3onacHocTB) n 2011/65/EE (RoHS). KOniO deKnapauN EC MoXHO 3anPoCtB y Artsana S.p.A. no aDpecy; Via S. Catelli 1 -22070 Grandate (Co), VITANIA.
BEZPECNOSTNI UPOZORNENI UPOZORNENI!
1) FULL SIZE (obr. 2)
PROBLEM A JEJICH RESENI
PROHLÁSENI O SHODE CE:
Spolecnost Artsana S.p.A. timto prohlasej, ze tento sterilizator urceny k dezinfekci parou znacky Chicco, mod.06782, splnuezkladni pozadavky a dalsi prislušna nafrzeni stanovena smernicemi 2004/108/ES (elektromagneticka kompatibila), 2006/95/ ES (elektricka bezpecnost) a 2011/65/EU (RoHS). Uplnou kopii prohlaseni CE si muzete vyzadat u Artsana S.p.A. Via S. Catelli 1- 22070 Grandate (Co) Italie

Instruţiuni de UTILIZARE
- 1.2.3.4.5.6.7.8.9.10.11.12.13.14.15.16.17.18.19.20.21.22.23.24.25.26.27.28.29.30.31.32.33.34.35.36.37.38.39.40.41.42.43.44.45.46.47.48.49.50.51.52.53.54.55.56.57.58.59.60.61.62.63.64.65.66.67.68.69.70.71.72.73.74.75.76.77.78.79.80
gj g j 1
JgIy JIab21 plq pnc no 51
JgAaIg A aWg I gA aLc21 ggi yolw Jg n oJgIplz wJ
pGlc aRswyI pgsy an abhyw jgI plxw Jg aawll aeyell gI ayrrnng
JgUu npwI aasS Jggygj F q ngkgl gagolw c Jgogwos
JbIa nn dIaIc ggbiy U aglewlg
Pogbc! bBnBnBnBnBnBnBnBnBnBnBnBnBnBnBnBnBnBnBnBnBnBnBnBnBnBnBnBnBnBnBnBnBnBnBnBnBnBnBnBnBnBnBnBnBnBnBnBnBnBnB
jLg10La 20
JlBj Jglio n 1y yagmo aai jh wI Ic x! jLg 2x · gil gil gil gil gil gil gil gil gil gil gil gil gil gil gil gil gil gil gil gil gil gil gil gil gil gil gil gil gil gil gil gil
a 1
. 1 1 1 1 1 1 1 1 1 1 1 1 1 1 1 1 1 1 1 1 1 1 1 1 1 1 1 1 1 1 1 1 1 1 1 1 1 1 1 1 1
1 1
JgJgJgJgJgJgJgJgJgJgJgJgJgJgJgJgJgJgJgJgJgJgJgJgJgJgJgJgJgJgJgJgJgJgJgJgJgJgJgJgJgJg
aagglgJgJgJgJgJgJgJgJgJgJgJgJgJgJgJgJgJgJgJgJgJgJgJgJgJgJgJgJgJgJgJgJgJgJgJgJgJgJgJgJgJgJgJgJgJgJgJgJgJgJg
aJUll aeggl gI oRg iI gI aiaia I aIcI ygi www.chicco.com crrzgoggocgaggio Laoie
MICROWAVE 11 a
11 g. Lg h j 11 11 11 11 11 11 11 11 11 11 11 11 11 11 11 11 11 11 11 11 11 11 11 11 11 11 11 11 11 11 11 11 11 11
1234567890
1234567890
1234567890
1234567890
1234567890
1234567890
1234567890
1234567890
1234567890
1234567890
l 1234567890
1234567890
1234567890
1234567890
1234567890
1234567890
1234567890
1234567890
1234567890
I 1234567890
1234567890
1234567890
1234567890
1234567890
1234567890
1234567890
1234567890
1234567890
jg011
AECaagolgagcogaaagaaagaaagaaagaaagaaagaaagaaagaaagaaagaaagaaagaaagaaagaaagaaagaaagaaagaaagaaagaaagaaagaaagaaagaaagaaagaaagaaagaaagaaagaaagaaagaaagaaagaaagaaagaa
44
puiuui 21 ooiuei
Lip fsiin 1
Iaia 150
S_ OBC = 12 · BO · CD = 12 × BO × 5
ji = k1,k_2,·s

iiaio 1g Jgell alaiill clll jao valil gll Liag ao vallo Jyaleell ayjdl lalaiin no yolaiii 2
SterilNatural 13
1
Steril yIgSll lIyIyIyIyIyIyIyIyIyIyIyIyIyIyIyIyIyIyIyIyIyIyIyIyIyIyIyIyIyIyIyIyIyIyIyIyIyIyIyIyIyIyIyIyIyIyIyIyIyIyIyg 1 y Natural 3
FULL SIZE aLoSll aaggl aalll cagagagagagagagagagagagagagagagagagagagagagagagagagagagagagagagagagagagagagagagagagagagagagagagagagagagagagagagagagagagagagagagagagagagagagagagagagagagagagagagagagagagagagagagagagagagagagagagagagagagag
a a a a a a a a a a a a a a a a a a a a a a a a a a a a a a a a a a a a a a a a a a a a a
S BCD = S COD + S BDO - S BOC
aclal jie jilgai jgi aaii liig g jia 10 axill po (a)glg (b)jaoogg (i)agg alal alal
La5jg1 Jls Lgaoe aolgl fll gmicROWAVE 2ggS 11aegog 30 j81 ayell lglg 11 CompACT aonall aegog 11 gag aonllg FULL SIZE alol Sll aegog 11 gajl pln wng 23 aas 6gag
slygslslaagai jiajia jiaqi - COMPACT
JieLgao Jiaue Luyuai jialu Juaig Jue Lai 11
jai aai aiai aai jao 80 2
10( 1 - 12) ( 2) .
(g)
10 5
a aiei1 8sLb p0g 220
| العربية | |
| 310001g | |
| 41001g600 | |
| 51001g440 |
Jg 11111111111111111111111111111111111111111
Laiy aai jg Jls aoell gill aiei jaiil hia 1aogao Lai (a) sll 24 aui iagj 100 (a) cai
ai = bi = 12
= - y1x1 - x_2
g/1 g wlll j 153 pcc o1o 19 J5w) a2o o 10 s a0s a0s a0s 2 . COMPACT aonol gl FULL SIZE alolSII aanggl g fgs. (f) slgy SII JLS 899,611 j88 aalalalalalalal gl (e) yssnnnll nssnss
aocli joloe aebipu wly (a) sllg (b) g iog (c) gig (i)