
POWX1170 - Drill PowerPlus - Free user manual and instructions
Find the device manual for free POWX1170 PowerPlus in PDF.

| Brand | PowerPlus |
| Model | POWX1170 |
| Tool type | Hammer drill (percussion drill) |
| Rated voltage | 230-240 V ~ 50 Hz |
| Power consumption | 750 W |
| No-load speed | 0 – 1050 min⁻¹ |
| Impact frequency | 0 – 4900 min⁻¹ |
| Chuck type | SDS-plus (keyed chuck 13 mm included) |
| Max. drilling capacity (concrete) | 26 mm |
| Max. drilling capacity (steel) | 13 mm |
| Max. drilling capacity (wood) | 40 mm |
| Net weight | 4.9 kg |
| Protection class | II (double insulation) |
| Sound pressure level (LpA) | 91 dB(A) |
| Sound power level (LwA) | 102 dB(A) |
| Vibration (aw) | 8.7 m/s², K=1.5 m/s² |
| Operating modes | Drilling only, hammer drilling, chiseling, rest position |
| Auxiliary handle | Yes, adjustable for right and left handed |
| Depth stop | Yes |
| Dust cap | Yes |
| Included accessories | 3 SDS drill bits (8/10/12 x 150 mm), 2 chisels (14 x 250 mm, 1 pointed, 1 flat), 13 mm keyed chuck with SDS adapter, dust cap, depth stop, auxiliary handle |
| Warranty | 36 months (excluding wear parts and accessories) |
| Intended use | Drilling and screwdriving in wood, metal, plastic, masonry (non-professional) |
Frequently Asked Questions - POWX1170 PowerPlus
User questions about POWX1170 PowerPlus
0 question about this device. Answer the ones you know or ask your own.
Ask a new question about this device
Download the instructions for your Drill in PDF format for free! Find your manual POWX1170 - PowerPlus and take your electronic device back in hand. On this page are published all the documents necessary for the use of your device. POWX1170 by PowerPlus.
USER MANUAL POWX1170 PowerPlus
2 BESCHRIJVING (FIG. A)
09/10/2020, Lier - Belgium
1 UTILISATION 2
2 DESCRIPTION (FIG. A) 2
3 LIST DES PIECES DU PACKAGE 2
4 PICTOGRAMMES 3
5 RÉGLES DE SECURITE GÉNÉRALES 3
MARTEAU PERFORATEUR 750 W POWX1170
1 UTILISATION
09/10/2020, Lier - Belgium
1 APPLICATION 2
2 DESCRIPTION (FIG. A) 2
3 PACKAGE CONTENT LIST 2
4 EXPLANATION OF SYMBOLS 2
5 GENERAL POWER TOOL SAFETY WARNINGS 3
5.1 Work area 3
5.2 Electrical safety 3
5.3 Personal safety 3
5.4 Power tool use and care 4
5.5 Service 4
6 SPECIFIC SAFETY RULES FOR IMPACT DRILL AND ROTARY HAMMERS 4
7 BEFORE STARTING WORK 5
7.1 Fitting and changing tools (Fig. 1)
7.2 Mounting/Dismount the auxiliary 13mm chuck for drilling in steel, wood and plastic (Fig. 2). 5
7.3 Depth guide (Fig. 3). 5
7.4 Dust cover (Fig. 4). 5
7.5 Fitting the auxiliary handle (Fig. 5) 6
7.6 Selecting the operation mode (Fig. 6) 6
8 OPERATION 6
8.1 Switch on/off (Fig. 6)
8.2 Forward/reverse lever.. 7
9 TECHNICAL DATA 7
10 NOISE 7
11 MAINTENANCE 7
12 WARRANTY 8
13 ENVIRONMENT 8
14 DECLARATION OF CONFORMITY 9
HAMMER DRILL 750W POWX1170
1 APPLICATION
The power tool is intended for driving and drilling through wood, metal, plastics and masonry. It is not designed for commercial use.

WARNING Please read and understand this operating manual before use and keep it for your future reference.
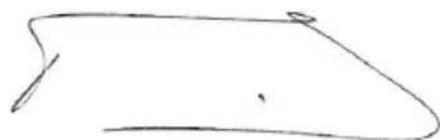
2 DESCRIPTION (FIG. A)
- Depth stop
- SDS Chuck
- Auxiliary handle
- Mode selector
- Lock knob for depth stop
-
Soft grip
-
Forward/reverse lever
- On/off trigger
- Lock on button
- Dust cover
- Speed regulator
3 PACKAGE CONTENT LIST
- Remove all packing materials
- Remove remaining packaging and transit supports (if existing)
- Check the completeness of the packing content
- Check the appliance, the power cord, the power plug and all accessories for transportation damages.
- Keep the packaging materials as long as possible till the end of the warranty period. Dispos it into your local waste disposal system afterwards.

WARNING Packing materials are no toys! Children must not play with plastic bags! Danger of suffocation!
1 hammer drill
1 manual
3 SDS drill (8/10/12 x 150mm)
2 chisel (14 x 250mm, 1 point, 1 flat)
1 13mm chuck and adapter
1 dust cover
1 depth gauge

When parts are missing or damaged, please contact your dealer.
4 EXPLANATION OF SYMBOLS
In this manual and/or on the machine the following symbols are used:
| CE | In accordance with essential requirements of the European directive(s) | Read instructions carefully | ||
| "Class II - The machine is double insulated; Earthing wire is therefore not necessary | Wear safety glasses and ear protection | |||
| Denotes risk of personal injury or damage to the tool. | Wear gloves | |||
5 GENERAL POWER TOOL SAFETY WARNINGS
Read all safety warnings and all instructions. Failure to follow all warnings and instructions may result in electric shock, fire and/or serious injury. Save all warnings and instructions for future reference. The term "power tool" in the warnings refers to your mains operated (cored) power tool or battery operated (cordless) power tool.
5.1 Work area
- Keep work area clean and well lit. Cluttered and dark areas invite accidents.
- Do not operate power tools in explosive atmospheres, such as in the presence of flammable liquids, gases or dust. Power tools create sparks which may ignite the dust or fumes.
- Keep children and bystanders away while operating a power tool. Distractions can cause you to lose control.
5.2 Electrical safety
- Power tool plugs must match the outlet. Never modify the plug in any way. Do not use any adapter plugs with earthed (grounded) power tools. Unmodified plugs and matching outlets will reduce risk of electric shock.
- Avoid body contact with earthed or grounded surfaces such as pipes, radiators, ranges and refrigerators. There is an increased risk of electric shock if your body is earthed or grounded.
- Do not expose power tools to rain or wet conditions. Water entering a power tool will increase the risk of electric shock.
- Do not abuse the cord. Never use the cord for carrying, pulling or unplugging the power tool. Keep cord away from heat, oil, sharp edges or moving parts. Damaged or entangled cords increase the risk of electric shock.
- When operating a power tool outdoors, use an extension cord suitable for outdoor use. Use of a cord suitable for outdoor use reduces the risk of electric shock.
- If operating a power tool in a damp location is unavoidable, use a residual current device (RCD) protected supply. Use of an RCD reduces the risk of electric shock.
5.3 Personal safety
- Stay alert, watch what you are doing and use common sense when operating a power tool. Do not use a power tool while you are tired or under the influence of drugs, alcohol or medication. A moment of inattention while operating power tools may result in serious personal injury.
- Use safety equipment. Always wear eye protection. Safety equipment such as dust mask, non-skid safety shoes, hard hat, or hearing protection used whenever conditions require will reduce personal injuries.
- Avoid accidental starting. Ensure the switch is in the off position before plugging in. Carrying power tools with your finger on the switch or plugging in power tools that have the switch on invites accidents.
- Remove any adjusting key or wrench before turning the power tool on. A wrench or a key left attached to a rotating part of the power tool may result in personal injury.
- Do not overreach. Keep proper footing and balance at all times. This enables better control of the power tool in unexpected situations.
- Dress properly. Do not wear loose clothing or jewellery. Keep your hair, clothing and gloves away from moving parts. Loose clothes, jewellery or long hair can be caught in moving parts.
If devices are provided for the connection of dust extraction and collection facilities, ensure these are connected and properly used. Use of these devices can reduce dust related hazards.
5.4 Power tool use and care
- Do not force the power tool. Use the correct power tool for your application. The correct power tool will do the job better and safer at the rate for which it was designed.
- Do not use the power tool if the switch does not turn it on and off. Any power tool that cannot be controlled with the switch is dangerous and must be repaired.
- Disconnect the plug from the power source before making any adjustments, changing accessories, or storing power tools. Such preventive safety measures reduce the risk of starting the power tool accidentally.
- Store idle power tools out of the reach of children and do not allow persons unfamiliar with the power tool or these instructions to operate the power tool. Power tools are dangerous in the hands of untrained users.
- Maintain power tools. Check for misalignment or sticking of moving parts, breakage of parts and any other condition that may affect the power tool's operation. If damaged, have the power tool repaired before use. Many accidents are caused by poorly maintained power tools.
- Keep cutting tools sharp and clean. Properly maintained cutting tools with sharp cutting edges are less likely to stick and are easier to control.
- Use the power tool, accessories and tool bits etc., in accordance with these instructions and in the manner intended for the particular type of power tool, taking into account the working conditions and the work to be performed. Use of the power tool for operations different from intended could lead to a hazardous situation.
5.5 Service
- Have your power tool serviced by a qualified repair person using only identical replacement parts. This will ensure that the safety of the power tool is maintained.
6 SPECIFIC SAFETY RULES FOR IMPACT DRILL AND ROTARY HAMMERS
- Important to protect yourself from the risk of electric shock, injury and fire when using an electric tool, it is imperative to take the following basic safety precautions. Read and note these instructions before you use the machine.
- Check the voltage (volt) marked on the rating plate.
- When using cable drums, run all the cable off the drum. Minimum conductor cross section: 1.0mm^2
- Make sure of your footing on ladders and scaffolding when drilling free-handed
- Use a line detector to localize lines in walls with concealed electric, water or gas lines. Avoid touching live components or conductors.
- Wear ear muffs to protect your hearing. Loss of hearing can be a gradual process!
- Do not use in areas where there are vapours or flammable liquids
Always pull the plug out of the socket before cleaning or making changes to the machine. - Protect the power cable from damage. Oil and acid can damage the cable.
- Never overload the machine. Secure all work pieces sufficiently.
- Important! It is imperative to follow all national safety regulations concerning installation. Operation and maintenance.
- Chisel bits and drill bits may be flung out of the machine accidentally and cause serious injury.
Before starting to work, always check that the chisel or drill bit is properly locked in the chuck. - Examine the chuck regularly for signs of wear or damage.
- Never start up a hammer tool until it pressed against a work piece (wall, ceiling, etc).
-
When you are finished, unplug the hammer drill from the electric supply and remove the chisel or drill bit from the machine.
-
Always disconnect the hammer drill from the electric supply before you change a chisel or drill bit.
- Protect your eyes and other workers from flying particles and splinters. Wear a helmet! Set up partition walls!
- Wear work gloves to protect fingers from bruising and grazing.
- Vibrations can injure the hand-arm system. Keep exposure to vibrations as short as possible.
Always lead the mains cable away backwards from the device. - Store the device where it is inaccessible to children.
- When carrying out work, always hold the device with both hands and ensure that you have a stable standing position.
7 BEFORE STARTING WORK
- Examine the place where the device is to be used for hidden electrical cables, gas and water pipes using a pipe finding device.
- Before connecting to the mains, ensure care that the mains voltage corresponds to the details on the rating plate.
7.1 Fitting and changing tools (Fig. 1)
The device is equipped with a SDS- plus attachment system.
- Clean tools and grease with a thin layer of machine grease before fitting.
For assembly:
Pull back fastening sleeve (A) and hold.
- Push and rotate the dust-free tool into the tool holder as far as it will go. The tool will lock automatically.
- Check that it has locked by pulling the tool. Removing SDS-plus tool
- Pull back fastening sleeve (A), hold and remove tool.

Accessories can be hot after use. Don't touch the tip of accurroty by hand!
Always use protective gloves to remove the accessory!
7.2 Mounting/Dismount the auxiliary 13mm chuck for drilling in steel, wood and plastic (Fig. 2)
Mount:
Pull back and hold the locking sleeve A of the SDS chuck.
Clean the adapter shank and put a bit of grease on it.
- Push the auxiliary chuck into the SDS chuck.
- Turn slowly to the right.
- Release the locking sleeve A.
Dismount:
- Pull back fastening sleeve (A), hold and remove tool.
7.3 Depth guide (Fig. 3)
Your drilling depth can be pre-set and/or repeated by using the depth stop.
Insert the required drill bit. Fit the depth stop into the hole of auxiliary handle and set the required depth
7.4 Dust cover (Fig. 4)
Slide the dust cover device over the drill bit before carrying out any hammer drilling vertically above your head.
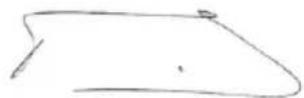
7.5 Fitting the auxiliary handle (Fig. 5)
The auxiliary handle can be fitted to suit both right-handed and left-handed users.

Always use the tool with the auxiliary handle properly assembly .
Loosen the auxiliary handle by unscrewing it.
For right handed users, slide the auxiliary handle clamp over the collar behind the bit holder, handle at the left.
For left handed users, Slide the auxiliary handle clamp over the collar behind the bit holder, handle at the right.
Rotate the side handle to the desire position and tighten the handle.
7.6 Selecting the operation mode (Fig. 6)
The rotary hammer drill can be used in the following operation modes.

For screwdriver and for drilling into steel, wood and plastics.

Simultaneous rotating and impacting for concrete and masonry drilling

for light chipping, chiselling and demolition applications .
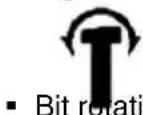
Non-working position used only to rotate a flat chisel into the desire position.
Select the required operating mode by depressing the safety button and rotating the mode selector switch until it points to the symbol of the required mode.
Release the safety button and check that the mode selector switch is locked place.
Do not select the operating mode when the tool is running.
For screw driving, refer to section: "Instructions for use".

Always wait until the machine has come to a complete standstill before changing the drilling, hammer/drilling function.

Do not use the chuck with SDS connector in combination with the hammer/hammer drill function!
8 OPERATION

Important! When hammer drilling you will require a low pressure. Too much pressure will place unnecessary load on the motor. Check the drill bits regularly. Resharpen or replace blunt drill bits.
8.1 Switch on/off (Fig. 6)
Plug the cord set into power socket.
To start the tool squeeze the on/off switch (8).
To stop the tool, release the on/off switch.
If you press the lock-on button (9) while the on/off switch is depressed, the on/off switch is kept in the operating position.
To release the on/off switch (8) again, press it briefly to and turn the tool off.
The harder you squeeze the on/off switch (8) the faster the tool will operate.
Use lower speeds for starting.
8.2 Forward/reverse lever
The forward/reverse lever (7) is to determine the direction of rotation of the tool.
To select forward rotation, release the on/off switch and push the forward reverse lever to right (R) side of the tool. To select reverse, push the lever to left (L) side of the tool.
When changing the position of the lever, be sure the on/off switch is released and the motor is stationary.
9 TECHNICAL DATA
| Model | POWX1170 | |
| Voltage | 230-240 V~ 50 Hz | |
| Power Input | 750 Watt | |
| No load speed | 0-1050 min-1 | |
| Impact rates | 0-4900 min-1 | |
| Shank style | SDS | |
| Max. drilling capacity | Concrete | 26 mm |
| Steel | 13 mm | |
| Wood | 40 mm | |
| Net weight | 4.9 kg | |
| Insulation class | / II | |
10 NOISE
Noise emission values measured according to relevant standard. (K = 3)
Acoustic pressure level LpA 91 dB(A)
Acoustic power level LwA 102 dB(A)

ATTENTION! Wear hearing protection when sound pressure is over 85 dB(A).
aw (Vibration)
8,7 m/s²
K = 1.5 m/s²
11 MAINTENANCE
Always keep the drill clean.
- Do not use corroding agents for cleaning plastic.
- Check carbon brushes in the case of excessive sparking.
- Keep ventilation channels free.
12 WARRANTY
This product is warranted for a 36-month period effective from the date of purchase by the first user.
- This warranty covers all material or production flaws excluding : batteries, chargers, defective parts subject to normal wear & tear such as bearings, brushes, cables, and plugs, or accessories such as drills, drill bits, saw blades, etc. ; damage or defects resulting from maltreatment, accidents or alterations: nor the cost of transportation.
- Damage and/or defects resulting from inappropriate use also do not fall under the warranty provisions.
We also disclaim all liability for any bodily injury resulting from inappropriate use of the tool.
- Repairs may only be carried out by an authorised customer service centre for Powerplus tools.
- You can always obtain more information at the number 00 32 3 292 92 90.
- Any transportation costs shall always be borne by the customer, unless agreed otherwise in writing.
- At the same time, no claim can be made on the warranty if the damage of the device is the result of negligent maintenance or overload.
- Definitely excluded from the warranty is damage resulting from fluid permeation, excessive dust penetration, intentional damage (on purpose or by gross carelessness), inappropriate usage (use for purposes for which the device is not suitable), incompetent usage (e.g. not following the instructions given in the manual), inexpert assembly, lightning strike, erroneous net voltage. This list is not exhaustive.
- Acceptance of claims under warranty can never lead to the prolongation of the warranty period nor commencement of a new warranty period in case of a device replacement.
Devices or parts which are replaced under the warranty therefore remain the property of Varo NV.
- We reserve the right to reject a claim whenever the purchase cannot be verified or when it is clear that the product has not been properly maintained. (Clean ventilation slots, carbon brushes serviced regularly, etc.).
- Your purchase receipt must be kept as proof of date of purchase.
- Your appliance must be returned undismantled to your dealer in an acceptably clean state, (in its original blow-moulded case if applicable to the unit), accompanied by proof of purchase.
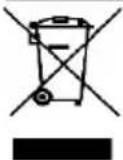
13 ENVIRONMENT
Should your machine need replacement after extended use, do not put it in the domestic waste but dispose of it in an environmentally safe way.
Waste electrical products should not be disposed of with household waste. Please recycle where facilities exist. Check with your Local Authority or retailer for recycling advice.
14 DECLARATION OF CONFORMITY

Vario
VARO N.V. - Vic. Van Rompuy N.V.- Joseph Van Instraat 9 - BE2500 Lier - BELGIUM, declares that,
product: Hammer drill 750 W
trade mark: PowerPlus
model:POWX1170
is in conformity with the essential requirements and other relevant provisions of the applicable European Directives, based on the application of European harmonized standards. Any unauthorized modification of the apparatus voids this declaration.
European Directives (including, if applicable, their amendments up to the date of signature):
2006/42/EC
2014/30/EU
2011/65/EU
European harmonized standards (including, if applicable, their amendments up to the date of signature):
EN60745-1:2009
EN60745-2-6:2010
EN55014-1:2017
EN55014-2:2015
EN61000-3-2:2014
EN61000-3-3:2013
Keeper of the Technical Documentation: Philippe Vankerkhove, VARO - Vic. Van Rompuy N.V.
The undersigned acts on behalf of the company CEO,

Philippe Vankerkhove
Regulatory Affairs - Compliance Manager
09/10/2020, Lier - Belgium
09/10/2020, Lier - Belgium
Regulatory Affairs - Compliance Manager
09/10/2020, Lier - Belgium
1 APLICACAO 2
2 DESCRIÇA(O FIG.A) 2
3 CONTEUDO DA EMBALAGEM 2
4 EXPLICACAO DE SIMBOLOS 2
5 PROCEDIMENTOS GERAIS DE SEGURANCA 3
5.1 Local de trabajo 3
5.2 Seguranca eltrica 3
5.3 Segurancia de pessoas 3
5.4 Manuseamento e lavoro de ferramentas eletricas com precauacao 4
5.5 Assistance Tecnica 4
6 REGRAS DE SEGURANÇA ESPECÍCías PARA MARTELOS PERFURADORES 5
7 ANTES DE COMEÇAR A TRABALHAR. 5
7.1 Fixar e trocar ferramentas (Fig. 1). 5
7.2 Montagem/Desmontagem do mandril auxiliar de 13 mm para perfurar aço, madeira e material plácico (Fig. 2). 6
7.3 Guia de profundidade (Fig. 3). 6
7.4 Tampa de po (Fig. 4) 6
7.5 Fixar o Manipulo auxiliar (Fig. 5). 6
7.6 SeLECTIONAR o modo operacional (Fig. 6). 6
8 OPERACAO 7
8.1 O interruptor para ligar/desligar (Fig. 6)
8.2 Alavanca de avanco/retroprocesso 8
9 INFORMAÇOES TÉCNICAS 8
10 RUIDO 8
11 MANUTENCAO 8
12 GARANTIA 9
13 MEIO-AMBIENTE 9
14 DECLARACAO DE CONFORMIDADE 10
MARTELO PERFURADOR 750 W POWX1170
1 APLICACAO
09/10/2020, Lier - Belgium
1 BRUKSOMRADE 2
2 BESKRIVELSE (FIG. A) 2
3 PAKKENS INNHOld 2
4 FORKLARING AV SYMBOLENE 2
5 GENERELLE SIKKERHETSFORSKRIFTER 3
5.1 Arbeitsplassen 3
5.2 Elektrisk sikkerhet 3
5.3 Personsikkerhet 3
5.4 Vær noyaktig og omhyggelig nár du omgås elektroverktøy 3
5.5 Service 4
6 SPESIFIKKE SIKKERHETSREGLER FOR SLAGBOR OG
BORHAMMERE 4
7 FOr DU STARTER ARBEIDET 5
7.1 Montere og skifte verktoy (Fig. 1) 5
7.2 Montere/demontere 13 mm hjelpechuck for boring i stal, tre og plast (Fig. 2)...5
7.3 Dybdestopp (Fig. 3) 5
7.4 Stovdeksel (Fig. 4) 5
7.5 Feste hjelpehandtaket (Fig. 5)
7.6 Velge bruksmodus (Fig. 6) 6
8 BRUK. 6
8.1 Slapa/av (Fig. 6) 6
8.2 Fremover/revers-spak 7
9 TEKNISKE DATA 7
10 STOY 7
11 VEDLIKEHOLD 7
12 GARANTI 8
13 MILJ0 8
14 SAMSVARSERKLÄERING 9
BORHAMMER 750 W POWX1170
1 BRUKSOMRADE
09/10/2020, Lier - Belgium
BORRHAMMARE 750 W POWX1170
1 ANVÄNDNINGSOMRADE
7 INNAN ARBETET PABÖRJAS
14 KONFORMITETSDEKLARATION


VARO N.V. - Vic. Van Rompuy N.V.- Joseph Van Instraat 9 - BE2500 Lier - Belgien, deklarerar harmed att,
09/10/2020, Lier - Belgium
09/10/2020, Lier - Belgium
1 EΦAPMΟΓH 2
2 έπΕΠΓΑΦΗ (EΙΚ.Α) 2
3 AIETA INEPIEXOMENQN YSEKEYAIAE 2
4 SYMBOA 3
5 TENIKEΣΣYMBOYΛΕΣ ΓΙA THN ΑΣΦΑΛΕΙA 3
5.1 Xwpos epyaiaas 3
5.2 Aospaaleiae to nEkrpiKo pEu .3
5.3 Atopiki aovapaleia 4
5.4 IpooeKIOKOS XeipiooKs KAI XpnoT Twv NkpiKwv EpyaIew 4
5.5 2
6 EIAIKOI KANONEAΦAIEIAIKA KPOYSTIKA ΔPAPANA KAI ΠΕPIΣTPOΦIKA ΣΦYPIA 5
7 PPIN TO EKINHMA THE EPGAIAE 6
7.1 Suvaopoyn kai aAayn epyaaleiwv (Eik. 1) 6
7.2 Toorthetaon/Aqaipeoan rou bOnthetaikou ophiyktnpa 13 xloT.yia diarpono n e aotai, fuo kai paoiko (Eik. 2).
7.3 O8nyos 86
7.4 KaIupma oKovns (Eik. 4) 6
7.5 v a p o y n o n n (E i k. 5)
7.6 Etnioyn rou rpOIOU Aetoupyiae (Eik. 6)
8 AEITOYPIA 7
8.1 7
8.2 MoXaos Kivnons Eppo/niow... 8
9 TEXNIKA XAPAKTHPIETIKA 8
10 OOPYBOs 8
11 SYNTHPHSEH 8
12 ERTYHsH 9
13 IEPIBAON 9
14 HΛΩΣH ΣYMMOPΦΩΣH
KPOYΣTIKO ΔPAPANO 750 W POWX1170
1 EΦAPMθH
Apaipexon epyaaleiou SDS-plus:
TpaBnEe TPOc Ta TIOw TO OTEpeewtiko XITWvio (A), KpatnoTe To, KAI aopaipoeTo EpyaIeio

Ta ta o i va eivai kauta aTTO xPnO. Mnu ayyizTe to xepi Tnv akpn evoc t o s!
Φopáte πávτa πpOoTATEUTIKA yáVTIA yα αρaipéσETo EApTnμa!
7.2 TOnoTeTnO/AqApEeON rou BOnθnTkoU σφIyKπρα 13 xλστ. yia δIaRpnO σε ασáλι,ξuLo kai πλaσTko (Eik.2)
Tooθεπησ:
09/10/2020, Lier - Belgium
1 PRIMENA 2
2 OPIS (SLIKA A) 2
3 SPISAK SADRZAJA PAKOVANJA 2
4 SIMBOLI 2
5 OPŠTA BEZBEDNOSNA UPUTSTVA ZA ELEKTRICNE ALATE.3
5.1 Radna oblast 3
5.2 Elektricna bezbednost 3
5.3 Lična bezbednost.. 3
5.4 Korisćenje i odžavanje elektricnog alata 4
5.5 Servisiranje 4
6 DODATNA BEZBEDNOSNA UPUTSTVA ZA BUSILICE -UDARNE CEKIC
7 PREPOCTKA RADA SA UREDAJEM 5
7.1 Postavljanje i zamena nastavaka (Sl. 1) 5
7.2 Montiranje/Demontiranje pomoćne stezne glave od 13 mm za buşenje Čelika,DRVeta i plastike (SI.2) 5
7.3 Granicnik dubine (SI. 3) 6
7.4 Šitnik za zašitu od prasine (SI. 4) 6
7.5 Postavljanje pomoche drske (Slika 5) 6
7.6 Izbor rezima rada (Sl. 6) 6
8 RUKOVANJE 7
8.1 Prekidač za ukljucivanje/iskljucivanje (Sl. 6)
8.2 Prekidač za rad: ulevo/udesno. 7
9 TEHNICKI PODACI 7
10 BUKA. 8
11 ODRZAVANJE 8
12 GARANCIJA 8
13 ZIVOTNA SREDINA 9
14 IZJAVA O USKLADENOSTI 9
BUSILICA -UDARNI CEKIC 750 W POWX1170
1 PRIMENA
Ova elektricna alatka je namenjena za buşenje drveta, metala, plastike i betona.
Ovaj alat niece predviðen za komercijalnu upotrebu.

09/10/2020, Lier - Belgium
09/10/2020, Lier - Belgium
1POUZIVANIE 2
2 POPIS (OBR. A) 2
3 OBSAH BALENIA 2
4 VYSVETLENIE SYMBOLOV 2
5 VŠEOBECNÉ BEZPEČNOSTNÉ VAROVANIA PRE ELEKTRICKÉ NÁRADIE 3
09/10/2020, Lier - Belgium
UPORABA 2
2 OPIS (SLIKA A) 2
3 SEZNAM VSEBINE PAKETA 2
4 SIMBOLI 2
5 SPLOŠNA VARNOSTNA OPOZORILA ZA ELEKTRICNO ORODJE 3
5.1 Delovno mesto 3
5.2 Elektricna varnost 3
5.3 Osebna varnost.. 3
5.4 Uporaba in nega elektricnega orodja 4
5.5 Servisiranje 4
6 POSEBNA VARNOSTNA NAVODILA ZA UDARNE IN ROTACIJSKE VRTALNIKE 4
7 PRED ZACETKOM DELA 5
7.1 Namestitev in menjava nastavkov (slika 1) 5
7.2 Namestitev/odstranjevanje pomožne 13-mm vpenjalne glave za vrtanje v jaklo, les in plastiko (sika 2) 5
7.3 Vodilo za omejitev globine (slika 3) 6
7.4 ProtiprašniPokrov(slika 4) 6
7.5 Namestitev pomoznega rocaja (sika 5) 6
7.6 Izbira delovnega načina (slika 6) 6
8 UPORABA 7
8.1 Vklop/izklop (slika 6)
8.2 Vzvod za obračanje naprej/nazaj. 7
9 TEHNIcNI PODATKI 7
10 HRUP 7
11 VZDRZEVANJE 8
12 GARANCIJA 8
13 OKOLJE 8
14 IZJAVA O SKLADNOSTI 9
UDARNI VRTALNIK 750 W POWX1170
1UPORABA
Elektricno orodje je namenjeno za vijačenje in vrtanje v les, kovino, plastiko in opeko. Naprava ni namenjena gospodarski uporabi.

Odstranite nastayka SDS Plus:
- Povlecite pritrdilno obojko (A) nazaj, jo zadržite in odstranite nastavek.

09/10/2020, Lier - Belgium
1 DOMENII DE UTILIZARE 2
2 DESCRIERE (FIG. A) 2
3 CONTINUTUL PACHETULUI 2
4 EXPLICATIILE SIMBOLURILOR. 2
5 AVERTISMENTE GENERALE DE SIGURANÀ PRIVIND APARATUL ELECTRIC 3
5.1 Zona de lucru 3
5.2 Siguranta electrica 3
5.3 Siguranţa personală 3
5.4 Utilizarea 日 intreinerea aparatului electric 4
5.5 Service 4
6 REGULI DE SIGURANÀ SPECIFICE PENTRU MAŞINILE DE GÜRIT CU PERCUÜTIE Şİ CIOCANELE ROTOPERCUTOARE...4
7 INAINTE DE A INCEPE LUCRUL. 5
7.1 Montarea 山 schimbarea uneltelor (Fig. 1).5
7.2 Montarea/demontarea mandrinei auxiliare de 13 mm pentru găurirea in oțel, lemnși plastic (Fig. 2)
7.3 Reperul de adancime (Fig. 3) 6
7.4 Capacul contra prafului (Fig. 4) 6
7.5 Montarea manerului auxiliar (Fig. 5) 6
7.6 Selectarea modului de fonctionare (Fig. 6) 6
8 MOD DE UTILIZARE 7
8.1 Pornirea 山 oprirea (Fig. 6). 7
8.2 Maneta inainte/inapoi 7
9 DATE TEHNICE 7
10 ZGOMOT 7
11 INTRETTINEREA 8
12 GARANTIE 8
13 MEDIU 8
14 DECLARATIE DE CONFORMITATE 8
MAŞINA DE GÜRIT CU PERCUTIE 750 W POWX1170
1 DOMENII DE UTILIZARE
09/10/2020, Lier - Belgium
1 ZASTOSOWANIE 2
2 OPIS (RYC. A) 2
3 LISTA ELEMENTOW W OPAKOWANIU 2
4 OBJASNIENIE SYMBOLI 2
5 OGOLNE ZASADY BEZPIECZNEGOKORZYSTANIA Z ELEKTRONARZEDZI 3
09/10/2020, Lier - Belgium
09/10/2020, Lier - Belgium
1 OBJACTb PIPMEHEHnA 2
2 OINCAHNE (PNC.A) 2
3 CODEPJKMOE YNAKOBKN 2
4 YCIOBhIE OBO3HAUHn 3
5 OБшпЕ YKA3AHЯ NO TEXHnke B63OpACHOCTN ПРИ PABOTE C 3JIeKTPoHnCHTPymEHTOM 3
5.1 Pa6ooye Mecmno 3
5.2 3
5.3 1uynha6e3oNaChocmb..4
5.4 3Kcnnyamauuauyxod 3a 3JekmpouHcmpyMeHMOM
5.5 06cnyxueaHue.. 5
6 OCObIe IINPABUNa TEXHnK B3OpAChOCTN JJI YdAPbIX DPEJEN IN PEPΦOPATOPOB 5
7 IEPED Hauajom PA6OTbI 6
7.1 YcmaHo8ka u cMeHa uHcmpyMeHma (Puc. 1) 6
7.2 ycmahOBka / cHmue BCnOmoZamelbHOzo nampoHa 13 MM dJa CbepeHua cmaru, depeea u nnacmmaccbl (Puc. 2) 6
7.3 Pezynuipo8ka any6uHbI ceepeHua (Puc. 3) 6
7.4 ⅡbIe3aumHbI KOxy (Puc. 4)
7.5 YcmaHOka ecnomoameIbHou pykOamku (Puc. 5)
7.6 BbI6op peKuma pa6ombi (Puc. 6)
8 3KcPJIyATAUa.. 8
8.1 BkIIOueHue /eBikIOueHue (Puc. 6) 8
8.2 IpeeknoyameIb HapaeHua epaueHua 8
9 TEXHnueCKNE DAHHbIE 8
10 8
11 OBCJIyXINBAHNE 9
12 TAPAHTЯ 9
13 OKPYXIAOUIA CPEDA 10
14 DEKJIAPAUZI O COOTBETCTBNI 10
yDAPHЯДРЕЛь 750 BTPOWX1170
1 OBJACTb IPIPIMEHEHnA
3NeKtpOnHCTpyMeHT npeHa3HaueH dIJI npo6uBaHnI n CbepeHnI DepeBa, MeTAnla, INaCTMaCCbI IN KpNnUHOJ KJaADKn.
I3dJIe He npEHa3HaYeHO Ia KOMMepueCKOIO nCNoJIb3OBaHnA.

BHIMAHHE!ДЯБаewлнанов6e3onacHocTn npoHTte DaHHoe pykoBoDCTBOиOBuNe INHcTpKcHnNo TExHnke 6e3onacHocTn nepeHaayalom 3Kcnnytaun annapaTa.Прп nepedaue Baawero 3IKeKTPoINHcTpymeHtA B NOb3OBaHne DpyrM lNcaM O6raTeNbHO npINLOXHTe DaHHble INHcTpKcHn.
2 ONICAHNE (PNC.A)
- OrpaHnUHTeIb Iny6uHbI CBepHeHnA
- Патон SDS
- BcnoMOraTeIbHa pyKoRTka
- NpeeknouateIb peKIMOB
5.PykaФИКСAUINДЯOrpaHnUTeNRApy6nHbICBepJeHnA -
Мякая руковда.
-
NpeeknouateIb HappaBneHnBpaueHn
- NyckoBov BbIKHouaTeNb BKn/BbIKn
- Khonka 6nokupobkn
10.Пьлесаши THьКожух
11.ИндikatopуглбьхцETOK
3 COIDEPXXHMOE YNAKOBKN
- YdaIInTe BCE ynaKOBOHyBie MaTePnAnbl.
- YdaIInTe ocTaTKn ynaKOBKn n peKNaMhbIe JnCTKn-BkJaNbIuN (ecnn ectb).
- PpOBepbTe NONHOTy KOMNNEKTA NOCTaBKn.
- Пюверьтpe annapaT, силови Кавь, Stencelb И Вспнадпжнон На прдmetповөдэн рп Трансортуровke.
XpaHnTe ynaKOBOHyIe MaTePnaJIbI NO BO3MOxHOCTN Do nCTeueHra rapaHTnHOro cpoKa. Iocne 3Toro n36abBtEc b OT HIX, NcnoJIb3yR MeCTHyIO CnCTeMy yTNIN3aunn 6bITOBbIX OTXODOB.

PPEyIeHHe: ynaKoBouhIe MaTePnAJIbI -3To He nrgyUKN! He no3BOJnTe DeTAM HpaTb C nlaCTNKOBbIMn NaKeTaM! Ectb onaChocTb yduWeHn!
1 ydapna npelb.
1pykoBOIDTO NO 3KcnnyatauIN
3 cBepna SDS (8/10/12 x 150 MM)
2doJota (14x250MM, 1ocTpoe, 1 nlockoe)
1 natpoH n aanTep 1 x 13 MM
1 nbIne3aunTHbI KOxuyX
1 rny6nHomep

Ecnn deTann OTCyTCTBYOT nnn noBpeXdHbI, o6paTNTecb K CBOemy dInlepy.
4 yCJIOBHBIE O6O3HAUeHnIa
B daHOM pyKOoCTBe n/nn Ha camom annapate nCnoIb3yOTc CneDyoUne CNMBOJIb:
6 OCObIe IPNABnla TEXHnKn BE3OpAChOCTn IJIa YdAPHbIX IPEJEN IEPΦOPATOPOB
BnMaHHe! UTo6bI IpeOxpaHntbC8 OT pNcKa IopaxeHna 3JIeKtpnueckm TOKOM, TpaBMbl nOxapa, Heo6xoJIMMo IpnHrTb CNeDyUOuNE OCHOBhIE Mepbl IpeOCTOpOXHOCTN. IpoHTnte INpIMMtE K CBeDeHnO 3TN INHCTpyKuIN, IpexJe Yem NOnb30BaTbcMaaHHOH.
- PpOBepbTe HAnpJKeHHe (B BoNbTx), yKa3aHHOe Ha Ta6nUcKc TExHnueckmIM DaHHbIM.
- Ipn nCnoJb3ObaHn Ka6eNbHbIX 6apabahOB noJIHOCTbIO cMOtaIte Ka6eNb c 6apa6aHa. MnHmAJbHoE ceueHne npoBOdHka: 1,0 MM².
- Oecneyte yctOnuBOcTB cBOero noNoxHn npu paBoTe c nepOpaTopom Ha neCTHnue n NOmOCTkax.
IcnoJIb3yIte IOKaTOp npOBODbIX IINHn IJRA O6HApYKeHNs CKpbITbIX B CTeHAX IINHn 3JIeKTPoPpOBOdKN, BODo- n Ra3OpPpOBOdOB. CTapaNTEcB He npKacatbcr K OOrJeHHbIM qactram INI npOBODHnKaM.
HaedeBaIte HayuHnKn dny 3aunbI cnyxa. Nopepa cnlyxa npocxOoNT noCTeNEHNO.
HaedeBaIte 3aunTHbIe OcKn I noJIb3yITeCb npOTnBONblIeBBIM pecnnpaTopom np IN BbIOJIHeHn pa6O, CBraHHbIX C o6pa3OBAHnEM nbJIN.
He nCnoJb3yIe npfopopatop B MecTx, rIe npncytCTbyOT napbl IINBOCnIaMeHraIOUneCRA KNDKoCTN.
Bcerda BbHMaTe 7TeNceIb n3 ceTeBOJ po3eTKn nepeq YnCTKOJ nIN peRyInpOBKoM MaHHbI. - Предхаяг Te ceTeBOI ka6eIb OT NOBpeXdEHHa. Cma3OuHbIe MaTePnAbl I npicaKIMORYT NOBpeDInTB ka6eIb.
- Hnkorda He neperpykaeMaunHy.
Kak cneyuET 3akpennTe BCE detaH.
BHHMaHHe! Heo6xoJIMo CO6JIIOaTb BCE DeIcTByUOuNE B CtpaHe IpaBnJa TeXnKn 6e3OnaCHOCTN, kacaUzneC yCTaHOBKn, 3KcIIpyatauN n O6cnyxNBaHn.
-Долотаи CBерпа MOrут сИчайно BBICKOHTb ИЗ Maшиньи пруннгс Серbe3HyTO TpaBMy.
Ipeen hauanom pa6oTb I BceIa npOBepnTe, TTO6bl DOJATO nIN CBePIO 6bln KaK cJeNyET 3axkTaB I naTPOHe.
PeryIpaHIO npOBepaTe natoHnHa HAnuHne npn3NaKOB n3HOca nnIOBpeXdEHN.
HnKoIa He 3aIyckaiTre peKHM IOJI6JIeHHN IIO TORO, KaK IIpNHMeTe IepΦopatop K o6pa6aTbIbAemomy IpeMety (CTHe, ITOJIKY H.T.I.).
IIO OKOHuaHH pa6oTBi OTcoeHnHTe nepΦopatop OT 3JIeKtpueckoi CETN BBHBTe JIOJTO HIN CBepHO H3 MaHHHbI.
Bcerda orcoeHHaHTe nepoapot O TJIeKTPHueCKO CETN IpeTcM, KaK MeHrTo bdoIOTOn Hn CBepIO.
- OecneyBte 3aunTy CBOHX Ia3 n npyrnx pa6oynx OT letraux yactn H ockoOB. HaebaiTe IeM! YcTaHaBJIbAaTe 3aunTHbIe neperopokn!
HaebaTe paoboune npcaTkn 3aunTb nlaIbueB or yuH6OB uapaHH.
Bbpaunn MOryT IOBpeHNTb CHCTemy "KHeTb-pyKa". CtapaIeTcB CBOHTb Bpemr BO3JeCTBnB bpaunn IIO MNHMyma.
BcerdaOTBOIDHTe Ka6eJIb 3JKeTpHueCKO CETN B IPOTHBOIOLOXKHyO OT MaHHHbI CTOPHY.
XpaHnte nepphiopatop B meCTe, HeIOCTyIHOM IJIa ITeT.
Bo Bpempa6oTbI BcerdaepKHTe nepfopatop o6eHMn pykamn n CJeHrTe 3a VCTOuHBOCTbIO CBOERO IIOJOKeHH.
7 IEPED HauJIOM PABOTbl
- IpiH NIOUH DeTeKTopa IPOBOJKN OCMOTPHTe MecTO HIOJIb3OBAHHy YCTPOHCTBa HAHnueCKpbIToH 3JIeKTPoIPNOBOKN, Ra30-H BOIOPTPOBOOB.
IpeennoCoeHHHeHemK3JIeKtpnueckoCetn y6eHTecbBTOM,yTO HApJxKeHHe B Cetn COOTBETCTBYET TOMY,TOYKa3aHO Ha Ta6NJuKE CTexHNueCKHMn DaHHbIMn.
7.1 YcmaHoKa u CMeHa UHcmpymEhMa (Puc. 1)
YcTpoIcTBO OCHaIeHo CnCTeMoN KpeIIeHNA SDS-plus.
IIOuHCTHTe H CMAKbTe HaCaJKN TOHKIM CLOeMaIIHHHO r MaCJIa IpePeY UCTAHOBKOJ.
Дясборки
OTTHHTeHa3aJ KpeIeKHyIO BTVIKy(A)N yIepXHbAte ee.
BCTABbTe OuHHeHyIO OT IIbIIN HacaKy B IepKaTeNb HNcTpymeHTa Do yIopa NOBepHHTe. HacaIka ABTomathueckn 3aΦHKChpyETc.
Y6eHITecb,HTO HacaKa 3aΦHKCnPOBaJaacb,NTaHbYB 3a HaCaKy.
YdaJIeHHe HacaIOK SDS-plus
OTTRHHTeHa3aI KpeIeKHyIO BTVIky(A)n,yIepKHBae ee,ydaIInTe HacaIky.

HacaKmoT 6bITb ropyMn nocne nCnoB3OBAHna. He npkaaTecb K KOHcy HacaKn pykoi!
IJIa CHaTIa HacaKb BcerDa HaDeBaIte 3aunTHbIe nepuATkn!
7.2 YcmaHO6ka / cHmue ecnmoZameIbHOzo npmpoHa 13 MM dJa csepeHua cmaru, depea u nnacmmaccbl (Puc. 2)
YcTaHOBka:
BbTnHHe HyepKHBaIe HKCHPYOHYO BTyIKy A n3 npoHa SDS.
OuHCTHTe XBOCTOBK aJaIaTepa HaHaHeCHTe Ha Hero HemHOro MacJa.
BCTaBbTe BcNOMoTaTeJbHbI NaTPOH B NaTPOH SDS.
MeJIeHHo IOBepHHTe HApBaBO.
OTnycHTeΦHKcHpyHO BTyIKyA.
ChTHe:
OTTHHTeHa3aI KpeEeKHyIO BTVIky(A)H,yeepKnBaIe ee,ydaIInTe HacaIky.
7.3 PeaylupoeKa aIy6uHbI csepeHeu (Puc. 3)
Iy6Hny CBepeHnMoXHO IpeBapHTeJIbHO H/HIN IOBTOPO HO OTPeryJNPOBaTb C NOMOIOO orpaHHHTeJI rIy6HHbI.
BcTaBBte Heo6xOaHmoe CBePNo. YcTaHOBtE orpaHnHTeJIy6bHbI B OTBepCTne BCnOMOraTeJbHOpyKoRTKN bblCTaBtE Tpe6yEmIO rny6bHy.
7.4 NbIe3aumHbI KOxyx (Puc. 4)
Ipeed BbInonHeHnem BepTkaJIbHorO yapHoro CbepeHnHaD rnoBoi nepeBnHbTe nblne3aunTHbIKoKxUepe3 CBePNo.
7.5 YcmaHoEka BCnOMoZamEnbHou pyKoRmku (Puc. 5)
BcnomoratEnbHyO pyKoTky MoXHO yCTaHaBJIbA Tb C yYeTOM KaK npabOpuyHoro, TaK n IeBopuyHoro NOJb30BaHn.

Bcerda nCnoJb3yIe HnCtpymEt C npaBnIbHo yCTaHOBHeHHo BcNoMOraTeJbHOn pyKoTko.
Ocna6bTe BCNOMOraTeIbHyO pyKoTky, BbIBePhyB ee.
IpybOpuyhix noIb3OBaTeJe, nepeBnHbTe 3axm BcNOMoTaJIbHOJ pyKoTKn uepe3 KpenekHyIO MyO TY 3a DepKaTeJem CBePJa, pyKoTka CneBa.
IЯпьорунбix noJIb3OBaTeJei, nepeBnHbTe 3axIM BCNOMORAteNbHOpyKoTknYepe3 KpeJekHyIO MyO Ty 3a DePkaTeJem CBePna, pyKoTka cnpaBa.
IobepHnTe 6OKOByIO pyKoTky B XeJaemoe NIOJXeHne N 3aTnHTe pyKoTky.
7.6 BbI6oppeXkuma pa6ombi(Puc.6)
Pepopatop MoXHO nCNoJIb3OBAbTB CJIeDyIOx npKIMax.
BpaataTeNbHoe cBepnHe
ДяЗakpyuBaHЯшуPyOBи CBepNeHЯВ CTaJI,ДepeBeИ ПlaCTMaCSe.
T
OndHOBpeMeHHoe BpaueHne n yap dIy cBepJeHna 6eToHa N KnpNnHou KlaKn
T
ToIbko yap
PpimHeTcIy IerKoro DOn6JeHn, cKaJIbBaHnI pa3NoMa.

BpaueHne Hacaok
Hepa6oay no3uynncnolb3yeTcra TOnbko dny nobopoTa nnockoro doIota B XeJaemoe noJoxHe.
Bb6epnte Heo6xOIMbI pexm pa60tI haxaTneM npeoxpaHHTbHOH KHOKN I NOBOPOTOM nepeKIOUOATEJIPEXIMOB, Ioka OH ykaxeT Ha CnMBOL HxKHO rpeXIMa.
Otnyctnte npedoxpahnteIbHyIO KhoNky I y6eIITecb, YTO nepeKJIuOaTeJIb peXIMOB 3aФNKCuPobAICI Ha MeCTe.
He cIeNyET bblbnpaTbpexkmpa60Tb, KOrda nHcTpymeHT pa6oTaet.
8.1 BknoyeHue /ebiknoyeHue (Puc. 6)
BcTaBbTe UHyp nHTaHn B po3eTky.
Дялэпсьнсгчмпт haхmnte BblknoateBbKJI/BbIKI (8).
IIOCTaHOBKN HNcTpymeHTa OTNyCTnTe BbIKHouaTeJIb BKn/BoKJ.
Ecnn BbI HaxMeTe Ha KhoNky 6JIOKInpOBKn (9), Korda haxaT BbIKNIOUaTeNb BKn/BbIKN, To BbIKNIOUaTeNb BKn/BbIKN OCTaHETcB pa6ooyem NOJoxeHN.
YTo6bI CHOBA OCB6OoNTb BBIKIOuTeNb BKn/BbIKn KpaTko HaxMnte Ha Hero, YTo6bI BBIKIOUHTb INCTpyMeH.
Yem cnIbHee Bbl HaxnMaete Ha BblKnIOuataJIb Bkn/BblKn (8), Tem 6oNbIe o6OpOtBi INCTpyMeHTa.
IcnoJIb3yIte 6oone Hn3Kne o6opotbl nna HauJa pa60tbl.
8.2 Ipeeknoyamelb HanpaenHua epaueHua
IpeeknioateBnHappaBneHnBpaueHn (7) cnyknt nonpepeHn HnpaBneHn BpaueHn IHCTpyMeHTa.
YTo6bI Bb6paTb npaBoe BpaSeHne, OTnyCTnte BbIKIOuataJeBkN/BbIKn I nepeBeiTe nepeKIOUaTeJb HapBaJIeHna BpaSeHna Ha npaByIO CTOpOHy (R) INcTpymEnTa . YTo6bI Bb6paTb o6paTHoe BpaSeHne, nepeBeIte nepeKIOUaTeJb Ha JEBYIO CTOpOHy (L) IHcTpymEnTa.
Ipn n3MeHHeHH noLoXeHn pyHuara y6eInTeCb, yTO BbIKNoCuTeNb BKn/BbIKn OTnyuEn, n DBruratelh HenoDbNKeH.
9 TEXHnueCKne DAHHbIe
13 OKPYXKAIOUJAR CPEDA

Ecnn no nCTeueHn BpeMeHn 3dJIne Ntpe6yET 3aMeHbI, He Bbl6paCbIBaIteero Bmecte c DomaunHM Mycopom, a No3a60TbTeCb O TOM, YTO6bI OHO NOdBeprnoCb nepepa60Ke Ha BtOpuHoe cbIpbe.
C OTXODAMN 3JIeKTPoHnCTpyMeHTOB HeJIb3I NOCTyNaTb KaK C O6bUHbIMN DOMaUNHMN OTXODAMN. YTNIN3npyTe 3JIeKTPoHnCTpyMeHT uepe3 COOTBETCTByIOuIne yUpeJxDeHnR. ObpaITnTeCb B MeCThBi OprAhBi Bnactn IInN K npOdaBcy 3a INHOpMaunE O nyHKtax c6opa n Nepepa60TKn TAKNX OTXODOB.
14ДЕКЛAPALEO COOTBETCTBIM


VARO N.V. - Vic. Van Rompuy N.V.- Joseph Van Instraat 9 - BE2500 Lier - BEJbIy, HACTOUIM 3aBJIeT, UTO,
PpOdyKT: ydaHnA npelb 750 B
Mapka: POWERplus
MoIeIb: POWX1170
COOTBETCTBYET OCHOHBIM Tpe6OBAHNm IN DpyrIM peNEBaHTbIM NOLOXKeHnM npIMeHNMbIX DInpeKtNB Ebponeckoro Co03a, kacaUxxCsE Ebponecknx rapMOHN3uPOBaHHbx CTaNapTOB. IIO6a HecaHKUHOHpOBaHHa nepeJeIka annapaTa deJaet daHHyIO DeKnapaun HeJeCTBntbHoH.
Ebponeckne dnpektnbbl (BkIIOUa, ecn npmeHMO, nx nonpaBKn Do daTbI noDncaHna):
2006/42/EC
2014/30/EU
2011/65/EU
Ebponeckne rapMOHn3npOBaHHbIe cTaHdapTbI (BKnIOUaY, ecN npImeHMo, nx nonpaBkn do DaTbI noDnncAHNA):
EN60745-1:2009
EN60745-2-6:2010
EN55014-1:2017
EN55014-2:2015
EN61000-3-2:2014
EN61000-3-3:2013
Держател Тхиеско ДOKум entaци: Флпн Ванkeхов (Philippe Vankerkhove), VARO -Vic.Van Rompuy N.V.
HnKeNoDnncabuncIeNCTbYeT OINMeHINcNOJIHNTeJIbHOrO dIpeKTopa KOMnaHIn,
Philippe Vankerkhove
OTdHn HopMOKoHTpOra-MeHeJxep no BOnpocam corlaocBaHm
09/10/2020, Lier - Belgium
1 IPEДHA3HauEHNHe HA ELEKTPuyeCKATA MAUNHa ....2
2 OINCAHNE 2
3 CnncbK HA CbIbPjXAHNETO HA IAKETA. 2
4 CnMBOJIH 2
5OBsI INPEdUINPEXJDEHnA 3A B63O1ACHOCT INPn H3IOJI3BAHE HA EJEKTPNueCKn NHCTPYMEHTn. 3
5.1 Pa6omHa 3oHa 3
5.2 EneKmpuuecka 6e3oNaChocm.. 3
5.3 JIuHa 6e3oNaChocm 4
5.4 3no36aHe u apuxu 3a Mexau3upaHua UhcmpyMeHm... 4
5.5 Cepu3Ho 06cnykeaHe 5
6 CNEUJIHIN IPNABUNA 3A BE3OJACHA PABOTA C yIAPHN BOPMAUHHN KbPTaU. 5
7 IPEIN DA 3ANOCHETE PABOTA 6
7.1 NocmaeHa u cmeHaeHa Ha npo6uau Ha kpaHuu (Uz.1) 6
7.2 Mohmupahe u demohupahe Ha donbHumeHua nampoHHuk 13 MM 3a npobuahe B Memai, dbpeo u pIacmaca (Fue 2)6
7.3 Ospanuumen Ha dblo6uHama Ha npo6ueaHe (Fua 3) 6
7.4 Ipnomueonpaxoe Kanak (Fua. 4) 6
7.5 NocmaaHe Ha donbHumeHama pbkoXgamka (Fua. 5) 7
7.6 136op Ha pekum Ha pa6oma (Fue. 6)
8 PAEBOTA 8
8.1 PpeeknIOyeameI 3a EKnIOyeHa/Eu3KnIOyeHa (Fua.6) 8
8.2 Iocmye 3a cmeHyahe Ha nocokama Ha ebpmene 8
9 TEXHnueCKn DAHHN 8
10 8
11 TEXHnuecko OBCnykBAHE 9
12 TAPAHU 9
13 ONA3BAHE HA OKOJIHATA CPEDA 10
14 DEKJIAPAUJ3A CbOTBETCTBNE 10
YДAPHA БОРMAШИHA 750 WPOWX1170
1 PENEHAA3HAUeHHe HA EJEKTPuyeCKATA MAUNHA
EneKtpnueckkata MaunHa e npedHa3NayeHa 3a n3CnuAHe n npo6nBaHe B dbpBO, MeTJI, pIaCTmaca n 3ndapna. MaunHata He e npedBnDeHa 3a n3N0J3BaHe B npOMnJneHOCTTa.

IpeynpexJeHne: Ppei Da n3non3BaTe ypeia npooyeTe BHNMaTeJHO TOBA pBkoBOcTBo n 06uHTe HnctpyKun 3a 6e3onacHocT, 3apaN BaWata co6CTBeHa cnryphocT. Baunr MexaHn3npaH HnctpyMeH Tpr6Ba da ce npedAba Ha dpyr caMo 3aeDHo c HactOuaNTe HnctpyKUn.
2 ONICAHNE
- OrpaHnUHTeHa IbIbOuHata Ha npo6nBaHe
- NaTpoHHNK SDS
3.ДоьнHTeHа pвКoxBaTka - ПразвклioчbaTeи Ha peхима Ha pa6oTa
-
3actonopraBaUc 6ytoh 3a orpaHnHTeJHa Dbl6OuHata
-
Meka pkoxbatka
- JIoCTYe 3a CMeHЯBaHe Ha NOCOKaTa Ha BbPTeHe
8.ДыуноионEnпpeВКЛIOUваTeN"ВКЛ./ИЗкN"(On/off) - 3actonopraBa u6yToH
10.ПрOTиВОпрaxOB KANAK - PerynaTop Ha ckopoCTTa
3 CnncbK HA CbIbPjXAHNETO HA INAKETA
- OtctpaheTe BCnKoNAKOBbHm MaTePnAaN.
OTCTpaHete eBHTyaHn DpyrO npakOBbHn IN BpeMeHHN NOCTaBKn (aKO mTaKnBa).
PpOBepeTe daHn NaKeTbT CbIbPka BCuKN KOMIOHeHTN.
IpoBepTe daHypeDbT,3axpaHbAunrKa6eN,uencenbTu akcecoapTe He ca 6nnn NobpeDeHn npu TpaHcnpTuPaHe. - Ipa3eTe onakOBbHnTe MaTePnaN KoIkOTo e Bb3MOxHO no-daJeu Do KpaHa rapaHcIOHHn nepno. N3XBbPneTe B nyHKT 3a Cb6nPaHe Ha otNaDbu, Korato ypeBt n3JIe3e ot ynoTppe6a.

BHIMAHHE! OnakobbunTe MaepnAn He ca nprayKn! He no3BOnBaTHe Na deca da npraT c haJIoHOBN Top6uKn! Pnck ot 3aDywaBaHe!
16p.ydapHa 6opMaunHa
16p. NapbUHnK
36p. cBpeIa SDS (8/10/12 x 150 MM)
26p.Дпета(14x250MM,1npoбо,1 nlocbKceka)
1 NaTpoHnK n aanTepe 13 MM
1 npotnboonpaxoB kaak
1IiHeaI 3a IbIbOuHaTa

B cnya, ye hakon yactn Iuncbat nna ca nobpepeH, Cbpxkete ce c MeCTHnI npedctabNTeJ.
4 CnMBOJIH
B HactoIHHN K I/II N Bbpy MaunHaTa Ca I3NOJ3BaHn CJIeHNTE CNMBONI:

BcbOTBcTCTBnE C OCHOBHnTe npNIOXIMN CTaHdApTN 3a 6e3ONaCHOCT Ha eBPoneckNTe DInpeKtNB.

Hocete 3aunTHn ouHa n HayuHnuc.
| Машана OT II Клас – Двийни иизолаць – He ве необховим Заземен центел. | Пюочетete Инструктугпес Внимателно. | ||
| Предунрекдава 3a сб自由贸易а Опасост OT наразнaya ве наха, смьрт Или пореда на Машината в с颔чай на Нессантахе на указаньага, сддьржанны сe в Н actoryшянарьчник. | Hocete 3aшитни ръкавци |
I3BaXdaHe Ha HnCTpyMeHTa "SDS-plus":
- ɪntərɪnneɪe Haɪaɪd 3axBaɪsaɪaɪta Btɪŋka (A), 3aɪpɒkTeɪ nɪnɪsBaɪdete npɒbɪbaɪnɪy nHCTpymænt.

PpHaJxHocHTe MoKe Da ca ropeu cneynotpe6a. He DokocBaTe BbpxHa npHaJxHocCTTa c pbka!
Bunharn n3noJ3BaIte npedna3Hn pKabuN 3a OTcTpaHraBe Ha npHaJneXHocTta!
7.2 Mohmupahe u demohupahe Ha donbJHumeHHua nampoHHuk 13 MM 3a npo6ueane e Meman, dbpeo u nnacmmaca (Fue 2)
MOnTupaHe:
- ɪəʌpʌnɪte Haɪdɪs ɪaɪpɒkTe 3æxbaʊaʊaTa Btɪŋka A Ḥaɪtpɔhɪnka SDS.
IOnuHCTeTe ONaWKaTa Ha aAnTepa n rO HAMaKHe C TbHbK Npact rpec..
BkapaTe DonbHnHTeHnnaTpoHHNK B naTpoHHnka ,SDS".
3aBbptTe6abHOHaACHO.
OTnycheTe 3axBaauaata Btyka A.
DemOHtIpaHe:
- ɪntərɪnneTe Ha3aɪd 3axBaɪsaɪaɪta Btɪŋka (A), 3aɪpɒkTeɪ nɪnɪsBaɪdete npɒbɪbaɪnɪy HICTpymEnT.
7.3 OapaHuyumeHa b 60uHama Ha npo6ueaHe (Fua 3)
BaWata DbIbOuHnHa Ha npoBnBaHe MoKe Da 6bJe PpeBapntHo HacTpoEHa I/INIOBTOpeHa C NOMOHTa Ha ORpaHUnTeJHa DblbOuHnHaTa Ha npoBnBaHe.
BkapaTe Heo6xOuMnI INCTpyMeNT 3a np6uBaHe. NocTabeTe OrpaHnUteJI B OTbopa B DOJbJIHHTeJIHaTApkoXBAtka HargaceTe Heo6xOuMaTa Dbl6OuHa.
7.4 Ipomueonpaxoe kanak (Uz. 4)
Пльзerte npOTиВОпрaxOBЯkanнадnpOБИBaUЯИHCTpyMeHT,пpeДЯИЗВьршTe KaKBOTO n da 6nIO ydapHo npOБИBaHe nad IJIaBa cN.
7.5 NocmaaHe Ha donbHumenHa pkoXamka (Ua. 5)
Доьннелната рькхватka може да ce постави по начин удобен 3a xopa, сныжи сс дясна слпьаразрьka.

BnHarn n3non3BaIte MaunHaTc npaBnHNo noCTaBeHa dOnbHnTeJHa pkoXBaTKa.
Pa3BnTe DoIbHnHTeHaTa pbKoXBaTka.
3a xopa, pa6oTeu n C JnCHaT a pbKa, nIb3HeTe cKo6aTa Ha dONbJIHnTEJIHnTa pkoXBaTKa C dpbXkata HnRABO Bbpxy BtUkata 3aD nbPkaHa np6nbAunnHCTpyMeHT.
3a xopa, pa6oTeu n C JnBaTa pKa, nIb3Hete cKo6aTa Ha dOnbHInTeJHaTa pkoxbatka C dpBkkata HnACHO Bbpxv Btynkata 3aD bpxkaHa np6nBaunnHCTpymEnT.
3aBbptete cTpaHnUHaTa pBkoXBaTKa B JKeJHaHTo NIOXeHne n 3aTeHHeTe.
7.6 136op Ha pexum Ha pa6oma (Ua. 6)
PotaunHata ydapha 6opMaunHa moKe da pa6OTn B cJeHNHe peKIMN:
BbpteINBO npo6nBaHe
Kato OTBepTka n 3a npo6nBaHe B Metan, DbpBO n INaCTMaCa.
Tl YdapHO-BbpteJIbBO npo6nBaHe
EINHOBpeMeHNO BbPteJIINBO u yapHO DeIcTBne 3a npo6nBaHe B 6eToH n 3nApna.
T Camo yapno dneiCTBne
3a neko n3yKbaHe, KbPTeHe npa3pywaBaHe.
T BbptHe Ha npobBaunnHcTpymeHT
Hepa6oTHO NOJoxHe, KOeTO Ce n3nON3Ba cAmO 3a 3aBbPtaHe Ha NIOCKO dNeTo B XeJaHOTo NOJoxHe.
I36epete Heo6xOIMnpeKm Ha pa6ota, kato HATNCHe TpeDna3Hn 6yTOH n 3aBbPTnte npEbkJIOUbaTeJ, DOKATO NOCOu CMBOna Ha JeJaHHpeKm Ha pa6ota.
Otnyche Te npedna3n8 bytoH npoBepTe daH npEbkIIOvBaTeT Ha pexima Ha pa6ota e 3aknoyeH.
He cmehaepekma ha pa6ota,dokaTo MaunHaTa pa6OTn.
3a 3aBnHTBaHe Ha 6oIToBe HAnpaBte CnpaKa B pa3eJa „Yka3aHn 3a N3NoJ3BaHe".

Bnhar n3yaKbaIte MaunHata da cnpe HantbIHO, npedn da npomeHTe pexMa h pa6ota - caMo BbpTeJIHBO, camo ydapHo IIN ydapHOBbpTeJIHBO DeiCTBna.

He n3no3BaIte naTPOHnka cbc cbeHNHTe1 SDS B KOM6nHaunca C cyHKuYTa yIapHO DeIcTBne/yIapHo npO6nBaHe!

BHMaHHe! KOrato pa6oTHe B yDapHO-BbPTeJnB peXm, He n3NoJ3BaIte rOJAM HaTnCK. PpeKomepHo cNlHnA T haTnCK ige ynpaxn HEnyXHO rOJAMo HaTOBapBaHe BbpxeJeKtpomOTopa. PpOBepraBe np6uBaunTe HHCTpyMeHTn peoBHO. 3aToUBaIte nnn CMeHraTe N3TbPeHNTe np6uBaun HHCTpyMeHTn.
8.1 PpeKnIOy6ameI 3a 6KnIOy6aHe/u3KnIOy6aHe (Fua. 6)
BknouteMaunHaTaB eJeKtpnueckaTmpeka.
PycheTe Ja pa60n, KaTo HaTncHe Te npeBknHcyBaTeJ (8) 3a BkIIOUbaHe/INKJIIOUBAHe (on/off).
OTnycHete npBkIkuBaTeJra 3a BkIIOUbaHe/INKIIIOUbaHe, 3a Da cnpTe MaunHaTa.
AkoHaTnCHTe 3actOnopraaun6byToH(9),DOKaTO npeBKnIOuBaTeJrT 3a BKnOuBaHe/N3KnIOUBaHe e npITnCHaT, nocNeHNrT ue octaHe B pa6oTHo noIoxHe.
HaTnchete Oue BeHbK npeBkHIOUbaTeIa 3a BKnIOUbaHe/IN3KnIOUbaHe (8), 3a da ro OCBO6OJNTe IN N3KNIOUHTe MaunHaTa.
KoIkoTo No-CnHHO HATNCKaTe npeBKnIOuBaTeJIa 3a BKIOUBAHe/INKIOUBAHe (9), TOnKOba no6bp30 ue pa6OTn MaunHaTa.
B HauaIIOTo n3NON3BaITe MaJIka ckopoCt.
8.2 Iocmye 3a cmeHaeane Ha nocokama Ha bpmhe
IocTeTo (7) 3a cMeHЯBaHe Ha NocKaTa Ha BbPteHe e npedHa3HaueHo Da onpeDeN B KOI NOcoka Da ce BbPTn npoBnBaunr HnCTpyMeHT.
3a da n36epete nocoka Hanpei, OTnycheTe npebKIOUbaTeIe 3a BKNIOUbaHe /n3KIOUBAHe n
n36ytaite IocTyeTo 3a CMeHraBaHe Ha noCOKata Ha BbPteHe B NOJKeHne HAdrcho (R) Ha
MaunHata. 3a da n36epete o6paTHa noCoka Ha BbPteHe, npemecTeTe loCTyeTo HAnBO (L)
Ha MaunHata.
YBepTe Ce, Ye npeBknHouBaTeIa 3a BKNIOUbaHe/IN3KnIOUbaHe e OCB06OJeH IN DnBraTeIaT e HEnoDbNIXeH, npei Da CMeHIne TocOKaTa Ha BbPteHe Ha npo6NuAunu INHCTpyMeHT.
9 TEXHnueCKn DAHHN
HnBO Ha 3ByKOBoTo Hnrahe LpA 91 dB (A)
HnBO Ha 3ByKObAta MoUHOcT LwA 102 dB (A)
aw (Bn6paun):
8,7 M/c²
K=1,5M/c²
11 TEXHnuecko OBCJnyKBAHE
IopdIbpxaIte npoBnBaunTe HnCTpyMeHTN BnHaHn YnCTn.
He n3noJ3BaIte pa3aJauXMMKaN 3a nooNCTBaH He nlaactMacOBITE qactn.
- PpOBepTe Kap6oHOBnTe YeTKn, aKo ce NOnyUaBa npeKoMePHo NckpeHe.
- Na3eTe BeHTnlaIauNoHHnte KaHaJIu NcCTn.
12 TAPAHUN
To3n npodukT mma rapaHcnoHEn cpoK 36 meceua, KOITo BIn3a B Cnna OT daTata Ha nokynka Ha nbpbwn noTppe6nten.
Ta3n rapaHnI NOKPbBA BCNUKn DeeEeKTH Ha MaTePnAIN I pOn3BOODCTBHeN DeeEeKTH, HO He BKNIOUBa: 6aTePN, 3apAnH yCTPOINCTBA, DeeEeKTH NaCTN BCNEIDCTBne Ha HOpMaJIHO n3HOCBaHE n 3TpNBaHe KaTo NaRePN, YeTK, Ka6eIN uIeNCeIN nII na akcecoApn KATO CBpeDn, HApauHnI 3a npoBnHn INCTpyMeHTn, peKeuI dNcKOBe m T.H., NOBPeDN I DeeEeKTH PON3TuAaUN OT HnpaBnHa yNOTpe6a, 3IOnOJyKn nIHN HAppaBEN nPOMEHN, HHTO TpaHCnOPTNTE pa3XODN.
Iobpei n/nnn deepeKtn npOn3TuHaaun ot HnpabNlHo ynoTpe6a He ce 0xbauat OTe3n rapaHnOHn ycNoBna.
OcbeH ToBa He Hocn HnKaKbA OTROBOpHOC3a TeNECHn HapaHbAHn IpOn3TuaUuN OT HnpabunHaTa ynotpe6a Ha IHCTpyMeHTa.
PemOHn MOrat da 6bDaT n3BbPwBaHc cAmO OT yNtHOMoUeH nOTpe6nteckn cepBn3EH eHTbp 3a eNEKtpoHCTpyMeHTn.
Moxete da noIyute donbIHTeHa HOpMaun Ha Homep 00 32 3 292 92 90.
BcnuK TpaHcnpTH pa3xoJn 6bDat noetn ot notpe6nten, oCBeH aKO nncMeHo He e dorobopeHO npyro.
B cIto BpeMe, He Morat da ce npedraBaT npeTeHcNn no rapaHcnaTa, aKO NOpeDaTa Ha ypeDa e BCJeDCTBHe OT nphe6perBaHe Ha TexHueCKTo 06cnyKbaHe nn npetOBapBaHe.
- Ot rapaunra KaTeOpuHo Ce n3KlNoUba NobpeDa, KOrTo e B pe3yIITa TOT npOHKBaHe Ha TeuHocT, MHOrO npax, PpeHaMepeHa NobpeDa (ymnIeHa nn Iopadn TotanHO 6e3rpNkne), HeNoDxOJaUo n3NoJ3BaHe (n3NoJ3BaHe 3a ceJI, 3a KOnTO ypeBbT He e NODXoJU), HEKOMNeTeHTHO n3NoJ3BaHe (HaNP. Hecna3BaHe Ha IHCTpyKUnTE B pBkoBOdCTBOTo), HEKOMNeTeHTeMHOTaK, rpbMOTeBvueH ydap, HeppaBUNHO HanpeKeHne. To3n CnncbK He e n3YeepNaTeJIeH.
- Ipiemaheto Ha rapaHcnoHHn npTeHcHn HNKora He MoKe da doBeDe Do ydbJxabaHe Ha rapaHcnoHHn cPOK, HTO do 3anOuBaHe Ha HOB rapaHcNoHc POK B CnyaH Ha 3amHa Ha yCTpoIcTBO.
- YcTpoiCTBaTAt HnN DeTaNITE, KOnTO ca 3aMeHEn CbO6pa3HO rapaHcNoHHnte ycNoBna, cJeIOBaTeJHo OCTaBAT CO6CTBeHOCT Ha Varo NV.
Hne cn 3ana3BaMe npaBTo Da OTXBpNIM BcRA Ka PpeTeHnra, B cIyauaYe NOKyPkata He MoKe da 6bDe npoBepeHa nII, KOrato e rCHO, Ye npOdyKTbT He e NOdIbpxkAn npaBnHNO. (NouchTaHe Ha BeHTnlauONHHnTe OTBOpn, peoBHa NoDpBXka Ha KapboHOBnTe YETKN,...)
CbXpaHraBaIteΦaKTypaTa 3a NOKyPkata KaTO DOKa3aTeJIcTBO 3a DaTata, Ha KOrTo e HapabaHa T.
Tp6Ba Da BbPHeTe HeMeHTnpaHn HNCTpyMeH Na npOdaBaua B npneMnBO YnCTO CbCToRHe, BOpINHaJIHOT My IANTO Kyapue, aKO yCTpoIcTBOTO mTaKOBa, npndpyKaBAHO OT DOka3aTeNCTBOTO 3a NOKyPkata.
13 OIIA3BAHE HA OKOIHATA CPEIa
Ako cIeI npOdbJxHtEnHa yNoTpe6a MaunHaTa Bn ce HxKdae OT NOmHa, He n3XBpIyIe CTapaT a Pn DOMAKINCKITe OTnaDbu, a r yHnIOXKeTe No HaUNH, 6e3oNaceH 3a OKoHNaTa Cpea.
HeHyxHnTe eIeKtpnueckn npOyKTn He Tp8Ba da 6bDaT n3XBbPnHn 3aEDHO cDomaknHcKnTe OTnaDbu. MoJ npoyte Kbde mMa Bb3MOxHoCTn 3a peuknnpaHe. POnckaiTe OT MeCTHnE BJaCTn nJIn OT npOdaBaua CbBeTn OTHOCHO peuknnpaHeTo.
14 DEKJIAPAUJ3A CbOTBETCTBNE


VARO N.V. - Vic. Van Rompuy N.V.-deKlapnpaT, Ye
Joseph Van Instraat 9 - BE2500 Lier - Bejtrna
IpoDyKT: YdapHa 6opMaunHa 750 W
Mapka : PowerPlus
Moden:POWX1170
e B CbOTBETCTBnE C OCHOBHnTe N3NCKBaHnI DpyrncBcOTBeTHn pa3nope6n Ha npINOxHMITE Ebponeckn DnpeKtNB, 6a3npaHn Bbpx npnaRaHeTo Ha EbponecknTe xapMOH3npaHn CTAndaptn. Bcya HeynbHOMoSeHa MoDfKnKauaHa anapata aHynpa Ta3n DeKnapaun.
Ebroneckn DnpekTbN (BkIIOHTeJIHO TexHITe npomeH NbM daTaTa Ha IOpINcBaHe, aKO ca npINOxIMN):
2006/42/EO
2014/30/EU
2011/65/EU
Ebponeckx xapMOH3npaHn cTaHdapTn (BKNIOHTeJIHO TexHNTe npOMEH NbM daTata Ha NOIDNCBaHe, aKO ca npINOJXIMN):
EN60745-1:2009
EN60745-2-6:2010
EN55014-1:2017
EN55014-2:2015
EN61000-3-2:2014
EN61000-3-3:2013
CbXpaHnTeJ Ha TexHnueckaTa DoKymeHTaUa: FInnn BaHkepKxOB, VARO - Vic. Van Rompuy N.V.
DonyoDncaHnT DeiCTBa OI MeTo Ha N3nJIHnTeHnI DaPeKTop Ha KOMnaHnraTa,
Philippe Vankerkhove
PereyanaOnHHn Bbnpocn - MeHnIxKbp NO CbOTBcTCTBnraTa09/10/2020, Lier - Belgium
OTSTARVE 2
2 KIRJELDUS (JOONIS A) 2
3 PAKENDI SISU 2
4 SUMBOLID 2
5 ULDISED HOIATUSED JA OHUTUSJUHISED 3
5.1 Toopirkond 3
5.2 Elektriohutus 3
5.3 Oht inimstele 3
5.4 Elektritöriistade kasutamine ja hooldamine 4
5.5 Teenindus 4
6 SPETSIIFILISED OHUTUSJUHISED LOÖKTURELLIDE JA PUURVASARATEGA TÖOTAMISEKS 4
7 ENNE TOO ALUSTAMIST 5
7.1 Toovahendite paigaldamine ja vahetamine (joonis 1) 5
7.2 Terase, puidu ja plastiku puurimiseks moeldud taiendava 13 mm padruni paigaldamine/eemaldamine (joonis 2)
7.3 Sugavuspiirik (joonis 3) 5
7.4 Tolmukate (joonis 4) 6
7.5 Lisakaepideme paigaldamine (joonis 5) 6
7.6 Toorezimi valimine (Joonis 6) 6
8 KASUTAMINE 7
8.1 Sisse- ja valjalulitamine (joonis 6)
8.2 Edasi/tagasi kang.. 7
9 TEHNILISED ANDMED 7
10 MURA 7
11 HOOLDAMINE 8
12 GARANTII 8
13 KESKKOND 8
14 VASTAVUSDEKLARATSIOON 9
LOÖKTURELL 750W POWX1170
1 OTSTARVE
5 ÜLDISED HOIATUSED JA OHUTUSJUHISED
T Ainurt vasardamine
Kergeteks raiumis- ja lohkumistödeks.
T
- Tarviku poöramine
ATTENTION! Wear hearing protection when sound pressure is over 85 dB(A).
aw (vibratsioon)
8,7 m/s²
K=1,5m/s²
11 HOOLDAMINE
Toode: Looktrell 750 w
09/10/2020, Lier - Belgium
1 3ACTOCYBAHHJ. 2
2 OINC (PNC. A) 2
3 IAKYBAJIbHnIINCT 2
4 103HAUeHHr 2
3aBxN BnKOpncToByTe iHCTpyMeHT i3 npaBnIbHO BCTaHOBNeHOO DonomixHoO pyko.
3HIMITb DONOMIXHy pyHKy, BiIDKpyTNBUNrBNHTN.
IJIa KOpNCTyBaHHI npaBOIO pyKOIO NocYbTe 3aTnCKaU DOnOMIXHOI pyuKN IOBepx MaHKeTI NO3aIy TpIMaHa CBePdNa,pyKa 3hAxOuITbcr JIBOPuy.
IJIa KOpNCtByBaHHJIIOO pyKOIO NocyHbTe 3aTnCKaU DOnOMixHOI pyuKN IOBepx MaHXKeTN I03aNy TpIMaHa CBePnA,pyKa 3NaXoDnTBc npabOpuy.
NobepHtB 6iHy pyky B nOtpi6He noIoxeHHra Ta aphiKcynTe.
7.6 Bu6ip pexkmy ekcnnyamaui (Puc. 6)
Iepopatop Moxha BnKOpncTOByBaTn B HabeDeHnx HnXype pexImax ekcnnyataui.
Pothe 6ypinHn
Дя ВИКPyчУВаннЯ Та CBердлпннЯ CTani, DepeBa i nnaCTnky.
T - yaphe 6ypinna
Ondohoche o6epTaHH Ta yDapHe 6ypiHn8 6eToHy Ta KlaKn
T -yaHn peKmM
nnpoctoro po3uennneHHra piaHHra Ta demoHTaxy.
.06
- ObertanhybpoBoi HacaKn
Hepo6oue noJoxeHH, 10 BnKOpNCTOByETbCra Nlwe dIy o6eTaHH nIackoro 3y6nla B notpi6he noJoxeHH.
Bn6epitbnoTpiHmpeXmpo6oTu,HaTncHyBun3an06jxHy KhoNky Ta o6epTaOuHn nepemkaqu peXmIB,doKN BiH He Bkaxe Ha CmBOJ noTpi6Horo peXmMy.
Bidnyctitb 3anobixhky Khonky Ta nepeBipTe, YI nepemika y peximib 3a6lokoBaHO. He BnbpauTe pooboun pexim, kkuo IHctpMeHTEKcnnyaTyEcra.
IIOO BkpyuBaHHaNb. PO3dIn: «IHcTpkyci 3 BnKOpncTaHHa»

Nepu hix 3miHnTu cyHKciIO 6ypiHHy, ydpHn peKm/CBepdInHH, 3aBXnn DoueKaIteCra, DOKN npuaad nobHicTTO 3ynHHTbcra.

He BnKOpncToBnyTe natoH i3 po3'cMOM SDS y noeHaHHi 3 ydapHM pexNMOM / pexNMOM ydaphoro 6ypiHHa!
8 EKCIJYATAUJI

Baxnbo! Pid yac ydapHoro 6ypiHnnoTpi6eH Hn3bKn Tnck. 3aHaTo BnCOKn Tnck npn3BeDe do HeNoTpi6Horo HaBaHTaXeHHa MoTO. PerynpHo nepeBipraTe CBepda. 3atynneHe CBepdo cnId HarocTpTu a6o 3amHtN.
8.1 Nepemukau (Puc. 6)
IiEHaTe KOMnneKToHypB Do DKepeNa KInBneHHa.
Uo6 3anyctnIn iHCTpyMeHT, HATNCiB nepeMnKaay (8).
Uo6 3yinnHnIn iNCTpyMeHT, BiDnyctiB nepemka.
Kaio Bu Hatackae T KhoNky fikcaii (9), KOHn HatachyTo nepemkaay, nepemkaay 3aIIuAeTbcB pOboOmy noIoxKeHHi.
3HOBy BiNcyTn nepemkau (8), HATNCHtB Ha Hboro Ta BUMKHITb iHCTpyMeHT.
LcNbHie Bn Hatackae Tepemkaay (8), To WbUdwe Bin npaioBaTme.
BukopncTobyTe MeHsI WbNdkocTi dnycky.
8.2 Baxijb dna nepemuKaHHa nepeo/ha3ad
Baxinb dny nepemnkaHn BnepeHa3a7 (7) Bu3haacn Hapmok o6epTahn iHCTpyMeHTa.
Дя осят haаьру (R) Ha iNCTpymEnTi. 6bpatn opeTaHHa3a, nepeBdiTb BaxiNb JЯ npemKanHЯ BnepeHa3aI npabopyu (L) Ha iNCTpymEnTi.
3MInHIOUOHNIOJXeHHBaKeJIa,NEpeKoHaITeCb,IO NepeMnKau po36IOKOBaHO,a DBNrH He pyxAcTbcra.
9 TEXHIyHI DAHI
| Modèle | POWX1170 | |
| Нарруга | 230-240 B ~ 50 Гι | |
| ВхіднaitоужнICTь | 750 BT | |
| Швийскість 6еЗ наразоженя | 0-1050xB.-1 | |
| Сида улару | 0-4900xB.-1 | |
| Корпунс | SDS | |
| Мас. дiamетр севedlyня | БetoH | 26 MM |
| Столь | 13 MM | |
| Деревina | 40 MM | |
| Bara нетTO | 4,9 кr | |
| Клас iзолацii | / II | |
10 Lwym
3HaueHH pIBHb Wmy, BmipjHi 3riIDHO 3 BiIDNOBIDHM CTaHdapTom. (K = 3)
PIBeHb akyctnHoro Tncky LpA 91 d6(A)
AkyctnHni piBHeh notyXHocti LwA 102 d(A)
YBAGA! OdaTae 3axnChi HabyuHnKn, KOJI 3ByKOBn TnCK npeBnUyec 85 d6(A).
aw (bi6paizj)
8,7 M/c²
K = 1.5M / c^2
11 TEXHIyHE OBCJyROBvBAHHa
CbepeNo NOBHHo 6yTN 3aBXn YNCTmM.
He BnKOpNCToBnyTe Kopo3iHi peOBOHN dIg OUYUeHH INaCTNKOBHX DeTaneJ.
- Ipepebipte ByrInbHi uItkn y pa3i HAdMpHoro icKpiHHa.
CTeKTe 3a Tm, 0o6 BeHTnJraHi KaHaJI N He 6yJI N 3acMieHi.
12「APAHTI
Ha cei npodukT hadaetbcra rapantia 36 micaib, kka habnpac uHHocTi 3 MOMHTy npudbaHn nepuim KopncTybaem.
Lra rapaHTia nouHIOeTbC Hb CIm MaTePiIbHi Yn BnPo6NHy I HeOnIK, 3a BnHrTKOM: akymyIaTOPIB, 3apAINHX npIcTPOIB, NOoKOJXeHNx DeTanei, 0o NiIpaIaOTb HopMaJIbHomy 3HOcy, HAnpKNaI, NiDUnNHKn, ZITKN, KaBeI Ta WTeKePN, a6o DonomixHoro O6LnHaHHa, HApNKnIa, CBepnla, HacaKn CBePdna, NIIKN ToIO; NOoKOJXeHHa a6o DeΦeKTH, 0o BNHkaOb BHacNIIDOK HeHaJIexHOrO NOoJXeHHa, abapi a6o 3Min; Jk i BapTOCTI TpaHCnOpTyBaHH.
- rapaHTia TAKOX He nouHPOeTBcHa noUKoJKeHHa Ta (a6o) deFeKTH, cnpuHHeHi HeHaJIeXHM BnKOpNCtAHHm.
Mn taKoB iDMOBJIeMoC BID 6yNb-koB iDIOBIAIbHOCTi 3a 6yNb-ki TIneChi ykoJKeHH, cnpuHHeH HeBDIOBHN M NKOpNCaHHm npuNaNy.
- PemOH T MoXe BnKohyBaTn JIiSe aBTopu3OBaHn UeHTp 06cnyroByBaHH KJIeHTIB IInr hCTpyMeHTiB Powerplus.
Bn 3aBxM oKeTe OtpMaTn DoaTkOBy iHΦopMaizio 3a Homepom 00 32 3 292 92 90.
- Bydbs-ki TpaHcnpTHi BnTpTaN 3aBxDn Hece 3amOBHnK, kIoo iHwe He 6yde noroJKeHO NHCbMOBO.
- YToJxueHne npnMaHObCJKOHi IpeTeH3Ii 0oIO rapaHTII, kUIO NOuKOxHeHH npnJaHy e HacNiIDkom He6aIoro TexHiuHOrO 0cCnyROyBaHHy UepeBaHTaXeHH.
- BezymOBHO BnKJIIOUeH0 3 rapaHTi: NOsKOJKeHH, cnpruHHeHi npOHKnHeHHm piINH, HAdMIPHM IPOHnKHeHHM INIy, HABMNCHM NOsKOJKeHHM (HaBMnCHO a6o uepe3 rpy6y HeIb6anictb), HeHaJIexHM BnKOpNCTaHHM (BnKOpNCTaHHM dIra ciJe, He nepeIb6aueHnx Ira cboRo npIpaNy), HEkOMnTeHTHM BnKOpNCTaHHM (HaPnIKNaI, HeIoTpMaHHI IHCTpyKci, HaBeDeHHx y cboMy nOciBHKy), MOHTaxem HEkOMnTeHTHHMn φaxIBzAIMN, yIapom 6bnckabKn, HeBIIDNoBIDHOI Ho HAnpyroIy y MepeXI. LcIcnCOK He e BVueepnHM.
- Пингггп npteH3i 3a rapaHTieIO He npu3BOJNTb Do npoOBoXeHHA TepMHy rapaHTII a60 noyATky HOBOrO rapaHTiHoro TepMHy y pa3i 3amHN npuNaIy.
Tomy npictpoi a6o deTani, 0o 3amHIObBcB iDnOBiHO do yMOB rapaHTii, 3aIIuAOTbcB BlachictIO kOMnaii Varo NV.
Mn 3aIuHaEMO 3a co6o npabo BixnHTn npTeH3IO, kUO nOKyKHy HEmoxNBO nepeBipTu, abo kUO 6yde BnABNeHO, 10 npOdyKT HeHaJExHo 6cnyroByBaBC. (HcTi BEHTNJiHi IiINH, ByrIeEeBI 1tKn, 10 peryIparHO 6cnyroByOTbcrTOIO).
KbntaHciio npo nokynky cnid 3ebpiratn k niTBepeHHaTn npiD6aHHa.
- Пилад слд NOВертати TOPROBOMу пededtabHNY hepo3i6paHIM, B npinHrTHO uNCTOMy cTahi (B opriHaJIbHOMy JIITOMy KOpnyci, kkuo e), pa3om i3 niIDTBepdxeHHM nOKynK.
13 3AXNCT IOBKINJIЯ
Ku npnnaD notpe6ye 3amHn nicra Tpnbanoro BnkOpncTahH, He cnid yTuNi3yBaTu NOro 3 No6yTOBm CmitTAM. YTuNi3auiO cnId BHKoHaTu EKOJorUHO 6e3neuHM cnocobom.
BidxoHn eIemHTiEeKtpuHnx i eIeKtpoHHx MaunH 3a6opHeHO yTuJI3yBaTNI K 3BVuaHi nObyTOBi BixoHn. BiDnpaBTe Ha BToPHHy nepepO6ky B BiNobiDiHi ycTaHO. IopadbTeCra 3 MicceBOIO BnaDOIO YN IpOdaBcEm DJIr OTPMaHHK KOHCyIbTaUoi 0do IOBtOPHOI nepepo6kn.
14 DEKJIAPAUÇI BİDNOBIDHOCTI


VARO N.V. - Vic. Van Rompuy N.V.- Joseph Van Instraat 9 - BE2500 Lier - BELGIUM
(BENbI),zim3aBJIe,
09/10/2020, Lier - Belgium

Vario
WWW.VARO.COM
DESIGNED AND MARKETED BY VARO
©copyright by varo
VARO - VIC. VAN ROMPUY nv
JOSEPH VAN INSTRAAT 9 - 2500 LIER - BELGIUM
OFFICES:
IBERICA BRICOLAGE S.L. - ESPANA
ASIA PACIFIC HONG KONG Ltd / SHANGHAI PRC
AUSTRALIA Pty Ltd


- BESCHRIJVING (FIG. A)
- MARTEAU PERFORATEUR 750 W POWX1170
- UTILISATION
- HAMMER DRILL 750W POWX1170
- APPLICATION
- DESCRIPTION (FIG. A)
- PACKAGE CONTENT LIST
- EXPLANATION OF SYMBOLS
- GENERAL POWER TOOL SAFETY WARNINGS
- Work area
- Electrical safety
- Personal safety
- Power tool use and care
- Service
- SPECIFIC SAFETY RULES FOR IMPACT DRILL AND ROTARY HAMMERS
- BEFORE STARTING WORK
- Fitting and changing tools (Fig. 1)
- Mounting/Dismount the auxiliary 13mm chuck for drilling in steel, wood and plastic (Fig. 2)
- Depth guide (Fig. 3)
- Dust cover (Fig. 4)
- Fitting the auxiliary handle (Fig. 5)
- Always use the tool with the auxiliary handle properly assembly .
- Selecting the operation mode (Fig. 6)
- OPERATION
- Switch on/off (Fig. 6)
- Forward/reverse lever
- TECHNICAL DATA
- NOISE
- MAINTENANCE
- WARRANTY
- ENVIRONMENT
- DECLARATION OF CONFORMITY
- MARTELO PERFURADOR 750 W POWX1170
- APLICACAO
- BORHAMMER 750 W POWX1170
- BRUKSOMRADE
- BORRHAMMARE 750 W POWX1170
- ANVÄNDNINGSOMRADE
- INNAN ARBETET PABÖRJAS
- KONFORMITETSDEKLARATION
- KPOYΣTIKO ΔPAPANO 750 W POWX1170
- EΦAPMθH
- TOnoTeTnO/AqApEeON rou BOnθnTkoU σφIyKπρα 13 xλστ. yia δIaRpnO σε ασáλι,ξuLo kai πλaσTko (Eik.2)
- BUSILICA -UDARNI CEKIC 750 W POWX1170
- PRIMENA
- UDARNI VRTALNIK 750 W POWX1170
- 1UPORABA
- MAŞINA DE GÜRIT CU PERCUTIE 750 W POWX1170
- DOMENII DE UTILIZARE
- yDAPHЯДРЕЛь 750 BTPOWX1170
- OBJACTb IPIPIMEHEHnA
- ONICAHNE (PNC.A)
- COIDEPXXHMOE YNAKOBKN
- yCJIOBHBIE O6O3HAUeHnIa
- OCObIe IPNABnla TEXHnKn BE3OpAChOCTn IJIa YdAPHbIX IPEJEN IEPΦOPATOPOB
- IEPED HauJIOM PABOTbl
- YcmaHoKa u CMeHa UHcmpymEhMa (Puc. 1)
- YcmaHO6ka / cHmue ecnmoZameIbHOzo npmpoHa 13 MM dJa csepeHua cmaru, depea u nnacmmaccbl (Puc. 2)
- PeaylupoeKa aIy6uHbI csepeHeu (Puc. 3)
- NbIe3aumHbI KOxyx (Puc. 4)
- YcmaHoEka BCnOMoZamEnbHou pyKoRmku (Puc. 5)
- Bcerda nCnoJb3yIe HnCtpymEt C npaBnIbHo yCTaHOBHeHHo BcNoMOraTeJbHOn pyKoTko.
- BbI6oppeXkuma pa6ombi(Puc.6)
- BknoyeHue /ebiknoyeHue (Puc. 6)
- Ipeeknoyamelb HanpaenHua epaueHua
- TEXHnueCKne DAHHbIe
- OKPYXKAIOUJAR CPEDA
- 14ДЕКЛAPALEO COOTBETCTBIM
- YДAPHA БОРMAШИHA 750 WPOWX1170
- PENEHAA3HAUeHHe HA EJEKTPuyeCKATA MAUNHA
- ONICAHNE
- CnncbK HA CbIbPjXAHNETO HA INAKETA
- CnMBOJIH
- PpHaJxHocHTe MoKe Da ca ropeu cneynotpe6a. He DokocBaTe BbpxHa npHaJxHocCTTa c pbka!
- Bunharn n3noJ3BaIte npedna3Hn pKabuN 3a OTcTpaHraBe Ha npHaJneXHocTta!
- Mohmupahe u demohupahe Ha donbJHumeHHua nampoHHuk 13 MM 3a npo6ueane e Meman, dbpeo u nnacmmaca (Fue 2)
- MOnTupaHe:
- DemOHtIpaHe:
- OapaHuyumeHa b 60uHama Ha npo6ueaHe (Fua 3)
- Ipomueonpaxoe kanak (Uz. 4)
- NocmaaHe Ha donbHumenHa pkoXamka (Ua. 5)
- 136op Ha pexum Ha pa6oma (Ua. 6)
- PpeKnIOy6ameI 3a 6KnIOy6aHe/u3KnIOy6aHe (Fua. 6)
- Iocmye 3a cmeHaeane Ha nocokama Ha bpmhe
- TEXHnuecko OBCJnyKBAHE
- TAPAHUN
- OIIA3BAHE HA OKOIHATA CPEIa
- DEKJIAPAUJ3A CbOTBETCTBNE
- LOÖKTURELL 750W POWX1170
- OTSTARVE
- ÜLDISED HOIATUSED JA OHUTUSJUHISED
- HOOLDAMINE
- 3aBxN BnKOpncToByTe iHCTpyMeHT i3 npaBnIbHO BCTaHOBNeHOO DonomixHoO pyko.
- Bu6ip pexkmy ekcnnyamaui (Puc. 6)
- EKCIJYATAUJI
- Nepemukau (Puc. 6)
- Baxijb dna nepemuKaHHa nepeo/ha3ad
- TEXHIyHI DAHI
- Lwym
- TEXHIyHE OBCJyROBvBAHHa
- 12「APAHTI
- 3AXNCT IOBKINJIЯ
- DEKJIAPAUÇI BİDNOBIDHOCTI
Brand : PowerPlus
Model : POWX1170
Category : Drill