
DW 6 - Fridge DOMETIC - Free user manual and instructions
Find the device manual for free DW 6 DOMETIC in PDF.
| Product type | Thermoelectric beverage refrigerator |
| External dimensions (L x W x H) | 515 x 266 x 415 mm |
| Weight | approx. 7.6 kg |
| Power supply | 12 V = (DC) or 220-240 V ~ (AC with included power adapter) |
| Power consumption | 36 W (12 V =), 43 W (230 V ~), 13 W (230 V ~ ECO mode) |
| Cooling temperature range | +5 °C to +20 °C |
| Capacity | 20 L (net content 18 L) |
| Maximum bottle length | 35 cm |
| Energy efficiency class | A |
| Electricity consumption | 114 kWh/year |
| Noise emissions | 44 dB(A) |
| Temperature display | LED screen with °C or °F selection |
| Interior lighting | Yes, switchable via LIGHT button |
| ECO mode | Yes, for energy saving |
| Interior shelves | 3 adjustable shelves on slides |
| Condensation water tank | Yes, removable at the bottom |
| Maintenance and cleaning | Clean exterior and interior with a damp cloth; do not use abrasive products |
| Safety instructions | Do not use if damaged; unplug before cleaning; do not immerse in water |
| Warranty | According to legal conditions; attach invoice and description of defect |
Frequently Asked Questions - DW 6 DOMETIC
User questions about DW 6 DOMETIC
0 question about this device. Answer the ones you know or ask your own.
Ask a new question about this device
Download the instructions for your Fridge in PDF format for free! Find your manual DW 6 - DOMETIC and take your electronic device back in hand. On this page are published all the documents necessary for the use of your device. DW 6 by DOMETIC.
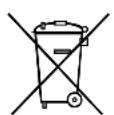
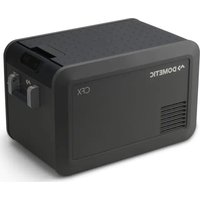
USER MANUAL DW 6 DOMETIC
Thermoelectric drinks refrigerator
Operating manual. 7
DE
Thermoelektrischer
Getränkekühlschrank
Please read this operating manual carefully before starting the device. Keep it in a safe place for future reference. If the device is passed on to another person, this operating manual must be handed over to the user along with it.
The manufacturer cannot be held liable for damage resulting from improper usage or incorrect operation.
Table of contents
1 Explanation of symbols. 7
2 Safety instructions 8
3 Scope of delivery 9
4 Intended use 10
5 Technical description 10
6 Using the refrigerator 11
7 Troubleshooting 14
8 Cleaning and maintenance 15
9 Warranty 15
10 Disposal. 15
11 Technical data. 16
1 Explanation of symbols

DANGER!
Safety instruction: Failure to observe this instruction will cause fatal or serious injury.

WARNING!
Safety instruction: Failure to observe this instruction can cause fatal or serious injury.

CAUTION!
Safety instruction: Failure to observe this instruction can lead to injury.

NOTICE!
Failure to observe this instruction can cause material damage and impair the function of the product.

NOTE
Supplementary information for operating the product.
2 Safety instructions
2.1 General safety

WARNING!
- Do not operate the refrigerator if it is visibly damaged.
- This refrigerator may only be repaired by qualified personnel. Inadequate repairs may cause serious hazards.
- This refrigerator can be used by children aged 8 years or over, as well as by persons with diminished physical, sensory or mental capacities or a lack of experience and knowledge, providing they are supervised or have been instructed how to use the refrigerator safely and are aware of the resulting risks.
- Electrical devices are not toys.
Always keep and use the refrigerator out of the reach of children.
- Cleaning and user maintenance must not carried out by unsupervised children.
- Children must be supervised to ensure that they do not play with the refrigerator.
- If the power cable for this refrigerator is damaged, it must be replaced by the manufacturer, customer service or a similarly qualified person in order to prevent safety hazards.
- Do not store any explosive substances, such as spray cans with propellants, in the refrigerator.

CAUTION!
-
Disconnect the refrigerator from the mains
-
Before cleaning and maintenance
-
A f t e r u s e
-
Food may only be stored in its original packaging or in suitable containers.

NOTICE!
- Check that the voltage specification on the type plate is the same as that of the power supply.
- Only use the cable supplied to connect the refrigerator to the AC mains.
- The refrigerator is not suitable for transporting substances which are caustic or contain solvents.
- Never pull the plug out of the socket by the connection cable.
- Disconnect the refrigerator and other electric consumers from the battery before connecting the quick charging device.
- Only select operation with DC power supply (battery mode) if the vehicle engine is running and providing sufficient voltage to the light system, or if you are using a battery monitor.
2.2 Operating the refrigerator safely

DANGER!
- Do not touch exposed cables with your bare hands.

CAUTION!
- Before starting the product, ensure that the power supply line and the plug are dry.
- Only use the refrigerator in a dry environment where it is protected from splashing water and high humidity.
- Do not place any objects on the refrigerator to avoid injury by falling objects when opening and closing the door.

NOTICE!
- Do not use electrical devices inside the refrigerator unless they are recommended by the manufacturer for that purpose.
- Do not place the refrigerator near naked flames or other heat sources (heaters, direct sunlight, gas ovens etc.) (fig. 1, page 2).
- Danger of overheating!
Always ensure sufficient ventilation so that the heat generated during operation can dissipate. Make sure that the refrigerator is sufficiently far away from walls and other objects so that the air can circulate (fig. 2, page 2).
- Ensure that the air vents are not covered.
- If you use more than two refrigerators, then maintain a distance of at least 50~cm between the two appliances.
- Do not fill the inner container with ice or fluid.
- Never immerse the refrigerator in water.
- Protect the refrigerator and the cable against heat and moisture.
3 S C O P E O F D E I
Quantity Description
1 R e f r i g e
1 Power supply with AC connection cable
1 DC connection cable
3 n t e r i o
1 Operating manual
The refrigerator is suitable for cooling bottles of drink.
The refrigerator is designed to operate on DC power supply and an AC power socket.
5 Technical description
5.1 Description
The refrigerator can be operated with an AC and DC power supply.
There are two buttons to set the temperature you require. A display shows both the desired and the current cooling temperature. The interior light can be switched as needed.
All materials used in the refrigerator are compatible for use with foodstuffs.
5.2 Refrigerator components
| No. in fig. 3, page 2 | Description | ||||
| 1 | A | i | r | v | e |
| 2 | D | o | o | r | h |
| 3 | A | C | c | o | n |
| 4 | DC connection cable | ||||
| 5 | Control elements | ||||
| 6 | I | n | t | e | r |
| 7 | R | a | i | l | s |
| 8 | Condensation tray | ||||
| 9 | Fan | ||||
| 10 | Mains adapter socket | ||||
The refrigerator has the following control elements:
No. in Description Description
1 POWER Switches the refrigerator on or off.
2 LIGHT Switches the interior light on or off.
3 Display Displays the temperature.
4 TEMP + Increases the cooling temperature by 1^ C (up to +20^ C maximum).
5 TEMP – Decreases the cooling temperature by 1^ (up to +5 °C minimum).

NOTE
You can switch the temperature display between Celsius and Fahrenheit. To do this, press the TEMP + and TEMP - for approx. three seconds at the same time.
6 Using the refrigerator

NOTE
Before starting your new refrigerator for the first time, you should clean it inside and outside with a damp cloth for hygienic reasons (see chapter "Cleaning and maintenance" on page 15).
6.1 Energy saving tips
- Choose a well ventilated location which is protected from direct sunlight.
- Use the ECO mode of the refrigerator if you want to set a higher energy efficiency and a limited cooling capacity of the refrigerator.
- Do not open the refrigerator more often than necessary.
- Do not leave the door open for longer than necessary.
6.2 Setting up the refrigerator
Make sure that the location is able to support the weight of the refrigerator as well as its maximum load.
Position the refrigerator horizontally.
Open the door of the refrigerator.
▶ Slide the condensation tray at the bottom of the refrigerator into the corresponding holder (fig. 5, page 3).
Put the interior racks in the refrigerator so that they are on the pre-assembled side rails (fig. 6, page 4).
Close the door of the refrigerator.
6.3 Connecting the refrigerator

DANGER!
Never handle plugs and switches if you have wet hands.
Before starting up the refrigerator for the first time, check whether the operating voltage and the mains voltage match (see type plate).
Operating with AC power supply (fig. 7, page 4)
Insert the mains adapter into the power supply socket on the back of the refrigerator.
Connect the adapter plug to the socket on the back of the refrigerator.
Connect the mains plug to an AC socket.
Operating with DC power supply (fig. 8, page 5)
Remove the AC mains adapter from the power supply socket on the back of the refrigerator.
Connect the plug of the DC connection cable to the socket on the back of the refrigerator.
Connect the DC connection cable to the DC power supply.
6.4 Using the refrigerator

NOTICE!
Food should be stored in its original packaging or in suitable containers.
Press the POWER button for 3 seconds to switch on the refrigerator.
The display (fig. 4 3, page 3) switches on and shows the current cooling temperature.
Press the POWER button again for 3 seconds when you want to switch the refrigerator off.
The display switches off.
Press the LIGHT button for 3 seconds to switch the interior light on or off.
Setting the temperature

NOTE
The cooling performance can be affected by:
- The ambient temperature
- The number of bottles to be cooled
- The frequency with which the door is opened.
Press the TEMP - button to reduce the cooling temperature in increments of 1^ .
Press the TEMP + button to increase the cooling temperature in increments of 1^ .
- The set temperature appears on the display and flashes twice. The current interior temperature of the refrigerator is then displayed.
Storing bottles (fig. 9, page 6)
Place the bottles horizontally on the grid shelves.
Place a maximum of two bottles on a shelf.
Make sure that the bottles do not exceed the maximum bottle length of 35~cm
7 Troubleshooting
Problem Possible cause Suggested remedy
| The refrigerator does not work. | The power plug is not inserted. Connect the mains plug to an AC socket. | |
| The DC connection cable is not inserted. | Connect the DC connection cable to the DC power supply. | |
| The connection cable or plug is damaged. | Have the damaged connection cable or plug replaced by an electrician. | |
| The refrigerator does not cool sufficiently. | The refrigerator is not level. Position the refrigerator horizontally. | |
| The ambient temperature is too high. | Lower the ambient temperature. | |
| The door is not closed properly. Close the door. | ||
| Ensure that the door is not obstructed. | ||
| The door has been opened too often. | Only open the door when it is necessary. | |
| More than one power source is being used. | Only use one power source. | |
| The gap between the wall at the side and back of the refrigerator is too narrow. | Keep the minimum distance to the side and back walls. | |
| The temperature has not been set correctly. | Set the temperature. | |
| The air vents are dirty. Clean the air vents with a soft cloth. | ||
| Condensation has built up on the outside of the refrigerator. | The condensation tray is full. Empty the condensation tray. | |
| The door does not close properly. Ensure that the door is not obstructed. | ||
8 Cleaning and maintenance

NOTICE!
Do not use abrasive cleaning agents or hard objects during cleaning as these can damage the refrigerator.
Clean the refrigerator regularly and as soon as it becomes dirty with a damp cloth. Switch the refrigerator off to do this.

NOTE
You can remove the interior racks to facilitate cleaning.
Make sure that no water drips into the seals. This can damage the electronics.
Wipe the refrigerator dry with a cloth after cleaning.
Regularly empty the condensation tray at the bottom of the refrigerator. To do this, open the door and pull the condensation tray completely out of the refrigerator (fig. 5, page 3).
9 W a r r a n t y
The statutory warranty period applies. If the product is defective, please contact the manufacturer's branch in your country (see the back of the instruction manual for the addresses) or your retailer.
For repair and guarantee processing, please include the following documents when you send in the device:
- A copy of the receipt with purchasing date
- A reason for the claim or description of the fault
10 Disposal
Place the packaging material in the appropriate recycling waste bins wherever possible.
If you wish to finally dispose of the product, ask your local recycling centre or specialist dealer for details about how to do this in accordance with the applicable disposal regulations.
11 Technical data
| DW6 | |
| Ref. no.: 9105330356 | |
| Voltage: 12 V== | 220 to 240 V~ (with mains adapter) |
| Power consumption: | 36 W (12 V~=), 43 W (230 V~), 13 W (230 V~) in ECO mode |
| Cooling temperature range: | +5 °C – +20 °C, up to 16 °C below the ambient temperature |
| Category: Pantry | |
| Energy efficiency class: A | |
| Power consumption: 114 kWh/per year | |
| Protection class: III | |
| Gross capacity: 20 l | |
| Net capacity: 18 l | |
| Maximum bottle length: | 35 cm |
| Climatic class: N | |
| Noise emission: | 44 dB(A) |
| Outer dimensions (L x W x H): | 515 x 266 x 415 mm |
| Weight: | Approx. 7.6 kg |
| Inspection/certification: | CE TÜVISO CERTIFICATION |
Risque de surchauffe!
5 Description technique
5.1 Description
Indstilling at temperatures

BEMAERK
Stalla in temperature

ANVISING
-Fare for overopbehing!
Pase at varme som oppstär under drift alltid blir tilstrekkelig ventiliert bort. Pase at kjolesystemet stär langt nok unna vegger eller gjenstander, slick at luften kan sirkulere (fig. 2, side 2).
6.1 Tips for energisparing
-3JeKtpo np6opbI He AbliaOTc DeTCKMn Hrgyukamn!
IOnToMvXpaHnTe HNCNoB3yInTe XONoDnBnK B HeOCTynHom dJeTeMeCTe.
3aIpeuaetcBbINONHtB OunchKy I NOnb3OBaTeNbCKoe TexHnueckoe 6cbnyxBaHne detam 6e3 npncmOTpa.
- 3a DeTbMn Heo6xOdIMo NOCToHNO CneINtB, YTO6bl He DOpyCKaTB INX INPbC XOJODINbHNKOM.
Bcnyae noBpeXdeHnIetaIOUeTo Ka6eJdaHHOrO XONODINbHNka OH-BO n36exaHne ONaCHoCTe -doJxeh 6bItb 3aMeHeH N3rTOBHTeJIem, CepBnCHbIM ueHTpOM IINn IMeIoUIm aHaONrHyU KBaIINΦKauIIO nepCOHaIOM.
He xpaHnTe B XOJOnIbHnKe B3PbIBOONaChbIe BeueCTBa,Ha npImep,a3pO3OJIbHbIE 6aIIIOhbl C rOpUcHm ra3aMn-BbITECHHTeYAMN.

OCTOPOXHO!
-OTCOeINHЯTe XOJODINbHNK OT CeTN
-
nepei KaJdoI OUnCTKOI uXoDOM
-
NOCNe KaXDoTO IcNOpb3OBaHnI
-
Пюдуксы питаяня pa3peшаetсяхpaHNTb TOnbKO B opINHaNbHOY naKOBKe Ип NOДХОДЯшIX EMKOSTX.

BHIMAHHE!
- CpaBnTe 3HaueHnHa npJxEHHy, yKa3aHHbIe Ha 3aBOdCKoT a6nUKe, c XapaKTepeNCTnKaMn NMeIOUeROc NCTOuHNa PNTaHn.
-Дя подкюецни рибopa к сети переменно тoka ИспобуITE TONBOKО ринагаemski Ka6elen NiTuHnA. - XOJIOJIbHnK He npedHa3HaueH dIy TpaHCnOpTnpOBKn eKnx nIIu CoepXaunx paCTBOPHTeN BeueCTB.
-He BbITaCKnBaIe BnIKy n3 po3eTKn 3a NiTaIOuN Kα6eJIb. - OTcoeHNHTe XoNoDnBnK n dpyTne NOTpe6nteN oT aBTOMObNbHOJ aKKyMnyTopHoi 6aTaPeN, npexJe Yem npncOeHNt b yCTpoNCTBO dIy yCKopeHHoro 3apJa.
BbIbpaIte pexm pa6OtBI OT nCTouHnka NOCToAHHO TOKa (pexim nITaHnAOTAKyMynTopa) TOnbKO B TOM Cnyae, ecnn pa6Otaet ABnraTeIb abTOMo6nI rHehepaTop BbIPA6aTbIBaET DOCTaTOUHoe HApJXeHne IIN ecnn Bbl NCNoJIb3YeTe 3aUNTHOE peIe.
2.2 Texnka 6e3onacnoctn npa6oTe xolodnbHnka

ONACHOCTb!
He 6epntecb roIbIMn pykamn 3a oroneHHbe npoBoda.

OCTOPOXHO!
- Pered BBODOM B 3KcnpyaTaUIO y6eINTEcB TOM, qTO NtAIOU KABEN B IN BUNKa cyxne.
- NcnoB3yIte XoNoDnBnK TOnbKO B CyXOcpe, B KOTOpO H 3aunueH OT 6pb3n I 3HaHTeBHO BnaXHOCTN.
-Bo n36exaHne TpaBM npn OTKpbTnN 3akpbTnN DBepn He KnaInte KaKne-n6o npedMeTb Ha XONODINbHNK.

BHIMAHHE!
He nCnoIb3yIte 3neKtpnpnbopbl BHyTpN XOOniNbHnka, 3a NCKNoUeHnem Cnyaeb, KOrda 3TN np6Opbl peKOMeHDoBaHb IINr 3TOrO N3ROTOBNTeHm.
He yctaHaBnBaIe XoIOAnbHbNK B6N3N OTKpbTOrO OTHr NpIpynx nCTouHKnOB TeNa (paNaTOPOB OToPnEHH, CNbHbIX COJIHeuHbIX Nyuei, ra3OBbx Neuei n T. n.) (pnc. 1, ctp. 2).
- Onachoctb neperpeba!
CneDnte 3a Tem, yTO6bI HnHTo He npenTCTBOBaNO OTBODy TeNIOBOY eHepRnN, o6pa3yIOUeINcRA BO BpeMra p6oBtBJ XOJOniNbHnKa. XoJOniNbHnK DoJXeH BCERda HaxOINTBcRA Ha DOCTaTOuHOM paCCTOARHH IO CTeH INN INhIX PpeDMeTOB, yTO6bI o6ecneuBanaacb XOpOaA uNpKyIaUNI BAo3dyxa (pnc. 2, cTp. 2).
-He3aKpbBaIeBcHTnIaUNHOHbIeOTBepCTN.
- Ecni Bbl NcnoB3yeTe HeCKoJIbKO XONODINbHnKOB, To paCCTOaHne MeXdY HmNdoNXHO COCTaBnTb He MeHee 50 cm.
-3anpeuaeTcra 3aONHrBbHTpeHHne EMKoCTn XndKOCTaM NIN nbDOM.
- He norgykaite XoIOniNbHnK B BoDy.
-Пре dioхранай Te xOLOdInbHnK n Ka6eNn OT DeIcTBnJ Xapbl n BnaTn.
3 K O M I e K T n C
KoI-BoHaIMeHOBaHne
1XoN0AnbHnK
1 BLOK nHTaHnC coeHNHTeNbHbIM Ka6eIeM nepemehHOTo Toka
1 CoeHnHTenbHbI Ka6eNb NOCTOHHOro TOKa
3 BnytpenHne peWeTkn
1 NctpyKuaI NO 3KcnIyaatauN
4 IcnoIb3ObaHne no Ha3HaueHnIO
XoIOniNbHnK npeHa3HaueH nIg OXnaJdeHn8 6yTbInOK cHaNTkAmN.
XoIOnbHnK paCCHTaH ha pa6Oy OT nCTOuHKnOB nepemEHoro n NOCToHHoro TOka.
5 TexHnueckoe onncahne
5.1 Onncahne
XoOnaHbNk MoKet pa6OtaTb OT nepemEHHO I NOCToHHOR TOKa.
C NOMOUIIO DByX KHOIOK MOxHO peRyIINPOBaTb Tpe6yeMyIO TempepaTypy. Ha IIncIIee yKa3bIBaETc KaK Tpe6yeMa, Tak I DeIcTBNTeJIbHaTempeaTypa OxJaXdEHHa. Pn Heo6XoIMocTn, MoxHO BKIOUHTb BHyTpeHHeE OCBeUeHne.
Bce MaTePnaIbI, IcNoIb3yEmbIe B XOIOINbHnKe, He Bbl3bBaIOT ONaCEHn IInI pOdyKTOB NITaHnI.
5.2 Komnohehtbl XoIounIbHnka
| Пос. на пс. 3,ст. 2 | Опесанne | |||
| 1 BeNTINЯЦИОнhoe OTBерстие | ||||
| 2 Рука девri | ||||
| 3 СоедINиТельни Kaбел NaчрemeHNO TOka | ||||
| 4 СоедINиТельни Kaбел NOCTOЯHNO TOka | ||||
| 5 Θ П e M e | ||||
| 6 Вунтrene reшетки | ||||
| 7 H a P a | ||||
| 8 EmKocStb Ддя сбора КONDeHcata | ||||
| 9 B H T N | ||||
| 10 Кренихе SFOKa питашия | ||||
XoIOniNbHnK nMeet cneDuOuine opraHbI ynpaBHeHn:
Pa6ota ot noctoHHoro ToKa (pnc. 8, ctp. 5)
ИЗВЛЕКИТЕ 6ПОК ПИТАнЯ РЕмEHOrO HAnPЯЖЕня ИЗ КрелпЕня Ha 3aДнeI CTOpOHe XОПОДИЛьНИКа.
CoeHnHte 1Tekep coeHnHteIbHOro Ka6eI NaOCToHnHO ToKa C THe3dOM Ha 3aDne CTOpOHe XoNoDnBnKa.
ПрсоeINHITe coeINHITeBHy Ka6eNb NOCTOHHORo TOKa K Cetn NOCTOHHORo TOKa.
6.4Пользованецхолдльнkom

BHIMAHNE!
IpoNyKtbl NITaHnCneDyET XpaHnTb TOnbKO BOpNHaNbHOYNaKOBKe ININ NOxOJnxX EMKoCTx.
BknIOuHTe XoJIoDnIbHnK, HaxaB KHOIpKy POWER Ha 3 cekyHdbI.
√Дисппeн (рис.43,ст.3)ВКПЮЧаETСИУКAZIBAET TEKUYIO TempepaTyPO oxnaXdHnIa.
EcnBbI XOTIe BbIKIOUHTb XOIOINbHnK,TO NOBTOpHO HaXMITE KHOJky POWER Ha 3 CEkyHdbI.
√Диспей ВькючaeTс.
BknIOHTe nn BbIKIOHTe BHyTpeHHee ocBeueHne, Haxab KONky LIGHT Ha 3 ceKyHdbI.
Hac tropona temnepatypbI

YKA3AHNE
HaMOUHOCTb OXpKaDeHnMaOry TBnIyTb:
-TeMnepaTpa OkpykaIOuSeI cpebl,
- KONHueCTBO OXnaxdaembIX 6yTbIIOK,
- YaCTOTA OTKpbIbAHNЯ DBepZbl.
Haxmnte KhoNky TEMP-, yTo6bI yMeHbUHTb Tpe6yemyIO TempepaTy pOxnaXdEHHa 1 ^ C
Haxmnte KhoNky TEMP +, yTo6bI yBennuTb Tpe6yemyo TemnepaTy pOxnaXdEHHa 1 ^ C
HactpoeHHa TempehpaTpa Dba pa3a Mnaet Ha dinCnnee. 3aTeM yKa3bBaetc Teyuza BHyTpeh Hra TempehpaTpa XoNoDnIbHnka.
YKlaDbIbAHHe 6yTbInok c HAnNTkAmn (pnc. 9, ctp. 6)
YknaBbAaTe 6yTbIKn C HAnNTKaMn rOpN3OHTaJIbHO Ha BHyTpEHHne peWetKn.
YKlaIbIbaiTe He 6Oonee IByx 6yTbIOK c HAnITkAmn Ha BHyTpEHIOIO peJWeTKy.
Y6eIITecb B TOM, yTO IINHa 6yTbIOK He IpeBbIaET MaKcImaIbHoe 3HaueHne 35 cm.
7 YctpaHHe HeNCnPaBHOCTe
Hencpapbhoctb Bo3moXnha npuHa BapnaHT yctpaHeHHa
| ХолодINьнк He pa6oTaet. | He BCTaBteHa cTeBaJ BnIka. BCTaBbTe cTeByO BnIky Bpo3eTKy cETNперemeHOrO ToKa. | |
| He BCTaBteH COeDInHtEINbHbI Ka6eNb NOCTOAnHOrToKa. | ПрибoeДINHte COeDInHtEINbHbI Ka6eNb NOCTOAnHOrToKa K cETN NOCTOAnHOrToKa. | |
| ПовржdeHb COeDInHtEINbHbIe Ka6eNи IIN N StTeKepbl. | СпесAnIst DoLxgen 3amEnTb ПовржdeHbIe COeDInHtEINbHbIe Ka6eNи IIN N StTeKepbl. | |
| XOLODINbHnK He oxJaXdAeT dOCTaTOUHbIM obpa3OM. | XOLODINbHnK cToIT He rOpN3OHTaIbHo. | YCTaHOBITE XOLODINbHnK rOpN3OHTaIbHo. |
| Спшkom BlyCOKa TEmpePAtypa okpyxaIOSeI cpebl. | ОБсpeЧte 60JIeE Hn3KуI Otem- пeРаТуРу OkpyxaIOSeI cpebl. | |
| Дерь He 3akpybIa NaIe JIeKpIaIe OIe | ЗakpoIte DBeRb. | |
| Y6eDInTEcB V TOM, YTO DBeRb He 3a6IokIpOBaHa. | ||
| Дерь OTKpbIbIaIbIc b CnIshKom чaTo. | ОТКрБaIte DBeRb TOnIbKO B Счуae HeO6xOДIMOCTN. | |
| ИсpoIb3ZyETc8 BoIbIe OdHOrO NCTOChNk AHePrrn. | ИсpoIb3ZyIte TOnIbKO OdINH NCTOChNk AHePrrn. | |
| НedoCTaTOUHoe pAcSTOgHne Do cTeHb I PdOM I N03aIi XOLODINbHnKa. | СоБПLOДАte МInHMaIbHoe pacSTOHne Do 6OKOBbIX I 3aIdNeI cTeHbI. | |
| НеравINbHо OTrpeYUnipOBaHa TempePapTaIpa. | HAcTpoIte TempePapTy. | |
| ВentINaIzONHbIe OTBepCTIa 3aGrp3IeHbI. | ОчирTe BeHTINaIzONHbIe OTBepCTIa MryIKo TPrIkoI. | |
| KOHDeHcat 3a празeДamn XOLODINbHnKa. | ЕмКоctы dЯ c6Opa KOнDEHcata перeОлнeHa. | Опорожнite emKocTb ДЯ c6Opa KOHdeHcata. |
| Дерь He 3akpybIaEcTc IOnXHbIM obpa3OM. | Y6eDInTEcB V TOM, YTO DBeRb He 3a6IokIpOBaHa. |
8 Ynctka n yxoid

BHIMAHNE!
He nCnoIb3yIte Inna YnCTKn a6pa3nBhIe YnCTaIe CpeDCTBa NnO octpIe npEIMeTbI, T. K. OHN MOrTy pInBecTn K NOBpeXdEHnM XoNoDnBnKa.
Perynpno n no Heo6xOIMOCn OunuAte XONODINbHNK BnaXHO TpIKN. Ipy 3TOBbIKIOUHTe XONODINbHNK.

YKA3AHNE
Dometic Australia Pty. Ltd.
1 John Duncan Court
Varsity Lakes QLD 4227
雪 1800212121
+61755076001
Mail: sales@dometic.com.au
AUSTRIA
Dometic Austria GmbH
Neudorferstraße 108
A-2353 Guntramsdorf
雪 +432236908070
+43223690807060
Mail: info@dometic.at
BENELUX
Domatic Branch Office Belgium
Zincstraat 3
B-1500 Halle
+3223598040
+3223598050
Mail: info@dometic.be
BRAZIL
Domatic DO Brasil LTDA
Avenida Paulista 1754, conj. 111
SP 01310-920 Sao Paulo
雪 +551132513352
+551132513362
Dometic Group Asia Pacific
Suites 2207-11·22/F·Tower 1
The Gateway · 25 Canton Road,
Tsim Sha Tsui · Kowloon
+85224611386
+85224665553
Mail: info@waeco.com.hk
HUNGARY
Dometic Zrt. Sales Office
Kérékgyarto u.5.
H-1147 Budapest
雪 +3614684400
+3614684401
Domatic Italy S.r.l.
Via Virgilio, 3
1-47122 Forli (FC)
+390543754901
+390543754983
Mail: vendite@dometic.it
JAPAN
Domicic KK
Maekawa-Shibaura, Bldg. 2
2-13-9 Shibaura Minato-ku
Tokyo 108-0023
+81354453333
+81354453339
Mail: info@dometic.jp
MEXICO
Dometic Mx_j S.de R.L.de C.V.
Circuito Médicos No. 6 Local 1
Colonia Ciudad Satélite
CP 53100 Naucalpan de Juarez
Estado de Mexico
+52553744108
+525553934683
Mail: info@dometic.com.mx
NETHERLANDS
Dometic Benelux B.V.
Ecustraat 3
NL-4879 NP Etten-Leur
+31765029000
+31765029019
Mail: info@dometic.nl
NEW ZEALAND
Domatic New Zealand Ltd.
PO Box 12011
Penrose
Auckland 1642
+6496221490
+6496221573
Mail: customerservices@dometic.co.nz
NORWAY
Dometic Norway AS
Osteroyveien 46
N-3232 Sandefjord
+4733428450
+4733428459
Mail: firmapost@dometic.no
POLAND
Dometic Poland Sp. z o.o.
Ul. Puławska 435A
PL-02-801 Warszawa
+48224143200
+48224143201
Mail: info@dometic.pl
PORTUGAL
Dometic Spain, S.L.
Komsomolskaya square 6-1
RU-107140 Moscow
雪 +74957807939
+74959165653
Mail: info@dometic.ru
SINGAPORE
Dometic Pte Ltd
18 Boon Lay Way 06-140 Trade Hub 21
Singapore 609966
雪 +6567953177
+6568626620
Mail: dometic@dometic.com.sg
SLOVAKIA
Domatic Slovakia s.r.o. Sales Office
Bratislava
Nadražná 34/A
900 28 Ivanka pri Dunaji
雪/+421245529680
Mail: bratislava@dometic.com
SOUTH AFRICA
Dometic (Pty) Ltd.
Regional Office
South Africa & Sub-Saharan Africa
2 Avalon Road
West Lake View Ext 11
Modderfontein 1645
Johannesburg
+27114504978
+27114504976
Mail: info@dometic.co.za
SPAIN
Domatic Spain S.L.
Avda. Sierra del Guadarrama, 16
E-28691 Villanueva de la Canada
Madrid
+34918336089
+34900100245
Mail: info@dometic.es
SWEDEN
Dometic Scandinavia AB
Gustaf Melins gata 7
Dometic Switzerland AG
Riedackerstrasse 7a
CH-8153 Rümlang
+41448187171
+41448187191
Mail: info@dometic.ch
UNITED ARAB EMIRATES
Dometic Middle East FZCO
P.O.Box 17860
S-D 6, Jebel Ali Freezone
Dubai
+97148833858
+97148833868
Mail: info@dometic.ae
UNITED KINGDOM
Dometic UK Ltd.
Dometic House, The Brewery
Blandford St. Mary
DorsetDT119LS
+443446260133
+443446260143
Mail: customerservices@dometic.co.uk
USA
Dometic RV Division
1120 North Main Street
Elkhart, IN 46515
+1574-264-2131
- DE
- Table of contents
- Explanation of symbols
- DANGER!
- WARNING!
- CAUTION!
- NOTICE!
- NOTE
- Safety instructions
- General safety
- - Electrical devices are not toys.
- Operating the refrigerator safely
- S C O P E O F D E I
- Quantity Description
- Technical description
- Description
- Refrigerator components
- Using the refrigerator
- Energy saving tips
- Setting up the refrigerator
- Connecting the refrigerator
- Operating with AC power supply (fig. 7, page 4)
- Operating with DC power supply (fig. 8, page 5)
- Using the refrigerator
- Setting the temperature
- Storing bottles (fig. 9, page 6)
- Troubleshooting
- Cleaning and maintenance
- W a r r a n t y
- Disposal
- Technical data
- Risque de surchauffe!
- Description technique
- Indstilling at temperatures
- BEMAERK
- Stalla in temperature
- ANVISING
- -Fare for overopbehing!
- Tips for energisparing
- OCTOPOXHO!
- BHIMAHHE!
- Texnka 6e3onacnoctn npa6oTe xolodnbHnka
- ONACHOCTb!
- - Onachoctb neperpeba!
- KoI-BoHaIMeHOBaHne
- IcnoIb3ObaHne no Ha3HaueHnIO
- TexHnueckoe onncahne
- Onncahne
- Komnohehtbl XoIounIbHnka
- Pa6ota ot noctoHHoro ToKa (pnc. 8, ctp. 5)
- 6.4Пользованецхолдльнkom
- BHIMAHNE!
- Hac tropona temnepatypbI
- YKA3AHNE
- YKlaDbIbAHHe 6yTbInok c HAnNTkAmn (pnc. 9, ctp. 6)
- YctpaHHe HeNCnPaBHOCTe
- Ynctka n yxoid
- Dometic Australia Pty. Ltd.
- AUSTRIA
- Dometic Austria GmbH
- BENELUX
- Domatic Branch Office Belgium
- BRAZIL
- Domatic DO Brasil LTDA
- Dometic Group Asia Pacific
- HUNGARY
- Dometic Zrt. Sales Office
- Domatic Italy S.r.l.
- JAPAN
- Domicic KK
- MEXICO
- Dometic Mx_j S.de R.L.de C.V.
- NETHERLANDS
- Dometic Benelux B.V.
- NEW ZEALAND
- Domatic New Zealand Ltd.
- NORWAY
- Dometic Norway AS
- POLAND
- Dometic Poland Sp. z o.o.
- PORTUGAL
- Dometic Spain, S.L.
- SINGAPORE
- Dometic Pte Ltd
- SLOVAKIA
- Domatic Slovakia s.r.o. Sales Office
- Bratislava
- SOUTH AFRICA
- Dometic (Pty) Ltd.
- Regional Office
- South Africa & Sub-Saharan Africa
- SPAIN
- Domatic Spain S.L.
- SWEDEN
- Dometic Scandinavia AB
- Dometic Switzerland AG
- UNITED ARAB EMIRATES
- Dometic Middle East FZCO
- UNITED KINGDOM
- Dometic UK Ltd.
- USA
- Dometic RV Division
Brand : DOMETIC
Model : DW 6
Category : Fridge