
HD 9204 MX Plus - Pressure washer Kärcher - Free user manual and instructions
Find the device manual for free HD 9204 MX Plus Kärcher in PDF.
| Brand | Kärcher |
| Model | HD 9204 MX Plus |
| Product type | Professional pressure washer |
| Operating pressure | 4 to 20 MPa (adjustable) |
| Maximum pressure | 22 MPa |
| Flow rate | 460 to 900 l/h (7.7 to 15 l/min) |
| Power supply | 400 V / 3~ / 50 Hz / 9 kW |
| Protection class | IPX5 |
| Dimensions (L x W x H) | 554 x 509 x 1000 mm |
| Weight (without accessories) | 48 kg |
| Max. water temperature | 60 °C |
| Oil tank capacity | 0.75 l |
| Oil type | SAE 90 Hypoid |
| Nozzle included | Rotabuse (for stubborn dirt) |
| Connection system | EASY! Lock (quick thread) |
| Gun | EASY! Force with safety catch |
| Pressure/flow regulation | Yes, continuous |
| Automatic shut-off | By pressure switch (motor stops when gun is closed) |
| Detergent function | CHEM injector, dosing valve, suction hose |
| Safety devices | Pressure relief valve, safety valve, safety catch |
| Sound level (LpA) | 75 dB(A) |
| Vibrations (handle) | < 2.5 m/s² |
| Maintenance | Oil change every 500 h, regular filter cleaning |
| Warranty | According to country conditions (parts and labor) |
Frequently Asked Questions - HD 9204 MX Plus Kärcher
User questions about HD 9204 MX Plus Kärcher
0 question about this device. Answer the ones you know or ask your own.
Ask a new question about this device
Download the instructions for your Pressure washer in PDF format for free! Find your manual HD 9204 MX Plus - Kärcher and take your electronic device back in hand. On this page are published all the documents necessary for the use of your device. HD 9204 MX Plus by Kärcher.
USER MANUAL HD 9204 MX Plus Kärcher
Chairman of the Board of Management

S. Reiser
Director Regulatory Affairs & Certification
71364 Winnenden (Germany)
Tel.: +49 7195 14-0
Fax: +49 7195 14-2212
Winnenden, 2019/04/01
Technische Daten
Please read and comply with these original instructions prior
to the initial operation of your appliance and store them for later use or subsequent owners.
Contents
Device elements EN 1
Safety instructions. EN 1
Proper use EN 2
Safety Devices. EN 2
Environmental protection . . . EN 3
Before Startup. EN 3
Start up EN 3
Operation EN4
Transport. EN 6
Storage EN6
Care and maintenance. EN 6
Troubleshooting EN 7
Accessories and Spare Parts. EN 8
Warranty EN 8
EU Declaration of Conformity. EN 8
Technical specifications . EN 9
Device elements
Please unfold the front picture side
1 Storage compartment for nozzles
2 Handle
3 High-pressure connection EASY!Lock
4 Water connection
5 Manometer
6 Oil level indicator
7 O i l t a n k
8 Cover
9 Power switch
10 Fastening screw for device hood
11 Storage compartment for hoses
12 Trigger gun storage clip
13 Nozzle
14 Marking of the nozzle
15 Spray lance EASY!Lock
16 Pressure/quantity regulation (not with HD 9/18 M)
17 Trigger gun EASY!Force
18 Safety catch
19 Trigger
20 Safety lever
21 High pressure hose EASY!Lock
22 Push handle
23 Cable clamp
24 Dosage valve for detergent
25 Detergent suction hose with filter and screw-on lid
26 Bottle holder for detergent
27 Crank
28 Hose drum
Colour coding
- The operating elements for the cleaning process are yellow.
- The controls for the maintenance and service are light gray.
Safety instructions
Before first start-up it is definitely necessary to read the operating instructions and safety indications Nr. 5.951-949.0!
- Please follow the national rules and regulations for fluid spray jets of the respective country.
- Please follow the national rules and regulations for accident prevention of the respective country. Fluid spray jets must be tested regularly and the results of these tests must be documented in writing.
- The appliance/accessories must not be modified.
Hazard levels
△DANGER
Pointer to immediate danger, which leads to severe injuries or death.
WARNING
Pointer to a possibly dangerous situation, which can lead to severe injuries or death.
CAUTION
Pointer to a possibly dangerous situation, which can lead to minor injuries.
ATTENTION
Pointer to a possibly dangerous situation, which can lead to property damage.
Symbols on the machine
High-pressure jets can be dangerous if improperly used. The
jet may not be directed at persons, animals, live electrical equipment or at the appliance itself.
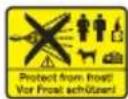
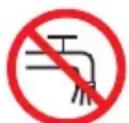
According to applicable regulations, the appliance must never be used on the drinking water net
without a system separator. A suitable system separator by KARCHER or alternatively a system separator according to EN 12729 type BA must be used.
Water that was flowing through a system separator is considered non-drinkable.
CAUTION
Always connect the system separator to the water supply, never directly to the appliance!
Proper use
Use this high pressure cleaner exclusively for
-
Cleaning using low pressure jet and detergent (for e.g. for cleaning machines, cars, buildings, tools),
-
For cleaning using high pressure jet without detergent (for e.g. for cleaning facades, terraces, garden appliances).
For stubborn dirt, we recommend the use of the dirt blaster as a special accessory.
HD...Plus includes a dirt remover as part of standard delivery.
Quality requirements for water: ATTENTION
Only clean water may be used as high pressure medium. Impurities will lead to increased wear and tear or formation of deposits in the appliance.
If recycled water is used, the following limit values must not be exceeded.
| pH value 6,5...9,5 | |
| electrical conductivity * Conductivity fresh water +1200 μS/cm | |
| settleable solids ** < 0,5 mg/l | |
| total suspended solids *** < | 50 mg/l |
| Hydrocarbons < 20 mg/l | |
| Chloride < 300 mg/l | |
| Sulphate < 240 mg/l | |
| Calcium < 200 mg/l | |
| Total hardness < 28 °dH | < 50 °TH < 500 ppm (mg CaCO3/l) |
| Iron < 0,5 mg/l | |
| Manganese < 0,05 mg/l | |
| Copper < 2 mg/l | |
| Active chloride | < 0,3 mg/l |
| free of bad odours | |
| * Maximum total 2000 μS/cm ** Test volume 1 l, settling time 30 min *** no abrasive substances | |
Safety Devices
Safety devices serve for the protection of the user and must not be put out of operation or bypassed with respect to their function.
Overflow valve with pressure switch
While reducing the water supply/quantity regulation at the pump head, the overflow valve opens and part of the water flows back to the pump suck side.
If the pulling lever on the trigger gun is released the pressure switch turns off the pump, the high-pressure jet is stopped. If the pulling lever is pulled the pump is turned on again.
Safety valve
The safety valve opens when the permissible operating pressure is exceeded; water flows back to the suction side of the pump. The overflow valve, pressure switch and safety valve are set and sealed at the factory.
Setting only by customer service.
Environmental protection
The packaging material can be recycled. Please do not throw the packaging material into household waste; please send it for recycling.
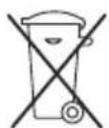
Old appliances contain valuable materials that can be recycled; these should be sent for recycling. Batteries, oil, and similar substances must not enter the environment. Please dispose of your old appliances using appropriate collection systems.
Electrical and electronic devices often contain components which could potentially pose a danger to human health and the environment if handled or disposed of incorrectly. However, these components are necessary for the proper operation of the device. Devices marked with this symbol must not be disposed of with regular household rubbish.
Notes about the ingredients (REACH)
You will find current information about the ingredients at:
www.kaercher.com/REACH
Before Startup
Unpacking
- Check the contents of the pack before unpacking.
In case of transport damage inform vendor immediately.
Check oil level
Read the oil level display when the device is not running. The oil level must be above the two pointers.
Activatedeaeration of oil container
Unscrew the fastening screws of the device hood; remove the device hood.
Cut off tip of oil container cover
Fasten the device hood.
Attaching the Accessories
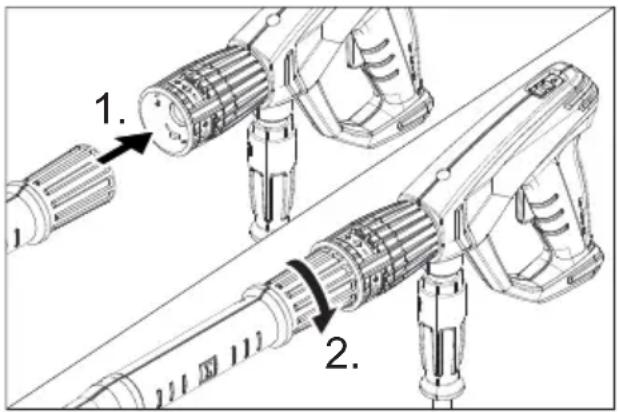
Note: The EASY!Lock system joins components with a quick-fasten thread solidly and securely with just one turn.
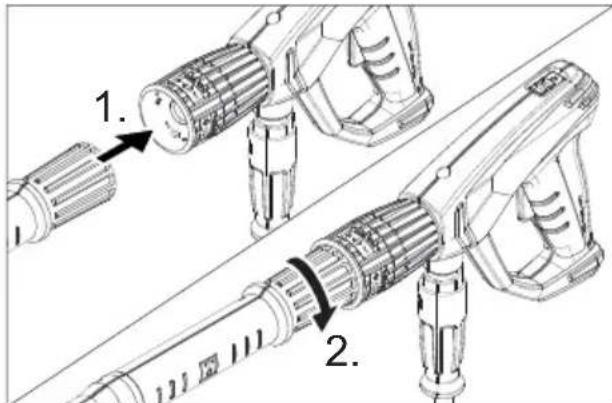
Mount the nozzle on the spray lance (marking on the adjustment ring at the top) and hand-tighten it (EASY!Lock).
Join the spray lance with the trigger gun and tighten until hand-tight (EASY!Lock).
In devices without hose drum:
Join the high-pressure hose with trigger gun and high-pressure connection of the appliance and tighten until handtight (EASY!Lock).
In devices with hose drum:
Insert the crank in the hose drum shaft and lock it in.
Before rolling up, stretch out the high pressure hose.
Wind the high pressure hose in uniform layers on the hose drum by rotating the crank. Select the rotation direction in such a way that the high pressure hose does not get bent.
Join the high pressure hose with trigger gun and tighten until hand-tight (EASY!Lock).
Start up
WARNING
Risk of injury! Appliance, accessories, supply lines and connections must be in fault-free condition. If they are not in a perfect state then the appliance must not be used.
Electrical connection
△DANGER
Danger of injury by electric shock.
- It is imperative to connect the appliance to the electric mains by means of a plug. It is forbidden to permanently connect the appliance to the power supply. The plug serves for the disconnection from the mains.
- The appliance may only be connected to alternating current.
- The highest allowed net impedance at the electrical connection point (refer to technical data) is not to be exceeded. In case of confusion regarding the power impedance present on your connection, please contact your utilities provider.
- The plug and coupling of the extension cable used must be watertight.
- Use the extension cord that has an adequate cross-section (see "Technical Data") and unwind it fully from the cable drum.
For connection values, see type plate/technical data.
Unwind the mains cable and place it on the floor.
Insert the mains plug into a socket.
Water connection
Connection to the water supply
△WARNING
Observe regulations of water supplier.
According to applicable regulations, the appliance must never be used on the drinking water net
without a system separator. A suitable system separator by KARCHER or alternatively a system separator according to EN 12729 type BA must be used.
Water that was flowing through a system separator is considered non-drinkable.
CAUTION
Always connect the system separator to the water supply, never directly to the appliance!
For connection values refer to technical specifications.
Connect the supply hose (minimum length 7.5m minimum diameter 1^* to the water connection point of the appliance (such as the tap).
Note:
The supply hose is not included.
Open the water supply.
Drawing in water from open reservoirs
Screw the suction hose (order no. 4.440-270.0) onto the water connection.
Connect filter (order-no. 4.730-012.0) to suction hose.
Deaerate the appliance: Unscrew the nozzle.
Switch on the appliance and let it run until the water exiting is bubble-free. At the end let the appliance run for approx. 10 seconds - then switch off. Repeat the procedure for a couple of times.
Switch off the appliance and fit the nozzle again.
Operation
△DANGER
Risk of explosion!
Do not spray flammable liquids.
If the appliance is used in hazardous areas (e.g. filling stations) the corresponding safety regulations must be observed.
Risk of injury! Hold the hand spray gun and the spray pipe firmly with both hands.
Risk of injury! The trigger and safety lever may not be locked during the operation.
Risk of injury! Contact Customer Service if the safety lever is damaged.
Risk of injury from high-pressure water jet. Slide the safety catch on the trigger gun forward before performing any work with the appliance.
CAUTION
Clean engines only at places with corresponding oil separators (environmental safety).
ATTENTION
Risk of blocking. Place the nozzles in the accessory compartment with their joint pointing upward.
Opening/closing the trigger gun
To open the trigger gun: Actuate the safety lever and trigger.
To close the hand spray gun: Release the safety lever and trigger.
High pressure operation
Note:
The appliance is equipped with a pressure switch. The motor starts up only when the trigger gun is open.
Roll off the high pressure hose totally from the hose drum.
Set the appliance switch to "I".
Release the trigger gun. To do so, push the safety catch towards the back.
Open the hand spray gun.
Set working pressure and flow rate through turning (runless) at the pressure- and amount regulation (B) (+/-) .
Only on HD 9/20-4....
For transporting small quantities, the engine heat ensures that water is heated up to approx. 15^
Select spray type
Close the hand spray gun.
Turn the casing of the nozzle till the desired symbol matches the marking.
| High pressure circular spray (0°) for specially stubborn dirt | |
| CHEM | Flat low pressure spray (CHEM) for operating using detergents or cleaning at low pressure. |
| High pressure flat spray (25°) for large dirt areas |
Operation with detergent
WARNING
Unsuitable detergents can cause damage to the appliance and to the object to be cleaned. Use only those detergents that have been approved by Karcher. Observe the dosage and other instructions provided
with these detergents. For considerate treatment of the environment use detergent economically.
Follow the safety instructions for using detergents.
Kärcher detergents ensure smooth functioning. Please consult us or ask for our catalogue or our detergent information sheets.
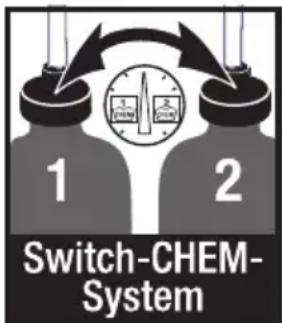
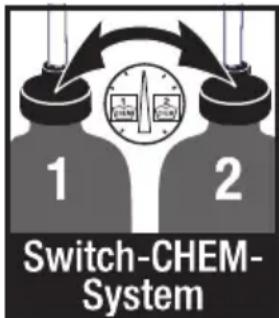
Place the detergent bottle into the bottle holder on the appliance or place a detergent container next to the appliance.. Two different detergents can be simultaneously placed into the appliance.
Pull the detergent suction hose out and immerse it into the detergent bottle or container.
Screw the lid onto the bottle or the container.
Set nozzle to "CHEM".
Set the detergent dosing valve to the desired detergent and concentration.
Recommended cleaning method
Spray the detergent sparingly on the dry surface and allow it to react, but not to dry.
Spray off loosened dirt with the high-pressure ray.
After operations, dip the filter in clear water. Turn the dosing valve to the highest detergent concentration. Start the appliance and rinse for one minute.
Interrupting operation
Close the hand spray gun. The appliance switches off.
Open the hand spray gun. The appliance will switch on again.
Turn off the appliance
Shut off water supply.
Open the hand spray gun.
Switch on the pump with the power switch and allow to run for about 5-10 seconds.
Close the hand spray gun.
Set the appliance switch to "0/OFF".
Pull main plug out of socket with dry hands only.
Remove water connection.
Activate hand spray gun until device is pressure less.
Secure the trigger gun. To do so, push the safety catch towards the front.
Only on HD 9/20-4....
△DANGER
Danger of scalding on account of hot water. The water remaining in the switched off device can get heated up. When you remove the hose from the water inlet, the heated water can spray out and cause scalding. Do not remove the hose before the device has cooled down.
Storing the Appliance
Insert the hand-spray gun in the holder.
Wind up the high-pressure hose and hang it over the hose storage. or Wind up the high-pressure hose on the hose drum. Push in the handle of the crank to block the hose drum.
Wind the connection cable around the cable holder.
Fasten the plug with the mounted clip.
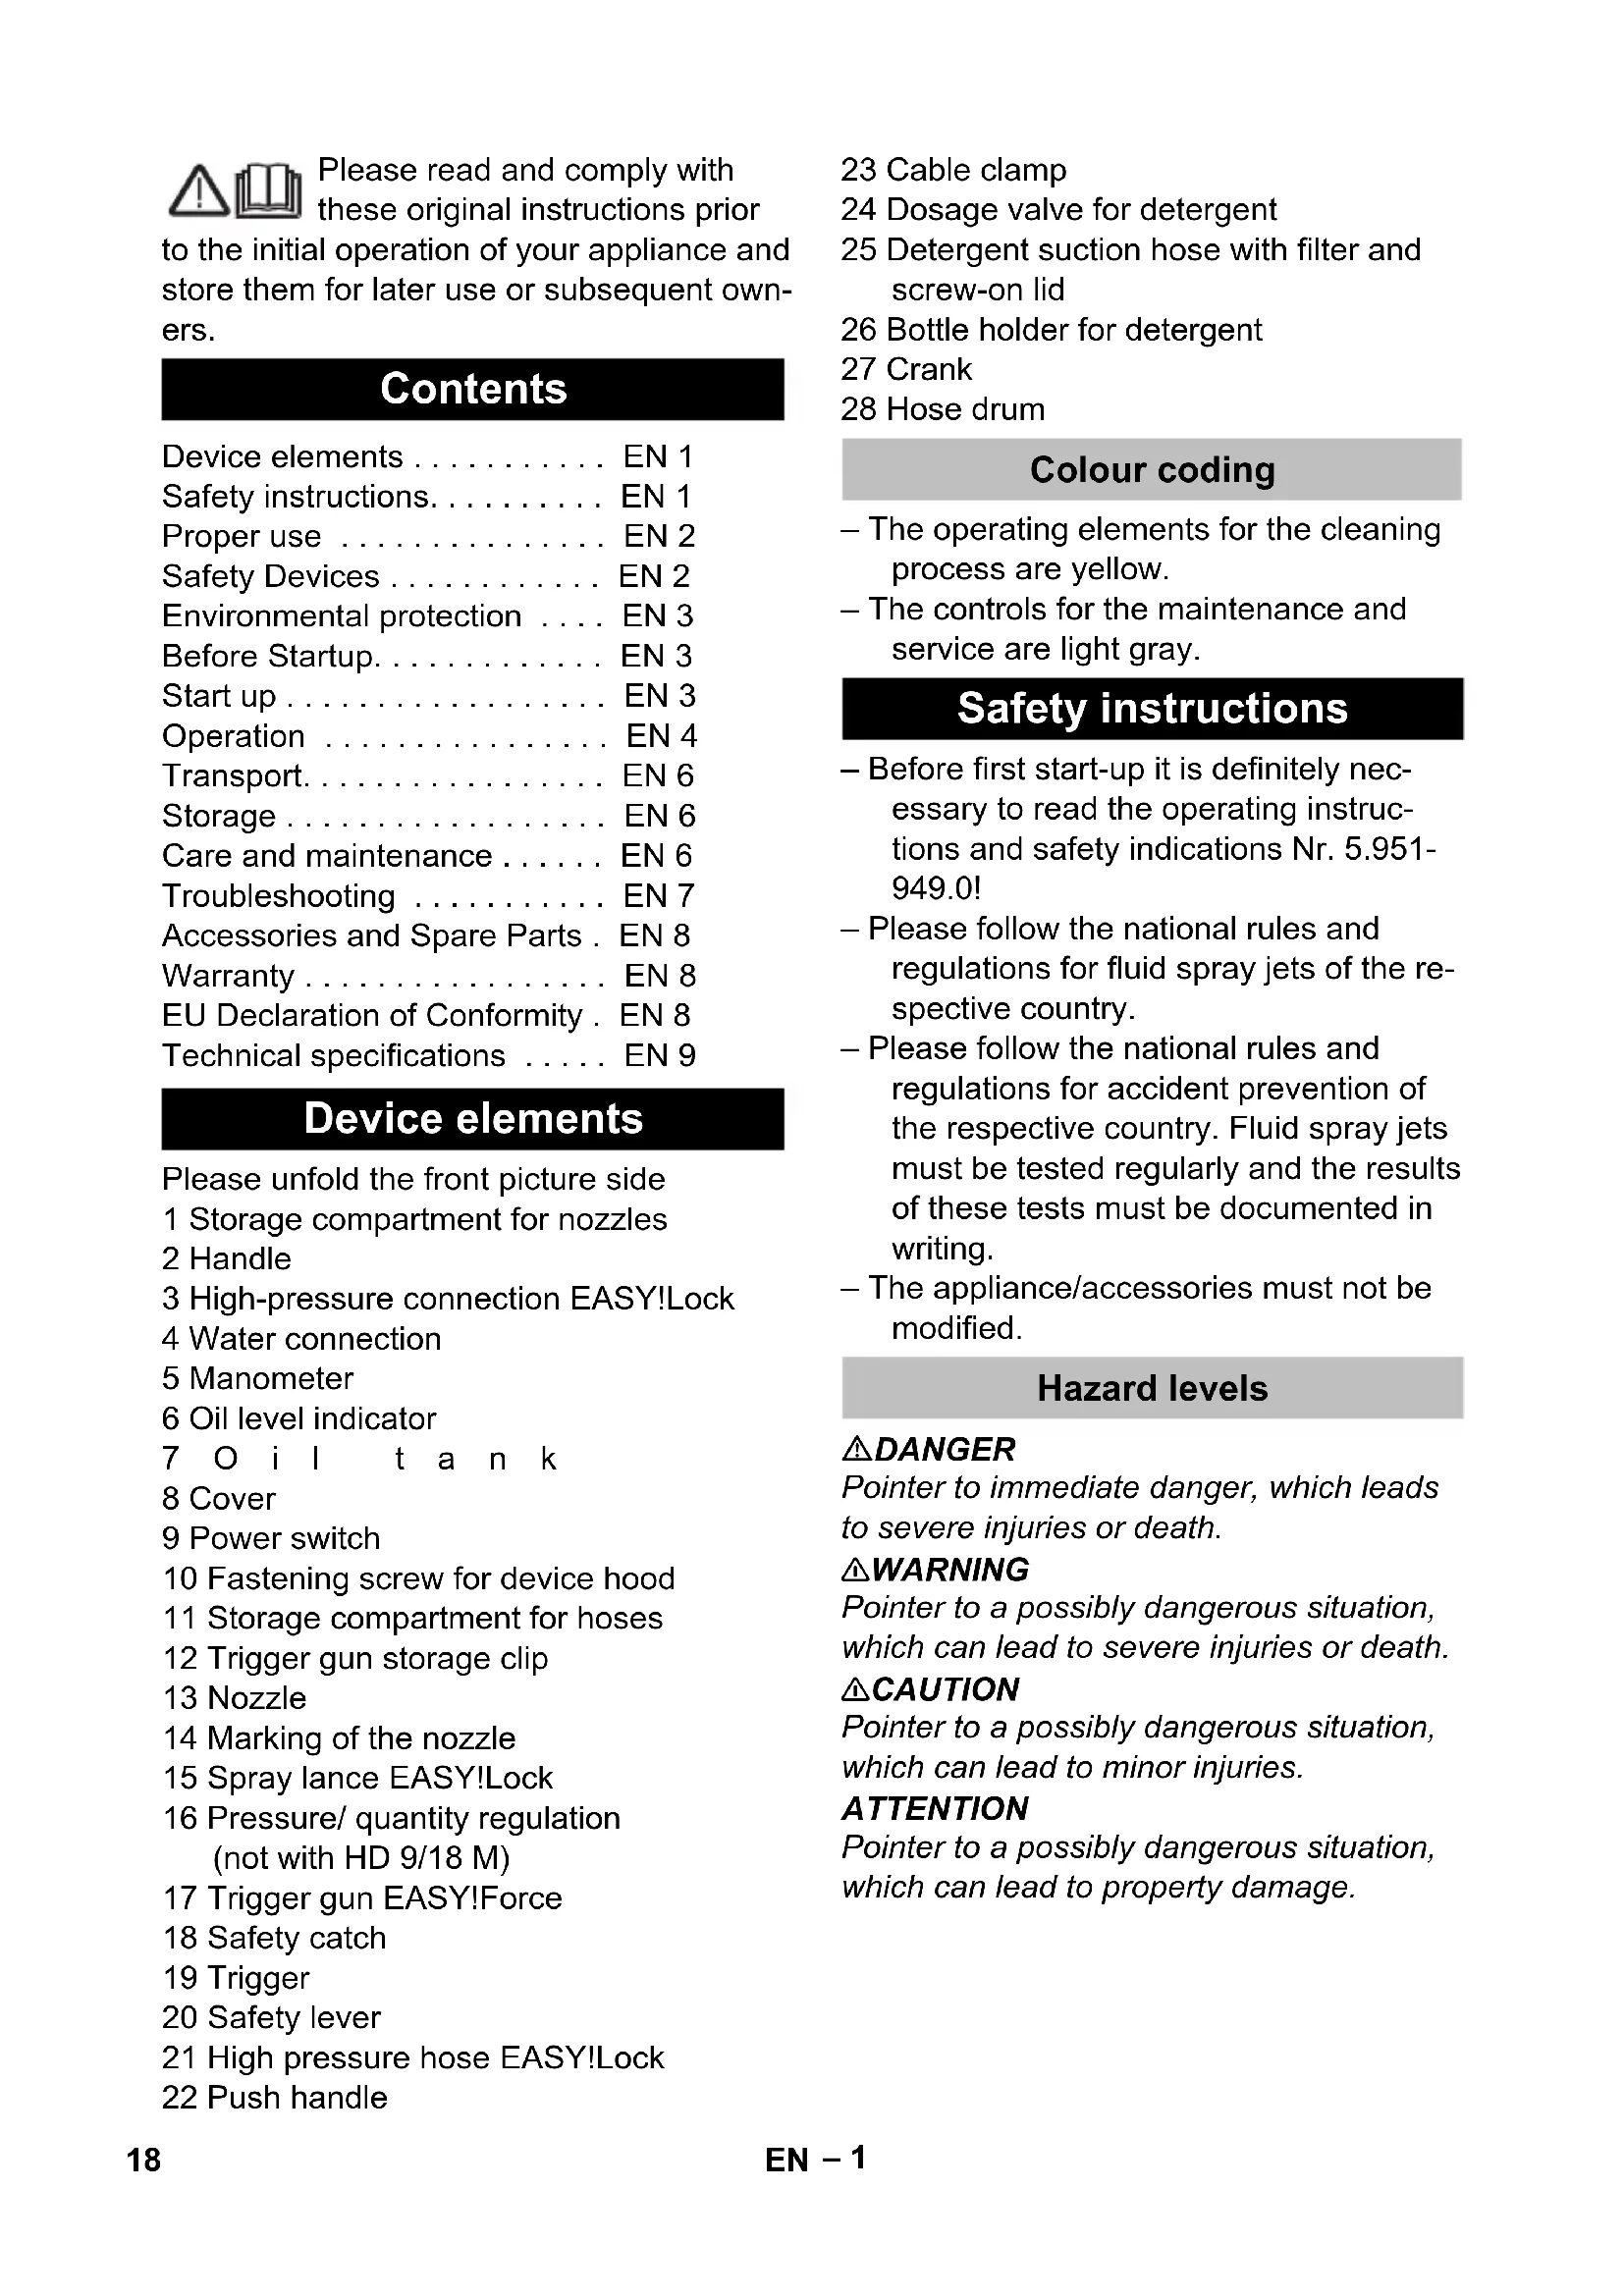
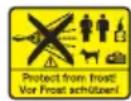
Frost protection
ATTENTION
Frost will destroy the not completely water drained device.
Store the appliance in a frost free area.
If you cannot store it in a frost-free place:
Drain water.
Pump in conventional frost protection agents through the appliance.
Note:
Use normal glycol-based anti-freezing agents for automobiles.
Observe handling instructions of the antifreeze agent manufacturer.
Operate device for max. 1 minute until the pump and conduits are empty.
Transport
CAUTION
Risk of personal injury or damage! Mind the weight of the appliance during transport.
ATTENTION
Protect the trigger from damage during transport.
Pull the device behind you at the handle for transporting it over longer distances.
For devices without hose drum, push the handle downward to carry the appliance. To carry, hold the appliance at the handles and not at the pushing handle.
Prior to transporting the appliance in horizontal position, remove the detergent bottles from the bottle holder and close them.
When transporting in vehicles, secure the appliance according to the guidelines from slipping and tipping over.
Storage
CAUTION
Risk of personal injury or damage! Consider the weight of the appliance when storing it. This appliance must only be stored in interior rooms.
Care and maintenance
△DANGER
Risk of injury by inadvertent startup of appliance and electrical shock.
Prior to all work on the appliance, switch off the appliance and pull the power plug.
Note:
Used oil must only be disposed of by the designated collection points. Please turn in used oil there. Polluting the environment with used oil is prosecutable.
Safety inspection/ maintenance contract
You can sign with your dealer a contract for regular safety inspection or even sign a maintenance contract. Please take advice on this matter.
Before each use
Check connection cable for damages (risk of electrical shock); get the damaged connection cable replaced immediately by an authorised customer service person/ electrician.
Check the high pressure hose for damages (risk of bursting).
Please arrange for the immediate exchange of a damaged high-pressure hose.
- Check appliance (pump) for leaks. 3 drops per minute are permitted and can come out from the lower side of the appliance. Call Customer Service if there is heavy leakage.
Weekly
Check oil level Please contact Customer Service immediately if the oil is milky (water in oil).
Clean the sieve in the water connection.
Clean filter at the detergent suck hose.
HD 9/20-4 only:
Clean the fine filter.
Unpressurize the appliance.
Unscrew the fastening screws of the device hood; remove the device hood.
Unscrew lid with filter.
Clean the filter with clean water or compressed air.
Reinstall in reverse sequence.
Every 500 operating hours, at least annually
Have the maintenance of the device performed by the customer service.
Oil change.
Oil change
Note:
See "Specifications" for oil volume and type.
Unscrew the fastening screws of the device hood; remove the device hood.
Remove the lid of the oil container.
Tilt the appliance forward.
Drain the oil in a collection basin.
Fill in new oil slowly; air bubbles should go out.
Attach the lid of the oil container.
Fasten the device hood.
Troubleshooting
△DANGER
Risk of injury by inadvertent startup of appliance and electrical shock.
- Prior to all work on the appliance, switch off the appliance and pull the power plug.
- Get the electrical components checked and repaired only by authorised customer service persons.
- Contact an authorised customer service person in case of problems not mentioned in this chapter or if you are in doubt or when you have been explicitly asked to do so.
Appliance is not running
Check connection cable for damages.
Check the supply voltage.
Turn device switch on "0" and let engine cool off for min. 5 minutes. If malfunction still occurs, have device checked by customer service.
Call Customer Service in case of electrical defects.
Pressure does not build up in the appliance
Set nozzle to "High pressure".
Clean the nozzle.
Replace the nozzle.
Deaerate the appliance (see "Start-up")
Check water supply level (refer to technical data).
Clean the sieve in the water connection.
Check all inlet pipes to the pump.
Contact Customer Service if needed.
Pump leaky
3 drops per minute are permitted and can come out from the lower side of the appliance. Call Customer Service if there is heavy leakage.
With stronger leak, have device checked by customer service.
Pump is vibrating
Check suction pipes for water and detergent and ensure that they are leakproof.
Close dosing valve for detergent to operate the machine without detergent.
Deaerate the appliance (see "Start-up")
Contact Customer Service if needed.
Detergent is not getting sucked in
Set nozzle to "CHEM".
Check/ clean detergent suction hose with filter.
Open or check/clean detergent dosing valve.
Contact Customer Service if needed.
Accessories and Spare Parts
Only use original accessories and spare parts, they ensure the safe and trouble-free operation of the device.
For information about accessories and spare parts, please visit www.kaercher.com.
Warranty
The warranty terms published by the relevant sales company are applicable in each country. We will repair potential failures of your appliance within the warranty period free of charge, provided that such failure is caused by faulty material or defects in manufacturing. In the event of a warranty claim please contact your dealer or the nearest authorized Customer Service centre. Please submit the proof of purchase.
EU Declaration of Conformity
We hereby declare that the machine described below complies with the relevant basic safety and health requirements of the EU Directives, both in its basic design and construction as well as in the version put into circulation by us. This declaration shall cease to be valid if the machine is modified without our prior approval.
Product: High pressure cleaner
Type: 1.524-xxx
Relevant EU Directives
2006/42/EC (+2009/127/EC)
2014/30/EU
2000/14/EC
Applied harmonized standards
EN 60335-1
EN 60335-2-79
EN 55014-1: 2006+A1: 2009+A2: 2011
EN 55014-2: 1997 + A2: 2008
EN 61000-3-2: 2014
EN 62233: 2008
HD 6/11, HD 6/15, HD 7/12, HD 7/18,
HD 9/19
EN 61000-3-3:2006
HD 6/16, HD 9/20:
EN 61000-3-11:2000
Applied conformity evaluation method
2000/14/EC: Appendix V
Sound power level dB(A)
| Measured: | Guaranteed: | |
| HD 6/11 83 84 | ||
| HD 6/15 83 84 | ||
| HD 6/16 83 84 | ||
| HD 9/19 89 91 | ||
| HD 9/20 87 88 |
The signatories act on behalf of and with the authority of the company management.

Chairman of the Board of Management

S. Reiser
Director Regulatory Affairs & Certification
Documentation supervisor:
S. Reiser
Alfred Kärcher SE & Co. KG
71364 Winnenden (Germany)
Tel.: +49 7195 14-0
Fax: +49 7195 14-2212
Winnenden, 2019/04/01
Technical specifications
| Type HD 6/11-4 M | 1.524-901.0 | HD 6/15-4 M 1.524-907.0 | HD 6/16-4 M 1.524-900.0 1.524-903.0 1.524-909.0 | |
| HD 6/16-4 MX 1.524-904.0 | ||||
| GB AU EU | ||||
| Main Supply | ||||
| Voltage V 100 240 230 | ||||
| Current type Hz 1~50 | ||||
| Motor rpm 1/min 1400 | ||||
| Connected load kW 2,9 3,3 3,4 | ||||
| Protection (slow, char. C) A 30 16 | ||||
| Type of protection | IPX5 | |||
| Maximum allowed net impedance | Ohm | - | 0,294+j0,184 | |
| Extension cord 30 m | mm² | 2,5 | ||
| Water connection | ||||
| Max. feed temperature | °C | 60 | ||
| Min. feed volume | l/h (l/min) | 600 (10) | ||
| Suck height from open container (20 °C) | m | 0,5 | ||
| Max. feed pressure | MPa | 1 | ||
| Performance data | ||||
| Operating pressure of water (using standard nozzle) | MPa | 3...11 | 3...15 | 3...16 |
| Size of standard nozzle 045 040 038 | ||||
| Max. operating over-pressure | MPa | 14 | 18 | 19 |
| Flow rate | l/h (l/min) | 250...600 (4,2...10) | 300...600 (5...10) | |
| Detergent suck in | l/h (l/min) | 0...40 (0...0,7) | ||
| Max. recoil force of trigger gun | N | 30 | ||
| Values determined as per EN 60335-2-79 | ||||
| Hand-arm vibration value | ||||
| Hand spray gun | m/s² | <2,5 | ||
| Spray lance | m/s² | <2,5 | ||
| Uncertainty K | m/s² | 1 | ||
| Sound pressure level LpA | dB(A) | 69 | ||
| Uncertainty KpA | dB(A) | 1 | ||
| Sound power level LWA + Uncertainty KWA | dB(A) | 84 | ||
| Fuel | ||||
| Amount of oil I | 0,5 | |||
| Oil grade | SAE 15W40 | |||
| Dimensions and weights | ||||
| Length | mm 554 | |||
| Width | mm 509 | |||
| Height | mm | 1000 | ||
| Weight without accessories (MX) | kg | 44,5 | 54 | 48 (50) |
| Type HD 7/12-4 M | 1.524-902.0 | HD 7/16-4 M 1.524-911.0 | HD 7/18-4 M 1.524-910.0 1.524-913.0 1.524-912.0 | |
| HD 7/18-4 MX 1.524-914.0 | ||||
| KAP KAP EU | ||||
| Main Supply | ||||
| Voltage V 220 400 | ||||
| Current type Hz 1~60 3~60 3~50 | ||||
| Motor rpm 1/min 1400 1680 1400 | ||||
| Connected load kW 3,5 4,1 | 4,7 | |||
| Protection (slow, char. C) | A | 20 | 16 | |
| Type of protection | IPX5 | |||
| Maximum allowed net impedance | Ohm | - | - | - |
| Extension cord 30 m | mm² | 4,0 | 2,5 | 2,5 |
| Water connection | ||||
| Max. feed temperature | °C | 60 | ||
| Min. feed volume | l/h (l/min) | 700 (11,7) | ||
| Suck height from open container (20 °C) | m | 0,5 | ||
| Max. feed pressure | MPa | 1 | ||
| Performance data | ||||
| Operating pressure of water (using standard nozzle) | MPa 3...12 | 3...16 | 3...18 | |
| Size of standard nozzle 054 045 042 | ||||
| Max. operating over-pressure | MPa | 14 | 19 | 21 |
| Flow rate | l/h (l/min) | 300...700 (5...11,67) | ||
| Detergent suck in | l/h (l/min) | 0...40 (0...0,7) | ||
| Max. recoil force of trigger gun | N | 30 | 35 | 37 |
| Values determined as per EN 60335-2-79 | ||||
| Hand-arm vibration value | ||||
| Hand spray gun | m/s² | <2,5 | ||
| Spray lance | m/s² | <2,5 | ||
| Uncertainty K | m/s² | 1 | ||
| Sound pressure level LpA | dB(A) | 69 | 75 | |
| Uncertainty KpA | dB(A) | 1 | ||
| Sound power level LWA + Uncertainty KWA | dB(A) | 84 | 90 | |
| Fuel | ||||
| Amount of oil | I | 0,5 | ||
| Oil grade | SAE 15W40 | SAE 90 Hypoid | ||
| Dimensions and weights | ||||
| Length | mm | 554 | ||
| Width | mm | 509 | ||
| Height | mm | 1000 | ||
| Weight without accessories (MX) | kg | 47,5 | 44,5 | 49 (52) |
| Type HD 9/18 M | 1.524-916.0 | HD9/19 M 1.524-915.0 1.524-919.0 | HD 9/20-4 M 1.524-924.0 | |
| HD 9/20-4 MX 1.524-927.0 | ||||
| KAP EU EU | ||||
| Main Supply | ||||
| Voltage V 220 400 | ||||
| Current type Hz 3~60 3~50 | ||||
| Motor rpm 1/min 3370 2800 1400 | ||||
| Connected load kW 6,7 6,8 6,9 | ||||
| Protection (slow, char. C) | A | 20 | 16 | |
| Type of protection | IPX5 | |||
| Maximum allowed net impedance | Ohm | - | - | 0,222+j0,139 |
| Extension cord 30 m | mm² | 4,0 | 2,5 | |
| Water connection | ||||
| Max. feed temperature | °C | 60 | ||
| Min. feed volume | l/h (l/min) | 900 (15) | ||
| Suck height from open container (20 °C) | m | 0,5 | ||
| Max. feed pressure | MPa | 1 | ||
| Performance data | ||||
| Operating pressure of water (using standard nozzle) | MPa | 18 4...18,5 | 4...20 | |
| Size of standard nozzle | 053 050 | |||
| Max. operating over-pressure | MPa | 23 | 22,5 | 22 |
| Flow rate | l/h (l/min) | 900 (15) | 450...890 (7,5...14,8) | 460...900 (7,7...15) |
| Detergent suck in | l/h (l/min) | 0...40 (0...0,7) | ||
| Max. recoil force of trigger gun | N | 49 | ||
| Values determined as per EN 60335-2-79 | ||||
| Hand-arm vibration value | ||||
| Hand spray gun | m/s² | <2,5 | ||
| Spray lance | m/s² | 3,0 | 1,5 | |
| Uncertainty K | m/s² | 1 | ||
| Sound pressure level LpA | dB(A) | 76 | 75 | |
| Uncertainty KpA | dB(A) | 2 | 1 | |
| Sound power level LWA + Uncertainty KWA | dB(A) | 91 | 88 | |
| Fuel | ||||
| Amount of oil | I | 0,5 0,75 | ||
| Oil grade | SAE 90 Hypoid | |||
| Dimensions and weights | ||||
| Length | mm | 554 | ||
| Width | mm | 509 | ||
| Height | mm | 1000 | ||
| Weight without accessories (MX) | kg | 48,6 | 42,1 (49) 47 (55) | 48 (50) |

www.kaercher.com/REACH
2006/42/CE (+2009/127/CE)
2014/30/UE
2000/14/CE
Chairman of the Board of Management

S. Reiser
Director Regulatory Affairs & Certification
Responsible de la documentation : S. Reiser
Alfred Kärcher SE & Co. KG
71364 Winnenden (Germany)
Tel.: +49 7195 14-0
Fax: +49 7195 14-2212
Winnenden, 2019/04/01
\section*{Caracteristiques techniques}
www.kaercher.com/REACH
2006/42/CE (+2009/127/CE)
2014/30/UE
2000/14/CE
Chairman of the Board of Management

S. Reiser
Director Regulatory Affairs & Certification
71364 Winnenden (Germany)
Tel.: +49 7195 14-0
Fax: +49 7195 14-2212
Winnenden, 2019/04/01
Dati tecnici
www.kaercher.com/REACH
Chairman of the Board of Management
S. Reiser
Director Regulatory Affairs & Certification
71364 Winnenden (Germany)
Tel.: +49 7195 14-0
Fax: +49 7195 14-2212
Winnenden, 2019/04/01
Technische gegevens
www.kaercher.com/REACH
2006/42/CE (+2009/127/CE)
2014/30/UE
2000/14/CE
Chairman of the Board of Management

S. Reiser
Director Regulatory Affairs & Certification
Responsible de documento:
S. Reiser
Alfred Kärcher SE & Co. KG
71364 Winnenden (Germany)
Tel.: +49 7195 14-0
Fax: +49 7195 14-2212
Winnenden, 2019/04/01
Datasétécnicos
www.kaercher.com/REACH
2006/42/CE (+2009/127/CE)
2014/30/UE
2000/14/CE
Chairman of the Board of Management

S. Reiser
Director Regulatory Affairs & Certification
71364 Winnenden (Germany)
Tel.: +49 7195 14-0
Fax: +49 7195 14-2212
Winnenden, 2019/04/01
Dados技术和
www.kaercher.com/REACH
Inden ibrugtagning
Udpakning
- Kontroller emballagens indhold.
- Ved transportskader skal forhandleren informeres omgående.
Kontroller oliestanden
2006/42/EF (+2009/127/EF)
2014/30/EU
2000/14/EF
Chairman of the Board of Management

S. Reiser
Director Regulatory Affairs & Certification
71364 Winnenden (Germany)
Tel.: +49 7195 14-0
Fax: +49 7195 14-2212
Winnenden, 2019/04/01
Tekniske data
www.kaercher.com/REACH
Förden tasibruk
Utpakking
- Kontroller ved utpakking at ingen ting mangler.
- Informer straks forhandleren ved transportskader.
2006/42/EF (+2009/127/EF)
2014/30/EU
2000/14/EF

Chairman of the Board of Management

S. Reiser
Director Regulatory Affairs & Certification
71364 Winnenden (Germany)
Tel.: +49 7195 14-0
Fax: +49 7195 14-2212
Winnenden, 2019/04/01
Tekniske data
www.kaercher.com/REACH
Färe ibruktagande
Uppackning
Chairman of the Board of Management

S. Reiser
Director Regulatory Affairs & Certification
Dokumentationsbefullmaktigad:
S. Reiser
Alfred Kärcher SE & Co. KG
71364 Winnenden (Germany)
Tel.: +49 7195 14-0
Fax: +49 7195 14-2212
Winnenden, 2019/04/01
Tekniska data
www.kaercher.com/REACH

Chairman of the Board of Management

S. Reiser
Director Regulatory Affairs & Certification
71364 Winnenden (Germany)
Tel.: +49 7195 14-0
Fax: +49 7195 14-2212
Winnenden, 2019/04/01
Tekniset tiedot
Aataeic aospaaleiae EL2
PpOToaia TepiBaalovtoC...EL3
Piv Tn 0eon oE λeitoupyia . . . EL 3
EvapxIaIoupyiaC. EL 4
Xειρισμός EL 5
Mεταφρα EL 7
AntoHKeUoN EL7
www.kaercher.com/REACH
SigmaoIoynon Eapntmuatwv
Chairman of the Board of Management

S. Reiser
Director Regulatory Affairs & Certification
71364 Winnenden (Germany)
Tel.: +49 7195 14-0
Fax: +49 7195 14-2212
Winnenden, 2019/04/01
Texvika xapakntnpiOTIKa
www.kaercher.com/REACH
Calismayi yarida kesme
El puskurtme tabancasini kapatin. Cihaz kapanir.
El puskurtme tabancasini acin. Cihaz tekrar aciir.
Cihazın kapatilmasio
Su beslemsini kapatin.
El puskurtme tabancasin污染防治。
Pompayi cihaz salteriyle acin ve 5-10 saniye calistirin.
El puskurtme tabancasini kapatin.
Cihaz salterini,0/OFF" konumuna getirin.
Chairman of the Board of Management
S. Reiser
Director Regulatory Affairs & Certification
71364 Winnenden (Germany)
Tel.: +49 7195 14-0
Fax: +49 7195 14-2212
Winnenden, 2019/04/01
Teknik Bilgiler
| Tip: HD 6/11-4 M | 1.524-901.0 | HD 6/15-4 M 1.524-907.0 | HD 6/16-4 M 1.524-900.0 1.524-903.0 1.524-909.0 | |
| HD 6/16-4 MX 1.524-904.0 | ||||
| GB AU EU | ||||
| Elektrik böglantı | ||||
| Gerilim V 100 240 230 | ||||
| Elektrik Türü Hz 1~50 | ||||
| Motor devri d/dk 1400 | ||||
| Bağlanti güçü kW 2,9 3,3 3,4 | ||||
| Sigorta (geçirmeli, Char. C) A 30 16 | ||||
| Koruma seksli | IPX5 | |||
| Izin verilen maksimum seksbeke empedansı | Ohm | - | 0,294+j0,184 | |
| Uzatma kablosu 30 m | mm² | 2,5 | ||
| Su böglantı | ||||
| Beslemeicine(Maks.) | °C | 60 | ||
| Besleme miktar | I/saat(I/ dakika) | 600(10) | ||
| Açık depodan emme)yükseligi(20℃) | m | 0,5 | ||
| Besleme bas | MPa | 1 | ||
| Performans değerleri | ||||
| Su calisma basinci(standart memeyle) | MPa | 3...11 | 3...15 | 3...16 |
| Standart memenin enjektör boyutu | 045 040 | 038 | ||
| Maksimum calisma üst basinci | MPa | 14 | 18 | 19 |
| Besleme miktar | I/saat(I/ dakika) | 250...600 (4,2...10) | 300...600(5...10) | |
| Temizlik maddesi emme | I/saat(I/ dakika) | 0...40(0...0,7) | ||
| El piskürtme tabancasinin geri tepme kuvveti(maks.) | N | 30 | ||
| 60335-2-79'a gö be bililenen değerler | ||||
| El-kol titreşimi değeri | ||||
| El piskürtme tabancasi | m/s² | <2,5 | ||
| Piskürtme borusu | m/s² | <2,5 | ||
| Güvensizlik K m/s | 2 | 1 | ||
| Ses basinci seviyesi LpA | dB(A) | 69 | ||
| Güvensizlik KpA | dB(A) | 1 | ||
| Ses basinci seviyesi LWA + Güvensizlik KWA | dB(A) | 84 | ||
| Isletme maddeleri | ||||
| Yağ miktari | I | 0,5 | ||
| Yağ Türü | SAE 15W40 | |||
| Ölcüler ve ağırkıclar | ||||
| Uzunluk | mm 554 | |||
| Genişlik | mm 509 | |||
| Yükselklik | mm | 1000 | ||
| Aksesuar hariç ağırkık (MX) | kg | 44,5 | 54 | 48 (50) |
| Tip: HD 7/12-4 M | 1.524-902.0 | HD 7/16-4 M 1.524-911.0 | HD 7/18-4 M 1.524-910.0 1.524-913.0 1.524-912.0 | |
| HD 7/18-4 MX 1.524-914.0 | ||||
| KAP KAP EU | ||||
| Elektrik böglantı | ||||
| Gerilim V 220 400 | ||||
| Elektrik Türü Hz 1~60 3~60 3~50 | ||||
| Motor devri d/dk 1400 1680 1400 | ||||
| Bağlanti güçü kW 3,5 4,1 4,7 | ||||
| Sigorta (geçikmeli, Char. C) A | 20 | 16 | ||
| Koruma seksli | IPX5 | |||
| Izin verilen maksimum®, sebeke empedansı | Ohm | - | - | - |
| Uzatma kablosu 30 m | mm² | 4,0 2,5 2,5 | ||
| Su böglantı | ||||
| Beslemeicine (maks.) | °C 60 | |||
| Besleme miktar | I/saat (I/ dakika) | 700 (11,7) | ||
| Açık depodan emme yüzsekligi (20 °C) | m | 0,5 | ||
| Besleme bas | MPa | 1 | ||
| Performans değerleri | ||||
| Su calisma basinci (standart memeyle) | MPa | 3...12 | 3...16 | 3...18 |
| Standart memenin enjektör boyutu | 054 | 045 042 | ||
| Maksimum calisma üst basinci | MPa | 14 19 21 | ||
| Besleme miktarı | I/saat (I/ dakika) | 300...700 (5...11,67) | ||
| Temizlik maddesi emme | I/saat (I/ dakika) | 0...40 (0...0,7) | ||
| El piskürtme tabancasinin geri tepme kuvveti (maks.) | N | 30 | 35 | 37 |
| 60335-2-79'a gö be bilernendehyder | ||||
| El-kol titreşimidehyeri | ||||
| El piskürtme tabancasi | m/s² | <2,5 | ||
| Piskürtme borusu | m/s² | <2,5 | ||
| Güvensizlik K | m/s² | 1 | ||
| Ses bas中国特色 seviyesi LpA | dB(A) 69 | 75 | ||
| Güvensizlik KpA | dB(A) | 1 | ||
| Ses bas中国特色 seviyesi LWA + Güvensizlik KWA | dB(A) 84 | 90 | ||
| İşletme maddeleri | ||||
| Yağ miktari | I | 0,5 | ||
| Yağ Türü | SAE 15W40 $AE 90 Hipoid | |||
| Ölcüler ve ağırliklar | ||||
| Uzunluk | mm | 554 | ||
| Genişlik | mm | 509 | ||
| Yükselklik | mm | 1000 | ||
| Aksesuar hariç,ağırlik (MX) | kg | 47,5 | 44,5 | 49 (52) |
| Tip: HD 9/18 M | 1.524-916.0 | HD9/19 M 1.524-915.0 1.524-919.0 | HD 9/20-4 M 1.524-924.0 | |
| HD 9/20-4 MX 1.524-927.0 | ||||
| KAP EU EU | ||||
| Elektrik böglantı | ||||
| Gerilim V 220 400 | ||||
| Elektrik Türü Hz 3~60 3~50 | ||||
| Motor devri d/dk 3370 2800 1400 | ||||
| Bağlanti güçü kW 6,7 6,8 6,9 | ||||
| Sigorta (geçikmeli, Char. C) A | 20 | 16 | ||
| Korum脘i ilekli | IPX5 | |||
| Izin verilen maksimum erfolke empedansı | Ohm | - | - | 0,222+j0,139 |
| Uzatma kablosu 30 m | mm² | 4,0 | 2,5 | |
| Su böglantı | ||||
| Beslemeicine(Maks.) | °C 60 | |||
| Besleme miktar | l/saat(l/ dakika) | 900(15) | ||
| Açık depodan emme yükseligi(20°C) | m | 0,5 | ||
| Besleme bas | MPa | 1 | ||
| Performans değerleri | ||||
| Su calisma basinci(standart memeyle) | MPa | 18 | 4...18,5 | 4...20 |
| Standart memenin enjektör boyutu | 053 050 | |||
| Maksimum calisma üst basinci | MPa | 23 | 22,5 | 22 |
| Besleme miktar | l/saat(l/ dakika) | 900(15) | 450...890 (7,5...14,8) | 460...900 (7,7...15) |
| Temizlik maddesi emme | l/saat(l/ dakika) | 0...40(0...0,7) | ||
| El piskürtme tabancasinin geri tepme kuvveti(maks.) | N | 49 | ||
| 60335-2-79'a gö be bilernendehyder | ||||
| El-kol titreşimidehyeri | ||||
| El piskürtme tabancasi | m/s² | <2,5 | ||
| Piskürtme borusu | m/s² | 3,0 | 1,5 | |
| Güvensizlik K | m/s² | 1 | ||
| Ses basinci seviyesi LpA | dB(A) | 76 | 75 | |
| Güvensizlik KpA | dB(A) | 2 | 1 | |
| Ses basinci seviyesi LWA + Güvensizlik KWA | dB(A) | 91 | 88 | |
| Işletme maddeleri | ||||
| Yağ miktari | l | 0,5 0,75 | ||
| Yağ Türü | SAE 90 Hipoid | |||
| Ölcüler ve ağırliklar | ||||
| Uzunluk | mm | 554 | ||
| Genişlik | mm | 509 | ||
| Yükselklik | mm | 1000 | ||
| Aksesuar hariç ağırlik (MX) | kg | 48,6 | 42,1 (49) 47 (55) | 48 (50) |

Ipeed nepBbIM npImeHneM BaWero np6opa npouHTaTe
3TyOpHnHaIbHyIO INHCTpyKcIIO NO 3KcNpyaTaun, NocJe 3TOrO DeIcTByIe COOTBeCTBENHO nCOxpaHnte ee dJaIaNbHeuJe- ro NoIb3OBaHnI IIN dJIa CNeDuOJeRO BnaIeNbca.
OrnaBneHne
3JIemEnTbI np6opa. .RU 1
Yka3aHnI NO TexHnke 6e3oNa-CHOCTN. RU1
IcnoJb3OBaHne no Ha3Haue- HnIO .RU 2
3aunthbyeycptpoicTba. RU 3
3aunTa OkpykaIoUe Cpebl.RU 3
Ipeud hauanom paobtbl. .RU 3
Haayano pa6oTbI RU 4
UnpaBJIeHne RU5
TpaHcnpTnpoBka RU7
XpaHHeRU 8
YxOД n TeXnueckoe o6cnyKuBaHne RU 8
POMOUIB Cnyae HenoJaOK RU 9
PnHaIeXHocTn 3aNaChbIe
Tean RU10
TapaHTnRU 10
3aBHeHne o COOTBeTCTBn EU RU 10
Texnueckne daHHbIe. RU 11
3JIeMeHTbI npn6opa
Pa3BepHnte, noXaIyIcTa, cHaYaJa cTpaHNuCbI c PNCyHKaMn
1 POnctabKa IJIa HacaIok
2 P y u Ka
3 Патрубok ВьICOKО Давпеня EASY!Lock
4 POnKJIIOUeHHe BOIOCha6KeHnA
5 MaHometp
6 YkaataTeIb ypoBHa Macna
7 Ma c J I H b I 6 a K
8 Kpbiuka npnbopa
9 BknoyateNB annapaTa
10 KpenexHbIe BNHTbIKpbIuKn np6opa
11 NocTbKa dny shnaHra
12 DepxaTeIb InpyHOro nictOteTaPacNbIInTeIa
13 Hacaika
14 Mapknupbka fopcyHKn
15 CtrpyHna Tpy6ka EASY!Lock
16 Perynipobka daBneHn/koNueCTBa (He dIy HD 9/18 M)
17Пистолет-pacnbinteIbEASY!Force
18 PpeOxpaHnteJIb
19 CnysckoBOn pbUar
20 Pbyar npedoxpanHtela
21 Ⅲnahr BbICOKOrO daBJeHnE EASY!Lock
22 BeDyuaa Dya
23Держателkaбеля
24 Do3npuoi Knaan Mooero cpeDCTBa
25 BcacbIbAIOuN IuaHr dIra MoUoero cpeIcTBA CΦnIbTpOM n pe3b6OBoN KpbIuKoN
26ДерхаTeьдябутblNKиCMOIOUIM CpeIcTBOM
27 PyKoTka
28 Bapa6aH dIy HAMOTKU IuaHa
UBeTHa MapKnupOBka
- OpraHbI ynpaBneHnIЯ npocecca OuNCTKn KeNToro CBeta.
- OpraHbI ynpaBJIeHnI dIyTexHnueckoTo 6cnyKuBaHnI n cepBnca CBetIoCeporo UBeTa.
Yka3aHnno TExHnKe 6e3ONaChOCTn
-Передпервим ВВODOMВЗКПУаТAUHОOBЯЗATEЛьНОпpoчтNTeуka3aHnI NOTEXHnke6e3OanacHocTn№5.951-949.0!
- Heo6xOIMO co6IIOdaTb COOTBeTCTByIOUne HaUNOHaHbHbIe 3aKHOaTeJIb-HbIe HOpMbI NO pa6Ote C XNIDKOCTHbIMN CTpyINbIMN yCTaHOBKaMn.
- Heo6xOJIMO co6IIOdaTb COOTBeTCTByIOUne HaUNOHaJIbHbIe 3aKOHOnaTeJIbHbIe HOpMbI IO TexHnke 6e3ONaCHocTN. Heo6xOJIMO peryIpaHO npOBepaTb pa60Tu XnIKoCTHBIX CTpyINbIX yCTaHOBOK IN pe3yJIbTaT pOBepKn OΦopMnA Tb B Nc6bMeHHOM BVNe.
-3anpeuaeTc npOn3BOINTb KaKneIin6o n3MeHEny yCTpoiCtBa/npHaJnHexHOCTeI.
CTeneHb onachoctn
ONACHOCTb
Yka3aHue omHocumelbHo Henocpedcm- beHNO 2p03raeU onachocmu, Komopar npubodum K mJKeIbIM yeeyBm uu K cmepmu.
△PENEYNPEXDEHNE
Yka3aHue omHocumelbHO 603MOxHoNo meHuaJIbHO onaCHO cumyaucu, Komopara MoXem npueecmu K mJKeIbIM yee- yBm UUNK CMEpmu.
OCTOPOXHO
Yka3aHue Ha nomeHuaJIbHO onachyU cmyauu, Komopar MoXem npueecmu K noJyuHeuIO ne2Kux mpaEM.
BHUMAHNE
Yka3aHue omHocumelbHO 603MOxHoJ noMeHuaJIbHO onaCHO cumyaquu, Komopra MoXem NOBHeB MamepuaIbHbIy uep6.
CnmboJIbHa annapaTe
Haxoaaaonb blicokum daeneHemcmpyboMoK
npu HenpaunbHom uCnoB3oBaHuu npedcmaaemb onachocmb. 3anpeuaemca Hapraenmb cmpyio bOdbHa JIOdeu, XUOBmHbIX, EKnIOueHHoe 3JeKmpuueckoe obopydoBaHue unu Ha cam 6bICOKoHaOpHbI MOUu annapam.
CoaIacHo deucmeyouum npednucanuym ycmpoocm8o 3anpeuaemcnaKcnnyamupoeamb6e3
cucmemno 0 pa3denumna empybopoeode c numbeofo doou. Cne dyem uonb3oamb coomeemcmyoo uucmemhbu cenapamop fupmbi KARCHER unu anbmephamuehbu cuemhbui cenapamop, coomeemcmyoen EN 12729 mun BA.
Boda, npoweedwaayepe3 cuememhbu cenapamop, cyumaemcna Hnpuzoohou dny numba.
OCTOPOXHO
Cucmemhbu pa3deNumenb 0ce2da donxhen haxodumbc8 cucmembe bodochab6xehn, He pa3pewaemcnoKnouambeo Hanpmyu K ycmpoucmey.
IcnoJb30BaHne no Ha3HaueHnIO
IcnoJb3OBaTb NCKIOUHTeJIbHO daHbIaannapaT BbICOKO rDaBHeHnA
-ДЯ OYHCTM CTpyeH HN3KOrO DaBJIeHnI C NcNoJIb3OBaHHeM MOUoJero CpeICTBa(HaNPIMep,YNCtKa ObOpyIDoBAHnI,ABTomO6uJIeN,3dAnH,INCHTpymENTOB),
-ДЯ OЧNTКИ CTpyeи BBICOKOТ DAВЛЕняи 6e3 ИСПОЛБЗОВАня moIоцero cpeIcTBA (HAnpIMeP,чИСТka Фа caДов, Teppac, caIobORO obOpyIDOBa-HЯ).
Дя yctоиBbIX 3aIrp3HeHm Mbl pekoMeHdyem B KaueCTBe DoONHITeJIbHOrO O6OpyIOBaHn IcNoIb3OBaTb 0pe3y Jnrgra3n.
B HD...Plus ppe3a dny ydaJeHnra rpa3n BXoNT B O6bem NOCTaBKn.
Tpe6oBaHnK KaueCTBy BoDbl: BHIMAHNE
B kauecmee cpebI blicoko2o daJIeHua MoXHO uCnOJb30aMb mOJbKO yUcmyIO body. 3aap3HeHua npueodm K npexKeepemEHOMy u3Hocy ycmpoucmea unu omIoKeHuO 6 Hem ocadka.
Ecn npumehemc boda nozmopno 0u cnoIb3o8aHua, mo HeIb3a 6bIXoDum 3a cnedyouue 2paHuhie 3haeHua.
| Значение pH 6,5...9,5 | |
| элес trпесся проводи-Mость* | проводи-Mость сөжөн BOДы + 120 MkСиМ/сM |
| осадаems bile ВeшесТВа ** | < 0,5 mg/l |
| фелърем bile ВeшесТВа *** | < 50 mg/l |
| угаловоровы < 20 mg/l | |
| хлорид < 300 mg/l | |
| сүлбүасы < 240 mg/l | |
| Кал buин < 200 mg/l | |
| Ошая жecTkocstb | < 28 °dH < 50 °TH < 500 ppm (mg CaCO₃/l) |
| Желего < 0,5 mg/l | |
| Маргалес < 0,05 mg/l | |
| Медь < 2 mg/l | |
| актульныйхлор < 0,3 mg/l | |
| беше НенийхлоргияхлоргияхлоргияхлоргияхлоргияхлоргияхлоргияхлоргияхлоргияхлоргияхлоргияхлоргияхлоргияхлоргияхлоргияхлоргияхлоргияхлоргияхлоргияхлоргияхлоргаяхлоргаяхлоргаяхлоргаяхлоргаяхлоргаяхлоргаяхлоргаяхлоргаяхлоргаяхлоргаяхлоргаяхлоргаяхлоргаяхлоргаяхлоргаяхлоргаяхлоргаяхлоргаяхлоргаяхлоргaleyхлоргaleyхлоргaleyхлоргaleyхлоргaleyхлоргaleyхлоргaleyхлоргaleyхлоргaleyхлоргaleyхлоргaleyхлоргaleyхлоргaleyхлоргaleyхлоргaleyхлоргaleyхлоргaleyхлоргaleyхлоргaleyхлоргaleyхлоргleyхлоргleyхлоргleyхлоргleyхлоргleyхлоргleyхлоргleyхлоргleyхлоргleyхлоргleyхлоргleyхлоргleyхлоргleyхлоргleyхлоргleyхлоргleyхлоргleyхлоргleyхлоргleyхлоргleyхлоргLEYхлоргleyхлоргleyхлоргleyхлоргleyхлоргleyхлоргleyхлоргleyхлоргleyхлоргleyхлоргleyхлоргleyхлоргleyхлоргleyхлоргleyхлоргleyхлоргleyхлоргleyхлоргleyхлоргleyхлорг leyxлоргleyхлоргleyхлоргleyхлоргleyхлоргleyхлоргleyхлоргleyхлоргleyхлоргleyхлоргleyхлоргleyхлоргleyхлоргleyхлоргleyхлоргleyхлоргleyхлоргleyхлоргleyхлоргleyхлоргleyxлоргleyхлоргleyхлоргleyхлоргleyхлоргleyхлоргleyхлоргleyхлоргleyхлоргleyхлоргleyхлоргleyхлоргleyхлоргleyхлоргleyхлоргleyхлоргleyхлоргleyхлоргleyхлоргleyхлоргLEYxлоргleyхлоргleyхлоргleyхлоргleyхлоргleyхлоргleyхлоргleyхлоргleyхлоргleyхлоргleyхлоргleyхлоргleyхлоргleyхлоргleyхлоргleyхлоргleyхлоргleyхлоргleyхлоргleyхлорг ley xлоргleyхлоргleyхлоргleyхлоргleyхлоргleyхлоргleyхлоргleyхлоргleyхлоргleyхлоргleyхлоргleyхлоргleyхлоргleyхлоргleyхлоргleyхлоргleyхлоргleyхлоргleyхлоргleyхлоргleyХxлоргleyххлоргleyххлоргleyххлоргleyххлоргleyххлоргleyххлоргleyххлоргleyххлоргleyххлоргleyххлоргleyххлоргleyххлоргleyххлоргleyххлоргleyххлоргleyхххлоргleyхххлоргleyххххлоргleyххххххххххххххххххххххххххххххххххххххххххххххххххххххххххххххххххххххххххххххххххххххххххххххххххххx |
3auntbIe yctpoiCTBa
3aunthbIe npncnocobneHna cnykaT dna 3auntbI NOB3OBaTeJI N He DOJXhbl BblBOUNTBcA H3 CToPraN pa6OtaTb B O6xOc CBOHX cyHKuN.
IepenyckHoi KlaanC nHeBMaTHueCKm peJe
Pn cokpaueHnn oBbema BODI npn NOMOu npyJrTopa daBHeHra/obbema OTKpbBaETcpepyckHO KnapanH uactb BODbBO3BpauaeTc H3ad K BCacbIBaIOseN CTOpone Hacoca.
Ecn cnysckoBpIyarpyHOro nIcToJeTa-pacbIInTeJIa OTnycKaETcra, MaHometPnueckn BblKIOUaTeJIb OTKIOUaET HaCOC, NOdauCA STpyN BOdbI NOD BBICOKM DaBLeHHeM PpeKpaUaETcra. Pn HaxkATnHa cnysckoBpIyar HACOC CHOBA BKIOUa-etcra.
PpeOxpaHnTeJbHbI KlaNaH
IpeOxpaHnteBHyknaHaN OTKpbBaETcR npn npeBbIeHN DDyCTmOro pa6Oyero MaHOMeTpueCKoro DaBHeNra; Boda CHOBa TeUeT K BCacbIBaHOuSei CTOpOHe HaCoca.
IpepyckHO Knapan, MaHometpueckn BbIKIOUaTeIb I npedoxpaHNTeIbHbI KnaPnAH HAcTpoEhbl N ONlOMbIpObaHbI Ha 3aBode.
Hactpoika ocuueCTBnaeTcra TOnbko cepBnCHOH cnyxboi.
3aunTa OkpykaIooeI cpebl
| Уразыпразы сорожа Чебайе пerepopаы вваиме Мaterияы, полесхшке пere- peadingу в рунков的基础上 Мaterияы, полесхшке Мaterияы Мaterияы Мaterия Мaterия Мaterия Мaterия Мaterия Мaterия Мaterия Мaterия Мaterия Мaterия Мaterия Мaterия Мaterия Мaterия Мaterия Мaterия Мaterия Мaterия Мaterия Мaterия Мaterия Мaterия Мaterия Мaterия Мaterия Мater� Мater� Мater� Мater� Мater� Мater� Мater� Мater� Мater� Мater� Мater� Мater� Мater� Мater� Мater� Мater� Мater� Мater� Мater� Мater� Мater� Мater� Мater� Мater� Мater� Мater� | |
| Стары пиборы сорожа Чебайе пerepopаы вваиме Мaterияы, полесхшке пere- peadingу в рунков的基础上 POMENKO Materies Materies Materies Materies Materies Materies Materies Materies Materies Materies Materies Materies Materies Materies Materies Materies Materies Materies Materies Materies Materies Materies Materies Materies Materies Materie Materies Materies Materies Materies Materies Materies Materies Materies Materies Materies Materies Materies Materies Materies Materies Materies Materies Materies Materies Materies Materies Materies Materies Materies MaterIES Materies Materies Materies Materies Materies Materies Materies Materies Materies Materies Materies Materies Materies Materies Materies Materies Materies Materies Materies Materies Materies Materies Materies Materies Materiesz Materiesz Materiesz Materiesz Materiesz Materiesz Materiesz Materiesz Materiesz Materiesz Materiesz Materiesz Materiesz Materiesz Materiesz Materiesz Materiesz Materiesz Materiesz Materiesz Materiesz Materiesz Materiesz Materiesz Materiesz Materiez Materiesz Materiesz Materiesz Materiesz Materiesz Materiesz Materiesz Materiesz Materiesz Materiesz Materiesz Materiesz Materiesz Materiesz Materiesz Materiesz Materiesz Materiesz Materiesz Materiesz Materiesz Materiesz Materiesz Materiesz Matericz Materiesz Materiesz Materiesz Materiesz Materiesz Materiesz Materiesz Materiesz Materiesz Materiesz Materiesz Materiesz Materiesz Materiesz Materiesz Materiesz Materiesz Materiesz Materiesz Materiesz Materiesz Materiesz Materiesz Materiesz Materiaz Materiaz Materiaz Materiaz Materiaz Materiaz Materiaz Materiaz Materiaz Materiaz Materiaz Materiaz Materiaz Materiaz Materiaz Materiaz Materiaz Materiaz Materiaz Materiaz Materiaz Materiaz Materiaz Materiaz Materiaz Materiesz Materiesz Materiesz Materiesz Materiesz Materiesz Materiesz Materiesz Materiesz Materiesz Materiesz Materiesz Materiesz Materiesz Materiesz Materiesz Materiesz Materiesz Materiesz Materiesz Materiesz Materiesz Materiesz Materiesz MaterHz MaterHz MaterHz MaterHz MaterHz MaterHz MaterHz MaterHz MaterHz MaterHz MaterHz MaterHz MaterHz MaterHz MaterHz MaterHz MaterHz MaterHz MaterHz MaterHz MaterHz MaterHz MaterHz MaterHz MaterHz MaterHZ MaterHz MaterHz MaterHz MaterHz MaterHz MaterHz MaterHz MaterHz MaterHz MaterHz MaterHz MaterHz MaterHz MaterHz MaterHz MaterHz MaterHz MaterHz MaterHz MaterHz MaterHz MaterHz MaterHz MaterHz Mater Hz MaterHz MaterHz MaterHz MaterHz MaterHz MaterHz MaterHz MaterHz MaterHz MaterHz MaterHz MaterHz MaterHz MaterHz MaterHz MaterHz MaterHz MaterHz MaterHz MaterHz MaterHz MaterHz MaterHz MaterHz MaterHy MaterHz MaterHz MaterHz MaterHz MaterHz MaterHz MaterHz MaterHz MaterHz MaterHz MaterHz MaterHz MaterHz MaterHz MaterHz MaterHz MaterHz MaterHz MaterHz MaterHz MaterHz MaterHz MaterHz MaterHz MaterHbI MaterHz MaterHz MaterHz MaterHz MaterHz MaterHz MaterHz MaterHz MaterHz MaterHz MaterHz MaterHz MaterHz MaterHz MaterHz MaterHz MaterHz MaterHz MaterHz MaterHz MaterHz MaterHz MaterHz MaterHz MaterZbI MaterHz MaterHz MaterHz MaterHz MaterHz MaterHz MaterHz MaterHz MaterHz MaterHz MaterHz MaterHz MaterHz MaterHz MaterHz MaterHz MaterHz MaterHz MaterHz MaterHz MaterHz MaterHz MaterHz MaterHz NaterHz NaterHz NaterHz NaterHz NaterHz NaterHz NaterHz NaterHz NaterHz NaterHz NaterHz NaterHz NaterHz NaterHz NaterHz NaterHz NaterHz NaterHz NaterHz NaterHz NaterHz NaterHz NaterHz NaterHz NaterHz MaterHz MaterHz MaterHz MaterHz MaterHz MaterHz MaterHz MaterHz MaterHz MaterHz MaterHz MaterHz MaterHz MaterHz MaterHz MaterHz MaterHz MaterHz MaterHz MaterHz MaterHz MaterHz MaterHz MaterHz NaterHZ NaterHz NaterHz NaterHz NaterHz NaterHz NaterHz NaterHz NaterHz NaterHz NaterHz NaterHz NaterHz NaterHz NaterHz NaterHz NaterHz NaterHz NaterHz NaterHz NaterHz NaterHz NaterHz NaterHz NaterHz NaterHZ NaterHz NaterHz NaterHz NaterHz NaterHz NaterHz NaterHz NaterHz NaterHz NaterHz NaterHz NaterHz NaterHz NaterHz NaterHz NaterHz NaterHz NaterHz NaterHz NaterHz NaterHz NaterHz NaterHz MaterHz MaterHZ MaterHz MaterHz MaterHz MaterHz MaterHz MaterHz MaterHz MaterHz MaterHz MaterHz MaterHz MaterHz MaterHz MaterHz MaterHz MaterHz MaterHz MaterHz MaterHz MaterHz MaterHz MaterHz NaterHz NaterHz NaterHZ NaterHz NaterHz NaterHz NaterHz NaterHz NaterHz NaterHz NaterHz NaterHz NaterHz NaterHz NaterHz NaterHz NaterHz NaterHz NaterHz NaterHz NaterHz NaterHz NaterHz NaterHz MaterHz MaterHz MaterHz MaterHZ NaterHz NaterHz NaterHz NaterHz NaterHz NaterHz NaterHz NaterHz NaterHz NaterHz NaterHz NaterHz NaterHz NaterHz NaterHz NaterHz NaterHz NaterHz NaterHz NaterHz NaterHz NaterHz NaterHz NaterHz MaterHZ NaterHz NaterHz NaterHz NaterHz NaterHz NaterHz NaterHz NaterHz NaterHz NaterHz NaterHz NaterHz NaterHz NaterHz NaterHz NaterHz NaterHz NaterHz NaterHz NaterHz NaterHz NaterHz NaterHz MaterHZ NaterHZ NaterHZ NaterHZ NaterHZ NaterHZ NaterHZ NaterHZ NaterHZ NaterHZ NaterHZ NaterHZ NaterHZ NaterHZ NaterHZ NaterHZ NaterHZ NaterHZ NaterHZ NaterHZ NaterHZ NaterHZ NaterHZ NaterHZ NaterHZ NaterHZ MaterHZ NaterHZ NaterHZ NaterHZ NaterHZ NaterHZ NaterHZ NaterHZ NaterHZ NaterHZ NaterHZ NaterHZ NaterHZ NaterHZ NaterHZ NaterHZ NaterHZ NaterHZ NaterHZ NaterHZ NaterHZ NaterHZ NaterHZ NaterHZ NaterHz NaterHZ NaterHZ NaterHZ NaterHZ NaterHZ NaterHZ NaterHZ NaterHZ NaterHZ NaterHZ NaterHZ NaterHZ NaterHZ NaterHZ NaterHZ NaterHZ NaterHZ NaterHZ NaterHZ NaterHZ NaterHZ NaterHZ NaterHZ NaterHZ NaterHz MaterHZ NaterHZ NaterHZ NaterHZ NaterHZ NaterHZ NaterHZ NaterHZ NaterHZ NaterHZ NaterHZ NaterHZ NaterHZ NaterHZ NaterHZ NaterHZ NaterHZ NaterHZ NaterHZ NaterHZ NaterHZ NaterHZ NaterHZ NaterHz NaterHZ MaterHZ NaterHZ NaterHZ NaterHZ NaterHZ NaterHZ NaterHZ NaterHZ NaterHZ NaterHZ NaterHZ NaterHZ NaterHZ NaterHZ NaterHZ NaterHZ NaterHZ NaterHZ NaterHZ NaterHZ NaterHZ NaterHZ NaterHZ NaterHz NaterHz NaterHZ NaterHZ NaterHZ NaterHZ NaterHZ NaterHZ NaterHZ NaterHZ NaterHZ NaterHZ NaterHZ NaterHZ NaterHZ NaterHZ NaterHZ NaterHZ NaterHZ NaterHZ NaterHZ NaterHZ NaterHZ NaterHZ NaterHZ NaterHz NaterHz MaterHZ NaterHZ NaterHZ NaterHZ NaterHZ NaterHZ NaterHZ NaterHZ NaterHZ NaterHZ NaterHZ NaterHZ NaterHZ NaterHZ NaterHZ NaterHZ NaterHZ NaterHZ NaterHZ NaterHZ NaterHZ NaterHZ NaterHz NaterHZ NaterHZ MaterHZ NaterHZ NaterHZ NaterHZ NaterHZ NaterHZ NaterHZ NaterHZ NaterHZ NaterHZ NaterHZ NaterHZ NaterHZ NaterHZ NaterHZ NaterHZ NaterHZ NaterHZ NaterHZ NaterHZ NaterHZ NaterHZ NaterHz NaterHZ NaterHz NaterHZ NaterHZ NaterHZ NaterHZ NaterHZ NaterHZ NaterHZ NaterHZ NaterHZ NaterHZ NaterHZ NaterHZ NaterHZ NaterHZ NaterHZ NaterHZ NaterHZ NaterHZ NaterHZ NaterHZ NaterHZ NaterHZ NaterHz NaterHZ NaterHz MaterHZ NaterHZ NaterHZ NaterHZ NaterHZ NaterHZ NaterHZ NaterHZ NaterHZ NaterHZ NaterHZ NaterHZ NaterHZ NaterHZ NaterHZ NaterHZ NaterHZ NaterHZ NaterHZ NaterHZ NaterHZ NaterHZ NaterHz NaterHz NaterHZ MaterHZ NaterHZ NaterHZ NaterHZ NaterHZ NaterHZ NaterHZ NaterHZ NaterHZ NaterHZ NaterHZ NaterHZ NaterHZ NaterHZ NaterHZ NaterHZ NaterHZ NaterHZ NaterHZ NaterHZ NaterHZ NaterHZ NaterHz NaterHz NaterHz NaterHZ NaterHZ NaterHZ NaterHZ NaterHZ NaterHZ NaterHZ NaterHZ NaterHZ NaterHZ NaterHZ NaterHZ NaterHZ NaterHZ NaterHZ NaterHZ NaterHZ NaterHZ NaterHZ NaterHZ NaterHZ NaterHZ NaterHz NaterHz NaterHz MaterHZ NaterHZ NaterHZ NaterHZ NaterHZ NaterHZ NaterHZ NaterHZ NaterHZ NaterHZ NaterHZ NaterHZ NaterHZ NaterHZ NaterHZ NaterHZ NaterHZ NaterHZ NaterHZ NaterHZ NaterHZ NaterHz NaterHZ NaterHZ NaterHZ MaterHZ NaterHZ NaterHZ NaterHZ NaterHZ NaterHZ NaterHZ NaterHZ NaterHZ NaterHZ NaterHZ NaterHZ NaterHZ NaterHZ NaterHZ NaterHZ NaterHZ NaterHZ NaterHZ NaterHZ NaterHZ NaterHz NiterHZ NiterHZ NiterHZ NiterHZ NiterHZ NiterHZ NiterHZ NiterHZ NiterHZ NiterHZ NiterHZ NiterHZ NiterHZ NiterHZ NiterHZ NiterHZ NiterHZ NiterHZ NiterHZ NiterHZ NiterHZ NiterHZ NiterHZ NiterHZ NiterHZ NiterTZ NiterHZ NiterHZ NiterHZ NiterHZ NiterHZ NiterHZ NiterHZ NiterHZ NiterHZ NiterHZ NiterHZ NiterHZ NiterHZ NiterHZ NiterHZ NiterHZ NiterHZ NiterHZ NiterHZ NiterHZ NiterHZ NiterHZ NiterHZ NiterHZ NiterHz NiterHZ NiterHZ NiterHZ NiterHZ NiterHZ NiterHZ NiterHZ NiterHZ NiterHZ NiterHZ NiterHZ NiterHZ NiterHZ NiterHZ NiterHZ NiterHZ NiterHZ NiterHZ NiterHZ NiterHZ NiterHZ NiterHZ NiterHZ NiterHZ NitterHZ NiterHZ NiterHZ NiterHZ NiterHZ NiterHZ NiterHZ NiterHZ NiterHZ NiterHZ NiterHZ NiterHZ NiterHZ NiterHZ NiterHZ NiterHZ NiterHZ NiterHZ NiterHZ NiterHZ NiterHZ NiterHZ NiterHZ NiterHZ NiterHZ NITERHZ NiterHZ NiterHZ NiterHZ NiterHZ NiterHZ NiterHZ NiterHZ NiterHZ NiterHZ NiterHZ NiterHZ NiterHZ NiterHZ NiterHZ NiterHZ NiterHZ NiterHZ NiterHZ NiterHZ NiterHZ NiterHZ NiterHZ NiterHZ NiterHZ NitterZs NiterHZ |
3JIeKTPnueckne n 3JIeKTPoHHbIe npn6Opbl
yacto coedePkata KOMnoHENTbl, KOToPbIE
pnp HnepaBnIbHom o6paUeHn nn He
HaIeJXaUeYtINn3aunn PpeCTaBnIOT
NOTeHuaNbHyO ONaCHocTb DnA IIODeN
3KOJOrnn. TeM He MeHee DaHHbIe KOMnoH
HTbl HE06XODMbI DnA IpaBnIbHO pa-
60TbI np6opa. Pnp6Opbl, O6O3NaueHHbIe
3TmCIMBOJOM, 3aNPeUeHo YtINn3nPoB
BaTb BMeCTe C 6bITOBbIM NTxODAMN.
www.kaercher.com/REACH
YcTaHOBka npHaJdJIeXHOCTei
PpmeHne: CnCTema EASY!Lock 6na-roDapra 6bICTpopa3bemHomy pe3b6OBomy COeINHeHIO N03BOJRAET COeINHARb KOMHOHTbI 6bICTPO HAdEHHo BOero 3a QdH O6OpOT.
ΦopcyHky yCTaHOBnTb Ha cTpynHOI Tpy6ke (MapKINPOBOOH MeTKoH Na yCTaHOBOHOM KOJIbue BBepx) n 3aTnyTb ycIIInem pyKn (EASY!Lock).
CoeHnHTb ctpuHny Tpy6ky C nncToIeTOM-pacbIJIInTeJem N 3aTaryTb BpyHyO (EASY!Lock).
B npn6opax 6e3 6apa6aHa shnaHra:
CoeHHTb IJHaHr BbICOKO rAbneHnC NtCTBa n 3aTHyTb BpyHyIO (EASY!Lock).
B npn6opax c 6apa6aHOM shnaHra:
BCTaBnTb n 3aΦnKcnpoBaTb pyKoRTky B BaIe 6apabHa dIy IJnaHra.
→ ΠepeД hamOTKоI pa3noXnTe UJIaHr BblCOKOrO DaBJIeHnR B BbITryHtOM BnIe.
→ Hamotatb wlaHr BbICOKO rDaBHeHnnyTem BpaueHn pyKoTKn paBHomepHbIMn DnXKeHnMa Ha 6apabn dIy WHaHra. BblpaTb HnPaBHeHne Bpa-WeHn TaKm o6pa3om, YTObI WlaHr BblcOKO DaBHeHn He nepeHync.
CoeHHTb WJNaHr BbICOKO DaBHeHn C NICTOJeTOM-pacNbIInTeJIem N 3aTMyTb BpyHyIO (EASY!Lock).
Hauaio pa6oTbI
△PENEYNPEXDEHNE
Onachocmb nonyueHua mpaem! Ycmpoucmbo, npuHaJexxHocmu, noB6Oaue luHu u coeDuHumeNbHbIe 3neMeHmbi doJXhbl 6bIm b 6e3ynpueHOM ccmorHu. Ecnu ccomnue He Jraemc uCnpaBIM, mo ycmpoucmbo UcNoB30-8amb Hnb3a.
3JIeKtpnueckoe noDcoeDInHeHne
△ONACHOCTb
Onachocmbmpaemblnpuydape 3neKmpo-mOKOM.
- Ycmpoucm8o K 3neKmpuueckou cemu 6 o6a3ameIbHOM np4oke doJxHo nOdknUoyambcra Wmekepom. Hepa3b- emhoe coedunHeue c 3neKmpuueckou cembu 3anpeueho. Wmekep cnjxum dna omcoedunHenor om cemu.
- Ppu6op cneoyem 8KnOyammb moIbKO 8 cemb nepemeHHo20 moka.
- PpeBbIeHue MaKcumalbHo dOnycmuMo20 nonHO2o cnpomueHeHu cemu e moUke 3JeKmpueeCKO2o nOdknIOeHu (cm. pa3deT"TexHueckue daHHie") He donyckaemc. B mom cnUyae, ecnu bAm He u3BeCmHa BeenuHa nonHO2o cnpomueHeHu cemu e moUke 3JeKmpueeCKO2o nOdknIOeHu, o6pamUmecb E 3HeP2oCnaKaIoU opaAnu3aUIO.
-
Umekep u coeduHumeIbHbI u 3neMeHm uCnoIb3yeMo2o yDnUHumeIbHO-20 npOba doJxHbI bIMb eOdoHeIpoHuuaeMbIMU.
-
IcnoIb3o6amb ydunHumeIb docma-moUHO2 duamempa (cm. pa3deJ "TexHuueCKue daHHble") u nonHoCmbl0 pa3-Mambieamb c kamyuku.
IapametpbI DnI NOkIIOueHnYka3aHbI Ha 3aBOckoT a6JIuKe N B pa3deJe "TexHHueCKne daHHble".
Pa3MoTaTb ceTeBOi Ka6eIb I NOIOKHTb eRo Ha IOnI.
BcTaBbTe WTeNceIbHyIO BnIKy 3NeKTpOpNTaHNA B 3NeKTpopo03eTKy.
IopKJIoueHne BODOCha6XeHnA
IIOBODK BOOONPOBOy
△PENEYNPEXDEHNE
Coblaodaume npednucnue npednpura mua bodocnakehna.
Co2nacHo deucmyuum npednucnuaym ycmpooucfo 3anpeuamcnaayamupoeamb6e3
cucmemHo2o pa3denuema 8
mpybopo8ode c numbeoB odou. Cne- dyem ucnno30aamb coomeemcmbyouu u cuscmemhui cenapamop fupmbi KARCHER unu anbmephamuehui cu-membui cenapamop, coomeemcmuyuEN 12729 mun BA.
Boda, npoweedwaayepe3 cuememhbu ce-napamop, cumaemcna Hnpuzoohou nurn.
OCTOPOXHO
Cucmemhbu pa3denumnbce2da donxhen haxodumbcB cucmeme bodocha6xehn, He pa3pewaemcn nooknouambeo Hanpmyo K ycmpoucmy.
InapaMeTpbl NOdkNIOUeHnYka3aHbIB pa3-DeJe "TexHnueCKne daHHbIe".
Pexnmpa60TbI BbICOKoro DaBneHn
Yka3aHne:
YcTpoIcTBO OCHASeHO MaHOMeTpNueCKIM BbIKIOUaTeIeM. DBrIaTeJIb 3aNyCKaETcT ToIbKO pR NOTKpbITOM NICTOJTe-pacblIINTEne.
Bcerda noJHocTbIO pa3MaTbIbAitc 6apabHa IaHaR BbICOKO r daBHeHn.
YcTaHOBInTe BbIKIIOuAteIb npIbopaB nOJoxHeHne ,I".
Pa36noknpoBaTb nCTOJeT-pacNbIINTeJIb, nepeBnHyB npeOxpaHITeJIbHbIΦnKcaTOp Ha3aI.
→ OTKpbItb pyHOn nCTOneT-pacnbIInTeJIb.
YcTaHOBnTe pa6Ooee daBneHne n KOJIInueCTBO BODbI BpaUeHEm (6eccty-NeHuato) peryJrAToPa daBHeHn I KOJIInueCTBa (+ / - )
ToIbKO dIa HD 9/20-4....
PnHaHMeHbWeMObbeMeNoDaunOTBODnMOeTeNIO dBnraTeJNaOBeCneuNbAeT HarpeB Bobl np6IIN3ntelbHo Do 15^
BbI6op BnDa cTpyu
3aKpbItb nIcTOneT-pacNbIInTeIb.
BpaaTb KOpnyc fOpcyHKn Do Tex nop, noka XeJnaembl CmMBOJ He COBnaTe Tc MapKnpOBko:
Pexm pa60tbI c MOIOUIM CpeDCTBOM
△PENEYNPEXDEHNE
Henodxoadaue moouue cpedcmea Mo- ym noepedumb npubop u obbekm, no- lekau ouucmke. IcnoIb3oabmb molko me moouue cpedcmea, komopbie donyebl K UcnoIb3oaeHuO KOMnHauei Karcher.Cobiodamb npuna2aemble K MOuum cpecdma yka3aHua u pekomeh dauu no dozupoeke.B ueJx bepeXhozo omHoweHnaK Okpykaioue cpe de cnedyem 3KOHOUMHOUCNOB3o6amb MOUue cpecdmea
PpuHm6o 6HMaHue yka3aHua no mexHuKe 6e3oNaChocMu, npueedeHHbIe Ha ynaKo6kax Yucmuaux cpeOcM8.
YnCTaIe cTpeDcTa KaRcher rapaHTpyIOT beCnepe6oHyO pa6Oy. IoxaIyIcTa, npOKOHcyIbTpPyITeCb C HAMN ININ 3anPoCtte HaI KATAIOr ININ INHOpMaUOnHHbI MaTePnaJIbI NO YnCTaIcM CpeDcTBam.
YcTaHOBb6yTbIKky C MOIOUIM cpeICTBOM B 6yTbIKOePKaTeJIb Ha npIbope IIN IOCTBaITb KaHnCTpy C MOIOUIM cpeICTBOM pAdom C npIbopom. C npIbOpom MOJHO OJHOBpeMeHHo INCNoJIb-3OBaTb DBA pa3HbIX MOIOUIX cpeICTBa.
→ BbITaHyTb BCaCbIbAIOUm IJNaHr dJa MOUoIero CpeDCTBa N IORpy3NtB eRo B 6ByTbIKy INI KAHNCtpy C MOUOIM CpeDCTBOM.
→ HABINHTITb pe3b6OByIO KpbIuKy Ha 6yTbIKy INN KaHnCTpy.
YcTaHOBnTb φOpcyHky Ha ,CHEM".
→Дозируюши
Клалан моюшero
средства уста-
новпь на щени
средстви и кон-
центрацию.
PeKomeHdyembI CNOCO6 MOKN
→ ΘKOHOMHO pa36pbI3raTb MOIOUeecpeIDCTBO NO cyXOJ IOBepxHOCTN I
aTb emy noeCTBOBaTb (He n03BOJrTaB BblcblXaTb).
OTXODIyIO rpa3b CMBITb C NOMOuBbOBICOKOHOPHOro MOUeRo annapata.
Посné зауаци поруntь ФпьтВЧИСТУВODY.ДоЗнрюши Клалан установпь на сamyю ВсICO-KYIO KOHuceHTpaциLO MOUSeRo CpeДCTBa.3anyctNB npnbopичep3 OndHy MInHyTu npOnoNoCKaTb.
IpepebB pa6ote
3aKpbIb NnCTOJIeT-pacNbIINTeJIb. YcTpoIcTB OTKIIouaETcra.
OTKpbITb pyHOn NnCTOJET-pacNbIINTeJIb. YcTpoiCTBO CHOBa BKJIIOUaETcra.
BbikloueHne np6opa
→ 3aKpbItb noJaCy BOJbl.
OTKpbIb pyHOn NnCTOneT-pacNbIIN-TeJIb.
→ BkIIOuHTb HAcOC C NOMOUsbIO BbIKJIIO- yATEIaPbopa a DaTb Emy npa6o-taTb 5-10 cekyHd.
3aKpbItb nIcTOneT-pacNbIInTeIb.
IpeBecTu nepeKIOuAteIb B noIOxEHNHe "0/OFF".
→ BbITACKnBaIte ITeNceJIbHyIO BNlKy N3 pO3eTKI TOJIbKO cyXIMN pyKaMn.
OTcoeHHTe BOOCha6KeHne.
BknHouHTb nIcToJET-pacNbIINTeJIb, noka annapaT He ocbo6oJntcra OT daBJIeHn.
3aФИКСИРОВАТБ ПИСТОЛЕТ- PACNsIINTeJIb,пeрдИнHyB ПeДОХpaHITeJIb-Hый ФИКСATOP ВepeД.
ToIbko dIa HD 9/20-4....
ONACHOCTb
Onachocmb obbapueaHua kuJaue Bo Dou. Ocmamku bOdbI bHympu bIKNoeHHO2o npubopa moym haapebambcr. Ppu omcoedunehuu uHaHa2a om ucmouHuka bOdbI 603MOxHo pa36pb13auehue HaapeMoou bOdbI, ymo moXem npueecmu K okoZam. UHaHa omcoedunmmb molkO nocne oxJaekdeHua ycmpoucma.
Xpaenne npn6opa
BCTaBntb pyHOn nNcTOnet-pacNbIIN-TeIb B DePkaTeIb.
ⅢIaHr BbICOKO rDabJIeHn rCMOTaTb I NOBecHTb HAd NODCTaBKoN dJa WJHaHra. IIN HaMOTaTB IIaHr BbICOKO rDaBJIeHn Ha 6apa6aH. BcTaBNTb pyky pyKoRTKn, YTO6bl 3a6JIOKIpOBaTb 6apa6aH dJa WJHaHra.
O6MoTaTb coeHnHTeHbHbI Ka6eJIb BOKpyr DePkaTeJra Ka6eJIa.
3aKpeNTb 1TeKepe yCTaHOBHeHHoH KInncOi.
3aunTa OT 3amep3aHnA
BHMHAHNE
Mop03 pa3pywaem npubop, ecnu u3 he2o noJIHocMbIO He ydaIeHa bOda.
Pnp6op cIeJyET xpaHnTb B 3aunueHHOM OT MOp03a NOMEeHN.
Ecnn xpaHene B MecTe, 3aunueHHOM OT MOp03a, HeBO3MOxHO:
→ Cnntb BOdy.
→ ΠροκαγαTp b Yepe3 aπnapaT nMeIoUηn-CaB TOpROBne aHTnΦpN3.
YkaHne:
IcnoB3OBaTb cTaHdapTHbI aHTnΦpN3 DnA BTOMO6nJIe Ha OCHOBe TnIKOJIa.
Co6JIIOdaIte HNCTpyKcHn NO IcNoIb3OBAHNIO aHTnΦpN3a.
OCTaBbTe npi6op BkIIOyeHHbIM B Te-ueHn He 6oJee 1 MInHyTbI Do Tex nop, noka Hacoc N Tpy6oNpOBoDbl He onOpoxKHaTcra.
TpaHcNoptnpoBka
OCTOPOXHO
Onachocmbmpaemblu noepexdeHua!
Obpammb eHMaHue Ha bec ycmpoucmBa npu mpaHcnOpmupoeke.
BHMHAHNE
Bo epemmpaHcnpmupo6ku obecne- yumb 3auumy cnycko02o pbiaaa om noepejdeHua.
Obpammb eHMaHue Ha bec ycmpoucm- 6a npu xpaHeHu.
TO yctpoicBO pa3peaetcXpaHntb TOIbKO BO BHyTpeHHNX NOMeueHnX.
yXoI IN TeXHnueckoe 06cIyXnBaHne
ONACHOCTb
Onachocmb nolyeHnmaPaeMbI om cnyuauHo 3anyueHNO2o annapama u 3neKmpouoka.
Ipeod npoeedeHue mIO6bix pa6om no o6cnykueaHuo ycmpoucmeo cneoyem eblKIOUumb u u38neu b wmenceIbHyIO BuNKy u3 po3emku.
Yka3aHne:
CTapoe MacNo DOJXHO yTINn3npoBaTbcr TOIbKO B IpeDyCMOTpeHHbIX DJIa3TOO npHmHbIX nyHKtax. IoxaIyncta, cdaBaTe Otpa6oTaHHoe MacNo IMeHNO TaM. 3a- rpa3HeHne OkpykaIoUe i CpeBt CTapbIM MaclOM YBnETCra Haka3yeMbIM.
HNCNEKZI NO TexNKe 6e3OpacHOCTn/DoROBOP o TexNueCKOM O6cJyXnBaHHN
BbI Bcerda MoXeTe DoROBOpHTbcr C BaUIM ToproBbIM npEicTaBnTeJem O peryIpyHOM npOBeHn TexHnueckOrO OcMOTpa IJI 3aKnIOuHTb DoROBop Texo6cnyKBAHn.
O6paaTecb K Ham 3a KOHcybTaunei!
Ipeed kaxdoi 3Kcnpnyataunei
→Пюверпь coeДинITEьньй ka6ь Na пеДмET NOВржден (Опасноctь nopaxжня TOKOM), NOBpeЖдENHbI Ka6ьdoJxeh 6blTb HemeДлeHNo 3aMe-HeN yNoJHOMOueHHoCepBnCHoI cnjxbo/əJIeKTPNKOM.
→ПроверпьшлангВысOKOTOдавлени
На повөдөнг (Опаснocтб разрь-
Ва).
IobpeXdEHHbI IJnAHr BbICOKO rDaBJIeHnHaMeDJIeHNO 3aMeHNTb.
Поберпь сиза па(THACOC)Ha repMeTNUHOCb.
3 KaJIIN BOdBi B MNHyTu DOnCyCTNMBI IN MOrTy IpoCTyNaTb C HxKHe N YaCTN aNnapata. Ppi 6oJee CnIbHoi HeRepMeTNUHOCTN O6paTITbcra B ceHTp NO 06cnyKIBaHIO.
eXeHeIeJIbHo
→Проверпь уровень масна. Пprьmonokoobpa3HOB KOHCNTeHcIM Macna (BOdaВ macne) HeMeДлeHNO obpaTntbcB CepBnC NO O6CnyKbAHNIO KJIneHTOB.
OuHCTnITb ceTcTaBIM pINbTp NOdkNIO-ueHnIPOdaH BODbl.
OuHCTnITbΦHbTp BO BCaCbBaIOUeM UHaHRe MOUeero CpeDCTBa.
ToJIbKO HD 9/20-4:
OuHCTnTb 0nJIbTp ToHKo OUHCTKn.
Ocbo6oDntb annpaat ot daBJeHna.
BbIBNHTnTb KpeEnExHbIe BNHTbI KpbIuKn np6opa, ChrTb KpbIuKy.
OTBnHTNb KpbIbKy C nJbTpOM.
OuHCTnTbΦnIbTp YnCToB BoOu nJIcKaTbIM BO3dYXOM.
→ CHOBA co6paTb B o6paTHoN nocneoBaTeJIbHOCTN.
Kakdble 500 yacob pa6oTbI, Hepeke pa3a B roD
TexHnueckoe o6cnyxnbAHne yCTpOInCTBa MoKet OcyuieCTBnTb cepBnchA cnYk6a.
3aMeHa Macna.
3aMeHa macJa
YkaHne:
KoJIuYeCTBO IVBd MacJa CM. B pa3JeIe "TexHnueCKne DaHHbIe".
BbIBNHTnTb KpeEnExHbIe BNHTbl KpbIuKIn npnbopa, cHrTb KpbIuKy.
→ ChrTb KpbIuKy MaCnHaHOro 6aka.
OnpoknHyb annapaT BnepeI.
Cnyctntb MacNo B Macnoc6OpHnK.
MeIeHNO 3aIHTb HOBOe MacNo; ny- 3bIPbKn BO3dYxa DOJXHbI BblTN.
YcTaHOBnTb KpbIuKy pe3epByapa Inna Macna.
→ 3aKpeNITb KpbIuKy npn6opa.
POMOUIB Cnyuae HenoJaIOK
△ONACHOCTb
Onachocmb noJyueHua mpaembl om cnyuauHo 3anyueHHo2o annapama u 3neKmpoWoka.
- Ipeod npoedeHuem nIObix pa6om no o6cnykuBaHuO ycmpoucmeo cneoyem ebIKnOumb u U36IeYb WmencelbHyU 6uNKy u3 p03emku.
-3neKmpueeKoHcmpyKmBHe 3nemeHmbi oJxHbI npoepeMbcr moIbKO ynoHOMOeyHHOcpeUCHOU cnjXbou. - Ppu noBpeJxdeHua, He yKa3aHHbIX 6 3mOM pa3deJe, 6 cIyuecOMHeHua Uu npu YemKom yKa3aHuu o6paUambc8 yNoJIHMOueHHyO cepUchHyo cnyk6y.
Pnp6op He pa6oTaeT
→Проверпь coeINHITeHBи Ka6eJIb Ha npEДмET NOBpeJxDeHn.
→ ΠpoBepNTb HnpaJKeHne B ceTn.
YcTaHOBnTe BbIKNIOuATEnb npIbopaB nOLOXKeHne "0" n DaIte DnIRaTeIIO OCTbITb B TeUHeNc 5 MNHyT.
Ecnn nocne 3Toro cHOBa NOBNTc HEnCnpaBHOCTb, NOpyHTe npOBepky npN6opa cepBnCHoCnyK6e.
→Пиэнкпчecнх HeHcnpaBHOCTx 6paTntecb B cepBnchHyO cnyk6y.
YnctTaeCpeDCTBO He BCacbIBaetc
YcTaHOBnTb φOpcyHky Ha ,CHEM".
IpoBepntb/npOuNCTnTb BCacbIbAIOuNIM ShlaHr MOUeero cpeDCTBa CΦnIb-TPOM.
OTKpbIb Hnn npOBepNTb/npOuNCHTb DO3nPOBOUHbI KJaNaH MOIOeRo cpeDCTBa.
→ Πρι ΘεοδxοДИМΟCTN OБpaTnteCbВ cepBnCHyU Cnyx6y.
PnHaJNeJXHocTn 3aNaChbIe DeTaJIu
IcnoJb3yIte opnHnHaJIbHbIe npHnAdIeXHOCTN 3aIHaCTN -TOJIbKO OHI rapaHTnpYIO76eONaChyIO HBeCnepe6oHyO pa6OToY yCTpoICTBa.
HnΦopMaunO npHaJneXhOCTx N 3aNaCTx Bb MoKeTe HaHTN Ha caTBe www.kaercher.com.
TapaHTnA
B KaXdoI cTpaHe DeiCTByOT COOTBeTcTBENHO rapaHTnHbIe ycNoBn, n3DaHHbIe yNOJHOMOueHHoI opraHn3aunie C6bIta HaWe npOdyKuIN B DaHHoN CTpaHe. Bo3MOxHbIe HncnPabHocTN np6opa B TeueHne rapaHTnHOrO cPoka Mbl YcTpaHЯe 6ecnPaTHO, ecn npUHa 3akNIOuaeTCa B deΦeKtax MaTePnaIob nIn OwN6kax npn N3rTOBLeHN. B cnYuae BO3NHKnOBehn IpeTeH3N B TeueHne rapaHTnHOrO cPoka npoc6ba o6paatbcra, Ime npn ce6e Yek O NOKyNke, B TOpROByO opraHn3aunIO, npoDaBShyO Bam np60p nn B 6bnXaMHyO yNoJHOMOueHHyIO cNy6by cepBnCHoro 6ClyKnBaHn.
Data Bbinycka OTo6paXaETcHa 3aObockoTae Ta6nueke B 3aKoOpOBaHHOM Bne.
Pn 3TOM OTdIbHbIe UnpbI NMeOT CneDyUcEe 3HaueHHe::
Приимер: 30190
3 roD BbInycka
0 CToneTne Bbinycka
1 DecTnIeTne BbInycka
9 BTOPAUHpaMecaaBbInycka
0 nepBaIuΦpa MeCraa BbInycka
TakIM 06pa3OM, B daHHOM npimepe kOd 30190 O3Haayet DaTy BbInycka 09/(2)013.
3aayBJIeHne o COOTBeTCTBnE EU
HaCTOaM MbI 3aABJREm, yTO HnKeyKa-3aHHbI np6Op nO CBOe KOHcEaN IN KOHCTpyKUIN, a TaKke B OcyueCTBHeHOM N DOnyuSeHHOM HAMN K IpOdaXe NCNoJIHeHN OTBeUaET COOTBETCTBYIOUM OCHOHBIM Tpe6oBaHnM NO 6e3OnacHOCTNU 3dOpOBbIO corlaacHO dIpeKTnBam EU. PnBHeCeHN N3MeHEn, He CorlaCoBAHHbIX C HAMN, DaHHoe 3aABJeHne TepReT CBOIO cnly.
PpOdyKT BbICOKOHApHbIM MOUcIN np6op
Tun: 1.524-xxx
OchOBHbIe DnpeKTHBbI EU
2006/42/EC (+2009/127/EC)
2014/30/EU
2000/14/EC
Chairman of the Board of Management
S. Reiser
Director Regulatory Affairs & Certification
YIIOHOMOeHHbI COTpydHnK IIO BeDeHNIO DOKyMeHToo6Opota:
S. Reiser
Alfred Kärcher SE & Co. KG
71364 Winnenden (Germany)
Tel.: +49 7195 14-0
Fax: +49 7195 14-2212
Winnenden, 2019/04/01
TexHnueckne daHHbIe
www.kaercher.com/REACH
Uzembevétel elótt
Kicsomagolás
Chairman of the Board of Management

S. Reiser
Director Regulatory Affairs & Certification
71364 Winnenden (Germany)
Tel.: +49 7195 14-0
Fax: +49 7195 14-2212
Winnenden, 2019/04/01
Muszaki adatok
www.kaercher.com/REACH
2006/42/ES (+2009/127/ES)
2014/30/EU
2000/14/ES
Chairman of the Board of Management

S. Reiser
Director Regulatory Affairs & Certification
71364 Winnenden (Germany)
Tel.: +49 7195 14-0
Fax: +49 7195 14-2212
Winnenden, 2019/04/01
Technické udaje
www.kaercher.com/REACH
Pred zagonom
Razpakiranje
Zadevne directives EU:
2006/42/ES (+2009/127/ES)
2014/30/EU
2000/14/ES
Chairman of the Board of Management

S. Reiser
Director Regulatory Affairs & Certification
71364 Winnenden (Germany)
Tel.: +49 7195 14-0
Fax: +49 7195 14-2212
Winnenden, 2019/04/01
Tehnični podatki
| Tip HD 6/11-4 M | 1.524-901.0 | HD 6/15-4 M 1.524-907.0 | HD 6/16-4 M 1.524-900.0 1.524-903.0 1.524-909.0 | |
| HD 6/16-4 MX 1.524-904.0 | ||||
| GB AU EU | ||||
| Omrežni priključek | ||||
| Napetost V 100 240 230 | ||||
| Vrsta toka Hz 1~50 | ||||
| Število vrtljajev motorja 1/min 1400 | ||||
| Priključna moč kW 2,9 3,3 3,4 | ||||
| Zaščita (inertna, kar. C) A 30 16 | ||||
| Vrsta zaščite IPX5 | ||||
| Maksimalno dopustna omrežna impe-danca | Ohm | - | 0,294+j0,184 | |
| Podaljiševalni kabel 30 m | mm² | 2,5 | ||
| Vodni priključek | ||||
| Temperatura dotoka (maks.) | °C | 60 | ||
| Količina dotoka (min.) | I/h (I/min) | 600 (10) | ||
| Sesalna višina iz odprte posode (20 °C) | m | 0,5 | ||
| Pritisk dotoka (maks.) | MPa | 1 | ||
| Podatki o zmogljivosti | ||||
| Delovni tlak vode (s standardno šobo) | MPa | 3...11 | 3...15 | 3...16 |
| Velikost standardne šobe | 045 040 038 | |||
| Max. obratovalni nadtlak | MPa | 14 | 18 | 19 |
| Pretok | I/h (I/min) | 250...600 (4,2...10) | 300...600 (5...10) | |
| Sesanje Čistila | I/h (I/min) | 0...40 (0...0,7) | ||
| Povratna udarna sila ročne brizgalne pi-STole (maks.) | N | 30 | ||
| Ugotovljene vrednosti v skladu z EN 60335-2-79 | ||||
| Vrednost vibracij dlan-roka | ||||
| Ročna brizgalna piSTola | m/s² | <2,5 | ||
| Brizgalna cev m/s | 2 | <2,5 | ||
| Negotovost K m/s | 2 | 1 | ||
| Nivo hrupa LpA | dB(A) | 69 | ||
| Negotovost KpA | dB(A) | 1 | ||
| Nivo hrupa ob obretenitviLWA + negoto-vost KWA | dB(A) | 84 | ||
| Goriva | ||||
| Količina olja | I | 0,5 | ||
| Vrsta olja | SAE 15W40 | |||
| Mere in teža | ||||
| Dolžina | mm 554 | |||
| Širina | mm 509 | |||
| Višina | mm | 1000 | ||
| Teža brez pribora (MX) | kg | 44,5 | 54 | 48 (50) |
| Tip HD 7/12-4 M | 1.524-902.0 | HD 7/16-4 M 1.524-911.0 | HD 7/18-4 M 1.524-910.0 1.524-913.0 1.524-912.0 | |
| HD 7/18-4 MX 1.524-914.0 | ||||
| KAP KAP EU | ||||
| Omrežni priključek | ||||
| Napetost V 220 400 | ||||
| Vrsta toka Hz 1~60 3~60 3~50 | ||||
| Število vrtljajev motorja 1/min 1400 1680 | 1400 | |||
| Priključna moč kW 3,5 4,1 4,7 | ||||
| Zaščita (inertna, kar. C) A | 20 | 16 | ||
| Vrsta zaščite | IPX5 | |||
| Maksimalno dopustna omrežna impe-danca | Ohm | - | - | - |
| Podaljiševalni kabel 30 m | mm² | 4,0 2,5 2 | 5 | |
| Vodni priključek | ||||
| Temperatura dotoka (maks.) | °C | 60 | ||
| Količina dotoka (min.) | l/h (l/min) | 700 (11,7) | ||
| Sesalna višina iz odprte posode (20 °C) | m | 0,5 | ||
| Pritisk dotoka (maks.) | MPa | 1 | ||
| Podatki o zmogljivosti | ||||
| Delovni tlak vode (s standardno šobo) | MPa | 3...12 | 3...16 | 3...18 |
| Velikost standardne šobe | 054 045 | 042 | ||
| Max. obratovalni nadtlak | MPa | 14 19 | 21 | |
| Pretok | l/h (l/min) | 300...700 (5...11,67) | ||
| Sesanje Čistila | l/h (l/min) | 0...40 (0...0,7) | ||
| Povratna udarna sila ročne brizgalne pi-STole (maks.) | N | 30 | 35 | 37 |
| Ugotovljene vrednosti v skladu z EN 60335-2-79 | ||||
| Vrednost vibracij dlan-roka | ||||
| Ročna brizgalna pištola | m/s² | <2,5 | ||
| Brizgalna cev | m/s² | <2,5 | ||
| Negotovost K | m/s² | 1 | ||
| Nivo hrupa LpA | dB(A) | 69 | 75 | |
| Negotovost KpA | dB(A) | 1 | ||
| Nivo hrupa ob obretenitviLWA + negoto-vost KWA | dB(A) | 84 | 90 | |
| Goriva | ||||
| Količina olja | I | 0,5 | ||
| Vrsta olja | SAE 15W40 | SAE 90 Hypoid | ||
| Mere in teža | ||||
| Dolžina | mm | 554 | ||
| Širina | mm | 509 | ||
| Višina | mm | 1000 | ||
| Teža brez pribora (MX) kg | 47,5 | 44,5 49 (52) | ||
| Tip HD 9/18 M | 1.524-916.0 | HD9/19 M 1.524-915.0 1.524-919.0 | HD 9/20-4 M 1.524-924.0 | |
| HD 9/20-4 MX 1.524-927.0 | ||||
| KAP EU EU | ||||
| Omrežni priključek | ||||
| Napetost V 220 400 | ||||
| Vrsta toka Hz 3~60 3~50 | ||||
| Število vrtljajev motorja 1/min 3370 2800 | 1400 | |||
| Priključna moč kW 6,7 6,8 6,9 | ||||
| Zaščita (inertna, kar. C) A 20 | 16 | |||
| Vrsta zaščite | IPX5 | |||
| Maksimalno dopustna omrežna impe-danca | Ohm | - | - | 0,222+j0,139 |
| Podaljiševalni kabel 30 m | mm² | 4,0 | 2,5 | |
| Vodni priključek | ||||
| Temperatura dotoka (maks.) | °C | 60 | ||
| Količina dotoka (min.) | l/h (l/min) | 900 (15) | ||
| Sesalna višina iz odprte posode (20 °C) | m | 0,5 | ||
| Pritisk dotoka (maks.) | MPa | 1 | ||
| Podatki o zmogljivosti | ||||
| Delovni tlak vode (s standardno šobo) | MPa | 18 | 4...18,5 | 4...20 |
| Velikost standardne šobe | 053 050 | |||
| Max. obratovalni nadtlak | MPa | 23 | 22,5 | 22 |
| Pretok | l/h (l/min) | 900 (15) | 450...890 (7,5...14,8) | 460...900 (7,7...15) |
| Sesanje Čistila | l/h (l/min) | 0...40 (0...0,7) | ||
| Povratna udarna sila ročne brizgalne pi-STole (maks.) | N | 49 | ||
| Ugotovljene vrednosti v skladu z EN 60335-2-79 | ||||
| Vrednost vibracij dlan-roka | ||||
| Ročna brizgalna pištola | m/s² | <2,5 | ||
| Brizgalna cev | m/s² | 3,0 | 1,5 | |
| Negotovost K | m/s² | 1 | ||
| Nivo hrupa LpA | dB(A) | 76 | 75 | |
| Negotovost KpA | dB(A) | 2 | 1 | |
| Nivo hrupa ob obretenitviLWA + negoto-vost KWA | dB(A) | 91 | 88 | |
| Goriva | ||||
| Količina olja | I | 0,5 0,75 | ||
| Vrsta olja | SAE 90 Hypoid | |||
| Mere in teža | ||||
| Dolžina | mm | 554 | ||
| Śirina | mm | 509 | ||
| Višina | mm | 1000 | ||
| Teža brez pribora (MX) kg | 48,6 | 42,1 (49) | 47 (55) | 48 (50) |

www.kaercher.com/REACH
2006/42/WE (+2009/127/WE)
2014/30/UE
2000/14/WE
Chairman of the Board of Management

S. Reiser
Director Regulatory Affairs & Certification
Administrator dokumentaci:
S. Reiser
Alfred Kärcher SE & Co. KG
71364 Winnenden (Germany)
Tel.: +49 7195 14-0
Fax: +49 7195 14-2212
Winnenden, 2019/04/01
Dane techniczne
www.kaercher.com/REACH
Directive UE respectate:
2006/42/CE (+2009/127/CE)
2014/30/UE
2000/14/CE
Norme armonizate utilizezate:
EN 60335-1
EN 60335-2-79
EN 55014-1: 2006+A1: 2009+A2: 2011
EN 55014-2: 1997 + A2: 2008
EN 61000-3-2: 2014
EN 62233: 2008
HD 6/11, HD 6/15, HD 7/12, HD 7/18, HD 9/19
EN 61000-3-3: 2006
HD 6/16, HD 9/20:
EN 61000-3-11:2000

Chairman of the Board of Management

S. Reiser
Director Regulatory Affairs & Certification
71364 Winnenden (Germany)
Tel.: +49 7195 14-0
Fax: +49 7195 14-2212
Winnenden, 2019/04/01
Date tehnice
www.kaercher.com/REACH
2006/42/ES (+2009/127/ES)
2014/30/EU
2000/14/ES
2000/14/ES: Priloha V

H.Jenner
Chairman of the Board of Management

S. Reiser
Director Regulatory Affairs & Certification
71364 Winnenden (Germany)
Tel.: +49 7195 14-0
Fax: +49 7195 14-2212
Winnenden, 2019/04/01
Technické udaje
| Typ HD 6/11-4 M | 1.524-901.0 | HD 6/15-4 M 1.524-907.0 | HD 6/16-4 M 1.524-900.0 1.524-903.0 1.524-909.0 | |
| HD 6/16-4 MX 1.524-904.0 | ||||
| GB AU EU | ||||
| Zapojenie siete | ||||
| Napätie V 100 240 230 | ||||
| Druh prúdu Hz 1~50 | ||||
| Ötáčky motora 1/min 1400 | ||||
| Pripojovaci výkon kW 2,9 3,3 3,4 | ||||
| Poistka (zotrvačná, char. C) A 30 16 | ||||
| Druh krytia | IPX5 | |||
| Maximálne prípustné siet'ová impedancia | Ohmov | - | 0,294+j0,184 | |
| Predlžovací kábel 30 m | mm² | 2,5 | ||
| Pripojenie vody | ||||
| Privodná teplota (max.) | °C | 60 | ||
| Privodné množstvo (min.) l/h (l/min) | 600 (10) | |||
| Sacia výška z otvoreného zásobníka (20 °C) | m | 0,5 | ||
| Privodný tlak (max.) | MPa | 1 | ||
| Výkonové parametre | ||||
| Pracovný tlak vody (so šstandardnou tryskou) | MPa | 3...11 | 3...15 | 3...16 |
| Veǐkost šandardnej dýzy | 045 040 | 038 | ||
| Max. prevádkový pretlak | MPa | 14 | 18 | 19 |
| Dopravované množstvo | l/h (l/min) | 250...600 (4,2...10) | 300...600 (5...10) | |
| Nasávanie Čistiacho prostriedku | l/h (l/min) | 0...40 (0...0,7) | ||
| Reaktívna sila ručnej streakacej pištole (max.) | N | 30 | ||
| Zistené hodnoty podl'æ EN 60335-2-79 | ||||
| Hodnota vibráci v ruke/ramene | ||||
| Ručná strekacia pištol | m/s² | <2,5 | ||
| Rozstrekovacia rúrká | m/s² | <2,5 | ||
| Nebezpečnost' K | m/s² | 1 | ||
| Hlučnost' LpA | dB(A) 69 | |||
| Nebezpečnost' KpA | dB(A) | 1 | ||
| Hlučnost' LWA + nebezpečnost' KWA | dB(A) 84 | |||
| Prevádkové látky | ||||
| Množstvo oleja | I | 0,5 | ||
| Druh oleja | SAE 15W40 | |||
| Rozmery a hmotnost' | ||||
| Dlžka | mm 554 | |||
| Śfirka | mm 509 | |||
| Výška | mm | 1000 | ||
| Hmotnost' bez príslušenstva (MX) | kg | 44,5 | 54 | 48 (50) |
| Typ HD 7/12-4 M | 1.524-902.0 | HD 7/16-4 M 1.524-911.0 | HD 7/18-4 M 1.524-910.0 1.524-913.0 1.524-912.0 | |
| HD 7/18-4 MX 1.524-914.0 | ||||
| KAP KAP EU | ||||
| Zapojenie siete | ||||
| Napätie V 220 400 | ||||
| Druh prúdu Hz 1~60 3~60 3~50 | ||||
| Otáčky motora 1/min 1400 1680 1400 | ||||
| Pripojovaci vykon kW 3,5 4,1 4,7 | ||||
| Poistka (zotrvačná, char. C) A | 20 | 16 | ||
| Druh krytia | IPX5 | |||
| Maximálne priustná siet'ová impedancia | Ohmov | - | - | - |
| Predlžovací kábel 30 m | mm² | 4,0 2,5 2,5 | ||
| Pripojenie vody | ||||
| Prívodná teplota (max.) | °C | 60 | ||
| Prívodné množstvo (min.) | I/h (I/min) | 700 (11,7) | ||
| Sacia výška z otvoreného zásobníka (20 °C) | m | 0,5 | ||
| Prívodný tlak (max.) | MPa | 1 | ||
| Výkonové parametre | ||||
| Pracovný tlak vody (so šstandardnou tryskou) | MPa 3...12 | 3...16 | 3...18 | |
| Ve'lkost' šstandardnej dýzy | 054 045 | 042 | ||
| Max. preváždkový pretlak | MPa | 14 | 19 | 21 |
| Dopravované množstvo | I/h (I/min) | 300...700 (5...11,67) | ||
| Nasávanie Čistiaceho prostriedku | I/h (I/min) | 0...40 (0...0,7) | ||
| Reaktívna sila ručnej striekacej pištole (max.) | N | 30 | 35 | 37 |
| Zistené hodnoty podl'æ EN 60335-2-79 | ||||
| Hodnota vibrráci v ruke/ramene | ||||
| Ručná striekacia pištol | m/s² | <2,5 | ||
| Rozstrekovacia rúrka | m/s² | <2,5 | ||
| Nebezpečnost' K | m/s² | 1 | ||
| Hlučnost' LpA | dB(A) | 69 | 75 | |
| Nebezpečnost' KpA | dB(A) | 1 | ||
| Hlučnost' LwA + nebezpečnost' KwA | dB(A) | 84 | 90 | |
| Prevádkové látky | ||||
| Množstvo oleja | I | 0,5 | ||
| Druh oleja | SAE 15W40 | Hypoid SAE 90 | ||
| Rozmery a hmotnost' | ||||
| Dlžka | mm | 554 | ||
| Širka | mm | 509 | ||
| Výška | mm | 1000 | ||
| Hmotnost' bez príslušenstva (MX) | kg | 47,5 | 44,5 | 49 (52) |
| Typ HD 9/18 M | 1.524-916.0 | HD9/19 M 1.524-915.0 1.524-919.0 | HD 9/20-4 M 1.524-924.0 | |
| HD 9/20-4 MX 1.524-927.0 | ||||
| KAP EU EU | ||||
| Zapojenie siete | ||||
| Napätie V 220 400 | ||||
| Druh prúdu Hz 3~ 60 3~ 50 | ||||
| Ötáčky motora 1/min 3370 2800 1400 | ||||
| Pripojovaci výkon kW 6,7 6,8 6,9 | ||||
| Poistka (zotrvačná, char. C) A 20 | 16 | |||
| Druh krytia | IPX5 | |||
| Maximálne priupustné siet'ová impedancia | Ohmov | - | - | 0,222+j0,139 |
| Predlžovací kábel 30 m | mm² | 4,0 | 2,5 | |
| Pipojenie vody | ||||
| Prívodná teplota (max.) | °C | 60 | ||
| Prívodné množstvo (min.) l/h (l/min) | 900 (15) | |||
| Sacia výška z otvoreného zásobníka (20 °C) m | 0,5 | |||
| Prívodný tlak (max.) | MPa | 1 | ||
| Výkonové parametre | ||||
| Pracovné tlak vody (so štandardnou tryskou) | MPa | 18 | 4...18,5 | 4...20 |
| Veǐkost štandardnej dýzy | 053 050 | |||
| Max. prevádkový pretlak | MPa | 23 | 22,5 | 22 |
| Dopravované množstvo | l/h (l/min) | 900 (15) | 450...890 (7,5...14,8) | 460...900 (7,7...15) |
| Nasávanie Čistiacho prostriedku | l/h (l/min) | 0...40 (0...0,7) | ||
| Reaktívna sila ručnej streakacej pištole (max.) | N | 49 | ||
| Zistené hodnoty podl'æ EN 60335-2-79 | ||||
| Hodnota vibrácić v ruke/ramene | ||||
| Ručná streakacia pištol' | m/s² | <2,5 | ||
| Rozstrekovacia rúrká | m/s² | 3,0 | 1,5 | |
| Nebezpečnost' K | m/s² | 1 | ||
| Hlučnost' LpA | dB(A) | 76 | 75 | |
| Nebezpečnost' KpA | dB(A) | 2 | 1 | |
| Hlučnost' LWA + nebezpečnost' KWA | dB(A) | 91 | 88 | |
| Prevádkové látky | ||||
| Množstvo oleja | I | 0,5 0,75 | ||
| Druh oleja | Hypoid SAE 90 | |||
| Rozmery a hmotnost' | ||||
| Dlžka | mm | 554 | ||
| Śirka | mm | 509 | ||
| Výška | mm | 1000 | ||
| Hmotnost' bez prislušenstva (MX) | kg | 48,6 | 42,1 (49) 47 (55) | 48 (50) |
Pije prve uporabe Vaseg ureda- ja procitajte ove originalne radne upute, postupajte prema njima i sacvajte ih za kasniju uporabu ili za sljedeceg vlasnika.
Pregled sadržaja
www.kaercher.com/REACH
Pripe prve uporabe
Raspakiravanje
2006/42/EZ (+2009/127/EZ)
2014/30/EU
2000/14/EZ
Primijenjene uskladene norme:
EN 60335-1
EN 60335-2-79
EN 55014-1: 2006+A1: 2009+A2: 2011
EN 55014-2: 1997 + A2: 2008
EN 61000-3-2: 2014
EN 62233: 2008
HD 6/11, HD 6/15, HD 7/12, HD 7/18,
HD 9/19
EN 61000-3-3:2006
HD 6/16, HD 9/20:
EN 61000-3-11:2000
Chairman of the Board of Management

S. Reiser
Director Regulatory Affairs & Certification
71364 Winnenden (Germany)
Tel.: +49 7195 14-0
Fax: +49 7195 14-2212
Winnenden, 2019/04/01
Tehnicki podaci
| Tip HD 6/11-4 M | 1.524-901.0 | HD 6/15-4 M 1.524-907.0 | HD 6/16-4 M 1.524-900.0 1.524-903.0 1.524-909.0 | |
| HD 6/16-4 MX 1.524-904.0 | ||||
| GB AU EU | ||||
| Priključak na električnu mrežu | ||||
| Napon V 100 240 230 | ||||
| Vrsta struje Hz 1~50 | ||||
| Broj okretaja motora 1/min 1400 | ||||
| Priključna snaga kW 2,9 3,3 3,4 | ||||
| Osigurač (inertni, karbeit. C) A 30 16 | ||||
| Zašita IPX5 | ||||
| Maksimalno dozvoljena impedancija | Ohm | - | 0,294+j0,184 | |
| Produžni kabel 30 m | mm² | 2,5 | ||
| Priključak za vodu | ||||
| Dovodna temperatura (maks.) | °C | 60 | ||
| Dovodni protok (min.) | l/h (l/min) | 600 (10) | ||
| Visina usisivanja iz otvorenih posuda (20°C) | m | 0,5 | ||
| Dovodni tlak (maks.) | MPa | 1 | ||
| Podaci o snazi | ||||
| Radni tlak vod (sa standardnom mlazni-com) | MPa | 3...11 | 3...15 | 3...16 |
| Veličina mlaznice za standardnu mlazni-cu | 045 040 | 038 | ||
| Maks. radni pretlak | MPa | 14 | 18 | 19 |
| Protočna količina | l/h (l/min) | 250...600 (4,2...10) | 300...600 (5...10) | |
| Usisivanje sredstva za pranje | l/h (l/min) | 0...40 (0...0,7) | ||
| Povratna udarna sila ručne prskalice (maks.) | N | 30 | ||
| Uvtvrëne vrijednosti prema EN 60335-2-79 | ||||
| Vrijednost vibracije na ruci | ||||
| Ručna prskalica | m/s² | <2,5 | ||
| Cijev za prskanje | m/s² | <2,5 | ||
| Nepouzdanost K | m/s² | 1 | ||
| Razina zvučnog tlaka LpA | dB(A) | 69 | ||
| Nepouzdanost KpA | dB(A) | 1 | ||
| Razina zvučne snage LWA + nepouzda-nost KWA | dB(A) | 84 | ||
| Radni mediji | ||||
| Količina ulja | I | 0,5 | ||
| Vrsta ulja | SAE 15W40 | |||
| Dimenzije i težine | ||||
| Duljina | mm 554 | |||
| Sirina | mm 509 | |||
| Visina | mm | 1000 | ||
| Težina bez pribora (MX) | kg | 44,5 | 54 | 48 (50) |
| Tip HD 7/12-4 M | 1.524-902.0 | HD 7/16-4 M 1.524-911.0 | HD 7/18-4 M 1.524-910.0 1.524-913.0 1.524-912.0 | |
| HD 7/18-4 MX 1.524-914.0 | ||||
| KAP KAP EU | ||||
| Priključak na električnu mrežu | ||||
| Napon V 220 400 | ||||
| Vrsta struje Hz 1~60 3~60 3~50 | ||||
| Broj okretaja motora 1/min 1400 1680 1400 | ||||
| Priključna snaga kW 3,5 4,1 4,7 | ||||
| Osigurač (inertni, karket. C) A | 20 | 16 | ||
| Zašita | IPX5 | |||
| Maksimalno dozvoljena impedancija | Ohm | - | - | - |
| Produžni babel 30 m | mm² | 4,0 2,5 2 | 5 | |
| Priključak za vodu | ||||
| Dovodna temperatura (maks.) °C | 60 | |||
| Dovodni protok (min.) | I/h (I/min) | 700 (11,7) | ||
| Visina usisavanja iz otvorenih posuda (20°C) | m | 0,5 | ||
| Dovodni tlak (maks.) | MPa | 1 | ||
| Podaci o snazi | ||||
| Radni tlak vod (sa standardnom mlazni-com) | MPa | 3...12 | 3...16 | 3...18 |
| Veličina mlaznice za standardnu mlazni-cu | 054 045 | 042 | ||
| Maks. radni pretlak | MPa | 14 19 | 21 | |
| Protočna količina | I/h (I/min) | 300...700 (5...11,67) | ||
| Usisivanje sredstva za pranje | I/h (I/min) | 0...40 (0...0,7) | ||
| Povratna udarna sila ručne prskalice (maks.) | N | 30 | 35 | 37 |
| Uvržene vrijednosti prema EN 60335-2-79 | ||||
| Vrijednost vibracije na ruci | ||||
| Ručna prskalica | m/s² | <2,5 | ||
| Cijev za prskanje | m/s² | <2,5 | ||
| Nepouzdanost K | m/s² | 1 | ||
| Razina zvučnog tlaka LpA | dB(A) | 69 | 75 | |
| Nepouzdanost KpA | dB(A) | 1 | ||
| Razina zvučne snage LWA + nepouzda-nost KWA | dB(A) | 84 | 90 | |
| Radni mediji | ||||
| Količina ulja | I | 0,5 | ||
| Vrsta ulja | SAE 15W40 | SAE 90 hipoidno | ||
| Dimenzije i težine | ||||
| Duljina | mm | 554 | ||
| Širina | mm | 509 | ||
| Visina | mm | 1000 | ||
| Težina bez pribora (MX) | kg | 47,5 | 44,5 | 49 (52) |
| Tip HD 9/18 M | 1.524-916.0 | HD9/19 M 1.524-915.0 1.524-919.0 | HD 9/20-4 M 1.524-924.0 | |
| HD 9/20-4 MX 1.524-927.0 | ||||
| KAP EU EU | ||||
| Priključak na električnu mrežu | ||||
| Napon V 220 400 | ||||
| Vrsta struje Hz 3~ 60 3~ 50 | ||||
| Broj okretaja motora 1/min 3370 2800 1400 | ||||
| Priključna snaga kW 6,7 6,8 6,9 | ||||
| Osigurač (inertni, karakt. C) A 20 | 16 | |||
| Zašita | IPX5 | |||
| Maksimalno dozvoljena impedancija | Ohm | - | - | 0,222+j0,139 |
| Produžni kabel 30 m | mm² | 4,0 | 2,5 | |
| Priključak za vodu | ||||
| Dovodna temperatura (maks.) °C | 60 | |||
| Dovodni protok (min.) | l/h (l/min) | 900 (15) | ||
| Visina usisavanja iz otvorenih posuda (20°C) | m | 0,5 | ||
| Dovodni tlak (maks.) | MPa | 1 | ||
| Podaci o snazi | ||||
| Radni tlak vod (sa standardnom mlazni-com) | MPa | 18 4...18 | 5 4...20 | |
| Veličina mlaznice za standardnu mlaznicu | 053 | 050 | ||
| Maks. radni pretlak | MPa | 23 | 22,5 | 22 |
| Protočna količina | l/h (l/min) | 900 (15) | 450...890 (7,5...14,8) | 460...900 (7,7...15) |
| Usisavanje sredstva za pranje | l/h (l/min) | 0...40 (0...0,7) | ||
| Povratna udarna sila ručne prskalice (maks.) | N | 49 | ||
| Uvtvržene vrijednosti prema EN 60335-2-79 | ||||
| Vrijednost vibracije na ruci | ||||
| Ručna prskalica | m/s² | <2,5 | ||
| Cijev za prskanje | m/s² | 3,0 | 1,5 | |
| Nepouzdanost K | m/s² | 1 | ||
| Razina zvučnog tlaka LpA | dB(A) | 76 | 75 | |
| Nepouzdanost KpA | dB(A) | 2 | 1 | |
| Razina zvučne snage LWA + nepouzda-nost KWA | dB(A) | 91 | 88 | |
| Radni mediji | ||||
| Količina ulja | I | 0,5 0,75 | ||
| Vrsta ulja | SAE 90 hipoidno | |||
| Dimenzije i težine | ||||
| Duljina | mm | 554 | ||
| Sirina | mm | 509 | ||
| Visina | mm | 1000 | ||
| Težina bez pribora (MX) kg 48,6 | 42,1 (49) | 47 (55) | 48 (50) | |

Pre prve upotrebe Vaseg ureada procitajte ove originalno
www.kaercher.com/REACH
Pre upotrebe
Raspakovavanje
- Prilikom raspakovavanja proverite sadrzaj pakovanja.
- U slučaju ostećenja pri transportu odmah obavestite prodavca.
Provera nivoa ulja
Nivo ulja očitajte dok uredaj stoji. Nivo ulja mora da se nalazi iznad obaPokazivača.
2006/42/EZ (+2009/127/EZ)
2014/30/EU
2000/14/EZ
Primenjene uskladene norme:
EN 60335-1
EN 60335-2-79
EN 55014-1: 2006+A1: 2009+A2: 2011
EN 55014-2: 1997 + A2: 2008
EN 61000-3-2: 2014
EN 62233: 2008
HD 6/11, HD 6/15, HD 7/12, HD 7/18, HD 9/19
EN 61000-3-3:2006
HD 6/16, HD 9/20:
EN 61000-3-11:2000

Chairman of the Board of Management

S. Reiser
Director Regulatory Affairs & Certification
Opunomoceni za izradu dokumentacije: S. Reiser
Alfred Kärcher SE & Co. KG
71364 Winnenden (Germany)
Tel.: +49 7195 14-0
Fax: +49 7195 14-2212
Winnenden, 2019/04/01
Tehnicki podaci
| Tip HD 6/11-4 M | 1.524-901.0 | HD 6/15-4 M 1.524-907.0 | HD 6/16-4 M 1.524-900.0 1.524-903.0 1.524-909.0 | |
| HD 6/16-4 MX 1.524-904.0 | ||||
| GB AU EU | ||||
| Priključak na električnu mrežu | ||||
| Napon V 100 240 230 | ||||
| Vrsta struje Hz 1~50 | ||||
| Broj obrtaja motora 1/min 1400 | ||||
| Priključna snaga kW 2,9 3,3 3,4 | ||||
| Ösigurač (inertni, karakt. C) A 30 16 | ||||
| Stepen zašite | IPX5 | |||
| Maksimalno dozvoljena impedancija | Ohm | - | 0,294+j0,184 | |
| Produžni kabl 30 m | mm² | 2,5 | ||
| Priključak za vodu | ||||
| Dovodna temperatura (maks.) °C | 60 | |||
| Dovodni protok (min.) l/h (l/min) 600 (10) | ||||
| Visina usisavanja iz otvorenih posuda (20°C) | m | 0,5 | ||
| Dovodni pritisak (maks.) | MPa | 1 | ||
| Podaci o snazi | ||||
| Radni pritisak vode (sa standardnom mlaznicom) | MPa | 3...11 | 3...15 | 3...16 |
| Veličina mlaznice kod standardne mlaznice | 045 040 | 038 | ||
| Maks. radni nadpritsak | MPa | 14 | 18 | 19 |
| Protočna količina | l/h (l/min) | 250...600 (4,2...10) | 300...600 (5...10) | |
| Usisavanje deterdženta | l/h (l/min) | 0...40 (0...0,7) | ||
| Povratna udarna sila ručne prskalice (maks.) | N | 30 | ||
| Izračunate vrednosti prema EN 60335-2-79 | ||||
| Vrednost vibracije na ruci | ||||
| Ručna prskalica m/s | 2 | <2,5 | ||
| Čev za prskanje | m/s² | <2,5 | ||
| Nepouzdanost K | m/s² | 1 | ||
| Nivo zvučnog pritiska LpA | dB(A) | 69 | ||
| Nepouzdanost KpA | dB(A) | 1 | ||
| Nivo zvučne snage LWA + nepouzdanost KWA | dB(A) | 84 | ||
| Radni mediji | ||||
| Količina ulja | I | 0,5 | ||
| Vrsta ulja | SAE 15W40 | |||
| Dimenzije i težine | ||||
| Dužina | mm 554 | |||
| Sirina | mm 509 | |||
| Visina | mm | 1000 | ||
| Težina bez pribora (MX) | kg | 44,5 | 54 | 48 (50) |
| Tip HD 7/12-4 M | 1.524-902.0 | HD 7/16-4 M 1.524-911.0 | HD 7/18-4 M 1.524-910.0 1.524-913.0 1.524-912.0 | |
| HD 7/18-4 MX 1.524-914.0 | ||||
| KAP KAP EU | ||||
| Priključak na elektricnu mrežu | ||||
| Napon V 220 400 | ||||
| Vrsta struje Hz 1~60 3~60 3~50 | ||||
| Broj obrtaja motora 1/min 1400 1680 1400 | ||||
| Priključna snaga kW 3,5 4,1 4,7 | ||||
| Osigurač (inertni, karakt. C) A | 20 | 16 | ||
| Stepen zašite | IPX5 | |||
| Maksimalno dozvoljena impedancija | Ohm | --- | ||
| Produžni kabl 30 m mm | 2 | 4,0 2,5 2,5 | ||
| Priključak za vodu | ||||
| Dovodna temperatura (maks.) °C | 60 | |||
| Dovodni protok (min.) | I/h (I/min) | 700 (11,7) | ||
| Visina usisavanja iz otvorenih posuda (20°C) | m | 0,5 | ||
| Dovodni pritisak (maks.) | MPa | 1 | ||
| Podaci o snazi | ||||
| Radni pritisak vode (sa standardnom mlaznicom) | MPa | 3...12 3...16 | 3...18 | |
| Veličina mlaznice kod standardne mlaznice | 054 | 045 042 | ||
| Maks. radni nadpritsak | MPa | 14 19 21 | ||
| Protočna količina | I/h (I/min) 300...700 (5...11,67) | |||
| Usisavanje deterdženta | I/h (I/min) | 0...40 (0...0,7) | ||
| Povratna udarna sila ručne prskalice (maks.) | N | 30 | 35 | 37 |
| Izračunate vrednosti prema EN 60335-2-79 | ||||
| Vrednost vibracije na ruci | ||||
| Ručna prskalica | m/s² | <2,5 | ||
| Cev za prskanje | m/s² | <2,5 | ||
| Nepouzdanost K | m/s² | 1 | ||
| Nivo zvučnog pritiska LpA | dB(A) 69 | 75 | ||
| Nepouzdanost KpA | dB(A) | 1 | ||
| Nivo zvučne snage LWA + nepouzdanost KWA | dB(A) 84 | 90 | ||
| Radni mediji | ||||
| Količina ulja | I | 0,5 | ||
| Vrsta ulja | SAE 15W40 | SAE 90 hipoidno | ||
| Dimenzije i težine | ||||
| Dužina | mm | 554 | ||
| Širina | mm | 509 | ||
| Visina | mm | 1000 | ||
| Težina bez pribora (MX) | kg | 47,5 | 44,5 | 49 (52) |
| Tip HD 9/18 M | 1.524-916.0 | HD9/19 M 1.524-915.0 1.524-919.0 | HD 9/20-4 M 1.524-924.0 | |
| HD 9/20-4 MX 1.524-927.0 | ||||
| KAP EU EU | ||||
| Priključak na elektrichnu mrežu | ||||
| Napon V 220 400 | ||||
| Vrsta struje Hz 3~60 3~50 | ||||
| Broj obrtaja motora 1/min 3370 2800 1400 | ||||
| Priključna snaga kW 6,7 6,8 6,9 | ||||
| Osigurač (inertni, karket. C) A 20 | 16 | |||
| Stepen zašite | IPX5 | |||
| Maksimalno dozvoljena impedancija | Ohm | - | - | 0,222+j0,139 |
| Produžni kabl 30 m | mm² | 4,0 | 2,5 | |
| Priključak za vodu | ||||
| Dovodna temperatura (maks.) °C | 60 | |||
| Dovodni protok (min.) | I/h (I/min) | 900 (15) | ||
| Visina usisavanja iz otvorenih posuda (20°C) | m | 0,5 | ||
| Dovodni pritisak (maks.) | MPa | 1 | ||
| Podaci o snazi | ||||
| Radni pritisak vode (sa standardnom mlaznicom) | MPa | 18 4...18 | 5 4...20 | |
| Veličina mlaznice kod standardne mlaznice | 053 050 | |||
| Maks. radni nadpritsak | MPa | 23 | 22,5 | 22 |
| Protočna količina | I/h (I/min) | 900 (15) | 450...890 (7,5...14,8) | 460...900 (7,7...15) |
| Usisavanje deterdženta | I/h (I/min) | 0...40 (0...0,7) | ||
| Povratna udarna sila ručne prskalice (maks.) | N | 49 | ||
| Izračunate vrednosti prema EN 60335-2-79 | ||||
| Vrednost vibracije na ruci | ||||
| Ručna prskalica | m/s² | <2,5 | ||
| Cev za prskanje | m/s² | 3,0 | 1,5 | |
| Nepouzdanost K | m/s² | 1 | ||
| Nivo zvučnog pritiska LpA | dB(A) | 76 | 75 | |
| Nepouzdanost KpA | dB(A) | 2 | 1 | |
| Nivo zvučne snage LWA + nepouzdanost KWA | dB(A) | 91 | 88 | |
| Radni mediji | ||||
| Količina ulja | I | 0,5 0,75 | ||
| Vrsta ulja | SAE 90 hipoidno | |||
| Dimenzije i težine | ||||
| Dužina | mm | 554 | ||
| Śirina | mm | 509 | ||
| Visina | mm | 1000 | ||
| Težina bez pribora (MX) | kg | 48,6 | 42,1 (49) 47 (55) | 48 (50) |

Ppei nIbPBoTo n3nOJI3BaHe Ha Bauny ypei npoyeTeTe ToBa
opunnaHNO nHcTpyKcyra 3a pa6ota, DeiCTBaIte cnopeH Hero ng 3ana3eTe 3a IIO-KbCHO n3nOJ3BaHe nII 3a CneDbaUy npTEkataI.
CbDtpxahanne
ElenmEnHa ypea .BG1
YkaHna 3a 6e3onacHocT BG1
YnOTope6a no npedHa3NaueHne BG 2
PpeDn3H npncno6neHn . BG 2
Ona3BaHe Ha okJHaTa cpea BG 3
Ppei n yckaHe B ekcnloaatauaBG 3
IyckaHe B ekcnloaTaunra...BG4
O6cnykBaHe BG5
TpaHcnpT. BG7
CbxpaHHe BG7
PnKn nOdpbXka .BG7
POMOUI npHn3npaBHOCTN..BG8
PnHaIeKHOCTn np3epBHN 7aactn. BG9
TapaHua BG9
ECДeKnapaun3a CbOTBeTCTBnE. BG9
Texnueckn daHHN BG 10
Elenentn ha ypeda
Molnna3BaTe cTpaHata C cnrgpata otnped
1 NocTaBka 3a IIO3aTa
2ДpbЖKa
3 N3BOD 3a BncoKo Hnrahe EASY!Lock
4 3axpaHbaHe c BOda
5 MaHOMeTbp
6 Noka3aHne 3a HNBOTo Ha MacNoTO
7 Pe3epBoap 3a MacNoTo
8 Kanak Ha ypea
9 Kliou Ha ypega
10 3akpenBaunT kaanHa ypeana
11 NocTabka 3a Mapkyua
12Дрьжka 3a пистонета 3a рьчно npбckaine
13ДIO3a
14 Mapknipobka Ha duO3aTa
15 Tpb6a 3a pa3npbckBaHe EASY!Lock
16 PeruIpaHe Ha HanaRaHeTo / KOJIueCTBOTO (He npH HD 9/18 M)
17 Пистолет за рьчно пьскан
EASY!Force
18 PpeDnzaHa cnnpaKa
19 JIoCT Ha cnycbKa
20 PpeDna3eH loct
21 Mapkyu 3a Bucoko Hajrahe EASY!Lock
22Пьзraца cko6a
23 IbpxkateI 3a Ka6eJa
24Дозираш,BeHTил NOuchTbaUso cpeД-CTBO
25 Mapkyu 3a BCMyKBaHe Ha NouchTbaIcpeIcTBOCΦnITbPи KaIak Ha BnHT
26 Hocau Ha 6yTnIkaTa 3a NouNCTBaUcO cpeIcTBo
27 MaHnVeJa
28БаразанHaМаркучa
UBeTHo 06O3HaueHne
-ObcnykBaunTe eIemEnTn 3a npoueca Ha obcnykBaHe ca XbNTn.
-ObcnykBaunTe eJeMeHTn 3a NOd-DbjKKa n cepBn3 ca CBETIOCNBn.
Yka3aHnja 3a 6e3oNaChOCT
-ПрдпьрвOTунсканБ ekрноataця Неременно рочетete YntBa-heto 3a ekрноataця № 5.951-949.0!
-Да ce сna3BaT cBOTBeTHnTe Haцno-HaHHи n3nCKBaHnЯ Ha 3aKoHoJaTeJIa 3a CTpyHn anapatn.
-Да ce сna3BaT cBoTBeTHnTe Haцио-HaHnИЗнСКВaHnЯ Ha 3aKoHoДaTeJIa 3anpedna3BaHe OT 3IonoJyKn. CtpynHnTe anapatN Tp86Ba Da ce npOBepaBAt peDobHO n pe3yIITaTa OT npOBepKaTa Da ce 3aIINcBA.
-По урета/akcecoapnte He Tp6Ba da ceпдпсemT помен.
CTeNeHn Ha onaCHOCT
ONACHOCT
Yka3aHue 3a HenocpedcmbeHo apo3raua onachocm, kOmo bdu do mexku melecHu HapahRaHua Unu do cMbpm.
△PENEYNPEXDEHNE
Yka3aHue 3a 6b3MOxHa onacha cumya- u, KoMo MoKe da doBeDe do meKku meNechu HapaHraBuHua unu do CmbpM.
△PENEIA3JNBOCT
Yka3aHue 3a 6b3MOxHa onacha cumya- uja, Kjmo MoKe da doBeede do Jeku Ha- paHraHua.
BHUMAHNE
Yka3aHue 3a 6b3MOxHa onacha cumya- uja, Kjmo Moke da doeede do Mamepu-anHu uemu.
CnmboHnHa ypeda
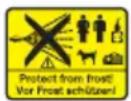
CunHume cmpyu noD haIraZaHe Mozam npu HenpaBUNHO nOJ3-
bahe da ca onacHu. He hacoouaume cmpyma KbM xopa, XueomHu, akmuBu eNeKmpuuecku ypeDu uUu KbMa camua ypeD.
CbaIacHO baIuHume pa3npoped6b ypeBm Hukoza He 6b8a da 6bde ekcnoamupan 6e3 cucmeMeH pa3delenm KbM Mpekama 3a numeHa boda. Tpa6Ba da ce u noxdxoadu cucmemen pa3delenme fupMa KARCHER unu kamo anme Ba cucmemen pa3delenm cbana 12729 mun BA.
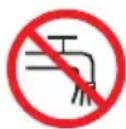
Bodama, npemunana npes cucmemnua pa3denumei, ce onpeeden kamo heoohna 3a nueHe.
△PENEIA3JINBOCT
Cebp3eaume cuscemHua pa3denumen BuHaZu KbM 3axpaHbaua uoDopnpo6o, Hukozadupekmno Kbmypeda.
YnoTpe6a no IpeHa3HaueHne
I3noJI3BaIte cAmO To3n ypeI 3a NoUcTBAHe C BnCOKO HAnraHe
-3a NOUcTBAHe CbC CtpyH NsCKO HAnrAHe H NouCTBaU, npenapat (HaNP. NouCTBaHe Ha MaunH, npeBO3H CpeD-CTBa, CTPONTeJH N KOHCTpyKUnn, IN-CTpymENT),
-3a NOUcTBAHe CbC CTpy BnCOKo HaNrAHe 6e3 NouCTBaU, npenapat (HaNP. Na φacadn, tepacn, rpaDnHckn ypeDi).
3a ynpnte 3ambpcraBnna Bn npenopbYuBame ppe3ata 3a Mpbcotna Kato cneuAnHa npHaadNkHOCT.
Pn HD...Plus MeJaKata 3a 6oknyka ce CbDpKa B O6ema Ha DoCTaBka.
ИЗнСКВа_HЯ КБМ KaYeCTBaTHa Ha BODaTa: BHIMAHHE
KamoФnyud noe bucoko Hanae ce n038oJraea u3noI38aHemocMoHa yucma boda.3ambpcraehura bodmdo npexdeepemHo u3HOceaHe Uu omnaaHua byeda.
Ako ce u3noJ38a peuuknapaHa 60da, He 6uea da ce hadeuwaam cneDhme apauHuYu cmoHocmu.
| pH-стонocst 6,5...9,5 | |
| е lektrichiеска провори-MOST* | пождимостчеса ворада +1200 μS/cm |
| утываши се вescетва** | < 0,5 mg/l |
| фелtrраши се вescетва*** | < 50 mg/l |
| Вълеворουн < 20 mg/l | |
| Хлорид < 300 mg/l | |
| С Burlфат < 240 mg/l | |
| калций < 200 mg/l | |
| ОвSETS < 28 °dH | < 50 °TH < 500 ppm (mg CaCO3/l) |
| Желаязо < 0,5 mg/l | |
| Манган < 0,05 mg/l | |
| Мед < 2 mg/l | |
| Актувен xлор | < 0,3 mg/l |
| бeз пошни ризmers | |
| * оьш максимуm 2000 μS/cm** оьem на побата 1 л, вре'mе за утаява-нe 30 мин*** бeз abраизвни вescетва | |
PpeDn3Hn npncno6JeHna
IpeNa3HnTe npncnoc6JIeHnCnyKaT 3a 3a- nHa nOpTeIeN He 6bBa da ce Cnnpa IIN Da ce npHe6perBa TxHaTaФyHKuIg.
PpeINBEN BeHTnC nHeBMaTnueH npeKbcBauch
Iprn HamaJraBaHe Ha KOJIuYeCTBOTO Ha BOdTaHa CpeYJInpaHe Ha HAnraHEno/KOJIuYeCTBOTO PpeINIBHnT BeHTnI OTbApRn EeHa Yact OT BODaTa N3TnUa O6paTHO KbM CmyKaTeJHATA CTpaHa Ha NOMnTa.
AkoNoCTbT Ha cnycbKa Ha nictOJeTa 3a
pbUHO IpbcKaHe ce OCBO6OuN, INHeBMaTnUHnT KOHTaKT N3KJIIOUvBa NOMnTa, CTpyTa NOBnCOKo HAnraHe ppeKbCBA. Ako NoCTbT Ha cnycbKa ce npndbpna, NOMnata
ce BKIOUvBa OTHOBO.
PpeDna3eH KlaanH
IpeDn3HnT KlaanotBapr npn HauBn-
shaBaHe Ha donyCTMOTO pa6OTHO CBpbx-
HaJraHe, BODaTa N3TuHa o6paTHO KbM
cMyKaTeHNHa TcPaHa Ha nomnata.
PpeINBEN BENTN, INHeBMaTnueH npeKbcBau n ppeDna3eH Klaanah ca HacTpoEHnFa6pnuHo nILOm6npaHn.
Hactpoika cmoB cepBn3a.
www.kaercher.com/REACH
Ipei nyskaHe B ekcnloatauia
Pa30nakobaHe
- CbIbpxkaHneTo Ha onaKOBkata Da ce npoBepn npi pa3oNaKOBaHe.
-При ТранспорTN Deфektи He3a6abHOn HΦopMnpaIte TbproBeca.
Ja ce npOBepn HNBOTO Ha macNoto
Ioka3aHneTo 3a HnBOTO Ha MacNoTo da ce OTye npu ypeB nOKoHnBoto Ha MacNoTo Tp6Ba Da 6bJe HaI DBeTe CTpeJKN.
Aктувиране ВентILAцяpe3epBoap 3a MacNo
Da ce pa3Bne 3akpenBauny BnHT Ha KaNaka Ha ypeDa, da ce CbaNn KaNaka Ha ypeDa.
Да ce OTpeKe Bbpxa Ha KaNaKa Ha pe-3epBoapa 3a MacNo.
Da ce 3aKpeNn KaNaKa Ha ypeJa.
MOnTnpaTe npHaJnEJXHocHTe
Yka3aHHe: CnCTemata EASY!Lock cBbP3Ba KOMHOENTITE NOCpeDCTBOM BUCOKOeΦeKTHBHa pe36a camo ceIHO 3aBbPtaHe-6bp30 n cnrgpHo.
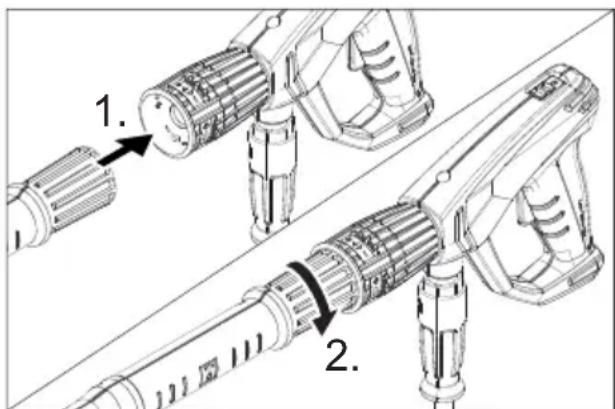
→ MoNTnpaIte IIO3aTa B Tpb6aTa 3a pa3- npbCKBaHe (MapKnpoBka Ha npbCTeHa 3a HacTpoiKa rope) n 3aTeHrHeTe Ha pbKa (EASY!Lock).
→ CbpxeTe Tpb6aTa 3a pa3npbckBaHe c nictoJeTa 3a pbHNO npbckaHe n 3aTertHeTe 3dpaboHa pbka (EASY!Lock).
Pn ypei 6e3 6apa6aH 3a Mapkya:
→ CbpxeTe Mapkya 3a pa60Ta noD BnCOKo HajraHe c nIcToJeTa 3a pbuHO npckaHe n N3BOda 3a pa60Ta noD BNcOKo HajraHe Ha ypeDa n 3aTeHheTe 3dpaboHa pbka (EASY!Lock).
Pn ypei n c 6apa6aH 3a Mapkya:
MaHnBeJaTa Da Ce NbXHe BbB BaJa Ha 6apa6aHa 3a Mapkyu n Da ce fNkCnpa.
Mapkya 3a pa6ota noi HaIrahe npe- nn HABnBaHeTo da ce nIOxN B pa3TeTJIeHO CbCTOarHne.
Mapkya 3a pa6oTa noi HaJraHe da ce HABnE CbC 3aBbPtaHe Ha MaHJIeJaTa Ha paBHOMepHn DblJxHH Bbpxy 6apabHa ha Mapkya. Iocokata Ha BbPteHe da ce n3Bepe TaKa, Ye MapkybT 3a pa6oTa noi HaJraHe da He ce npereBa.
→ CbpxeTe n3BOda 3a pa6oTa noi BnCOKO HaIraHe c NtCTOneTa 3a pbuHOppbckane H 3aTeHHe Te 3npaBO Ha pbka (EASY!Lock).
Пусканьекпюатуnia
△PENEYNPEXDEHNE
Onachocm om hapaHbAhe! Ypeobm, akcecoapume, 3axpaHbauUme Ka6eIu, Mapkyubm 3a pa6oma nod Hnla2ane u epb3kume mpr6ea da 6bdam e omluuHO cbcmoHue. Ako ypeobm He e omluuHO cbcmoHue, u3non3eaHemo My e 3a6paHeNo.
EneKtpnuecko 3axpaHbaHe
ONACHOCT
Onachocm om HapaHaehe nopadu eJekmpuuecku ydap.
- Ypeobmmp6ea da ce c8bpxe 3adblKumenHO C ukep KbM eIekmpuueckama mpeka. 3a6paHrae ca He pa3deIema epb3ka c eIekmpuueckama mpeka. Ukepbm cnxku 3a pa3deIne om mpekama.
- Cepb36aume ypeda cmo KbM npomHnue mok.
He 6uba da ce haobuwa maKcumanno donycmumo nJnHO Hanpexehue Ha mpexama Ha enekmpueckama moka 3a npucbeduhahe (buxme TexHuceku daHn).Ppu HeacHom no omHoweHue Ha Hauhomo Ha Bawa
ma moka 3a npucbeodunhahe nblnho HanpexeHue Ha mpekama MoJ da ce c6bpxeme C Bauemo npednpumue no eNeKmpo3axpaHaHe.
- Μεπεπβm, Μεκερβm u κυπηνηβm Ḍa u3πολσεθημγ yδβλχμει mραδεa δa ca bɔdɔycmούuεu.
-Да ce u3non3ea yodbJxumemeH Ka6en c docmambyHo ceyeHue (Buxme "TexHuuecku daHHU") u zo pa3BuIme Ha-nbJnHO om bapabHa 3a Ka6ena.
3a napametpuTe 3a Cbbp3BaHe BnK Ta6eIka-Ta Ha ypeJa/TexHnueeCKnte napametpn.
Pa3BnTe 3axpaHbau nKa6eI n ro noJIOXKeTe Ha nOda.
BkJIIOUeTe UeNCEJa B KOHTaKTa.
3axpaHbHe c BOda
3aunTa OT 3ampb3BaHe
BHUMAHNE
Ipu 3aMpb3BaHe He HaNbJHo u3npa3HeHua om e0da ypeD ue 6bde pa3pyweH. YpeDa da ce cxbpaHa Ha MrcTo, KbTeTo He MoKe Da 3aMpb3He.
Ako He Bb3MOxHO CbXpaHЯBaHe OCHrypeHo npOTnB 3aMp3BaHe:
Da ce npoodyxa BodaTa.
Bypeda da ce HAnOMn KOHBeHcNoHaJIeH aHTnΦpN3.
Yka3aHne:
I3noJ3BaIte KOHBeHcNoHaJIeH npenapaT 3a 3aUHTa OT 3ampb3BaHe 3a aBTOMO6nHn Ha IIOKoJHa OCHOBA.
Ja ce cna3BaT pa3nope6nte 3a pa6oTa Ha npOn3BODInTeIHa npenapaTa 3a 3auNTa OT 3aMpb3BaHe.
YpeDa Da ce octaBn Da pa6OTn MaKc.1 MNHyTa DOKaTO Ce N3npa3HrT NOMnTa n IPOBOdnte.
TpaHcnpoT
△PENEIA3JNBOCT
Onachocm om HapaHbaHe u nopeda! Ppu mpaHcnpm umaume nped eud meaIomo Ha ypeda.
BHIMAHNE
Ipu mpaHcnpupaHe npedna3eaume Iocma Ha cnycbka om nopeda.
3a TpaHcnpT Ha no-DbIgN OTceKu ypeDa Da ce Dbpna 3a DpbKkata.
Пи уреди 6e3 баразан 3a Маркуа пьзрацета скоба 3a Нoche Да ce obp-he Na3a. 3a Нoche урда Да ce xbahe 3a Дрьхкпг, He 3a пьзрацета скоба.
Празн.TpaHcnpTВЛERHaNo NOLOKeHHe cBaIeTe 6yTuNKuTe 3a NOUcTBA-IO CpeDCTO HOcaua 3a 6yTuKn I rN 3aTBOpTe.
→ПиТранспгВаВТOMOБИИОСИУРЯ-Вайтуpeда сыласно BAПДНITEДИPEKТИВИnpOTИВ Пь3raHe И пpeOBpbUaHe.
CbXpaHHeHne
△PENEIA3JNBOCT
Onachoc om hapaHbaHe u nopeda! Ppu cxbxpanHe umaime nped eud me- nomo ha ypeda.
CbXpaHHeHneTo Ha To3n ypeI e n03BOJeHo cMo BbB BbTpeHNI NOMEuEHNJ.
PnXn n PndpBxKka
ONACHOCT
Onachocm om HapaHaahe nopadu He npedHaMepeHo nomeaJau yped u eJekmpueecku ydap.
Ipeu ecuku deu hocmu no ypea moa da ce u3knouu da ce u3ea du uenceeta.
Yka3aHHe:
OTCTpaHЯBaHeTo Ha CTapOTO MacNo e No3-BOJIeHO cAmO Ha npeBnDEHnTe 3a ZeIJa MeCtA 3a Cb6upaHe. MoJn PpeaTe Tam NOnyUnOTo ce CTapo MacNo. 3aMbpcraBaHnraTa Ha OKoJIHaTa CpeDa Cbc CTapu MaCJa Ca Haka3yeMn.
IHCneKzna 3a cnrypnoct/OrOBop 3a noDprbXka
Moxete da dorobopnte peoBna nHcneKuia 3a cnpyhocT c Baunra TbproBeu nnDa ckIIOHTe dorOBop 3a noDpBxka.
MOnI nckaIte cBbETn.
Ppei BcKa ekcnloaTaun
→ПисьeДиHNTeHnЯ Ka6eI Da ce npoBepn 3a yBpeKdAHHa (OanachocT OT eJIeKtpuYeCKn ypeI),yBpeDeHNTe npiCbeDINHTeHNr Ka6eI N He3a6abHo Da ce CMeHrT OT aBTOpN3npaHncapeBn3/ eJIeKtpOTexHnK.
Поберете Маркуа 3a pa6ota по налягане 3a урждань (onaCHOCT OT nponykbahe).
He3a6abHcMeHeTe Mapkyua 3a pa6o-Ta noHaIraHe.
Ypeia (nomnata) da ce npoBepn 3a xepMeTnUHOCt.
3 KaKn BOda Ha MNHyTa ca DOnyCTMn N MORa Tda N3TNUat OT DOHATA cTpaHa Ha ypeDa. Ppi NO-cUNHn HexepMeTuHOCTHI NOTbpcTe cepBn3a.
EkeceMnUHo
Да ce npOBepn CbCTOJHHeTO Ha macIto.Ako MacNoTo e MJIeKOnoD6Ho (Boa B MacNoTo), BeHaRa NotbpcTe cepBn3a.
Да ce пости цдкata Кьм 3axpaHba-HeTo C BODa.
Da ce nouCTn fHJTbpa Ha BCMyKBa- uJy Mapkyu nouCTBaO cpeDCTBO.
Camo HD 9/20-4:
Da ce nouchtnnHnnaNTbp.
YpeDa da ce ocTaBn 6e3 HaJraHe.
Da ce pa3Bne 3aKpePnBauny BnHT Ha KaNaka Ha ypeDa, da ce CbJIi KaNaka Ha ypeDa.
Da ce pa3Bne kaNaKa cΦnTbpa.
→ Φилтьра Да ce поисс tc чисс вда ИИ Nвздух под НалягаHe.
Да ce moHTnpaВ obpaTHa NOcNeIOBaTeJIHOCT.
Ha Bcekn 500 pa6oTHn yaca, MHHmym ekeorndno
→ AnraxupaTe cepBn3a c noDpBjKka Ha ypeHa.
Да ce smeHn MacJIoTO.
CmHa Ha MacJo
YkaHne:
KoJIyEcTBOTO IN BnDa Ha MacIcTO BnXTe OT "TexHueCKn DaHHN".
Da ce pa3Bne 3aKpePbAuny BnHT Ha KaNaka Ha ypeDa, da ce CbaJN KaNaka Ha ypeDa.
→ CbaileTe kanaKa Ha pe3epBoapa 3a MacNo.
HaKIOHeTe ypeDa HAnpeI.
MaCNoTo Da ce n3nysHe B npneMHnA cb.
→ BaBHO HaneiTe HOBOTo MaCNo; Bb3dUHnTe Mexypeta Tpa6Ba Da ce npcbHaT.
→ NocTaBete KaNaKa Ha pe3epBoapa 3a MacNo.
Da ce 3aKpeNn KaNaKa Ha ypeJa.
Помоц пи Нeн3правноCTN
ONACHOCT
Onachocm om HapaHbaHe nopadu He npedHamepeNo nomeaJyped u eJekmpueecku ydap.
-
Ppeu bcuku deu Hocmu no ypea mou da ce u3KIOUu d a ce u3BaDu uenceena.
-
EneKmpuueckume KOHcmpykmubHu enemeMu da ce npoeepaam u nonpa- 3m caMo om aemopuzupan cepu3.
- Ppu noepeu, Koumo He ca nocoyu e ma3u 2na8a, Ppu cnyau Ha KonebaHue u npu u3puuHo yka3aHue nombpceme aemopu3upaHua cepbu3.
ypeT he pa60tN
→ПисьeннTeHnЯKa6eIda ce npoBepn 3a NOBpeHn.
Да ce npOBepn HAnpeXeHneTo Ha MpeJxata.
KlnoyaHa ypeda Da ce noctabn Ha "0" I MOTopa Da ce OCTaBn Da ce OxnaI MInH.5MnHyTn.
Ako cIeT TOBa IOBpeDaTa OTHOBO ce noBA, ypeDa Da ce npOBepn B cepBn3a.
→При eIeKtpnueckn DeΦeKT da ce noTbpcn cepBn3a.
YpeBt He DoCTnra HaJraHe
NocTaBeTe dI03aTa Ha ,BucOko HnIraHe".
→ NouinCTe IIO3aTa.
→ CMeHeTe IHO3aTa.
06e3Bb3dUyweTe ypeDa (BnKTe "NycKaHe B DeiCtBne").
Da ce npoBepn De6nTa Ha BOnaTa 3a 3aXpaHbAhe (BnKTe TexHnueckn DaHHN).
Da ce nouCTn ueKKaTa KbM 3aXpaHbA-HeTO C BOda.
Da ce npOBeprT BCnKn 3axpaHBaun Tpb6oPBOOIN KbM NOMnata.
→Прин HeобхоДиМОСТNotьрсЕсервза.
HexepmetnHa nomna
3 KaIIKn BOda Ha MNHyTa ca DOnyCTMn MoRat Da N3TNUaT OT DOJHaTa CTrpaHa Ha ypeDa. Ppi NO-cNJHn HexepMeTNUHOCTN NOTbpcTe cepBn3a.
→ Пи по-cилнаhexepMeTnHocT ypeda da ce npOBepn B cepBn3a.
Nomnatayka
CmykaTeJIHnIe Tp6bOpPoBOuN 3a BOda n NOUcTBAuO cpeDCTBO Da ce npOBepaT 3a TeOBe.
Do3npaunBENTnI 3a NOUcTbauO cpeCTBa da ce 3aTBOpn 6e3 NoUcTbauCpeDCTBO.
06e3Bb3NyweTe ypeHa(BnKTe "NycKaHe B DeiCTBne").
→Прин Heo6xOДМОСТnotbpcTe cepBn3a.
ПочиствацOTO сретсъ He ce 3acMyKBa
NocTaBete ro Ha ,CHEM".
Da ce npoBepn/NouNCTn MapKyu 3a BCMyKBaHe Ha NoUInCTBaIoo CpeIcTBO C cnIITbp.
Da ce OTBOPN Do3npauny BeHTnJ 3a NouchTbaUO CpeIcTBO NIn Da ce npOBepn/NouHCTn.
→Прин Heo6xOДIMOCt nOTbpcTe cepBn3a.
IpnHaJneJxHocTn np3epBHN qactn
I3noJ3BaIte cAmO opuHnHaJIHn akcecoapn I opuHnHaJIHn pe3epBHN qactn, noTo3n Haun HCnpyBaTe 6e3OpacHaTa n6e3npo6IemHa ekCnloaTaun Ha ypeDa. Moxete da Hamepnte INΦopMaun 3a akcecoapn I pe3epBHN qactn Ha www.kaercher.com.
TapaHcH
BbB BcKa KaCTpaHa BaXaT rapaHcIIOHHTe yCIOBnA, N6JIkyBaHn OT OToPn3npaHaTa OT Hac DnCTpr6yTopcKa fIpMa. EBeHTyaJIHn NOBpeiHa Baunr ypei ZeOTCTpaHm B pAMKITE Ha rapaHcIIOHHN CpOK 6e3IIaTHO, aKO Ce Kacae 3a DeΦeKT B MaTePnaJIte nI npn Ipon3BOdCTBO. B rapaHcIIOHe nClyaai ce ObbPheTe KbM DnCTpr6yTopa nIi HaN-6JIIN3KNr OTOpN3npaH cepBn3, KaTO IpeDcTA-BNTe KACOBATA 6eJexKa.
ECДeКларацnia 3a cboTBetCTBne
C hactoIooTo DeKnapuPame, Ye cHTnpaHaTa NO-DOy MaunHa CbOTBcTBA No KOHcENZn I KOHCTpyKzra, KaKTO N NO HauIN Ha npOn3BOcTBO, PpJIarAH OT Hac, Ha CbOTBeTHNTe OCHOBn N3NCKBaHn 3a TexHuecka 6e3OpaHocT n 6e3BpeHocT Ha DInpeKTNBte Ha EC. Ppi npomeHn Ha MaunHaT, KOnTO He ca CbflacyBaHn C HAc, HactoJata DeKnapaZn rHyb BaNndHOCT.
Chairman of the Board of Management

S. Reiser
Director Regulatory Affairs & Certification
ПьнHomошик NO дokум entaцята:
S. Reiser
Alfred Kärcher SE & Co. KG
71364 Winnenden (Germany)
Tel.: +49 7195 14-0
Fax: +49 7195 14-2212
Winnenden, 2019/04/01
TexHnueckn daHHN
| Tin HD 6/11-4 M | 1.524-901.0 | HD 6/15-4 M 1.524-907.0 | HD 6/16-4 M 1.524-900.0 1.524-903.0 1.524-909.0 | |
| HD 6/16-4 MX 1.524-904.0 | ||||
| GB AU EU | ||||
| При scьедиявае Кьм мреката | ||||
| Нарожени V 100 240 230 | ||||
| Вид тok Hz 1~50 | ||||
| Овороти на двигателя 1/мен 1400 | ||||
| При scьедиявае мошност кW 2,9 3,3 3,4 | ||||
| Преда пазител (лесов, Char C) A 30 16 | ||||
| Вид зашита IPX5 | ||||
| Мakсимално дочустимо пьлно нарөжени на мреката | Ohm | -0,294+j0,184 | ||
| Удьженин кабел 30 m | MM² | 2,5 | ||
| Зхсанты с вoda | ||||
| Температура на постывацatta вoda (макс.) | °C | 60 | ||
| Дебит 3a постывацatta вoda (Minn.) | π/ч (π/мен) | 600 (10) | ||
| Височина на засмунваце OT OTворецьясыd (20 °C) | M | 0,5 | ||
| Налогане на постывацatta вoda (макс.) | MPa | 1 | ||
| Данни 3a мошностtra | ||||
| РавOTно налаягане вoda (сбс сдандагтона дюза) | MPa | 3...11 | 3...15 | 3...16 |
| Големпна на дюза 3a сдандагтона дюза | 045 | 040 | 038 | |
| Макс. равOTно с蜱хсангане | MPa | 14 | 18 | 19 |
| КолочECTBO на подаванe | π/ч (π/мен) | 250...600 (4,2...10) | 300...600 (5...10) | |
| Засмунвае на пооч_STВАSOСРЕДТВО | π/ч (π/мен) | 0...40 (0...0,7) | ||
| Сиña на олpopа на пистоleta за рычно ррьскане (макс.) | N | 30 | ||
| Установен STОДНОСТСВЛФАСHО EN 60335-2-79 | ||||
| Стойост на вибрациме в облacr'tа на дplaHTA - рыкatinga | ||||
| Пистолет за рычно ррьскане | M/cesK² | <2,5 | ||
| Травьа за радирьсквае м/cesK | 2 | <2,5 | ||
| Hecsinурноct K | M/cesK² | 1 | ||
| Нibо на звука LpA | dB(A) | 69 | ||
| Hecystоийambocst KpA | dB(A) 1 | |||
| Нibо на звуковая мошност LWA + Hey-stоийambocst KWA | dB(A) | 84 | ||
| Торови matерпали | ||||
| КолочESTBO на маслOTO | π | 0,5 | ||
| Вид масло | SAE 15W40 | |||
| Мерки и тergla | ||||
| Дылжина | MM | 554 | ||
| Широчина | MM | 509 | ||
| Височина | MM 1000 | |||
| Тergлбь Зрінадліжност (MX) | kr | 44,5 | 54 | 48 (50) |
| Tin HD 7/12-4 M | 1.524-902.0 | HD 7/16-4 M 1.524-911.0 | HD 7/18-4 M 1.524-910.0 1.524-913.0 1.524-912.0 | |
| HD 7/18-4 MX 1.524-914.0 | ||||
| КAP KAP EU | ||||
| При scьединявае Кьм Мрекату | ||||
| Нарlexенue V 220 400 | ||||
| Вид тok Hz 1~60 3~60 3~50 | ||||
| Овороти на дыгателя 1/MIN 1400 1680 | 1400 | |||
| Пробетиител ha мошноct кW 3,5 4,1 4,7 | ||||
| Проблaitentel (пени, Char C) A 20 | 16 | |||
| Вид зашита | IPX5 | |||
| Мakсимално дочустимо пьлно hap体现在 ha мрекату | Ohm | - | - | - |
| Удъжителен kaбел 30 m | MM² | 4,0 2,5 2,5 | ||
| Зханьанe с вoda | ||||
| Tempepatура на постьразада вoda (макс.) | °C | 60 | ||
| Дебит за постьразада вoda (Min.) | π/ч (π/MIN) | 700 (11,7) | ||
| Височина на засмквае OT OTВорецьясыd (20 °C) | M | 0,5 | ||
| Налегане на постьразада вoda (макс.) | MPa | 1 | ||
| Данни за мошноcttra | ||||
| РавOTNO на лягане вoda (сбс стандертона дюза) | MPa | 3...12 | 3...16 3...18 | |
| Големина на дюза за стандертона дюза | 054 045 | 042 | ||
| Макс. равOTNO сравхсанганe | MPa | 14 | 19 | 21 |
| КолочевTO на поадаванe | π/ч (π/MIN) | 300...700 (5...11,67) | ||
| Засмквае на поочевтоц spredSTBO | π/ч (π/MIN) | 0...40 (0...0,7) | ||
| Силиа на оtmора на пистоleta за ръчно ррьсканe (макс.) | N | 30 | 35 | 37 |
| Установени стойостс съласно EN 60335-2-79 | ||||
| Стойост с на вибрациITEВ oblacssТа на дplaHTA - ръката | ||||
| Пистолет за ръчно ррьсканe | M/cesk² | <2,5 | ||
| Трьба за разирьсквае | M/cesk² | <2,5 | ||
| Несигуrchост K | M/cesk² | 1 | ||
| Инbero на звука LpA | dB(A) | 69 | 75 | |
| Нештойчвост KpA | dB(A) | 1 | ||
| Инbero на звуковая мошноct LWA + hey-stойчвost KWA | dB(A) | 84 | 90 | |
| Горовни мaterпали | ||||
| КолочевTO на маслоTO | π | 0,5 | ||
| Вид масло | SAE 15W40 | SAE 90 Hypoid | ||
| Мерки и тergla | ||||
| Дължина | MM | 554 | ||
| Широчиna | MM | 509 | ||
| Височиna | MM | 1000 | ||
| Тergлобся п riinaцдлесноctи (MX) | Кг | 47,5 | 44,5 | 49 (52) |
| Тин HD 9/18 M | 1.524-916.0 | HD9/19 M 1.524-915.0 1.524-919.0 | HD 9/20-4 M 1.524-924.0 | |
| HD 9/20-4 MX 1.524-927.0 | ||||
| КAP EU EU | ||||
| При scьединявае Кьм мржата | ||||
| Нарожени V 220 400 | ||||
| Вид тok Hz 3~60 3~50 | ||||
| Овороти на двигалейа 1/MIN 3370 2800 | 1400 | |||
| При scьединявае мошист кW 6,7 6,8 6 | 9 | |||
| Прedingлел (ленив, Char C) A 20 | 16 | |||
| Вид зашита | IPX5 | |||
| Масимално дочустимо пьлно нар.... жени на мржата | Ohm | - | - | 0,222+j0,139 |
| Удъжителен кабел 30 M | MM² | 4,0 | 2,5 | |
| Зхранвае с вoda | ||||
| Temperatura на постывацata вoda (макс.) | °C | 60 | ||
| Дебит за постывацata вoda (Min.) | π/ч (π/MIN) | 900 (15) | ||
| Височина на засмужке OT OTборенья... сыd (20 °C) | M | 0,5 | ||
| Налеганы на постывацata вoda (макс.) | MPa | 1 | ||
| Данни за мошистта | ||||
| РавOTно налаягende вoda (сбс сдандарtnа... дюз) | MPa | 18 4...18 | 5 4...20 | |
| Големпна на дюз за сдандарtnа дюз | 053 050 | |||
| Мakс. равOTно сравх国家战略 | 23 | 22,5 | 22 | |
| Колочець на поадаунe | π/ч (π/MIN) | 900 (15) | 450...890 (7,5...14,8) | 460...900 (7,7...15) |
| Засмужке на пооч_STВАСОСЕДСТВО | π/ч (π/MIN) | 0...40 (0...0,7) | ||
| Сида на оtmора на пастолеса за ръчно... ръскан(e (макс.) | N | 49 | ||
| Установени StOnисту StByLacHo EN 60335-2-79 | ||||
| Стойост на вибрациме В облacr'tа на д��па - ръкatinga | ||||
| Пастолет за ръчно рьсканe | M/cesk² | <2,5 | ||
| Трьба за разирьсквае | M/cesk² | 3,0 | 1,5 | |
| Несигурноct K | M/cesk² | 1 | ||
| НИво на звука LpA | dB(A) | 76 | 75 | |
| Нeuctоийчобst KpA | dB(A) | 2 | 1 | |
| НИво на звукова мошист LWA + Hey- стоийвост KWA | dB(A) | 91 | 88 | |
| Горовни matерпали | ||||
| Колочeatingо на маслоно | π | 0,5 0,75 | ||
| Вид масло | SAE 90 Hypoid | |||
| Мерки и тergla | ||||
| Дьлжина | MM | 554 | ||
| Широчиna | MM | 509 | ||
| Височиna | MM | 1000 | ||
| Терлоб ecз п riпадлөжстг(MX) | Kr | 48,6 | 42,1 (49) 47 (55) | 48 (50) |

www.kaercher.com/REACH
Toode: Korgsurvepesur
Tüüp: 1.524-xxx
Chairman of the Board of Management

S. Reiser
Director Regulatory Affairs & Certification
71364 Winnenden (Germany)
Tel.: +49 7195 14-0
Fax: +49 7195 14-2212
Winnenden, 2019/04/01
Tehnilised andmed
www.kaercher.com/REACH
Chairman of the Board of Management

S. Reiser
Director Regulatory Affairs & Certification
Pilnvarotais sagatavot dokumentaciju:
S. Reiser
Alfred Kärcher SE & Co. KG
71364 Winnenden (Germany)
Tel.: +49 7195 14-0
Fax: +49 7195 14-2212
Winnenden, 2019/04/01
Tehniskie datum
www.kaercher.com/REACH
Pries pradedant naudoti
Ispakavimas
Chairman of the Board of Management

S. Reiser
Director Regulatory Affairs & Certification
71364 Winnenden (Germany)
Tel.: +49 7195 14-0
Fax: +49 7195 14-2212
Winnenden, 2019/04/01
Techninai duomenys
BVeDeHnB eKcnIyataciIO
△NONEPENKEHNA
He6e3neKa mpaBmyBaHn! PpuCpiu, do-damkoBe oBnaDHaHnra, nHii niDeedeHnma 3'edHyBaIbHi eIemEmmu NobuHHi bymu y 6e3do2aHHomy cmaHi. JaKuo cmaH e HecnpaBHum, mo npucpiu buKOpucmoByeaMu He MoKHa.
EneKtpnHi 3'cDHaHHa
△HEBE3NEKA
He6e3neKa npaHeHH eJekmpuHUM cmpyMOM.
- Ppuad o6o8'3ko8o noBuH en 6ymu nioKnIOeHu do eIekmpuHoi MepeXi 3a donomooio wmekepa. 3abopoHЯembcn Hepo3'EmHe 3'edHaHH 3 dKepeNoM XueJehn. Wmekep npu3Haehu dnn bIDKnIOeHH Bd MepeXi.
- Ppucmpiu cnid Emukuamu nuwe do dkepepa 3MiHHo2o cmpymy.
3abopohmcbnpeeuuyamu MakcumaIbHO donycmmu noBu onip e moqui nID'edHaHna do Mepeksi (dub. TexhiHi daHI).B momy buNaDky, kkuo 6am He biOma beNuUHa noBHo2O onOppy Mepeksi moqui enekmpuHzo nIdKluoyenHry, 3eepHmbc8 eHep2o3a6e3neuyou op2aH3auio. - Wmekepu ma 3'εδHaHnЯ nooExyaay, uO eukopucmoeyembcry, noBuHni 6ymu oOHOHe npOHkHUMU.
Bukopucmoeyamu nooeyeaq do-cmamhbozo diamempa (due. po3di "TexhiHi daHI") i noeHicmIo po3Momamu uOso 3 komyuku.
IOTyXHicTB dNb. Ha 3BODcbKiI Ta6nUci/ B TexHiuHnx daHnx.
Po3MoTaTn MepeXeBn Ka6eNb Ta noKnaCTn Ioro Ha NiDNoRy.
BCTaBTe MepeXnH uTKeep y uTenCeIbHy po3eTKy npuIaNy.
Подача ВODи
ПиДБeДeнгЯ ДО ВОДОпВОДу
△NONEPEDXEHN
Dompumyeamucb iHcmpykuiui ndpuemcmba eodonocmaaannr.
BidnoiDHO do dioux dupekmue 3abopohmcbc eKcnnyamaia npucmpo 6e3 cucmemHo2o po3diIObaya y cucemI bODOnocmaaHn numhoI bDu. Cnid buyeamu biNoBDHu cucmemHu bau fipmu KARCHER a6o anbme Hui cucmemHu po3diIObay, 321 12729 muny BA.
Boda, uo npouwna uepe3 cucmemHu po- 3diinobau, baxaembcn HnpudamHOJ dna numma.
OBEPEXHO
CucmemHu po3diHobay 3a6Kdu noBuHe H3haxodumuc8 cucmemi 6oDonocmaaHn, He do3BOnembcn iDKnouamu u02o 6e3nocepedHbO do npucmpo.
NotyKhictb nVB. B TexHiuHnx daHnx.
→Писднатишалг поачі Bodи (mimiMaJIbHa DoBxHnHa 7,5 M, MiHiMaJIbHnДiametp 1")do Micu piKluoyeHHa BO-DIOnocTaayHHЯ npucTpoIO (HaPnKnaD,do KpaHa).
Bka3ibKa:
IHaHr noaui Boi He BXoNTb DO KOMnleKTy nocTayAHN.
→ BiikpnTn noaCy BOAn.
3aJIHTN BOy 3 BiKpHToI cMHOCTi.
→ BcmoKtyBaJIbHnI ShaHr (NgДЯ 3amOB IeHHra 4.440-270,0) npurBnHTTu Do Micu NiKJIuOeHHRA BODoONCTaHaHHa
BCTaHOBHTnΦiNbTp (NoДЯЗAMOBHeH HЯ 4.730-012.0) y BCMOKTyBaJIbHn IJIaHr.
BuaIHTn NOBITp3 npIaNy: BiDrBnHTnФOpcuHky.
Дату пидау nonpaцювати, дOKи ВODа He понеTekтп 6e3 nyxирь noBITря.
DAtn npnilady nonpaucobatn 10 ceKynd - notim BnKJIIOuHTn. NobTOpNTn npoec KInbka pa3iB.
→ BnMknHtB npncTpii Ta 3HOB npueHaaiTe po3nIIOBaU.
Ekcnnyatacia
△HEBE3NEKA
He6e3neKa 8u6yxy!
He po3nunmu zoipoi piDuHu.
Ipu bukopucmaHni npucmpoio he6e3neuHomy micui (hanpuKnaD, 6eH3OKOLOHa) Heo6xiodno npumpumyeamucb cneuaJbHux nopad no mexHi ci 6e3neku.
He6e3neKa mpaemyeaHn! Iio qac po6oMu mpumamu nicmonem-po3nuiuea macmpymuHy mpy6ky deoma pykamu.
He6e3neKa mpa8MyBaHHr! Nid yac buKOpuCmaHnCnyckHu ma 3anobixHuBaJxJI He noBuHHi 6ymu 3a6nOKoBaHUMu.
He6e3neKa mpa8MyBaHnHa! Y pa3i nowkodJxHHa 3anobixKHO2o BaxKeIa 3BepHymucdo cepicho'i cnyK6u.
He6e3neKa mpa8MyBaHnHaYepe3 cmpymiHb bOdu nio muckom. Npeod npoBe- deHNm 6ydb-akux po6im Ha npucmpoi nepecyhmu 3anobixHu φikcamop Ha pyHOMy nicmonemi-po3nunuBaay ynepeod.
OSEPEXHO
Yucmumu dbuynu y Micuax 3 biDnoBidHum MacNoyNoBnObaem (3axucm HauKoJUHb02o cepedobuua).
YBAGA
Hebe3neka 3acmueHn. Noknacmu fopcyHu y biocik dna akcecyapie KInuem Ha2opy.
BidkpTTa/3akpTTn nicToJeta- po3nnIOBaaya
Bikpnntn nicToIeT-po3nnIOBauchytn 3anO6ixHn Ta cnYCKn BaxKeJI.
3akpnntn nicToJeT-po3nnIOBaU: BiDny-CTNTn 3anO6ixHn Ta cnYckHn BaxKeI.
Pobota piBvCOKM TnCKOM
Bka3iBka:
IpiJaOcHaUeHO MaHOMeTpNHM BIMKaueM.ДВiRyH 3aNyckaetbCra TiJbKn npB BiKpNTomy nicToJIeTI-po3nIIIOBaCy.
→ 3aBxДи NOBHiCTIO pO3MOTyIte IJIaHr BnCOKOrO TnCKy 3 bapa6aHa.
BcTaHOBIb BmIKaU npIaMy y noNo-KeHHra "I".
Po36nokyBaTu nicToNET-po3nnIOBau, nepemictuBun 3anobixHn Kicatop Ha3aI.
Bikpn npuHn nictolet-p03nIIO-Ba.
BcTaHOBHTnpo6OuN TnCK i 06'Em no-daqui BODn O6epTahHnM (6e3ctyniHa-to) peryIaTopa TnCKy/Noaqi nictoIeta-po3nnIOBaay (+/-).
Tinbkn dny HD 9/20-4...
Пи Наймehшому ob'emi noДачi TeNIOBnBIDHnK DBnryHa 3a6e3neUye HarpiBaHHЯ BODI npi6n3Ho Do 15 °C.
Bn6ip BnDy cTpyMeHЯ
3akpnt npuHn nictoTe-t-p03nIIO-BaU.
O6eptaTn KOpnyc fOpcyHKn DoTn, DOKN 6axaHn CmBOJ He 6yJe BiDnOBiDaTn MapkyBaHHIO:
PekomeHIOBaHi MeToOn OUnSeHHa
→ Po3nntn HeBEnky KInbkiCTb 3ac06y IJIa YIeHHa cCyXy NOBepxHIO Ta 3aJIINHTN dIaTI (He Bucnxatn).
Po3uHHeHn 6pyd 3mTn cTpymeHemPiD TnCKOM.
PicnEeKcnnyataa3aHypntu pInbtp y uNCTy BODy.03yUOHy KlaPAnB CbTaHOBHTn Ha HauBNuSy KOHcEHpaCiIO MmHoro 3acoby.3anyctntn npnilad ipe3 OndHy XBNIHy npoNoLOCKaTN.
Перетпавна роботи
3akpnt npuHn nicToJeT-po3nnIOBau.
Pncptpi BmNkaeTbcra.
Bikpn npuHn nictolet-po3nIOBa.
PnucpiB BMnKaetbCra 3HOBy.
BmKHyTn npncTpi
→ 3aKpniTe nOdaCy BOiN.
Bidkpnt npHn nicToJeT-po3nnIOBa.
YBIMKHyTN HAcOC 3a DOnOMORO BUMNKa- Ya npInCTpoIO Ta DaTn NMy NoppaIbA-tN 5-10 cekyHd.
3aKpnt npyHn nictoTe-po3nIIOBa4.
BCTaHOBNTu BUMNKaHa ,0/OFF".
→ Bntaryte wTeencelbHy BNlky 3 po3eTKN TiIbKn cyxIMn pykamn.
Bid'edhaite BoDOnocTaaHn.
3anyctitb pyuHn po3nIIOBaU,doKn npncTpiH He 3aNNHTbc863 Hanopy.
3aφikcyBaTu nictoJet-po3nHOBaU, nepemictNBu 3anobixKn H KcatoP ynepe.
Tinbkn dny HD 9/20-4....
△HE6E3NEKA
He6e3neKa oniky zapraoIO bodo. 3aunuKu bodu Mojymb Haepiaamucr y BumKHeHomy npunaDi. Haepima boda moke po36pu3kyamucb npu biO'edHaHHi uHaHa2a biNodayi bodu, uO moKe npuzecmu do onikie. BiO'edHyamau wana Hnue nicna OxolodJxehn npucmpoio.
36epiratnpncptpi
BCTaBHTn pyHn niCToJeT-pO3nIIO-Bauch TpImaU.
Ⅲnahr BncoKoro TnCKy 3MOtAn N nobicHTn Ha nDCTabky dny shnaHra. a6o Hamotatn Ⅲnahr BncoKoro TnCKy Ha 6apa6aH. BcTabtu pyk Ky pkoTkn, 06 3a6JokyBaTu 6apa6aH dIy ShnaHa.
O6MOTaTn cNoJyHn KabeJIb HABKOJIO TpIMaHa Ka6eIIO.
3akpinTu uTekep yctaHOHeHO KIncoH.
3axnct BiMop03iB
YBAGA
Mopo3 3awkoodmb anapamy, kuo 3 Hb0-20 noBicmIO He cnyuueHo body.
PpnaCnI36epiratN B 3axuheomy BiMop03y npmiueHHi.
Якwo 36epiraHnB Micci, 3axnueHomy BiMopo3y, HEmoJNBe:
3nnte Body.
→Прогиить сандартнй 3acic6 3axncty BiMopo3iB uepe3 npncpti.
Bka3iBka:
BnKOpNCtAtn cTaHdApTHi aHTnΦpN3n dIa ABTomO6iJiB Ha rIrkOJIeBi OCHOBI.
DToPmMyTeCnHCTpyKciN 3 BnKOpNCtAHNaHTnΦpN3y.
3aIiIe npIaJ yBIMKHeHm Ha npoTj3i He 6IbSe 1 XBnIHn, Dokn Hacoc i Tpy6OpOBoDn He cNoPoxHJrTbcra.
TpaHcnpTyBaHHa
OBEPEXHO
He6e3neka mpaem ma nowkoxdxeHb! Ppu mpaHcnpmyeaHHi cnid 3eepHymu yeaay Ha 8aay npucmpoio.
YBAFA
Iid yac mpaHcnpmyBaHHa3abe3neumu 3axucm cnycko0o 6aKeJnB iD nowkod-KeHHa.
→ПиТранспортувашиHa Beлику BiД-стань HeCTN npnilad 3a pyuky.
Y npunaax 6e3 6apabha nnaHra niid yac nepenecenHra TaroBy pyky cniD noCTaBnT Bn3. Ppi nepenecenHi TpMaTu npuna3a pykoTky, a He 3a TaroBy pyky.
→ Перд Трансортуваиму у ropионТальбому поожжни ВинятNiЯшky 3 МИнIMЗACOBOM 3 пяшКOTPIMaча Ta 3akpITN II.
→Пипесьehнi anapatyВ trpaHcnpTnIX 3acobax cIiBbpxoByBaTN MicuCiBi DiOci DepkabHi HOpMn, HanpaBJIeHi Ha 3axNCT BiD KOB3aHHa Ta nepeKnDaHHa.
36epirannn
△OSEPEXHO
He6e3neKa mpaem ma nowkoDxeHb! Ppu 36epizahnhi 3eephymu yba2y Ha eazy npucmpoio.
Lcen npnnaMac 36epiraTncra Nlleye BVHTpiHix npmiiueHHax.
Доглад та Тхничne
O6cIyroByBaHHa
△HEBE3NEKA
He6e3neKa mpaemybaHn bID eunadkoBo 3anyueHOzo anapamy i eIekmpoWOky. Ipeod npoeedeHNm 6byb-kaux po6im 3 o6cny2oeyBaHH npucmpiu cnid BumKHymu ma BumraHymu wmenceBHy bukky 3 po3emku.
Bka3iBka:
CTape mactnlo notpi6no ytni3ybaTNIbKn B nepe6bueHnx dny zuBOro npimMaIbHnx nyHkTx. ByNb IacKa, 3daBaIte BiInpa2boBaHe macNo came TaM. 3a6pyd-HeHHra DOBkiIIra CTapm MaCTnIOM kaPacTbcra.
06ctexeHHa 6e3neuHocTi/DoROBip texHiUro 06cIyroByBaHHa
Bn 3aBXKn MoKeTe DOMOBHTncs3 BaHIM ToproBeHnM npedCTabHnKOM npo peryIЯPHe npoBeDeHHaTexHiuHoro orIaMy a6O yKnactn DoROBip Texo6cnyRObyBaHHa.
3BepTaITeCn Do Hac 3a KOHcyNbTaucieio!
Ipeed KoxHm 3aCTocyBaHHaM
→ IpeBipTu cnoJyHn Ka6eIb Ha npEmdTe yuKOxKeHb (He6e3neKa BpaKxHn CTPymOM), NooKOxKeHn Ka6eIb cIiD HeraaHNo 3amHnT B yNOBHOBAxKeHn cepBicHi cnXkbi/JeKtPnKOM.
→ ΠepeBipTuHa nouKoJKeHnPyKaB BuCOKOro TnCKy (OnacHicTb po3pNBy).NouKoJKeHHn pyKaB BuCOKOro TnCKy Notpi6Ho HeaHn 3amHHTn.
→ IpepeBipTe npncptpi (Hacoc) Ha repMeTnUHicTb. 3 KpanPi BOAn 3a XB. E DoNcyCTmMMTa MOxTyB BNXODHTn Ha 30BHiUHIO NOBepXHIO npncTPO. Pnp 6IbSi HierepeMeTnUHOcTI BnKlNiKaIe cLnyk6y texHicHoI NiIDTPMKN.
KoXHOrO TnxHn
→ IpeBipka pIBHЯ MaCTnla Ppr MoIOKoO6pa3HiKOHcNCTeHciMaCTnla (BOda B MaCTnJI) cIiD HeraHNo 3BepHyTnCra Do cepBicHOi Cnyx6n.
OuHCTnCiTuaCTnΦIbTp eEnMeHTy nIKHueHHaDauBODn.
OuHCTnTn fIbTp y BcMOKTyBaJIbHOMy IJNaHROBi MNoUOro 3acO6y.
Tinbkn dny HD 9/20-4:
Nouchitb qijbtp ToHKOrO OunueHHa.
YcyHbTe TnCK 3 npUJaNy.
BnBnHTnKpinnbHi rBnHTn KpnuKn npnaDy, 3HrTn KpnuKy.
BukpyiTb wTeNceIbHy po3eTky 3 pInb-tpom.
→Поунстыфльтчистювдюч STPумehem NOBITpyпID TnCKOM.
3HOBy 36epiTy 3BOpOTHiINocnIOB-HOCTI.
KoXHi 500 roDIn h po6Ot, He piDwe odHoro pa3y Ha pik
Texhuihe o6cnyroByBaHH npnctpoMOKe BnKOHyBaTN cepBicHa cnyk6a.
3amHaMaCTnla.
3amHa MaCTnla
Bka3iBka:
KinbkiCTb i BnD MaCTnla DnB. B po3diNi «TexhiHi daHi»
BnBnHTnKpinnbHi rBNHTn KpnKn npnay, 3HrTn KpniKy.
3HЯТи KpИшky baka ДЯ МаСтипа.
→ ΠepeKnHyTu anapat ynepeI.
Cnyctitb oJIO 3 KOHTeHepa.
NobiNbHO 3aJNTn HOBe MaCTnIO; nyXnpci NOBITpr NOBHHI BnHTN.
→ OДягнту Кршку бакдлma Macтuna.
→ 3akpiINTu KpNShKy npnlaNy.
ДономогауВипадкУ НеноладOK
△HEBE3NEKA
He6e3neKa mpaemyeaHnB eID buNaKoBO 3anyueHo2 anapamy i enekmpowoky.
- Pered npoedeHnem 6yob-kaux po6im 3 obcnyoeyeaHn npucmpiu cnid uMkhymu ma eumraHymu wmenceIbHy buIky 3 p03emku.
- EneKmpuHi KOHcmpyKmueHi eIeMeHmu noBuHHi nepeEipmauc miBku eno6HOaKeHoIO cepicHO cnyk6oio.
- Ppu nowkodxehn, He 3a3naeHux y uboMy po3di, y buadky cymh iy a6o npu yimkiu ekazieci cnid 3eepmamucdo yno8hoaehoi cepicHOcnyk6u.
PnictiHne npaioe
IpeBipuTn cnoJyHn KabeIb Ha npEaMeT NOsKoJxHeH.
→ ΠepeBipuTu Happyu B Mepexi.
BctaHOBIb BUMKau npuJaCy B NOJooXeHHra "0" i daIte DBNHy OXONoHyTN npOTAROM 5 XBUNH.
Ko nicna 3HOBy 3'ABnTbCnnpaBnictb, DopyuHtnepeBipky npna- dy cepBichi cnxki.
3aBa npn BiDnoBicHicTb CBpOeNcKoro cnIBTOBapNCtBa
LIMMNI NOBIDOMNROMO,IO HNXue 3a3Na-yeHa MaunHa Ha OCHOBI CBOei KOHCTpyKuT Ta KOHCTpyKTUBHO BnKOHaHHa, a TAKoX y BNyuIeHOI y npOaxk MoJeI, BiNOBiAc CneiaIbHM OCHOBHIM BIMORam IOdo 6e3neKn Ta 3axncty 3Opob'ny PpeDcTabHeHnx HNXe DnpeKTHB CC. Y BnPaIky Hey3-roJKeHOI 3HAM 3MiHN MaunHn cIaBA BTPaayc CBOO cnIy.
Chairman of the Board of Management

S. Reiser
Director Regulatory Affairs & Certification
YnOBHOBaXeHn CnIBpO6iTHNk NO BeDeHHIO DOKyMeHToo6iry:
S. Reiser
Alfred Kärcher SE & Co. KG
71364 Winnenden (Germany)
Tel.: +49 7195 14-0
Fax: +49 7195 14-2212
Winnenden, 2019/04/01
Texhichi xapaKTepeNCTnKn
www.kaercher.com/REACH
Chairman of the Board of Management

S. Reiser
Director Regulatory Affairs & Certification
Penyusun dokumen yang berwenang:
S. Reiser
Alfred Kärcher SE & Co. KG
71364 Winnenden (Germany)
Tel.: +49 7195 14-0
Fax: +49 7195 14-2212
Winnenden, 2019/04/01
Data Teknis
| Jenis HD 6/11-4 M | 1.524-901.0 | HD 6/15-4 M 1.524-907.0 | HD 6/16-4 M 1.524-900.0 1.524-903.0 1.524-909.0 | |
| HD 6/16-4 MX 1.524-904.0 | ||||
| GB AU EU | ||||
| Catu daya | ||||
| Tegangan V 100 240 230 | ||||
| Tipe arus listrik Hz 1~50 | ||||
| Putaran mesin rpm 1400 | ||||
| Daya sambungan kW 2,9 3,3 3,4 | ||||
| Perlindungan (inersia, Char. C) A 30 16 | ||||
| Jenis pelinding IPX5 | ||||
| Daya maksimal yang diizinkan | Ohm | - | 0,294+j0,184 | |
| Kabel ekstensi 30 m | mm² | 2,5 | ||
| Sambungan air | ||||
| Temperatur masuk (maks.) | °C | 60 | ||
| Jumlah masuk (min.) | l/h (l/min) | 600 (10) | ||
| Ketinggian penyedotan air dari tangki air yang terbuka (20 C) | m | 0,5 | ||
| Tekanan masuk (maks.) | MPa | 1 | ||
| Data kinerja | ||||
| Tekanan kerja air (dengan nosel standar) | MPa | 3...11 | 3...15 | 3...16 |
| Ukuran nozzle standar | 045 040 038 | |||
| Tekanan lebih pengoperasian maks. | MPa | 14 | 18 | 19 |
| Volume pengiriman | l/h (l/min) | 250...600 (4,2...10) | 300...600 (5...10) | |
| Penyedotan bahan pembersih | l/h (l/min) | 0...40 (0...0,7) | ||
| Kekuatan pantulan balik pistol penyemprot (maks.) | N | 30 | ||
| Penentuan nilai menurut EN 60335-2-79 | ||||
| Nilai getaran tangan-lencing | ||||
| Pistol penyemprot | m/s² | <2,5 | ||
| Pipa penyemprot | m/s² | <2,5 | ||
| Ketidakstabilan K | m/s² | 1 | ||
| Tingkat sekanan suara LpA | dB(A) | 69 | ||
| Ketidakstabilan KpA | dB(A) 1 | |||
| Tingkat kekuatan suara LWA + Ketidakstabilan KWA | dB(A) | 84 | ||
| Cairan pengoperasian | ||||
| Jumlah oli I | 0,5 | |||
| Tipe oli | SAE 15W40 | |||
| Berat dan Ukuran | ||||
| Panjang | mm 554 | |||
| Lebar | mm 509 | |||
| Tinggi | mm | 1000 | ||
| Bobot tanpa aksesori (MX) | kg | 44,5 | 54 | 48 (50) |
| Jenis HD 7/12-4 M | 1.524-902.0 | HD 7/16-4 M 1.524-911.0 | HD 7/18-4 M 1.524-910.0 1.524-913.0 1.524-912.0 | |
| HD 7/18-4 MX 1.524-914.0 | ||||
| KAP KAP EU | ||||
| Catu daya | ||||
| Tegangan V 220 400 | ||||
| Tipe arus listrik Hz 1~60 3~60 3~50 | ||||
| Putaran mesin rpm 1400 1680 1400 | ||||
| Daya sambungan kW 3,5 4,1 4,7 | ||||
| Perlindungan (inersia, Char. C) A 20 | 16 | |||
| Jenis pelindung | IPX5 | |||
| Daya maksimal yang diizinkan | Ohm | - | - | - |
| Kabel ekstensi 30 m | mm² | 4,0 2,5 2 | 5 | |
| Sambungan air | ||||
| Temperatur masuk (maks.) | °C | 60 | ||
| Jumlah masuk (min.) | l/h (l/min) | 700 (11,7) | ||
| Ketinggian penyedotan air dari tangki air yang terbuka (20 °C) | m | 0,5 | ||
| Tekanan masuk (maks.) | MPa | 1 | ||
| Data kinerja | ||||
| Tekanan kerja air (dengan nosel standar) | MPa | 3...12 | 3...16 | 3...18 |
| Ukuran nozzle standar | 054 045 | 042 | ||
| Tekanan lebih pengoperasian maks. | MPa | 14 | 19 | 21 |
| Volume pengiriman | l/h (l/min) | 300...700 (5...11,67) | ||
| Penyedotan bahan pembersih | l/h (l/min) | 0...40 (0...0,7) | ||
| Kekuatan pantulan balik pistol penyemprot (maks.) | N | 30 | 35 | 37 |
| Penentuan nilai menurut EN 60335-2-79 | ||||
| Nilai getaran tangan-lengan | ||||
| Pistol penyemprot | m/s² | <2,5 | ||
| Pipa penyemprot | m/s² | <2,5 | ||
| Ketidakstabilan K | m/s² | 1 | ||
| Tingkat tekanan suara LpA | dB(A) | 69 | 75 | |
| Ketidakstabilan KpA | dB(A) | 1 | ||
| Tingkat kekuatan suara LWA + Ketidakstabilan KWA | dB(A) | 84 | 90 | |
| Cairan pengoperasian | ||||
| Jumlah oli I | 0,5 | |||
| Tipe oli | SAE 15W40 | SAE 90 Hypoid | ||
| Berat dan Ukuran | ||||
| Panjang | mm | 554 | ||
| Lebar | mm | 509 | ||
| Tinggi | mm | 1000 | ||
| Bobot tanpa aksesori (MX) | kg | 47,5 | 44,5 | 49 (52) |
| Jenis HD 9/18 M | 1.524-916.0 | HD9/19 M 1.524-915.0 1.524-919.0 | HD 9/20-4 M 1.524-924.0 | |
| HD 9/20-4 MX 1.524-927.0 | ||||
| KAP EU EU | ||||
| Catu daya | ||||
| Tegangan V 220 400 | ||||
| Tipe arus listrik Hz 3~60 3~50 | ||||
| Putaran mesin rpm 3370 2800 1400 | ||||
| Daya sambungan kW 6,7 6,8 6,9 | ||||
| Perlindungan (inersia, Char. C) A 20 16 | ||||
| Jenis pelindung | IPX5 | |||
| Daya maksimal yang diizinkan | Ohm | - | - | 0,222+j0,139 |
| Kabel ekstensi 30 m | mm² | 4,0 | 2,5 | |
| Sambungan air | ||||
| Temperatur masuk (maks.) | °C | 60 | ||
| Jumlah masuk (min.) | l/h (l/min) | 900 (15) | ||
| Ketinggian penyedotan air dari tangki air yang terbuka (20 °C) | m | 0,5 | ||
| Tekanan masuk (maks.) MPa | 1 | |||
| Data kinerja | ||||
| Tekanan kerja air (dengan nosel standar) | MPa | 18 | 4...18,5 | 4...20 |
| Ukuran nozzle standar | 053 050 | |||
| Tekanan lebih pengoperasian maks. | MPa | 23 | 22,5 | 22 |
| Volume pengiriman | l/h (l/min) | 900 (15) | 450...890 (7,5...14,8) | 460...900 (7,7...15) |
| Penyedotan bahan pembersih | l/h (l/min) | 0...40 (0...0,7) | ||
| Kekuatan pantulan balik pistol penyemprot (maks.) | N | 49 | ||
| Penentuan nilai menurut EN 60335-2-79 | ||||
| Nilai getaran tangan-lengan | ||||
| Pistol penyemprot | m/s² | <2,5 | ||
| Pipa penyemprot | m/s² | 3,0 | 1,5 | |
| Ketidakstabilan K | m/s² | 1 | ||
| Tingkat tekanan suara LpA | dB(A) | 76 75 | ||
| Ketidakstabilan KpA | dB(A) | 2 | 1 | |
| Tingkat kekuatan suara LWA + Ketidakstabilan KWA | dB(A) | 91 88 | ||
| Cairan pengoperasian | ||||
| Jumlah oli I 0,5 0,75 | ||||
| Tipe oli | SAE 90 Hypoid | |||
| Berat dan Ukuran | ||||
| Panjang | mm | 554 | ||
| Lebar | mm | 509 | ||
| Tinggi | mm | 1000 | ||
| Bobot tanpa aksesori (MX) | kg | 48,6 | 42,1 (49) 47 (55) | 48 (50) |


- Contents
- Device elements
- Colour coding
- Safety instructions
- Hazard levels
- △DANGER
- WARNING
- CAUTION
- ATTENTION
- Symbols on the machine
- Proper use
- Quality requirements for water: ATTENTION
- Safety Devices
- Overflow valve with pressure switch
- Safety valve
- Environmental protection
- Notes about the ingredients (REACH)
- Before Startup
- Unpacking
- Check oil level
- Activatedeaeration of oil container
- Attaching the Accessories
- In devices without hose drum:
- In devices with hose drum:
- Start up
- Electrical connection
- Water connection
- Connection to the water supply
- △WARNING
- Note:
- Drawing in water from open reservoirs
- Operation
- Opening/closing the trigger gun
- High pressure operation
- Only on HD 9/20-4....
- Select spray type
- Operation with detergent
- Recommended cleaning method
- Interrupting operation
- Turn off the appliance
- Storing the Appliance
- Frost protection
- If you cannot store it in a frost-free place:
- Transport
- Storage
- Care and maintenance
- Safety inspection/ maintenance contract
- Before each use
- Weekly
- HD 9/20-4 only:
- Every 500 operating hours, at least annually
- Oil change
- Troubleshooting
- Appliance is not running
- Pressure does not build up in the appliance
- Pump leaky
- Pump is vibrating
- Detergent is not getting sucked in
- Accessories and Spare Parts
- Warranty
- EU Declaration of Conformity
- Applied harmonized standards
- Applied conformity evaluation method
- Inden ibrugtagning
- Udpakning
- Kontroller oliestanden
- Förden tasibruk
- Utpakking
- Färe ibruktagande
- Uppackning
- SigmaoIoynon Eapntmuatwv
- Calismayi yarida kesme
- Cihazın kapatilmasio
- OrnaBneHne
- 3JIeMeHTbI npn6opa
- UBeTHa MapKnupOBka
- Yka3aHnno TExHnKe 6e3ONaChOCTn
- CTeneHb onachoctn
- ONACHOCTb
- △PENEYNPEXDEHNE
- OCTOPOXHO
- BHUMAHNE
- CnmboJIbHa annapaTe
- IcnoJb30BaHne no Ha3HaueHnIO
- Tpe6oBaHnK KaueCTBy BoDbl: BHIMAHNE
- 3auntbIe yctpoiCTBa
- IepenyckHoi KlaanC nHeBMaTHueCKm peJe
- PpeOxpaHnTeJbHbI KlaNaH
- 3aunTa OkpykaIooeI cpebl
- YcTaHOBka npHaJdJIeXHOCTei
- B npn6opax 6e3 6apa6aHa shnaHra:
- B npn6opax c 6apa6aHOM shnaHra:
- Hauaio pa6oTbI
- 3JIeKtpnueckoe noDcoeDInHeHne
- △ONACHOCTb
- IopKJIoueHne BODOCha6XeHnA
- IIOBODK BOOONPOBOy
- Pexnmpa60TbI BbICOKoro DaBneHn
- Yka3aHne:
- ToIbKO dIa HD 9/20-4....
- BbI6op BnDa cTpyu
- Pexm pa60tbI c MOIOUIM CpeDCTBOM
- PeKomeHdyembI CNOCO6 MOKN
- IpepebB pa6ote
- BbikloueHne np6opa
- Xpaenne npn6opa
- 3aunTa OT 3amep3aHnA
- BHMHAHNE
- Ecnn xpaHene B MecTe, 3aunueHHOM OT MOp03a, HeBO3MOxHO:
- YkaHne:
- TpaHcNoptnpoBka
- yXoI IN TeXHnueckoe 06cIyXnBaHne
- HNCNEKZI NO TexNKe 6e3OpacHOCTn/DoROBOP o TexNueCKOM O6cJyXnBaHHN
- Ipeed kaxdoi 3Kcnpnyataunei
- eXeHeIeJIbHo
- ToJIbKO HD 9/20-4:
- Kakdble 500 yacob pa6oTbI, Hepeke pa3a B roD
- 3aMeHa macJa
- POMOUIB Cnyuae HenoJaIOK
- Pnp6op He pa6oTaeT
- YnctTaeCpeDCTBO He BCacbIBaetc
- PnHaJNeJXHocTn 3aNaChbIe DeTaJIu
- TapaHTnA
- 3aayBJIeHne o COOTBeTCTBnE EU
- Uzembevétel elótt
- Kicsomagolás
- Reiser
- Pred zagonom
- Razpakiranje
- Pregled sadržaja
- Pripe prve uporabe
- Raspakiravanje
- Primijenjene uskladene norme:
- Pre upotrebe
- Raspakovavanje
- Provera nivoa ulja
- CbDtpxahanne
- Elenentn ha ypeda
- UBeTHo 06O3HaueHne
- Yka3aHnja 3a 6e3oNaChOCT
- CTeNeHn Ha onaCHOCT
- ONACHOCT
- △PENEIA3JNBOCT
- CnmboHnHa ypeda
- △PENEIA3JINBOCT
- YnoTpe6a no IpeHa3HaueHne
- ИЗнСКВа_HЯ КБМ KaYeCTBaTHa Ha BODaTa: BHIMAHHE
- PpeDn3Hn npncno6JeHna
- PpeINBEN BeHTnC nHeBMaTnueH npeKbcBauch
- PpeDna3eH KlaanH
- Ipei nyskaHe B ekcnloatauia
- Pa30nakobaHe
- Ja ce npOBepn HNBOTO Ha macNoto
- Aктувиране ВентILAцяpe3epBoap 3a MacNo
- MOnTnpaTe npHaJnEJXHocHTe
- Pn ypei 6e3 6apa6aH 3a Mapkya:
- Pn ypei n c 6apa6aH 3a Mapkya:
- Пусканьекпюатуnia
- EneKtpnuecko 3axpaHbaHe
- 3axpaHbHe c BOda
- 3aunTa OT 3ampb3BaHe
- Ako He Bb3MOxHO CbXpaHЯBaHe OCHrypeHo npOTnB 3aMp3BaHe:
- TpaHcnpoT
- BHIMAHNE
- CbXpaHHeHne
- PnXn n PndpBxKka
- Yka3aHHe:
- IHCneKzna 3a cnrypnoct/OrOBop 3a noDprbXka
- Ppei BcKa ekcnloaTaun
- EkeceMnUHo
- Camo HD 9/20-4:
- Ha Bcekn 500 pa6oTHn yaca, MHHmym ekeorndno
- CmHa Ha MacJo
- Помоц пи Нeн3правноCTN
- ypeT he pa60tN
- YpeBt He DoCTnra HaJraHe
- HexepmetnHa nomna
- Nomnatayka
- ПочиствацOTO сретсъ He ce 3acMyKBa
- IpnHaJneJxHocTn np3epBHN qactn
- TapaHcH
- ECДeКларацnia 3a cboTBetCTBne
- Pries pradedant naudoti
- Ispakavimas
- BVeDeHnB eKcnIyataciIO
- △NONEPENKEHNA
- EneKtpnHi 3'cDHaHHa
- △HEBE3NEKA
- Подача ВODи
- ПиДБeДeнгЯ ДО ВОДОпВОДу
- △NONEPEDXEHN
- OBEPEXHO
- Bka3ibKa:
- 3aJIHTN BOy 3 BiKpHToI cMHOCTi.
- Ekcnnyatacia
- OSEPEXHO
- YBAGA
- BidkpTTa/3akpTTn nicToJeta- po3nnIOBaaya
- Pobota piBvCOKM TnCKOM
- Tinbkn dny HD 9/20-4...
- Bn6ip BnDy cTpyMeHЯ
- PekomeHIOBaHi MeToOn OUnSeHHa
- Перетпавна роботи
- BmKHyTn npncTpi
- Tinbkn dny HD 9/20-4....
- △HE6E3NEKA
- 36epiratnpncptpi
- 3axnct BiMop03iB
- Якwo 36epiraHnB Micci, 3axnueHomy BiMopo3y, HEmoJNBe:
- TpaHcnpTyBaHHa
- YBAFA
- 36epirannn
- △OSEPEXHO
- Доглад та Тхничne
- O6cIyroByBaHHa
- 06ctexeHHa 6e3neuHocTi/DoROBip texHiUro 06cIyroByBaHHa
- Ipeed KoxHm 3aCTocyBaHHaM
- KoXHOrO TnxHn
- Tinbkn dny HD 9/20-4:
- KoXHi 500 roDIn h po6Ot, He piDwe odHoro pa3y Ha pik
- 3amHa MaCTnla
- ДономогауВипадкУ НеноладOK
- PnictiHne npaioe
- 3aBa npn BiDnoBicHicTb CBpOeNcKoro cnIBTOBapNCtBa
Brand : Kärcher
Model : HD 9204 MX Plus
Category : Pressure washer