
0700 AA - Broom BOSCH - Free user manual and instructions
Find the device manual for free 0700 AA BOSCH in PDF.
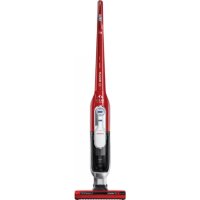
| Product type | Electric weed brush (weed broom) |
| Brand | Bosch |
| Model | 0700 AA |
| Power supply | Mains, 230 V ~ 50 Hz |
| Maximum brush diameter | 100 mm |
| Tube length | Telescopic, adjustable (not specified) |
| Sound pressure level (LpA) | 68 dB(A) |
| Sound power level (LWA) | 88 dB(A) (guaranteed < 91 dB(A)) |
| Vibrations (hand-arm) | 3.2 m/s² (uncertainty K = 1.5 m/s²) |
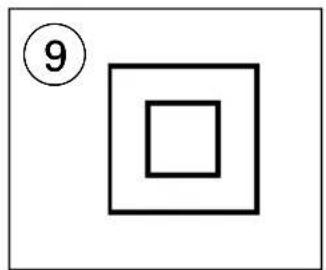
| Double insulation | Yes (symbol ⑨) |
| Cutting guard | Yes, removable |
| Guide wheel | Yes, clip-on |
| Main functions | Weed removal on patios and between tiles |
| Maintenance | Regularly clean the ventilation slots and cutting guard with a soft cloth |
| Spare parts | Replacement brush SKIL 2610Z02973 |
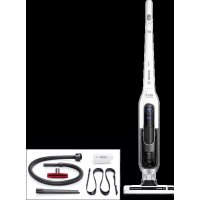
| Included accessories | Cutting guard, wheel, brush, key, telescopic tube, cord lock device |
| Ambient operating temperature | 0 °C to 40 °C |
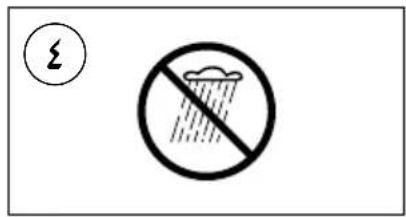
| Protection rating | Do not expose to moisture (symbol ④) |
Frequently Asked Questions - 0700 AA BOSCH
User questions about 0700 AA BOSCH
0 question about this device. Answer the ones you know or ask your own.
Ask a new question about this device
Download the instructions for your Broom in PDF format for free! Find your manual 0700 AA - BOSCH and take your electronic device back in hand. On this page are published all the documents necessary for the use of your device. 0700 AA by BOSCH.
USER MANUAL 0700 AA BOSCH
natural_image
Illustration of a cleaning power tool with a lever and attached cable (no text or symbols visible)
GB ORIGINAL INSTRUCTIONS 6
F NOTICE ORIGINALE 8
D ORIGINALBETRIEBSANLEITUNG 11
NL ORIGINELE GEBRUIKSAANWIJZING 14
S BRUKSANVISNING I ORIGINAL 17
DK ORIGINAL BRUGSANVISNING 20
N ORIGINAL BRUKSANVISNING 23
FIN ALKUPERÄISET OHJEET 25
E MANUAL ORIGINAL 28
(P) MANUAL ORIGINAL 31
I ISTRUZIONI ORIGINALI 34
H EREDETI HASZNÁLATI UTASÍTÁS 37
CZ PÚVODNÍM NÁVODEM K POUŽÍVÁNÍ 40
TR ORİJINAL İŞLETME TALİMATI 42
PL INSTRUKCJA ORYGINALNA 45
RU ПОДЛИННИК РУКОВОДСТВА
ПО ЭКСПЛУАТАЦИИ 48
UA ОРИГІНАЛЬНА ІНСТРУКЦІЯ
З ЕКСПЛУАТАЦІЇ 52
GR ΠΡΩΤΟΥΠΟ ΟΔΗΓΙΩΝ ΧΡΗΣΗΣ 56
RO INSTRUCTIUNI DE FOLOSIRE
ORIGINALE 58
BG ОРИГИНАЛНО РЪКОВОДСТВО
ЗА ЕКСПЛОАТАЦИЯ 61
SK PÔVODNÝ NÁVOD NA POUŽITIE 65
HR ORIGINALNE UPUTE ZA RAD 68
SRB ORIGINALNO UPUTSTVO ZA RAD 70
SLO IZVIRNA NAVODILA 73
EST ALGUPÄRANE KASUTUSJUHEND 76
LV ORIGINĀLĀ LIETOŠANAS PAMĀCĪBA 78
LT ORIGINALI INSTRUKCIJA 81
МК ИЗВОРНО УПАТСТВО ЗА РАБОТА 84
AL UDHËZIMET ORIGJINALE 87
AR دليل الاستعمال 95
④ RAHENMAI AUSLI 93
www.skil.com


natural_image
Two circular icons with head and face symbols, no text or numbers present


natural_image
Simple geometric diagram with two concentric squares, one circled in black (no text or symbols)


ACCESSORIES
→ WWW.SKIL.COM
GB
Weed brush 0700
INTRODUCTION
- This tool has been designed for removing weed from terraces and between tiles
• This tool is not intended for professional use - Check whether the packaging contains all parts as illustrated in drawing ②
- When parts are missing or damaged, please contact your dealer
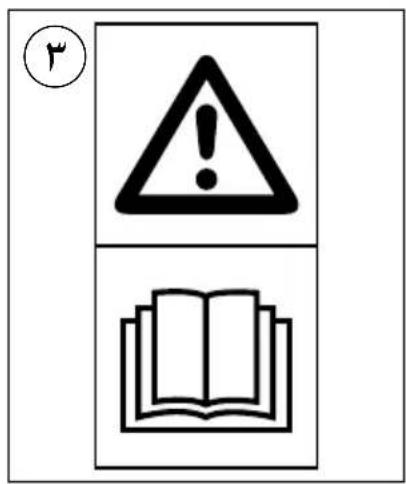
- Read this instruction manual carefully before use and save it for future reference ③
- Pay special attention to the safety instructions and warnings; failure to follow these may result in serious injury
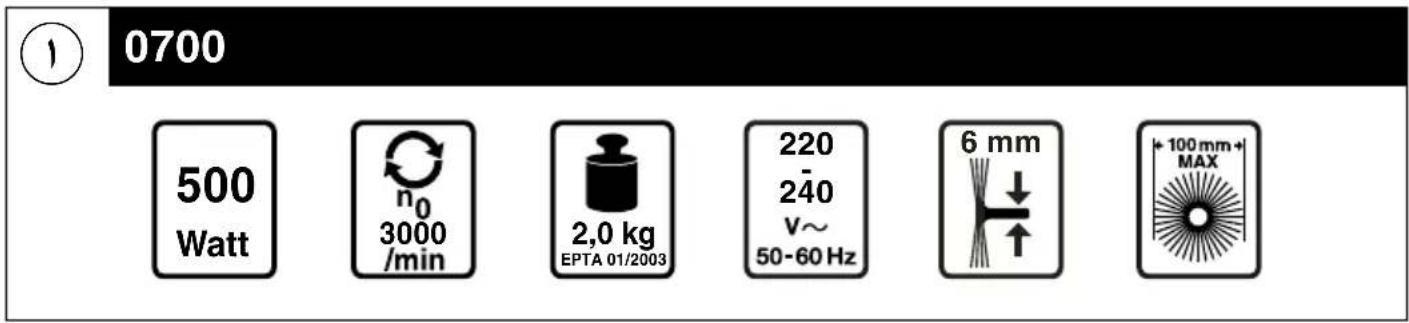
TECHNICAL DATA ①
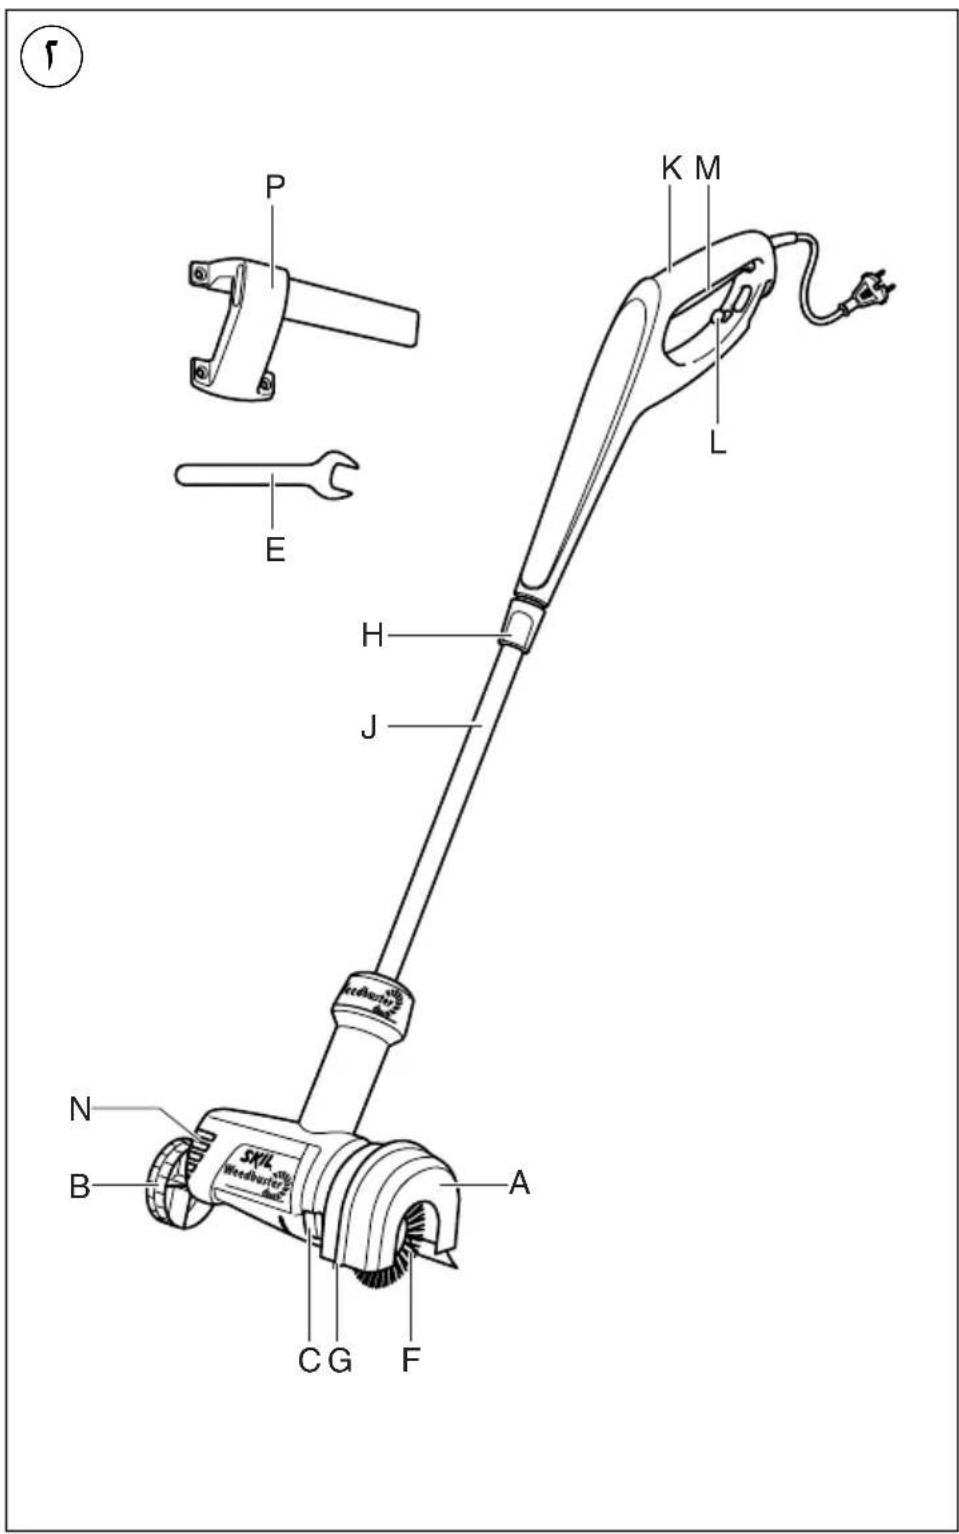
TOOL ELEMENTS ②
A Cutting guard
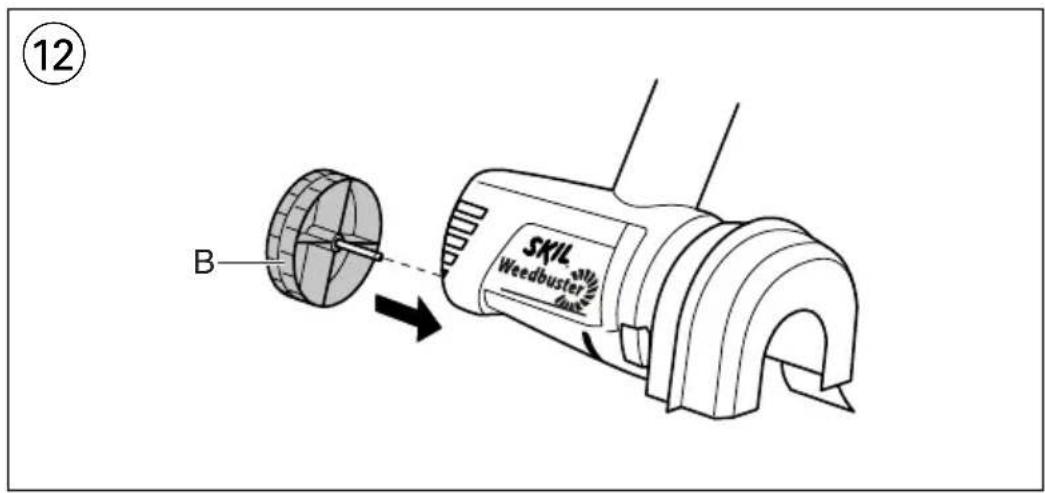
B Wheel
C Spindle-lock button
D Collet nut
E Wrench
F Brush
G Brush indicator
H Locking sleeve
J Telescopic tube
K Handle
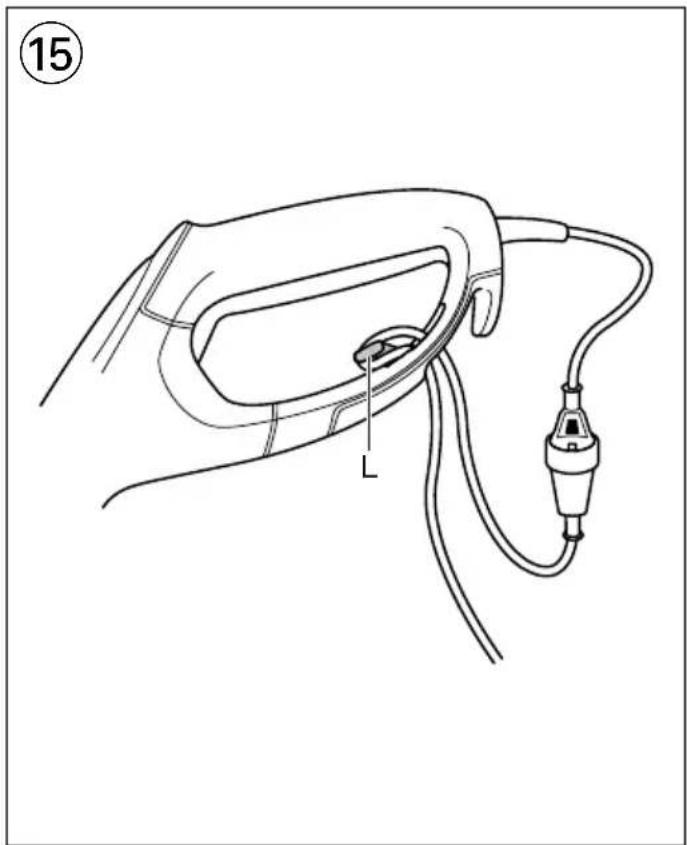
L Cord restraint
M Trigger switch
N Ventilation slots
P Storage rail (screws not supplied)
SAFETY
SPECIFIC SAFETY INSTRUCTIONS FOR WEED BRUSHES
GENERAL
- Be familiar with the controls and the proper use of the tool
- The user is responsible for accidents or hazards occurring to other people or their property
- Only use the tool when the ambient temperature is between 0°C and 40°C
- Never mount metal cutting elements onto this tool
- Do not use the tool for removing wet weed
PERSONAL SAFETY
- This tool is not intended for use by persons (including children) with reduced physical, sensory or mental capabilities, or lack of experience and knowledge, unless they have been given supervision or instruction concerning use of the tool by a person responsible for their safety
- Ensure that children do not play with the tool
-
Never allow children or people who are not familiar with the operating instructions to use the tool
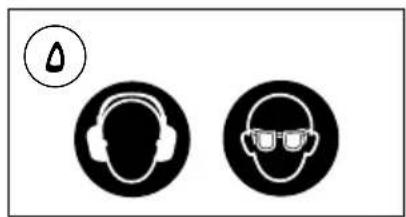
• Always wear eye protection, long trousers and sturdy shoes when operating the tool -
Never operate the tool with a damaged cutting guard or without the cutting guard mounted
- Never operate the tool in the direct vicinity of persons; stop using the tool when persons (especially children) or pets are nearby
- Never operate the tool when you are tired, sick or under the influence of drugs, alcohol or medication
ELECTRICAL SAFETY
- Always check that the supply voltage is the same as the voltage indicated on the nameplate of the tool (tools with a rating of 230V or 240V can also be connected to a 220V supply)
- Inspect the cord periodically and have it replaced by a qualified person, if damaged
- Inspect the extension cord periodically and replace it, if damaged (inadequate extension cords can be dangerous)
- Only use an extension cord which is intended for outdoor use and equipped with a watertight plug and coupling-socket
- Use completely unrolled and safe extension cords with a capacity of 16 Amps (U.K. 13 Amps)
- When operating the tool use a residual current device (RCD) with a triggering current of 30 mA maximum
- Do not run over, crush or pull the (extension) cord
- Protect the (extension) cord from heat, oil and sharp edges
- Keep the (extension) cord away from the rotating brush
- Always switch off tool and disconnect plug from power source if the power supply cord or the extension cord is cut, damaged or entangled (do not touch the cord before disconnecting the plug)
BRUSHES
- SKIL can assure flawless functioning of the tool only when original accessories are used
- Only mount brushes of which the maximum speed ("RPM") is higher than the rotations per minute marked on the tool
- Only use brushes with a maximum diameter of 100 mm
- Do not use worn brushes
- Rust stains or other signs of chemical or mechanical changes of the material that hold the brush threads may cause premature brush disfunctioning
- Store brushes in a suitable place in such a way that they are protected against the following influences:
- high atmospheric humidity, heat, water or other fluids which could damage the brush
- acids or acid vapours, which could damage the brush
- low ambient temperatures causing condensation on the brush when stored in an area with higher ambient temperatures
- deformation of whatever part of the brush
BEFORE USE
- Only use the tool in daylight or with appropriate artificial lighting
- Check the functioning of the tool before each use and after any impact; in case of a defect, have it repaired immediately by a qualified person (never open the tool yourself)
- Remove any adjusting key or wrench before turning the power tool on (a wrench or a key left attached to a rotating part of the power tool may result in personal injury)
- Before use, thoroughly inspect the cutting area and remove any object that the tool may sling during cutting (such as stones, loose pieces of wood, etc.)
DURING USE
- Only use the tool in an vertical position, with the brush pointing to the ground (never switch on the tool in another position)
- Operate the tool at a walking pace only (do not run)
- Do not cross roads or gravel paths with the tool still running
- Do not get distracted and always concentrate on what you are doing
- Always ensure that the ventilation openings are kept clear of debris
AFTER USE
-
The brush continues to rotate for a short time after the tool is switched off (do not touch the rotating brush)
• Always disconnect plug from power source -
whenever leaving the tool unattended
- before clearing jammed material
- before checking, cleaning or working on the tool
- after striking a foreign object
-
whenever the tool starts vibrating abnormally
-
Before you put down the tool, switch off the motor and ensure that all moving parts have come to a complete standstill
- Store the tool indoors in a dry and locked-up place, out of reach of children
EXPLANATION OF SYMBOLS ON TOOL
③ Warning! Read the instruction manual
④ Do not expose tool to rain
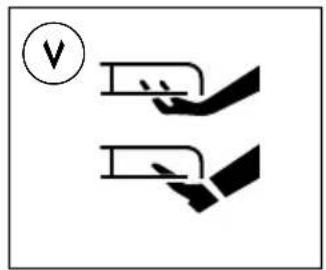
⑤ Wear protective glasses and hearing protection
⑥ Pay attention to the risk of injury caused by flying debris (keep bystanders a safe distance away from work area)
⑦ Always keep hands and feet away from rotating parts
⑧ Switch off and disconnect plug before cleaning/maintenance or if (extension) cord is damaged or entangled
⑨ Double insulation (no earth wire required)
⑩ Do not dispose of the tool together with household waste material
WHEN CONNECTING NEW 3-PIN PLUG (U.K. ONLY):
- If for any reason the old plug is cut off the cord of this tool, it must be disposed of safely and not left unattended
- Do not connect the blue (= neutral) or brown (= live) wire in the cord of this tool to the earth terminal of the plug
USE
- Assembly instructions
! always disconnect the plug before mounting/removing the brush
- slide guard A over motor housing as illustrated until it clicks into place ⑪
- mount wheel B onto motor housing as illustrated until it clicks into place ⑫
- push spindle-lock button C and hold it while you loosen collet nut D with wrench E ^13
- mount brush F with its centre in line with brush indicator G
- tighten collet nut D with wrench E while pushing spindle-lock button C
! replace the brush when it is worn (SKIL accessory number 2610Z02973)
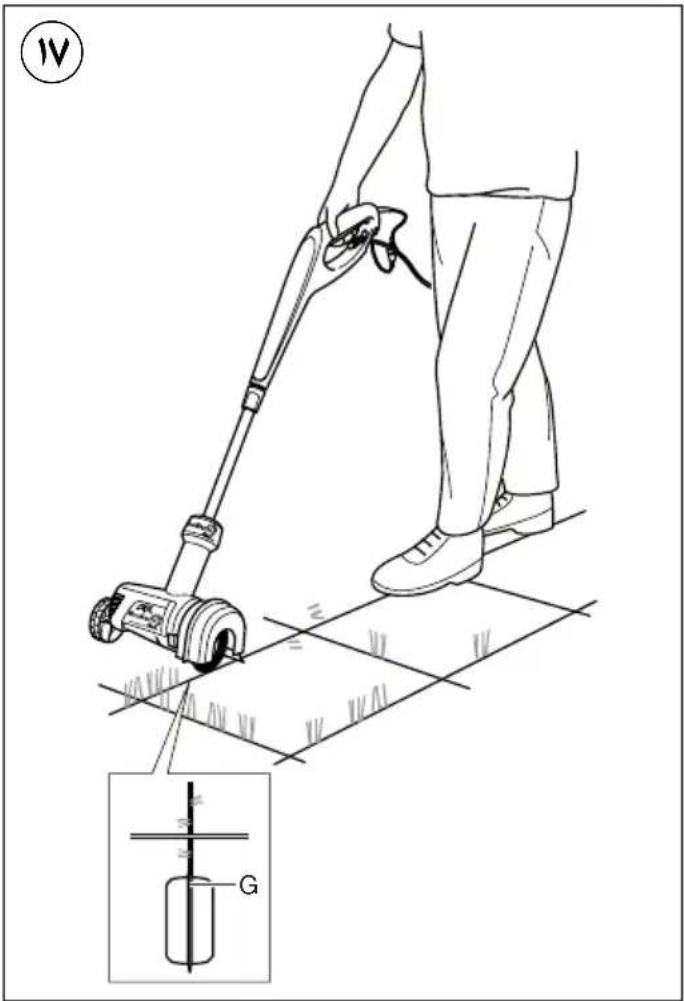
• Height adjustment ⑭
- loosen locking sleeve H by turning it clockwise
! when using tool for the first time, rotate handle K 90° after loosening locking sleeve H - extend tube J to the desired height
- tighten locking sleeve H by turning it counter-clockwise
! do not force the tool when extending/retracting the tube to desired height
- Cord restraint 15
- hook the loop in the extension cord over restraint L as illustrated
- pull tight to secure the extension cord
- On/off ⑯
- switch on tool by pressing trigger switch M
- switch off tool by releasing trigger switch M
! after switching off the tool the brush continues to rotate for a few seconds
- allow the brush to stop rotating before switching on again
! do not rapidly switch on and off
- Before using the tool
- ensure that brush F ⑬ is correctly mounted and that collet nut D ⑬ is firmly tightened
- test-run tool for at least 30 seconds at highest no-load speed in a safe position
- stop immediately in case of considerable vibration or other defects and check tool to determine the cause
- Removing weed
! ensure that the cutting area is free of stones, debris and other foreign objects
- ensure that the bottom side of the tool is kept in a level position
- start working only when motor is running
- start working near the mains socket and move away while working
- keep the tool away from solid objects and plants
- do not use the tool in one spot too long
- do not overload the tool
• Holding and guiding the tool ⑰
- hold the tool firmly with one hand
- guide the tool at a constant speed over the surface to be worked on
- maintain a stable working position
- always hold the tool well away from your body
APPLICATION ADVICE
- For best results test-run the tool on a small part of the surface and check if the tiles do not get damaged
- Regular weeding helps to avoid persistent weed
- For more tips see www.skil.com
MAINTENANCE / SERVICE
• This tool is not intended for professional use
• Always keep tool and cord clean
! disconnect the plug before cleaning
- regularly clean ventilation slots N ② with a soft cloth
- regularly remove dirt from cutting guard A ② with a soft brush
- Storage ⑱
- store the tool indoors in a dry and locked-up place, out of reach of children
- securely mount storage rail P on the wall with 4 screws (not supplied) and horizontally leveled
- If the tool should fail despite the care taken in manufacturing and testing procedures, repair should be carried out by an after-sales service centre for SKIL power tools
- send the tool undismantled together with proof of purchase to your dealer or the nearest SKIL service station (addresses as well as the service diagram of the tool are listed on www.skil.com)
TROUBLESHOOTING
- The following listing shows problem symptoms, possible causes and corrective actions (if these do not identify and correct the problem, contact your dealer or service station)
! switch off the tool and disconnect the plug before investigating the problem
★ Tool does not operate
- power supply socket faulty -> use another socket
- extension cord damaged -> replace extension cord
- brush incorrectly mounted -> mount brush again
★ Tool operates intermittently
- internal wiring defective -> contact dealer/service station
- on/off switch defective -> contact dealer/service station
★ Weed is not removed completely
- brush damaged/worn -> replace brush
ENVIRONMENT
- Do not dispose of electric tools, accessories and packaging together with household waste material (only for EU countries)
- in observance of European Directive 2002/96/EC on waste of electric and electronic equipment and its implementation in accordance with national law, electric tools that have reached the end of their life must be collected separately and returned to an environmentally compatible recycling facility
- symbol ⑩ will remind you of this when the need for disposing occurs
DECLARATION OF CONFORMITY C€
- We declare under our sole responsibility that the product described under “Technical data” is in conformity with the following standards or standardization documents: EN 60335, EN 61000, EN 55014 in accordance with the provisions of the directives 2006/95/EC, 2004/108/EC, 2006/42/EC, 2000/14/EC, 2011/65/EU
• Technical file at: SKIL Europe BV (PT-SEU/ENG1), 4825 BD Breda, NL
- Measured in accordance with EN 60335 the sound pressure level of this tool is 68 dB(A) and the sound power level 88 dB(A) (standard deviation: 3 dB), and the vibration 3.2 m/s ^2 (hand-arm method; uncertainty K = 1.5 m/s ^2 )
- Measured in accordance with 2000/14/EC (EN/ISO 3744) the guaranteed sound power level LWA is lower than 91 dB(A) (conformity assessment procedure according to Annex VI) Notified body : KEMA, Arnhem, NL Notified body identification number : 0344
- The vibration emission level has been measured in accordance with a standardised test given in EN 60335; it may be used to compare one tool with another and as a preliminary assessment of exposure to vibration when using the tool for the applications mentioned - using the tool for different applications, or with different or poorly maintained accessories, may significantly increase the exposure level - the times when the tool is switched off or when it is running but not actually doing the job, may significantly reduce the exposure level
! protect yourself against the effects of vibration by maintaining the tool and its accessories, keeping your hands warm, and organizing your work patterns
F
Operations & Engineering
Approval Manager
SKIL Europe BV, 4825 BD Breda, NL
30.07.2013
BRUIT/VIBRATION
Operations & Engineering
Olaf Dijkgraaf
Approval Manager

SKIL Europe BV, 4825 BD Breda, NL
30.07.2013
C€11
GERÄUSCH/VIBRATION
Operations & Engineering
Approval Manager

SKIL Europe BV, 4825 BD Breda, NL
30.07.2013
CE11
LJUD/VIBRATION
Operations & Engineering
Olaf Dijkgraaf
Approval Manager

SKIL Europe BV, 4825 BD Breda, NL
30.07.2013
CE11
ST∅J/VIBRATION
VEDLIKEHOLD / SERVICE
Operations & Engineering
Olaf Dijkgraaf
Approval Manager

SKIL Europe BV, 4825 BD Breda, NL
30.07.2013
CE11
MELU/TÄRINÄ
Operations & Engineering
Approval Manager

SKIL Europe BV, 4825 BD Breda, NL
C€11
30.07.2013
RUIDOS/VIBRACIONES
Operations & Engineering
Olaf Dijkgraaf
Approval Manager


SKIL Europe BV, 4825 BD Breda, NL
30.07.2013
CE11
RUÍDO/VIBRAÇÕES
Operations & Engineering
Olaf Dijkgraaf
Approval Manager


SKIL Europe BV, 4825 BD Breda, NL
30.07.2013
ZAJ/REZGÉS
Operations & Engineering
Olaf Dijkgraaf
Approval Manager


SKIL Europe BV, 4825 BD Breda, NL
30.07.2013
C€11
HLUČNOSTI/VIBRACÍ
Operations & Engineering
Olaf Dijkgraaf
Approval Manager


SKIL Europe BV, 4825 BD Breda, NL
30.07.2013
CE11
HAŁASU/WIBRACJE
Operations & Engineering
Olaf Dijkgraaf
Approval Manager


SKIL Europe BV, 4825 BD Breda, NL
30.07.2013
Operations & Engineering
Olaf Dijkgraaf
Approval Manager


SKIL Europe BV, 4825 BD Breda, NL
30.07.2013
C€11
ШУМ/ВІБРАЦІЯ
Operations & Engineering
Olaf Dijkgraaf
Approval Manager


SKIL Europe BV, 4825 BD Breda, NL
30.07.2013
CE11
ΘΟΡΥΒΟ/ΚΡΑΔΑΣΜΟΥΣ
Operations & Engineering
Olaf Dijkgraaf
Approval Manager


SKIL Europe BV, 4825 BD Breda, NL
30.07.2013
CE11
ШУМ/ВИБРАЦИИ
Operations & Engineering
Olaf Dijkgraaf
Approval Manager


SKIL Europe BV, 4825 BD Breda, NL
30.07.2013
CE11
BUKA/VIBRACIJE
- Mereno u skladu sa EN 60335 nivo pritiska zvuka ovog alata iznosi 68 dB(A) a jačina zvuka 88 dB(A) (normalno odstupanje: 3 dB), a vibracija 3,2 m/s ^2 (mereno metodom na šaci-ruci; nesigurnost K = 1,5 m/s ^2 )
- Garantovani nivo jačine zvuka LWA, izmeren u skladu sa 2000/14/EG (EN/ISO 3744) niži je od 91 dB(A) (postupak ocene usaglašenosti prema Dodatku VI) Obavešteno telo : KEMA, Arnhem, NL Identifikacioni broj obaveštenog tela : 0344
-
Nivo emisije vibracija izmeren je u skladu sa standardizovanim testom datim u EN 60335; on se može koristiti za upoređenje jedne alatke sa drugom, kao i za preliminarnu procenu izloženosti vibracijama pri korišćenju ove alatke za pomenute namene
-
korišćenje alatke u drugačije svrhe ili sa drugačijim ili slabo održavanim nastavcima može značajno povećati nivo izloženosti
- vreme kada je alatka isključena ili kada je uključena, ali se njome ne radi, može značajno smanjiti nivo izloženosti
! zaštitite se od posledica vibracija održavanjem alatke i njenih nastavaka, održavajući Vaše ruke toplim i organizovanjem Vaših radnih obrazaca

Operations & Engineering
Olaf Dijkgraaf
Approval Manager


SKIL Europe BV, 4825 BD Breda, NL
30.07.2013
C€11
HRUP/VIBRACIJA
APKALPOŠANA / APKOPE
TECHNINIAI DUOMENYS ①
PRIETAISO ELEMENTAI ②
A Apsauga
B Ratas
C Suklio blokavimo mygtukas
D Ivorès veržlé
E Raktas
F Šepetys
G Šepečio indikatorius
H Užraktinis žiedas
J Teleskopinis vamzdis
K Rankena
L Laido laikiklis
M Gaiduko jungiklis
N Ventiliacinès angos
P Pakaba (varžtai nepateikiami)
SAUGA
SPECIALÜS DARBO ŽOLIŲ ŠEPEČIAIS SAUGOS NURODYMAI
BENDROJI DALIS
Operations & Engineering
Olaf Dijkgraaf
Approval Manager

SKIL Europe BV, 4825 BD Breda, NL
30.07.2013
CE11
TRIUKŠMINGUMAS/VIBRACIJA
Operations & Engineering
Olaf Dijkgraaf
Approval Manager


SKIL Europe BV, 4825 BD Breda, NL
30.07.2013
C€11
БУЧАВА/ВИБРАЦИИ
Operations & Engineering
Olaf Dijkgraaf
Approval Manager

SKIL Europe BV, 4825 BD Breda, NL
CE1130.07.2013

natural_image
Line drawing of a medical device with labeled component 'L' and cable (no text or symbols beyond label)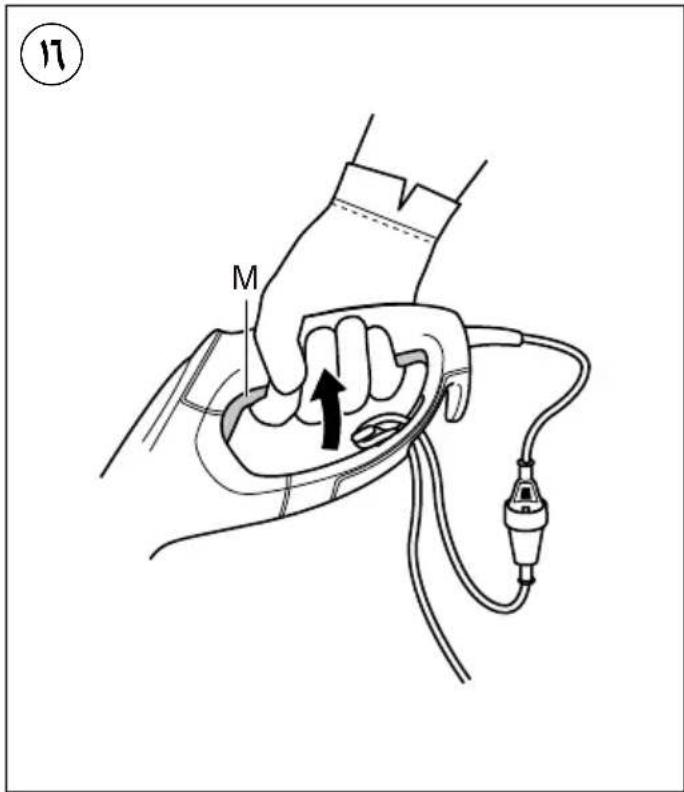


natural_image
Simple line drawing of an open book with tools and a gear icon, no text or symbols present

natural_image
Simple geometric diagram with two concentric squares, one circled in black (no text or symbols)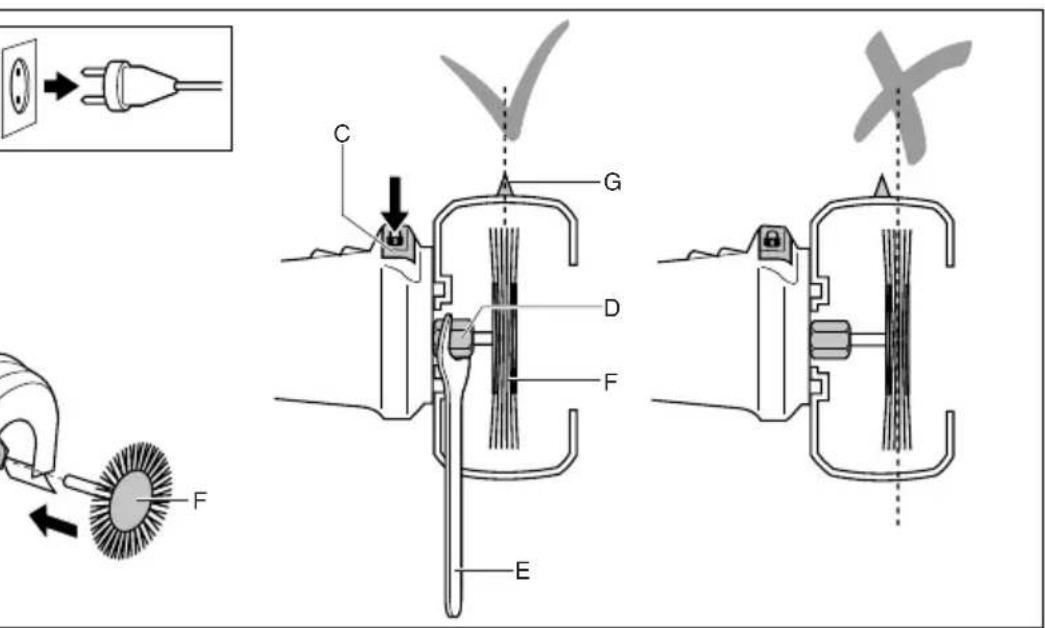


natural_image
Two circular icons with headphones and eyeglasses, one containing a warning symbol (no text or numbers present)

natural_image
Illustration of a cleaning power tool with a lever and attached cable (no text or symbols visible)دليل الاستعمال
AR
راهنماي اصلی
FA


2610Z05330
07/13
سکیل أروبا ب.ق - کونینانبرج 60


- GB
- Weed brush 0700
- INTRODUCTION
- TECHNICAL DATA ①
- TOOL ELEMENTS ②
- SAFETY
- SPECIFIC SAFETY INSTRUCTIONS FOR WEED BRUSHES
- GENERAL
- PERSONAL SAFETY
- ELECTRICAL SAFETY
- BRUSHES
- BEFORE USE
- DURING USE
- AFTER USE
- EXPLANATION OF SYMBOLS ON TOOL
- WHEN CONNECTING NEW 3-PIN PLUG (U.K. ONLY):
- USE
- APPLICATION ADVICE
- MAINTENANCE / SERVICE
- TROUBLESHOOTING
- ENVIRONMENT
- DECLARATION OF CONFORMITY C€
- BRUIT/VIBRATION
- GERÄUSCH/VIBRATION
- LJUD/VIBRATION
- ST∅J/VIBRATION
- VEDLIKEHOLD / SERVICE
- MELU/TÄRINÄ
- RUIDOS/VIBRACIONES
- RUÍDO/VIBRAÇÕES
- ZAJ/REZGÉS
- HLUČNOSTI/VIBRACÍ
- HAŁASU/WIBRACJE
- ШУМ/ВІБРАЦІЯ
- ΘΟΡΥΒΟ/ΚΡΑΔΑΣΜΟΥΣ
- ШУМ/ВИБРАЦИИ
- BUKA/VIBRACIJE
- HRUP/VIBRACIJA
- APKALPOŠANA / APKOPE
- TECHNINIAI DUOMENYS ①
- PRIETAISO ELEMENTAI ②
- SAUGA
- SPECIALÜS DARBO ŽOLIŲ ŠEPEČIAIS SAUGOS NURODYMAI
- BENDROJI DALIS
- TRIUKŠMINGUMAS/VIBRACIJA
- БУЧАВА/ВИБРАЦИИ
Brand : BOSCH
Model : 0700 AA
Category : Broom