
HD 513 E Classic - Pressure washer Kärcher - Free user manual and instructions
Find the device manual for free HD 513 E Classic Kärcher in PDF.
| Product type | Electric high-pressure cleaner |
| Model | HD 5/13 E Classic |
| Brand | Kärcher |
| Dimensions (L × W × H) | 350 x 330 x 880 mm |
| Weight (without accessories) | 18.3 kg |
| Supply voltage | 220-240 V / 1~ / 50 Hz |
| Connected power | 2.4 kW |
| Main fuse (slow-blow) | 15 A |
| Operating pressure | 13 MPa (130 bar) |
| Maximum pressure | 16 MPa (160 bar) |
| Water flow rate | 500 l/h (8.4 l/min) |
| Max feed temperature | 40 °C |
| Max feed pressure | 1.0 MPa (10 bar) |
| Sound pressure level | 93 dB(A) measured / 96 dB(A) guaranteed |
| Protection type | IPX5 |
| Main functions | High-pressure jet, rotary lance, automatic shut-off (pressure switch), child safety on gun |
| Maintenance and cleaning | Weekly water filter cleaning, oil change every 500 h, regular inspection |
| Safety | Safety lever on gun, overflow valve, frost protection, CE safety instructions |
| Spare parts and repairability | Original accessories and spare parts available (www.karcher.com) |
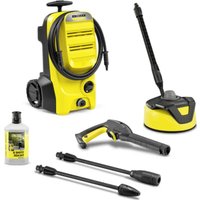
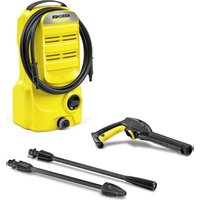
| General information | Supplied with gun, lance, high-pressure nozzle, high-pressure hose, water filter, telescopic handle |
Frequently Asked Questions - HD 513 E Classic Kärcher
User questions about HD 513 E Classic Kärcher
0 question about this device. Answer the ones you know or ask your own.
Ask a new question about this device
Download the instructions for your Pressure washer in PDF format for free! Find your manual HD 513 E Classic - Kärcher and take your electronic device back in hand. On this page are published all the documents necessary for the use of your device. HD 513 E Classic by Kärcher.
USER MANUAL HD 513 E Classic Kärcher

H.Jenner
Chairman of the Board of Management

S. Reiser
Manager Regulatory Affairs & Certification
71364 Winnenden (Germany)
Tel.: +49 7195 14-0
Fax: +49 7195 14-2212
Winnenden, /06/01
Contents
General notes. 11
Intended use 11
Environmental protection 12
Accessories and spare parts 12
Scope of delivery 12
Safety instructions. 12
Safety devices 12
Symbols on the device 12
Description of the device. 12
Initial startup. 13
Operation 13
Transportation 14
Storage. 14
Care and service. 14
Troubleshooting guide. 15
Warranty. 15
Technical data 15
EU Declaration of Conformity. 16
General notes

Read these original operating instructions and the enclosed safety instructions before using the device for the first
time. Proceed accordingly.
Keep both books for future reference or for future owners.
Intended use
The high-pressure cleaner with high-pressure jet is intended only for the cleaning of objects, including:
- Machines, vehicles, structures, tools, facades, terraces and garden equipment.
Detergent can be added with optional accessories. We recommend using a dirt blaster as a special accessory for stubborn soiling.
Water supply limit values
ATTENTION
Dirty water
Premature wear and tear or deposits in the device Supply the device using only clean water, or recycled water that does not exceed the specified limit values.
The following limit values apply to the water supply:
pH value: 6.5-9.5
-
Electrical conductivity: Conductivity of fresh water +1200~ S / cm , maximum conductivity 2000~ S / cm
-
Settleable particles (sample volume 1 L, settling time 30 minutes): < 0.5 mg/l
- Filterable particles: < 50mg/l ,no abrasive substances
Hydrocarbons: < 20mg / l - Chloride: < 300 mg/l
- Sulphate: < 240 mg/l
Calcium: < 200 mg/l - Total hardness: < 28^ dH, < 50^ TH, < 500ppm (mg CaCO_3/l )
- Iron: < 0.5mg/l
Manganese: < 0.05 mg/l
Copper: < 2mg / l
Active chloride: < 0.3mg / l
Free of unpleasant odours
Environmental protection

The packing materials can be recycled. Please dispose of packaging in accordance with the environmental regulations.

Electrical and electronic devices contain valuable, recyclable materials and often components such as batteries, rechargeable batteries or oil, which - if handled or disposed of incorrectly - can
pose a potential danger to human health and the environment. However, these components are required for the correct operation of the device. Devices marked by this symbol are not allowed to be disposed of together with the household rubbish.
Notes on the content materials (REACH)
Current information on content materials can be found at: www.kaercher.de/REACH
Accessories and spare parts
Only use original accessories and original spare parts. They ensure that the appliance will run fault-free and safely.
Information on accessories and spare parts can be found at www.kaercher.com.
Scope of delivery
Check the contents for completeness when unpacking. If any accessories are missing or in the event of any shipping damage, please notify your dealer.
Safety instructions
It is essential that you read the safety instructions 5.951-949.0 before initial start-up.
- Observe the national regulations for liquid jet cleaners.
- Observe the national accident prevention regulations. Liquid jet cleaners must be tested regularly. The test result must be recorded in writing.
- Do not modify the device or accessories.
Safety devices
CAUTION
Missing or modified safety devices
Safety devices are provided for your own protection.
Never modify or bypass safety devices.
Safety lever
The safety lever on the high-pressure gun prevents the device from being switched on inadvertently.
Overflow valve
If the high-pressure gun is closed, the overflow valve opens and the entire water volume will flow back to the pump suction side.
The overflow valve is set by the manufacturer and sealed. Setting shall only be carried out by Customer Service.
Symbols on the device

Do not aim the high-pressure jet at persons, animals, live electrical equipment or the device itself.
Protect the device against frost.
According to applicable regulations, the device must never be used with the drinking water network without a system separator. Ensure that the connection to your house water system, with which the high-pressure cleaner is operated, is equipped with a system separator according to EN 12729 type BA. Water that has flowed through a system separator is classified as undrinkable. Always connect the system separator to the water inlet and never directly to the device.
WARNING
The high nozzle outlet speed of the high-pressure water jet results in a high noise level that can cause discomfort or hearing damage (e.g. tinnitus) to persons in the immediate vicinity. A continuously high noise level can result in deafness.
- Wear the prescribed personal protective equipment.
- High noise levels can impair vocal communication and impair or prevent your ability to perceive acoustic warning signals. Never work alone. A second person must be present outside the work area.
Description of the device
Overview of HD 5/11 E Classic and HD 5/13 E Classic
Illustration A
①Nozzle screws
② High-pressure nozzle
Spray lance
4 Safety lock
5 Gun handle
⑥ Trigger
⑦high-pressure hose
⑧Gun hook
Additional handle
10Cable hook
Water filter
Spray lance storage quiver (for long spray lance)
13Water inlet connection
14Water outlet
(15) Power switch
Push handle, top (extended)
Overview of HD 5/11 EX Plus Classic and HD 5/13 EX Plus Classic
Illustration B
①Nozzle screws
② High-pressure nozzle
③ Spray lance
4 Safety lock
5Gun handle
⑥ Trigger
(7) High-pressure hose
8Push handle, top (extended)
(9) Additional handle
10 Cable hook
1Water filter
⑫ Spray lance storage quiver (for long spray lance)
13Water inlet connection
14Water outlet
(15)Power switch
16 Hand crank
Spray lance holder
18Dirt Blaster
Initial startup
△DANGER
Danger of injury from electric shock
Only allow authorised technical specialists to install the water supply, electrical connections and high-pressure network.
Colour coding
- Control elements for the cleaning process are yellow.
Unpacking
- Check the contents of the package when unpacking.
- Notify the dealer immediately in the case of shipping damage.
Installing the accessories
- Insert the push handle into the machine and insert the screws into the handle. Illustration C
- Install the nozzle with the nozzle screws at the spray lance.
- Connect the spray lance to the high-pressure gun. Illustration D
- Screw the high-pressure hose to the high-pressure gun.
- Only HD 5/11 E Classic and HD 5/13 E Classic, fasten the high-pressure hose to the water outlet.
- Only HD 5/11 E Classic and HD 5/13 E Classic, push the hand crank into the hole of the hose reel and make sure the hand crank is secure. Illustration E
Electrical connection
△DANGER
Risk of injury from electric shock
Use a plug to connect the device to the mains grid. Permanent connection to the mains grid is prohibited. The plug is used for disconnection from the mains.
See the type plate or technical data for the connection values.
- Unwind the mains cable and place it on the ground.
- Plug the mains plug into the socket.
Water connection
Connection to a water line
WARNING
Health risk from return flow of contaminated water into the drinking water network.
Observe the regulations of your water supply company.
- Check the feed pressure, input temperature and input amount of the water supply. See Chapter Technical data for the requirements.
- Connect the system separator and water connection of the device with a hose (minimum length 7.5m minimum diameter 3 / 4
The supply hose is not included in the scope of delivery.
- Open the water inlet.
Venting the device
- Open the water inlet.
- Remove the high-pressure nozzle.
- Switch on the device.
- Allow the device to run until the escaping water is free of air bubbles.
- Switch off the device.
- Fit the high-pressure nozzle.
Operation
△DANGER
Risk of explosion!
Do not spray flammable liquids.
If the device is used in hazardous areas (e.g. filling stations), the corresponding safety regulations must be observed.
Opening / closing the high-pressure gun
- Push back the safety lock and actuate the trigger. Illustration F
The high-pressure gun opens.
- Release the trigger and push the safety lock forward.
Then the high-pressure gun closes.
High-pressure operation
Note
- The device can be operated vertically.
- The device is equipped with a pressure switch. The motor only starts up when the high-pressure gun is open.
-
The high-pressure hose should be kept away from sharp edges.
-
For a device with the hose reel: unfold the high-pressure hose completely from the hose reel.
- Open the water supply.
- Set the power switch to "1".
- Open the safety lock of the high-pressure gun.
-
Open the high-pressure gun.
-
Aim the high-pressure gun at the object to be cleaned and start the cleaning operation.
Operation with detergent
Note
A foam lance (optional) is needed for operating with detergent.
WARNING
Incorrect handling of detergents
Health risk
Adhere to the safety instructions stated on the detergent packaging.
ATTENTION
Unsuitable detergents
Damage to the device and the objects to be cleaned Use only detergents approved by KARCHER.
Observe the dosing recommendations and notes provided with the detergent.
Use detergents sparingly to help conserve the environment.
KÄRCHER detergents ensure fault-free operation.
Please feel free to request a consultation, our catalogue or our detergent information sheets.
- Fill the detergent into the container of the foam lance. (Follow the dosage instructions on the detergent bottle.)
Illustration G
Recommended cleaning method
- Spray the detergent sparingly on the dry surface and let it work for a while (do not let it dry).
- Rinse off the loosened dirt with the high-pressure jet.
After operation with detergent
- Flush the foam lance with clear water for approx. 30 seconds.
Replacing the nozzle
△DANGER
Risk of injury!
Switch the device off prior to replacing nozzle and do not activate hand spray gun until the device is pressured less.
1 Secure the high-pressure gun. To do so, push the safety lever towards the front.
2 Unscrew nozzle screws and remove the nozzle.
3 Screw on the dirt blaster and tighten them by hand.
4 Only HD 5/11 EX Plus Classic and HD 5/13 EX Plus Classic, screw on the dirt blaster and tighten them by hand.
Dirt Blaster Storage
- Screw the dirt blaster onto the yellow connector. Illustration H
Interrupting operation
Note
When the device is shut down, the water pressure will be reduced, which can reduce the operating force of the high-pressure gun and improve the service life of the equipment.
- Close the high-pressure gun, the device will interrupt.
- Push the safety lock forward to close the safety lock of the high-pressure gun.
-
Push the safety lock back to open the safety lock of the high-pressure gun.
-
Open the high-pressure gun, the device will switch on again.
Finishing operation
- Shut off the water supply.
- Open the high-pressure gun.
- Set the power switch to "1" and let the device run for 5 to 10 seconds.
- Set the power switch to "0".
- Close the high-pressure gun.
- Unplug the power supply from the device with dry hands.
- Remove water inlet.
- Close the safety lever of the high-pressure gun and push the safety lock forward.
Transportation
CAUTION
Failure to observe the weight
Risk of injury and damage
Be aware of the weight of the device during transportation.
- Place the spray lance with the high-pressure gun on the hooks.
- Wind the power cable around the cable hooks.
- Without hose reel: Wind up the high-pressure hose and hang it over the hook. With hose reel: Wind the high-pressure hose onto the hose reel.
- When transporting the device in vehicles, secure the device against shifting and tipping over.
- For short distance transportation, pull the telescopic handle to drag the device. Illustration I
- When going up stairs, hold the additional handle and lift the device up.
Illustration J
Storage
CAUTION
Failure to observe the weight
Risk of injury and damage
Be aware of the weight of the device during storage.
Store the device indoors only.
Frost protection
ATTENTION
Frost destroys the device if it is not completely drained of water.
Store the device in a frost-free location.
If frost-free storage is not possible:
- Drain excess water.
- Pump commonly available anti-freeze through the device.
- Allow the device to run for a maximum of 1 minute until the pump and lines are empty.
Note
Use commonly available, Glycol-based vehicle antifreeze. Observe the handling instructions of the antifreeze manufacturer.
Care and service
△DANGER
Inadvertently starting up the device
Risk of injury, electric shock
Switch off the device immediately and unplug the mains plug before performing work.
Note
Old oil may only be disposed of at designated collection points. Please dispose of any old oil at these locations. Polluting the environment with old oil is punishable by law.
Safety inspection/maintenance contract
You can agree on regular safety inspections or close a maintenance contract with your dealer. Please seek advice on this.
Maintenance intervals
Each time before use
- Check the power cable for damage and have a damaged cable replaced immediately by the authorised Customer Service or a qualified electrician.
- Check the high-pressure hose for damage and replace a damaged high-pressure hose immediately.
- Check the device for leaks. 3 drops of water per minute are permissible. Contact Customer Service in the case of more serious leaks.
Weekly
- Clean the water filter, see Chapter Cleaning the water filter.
Every 500 operating hours, at least once annually
Have the oil changed by Customer Service.
| Fault Remedy | |
| Device does not start | Check the power cable for damage. Check the mains voltage. If the device overheats: a Set the power switch to "0". b Allow the device to cool for at least 15 minutes. c Set the power switch to "1". Contact Customer Service in case of electrical faults. |
| Device not building up pressure | Fit the standard nozzle (size specified, see Chapter Technical data). Clean / replace the high-pressure nozzle. Vent the device (see Chapter Venting the device). Clean the water filter (see Chapter Cleaning the water filter). Clean all inlet pipes to the pump. Check the water supply volume (see Chapter Technical data). |
| Pump leaking Up to 3 drops of water per minute are permissible. | In case of more serious leaks, have the device checked by Customer Service. |
| Pump knocking • Clean | the water filter. Check the water supply line for leaks. Vent the device (see Chapter Venting the device). Contact Customer Service if necessary. |
Warranty
The warranty conditions issued by our relevant sales company apply in all countries. We shall remedy possible malfunctions on your appliance within the warranty period free of cost, provided that a material or manufacturing flaw is the cause. In a warranty case, please con
tact your dealer (with the purchase receipt) or the next authorised customer service site.
(See overleaf for the address)
Further warranty information (if available) can be found in the service area of your local Kärcher website under "Downloads".
Technical data
| HD 5/11 E Classic | HD 5/11 EX Plus Classic | HD 5/13 E Classic | HD 5/13 EX Plus Classic | ||
| Electrical connection | |||||
| Voltage | V | 220 - 240 | 220 - 240 | 220 - 240 | 220 - 240 |
| Phase | ~ | 1 | 1 | 1 | 1 |
| Frequency | Hz | 50 | 50 | 50 | 50 |
| Power rating | kW | 2.2 | 2.2 | 2.4 | 2.4 |
| Degree of protection IPX5 IPX5 IPX5 IPX5 | |||||
| Power protection (slow-blowing) A 15 15 15 15 | |||||
| Extension cable, 30 m mm | 2 | 2.5 2.5 2.5 2.5 | |||
| Water connection | |||||
| Feed pressure (max.) MPa (bar) 1.0 (10) 1.0 (10) 1.0 (10) 1.0 (10) | |||||
| Input temperature (max.) °C 40 40 40 40 | |||||
| Input amount (min.) | l/h (l/min) | 720(12) | 720 (12) | 720(12) | 720(12) |
| Suction height (max.) | m | 1.0 | 1.0 | 1.0 | 1.0 |
| Device performance data | |||||
| Nozzle size of standard nozzle | 036 | 036 | 032 | 032 | |
| Water flow rate | l/h (l/min) | 500 (8.4) | 500 (8.4) | 500 (8.4) | 500 (8.4) |
| Operating pressure | MPa (bar) | 11 (110) | 11 (110) | 13 (130) | 13 (130) |
| Operating pressure (max.) | MPa (bar) | 16 (160) | 16 (160) | 16 (160) | 16 (160) |
| High-pressure gun recoil force | N | 20.4 | 20.4 | 22.4 | 22.4 |
| Dimensions and weights | |||||
| Weight (without accessories) | kg | 18 | 21 | 18.3 | 21.3 |
| Length x width x height | mm | 350 x 330 x 8 | 350 x 330 x 8 | 350 x 330 x 8 | 350 x 330 x 8 |
| 80 | 80 | 80 | 80 | ||
| Determined values in acc. with EN 60335-2-79 | |||||
| High-pressure gun hand-arm vibration value | m/s2 | 2.27 | 2.27 | 3.1 3.1 | |
| Uncertainty K | m/s2 | 1.5 1.5 1.5 1.5 | |||
| Sound pressure level LpA | dB(A) | 76 | 76 | 80 | 80 |
| Uncertainty KpA | dB(A) | 2.5 2.5 | 2.5 2.5 | ||
| Sound power level LWA + uncertainty KWA | dB(A) | 91 | 91 | 96 | 96 |
Subject to technical modifications.
EU Declaration of Conformity
We hereby declare that the machine described below complies with the relevant basic safety and health requirements in the EU Directives, both in its basic design and construction as well as in the version placed in circulation by us. This declaration is invalidated by any changes made to the machine that are not approved by us.
Product: High-pressure cleaner
Type: 1.520-xxx
Currently applicable EU Directives
2000/14/EC
2006/42/EC (+2009/127/EC)
2011/65/EU
2014/30/EU
2009/125/EC
Commission Regulation(s)
(EU) 2019/1781
Harmonised standards used
EN 60335-1
EN 60335-2-79
ENIEC63000:2018
EN 55014-1:2017 + A11:2020
EN 55014-2: 1997+A1: 2001+A2: 2008
EN 61000-3-2: 2014
EN 61000-3-3:2013
EN 62233: 2008
Applied conformity evaluation method
2000/14/EG:Annex V
National standards used
Sound power level dB(A)
HD 5/11 E Classic, HD 5/11 EX Classic
HD 5/11 EX Plus Classic, HD 5/12 EX Plus Classic
Measured: 89
Guaranteed: 91
HD 5/13 E Classic, HD 5/13 EX Plus Classic
Measured: 93
Guaranteed: 96
The signatories act on behalf of and with the authority of the company management.

H.Jenner
Chairman of the Board of Management

S. Reiser
Manager Regulatory Affairs & Certification
Documentation supervisor:
S. Reiser
Alfred Kärcher SE & Co. KG
Alfred-Karcher-Str. 28 - 40
71364 Winnenden (Germany)
Ph.: +49 7195 14-0
Fax: +49 7195 14-2212
Winnenden, /06/01
Contenu
Remarques generales
Usage prévu 17
2006/42/CE (+2009/127/CE)
2011/65/UE
2014/30/UE
2009/125/CE
Ordonnance(s) appliquee(s)
(UE) 2019/1781

H.Jenner
Chairman of the Board of Management

S. Reiser
Manager Regulatory Affairs & Certification
Responsible de la documentation :
S. Reiser
Alfred Kärcher SE & Co. KG
Alfred-Karcher-Str.28-40
71364 Winnenden (Germany)
Tel.: +49 7195 14-0
Télécopie:+49719514-2212
Winnenden, le 01/06/
Indices
Chairman of the Board of Management

S. Reiser
Manager Regulatory Affairs & Certification
71364 Winnenden (Germany)
Tel.: +49 7195 14-0
Fax: +49 7195 14-2212
Winnenden, 01/06/

H.Jenner
Chairman of the Board of Management

S. Reiser
Manager Regulatory Affairs & Certification
Responsible de documentacion:
S. Reiser
Alfred Karcher SE & Co. KG
Alfred-Karcher-Str. 28 - 40
71364 Winnenden (Germany)
Tel.: +49 7195 14-0
Fax: +49 7195 14-2212
Winnenden, 01/06/
Indices
Indicaoesgerais 34
Uso previsto 34
2006/42/CE (+2009/127/CE)
2011/65/UE
2014/30/UE
2009/125/CE
Regulamento(s) aplicavel/aplicaveis
(UE) 2019/1781
H.Jenner
Chairman of the Board of Management
S. Reiser
Manager Regulatory Affairs & Certification
Chairman of the Board of Management
S. Reiser
Manager Regulatory Affairs & Certification
71364 Winnenden (Germany)
Tel.: +49 7195 14-0
Fax: +49 7195 14-2212
Winnenden, /06/01
icindekiler
Genel uyarilar. 45
Kullanim amaci 45
Cevre koruma. 46
Akesuarlar ve yedek parcalar. 46
2006/42/AT (+2009/127/AT)
2011/65/AB
2014/30/AB
2009/125/EG

H.Jenner
Chairman of the Board of Management
S. Reiser
Manager Regulatory Affairs & Certification
Chairman of the Board of Management

S. Reiser
Manager Regulatory Affairs & Certification
Dokumentationsbefullmaktigad:
S. Reiser
Alfred Kärcher SE & Co. KG
Alfred-Karcher-Str.28-40
D-71364 Winnenden (Germany)
Tfn: +49 7195 14-0
Fax: +49 7195 14-2212
Winnenden, 01.06.
Sisälto
Yleisia ohjeita 56
Käytötarkoitus. 56
Chairman of the Board of Management
S. Reiser
Manager Regulatory Affairs & Certification
71364 Winnenden (Germany)
Puh.: +49 7195 14-0
2006/42/EF (+2009/127/EF)
2011/65/EU
2014/30/EU
2009/125/EF
Anvendt(e) forordering(er)
(EU) 2019/1781
Anvende harmoniserte standarder
EN 60335-1
EN 60335-2-79
ENIEC63000:2018
EN 55014-1: 2017 + A11: 2020
EN 55014-2: 1997+A1: 2001+A2: 2008
EN 61000-3-2: 2014
EN 61000-3-3: 2013
EN 62233: 2008
Chairman of the Board of Management

S. Reiser
Manager Regulatory Affairs & Certification
71364 Winnenden (Germany)
TIf.: +49 7195 14-0
Relevant EU-directiver
2000/14/EF
2006/42/EF(+2009/127/EF)
2011/65/EU
2014/30/EU
2009/125/EF
2000/14/EF: Tillag V
Anvendte nationale standarder
Lydeffektniveau dB(A)
HD 5/11 E Classic, HD 5/11 EX Classic
HD 5/11 EX Plus Classic, HD 5/12 EX Plus Classic
Malt: 89
Garanteret: 91
HD 5/13 E Classic, HD 5/13 EX Plus Classic
Malt: 93
Garanteret: 96
Chairman of the Board of Management
S. Reiser
Manager Regulatory Affairs & Certification
71364 Winnenden (Germany)
TIf.: +49 7195 14-0
Fax: +49 7195 14-2212
Winnenden, /06/01
Sisukord
Uldised juhised 72
Siftotstarve 72
Keskkonnakaitse 72
Lisavarustus ja varuosad. 72
Tarnekomplekt 72
Ohutusjuhised 72
Ohutusseadised 72
Toode: Korgsurvepesur
Tüpp: 1.520-xxx

H.Jenner
Chairman of the Board of Management
S. Reiser
Manager Regulatory Affairs & Certification
Dokumentatsoonivolinik:
S. Reiser
Alfred Kärcher SE & Co. KG
Alfred-Karcher-Str. 28 - 40
71364 Winnenden (Germany)
Tel: +49 7195 14-0

H. Jenner
Chairman of the Board of Management

S. Reiser
Manager Regulatory Affairs & Certification
Pilvarotais sagatavot dokumentaciju:
S. Reizers (S. Reiser)
Alfred Kärcher SE & Co. KG
Alfred-Karcher-Str.28-40
71364 Winnenden (Vacija)
Talr.: +49 7195 14-0
Fakss: +49 7195 14-2212
Vinendene (Winnenden), 01.06..
Turinys
H.Jenner
Chairman of the Board of Management

S. Reiser
Manager Regulatory Affairs & Certification
2006/42/WE (+2009/127/WE)
2011/65/UE
2014/30/UE
2009/125/WE
Chairman of the Board of Management
S. Reiser
Manager Regulatory Affairs & Certification
Administrator dokumentaci:
S. Reiser
Alfred Karcher SE & Co. KG
Alfred-Karcher-Str. 28 - 40
71364 Winnenden (Germany)
Tel.: +49 7195 14-0

H. Jenner
Chairman of the Board of Management

S. Reiser
Manager Regulatory Affairs & Certification
2006/42/ES (+2009/127/ES)
2011/65/EU
2014/30/EU
2009/125/ES
2000/14/ES: Priloha V
Chairman of the Board of Management
S. Reiser
Manager Regulatory Affairs & Certification
2006/42/ES (+2009/127/ES)
2011/65/EU
2014/30/EU
2009/125/ES
2000/14/ES: Priloha V
Chairman of the Board of Management
S. Reiser
Manager Regulatory Affairs & Certification
71364 Winnenden (Germany)
Tel.: +49 7195 14-0
Fax: +49 7195 14-2212
Winnenden, 01.06.
Kazalo
Splošna navodila 110
Predvidena uporaba. 110
Zašcita okolja 111
Pribor in nadomestni deli. 111
Obsegdobave. 111
Varnostna navodila. 111
Varnostne naprave 111
Simboli na napravi 111
Opis naprave. 111
Prvi zagon 112
Delovanje 112
Prenašanje in prevalanje 113
Shranjevanje 113
Nega in servis 114
2006/42/ES (+2009/127/ES)
2011/65/EU
2014/30/EU
2009/125/ES
Uporabljena(-e) uredba(-e)
(EU) 2019/1781
Chairman of the Board of Management

S. Reiser
Manager Regulatory Affairs & Certification
Directive UE relevante
2000/14/UE
2006/42/UE (+2009 / 127 / UE)
2011/65/UE
2014/30/UE
2009/125/UE
Regulament(e)utilizat(e)
(UE) 2019/1781
Norme armonizate aplicate
EN 60335-1
EN 60335-2-79
ENIEC63000:2018
EN 55014-1:2017 + A11:2020
EN 55014-2: 1997+A1: 2001+A2: 2008
EN 61000-3-2: 2014
EN 61000-3-3:2013
EN 62233: 2008
Procedura de evaluates a conformitàti
2000/14/UE: Anexa V
Standardenationale aplicate
Nivel de putere acustica dB(A)
HD 5/11 E Classic, HD 5/11 EX Classic
HD 5/11 EX Plus Classic, HD 5/12 EX Plus Classic
Māsurat: 89
Garantat: 91
HD 5/13 E Classic, HD 5/13 EX Plus Classic
Māsurat: 93
Garantat: 96
Semnatarii actiona zin numele si prin imputernicirea

H.Jenner
Chairman of the Board of Management

S. Reiser
Manager Regulatory Affairs & Certification
Insarcinat cu elaborarea documentationie:
S. Reiser
Alfred Kärcher SE & Co. KG
Alfred-Karcher-Str.28-40
71364 Winnenden (Germania)
Tel.: +49 7195 14-0
Fax: +49 7195 14-2212
Winnenden, /06/01
Sadržaj
Opé napomene 121
Namjena 121
Zašita okolísa 122
2006/42/EZ (+2009/127/EZ)
2011/65/EU
2014/30/EU
2009/125/EZ
Primijenjene uredbe
(EU) 2019/1781
Primijenjene uskladene norme
EN 60335-1
EN 60335-2-79
ENIEC63000:2018
EN 55014-1:2017 + A11:2020
EN 55014-2: 1997+A1: 2001+A2: 2008
EN 61000-3-2: 2014
EN 61000-3-3: 2013
EN 62233: 2008
Chairman of the Board of Management
S. Reiser
Manager Regulatory Affairs & Certification
2006/42/EZ (+2009/127/EZ)
2011/65/EU
2014/30/EU
2009/125/EZ
Primenjena(e) odredba(e)
(EU) 2019/1781
Primenjene harmonizovane norme
EN 60335-1
EN 60335-2-79
ENIEC63000:2018
EN 55014-1:2017 + A11:2020
EN 55014-2: 1997+A1: 2001+A2: 2008
EN 61000-3-2: 2014
EN 61000-3-3: 2013
EN 62233: 2008

H.Jenner
Chairman of the Board of Management
S. Reiser
Manager Regulatory Affairs & Certification
71364 Winnenden (Germany)
Tel.: +49 7195 14-0

H.Jenner
Chairman of the Board of Management

S. Reiser
Manager Regulatory Affairs & Certification
YTEUVOOC TEXVIKOU qakeAou: S.Reiser
Alfred Karcher SE & Co. KG
Alfred-Karcher-Str.28-40
71364 Winnenden (Germany)
Tnλ: +49 7195 14-0
Φaξ: +49 7195 14-2212
Winnenden, /06/01
CopepkHne
O6uye yka3aHn. 138
Ha3naueHne 138
3aunTaOkpykaIOuei cpebl 139
PpHaadnExHoCTn 3anaChbIe Yactn. 139
KOMJIeKT NocTaBKn. 139
HCTpyKunnoTeXnKe6e3oNaChocTn 139
IpeoxpaHnteNbhe yctpoiCTBa 139
CIMBOJIHa yCTpoiCTBe 139
Oncanhe np6opa. 140
IepBbI 3aynck 140
Pabota 141
TpaHcnpOpBbKa 142
XpaeHne 142
06cnyxmbaHne 142
Pomoub npn HeucnpaBHOCTx 143
TapaHTnra 143
Texnueckne xapaKTepeNCTIKN 143
Deknapaun O COOTBETCTBUN CTAHapTAM EC 144
Obuntyeka3aHnna
IpeepnepbIM npimHeHneM yctpoiCTBa 03HaKOMNTbcra C daHHoOpunHnabHo HNCTpykUeH no
3KcNpyatauIN npnlaraeMbIM yKa3aHnA MNo TEXHKe 6e3oNaCHOCTN. DeIcTBOBaTb B COOTBETCTBn C HmN.
CoxpaHrB o6e 6poUOpbln daJbHeuero noJb3ObaHn nn dnyuOero BlaJeIbua.
Ha3haueHne
OuHCTnTeJIb BbICOKOro DaBHeHn Co Ctpye BbICOKOro DaBHeHn PpeHa3HaueH ToIbKO DnA OuHCTKn 06BeKToB, BKIOUaY:
MaunHbI, TpaHCnOpTHbIE cpeJCTBa, KOHcTpkyuIN, HcTpymeHTbl, faacabI, Teppacbl N caOBOyHO TexHky.
MoOuee cpeCTBO MOXHO Do6aBnTb C NOMOuBIO DOONHHTeNbHbIX AxKCECCyapOB. Mbl peKoMeHdyem MCNOJb3OBA Tb rpa3EByo 0pe3y B KaucctBe CneuaJIbHoro npncnoc6NeHnI ydaIeHnI CTOnkNx 3aFpR3HeHn.
PpeBbIe 3NaueHnIy BODOcHa6KeHnI
BHIMAHNE
3aepnHennb0da
PpeKde6peMeHHbU u3Hoc uNu omNoKeHua 6 ycmpoucme
ДяЗкпунуамау усmpосмea ucnonь308amb monькусмую unu obopomHyIO body, komopar He npeБиwaemnpedENbHbIX 3NaueHui.
IINBDOCHAB6XeHnI npMHeHOTcCneDyIOUne IpeJeIbHbIe 3HaueHnI:
3NaueHne pH:6,5-9,5
3NeKtpoPoBOHocTb:3JIeKtpoPBOHOHOCTb 甲CTO BODI +1200 MKCM/cm, MaKC. 3JIeKtpoPBOHOcTb 2000 MKCM/cm
OcakdaembeBeeCTBa(Obem npo6bl 1J, BpeMa ocakdeHn30 MNHyT) <0,5 MR/
- ΦινλτργεMbIe BeUeCTBa: < 50 Mr/π, Heaδpa3uBHBiE BeUeCTBa
- YrIeBODOpOdbI: < 20 Mr/π
Xnpd:300Mr/
CytbpaT: < 240M r/π
KaJIbU: < 200M /n
- Ośuza XIII KocTb: < 28 °dH, < 50° TH, < 500 ppm (Mg CaCO₃/π)
Keeneo: < 0,5M r/π
MapraHeu: < 0,05M r/n
MeBb: < 2M r/π
AKTNBbI XJOp: < 0,3M /n
3aunTa OkpyXaOuSei cpeDbI

YnakoBouHbI MaTePnaJIbI NOJaOTcBTOpUHOn Inepepa6OtKe. YnakoBky Heo6xOJIMoYTNIN3NPOBaT 6e3 yuep6a dIy OkpykaIOseI
cpebl.

3NeKtpueckne n 3eKtpoHHbI ycTpoNCTBa
aacto coepkataeHHbI MaTePnaJIbI,
pnpOHDhIE pA BToPunHn nepepa6tKn, n
3aayactyo TaKne KOMnoHeHTbl, KaK BaTapei,
akymyITopbI INMaCNo, KOtOpbI npn He npabInbHom 6paueHn INn HeHaJnxJaSey TnIn3aunnpedctablanot NoteHuaNbHyO onachocb dnn 3doPobBy n Okpykaiou cpebl. Tem He MeHee, daHbIe KOMnoHEtbl Heo6xOdmbI nn npabInbHO pa60bI yCTpoiCTBa. YcTPOiCTBa, 0603NaeHHbIe 3TNM CmBOnom, 3anpeHo yTNIN3NpOBaTB BMeCTe C 6bITOBbIM OTXoDAMN.
Yka3aHnI NO KOMIOHeHTam (REACH)
Дпя пolyчениakтуальноинформачи о kompoнentaxсm. www.kaercher.de/REACH
He HanpaBnIte CtpyIO NOI BbICOKIM DaBneHnEM HaJIIOeN, XNBOTbIX, 3JIeKTOO6OpUdOBaHnE IOI HAnpJxKeHnEm IINIcam np6Op. BepeRITe np6Op OT MOp03a.
CorlaacHO DeIcTByUOuM npaBnAm np6op HeIb38 nCNoJb30BaTb B cTeax NtBeBOrO BOIOChA6XeHn6e3 CNTeMHOro pa3dIINTeJI. PpOBepbTe HauNue CNTeMHOrO pa3deIINTeJI cTaHdpTa EN 12729 Tnna BA B CNTeMe 6bIToboro BOIOChA6XeHn, K KOtOpoi Bbl 6yDeTe NOcOeHNrTb ONUCTnTeNb BBICOKoro DaBnEHn.Boa, npoWeJwA uepe3 CNTeMHbI pa3dIINTeJI, CHTaETcH HenpiroDHOJ dJa nITbY.BceHa nOdkluHai Te pa3dIINTeJI Ko BXOdy Bobl, a He HapPMyK np6Opy.
△NPEyynPExKDEHNE
Bcnedcmeue bicokou ckopcmu ebixoda cmpyu ebicokoz daenehura u3 hacadku co3daemc ebicokui ypoeheb wyma, komopbu moxem ebisibamb duckomfopm unu noepexdeHue cnyxa (Hanpumep, muHHumyc) y mex, kmo haxodumc 8 HenocpecdmeHHo 6nu30cmu om npubopa. DnumenbHOe 603deucmeue ebicokoz ypoBHwyMa moxem npueecmu K nompe cnyxa.
IcnnoB308ambcpedcmea uHduuodyanbHou 3auumbl.
BbICOKu ypooeHb wyma MoXem npenmcmboamb 2 onocobou KOMMyHukaauu, a maKxue yxyduamb uIu de lamb Heo3MOxHBIM 6ocnpuraue akycmuueckux npedynpexdaioux cuHaNoB. Hko2da He pa5omamb e oduhOky. 3a npedeIampu paoe30hbldoJKeH haxodumbcra empou pa5omnuk.
OncanHe np6opa
O63op HD 5/11 E Classic u HD 5/13 E Classic PucyHok A
1 BuHTbHaCaNK
②ΦopcyHka BbICOKOTo DaBJIeHnIa
3 PacnbInnteB
④IpeoXpaHntTeNb
⑤учкannctoleta
⑥CnyckOBoK KpOyOK
⑦ WlaHr BbICOKOraBHeHra
⑧ KpIouOK dIy KpeIIeHn IncToIeta
⑨ DononHnTenbHa pyka
10 KpOyok dny kpeJIeHnKa6eIa
(1)ΦnIbTpДIЯ BOdBi
12 OtcekДЯхpaHeHn paCnbIInTeNei(ДЯ DnHHoro paCnbIInTeJIa)
(13)ПОДВОВ ВОДы
14BbIXoD BoDbI
(15)BbIKJIIOUATEJIbIITaHIN
16ПиЖИМнЯpyKOrTka,BBepxHemNoJIOXKeHHN (BbIDBHyTa)
O63op HD 5/11 EX Plus Classic n HD 5/13 EX Plus Classic
PucyhoK B
1BnHTbHaCaKn
②ΦopcyHkA BbICOKO DaBHeHn
3 PaCnblnteB
④IpeaoxpaHnteHb
⑤учкannctoJeta
⑥CnyckoBoK KpOyOK
7 Ⅶnahr BbICOKoro DaBneHnA
⑧Пижимная руковка,В Верхем положени (Выдун hyTa)
9 DononHnTeNbHa pyka
10 KpOyOK nIg KpeJIeHnKa6eIa
(1)ΦnIbTpДЯ BOdBi
12 OTceK dny xpaHEny paCnblntenei (dny DnHHoro paCnblnte)
⑬ПОДВОВ ВОДы
14BbIXOABOdbI
(15)BbIKJIIOuOaTeJIb NITaHn
16PyKoTka
(17)ДерхателbacnbinteTЯ
18PraeBaBpaepa
PepBbI 3anyck
ONACHOCTb
Onachocmb nopaxeHua 3JeKmuueckum mokom! KMOhmaxky bOdonpoBoda, 3neKmuueckux coeduneHu u cemu bICOKo0 daeneHua donyckamb moIbko aemopuzoeaHHbIX mexHuueckux cneuaunucmo8.
ZBeToBaKa KoDnPoBka
3JemeHTbI ynpaBHeHn npoeccOM ONUCTKn 603HaueHbIXeJTbIM LBeTOM.
PacnaKOBbIbAHne
-
Пи паспakOBыВанпpoВерпь соджимоунakOBKN.
-
Пи obHApUKeHn TpaHcNOpTHbIX NOBpeKdEHN cpa3y npOnHΦopMnPoBaTb TOPROBO npeDCTaBNTeJ.
YcTaHOBka akcecccyapOB
- YCTaHOBNTe pyKoRtky B yCTpOINCTBO N BCTaBBTe B HEE BNHTbl.
PncyHOK C
- CMOHTpyTe HacaKy npN NOMOuIN BnHTOB Ha paCnblNTeJIb.
3.ПодсоeДиHHTe paCnblnteIb K nICToJIeTу BblcOKOrO DaBJIeHnIy. PucyHok D - NoidcoeHNHTe WnHaHr BbICOKO rDaBHeHnK nCTOnTeY BbICOKO DaBHeHn.
- TOnbko dIaH D 5/11 E Classi n HD 5/13 E Classic, npnKpeNITe WnHaR BbICOKOr O daBneHn K BbIXOy BObl.
- TOnbKO dIaH D5/11 E Classi n HD 5/13 E Classic, BCTaBbTe pyKoTky B OTBepCTne Ha bapa6aHe dIra IHaHaHaY6eDInTEcb, YTO OHa HAdexHo 3aKpennnHa.
PucyHok E
3NeKtpnueckoe coeHHeHne
ONACHOCTb
Puck npaxehur 3neKmpuueckum mokom!
Nodknohme bunky cemeo2o whypa npubopa K 3neKmpocemu. Nocmohoe noknoueHue K 3neKmpocemu 3anpeuEHO. Bunka uonjbyemcra dna omKnouehur om 3neKmpocemu.
IapametpbI noKJIIOUeHnA cm. Ha 3aBOdCKoT a6NIuKe IJIN B rnaBe «TexHueckne daHHbIe»
- Pa3moTaIte ceTeBOH uHyp nNoJoxnTe ero Ha 3eMJIHO.
- BcTaBbTe BnIKy Bpo3eTKy.
IopKnIOueHHe K nCTOuHnky BoDbI
IopKIOUOHeH K BOODonpoBOdy
△PENDyINPEXKDEHNE
Onachocmbdny3doopobb8cneedcmblue ommoka 3a2p3HeHHou 60dbI 6 cemb numbe6o2o 6o0cha6xhen.
Cobnodaune npednucnue baweue bodonpooohou KOMnaHUU.
- Поберьтдавпениюдач,在tmнература вхODEиOBьeIM NOДаВаEMоВд.Враздел TeXHueckue xapakmepucmuku npINBOJrTc coOTBETCTByIOUne Tpe6OBAHnI.
- CoeHInHe CnCTeMHbI pa3JeHInTeJIb I naTppy6ok NOBODa BOdbI K np6Opy UHaHROM (MHHMaJIbHaa DmHa 7,5 M, MNHMaNbHbI dAmEtP 3/4 DIOHa). IdoaIOuIN WNaHr He BXoNT B KOMNJIeKT NocTAbK.
- OTKpoTe BOJHOH KpaH.
CtpaBnBaHne Bo3dyxa n3 np6opa
- OTKpoIte BOJaHOJ KpaH.
- CHIMMTE φορcyнky BbICOKO rabneHnA.
- BkIIOUHTe npu6op.
4.ДаTe np6Opy npa6oTaTb Do Tex nop, noka B BbITEkaIOUeI BOe He NcYe3HyT Ny3bIPbKn BO3dYxa. - BbIKIOHTe np6Op.
- YctaHOBnte fOpcyHky BbICOKoTo daBHeHnA.
Pa6ota
△OIIACHOCTb
B3pbboONaCHO!
He pacnblnme zoipoue kudkocmu.
Ecnu npubop ucnonb3yemc8o 83pb800nacbix 30hax (Haipumep, Ha 3anpaeeuHbix cmaunex), Heobxodmo cobnoidamb coomeemcmyouue npaeuna mexhuku bezonachocmu.
OTkpbIbAHne/3aKpbIBaHne INCTOJeTa BBICOKO rDaBJIeHn
- OToDnHbTe npedoxpaHnteIb n HaxMnte cnYCKOB0 KpOyOK.
PcyHOK F
TnCTOnET BbICOKO TdABJIeHnO tKpbIbAeTCr.
- Otnyctnte cnycKOBo KpHocn CdBnHbTe npedoxpaHntBnpeqd.
Iocne 3TOro nIcToTeBbICOKoro DaBHeHn 3aKpbBaETcR.
Pa60Ta C BbICOKM DaBJIeHHeM
Ппмочаиме
- Ppu6op moxem pa6omamb e eepmuKaIbHOM noJoxeHu.
- Ppubop ochauen pene daeneHua. Deuzamenb 3anyckaemc monko npu omkpblom nucmoneme ebicokoo daeneHua.
- IJanahe ebicoko20 daaehnue cneyem pa3meuamb edanu om ocmpbix kpaee.
1.Дя np60pa c KaTykoJ dJa WJNaHra: noJIHOCTbIO pa3MOTaTe WJNaHR BbICOKO r DaJIeHnC KaTyuKn. - OtkpoTe noaCy BObl.
- YctahOBITE nepeKIOUaTeIb NITAHIN B NOIOKeHne «1».
- OT KpoIe npedoxpaHntJIb NICTOJeta BbICOKOr DaBJIeHnIa.
- OTKpoIte nIcTOnet BbICOKOrO daBHeHnA.
- HanpaBbTe NCTOnet BbICOKOraBnEnHa Ounuembl OBeKTn HauHIne OUnCTky.
Pa6Ota c MOIOUcM CpeDCTBOM
Ппмочанne
Ipaobbcmouumcpedcmbompe6yemca neHHaHacdaKa (doonlhumenbHo).
△IPEДУПЕЖДECHNE
HeipabHJIbHOeObaaueHHe CMOIOHHMn CpeJCTBaAMN
Onachocmb dna 3doopobba
Cobnodamby yka3aHua no mexHuke 6e3oNaChocmu, codepkauuecna Mouux cpedcmax!
BHHMAHNE
HepnroHbIe MOIOJIne cpeCTBa
IopexdeHue ycmpoucmea u ouuuaembix obebkmoe
NcnoB3o6amb monko moioue cpecmba,
odobpeHHie KomnaHuei KARCHER.
Co6nioaamb peKoMeHdauuu no do3upoeke u yka3aHua KMOUeMy cpedcmey.
BueJnx 6epeKHOo omHowenu K OkpykaUoue cpeDe 3KOHOH UcNoIb3OaMb MOIOue cpeDcMa. MoIOUne cpeCTBa KARCHER oEocneHBAOT 6e30Ka3HyO pa6ToY. ObaauiTeCb HEnOCpeDCTBeHHo B KOMnAHIO 3a KOHCyIbTaUne, KaTaNOrom IJI INHOpMaune O MOIOxxCpeDCTBax.
- 3aIeTe Mo IOuee CpeCTBO B EMKoCTb NeHHoH HacaIKn. (CJeDuYte INHCTpyKUINM NO DO3nPobKe Ha 6yTbInke C MOIOUIM CpeCTBOM.)
PucyHok G
PeKOMeHDoBaHHbI MeTOd OChCTKN
- MoOüee cpeIcTBO 3KOHOMHO paCnblIITb Ha cyxuHIOBepxHOCTb I DaTb emy IOpEInCTBOBaTb (He BblCbIXaTb).
- Cmblb 3aqrpa3HeHnA CTpye BbICOKo DaBnEHN.
Pocne pa6oTbIC MOUcIM cpeCTBOM
- Помог TeпнHyю HacäкуЧистов ВдоьВ Teченпrimерно 30 cekyн.
3aMeHaΦopcyHKn
△OIIACHOCTb
OnachOCTb TpaBMbl!
Ipeed 3aMeHO fOpcyHKu bIKIOUcme npubop u He akmuBupyume pyHou nucmonem-pacnbumenb do noNHOZ cnycka daenHe r npubope.
1 3aФИКСИРУTe NICTOJET BbICOKOrO daBNeHnA.ДЯ 3TOrO cDvHbTe npedoxpaHntbHbI pyHar BnepeI.
2 OTkpTyTe BnHTbI φopCyHKn n CHIMITE φopcyHKy.
3 PnKpyTnTe rpa3eByIO fpe3y n 3aTaNITE ee BpyHyIO.
4 TOnbko dIaH D5/11 EX Plus Classic n HD 5/13 EX Plus Classic, npnKpyTe rpa3eByo fpe3y n 3aTaNITE ee BpyHyIO
XpaHHe rpa3eBOH ppe3bI
- CnneTe NnHIOHO BDOy.
- PpokaaTe yepe3 ycTpoiCTBO 0bIHybI aHTnΦpn3.
3.ДаTe yCtpoIcTBy npa6oTaTb He 6Oonee 1 MInHytbI DnI ONOpOXHeHnHaNcoCa n Tpy6OnpOBOIOB.
PpumeyaHue
Icnonb3yume obbyHbui aemomobuHbui anmufpu3 Ha ochoe 2nukon. Co6lnodaume uHcmpkyuu npou3eodumna hmufpu3a.
06cnyxmbHne
ONACHOCTb
HenpehamepeHHbI 3anyck npu6opa
Puck nopaxeHua 3neKmpuecKum mokom!
Ipeed ebinoJIHeuem Kaux-lu6o pa6om ebIKIOUme npubop u omcoeduHume bunky uHypa numaHua om cemu.
PpumeyaHue
Cmapoe macno moKHO ymuu3upoabmb monbco 6 cneuaibho omeedeHHbIX nyHKmax cbopa. Ioxanyucma, ymuu3upyume cmapoe macno molboe 3mux mecmax.3aepzHHeue okpykaiouecpeblcmapbIM macnO npcepeyemcr no 3akoHy.
PpOBepKa TexHKn 6e3onacHocTn /doROBOp
HeincpabHocTb CnocO yctpaeHn
Pn60p He 3anyckaetc
PpOBepeTe shHyp nHTaHnHa hAnuYe NOBpeKdHn.
PpOBepeCeTeBOe HnppKeHne.
EcIn np6op neperebaeTc: a YctahOBITE nepeKlnOHTeNB NITAHN B NOJIOXeHne 0 b DaTe np6Opy oCTbITb B TeueHne He MeHee 15 MNHyT. c YctahOBITE nepeKlnOHTeNB NITAHN B NOJIOXeHne 1
B cnyuae HeucnpabHocTu 3neKtpoo6OpyDobAHnO6paTntecb CepBncHyO cnxk6y.
O TexHnueckOM o6cIyXuBaHn
C ToproBbIM npeCTaBnTeJIe MoKHO DOROTOBOpNTBCO OpeRyIpaHNo IPOBepKe TexHNKn 6e3OnaCHOCTN NIN 3aKNIOHTb C Hm DOROTOBOP Ha TEXo6cnyKuBaHHe. O6paauTecb K Ham 3a KOHCyIbTaCuNei.
IpeepKaKdbimHaayanompa6oTbI
- Поберпь сединштеловский Кабел На п徴metповрждени, поевждень Кабел HeMeДлЕНо 3aMeHNTь силами abTOpN3OBaHHОс сервicHO сужбы ИлnpoфессногьHorO 3JIeKTPnka.
- Поверпьшланг ВсOKО Гдамнг Ha npdmet NOBpeKdHn, NOBpeKdHbI WlaHr HemeDneHHO 3aMeHHTb.
- Поверпь repMeTnUHOCt b yctpoiCTBa. Дустмbl 3 kaJIIN BOДbl B MInHyTy. Пи 6олee 3haHTeIbHOYteHKe O6paTntbCra B cepBucHyIO cnJx6y.
ExeHeDbHo
- OuCTnTe 0nB Tp JnB BOdbI, CM. pa3JeN OucmKa 0nBmpa dna 0bbl.
Yepe3 kaxdble 500 yacob pa6oTbI, He pexe odHoro pa3a B roD
IopyuHTe 3aMeHy MaCna cepBnChOn cnJxBe.
Pa6oTbI NO TexHnueckomy 06CJnyKBAHHIO Ounchka qnlbtpa dna BOdi
BHUMAHNE
Poepekehen pfunbmp dnn eodbe e odonpoeohom nampy6ke
Poepekehue npubopa u3-3a 3aepnHou bOdbI
Ppeke de yem ecmaenmb fumbp dna 60dbI,
npoeepbme ezo Ha omycmcbue noepkdeHu.
- BbTaunTeΦnIbTpДЯ BOdbl.
- Ouchntte fnnbTp dIy BOdbIOI npOToHNOBdoI.
- Choba BCTaBtpe nIbTp dIy BObl B BOOnpOBoHbI npTy60k.
POMOUIpHHeNCpPaBHOCTX
ONACHOCTb
Onachocmb nolyeHn mpaBmbl om cnyuauHo 3anyueHHo ycmpoucmeu ydapa 3Jekmpuueckum mokom.
Ipepe ebinoHHeuem IIObix pa6om Ha ycmpoUcmee ebIKIOumb ycmpoucmeo U bHymb cemeoo wmekep u3 po3emku.
BbIIOJIHrMb npoBepKy u peMoH 3neKmpuueckux KOMnoHeHmOe moIbKO e aemopu30aHaHo cpeBuchou cnlyk6e.
Ipu nopejdeHuX, He yka3aHHbIX e 3mom pa3dene, cIyuee comHeHu uu npu yemkom yka3aHuOcbpaambc8 aemopuzo6aHHy ocepuchHy cnyk6y.
YcTaHOBJIeHHaKceCyapiB
- BCTaBTe npHTnCKHy pyKoTky B MaunHy n HacadItb Ha HeI rBnHTn.
MaJIHOK C
- YctaHOBiB HacaKy 3 rBnHTamn Ha po3nnIOBaayi.
- Ппсднайт epo3nuiobau Do nictoneTa Bucokoro TUCKY.
MaJIHOHOKD
- ПикрутьшалгВUCOKOTO TUCKуdo nicToJIeta BUCOKOTO TUCKY.
- TinbKn dnn HD 5/11 E Classic ta HD 5/13 E Classic, npnkiniTb wnaHr BnCOKOrO TnCKy Do BnXoDy BoN.
- TinbKn DnA HD 5/11 E Classic Ta HD 5/13 E Classic, BCTaBTe 3aBOdHy pyKoTky B OTbip KOTyUkn DnIe UHaHry NpekoHaTecra, IIO BOHa HadiiHo 3akpinJeHa.
MaJIHOHOK E
EneKtpnueHne iDkIIOueHHa
△HE6E3NEKA
He6e3neka mpaemybaHH iaD ypaXeHH eNeKmpuHUM cmpymom
IidKluaume npuaad do eJeekmpomepexi 3a donomooioe uku. Nocmiue He iokluoyehnra do eJeekmpomepexi 3aboponeHo. Buika
eukopucmoeycmbc dnn biknoyehn biMepexi.
Iapametpn iiknoyehn 3a3nahehi Ha 3aBOCDbKi
Tabnuyi a6o y texHiHN DaHnx.
- Po3motaTe MepexeBn Ka6enb i noklaDiTb Ioro Ha 3emIIO.
- BCTaBTe BnIky Bpo3eKy.
Natpy6ok dnniiknueHH
BODONOCTaayHn
PnncdHaHHdoBODonpoBdy
△NONEPEDXKEHH
He6e3neka dna 3dopeo' enacniodok eidnuey 3a6pydhehoi bodu do mepexi numho2 oboonocmaaHn.
Dompumyimeb npaeun bawoi bodonocmaaJIbHOI KOMnaiHII.
- NpebipTe TnCK NoaChi, BxHy Temnepatpy Ta 06'EM BOIN, 0o Noaetbcy. Y po3di TeXhiHi xapaKmepucmuH HabeHei BiinobiHi BmOrn.
- 3'εДнайтсистемп роздловач та natpy6ok ПДБЕDEHЯ BODИ ДО пиладу Лангом (MIHIMaJIbHa DoBxINHa 7,5 M, MIHIMaJIbHnДiametp 3/4 Дюма). ШаHR NOdai He BXOДNTb Y KOMNJIeKТ NOCTaBKn.
- BiDkpiTe BOJHn KpaH.
Bunyck nobitpr3 npnla dy
- BiDkpiTe BOJHn KpaH.
- 3HIMITb φopcyHKy BUCOKO TnCKy.
- YbIMKHiTb npnlaI.
4.ДaIte npnlaу npauoBAtn,doKu y Boi,io BNTiKae,He 3HnKHyb 6yNb6aWKn NOBITpR. - BmKHiTb npnlaI.
- BcTaHOBiB φOpCyHky BnCOKOro TnCKy.
Ekcnnyataciia
HE6E3NEKA
Bubxohoe6e3neuHO!
He po3npooyume neaKo3aumcmi pidunu.
3a eukopucmaHH npunadye Hebe3neuHX 3ohax (HappuKna, Ha A3C) cnid dompumyamuc erionobihux npabun be3neku.
BIDKpNBaHH/3akpNbBaHH nicToJeTa BNCOKO TnCKy
- Nocyhhe 3an06ixHnK Ha3a i HataNCHiB cnYCKOBn Baxinb.
MaJIHOHOKF
IicToJeT BnCOKOro TnCKy BiKpNbBaETbcra.
- BiDnyctiB cnycOBn BaxiNb i nocyHbTe 3anobixnK Bnepei.
TicToNETBVCOKO TnCKy 3aKpNbBaETbCra.
Pobota nID BnCOKM TnCKOM
Bka3ieka
- PpunaDom MOKHa KOpucmyaMucy y eepmuKaNbHOMy NOJoxeHHi.
- П汞ад осацehupe mucky.Дeuzун зanyckaembcra nuue modi, konu biokpumu nicmonem bucokozo mucky.
- Ulnahe bucokozo mucky cnid mpumamu dani eid zocmpux kpaie.
- Пилад 3 КOTУшКОЮ ДЯ Шанга: NOBHCITPO3MOTaTe WJNaHr BnCOKOТ TnCKY 3 KOTUshKn.
- BiKpnIte noaCy BOni.
3.YcTaHOBItbBMNKaayKnBHeHHBNoIOnKeHHN《1》 - BidkpniTe 3anobixnK nictoTa BnCOkOTo TnCKy.
- BiDkPnIe nicToJET BucOKoro TnCKy.
- HabeiB niCtoJET BUCOKO TnCKy Ha 06'Kt, kKn Tpe6a OvnCTnT, n po3nooHiB po6Oty.
Po60Ta 3 MNUOuM 3aCo6oM
Bka3ieka
IpeioDnHicThTexHCHOrO OcCnyroByBaHHa Ipeed KoxHM BkOpNCtAHm
- IpeBipuTn 3'edHyBaIbHn Ka6eJb Ha BiDcyTHicTb noUKoJKeHb.Y pa3i BnRbNeHHN NOUKoJKeHHa HeraiHo 3BepHyTncr dnyaMinn Ka6eHNo do aBtOpu3OBAHOcepBicHO cnyK6n a6o Do qaxibzra 3 eJIekTpkn.
- IpeBipuN BnCOKoHaipHn ⅢJAHr Ha BiCyTHiCTb NookDxHe. NookOxDxHeH N BnCOKoHaipHn ⅢJAHr HeraHHO 3aMiHTn.
- NpeBipuTn repMeTuHicb npuctpoJ. DonyckaTaBcB NTiKaHHa 3 Kpanenb BoN Ha XBNHHy. KaIO HeRepeMeTuHicb cepNo3Hiwa, cIid 3BepHyTncdO cepBicHOcnyK6n.
LOTINKHA
- Ouicbte fipnbtpnBODn, nB.po3in OuuueHHa eodrazo fipmbpa.
Yepe3 koxhi 500 roDnH po6Ot, npHaamHti opoKy 3BepHiTbCJ do cepBicHOi cnyk6n JIa 3AmHn MaTuna.
Po60Tu 3 TexHiuHoro 06cIyroByBaHHa
OuHHeHH BODaHoro fIbTpTa
yBAGA
NookkeHuB OoHbmp Ha 3'cdHaHHI oodu
NoukodkeHH npunady uepe3 3abpyOHeHy body
Ipeebipme bOdHnU fInbmp Ha NowkoDkeHH, nepu HIX ecmaenmu uo2o do 3'edHaHH eOdu.
- BtIaHITb BOJAHn φINbTp.
- OuHCTbTe BOaHnI pJIbTp nID npOTouHO BOIOJ.
- 3HOBy BCTaBTe BOJAHn FjIbTp y 3'EDHaHHBOJN.
Дономora B pa3i HecnpabHocTei
HE6E3NEKA
He6e3neka mpaamyeaHn ype3 eunadko8o 3anyueHu npucmpiu ma ypaKeHHra eKeKmpuHUM cmpymom.
Ipepe npoeedeHHaM 6y6kux po6im eumukamu npucmpiu i eumraam umencehny eunky. Ipeepiky ma pemohm enekmuuHx kmoHeHmie cnid dopyamu nuwe aemopuzoeahi cepeichi ciyy6i.
Y pa3i buraenHHe ncepnaeHocme, He onucaHux y ubomy po3di, a6o 8 pa3i cymHie 4u eidnoBihux Yimkux 8ka3ibok 3eepmamucdo abmopuzoeaHOI cepeichoI cnx6b.
| Hecnpabnictb Cnoci6уснени | |
| Прилад не занькася | ● Перевір'te кабел' живлиенna Na пошкоДжени. ● Перевір'te Hanpyru BМерекi. ●Якso пriлад пeperріра\'ься: a YctanobiTb ВIMNKaч живлиенna B поожени «0». b Дайтpe пriладу oxolohnytn п riha`mHi 15 XBnlnH. c YctanobiTb ВIMNKaч живлиenna B noIoojennn «1». 3BepHIbCSdo cepBicHOi cIyXbB Paazi HeçnpabnHOci eNeKtpnHOi cIstemn. |
| Прилад не habираз «пuck | ●УстановітБ STANДAPTHU Hacadku (po3mip dinB.у po 3dini TexNchix xapaKmepucmuku). ●Очир've/3amHITb Hacadku BVCOKOrO TnCKy. ●Виус'te nobitpr3Приладу (dINB.po3dIn Bunysck nobimpr3Приlaody). ●Очир've BOJANH N OJIbTp (dINB.po3dIn OchuSEHNH BOJHOZO φiNbmpa). ●Очир've Bci BnYCKH i natpy6kn HacocA. ●Перевір'te obseyплду Bodn (dINB.po3dIn TexNchix xapaKmepucmuku). |
| HerepmetnichtB hacoca ДогуSCaEыСя витikannу до 3 кpaneь Bodи нахвлину. | ●У разісі сэріоЗніоі» HerepmetnichOCTi dopuchti cepBicHii cIyXb6i nepebipuNTn рисtrpii. |
| Стук y habosci | ●Очир've BOJANHФільт. ●Перевір'te BoJOpPoviD Na BiDcyTHiCtBuTOKiB. ●Виус'te nobitpr3Приладу (dINB.po3dIn Bunysck nobimpr3Приlaody). 3a Notpe6n 3BepHIbCSdo cepBicHOi cIyXb6n. |
TapaHTi
YKOxHKnKpaHnDiIObBiIDNObHnI rapaHTiHi yMOBn, BCTaHOJIeHi yNOHBaXeHIO oprAh3aueo 36yTu haOoi npodykuiB ui KpaiHi. MoxNBI HecnpabHocTi npICTPOI npOTAROM rapaTInHoro cTPOky MN yCyBaEMo 6e3KOuTobHo, kUO npUHNHa HecnpaHocTi noJrae B dePekTx MaTePiAIB a60 BnPo6hNHyOM bPaKy. Y pa3i BHNKHeHHn PpeTeH3i npOTAROM rapaTInHoro cTPOky npoxAHn 3BePTaTncr, MaOuN pnpco6i Yek npo
nokynky,doTOPROBEnbHOi opraHia3aui,1o npOda npOdyKT,aboDoHaN6bnXQoi ynoBHOaxKeHOi cnyx6n cepBichoro 06cnyroByBaHHa.
(Adpecn nB. Na 3Bopoti)
Iodatkoby iHopmaui npo rapaHTIO (3a HABHOCTI) MoXHa 3NaHTN B O6nacti cepBICHO 06ClyROByBaHHa MiceBOrO Be6cauTy Karcher y po3dini
《3aBaHTaxeHHA》
TexhiHixapakTepncTnKu
| HD 5/11 E Classic | HD 5/11 EX Plus Classic | HD 5/13 E Classic | HD 5/13 EX Plus Classic | ||
| Еlektrочne pi disclosedуеня | |||||
| Нарuya V 220 - 240 220 - 240 220 - 240 220 - 240 | |||||
| Фаза ~ 1 1 1 1 1 | |||||
| Частota | Hz | 50 | 50 | 50 | 50 |
| Пд'едунова потужнисть | kW | 2,2 | 2,2 | 2,4 | 2,4 |
| Стуний засcentу | IPX5 | IPX5 | IPX5 | IPX5 | |
| Запобожник мереки (инец): (инец) | A | 15 | 15 | 15 | 15 |
| Поровский кабел 30 m | mm² | 2,5 | 2,5 | 2,5 | 2,5 |
| Патубok для пidкlioчинения вожимостацаня | |||||
| Тиск на вхоDI ( макс.) | MPa (bar) | 1,0 (10) | 1,0 (10) | 1,0 (10) | 1,0 (10) |
| Temпература на вхоDI ( макс.) | °C | 40 | 40 | 40 | 40 |
| Витраты на вхоDI ( ми.) | l/h (l/min) | 720(12) | 720 (12) | 720(12) | 720(12) |
| Висota BCМОКТУВАнHA ( макс.) | m | 1,0 | 1,0 | 1,0 | 1,0 |
| Робочи Харазочирстки ристою | |||||
| Розмір стандагно сорпla | 036 | 036 | 032 | 032 | |
| Оь'ем подач, вODа | l/h (l/min) | 500 (8,4) | 500 (8,4) | 500 (8,4) | 500 (8,4) |
| Розочи тиSC | MPa (bar) | 11 (110) | 11 (110) | 13 (130) | 13 (130) |
| Розочи налшковýten STSC ( макс.) | MPa (bar) | 16 (160) | 16 (160) | 16 (160) | 16 (160) |
| Сила вidiаду Високонлірно nicтолета | N | 20,4 | 20,4 | 22,4 | 22,4 |
| Розmirи та Bara | |||||
| Bara (бeз пиадя) | kg | 18 | 21 | 18,3 | 21,3 |
| Довкинахширинах висota | mm | 350 x 330 x 8 | 350 x 330 x 8 | 350 x 330 x 8 | 350 x 330 x 8 |
| 80 | 80 | 80 | 80 | ||
Po3paxoBani 3haueHnra 3riDno 3 EN 60335-2-79
| Значени вибацii на руц/костi вid високанірно nicтолета | m/s2 | 2,27 | 2,27 | 3,1 | 3,1 | |||
| Пожибka K m/s | 2 | 1,5 | 1,5 | 1,5 | 1,5 | |||
| Ровень 3вкового тиасу LpA | d | B | ( | A | ) | 7 | ||
| Пожибka KpA | dB(A) | 2,5 | 2,5 | 2,5 | 2,5 | |||
| Ровень 3вковоіnotужноcti LWA + похибka KWA | d | B | ( | A | ) | 9 |
36epiraetbpc npaboHaBHeceHHH TeXHiHx 3MiH.
Bupi6: Mmouh anapaT Bucokoro Tncky
Tun: 1.520-xxx
BiINOBiDiHINpeKTHBn EC 2000/14/EG
2006/42/EG (+2009/127/EG)
2011/65/EC
2014/30/EC
2009/125/EC
3actocobahn(-i) pernaent(-n) (EC) 2019/1781
3actocobyahi rapMOHI3OBaHI CTaHdapTN EN 60335-1
EN 60335-2-79
EN IEC 63000:2018
EN 55014-1:2017 + A11:2020
EN 55014-2: 1997+A1: 2001+A2: 2008
EN 61000-3-2: 2014
EN 61000-3-3: 2013
EN 62233: 2008
3actocobybHm MeToD oziHKn BiIDNObiHocti 2000/14/EG:doaTOKV
3actocobyaHaiohaBHi CTaHapTn
PibHb 3BykoBoi nToyXhOcti, dE(A)
HD 5/11 E Classic, HD 5/11 EX Classic
HD 5/11 EX Plus Classic, HD 5/12 EX Plus Classic
BumipraHn: 89
TapaHToBaHn: 91
HD 5/13 E Classic, HD 5/13 EX Plus Classic
BumipraHn: 93
TapaHToBaHn: 96
Oco6n, 10 HxKHe nIiHncaIINcR, IIOb BiD imHi Ta 3a DobipeHicTIO KepIBHuNTBa.

H.Jenner
Chairman of the Board of Management
S. Reiser
Manager Regulatory Affairs & Certification
Oco6a, BiinobiJaIbHa 3a BeJeHHN DaKymeHTaui: II. Pau3ep (S. Reiser)
Alfred Kärcher SE & Co. KG
Alfred-Karcher-Str. 28 - 40
71364 Winnenden (Germany)
Ten.: +49 7195 14-0
ΦaKc: +49 7195 14-2212
Hnctpykun 3a6e3oNaCHOCT 151
IpeDn3H yCtpoCTBa 151
CnmbonBbpxy yctpoCTBOTO. 151
OnicaHne Ha yCTpOInCTBOTo. 152
IpbboHauJIHO cTapTupaHe. 152
Ekncnoataua 153
TpaHcnpOpTuPaHe 154
CbxaheHne 154
PnKn n o6cJyXBaHe 154
Pomou npn Henn3npaBHOCTN 155
TapaHcua 155
Texnueckn daHHN 155
Deknapaun 3a cboTBcTbne Ha EC. 156
06uynka3aHn
Ppei npBpTO n3nO13BaHe Ha ypea npooyTeTe TOBA opuHnHaHNO pkoBOOCTBO 3a ekCnloataunia
PpIIOXeHInTe yKa3aHn8 3a 6e3ONaCHOCT.
Ppoeepaane CbOTBeTHO.
3ana3e Te DBeTe KNHXKn 3a NoCneDbaUo N3NOJ3BaHe nJIn 3a CNeDbaunco6CTBHeNK.
PpeHa3NaueHne
YpeBt 3a NOUcTBAHe C BnCOKO HaNJraHe CbC CTpyr NOI BnCOKO HaNJraHe e NpeDHa3HaueH CaMo 3a NOUcTBAHe Ha NpeDMTeNHO:
MaunHn, npeBO3HN cpeCTBa, KOHcTpyKcuu, HcTpymeHTN, facaDu, Tepacu ngadHcKO 60bOpyDbAhe.
C donbHnHTeHNHTe akcecoapn moKe da ce do6aBn nouchTbau npenapaT. IppenopbHTeJHo e da n3noJI3BaTe PncbKOctpyeH anapat 3a MPbCOtnra Kato cneuaJeh akcecoap 3a ynpNTn 3aMbpCpaBAHHa.
Гразични StOnHocTn 3a 3axpaHBaHe C Boda BHIMAHNE
3aMbpcehoeda
IpekdeepemHNO u3HocBaHe unu omnaaHa e ypeda 3axpaHbaUme ypeDa cmo C qucma unu peuknupHa eOda, kOraMo He npEwuaba epauhUHume cmouHocMu. 3a 3axpaHbaHeTo C BOda BaxaT CneHNTE rpaHnHn CTOnHOCTN:
CTO HOC pH:6,5-9,5
- EneKtpnuecka npoBoDmOcT: npoBODmOcT ha
Yncta BoJa + 1200 μS/cm, MaKcImaJHa
npoBODmOcT 2000 μS/cm
- YtaBaCuCe BeUeCTBa (O6Em Ha npo6aTa 1 I, BpeMe 3a yTaBaHe 30 MNHyTu): < 0,5 mg/l
- Φιπτριραύνς ένεικεῖνα: < 50 mg/l, 6e3 aδρασηνβήν ευεικεῖνα
BbIeBoIopOu: < 20mg / l
Xnpi: < 300~mg / l
CynΦaTn: < 240mg / l
Ka n u n :<200 mg/l
- Ośuza TxBpdoct: <28°dH, <50°TH, <500 ppm (mg CaCO₃/l)
- Xe n y 3 o :<0,5 mg/l
MaHraH: < 0,05mg / l
M e n :<2 mg/l
A K T N B e H xlop: < 0,3mg / l
B e 3 HEnpnyTH MmPn3M
3aunTa Ha OKoJHaTa cpeDa

Onakobbunte MaTeepnann NoDnexkat Ha peuNKnupaHe. MoJn, n3XbPnIe OnakOBKnte no Cbo6pa3EH cOKnHaTa cpeaHaunH.

EneKtpnuecknte n eneKtpoHnTe ypeu cnBpXaT cEHn MaTePnaJIn, NOJnxAun Ha peunKnIpaHe, a YecTo N CbCTabHN YacTN, HApN. 6aTePn, akMyNaTopH N batePnn Nn MacNo,
KoITo npn HennpaBnHb6opabe He nIn n3XbbpnaHe MoarT da npedctabJraBt noTeHuaNHa onaCHOCT 3a OOBeWKOTO 3dpabe N 3a OKoJIHATA cpea.3a npabHHOTo FyHKUHOHpaHe Ha ypeDa BCE naK Te3n CbCTABHn Yactn Ca Heo6xOdMn. O6o3HaueHnte C To3n CmBON ypeDn He Tp8Ba Da 6bDaT n3XBbPJIHN 3aeDnC 6bntOBITE OTnAdBuN.
Yka3aHnna 3a ccbTaBn BeuecTeBa (REACH)
AkyaHa HOpMaun 3a CbctabKnte ue HaMepeTHe Na HtepHcTpaHua: www.kaercher.de/REACH
Akkcecoapn npe3epBn YacTn
N3no3BaIe cAmO opuHaHnHn Akcecoapn OpunHnHn pe3epBn yacTn, no To3n HaunocnpyraBe 6e3onacHata n 6e3npo6lemhaeknloataaHa ypeda.
Информаця OTHOCHо akcecoapи и pezeрви части ице hamepnte tuk: www.kaercher.com.
KOMNJIeKT Ha DOCTaBkata
Ppna paoaKaBaHe npoBepeTe cBbpxKaHneTo 3a qIIOCT. Pp nncBaun akcecoapn npn
TpaHcnpTHN UeTN, MoJr, o6bPHeTe ce KbM Baunr dNCTpN6yTop.
Hnctpykun 3a 6e30nacHoCT
- Ot cьшостбно 3науене eда почетete
нсструкшип'te 3a 6ezonacnoct 5.951-949.0 педи
пьрвоначално CTapТираhe.
CnasaBaiTe HaunohanHnte pa3npoe6n 3a nouchTbauni ypei n C TeuhoCTn NOD BUCOKO haJraHe.
Cna3BaIte HaunohAHnHe pa3nope6n 3a npedOTbpaTBAHe Ha 3NOnOlyKn. NOnCTBaUNTe ypeN C TeuHOCTn NOB BnCOKo HAnraHe Tp86Ba peOBHO Da Ce n3NTBaT. Pe3yNTaTbT OT n3NTBaHTo Tp86Ba Da 6bDe 3aNcH B NmCMeHa fOpMa.
He moi nupa Te yctpoCTBOTo nn akcecoapTe.
PpeDn3Hn yCtpoNCTBa
△PPEДПА3ЛИВОCT
Juncceauu unu npomeheu npedna3Hu ycmpoucmba
Ipepa3Hume ycmpoucmea cnxam 3a Bawama 3auuma.
Hukozha He npomehme unu npene6pezeaume npedn3hu ycmpoucmea.
PpeDna3eH loct
IpeDnA3HnT Noc H a NcToJeta 3a BnCOKo HaIraHe npedOTBpataBa HeBOJHOTO BKIOUvBaHe Ha yCTpoiCTBOTO.
PpeJnBeH KJIanaH
Ako nictoJet3a BnCOKO HnIraHe e 3aTBopeH, npEnBnRt KnaanCe OTbapr N CEJIyRr O6em BOda n3TuHa o6paTHo KbM BCMyKaTeJIHaTa CtpaHa Ha nomnata.
IpeINBnT KnaanH ce HacToBa OT npOn3BOAnTeN n ce 3aneYaTa. HAcToPkata Ce n3BbPwBa cAmO OTJeNa NO o6CnykBaHe Ha KIneHTN.
CnmboN Bbpxy ycTpoNCTBOTO
He hacoubaTe ctpyTa C BnCOKo haIraHe KbM Xopa, KINBOTHn, eJKeTpUyecko obOpuyBaHe NOD HAppeKHe IIN KbM camOTO yCTpoNCTBO.
3auntete yctpoiCTBOTo cpeu 3ampb3BaHe.
CbIpaHIOXIMte pa3nope6n yCTPOIcTBOTHOHKORA He Tp86Ba Da CE n3NOJI3Ba CmpexaT3a NITeHa BOa 6e3 cNCTEmeH pa3dIINTe. YBepTe ce, ye Bp3KaTa KbM DoMaShaTA Bn BOIOPOBOHa CNCTema, C KOrTO Ce n3NOJ3Ba UpeBbT 3a NOHcTBAHe C BNCOKO HAnraHe, e ObOpyDbaHa CbC CNCTemEH pa3dIInTe CbIpaHo EN 12729, TnB A. BoDaTa, KOrTo e PpemHana ppe3 CNCTEmeH pa3dIInTe, He e NITeHa. BuHaRc CBbp3BaIte CNCTeMHna pa3dIInTe KbM BXOda 3a BOda N HIKORA dIpeKTHO KbM yCTPOIcTBOTO.
△PENDyINPPEKDEHNE
Bucokama ckopocm Ha u3xoda Ha du3ama Ha bodhama cmpy nod bucoko hanae bodu do bucoko Hueo Ha ywm, Koemo moke da npuunu duckomfopm unu ypekdahe Ha cnyxa (HaNP. wym e yuume) Ha nuqama 8 Henocpedcmbeha 6nuzocm. Nocmonho bucoko Hueo Ha wym moke da dobeede do anyxoma.
Hoceme npenopbuaHume nuHu npedna3Hu cpedcmba.
Buc okume Hua ha yum Mozam da 3ampydnm anacobama Komyukaua u da yepdarn unu nonpeam Ha cnocobnocma bu da b3npuemame 38kyoBu npedynpedumenu cuaHanu. Hukoa he paobomeme camu. N3bH paobomhama 3oha mpr6ea da npucbcmea emopo nuue.
OnncaHne Ha yctpoNCTBOTO
Перлед на HD 5/11 E Classicи HD 5/13 E Classic
Фигура A
① BuHTOBe Ha IIO3aTa
② IIO3a 3a BUCOKO HaIraHa
③Pb6cka4ka
④претаeh3aklnouBaU MExaHn3bM
(5)ДрьхkaHa nuctoeta
(6)Cnycbk
⑦ Mapkyu 3a BncoKo HnraHe
⑧ Kyka 3a nictoNET
9OnbHnHTenHa dpbXka
10 Kyka 3a ka6eI
①BoidenΦnTbp
12 OTeJeHne 3a cbxpaHHe Ha npbckaKaTa (3a Dblra npbckaKa)
13Bp63ka 3a BxoD 3a BOda
14 N3xOД 3a BOda
15 PpeBkIIOuBaTeI Ha 3axpaHbAHeTo
16 Dpbkka, ropHa (yDbJKeHa)
Перлед на HD 5/11EX Plus Classic n HD 5/13 EX Plus Classic
ФигураВ
① BnHTObe Ha IIO3aTa
② IIO3a 3a BUCOKO HaJIraHe
3PbckaKa
4IpeDn3eH 3aKnIOyBaU MExaHN3bM
⑤ДрьхkaHa nuctoleta
6Cnycbk
⑦ Mapkyu 3a Bucoko Hana rhahe
⑧Дрьхka, ropHa(ydblxkeHa)
9 DonbHnHTeHa dpbKka
⑩ Kyka 3a ka6en
①BoeHΦnTbp
12 OTeJeHHe 3a cbxpaHHe Hn npbckaKkata (3a Dblra npbckaKa)
13Bpb3ka 3a BxOa 3a BOda
14 IVxOa 3a BOda
15 PpeBknOuBaTeH Na 3axpaHbAHeTo
16PbUHaMaHnBeJa
17 Dbpxka 3a npbckauKaTa
18 Pncbkoctpye anapaat 3a 3ambpcaBaHe
06e3Bb3dnywabaHe Ha yctpoIcTBOTO
- OTBopTe BXoJa 3a BOJa.
- ⅢBaIeTe IIO3aTa 3a BnCOKo HaNraHe.
- BknIOyTe yCTpoNCTBOTo.
- Octabete yctpoiCTBOTo Da pa60Tu, DOkaTo B H3TNuAaTa BOda HMa Bb3DyUHm MExypYeTa.
5.ИЗКПЮЧЕТУСТРОДВOTO. - NocTabete IIO3aTa 3a BUCOKO HaIraHaHe.
Ekcnnoataa
ONACHOCT
Puck om ekcnno3u!
He npbckaume 3anaum meuHocmu.
Ako ycmpoucmeo ce u3noJ3ea 8 onaChu 30Hu (Hnpi. 6eH3uHocmaHuu),mpraea da ce cna3eam cbomeemhume npabuna 3a 6e3onachocm.
OTBapRHe/3aTbapRHe 3a BnCOKo HJIraHe
3aunTa OT 3ampb3BaHe
BHIMAHHE
3ampb3eaHemo yHuoxkaa ycmpoucmeomo, ako bodama om Heo He e u3moeHa HanbIHO.
Cbxpanhaume ycmpoucmomo Ha mcmo 6e3 onachocm om 3ampb3bahe.
Ako cbxpaHeHneTo Ha MrcTo 6e3 onaCHOCT OT 3ampb3BaHe He e Bb3MOXHO:
- ɪnʒeɪdeteɪn3ɪnɪshɪhaɪtBɔː
2.ИЗнOMNBAIte pa3npocTpaneHn npenapaTn npOTNB 3ampb3BaHe B yCTpOInCTBOTO. - OctaBeTe yCTpOncBTo Da pa6oTn MaKcMym 1 MNHyTa, DOKaTO NOMnata N Tpb6nte Ce n3npa3HrT. YKa3aHue
N3non38aume pa3npocmpaHenu npenapamu npomue 3ampb36aHe Ha zluKoHa Ocho8a 3a npee03Hu cpedcme. Cna38aume uncmpykuume 3a pa6oma Ha npou3eodumena Hau npenapama npomue 3ampb38ahe.
Грnxи n o6cnyxBaHe
ONACHOCT
HeoHcmapmuHa ycmpoucmeomo
Puck om HapaHaeane, mokoe ydap
I3KIOUcHeme He3a6a8Ho ycmpoucmeo u u3eadedema
uencena om KOHmacma, npedu da u3ebpweame
pa6oma.
YKa3aHue
Cmapomo Macno Moke da ce u3xebpna cmo Ha onpefenenu 3a ueima Mecma 3a cb6upahe. Mon, u3xebpnaume cmapomo Macno Ha mezu Mecma. 3ambpcraeaHemo Ha okonhama cpeda cbc cmapo Macno ce haka3ea om 3aKoHa.
HcneKua Ha 6e3oNaChocTtA/DoROBop 3a noDpBxKa
C Baunia nctpn6ytop mokeTe da dorobopnte npOBexdaneTo Ha nepnoDnUHa HnCneKuNa Ha 6e3oNaChocTt a nn Da cKnIOuyte dorobop 3a noDpBkka. Mon, KOHCyUTnpaIte ce.
HHTepBaJIHa noDpBxKa
PpeBn BcKa ynoTpe6a
- Поверете письединтугеля Кабел за по breast, He3a6abHOBb3naIarTe CMHa Ha NOBpeHЯ Ka6en OT OTOpH3npaH cepBn3 nIN eNEKtpoTeXnK.
- Поберете Маркуа 3a pa60ta noD BUCOKO налягане 3a nobpeda, незабавно Cмени пobpeden�у Маркуа 3a pa60ta noD BUCOKO наляганe.
- Поберете урда захерmetичовс.TOnусяа ce 3a n3TuYat 3 KaNKn BOda 3a eHa MInHyta.Прп noCnJIHa npOnyckJINBOCTNotbpcTe cepBn3.
CeDMnHNO
- Nocntete BoHnB qnltp, BxKte rnaBa Nocmeane Ha bOdHnB qunmtp.
Ha Bcekn 500 pa6oTHn Yaca, Nohe BeHbXr ToDnshO
OTdnt3a 06cnykBaHe Ha KIneHTn Tp86Ba Da n3BbPm CMHaTt Ha MacIOTO.
Pa60tn no noaipbxxka
Nouctbahe Ha BOHNJHp
BHIMAHHE
Iospehen bodeh fummbp Ha 6oDhama epb3ka
PoepeHa ycmpoucmeomo nopadu 3ambpceHa boda Ppoepeme bodnua fummbp 3a noepda, npedu da 20 nocmaeume Ha bodhama 6pb3ka.
1.ИЗваде Te BODнЯ ФнЛТьр.
2. NouncTeTe BODHnA FNTbp NOI TeHaaB ODa.
3. NocTaBeTe OTHOBO BOHnA ΦnITbP BbB BOHaTa Bpb3ka.
HOMOu npn HEn3npaBHOCTN
ONACHOCT
Onachocm om HapaHaeane nopadu eknoueau, ce HenpehamepeHo yped u om enekmpuuecku ydap.
Ppeu ecaekpu pa6omu u3knquaeume ypea u 30bpneae mpekoue u cen.
Bb3naaume npoeepkama u pemohma ha eNeKmpuuecku KOMnoHeHmu cmo Ha omopuzupaHua cepu3.
Ipu Heu3npaehocmu, Koumo He ca cnomehamu 6 Hacmouama 2naea, nombpceme omopu3upaH cepeu3 npu cbMHeHue uu npu u3puHo yka3aHue 3a moea.
| Henisztpavhosc T Kopekuzi | |
| UcstpoiCSTBOTO He ce cTaptnpa | • Поверete 3axpanbaunka6en 3a nobpeda. • Поверete Мржoboto Hanpejehne. • Ако устpoiCSTBOTO nperpee: a Пocstabete правлочьатя на зхpanbaheTo B noIoxjehne ,0" b Ocstabete устpoiCSTBOTO da ce oxlaadi 3a nohe 15 mInhytN. c Пocstabete правлочьатя на зхpanbaheTo B noIoxjehne ,1". • Свржete ce c OTdela 3a obScnykBaHe Na KIneHTN B clyuayn Ha eJelKtpnueckn HenisztpavhoscT. |
| UcstpoiCSTBOTO He cIbZdaba HANrAHe | • Поверete StaNdapTHata Дюз(a pa3mepbTe epocohn, Вижte rnaBa TexHucecku daHnU). • Повстete/cmeHete Дюзatura 3a Bincoko HanelraHe. •ОбeЗБЗduyete устpoiCSTBOTo (Вижte rnaBa ObeЗБЗduyaBaHe Na ycmpoiCmEOMo). • Повстete Bodnna ФиNTbp (Вижte rnaBa ПocuSmeBaHe Na Bodnna ФиNTbP). • Повстete BCnCKn BxOJaUN Trpb6n KbM ПOMnATA. • Поверete DeBnTa Na BodOCha6DyBaHeTO (Вижte rnaBa TexHucecku daHnU). |
| Помпата He e xermetTuHa | • При по-cinlha nponucknibocSt Bv3lanaiTe npoverpka Na UypeDA ot cepBn3a. |
| Дунчka se ИЗпuckане на до 3 калки ВODa 3a edha MInHyta. | |
| ПочьВанe Na nomnata | • Повстete Bodnna ФиNTbp. • Поверete 3axpanbaunka WodopnpOBoD 3a TeUOBe. •ОбeЗБЗduyete устpoiCSTBOTo (Вижte rnaBa ObeЗБЗduyaBaHe Na ycmpoiCmEOMo). •Свржete ce c OTdela 3a obScnykBaHe Na KIneHTN, akO e NeobxOДIMO. |
TapaHcH
BbB BcKaJaBpKabBa Ca BaHnHn H3daJeHHeOT Haun OToPn3upan DnCTpn6yTop rapaHNoHHu YcNoBn.
EbeHTyaHn nobpeHn Ha Baunna ypeI ue otctpaHm B paMKnTe Ha rapaHcnoHHn CpOK 6e3nAthO, aKo ce kacae 3a dekeT B MaTePnAInTe Hn n npOn3BOdCTBeH dekeT. B cnUyauHa npedraBaHe Ha npabo Ha
rapaunca,ce o6bprhe KBM Baunia nncptn6ytopnn Kbm Hau-6n3kn OTO np3npaH cepBn3,KATO npedctabte kacobata 6eJekka.
(Adpec, Bk. 3aHaTa cTpaHa)
IOnbHnTeHa rapaHcNoHHa HOpMaqna (ako mTaKaaba) moKeTe da Hamepnte B ctpaanuata „CepBn3" Ha MeCTHnye6caHT Ha Karcher B pa3deN „N3ternHe".
TexHnueckn DaHHN
| HD 5/11 E Classic | HD 5/11 EX Plus Classic | HD 5/13 E Classic | HD 5/13 EX Plus Classic | ||
| Еlektrichiеско CBьрзванe | |||||
| Нарlexенье V 220 - 240 220 - 240 220 - 240 220 - 240 | |||||
| Фаза ~ 1 1 | 1 | 1 | 1 | ||
| Чебota | Hz | 50 | 50 | 50 | |
| Присьдени滥но мошноct | kW | 2,2 | 2,2 | 2,4 2,4 | |
| Тил зашита | IPX5 | IPX5 | IPX5 | IPX5 | |
| Предимател (истен) | A | 15 | 15 | 15 | 15 |
| Удлжителен кабел 30 m | mm² | 2,5 2,5 2,5 2,5 | |||
| Извор差别 loда | |||||
| Налгане на постовашиatingа loда (макс.) | MPa (bar) | 1,0 (10) | 1,0 (10) | 1,0 (10) | 1,0 (10) |
| Temпегатура на постовашиatingа loда (макс.) | °C | 40 | 40 | 40 | 40 |
| Колочевога на постовашиatingа loда (мен.) | l/h (l/min) | 720(12) | 720 (12) | 720(12) | 720(12) |
| Висунна на засукванe (макс.) | m | 1,0 | 1,0 | 1,0 | 1,0 |
| Данни за мошноста на урEDA | |||||
| Големпна на дюза за.stандарта дюза | 036 | 036 | 032 032 | ||
| Дебит, ВODA | I/h (I/min) | 500 (8,4) | 500 (8,4) | 500 (8,4) | 500 (8,4) |
| РавOTно налягане | MPa (bar) | 11 (110) | 11 (110) | 13 (130) | 13 (130) |
| РавOTно CBрьхналягане (макс.) | MPa (bar) | 16 (160) | 16 (160) | 16 (160) | 16 (160) |
| Peaktnibna сILA на пистолета за paбoting的对象Високо наляганe | N | 20,4 | 20,4 | 22,4 | 22,4 |
| Размери и тergla | |||||
| Тergло (бez пшиадлесности) | kg | 18 | 21 | 18,3 | 21,3 |
| Дыжинахшиroduунах височиа | mm | 350 x 330 x 8 | 350 x 330 x 8 | 350 x 330 x 8 | 350 x 330 x 8 |
| 80 | 80 | 80 | 80 | ||
| Установени StOnиости съласно EN 60335-2-79 | |||||
| Стойnot на висец ръка-pамо пистолет за paбoting по Двисоко налягане | m/s2 | 2,27 | 2,27 | 3,1 | 3,1 |
| HeystочимьостК | m/s2 | 1,5 | 1,5 | 1,5 | 1,5 |
| НИво на звуково налягане LpA | dB(A) | 76 | 76 | 80 | 80 |
| Heystочимьост KpA | dB(A) 2,5 | 2,5 | 2,5 | 2,5 | 2,5 |
| НИво на звукова мошност LWA+ Heystочимьost KWA | dB(A) | 91 | 91 | 96 | 96 |
3ana3bame cn npaBTo Ha TeXHnueckn npomeHn.
ДeКларачи 3a CbOTBeTCTBHe Ha EC
C HacToaTO OeKnapuPame, Ye nocOueHaTa No-dOny MaunHa NO CBOrTa KOHcEunu N KOHCTpyKUIn, KaKTo IN B NycHaTOTO OT HAc Ha Na3apa N3NbIhHeHne, CbOTBeTCTBa Ha npINoXUMITE OCHOBn N3NCKBaHN 3a 6e3oNaChOCT N ona3BaHe Ha 3dpabeto, ONpeDeenHn B DnpeKTbNTe Ha EC. Ppi HeCbIgnaCyBaHa c Hac IpomraHa Ha MaunHaTa Ta3N DeKnapaunr r6n CBOrTa BaIINDHOCT. PpOdyKT: Ype3a NouchTaBHe NOD BnCOKO HaJraHe TUn:1.520-xxx
PnJIOXIMM DnpeKTHBn Ha EC
2000/14/EO
2006/42/EO (+2009 / 127 / EO)
2011/65/EC
2014/30/EC
2009/125/EO
PpnoJoxeH(n) perIamEnT(n)
(EC) 2019/1781
PpIIOXIMM XapMOHN3npaHn CtaHdApTn
EN 60335-1
EN 60335-2-79
ENIEC63000:2018
EN 55014-1:2017 + A11:2020
EN 55014-2: 1997+A1: 2001+A2: 2008
EN 61000-3-2: 2014
EN 61000-3-3: 2013
EN 62233: 2008
PpIIOxIMa IpoeDpya 3a OueHBAhe Ha CbOTBETCTBHeTO
Chairman of the Board of Management
S. Reiser
Manager Regulatory Affairs & Certification
Пьномошик по дOKум entaцята:
S. Reiser
Alfred Kärcher SE & Co. KG
Alfred-Karcher-Str.28-40
71364 Winnenden (Germany)
Ten.: +49 7195 14-0
ΦaKc: +49 7195 14-2212
BInHeHdEn, /06/01
Nói dung
Huongdan chung 157
May phun rua ap luc cao voi tia phun ap luc cao chi dung de lam sach cac do vat, bao gom:
- May moc, phuong tién, cau truc, cong cu, mat tién, san thuong va thiét bj lam vuon.
Co the them chat tay rva voi cac phu kien tuy chon. Ban nen su dung phu kien dac biet nhur dau phun xoay de xu ly vet dat ban cung dau.
Gia tri gioi han nguôn cap nuoc
CHU Y
Nuroc ban
Hao mon som va rach hoac can ban trong thiet bi Chi cap nuoc cho thiet bi bang nuoc sach hoac nuoc tai che khong vuot qua cac già tri gioi han quy dinh.
Các giá tri gioi han sau ap dung cho nguôn cap nuó:
Gia tri pH: 6.5-9.5
- Do dan dien: Do dan dien cua nuoc ngo t à +1200 μS/cm, do dan dien toi da la 2000 μS/cm
Bui lang (thé tich mαu 1 l, thoi gian lang 30 phút): < 0.5 mg/l
Bui co the loc: < 50mg / l , khong co chat mai mon
Hydrocarbon: < 20mg / l
- Clorua: < 300mg/l
- Sulphate: < 240 mg/l
Canxi: < 200mg / l
- Do cung toan phan: < 28 °dH, < 50 °TH, < 500 ppm (mg CaCO₃/l)
Saat: < 0.5mg / l
- Mangan: < 0.05mg/l
D ng: < 2mg / l
- Clorua hoat tinf: < 0.3mg/l
- Khong có mui khó chu
Bao vê mói truong

Cac vát liéu bao bi phai tái ché duoc. Hay xu ly bao bi theo cach than thien moi truong.

Cac thiet bi dien va dien tur thuong chuca cac vat lieu tai che co giia tri va cac bo phan nhu pin dung 1 lan, pin sac hoac dau co the gay ra nguy co tiem an voi suc khoe con nguoi va moi truong neu
nhu duoc su dung vax ly khong dung cach. Tuy nhien cac bo phan nay lai rat can thi et cho su hoat dong cua thiet bi. Khi thi et bi duoc danh dau bang ki hi eu nay thi khong duoc phep vut vao rac thai sinh hoat.

H. Jenner
Chairman of the Board of Management

S. Reiser
Manager Regulatory Affairs & Certification
Dai dien duoc uy quyen:
S. Reiser
Alfred Karcher SE & Co. KG
Alfred-Karcher-Str. 28 - 40
71364 Winnenden (Duc)
2000/14/EG:Lampiran V
Chairman of the Board of Management

S. Reiser
Manager Regulatory Affairs & Certification
Penyusun dokumen yang berwenang:
S. Reiser
Alfred Kärcher SE & Co. KG
Alfred-Karcher-Str. 28 - 40
71364 Winnenden (Jerman)
Tel.: +49 7195 14-0

Chairman of the Board of Management
S. Reiser
Manager Regulatory Affairs & Certification
Register your product and benefit from many advantages.
www.kaercher.com/welcome


Rate your product and tell us your opinion.
www.kaercher.com/dealersearch


- Contents
- General notes
- Intended use
- Water supply limit values
- ATTENTION
- Environmental protection
- Notes on the content materials (REACH)
- Accessories and spare parts
- Scope of delivery
- Safety instructions
- Safety devices
- CAUTION
- Safety lever
- Overflow valve
- Symbols on the device
- WARNING
- Description of the device
- Overview of HD 5/11 E Classic and HD 5/13 E Classic
- Illustration A
- Overview of HD 5/11 EX Plus Classic and HD 5/13 EX Plus Classic
- Illustration B
- Initial startup
- △DANGER
- Colour coding
- Unpacking
- Installing the accessories
- Electrical connection
- Water connection
- Connection to a water line
- Venting the device
- Operation
- Opening / closing the high-pressure gun
- High-pressure operation
- Note
- Operation with detergent
- Incorrect handling of detergents
- Unsuitable detergents
- Illustration G
- Recommended cleaning method
- After operation with detergent
- Replacing the nozzle
- Risk of injury!
- Dirt Blaster Storage
- Interrupting operation
- Finishing operation
- Transportation
- Failure to observe the weight
- Illustration J
- Storage
- Frost protection
- Frost destroys the device if it is not completely drained of water.
- If frost-free storage is not possible:
- Care and service
- Inadvertently starting up the device
- Safety inspection/maintenance contract
- Maintenance intervals
- Each time before use
- Weekly
- Every 500 operating hours, at least once annually
- Warranty
- EU Declaration of Conformity
- National standards used
- Sound power level dB(A)
- Contenu
- Indices
- Regulamento(s) aplicavel/aplicaveis
- icindekiler
- Sisälto
- Sisukord
- Turinys
- Kazalo
- Directive UE relevante
- Regulament(e)utilizat(e)
- Norme armonizate aplicate
- Procedura de evaluates a conformitàti
- Standardenationale aplicate
- Nivel de putere acustica dB(A)
- Sadržaj
- Primenjena(e) odredba(e)
- Primenjene harmonizovane norme
- CopepkHne
- Obuntyeka3aHnna
- Ha3haueHne
- PpeBbIe 3NaueHnIy BODOcHa6KeHnI
- BHIMAHNE
- 3aepnHennb0da
- 3aunTa OkpyXaOuSei cpeDbI
- cpebl.
- Yka3aHnI NO KOMIOHeHTam (REACH)
- △NPEyynPExKDEHNE
- OncanHe np6opa
- O63op HD 5/11 E Classic u HD 5/13 E Classic PucyHok A
- O63op HD 5/11 EX Plus Classic n HD 5/13 EX Plus Classic
- PucyhoK B
- PepBbI 3anyck
- ONACHOCTb
- ZBeToBaKa KoDnPoBka
- PacnaKOBbIbAHne
- YcTaHOBka akcecccyapOB
- PncyHOK C
- PucyHok E
- 3NeKtpnueckoe coeHHeHne
- Puck npaxehur 3neKmpuueckum mokom!
- IopKnIOueHHe K nCTOuHnky BoDbI
- IopKIOUOHeH K BOODonpoBOdy
- △PENDyINPEXKDEHNE
- CtpaBnBaHne Bo3dyxa n3 np6opa
- Pa6ota
- △OIIACHOCTb
- OTkpbIbAHne/3aKpbIBaHne INCTOJeTa BBICOKO rDaBJIeHn
- PcyHOK F
- Pa60Ta C BbICOKM DaBJIeHHeM
- Pa6Ota c MOIOUcM CpeDCTBOM
- △IPEДУПЕЖДECHNE
- BHHMAHNE
- PucyHok G
- PeKOMeHDoBaHHbI MeTOd OChCTKN
- Pocne pa6oTbIC MOUcIM cpeCTBOM
- 3aMeHaΦopcyHKn
- XpaHHe rpa3eBOH ppe3bI
- PpumeyaHue
- 06cnyxmbHne
- PpOBepKa TexHKn 6e3onacHocTn /doROBOp
- HeincpabHocTb CnocO yctpaeHn
- Pn60p He 3anyckaetc
- O TexHnueckOM o6cIyXuBaHn
- IpeepKaKdbimHaayanompa6oTbI
- ExeHeDbHo
- Yepe3 kaxdble 500 yacob pa6oTbI, He pexe odHoro pa3a B roD
- Pa6oTbI NO TexHnueckomy 06CJnyKBAHHIO Ounchka qnlbtpa dna BOdi
- BHUMAHNE
- POMOUIpHHeNCpPaBHOCTX
- YcTaHOBJIeHHaKceCyapiB
- EneKtpnueHne iDkIIOueHHa
- △HE6E3NEKA
- Natpy6ok dnniiknueHH
- BODONOCTaayHn
- PnncdHaHHdoBODonpoBdy
- △NONEPEDXKEHH
- Bunyck nobitpr3 npnla dy
- Ekcnnyataciia
- HE6E3NEKA
- BIDKpNBaHH/3akpNbBaHH nicToJeTa BNCOKO TnCKy
- MaJIHOHOKF
- Pobota nID BnCOKM TnCKOM
- Bka3ieka
- Po60Ta 3 MNUOuM 3aCo6oM
- IpeioDnHicThTexHCHOrO OcCnyroByBaHHa Ipeed KoxHM BkOpNCtAHm
- LOTINKHA
- Po60Tu 3 TexHiuHoro 06cIyroByBaHHa
- OuHHeHH BODaHoro fIbTpTa
- yBAGA
- NookkeHuB OoHbmp Ha 3'cdHaHHI oodu
- Дономora B pa3i HecnpabHocTei
- TapaHTi
- 06uynka3aHn
- PpeHa3NaueHne
- Гразични StOnHocTn 3a 3axpaHBaHe C Boda BHIMAHNE
- 3aMbpcehoeda
- 3aunTa Ha OKoJHaTa cpeDa
- Yka3aHnna 3a ccbTaBn BeuecTeBa (REACH)
- Akkcecoapn npe3epBn YacTn
- KOMNJIeKT Ha DOCTaBkata
- Hnctpykun 3a 6e30nacHoCT
- PpeDn3Hn yCtpoNCTBa
- △PPEДПА3ЛИВОCT
- PpeDna3eH loct
- PpeJnBeH KJIanaH
- CnmboN Bbpxy ycTpoNCTBOTO
- △PENDyINPPEKDEHNE
- OnncaHne Ha yctpoNCTBOTO
- Перлед на HD 5/11 E Classicи HD 5/13 E Classic
- Фигура A
- Перлед на HD 5/11EX Plus Classic n HD 5/13 EX Plus Classic
- ФигураВ
- 06e3Bb3dnywabaHe Ha yctpoIcTBOTO
- Ekcnnoataa
- ONACHOCT
- OTBapRHe/3aTbapRHe 3a BnCOKo HJIraHe
- 3aunTa OT 3ampb3BaHe
- BHIMAHHE
- Ako cbxpaHeHneTo Ha MrcTo 6e3 onaCHOCT OT 3ampb3BaHe He e Bb3MOXHO:
- Грnxи n o6cnyxBaHe
- YKa3aHue
- HcneKua Ha 6e3oNaChocTtA/DoROBop 3a noDpBxKa
- HHTepBaJIHa noDpBxKa
- PpeBn BcKa ynoTpe6a
- CeDMnHNO
- Ha Bcekn 500 pa6oTHn Yaca, Nohe BeHbXr ToDnshO
- Pa60tn no noaipbxxka
- Nouctbahe Ha BOHNJHp
- HOMOu npn HEn3npaBHOCTN
- TapaHcH
- ДeКларачи 3a CbOTBeTCTBHe Ha EC
- PnJIOXIMM DnpeKTHBn Ha EC
- PpnoJoxeH(n) perIamEnT(n)
- PpIIOXIMM XapMOHN3npaHn CtaHdApTn
- PpIIOxIMa IpoeDpya 3a OueHBAhe Ha CbOTBETCTBHeTO
- Nói dung
- Gia tri gioi han nguôn cap nuoc
- CHU Y
- Nuroc ban
- Bao vê mói truong
Brand : Kärcher
Model : HD 513 E Classic
Category : Pressure washer