
UR3000 - Grass trimmer MAKITA - Free user manual and instructions
Find the device manual for free UR3000 MAKITA in PDF.

| Product type | Corded electric grass trimmer |
| Brand | Makita |
| Model | UR3000 |
| Rated voltage | 230-240 V ~ |
| Rated frequency | 50-60 Hz |
| Rated power | 450 W |
| No-load speed | 9000 min⁻¹ |
| Cutting width | 300 mm |
| Cutting line diameter | 1.65 mm |
| Net weight | 2.6 kg |
| Dimensions (L/W/H) | 1016-1256 / 301 / 262 mm |
| Sound pressure level | 75.1 dB(A) (K=3 dB(A)) |
| Guaranteed sound power level | 96 dB(A) |
| Vibration | 2.73 m/s² (K=1.5 m/s²) |
| Protection class | II (double insulation) |
| Power supply | Mains (corded) |
| Cutting mode | Grass cutting and edging (180° pivoting head) |
| Line system | Pre-filled cartridge or manual refill |
| Safety | Lock button, guard cover, line stops within 2 seconds |
| Included accessories | Auxiliary handle, strap, safety glasses, line cartridge |
| Maintenance | Disconnect before cleaning, check cable regularly, store in a dry place |
| Spare parts | Line cartridge, spool, cutting line, safety guard, handle |
| Repairability | Repairs only by authorized Makita service center |
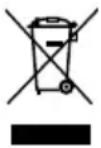
| Disposal | Do not dispose with household waste, recycle WEEE |
| Standards | CE, EN55014, EN60335, EN61000, EN62233 |
Frequently Asked Questions - UR3000 MAKITA
User questions about UR3000 MAKITA
0 question about this device. Answer the ones you know or ask your own.
Ask a new question about this device
Download the instructions for your Grass trimmer in PDF format for free! Find your manual UR3000 - MAKITA and take your electronic device back in hand. On this page are published all the documents necessary for the use of your device. UR3000 by MAKITA.
USER MANUAL UR3000 MAKITA
ENGLISH (Original instructions)
We wish to thank you for choosing our products. We are confident that the high quality of our machine will meet with your satisfaction and appreciation and that we will give you long-lasting service.
Before starting to use your machine, make sure to read with care this manual, which has been purposely drawn up to provide you with all the necessary information for proper use, in compliance with basic safety requirements.

SYMBOLS
Some of the following symbols maybe used on your tool, please study them and learn their meaning, proper interpretation of these symbols will allow you to operate the tool more safely and effectively.
| SYMBOLS NAME EXPLANATION | ||
| CE | CE marking | The product meets demands and regulations set by the European Community (now European Union). |
| 回 | Class II Construction Double Insulated construction. | |
| WEEE MARKING | CAUTION! Unusable power tools do not belong with domestic waste. They must be taken to a communal collecting point for environmentally friendly disposal in accordance with local regulations. | |
| Read the operator's instructions | To reduce the risk of injury, user must read and understand operator's manual before using this product. | |
| Electric Shock! Disconnect the mains plug if the cord is damaged or entangled. | ||
| Do not expose to rain Don't leave your tool expose to outdoor or rain. | ||
| Wear eye protection To reduce the risk of your eye, wear eye protection! | ||
| 96 | Noise level marking Your tool | noise is not more than 96 dB. |
| KEEP ALL BYSTANDERS AWAY! | KEEP ALL BYSTANDERS AWAY! | |
1. IMPORTANT SAFETY INSTRUCTIONS
The purpose of the safety rules is to attract your attention to possible dangers. The safety symbols and the explanations with them, require your careful attention and understanding. The safety warnings do not eliminate any danger. Always use proper safety equipment, such as the guard, although you follow the safety instruction and warnings.

SAFETY ALERT SYMBOL: Indicates caution or warning may be used in conjunction with other symbols or pictures.

WARNING: Be familiar with the controls and
proper use of the equipment.

WARNING: Failure to follow the safety warnings is a result in serious injury to you or to others. Always use the safety precautions to reduce the risk of fire, flash, and personal injury. Save owners' manual view frequently for continuing safe operation and bring others who may use this tool.

WARNING: Never use your trimmer without the properly installed. Failure to adhere to this warning can cause serious personal injury.

WARNING: This machine produces an
electromagnetic field during operation. This field may under some circumstances interfere with active or passive medical implants. To reduce the risk of serious or fatal injury, we recommend persons with medical implants to consult their physician and the medical implant manufacturer before operating this machine.


WARNING: The operation of any tool
can result in foreign objects being thrown into your eyes, which can result in loss of vision or serious eye injury. Before beginning power tool operation, always wear safety goggles or safety glasses with side shields and a full face shield when needed. We recommend Wide Vision Safety Mask for use over eyeglasses or standard safety glasses with side shield.
- This appliance is not intended for use by persons (including children) with reduced physical, sensory or mental capabilities, or lack of experience and knowledge, unless they have been supervised or instruction concerning use of the appliance by a person responsible for their safety.
- Children should be supervised to ensure that they do not play with the appliance.
- Read the instructions carefully.
- Be familiar with the controls and proper use of the equipment.
- Before use, check the supply and extension cord for signs of damage or ageing.
- If the cord becomes damaged during use, disconnect the cord from the supply immediately. DO NOT TOUCH THE CORD BEFORE DISCONNECTING THE SUPPLY.
- Do not use lawn trimmer (edge trimmer), if the cords are damaged or worn.
- Warning: Cutting elements continue to rotate after the motor is switched off.
-
Keep extension cords away from cutting elements.
-
Wear protective glasses or goggles.
- Never allow children or people unfamiliar with the instructions to use the machine.
- Stop using the machine while people especially children, or pets are nearby.
- Only use the machine in daylight or good artificial light.
- Before using the machine and after any impact, check for sighs of wear or damage and repair as necessary.
- Never operate the machine with damaged guards or without the guards in place.
- Keep hands and feet away from the cutting means at all times and especially when switching on the motor.
- Take care against injury from any device fitted for trimming the filament line length. After extending new cutter line, always return the machine to its normal operating position before switching on.
- Never fit metal cutting elements.
- Never use replacement parts or accessories not provided or recommended by the manufacturer.
- Disconnect the machine from the mains before checking, cleaning or working on the machine and when it is not in use.
- Always ensure that ventilation openings are kept clear of debris.
- Where symbols pictograms are used in the marking on the machine their function shall be explained.
- Always disconnect the trimmer from the mains when leaving the trimmer unattended.
- When not in use, store the machine out of the reach of children.
- Mains powered trimmers should only be repaired by an authorized service center.
- Ask an authorized service center for any repair or adjustment other than described in this manual.
- Use only manufacturer's recommended replacement parts and accessories.

Due to Makita continuous product refinement
policy, product features and specification will change without notice.
2. GENERAL IDENTIFICATION (Fig. 1)
- Safety lock button
- Auxiliary handle
- Lock knob
- Adjust button
-
Main handle
-
Switch trigger
- Tube
- Motor housing
- Safety guard
Accessories:
Belt
Eye protection glass
3. SPECIFICATIONS
| Model UR3000 | |
| Rated voltage: 230 - 240 V~ | |
| Rated frequency: 50 - 60 Hz | |
| Rated power: 450 W | |
| No load speed: 9,000 min | -1 |
| Cutting width: 300 mm | |
| Line size: Φ1.65 mm | |
| Sound pressure level at operator's position: 75.1 dB (A) K=3 dB (A) | |
| Guaranteed sound power level: | 96 dB (A) |
| Vibration: | 2.73 m/s² K=1.5 m/s² |
| Size (L/ W/ H): | 1,016 - 1,256 / 301 / 262 mm |
| Net weight: | 2.6 kg |
4. ASSEMBLY INSTRUCTION
The trimmer is supplied with some components not assembled. To assemble these, proceed as follows:
4-1 Safety guard assembly
Fix the safety guard onto the motor housing. (Fig. 2 & 3)
- Put the safety guard onto the motor housing.
- Rotate the safety guard to the right position.
- Fix the safety guard on the motor housing with a screw.

WARNING: Take care against injury from the
blade fitted to the guard for trimming the line to length.
After extending new line, always return the trimmer to its normal operating position before switching on.

WARNING: Never fit metal cutting elements.

WARNING: Never use it without the safety guard
properly installed. Failure to adhere to this warning can cause serious personal injury.
4-2 Auxiliary handle assembly
- Attach the auxiliary handle to the support. (Fig. 4)
- Insert the bolt to the holes of the handle support and the handle, and screw the lock knob to the bolt, but don't screw fully. (Fig. 5)
- Put the head of the machine on the ground, then adjust the auxiliary handle to the comfortable position by another handle for you: (Fig. 6)
3a. Push the adjust button, adjust the tube length for you want.
3b. Rotate the auxiliary handle on a comfortable angle for you want.
- Screw the lock knob to firm the auxiliary handle.
5. STARTING
Before start the trimmer, fix the extension cord into the hole of the main handle. (Fig. 7 & 8)
Take a secure hold the trimmer and without letting it touch the grass to be cut, depress the safety lock button and the switch trigger on the upper and grip.
To switch off the trimmer, release the switch trigger.
(Fig. 9)

WARNING: Switch on motor only when your
hands and feet are away from the cutting means.
6. UTILIZATION THE TRIMMER AS AN EDGER
For edging of driveways and paths, transform the trimmer from the trimmer mode to the edging mode as follows:
- Hold the tube of the trimmer with one hand and push the rotation button by another hand. (Fig. 10)
- Rotate the tube 180^ until it locks in the edging mode. (Fig. 11)

WARNING: To prevent accidental starting which
may cause serious personal injury, always disconnect the power cord before attempting to rotate the shaft.
7. REPLACEMENT OF THE CUTTING LINE CARTRIDGE
Your trimmer is supplied with a fully disposable cutting line cartridge which overcomes troublesome rewinding of the cutting line.
To replace an empty cutting line cartridge as follows:
- Press both of the release latch on the spool holder and boost up it out of the cap (Fig. 12), remove the empty spool out. (Fig. 13)
- Put the spring and cap out of the empty spool and into the new spool, then feed the two cutting lines of the new spool through the eyelets of the cap. (Fig. 14)
- Put the new spool into the spool holder, and then press the cap down till lock into place by the release latch. (Fig. 15)
8. REFILL OF CUTTING LINE
To refill cutting line:
- Disconnect the machine from the mains.
- Remove the empty spool. (Fig. 12 & 13)
- Cut a new cutting line to less than 8m and bend it at the middle.
- Hook the middle of the new cutting line to the notch located at the center of the spool between the 2 channels provided for the cutting line. The arrow on the spool shows the direction of winding the cutting line. (Fig. 16)
- Wind the cutting line around the A section (10) in an orderly placement. Make sure to wind it tight and flat so that the surface of the wound line is not ragged. (Fig. 17)
- Wind all but about 100mm of the cutting line, leaving the end temporarily hooked through a line holder (12) on the side of the spool. (Fig. 18)
- In this way, wind the cutting line in the B section (11) as well and leave the end temporarily hooked. (Fig. 17 & 19)
- Mount the spool onto the cap so that the temporarily hooked position of the cutting line (13) matches up with the notches (14) on the side of the cap (15). (Fig. 20)
- Unhook the ends of the cutting line from their temporary position and fit them into the notches on the side of the cap. (Fig. 21)

WARNING: Make sure that the cap is secured to
the spool holder properly. Failure to properly secure the cap may cause the components to fly apart resulting in serious personal injury.
- Make sure that the spring is in place. Push the cap (15) in the spool holder (16). Make sure the latches fully spread in the cap. (Fig. 14, 15 & 22)
- Press on the spool button (18) and pull out one end of the cutting line. Make sure that the line has been fed out. (Fig. 22 & 23)
- Finally, pull out the other end of the line without pressing the spool button. Make sure that the line has been fed out.
9. FEEDING CUTTING LINE
Short or worn lines cut less efficiently. To improve its operation on subsequent occasions, tap the spool button lightly on the ground while the trimmer is running at full speed. This will automatically feed extra cutting line. The cutting line blade (17) under the guard will automatically trim the cutting line to the correct length during operation. (Fig. 22 & 24)

NOTE: Hitting hard or abrasive objects, such as
fences, concrete and rocks hidden by tall grass may cause the cutting line to break. If the cutting line breaks, follow the feeding procedure.
10. INSTRUCTION FOR USE
Start the trimmer before getting close to the grass to be cut.
Cut the grass by moving the trimmer from right to left and proceed slowly, keeping trimmer inclined about 30^ . High grass should be cut in layers, always beginning from the top. The cuts should be short.
Do not cut damp or wet grass.
Avoid wearing the line out quickly by knocking against hard objects (stone, walls, fences, etc.). Use the edge of the guard in order to keep the trimmer at the right distance.

WARNING: Do not use excessive force or hitting
the Trimmer Bump Head on the ground to feed the trimming line. If the trimming line will not be fed after tapping the bump head on the ground while the trimmer is running, the cutting line may have tangled or broken within the cartridge or the cutting line may have been used up.
NOTE: Excessive force or hitting the Trimmer Bump Head on the ground to feed the cutting line will damage the bump head.

WARNING: The cutting head continues to rotate
after motor is switched off for a few seconds.
11. EXTENSION CORDS
You should only use extension cords for outdoor use, ordinary duty PVC or flexible heavy duty rubber sheathed with a cross sectional area not less than 0.75mm^2 Before using, check the supply and extension cords for signs of damaged during use, disconnect the cord for signs of damage or aging. If the cord becomes damaged during use, disconnect the cord from the supply immediately. DO NOT TOUCH THE CORD BEFORE DISCONNECTING THE SUPPLY. Do not use the appliance if the cord is damaged or worn. Keep extension cord away from cutting elements.

WARNING: Always ensure that the ventilation
openings are kept clear of debris.
12. MAINTENANCE
- After use, disconnect the machine from the mains and check for damage.
- When not in use, store the machine out of the reach of children.
- Mains powered trimmers should only be repaired by an authorized service center.
- Ask an authorized service center for any repair of adjustment other than described in this manual.
- Use only manufacturer's recommended replacement parts and accessories.
13. ENVIRONMENTALLY FRIENDLY DISPOSAL
According to EU directive 2002/96/EC on electric and electronic equipment and its implementation into national law, all electric tools must be separately collected and environmentally friendly recycled. Alternative disposal: If the owner of the power tool does
not return the tool to the manufacturer, he is responsible for proper disposal at a designated collection point that prepares the device for recycling according to national recycling laws and regulations.
This does not include accessories and tools without electric or electronic components.
EC Declaration of Conformity
We Makita Corporation as the responsible manufacturer declare that the following Makita machine(s):
Designation of Machine: String Trimmer
Model No./ Type: UR3000
Specifications: see "SPECIFICATIONS" table.
are of series production and
Conforms to the following European Directives:
2000/14/EC, 2004/108/EC, 2006/42/EC, 2006/95/EC
And are manufactured in accordance with the following standard or standardised document:
The technical documentation is kept by our authorised
representative in Europe who is:
Makita International Europe Ltd.
Michigan Drive, Tongwell,
Milton Keynes, MK15 8JD, England
The conformity assessment procedure required by
Directive 2000/14/EC was in Accordance with annex VIII.
Notified Body:
Measured Sound Power Level: 92.7 dB (A)
Guaranteed Sound Power Level: 96 dB (A)
-
- 2010

Tomoyasu Kato
Director
Makita Corporation
3-11-8, Sumiyoshi-cho,
Anjo, Aichi, JAPAN
Michigan Drive, Tongwell,
Milton Keynes, MK15 8JD, England
3-11-8, Sumiyoshi-cho,
Anjo, Aichi, JAPAN
Michigan Drive, Tongwell,
Milton Keynes, MK15 8JD, Angleterre
3-11-8, Sumiyoshi-cho,
Anjo, Aichi, JAPAN
2000/14/EC, 2004/108/EC, 2006/42/EC, 2006/95/EC
Michigan Drive, Tongwell,
Milton Keynes, MK15 8JD, Inghilterra
VEILIGHEIDSWAARSCHUWING
WAARSCHUWING: Schakel de motor alleen in
WAARSCHUWING: Nadat de strimmer is
2000/14/EC, 2004/108/EC, 2006/42/EC, 2006/95/EC
Michigan Drive, Tongwell,
Milton Keynes, MK15 8JD, England
Richtlij 2000/14/EC was is Overeenstemming met annex VIII.
Officèle instantie:
3-11-8, Sumiyoshi-cho,
Anjo, Aichi, JAPAN
ESPANOL (Instrucciones originales)
2000/14/CE, 2004/108/CE, 2006/42/CE, 2006/95/CE
Michigan, Drive, Tongwell,
Milton Keynes, MK15 8JD, Inglaterra
3-11-8, Sumiyoshi-cho,
Anjo, Aichi, JAPAN
2000/14/EC, 2004/108/EC, 2006/42/EC, 2006/95/EC
Michigan Drive, Tongwell,
Milton Keynes, MK15 8JD, Inglaterra
Corpo notifications:
3-11-8, Sumiyoshi-cho,
Anjo, Aichi, JAPAN
aToneAeI npaywyn oE oipka
Eumopowvetai me tis akoloutheta Eupwtaikcs
Osnyie:
2000/14/EK, 2004/108/EK, 2006/42/EK, 2006/95/EK
Kai kataoekuaetai ouuva u To npakatw TpOTUTo n TUTTOINevo Eyypafo:
Michigan Drive, Tongwell,
Milton Keynes, MK15 8JD, England
H diaikacia eKtiunon sUmuoppwons Tou aataeirat ano tv Odyia 2000/14/EK kTeLeaTnke ouuwova e to Napaptna VIII.
KoiVToiOnIevoOpyAvioaOc:
3-11-8, Sumiyoshi-cho,
Anjo, Aichi, JAPAN
TÜRKÇE (Original talimatlar)
3. TEKNIK ÖZELLLIKLER
| Model UR3000 | |
| Anma gerilimi: 230 - 240 V~ | |
| Anma frekansi: 50 - 60 Hz | |
| Anma güü辙: 450 W | |
| Yüksüz yüz: 9.000 dak | -1 |
| Kesme genişiğ: | 300 |
| Misina boyut: Φ1,65 mm | |
| Operatör konumundaki ses basınçı seviyesi: | 75,1 dB (A) K=3 dB (A) |
| Garanti edilen ses güü辙)düzeyi: 96 dB (A) | |
| Titreşim: 2,73 m/s | 2 K=1,5 m/s2 |
| Büyüklük (U/ G/ Y): | 1.016 - 1.256 / 301 / 262 mm |
| Net a®,l:, | 2,6 kg |
4. MONTAJ TALIMATLARI
2000/14/EC, 2004/108/EC, 2006/42/EC, 2006/95/EC
Michigan, Drive, Tongwell,
Milton Keynes, MK15 8JD, ingiltere
3-11-8, Sumiyoshi-cho,
Anjo, Aichi, JAPAN
SVENSKA (Originalanvisningar)
sopsorderingsstation darraskinenforbereds for
Michigan Drive, Tongwell,
Milton Keynes, MK15 8JD, England
3-11-8, Sumiyoshi-cho,
Anjo, Aichi, JAPAN
2000/14/EF, 2004/108/EF, 2006/42/EF, 2006/95/EF
Og er produceret i overensstemmelse med den følgende standard eller standardiserede dokument:
Michigan Drive, Tongwell,
Milton Keynes, MK15 8JD, England
3-11-8, Sumiyoshi-cho,
Anjo, Aichi, JAPAN
2000/14/EY, 2004/108/EY, 2006/42/EY, 2006/95/EY
Michigan Drive, Tongwell,
Milton Keynes, MK15 8JD, England
3-11-8, Sumiyoshi-cho,
Anjo, Aichi, JAPAN
8. DOPLNÉNI SEKACÍ STRUNY
2000/14/ES, 2004/108/ES, 2006/42/ES, 2006/95/ES
Michigan Drive, Tongwell,
Milton Keynes, MK15 8JD, England
3-11-8, Sumiyoshi-cho,
Anjo, Aichi, JAPAN
2000/14/WE, 2004/108/WE, 2006/42/WE, 2006/95/WE
Michigan Drive, Tongwell,
3-11-8, Sumiyoshi-cho,
Anjo, Aichi, JAPAN
3-11-8, Sumiyoshi-cho,
Anjo, Aichi, JAPAN
PYCCKN (OpnHaJIbHbIe HNCTpyKcIIN)
БлагорамьмВась Вьборнании3дени.Мыуверны,чTO ВьсOKоЕ КачecТВО Нашero ИЗдениудовпьорNTВашIM Tpe6OBaHnЯmИБудET OцehedoДOCToHCTBy.Mыxe,BСBOO Oчep徴, rapaHTnpуeBMdДПNTeNBhCpOK Cnyx6bI N3deleny.
Ipeed Hauanom 3KcnpnyatauBHNMaTeIbHO n3yHnTe daHHoe pykoBOdCTBO, KOToPoE 6blIO cneuaNbHO co3daHO dI IpeoOCTaBHeH BcE Heo6xOIMoH INΦopMaUIN DJI HAJIeXaUeI 3KcnpyaTaunB COOTBeTCTBNI C OCHOBbIM NTpe6OBaHnMn NO TEXnKe 6e30NaChOCTn.

CIMBOJbI
Ha nHcTpymHe Me rT nCnOJIb3OBAtbcra HeKOTOpbIe N3 npNBedeHHbIX HnKe cMBOIOB. BaXHO 3HaTb Ix 3HaYeHne dIpy oBeCepeHn6e3oNaCHO n 3ΦΦeKTUBHO 3KcNpyatauIN.
IPEIOCTEPEXHENE:O3HaKoMbTeCb co
BCEMNoprHaMnyynpaBnEnHnnpaBnAmn npaBnBHOJ 3KcNpyatauHn3dEHH.

ПЕДОCTEPEXFEHNE: Hecneobache
IpeDynpexdeHIO IO TexHnke 6e3ONaChocTNI MOXET
npBecTn K cepBe3HOn TpaBMe OepaTopa NIN OKpykaOuXx.Bo n36ExKaHne pNcKa Bo3ropaHna, IopaxeHNa 3JIeKTPnuYeCKM TOKOM NIN NOJyEHHra TpaBMbl cIeDyET CO6NIoDaTb npAByla TeXnIKN 6e3OanachocTn. CoXpaHInTe daHHoe pyKOBODCTBO NONb3OBaTeN I nepHOJNuCeKN IpOCMaTpNBaIte erO, UTO6bl o6ceNeHTb 6e3OanachyIO 3KnpyatauIO INHCTpyKTIpOBaTb dpyNX NOpb3OBaTeJe DaHHoro N3dJIYn.

ПЕДОCTEPEXEHNE:HaВрема
3KcNpyataunn 68a3atEnbHo yCTaHaBnBaIte
OrpaKaJdeHne. HecO6JIoDeHne DaHHoro Tpe6OBaHnra
MOKeT CTAb PpUHNOH CepBe3HO TpaBMbl.

IPEIOCTEPEXEHNE:BoBpempaobtbl
DaHHoe yCTpoiCTBO CO3daet 3NEKtPOMaHTHOe noJe. B HeKOToBbIX CnyaX 3TO NOJE MOKeT CO3daBaTb NOMEXn DnA KTHBbIX NIN NACCNBbIX MeNcHckNX MMNaHTaTOB. YTO6bl YMeHbUHTb PNCK TAgKeNoI INm CmePeTbHOI TpaBMbl, nepeI HaayamO 3KcNpyatauIN ycTPOiCTBa IIOJAM C MeNcHckIMM IMPaHTaTM PeKOMeHdyETcI pOKOHcyNbTIpOBAtbcr C BpaQOM IN PpON3BOIDNTeEM MMNaHTaTa.


IPEDOCTEPEXHEH:3Kcnpnyataa
IIO6Oro INHCTpyMeHTA MOKET npINBeCTN K IONaDAHIO
IHOPoIDhIX ppeIMeTOB B rna3a, YTO MOKET NocnyKHTb
pnpuHNO TjXKeIoro yuepe6a 3peHIO uIN erO nOtepe.
Ipeed hauaIOM pa6oTbIC IHCTpyMeHTOM o63aTeNbHO
HaDeBaIte 3aUHTbIE OUYI IN OUYC C 6OKOBIMN
UNTkAMn, NIO 3aUHTHyO MACKy (ecn HEO6xOdmo).
PeKOMeHN dyETcN cNoJIb3OBaTb 3aUHTHyO MACKy C
yBEInuHeHHbIM yrIOM o630pa-y HeE MHORO
IpeIMyUeCTB NO cpaBHeHIO C OUYkAMN IIN
CTAHApTHbIMN 3aUHTHBIMN OUYkAMN C 6OKOBIMN
UNTkAMn.
1.Данhoe yctpoiCTBO He npedHa3NaeH OJN IcNoIb3OBAHnJIIOdbMn (BkIIOyAa DeTei) C ORpaHnueHHbIMnФn3NueCKnIMn, CeHCOPHbIMn NIN YmCTBeHHbIMN BO3MOXHOCTaMn, JIn6O He NMeIOUHM COOTBeTCTByIOUeOOnbTA INN 3HaHn, 3a NCKIIOUeHHeClyuAEVB, KOrda OHn DeIcTBYOT NOd pyKOBODCTBOM INN NocNe HaIpeKaUero INHCTpyKTaxa No IcNoIb3OBAHnIO yCTpoiCTBa Co CTOpOHbI Nlua, OTBETCTBEHHoro 3a INx 6e3OnacHOCTb.
2. CnEpyET CNEINb 3a MaIeHbKIMM DeTbM, YTO6bl OH He IcNoJIb3OBaJIY yCTpOJCTBO B KaHeCTBe INrpyuKN.
3. BHIMATEBHO npoHTaTe INHCTpyKuIN.
4. O3HaKombTeCb CO BcEMN opraHAmn ynpaBJIeHnI npabNJama npaBnJbHOH 3KcNJyatauN N3dennr.
5. Перед началов诫кпунаци поверъся сетевоуденинъный Кабелни на рedingmet поразжdenиллстAPEHURA.
6. B cnyae nobpekdeHna Ka6eNa BO BpeMa p6oTbI HeMeDneHNOOTcoeHNHTe Ka6eNb OT NCTOHHa nITAHN. HE KACAITECb KABEJI DO OTKIIIOUEHNA OT NCTOCHNKA NITAHN.
- B cnyae noBpeKdEHHa nIIN n3Hoc aKa6eNei 3KcNpyatauHa HnCTpyMeHTa dJa o6pe3Kn 3anpeSeHa.
- Празостерахен: Посл e Вькючен эльктpondота ржшп eям entы прдолжaitВраца tbс.
- PacnojaraTe ydInHInTeIbHbIe Ka6eN B cTopoHe OT peKyuux 3JIeMeHTOB.
- HanaeBaIte 3auntHbIe OcKN nn 3aunTHyIO MACKy dJIa.
- He pa3peuAte DeTAM n JIuCaM, He 3HaKOMbIM C DaHHbIMn IHCTpyKUyAMN, IONb3OBaTbcra IHCTpyMeHTOM.
- 3anpeaetc3kCnnyatnpoBaTb yctpoiCTBO,ecn nno6n30ctn haojatcra IHOu (BOCO6eHHocTn deTn) nnXNBOTbIe.
- Pa60bI BbINONHnTe ToJIbKO B DHeBHOe BpEma IIN npx XOpOwEM NCKyCCTBeHHOM OCBeUeHN.
14.пегнанлгдуаци nnoслngobor ydapa npOBepbte nHCTpymeHT Ha haJIuHne npn3HaKOB n3Hoca nIIN noBpeKdEHHa. PnHeo6xOIMOCtN OTpeMOHTpyTe.
15.3anpeaetcBKNIOuATb INHCTpyMeHT C NOBpeKDeHHbIM NIN OTCyTCTBYIOUIM ORpaXKeHNHeM. - Бернштейтуки и horи орөхушидөтай (ocobehno BO Bpema 3anycka 3nektpomotopa).
- Co6nOdaIte octopoxHocTb, yTO6bl He noJyHTb TpaBMy OT IIO6oro yCTpOInCTBa, npeHa3HaueHHoro DnIg 6pe3Kn Hnte. BbITaHyB HOByu HNTb, nepeB BKIIouHeHem 6o3aTeJIbHO BepHIne INHCTpyMeHT B 06bUHoe pa6Oye nnOKeHne.
- 3anpeaetcyaYCTAHOBka MeTaJIHuecknx peKyuux 3JIeMeHTOB.
- 3anpeaetcnaonb3oBaHne 3anaChbix cacte nnn akceccayob, He peKOMeHdyemblx npOn3BOnTeJeM.
20.пердnpobepko,нсTkOиИнсnoIb3OBaHnEM nHCTpyMeHTa,aTakkeecnOHHeNCNoIb3yeTcR, OTcoeDnHInTe nHCTpyMeHTOT cETn. - Cneinte 3a Tem, yTo6bI BeHTnJIauNoHHbIe OTBepCTNHe 6bln 3acopeHbI.
22.Испальуемын ИСТPyмЕТе CBMBOЛыdoJXHbI IMETb IORCHEHHe. - EcIN 3NEKtpOKoCA ocTaetc6e3 npncmOTpa, 063aTeIbHO OTKIOUHTe ee OT cETn.
- EcIn 3JIeKTPoHnCTpyMeHT He IcNoJIb3yeTcR, OH DOJIIXeH XpaHnTBcR B MeCTe, HeIOCTyINHom DJIa deteR.
- Pemont INHCTpymeHTOB IIJI pe3KN, pa6oTaIOuix OTCETN, DOJIKeH IPOUN3BOJNTbcR B OΦnUaJIbHOM cepBnCHOM ueHTpe.
- Пп ВОЗнКовен ИеОБхДИМОCTи рЕмоТа ИЛп PerулрOBК, He OПИСАНьIX B ДАнHOM ryKOBODCTBE, ОбразИТecьВОФицаЛьньсерВИСЧьИ сEHТР.
27.Используг TeToьКо peKOMeHDoBaHHbIe npOn3BODHTeJIeM 3aJaCHbIe YAcTи npHaJdJIeXHoCTN.

B CBy3n c npoBoDmOi KomnaHnei Makita
NONITIKO NOCTOARHORO yCOBepWeHCTBOBAHNA, fYHKUIN XapakTePNCNI 3dEIN MOryT 6bITb N3MeHeHbI 6e3 npedBaupTeNbHO yBeOMNeHn.
2. PACNOJIOXJEHNE KOMNHOHETOB (Pnc. 1)
-
Khonka npedoxpanitela
-
KypKobBb BbIKHouaTeJIb
DOnONHInTeIbHbIe npHaadnExKHOCTN:
PNEOCTEPEXHEN: NpeonbIrkou
NOBOPOTA uTaHn O6ra3aTeIbHo OTcoeHNrYe shHyp
PiTaHn BO n36exKaHne cIyuaHOro BKIOUcEHn
INCTpyMeHTA, KOTOpoe MOKeT npNBecTn K cepbe3HbIM
TpaBMam.
7. 3AMEHA KAPTPNДЖА PEKUŞEN HNTN
HCTpymEnI p3Kn OCHaueH NOHOCbIO yTnIn3yeMbIM KapTpndKem CpeKyuee HHTbIO, KOTOpBiy ycTaPAnrE Heo6XoDnMoCtB HaMOTKn peKyuee HHTN. 4To6bl 3aMeHtB IyCtoi KapTpndKcpeKyuee HHTbO BbINOHNHe CneDyUuNe DeiCTBn:
- Haxmte 3aueKky Ha dePkaTeene KaTyuKn u npnoDnHmTe KaTyuKy n3 Konnaqka. (Pnc. 12) Chmnte Nyctyko KaTyuKy. (Pnc. 13)
2.ИЗВЕКЛТЕ npуЖИн И кОЛNAчOKи 3NYCTоI KATUШКИ n NOMeCTnTE INx HOByIO KAtyшКy.3aTeM npOnyCTnTE DBe peKryuXn HHTN I3 HOBOI KATUшКИYepe3 OTBepCTnR KOJINaчka.(Pnc.14) - IomeCTnTe HObyIO KaTyKU B DepkaTeIb N BdaBNTe KOnnaqOK, YTo6bl OH 3aUeNKnHynCra. (Pnc.15)
8. 3APABKA PEXUJIEN HNTN
IЯЗларвп ржуш сн.TN BbINHHTe cNeDyUOJIne DeiCTBnI:
- OtknHouHTe HNCTpyMeHT OT cETN.
- CHIMITE nyctyko katyky. (Pnc. 12 n 13)
- 06peKbTe HObyo peKyuIy HHTb, yTO6bl ee dHnHa coCTabJIa MeHee 8 M, nCLOXHTe ee IONOLAM.
4.Поцente HOByIOpeKyUIO HHTb K npope3N B ueHTpe KaTyuKN MExNy DByMRAHaJnAmN, npedHa3NaeHHbIMnДЯpeKyuIeHHTN.CtpeJIka Ha KaTyuKe yKa3bIBaET HAnpaBJIeHne HAMOTKn HHTN. (Pnc.16) - AkkypaTHo HAMOTaItepeKyuIHyHHTb BOKpyr CeKUIN A (10).HamatbIbAitHe HHTb IIOtHO npABHomepHo, YTO6bl NOBepxHOCTb HAMOTAHHOHHTn 6bla poBHOr. (Pnc.17)
- OctabBe 100 MM HnHa nTne depKaTeNa Hn (12) c6Oky KaTywn. (Pnc. 18)
-
HAmotaTe pexyUH HHTb Ha ceKUnB (11) TaKIM Ke o6pa3OM uOCTaBBte KOHeu HHTn Ha nETne. (Pnc. 17 n 19)
-
YctaHOBnTE KaTyUkky B KOJNaUOK TaKIM O6pa3OM, YTO6bI MecTo BnCraUnx HntEi (13) CoBnaJaNo C BblEMKaMn (14) c6Oky KOJNaUka (15). (Pnc. 20)
- CHIMITE c neteB KOHcI HnTe N NOMECTNTe INX B BBIEMK c60ky KOnnaUka. (Pnc. 21)

IPEIOCTEPEXHENE:Y6eNTecb,HTO
KoJNaQOK HaJeKHO 3aKpenHeH Ha depKaTeNe KaTyuKn. B IpOTnBHom CJIyae KOMNoHEHTbI MOrYt pa3NeTeTbcR B CTOpOHbl, YTO MoKeT PnUBeCTN K cepbe3HbIM TpaBMam.
- Y6eIntecb, yTO npyKHa Ha MeCTe. 3aADBHeTe KOJINaUOK (15) B DEpXaTeB KaTyuKn (16). Y6eIntecb, yTO 3aueKN IONHOCTbIO BOJIN B KOJINaUOK. (Pnc. 14, 15 n 22)
- Haxmnte KhoNky KaTyuKn (18) n BbITaHnTe OINH KOHeu pexyuei HHTN. Y6eIntecb, YTO HNTb BBBeDeHa. (Pnc. 22 u 23)
- 3aTeM BbITHnTe DpyroKoHeu HHTn, He HaXIMaHa KHOKNy KaTuShKn. Y6eINTecb, YTO HHTb BBiBeDeHa.
9. ПОДАЧЕЖУSUЕН HINTI
KopoTKnue nnnn3HOuWeHHbIe HHTn peKyT MeHee 3o6bI ynyuHnTB pa6Oy B CneDyUoyni pa3, cIeRka CTyKHnTe KhoNkOaTyuKN O3emJIO (INCHpymeHT npn 3OM DoJIKeH pa6OtaTb Ha MAKcImaJIbHOH CKOpOCTn). 3TO aBtOMaTHueCKn NOaCT dONONHnTeBHyO peKyuHnHt. Bo BpeMpa60tbl ne3BVE (17) noD orpaxdEHNEM aBtOMaTHueCKn ObpeXET HHTb Ha Heo6xOuIMy DInHy. (Pnc.22 u 24)

PIMMEAHHE: YdapbI NO TBepdbIM INN
a6pa3nBhIM npedMeTam (HaNPmep, orpaJdeHnra, 6eToH n kAMn), cKpbITbIM B BbICOKo TpaBe, MOryT npNBecTN K o6pbBypeKyuuei Hnt. B 3tOM cnyae BblONHInTe pnoeDpyu noDaun HNT.
10.ИHCTPyKUЯ NO 3KcIpyATAUIN
BknHouHTe HnCTpymeHT dIy pe3Kn, npexJe cem np6nKataC K 06pa6aTbIbAemOn TpaBe.
CpeKbTe TpaBy, MeIeHHO nepMeuea cnpaba HaneBO nHCTpyMeHT, HAKIOHeHHbI NOy rIOM 30^ . BbICOKyIO TpaBy cneMyET cpe3aTb CIOAMn, HauHna CBepxY. Cpe3bl DOnKHB6bITb KopoTKMm.
He Kocnte BnaXHyIO nn MOKpyIO TpaBy.
N36eraIte 6bICTpOro N3HOCa HHTn N3-3a ydapOB o TBepIbe IpeMTeB1 (KAMHN, CTeHbl, orpaXKeHnra NT.D.). NcNoJIb3yIte KpaI orpaXKeHnra DnI na NDApEJaHnry HJxHO r pacCToHnra.

PPEOCTEPEXHENE:ДЯpoaynpejyuei
HNTn He npImeHnTe Ype3MepHoe ycInne H He 6eIte o6
3emnnoNolnyaBtOMaTnueckyIOJIOBky INHCTpyMeHTa.
Ecnn nocne ynpa o 3emnpo paobotaioero nHctpmenta HHTb He Bblna, pexyuaa HNTb MOrna 3anyTaTbcra NIN O6opBaTbca BHyTpni KapTpndka (Nn6o HNTb Morla 3akOHHTbcra).
PNEOCTEPEXHENIE: TocJe BbIKJIOUeHnI
MOTOPa peKuzaI rOIOBka IpoDoJIkaeT BpaUaTbC8 B TeueHHe HeCKoJIbKInx CeKyHd.
11.ydJIHHTeJIbHbIE UHHyPbI
Pa3pe7aetcNcNoB3OBaTb TOnbKO cTaHapThbIe ydInnHtBhIe HHypbl IJRA HApxKbIX pa6OT C 06oNoOyKo n3 PBX nIN r6Kne dJIra TJeKbIX ycIOBNI 3KcNpyatauIN B peHOBoi ONJIeTKe, ceHeHem He MeHee 0.75 MM2.
Ipeed nCpOJIb30BaHnem npOBepbTe cTeBoi n yDINHITeNbHbI Ka6eNHa npEIMET NOBpeXJDeHn,ecn IMeOTc CneDbI NOBpeXJDeHn Hn CTapeHn. OTCoeDInHteteKaiKa6eN. B Cnyae IOBpeXJDeHn Ka6eNBA BpEmra PaOToB HeMeDJIeHNO OTcoEInHtete Ka6eNbOT NCTOCHNkA NHTAHN. HE KACAITECb KA6EJIa DO OKJIIOUeyHr O T NCTOCHNKA IITAHN. He nCpONb3yIte yctpoiCTBO,ecn Ka6eN b NOBpeXJDeHn Hn 3HOWeH.Pacnonarai Te yDINHITeNbHbI Ka6eNb B CTOpOHe OT pexyux 3JIeMeHTOB.

PPEIOCTEPEXEHNE:CneIte 3a TeM,HTo6bI
BENTINIaIOHbIe OTBepCTnHe 6bln 3acopehbl.
12. OBCJNYKUBAHNE
- Посл луаци OToeHnTe nHcTpyment ot cetи npOBepbTe HaHaJIuYne nobpeKdEHH.
- Ecnn 3neKtpOnHCTpymEn He nCNOJIb3yETcra, OH DoJXKeH XpaHHTbcR B MecTe, HeDOCTyNHom dIra DeTeu.
- Pemont nHcTpymEntOB nIpe3Kn, pa6oTaIOuix OTCeTN,doJIKeH npOn3BOaNTbcraB OΦnuaJIbHOM cepBucHom ceHTpe.
- Пи ВОЗнКНовен ИеОБхODIMOCTN peMOHTA nI IN peYIINPOBKN, He OПИСАньIX B DAHOM pyKOBOIDCTBE, obpaTnTEcB OФицаJIbHbI CepBICHBI ueHTp.
5.Испοльзуне толбко pekomehнобаHHbie npoиЗБODиTeJEM 3aJaCHbIe YactN npuHaДnexKHOCTN.
13. 3KOKOJIOrNueCKn B3ONACHA YTNJIIN3AUIN

CornaCHO dnpekTne EC 2002/96/EC no 3JNEKtpnueckomy n 3JNEKTPoHOMy o6opuyOBaHnO H ee peaHn3aunn B HaOnHObHOM 3aKHOdaTeJIbCTBe BCE 3JNEKTPoHnCtpyMeHTb Heo6XoDmO co6npaTb OTJeBHo N CdaBaTb Ha 3KoJIoRnueckn
6e3oNaChyIO nepepa60Ky.ДуговВариANT yTINH3aUN: EcNn BnaIeNeu 3neKtpOnHcTpymEnTa He BO3Bpauaet INHCTpymENT npOn3BOIHTeIIO, OH HecET OTBeTCTBeHHOCtB 3a NaJIeXkaUO yTINH3aUN B ONpeIeNEHHbIX NyHKtAX c6opa, rIe npOnCXoIIT NOIroTOBka I3JeNk
pepepa60TeB CooTBeCTBnC HauNoHaJIbHbIMN 3aKoHamn n npabJAmn no pepepa60Ke.
3To He pacnpoctpaHReTc H aDOnoJIHnTeIbHbIe npHaadJeKHOCTn IN HCTpyMeHTbl 6e3 3JKeKtpnuecknx IN 3JeKtpOHbIX KOMNoHEHTOB.
Deknapaun o cooTBetCTBn EC
Makita Corporation, JBnBcB OTBeTCTBeHHbIM npOn3BOInTeJEM, 3aBnEeT, YTO CJeDyUOuNe yCtpoiCTBa Makita:
0603haueHne yctpoiCTBa: 3neKtpokoca
No moDen/ Tn: UR3000
TexHnueckne xapaKtepncTkn:cm. Ta6nUy
"TEXHINUCKNE XAPAKTEPNCIKN".
YBJIOTC cepINHbIMN3dJIyMaMn
CoOTBeTCTByHcIeDyIOUImMnIpeKtNtBAM EC:
2000/14/EC, 2004/108/EC, 2006/42/EC, 2006/95/EC
I n3rOToBnEhBi B COOTBetCTBm CO CneDyUcIM CTaHdApTOM IIN HOpMaTHBbIMN DOKymeHTAMN:
Michigan, Drive, Tongwell,
Milton Keynes, MK15 8JD, England
IpoceDypa OueHKn COOTBETCTBnA CORNaCHO DnpeKtNB 2000/14/EC 6bIa npOBeHa B COOTBETCTBnC npInoXeHnEM VIII.
YnONHMOUeHHbI opraH:
1. VAŽNE SIGURNOSNE UPUTE
Svrha sigurnosnih pravila je da privuku vašu pozornost na moguce opasnosti. Sigurnosni simboli i njihova objasnjenja zahtijevaju vašu pažnju i razumijevanje. Sigurnosna upozorenja ne uklanjaju bilo koju opasnost. Uvijek koristite odgovarajuću zašitnu opremu, poput štitnika, jak se pridržavate sigurnosnih uputa i upozorenja.

SIGURNOSNI SIMBOL UPOZORENJA:
Oznacava oprez ili upozorenje i moze biti koriisten u sprezi s ostalim simbolima ili slikama.

UPOZORENJE: Upoznajte ses kontrlama i
2000/14/EC, 2004/108/EC, 2006/42/EC, 2006/95/EC
Michigan Drive, Tongwell,
Milton Keynes, MK15 8JD, Engleska
3-11-8, Sumiyoshi-cho,
Anjo, Aichi, JAPAN
SLOVENŠCINA (Izvirna navodila)
2000/14/ES, 2004/108/ES, 2006/42/ES, 2006/95/ES
Michigan Drive, Tongwell,
Milton Keynes, MK15 8JD, England
3-11-8, Sumiyoshi-cho,
Anjo, Aichi, JAPAN
SLOVENCINA (Póvodné pouyny)
1. DÔLEŽITÉ BEZPECNOSTNÉ POKNY
2000/14/ES, 2004/108/ES, 2006/42/ES, 2006/95/ES
a su vyrobené podla nasledujucej normy a
Michigan Drive, Tongwell,
Milton Keynes, MK15 8JD, Anglicko
3-11-8, Sumiyoshi-cho,
Anjo, Aichi, JAPAN
ROMÁNA (Instruktiuni originale)
2000/14/CE, 2004/108/CE, 2006/42/CE, 2006/95/CE
Michigan Drive, Tongwell,
Milton Keynes, MK15 8JD, Anglia
Procedura de evaluates a conformitàti cerutá de Direita 2000/14/CE s-a efectuat in conformitate cu anexa VIII.
Organism notificat:
3-11-8, Sumiyoshi-cho,
Anjo, Aichi, JAPAN
LIETUVIÇ KALBA (Originali instrukcija)
Noretume padekoti, kad pasirinkote mûs gaminj. Esame tikri, kad jus ivertinsite ir bùsite patenkinti šiu aukstos kokybès i'renginiu; be to, mes suteiksime ilgā techninio aptarnavimo garantija.
Michigan Drive, Tongwell,
Milton Keynes, MK15 8JD, England (Anglia)
Atitikties ivertinimo procedura, butina pagal Tarybos
Direktyva 2000/14/EB, atlikta atsižvelgiant VIII prieda.
Paskelbtoji lstaiga:
3-11-8, Sumiyoshi-cho,
Anjo, Aichi, JAPAN
LATVIEŠU (Originalas instrukcijas)
Pateicamies, ka izvelejaties musu izstradajumu. Mes esam parliecinati, ka musu icerce atbildis jusu prasibam un iegus jusu atzinibu un mes apliecinam, ka nodrosinasim ilglaiciguapkopi.
Pirms sakt iekartu izmantot, uzmanigi izlasiet so rokasgramatu, kas izveidota ar noluku jums sniegt nepiecesamo informaciju pareizai lietosanai atbilsto si pamata droibas noteikumiem.

SIMPOLI
Uz instrumenta var but izmantoti dazi no siem simboliem. Ludzu, iepazistieties ar tiem un uzziniet to nozimi, jo simbolu pareiza interpretacija laus instrumentu lietot drošak un efektivák.
| SIMBOLS NOSAUKUMS SKAIDROJUMS | ||
| CE | CE markëjums | Izstrãdãjums atbilst Eiropas Kopienã (tagad Eiropas Savienîbã) piemãrojamãm prasibãm un noteikumiem. |
| II klases konstrukcija | Dubultãs izolãćijas konstrukcija. | |
| WEEE MARKëJUMS | UZMANIIBU! Neizmetiet nolietotus instrumentus kopã ar mãjsaïmnicëbas atkritumiem. Tie jãazved uz publisku sav akšanas punktu, kur tos likvidës saskaŋã ar vietëjiem noteikumiem. | |
| Izlasiet norãdijumus lietotãjam | Lai ivainojumu risks bûtu mazãks, lietotãjam pirms izstrãdãjuma lietoşanas jãizlasa un jãizprot lietotãja rokasgrãmata. | |
| Elektriskãs strãvas trciens! | Ja vads ir bojãts vai sapinies, atvienojiet tɪkla kontaktdakšu. | |
| Neatstãjiet lietū | Neatstãjiet instrumentu ørpus telpãm vai lietū. | |
| Lietojiet acu aizsargus | Lai samazinãtu acu ivainojumu risku, lietojiet acu aizsargus! | |
| 96 | Troksiønøma markëjums | Instrumenta troksiønømenis nepãrsniedz 96 dB. |
| NELAUJIET TUVUMÄ ATRASTIES NEVIENAI NEPIEDEROŠAI PERSONali! | NELAUJIET TUVUMÄ ATRASTIES NEVIENAI NEPIEDEROŠAI PERSONali! | |
1. SVARIGIDROŠIBAS NORADIJUMI
Drosibas noteikumu mérkis ir pieverst jusu uzmanibu iespejamam briesmam. Jums japiever's ipasa uzmaniba droxbas simboliem un to skaidrojumiem un tie jaizprot. Droxbas bridinajumi ka tadi nemazina briesmas. Vienmér izmantojiet atbilstošu aizsargaprkojumu, piemeram, aizsargus, ari tad, ja ieverojat droxbas noradijumus un bridinajumus.

DROŠIBAS BRIDINA JUMA SIMBOLS: pieverš uzmanibu vai bridina, un to izmanto kopā ar citiem simboliem un atteliem.

1 BRIDINAJUMS: lepazstieties ar ierfces vadibas en un pareizu izmantoisanu.

BRIDINAJUMS: Drošibas bridinajuma
Rojana var izraisit nopietnus ivainojumus
Jem vai citiem. Vienmér ieverojet drošibas
Uzumus, lai mazinatu ugunsgreka, elektriskas stravas
a un personas ivainojumu risku. Saglabajiet
Ras rokasgramatu un izskatiet to laiku pa laikam, laik
nos ar instrumenta drosu lietoanu un apmacitu
vas varetu lietot so instrumentu.

BRIDINAJUMS: Nekad neizmantojiet trimeru, ja neizi uzstadits aizsargs. Ja neievero so umu, var radit nopietnus personas evainojumus.

8. GRIESANAS AUKLAS NOMA
Lai nomainfttu griesanas auklu:
- Atvienojiet ierici no elektribas tikla.
- Izemiet sukso spoli. (12. un 13. att.)
- Nogrieziet jaunu griesanas auklu mazak par 8 m un to vidu salociet.
- Aizakejiet griesanas auklas vidu aiz iberoba, kas atrodas spoles centra starp 2 kanaliem, kas paredzeti griesanas auklai. Bulta uz spoles norada griesanas auklas uztisanas virzenu. (16. att.)
- Kärtigi aptiniet griesanas auklu ap A posmu (10). Pärbaudiet, vai esat to cieši un vienmérigi aptinis tā, lai aptītās auklas virsa nav nelidzena. (17. att.)
- Aptiniet visu griesanas auklu, iznemot apméram 100 mm, galu pagaidam aizakejot aiz auklas turetaja (12) spoles sanos. (18. att.)
- Tāpat aptiniet griesanas auklu B posma (11) un galu pagaidam aizakejiet. (17. un 19. att.)
- levietojiet spoli vacinā tā, lai pagaidam aizakēt o griesanas auklas galu (13) atrasanas vieta atbilst ierobiem (14) vacinā sānos (15). (20. att.)
- Atakejiet griesanas auklas galus no to pagaidu atrasanas vietas un ievietojiet ierobos vacina sanos. (21. att.)

BRIDINAJUMS: Pärbaudiet, vai vacinš ir karti gī
piestiprinats spoles turetajam. Ja vacin's nav pareizi piestiprinats, sastavdalas var izjukt, radot nopietnus personas ivainojumus.
- Pärbaudiet, vai atspere ir savā vieta. Uzlieciet vacinu (15) uz spoles turetaja (16). Pärbaudiet, vai aizturi pilnībā ievirzās vacina. (14., 15. un 22. att.)
- Nospiediet spoles pogu (18) un izvelciet vienu griesanas auklas galu. Pärbaudiet, vai aukla ir izvikta. (22. un 23. att.)
- Visbeidzot, nenospiezot spoles pogu, izvelciet auklas otru galu. Parbaudiet, vai aukla ir izvilkta.
9. GRIESANAS AUKLAS PADEVE
Tsa vai nodilusi aukla griez mazak efektivi. Lai uzlabotu darbibu noteiktos gadijumos, viegli atsitet spoles pogupret zemi, trimeram darbojoties ar pilnu jaudu. Tasautomatiski pads papildu griesanas auklu. Griesanas auklas asmens (17) zem aizsarga eksplatacijas laikaautomatiski nogriezis griesanas auklu pareizajā garuma. (22. un 24. att.)

PIEZIME:Ja griesanas aukla atsitas pret cietiem
vai abraziviem prieksmetiem, ko slepj gara zale, piemeram, zoju, betonu vai akmeniem, griesanas aukla var partrukt. Ja griesanas aukla partrukst, veiciet auklas padevi.
10. LIETOSANAS NORADIJUMI
Michigan Drive, Tongwell
Milton Keynes, MK15 8JD, Anglia
Atbilstibas novertejuma proceduru, ko nosaka Direktiva 2000/14/EK, veica atbilstoşi VIII pielikumam.
Pieteiktä estäde:
3-11-8, Sumiyoshi-cho,
Anjo, Aichi, JAPAN
EESTI (Originaljuhendid)
Michigan Drive, Tongwell,
Milton Keynes, MK15 8JD, Inglismaa
3-11-8, Sumiyoshi-cho,
Anjo, Aichi, JAPAN
SRPSKI (Originalno uputstvo)
Cestitamo vam sto ste izabrali nase proizvode. Uvereni smo da cete biti zadovljni visokim kvalitetom nase masine kao i da ce vas dugo i dobro sluziti.
Pre nego sto započnete sa upotrebom masine pažljivo pročitajte ovo uputstvo, koje je zamisljeno sa namerom da vam pruži sve neophodne informacije o pravilnoj upotrebi u skladu sa osnovnim bezbednosnim zahevima.

SIMPOLI
2000/14/EC, 2004/108/EC, 2006/42/EC, 2006/95/EC
Takode su proizvedeni u skladu sa sledecim standardima ili standardizovanim dokumentima:
Michigan, Drive, Tongwell,
Milton Keynes, MK15 8JD, Engleska
Procedura procene uskladenosti koju zahteva Odredba 2000/14/EC bila je u skladu sa aneksom VIII.
Ovlasceno telo:
3-11-8, Sumiyoshi-cho,
Anjo, Aichi, JAPAN
Makita Corporation
Anjo, Aichi, Japan
UR3000-24L-0511 www.makita.com