Silver Fresh 151942 - Bread maker PRINCESS - Free user manual and instructions
Find the device manual for free Silver Fresh 151942 PRINCESS in PDF.
Frequently Asked Questions - Silver Fresh 151942 PRINCESS
User questions about Silver Fresh 151942 PRINCESS
0 question about this device. Answer the ones you know or ask your own.
Ask a new question about this device
Download the instructions for your Bread maker in PDF format for free! Find your manual Silver Fresh 151942 - PRINCESS and take your electronic device back in hand. On this page are published all the documents necessary for the use of your device. Silver Fresh 151942 by PRINCESS.
USER MANUAL Silver Fresh 151942 PRINCESS
Silver Fresh Breadmaker/Royal Fresh Breadmaker Article 151942/151943
1 display
2 T I M E R +
3 T I M E R -
4 START / STOP
5 BASIC
6 FRENCH
7 WHOLE WHEAT
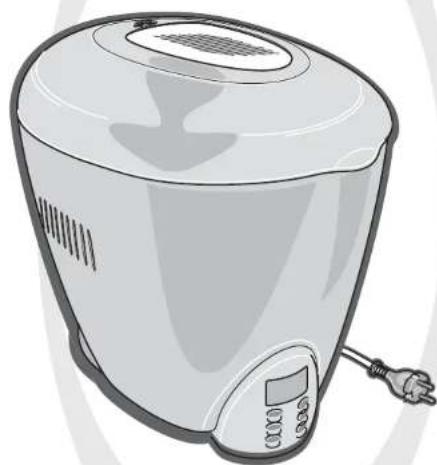
It is possible to bake bread quickly and easily using the Princess Silver Fresh Breadmaker (art. no. 151942) or the Royal Fresh Breadmaker (art. no. 151943). This fully-automatic breakmaker mixes and kneads the dough, bakes the bread and switches on the keep-warm function to keep the bread crisp and fresh. You can now always have fresh bread made to your own taste.
You will notice that baking bread with this breadmaker is not only cheap and easy, but also fun. You can use our recipes to bake your first bread, but you will gradually experience the pleasure of experimenting with different types of flour and other ingredients.
The appliance comes supplied with a baking tin with an non-stick coating, a measuring jug and a measuring spoon.
The Breadmaker has three programs for different types of bread: Basic, French and Whole Wheat. You can set the timer to the time that you wish the bread to be ready.
For example, you can have delicious, fresh bread for breakfast!

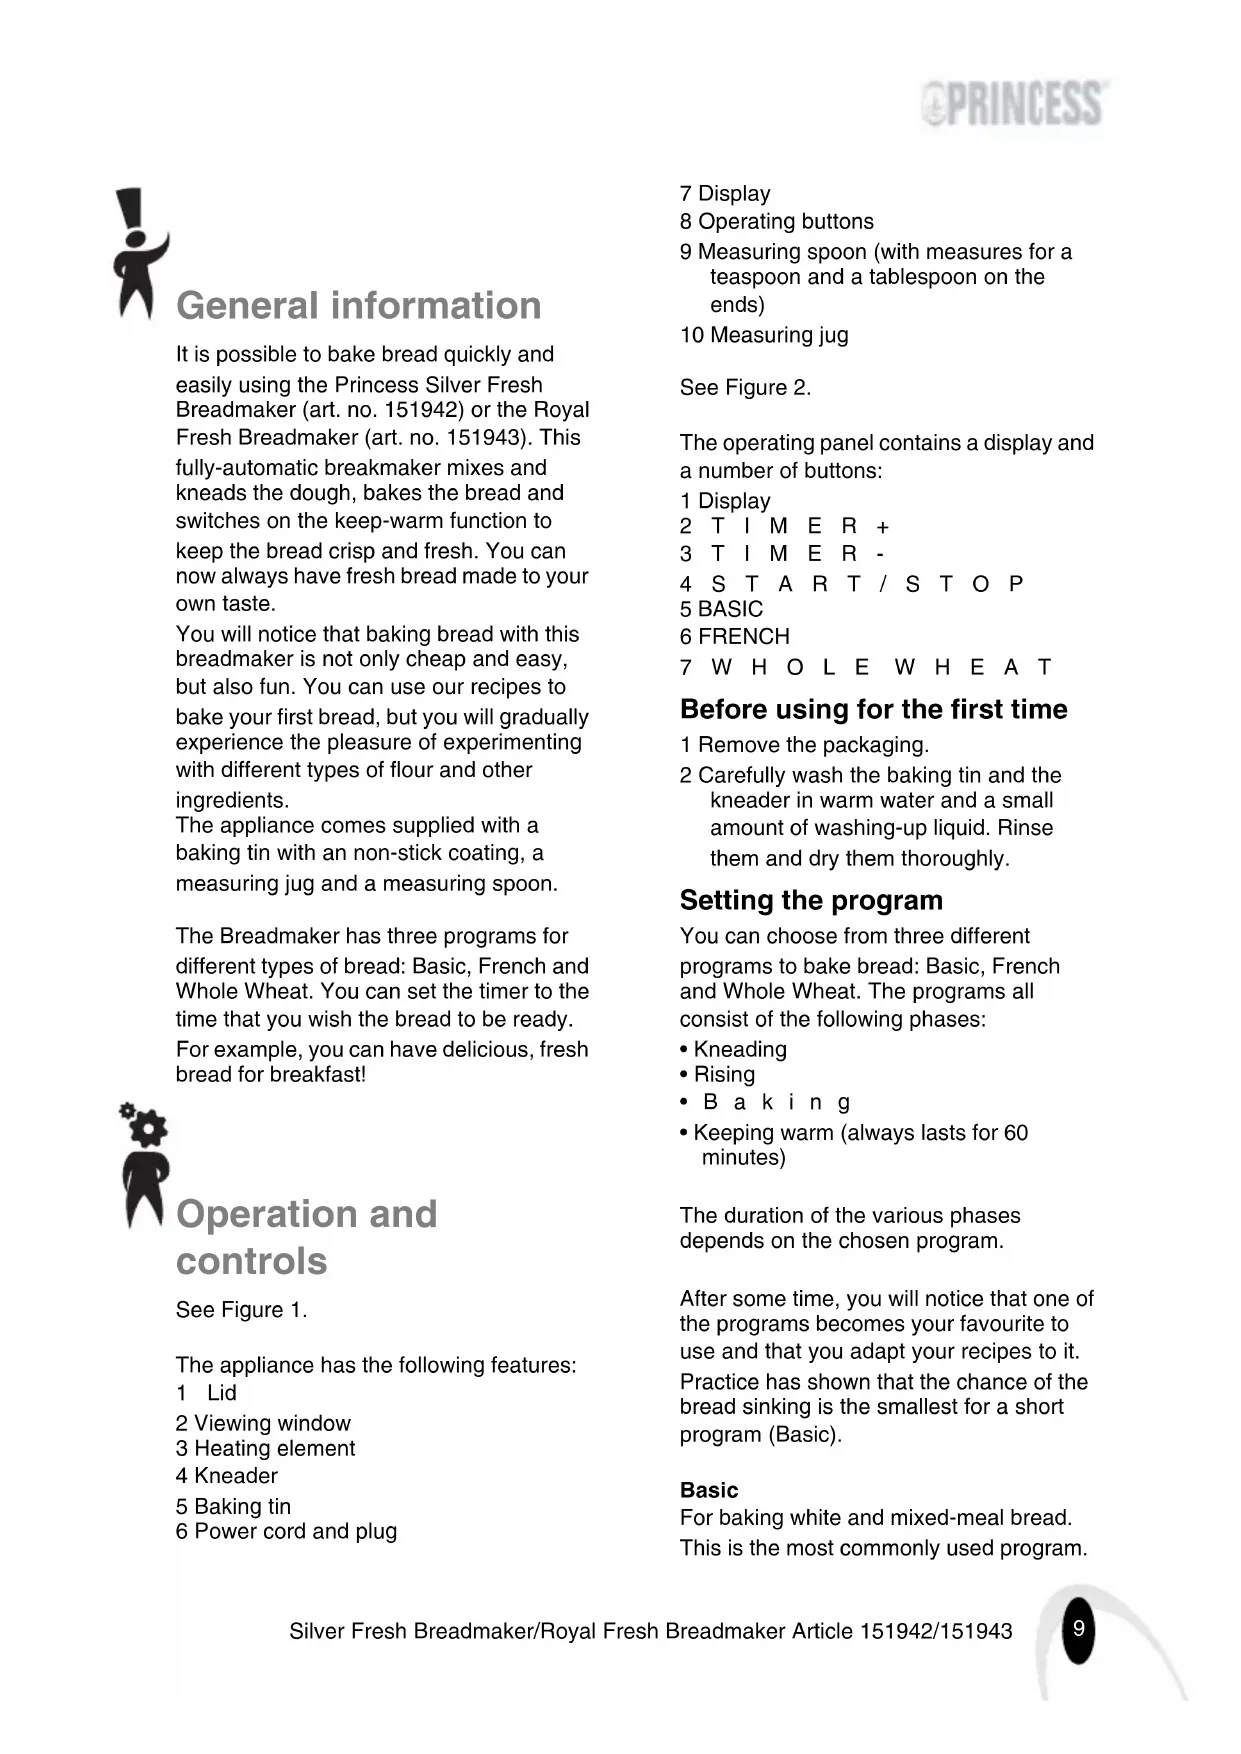
Operation and controls
See Figure 1.
The appliance has the following features:
1 Lid
2 Viewing window
3 Heating element
4 Kneader
5 Baking tin
6 Power cord and plug
7 Display
8 Operating buttons
9 Measuring spoon (with measures for a teaspoon and a tablespoon on the ends)
10 Measuring jug
See Figure 2.
The operating panel contains a display and a number of buttons:
1 Display
2 T I M E R +
3 T I M E R -
4 START / STOP
5 BASIC
6 FRENCH
7 WHOLE WHEAT
Before using for the first time
1 Remove the packaging.
2 Carefully wash the baking tin and the kneader in warm water and a small amount of washing-up liquid. Rinse them and dry them thoroughly.
Setting the program
You can choose from three different programs to bake bread: Basic, French and Whole Wheat. The programs all consist of the following phases:
- Kneading
Rising - Baking
- Keeping warm (always lasts for 60 minutes)
The duration of the various phases depends on the chosen program.
After some time, you will notice that one of the programs becomes your favourite to use and that you adapt your recipes to it.
Practice has shown that the chance of the bread sinking is the smallest for a short program (Basic).
Basic
For baking white and mixed-meal bread.
This is the most commonly used program.
Total duration: 130 minutes.
French
This program is also suitable for baking white and mixed-meal bread. The baking and rising time for this program is slightly longer than for the Basic program. Total duration: 150 minutes.
Whole Wheat
For baking wholemeal bread and bread made from heavier types of flour. Total duration: 180 minutes.
The most suitable program depends on a number of different factors. It may, therefore, well be possible that you bake your best wholemeal bread using the Basic program.
Use

Always use the appliance with the lid closed.
- Use oven gloves if you need to touch the appliance during or after use. The appliance and the baking tin will become hot.
- Do not use the appliance without the baking tin.
1 Place the baking tin in the machine and make sure it remains in place.
2 Attach the kneader to the pin in the baking tin.
3 Add the ingredients to the baking tin in the order given below:
-Flour
- Oil/butter in one corner
- Sugar and salt in another corner
- Yeast on top in a small hole in the flour
- Pour water/milk around the edges
4 Close the lid and insert the plug into the plug socket
5 Select the desired program (Basic, French or Whole Wheat). The display will indicate the chosen program
number and the time remaining until the bread is ready.
6 Press the START/STOP button to start the chosen program. A triangle will be shown on the display to indicate that the baking program has started.
7 Five beeps will be heard once the baking program has finished. The keepwarm phase will then start automatically. The bread will be kept warm for 60 minutes. Twelve beeps will be heard once the keep-warm phase has finished.
8 The keep-warm phase can be stopped. To do so, press the START/STOP button for two seconds. One beep will be heard and the display will show the chosen program and the required time again.
9 Open the lid and lift the baking tin out of the machine. Always wear oven gloves when doing so. Tip the baking tin upside down and shake it carefully until the bread comes out. If the kneader has been left in the bread, insert a non-metallic object in the hole of the kneader and carefully lever the kneader out of the bread. This is easiest to do if the bread is still warm.
10 Leave the bread to cool down on a grille.
11 Remove the plug from the plug socket.
12 Allow the appliance to cool down sufficiently before using it again.
Timer
The timer can be set to the time when the selected program must be completed.
Example
1 Add all the ingredients to the baking tin. The yeast must not come into contact with the liquid, salt or butter, since this would immediately start the rising process.
2 Select the required program.
3 Imagine that it is 10.00 p.m and you wish the freshly-baked bread to be ready at 7:30 a.m. the next morning.
The time difference is then 9 hours and 30 minutes.
Use the TIMER buttons to set the delay to 09.30.Use the TIMER + button to increase the time by 10 minute intervals and the TIMER- button to decrease the time by 10 minute intervals.
The set time includes the time required for the chosen baking program. In this example, the breadmaker will finish baking the bread in 9 hours and 30 minutes.
4 Press the START/STOP button to start the timer. The flashing dot between the hours and the minutes indicates that the timer is counting down. The display shows the time remaining until the end of the program.

Maintenance and cleaning

- Do not immerse the appliance in water, or in other liquids. If this was to happen, do not use the appliance again and dispose of the appliance for safety reasons.
- Never use corrosive or scouring cleaning agents.
Always clean the appliance and the accessories after each use. This will prevent food residues from baking onto the appliance.
- Remove the plug from the wall socket, and allow the appliance to cool down completely.
- If the kneader remains in the baking tin after baking, then fill the baking tin with warm water, allow it to soak for five minutes and then remove the kneader.
-
Clean the baking tin and the kneader with a damp cloth and a small amount of washing-up liquid. Dry them thoroughly.
-
Clean the interior and exterior of the housing with a damp cloth.

Safety
General information
- Please read these instructions carefully and retain them for reference.
- Use this appliance only in accordance with the instructions.
- This appliance is intended solely for domestic use.
- Keep the appliance out of the reach of children, and of persons who may not be able to operate it safely.
- Have the appliance repaired only by a qualified electrician. Never try to repair the appliance yourself.
Electricity and heat
- Before use, verify that the mains voltage is the same as that indicated on the type plate on the appliance.
- Plug the appliance into an earthed wall socket.
Always remove the plug from the socket when the appliance is not in use. - Always remove the plug from the wall socket by pulling on the plug, not the power cord.
- Do not use the equipment if it is damaged, or if the lead is damaged. Send it to our Service Department in order to avoid a hazard. With this type of appliance, a damaged cord should only be replaced by our Service Department using special tools.
- Make sure that the appliance and the power cord do not come in contact with sources of heat, such as a hot hob or naked flame.

Some bread recipes
The measuring jug and the measuring spoon (with the teaspoon and tablespoon measures on the ends), which comes with the breadmaker, have been used for the quantities.
White bread
Wheat flour or wheatmeal 450g
Sachet-type yeast 2 teaspoons
Oil 3 tablespoons
Milk 2 to 3 tablespoons
Salt 1 heaped teaspoon
Sugar 1 12 tablespoons
Water 250 ml
Wholemeal bread
Wholemeal flour 450 g
Sachet-type yeast 2 teaspoons
Oil 3 tablespoons
Milk 2 tablespoons
Salt 1 heaped teaspoon
Sugar 1 12 tablespoons
Water 260 ml
Mixed bread
Wheatmeal 400g
Cornmeal
(or another type of flour) 50g
Sachet-type yeast 2 teaspoons
Oil 3 tablespoons
Milk 2 tablespoons
Yoghurt 1 tablespoon
Salt 1 heaped teaspoon
Sugar 1 12 tablespoons
Water 250 ml
Ingredients
You can, of course, bake bread using one of the recipes given above, but once you get into it, it is fun to experiment using different ingredients. To do so, it is useful to know more about the various bread-baking ingredients. Some useful information you will need when baking bread is given below.
Flour
The main ingredient of bread is flour. There are many different kinds of flour and mixes of flour. The type of grain you use makes a
big difference to the bread. For example, wheat flower contains so much gluten that it rises better than heavier flour and you, therefore, need less yeast. Gluten is a protein compound which is found in grain, such as wheat, oats, rye and barley. As the bread rises, gluten forms a network that keeps in the carbon dioxide bubbles and this causes the bread to rise.
Patent flour or household flour
Most white flour is called patent flour or household flour. It contains almost no bran or seeds, but does contain a lot of gluten. This flour is usually used to bind soups and sauces, but is also good for baking (white) bread.
Wheat flour and wheatmeal
Wheat flour is white wheatmeal. Wheatmeal is somewhat greyer in colour and contains a small amount of bran and seeds. Wheat flour and wheatmeal also contain a lot of gluten.
Wholewheat flour and wholewheat meal Wholewheat flour is ground from whole, untreated grains of wheat. It contains all the bran and seeds from the wheat.
Wholewheat flour has, just like wheat flour, a lot of gluten, but is heavier because of the bran and seeds. As a result, the bread will be more compact if it is made only using wholewheat meal. Therefore, most home bakers add some wheat flour.
Besides these types of flour and meal, there are also many other types to keep you busy to your heart's content, such as: oatmeal, barley meal, buckwheat flour, maize meal and rye flour.
Meal mixes
Most types of meal can be mixed together. The combination of buckwheat flour/ oatmeal/wheat flour is a good example. You could also try barley meal/wheat flour. Various mixes can also be bought in shops, such as cornmeal, six-grain meal, nine-grain meal or ten-grain meal. These mixes sometimes contain flour and/or a bread improver.
All-in-one mixes
You can also buy mixes which contain all the ingredients, except water. These all-in-one mixes are easy and quick to use, but are also more expensive.
Yeast
Yeast is required in order for the bread to rise. You can buy fresh yeast (blocks) or dried yeast (granules). The taste of fresh yeast is slightly more pronounced than that of dry yeast. There are various brands of dry yeast and the effect they have varies somewhat. The yeast that suits you the best is a question of personal preference. As a rule of thumb, you can say that you need about half the weight of dry yeast (also called instant yeast) compared to fresh yeast. The effect of the yeast can be affected if the yeast comes into contact with salt or fat. Salt dries out the yeast and fat encloses the yeast cells, so that the dough can no longer rise. It is, therefore, important to ensure that the yeast, salt and butter are not placed too close to each other in the breadmaker.
Salt
Salt adds to the taste of the bread, but is also important for the crust and for the bread rising (although salt can also stop the bread from rising if it comes into direct contact with the yeast). Salt strengthens the gluten construction which gives the bread shape. Salt also ensures that the bread does not rise out of the baking tin and then sinks before it is well baked. It is possible to bake low-sodium or salt-free bread, but it will require varying the ingredients.
Liquids
The most common liquid used to bake bread is water, but you can also try using milk or buttermilk. This influences the taste, the rising and the bread structure. The fats in full-fat milk have a positive influence on the freshness and the lactose in the milk stimulates the fermentative power. Buttermilk produces a lighter bread that remains fresh for longer.
Sugar
Sugar only makes a small contribution to the rising process, but it determines the taste of
the bread. Instead of sugar, you can also use honey, treacle or syrup. Do not use any large granular sugar (hard sugar) or sugar candy in the breadmaker. This may damage the non-stick coating. Do not use any artificial sweeteners, because they are generally not good at withstanding heat.
Fats
Fat is, in fact, a bread improver. You do not necessarily need it, but the bread is much better if you do use it. Fat makes the dough more pliable and ensures that it can rise more easily. Fat also encloses the gluten network, so that the carbon dioxide is kept in. This makes the bread airier and it remains fresh for longer. Various types of fat are suitable. Oil (sunflower oil or olive oil), butter and margarine give an excellent result. Oil makes the crust softer. Margarine produces a crispier crust and also improves the rising process. When baking herb bread, it may be tasty to use a seasoned oil, such as walnut oil, garlic oil or basil oil.
Temperature
It is best if the ingredients are at room temperature when they are placed in the baking tin. Never use liquid that is too warm, because this can have a negative effect on the yeast.
Aids and tips
It states that the dry ingredients should be added to the bread pan first, which is generally not the case with bread makers. We have tried this method with the 1942 model and the result is an unsightly deposit of un-mixed flour around the top of the pan.
The unit performs far better if the water is added first followed by the other ingredients.
Cool the bread on a grille
After baking, leave the bread to cool down on a grille. The heat can then escape from all sides.
Cutting the bread after it has cooled down
Home-made bread is best cut after it has cooled down. If the bread is still warm, then it is best to cut it using an electric knife, such as the Princess 2952 Silver Electric Knife.
Storing bread
After cooling, it is best to wrap home-made bread in a tea towel. This will keep the crust nice and crisp. Special paper bread bags are also suitable. The bread will become soft if it is kept in a plastic bag or in the refrigerator.
Freezing bread
Home-made bread can be frozen after it has cooled down. It is useful to freeze it in daily portions.
It is best to defrost the bread at room temperature, because a microwave dris the bread out too quickly.
Although the bread can be frozen, it always has a negative effect on the quality.
Darker bread
One tablespoon of cacao powder can be added to the flour to give bread a darker colour. This has almost no influence on the flavour.
Crispier crust
To achieve a crispier crust, you can leave the bread in the machine for ten to fifteen minutes during the keep-warm phase.
If the bread rises out of the baking tin
You can watch the rising process through the viewing window. Normally, it is not a good idea to open the lid during the rising process, because this can cause the bread to sink, but if the dough rises out of the baking tin and sticks against the viewing window (this can also happen during baking), then open the lid briefly. The dough will then sink slightly.
Small, compact bread
Too much liquid produces a small, flat bread. The dough is not able to rise properly, because it is too wet. The yeast may also have been too old.
Dry bread
Too little liquid produces bread which is too dry. Try using (slightly) more water or milk. If the bread is good after baking, but then dries out quickly, add more oil or butter.
Sunken bread
If your bread rises fine, but sinks during baking, try baking it using the shortest program (Basic). In general, longer programs increase the chance of the bread sinking during baking.
Finally
After reading all of this information, you should, in theory, be able to come up with your own favourite recipes. All that is left is the practice. It may not be so easy, though, because baking bread is a skill that you cannot learn in just one day. The search for the perfect bread can have a lot of setbacks. Do not be disappointed if you have trouble at first. Ask other home bakers about their experiences, take time to read about the subject, look things up on the Internet and, most importantly, keep experimenting, because the possibilities are endless. After all, home-made bread is the tastiest.
Meal mixes
Most types of meal can be mixed together. The combination of buckwheat flour/ oatmeal/wheat flour is a good example. You could also try barley meal/wheat flour. Various mixes can also be bought in shops, such as cornmeal, six-grain meal, nine-grain meal or ten-grain meal. These mixes sometimes contain flour and/or a bread improver.
All-in-one mixes
You can also buy mixes which contain all the ingredients, except water. These all-in-one mixes are easy and quick to use, but are also more expensive.
Yeast
Yeast is required in order for the bread to rise. You can buy fresh yeast (blocks) or dried yeast (granules). The taste of fresh yeast is slightly more pronounced than that of dry yeast. There are various brands of dry yeast and the effect they have varies somewhat. The yeast that suits you the best is a question of personal preference. As a rule of thumb, you can say that you need about half the weight of dry yeast (also called instant yeast) compared to fresh yeast. The effect of the yeast can be affected if the yeast comes into contact with salt or fat. Salt dries out the yeast and fat encloses the yeast cells, so that the dough can no longer rise. It is, therefore, important to ensure that the yeast, salt and butter are not placed too close to each other in the breadmaker.
Salt
Salt adds to the taste of the bread, but is also important for the crust and for the bread rising (although salt can also stop the bread from rising if it comes into direct contact with the yeast). Salt strengthens the gluten construction which gives the bread shape. Salt also ensures that the bread does not rise out of the baking tin and then sinks before it is well baked.
It is possible to bake low-sodium or salt-free bread, but it will require varying the ingredients.
Liquids
The most common liquid used to bake bread is water, but you can also try using milk or buttermilk. This influences the taste, the rising and the bread structure. The fats in full-fat milk have a positive influence on the freshness and the lactose in the milk stimulates the fermentative power. Buttermilk produces a lighter bread that remains fresh for longer.
Sugar
Sugar only makes a small contribution to the rising process, but it determines the taste of the bread. Instead of sugar, you can also use honey, treacle or syrup. Do not use any large granular sugar (hard sugar) or sugar candy in the breadmaker. This may damage the non-stick coating. Do not use any artificial sweeteners, because they are generally not good at withstanding heat.
Fats
Fat is, in fact, a bread improver. You do not necessarily need it, but the bread is much better if you do use it. Fat makes the dough more pliable and ensures that it can rise more easily. Fat also encloses the gluten network, so that the carbon dioxide is kept in. This makes the bread airier and it remains fresh for longer. Various types of fat are suitable. Oil (sunflower oil or olive oil), butter and margarine give an excellent result. Oil makes the crust softer. Margarine produces a crispier crust and also improves the rising process. When baking herb bread, it may be tasty to use a seasoned oil, such as walnut oil, garlic oil or basil oil.
Temperature
It is best if the ingredients are at room temperature when they are placed in the
baking tin. Never use liquid that is too warm, because this can have a negative effect on the yeast.
Aids and tips
Cool the bread on a grille
After baking, leave the bread to cool down on a grille. The heat can then escape from all sides.
Cutting the bread after it has cooled down
Home-made bread is best cut after it has cooled down. If the bread is still warm, then it is best to cut it using an electric knife, such as the Princess 2952 Silver Electric Knife.
Storing bread
After cooling, it is best to wrap home-made bread in a tea towel. This will keep the crust nice and crisp. Special paper bread bags are also suitable. The bread will become soft if it is kept in a plastic bag or in the refrigerator.
Freezing bread
Home-made bread can be frozen after it has cooled down. It is useful to freeze it in daily portions.
It is best to defrost the bread at room temperature, because a microwave dris the bread out too quickly.
Although the bread can be frozen, it always has a negative effect on the quality.
Darker bread
One tablespoon of cacao powder can be added to the flour to give bread a darker colour. This has almost no influence on the flavour.
Crispier crust
To achieve a crispier crust, you can leave the bread in the machine for ten to fifteen minutes during the keep-warm phase.
If the bread rises out of the baking tin
You can watch the rising process through the viewing window. Normally, it is not a good idea to open the lid during the rising process, because this can cause the bread to sink, but if the dough rises out of the baking tin and sticks against the viewing window (this can also happen during baking), then open the lid briefly. The dough will then sink slightly.
Small, compact bread
Too much liquid produces a small, flat bread. The dough is not able to rise properly, because it is too wet. The yeast may also have been too old.
Dry bread
Too little liquid produces bread which is too dry. Try using (slightly) more water or milk. If the bread is good after baking, but then dries out quickly, add more oil or butter.
Sunken bread
If your bread rises fine, but sinks during baking, try baking it using the shortest program (Basic). In general, longer programs increase the chance of the bread sinking during baking.
Finally
After reading all of this information, you should, in theory, be able to come up with your own favourite recipes. All that is left is the practice. It may not be so easy, though, because baking bread is a skill that you cannot learn in just one day. The search for the perfect bread can have a lot of setbacks. Do not be disappointed if you have trouble at first. Ask other home bakers about their experiences, take time to read about the subject, look things up on the Internet and, most importantly, keep experimenting, because the possibilities are endless. After all, home-made bread is the tastiest.

Généralités
1 Display
2 T I M E R +
3 T I M E R -
4 START / STOP
5 B A S I C
6 FRENCH
7 WHOLE WHEAT
1 display
2 T I M E R +
3 T I M E R -
4 START / STOPP
5 BASIC
6 FRENCH
7 WHOLE WHEAT
Innan användning
exempl Princess 2952 Silver Electric Knife.
Förvara brod
1 displ ay
2 T I M E R +
3 T I M E R +
4 START / STOP
5 B A S I C
6 FRENCH
7 WHOLE WHEAT
Rugmelsblanding (rugmel, havregryn,
hørfro osv.)
(eller anden melsort) 50g
Gae 4 teskeer
Olie 3 spiseskeer
Maelk 2 spiseskeer
Yoghurt 1 spiseske
Salt 1 teske med top
Sukker 1 12 spiseske
Vand 250 ml
Ingreedienser
1 Display
2 T I M E R +
3 T I M E R -
4 START / STOPP
5 BASIC (grunnprogram)
6 FRENCH (loff)
7 WHOLE WHEAT (grovbrød)
Før对不起 gangs bruk
1 Fjern emballasjen.
2 Vask stekeformen og eltekroken grundig i varmt vann med litt oppvaskmiddel, skyll og tork godt.
Whole Wheat (Farinha Integral):
Para a preparacao de pao integral e pao de farinhas mais pesadas. Tempo total de cozedura: 180关键时刻.
Aotpo
Aεúpi tuTou 70% n ΣaPévio aεúpi 450 ypaμ.
Maíá (ξηρή) 4 koutaλákia tou ylukóu
Aδi 3 koutaλieç σoʊTTac
Γαλa 2 εως 3 koutaλieç σoʊTTac
Aλati 1 yεμato koutaλákia tou ylukóu
Zaxapn 1½ koutaλieç σoʊTTac
Nεpó 250 ml
olikns aAeons
Aεúpi oiknáαεoç 450 ypaμ.
Mayia (ξnpn) 4 koutaakia tou ylukou
Aδi 3 koutaiec σouTTac
Γαλa 2 koutaiec σouTTac
ALATI 1 yεμato koutaakia tou ylukou
Zaxapn 1½ koutaiec σouTTac
Nεpo 260 ml
AvαμεικTO ψωμί
Aεúpi oλikns aεoons 400 ypa. Kaαμπokαλeupo (n aεúpi aλlou tUPO 50 ypa. Mayia (ξnp) 4 koutaakia tou ylukou Aδi 3 koutaiec ooTTac Γαλa 2 koutaiec ooTTac Fiaupti 1 koutaia ooTTac Aλati 1 yεμato koutaakia tou ylukou Zaxapn 1½ koutaiec ooTTac Nεpo 250 ml
ΣUOTATIKÁ
MTOpeTe, quoiká, va TapaaKeuaçete
WUMI xpnoiOIOIwVtac mia aTIO TIC
TAPaTavw ouVTayc, aAa apou
Egoikeiwothe t n diaikocia th
diTiotwoTe oTI eivai EUxapioTo va
TIEpaatizote XpnoiOIOIwVtac
diapopetikauoatakia TAO TOV OKOTTO
auto, evai xpnoiova maTeA liya
TIepioootepa npayata yia ta diapopa
ouotatikauo xnpoiooIOuVTai yia TnV
Tapaokeu n wmuou. Tn ouvexia 0a oac
Tapouoiaoue opievec PAnpoopieocoi
OTIOECtheta oac qavouv xpnoiueyia Tnv
Tapaokeu n wmuou.
Aλεύρι
To aoiok oouotatikocou wuoiou eivai To
aeeupi.YIapxouv TOnla dbiaqopetikc eio n
aeeupiou, kaoowc kai meiyuaata aeeupiwv.
To eiooc twv onnntpiakwv Toun
XpnoiOIOIEiTai kavei tn meyaln diapopa
oTo wmu.Ia npadEiyma, ETEIDn to
aonpo aeeupi TepiexEi meyaln TooTNTa
yAoutevnc fouakwvei kautepa atto T
"Baputepo" aeeupi, OTOTE xpeiaZeOTe
liyotepn yia.H youtevn eivai eva
oumlleyma TTpwteivwv TO otio 0 piokeTai
ota dnntpiakc,OTTWC TO sITapi, n Bpomega,
n oikaln kai TO KPIaPI. OTAV TO wmu
fouokwvei, n youtevn oxnuatiZe i eva
"diKtuO"TO OTIOIO SUyKpatei TIC fuoaalidecs
tou bioxiidiou Tou avtpaka.Auto eivai To
xapaktniotikoc Tou TpokaTe
fooukwaTou wuoiou.
TUTTOINUEVO aEUPI n aEUPIOIKAKNS
XpnoNCS TEPIOOOTEPES MOPeC TOU, TO aTPO
aEUPIOVouMaZETAI TUTTOINIEVO aEUPI, n
aEUPIOKIAKNS XpnoNCS. TEPiExE
OXEDov KAoLau NIToupa n OTOpouc, AALA
TIPEIXI POANyOUTeVn.Auto to aEupi
XpnoIIOToIEiTAl OuvNtWc YIA VA "Eosouv"
OI OOUTEC KAI OaALTcS, AALA Eivai ETIONCS
KALO YIA TIV TAPAOKEUN AOIPOU WMOIOU.
Aεúpi Ttou 70% kai σtapévio aεúpi
To aεúpi Ttou 70% εivai λεukó σtapévio
aεúpi. To kaθατο σtapévio aεúpi éxεi
ελφρως πio ykpi ρwμα kai περíexei
μikpε ΠOoTηe ΠIoupu KAI OTOpWv.
To aεúpi Ttou 70% kai to σtapévio
aεúpi περíexouv επiσç πoλn γλouTeνη.
Aeupi oikns aeons
To aeeupi oikns aeons napaokuazetai
aTIO oloknpouc, m-ETEgpyaoevouc
Otropous otapiou. Nepieexo 0AoTO TITOUPO
kai Touc otropouc aTTO tOITAPIO. Omae
TO otapevio aeeupi, TO aeeupi oikncs
aeeoncs exei TOnAn yloutevn, aaaa eivai
Baputepo loyw Tou TIToupou kai Tuv
OTIOPWv. Zav aTOTeMa, to wmu th
eivai TIO "oumuayec" ev TnapaOKuatoi
movo e aeupi oikncs aeans. TIA Tov loyo
auto,oi TEPIOOTepoi xpnoTEc TOUT
TAPAOKUauQov Wwmi movo Touc
TPOoTeouv Aiyoo aeupi TUPOU 70%.
EKTOS aToua TAPATAV TUOTUc
aAeupou, UAPXouv kai aAloi e Touc
OTIOUc mTOpeITE va TEIPAATOTTE,
OTWCSIa TAPADyMa: aEupi aTOBpOu,
aEupi aTO KPIaP, aEupi aTO oikAln KaI KAALaAMTOKaLEUPO.
Meiyuata diaopotikwv tuww aeeupiou OI TepiooTepoi TuToI aeeupou u Tnopouv va avaeivvovta.Iva kaIo npadEiyua eivai o ouvdusoc aeeupou auo icakn, Bpwun kai otapi. Oa mTOpouoate etionc va dokmuote eva ouvduao o aeupou aTO KPIaipkoi aitap. Mtopeite etionc ayopaoTE tOia ma eiyuata ato kataotnaata, oTWC yia npadEiyua meiyuatae baoTOKaleuponeiyura exi, evea n dekaonptiaKw. Auta ta meiyuata Tepieoxuv ouvn0wcaeupi/ h 2eA1Wtika yia to wmi.
Meiymuata "ola-oe-Eva"
Mtopeite 10iogv aayopaoet Etoia
muivata ta otioa TEPEXOUV oA ta
ouotatik, kTOc aTTo Vepo.AutTa
Etoia muivata eivai ukoLa kai ypnyopa
Onnv xPnO, aAa eivai 1010
akipia.
Mayá
H maYiEivai aTnapaiTnYia va
pouokwoeI TO WMTOpEITE va
ayopaoTe QpeoKia mayia (eKoMuatia) n
Enpn mayia (eOskovn). H yuon tnS
jLj1 jLj1 pJiwiWl aJywg aJgWw jLj1 cLj1 JSc
a.111 aCGa+1 10g1(101925 a3) a.2a11 aCGa+1 100
JolSJIy Sjlogig 1 jL 1 Joo.10192r
aagb jw g j 1 cai jg .siig jnll
21 SaaLisLw jzj zslzg aig wJbLa-21
j31 j 1 yhwhwog wol 1 g 20 clll j31
aill ywi aIg wJg aIcJI aIe JyLx
1
aJgGwJg aalcJI JLa jll aLxLy j 1
jldi slcX LiLaog cLi ci Lai i aill po wiy dij
1281 00 22cg aaiu wic
auiu 1
+ - 套 21
-2gU
J
BASIC
FRENCH 1
WHOLE WHEAT JILs Cae V
Jg21 0aL pssw21
a < 1( 4,5) j < 32i 个
Jao gol sLo g oos aIg j 1 Jw
- Lag > gLag .
Coi
Whole, French Basic:
:JJI JJJ 0 00000000000000000000000000000000000000000
L
1
(aaaa) 1 aai Lai jai wai) ojol lc lal
jolol jolol jolol ool ool
plssiwi jlinz li jihalw gll jg 0
aegdLgagaaogjucgba LgcoJ
Jolj J 10000000000000000000000000000
Basic
1 1
1 1
1 1
1 1
1 1
1 1
1 1


Aolc Logles
Lg jlae>81g l aai 0a oao 0cgr y
.
.
.
.
.
.
.
.
.
.
.
.

1g. 21 JglwJy g jLg31 y 8 .
g 31 g 31 g 31 31 31 31 31 31 31 31 31 31 31 31 31 31 31 31 31 31 31 31 31 31 31 31 31 31 31 31 31 31 31 31 31 31
Jg jy Jl 15 y bclllg jlg i j
jgl g ploal Llae gao 8 Llc 8
Lol y jlg s lg jdl s s aall y
j jilac y jilac y jilac y jilac y jilac y jilac y jilac y jilac y jilac y jilac y jilac y jilac y jilac y jilac y jilac y jilac y jilac y jilac y jilac y jilac y jilac y jilac y jilac y jilac y jilac y jilac
1 2 3 4 5 6 7 8 9
Lilj jilw w 1g5og jlgj 8g jy
jie Jago 1
JLJIg 11
aLuo 0g g 00 gS1. gj 00 jao
JL 100
p^a + 1 x^p - y^p.
afo 1000
p1i:W21 sLi
aogui 15081 jgai gaiw 8 .
loga
gj j4-1 pssnn J3 Jcckc 0s
J11 11WJ1
a 1
joo 00 wlll jol jol jol g
i 1
1g 1
p#
8 00 51 C0s jg 1
13 140
m = 311
pJg 2 allu Jy aall q g
pJg . (g) oJr jEgj g) 8Jl J
sLg 4 Jo (aLg) as
pleb cLo sJo C
pleb gaoe lo y
pleb aaol o
aiio slw aoLa oJ
aag plo b ael o sJo S
11o 0. Lo
Lg
aolal caiogjll plsswly jj jz
1 10
aal jao. liy pai ng. aitiso ciingno piai
joo!olij jg.ajoljjugio Jg>jjll aoe
j:31 1iC Loglinu w gill aal l oLogell
#
J 10000000000000000000000000000000000000000000000000000000000000000000000000000000
yj11
g2 gog.1 jll qd dJy 1000
8L1 0 yS11 1c ggy aS1 .g 1
gjI bJ oLc qeJIL iO pssu .(jgJ) aJy
.(jy) jJJ Jai aS1 .ggJg sLw31
AJIaJI 10
JLJI L JI 1000000000000000000000000000000000000000000000000000000000000000000000000000000
JolSJI 0aJI JUg g JOL5JI CQJI
SsJLolSJIcoaJIg>oJoLolSJIcoaJIg
00g 11g allsll Jsc ggsg .aieo aol
1c.20all jao. Jol51 caii ggsy .coai
aJ 1 aJ 1 aJ 1 0
ae i Jc j 1 0 1
. bJ J J J
| ### | ### | ### | ### | ### | ### | ### | ### | ### | ### | ### | ### | ### | ### | ### | ### | ### | ### | ### | ### | ### | ### | ### | ### | ### | ### | ### | ### | ### | ### | ### | ### | ### | ### | ### | ### | ### | ### | ### | ### | ### | ### | ### | ### | ### | ### | ### | ### | ### | ### | |||||||||||||||||||||||||||||||||||||||||||||||||||||||||||||||||||||||||||||||||||||||||||||||||||
| ### | ### | ### | ### | ### | ### | ### | ### | ### | ### | ### | ### | ### | ### | ### | ### | ### | ### | ### | ### | ### | ### | ### | ### | ### | ### | ### | ### | ### | ### | ### | ### | ### | ### | ### | ### | ### | ### | ### | ### | ### | ### | ### | ### | ### | ### | ### | ### | ### | ### ### | ### | ### | ### | ### | ### | ### | ### | ### | ### | ### | ### | ### | ### | ### | ### | ### | ### | ### | ### | ### | ### | ### | ### | ### | ### | ### | ### | ### | ### | ### | ### | ### | ### | ### | ### | ### | ### | ### | ### | ### | ### | ### | ### | ### | ### | ### | ### | ### | ### | ||||||||||||||||||||||||||||||||||||||||||||||||||
| ### | ### | ### | ### | ### | ### | ### | ### | ### | ### | ### | ### | ### | ### | ### | ### | ### | ### | ### | ### | ### | ### | ### | ### | ### | ### | ### | ### | ### | ### | ### | ### | ### | ### | ### | ### | ### | ### | ### | ### | ### | ### | ### | ### | ### | ### | ### | ### | ### ### | ||||||||||||||||||||||||||||||||||||||||||||||||||||||||||||||||||||||||||||||||||||||||||||||||||||
| ### | ### | ### | ### | ### | ### | ### | ### | ### | ### | ### | ### | ### | ### | ### | ### | ### | ### | ### | ### | ### | ### | ### | ### | ### | ### | ### | ### | ### | ### | ### | ### | ### | ### | ### | ### | ### | ### | ### | ### | ### | ### | ### | ### | ### | ### | ### | ### | |||||||||||||||||||||||||||||||||||||||||||||||||||||||||||||||||||||||||||||||||||||||||||||||||||||
J 151 J
Ld 151
p 151
g 151
g 151
g 151
g 151
g 151
10 10 10 10 10 10 10 10 10 10 10 10 10 10 10 10 10 10 10 10 10 10
1 1 1 1 1 1 1 1 1 1 1 1 1 1 1 1 1 1 1 1 1 1 1 1 1 1 1 1 1
1 1 1 1 1 1 1 1 1 1 1 1 1 1 1 1 1 1 1 1 1 1 1 1 1 1 1 1 1
Lal
1 1 1 1 1 1 1 1 1 1 1 1 1 1 1 1 1 1 1 1 1 1 1 1 1 1 1 1 1 1 1 1 1 1 1 1 1 1 1 1 1 1 1 1 1 1 1 1
. Electric Knife
Jgl Jg Jg Jg Jg Jg Jg Jg Jg Jg Jg Jg Jg Jg Jg Jg Jg Jg Jg Jg Jg Jg Jg Jg Jg Jg Jg Jg Jg Jg Jg Jg Jg Jg Jg Jg Jg Jg Jg Jg Jg Jg Jg Jg Jg Jg Jg Jg Jg Jg Jg J g
J 1 J 1
aolc.(yLw)jolj jol 10
a 1 1 1 1 1 1 1 1 1 1 1 1 1 1 1
1 1 1 1 1 1 1 1 1 1 1 1 1 1 1 1 1
1
Jao jol j 81 Jli yjlll no .Loglo 15 aJr 2
. aJoll gao lo Jg .alall aalldi Llaeog
Lsc x oJg ao jil 2 11 10000000000000000000000000000000000000000000000000000000000000000000000000000000000000000000000