
152001 - Bread maker PRINCESS - Free user manual and instructions
Find the device manual for free 152001 PRINCESS in PDF.
| Product Type | Bread Machine |
| Brand | Princess |
| Model | 152001 |
| Color | White (Cool White) |
| Number of Programs | 5 (BASIC, WHOLE WHEAT, QUICK, DOUGH, BAKE) |
| Maximum Flour Capacity | 500 g |
| Power Supply | 220-240 V, 50/60 Hz |
| Power | 650 W |
| Dimensions (approx.) | 30 x 25 x 35 cm |
| Net Weight (approx.) | 5 kg |
| Mold Material | PTFE Non-stick |
| Included Accessories | Measuring cup, measuring spoon, baking pan, kneading paddle, metal hook |
| Indicator Lights | Yes, for program and operation |
| Viewing Window | Yes |
| Keep Warm | Up to 1 hour after baking |
| Cleaning | Removable parts dishwasher safe; housing cleaned with damp cloth |
| Safety | Automatic stop in case of power failure (up to 15 min); do not immerse; use on a stable surface |
| Repairability | Repairs by qualified technician; spare parts available via Princess after-sales service |
| Recommended Ambient Temperature | 15 °C to 35 °C |
Frequently Asked Questions - 152001 PRINCESS
User questions about 152001 PRINCESS
0 question about this device. Answer the ones you know or ask your own.
Ask a new question about this device
Download the instructions for your Bread maker in PDF format for free! Find your manual 152001 - PRINCESS and take your electronic device back in hand. On this page are published all the documents necessary for the use of your device. 152001 by PRINCESS.
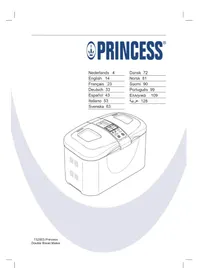
USER MANUAL 152001 PRINCESS
Breadmaker Cool White
Article 152001
- Gebruiksaanwijzing • User's instructions • Mode d'emploi
- Bedienungsanleitung • Instrucciones de uso • Istruzioni per l'uso
- Bruksanvisning • Brugsanvisning • Bruksanvisning • Käyttöohje
- Instruções de uso • Οδηγίες χρήσης •
Nederlands 1
English 11
Français 21
Deutsch 31
Español 41
Italiano 52
Svenska 62
Dansk 71
Norsk 80
Suomi 89
Português 98
Ελληνικά 108

Algemene informatie
This Princess Cool White breadmaker mixes and kneads the dough, and then bakes the bread. The appliance is supplied complete with a measuring cup and measuring spoon and a baking tin with non-stick coating.
The breadmaker is equipped with
5 programs that you can use for various types of bread!

Operation and controls
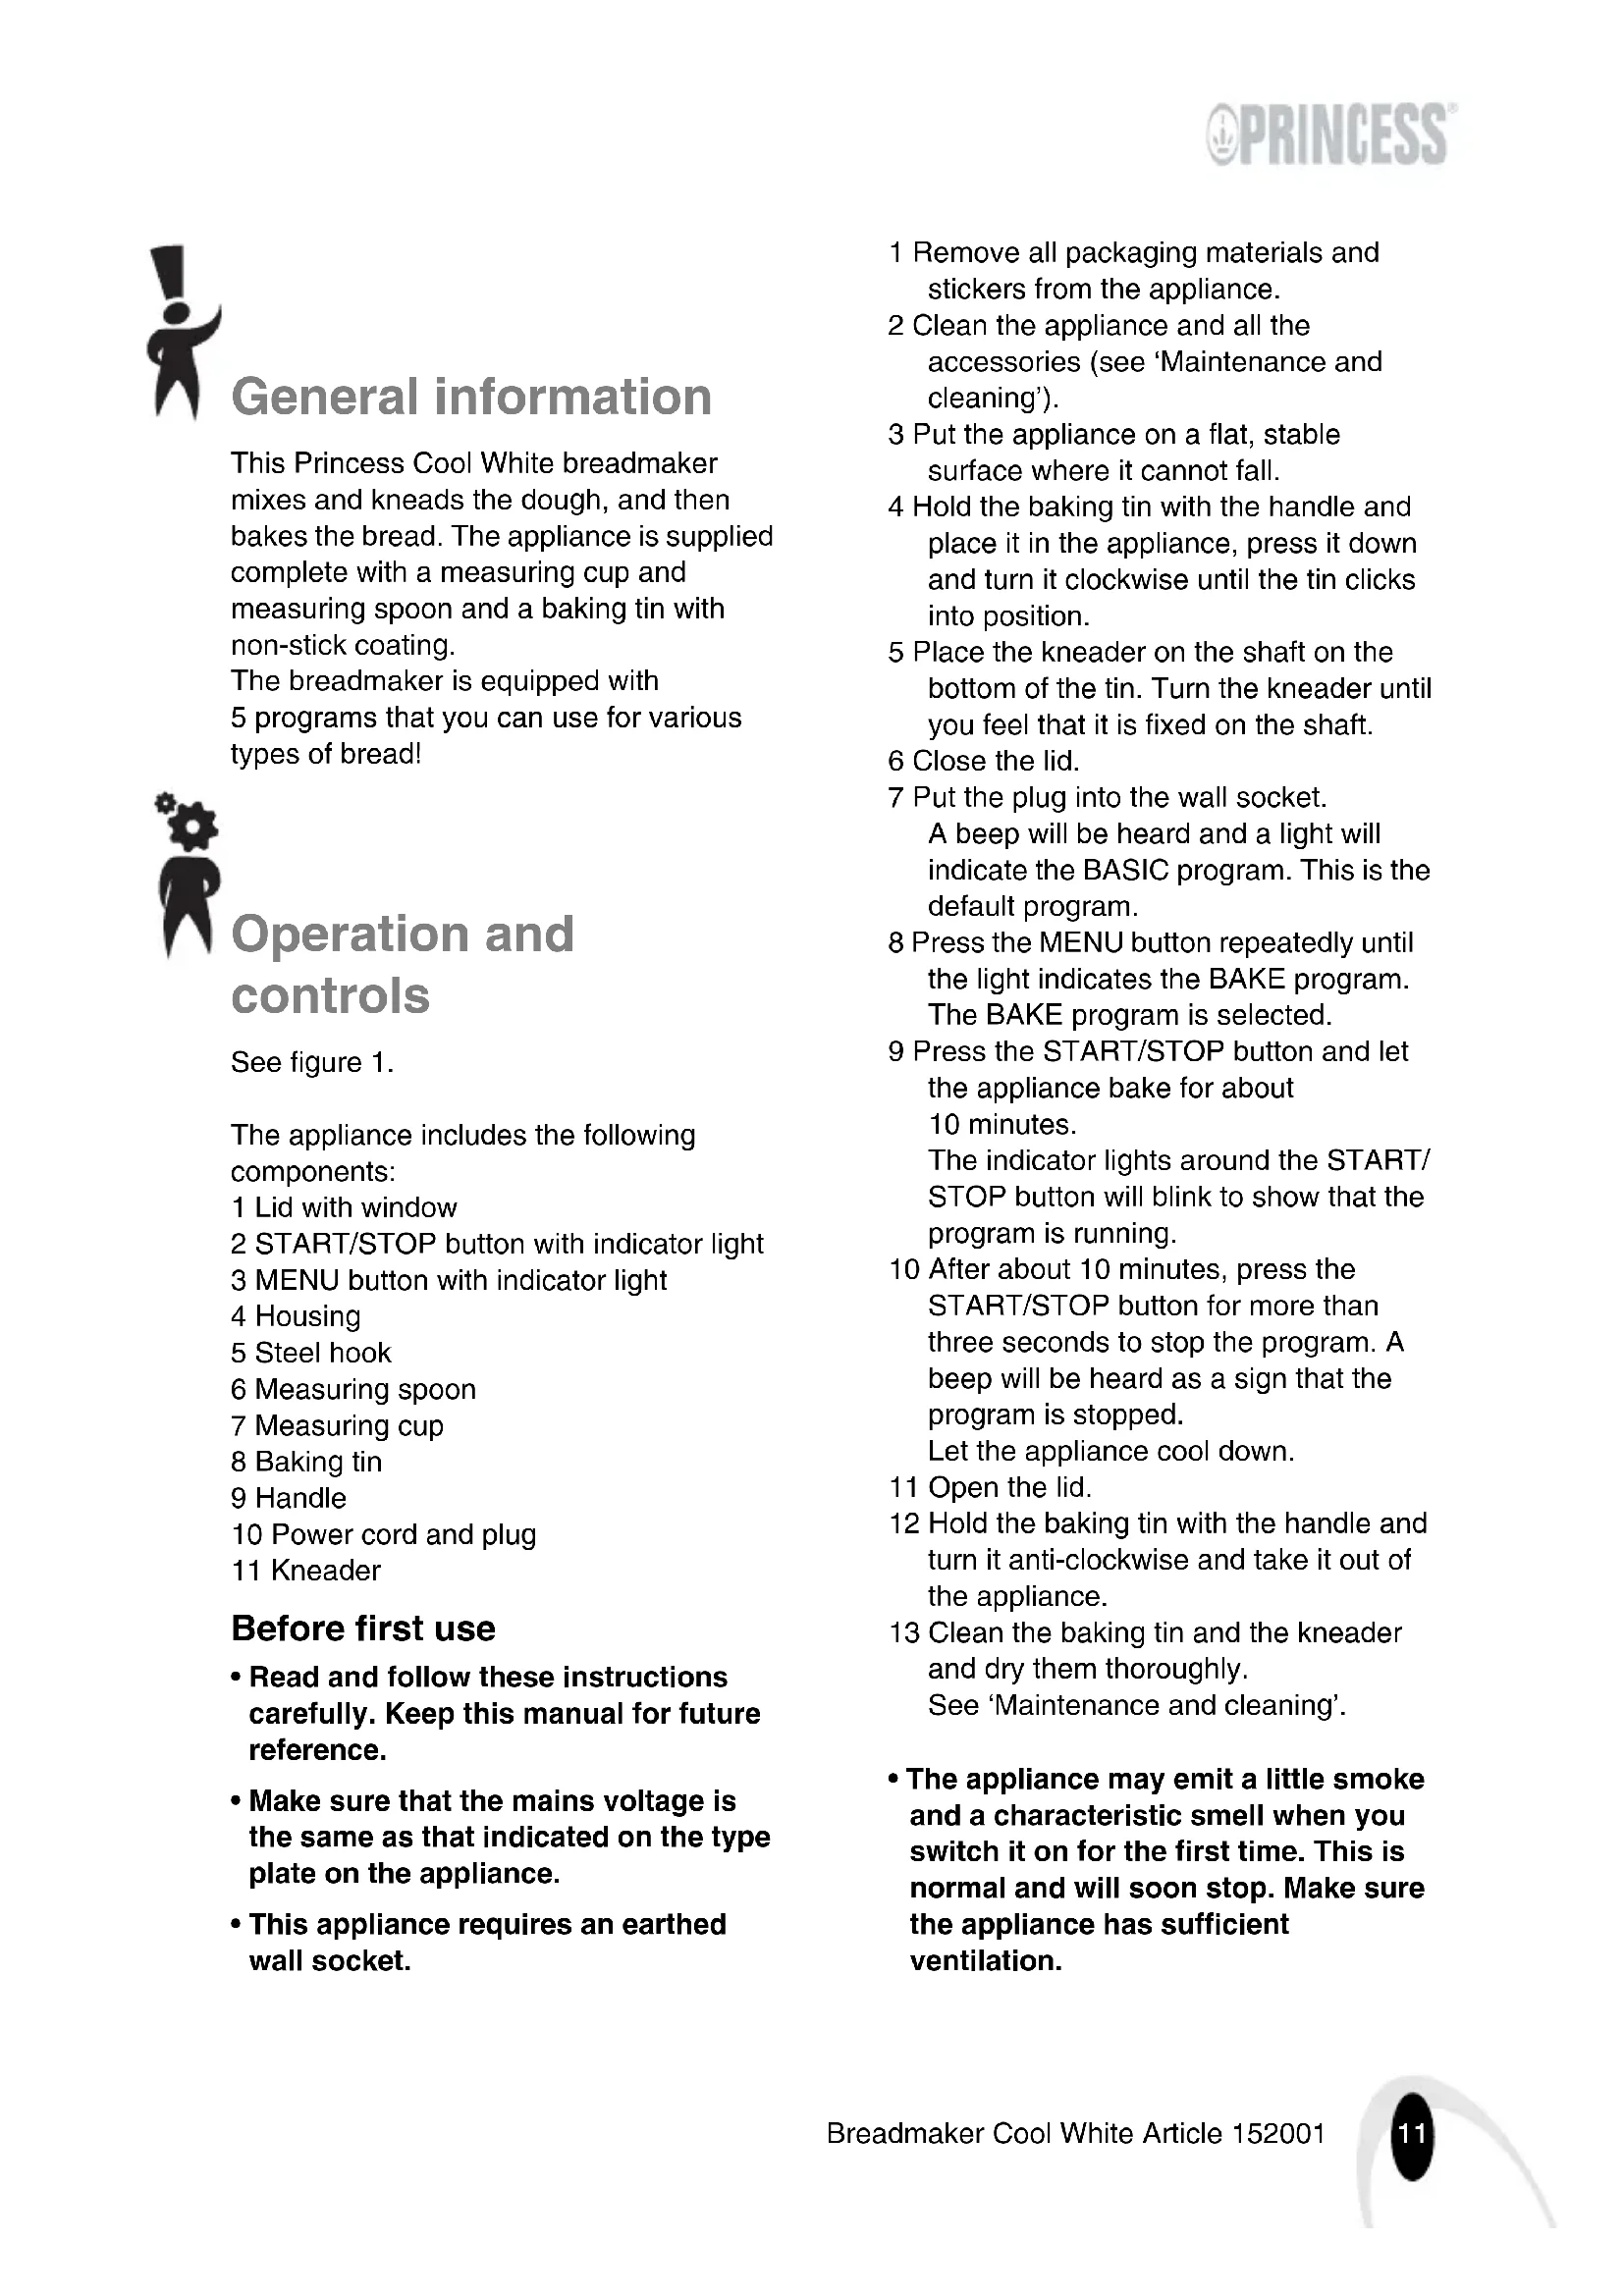
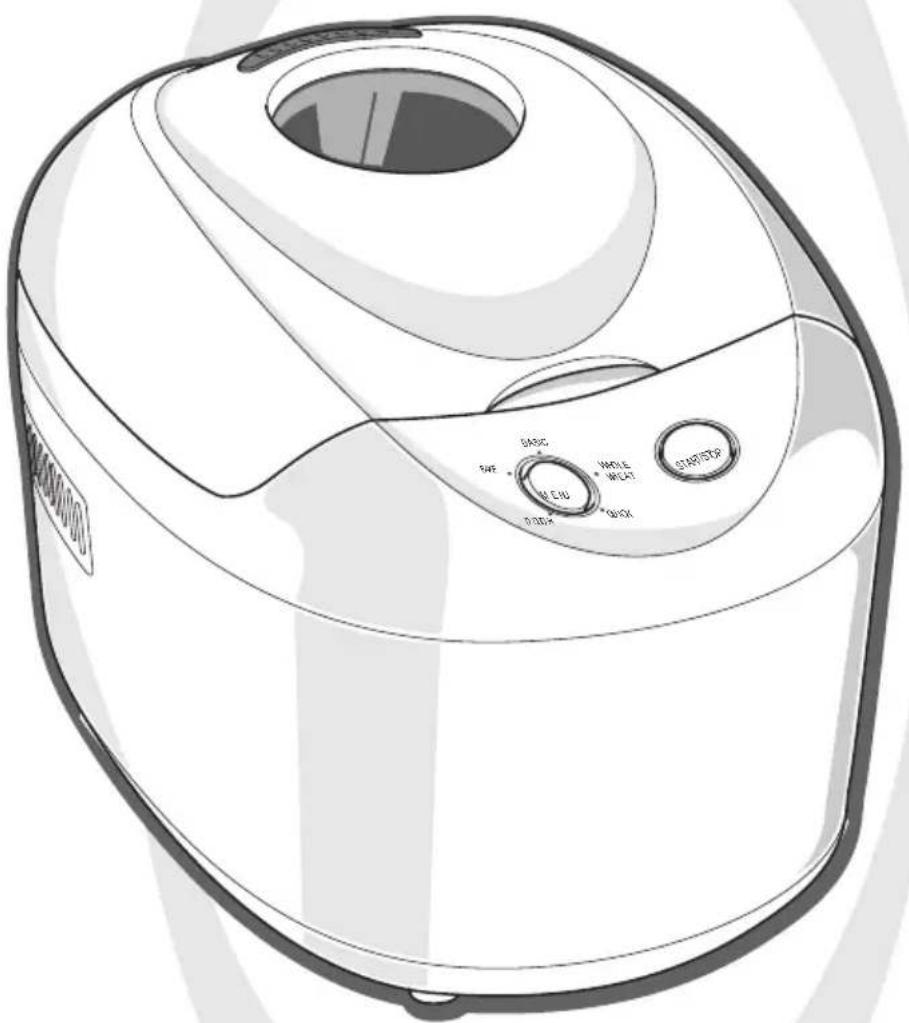
See figure 1.
The appliance includes the following components:
1 Lid with window
2 START/STOP button with indicator light
3 MENU button with indicator light
4 Housing
5 Steel hook
6 Measuring spoon
7 Measuring cup
8 Baking tin
9 Handle
10 Power cord and plug
11 Kneader
Before first use
- Read and follow these instructions carefully. Keep this manual for future reference.
- Make sure that the mains voltage is the same as that indicated on the type plate on the appliance.
- This appliance requires an earthed wall socket.
1 Remove all packaging materials and stickers from the appliance.
2 Clean the appliance and all the accessories (see 'Maintenance and cleaning').
3 Put the appliance on a flat, stable surface where it cannot fall.
4 Hold the baking tin with the handle and place it in the appliance, press it down and turn it clockwise until the tin clicks into position.
5 Place the kneader on the shaft on the bottom of the tin. Turn the kneader until you feel that it is fixed on the shaft.
6 Close the lid.
7 Put the plug into the wall socket. A beep will be heard and a light will indicate the BASIC program. This is the default program.
8 Press the MENU button repeatedly until the light indicates the BAKE program. The BAKE program is selected.
9 Press the START/STOP button and let the appliance bake for about 10 minutes.
The indicator lights around the START/STOP button will blink to show that the program is running.
10 After about 10 minutes, press the START/STOP button for more than three seconds to stop the program. A beep will be heard as a sign that the program is stopped.
Let the appliance cool down.
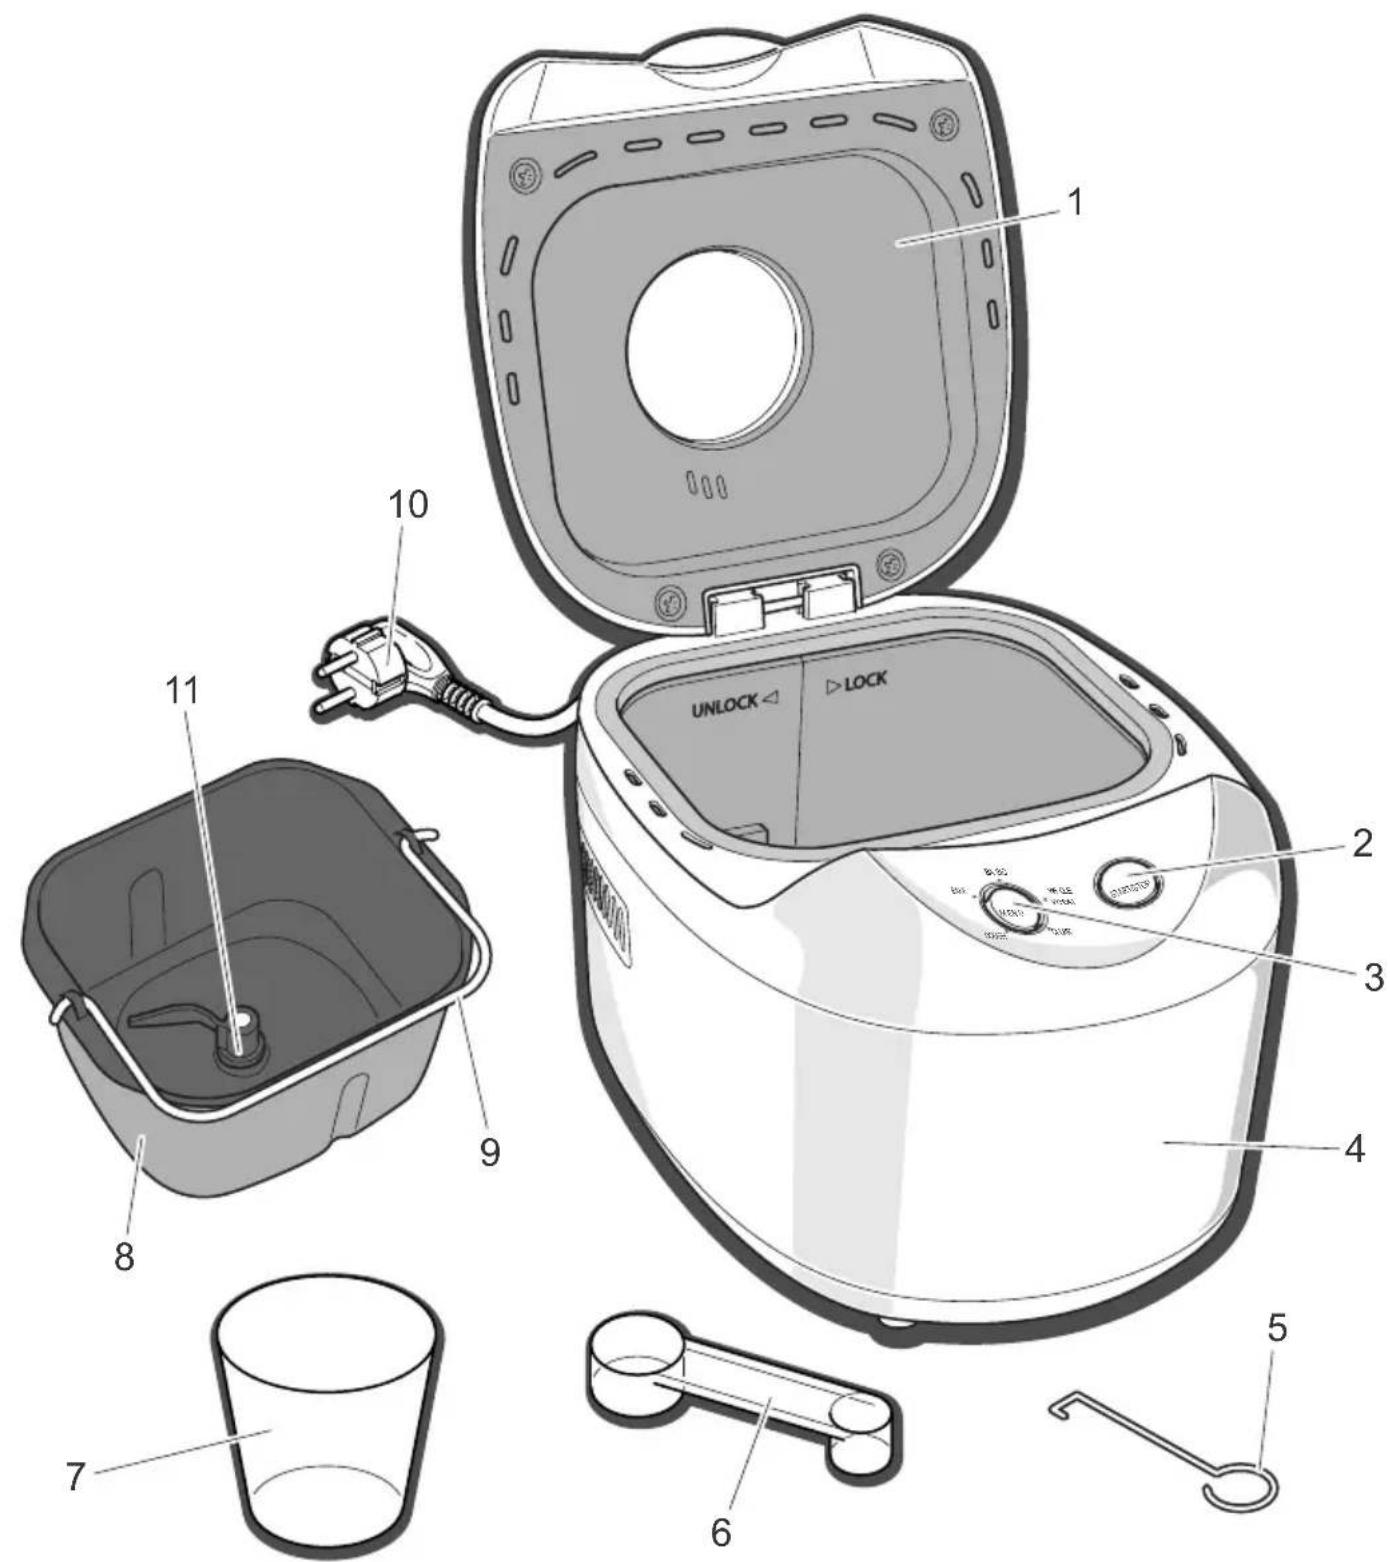
11 Open the lid.
12 Hold the baking tin with the handle and turn it anti-clockwise and take it out of the appliance.
13 Clean the baking tin and the kneader and dry them thoroughly.
See 'Maintenance and cleaning'.
- The appliance may emit a little smoke and a characteristic smell when you switch it on for the first time. This is normal and will soon stop. Make sure the appliance has sufficient ventilation.
- The baking tin supplied with this appliance is finished with a non-stick PTFE coating. When heated this coating may release small amounts of gases which are totally harmless to humans. However, the nervous system of birds has been found to be extremely sensitive to these gases. Therefore, this appliance should not be used near cage birds (for example, tropical birds such as parrots).
Preparing the appliance for use
1 Put the appliance on a flat, stable surface where it cannot fall.
2 Place the kneader on the shaft on the bottom of the tin. Turn the kneader till you feel that it is fixed on the shaft.

Before baking, it is recommended to fill the holes around the shaft of the kneader in the baking tin with butter before placing the kneader. This prevents the dough from sticking in this place and facilitates the removal of the kneader from the bread when it is ready.
Use
Adding ingredients
1 Weigh the required ingredients for the recipe.

Never fill the appliance with more than the maximum quantity (a total of a maximum of 500 g (1.1 lb.); otherwise the dough will spill over the baking tin.
2 Add the ingredients one by one to the baking tin. Begin by pouring water or liquid into the baking tin. Then add the flour and - depending on the recipe - add sugar, salt, butter and yeast or baking powder. Put the yeast or baking powder in a hollow in the flour and each of the other ingredients in one corner of the baking tin (this is particularly important when using the timer).
3 Hold the baking tin with the handle and place it in the appliance, press it down and rotate it clockwise until it clicks in position.
4 Close the lid.
- Make sure there is sufficient free space around the appliance. This will ensure that the vapour is distributed well and items close to the appliance will not become damp.
- Do not use sharp tools with the tin, such as metal spatulas, knives and forks. This may damage the non-stick coating.
Setting the program
1 Put the plug into the wall socket.
A beep will be heard and a light will indicate the BASIC program. This is the default program.
2 Select the required program by pressing the MENU button repeatedly until the light indicates the required program.
See 'MENU selection'.
Baking
3 Press the START/STOP button. A short beep will be heard to indicate that the selected program is started. The indicator lights around the START/STOP button will blink to show that the program is running.
- The MENU button is inactive from now on to avoid unwanted program changes by accidentally pressing this button.
- The program can be stopped by pressing the START/STOP button for more than 3 seconds. A short beep will be heard to indicate that the program has stopped.
• Always use the appliance with the lid closed.
• The appliance will automatically switch off in the event of a power
failure whilst it is in use. The appliance will automatically switch on again if the power is restored within 15 minutes. The appliance will then complete the program.
If the power interruption exceeds 15 minutes, the program cannot be kept. If, in this case, the dough has not yet entered the rising phase, you can press the START/STOP button to restart the program from the beginning. Otherwise, discard the ingredients and start over again.
- Use oven gloves if you need to touch the appliance during or after use. The appliance and the baking tin will become hot.
- The appliance will work fine in a wide temperature range, but there may be a difference in loaf size baking in a very warm room or in a very cold room. We suggest that the appliance is used at temperatures between 15 and 35^ .
You can keep track of the baking process by looking through the window in the lid.
For the program BASIC:
4 During the baking process a long beep will be heard. This beep alerts you to add extra ingredients to improve the flavour (if required):
Open the lid and add the required ingredients and close the lid again.
End
5 When the program is finished, beeps will be heard to alert you to the program end.
The appliance will keep the bread warm for one hour once it is baked. This prevents condensation on the crust. If you want to stop this warming process, press the START/STOP button for more than 3 seconds. You will hear a beep to indicate the end of the program.

The appliance and the baking tin are very hot. Use oven gloves to open the
lid and to take the baking tin out of the appliance.
6 Open the lid.
7 Hold the baking tin with the handle, turn it anti-clockwise and take the baking tin out of the appliance.
8 Remove the loaf from the baking tin by turning the tin upside down and tapping it gently. If so required, you can use a wooden or plastic spatula to remove the loaf; take care however not to damage the non-stick coating.
The kneader may remain in the loaf. Use the steel hook to remove it from the bread. Take care when removing it; it is hot.
Allow the bread to cool on a rack before cutting it. (Tip: you can cut fresh bread very easily with the Princess electrical knife (Article no. 492952).
9 Allow the appliance to cool down sufficiently before using it again.
10 When you have finished using the appliance remove the plug from the wall socket, and allow the appliance to cool down sufficiently before you clean and store it.
See 'Maintenance and cleaning'.
MENU selection
1 Press the MENU button to toggle through the different programs. The selected program is indicated by a light.
Operating time for the different programs:
| Program Time | (Hr:min) |
| BASIC 3:00 | |
| WHOLE WHEAT 3:40 | |
| QUICK 1:38 | |
| DOUGH 1:30 | |
| BAKE 0:30 |
1. BASIC
This is the most used program for kneading, rise and baking normal bread.
2. WHOLE WHEAT
This program can be used to knead, rise and bake a whole wheat bread.
3. QUICK
This program can be used to knead, rise and bake loaves in less time than the BASIC program. Bread baked with this program is usually smaller with a dense texture.
4. DOUGH
This program can be used to knead and rise dough without baking it. The dough can be used for making bread rolls, pizza, steamed bread, etc.
5. BAKE
This program can be used to bake a loaf without kneading and rising. It can also be used to increase the baking time with preferred settings directly after using another standard bake program.
Switching off and storing the appliance
1 Remove the plug from the wall socket.
2 Allow the appliance to cool down.
3 Clean the appliance and all accessories (see 'Maintenance and cleaning').
4 Store the appliance in a dry, frost-free location.

Maintenance and cleaning
- Clean the appliance thoroughly after use.
- Make sure the appliance is not plugged into the wall socket when you are going to clean it.
- Never clean the appliance when it is still hot.
- Make sure no moisture comes into contact with the appliance's electrical parts.
- Never immerse the appliance, the power cord or the plug in water or other liquids.
- Never use aggressive or scouring cleaning products or sharp objects (such as a knife or a hard brush) to clean the appliance.
- Only the loose parts and accessories (baking tin, kneader, measuring spoon and cup, and the steel hook) may be cleaned in a dishwasher. The appliance itself may not be cleaned in the dishwasher.
1 Remove the plug from the wall socket and let the appliance cool down completely.
2 Clean the appliance's housing with a soft, damp cloth. Use warm water and some washing-up liquid to moisten the cloth.
3 Clean the loose parts (baking tin, kneader, measuring spoon and cup, and the steel hook) in soapy water or in a dishwasher.
4 Dry the appliance and accessories thoroughly before storing them.

Safety
General information
- Read and follow these instructions carefully. Keep this manual for future reference.
-
Use this appliance only in accordance with these instructions.
-
This appliance is intended solely for domestic use.
- The use of this appliance by children or persons with a physical, sensory, mental or motor disability or with a lack of the necessary knowledge and experience may cause a hazard. Persons responsible for the safety of such people must give explicit instructions or supervise the use of the appliance.
- Keep the appliance out of the reach of children, and of persons who may not be able to operate it safely.
- Have the appliance repaired only by a qualified electrician. Never try to repair the appliance yourself.
- Only use accessories recommended by the supplier. The use of other accessories may result in damage to the appliance, thereby creating hazards for the user.
- The appliance is not intended to be operated by means of an external timer or separate remote control system.
Electricity and heat
- Verify that the mains voltage is the same as that indicated on the appliance's type plate before use.
- Use an earthed plug socket that is connected to a fused circuit of at least 10 A and to which no other heavy loads are connected.
- If you use an extension lead, use an earthed extension lead that is suitable for the appliance's power rating. Unwind the extension lead fully and position it so that nobody can trip over it.
-
The appliance should be supplied through a residual current device (RCD) having a rated residual operating current not exceeding 30 mA.
-
Always remove the plug from the wall socket when the appliance is not going to be used for a longer period of time.
- When you remove the plug from the wall socket, pull the plug and not the power cord.
- Never pull the power cord to move the appliance.
- Never move the appliance while it is in use.
- Do not use the appliance if the appliance or the power cord is damaged. Have a damaged power cord replaced by a qualified electrician.
- Make sure the appliance, the power cord and the plug do not come into contact with heat sources, such as a hot hob or a naked flame.
- Make sure the appliance and the power cord do not come into contact with water, other fluids or chemicals.
- Do not pick up the appliance if it falls into water. Immediately remove the plug from the wall socket. Do not use the appliance anymore.
- The appliance and its parts can become hot while the appliance is in use. To avoid being burnt, take care when touching the appliance and its parts.
- The appliance must be able to dissipate its heat to avoid a risk of fire. Make sure that the appliance has sufficient space around it, and does not come in contact with inflammable material. The appliance must not be covered.
- Allow the appliance to cool down before you store it, clean it or carry out maintenance work.
- Do not use the appliance near another heat source.
During use
- Never use the appliance outdoors.
- Never use the appliance in a humid room.
- Use the appliance only at a temperature between 15^ and 35^ .
- Place the appliance on a flat, stable surface where it cannot fall.
- Never allow the power cord to hang over the edge of the draining board, worktop or table.
• Always make sure the power cord has been fully unwound.
- Make sure your hands are dry when you touch the appliance, the power cord or the plug.
- Switch off the appliance and/or remove the plug from the wall socket in the event of a malfunction during use, before cleaning the appliance, before fitting or removing an accessory and before storing the appliance after use.
- Never leave the appliance unattended when in use.
- Never move the appliance when it is switched on or is still hot. Before you move the appliance, switch it off and wait until it has cooled down.
- This appliance's tin has a non-stick PTFE coating. When heated this coating may release small amounts of gases which are totally harmless to humans. However, the nervous system of birds has been found to be extremely sensitive to these gases. Therefore, this appliance should not be used near cage birds (for example, tropical birds such as parrots).
U.K. WIRING INSTRUCTIONS
The wires in the mains lead are coloured in accordance with the following code:
As the colours of the wire in the mains lead of this appliance may not correspond with the colour markings identifying the terminals on your plug, proceed as follows:
- The wire which is coloured BLUE must be connected to the terminal which is marked with the letter N or coloured black.
- The wire which is coloured BROWN must be connected to the terminal which is marked with the letter L or coloured red.
- The wire which is coloured GREEN/YELLOW must be connected to the terminal which is marked with the letter E or (earth symbol) and is coloured GREEN or GREEN/YELLOW
WARNING: THIS APPLIANCE MUST BE EARTHED
With this appliance, if a 13A plug is used a 13A fuse should be fitted. If any other type of plug is used, a 15A fuse must be fitted either in the plug or at the distribution board.


The Environment
Dispose of packaging material, such as plastic and boxes, in the appropriate waste containers.
If you wish to dispose of the appliance whilst it still works properly or can be easily repaired, then ensure that the appliance is recycled.

When the appliance reaches the end of its useful life, it should be disposed of in a responsible manner, thereby ensuring the reuse of the appliance or its parts. Do not dispose of the appliance with unsorted refuse; hand it in at the store, or take it to a recognized collection point. Contact your municipality for information about the reception and collection systems in your area.
Applicable European guideline:
2002/95/EC
2002/96/EC

Some bread recipes
The measuring jug and the measuring spoon (with the teaspoon and tablespoon measures on the ends), which comes with the breadmaker, have been used for the quantities.
White bread
Wheat flour or wheatmeal 280 g
Yeast (dry) 1 teaspoon
Oil 1½ to 2 tablespoons
Milk 1 to 2 tablespoons
Salt 1 teaspoon
Sugar 1 tablespoon
Water 155 ml
Wholemeal bread
Wholemeal flour 280 g
Yeast (dry) 1 teaspoon
Oil 1½ to 2 tablespoons
Milk 1 to 1 12 tablespoons
Salt 1 teaspoon
Sugar 1 tablespoon
Water 160 ml
Mixed bread
Wheatmeal 250 g
Cornmeal
(or another type of flour) 30 g
Yeast (dry) 1 teaspoon
Oil 1½ to 2 tablespoons
Milk 1 to 1½ tablespoons
Yoghurt 12 to 1 tablespoon
Salt 1 teaspoon
Sugar 1 tablespoon
Water 155 ml
Ingredients
You can, of course, bake bread using one of the recipes given above, but once you get into it, it is fun to experiment using different ingredients. To do so, it is useful to know more about the various bread-baking ingredients. Some useful information you will need when baking bread is given below.
Flour
The main ingredient of bread is flour. There are many different kinds of flour and mixes of flour. The type of grain you use makes a big difference to the bread. For example, wheat flower contains so much gluten that it rises better than heavier flour and you, therefore, need less yeast. Gluten is a protein compound which is found in grain, such as wheat, oats, rye and barley. As the bread rises, gluten forms a network that keeps in the carbon dioxide bubbles and this causes the bread to rise.
Patent flour or household flour
Most white flour is called patent flour or household flour. It contains almost no bran or seeds, but does contain a lot of gluten.
This flour is usually used to bind soups and sauces, but is also good for baking (white) bread.
Wheat flour and wheatmeal
Wheat flour is white wheatmeal.
Wheatmeal is somewhat greyer in colour and contains a small amount of bran and
seeds. Wheat flour and wheatmeal also contain a lot of gluten.
Wholewheat flour and wholewheat meal Wholewheat flour is ground from whole, untreated grains of wheat. It contains all the bran and seeds from the wheat. Wholewheat flour has, just like wheat flour, a lot of gluten, but is heavier because of the bran and seeds. As a result, the bread will be more compact if it is made only using wholewheat meal. Therefore, most home bakers add some wheat flour.
Besides these types of flour and meal, there are also many other types to keep you busy to your heart's content, such as: oatmeal, barley meal, buckwheat flour, maize meal and rye flour.
Meal mixes
Most types of meal can be mixed together. The combination of buckwheat flour/oatmeal/wheat flour is a good example. You could also try barley meal/wheat flour. Various mixes can also be bought in shops, such as cornmeal, six-grain meal, nine-grain meal or ten-grain meal. These mixes sometimes contain flour and/or a bread improver.
All-in-one mixes
You can also buy mixes which contain all the ingredients, except water. These all-in-one mixes are easy and quick to use, but are also more expensive.
Yeast
Yeast is required in order for the bread to rise. You can buy fresh yeast (blocks) or dried yeast (granules). The taste of fresh yeast is slightly more pronounced than that of dry yeast. There are various brands of dry yeast and the effect they have varies somewhat. The yeast that suits you the best is a question of personal preference. As a rule of thumb, you can say that you need about half the weight of dry yeast (also called instant yeast) compared to
fresh yeast. The effect of the yeast can be affected if the yeast comes into contact with salt or fat. Salt dries out the yeast and fat encloses the yeast cells, so that the dough can no longer rise. It is, therefore, important to ensure that the yeast, salt and butter are not placed too close to each other in the breadmaker.
Salt
Salt adds to the taste of the bread, but is also important for the crust and for the bread rising (although salt can also stop the bread from rising if it comes into direct contact with the yeast). Salt strengthens the gluten construction which gives the bread shape. Salt also ensures that the bread does not rise out of the baking tin and then sinks before it is well baked. It is possible to bake low-sodium or salt-free bread, but it will require varying the ingredients.
Liquids
The most common liquid used to bake bread is water, but you can also try using milk or buttermilk. This influences the taste, the rising and the bread structure. The fats in full-fat milk have a positive influence on the freshness and the lactose in the milk stimulates the fermentative power. Buttermilk produces a lighter bread that remains fresh for longer.
Sugar
Sugar only makes a small contribution to the rising process, but it determines the taste of the bread. Instead of sugar, you can also use honey, treacle or syrup. Do not use any large granular sugar (hard sugar) or sugar candy in the breadmaker. This may damage the non-stick coating. Do not use any artificial sweeteners, because they are generally not good at withstanding heat.
Fats
Fat is, in fact, a bread improver. You do not necessarily need it, but the bread is much
better if you do use it. Fat makes the dough more pliable and ensures that it can rise more easily. Fat also encloses the gluten network, so that the carbon dioxide is kept in. This makes the bread airier and it remains fresh for longer.
Various types of fat are suitable. Oil (sunflower oil or olive oil), butter and margarine give an excellent result. Oil makes the crust softer. Margarine produces a crispier crust and also improves the rising process. When baking herb bread, it may be tasty to use a seasoned oil, such as walnut oil, garlic oil or basil oil.
Temperature
It is best if the ingredients are at room temperature when they are placed in the baking tin. Never use liquid that is too warm, because this can have a negative effect on the yeast.
Aids and tips
Cool the bread on a grille
After baking, leave the bread to cool down on a grille. The heat can then escape from all sides.
Cutting the bread after it has cooled down
Home-made bread is best cut after it has cooled down. If the bread is still warm, then it is best to cut it using an electric knife, such as the Princess 2952 Silver Electric Knife.
Storing bread
After cooling, it is best to wrap home-made bread in a tea towel. This will keep the crust nice and crisp. Special paper bread bags are also suitable. The bread will become soft if it is kept in a plastic bag or in the refrigerator.
Freezing bread
Home-made bread can be frozen after it has cooled down. It is useful to freeze it in daily portions.
It is best to defrost the bread at room temperature, because a microwave dries the bread out too quickly.
Although the bread can be frozen, it always has a negative effect on the quality.
Darker bread
One tablespoon of cacao powder can be added to the flour to give bread a darker colour. This has almost no influence on the flavour.
Crispier crust
To achieve a crispier crust, you can leave the bread in the machine for ten to fifteen minutes during the keep-warm phase.
If the bread rises out of the baking tin
You can watch the rising process through the viewing window. Normally, it is not a good idea to open the lid during the rising process, because this can cause the bread to sink, but if the dough rises out of the baking tin and sticks against the viewing window (this can also happen during baking), then open the lid briefly. The dough will then sink slightly.
Small, compact bread
Too much liquid produces a small, flat bread. The dough is not able to rise properly, because it is too wet. The yeast may also have been too old.
Dry bread
Too little liquid produces bread which is too dry. Try using (slightly) more water or milk. If the bread is good after baking, but then dries out quickly, add more oil or butter.
Sunken bread
If your bread rises fine, but sinks during baking, try baking it using the shortest program (Basic). In general, longer programs increase the chance of the bread sinking during baking.
Finally
After reading all of this information, you should, in theory, be able to come up with your own favourite recipes. All that is left is the practice. It may not be so easy, though, because baking bread is a skill that you cannot learn in just one day. The search for the perfect bread can have a lot of setbacks. Do not be disappointed if you have trouble at first. Ask other home bakers about their experiences, take time to read about the subject, look things up on the Internet and, most importantly, keep experimenting, because the possibilities are endless. After all, home-made bread is the tastiest.

2. WHOLE WHEAT (trigo integral)


- Breadmaker Cool White
- Article 152001
- Algemene informatie
- Operation and controls
- Before first use
- Preparing the appliance for use
- Use
- Adding ingredients
- Setting the program
- Baking
- For the program BASIC:
- End
- lid and to take the baking tin out of the appliance.
- MENU selection
- BASIC
- WHOLE WHEAT
- QUICK
- DOUGH
- BAKE
- Switching off and storing the appliance
- Maintenance and cleaning
- Safety
- General information
- Electricity and heat
- During use
- U.K. WIRING INSTRUCTIONS
- WARNING: THIS APPLIANCE MUST BE EARTHED
- The Environment
- Some bread recipes
- White bread
- Wholemeal bread
- Mixed bread
- Ingredients
- Flour
- Meal mixes
- All-in-one mixes
- Yeast
- Salt
- Liquids
- Sugar
- Fats
- Temperature
- Aids and tips
- Cool the bread on a grille
- Cutting the bread after it has cooled down
- Storing bread
- Freezing bread
- Darker bread
- Crispier crust
- If the bread rises out of the baking tin
- Small, compact bread
- Dry bread
- Sunken bread
- Finally
- WHOLE WHEAT (trigo integral)
Brand : PRINCESS
Model : 152001
Category : Bread maker