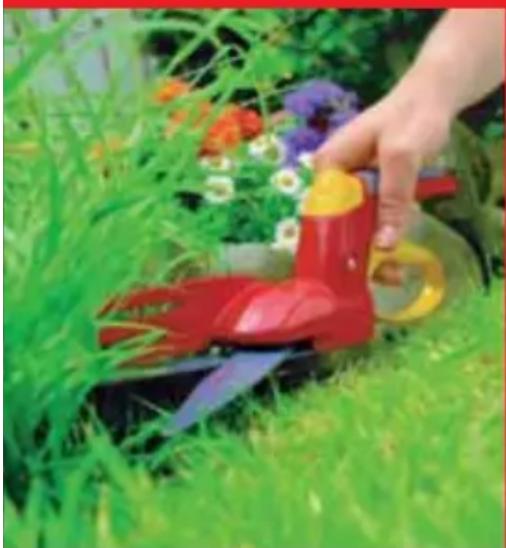
GT 840 - Grass trimmer Wolf Garten - Free user manual and instructions
Find the device manual for free GT 840 Wolf Garten in PDF.

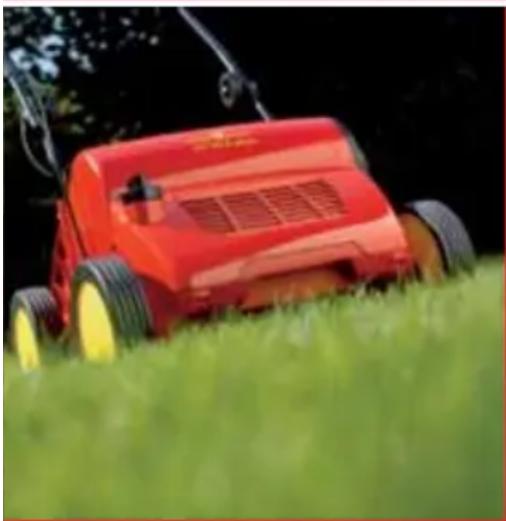
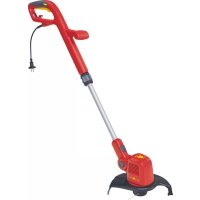
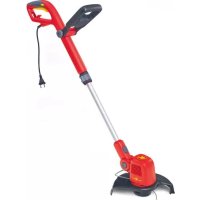
| Product type | Electric grass trimmer |
| Brand | Wolf Garten |
| Model | GT 840 |
| Power supply | 230 V ~ 50 Hz |
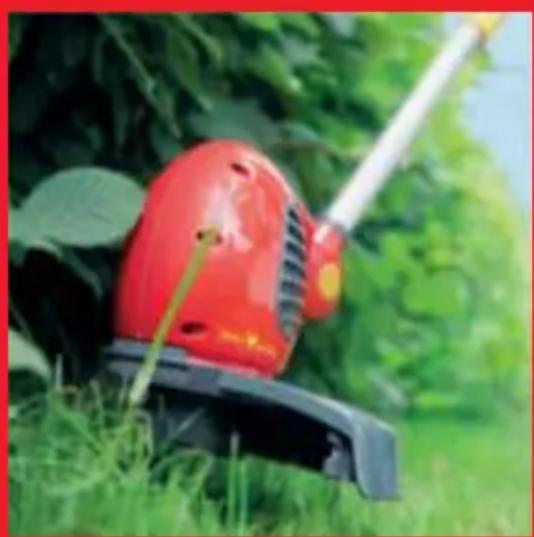
| Cutting system | Automatic advance nylon line (6-8 mm per start/stop) |
| Line spool | Nylon line cassette (ref. 7130 085 GT-F7 or 7136 085 GT-F8) |
| Wheels (accessory) | Ref. 7136 086 GT-R, for regular cutting |
| Cutting angle | 4 adjustable positions (unguided cutting, regular, under bushes, vertical edging) |
| Telescopic handle | Yes, height adjustable with central handle |
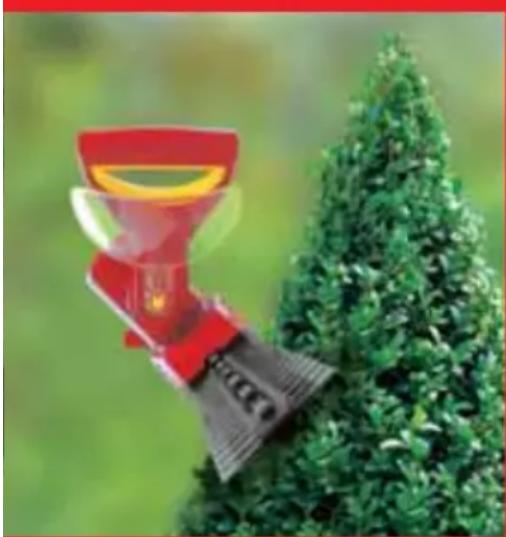
| Edging function | Yes, cutting head rotatable 90° for vertical cutting |
| Protective hoop | Present on GT 850 (higher model), protects plants |
| Cable fixing | Cable clip on handle to prevent accidental disconnection |
| Safety device | Residual current device (RCD) recommended ≤30 mA |
| Maximum extension cable length | 25 m with cross section ≥3×1.5 mm² |
| Minimum age of use | 16 years |
| Maintenance | Clean ventilation slots after each use; do not clean the blade with water jet |
| Spare parts | Line cassette (7130 085, 7136 085), wheels (7136 086) available from dealer |
| Warranty | According to conditions in force in the country (material or manufacturing defects) |
Frequently Asked Questions - GT 840 Wolf Garten
User questions about GT 840 Wolf Garten
0 question about this device. Answer the ones you know or ask your own.
Ask a new question about this device
Download the instructions for your Grass trimmer in PDF format for free! Find your manual GT 840 - Wolf Garten and take your electronic device back in hand. On this page are published all the documents necessary for the use of your device. GT 840 by Wolf Garten.
USER MANUAL GT 840 Wolf Garten
Original operating instructions 12
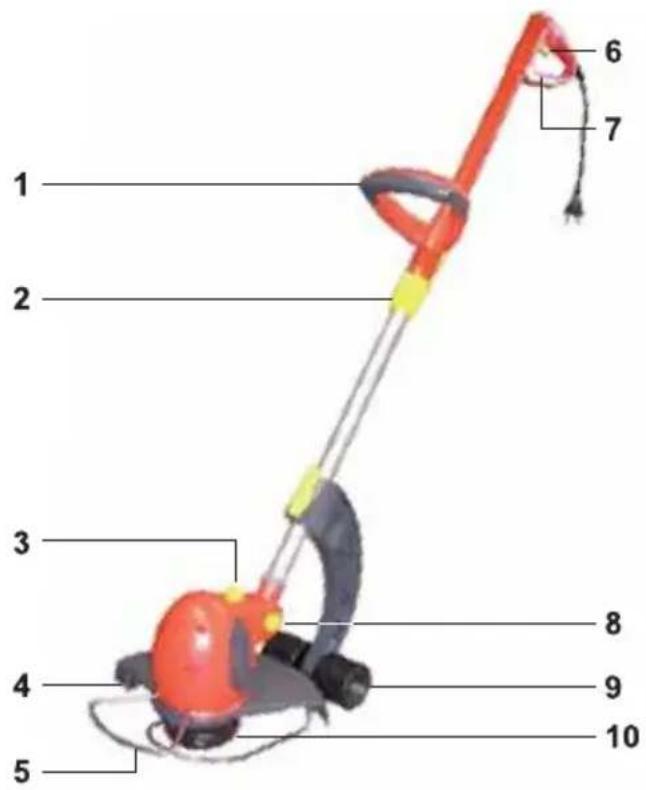
1 Middle grip
2 Telescoping handle
3 Edge adjustment
4 Cord cutter
5 Plant hoop guard (GT 850)
6 On-/Off-switch
7 Upper grip with cable holder
8 Handle angle adjustment
9 Chassis (GT 845, GT 850)
10 Cord spool
F
Congratulations on the purchase of your WOLF product!

Please read the instructions carefully and familiarize yourself with the different control elements and how to operate the device properly. Attention! When using power tools it is important to observe the following safety advice in order to protect yourself against electrical shock. The operator is responsible for accidents involving other persons and/or their property.

Never let children or other persons who have not read these instructions use the device. Persons younger than 16 must not use the device. Local regulations may determine the minimum age for users.
Contents
Meaning of the symbols 12
Safety instructions 13
Operation 14
Maintenance 16
Faults and how to remedy 16
Spare parts. 16
Warranty 16
Meaning of the symbols

Warning! Read the operating instructions before placing in service!
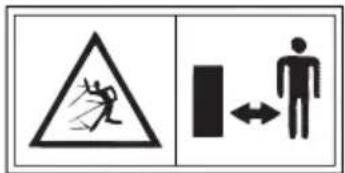
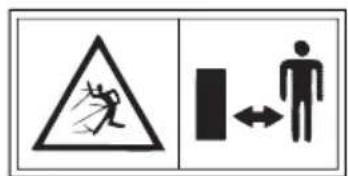
Keep bystanders away!
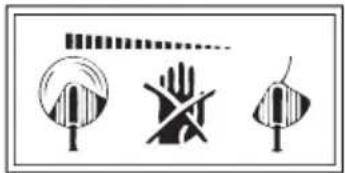
Tool is coasting!

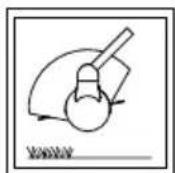
Wear protective goggles!

Do not expose to moisture!
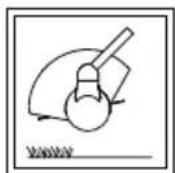
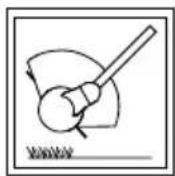
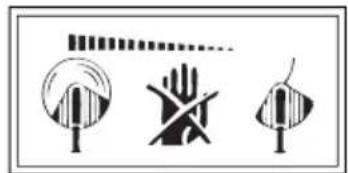
For vertical cutting:
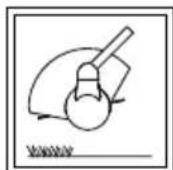
Hold the protective cover with the cord input side (cord cutter side) downward.
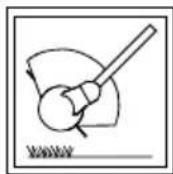
Do not hold the protective cover upward.
Safety instructions
General
- This trimmer is ideal for trimming lawn edges and small lawn areas in private gardens. The trimmer should not be used in public gardens, parks, sports grounds, streets etc. and in farming and forestry.
- Because of possible accidents the trimmer must not be used for:
- trimming of bushes and hedges
- cutting of flowers
- cutting garden by-products for composting
These tools are not intended to be used by persons with insufficient experience and/or lack of skills or persons with limited physical, sensory or mental abilities unless these persons are supervised or instructed on the use of the tools by a person responsible for the safety of these persons. - Young adults below the age of 16 may not use the tools.
Make sure that no persons (in particular children) or pets are in the vicinity of the working area. You are responsible for damages. - Never operate the unit in the presence of individuals (particularly children) or animals.
- Only operate the unit in daylight hours or if adequate artificial lightning is available.
- Use trimmer when the weather is dry and do not leave it outside when it rains.
- Use a residual current device (RCD) rated for a residual current not greater than 30mA .
- Never install metal cutting elements.
Before operating
- Before starting the trimmer, clear all string, wire etc. away from the area to be cut. Whilst cutting look out for foreign objects.
- All cable must be inspected regularly for signs of damage or ageing. Use only in perfect condition!
- Tool must not be used when the safety device or the covering is damaged.
- For safety reasons only original WOLF spare parts or parts appointed by the manufacturer shall be used. Please note the installation instructions!
Before adjusting or cleaning the tool and before checking for a caught or damaged connecting cable, switch off the tool and disconnect the mains plug.
Before starting the unit, and after any impacts, examine the unit for signs of wear or damage. Have any detected damage repaired immediately.
Cable
- Use only extension cables with a minimum cross-section of 3 × 1.5 mm^2 and a length of max. 25 m :
- When using rubber-sheathed cables, they must be of typeHO7RN-F or heavier.
- When using PVC-sheathed cables, they must be of type HO5 VV-F or heavier (cables of this type are not suitable for continuous outdoor use - e.g. underground installation for the connection of an outdoor socket or pond pump, or outdoor storage).
- They must be waterproof mobile devices that are used outdoors must be connected via a residual current circuit breaker.
- Use a leakage-protective system (RCD) with a leakage current of no more than 30mA .
- Attach connection cable to traction relief. Make sure that in does not rub against edges, pointed or sharp objects. Do not squeeze cable through door or window gaps.
- Switching devices must not be removed or bridged (e.g. tying of switching lever to guide spar).
Working
Always keep hands and feet well clear of the cutting mechanism, particularly when starting the unit.
- Avoid injury from each of the components which serve to cut the line length. After pulling out a new length of line, always hold the unit in its normal operating position before starting it.
- When starting the trimmer hold its base parallel to the lawn area in order to avoid accidents.
- Keep your hands away from the moving cord.
Wear eye protection!
- Always wear appropriate working clothes and sound footwear when using the trimmer.
Before carrying the trimmer to the next lawn area to be cut, switch it off. - Be careful when you go backwards. You may stumble!
- Keep the cable away from the cutting tool.
- Should the powercord be damaged during use, immediately disconnect it from the mains. Do not touch the cable until it has been disconnected from the mains.
- Never leave the trimmer without supervision. Store it in a safe place.
- The switches installed shall not be removed or bridged over, e. g. by binding the switch to the handle.
- Do not allow the cord spool to strike the ground or edges of working area. If the cord spool receives a hard knock, this will cause a strong vibration on the handle. If this occurs, the trimmer should be checked by a qualified service centre.
After operating
After using the unit, disconnected the power cord from the wall outlet and inspect the unit for damage.
- When switching off the trimmer: Attention: the cutting tool does not stop immediately!
Always wait for the cutting tool is stop.
Before examining or cleaning the tool or before removing the safety device or the cord spool, switch off and disconnect the trimmer from the mains. Only use original WOLF cord spools and note the installation instructions!
- The cutting knife should not be cleaned under running water or under high-pressure.
- Faults shall only be repaired by appointed service centres or by the manufacturer.
Make sure all air holes are free of dirt.
- Do not store the unit within reach of children.
Disposal
Do not dispose of electrical equipment in domestic waste. Recycle equipment, accessories and packaging in an environment-friendly manner.
Operation
Operating times
- Please check noise abatement regulations prevailing in your country.
Settings
The lawn trimmer is equipped with a four-position adjustable working angle. This enables you to easily trim hard-to-reach areas in your garden. To set the ideal working position, please follow the instructions below.

The cutting head should be inclined slightly forward while trimming.
Working angle and wheels
Free trimming - Working angle 1 A
Free trimming is especially suitable for trimming large areas with high weeds or grass. During free trimming, you should swing the trimmer in a semicircular motion in front of your body.
- Set working angle . E
- Remove wheels . G
Even trimming - Working angle 2 B
Recommendation: In order to achieve an even and clean cut, you should use the wheels (see Accessories).
- Set working angle . E
- Fit wheels . H
- Position wheels . J
Trimming under bushes / on slopes - Working angle 3 C
- Set working angle . E
- Remove wheels . G
Edge function (horizontal cut) - Working angle 4 D
The edge function enables precise and convenient trimming along the edge of the lawn.
- Turn cutting head 90^ . F
- Set working angle . E
- Fit wheels . H
- Position wheels . J
Plant hoop guard (GT 850)
The plant hoop guard protects bushes, trees and plants M). When edging, the plant hoop guard must remain in the position illustrated in M).
Telescoping handle and grip
The trimmer is adjusted to your body height by means of the telescoping handle and the middle grip K L.
Insert power cable into cable holder
The power cable holder in the guide grip prevents accidental disconnection of the extension cable N (1).
Connect to the socket (230 Volt, 50 Hz)
- Connect the device only to sockets that are protected with a 10-16 Amp. fuse (or LS switch type B)
Note: Residual current protection device
These safeguards provide protection against severe injuries resulting from touching damaged cables, insulation defects and in some cases cables that conduct electricity.
We recommend that the equipment only be plugged into a power socket, which is protected by a residual current protection device (RCD) with a residual current of no more than 30mA .
- Retrofit kits are available for old installations. Consult an electrician
On/off switch (2)
i Tips on trimming
Cut high grass slowly, step by step.
- If the cutting cord becomes too short due to normal wear, simply switch off the trimmer. The cord will then automatically adjust to the correct length.
- Whenever the trimmer is switched off and then on again, the cord automatically lengthens 6 - 8mm . If the trimmer is frequently switched on and off for no reason, this will increase wear of the cord.
- You can prolong the life of your trimmer by removing grass from the ventilation slots and the bottom of the trimmer before or after each use.
Maintenance
Replacing the cord spool

The trimmer continues to spin after being switched off! Always disconnect from the power supply before performing any work on the trimmer!
- Press both locking tabs of spool cover simultaneously and remove O
- Remove cord spool
- Clean, if necessary
-
In order to prevent accidental unwinding, do not remove the cord ends of the new cord spool from the slits before inserting the spool
-
Insert cord spool into housing . Q

The bumps on the cord spool must face the cover!
- Place the spool cover on the cord spool holder so that the two locking tabs lock into place.

Before switching on: Hold trimmer parallel to the ground; otherwise, there is danger of injury.
Faults and how to remedy
| Problem Ursache Abhilfe | ||
| Automatic line feed mechanism is not working. | ·Spool is empty. ·Fit new spool. | |
| ·Dirt and debris in spool drive mechanism. ·Line is torn and stuck inside spool. | Clean parts with a brush. | |
| ·Line is "welded" to itself or to spool through heat build-up. | ·Remove spool, check tightness of winding and replace spool in the usual way. | |
| ·Remove welded line section, check tightness of winding and replace spool in the usual way. | ||
When in doubt, always consult a WOLF service workshop.
Spare parts
| Ordering Number Designation of the item Description of the item | |
| 7130 085 GT-F7 Cord spool | |
| 7136 085 GT-F8 Cord spool | |
| 7136 086 GT-R Wheels |
Supplied by your dealer
Warranty
The warranty rules issued by our company or the importer apply to every country. As part of the warranty, we remedy malfunctions on your appliance free of charge provided that this malfunction is
caused by a material or manufacturing defect. In the event of a warranty claim, please turn to your dealer or the nearest branch office.

i Merk: Jordfeilbryter
m = 311
He pa6oTeTe npn 1bXd!
PnBepTnKaJHo p3aHe:
ДрьхTe 3aинTHЯ ekpan cbc CTpaHaTа Ha BIn3aHETO Ha HnIrkata (CTpaHa HOx 3a HnIrkata)HaJony.
He npbxte 3aunTHnE ekpaH arope.
Инструкции за Тхниka на бezоносост
06uHcTpyKuu
To3n TpIMep 3a OKaHTBaHe Ha TpeBaTa e npedHa3NaueH 3a JInuHO NOp3BaHe 3a NOdIbpxaHeTO Ha KaHTOBeTe Ha TpeBaTa KaKTo n Ha MaIKn TpeBHN I napKOBn PloU. To3n TpIMep He Tp6Ba Da ce N3NoJ3Ba B O6IecTBEN rpaDHH, NapKOBe, CnOpTHN CbOpBXeHNA, NO yINuITE N.T.H. KaKTo N B CEJIckOTO IROPCKO CTOnaHCTBO.
-TopaHn onachocT OT TeJeHa NOBpeHa Ha n3PON3BaUTo r Nlue TpImepbT He Tpr6Ba Da Ce n3POn3Ba:
-3a p83aHe Ha xpaTn JKBn PNeTn;
-3a p83aHe Ha UBeT;
-3a Hapra3BaHe 3a KOMNoCTnpaHe.
Te3n ypeNi He ce IooXoJaun 3a n3noJ3BaHe OT JIua C HeOCTaTbUHO ONIT N/INn He3HaHne INOT JIua C OpaHnueHn FIn3nueckN, CETNBn INN yMCTBeHn CNOc6HOCTN,OCBeH aKO Te He CE KOHTPOINpAT OT KOMNeTeHTHO 3a TExHaTa 6e3OnaCHOCT JIuce INN He NOJyuat OT HrO yKa3aHnra 3a IN3NoJ3BaHeto Ha Te3n ypeDi.
- Лица под 16 ratин He trpaБа DA n3noJ3BaT ypeДNTe.
- YpeIbT He Tp86Ba Da ce n3noJ3Ba B HEnocpeIcTBeHa 6JIIN3OCT Do Xopa (HaN-BeYe Deua) ININ JXIBOTHN; BHe HOCnTe OTROBOPHOCT 3a UETnTe.
-П配电ибовета работа с MaшиннаТа, koratoB 6ЛИЗОСТ Имахopa,пpeДи BCNUЧКо Deца, ИДOMaшнЖИВOTHИ.
-ИЗПОЛЗВайтЕ Maшин haTа CamO Ha Дневha CBETПиHA ИПи ПпДоБр OзКуCTBEHO OCBETЛeHne.
-3no3BaIte TpImepa cMo B cyxo BpeMe n He ro OCTabYTe, KOrato BaII.
He MoHTnpaIte MeTaHn peXeIu eJeMeHTN.
Ppeyn ynoTpe6ata
- NoucTeMopabataOTyXkTeta KaTo KIOHn, KambHn, TeN T.H. No BpeMe Ha p3aHTo CbUO He Tp6Ba Da Ima YxKTeJa.
PeDOBHO npOBepaBaiTe daJIIM MOHTnpaHnIOTbBn CbeDNHInTeJeH Ka6eN KbM ypeJa uYdbJnxTeJIHNrT Ka6eN He ca NOBpeHnIOCTapeJI (pa3pyuEHN). N3noJ3BaIteMaunHaTa cAmO KOrato He e NOBpeHa!
He n3noJ3BaITe MaunHaTa C nobpeDeHn 3aunTHn yCTPOiCTBa nn NOKpITnA.
OT cbo6paKeHn 3a cnrypHoCT Tp8Ba da ce n3no13BaT cAmO opuHnHaHn pe3epBn Yactn nn uactn, Oo6peHn OT npOn3BOUnTeI. Pn CMHaTa Cna3BaIte NHCtpyKcInTe 3a MOHTax!
- Ppei nperynnpaHTo nIIN noNCTBaHTo Ha ypeDa nn npEi npOBepkata daJIc BcEHHTeHNrT Ka6eJI He e NOrbJIHaT nIIN HapAHen, ypeBbT Tpr6Ba Da ce N3KIOUH IN UeNCeJIbT Da ce N3Dbpna.
- pei nyckaHeTo B eKcnnoaTaunHa MaunHaTaN CneI ynap npOBepTe daHn CbeHNHTeHHrT Ka6e He e n3HOceH nn NOBpeHn HappaBeTe Heo6xOdUmTe peMOHTN.
Ka6eJ
-3no3BaIte cAmO yIbJXHTeHc Ka6en C MInHmAJHO HanpeHc CeHHe 3x1,5MM² mAKC. IbJXHa 25M:
- npn npoBODHnCn B rymeHa Tpb6nUka, He no-JeKn OT TnH HO 7 RN-F
- npn PVC npoBOnHnU, He no-JeKn OT TnH O5 VV-F (To3n TnnpoBOnHnU He ca nOxOJaU 3a NoCToRnHNO H3NoT3BaHe Ha oTKpNtO - KaTO HaNP:: NOd3eMHO NOnaTaHe 3a CBbp3BaHe Ha rpaDnHcK NOKTaKT, CBbp3BaHe Ha e3epHa NOMna IIN CbXpaHeHne Ha oTKpNtO)
Te Tp6Ba Da ca 3aunTeHn OT BoHN npbckn.
-13no3BaIte yCTpoiCTBO 3a DnpepeHuaHa 3aunTa (RCD) c ytaeeh TOK mAc. 30 mA.
3akpenete cbeHnHTeHHa Ka6JI KbM oTeRa. He octabaIte da ce Tpne B p6oBe nInBoctpn npEdMeTn. He npitncaIte Ka6eJa npes3 npITBOpEn BpaTn nIn npOzOpu. IpeKbcBaUHe Tp6Ba Da ce CBAJrNJa da ce CbeDnHraBt HaKbCo (HaNP. CBbp3BaHe Ha pbKOxBaTkata Ha pbHnA npekcbauch KbMa HapabJBaun npbT)
Ppnpa6ota
PbueTe n KpaKaTa Bn Tp86Ba Da ca daJeu OT npncnocO6JIeHHeTo 3a p3aHe, npEi BCNUKO KOrato BKIOUbATE DBNrAteJI.
- Na3ete ce ot HapaHЯBaHe OT BCaKO npncnoc6IeHne, KoTo cnyKn 3a pr3aHe Ha Hnskata. Cnei n3dbpnaHeto Ha HObAta HnkaДрBXTe MaunHaTBA HopMaHHOto pa60THO noJoxKeHne, PpeN DaЯ BkIIOHTe.
-Пи Вклочьанeto Дрьхte ТримерусноpeДно Ha 3eмЯта,ЗацOTOВпpoТиBEHСИчай Имо_ONACHOCT OT HabapяBaHe.
- IIO Bpeme Ha pa6Ota CbIc O CTOnTe Ha 6e30nacHO pa3CToHHe OT BbpTuaTa ce HnUka. He nocraIte KbM BbpTuaTa ce HnUka.
BunarHocete noxoadpo paotno obnekno; He Hocete shpOKn dpexn np. KOnTO MORAT Da ce 3axBaHaT OT pexeun INCTpymEn. Hocete 3dpaBn obykIn! PpeNa3BaIte n KpaKaTa CN (HaNP. Hocete Dblr NaHTaONH).
Hocete 3aunTHn ouuna!
-ПрtnТранспортуарнодо OTДeЛНITEМecta3a pa6Ota DBnIraTeJЯТ TpЯ6BaДа ce N3KJIIOU.
-Бьдete ocobeno npea3nBn, Korato BbpBNTe Ha3a. OnachOCT OT cnBaHe!
CbeHnHnHnT Ka6e Tp8Ba Da cTOn daJeOT pexeunte nHCTpymEnI.
Ako cbeHnHTeHNrT Ka6eI ce noBpeN npu ynoTpe6a,Toi BeHa rTaPra6Ba Da ce n3KIOUOn OT MPexKaTa. He DOKOCBaTe Ka6eNa npEIN Da CTe IOn3KIOUOnnOT MPexKaTa.
-Пи пекьсане на paбота не оставайтгимера 6e3 habзор.Сыхаянайтг набezэпасно място.
MoHTnpaHnTe Ha ypea npeKbCBAu He Tp6Ba Da ce CbaT nn Da ce CbeDnHraBt HkBo (Ha np. CBbp3BaHe Ha KOMaHdHna NpeKbCBAu KbM pkoXBaTKaTa).
He ydpnTe kaceTaTc HnKkTaB 3emrTa n no pboBote Ha cteHnte. Ako Kacetata C HnKkatae 6uHa yapaHa cnlnHO, no pbKOXBtKaTa uce ce ycETn NO-CnHa Bn6paun. Ako ToBa e Taka, ypeDbT Tp6Ba da ce npOBepn OT cepBn3.
Cnepa6oTaTa
CneI ynoTpe6a n3IbpaIte uenceI npOBepTe MaunHaTa 3a nobpeJa.
-При сиранeto:Вииманne,onaCHOCT!Иmapeжeц nHcTpymeHT!
Bunharu n3yaKaBaTe cnpaHeTo Ha peKeUHCTpyMeHT.
Pa60NTe NO NOIbIpbXaHETo I NOUcCTBaHETO Ha ypeDa KaKTo N CBAJIaHETo Ha IpeDnA3HITe CbOpBXeHn IIN CMHaTAt Ha KaceTaTa C HnUKaTa Ce N3BbPbBAT Camo Prn N3KNIOueH DnIRatEn HnOdBnXeH pExeU INHCTpyMeHT n CAMO KOrato UeNCeJIbTe E N3KNIOueH. N3NOJ3BaIte Camo OpRnHaJIH KaceTn 3a HnUKaTa Ha WOLF, cna3BaIte INHCTpyKuInTe 3a MoNTax!
HOxBT 3a HnIkaTHe Tp6Ba Da Ce NOUcTBa Ha Teuaa BODa,HaB-Beue NOD BnCOKO HajraHe.
- Pemontne no ypeda Tp6Ba da ce n3BbPWBat camo ot cepBn3nte ha WOLF n OTopn3npaHte pa6OTnHNu.
-BeHTnlaUHOHHTe OTBOpH He Tp6Ba Da ca 3aMbpcEH.
CbxpahraBaireMaunHaTa daJeouOTdeua.
OTcTpaHЯBaHe Ha OTnadbCHTe
He n3xBpIyTe eIeKtpnueckn ypeiB 6ntOBnTe OTnaDbu. PeunknpaTe ypeiTe, akcecoapnte n onakOBKnTe IIO NaCHN, ONa3BaU OKoJHaTa cpeJa.

Ekcpnoataua
PpOdbJxHnHocT ha pa6ota
CnasaBaiTe MeCTHnTe pa3npoe6n.
- OcbeDomeTe ce 3a npoDbJxKITeHocCTTa Ha pa60ta OT MeCTHaTa cnyk6a 3a peDa.
Hac troponk
Pa60THnIbIbJIHa TpImepa e c 4 HacTpoiKn.
Taka IecHO MoKe Da DoCTnIraTe
np6bnMaTuHnTE N TpyDIOcTBnH MeCTa B
rpaDnHaTa.3a Da ce HAcTpon ONTMaHOTO
noJIoXeHne 3a pa6Ota, Cna3BaIte CpeDnHTe
HHCTpyKuIN.

IIO BpeMe Ha pa6oTa peXeUaTa rnaBa Tp86Ba neko Da e HakNoHeHa Hanpei.
Pa6oTHn bIyn KoJeJa
Cbo6oJno pyaHe - Pa6OteH bTbI 1 A
Cbo6oHTo p3aHe e noDxOJaIO 3a p3aHeTO Ha rOlemn PLOUc CBnCOKa paCTnteJIHOCT. PnCBO6oHTo p3aHe TpIMePbT Tp6Ba Da ce HAKlaHa Npei TaIOTO B NOlyKpbI.
- PerynipaTe pa6oTHnI bTbI . E
- CbaNETe konenata . G
PaBHomepHo pR3aHe - Pa6OTeH bTbJ 2 B
Ipenopbka: 3a da ce nocturhe p3ahe c paBHomepHa BncoUHa n rnaKocT, Tpr6Ba da ce n3noJ3BaT KOJIeJaTa.
- PerynpaTe pa6oTnIy bIbI . E
- NocTabaHHe Ha KojEnaTa . H
3.Позицунраіte коланета . J
Pra3aHe noi xpaTn / no ckNoHOBe -
Pa6oTeH bTbI 3 C
- PerynpaIte pa6oTnIy bIbI . E
- Cbaneke konenata . G
Функцу“OKaHTBaHe"(BepTnKaJIHOp p3aHe)
-Pa6oTeHbI4D
Upe3 cyHKunra "OKaHTBaHe" ce noctnira npeu3HO u ydo6Ho p3aHe no kpar Ha TpeBata.
- 3aBbptetepexeaTa rnaBaHa 90^ .F
-
PerynpaIte pa6oTHna bIbI . E
-
NoctabrHe Ha konenata . H
4.Позицнонрай Te kolyela t a . J
3auntha cko6a 3a pacTeHnra (GT 850)
3aunthata cKo6a 3a pacteHnra npedna3Ba xpactnte,dbpBeTata n uBETra M).Pnp OKaHTbAHeto 3aunTHata cKo6a 3a pacteHnraT a Tp86Ba da octahe M).
TeleckonuHoydJIkaBaUc ce npbT npkoXBaTKa
Upe3 TeleckonuHo ydbJxabaunCe npbT n CpeHaTa pkoxBaTka ypeBt ce perynipa Cnopei Pbcta KL
Pojarahe Ha ka6eJa B o6Teeraa
ObteraHT Ha HanpaBnaBau npbT npdeOTbpaTBA HenpeBn-DeHTo pa3BnuBaHe Ha yIbJNITeHHa Ka6eN N).
Cbbp3BaHe KbMeJeleKtpnuecka po3eTka (230 BoIta, 50 Hz
BknIOuBaIte ypeDa cAmo B uenCeHn np3eKn, cna6dEnn C npedna3nten ot 10-16 amepa (nnn JnHeeh npedna3EH aBTOMAT TIN B) nHePcNoH eTIN.
I yka3aHHe: ABToMaTuHNo 3auNTHO ycTpoiCtBO cpeu TY OK npn NOBpeDa
Te3n 3aunTHn ycTPOcTBa OcnIpyBaT 3aunTa npn DoOpnp Do NOBpeHn npoBDnU, Heu3npaBHa uOlaucn I B onpeJeHn Cnyaan CbUo n npn NobpeHn Ha HAMpaUc Ce NOD HApexEHe npoBDnU OT TeKKn HapaHyaHn.
-Прелорьаме уретда ce BKнчыcamoВ eлктуесkn po3eTKn CbC3auntHO yctpoiCTBO cpeu TOK npinobpeda (RCD),donyckaio TOK hayTeuka He nobee ot 30 mA.
-3a no-ctapn Hhctanaunce npednarat KOMnJIeKTHa DOOBOpyDbaHe. KOHCytIpaTne ce c eJeKTPoTeXHnK.
BkIIOUBaHe / n3KJIIOUBaHe (2)

CbBETn 3a pR3aHeTo
PexkTe BncoKaTa TpeBa 6aBHO nOCTeNEHNO.
Ako pekeaata Hnka ce e ckbcnla ot n3HOCBaHe, npocTo n3KIOUeTe ypeHa. Hnkata aBTOMaTNoCe perynipa.
-Prn BcKo BKIOUbaHe n N3KIOUbaHe Hnskata ce peYnpa aBTOMaTNUHO C 6-8 MM. YecToTO 6e3npuHNO BKIOUbaHe n N3KIOUbaHe yBENuAba N3HOCBAHETo Ha Hnskata.
-ПрбьлжnteHOCTTa Ha pa6oTa Ha BaшиЯ TrpIMep ce yBelenuaba, korato npdeN nIIN cNeD BCaKO pr3aHe NOuchTBaTe BEHTnlaUHOHHte OTBOpN OTCpaHbATE OCTaTbUITE OT TpeBaTa no DoJHaTa CTpaHa Ha ypeDa.
Pondpbxkan
CmHa Ha kacetata c HnIkaTa

Ima pexeunHcTpymeHT!Ppeu BCnUKN pa60tn no ypea n3dbpnaTe uencena!
- Hatnchete Kanaka Ha Kacetata eHOBpeMeHHo Ha DBeTe qNKcnpaun rHe3da nTo demOHnpaaye O
2.ИЗваде Te Kacete Ta C HnшkaTa -
OToTaPaHeTe eBentyAInHte 3aMbpcBaHn
4.3a da ce npedOTbpaTn HnpeBnDEHOTO pa3BnBaHe, KpaN-aaTa Ha HnKkata OT HObaTa KaceTa He Tp6Ba Da ce n3BaXdaT OT 1nkCnpaunTe OTBOpn npen Da ce noCTABRT -
NocTabete kaceTaHa HnUkata B Kopnyca Q.

Yde6eJehnraHa KaceTaHa HNIkata Tp6Ba Da COyat KbM Kanaka!
- KanakbT Ha KaceTaTa Tp8Ba Da ce NoCTaBn Ha qKcatOpnte Ha KaceTaTa Taka, Ye DbTe qKcnpaun rHe3da da upaKaHAT.

Ipei BkIOUbaHeTo: DpbXTe TpIMepa ycnopeHnHa 3eMaTa, 3aIoTOB npoTnBeH cnuya IMa onaCHOt OT HapaHBAHe.
OTcTpaHЯBaHe Ha NOBpeNi
| Пов徕 Кли�а OTстраве | ||
| авTomатICALО регулирахе на Ншka差别 не павOTи | • паязна касета • Сменихе касета за 3а | Ншka差别 |
| • замърсану можду черваима 6byTOH и касета за Ншka差别. | • Рочистете замърсану ча STС счETК. | |
| • ржescота Ншka e сксана и се e побразал в касета. | • ДемонтуарейтЕ касета за Ншka差别, eBEHT. Лесо развийтЕ Ншka差别 и поставе ТЕ касета. | |
| • ржescота Ншka e склOKИралa в касета. | ||
| • ржescота Ншka ce e 3abарILA за касета. | • Изва对接е Заваренaita ча STС OTНшka差别, eBEHT. Лесо развийтЕ Ншka差别 и поставе ТЕ касета. | |
Pn cBmHeHne BnHa n ce 6pbuaTe Kb m cepBn3 Ha WOLF.

BHHMaHHe, n3KJIIOUByaIe TpIMepa IpeDn BcRA KPOBepKa, NOuNCTBaHe NIn pa6OTn no kacetata n n3BaJdaIte 8enceJa.
Pe3epBn qactn
| Homep 3a nopьчka | Овознayене на.apтукуla | Описних.apтукуla |
| 7130 085 GT-F7 | Касета 3a Ншkaраз | |
| 7136 085 GT-F8 | Касета 3a Ншkaраз | |
| 7136 086 GT-R | Хожова част |
DocTaBkata ce n3BbPwBa Ype3 Baunr TbproBeu
TapaHcnoHHuCNoBnA
BbB BcRA Ka CtpaHa Ca BaJIuINn H3daJeHInTe OT HaAsta KOMNaHn IINOT CbOTBETHN BHOCTe rapaHcUOnHH ycNoBn. BpaMKte Ha rapaHcUOnHH cPOK OTcTpaHrBaMe NOBpeNi No Baun ypeI 6e3PiAtHo, DOKoJIKOTO Te Ce IbJXkAT Ha DeΦeKT B MaTePnAJa IIN npi PpOu3BOdCTBOTo. B Cnya, Ye Tp8Ba Da n3NoJ3BaTe npaBaTa cn Ha rapaHcUOnHo o6CnyKbaHe, ce O6bpHeTe KbM npoJaanBn ypeDa IIN KbM Na-6JIu3KN KIOH Ha HaaTa CpnpMa.
POn3dpaBnJaem Bac c nokynkoi n3deJnna qnpmbI WOLF

BHNMaTeIbHO O3HaKOMbTeSc CnHCTpyKcneiNo 3KcNlMyatauN I 3aONMHnte Ha3NaueHne 3JIeMeHTOB ynpabIneH N npabIna 3KcNlMyatauN yCTpoiCTBa. BHNMaHne! Ppi NCNOJb3ObaHmN 3JeKTPoHnCTpyMeHTOB dJa npeD0TbpaUeHn NOyueHn Ydapa 3JeKTPuYeCKM TOKOM, TpaBM N BO3rOpAHn HEO6XODIMoCo6LIODaT pINBeEHHbIe HIXKe npabIna 6eOnaChOCTN. POnb3OBaTeNb yCTPOIcTBa HecET OTBETCBEHOCtB 3a HeCCHTbIe CnUaH, KOTOpbIE MOryt Ipon30Tu C dpYHMn IIOdbMn, IN yUep6, KOTOpbI MoKeT 6bITb HaHeCeh INx IMyUeCTBy.

HnkOrda He DoynckaTe K pa6oTe C yCTPOIcTBOM DeTeN NnU,He3HaKOMbIX C nHCTpykneI NO eO EKCNyatau. NuaM,He DOCTnIM 16 let,NoJIb30BaTbcra yCTPOIcTBOM 3anpeueHo.MecThbIMn HOpMaTnBAMMOKeT 6bITb YCTaHOBJeH MHNMaJIbHbI B03pACT NlU, 3KcnPyATnpuyOuix DaHHoe yCTPOIcTBO.
CopepkHne
3HaueHne CmBBOJOB. 95
IpaBnJaTexHnK6e3OnaChOCTn 96
3Kcnnyataua 98
TexobcnykBaHne 99
YcTpaHHe HenoJaOK 100
3anpaactn 100
TapaHcna 100
3haueHne cHMBOJIOB


BHMaHne! NpeD BBODOMB 3KcPnyatauH IOPOOTIe HNCTpykUIO NO pIMHeHIO! HeOnyckaTb NOCTOPOHNX BONaChyO 30Hy!
HCTpymeHT DnKetcno HnepuN!
Hocnte 3aunTHbIe ouKn!

He octabnptb noDdoxdE M!
PnBepTnKaIbHOMcpe3e:
3aHTbI 3KpaH DePkaTb HnpaBHeHHo Bn3 CTOpHOH BXOda KOpda (CTpaHnca Pexyui KOpd).
3aunTHbI 3KpaH He NOdHMaTb BBepx.
ПразвILA Тхник 6e3ОпаСоCTN
Obune yka3aHnA
m = 311
He cIeJeT BbIbpaCbIBaTb
cIOMaHHoe 3JIeKTPoOobOpyIDOBaHne
BMeCTe C 6blTOBbIMN OTXODAMN.
YtINn3aunr 3JIeKTPoOobOpyIDOBaHnR,
akceccyapOB n yNaKOBOUHORo
MaTePnAHa DOnJHn PpON3BOIDTBcR
6e3 yUepe6a dnn OkpyKaIOuSei
CpeDbI.
3KcπlyaTaця
Bpem3KcNpyatau
-Прocьба co6людь MeCTHbI e npeДисанИ.
- O6paTNTecb B MeCTHbIe aAMMHnCTpaTNBHbIE opraHbI dIЯ BbIaCHEHn BpeMeHn 3KcPnyatauN.
PeynilpoBka
Tpmmep 6nadaet pa6oum yIOM,
perynpyembIM B4 noJoxeHnx.Bnaorapra
3Tomy Bbl moKeTe IerKo 6pa6aTbIBaTb cNoXHbie
In TpyNDIOCTyNHie MeCTa B caNy.
UTo6bl yCTaHOBtB ONTMaJIbHoe pa6Oyee
noJoxeHne,Bbl DOJXHbI BblONHrTb CJeDyUOuNe
yKa3aHnI.

Pnpa6oTe pexuza rOIOBka dOJIxHa 6bITb cIerKa haknoHeHa Bneped.
Pa6oyn yroJn kOJIeCa
Cbo6oHa nay cTpnkka - Pa6ouy yro1 A
Cbo6oHaJcTpXkaXopoOIOPOxOHTIg
obpa60Kb6Oblux, BbICOKO 3apocuNX
Pno Cbo6oHOn cTpXkKe cneDyET
pa3MaxBaTbpeedco6oTpIMMepom
DBHXKeHNMaBΦOpMe nOlyKpyra.
- OTPerynipoBaTpa6oynyron.E
- YdaJIntb KOneca . G
PaBHomepHa cTpnKka - Pa6ouH yro1 2 B
PekomeHdaun: UTo6bI Do6ntbca paBHomepHoro n YnCTORO cpe3a, cJeDyET NcNoJb30BaTb KOneca.
- OTPerynipoBaTpa6oynyron.E
2.ykpennayb koneca .H - PacnoIoxKtB koneca . J
CtrnKka noi KcytaMn / Ha cKnloHax - Pa6oyn yron 3 C
- OTPerynipoBaTpa6oyn yron . E
- YdaNTb KOneca . G
MTD Products AG, Industriestraße 23, D-66129 Saarbrücken, T. Bukovec (Manager Products Standards Compliance)
| BG-Тример; CZ-Strunový vyžínač; DK-Graestrimmer; D-Rasentrimmer; GR-trímuép ykažov; GB-Trimmer; FIN-Trimmeri; F-Débrousailleuses; HR-Trimeri trave; H-Gyepszegély nyíró; I-Trimmer per tappeti erbosi; NL-Trimmer; N-Plentrimmer; PL-Trymer do trawy; RO-Trimmer pentru gazon;RUS-Тример для razoña; SK-Strunová kosáčka; SLO-Trimer za travo; S-Grästrimmer; TR-çim budama makinesi | |
| BGM-РавOTNaШирино; CZ-Pracovní záber; DK-Arbejdsbredde; D-Arbeitsbreite; GR-Плátос εργασίας; GB-Working width; FIN-Työleveys; F-Largeur opérationnelle; HR-Radna širina; H-Munkaszélesség; I-Larghezza di lavoro; NL-Werkbredte; N-Arbejdsbredde; PL-Szerokósc pracy; RO-Latime de lucru; RUS-Shiрино образobtк; SK-Pracovný záber; SLO-Delovnaširina; S-Arbeitsbredd; TR-Çalıma genişi | |
| BGM-Дебелпа нашикatinga / Дьлжина нашикatinga; CZ-Sila struny / Délka struny; DK-Snørens tykkelse/ Tråd Længe; D-Fadenstärke/Faden-länge; GR-Плáхος vúmpaος / Мнкος vúmpaος; GB-cord dia / cord length; FIN-Siima halk. / Siima Pituus; F-Fil section / Fil Longueur; HR-Deblina niti/Duljina niti; H-Szálvastagság/Szálhosszúság; I-Filo Diameter / Filo Lungo; NL-Draad Doorsnde / Draad Lenght; N-Tråd Tykkelse/ Tråd langde;PL-srednica / dlugość; RO-Diametrul firului / Lunginea firului; RUS-Tolüncia kopda / Длиа kopda; SK-Hrubka struny / Dižka struny; SLO-Debelina nitke / Dolžina nitke; S-Tråd Grovlek / Längd; TR-Misina kalýnlýóf / Misina uzunlu | |
| BGM-Terro; CZ-Hmotnost; DK-Vægt; D-Gewicht; GR-Bápoç; GB-Weight; FIN-Paino; F-Poids; HR-Težina; H-Súly; I-Peso; NL-Gewicht; N-Vekt; PL-Ciezar; RO-Greutate; RUS-Macca; SK-Hmotnost'; SLO-Teža; S-Vikt; TR-Agírlík | |
| BGM-Mошност/обороти elektromotorop; CZ-Výkon / otáčky elektromotoru; DK-Elmotorens ydelse / omdrejningstal; D-Leistung / Drehzahl Elektromotor; GR-Ioχύς / Aριθύς στροφών ηλεκτροκινητήρα; GB-Power / speed of electric motor; FIN-Teho / kierrosluku sähkömoottori; F-Puisance/Vitesse du moteur électrique; HR-Snaga / Broj okretaja elektromotora; H-Teljesitmény / Elektromotor fordulatszámia; I-Potenza / numero di giri motore elettrico; NL-Vermogen/toerental elektromotor; N-Ytelse / turtall elektromotor; PL-Moc / liczbaa obrotów silnika elektrycznégo; RO-Putere / turaitie electromotor; RUS-Mошност/Число obportов们的 вага对接; SK-Výkon / otáčky elektromotora; SLO-Moč / Stevilvo virtljaje elektromotorja; S-Effekt / varvital elmotor; TR-Güç / Devir sayisi, elektronik motor | |
| BGM-Hanpeşene; CZ-Napěti; DK-Spaending; D-Spannung; GR-Táoń; GB-Voltage; FIN-Jännite; F-Tension; HR-Napon; H-Feszültseg; I-Tensione; NL-Spanning; N-Spenning; PL-Napięcie; RO-Tensiune; RUS-Hanprajnéme; SK-Napàtie; SLO-Napetost; S-Spanning; TR-Gerilim | |
| BGM-Пред nauseю; CZ-Pojistka; DK-Sikring; D-Sicherung; GR-Aşφáλίοŋ; GB-Fuse; FIN-Sulake; F-Fusable; HR-Osigurač; H-Biztositék; I-Fusible; NL-Zekering; N-Sikring; PL-Bezpiecznik; RO-Siguranţă; RUS-Предоча пленыhoe усточев; SK-Posista; SLO-Varovalka; S-Säkring; TR-Sigorta | |
| BGM-Трени – рамо/рьka; CZ-Vibrate prěnášené na ruce; DK-Händ-arm-swingninger; D-Hand- Arm-Schwungungen; GR-Kpaδаσοoi χεριου-βραχiova; GB-Hand/arm vibrations; FIN-Kasiin ja käsivarsin kohdistuva täriná; F-Vibrations DKns les mains et les bras; HR-Vibraciye šake i ruke; H-Kezet és kart érö rezgés; I-Vibrazioni su mano-braccio; NL-Hand-en armtrillingen; N-Händ arm swingninger; PL-Drgania przenoszone na dlönie i rece; RO-Oscilaşi-mână-brat; RUS-Upovemb lokaibnoи вибраци; SK-Vibrácie prěnášané na ruky; SLO-Tresljaji dlani in roke; S-Hand-armsvängninger; TR-EI, kol sallamalar |
| BG-Измерета/ rapантурана звукова мошност (LWA/LWAg); CZ-Změřený / zaručený akustický vykon (LWA/LWAg); DK-Malt / garanteret lydeffekt-niveau (LWA/LWAg); D-gemessene / garantierte Schalleistung (LWA/LWAg); GR-Mετρημένη / εγγυμένη ηχητική στύς (LWA/LWAg); GB-Measured/guaranteed sound power (LWA/LWAg); FIN-Mitattu / taattu äänitehotaso (LWA/LWAg); F-Puisance sonore mesurée / garantie (LWA/LWAg); HR-Izmjerena / zajemčena jakost zvuka (LWA/LWAg); H-Mér / garantált hangeljesitmény (LWA/LWAg); I-Potenza acustica misurata / garantita (LWA/LWAg); NL-Gemeten/gegarandeerd geluidsniveau (LWA/LWAg); N-Malte / garanterte lydefeffekt (LWA/LWAg); PL-Zmierzony / gwarantowany poziomhałasu (LWA/LWAg); RO-Putere sonora másurată / garantata (LWA/LWAg); RUS-Измеренnéй / Гарандованный уровень 3вуковов мошност (LWA/LWAg); SK-Namerány / zaručený akustický vykon (LWA/LWAg); SLO-Izmerjena / zagotovljena akusticna moč (LWA/LWAg); S-Uppmätt / garan-terad bullereffekt (LWA/LWAg); TR-Olçūlmüş / Garantie edilen ses cucü (LWA/LWAg) | |
| BG-Звуково налгаге (LpA); CZ-Akustický tlak (LpA); DK-Lydtryk (LpA); D-Schaldruck (LpA); GR-Akouotíkný πίεση (LpA); GB-Sound pressure (LpA);FIN-Äänenpainetaso (LpA); F-Pression acoustique (LpA); HR-Zvučni tlak (LpA); H-Hangnyomás (LpA); I-Pressione acustica (LpA); NL-Geluidsdruk (LpA); N-Lydtrykk (LpA); PL-Cijsnienie akustyczne (LpA); RO-Presiunea sunetului (LpA); RUS-Уровьь 3вукового давлиения (LpA); SK-Akustický tlak (LpA); SLO-Akusticnipritisk (LpA); S-Ljudtryck (LpA); TR-Ses basinci (LpA) | |
| BG-Texhneycka дokumentаши рп; CZ-Technické dokumenty; DK-teknisk dokumation for; D-Technische Unterlagen bei; GR-Texvičnǐngtekmpíwól; GB-Technical documentation at; FIN-Teknisitet asiakirjat; F-Dossier technique chez; HR-Tehnicke Dokumentacije na; H-Technikai dokumentáció...–nál; I-Documentazione tecnia presso; NL-Technische gevevens bij; N-Tekniske dokumenter på; PL-Dokumentacja techniczna jest archiwowska i dostepna (w firmie); RO-Documente tehnice; RUS-Texhneycka dokumentaши B ...; SK-Technické podklady u; SLO-Tehnicnadi Dokumenti; S-Tekniska dokument; TR-deki teknik belgeler |
WOLF Garten