
DiGYBOXX T4 - Digital decoder TECHNISAT - Free user manual and instructions
Find the device manual for free DiGYBOXX T4 TECHNISAT in PDF.
| Product type | Digital TNT decoder |
| Brand | TechniSat |
| Model | DiGYBOXX T4 |
| Dimensions (W x D x H) | 295 mm x 135 mm x 45 mm |
| Weight | Approximately 460 g |
| Power supply | External power supply unit, input 230 V / 50 Hz, output 12 V / 1 A |
| Power consumption | Max. 12 W (MPEG4 HD decoding), active standby < 7 W, passive standby < 1 W |
| TNT tuner | VHF I/III, UHF (48-858 MHz), QPSK, 16-QAM, 64-QAM, guard interval 1/4 to 1/32, 2K/8K mode |
| Connectors | IEC antenna input, IEC antenna output, SCART TV (RGB, CVBS), HDMI v1.2, USB 2.0 host, analog audio RCA (L/R), digital audio S/PDIF electrical, DC input |
| Video formats | MPEG4 AVC (High Profile level 4.1), MPEG2 MP@HL, 4:3 and 16:9, PAL |
| HDMI resolutions | 1080i, 720p, 576p, 576i |
| Audio | MPEG1/2 Layer I/II, Dolby Digital (AC3), stereo and multichannel output, sampling 32, 44.1, 48 kHz |
| Teletext | 1000 pages, built-in decoder |
| Timer | Up to 8 events |
| Main functions | Electronic Program Guide (EPG), parental control, favorite lists, auto standby, software update, scheduled recording |
| Remote control | Infrared RC-5, 2 R03 1.5 V batteries |
| Operating temperature | 5 °C to 40 °C |
| Maintenance and cleaning | Unplug before cleaning. Clean with a soft, dry cloth. Do not use abrasive or liquid products. |
| Safety | Do not open the device. Do not expose to moisture or splashes. Unplug during thunderstorms or if unused for long periods. Use only the supplied power supply unit. |
| Spare parts and repairability | Contact TechniSat customer service or an authorized dealer. The remote control and power supply unit are replaceable. |
| General information | Reception of free TNT channels. Compliant with CE standards. Software update via USB or OTA. |
Frequently Asked Questions - DiGYBOXX T4 TECHNISAT
User questions about DiGYBOXX T4 TECHNISAT
0 question about this device. Answer the ones you know or ask your own.
Ask a new question about this device
Download the instructions for your Digital decoder in PDF format for free! Find your manual DiGYBOXX T4 - TECHNISAT and take your electronic device back in hand. On this page are published all the documents necessary for the use of your device. DiGYBOXX T4 by TECHNISAT.
USER MANUAL DiGYBOXX T4 TECHNISAT
Operating Instructions
For the reception of free DTT programmes.
DVB
Digital Video
Broadcasting

DOLBY
DIGITAL
Streaming
1 Table of Contents
1 Table of Contents ...... 2
2 Illustrations....5
3 Please Read Before Operation....8
3.1 Important notes for use 8
3.2 Disposal instructions 8
3.3 Safety instructions 9
3.4 Breaks in operation 9
4 Connecting the DVB Receiver .... 10
4.1 Outdoor unit 11
4.2 Connection to a television set 11
4.2.1 Via HDMI cable 11
4.2.2 Via SCART cable 11
4.2.3 Via RF cable.... 11
4.3 Video recorder (VCR).... 11
4.4 Hi-fi amplifier 11
4.4.1 Analogue 11
4.4.2 Digital 12
4.5 Mains connection 12
5 Initial installation....13
6 Settings....16
6.1 Menu language 16
6.2 Basic settings 17
6.2.1 Country.... 17
6.2.2 Time offset selection 18
6.2.3 GMT time offset (hrs.) 18
6.2.4 Antenna feed 5 V 18
6.2.5 Automatic standby 18
6.3 Audio/Video settings....18
6.3.1 HDMI resolution 19
6.3.2 Display format 19
6.3.3 Picture format.... 19
6.3.4 HDCP 20
6.3.5 Audio delay 20
6.3.6 Digital audio 20
6.3.7 Digital volume adjustment 20
6.4 Language settings 20
6.5 Antenna adjustment 21
7 Operation 22
7.1 Switching on/off 22
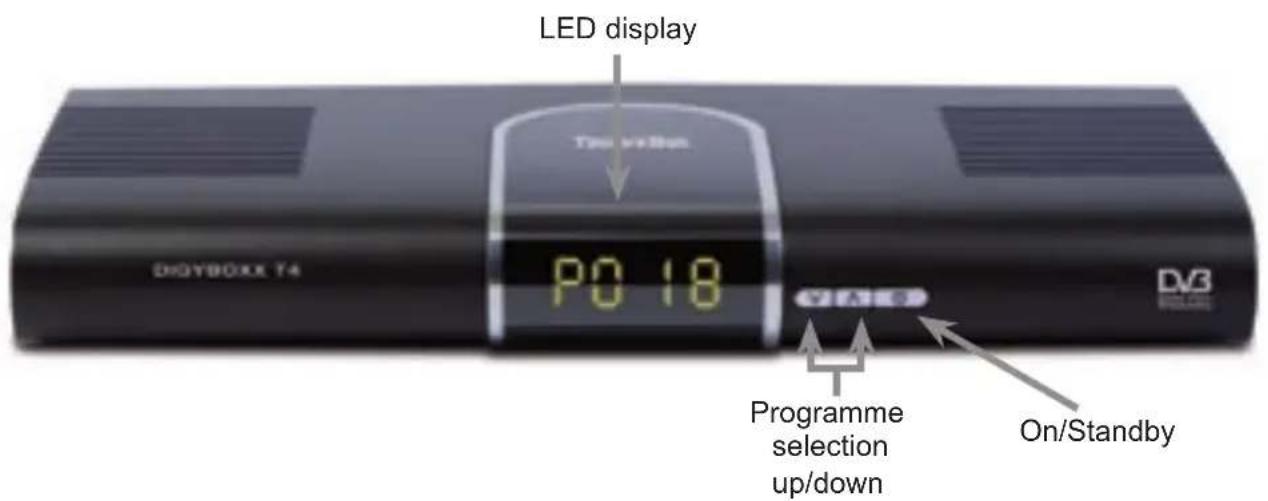
7.2 Programme selection 22
7.2.1 Using the programme up/down buttons.... 22
7.2.2 Using the number buttons 22
7.2.3 Using the navigator (programme list)....23
7.2.4 Accessing blocked programmes 24
7.2.5 Infobox 24
7.3 Volume control 24
7.4 Switching between TV and radio 25
7.5 Selecting a different language (TV mode) or station (radio mode) ..... 2 5
7.6 Returning to the previously selected programme 25
7.7 Displaying clock and programme information 25
7.8 Additional programme information....26
7.9 Channel information....26
7.10 Teletext....26
7.10.1 Using your television set's teletext decoder....26
7.10.2 Using the internal teletext decoder 27
7.11 Subtitles 27
7.12 Electronic programme guide (EPG) 27
7.12.1 Opening the electronic programme guide 28
7.12.2 EPG info....29
7.12.3 Timer 30
7.12.4 Exiting the EPG 30
7.13 Timer recordings 30
7.13.1 Manually programming the timer 30
7.13.2 Timer overview 32
8 Changing the Basic Program Settings....3 3
8.1 Configuring the favourites list....33
8.1.1 Opening the programme list management.... 33
8.1.2 Adding programmes to the favourites list 35
8.1.3 Deleting programmes (removing them from the favourites list).... 35
8.1.4 Sorting programmes....35
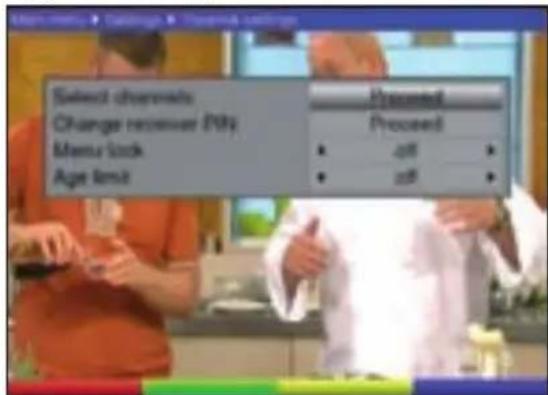
8.2 Parental settings 36
8.2.1 Select channels 36
8.2.2 Change receiver PIN 37
8.2.3 Menu lock.... 38
8.2.4 Age limit 38
8.3 Programme search....38
8.3.1 Automatic search 39
8.3.2 Manual search 39
8.3.3 After the search is complete 40
8.4 Service settings 40
8.4.1 Restore factory settings 41
8.4.2 Delete all channels.... 41
8.4.3 Update software.... 42
8.5 System configuration 42
9 Technical Terms 43
10 Technical Data 45
11 Troubleshooting 48
Your unit bears the CE mark and meets all the necessary EU standards.
Subject to changes and printing errors. Version: 10/09
TechniSat and DiGYBOXT4 are registered trademarks of
Remote control option:
By switching the remote control option, this remote control unit can be used to control two TechniSat receivers and one TechniSat television set with the same coding.
To switch the remote control option, press the desired button
(SAT1, SAT2 or TV) and the OK button at the same time.

Dear customer,
Congratulations on your purchase of the DiGYBOXX T4 digital receiver. These operating instructions should help you to get the maximum use and enjoyment from your new digital receiver.
We have made these operating instructions as brief and easy to understand as possible.
Your device will continue to get additional functions through software updates. This may mean that some operating steps are new and may not be covered in these operating instructions. Currently existing functions may also be changed. For this reason, you should visit the TechniSat homepage from time to time to download the latest version of the operating instructions.
We hope you enjoy using your TechniSat DiGYBOXT4!
Your
TechniSat team

Technical hotline
+49 (0) 180-5005-907*
*(€0.14/minute from the German landline network,
prices may vary when calling on mobile phones or from outside Germany)
This product incorporates copyright protection technology that is protected by U.S. patents and other intellectual property rights. Use of this copyright protection technology must be authorised by Macrovision, and is intended for home and other limited viewing uses only unless otherwise authorised by Macrovision. Reverse engineering or disassembly is prohibited.
3 Please Read Before Operation
Before using the device, first check to make sure that all of the parts are included.
The scope of delivery includes:
1 digital receiver, 1 mains adapter, 1 remote control, 2 batteries (1.5 V AAA battery),
1 operating instructions on CD-ROM, 1 quick reference guide, 1 warranty card.
Place the supplied batteries in the battery compartment of the remote control (make
sure that the polarity is correct).
3.1 Important notes for use
The on-screen display (OSD) makes it easier to use the digital receiver and reduces the number of remote control buttons that need to be pressed. All functions are displayed on the screen and can be controlled with just a few buttons. Related functions are grouped together as a MENU. The selected function is highlighted in colour. The function buttons are represented by four coloured bars (red, yellow, green, blue) at the bottom of the screen. These coloured bars represent differing functions in the individual menus, which can be activated by pressing the corresponding coloured button (multi-function button) on the remote control. The function buttons are only active when a brief designation appears in the corresponding field. Button designations and terms that appear in the OSD menu are printed in bold text throughout these operating instructions.
Help:
When available, you can display/hide the help text in the menus by pressing the blue function button.
3.2 Disposal instructions
The packaging that was used to ship this device is made exclusively from recyclable materials. Please dispose of packaging in accordance with local ordinances. In Germany, the packaging can should be sorted and recycled using the “dual system”.
When this product has reached the end of its service life, do not dispose of it with the normal household rubbish. Instead, it must be brought to a collection point for the recycling of electrical/electronic devices. This is indicated by the symbol on the product, instruction manual or packaging.
The materials can be recycled in accordance with their markings.

Recycling old devices, the materials used to manufacture them, or any other form of re-utilisation serves as an important contribution in the protection of our environment.
Please contact your local government to find the appropriate waste disposal point in your area.

Do not dispose of used batteries (for the remote control) or other electronic waste with the household rubbish. Instead, make sure they are properly disposed of (return to the retailer, hazardous waste).
3.3 Safety instructions
For your own protection, you should carefully read through the safety precautions before operating your new device.
The manufacturer assumes no liability for damage caused by improper use or failure to comply with safety precautions.
In order to provide sufficient ventilation, place the device on a smooth, level surface, and do not place any objects on top of the device. The top of the device has ventilation slots that allow the heat to escape from the interior.
Do not place any burning objects (e.g. burning candles) on the device.

Do not expose the device to dripping/splashing water, and do not place objects that contain fluids (such as vases) on the device.

Do not operate heaters near the device. This will cause the device to become hotter.

The device may only be operated in a moderate environment.

Never open the device. This could give you an electric shock. Any necessary repair work should be performed only by trained technicians.
natural_image
Illustration of a closed book with a black cover and a small cross mark on the right page (no text or symbols)You should disconnect the device from the mains and contact a technician in the following cases:
When the power cable or mains adapter is damaged
When the device has been exposed to moisture or when fluid has gotten into the device
When there are serious malfunctions
When the device has suffered significant external damage
3.4 Breaks in operation
Disconnect the device from the mains and the antenna during a thunderstorm or when the device is not being used for an extended period of time (e.g. when you are on holiday).
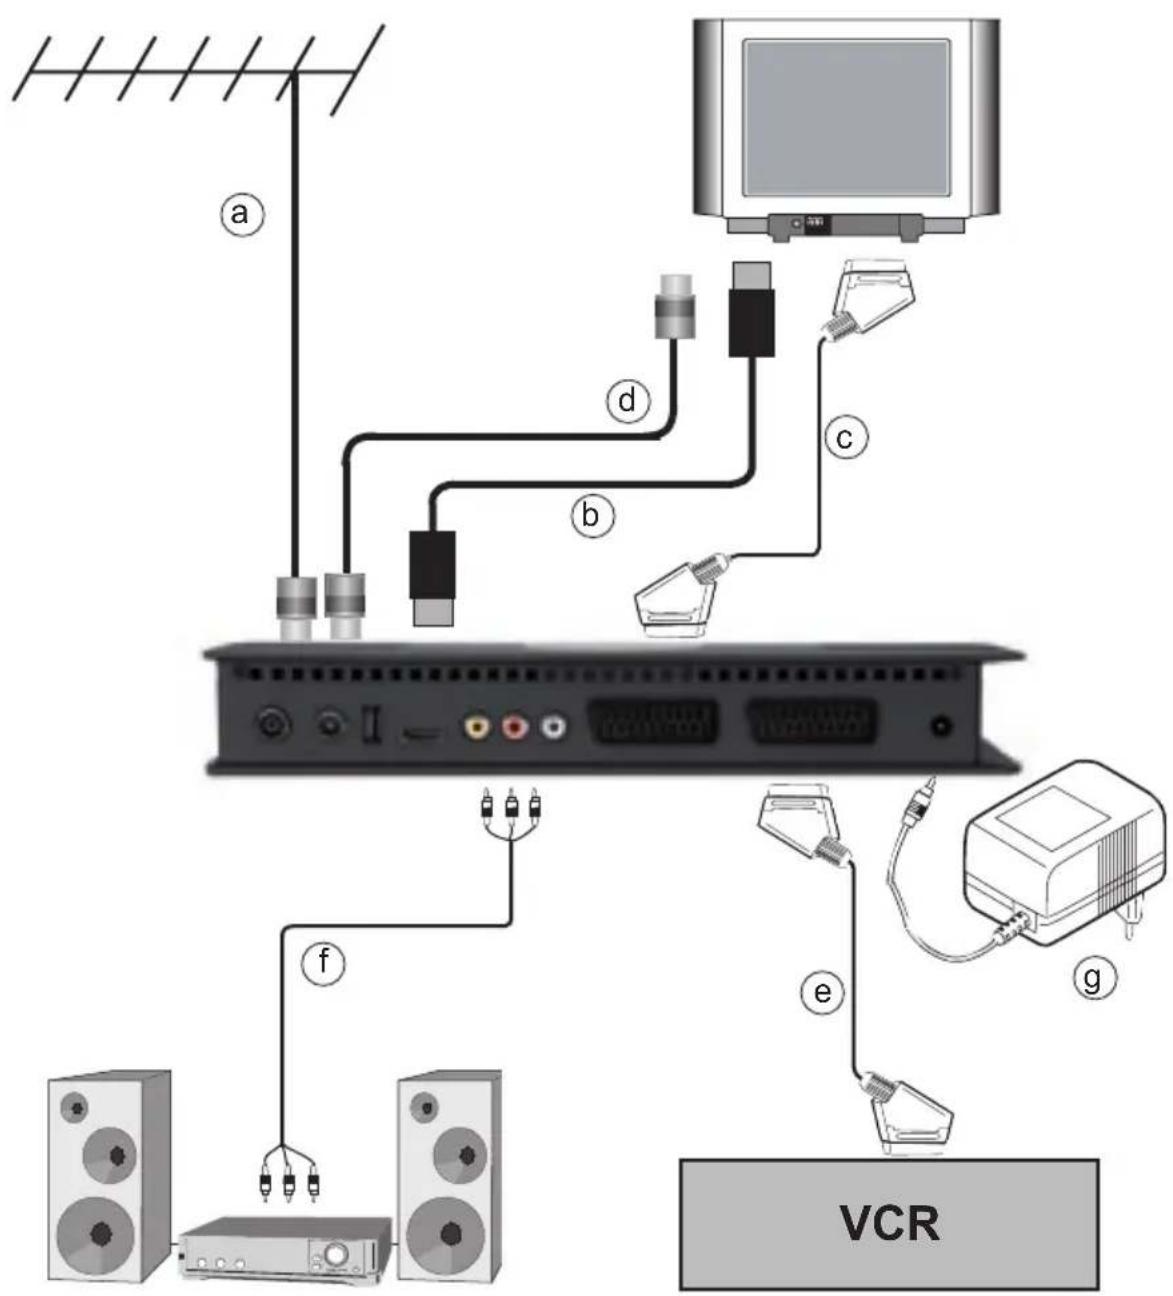
4 Connecting the DVB Receiver
a. Connection between the antenna and the antenna input on the DVB receiver.
b. HDMI connection between the DVB receiver and the television set.
c. SCART connection between the DVB receiver and the television set.
d. Connection between the antenna output and the television set.
e. SCART connection between the DVB receiver and the video recorder
f. Connection between the audio outputs and a hi-fi system.
g. Mains connection
4.1 Outdoor unit
a Connect the cable that extends from the terrestrial antenna (roof antenna or indoor antenna) to the terrestrial antenna input on the receiver.
Use a roof antenna, if possible. An indoor antenna may be sufficient if you have favourable reception conditions. When using an active antenna, the antenna feed must be switched on (section 6.2.4).
4.2 Connection to a television set
4.2.1 Via HDMI cable
b Use an HDMI cable to connect the receiver (HDMI output) with the television set (HDMI input).
If your television set is appropriately equipped, it will automatically switch to the HDMI input when you turn on the digital receiver.
4.2.2 Via SCART cable
c Use a SCART cable to connect the receiver (TV SCART socket) with the television set (SCART socket). If your television set is appropriately equipped, it will automatically switch to AV (and therefore to DTT mode) when you turn on the digital receiver.
4.2.3 Via RF cable
In order to continue receiving existing analogue programmes, the digital receiver must be connected to the antenna input on your television set. This connection is used exclusively to transmit analogue programmes to the television set. In order to display DTT programmes on your television set, you must make the HDMI connection or the SCART connection (see sections 4.2.1 and 4.2.2).
d Use a suitable TV connection cable to connect the receiver (antenna output) with the antenna input on your television set.
4.3 Video recorder (VCR)
e Connect the video recorder to the VCR SCART socket. During playback, the video recorder sends a switching signal to the digital receiver. The video recorder's signal is thereby automatically received by the TV set. If your video recorder does not provide switching voltage, use the AV button to switch your digital receiver to the external AV input. Pressing this button again will return the device to normal operation.
4.4 Hi-fi amplifier
4.4.1 Analogue
f To obtain the best possible sound quality, you can connect the digital receiver to a hi-fi amplifier. To do so, use a suitable cable to connect the right audio and left audio RCA jacks on the digital receiver with an input on your hi-fi amplifier (e.g CD or AUX; Note: the phono input is not suitable).
4.4.2 Digital
f If your amplifier is equipped with an appropriate electrical input, connect the digital (electrical) audio output with the electrical input on your amplifier.
Depending on the particular station, sample rates of 32 kHz, 44.1 kHz and 48 kHz are available. Also, if it is broadcast, the Dolby Digital signal (AC3) is present at this output.
4.5 Mains connection
The digital receiver should not be connected to the mains power supply until after all of the connections with other components have been made. This helps to avoid damage to the digital receiver, as well as to other components.
g After all of the connections have been made, use the included mains adapter to connect the receiver to an electrical outlet (230 V/50-60 Hz).
5 Initial installation
After you have read through the safety instructions and connected the device according to the instructions contained in section 4, it is now time to switch on the device (as described in section 7). When you start the device for the first time, the start screen of the Auto
Install installation wizard appears. The installation wizard helps you to make the most important settings on the digital receiver.
You can cancel the initial installation at any time by pressing the red function button.
Use the green function button to return to the previous installation step should you need to correct any erroneous entries.
If the initial installation is incomplete or cancelled, your device will start with the standard presets.
The initial installation process shown here is only an example. The exact initial installation process depends on which settings you make. Therefore, follow the on-screen instructions precisely.
Menu language
When you start the installation wizard, the first selection screen you see is for the Menu language.
Use the up/down arrow buttons to highlight the desired operating language.
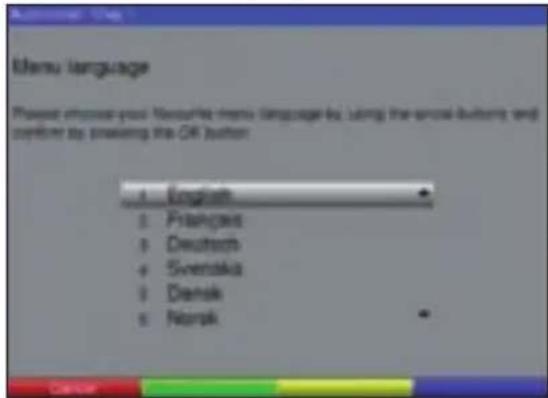
Confirm by pressing OK.
Confirm by pressing OK, to accept the selection.
Country adjustment
Use the up/down arrow buttons to select the time zone that corresponds to your country.
The time is automatically set according to your selection.
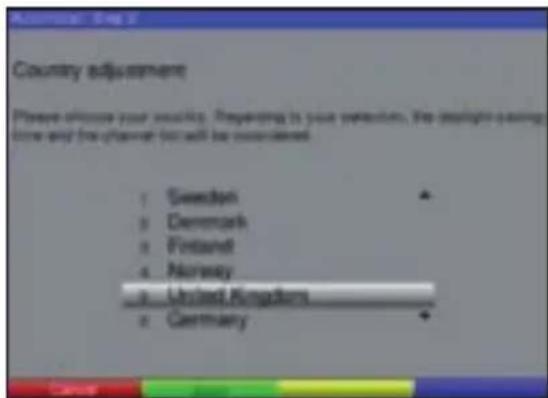
Confirm by pressing OK, to accept the selection and proceed to the antenna configuration.
Basic setup
You make the display format and antenna feed settings in this installation step.
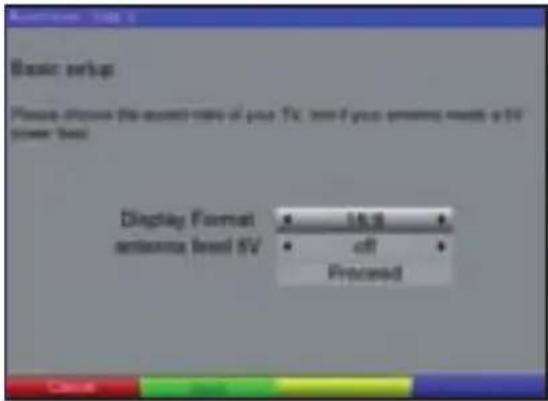
Use the up/down arrow buttons to highlight the Display Format row, and then use the left/right arrow buttons to set the display format to 16:9 or 4:3.
To activate the antenna feed, highlight the antenna feed 5V row, and then use the left/right arrow buttons to switch the feed on or off.
Use the up/down arrow buttons to highlight the Proceed row, and then confirm by pressing OK to proceed to the Antenna adjustment item.
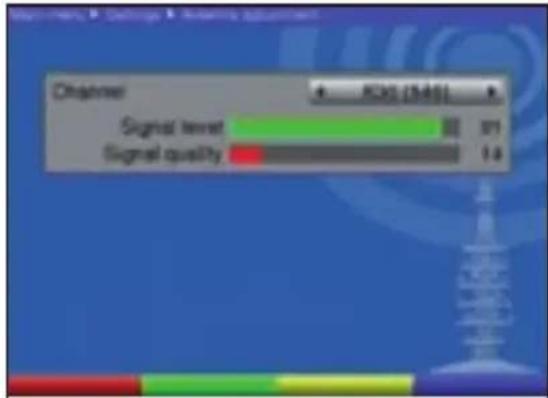
Antenna adjustment
In this installation step, you can use the signal strength and signal quality indicators to adjust the antenna optimally.
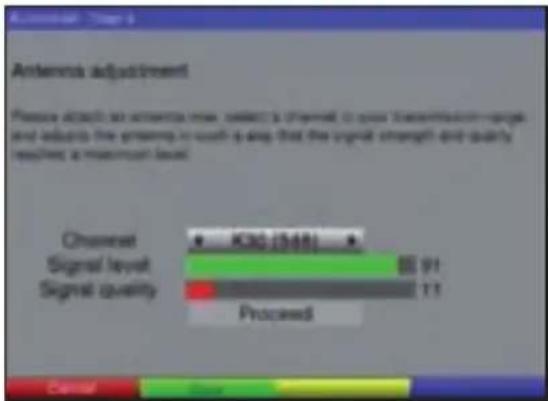
Use the up/down arrow buttons to select the Channel field.
Use the left/right arrow buttons to select a channel on which DTT programmes are broadcast.
Adjust the antenna so that the signal strength and signal quality indicators show their strongest levels.
Use the up/down arrow buttons to highlight the Proceed field, and then confirm by pressing OK.
Channel search
After the antenna adjustment, the channel search screen appears.
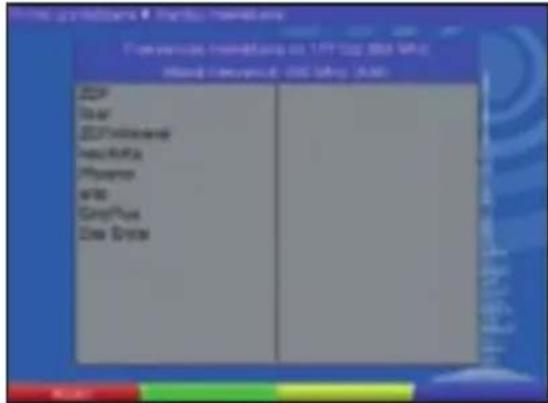
The channel search starts automatically. During this process, the entire reception frequency range is searched for digital programmes. This process can take a few minutes to complete. Pay attention to further on-screen instructions. If you are using an active antenna and the search finds no programmes (or not all of the programmes that are available in your area), you have to switch on antenna feed (see section 6.2.4).
Software update
After the search is complete, the digital receiver checks whether a software update is available for the device. If a new software version is available, you can update the software automatically.
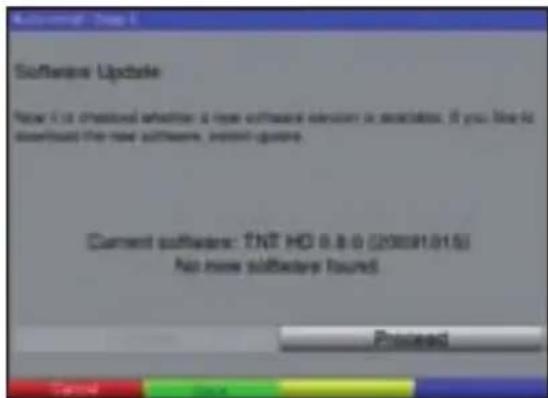
Use the left/right arrow buttons to select the Update field, and then confirm by pressing OK. The new software for your device will now be downloaded. This process can take a few minutes to complete.
Exiting the installation wizard
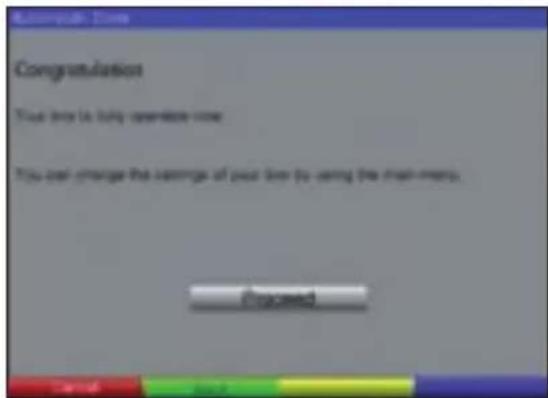
Confirm the on-screen instruction by pressing OK to return to normal operation.
6 Settings
After you have connected your new digital receiver and set it up, you can optimise the digital receiver to meet your needs, if necessary.
6.1 Menu language
You can set the desired menu language in this menu item.
To change the operating language, proceed as follows:
Use the MENU button to open the Main menu.
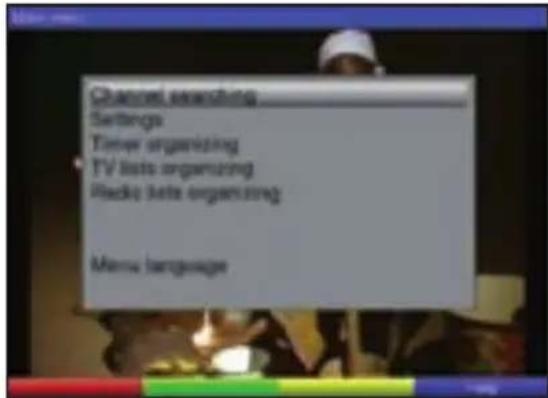
Now select the Menu language row using the up/down arrow buttons to highlight it.
Confirm by pressing OK. The Menu language submenu appears.
Use the up/down arrow buttons to highlight the desired language.
Save your selection by pressing the OK button.
Press the EXIT button to return to the Main menu.
6.2 Basic settings
In order to optimally use your DVB receiver, you still need to configure it to meet your individual needs.
Open the Main menu by pressing the MENU button.
Highlight the Settings row using the up/down arrow buttons.
Confirm by pressing the OK button.
The Settings submenu appears.

Now highlight the Basic settings row using the up/down arrow buttons.
Confirm by pressing OK.
The Basic settings menu appears.

Use the up/down arrow buttons to highlight the option you want. Change the individual items as indicated below. When selecting a menu item, also pay attention to any on-screen instructions that may appear. You can make the following settings:
6.2.1 Country
This function is used to automatically switch between standard and daylight saving time.
In the Country row, use the left/right arrow buttons to select the country in which the device is operated.
6.2.2 Time offset selection
Your device is equipped with a clock. This clock is synchronised to Greenwich Mean Time via DTT.
automatic
Use the left/right arrow buttons to set to automatic.
The local time will now be automatically set according to the country that you selected (section 6.2.1).
manual
Use the left/right arrow buttons to set to manual.
Now you can manually adjust the local time in the GMT time offset (hrs.) menu item.
6.2.3 GMT time offset (hrs.)
Use the left/right arrow buttons to set the time difference in relation to Greenwich Mean Time.
6.2.4 Antenna feed 5 V
When you use an active antenna, you need to switch on the antenna feed (5 V/30 mA).
This supplies the antenna with power through the terrestrial antenna input.
Highlight this row and use the left/right arrow buttons to switch the antenna feed on or off.
In the event of an overload or short-circuit in the antenna feed, this will be automatically switched off. If this happens, fix the error and then switch the antenna feed back on.
Press the EXIT button to return to the Settings menu or press the MENU button to return to normal operation. Your settings are automatically saved.
6.2.5 Automatic standby
After the preset time has elapsed, the automatic standby circuit automatically switches the device to standby mode, provided you have not operated any of the device's controls during this period.
Use the left/right arrow buttons to select a period of time after which the device will automatically switch to standby mode.
6.3 Audio/Video settings
You can make additional settings in the Audio/Video settings menu so that the digital receiver is configured for your television set.
Use the MENU button to open the Main menu.
Highlight the Settings row using the up/down arrow buttons.
Confirm by pressing the OK button.
The Settings submenu appears.
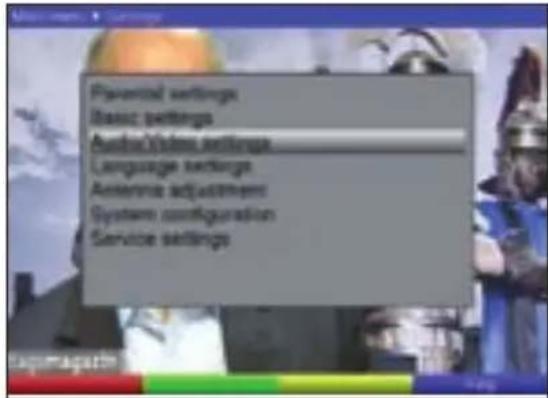
Now highlight the Audio/Video settings row using the up/down arrow buttons.
Confirm by pressing OK. The Audio/Video settings menu appears.
Use the up/down arrow buttons to highlight the option you want. Change the individual items as indicated below. When selecting a menu item, also pay attention to any on-screen instructions that may appear. You can make the following settings:
6.3.1 HDMI resolution
Use the left/right arrow buttons to select automatic to have the resolution automatically adjusted to the resolution of the connected TV set, or select one of the preset resolutions.
6.3.2 Display format
Use the left/right arrow buttons to adjust the display format to match your TV set (4:3 or 16:9). This function automatically adjusts the picture to match the aspect ratio of your television set.
6.3.3 Picture format
Depending on which display format you select, use the left/right arrow buttons to set the desired picture format. If you selected the 16:9 display format, the following options are available: automatic, Black Borders and Zoom. If you selected the 4:3 display format, the following options are available: automatic, Letter Box and Pan & Scan.
6.3.4 HDCP
Highlight this row and use the left/right arrow buttons to switch the HDCP (High Definition Content Protection) function on or off.
6.3.5 Audio delay
Highlight this row and use the left/right arrow buttons to select from a range of 0 ms to 250 ms.
6.3.6 Digital audio
Highlight this row and use the left/right arrow buttons to select stereo or multichannel.
6.3.7 Digital volume adjustment
Highlight this row and use the left/right arrow buttons to adjust the volume of the digital output.
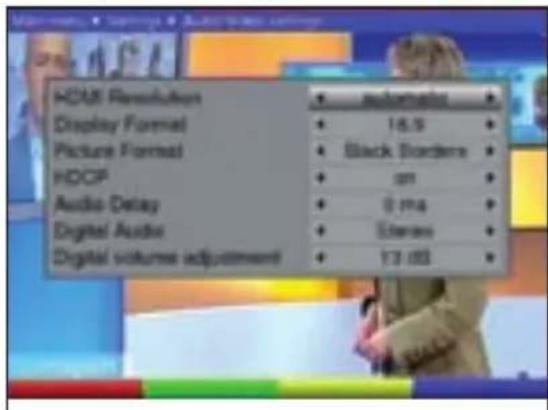
6.4 Language settings
In this menu you can set your preferred menu language, audio language and subtitle language.
Use the MENU button to open the Main menu.
Highlight the Settings row using the up/down arrow buttons.
Confirm by pressing the OK button.
The Settings submenu appears.
Now highlight the Language settings row using the up/down arrow buttons.
Confirm by pressing OK.
The Language settings menu appears.
Use the up/down arrow buttons to highlight the option you want. Change the individual items as indicated below. You can make the following settings:
Menu language
Use the left/right arrow buttons to select your preferred Menu language.
Primary audio language
Use this option to select your preferred audio language for digital programmes. This is automatically selected when you switch on the device or change to a different programme (used for multilingual broadcasts).
Use the left/right arrow buttons to select your preferred Audio language.
Secondary audio language
Use this option to automatically select a secondary audio language for digital programmes when the primary language is not available.
Use the left/right arrow buttons to select your preferred Audio language.
Primary subtitling language
Use this option to select your preferred subtitle language. When you change the programme, subtitles automatically appear at the bottom of the screen (provided the programme is broadcast with subtitles). Set to Off to switch off automatic display. You can manually switch on subtitles as described in section 7.14.
Use the left/right arrow buttons to select your preferred subtitling language.
Secondary subtitling language
Use this option to automatically display a secondary subtitle language when the primary subtitle language is not available.
Use the left/right arrow buttons to select your preferred subtitling language.
Subtitling mode
Use the left/right arrow buttons to set the Subtitling mode to normal or hard of hearing.
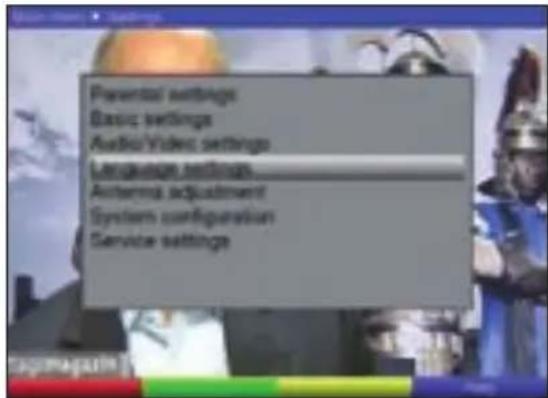
6.5 Antenna adjustment
Your receiver is equipped with a signal strength indicator so that you can adjust the antenna optimally.
Use the MENU button to open the Main menu.
Now highlight the Settings menu row by using the up/down arrow buttons.
Confirm by pressing OK.
The Settings submenu appears.

Now highlight the Antenna adjustment menu row using the up/down arrow buttons.
Confirm by pressing OK. The Antenna adjustment menu appears.
Now use the left/right arrow buttons to select the channel with the weakest reception signal.
Adjust the antenna so that both bars show the strongest level.
Red bar Poor reception
Yellow bar Good reception
Green bar Very good reception
7 Operation
7.1 Switching on/off
Switch the digital receiver on by pressing the On/Standby button on the device or remote control.
Press this button on the device or remote control again to switch the device off.
The device is now in standby mode, which is indicated by a red LED on the display.
7.2 Programme selection
7.2.1 Using the programme up/down buttons
Use the PROG +/- buttons on the receiver or remote control to move up/down one programme position at a time.
7.2.2 Using the number buttons
Use the number buttons to enter the desired programme number.
For example:
1 For programme position 1
1, then 4 For programme position 14
2, then 3, and then 4 For programme position 234
7.2.3 Using the navigator (programme list)
Press the OK button.
The programme list navigator appears. In TV mode, only TV programmes will be shown and in radio mode, only radio programmes. The currently selected programme is highlighted.
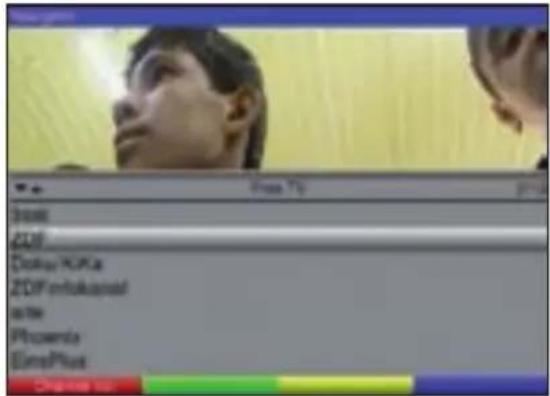
You can now use the up/down arrow buttons to highlight the desired programme.
Pressing the OK button will select the highlighted programme.
Use the up/down arrow buttons to move the highlighting up/down one row at a time.
Use the left/right arrow buttons to scroll up/down one page at a time.
Selecting a list
To make it easy for you to find programmes, your unit provides various programme lists. You can select from your favourites lists (see section 8.1) or sorted lists that show only free programmes or all (free and encrypted) programmes.
Press the OK button. The active programme list appears.
Use the red Channel list function button to open a window with various programme lists (Free TV, All TV and Favourites lists). The active programme list is highlighted.
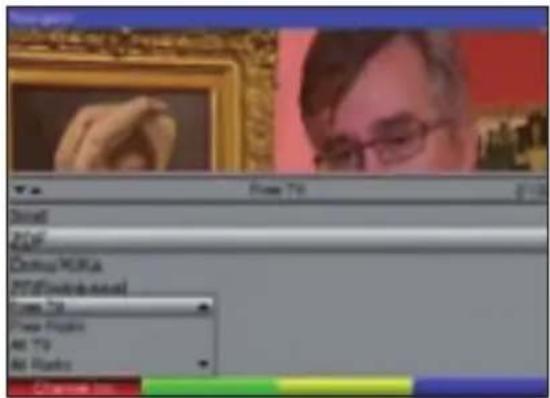
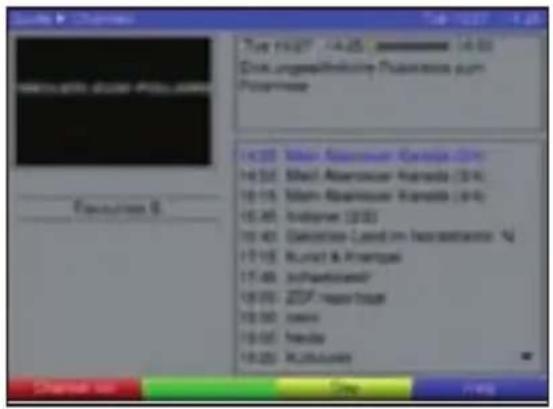
Use the up/down arrow buttons to select the Favourites A programme list (for example).
Confirm by pressing OK.
The Favourites A list appears, which contains all of the programmes that you added to it (see section 8.1).
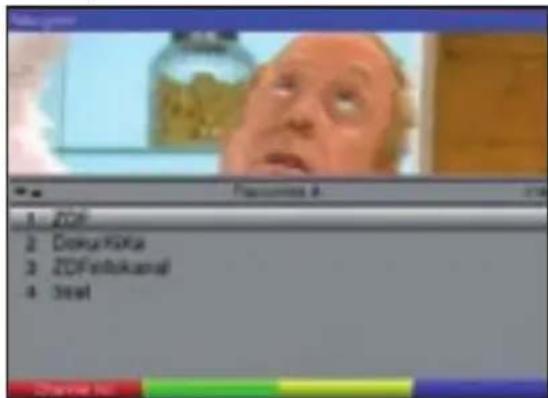
Use the up/down arrow buttons to highlight the programme that you would like to watch.
Confirm by pressing OK.
7.2.4 Accessing blocked programmes
When you select a programme that is blocked by the child lock, the Receiver PIN message will appear on the screen.

Use the number buttons to enter your PIN code. The desired programme will be tuned in.
Or
Switch to a programme that is not blocked.
When the parental settings are activated (see section 8.2), you will always be asked to enter the PIN code when you switch to a blocked programme.
7.2.5 Infobox
Every time you switch programmes, an information box showing the programme position and the name of the selected programme is briefly displayed. It also indicates additional programme features, such as for teletext, for 16:9 programmes, or for encrypted programmes. If broadcast, the EPG genre and the film's rating will also be displayed.

7.3 Volume control
You can adjust the volume on your digital receiver. This makes it easier to use the receiver, because you have all of the important functions on one remote control, and you do not have to use the remote control for your television set so often.
When you switch on the digital receiver, the volume is set to the level that you previously selected.
To adjust the volume of your digital receiver, press the Volume + button to increase the volume and the Volume - button to lower it.
Press the Mute button to switch the sound on or off.
7.4 Switching between TV and radio
The receiver is pre-programmed with both TV and radio programmes.
Use the TV/Radio button to switch the digital receiver to radio mode.
The receiver will now switch to the last radio programme that you had listened to.
Press the TV/Radio button again to tune in the last TV programme that you had viewed.
7.5 Selecting a different language (TV mode) or station (radio mode)
When a TV show is broadcast in multiple languages or with multiple audio channels, or if multiple radio programmes are available in one radio programme position, this will be indicated by an on-screen message.

In this case, you can select a different language or audio channel as follows:
Press the OPT button.
A list showing the languages (or radio programmes) that are currently being broadcast will now appear on the screen.
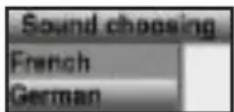
Use the up/down arrow buttons to highlight the desired language or radio programme and confirm by pressing OK.
You can now listen to the broadcast in the language that you selected. Your digital receiver can also receive programmes that are broadcast in mono.
7.6 Returning to the previously selected programme
Press the EXIT button on the remote control to return to the previously selected programme.
Press this button once more to return to the programme that you were just watching.
7.7 Displaying clock and programme information
Use this function to view programme information for the currently selected programme.
Press the INFO button to display information for the currently selected programme.
An on-screen display will now appear in the bottom half of the screen with the current time, the name of the selected programme and the current show (with start and end times), provided the necessary data has been transmitted by the broadcasting station.
7.8 Additional programme information
You can use the programme information function to obtain further programme information (if broadcast) for the currently selected programme.
Press the INFO button twice to open an additional information window.
Additional information for the current programme is displayed.
You can use the left/right arrow buttons to scroll through longer information texts line by line.
Press the INFO button again to display the next broadcast (if this information is broadcast).
Press the INFO button to switch off the on-screen display.
7.9 Channel information
Press the green function button (Channel information) to display the data for the selected channel.
The coloured function buttons can also be used to display audio/video and programme information, as well as information on the encryption system (CA) that is used, when available.
Exit the information screen by pressing the MENU button.
7.10 Teletext
7.10.1 Using your television set's teletext decoder
If broadcast, the teletext is transmitted to your television set through the SCART output. Use the remote control for your television set to navigate through the teletext.
7.10.2 Using the internal teletext decoder
As an alternative, you can use the integrated teletext decoder to display the information.
Switch to the programme for which you want to view teletext information.
Press the TXT button to access the teletext.
Use the number buttons to enter the number of the desired teletext page. Your entry is displayed in the upper left-hand corner of the screen. After you enter the tele-text page number, your device searches for the desired page. Because not all teletext pages can be transmitted simultaneously, it may take a few seconds for your unit to find the page and display it on the television screen.
Teletext page 100 is generally used to display a table of contents.
7.11 Subtitles
When subtitles are transmitted, this is indicated by the on-screen display Subtitle choosing. If the Subtitle function is switched on (see section 6.4), subtitles will be automatically displayed, provided subtitles are available for the language you selected. If subtitles are transmitted via teletext or only in other languages, you can manually switch them on as follows:
Press the OPT button (several times, if necessary) until a selection screen showing the available subtitle languages and/or teletext pages on which subtitles are transmitted appears below the Subtitle option.
Use the up/down arrow buttons to highlight the desired language/teletext page.
Confirm by pressing OK. Subtitles will now be displayed.
Keep in mind that this function only works when subtitles are actually transmitted and that this setting is not retained when you switch to a different programme.
7.12 Electronic programme guide (EPG)
Your digital receiver is equipped with an electronic programme guide. This is used to display programme information for individual programmes on the screen.
This gives you an overview of the shows that are currently being broadcast and those that are to be broadcast today and during the coming days.
7.12.1 Opening the electronic programme guide
Switch on the digital receiver and your television.
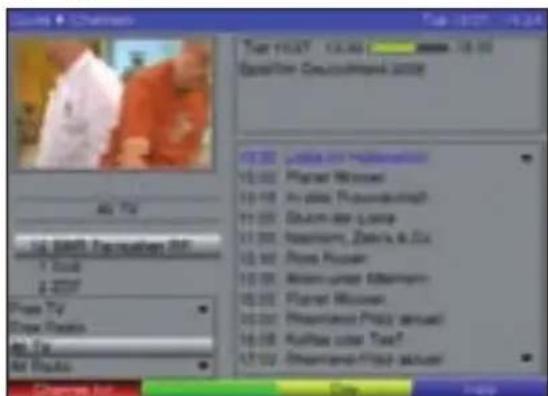
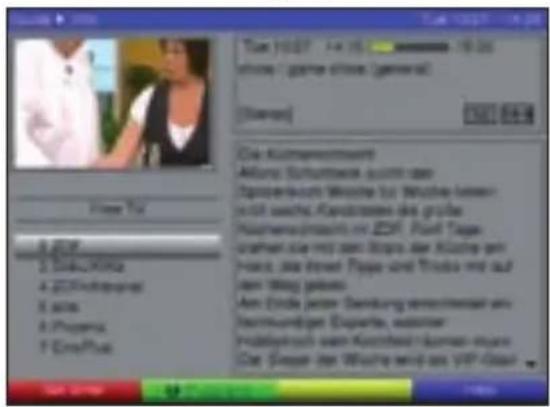
Press the EPG button on the remote control for the digital receiver. The electronic programme guide will now appear on the screen.
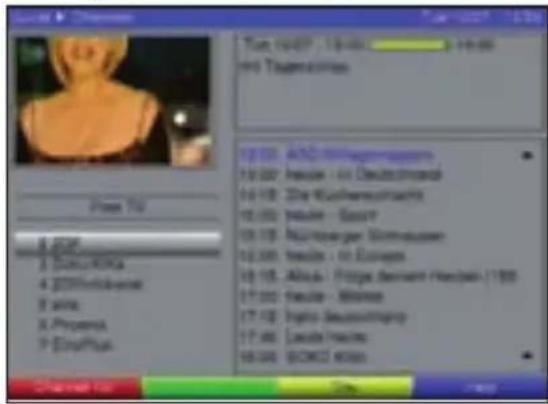
The programmes for the currently selected programme list are displayed on the left-hand side of the window. The right-hand side of the window shows the daily schedule for the highlighted programme.
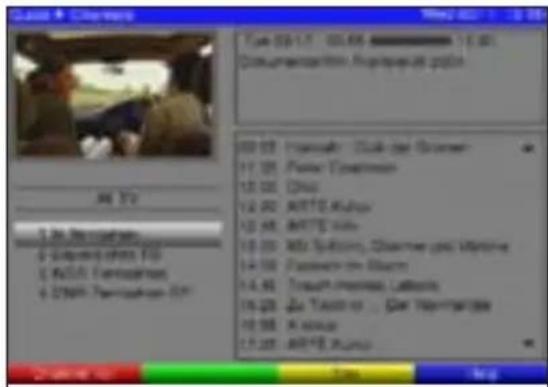
Press the red Channel list function button to open a second window where you can select the desired programme list.
Use the up/down arrow buttons to select the desired programme list, and confirm by pressing OK. The programmes for the selected list will now be displayed.
Use the up/down arrow buttons to highlight the programme and have its daily schedule displayed.
Press the right arrow button to access the daily schedule for the selected programme.
Use the up/down arrow buttons to highlight the desired show.
Press the green Info function button to display the information.
Press the green Programs function button to return to the daily schedule.
Pressing the yellow Day function button opens a second window.
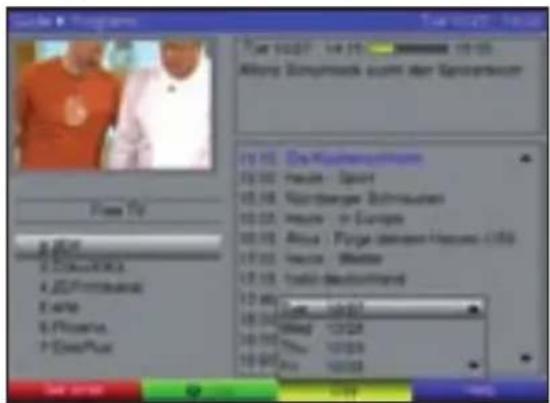
Use the up/down arrow buttons to highlight the day for which you need a schedule, and confirm by pressing OK.
The daily schedule for the selected day will now be displayed.
7.12.3 Timer
The electronic programme guide (EPG) function makes it easy to program the timer.
Highlight the show (as described above) that you would like to make a timer recording of.
Now press the red Set timer function button.
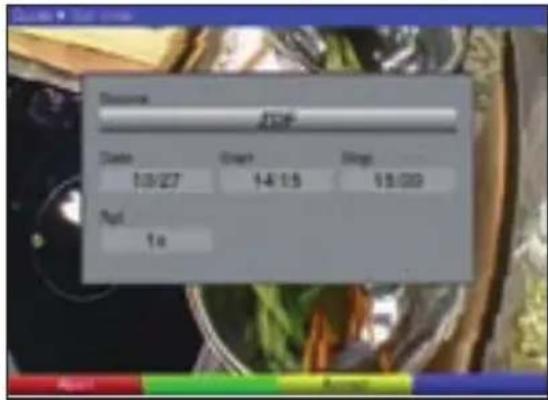
For control purposes, the "Set timer" menu is displayed with the data for the selected show. If you need to, you can make changes here (see section 7.13.2.1).
Press the yellow Accept function button to set the timer using the displayed data.
Note:
You can cancel the current timer operation by pressing the EXIT button.
7.12.4 Exiting the EPG
Press the MENU or TV/Radio button to return to normal operation.
7.13 Timer recordings
Your receiver is equipped with a video recorder timer function. You can program the timer manually (as described in this section) or as explained in section 7.12.3.
You can use the timer on your video recorder to switch the digital receiver on/off so that you can record the selected show using an external recording device (e.g. video recorder) when you are away. Keep in mind that you have to program your video recorder in order to record the show.
Once your video recorder timer has switched the device on, most of the functions on the remote control are deactivated to keep you from accidentally cancelling your recording.
7.13.1 Manually programming the timer
Use the MENU button to open the Main menu.
Highlight the Timer organizing row using the up/down arrow buttons.Confirm by pressing the OK button.
The Timer organizing submenu appears.

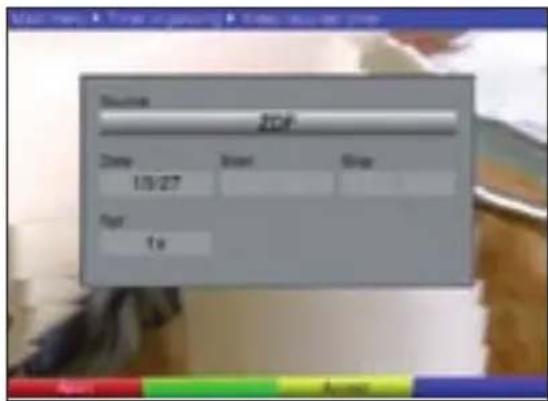
Use the up/down arrow buttons to select the New video recorder timer option.
Pressing the OK button opens an input screen where you can program a new timer event.
To program the timer, proceed as follows:
Source
Use the arrow buttons to highlight the Source row.
Press the OK button.
Use the arrow buttons to highlight the desired programme.
Pressing the OK button will store your selection in thetimer.
Date
Use the arrow buttons to highlight the Date column.
Use the number buttons to enter the date (4 digits) on which the timer event is to take place.
Start
Use the arrow buttons to highlight the Start column.
Use the number buttons to enter the start time for the timer event.
Stop
Repeat the steps listed in the "Start" section to enter the stop time (except for timer events for automatically switching to another station at a specific time).
Rpt
Use the arrow buttons to highlight the Rpt column.
Press the OK button.
A selection screen with various repeat options is displayed.
1x Record once
D Record daily
W Record once a week
Use the up/down arrow buttons to select the desired function.
Press the OK button to save the setting.
Copying the data to the memory
After you have finished programming, press the yellow Accept function button to copy the data to the memory. If there are overlapping timer events, they will be marked in red.
Use the TV/Radio button to return to normal operation.
7.13.2 Timer overview
The timer overview shows all of the timer events that have already been programmed.
To access the Timer overview menu, open the Timer organizing menu as described above.
Use the up/down arrow buttons to highlight the Timer overview row.
Confirm by pressing OK.
7.13.2.1 Changing programmed timer events
To change an existing timer setting, use the up/down arrow buttons to highlight the timer event that you want to change.
Press the yellow Modify function button to access the settings for the highlighted timer event. You can now edit this event as described in section 7.13.1.
After you have finished programming, press the yellow Accept function button to copy the data to the memory.
7.13.2.2 Deleting programmed timer events
To delete an existing timer setting, use the up/down arrow buttons to highlight it.
Press the green Delete function button. The following message appears: "Really delete this timer?"
Use the left/right arrow buttons to highlight "Yes".
To delete the timer event, confirm by pressing OK.
7.13.2.3 Programming a new timer event
To program a new timer event, use the up/down arrow buttons to highlight an empty row in the Timer overview menu.
Pressing the yellow New function button opens an input screen where you can program a new timer event. You can now edit this event described in section 7.13.1.
After you have finished programming, press the yellow Accept function button to copy the data to the memory.
7.14.2.4 Cancelling a timer operation
You can cancel the current timer operation by pressing the EXIT button.
8 Changing the Basic Program Settings
8.1 Configuring the favourites list
This section describes how to change both the standard presets on the digital receiver and the favourites programme list to suit your needs. This function is also used to add new programmes to the list which were found during the programme search.
Keep in mind that the device has two programme lists: the favourites list, and the complete list. The favourites programme list contains all of the programmes that you added to it (as described below). The complete list shows all of the programmes.
This section also explains how to delete programmes or block them using the child lock function. When you open the programme list using the OK button, the active favourites programme list is displayed.
8.1.1 Opening the programme list management
To edit the favourites list, proceed as follows:
Use the MENU button to open the Main menu.
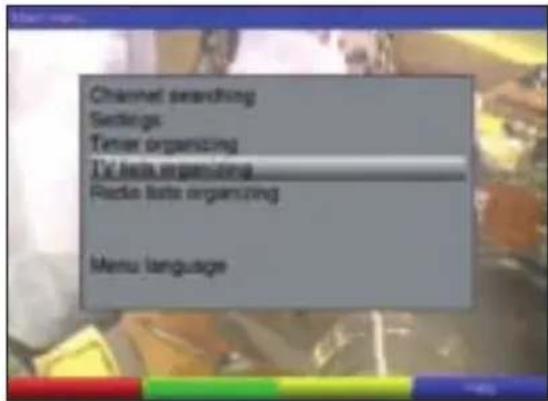
Use the up/down arrow buttons to highlight the TV lists organizing row to edit the TV list, or the Radio lists organizing row to edit the radio list.
Confirm by pressing OK.
The programme list management window appears, where you can edit the respective favourites lists (TV or radio list).
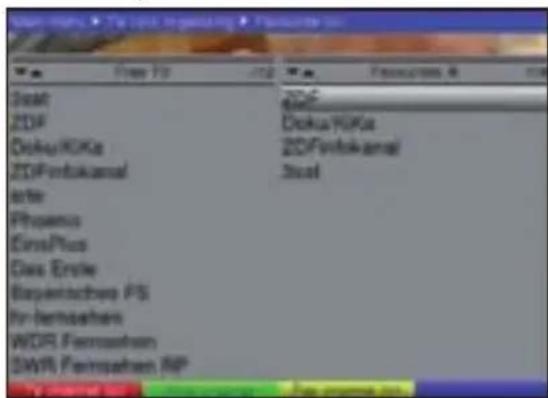
The active favourites list is displayed in the right-hand portion of the screen. This is active because the currently selected programme is highlighted. The complete list is displayed on the left-hand side of the screen. The complete list shows all of the programmes that are available.
Press the red function button to switch to the complete list. It is now active.
Pressing the red function button once more will open a selection screen. Here you can display all (free and encrypted) of the programmes (All TV) in the complete list, or only the free ones (Free TV).
Use the up/down arrow buttons to select the desired programme listing (Free TV or All TV).
Confirm by pressing OK.
Depending on your selection, a list with either all of the programmes or only the free ones will displayed.
Press the red TV channel list or the yellow Fav channel list function button to switch between the favourites list and the complete list. The currently active list is the one with a highlighted programme.
When the favourites list is active, you can press the yellow function button once more to open a second window where you can select the desired favourites list.
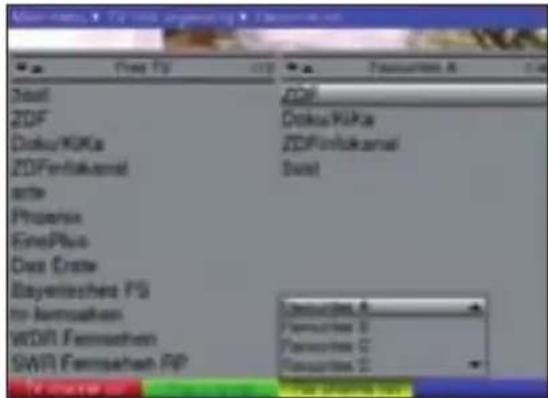
Use the up/down arrow buttons to highlight the favourites list that you want to edit and confirm by pressing OK.
The selected favourites list is now active.
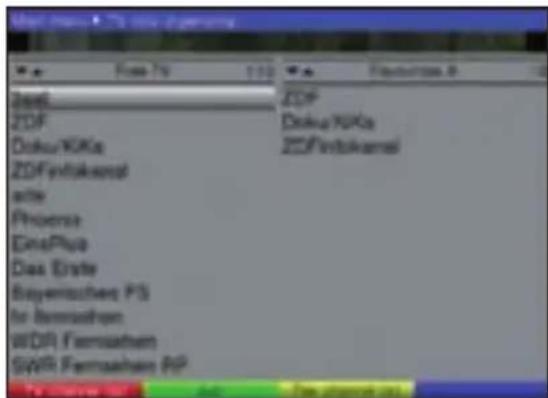
8.1.2 Adding programmes to the favourites list
To add programmes from the complete list to the favourites list, open the programme list management and switch to the complete list (see section 8.1.1).
Use the up/down arrow buttons to highlight a programme that you want to add to the list.
Press the green Add function button to add the highlighted programme to the favourites list.
8.1.3 Deleting programmes (removing them from the favourites list)
To remove programmes from the favourites list, open the programme list management as described in section 8.1.1. The favourites list is active.
Use the up/down arrow buttons to highlight a programme that you want to delete from the list.
Press the yellow Remove channel function button.
The programmes that are deleted in this manner are still retained in the complete list and can be added back to the favourites list any time you want.
8.1.4 Sorting programmes
To sort the programmes in the favourites list to suit your needs, open the programme list management as described in section 8.1.1. The favourites list is active.
Now use the up/down arrow buttons to highlight the programme that you want to move to a different location in the list.
Press the green Pick channel function button. A double arrow appears next to the selected programme.
You can now use the up/down arrow buttons to move the highlighted programme to its new location in the programme list.
Press the green Drop channel function button to relocate the programme to the highlighted position.
After you have configured the programme list to suit your needs, press the MENU button to return to normal operation.
8.2 Parental settings
Your device is equipped with a child lock. This function is used to prevent unauthorised access to important functions (e.g. opening the main menu). (In addition to this child lock, shows that are broadcast already including a child lock also require you to enter the four-digit parental settings PIN code.)
Furthermore, programmes and recordings that you have blocked can only be tuned in after you enter a four-digit PIN code (receiver PIN).
To edit the Parental settings menu, proceed as follows:
Use the MENU button to open the Main menu.
Highlight the Settings row using the up/down arrow buttons.
Confirm by pressing the OK button.
The Settings submenu appears.
Highlight the Parental settings row using the up/down arrow buttons.
Confirm by pressing the OK button.
The Parental settings menu appears.
Use the up/down arrow buttons to highlight the option you want. Change the individual items as indicated below. When selecting a menu item, also pay attention to any on-screen instructions that may appear.
8.2.1 Select channels
Press the OK button.
The most recently used programme list for the selected area (radio or TV) is displayed. The currently selected programme is highlighted.

Pressing the red function button will open a selection screen. You can select the desired programme list here.
Use the up/down arrow buttons to select the desired programme list (e.g. Favourites A).
Confirm by pressing OK. The selected programme list is displayed.
Now use the arrow buttons to highlight the programme that you want to block.
Press the yellow function button to block the programme. A child lock symbol appears next to the selected programme.
After you have configured the programme list to suit your needs, press the MENU button to return to normal operation.
To unblock programmes, use the same procedure as described above. Highlight the relevant programme and remove the child lock symbol by pressing the yellow function button.
8.2.2 Change receiver PIN
The receiver PIN code is set to 0000 at the factory.
Press the OK button. A menu appears where you can change the receiver PIN code.
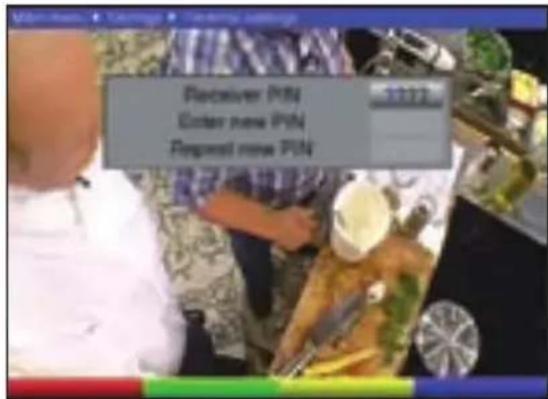
Now use the number buttons to enter the current device PIN code. (factory setting = 0000)
Use the number buttons to enter the new device PIN code of your choosing.
Repeat this entry.
After you have changed the device PIN code, you are automatically returned to the Parental settings menu.
Caution:
Do not forget the device PIN code! If this does ever happen, please contact your specialist dealer.
8.2.3 Menu lock
When the menu lock function is activated, you must enter the PIN code to access the menus, in addition to having to enter it to unlock blocked programmes.
Activate/deactivate the menu lock using the left/right arrow buttons to turn it on or off.
8.2.4 Age limit
Use the left and right arrow buttons to select the desired age limit for the parental settings function.
For example, if you set the age limit to 16 years, you must enter the PIN to be able to view shows that are broadcast with a parental guidance rating of 16 years of age or older.
8.3 Programme search
There are several type of programme searches you can use when you want to search for new programmes.
1. Automatic search
Use this search method to search all reception channels for programmes.
2. Manual search
Use this search method to search one specific reception channel for programmes.
After the search is complete, a message appears on the screen to indicate the total number of programmes that were found by your digital receiver, how many of them are new, and how many of them are encrypted. New programmes will be saved in the complete list and can then be added to the favourites list as described in section 8.1.
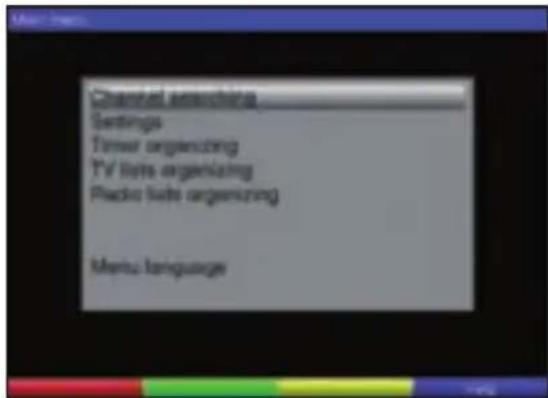
To perform a programme search, first open the Main menu.
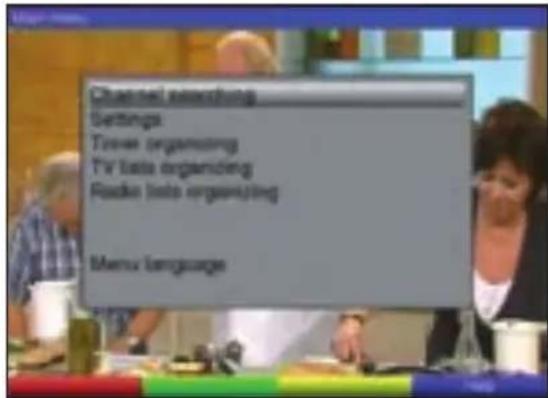
Use the up/down arrow buttons to highlight the Channel searching row.
Confirm by pressing OK.
The Channel searching submenu appears.
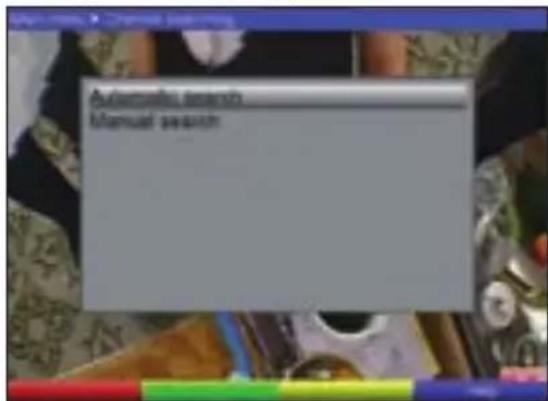
Use the up/down arrow keys to highlight the desired search method and confirm by pressing OK.
8.3.1 Automatic search
This search method searches all reception channels for programmes.
Press the OK button to begin the search.
To cancel the search, press the red Cancel function button.
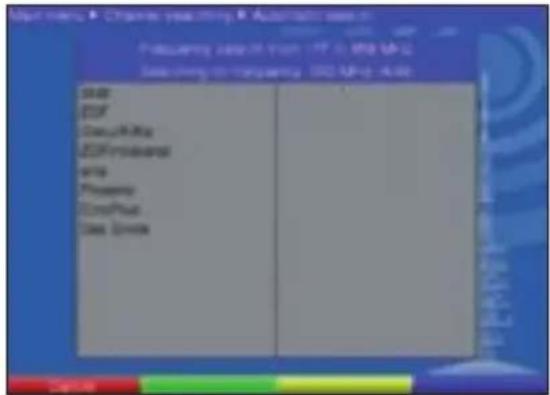
Press the red New search function button to start a new search.
The search may take a few minutes to complete.
Pay attention to the on-screen instructions.
8.3.2 Manual search
Use the manual search to search one specific channel for programmes.
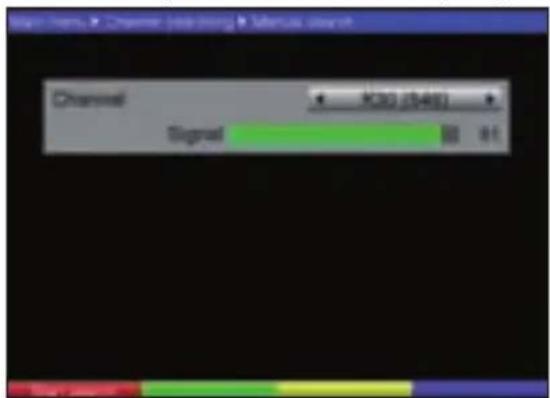
Use the left/right arrow buttons to select the reception channel that is to be searched for programmes.
Start the search by pressing the red Start search function button.
8.3.3 After the search is complete
While the search is being performed, you can follow the progress of the channel search on the screen. After the search is complete, the total number of programmes and the number of new programmes that were found are displayed.
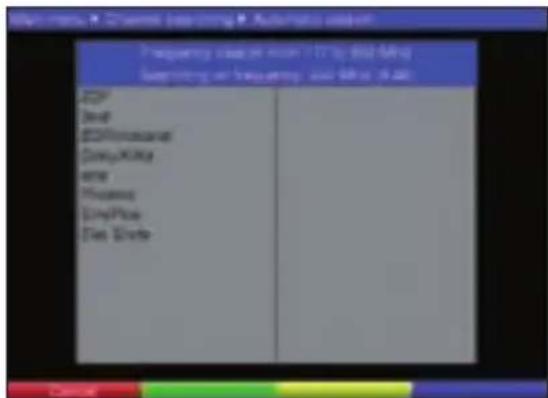
Pressing the yellow Done function button will take you back to the Channel searching menu.
8.4 Service settings
You can restore the factory settings at any time. In addition, you can delete the entire programme list (if it has become out-of-date due to changes made by the programme providers) and then perform a new search. Keep in mind that after you delete it, you must first start a new search and then copy the desired programmes from the complete list to the favourites list.
Use the MENU button to open the Main menu.
Now select the Settings row using the up/down arrow buttons to highlight it.
Confirm by pressing OK.
The Settings submenu appears.
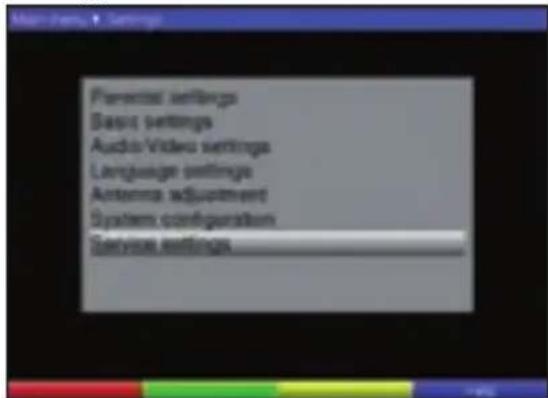
Now highlight the Service settings menu row using the up/down arrow buttons.
Confirm by pressing OK. The Service settings submenu appears.
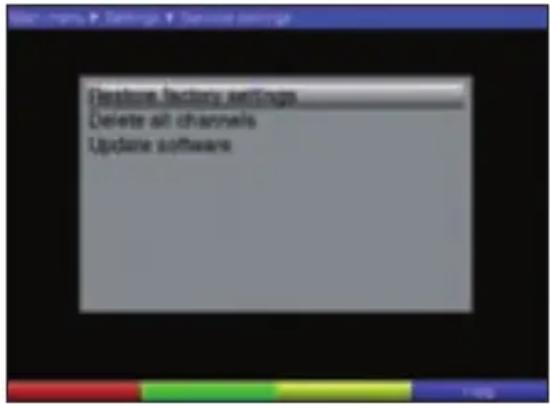
8.4.1 Restore factory settings
This function restores the factory settings, deletes your personal settings, and then starts the Autolnstall installation wizard.
Use the up/down arrow buttons to highlight the Restore factory settings row.
Press the OK button. The following message appears: "Really restore factory settings?".
Use the left/right arrow buttons to highlight Yes or Abort.
Confirm your selection by pressing OK.
8.4.2 Delete all channels
This function deletes the entire programme memory.
Use the up/down arrow buttons to highlight the Delete all channels row.
Press the OK button. The following message appears: "Really delete all channels?". Use the left/right arrow buttons to highlight Yes or Abort.
Confirm your selection by pressing OK.
8.4.3 Update software
You can also update the operating software on your digital receiver.
Press the OK button to search for new software for your device.
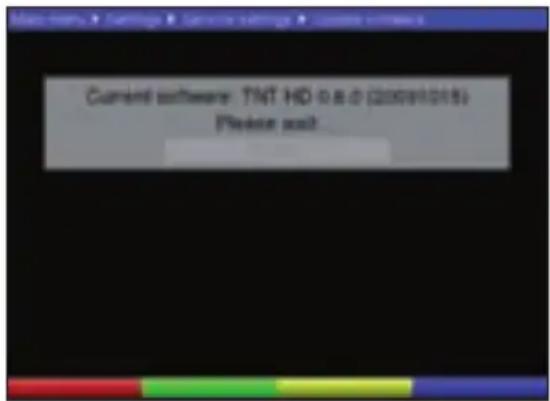
If a new software is available for your device, highlight the Update row and then press the OK button.
Caution:
Do not interrupt the update process (for example, by switching the device on/off).
Press the MENU button to return to normal operation.
Regardless of whether automatic software update is switched on or off, your digital receiver automatically checks for new operating software when you turn it on.
8.5 System configuration
This menu item displays the specific data for your device (e.g. the current software version).
Highlight this row in the Settings menu using the up/down arrow buttons.
Confirm by pressing OK.
Press the MENU button to return to normal operation.
9 Technical Terms
Antenna cable:
Connection cable between the antenna output on the receiver and the antenna input on the television for the purpose of receiving analogue television programmes with the television set.
AV: see SCART
Channel:
Portion of a frequency band that is delivered according to a specific allocation method. A TV channel consists of two frequencies: one for video, and one for audio. Each channel is identified by a numeric code (except for European television channels, which are transmitted over the 40-230 MHz frequency band, and that are identified using letters).
Coaxial cable:
Connection cable between the antenna and the receiver, used to carry the incoming signals.
DTT receiver (also known as DVB-T):
The signals that are received from the antenna cannot be processed by the television. The DTT receiver converts them into audio/video (AV) signals, which are output to the television for playback.
DVB:
DVB (Digital Video Broadcasting) is a universal method for transmitting image, sound and text data in digital form (i.e. data in any conceivable form and of any possible quality).
Frequency:
Physical quantity that indicates the number of oscillations per second, expressed in hertz (Hz).
HDCP:
Abbreviation for High Definition Content Protection
HDMI:
Abbreviation for High Definition Media Interface
Mode:
Indicates whether a mono or stereo programme is being received.
MPEG1/MPEG2 data compression:
Transmitting today's television standard (625 lines and a refresh rate of 50 Hz) in digital form requires a data transfer rate of 216 MBit/s.
This would require bandwidths that are not available either by terrestrial or satellite transmission. The data amount is therefore compressed. MPEG-2 is used as the worldwide standard for data compression for Europe. MPEG2 is an enhancement of the MPEG1 standard.
OSD:
On-Screen Display
PID:
Packet Identifier, Packet ID
Receiver:
The signals that are received from the antenna cannot be processed by the television. The receiver converts them into audio/video (AV) signals which are output to the television for playback.
SCART:
Plug connector for televisions, video recorders, receivers and other consumer electronic devices, used for the transmission of audio and video (AV) signals.
Software update:
Digital television is a new medium that provides an improved image and sound quality, as well as optional interactive services. These new services are continuously being developed and improved by programme providers. Therefore, you may have to update the software on the digital receiver to be able to use these services.
10 Technical Data
DTT tuner
RF reception: Low, mid and high band, including VHF I (48.25-82.25 MHz), VHF III (177.5-227.5 MHz), and UHF (474-858 MHz)
Tuner input: IEC socket
Input/Output impedance: 75 ohms
Tuner output: IEC connector
Constellation: QPSK, 16-QAM, 64-QAM
Code rate: 1/2, 2/3, 3/4, 5/6, 7/8
Guard interval: 1/4, 1/8, 1/16, 1/32
Transmission mode: 2K, 8K
Active RF loop-through
Antenna feed: 5 V / 0.03 A
(short-circuit resistant, switchable)
Terrestrial frontend;
Compliant according to EN 300 744 (DVB framing structure, channel coding and modulation for DTT)
Meets Nordig requirements
Transport stream demultiplexing:
100 Mbit/s 1394 data output (maximum)
48 general-purpose SI/PSI filters
Decoders:
MPEG4/AVC video decoder high profile level 4.1
MPEG2 video decoder MP@HL 4:3 and 16:9 in PAL, letterbox and pan & scan.
MPEG1 & 2 audio decoder layer I and II with support for all standardised bitrates and normal sampling frequencies (32, 44.1 and 48 kHz). Supports Dolby Digital and MPEG2 layer III as an option (under licence).
Digital audio output:
SP/DIF output: Electrical, RCA jack
Analogue audio output
Left/right audio channel: RCA jacks (white, red)
HDMI:
HDMI v1.2
Support for YCC4:4:4/4:2:2 and RGB colour spaces
Resolution: 1080i, 720p, 576p, 576i
HDCP
Stereo PCM audio
SCART:
Supports PAL B/G
Supported analogue video formats: RGB and CVBS
SCART connector
WSS signalling
Function switching via pin 8
Audio output:
Audio decoding: support for monaural (mono), stereo (including
joint stereo) and multi-channel (up to 5.1); audio decoding for:
MPEG-4 HE AAC Level 4, version 1 (ISO/IEC 14496-3)
Enhanced AC3 ("Dolby Digital Plus") (ETSI TS 102 366)
MPEG-1 Layer II (ISO/IEC 11172-3), here only up to 2.0 stereo
USB interface:
USB 2.0 host connector
Update function for operating software
Connectors:
1 RF input connector: IEC female,
1 RF output connector: IEC male
1 TV SCART connector; RGB, CVBS
1 HDMI connector
1 USB interface
3 RCA connectors:
1 S/PDIF connector, electrical
Audio left+right
DC power supply input
Front panel:
Front panel buttons and LEDs
1 smart card reader
Power supply:
The total power consumption is approximately 12 W (MPEG4 HD decoding).
An active standby mode with less than 7 W of power consumption is supported.
Passive standby is less than 1 W (depending on quality of wall socket).
Environmental conditions:
Operating temperature: 5^ C to 40^ C ambient.
Regulatory note: The DTT receiver is designed to comply with CE, ETSI and safety approvals in mind.
Teletext:
Teletext filtering: In accordance with the ETS 300 472 standard
Entering of teletext data: (FBAS) in accordance with ITU-R BT.653-2;
lines: 6-22 and 320-335
Soft teletext: 1000-page memory
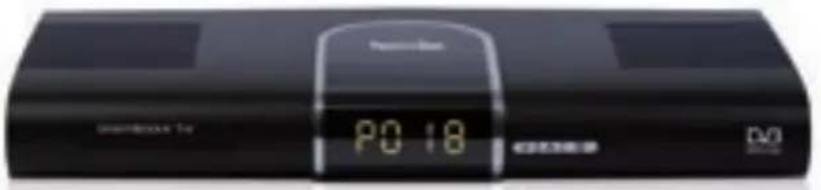
Display:
LED: 4-character, 7-segment display
Number of programmes:
Complete list for
TV/radio: The complete list can hold a total of 1,000 programmes
Timer:
Events: A maximum of 8 events
Remote control
system: RC-5
Subsystem address: 8 (SAT 1)
Modulation frequency: 36 kHz
Infrared wavelength: 950 nm
Power supply adapter:
Type: Switching power supply
Input voltage: 180 V to 250 V/50 Hz AC voltage
Rated input voltage: 230 V/50 Hz AC voltage
Output voltage: 12 V/1 A (power supply adapter)
General
Dimensions (W x D x H): 295 mm x 135 mm x 45 mm
Weight: Approx. 460 g
11 Troubleshooting
| Error Possible | reason Remedy | |
| Some programmes are not displayed in the programme list | The wrong programme list was selected | Choose a different programme list (see section 7.2.3.1) |
| Sound is okay, but no picture Radio mode is activated Switch to TV mode | ||
| Device cannot be operated Bad data stream-->Device is blocked | Remove the mains plug for 5 seconds, then turn the device back on | |
| Remote control does not work Batteries have no more power Replace the batteries | ||
| Rectangular blocks occasionally appear on the screen. The picture freezes sometimes, with no sound. The screen temporarily goes black and the message “No signal” appears on the screen. | Antenna is not properly adjusted Re-adjust the antenna | |
| No signal when using an active antenna | The antenna feed (5 V) is switched off | Switch on the antenna feed (section 6.2.4) |
| No picture or sound, and the LED display is blank | No mains voltage Check the mains connection and connectors | |
| Defective or missing cable connection | Check all cable connections | |
| Antenna is not properly adjusted Re-adjust the antenna | ||
| Some programmes are no longer received | Antenna has been moved or is defective | Check the antenna |
| The programme is now broadcast on a different channel | Perform a search (see section 8.3) | |
| The programme is no longer broadcast | None | |
For daily use
Switching on/off
Switch on the digital receiver by pressing the On/Standby button on the device or remote control.
Press this button again to switch the device off.
Programme selection
Using the programme up/down buttons
Use the PROG +/- buttons on the device or remote control to move up/down one programme position at a time.
Using the number buttons
Use the number buttons to enter the desired programme number. For example:
1 For programme position 1
1, then 4 For programme position 14
2, then 3, and then 4 For programme position 234
When entering programme numbers with more than one digit, you have approx. 3 seconds after pressing each button to complete entering the number.
Using the programme list
Press the OK button.
You can now use the up/down arrow buttons to highlight the desired programme.
Pressing the OK button will select the highlighted programme.
Use the up/down arrow buttons to move the highlighting up/down one row at a time. Use the left/right arrow buttons to move through the list one page at time.
Volume control
To adjust the volume of your digital receiver, press the Volume + button to increase the volume and the Volume - button to lower it.
Press the Mute button to switch the sound on or off.
Switching between radio and TV
Press the TV/Radio button to switch between TV and radio modes.
TechniSat®
DiGYBOXX T4
Assistance technique
+49 (0) 180-5005-907*
natural_image
Illustration of a closed book with a cross symbol on the cover (no text or symbols present)MPEG-4 HE AAC Level 4, version 1 (ISO/IEC 14496-3)
natural_image
Simple line drawing of a rectangular electronic device with a black top and white base, no text or symbols present.4.1 Unidad exterior
bar
Antenna adjustment Please attach an antenna line, check a channel in your transmittent range and adjust the antenna in such a way that the signal strength and quality assurance a threshold level. Channel: 930 (948); Signal level: 91 Signal quality: 11 Proceed: Cancel: Green Output: Yellowbar
| Channel | Value (%) | |---|---| | Signal level | 31 | | Signal quality | 14 |bar
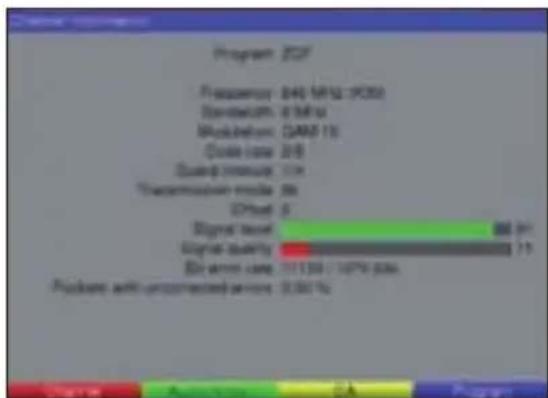
| Program | Frequency | |---|---| | Frequency | 140 MHz (P200) | | Bandwidth | 0.5 MHz | | Modulation | QAM-10 | | Close rate | 0.9 | | Signal intensity | 1.3 | | Transmax power mode | 0s | | DPHM | 0 | | Signal level | 800 dB | | Signal saturation | 7.5 | | Bin error rate | 111.54 / 109% bits | | Protocol with precorrected action | 6.00% |8.2.2 Cambiar el PIN del receptor (Change receiver PIN)
8.4.1 Recuperar la configuración de fábrica (Restore factory settings)
Conector host USB 2.0
Digital Video Broadcasting
DO DOLBY
DIGITAL
Streaming
1 Índice
1 Índice 152
2 Figuras 155
natural_image
Illustration of a closed electronic device with a black cover and a small cross mark on top (no text or symbols)Saída do tuner: Conector IEC
Active RF loop through
Conector ao host USB 2.0
natural_image
Illustration of a closed electronic device with a black cover and indicator lights (no text or symbols)4.1 Unità esterna
Lingua audio secondaria (Secondary audio language)
Loop through RF attivo
Conforme ad EN 300 744 (DVB Framing structure, channel coding & modulation for DTT)
Soddisfa i requisiti Nordig
Digital Video Broadcasting

DOLBY
DIGITAL
Streaming
1 Περιεχόμενα
1 Περιεχόμενα 252
2 Σχήματα 255
natural_image
Illustration of a rectangular electronic device with a black top and gray base, featuring a small cross mark on the right side (no text or symbols)bar
Antenna adjustment Passive drop-off on antenna level detects a channel of your transmission range and adjusts the antenna in each way that the signal strength and quality matches a minimum level. Channel: 930 (548) Signal level: 91 Signal quality: 17 Proceed: Cancel: Green Buy: Yellowbar
| Category | Value | |---|---| | Signal kernel | 101 | | Signal quality | 14 |8.2.2 Change receiver PIN (Αλλαγή του PIN δέκτη)
natural_image
Illustration of a closed book with a bookmark and a cross mark on the cover (no text or symbols)4.1 Ytre enhet
a Kabelen som kommer fra den terrestriske antennen (takantenne eller romantenne) forbinder du med inngang terrestrisk antenne til mottaker.
Som antenne bruker du en takantenne, hvis det er mulig. Ved gunstige mottaksforhold kan det eventuelt også være tilstrekkelig med en romantenne. Ved bruk av en aktiv antenne må antennematingen slås på (punkt 6.2.4).
6.2 Grunninnstillinger
1 for programclass 1
1, så 4 for programplass 14
2, så 3, så 4 for programplass 234
bar
| Category | Value | |---|---| | Proteins | 545 MHz (KHz) | | Biosynthesis | 6 MHz | | Metabolism | QAMF-18 | | Oxide-rich | 329 | | Metabolism-related | 1.4 | | Transmembrane protein | 86 | | Difusol | 9 | | Glycine | 100 Hz | | Biomethylation | 100 Hz | | Biotransferase | 80 MHz | | Metabolism-related protein (BET) | 0.001 % | Figure: Progress - reactivity Balance - Change in DIA - ProgressMed numerisk tastatur tastes apparatets aktuelle PIN-kode inn. (fabrikkinnstilling 0000)
Tast inn ønsket ny PIN-kode med numerisk tastatur.
Gjenta inntastingen.
Etter at du har endret PIN-koden på denne måten, kommer du automatisk tilbake til menyen barnesikring.
OBS!
8.4.1 Gjenopprett standardinnstillinger
1 for programclass 1
1, så 4 for programplass 14
2, så 3, så 4 for programplass 234
natural_image
Illustration of a closed book with a cross mark on the right page (no text or symbols visible)Active RF loop through
(indgangssignal)
Antenneforsyning: 5 V/0, 03 A
Terrestrial Frontend:
Transport Stream Demultiplexing:
100 Mbit/s 1394 data-udgang (maks.)
48 universale SI/PSI-filtre
Decodere:
MPEG4/AVC-video-decoder high profile niveau 4.1
MPEG2 video-decoder MP@HL 4:3 og 16:9 in PAL, letterbox og pan-scan.
natural_image
Illustration of a rectangular electronic device with a black top and gray base, featuring a small cross mark on the right side (no text or symbols)4.1 Utomhusenhet
Digital Video Broadcasting

DOLBY
DIGITAL
Streaming
1 Sisällysluettelo
natural_image
Illustration of a closed book with a black cover and a small cross mark on the cover (no text or symbols)Digital Video Broadcasting

DOLBY
DIGITAL
Streaming
1 Sisukord
1 Sisukord 502
2 Joonised 505
6.3 Audio/Video settings (Audio/video seaded) 518
6.5 Antenna adjustment (Antenni reguleerimine)....521
7 Kasutamine....522
8.2.2 Change receiver PIN (Muuda ressiiveri PINi) 537
8.2.3 Menu lock (Menüü lukk)....538
8.2.4 Age limit (Vanusepiirang) 538
8.3 Programmiotsing 538
8.3.1 Automatic Search (Automaatotsing) 539
8.3.2 Manual Search (Käsiotsing) 539
8.4 Service settings (Hooldusseaded) 540
8.4.1 Restore factory settings (Taasta tehaseseaded) 541
8.4.2 Delete all channels (Kustuta köik kanalid)....541
8.4.3 Update software (Tarkvara värskendamine) 542
8.5 System configuration (Süsteemi seaded) 542
9 Tehnilised terminid. 543
10 Tehnilised andmed .... 5 4 5
11 Törkeotsing....548
natural_image
Illustration of a rectangular electronic device with a black top and gray base, no visible text or symbols.4.1 Välisseade
Basic setup (Põhiseaded)
bar
Antenna adjustment Please update an antenna mode, check a channel of signal transmittance range and update the antenna size to say that the signal strength and quality measure is maximum level. Channel: K30 ($48) → K11 Signal level: 91 Signal quality: 11 Processed: Cancel: - (-) - (-) - (-)6.2 Basic settings (Põhiseaded)
6.3 Audio/Video settings (Audio/video seaded)
Secondary audio language (Heli teisene keel)
bar
| Channel | Value (k) | |---|---| | Signal kernel | 31 | | Signal quality | 14 |8.2.2 Change receiver PIN (Muuda ressiiveri PINi)
Lülitage menu lock (Menüü lukk) sellel real paremale/vasakule-nooleklahvide abil sisse/välja (on/off).
8.2.4 Age limit (Vanusepiirang)
8.4 Service settings (Hooldusseaded)
8.4.1 Restore factory settings (Taasta tehaseseaded)
Active RF loop through
Antennitoide: 5 V / 0,03 A
Digital Video Broadcasting

DOLBY
DIGITAL
Streaming
1 Turinys
1 Turinys 552
natural_image
Illustration of a closed book with a black cover and a small cross mark on the right page (no text or symbols)4.1 Išorinis blokas
Digital Video Broadcasting
DO DOLBY
DIGITAL
Streaming
1 Satura rādītājs
natural_image
Illustration of a closed book with a bookmark and a small cross mark on the cover (no text or symbols)4.1 Ārējā ierīce
bar
| Category | Value (%) | |---|---| | Energy Consumption | 80 | | Energy Expenditure | 77 | | Energy Investment | 100 | | Other | 239 |Programmēšanu veiciet sekojoši:
Avots
Digital Video Broadcasting
DO DOLBY
DIGITAL
Streaming
1 Kazalo
1 Kazalo 652
2 Slike 655
3 Najprej preberite 658
3.1 Pomembna navodila za upravljanje....658
natural_image
Illustration of a rectangular electronic device with a black top and a small cross mark on the right side (no text or symbols)4.1 Zunanja enota
S smernima tipkama gor/dol označite vrstico Format zaslona ter s smernima tipkama desno/levo nastavite format zaslona 16:9 ali 4:3.
Za aktiviranje napajanja antene označite vrstico napajanje antene, 5V ter s smernima tipkama desno/levo nastavite napajanje na vklop ali izklop.
S smernima tipkama gor/dol označite vrstico Nadaljuj ter se s pritiskom na V redu pomaknete do točke Prilagoditev antene.
Prilagoditev antene
S pritiskom na V redu potrdite namig in preklopite v normalno delovanje.
6 Nastavitve
for storage issues: hambia
Za prevzem prikazanih podatkov v časovnik pritisnite rumeno funkcijsko tipko Potrdi.
Pozor!
S smernima tipkama desno/levo nastavite sprejemni kanal, na katerem želite iskati programe.
S pritiskom na rdečo funkcijsko tipko Začni iskanje zaženite postopek samodejnega iskanja.
8.3.3 Po samodejnem iskanju
Digital Video Broadcasting

DOLBY
DIGITAL
Streaming
1 Tartalomjegyzék
7.2.1 A program fel/le gombbal....722
natural_image
Isometric view of a rectangular electronic device with a black top and gray base, no visible text or symbols.4.1 Kültéri egység
Transport Stream Demultiplexing:
100 Mbit/s 1394 adatkimenet (maximum)
MPEG-4 HE AAC Level 4, version 1 (ISO/IEC 14496-3)
bővített AC3 („Dolby Digital Plus“) (ETSI TS 102 366)
A program fel/le gombbal
Digital Video Broadcasting
DO DOLBY
DIGITAL
Streaming
1 Spis treści
natural_image
Illustration of a closed book with a black cover and a small cross mark on the right page (no text or symbols)4.1 Antena
14 Water change Services
Przyciski i diody LED
natural_image
Illustration of a closed electronic device with a black cover and a small cross mark on top (no text or symbols)4.3 Video recorder (VCR)
Intrare tuner: Mufă IEC
Digital Video Broadcasting

DOLBY
DIGITAL
Streaming
1 Оглавление
1 Оглавление 852
natural_image
Illustration of a closed book with a black cover and a small cross mark on the right page (no text or symbols)bar
Antenna adjustment Please attach an antenna line, select a channel to your device/reconnect range and adjust the antennas in case is easy that the signal strength and quality reaches a minimum level. Channel: 930 (9481) Signal level: 91 Signal quality: 11 Processed Cancelbar
| Category | Value | |---|---| | Signal level | 30 | | Signal quality | 14 |

- Operating Instructions
- Table of Contents
- Changing the Basic Program Settings....3 3
- Technical Terms 43
- Dear customer,
- Please Read Before Operation
- Important notes for use
- Help:
- Disposal instructions
- Safety instructions
- You should disconnect the device from the mains and contact a technician in the following cases:
- Breaks in operation
- Connecting the DVB Receiver
- Outdoor unit
- Connection to a television set
- Via HDMI cable
- Via SCART cable
- Via RF cable
- Video recorder (VCR)
- Hi-fi amplifier
- Analogue
- Digital
- Mains connection
- Initial installation
- Menu language
- Country adjustment
- Basic setup
- Antenna adjustment
- Channel search
- Software update
- Exiting the installation wizard
- Settings
- Menu language
- Basic settings
- Country
- Time offset selection
- automatic
- manual
- GMT time offset (hrs.)
- Antenna feed 5 V
- Automatic standby
- Audio/Video settings
- HDMI resolution
- Display format
- Picture format
- HDCP
- Audio delay
- Digital audio
- Digital volume adjustment
- Language settings
- Primary audio language
- Secondary audio language
- Primary subtitling language
- Secondary subtitling language
- Subtitling mode
- Antenna adjustment
- Operation
- Switching on/off
- Programme selection
- Using the programme up/down buttons
- Using the number buttons
- Using the navigator (programme list)
- Selecting a list
- Accessing blocked programmes
- Infobox
- Volume control
- Switching between TV and radio
- Selecting a different language (TV mode) or station (radio mode)
- Returning to the previously selected programme
- Displaying clock and programme information
- ) ### ######
- Additional programme information
- Channel information
- Teletext
- Using your television set's teletext decoder
- Using the internal teletext decoder
- Subtitles
- Electronic programme guide (EPG)
- Opening the electronic programme guide
- Timer
- Note:
- Exiting the EPG
- Timer recordings
- Manually programming the timer
- Source
- Date
- Start
- Stop
- Rpt
- Copying the data to the memory
- Timer overview
- Changing programmed timer events
- Deleting programmed timer events
- Programming a new timer event
- Cancelling a timer operation
- Changing the Basic Program Settings
- Configuring the favourites list
- Opening the programme list management
- Adding programmes to the favourites list
- Deleting programmes (removing them from the favourites list)
- Sorting programmes
- Parental settings
- Select channels
- Change receiver PIN
- Caution:
- Menu lock
- Age limit
- Programme search
- Automatic search
- Manual search
- Automatic search
- Manual search
- After the search is complete
- Service settings
- Restore factory settings
- Delete all channels
- Update software
- Do not interrupt the update process (for example, by switching the device on/off).
- System configuration
- Technical Terms
- Antenna cable:
- Channel:
- Coaxial cable:
- DTT receiver (also known as DVB-T):
- DVB:
- Frequency:
- HDCP:
- HDMI:
- Mode:
- MPEG1/MPEG2 data compression:
- OSD:
- PID:
- Receiver:
- SCART:
- Software update:
- Technical Data
- DTT tuner
- Terrestrial frontend;
- Transport stream demultiplexing:
- Decoders:
- Digital audio output:
- Analogue audio output
- Audio output:
- USB interface:
- Connectors:
- Front panel:
- Power supply:
- Environmental conditions:
- Teletext:
- Display:
- Number of programmes:
- Timer:
- Remote control
- Power supply adapter:
- General
- For daily use
- Switching on/off
- Programme selection
- Using the programme up/down buttons
- Using the number buttons
- Using the programme list
- Volume control
- Switching between radio and TV
- TechniSat®
- DiGYBOXX T4
- Unidad exterior
- Cambiar el PIN del receptor (Change receiver PIN)
- Recuperar la configuración de fábrica (Restore factory settings)
- Índice
- Unità esterna
- Lingua audio secondaria (Secondary audio language)
- Περιεχόμενα
- Περιεχόμενα 252
- Σχήματα 255
- Change receiver PIN (Αλλαγή του PIN δέκτη)
- Ytre enhet
- Grunninnstillinger
- OBS!
- Gjenopprett standardinnstillinger
- Terrestrial Frontend:
- Decodere:
- Utomhusenhet
- Sisällysluettelo
- Sisukord
- Tehnilised terminid. 543
- Välisseade
- Basic setup (Põhiseaded)
- Basic settings (Põhiseaded)
- Audio/Video settings (Audio/video seaded)
- Secondary audio language (Heli teisene keel)
- Change receiver PIN (Muuda ressiiveri PINi)
- Age limit (Vanusepiirang)
- Service settings (Hooldusseaded)
- Restore factory settings (Taasta tehaseseaded)
- Turinys
- Išorinis blokas
- Satura rādītājs
- Ārējā ierīce
- Avots
- Kazalo
- Zunanja enota
- Prilagoditev antene
- Nastavitve
- Pozor!
- Po samodejnem iskanju
- Tartalomjegyzék
- Kültéri egység
- A program fel/le gombbal
- Spis treści
- Antena
- 2001
- 500
- 1000000
- Russian
- Оглавление
Brand : TECHNISAT
Model : DiGYBOXX T4
Category : Digital decoder