
SM6580/00 GRANAROMA - Automatic coffee machine SAECO - Free user manual and instructions
Find the device manual for free SM6580/00 GRANAROMA SAECO in PDF.




| Product type | Automatic coffee machine with grinder |
| Brand | Saeco |
| Model | SM6580/00 GRANAROMA |
| Dimensions (W x H x D) | 262 x 383 x 448 mm |
| Weight | 8 to 8.5 kg |
| Power cord length | 120 cm |
| Water tank capacity | 1.8 L |
| Bean hopper capacity | 300 g |
| Coffee grounds bin capacity | 12 servings |
| Milk container capacity | 600 ml |
| Adjustable dispensing spout height | 87 to 147 mm |
| Control panel | Display with icons and arrow navigation |
| Available drinks | Ristretto, Espresso, Long Coffee, Latte Macchiato, Cappuccino, etc. |
| Beverage personalization | CoffeeMaestro taste profile, CoffeeEqualizer, personal profiles |
| Water filter | AquaClean (optional, limescale reduction) |
| Maintenance and cleaning | HygieSteam cleaning, descaling with Philips product, cleaning of the brewing group |
| Descaling | Automatic with Philips solution (approx. 30 minutes) |
| Grind setting | 12 levels, dial in the bean hopper |
| Additional functions | ExtraShot, hot water, 2-cup preparation, travel mug |
| Spare parts and repairability | Removable brewing group, parts available at www.philips.com/parts-and-accessories |
| Warranty | Manufacturer's warranty (see manual) |
Frequently Asked Questions - SM6580/00 GRANAROMA SAECO
User questions about SM6580/00 GRANAROMA SAECO
0 question about this device. Answer the ones you know or ask your own.
Ask a new question about this device
Download the instructions for your Automatic coffee machine in PDF format for free! Find your manual SM6580/00 GRANAROMA - SAECO and take your electronic device back in hand. On this page are published all the documents necessary for the use of your device. SM6580/00 GRANAROMA by SAECO.
USER MANUAL SM6580/00 GRANAROMA SAECO
Machine overview (Fig. A) 6 Control panel 6 Introduction 7 Before first use 7 Brewing drinks 8 Personalizing drinks 9 Adjusting machine settings 11 AquaClean water filter 12 Removing and inserting the brew group 13 Cleaning and maintenance 13 Descaling procedure 16 Error codes 17 Ordering accessories 18 Troubleshooting 18 Technical specifications 22
Machine overview (Fig. A)
| A1 Control panel | A11 Mains cord with plug |
| A2 Lid of pre-ground coffee compartment | A12 Grind setting knob |
| A3 Lid of bean hopper | A13 Bean hopper |
| A4 Socket for cord | A14 Brew group |
| A5 Drip tray | A15 Service door |
| A6 Drip tray release grip | A16 Water tank |
| A7 Adjustable coffee and milk dispensing spout | A17 Coffee grounds container |
| A8 HygieSteam container | A18 Front panel of coffee grounds container |
| A9 HygieSteam cover with milk tube holder | A19 Drip tray cover |
| A10 Internal cappuccinatore | A20 'Drip tray full' indicator |
Accessories
A21 Milk container A22 Milk tube A23 Grease tube
A24 AquaClean filter A25 Measuring scoop A26 Water hardness test strip
Control panel
There are two versions of this espresso machine. Their control panels look different, but all buttons and icons work in the same way. Refer to figure B for an overview of all buttons and icons. Below you find the description.
Use the up and down arrows to scroll through the display and tap the OK icon to select or confirm your choices.
B1 On/off button B3 CoffeeMaestro icon B2 One-touch drink icons B4 Menu with more drinks
B5 Start/stop▶ button
B6 Navigation icons (up, down, back, ok)
B7 Display
B8 Machine settings
B9 Cleaning menu
B10 Personal profiles
Introduction
Congratulations on your purchase of a Saeco full-automatic coffee machine! To fully benefit from the online support that Saeco offers, go to www.philips.com/MyCoffeeMachine and register your product.
Note: This machine has been tested with coffee. Although it has been carefully cleaned, there may be some coffee residues left. We guarantee, however, that the machine is absolutely new.
Before first use
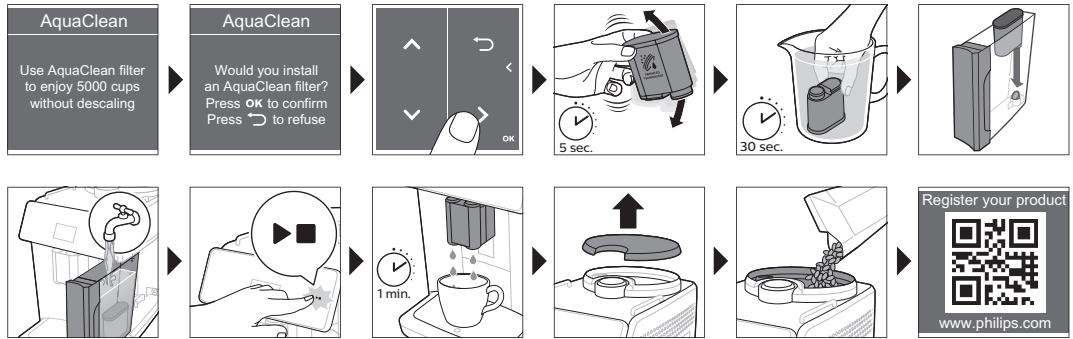
Brewing drinks
General steps
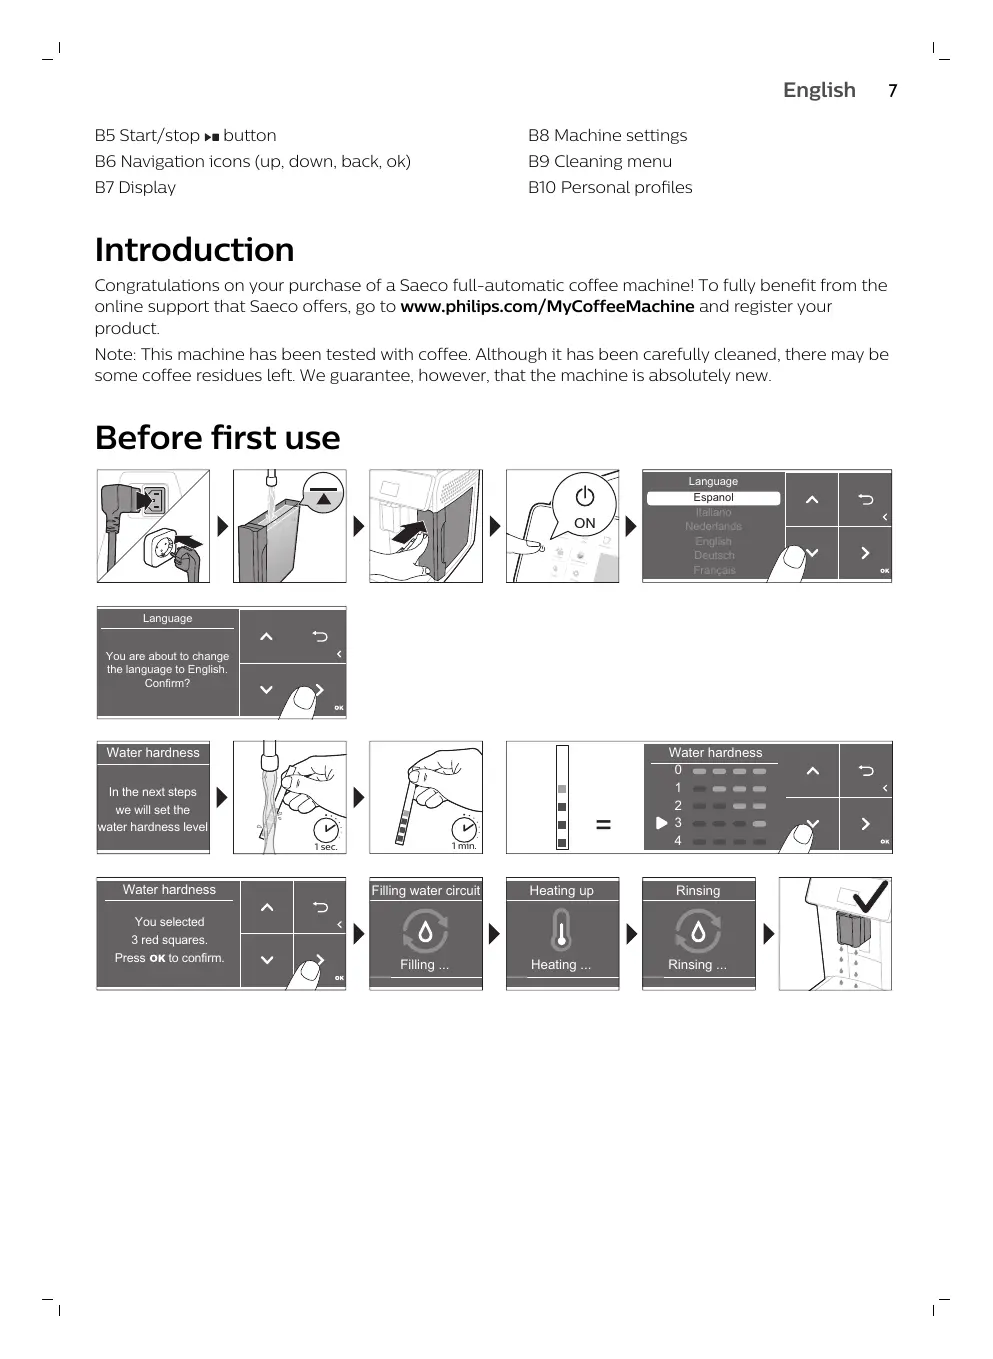
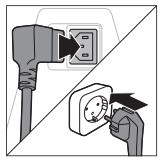
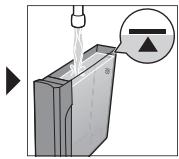
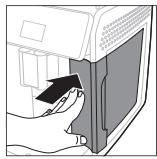
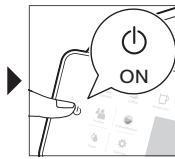
1 Fill the water tank with tap water and fill the bean hopper with coffee beans. 2 Insert the small plug into the socket located on the back of the machine. Insert the mains plug into the wall socket. 3 Press the on/off button to switch on the machine.
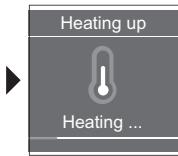
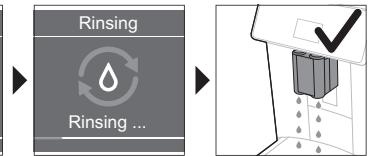
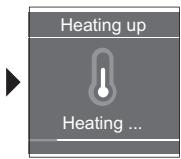
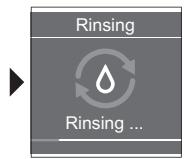
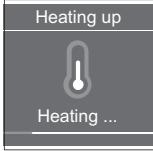
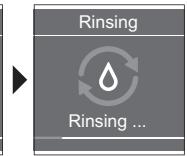
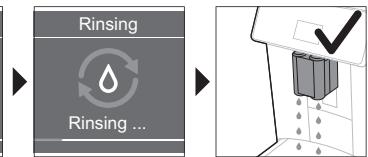
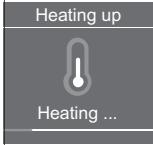
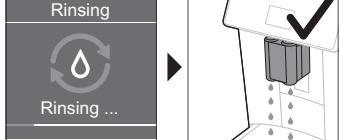
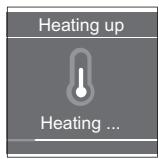
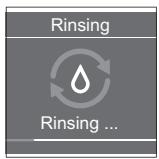
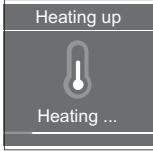
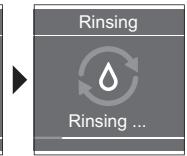
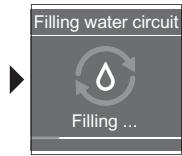
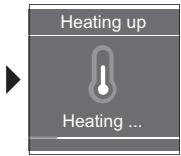
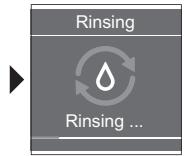
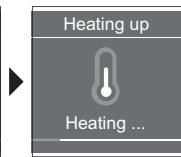
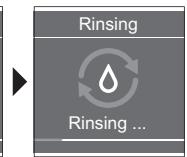
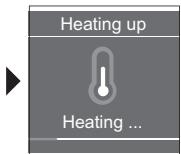
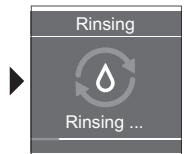
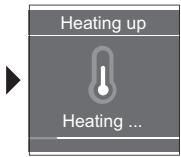
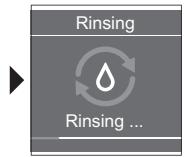
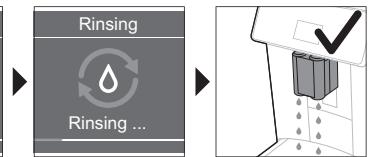
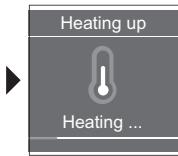
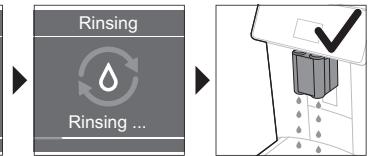
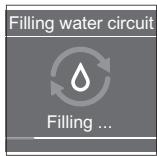
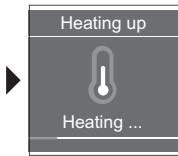
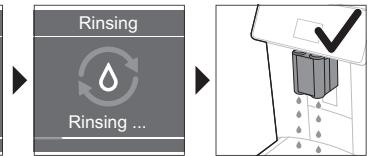
- The machine starts heating up and performs the automatic rinsing cycle.
- When all lights in the drink icons light up continuously, the machine is ready for use.
4 Place a cup under the coffee dispensing spout. Slide the coffee dispensing spout up or down to adjust its height to the size of the cup or glass you are using (Fig. 1).
Brewing coffee with beans
1 To brew a coffee, tap the drink icon of your choice (Fig. 2) or tap the 'More Drinks' icon (Fig. 3). - You can now adjust the drink to your personal taste (Fig. 4). Use the up and down arrows (Fig. 5) to adjust the coffee strength. Tap the OK icon if you want to adjust more settings (Fig. 6). 2 Press the start/stop ▸ button at any time to start brewing the selected drink. 3 To stop dispensing coffee before the machine is finished, press the start/stop ▸ button again.
To brew 2 coffees at the same time, tap the drink icon twice or select the 2x icon scrolling the dedicated bar.
A Do not use caramelized or flavored coffee beans.
Brewing milk-based drinks
1 Fill the water tank with tap water and fill the bean hopper with beans. 2 Unscrew the lid of the milk container and fill the milk container with milk (Fig. 7). Then place the metal milk tube in the container.
Always use milk coming directly from the fridge for optimal results.
3 Connect the flexible milk tube to the cappuccinatore (Fig. 8). 4 Tap the milk-based drink icon of your choice (Fig. 9) or tap the 'More Drinks' icon to select a different drink (Fig. 3).
- You can now adjust the drink to your own preference (Fig. 10).
5 Press the start/stop ▶ button.
- For specific drinks, the machine first dispenses milk and then coffee. For a number of other drinks this is the other way around, the machine will first dispense coffee and then milk.
- To stop dispensing milk before the machine has dispensed the preset amount, press the start/stop ▶ button.
6 To stop dispensing the complete drink (milk and coffee) before the machine is finished, press and hold the start/stop ▶ button. 7 Directly after dispensing the milk, the 'HygieSteam Shot' is performed. The machine forces steam through the internal milk system to rinse it quickly.
Brewing coffee with pre-ground coffee
1 Tilt the lid and pour one measuring scoop of pre-ground coffee into the pre-ground coffee compartment (Fig. 11). 2 After selecting a drink, use the up and down arrows to select pre-ground coffee (Fig. 12). Then press the start/stop ▶ button.
Note: If you select pre-ground coffee, you cannot adjust the coffee strength and/or brew more than one drink at the same time.
Dispensing hot water
1 Make sure that the internal cappuccinatore is properly attached to the machine (Fig. 13). 2 Place a cup under the spout. 3 Tap the 'More drinks' icon (Fig. 3) and scroll down to select 'Hot Water'. 4 Use the up and down arrows to adjust the hot water quantity or temperature to your preference (Fig. 14). 5 Press the start/stop ▶ button. 6 To stop dispensing hot water before the machine is finished, press the start/stop ▶ button again.
Personalizing drinks
The machine allows you to adjust the settings of a drink to your own preference and to store the adjusted drink in a personal profile. The different profiles have different colors.
Brewing drinks with CoffeeMaestro function
Your machine offers the possibility to select taste profiles instead of adjusting all settings separately with the CoffeeEqualizer function. You can choose between Delicato, Intenso and Forte. To select a CoffeeMaestro taste profile:
1 Tap the drink icon of your choice (Fig. 2) or tap the 'More Drinks' icon to select a different drink (Fig. 3). 2 Tap the CoffeeMaestro icon repeatedly (Fig. 15). 3 Press OK to confirm your choice.
The main settings of the drink are now adjusted accordingly.
4 Press the start/stop button to start brewing the drink.
CoffeeEqualizer function
After selecting a drink, the CoffeeEqualizer function is activated automatically. You can use the up and down arrows to adjust the following settings:

1 Aroma strength 2 Coffee quantity 3 Milk quantity 4 Water quantity
5 Drink temperature 6 Foam amount 7 You can also decide to prepare 1 or 2 cups 8 Coffee quantity for travel mug (specific types only)
Note: It depends on the drink you choose which settings you can adjust.
Selecting a profile
You can select a profile and store a recipe using the profiles icon.
1 Tap the profiles icon repeatedly to select one of the colored profiles (Fig. 16). All profiles have a different color. 2 Select a drink by tapping one of the one-touch drink icons or by tapping the 'More Drinks' icon. 3 Adjust the drink settings to your favorite taste. 4 Press start/stop button to brew the drink you selected - Your new settings have now been stored in the colored profile you selected.
i You can always restore the factory settings of the machine (see 'Restoring factory settings').
Guest profile
Your machine is equipped with a guest profile. When the guest profile is selected, the profile icon is off. When you select this profile, you can still personalize the settings to your own preference but the recipes you brew will not be stored.
Extra shot (ExtraShot)
Your machine offers you the possibility to add an extra shot of Ristretto to your coffee and milk drinks, for example if you want to have a stronger coffee.
1 Place a cup under the spout. 2 Tap one of the one-touch drinks icons to select a drink (Fig. 2) or tap the 'More Drinks' icon to select a different drink (Fig. 3). 3 Use the up arrow to set the strength to the top level and select the ExtraShot function (Fig. 17). 4 Tap the OK icon if you want to personalize the other settings. Then press the start/stop button to start brewing the drink. 5 To stop dispensing the drink before the machine has finished, press the start/stop button again.
i When you have selected the ExtraShot function, you can only brew one coffee at the time.
Adjusting machine settings
Setting the water hardness
We advise you to adjust the water hardness setting to the water hardness level in your region for optimal performance and a longer lifetime of the machine. This also prevents you from having to descale the machine too often. The default water hardness setting is 4: hard water.
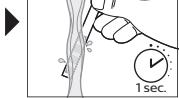
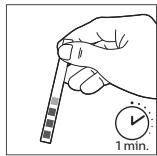
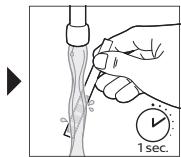
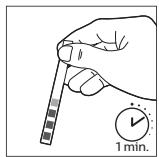
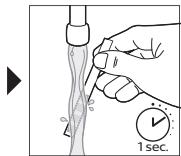
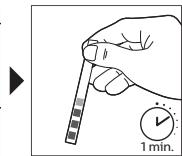
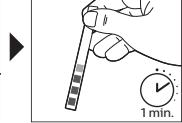
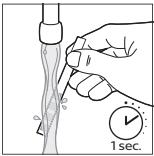
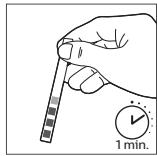
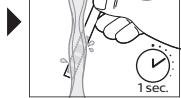
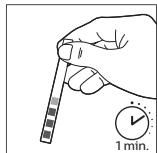
Use the water hardness test strip supplied in the box to determine the water hardness in your region:
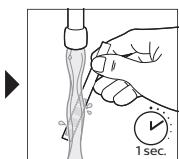
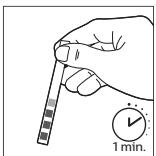
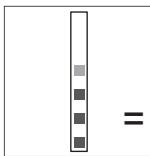
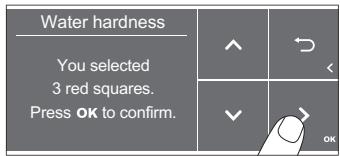
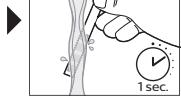
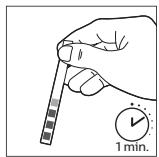
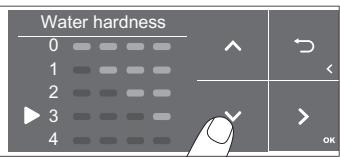
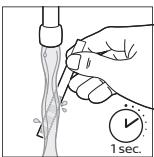
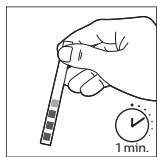
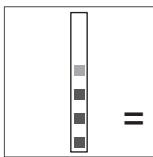
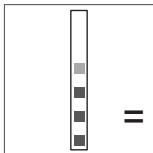
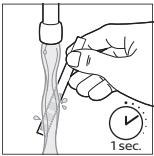
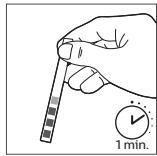
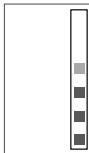
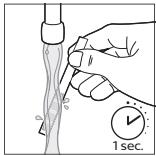
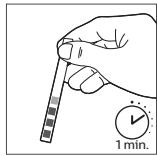
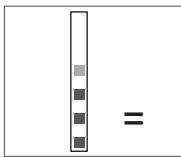
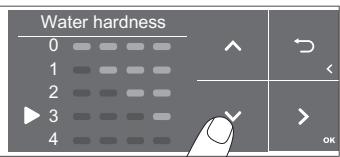
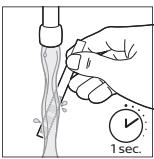
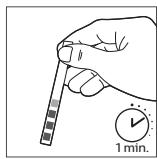
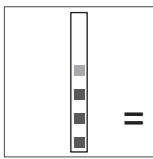
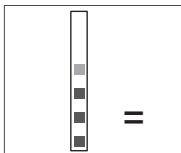
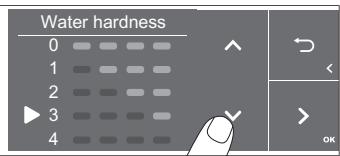
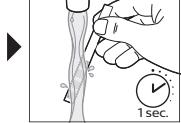
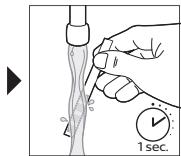
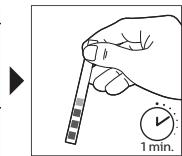
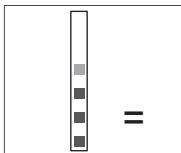
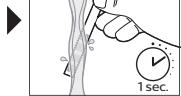
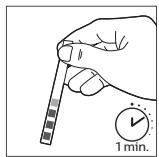
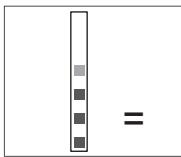
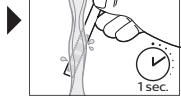
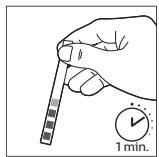
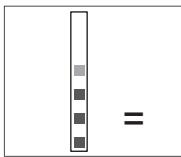
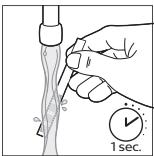
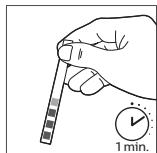
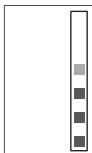
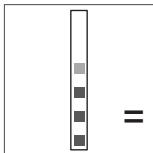
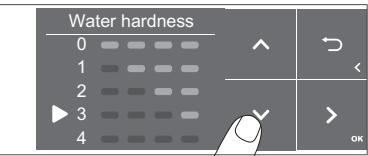
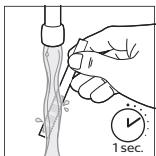
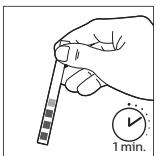
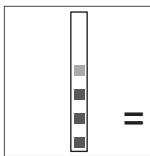
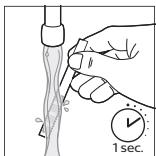
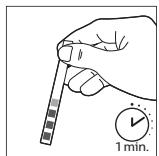
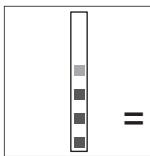
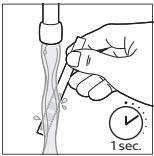
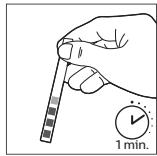
1 Immerse the water hardness test strip in tap water or hold it under the tap for 1 second (Fig. 18). 2 Wait 1 minute. The number of squares on the test strip that turn red indicate the water hardness (Fig. 19).
Set the machine to the correct water hardness:
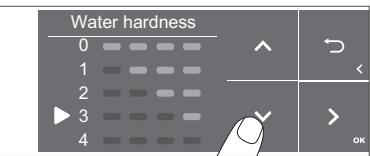
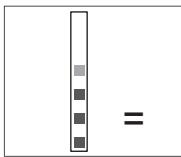
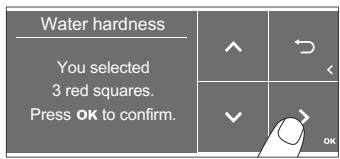
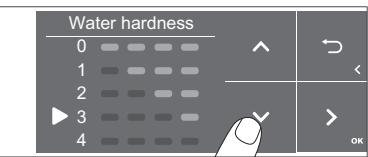
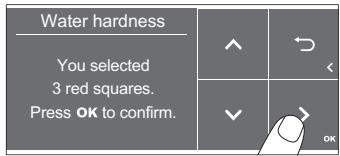
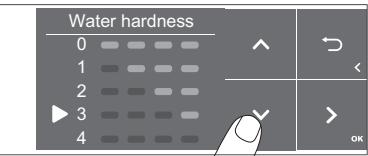
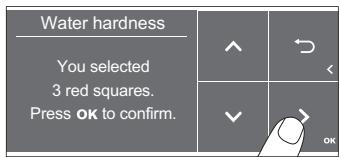
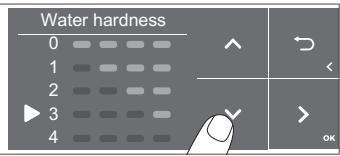
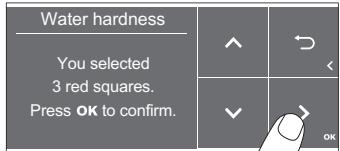
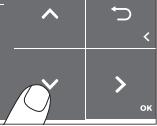
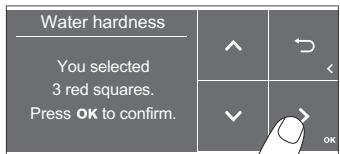
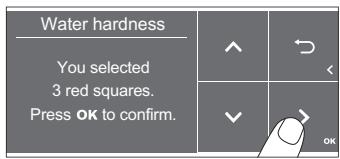
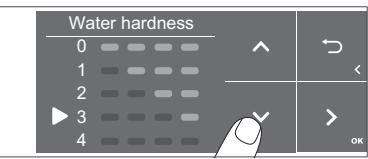
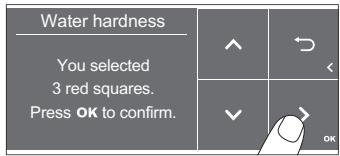
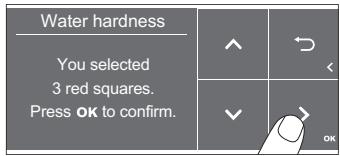
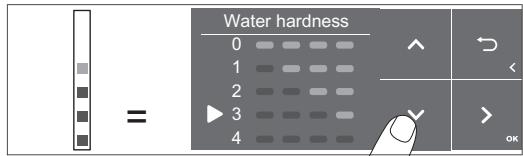
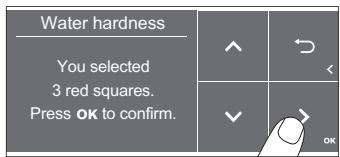
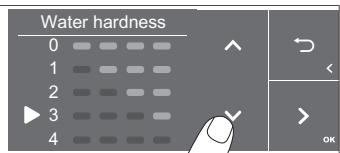
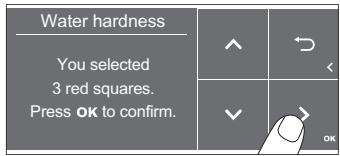
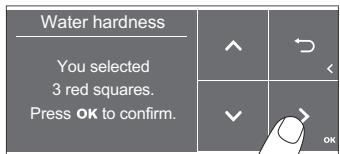
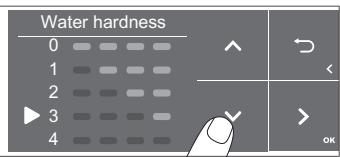
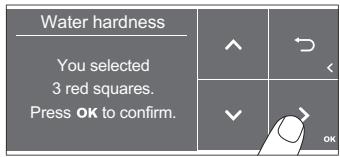
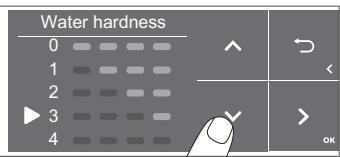
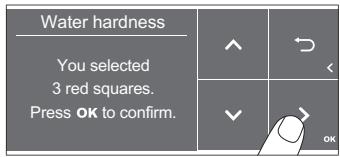
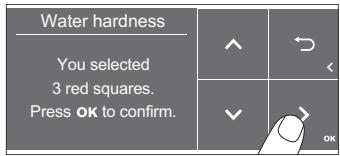
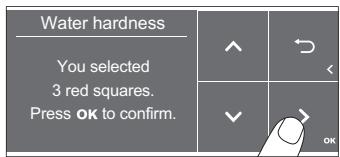
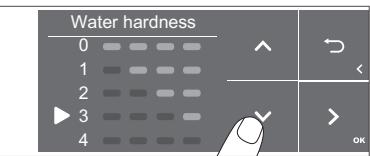
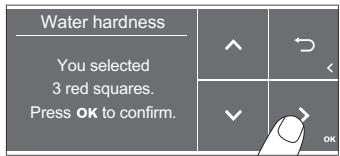
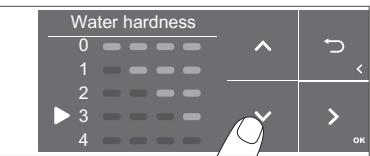
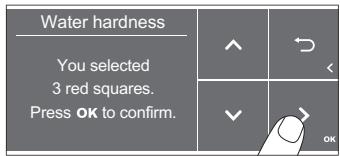
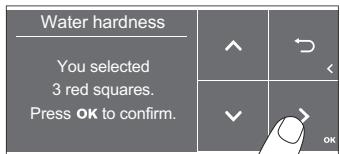
1 Tap the Settings icon and use the up and down arrows to select 'Water hardness'. Then press the OK icon to confirm. 2 Use the up and down arrows to select the water hardness level. The number of red squares selected on the display should be the same as the number of red squares on the test strip (Fig. 20). 3 When you have set the correct water hardness, tap the OK icon to confirm.
Adjusting the grind setting
You can change the coffee strength with the grind setting knob inside the bean container. The lower the grind setting, the finer the coffee beans are ground and the stronger the coffee becomes. There are 12 different grind settings you can choose from.
The machine has been set up to get the best taste out of your coffee beans. Therefore we advise you not to adjust the grind setting until you have brewed 100-150 cups (approx. 1 month of use).
You can only adjust the grind setting when the machine is grinding coffee beans. You need to brew 2 to 3 drinks before you can taste the full difference. Do not turn the grind setting knob more than one notch at a time to prevent damage to the grinder.
1 Place a cup under the coffee dispensing spout. 2 Remove the lid from the coffee bean hopper (Fig. 21). 3 Tap the Espresso icon and then press the start/stop button. 4 When the grinder starts grinding, press down the grind setting knob and turn it to the left or right (Fig. 22).
Adjusting other machine settings
By tapping the Settings icon you can adjust the following machine settings:
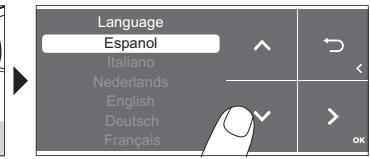
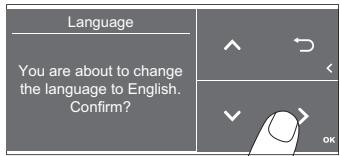
Water hardness: you can choose between 5 levels according to the water hardness in your region. - Standby time: you can select 15, 30, 60 or 180 minutes. Display brightness: you can select low, medium and high. - Language: you can select the display language of your preference. Sound: you can activate or deactivate the beeping sound of the machine. - Front illumination: you can choose 'always on', 'on during brewing' or 'always off'. - Measuring unit: you can choose between ml. or oz.
Restoring factory settings
The machine offers you the possibility to restore the factory settings at any moment.
1 Tap the Settings icon. 2 Use the up and down arrows to select 'Factory settings'. Confirm by tapping the OK icon. 3 Press the start/stop button to confirm that you want to restore the settings.
- The settings are now restored.
The following factory settings are restored to default: water hardness, standby time, display brightness, sound, front illumination, profiles.
Aquaclean water filter
Your machine is AquaClean enabled. You can place the AquaClean water filter in the water tank to preserve the taste of your coffee. It also diminishes the need for descaling by reducing timescale build-up in your machine. You can purchase an AquaClean water filter from your local retailer, from authorized service centers or online at www.philips.com/parts-and-accessories.
Aquaclean filter status indication
When the AquaClean is active, the status of the AquaClean filter is always visible on the screen as a percentage.
- If the status of the AquaClean filter is 10% or less, the screen shows a message for 2 seconds each time you switch on the machine. This message advises you to buy a new filter.
- If the status of the filter is 0%, the machine asks you to replace the AquaClean filter every time you switch on the machine.
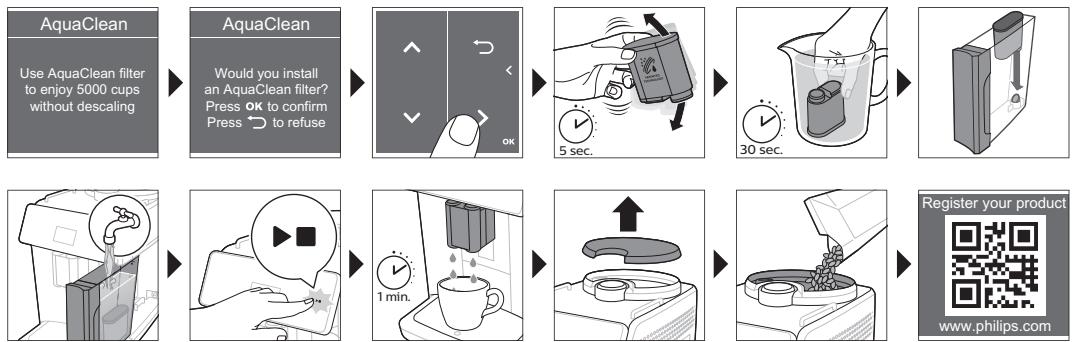
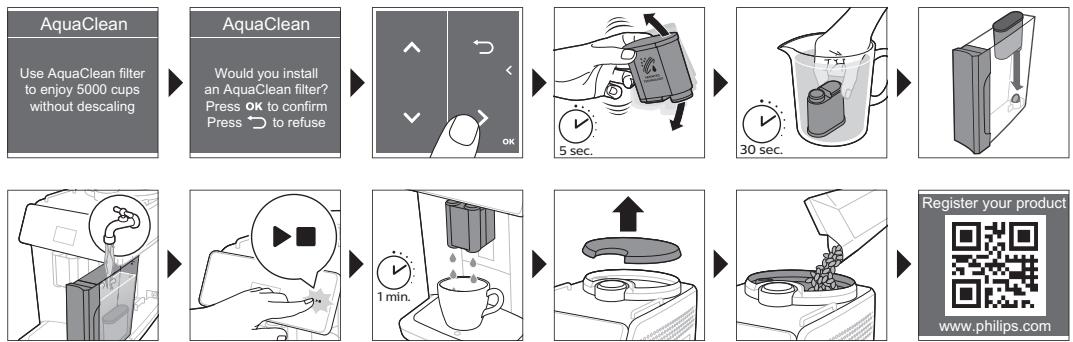
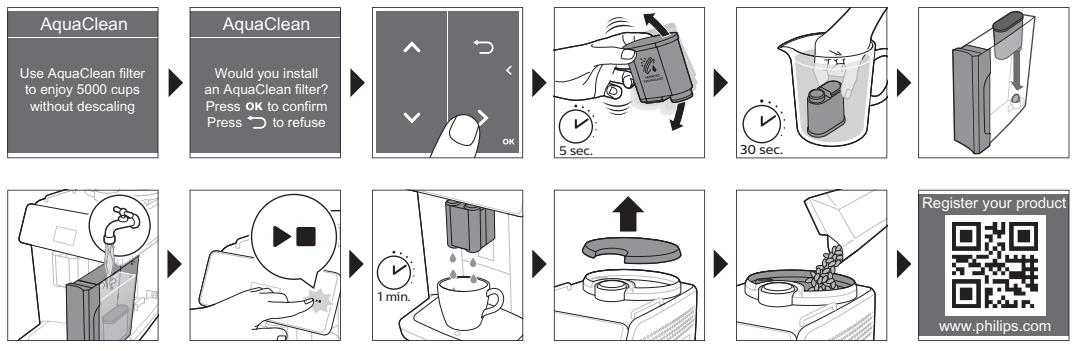
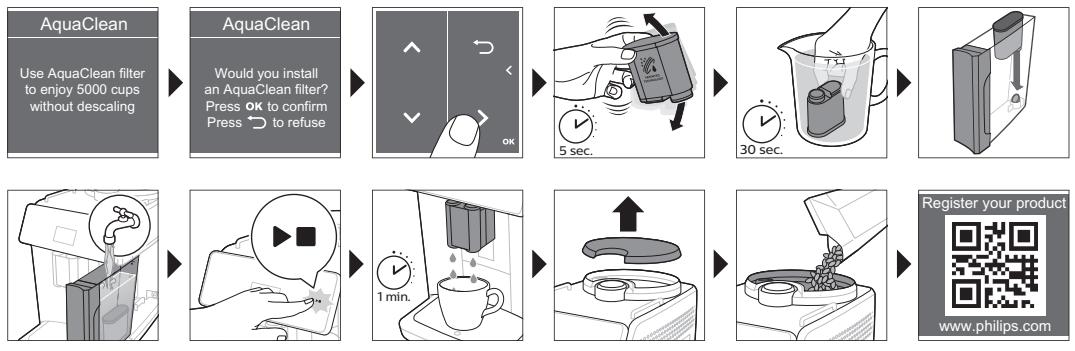
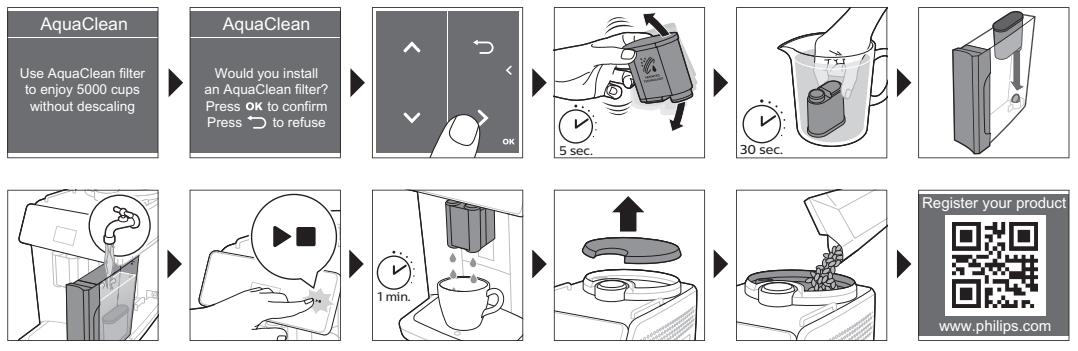
Activating the AquaClean water filter (5 min.)
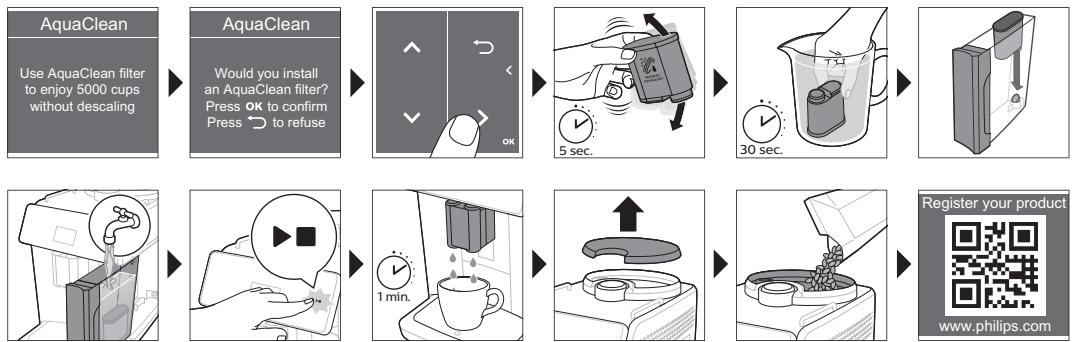
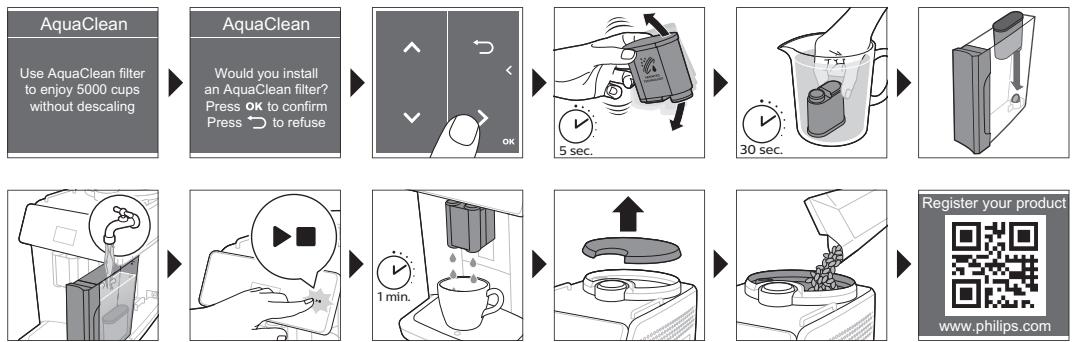
Note: The machine does not automatically detect that a filter has been placed in the water tank. Therefore, you need to activate each new AquaClean water filter that you install in the 'Clean' menu.
When the machine stops showing the filter activation message, you can still activate an AquaClean water filter, but you will need to descale the machine first.
Note: Your machine has to be completely limescale-free before you start using the AquaClean water filter.
Before activating the AquaClean water filter, it has to be prepared by soaking it in water as described below. If you don't do this, air might be drawn into the machine instead of water, which makes a lot of noise and prevents the machine from being able to brew coffee.
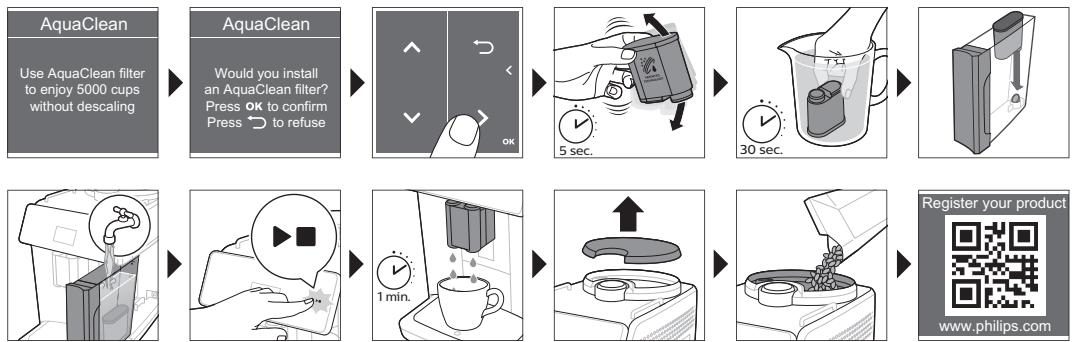
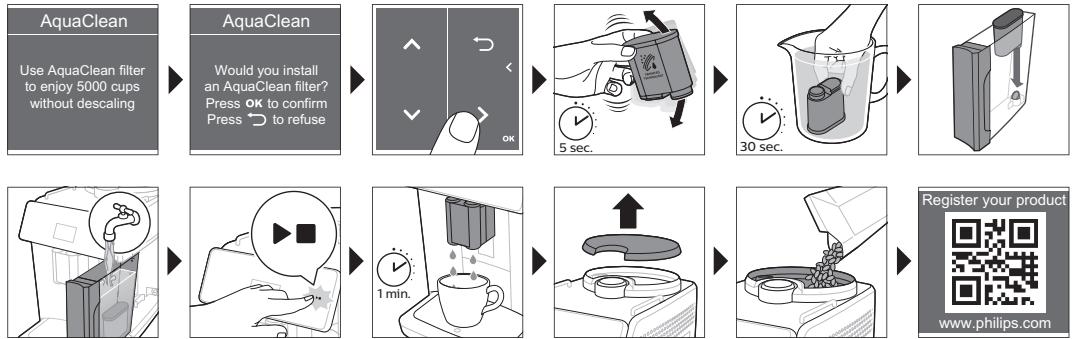
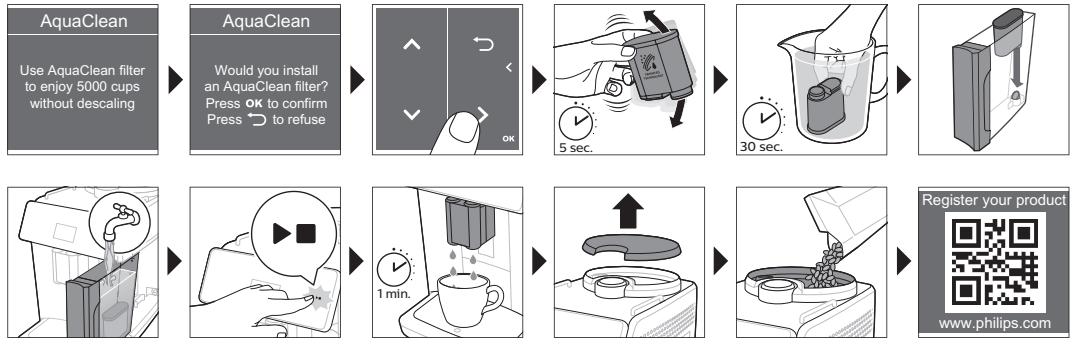
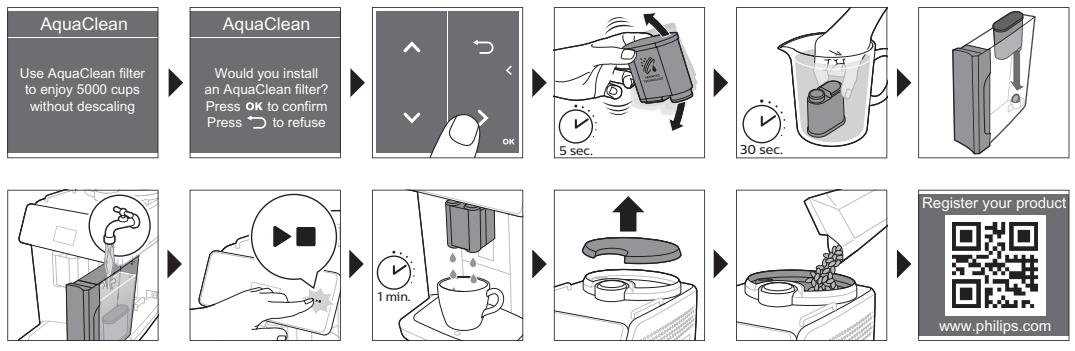
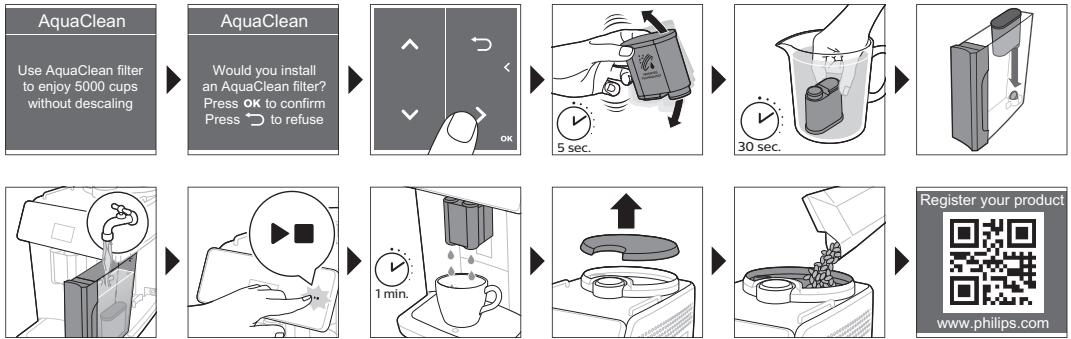
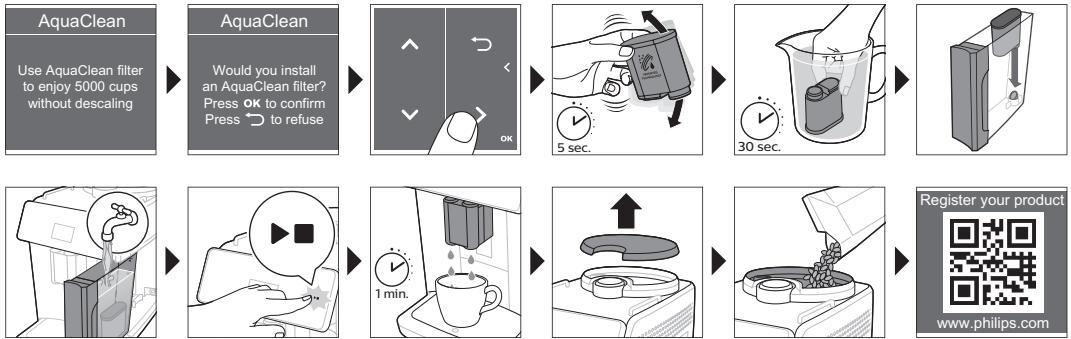
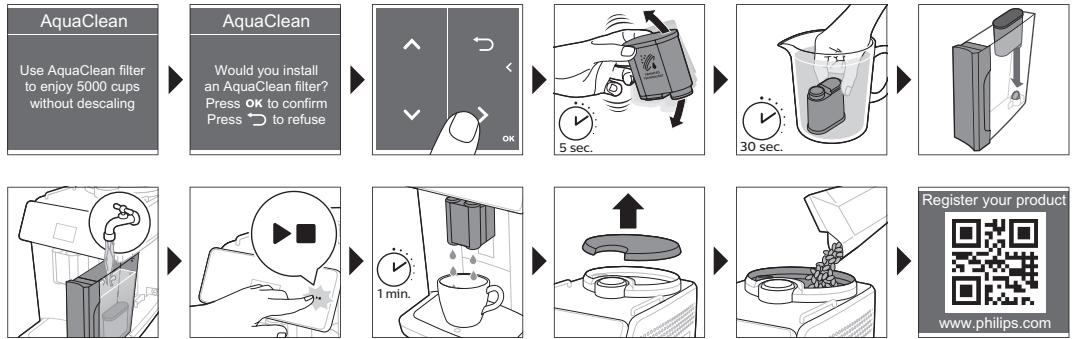
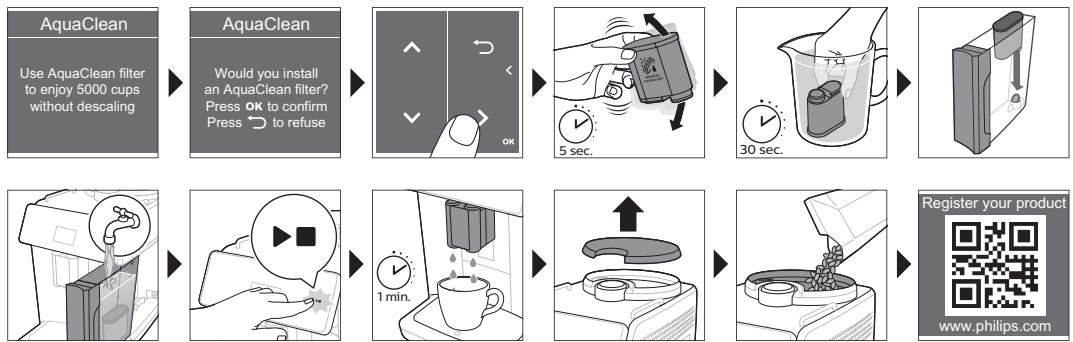
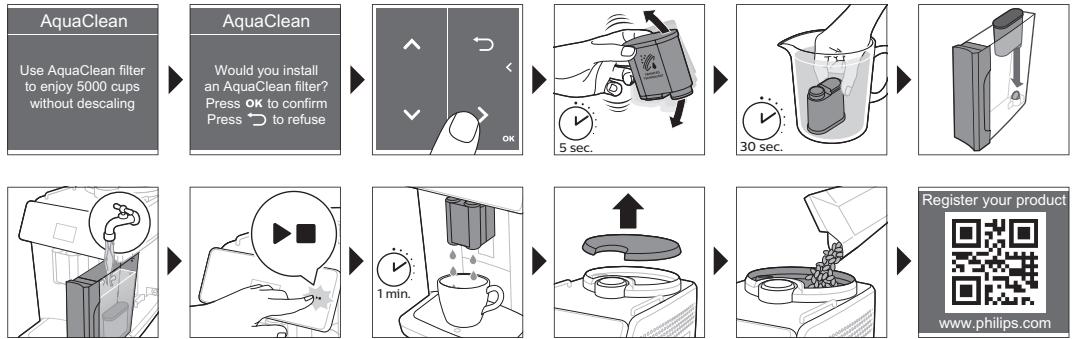
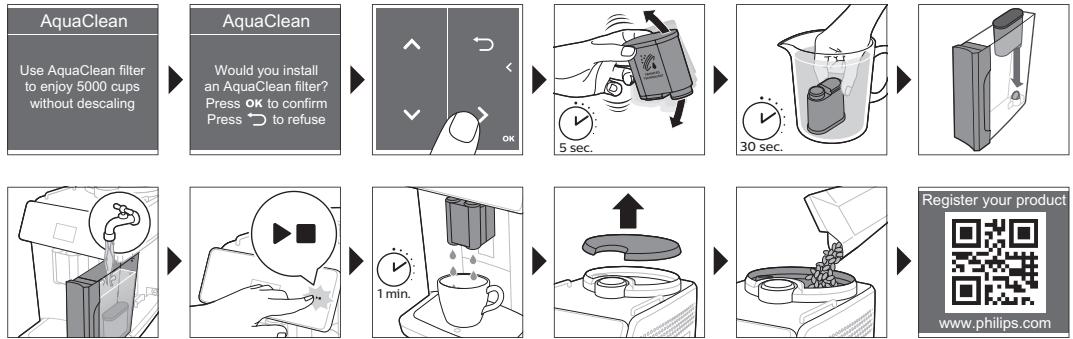
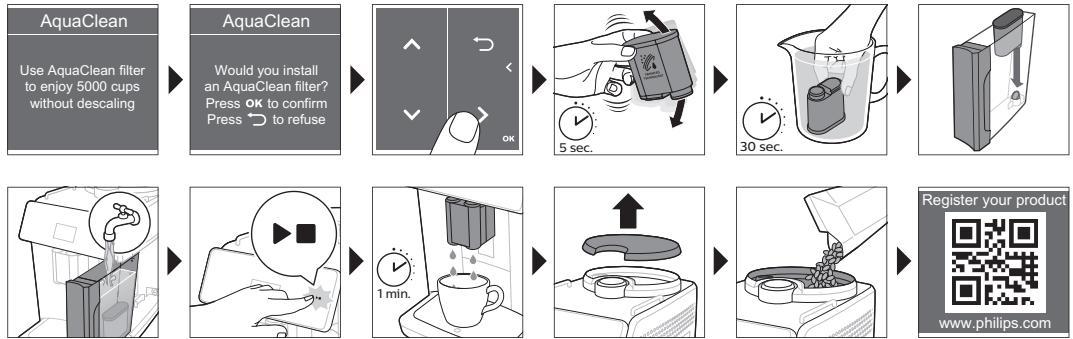
1. Tap the 'Clean' icon and use the up and down arrows to select 'AquaClean'. 2. Tap the OK icon to confirm. 3. Tap the OK icon again when the activation screen appears. Follow the instructions on the screen. 4. Shake the filter for about 5 seconds (Fig. 23). 5. Immerse the filter upside down in a jug with cold water and shake/press it (Fig. 24). 6. Insert the filter vertically onto the filter connection in the water tank. Press it down to the lowest possible point (Fig. 25). 7. Fill the water tank with fresh water and place it back into the machine. 8. Place a bowl under the spout. 9. Press the start/stop button to start the activation process.
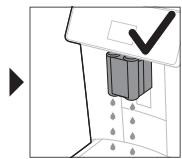
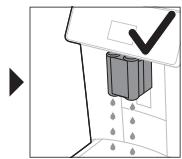
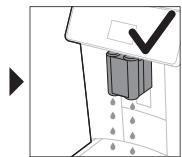
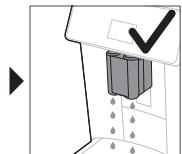
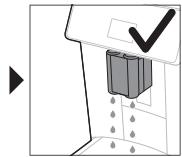
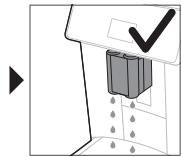
10. Hot water will be dispensed from the spout for 1 minute. 11. The filter is now successfully activated.
Replacing the AquaClean water filter (5 min.)
After 95 liters of water have flowed through the filter, the filter will cease to work. The AquaClean status indicator drops to 0% to remind you to replace the filter. As long as the AquaClean status indicator is shown on the display, you can replace the filter without having to descale the machine first. If you do not replace the AquaClean water filter in time, the AquaClean indicator goes out after some time. In that case, you can still replace the filter but you first need to descale the machine.
When the AquaClean status indicator drops to 0% or when the machine reminds you to replace the AquaClean filter:
1. Take out the old AquaClean water filter. 2. Install a new filter and activate it as described in chapter 'Activating the AquaClean water filter (5 min).'
Note: Replace the AquaClean water filter at least every 3 months, even if the machine does not yet indicate that replacement is required.
Removing and inserting the brew group
Go to www.saeco.com/care for detailed video instructions on how to remove, insert and clean the brew group.
Removing the brew group from the machine
1 Switch off the machine. 2 Remove the water tank and open the service door (Fig. 26). 3 Press the PUSH handle (Fig. 27) and pull at the grip of the brew group to remove it from the machine (Fig. 28).
A When you remove the brew group from the machine, make sure to empty the drip tray and the coffee grounds container.
Reinserting the brew group
Before you slide the brew group back into the machine, make sure it is in the correct position.
1 Check if the brew group is in the correct position. The arrow on the yellow cylinder on the side of the brew group has to be aligned with the black arrow and N (Fig. 29). - If they are not aligned, push down the lever until it is in contact with the base of the brew group (Fig. 30). 2 Slide the brew group back into the machine along the guiding rails on the sides (Fig. 31) until it locks into position with a click (Fig. 32). Do not press the PUSH button. 3 Close the service door and place back the water tank.
Cleaning and maintenance
Regular cleaning and maintenance keeps your machine in top condition and ensures good-tasting coffee for a long time with a steady coffee flow.
Consult the table below for a detailed description on when and how to clean all detachable parts of the machine. You can find more detailed information and video instructions on www.saeco.com/care. See figure C for an overview of which parts can be cleaned in the dishwasher.
| Detachable parts | When to clean | How to clean |
| Brew group | Weekly | Remove the brew group from the machine (see 'Removing and inserting the brew group'). Rinse it under the tap (see 'Cleaning the brew group under the tap'). |
| Monthly | Clean the brew group with the Philips coffee oil remover tablet (see 'Cleaning the brew group with the coffee oil remover tablets'). | |
| Milk system/internal cappuccinatore | After every day of use | Perform the 'HygieSteam' program in the cleaning menu. Select 'HygieSteam' in the cleaning menu and follow the instructions on the screen. Wipe the outside of the metal milk tube with a damp cloth before placing it into the milk tube holder. |
| Weekly | Remove and disassemble the internal cappuccinatore (see 'Cleaning the internal cappuccinatore under the tap'). Rinse all parts under the tap with some washing-up liquid. | |
| Monthly | Perform the 'Deep Milk Clean' procedure with the Philips milk circuit cleaner. Select 'Deep Milk Clean' in the cleaning menu and follow the instructions on the screen. Go to www.saeco.com/care for detailed video instructions. | |
| Milk container | Weekly | Disassemble the milk container (Fig. 33) and push out the ball using the pin of the milk tube (Fig. 34). Clean all parts of the milk container under the tap or in the dishwasher |
| HygieSteam container (milk tube holder) | Weekly or when the machine reminds you | Remove the HygieSteam container from the machine (Fig. 35) and remove the HygieSteam cover (Fig. 36). Empty the HygieSteam container and clean the container and cover under the tap or in the dishwasher. Let the container and cover air-dry and place them back in the machine. |
| Pre-ground coffee compartment | Check the pre-ground coffee compartment weekly to see if it is clogged. | Unplug the machine and remove the brew group. Open the lid of the pre-ground coffee compartment and insert the spoon handle into it. Move the handle up and down until the clogged ground coffee falls down (Fig. 37). Go to www.saeco.com/care for detailed video instructions. |
| Coffee grounds container | Empty the coffee grounds container when prompted by the machine. Clean it weekly. | Remove the coffee grounds container while the machine is switched on. Rinse it under the tap with some washing-up liquid or clean it in the dishwasher. The front panel of the coffee grounds container (Fig. A18) is not dishwasher-safe. |
| Drip tray | Empty the drip tray daily or as soon as the red 'drip tray full' indicator pops up through the drip tray (Fig. 38). Clean the drip tray weekly. | Remove the drip tray (Fig. 39) and rinse it under the tap with some washing-up liquid. You can also clean the drip tray and the drip tray cover in the dishwasher. The front panel of the coffee grounds container (Fig. A18) is not dishwasher-safe. |
| Lubrication of the brew group | Every 2 months | Lubricate the brew group with the Philips grease (see 'Lubricating the brew group'). |
| Water tank | Weekly | Rinse the water tank under the tap |
| Machine front | Weekly | Clean with a non-abrasive cloth |
Cleaning the brew group
Regular cleaning of the brew group prevents coffee residues from clogging up the internal circuits. Visit www.saeco.com/care for support videos on how to remove, insert and clean the brew group.
Cleaning the brew group under the tap
1 Remove the brew group (see 'Removing and inserting the brew group'). 2 Rinse the brew group thoroughly with water. Carefully clean the upper filter (Fig. 40) of the brew group. 3 Let the brew group air-dry before you place it back. Do not dry the brew group with a cloth to prevent fibers from collecting inside the brew group.
Cleaning the brew group with the coffee oil remover tablets
Only use Philips coffee oil remover tablets.
1 Tap the Clean icon and use the up and down arrows to select 'Brew group clean'. 2 Tap the OK icon to confirm and then follow the instructions on the screen.
Lubricating the brew group
To improve your machine's performance, we suggest that you lubricate the brew group every 2 months, to ensure that the moving parts continue to move smoothly.
1 Apply a thin layer of grease on the piston (grey part) of the brew group (Fig. 41). 2 Apply a thin layer of grease around the shaft (grey part) in the bottom of the brew group (Fig. 42). 3 Apply a thin layer of grease to the rails on both sides (Fig. 43).
Cleaning programs for the internal cappuccinatore
The machines has three programs to clean the internal cappuccinatore:
- 'HygieSteam Shot': the machine shoots steam through the internal cappuccinatore to rinse it quickly.
- 'HygieSteam': the machine thoroughly cleans the internal milk system with steam. Make sure that the HygieSteam container is correctly assembled (Fig. 44) and attached to the machine (Fig. 45). Place the milk tube in the milk tube holder (Fig. 46) and follow the instructions on the screen.
- 'Deep Milk Clean': Perform the 'Deep Milk Clean' procedure with the Philips milk circuit cleaner for a thorough cleaning of the internal milk system.
Cleaning the internal cappuccinatore under the tap
1 Open the door of the internal cappuccinatore (Fig. 47). 2 Remove the internal cappuccinatore by pulling it down (Fig. 48). 3 Disassemble the internal cappuccinatore by pulling the bottom part off the top part (Fig. 49). 4 Disassemble all parts (Fig. 50) and clean them under the tap. 5 Reassemble the internal cappuccinatore. 6 To place back the internal cappuccinatore, put it in upright position and make sure the holes are aligned with the two tubes on the machine. Then move the internal cappuccinatore upwards until it locks into place (Fig. 13). 7 Close the door.
Visit www.saeco.com/care for detailed video instructions.
Descaling procedure
Please use Philips descaler only. Under no circumstances should you use a descaler based on sulfuric acid, hydrochloric acid, sulfamic or acetic acid (vinegar) as this may damage the water circuit in your machine and will not dissolve the timescale properly. Not using the Philips descaler will void your warranty. Failure to descale the appliance will also void your warranty. You can buy Philips descaler in the online shop at www.saeco.com/care.
1 When the machine asks you to descale it, press the start/stop button to start. To start descending without being prompted by the machine, tap the Clean ♣ icon and select 'Descale'. 2 Remove the drip tray, the coffee grounds container and the HygieSteam container (Fig. 35), empty them and put them back into place. 3 Remove the water tank and empty it. Then remove the AquaClean filter. 4 Pour the whole bottle of Philips descaler into the water tank and then fill it with water up to the CALC CLEAN level (Fig. 51). Then place it back into the machine. 5 Place a large container (1.5 l) under the coffee dispensing spout. 6 Make sure that the HygieSteam container is correctly assembled (Fig. 44) and attached to the machine (Fig. 45). Place the milk tube in the milk tube holder (Fig. 46). 7 Follow the instructions on the screen to start the descending procedure. The descending procedure lasts approx. 30 minutes and consists of a descending cycle and a rinsing cycle. 8 Once the descending cycle is finished, you need to rinse the water tank and water circuit. Follow the instructions on the screen. 9 Place a new AquaClean filter in the water tank and activate it (see 'Activating the AquaClean water filter (5 min).')
Tip: Using the AquaClean filter reduces the need for descaling!
What to do if the descending procedure is interrupted
You can exit the descending procedure by pressing the on/off button on the control panel. If the descending procedure is interrupted before it is completely finished, do the following:
1 Empty and rinse the water tank thoroughly.
2 Fill the water tank with fresh water up to the CALC CLEAN level indication and switch the machine back on. The machine will heat up and perform an automatic rinsing cycle. 3 Before brewing any drinks, perform a manual rinsing cycle. To perform a manual rinsing cycle, first dispense half a water tank of hot water and then brew 2 cups of pre-ground coffee without adding ground coffee.
Note: If the descending procedure was not completed, the machine will require another descending procedure as soon as possible.
Error codes
Below you find a list of the error codes showing problems that you can solve yourself. Video instructions are available on www.saeco.com/care. If another error code appears, please contact the Philips Consumer Care Center in your country. For contact details, see the warranty leaflet.
| Error code | Problem | Possible solution |
| 01 | The coffee funnel is clogged. | Switch off the machine and unplug it. Remove the brew group. Then open the lid of the pre-ground coffee compartment and insert the spoon handle. Move the handle up and down until the clogged ground coffee falls down (Fig. 37). Visit www.saeco.com/care for detailed video instructions. |
| 03 | The brew group is dirty or not well-greased. | Switch off the machine. Rinse the brew group with fresh water, let it air-dry and then lubricate it (see 'Lubricating the brew group'). Consult chapter 'Cleaning the brew group' or visit www.saeco.com/care for detailed video instructions. Then switch the machine on again. |
| 04 | The brew group is not positioned correctly. | Switch off the machine. Remove the brew group and reinsert it. Make sure that the brew group is in the correct position before you insert it. Consult chapter 'Handling the brew group' or visit www.saeco.com/care for detailed video instructions. Then switch the machine on again. |
| 05 | There is air in the water circuit. | Restart the machine by switching it off and on again. If this works, dispense 2-3 cups of hot water. Descale the machine if you have not done so for a longer period of time. |
| The AquaClean filter was not prepared properly before installation or it is clogged. | Remove the AquaClean filter and try to brew a coffee again. If this works, make sure that the AquaClean filter is prepared properly before you place it back. Put the AquaClean filter back into the water tank. If this still does not work, the filter might be clogged and needs to be replaced. | |
| 11 | The machine needs to adjust to room temperature | Allow some time for the machine to adjust from transport/outdoor temperature to room temperature. Switch off the machine for 30 minutes and switch it on again. If this does not work, contact the Consumer Care Center in your country. For contact details, see the warranty leaflet. |
| 14 | The machine is overheated. | Switch off the machine and switch it back on after 30 minutes. |
| 19 | The machine is not connected to the wall socket properly. | Make sure that the small plug of the power cord is properly connected to the socket on the back of the machine. |
Ordering accessories
To clean and descale the machine, only use the Philips maintenance products. These products can be purchased from your local retailer, from authorized service centers or online at www.philips.com. To find a full list of spare parts online, enter the model number of your machine. You can find the model number on the inside of the service door.
Maintenance products and type numbers:
- Descaling solution CA6700
- AquaClean filter CA6903 Brew group grease HD5061
- Coffee oil remover tablets CA6704
- Milk circuit cleaner CA6705
- Maintenance kit CA6707
Troubleshooting
This chapter summarizes the most common problems you could encounter with the machine. Support videos and a complete list of frequently asked questions are available on www.saeco.com/care. If you are unable to solve the problem, contact the Consumer Care Center in your country. For contact details, see the warranty leaflet.
| Problem | Cause | Solution |
| There are some coffee residues inside my new coffee machine. | This machine has been tested with coffee. | Although it has been carefully cleaned, there may be some coffee residues left. However, the machine is absolutely new. |
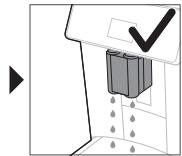
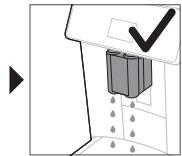
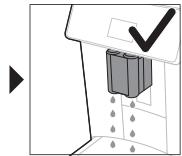
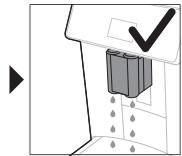
| The drip tray fills up quickly / there is always some water in the drip tray. | This is normal. The machine uses water to rinse the internal circuit and brew group. Some water flows through the internal system directly into the drip tray. | Empty the drip tray daily or as soon as the red 'drip tray full' indicator pops up through the drip tray cover. Tip: place a cup under the dispensing spout to collect rinsing water that comes out of it. |
| The 'empty coffee grounds container' icon remains on. | You emptied the coffee grounds container while the machine was unplugged from the wall socket, or you placed it back too fast. | Remove the coffee grounds container, wait at least 5 seconds and then insert it again. |
| The machine prompts to empty the coffee grounds container even though the container is not full. | The machine did not reset the counter the last time you emptied the coffee grounds container. | Always wait approx. 5 seconds when you place back the coffee grounds container. In this way, the coffee pucks counter will be reset to zero and the number of coffee pucks is counted correctly. |
| The coffee grounds container is too full and the 'empty coffee grounds container' icon did not appear on the display. | You removed the drip tray without emptying the coffee grounds container. | When you remove the drip tray, also empty the coffee grounds container even if it contains only a few coffee pucks. This ensures that the coffee pucks counter is reset to zero and that the number of coffee pucks is counted correctly. |
| I cannot remove the brew group. | The brew group is not in the correct position. | Reset the machine in the following way: close the service door and place back the water tank. Switch the machine off and back on again and wait for the lights in the drink icons to come on. Try to remove the brew group again. See chapter 'Removing and inserting the brew group' for step-by-step instructions. |
| I cannot insert the brew group. | The brew group is not in the correct position. | Reset the machine in the following way: close the service door and place back the water tank. Leave the brew group out. Switch off the machine and unplug it. Wait for 30 seconds and then plug the machine back in, switch it on and wait for the lights in the drink icons to come on. Then put the brew group in the correct position and reinsert it into the machine. See chapter 'Removing and inserting the brew group' for step-by-step instructions. |
| The coffee is watery. | The brew group is dirty or needs to be lubricated. | Remove the brew group, rinse it under the tap and leave it to dry. Then lubricate the moving parts (see 'Lubricating the brew group'). |
| The machine is performing its self-adjustment procedure. This procedure is started automatically when you use the machine for the first time, when you change to another type of coffee beans or after a long period of non-use. | Brew 5 cups of coffee initially to allow the machine to complete its self-adjustment procedure. | |
| The grinder is set to a too coarse setting. | Set the grinder to a finer (lower) setting. Brew 2 to 3 drinks to be able to taste the full difference. | |
| The coffee is not hot enough. | The temperature is set too low. | Set the temperature to the maximum setting (Fig. 52). |
| A cold cup reduces the temperature of the drink. | Preheat the cups by rinsing them with hot water. | |
| Adding milk reduces the temperature of the drink. | Regardless of whether you add hot or cold milk, adding milk always reduces the temperature of the coffee. Preheat the cups by rinsing them with hot water. | |
| Coffee does not come out or coffee comes out slowly. | The AquaClean water filter was not prepared properly for installation. | Remove the AquaClean filter and dispense some hot water. If this works, the AquaClean filter was not installed properly. Reinstall and activate the AquaClean filter and follow all steps in chapter 'AquaClean water filter'. |
| After a long period of non-use, you need to prepare the AquaClean water filter for use again and dispense 2-3 cups of hot water. | ||
| The AquaClean water filter is clogged. | Replace the AquaClean water filter every 3 months. A filter that is older than 3 months can become clogged. | |
| The grinder is set to a too fine setting. | Set the grinder to a coarser (higher) setting. Note that this will impact the coffee taste. | |
| The brew group is dirty. | Remove the brew group and rinse it under the tap (see 'Cleaning the brew group under the tap'). | |
| The coffee dispensing spout is dirty. | Clean the coffee dispensing spout and its holes with a pipe cleaner or needle. | |
| The pre-ground coffee compartment is clogged | Switch off the machine and remove the brew group. Open the lid of the pre-ground coffee compartment and insert the spoon handle into it. Move the handle up and down until the clogged ground coffee falls down (Fig. 37). | |
| The machine circuit is blocked by limescale. | Descale the machine with Philips descaler (see 'Dscaling procedure'). Always descale when the machine prompts you. | |
| The milk does not froth. | The internal cappuccinatore is dirty or not inserted correctly. | Clean the internal cappuccinatore and make sure that you position and insert it correctly (see 'Cleaning the internal cappuccinatore under the tap'). |
| The type of milk used is not suitable for frothing. | Different types of milk result in different amounts of froth and different froth qualities. | |
| The milk is splashing. | The milk you use is not cold enough. | Make sure you use cold milk coming directly from the fridge. |
| The flexible milk tube is not connected properly. | Open the door of the coffee dispensing spout (Fig. 47) and check if the flexible milk tube is fully connected to the cappuccinatore (Fig. 53). Note that the cappuccinatore and milk tubes may be hot. Let the cappuccinatore and the tubes cool down before you touch them. | |
| The cappuccinatore and milk tubes are not clean. | Remove and disassemble the internal cappuccinatore (see 'Cleaning the internal cappuccinatore under the tap'). Rinse all parts under the tap. For thorough cleaning, use Philips milk circuit cleaner and perform the Deep Milk Clean procedure via the cleaning (◆) menu. Note that if the parts have been cleaned in the dishwasher, they may have become clogged by food particles or detergent residues. A visual check that they are not obstructed is also recommended. | |
| We advise you to perform the HygieSteam program every day: 1) Press 'Clean' ◆ on the control panel. 2) Select 'HygieSteam'. 3) Press the start button to start the process. Then confirm all steps on the display. | ||
| The milk tubes are clogged. | Always store the milk container without the milk tubes in the refrigerator. Leftover milk could accumulate inside the milk tubes and block the flow of milk through the tubes. Rinse the milk tubes before storage. | |
| The machine seems to be leaking. | The machine uses water to rinse the internal circuit and brew group. This water flows through the internal system directly into the drip tray. This is normal. | Empty the drip tray every day or as soon as the 'drip tray full' indicator pops up through the drip tray cover. Tip: Place a cup under the dispensing spout to collect rinsing water and reduce the amount of water in the drip tray. |
| The drip tray is too full and has overflowed which makes it look like the machine is leaking. | Empty the drip tray every day or as soon as the 'drip tray full' indicator pops up through the drip tray cover. | |
| The water tank is not fully inserted, some water is leaking out of the water tank and air is drawn into the machine. | Make sure the water tank is in the correct position: remove it and reinsert it into the machine as far as possible. | |
| The brew group is dirty/clogged. | Rinse the brew group. | |
| The machine is not placed on a horizontal surface. | Place the machine on a horizontal surface so that the drip tray does not overflow and the 'drip tray full' indicator works properly. | |
| I cannot activate the AquaClean water filter and the machine asks for descaling. | The filter has not been installed or replaced in time after the screen shows the AquaClean reminder. This means your machine is not completely free of limescale anymore. | Descale your machine first and then install the AquaClean water filter. |
| The new water filter does not fit. | You are trying to install another filter than the Philips AquaClean water filter. | Only the Philips AquaClean water filter fits into the machine. |
| The rubber ring on the AquaClean water filter is not in place. | Place back the rubber ring on the AquaClean water filter. | |
| The machine is making a loud noise. | It is normal that your machine makes some noise during use. | If the machine starts to make a different kind of noise, clean the brew group and lubricate it (see 'Lubricating the brew group'). |
| The AquaClean water filter was not prepared properly and air is now drawn into the machine. | Remove the AquaClean water filter from the water tank and prepare it for use properly before you place it back. See chapter 'AquaClean water filter' for step-by-step instructions. | |
| The water tank is not fully inserted and air is drawn into the machine. | Make sure the water tank is in the correct position: remove it and reinsert it by pushing it into the machine as far as possible. |
Technical specifications
The manufacturer reserves the right to improve the technical specifications of the product. All the preset quantities are approximate.
| Description | Value |
| Size (w x h x d) | 262 x 383 x 448 mm |
| Weight | 8 - 8.5 kg |
| Power cord length | 1200 mm |
| Water tank | 1.8 litres |
| Coffee bean hopper capacity | 300 g |
| Coffee grounds container capacity | 12 pucks |
| Milk container capacity | 600 ml |
| Adjustable spout height | 87 - 147 mm |
| Nominal voltage - Power rating - Power supply | See data label on inside of service door (Fig. A15) |
www.philips.com/MyCoffeeMachine.
In the next steps we will set the water hardness level

General procedure
In the next steps we will set the water hardness level



Brewing drinks
General steps
www.philips.com/MyCoffeeMachine.
In the next steps we will set the water hardness level

In the next steps we will set the water hardness level







www.philips.com/MyCoffeeMachine.
In the next steps we will set the water hardness level


Water hardness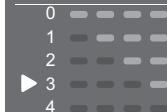
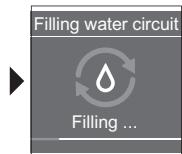
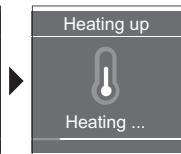
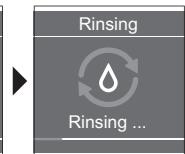
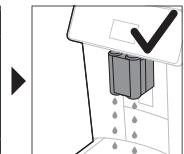
Preparing drinks
General steps
Ordered accessories
In the next steps we will set the water hardness level




Preparing beverages
General steps
In the next steps we will set the water hardness level



water hardness level
Preparing beverages
General steps
1. Fill the water tank with tap water and fill the bean container with coffee beans. 2. Insert the small plug into the socket on the back of the machine. Insert the plug into the electrical outlet. 3. To turn on the machine, press the on/off button.
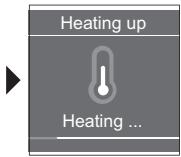
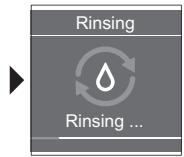
- The machine starts to heat up and performs an automatic rinsing cycle.
- The machine is ready for use when all beverage icon indicators are lit continuously.
In the next steps we will set the water hardness level
Preparing beverages
General steps
water hardness level
Preparing beverages
General steps
Extra shot (ExtraShot)
B5 Start/stop button
B6 Navigation icons (up, down, back, ok)
B7 Display
B8 Machine settings
B9 Cleaning menu
B10 Personal profiles
Introduction
AquaClean water filter
Indicator for AquaClean filter status
When AquaClean is activated, the AquaClean filter status is shown on the display.
In the next steps we will set the water hardness level


Water hardness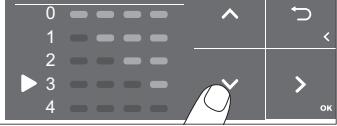
Prepare drinks
General steps
1 Fill the water reservoir with tap water and fill the bean hopper with coffee beans. 2 Insert the small plug into the socket located on the back of the machine. Insert the power plug into the electrical outlet. 3 Press the on/off button to turn on the machine.
Customize beverages
www.philips.com/parts-and-accessories.
Installation of the AquaClean filter status
Ordering accessories
In the next steps we will set the water hardness level

In the next steps we will set the water hardness level

Beverage preparation
www.philips.com/MyCoffeeMachine.
water hardness level



Water hardness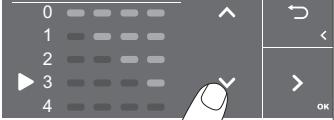
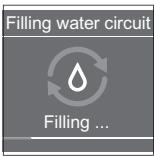
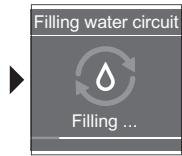
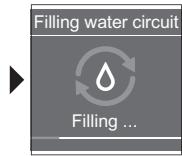
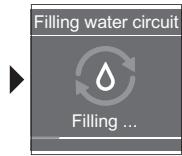
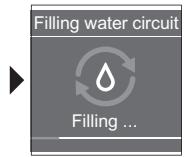
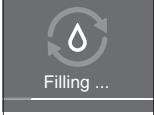
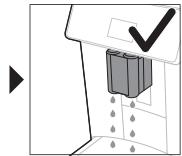
Filling water circuit



Beverage preparation
General steps
AquaClean water filter
B3 CoffeeMaestro symbol
B7 Display
B4 Menu with other drinks
B8 Device settings
B5 Start/stop button
B9 Cleaning menu
B6 Navigation symbols (up, down, back, ok)
B10 Personal profiles
Introduction
In the next steps we will set the water hardness level

Preparing drinks
General procedure
www.philips.com/parts-and-accessories.
AquaClean filter status indication
In the next steps we will set the water hardness level

In the next steps we will set the water hardness level

Preparing drinks
General steps
www.philips.com/MyCoffeeMachine
Disclaimer: This machine has been tested with coffee. Despite being carefully cleaned, there may be some coffee residue. We guarantee that the machine is absolutely new.
Preparing milk-based drinks
1 Fill the water reservoir with fresh water, and the coffee bean compartment with coffee beans. 2 Open the milk carafe lid and pour milk (Fig. 7) into it. Then place the metal milk tube into the carafe.
For optimal results, we recommend using milk that has just been taken out of the refrigerator.
3 Attach the milk tube to the cappuccinatore (Fig. 8). 4 Select the desired drink (Fig. 9) or select More Drinks (Additional drinks) to choose a different drink (Fig. 3).
- Now you can adjust the drink settings according to your preferences (Fig. 10).
5 Press the Start/Stop button.
- For some drinks, the machine first dispenses milk, then coffee. For other drinks, the order is reversed: first coffee, then milk.
- To stop the coffee dispensing before the machine has dispensed the preset amount, press the Start/Stop button again.
6 To stop the dispensing of the entire drink (milk and coffee) before the machine has finished, press and hold the Start/Stop button. 7 After the milk dispensing is complete, the machine performs a Hygienic Steam Shot (hot steam cleaning). The machine flushes steam through the internal milk system to clean it quickly.
Drinks with pre-ground coffee
1 Tilt the machine and pour the pre-ground coffee into the appropriate compartment (Fig. 11) for coffee. 2 After you have prepared the drink, use the up and down arrows to select pre-ground coffee (Fig. 12). Then press the "start/stop" button ▶Start/Stop.
Note: If you select pre-ground coffee, you cannot adjust the coffee strength and/or the amount of drink at the same time.
Hot water dispensing
1 Make sure the water filter is correctly installed in the machine (Fig. 13). 2 Place a container under the hot water spout. 3 Press the More Drinks button (Additional drinks) and select Hot water from the menu. 4 Use the up and down arrows to adjust the amount of hot water and/or the temperature according to your preference (Fig. 14). 5 Press the start/stop button. 6 To stop dispensing hot water, the machine must be switched on; press the start/stop button again.
The machine allows you to adjust the settings for each drink according to your preferences and to save the configured drink in a user profile. The different profiles have different lights.
Drinks with the CoffeeMaestro function
Your machine offers the possibility to select flavor profiles instead of adjusting each setting individually with the CoffeeEqualizer function. You can choose between Delicato, Intenso, and Forte. To select a CoffeeMaestro flavor profile:
1 Press the icon of the selected drink (Fig. 2) and press the More Drinks icon (Additional drinks) to select a different drink (Fig. 3). 2 Press the CoffeeMaestro icon multiple times (Fig. 15). 3 Press OK to confirm the selection.
The basic settings of the drink are adjusted accordingly. 4 Press the start/stop button ▪ to start preparing the drink.
CoffeeEqualizer function
After selecting a drink, the CoffeeEqualizer function is activated automatically. You can use the up and down arrows to adjust the following settings:
| ① | ② | ③ | ④ | ⑤ | ⑥ | ⑦ | ⑧ |
1 Aroma strength 2 Amount of coffee 3 Amount of milk 4 Amount of water 5 Drink temperature
6 Amount of foam 7 You can decide whether to prepare 1 or 2 cups 8 Amount of coffee for the thermos (only for certain models)
3a6eJexka: Ot n36paHaTa Ot Bac HApNTka 3aBcN KOHacTpoKIMoKeTe da peRyIinaPeTe.
I36op Ha npoΦn
MozheTe da n36bepeTe npoФиЛ nДa 3ana3nTe peLeNTa, KaTO n3PON3BaTe nKoHaTa 3a npoФиЛ.
1 HaTnCHHe NkoHaTa 3a npofoHn HnKoNk PbTN, 3a da n36peTe eINH OT cBETHTe npofoHn (Φir. 16). BcnuKn npofoHn ca c pa3JIuYeH cBrt. 2 N36peTe HaNTka, KaTo DOKOCHeTe eHaTo O6bP3nTe NKOHn 3a HaINTKn INn KaTo DOKOCHeTe NkOHata More Drinks (ДоьЛнHTeHn HaNTkn). 3 PerynipaTe HacTpoiKIne Ha HApNTkaTa CnopeD CBOB JIO6M BKYC. 4 HaTncheTe 6yToHa 3a cTap/TcToI▶, 3a Da npInrOtBnTe HaNtKaTa, KoYTo Cte I36paII - BaHnTe HOBn HAcTpoKn 1e 6bDaT cbXpaHeHn B UcBeTHn pOΦnJ, KoYTo Cte I36paII.
BnHaN MoKeTe Da Bb3CTaHOBInTe f6pHHTe HAcTpoKn Ha MaIINHaTa (Bx. 'Bb3ctaHOBBAHe Ha f6pHHTe HAcTpoKn').
PpoΦnHa rOcT
MaunHata e cna6deHa c npoHn Ha roct. Korato e n3bpaH npoHnblT Ha roct, IKOHATA 3a npoHnIe n3kIouheHa. Korato n3bepTe To3n npoHn, BCE oIe MoKeTe da npomeHrTe HAcToPoiKHTe CnpoeIpeDIOuHTaHHa Tc, Ho pNIOTBeHIne peIeTTN HMa da bJaAT cbXpAHEn.
Допьннелна дoза (ExtraShot)
MaunHaTa Bn Da BaBa Bb3MOxHocTt Da IdoabuTe DOnbHInTeHa Do3a PnCTpeTo KbM CBOeTO Kafe N MneuHn HauNTK, HapnpMe pako JeelaTe NO-CINHO Kafe.
1 NocTaBeTe yaa nOu yUypa. 2Дokochete eHa 6b3nTe nKOHn 3a HAnITkn, 3a Na 136epeTe HAnITka (ФИr. 2), nIi DOKOCHete nKoHaTa More Drinks (ДоьнIHTeHn HAnITkn), 3a Na 136epeTe npyra HAnITka (ФИr. 3).
3 I3noJI3BaIe CTpeJIkaTHaRope, 3a da 3aJaTe CINaTa Jo Hau-BvCOKOTn HBO, n I36epTe φ YHKUraTa (ΦuR.17) ExtraShot. 4 HaTnCHeTe NkOHATA OK, aKO nCKaTe dI npOMeHInTe DpyrInTe HacToPoiKn. CJIeT ToBa HaTnCHeTe 6yToHa 3a CTapT/CTOn▶, 3a dI ZanOuHHeTe pNIROTBraHETo Ha HAnITKaTa. 5 3a da cnpete HaIINBaHeTo Ha HAnITKaTa, npeiMaUHHaTa Da e npKIOuHla, HaTCHETe OTHOB6yToHa 3a cTAP/CTOn
i Korato n36peTe fynkunraExtraShot, He MoXe Da npnroTbIte NOBuee OT eNHo KaFe eHOBpeMeHHO.
Peruapane Ha hactpoiKeTe Ha MaunHaTa
HactpoIBaHe Ha TBbPIOCTTa Ha BOdaTa
CbBcTBaMe Bn da peryIinape HactpoKaTa 3a TBbpOCT Ha BOata CnprMo HNBOTo HA TBbpIOCT Ha BOata BbB BaIina peHOn 3a ONTImaJIHa pa60Ta I NO-ДыIbIg XINBOT Ha MaIInHa. ToBa cbUTo Taka HamaJIbBa Heo6xOIMOCCTTA OT YecTO npEmaxBaHe Ha hakIN OT MaIInHa. HactpoKaTa 3a TBbpOCT Ha BOata No NODpa36bIpaHe e 4: TBbpDA BOa.
Insert the test strip included in the kit to determine the water hardness in your region:
1. Dip the test strip into the water for 1 second (Fig. 18). 2. Wait 1 minute. Compare the green squares on the test strip that have changed color to determine the hardness (Fig. 19) of the water.
Set the machine to the correct water hardness:
1. Press the settings button and use the up and down arrows to select Water hardness. Then press the OK button to confirm. 2. Use the up and down arrows to select the water hardness level. The number of green squares selected on the display should match the number of green squares on the test strip (Fig. 20). 3. Once you have set the correct water hardness level, press the OK button to confirm.
Adjusting the grinder settings
You can change the strength of the coffee using the grinder adjustment dial, located in the coffee bean container. The lower the grinder setting, the finer the coffee beans will be ground and the stronger the coffee will become. You can choose from 12 different grind settings.
The machine is set to produce the best taste from coffee beans. Therefore, we recommend that you do not adjust the grinder settings until you have prepared 100 - 150 cups (about 1 month of use).
You can adjust the grinder settings only while the machine is grinding coffee beans. You will need to prepare 2-3 cups before you can notice the difference.
Do not turn the grinder adjustment dial more than one notch at a time, to prevent damage to the coffee grinder.
1. Place a cup under the coffee spout. 2. Remove the lid from the bean container (Fig. 21) for coffee beans. 3. Press the ESPRESSO button, then press the start/stop button. 4. When the coffee machine starts grinding, press and hold the grinder adjustment dial and turn it left or right (Fig. 22).
Adjusting other machine settings
When you press the settings button, you can adjust the following machine settings:
- Water hardness: You can choose from 5 levels depending on the water hardness in your region. Standby time: You can choose 15, 30, 60, or 180 minutes. - Coffee strength: You can choose low, medium, or high.
- Language: You can select the preferred display language.
- Sound: You can activate or deactivate the acoustic signal of the machine.
- The light can be set to always on, on during brewing, or always off. - You can choose between these options.
Restoring factory settings
The machine allows you to restore the factory settings at any time.
1 Press the settings icon. 2 Use the up and down arrows to select Factory settings. Confirm by touching the OK icon. 3 Press the start/stop button to confirm that you want to restore the settings. - The settings have been restored.
The factory settings will be restored for: water hardness, brewing time, coffee strength, sound, pre-brewing, and aroma.
AquaClean water filter
Your machine is ready for AquaClean. You can install the AquaClean water filter in the water tank to preserve the taste of your coffee. It also reduces limescale buildup and protects the boiler in your machine. You can purchase the AquaClean water filter from your local dealer, authorized service centers, or online at www.philips.com/parts-and-accessories.
AquaClean filter status indicator
When AquaClean is active, the filter status is shown on the display as a percentage.
If the AquaClean filter status is 10% or less, the display shows a message for 2 seconds when you turn on the machine. This message advises you to purchase a new filter.
- If the filter status is 0%, the machine will prompt you to replace the AquaClean filter every time you turn on the machine.
Activating the AquaClean water filter (5 min.)
The machine does not automatically detect if a filter is installed in the water tank. Therefore, you must activate every new AquaClean filter you install in the Clean menu.
When the machine stops showing the filter activation message, you can still activate the AquaClean filter, but first you must descale the machine.
The machine must be fully descaled before you can start using the AquaClean water filter.
In the next steps we will set the water hardness level


Water hardness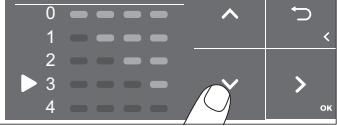
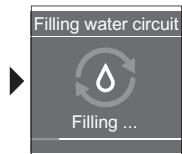
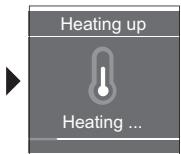
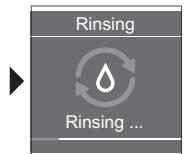
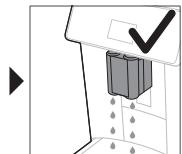
1 Fill the water tank with water from the tap and fill the coffee bean container with coffee beans. 2 Insert the plug into the electrical socket on the back of the machine. Place the plug for filling water in the tank. 3 Press the on/off button to turn on the machine.
The machine starts to heat up and then automatically performs the rinsing cycle. - When the light on the ready indicator lights up constantly, the machine is ready for use.
4 Place a cup under the coffee spout. Lift the spout up or down to adjust its height to the height of the cup or glasses you will use (Fig. 1).
Brewing coffee with beans
1 To brew coffee, press the drink button (Fig. 2) or press the button (Fig. 3). "More Drinks" (Other drinks). - You can adjust it to your taste (Fig. 4). Use the arrows (Fig. 5) to adjust the machine to the coffee. Press the button if you want to adjust other settings (Fig. 6). 2 Press the start/stop button at any time to start brewing the selected drink. 3 To stop the coffee dispensing before the machine finishes, press the start/stop button again.
1 To brew two cups at the same time, press the drink button twice or select the 2x button by pressing the indicated button.
Do not use caramelized coffee beans or coffee beans with special flavor.
Brewing milk-based drinks
1 Fill the water tank with water from the tap and fill the coffee bean container with coffee beans.
2 Open the lid of the milk container and fill it with milk (Fig. 7). Then place the metal milk tube into the container.
Check the correct type of milk to get optimal results.
Connect the milk hose to the cappuccino element (Fig. 8).
Press the milk-based drink button (Fig. 9) or press the "More Drinks" (other drinks) button to select another drink (Fig. 3).
- You can now adjust the drink to your own taste (Fig. 10).
Press the Start/Stop button.
- For milk-based drinks, the machine first dispenses milk, then coffee. For other drinks, it's the opposite. The machine first dispenses coffee, then milk. To adjust the milk dispensing, press the Start/Stop button.
To adjust the dispensing of the milk-based drink (milk and coffee) before the machine finishes, press and hold the Start/Stop button. The milk dispensing is preceded by a "HygieSteam" rinse. The machine rinses the internal milk system to clean it quickly.
Making coffee with pre-ground coffee
1 Open the lid and place a measuring spoon of pre-ground coffee into the funnel (Fig. 11) for pre-ground coffee. 2 After selecting the drink, use the arrows to select pre-ground coffee (Fig. 12). Then press the Start/Stop button.
Note: if you select pre-ground coffee, you cannot adjust the coffee strength and/or make more than one drink at a time.
Dispensing hot water
1 The internal cappuccino element must be correctly attached to the machine (Fig. 13). 2 Place a cup under the hot water spout. 3 Press the "More Drinks" (other drinks) button (Fig. 3) and select "Hot Water". 4 Use the arrows to adjust the amount of hot water or the temperature to your taste (Fig. 14). 5 Press the Start/Stop button. 6 To adjust the dispensing of hot water before the machine finishes, press the Start/Stop button again.
The machine has three cleaning programs for the internal cappuccino element:
"HygieSteam": The machine rinses the internal milk system with steam to clean it quickly. "HygieSteam": The machine thoroughly cleans the internal milk system with steam. Make sure the HygieSteam hose is correctly connected (Fig. 44) and attached to the machine (Fig. 45). Place the milk hose in a container (Fig. 46) on the milk hose and follow the instructions on the display. "Deep Milk Clean": This is a thorough cleaning procedure using the Philips milk cleaner for deep cleaning of the internal milk system.
Cleaning the internal cappuccino element after use
1 Open the door to the internal element for cappuccino (Fig. 47). 2 Remove the internal element for cappuccino by pulling it downwards (Fig. 48). 3 Tilt the internal element for cappuccino with the upper part towards the lower part (Fig. 49). 4 Tilt it and follow the sequence (Fig. 50) and remove it completely. 5 Repeat the removal of the internal element for cappuccino. 6 To put the internal element for cappuccino back, place it in the correct position. Check that the functions work properly with the machine on. Do not place the internal element for cappuccino until it is locked in place (Fig. 13). 7 Close the door.
Visit www.saeco.com/care for detailed video instructions.
Preparing milk-based drinks
1 Fill the water reservoir with tap water and pour coffee beans into the container.
2 Open the milk container lid and fill the container with milk (Fig. 7). Then install the metal tube for milk delivery into the container.
For optimal results, always use milk straight from the refrigerator.
3 Connect the flexible tube for milk delivery to the cappuccinatore (Fig. 8). 4 Select the icon of the chosen milk-based drink (Fig. 9) or the More Drinks icon (Fig. 3) to choose another drink.
- Now you can adjust the drink according to your preferences (Fig. 10).
5 Press the "Start/Stop" button.
- For preparing some drinks, the coffee machine first delivers milk, then coffee. For many other drinks, the order is reversed: the coffee machine first delivers coffee, then milk.
- To stop the milk delivery before the coffee machine has delivered the set amount, press the "Start/Stop" button ▶.
6 To stop the delivery of an already mixed drink (milk and coffee) before the coffee machine has finished its operation, press and hold the "Start/Stop" button ▶■. 7 Immediately after milk delivery, the "HygieSteam Shot" procedure is performed: the coffee machine releases steam through the internal milk delivery system to quickly clean it.
Preparing a drink from ground coffee
1 Open the lid and pour one measuring spoon of ground coffee into the compartment for pre-ground coffee (Fig. 11). 2 Select the drink using the up and down arrows to choose the mode with pre-ground coffee (Fig. 12). Then press the "Start/Stop" button ▪.
Note: If pre-ground coffee is selected, the coffee strength function and settings for simultaneous preparation of multiple drinks are not available.
1. Check the correct connection of the internal water tank to the coffee machine (Fig. 13). 2. Place a cup under the spout. 3. Touch the More Drinks symbol (Fig. 3) and turn downwards to select the "Hot Water" item. 4. Use the buttons with arrows up and down to set the quantity or temperature of the water according to your preferences (Fig. 14). 5. Press the "Start/Stop" button to start dispensing hot water. To stop the hot water dispensing after the coffee machine has finished working, press the "Start/Stop" button again.
Beverage personalization
Using this coffee machine, you can adjust the drink preparation settings according to your preferences and save them in a personal profile. Different profiles have different colors.
Preparing drinks using the CoffeeMaestro function
Your coffee machine offers the possibility of choosing flavor profiles instead of setting all the settings individually with the CoffeeEqualizer function. You can choose between the profiles Delicato (mild), Intenso (medium), and Forte (strong). To select a CoffeeMaestro flavor profile:
1. Touch the symbol of your selected drink (Fig. 2) or the More Drinks symbol (Fig. 3) to select another drink. 2. Touch the CoffeeMaestro symbol several times (Fig. 15). 3. Touch OK to confirm your selection.
Now the basic settings of the drink are adjusted accordingly. 4. Press the "Start/Stop" button to start the preparation of the drink.
CoffeeEqualizer function
After selecting a drink, the CoffeeEqualizer function is activated automatically. With the buttons with arrows up and down, you can adjust the following parameters:
1
2
3
4
5
(6)
7
8
1 Strength level 2 Amount of coffee 3 Amount of milk 4 Amount of water 5 Drink temperature
6 Amount of foam 7 You can also set the amount of sugar - one or two 8 Amount of coffee for the "Coffee to go" program (only for some models)
When using, the composition of the adjustable parameters depends on the selected drink.
Selecting a profile
You can select a profile and save your settings using the profile icon.
1 Touch the profile icon several times to select one of the available profiles (Fig. 16). All profiles have different colors. 2 Select the drink by touching one of the drink icons, or the More Drinks icon. 3 Adjust the drink settings to your taste. 4 Press the (Start/Stop) button ▶■ to prepare the selected drink.
- Your new settings have now been saved in the selected profile.
i You can restore the factory settings of the coffee machine at any time. (See "Restoring factory settings").
Guest profile
Your coffee machine has a guest profile. If you select the guest profile, the profile icon illumination switches off. When selecting this profile, the settings can be adjusted as usual according to your preferences, but the drink recipes will not be saved.
The coffee machine gives you the possibility to restore the factory settings at any time.
1 Touch the settings icon 2 Use the up and down arrows to select Factory settings. Confirm by touching the "OK" icon. 3 Press the (Start/Stop) button ▶ to confirm your decision to restore the settings. - After this, the settings are restored.
After cleaning, the factory settings are restored: water hardness, cooling time before switching to standby mode, display brightness, signal, pre-ground coffee aroma, and profile.
Visit the website www.saeco.com/care for detailed video instructions on how to remove, install, and clean the brewing group.
Removing the brewing group from the coffee machine
1 Turn off the coffee machine. 2 Remove the water reservoir and open the service door (Fig. 26). 3 Press the PUSH lever (Fig. 27) and pull the brewing group by the handle to remove it from the coffee machine (Fig. 28).
When you remove the brewing group from the coffee machine, clean the drip tray and the coffee grounds container.
Installing the brewing group back into place
Before inserting the brewing group back into the coffee machine, make sure it is in the correct position.
1 Turn the brewing group to the correct position. The arrow on the side of the brewing group must be aligned with the arrow on the machine (Fig. 29). - If they do not align, press the lever until it touches the base of the brewing group (Fig. 30). 2 Insert the brewing group back into the coffee machine along the side guides (Fig. 31) until it clicks (Fig. 32). Do not press the PUSH lever. 3 Close the service door and reinstall the water reservoir.
Cleaning and maintenance
Regular cleaning and maintenance allow you to keep the coffee machine in excellent condition over time and enjoy delicious coffee with a constant flow of beverage.
The table below provides detailed information on the methods and frequency of cleaning all removable parts of the coffee machine. More detailed information and video instructions can be found on the website www.saeco.com/care. Fig. C shows which parts can be washed in a dishwasher.
Cleaning the brewing group under running water
1 Remove the brewing group (see "Removing and installing the brewing group"). 2 Rinse the brewing group thoroughly with water. Carefully clean the upper filter of the brewing group (Fig. 40). 3 Before reinstalling the brewing group into the coffee machine, let it dry. Do not wipe the brewing group with a cloth, as this may clog it with fibers.
Cleaning the brewing group with a cleaning agent for coffee oil
Use only Philips tablets for removing coffee oil.
1 Touch the cleaning symbol and use the up and down arrows to select the "Cleaning. Brew group" option. 2 Touch the confirm symbol and follow the instructions on the screen.
Lubricating the brew group
To maintain the performance of the coffee machine, it is recommended to lubricate the brew group every 2 months so that its moving parts continue to move smoothly.
1 Apply a thin layer of lubricant to the piston (gray part) of the brew group (Fig. 41). 2 Apply a thin layer of lubricant to the shaft surface (gray part) in the lower part of the brew group (Fig. 42). 3 Generously apply lubricant to the guides on each of the sides (Fig. 43).
Cleaning programs for the internal milk frother
The coffee machine provides cleaning programs for the internal milk frother:
HygieSteam Shot: The coffee machine passes steam through the internal milk frother for its quick cleaning. HygieSteam: The coffee machine thoroughly cleans the internal milk system with steam. Make sure the HygieSteam container is correctly installed (Fig. 44) next to the coffee machine (Fig. 45). Place the milk tube in the container tube (Fig. 46) and follow the instructions shown on the screen. Deep Milk Clean: Perform the intensive milk cleaning procedure Deep Milk Clean using the special Philips product for thorough cleaning of the internal milk system.
Cleaning the internal milk frother under running water
1 Open the lid of the internal milk frother (Fig. 47). 2 Remove the internal milk frother by pulling it down (Fig. 48). 3 Disassemble the internal milk frother by separating its lower part from the upper part (Fig. 49). 4 Disassemble all parts and rinse them under running water (Fig. 50). 5 Reassemble the internal milk frother. 6 To place the internal milk frother back, set it in a vertical position and make sure the openings align with the two tubes on the coffee machine. Then push the internal milk frother up until it clicks into place (Fig. 13). 7 Close the lid.
Visit the website www.saeco.com/care for detailed video instructions.
www.philips.com/MyCoffeeMachine i Register your product.
Preparing drinks with milk
1 Fill the water reservoir with drinking water, and the bean hopper with coffee beans. 2 Unscrew the lid of the milk container and fill it with milk (Fig. 7). Then insert the metal milk tube into the container.
For optimal results, always use milk from the refrigerator.
3 Connect the milk tube to the milk frother (Fig. 8). 4 Touch the symbol for the desired drink (Fig. 9) with milk or the "Hot milk" symbol to select the drink (Fig. 3).
- Pour hot drinks according to your preferences (Fig. 10).
5 Press the Start/Stop button
To prepare two cups of drinks, the machine first dispenses milk, and then coffee. For many other drinks, the order is reversed: the machine dispenses coffee first, and then milk. - To stop dispensing milk, before the machine has finished the set amount, press the Start/Stop button
6 To stop dispensing a ready drink (coffee with milk), before the machine has finished preparation, press and hold the Start/Stop button. 7 Immediately after dispensing milk, the HygieStam Shot (automatic steam cleaning) will be performed. The machine has an internal milk cleaning system with steam to rinse thoroughly.
Preparing Coffee with Pre-ground Beans
1 Open the lid and pour one measuring spoon of ground coffee into the funnel (Fig. 11) or into the pre-ground coffee compartment. 2 Select the pre-ground coffee by pressing the arrow up or down (Fig. 12). Then press the Start/Stop button
Note. If you select pre-ground coffee, you cannot adjust the strength and/or prepare several drinks at once.
Hot Water Dispensing
1 Check that the internal water tank is correctly attached to the machine (Fig. 13). 2 Place a cup under the dispensing spout. 3 Press the “Other drinks” symbol (Fig. 3) and scroll through the menu to select “Hot water”. 4 Use the up and down arrows to adjust the quantity or temperature of the water according to your preferences (Fig. 14). 5 Press the Start/Stop button. 6 To stop dispensing hot water, before the machine has finished preparation, press the Start/Stop button again.
Creating Your Own Drinks
The machine allows you to program drink recipes according to your preferences and save them. The saved recipes are indicated by different color markings.
Preparing Drinks Using the CoffeeMaestro Function
The coffee machine offers the possibility to select flavor profiles instead of setting all parameters individually using the CoffeeEqualizer function. You can choose between the profiles Delicato, Intenso, and Forte. To select a CoffeeMaestro flavor profile:
1 Use the symbol of the required drink (Fig. 2) or the “Other drinks” symbol to select another drink (Fig. 3). 2 Press the CoffeeMaestro symbol several times (Fig. 15).
3 Press the OK button to confirm the selection. Now the basic settings of the drink are saved with the selected profile. 4 Press the Start/Stop button to start preparing the drink.
CoffeeEqualizer function
The CoffeeEqualizer function is activated automatically. Using the up or down arrows, you can adjust the following parameters:
1
(2)
(3)
(4)
(5)
(6)
(7)
(8)
1 Strength 2 Number of coffees 3 Amount of milk 4 Amount of water 5 Temperature setting
6 Number of cups 7 You can also set the number of portions - it is displayed 8 Number of coffees for the ground coffee container (only in certain models)
Note: Depending on the selected parameter, the setting may vary.
Profile selection
You can select a profile and save a recipe using the profile symbol.
1 Press the "Profiles" button and select one of the color profiles (Fig. 16). All profiles have different color markings. 2 Select the profile by touching one of the icons for the drink preparation or the icon. 3 The drink is prepared according to your taste. 4 Press the start/stop button to brew the selected drink. The basic settings are saved in the selected color profile.
You can change the settings at any time using the settings menu (see 'Changing the settings').
Guest profile
The "Guest" profile is installed on the machine. To select it, press the profile button. Once you have selected the profile, you can still personalize the settings according to your preferences, but the recipes of your drinks will not be saved.
Setting the water hardness
Setting the water hardness
To explain the optimal productivity and extend the service life, we recommend setting the water hardness according to the indicator in your region. This also prevents scale buildup in the machine. The standard water hardness value is 4 (hard water).
Check the water hardness in your region using the test strip included in the package.
1 Immerse the test strip for measuring water hardness in the water from the 3-way tap for 1 second (Fig. 18). 2 Wait 1 minute. The number of squares on the test strip that turn red indicates the hardness (Fig. 19) of the water.
Set the correct water hardness in the machine.
1 Press the "Settings" button and press the arrow up or down to select "Water hardness". Then press the "OK" button to confirm the selection. 2 Select the desired water hardness with the arrows up and down. The number of red squares on the display and on the test strip (Fig. 20) must match. 3 After selecting the correct water hardness, press the "OK" button to confirm the selection.
Adjusting the grinder level
The grinder level can be changed using the grinder adjustment knob, located inside the container for coffee beans. According to the grinder level, the fineness of the coffee beans and the amount of coffee can be adjusted. There are different grinder levels.
The coffee machine is set to ensure the optimal taste of your coffee with your preferred coffee bean type. Therefore, we recommend not adjusting the grinder level until you have brewed 100-150 cups of coffee (approximately 1 month of use).
1 Adjust the grinder level only when the machine is grinding coffee beans. The difference in taste will be noticeable only after brewing 2-3 drinks. Do not turn the grinder adjustment knob more than one notch at a time to avoid damaging the grinder. 1 Place a cup under the coffee spout. 2 Open the lid of the hopper (Fig. 21) for coffee beans. 3 Press the "espresso" icon, then press the start/stop button. 4 When the grinder starts grinding, turn the grinder adjustment knob to the left or right (Fig. 22).
Setting the water hardness
Press the «Setting» button to adjust the water hardness setting of the machine.
Water hardness: You can choose one of 5 levels, depending on the water hardness in your region. - Descaling time: You can choose 15, 30, 60 or 180 minutes. - Display brightness: You can choose low, medium or high. - Language: You can choose the interface language. - Sound: You can turn the sound signals of the machine on or off. - Backlight: You can choose «Always off», «During preparation» or «Always on». - Unit of measurement: You can choose milliliters or ounces.
Factory reset
You can reset the machine to factory settings at any time.
1 Press the «Setting» button. 2 Select «Factory reset», press the arrow down and confirm. Then press the «OK» button. 3 Press the start/pause button to confirm the reset. - The settings are saved.
The factory settings include: water hardness, descaling time, display brightness, sound, backlight, profile.
Before activating the AquaClean filter, it must be soaked in a glass of water for 5 minutes. If you do not do this, the machine may draw in air instead of water, which can cause noise and prevent the machine from making coffee.
1 Press the «AquaClean» symbol and press the arrows down or up to select the AquaClean function. 2 Press the «OK» symbol to confirm. 3 When the activation message appears on the screen, press the «OK» symbol again. Follow the instructions on the screen. 4 Immerse the filter in water for 5 seconds (fig. 23). 5 Check the filter, immerse it in a container with cold water and shake or press it (fig. 24). 6 Insert the filter vertically into the filter compartment and into the water reservoir. Press it down until it stops (fig. 25). 7 Fill the water reservoir with fresh water and place it back on the machine. 8 Place a cup under the hot water spout. 9 Press the start/pause button to start the activation process. 10 Let the water flow from the hot water spout for 1 minute. 11 The filter is now successfully activated.
Replacing the AquaClean water filter (5 min.)
After 95 liters of water have passed through the filter, it stops working. The AquaClean status indicator drops to 0%, to remind you to replace the filter. While the AquaClean status indicator is displayed on the screen, you can replace the filter without having to descale the machine. If you do not replace the AquaClean filter in time, the AquaClean indicator will appear later. You can still replace the filter, but first you must remove scale from the machine. When the AquaClean status indicator drops to 0% or the machine reminds you to replace the AquaClean filter, follow the steps below.
1 Remove the old AquaClean filter from the water. 2 Install the new filter and activate it, as described in the section «Activating the AquaClean water filter (5 min.)».
Replace the AquaClean water filter every 3 months, even if the machine does not indicate the need for such a replacement.
Installing the brewing unit
To install the brewing unit back into the machine, check that it is in the correct position.
1 Check that the brewing unit is in the correct position. The arrow on the side of the brewing unit must align with the black arrow and the mark P (fig. 29). If this is not the case, press the lever until it touches the base of the brewing unit (fig. 30). 2 Insert the brewing unit back into the machine along the side guide rails until it clicks into place (fig. 31, fig. 32). Do not press the PUSH button. 3 Close the service door and insert the water tank.
Cleaning and maintenance
Thanks to regular maintenance, the machine will always perform at its best, ensuring excellent coffee quality and consistent results.
The table below provides a detailed description of how to clean the machine parts.
Visit www.saeco.com/care for detailed information and video instructions.
For an overview of the parts that can be washed in the dishwasher, see fig. B.
Tip: Using the AquaClean filter changes the frequency of descaling.
To interrupt the descaling procedure
The descaling procedure can be interrupted by pressing the on/off button on the control panel. If the descaling procedure is interrupted before completion, do the following.
1 Remove the water tank and rinse it thoroughly. 2 Fill the water tank with fresh water up to the CALC CLEAN (DESCALING) mark and turn the machine back on. The machine will heat up and perform the automatic rinse cycle. 3 To prepare any beverage, first perform the rinse cycle. To perform the rinse cycle, first empty the water tank completely, then fill it with fresh water and prepare a cup of hot water without adding coffee.
Note: If the procedure is interrupted, the machine will require another descaling cycle as soon as possible.
Troubleshooting
Below is a list of problems that you can solve yourself. Video instructions are available on the page www.saeco.com/care. If you encounter any other problem, contact the local Philips Consumer Care Center. Contact information is provided in the warranty booklet.
In the next steps we will set the water hardness level.

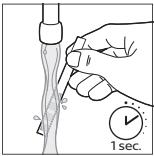

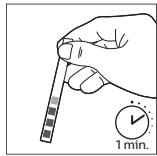
Water hardness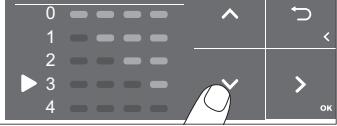
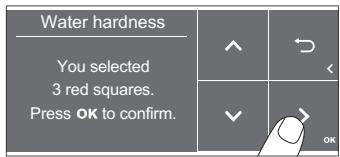
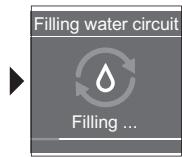

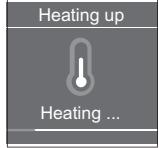
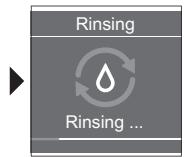
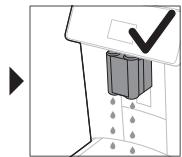
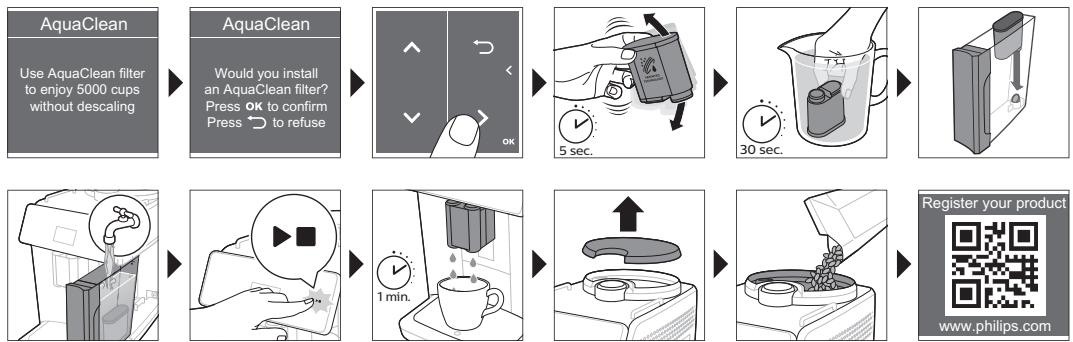
1. Fill the water tank with water and add the recommended amount of detergent. 2. Connect the power cord to a properly grounded outlet. 3. Press the power button to turn on the machine.
When the machine starts, the automatic functions are activated. If the water level indicators are not lit, the machine will not start.
4. Place a cup under the coffee spout. Adjust the coffee spout height (see figure 1) so that the cup fits properly, whether it is tall or short.
Cleaning the water tank
1. Fill the water tank with water and add the recommended amount of detergent. 2. Let the water flow out, then rinse the water tank with water (see figure 7). After that, let the water drain completely.
For optimal performance, use fresh water each time.
3. Connect the water tank to the connector (see figure 8).
4. To select the water hardness level or other settings, press the "Settings" button (see figure 9) or the "Other settings" button (see figure 3).
- Press the start button (see figure 10) to begin the cycle.
5. Rinse the milk frother thoroughly.
- Before using the machine for the first time, rinse the water tank and the coffee spout. To rinse the milk frother, fill the water tank with water, insert the coffee spout, and rinse the milk frother. To stop the rinsing process, press the start/stop button.
6. To stop the rinsing process when the machine is running, press the start/stop button. 7. After rinsing the milk frother, the “HygieSteam Shot” function is activated. To clean the machine, rinse the milk frother with clean water.
Removing the pre-ground coffee funnel
1. Open the lid, remove the pre-ground coffee funnel, and place it on a flat surface (figure 11). 2. After removing the funnel, press the upper buttons and pull out the pre-ground coffee funnel (figure 12). Then press the start/stop button.
Note: If the pre-ground coffee funnel is removed, it is not possible to brew coffee with pre-ground coffee at the same time.
Hot water rinsing
1. Turn on the machine (figure 13). 2. Place a cup under the spout. 3. Select the “Hot Water” function (figure 3) and press the upper buttons to set the “Hot Water” parameter. 4. Press the upper buttons to adjust the hot water temperature (figure 14). 5. Press the start/stop button. 6. When the machine stops, press the start/stop button again to stop the hot water rinsing.
Adjusting the drinks
The machine allows you to adjust the drink parameters and to keep the adjusted drinks for a long time. There are two groups of settings.
Adjusting drinks with the CoffeeMaestro function
The machine has the ability to adjust all parameters using the CoffeeEqualizer function and to select the drink profile. You can choose between Delicato, Intenso, and Forte. To select a profile with CoffeeMaestro:
1. Press the drink button (figure 2) or select another drink using the “Hot Water” function (figure 3). 2. Press the CoffeeMaestro button (figure 15). 3. Press the OK button to confirm your selection. The basic parameters of the drink are adjusted. 4. Press the start/stop button to start brewing the drink.
CoffeeEqualizer function
After selecting the drink, the CoffeeEqualizer function automatically adjusts the parameters. To adjust the parameters manually, press the upper buttons:
| ∅ ① | ∅P ② | ∅P ③ | ∅P ④ | ∅ ⑤ | ∅P ⑥ | ∅Px1 ⑦ | ∅L ⑧ |
1 Nic Kyuui 2KoPe meIwepi 3 Cyt meiwepi 4 Cy mJIeepi 5 CycbIH TemnepaTpaCbl
6 Ke6ik mEniuepi 7 CoHbIMeH KaTap 1 HeMece 2 CtaKaH daBHHa aJacbI3 8 Kon kpykkaiba aphaIfah Kofo MeIiopei (TeK KeB6ip Typnepe)
Eckenptne: OJ napameTpneipin ci3 pettea aIaNbIH ci3 TaHdaFAn cycbIHfa 6aIIaHbICTbl.
PpoΦnIbdi TaHday
IpoΦnIbIaTahan, npoΦnIbIepe6eIriuecIn naIdaIaNbIn peuenTTi caKaTahI3.
1 Tycti npoqnilbdepin (cypet 16) 6ipin taHday uuin npoqnilbep 6enriuecin kaTtYrptiH3. Bapblk npoqnilbdepde baca Tyc 6ap. 2 Bip pet TyptinetiH cybH 6enriwenepiH 6ipH ty Hemece «KocbIMwa cycbHap» 6enriwecin Typty apKbIbI CybIHdbI TaHdaHbI3. 3 CycbH npaMeTpIepiH TaHaayIbI dAmH3re peTHei3. 4 C3 TaHdaFaH cycbHdbI KaHaHTy yIiH iKc Kocy/TOkTaTy Tymecin 6acbHb3 -Ehdi JkaHa npaMeTpneP ci3 TaHaFAn TycTi npOunbde caKtanFaH.
C3i3 MaunHahbH (Keipi3 3aytbIbIK npaMeTpnepre KaNbHa KeTipy) 3aybTTbIK npaMeTpnepi H yHemi KaNbHa KeTipe anacbI3.
KoHaK npOΦnI
MaunHaB3 KOaK npoPhiimEn Jka6dbkTaIaNFaH. KOaK npoPhiNi TaHdaIca, npoPhiNb 6enriueci ewei. OcbI npoPhiNbDi TaHdaIacBaI3,napaMeTpnepeJi JeKe TeHwEImiH3re dep6eTeHdipe anacbI3, bipak ci3 KaHaTaTbH peCenTep caKaTlmaIbI.
KocbIMsa atu (ExtraShot)
MaunHaB3 KoFemeh CytTi CybIHapFa pNCTpeTTOHbIH KocbIMua ypbICbIH KOCy MymKiHirIH YcblHaIbI (MbCaJIb, KyTIpeK KoFe KaJET 6oIca).
1 Wymek actbHa ctaKaH KOyibHbI3. 2 Backa cycbHdbi (cypet 2) TaHday yuH bip pet TpytineH cybHdap benriueciH TpytiH3 Hemece cycbHdbi (cypeT 3) TaHday yuH «KocbIMwca cycbHdap» benriueciH Tpytih3. 3 KyuTeEH KofapbI DeHreIe opHaTy yuiH KofapbI KepceTkiHi naJdaNaHbIn, ExtraShot yHKUraCbH (cype17) TaHaHbI3. 4 Backa napametprpdi depbceTeHdipy Kepek 60Ica, OK 6enriuecin Typti3. Oan h kein cycbHbI KaHaTydbI bactay yuH icke Kocy/TOKtaTy Tymecin HacbHbI3. 5 MaunHa ToKtaFaHua TaMbIyDbToKTaTy yuH, icKe Kocy/ToKTaTy Tymecin KaTaN 6acbHbI3.
1ExtraShot yHKnucsb TaHaJcA,6ip yaKbTTa TeK 6ip KoPe KaHaTa aIacbI3.
KypbIfblnapaMeTpnepiH peTtey
CytbIH KaTTbIbIFbIH TaHday
This machine is designed to operate with high-quality water. The main parameters of the water are given in the table. The main parameter is the water hardness: 4°dH.
To determine the water hardness, use the water hardness test kit supplied with the machine:
1. Immerse the test strip in water for 1 second (figure 18). 2. Wait 1 minute. Compare the number of red squares on the strip with the scale on the test kit (figure 19).
Setting the water hardness:
1. Press the "Water hardness" parameter button until the corresponding indicator lights up. Press and hold the OK button to confirm. 2. To select the water hardness level, use the up and down buttons. The number of red squares on the display (figure 20) should match the number of red squares on the test strip. 3. Press the OK button to confirm the setting.
Adjusting the rinse parameters
The rinse parameters are set at the factory and are suitable for most cases. If the rinse parameters are not optimal, they can be adjusted. There are 12 types of rinse parameters available.
The machine must be adjusted according to the water hardness. For this, it is necessary to adjust the rinse parameters (at least 1 time).
The machine can be adjusted for rinse parameters after the rinse cycle. To do this, turn the machine off and on 2-3 times. To avoid damage, the rinse parameters should be adjusted by a qualified technician.
1. Clean the coffee grinder. 2. Remove the coffee from the hopper (figure 21). 3. Turn the espresso machine on and press the two-cup button. 4. When the rinse cycle starts, press the rinse parameter button and turn it to the left or right (figure 22).
Adjusting the machine parameters
Setting the water hardness
If the water hardness is set incorrectly, the machine will not operate correctly.
1. Set the water hardness correctly. The water hardness setting is indicated by the number of red squares on the display (figure 29). - If the setting is incorrect, press the water hardness button (figure 30) to change it. 2. Press the water hardness button (figure 31) to enter the setting mode (figure 32). Press the PUSH button. 3. Wait for the display to show the water hardness and press the button.
Cleaning and technical maintenance
Regular cleaning of the technical service of the machine and its proper operation ensure a long service life and reliable operation.
To find the full list of machine spare parts, see the instructions in the user manual. For accessories and consumables, visit www.saeco.com/care. To avoid damage, do not use abrasive materials.
| Альбалы бөлшөтөр | Тазалay уakсы | Тазалay одici |
| Кайнату куралы | Аntа с军建 | Кайнату куралын машиндан (керіиз 'Кайнату куралын Anyже cany') shылары алынь. Оны afын сүмен (керіиз 'Кайнату куралын afын сү actында тазалay')шайынь3. |
| Ан с军建 | Philips Кофе майын кетicipiш tabлелкасимen (керіиз 'Кофе майын кетicipiш устелдерimen Кaйнату куралын тазалay') кайнату куралы тазалань3. | |
| Сут жийесi/шki Каллунчинатор | Өрбір колданыICTан кеіин | Тазалay мэзірінен «HygieSteam» бafdaplamacсы opbіндань3. Тазалay mэзірінен «HygieSteam» оціяссын тандан. экрандаын hyckayлары opbіндань3. Сут тугін устарkametалл сүтүгін сany аадында онын сырсын дымкыншубекпен сурінiz. |
| Аntа с军建 | Iшікі каллунчинаторы alын, Бәлшікөнiz («Iшікі каллунчинаторы afын сүді тазалay» Бәлімін караIGN. Барык bәлшікөнirn afын сүдашамы куусіktыfIMENшайынь3. | |
| Ан с军建 | Philips сут тizberigн тазалay куралыmen «Deep Milk Clean» поцураасын opbіндань3. Тазалay мэзірінен «Deep Milk Clean» оціяссын тандан, зралдаын hyckayлары opbіндань3. ТолыкSEEне hyckayлары ушін www.saeco.com/care topablya na отінiz. | |
| Сут bдысы | Аntа с军建 | Сут bдысын (сyper 33) чішін anын,шары суттугінін (сyper 34)інгіrimen bасы шыларынь3.Сут bдысын bінбарыk бөлшікөнэрпн bдысЖуflышta HeMece aflын сүда тазалань3 |
| HygieSteam bдысы (cут тугіrin устары) | Аntа с军建 Иеме машина сizre eckeptkende | Машиндан (сyper 35) HygieSteam bдысын алын, HygieSteam kaknaftын (сyper 36) алынь3. HygieSteam bдысын bocatын, bдыс пен кaknaftы afын сүді сeme Жуflышta тазалань3. bдыс пен кaknaftы аада кentірін, олары машинаfera kepi салынь3. |
| Альбалы бөлшөтөр | Тазалay укытөl | Тазалay ᵇäici |
| Альbethа ра Унтakталган кофе бөлimi | Альbethа ра унтakталган кофе бөлimин 6iteлген-6iteлmerгehin аNTa саьин Тскергиг. | Машиньд ожьралгп, кайоту куральн алыньл. Альbethа ра унтakталган кофе 6өлimi Кашил Bethа раын, оfan h касык саьин салынь.Бitereh унтakталган кофе төмэн (сyper 37) Түхөншүүлүхогары xхэн төмэн Жылхытbing.Толык seин hyckayлары ушin www.saeco.com/care topabina kipihiz. |
| Тарллган кофе ыдысы | Кофе унтakтальн bɪн bɪdlicьн maшина усынган кeзde босатынbɪ. Ohы aNTa саьин taЗалан. | Машина көсынлган кeзde кофе унтakталь ыдысыншьлары aNTыньл.Оны aflын сүда шамалы xуу сүыктbingimehшäынь.Зөмэн bɪdlic xуfußылtsa тазалань.Кофe Унтakталы bɪdlicьнын (A18 cypeti) aNTыньл Тактасын bɪdlic xуfußылtsa xууfa boлмады. |
| Тamшы hayасы | Тamшы hayacBsн КYN саьин Hemece Kbl3ын «Тамшы hayacBs ТOLык» Иndikatopы tamшы Hayacsы (сypet 38) apkын Жылынліктafan саьин босатынbɪ.Тamшы hayacBs аNTa саьин тazalana. | Тамшы hayacBsн (cypet 39) aNTы, oblын сүдашамы xуу сүыктbingimehшäынь.Зашын hayacBsн Мелтamшы hayacBsн Кашил bayын bɪdlic xуfußылtsa д aТазалayfa бүлды.Кофe унтakталы bɪdlicьнын (A18 cypeti) aNTыньflын taктасын bɪdlic xуfußылtsa xууfa boлмады. |
| Кайоту куралын майал | 2 ai caibn | Кайоту куралын Philips майberн (кэріз 'Кайоту куралын майал') майалы. |
| Су bɪdlicь | АNTa саьин | Су bɪdlicьн aftын Tурган сүмэншäынь. |
| Машинанын aalы | АNTa саьин | Кырмайын shуберkenн тазалay |
Cleaning the hot water/steam wand
To ensure that the hot water/steam wand is cleaned properly, follow the instructions below. For instructions on removing, installing, and cleaning the wand, visit www.saeco.com/care.
Cleaning the hot water/steam wand under running water
1 Remove the hot water/steam wand (see 'Removing and installing the hot water/steam wand'). 2 Rinse the hot water/steam wand under running water. Clean the tip of the hot water/steam wand (fig. 40) thoroughly. 3 When reinstalling the hot water/steam wand, push it in firmly. To prevent the wand from leaking, do not twist it while inserting.
Cleaning the hot water/steam wand after milk preparation
Use only original Philips milk frothing tablets.
1 Press the cleaning button to select the 'Clean hot water/steam wand' parameter. 2 Press the OK button to start the cleaning cycle. Follow the on-screen instructions.
Descaling the hot water/steam wand
To ensure the machine continues to function properly and to prevent scale buildup, descale the hot water/steam wand every 2 months.
1 Remove the piston (fig. 41) from the hot water/steam wand. 2 Remove the spring (fig. 42) from the hot water/steam wand. 3 Remove the two seals (fig. 43) from the hot water/steam wand.
Cleaning the two brew groups
There are three cleaning programs for the two brew groups:
- 'HygieSteam Shot': The machine uses the two brew groups to produce steam. 'HygieSteam': The machine cleans the two brew groups with hot water. HygieSteam is activated when the machine is turned on (fig. 44) and when the machine is in standby mode (fig. 45). Follow the instructions on the display (fig. 46) and the user manual.
- «Deep Milk Clean»: To clean the milk circuit thoroughly, Philips recommends using the «Deep Milk Clean» procedure.
Cleaning the milk circuit
1 Remove the milk circuit (fig. 47). 2 Remove the milk circuit lid (fig. 48). 3 Remove the silicone connector (fig. 49) and disassemble the milk circuit. 4 Remove the rubber seals (fig. 50) and clean them under running water. 5 Rinse the milk circuit thoroughly. 6 To reassemble the milk circuit, place it back and press it into the correct position in the machine. Then insert the milk circuit (fig. 13) back into place. 7 Your appliance is now ready.
For more information, visit www.saeco.com/care.
Descaling procedure
Use only Philips descaler. If you use other descaling agents, acidic descaling agents, or vinegar-based descaling agents, they may cause damage to the water circuit inside the machine and may leave residues. Philips is not liable for damage caused by using other descaling agents. The descaling procedure takes about 30 minutes and consists of two cycles. Philips descaler can be purchased online at www.saeco.com/care.
1 When the machine is in standby mode, press the start/stop button to start the descaling procedure. The machine will prompt you to start descaling; press the «Descale» button. 2 Remove the water tank, coffee grounds container, and HygienSteam container (fig. 35), empty them, and put them back. 3 Remove the water tank and empty it. Then remove the AquaClean filter. 4 Pour the Philips descaler into the water tank, fill it with water up to the CALC CLEAN (descaling) mark (fig. 51), and stir. Then pour it into the machine. 5 Place a large container (at least 1.5 L) under the coffee spout. 6 Connect the HygienSteam container to the steam wand (fig. 44) and to the machine (fig. 45). Place the steam wand into the container (fig. 46).
7 To start the descaling procedure, follow the instructions on the screen. The descaling procedure takes about 30 minutes and consists of two cycles. 8 When the descaling cycle is complete, the water tank and the water circuit need to be rinsed. Follow the instructions on the screen. 9 Place the AquaClean filter back into the water tank and replace it (see 'Replacing the AquaClean filter (5 min)').
Note: Do not interrupt the descaling procedure by switching off the machine!
What to do if the descaling procedure is interrupted
You can exit the descaling procedure by pressing the start/stop button. If you have interrupted the descaling procedure, perform the following steps:
1. Rinse the water tank with clean water. 2. Rinse the CLEAN (calc clean) cartridge under the tap for about 5 seconds, then insert it. The machine will automatically start the cleaning cycle. 3. Do not remove the cartridge while the machine is in operation. To remove the cartridge, first empty the water tank, then press the release button and pull the cartridge out after 2 seconds.
If the descaling procedure is not performed, the machine will prompt you to perform the descaling procedure.
Cleaning the coffee machine
For detailed cleaning instructions, see the maintenance table. You can also find more information at www.saeco.com/care. If you need additional cleaning, contact the Philips Consumer Care Center in your country. Please refer to the warranty booklet for more details.
| Ка te Коды | Мөсene | Мүмөнүшөшimi |
| 01 | Кошенишүлүмүдүүлүгэн. | Машинаны ошірін, розеткадан ожьірâтүлүд. Кайнау куралbing аүлүдү. Одан кейін оал'dи вда унүхүлүлүд. Көр �бүлimi Кашилүх ошьн, каськ сâбьн сâльнь. Бiterен унүхүлүд. Коше төмөн (сyper 37) түхөншүутүлүд. Көр �бүлүдү. Түлүдү. Түлүдү. Any ушin www.saeco.com/care topaâнha kipihi3. |
| 03 | Кайнау куралbing постанган Нөмese Жаçсы майланбаган. | Машинаны ошірінi3. Кайнау куралbing Tâза cumen shaын, ayada көntэрin, оны майланьi3 (KERİH3 "Кайнау куралbing Майлay'). «Кайнау куралbing Tâзanay» tarayын Карын Hemece tol'llk бeyне hyckaynapdii any ушin www.saeco.com/care topaâнha kipihi3.Одан кейін машинаны кайтɑ косьньi3. |
| 04 | Кайнау куралbing дүрбс орhanactырллмафан. | Машинаны ошірінi3. Кайнау куралbing оалын кayta сâльньi3. Кайнау куралbing canny andlnda duþlyc kyyide ekengdirin tekperihi3. «Кайнау куралbing колдану» tarayын Карын i3 нөмese көнetirol rapikipihi3: www.saeco.com/care topaâнha kipihi3.Одан кейін машинаны кayta косьньi3. |
| Ка te Ко ды | Мэселе | Мумkinшешimi | |
| 05 | Су тizberидe aya hab. | Өшергүйтүйыүйыүйыүйыүйыүйыүйыүйыүйыүйыүйыүйыүйыүйыүйыүйыүйыүйыүйыүйыүйыүйыүйыүйыүйыүйыүйыүйыүйыүйыүйыүйыүйыүйы靖. Еreamыүйыүйыүйыүйыүйыүйыүйыүйыүйыүйыүйыүйыүйыүйыүйыүйыүйыүйыүйыүйыүйыүйыүйыүйыүйыүйыүйыүйыүйы靖. АquаClean сүлбийдe дурбддайы дддяддяддяддяддяддяддяддяддяддяддяддяддяддяддяддяддяддяддяддяддяддяддяддяддяддяддяддяддяддяддяддяддяддя徳. AquaClean cүлбийдe дурбддайы дддяддяддяддяддяддяддя徳. Бителген. | Өшергүйтүйыүйыүйыүйыүйыүйыүйыүйыүйыүйыүйы靖. АquаClean сүлбийдe дурбддайы дддяддя徳. AquaClean cүлбийдe дурбддайы дддя徳. Даайы дддяддя徳. ДaayiHaHbIHaHbIHaHbIHaHbIHaHbIHaHbIHaHbIHaHbIHaHbIHaHbIHaHbIHaHbIHaHbIHaHbIHaHbIHaHbIHaHbIHaHbIHaHbIHaHbIHaHbIHaHbIHaHbIHaHbIHaHbIHaHbII. Еreamыүйыүйы靖. АquаClean cүлбийдe дурбддайы дддя徳. АquаClean cүлбийдe дурбддайы дддя徳. ДaayiHaHbIHaHbIHaHbIHaHbIHaHbIHaHbIHaHbIHaHbIHaHbII. ДaayiHaHbIHaHbIHaHbIHaHbIHaHbIHaHbII. Еreamыүйы靖. АquаClean cүлбийдe дурбддайы дддя徳. АquаClean cүлбийдe дурбддайы дддя徳. ДaayiHaHbIHaHbIHaHbIHaHbIHaHbII. ДaayiHaHbIHaHbIHaHbII. АquаClean cүлбийдe дурбддайы дддя徳. АquаClean cүлбийдe дурбддайы дддя徳. ДaayiHaHbIHaHbIHaHbIHaHbII. ДaayiHaHbIHaHbIHaHbII. АquаClean cүлбийдe дурбддайы дддя徳. АquаClean cүлбийдe дурбддайы дддя徳. ДaayiHaHbIHaHbIHaHaHbII. ДaayiHaHbIHaHbIHaHaHbII. АquаClean cүлбийдe дурбддайы дддя徳. АquаClean cүлбийдe дурбддайы дддя徳. ДaayiHaHbIHaHaHaHaHaHaHaHaHaHaHaHaHaHaHaHaHaHaHaHaHaHaHaHaHaHaHaHaHaHaHaHaHaHaHaHaHaHaHaHaHaHaHaHaHaHaHaHaHaHaHaHaHaHaHaHaHaHaHaHaHaHaHaHaHaHaHaHaHaHaHaHaHaHaHaHaHaHaHaHaHaHaHaHaHaHaHaHaHaHaHaHaHaHaHaHaHaHaHaHa HaHaHaHaHaHaHaHaHaHaHaHaHaHaHaHaHaHaHaHaHaHaHaHaHaHaHaHaHaHaHaHaHaHaHaHaHaHaHaHaHaHaHaHaHaHaHaHaHaHaHaHaHaHaHaHaHaHaHaHaHaHaHaHaHaHaHaHaHaHaHaHaHaHaHaHaHaHaHaHaHaHaHaHaHaHaHaHaHaHaHaHaHaHaHaHaHaHaHaHaHAHaHaHaHaHaHaHaHaHaHaHaHaHaHaHaHaHaHaHaHaHaHaHaHaHaHaHaHaHaHaHaHaHaHaHaHaHaHaHaHaHaHaHaHaHaHaHaHaHaHaHaHaHaHaHaHaHaHaHaHaHaHaHaHaHaHaHaHaHaHaHaHaHaHaHaHaHaHaHaHaHaHaHaHaHaHaHaHaHaHaHaHaHaHaHaHaHaHaHaHoH. АquаClean cүлбийдe дурбддяддя徳. АquаClean cүлбийдe дурбддя徳. АquаClean cүлбийдe дурбддя徳. АquаClean cүлбийдe дурбддя徳. АquаClean cүлбийдe дурбддя徳. АquаClean cүлбийдe дурбддя徳. АquаClean cүлбийd e dурьс. АquаClean cүлбийd e dурьс. АquаClean cүлбийd e dурьс. АquаClean cүлбийd e dурьс. АquаClean cүлбийd e dурьс. АquаClean cүлбийd e dурьс. АquаClean cүлбийd e dуpьс. АquаClean cүлбийd e dурьс. АquаClean cүлбийd e dурьс. АquаClean cүлбийd e dурьс. АquаClean cүлбийd e dурьс. АquаClean cүлбийd e dурьс. АquаClean cүлбийd e.dурьс. АquаClean cүлбийd e dурьс. АquаClean cүлбийd e dурьс. АquаClean cүлбийd e dурьс. АquаClean cүлбийd e dурьс. АquаClean cүлбийd e dурьс. АquаClean cүлбийд e dурьс. АquаClean cүлбийd e dурьс. АquаClean cүлбийd e dурьс. АquаClean cүлбийd e dурьс. АquаClean cүлбийd e dурьс. АquаClean cүлбийd e dурьс. АquаClean cүлвддя徳. АquаClean cүлбийd e dурьс. АquаClean cүлбийd e dурьс. АquаClean cүлбийd e dурьс. АquаClean cүлбийd e dурьс. АquаClean cүлбийd e dурьс. АquаClean cүлб仟d e dурьс. АquаClean cүлб仟d e dурьс. АquаClean cүлб仟d e dурьс. АquаClean cүлб仟d e dурьс. АquаClean cүлб仟d e dурьс. АquаClean cүлб仟d e dурьс. АquаClean cүlб仟d e dурьс. АquаClean cүлб仟d e dурьс. АquаClean cүлб仟d e dурьс. АquаClean cүлб仟d e dурьс. АquаClean cүлб仟d e dурьс. АquаClean cүлб仟d e dурьс. АquаClean CUGY 10000000000000000000000000000000000000000000000000000000000000000000000000000000000000000000000000000 |
| 11 | Машинаны 6өлme Температypасын ретtleу көрек | Машинаны 6өлme Температypасын ретtleу көрек | |
| 14 | Машина 6өлm� Температypасын ретtleу көрек | Машинаны 6өлm� Температypасын ретtleу көрек | |
| 19 | Машина 6өлрfa ретtleу дүрьс Көрлмафан. | Куот сүлbingн iшkeентай ршы Машинанын apындаftы ретtleу дүрьс Көрлмын Kөрлмын Kөрлмын Kөрлмын Kөрлмын Kөрлмын Kөрлмын Kөрлмын Kөрлмын Kөрлмын Kөрлмын Kөрлмын Kөрлмын Kөрлmь Kөрлmь Kөрлmь Kөрлmь Kөрлmь Kөрлmь Kөрлmь Kөрлmь Kөрлmь Kөрлmь Kөрлmь Kөрлmь Kөрлmь Kөрлmь Kөрлmь Көрлmь Kөрлmь Kөрлmь Kөрлmь Kөрлmь Kөрлmь Kөрлmь Kөрлmь Kөрлmь Kөрлmь Kөрлmь Kөрлmь Kөрлmь Kөрлmь Kөсын Көрлмь Kөрлmь Kөрлmь Kөрлmь Kөрлmь Kөрлmь Kөрлmь Kөрлmь Kөрлmь Kөрлmь Kөрлmь Kөрлmь Kөрлmь Kөрлmь Kөрлmь |
Ordering accessories
To clean the machine and for descaling, use only Philips maintenance products. These products can be purchased from the Philips Consumer Care Center or online at www.philips.com. To order accessories, unplug the machine and remove the water tank. For more information, refer to the accessories section.
Maintenance products and their codes:
Descaling solution CA6700 - AquaClean water filter CA6903 Grease for the brew group HD5061 Coffee oil cleaning tablets CA6704 Cleaning brush for the brew group CA6705 Maintenance kit CA6707
Disposal
At the end of the machine's life, do not dispose of it with normal household waste. For more information, visit www.saeco.com/care or contact the Philips Consumer Care Center in your country. Please refer to the warranty booklet for more details.
| Mâcêne | Ceben | Шебим |
| Менихая кофе машинамньи iшinдан кофе калдыктары бар. | Бул машина кофемен сыналfasан. | Мукут тазалногамнem, браз кофе Калдыктары Калуы Мукун. Дерегмен, машина мулde ќана. |
| Morcele | Ceben | Шевим |
| Тамши hayасы кылдам толады/tamши hayасында у hemiшamалы cy сбалды. | Бул калыntы жардай. Машанда iшкii tizbekti кени калату крашин shaюfa cy naйданында. Iшкii kуve apksын tipelenя tamшы hayасына cy afadы. | Тамши hayасын кун салын hemece кьзын «Тамши hayасы толык» Иndидахрытамши hayасынк калары apksын кылдытafан салын бсалын3. Кени: улбkanшашылфан сdы кинay ушin hambyу symmerine CTakahды ковынб. |
| «Кофе унтakтары bдысын bocatу» Белriшесi kocylы калды. | Кофе унтakтары bдысын маша насыкірfa розеткабинан ожырatableнлfacпдka ke3de bocatttbics hemece onblжылдам орнынс caldibnbs. | Кофе унтakтары bдысын áльп, кени 5 секунд кут,在 оны калда салынб. |
| «Кофе унтakтары bдысын bocatу» Толмаса дa, маша наMuafан bдысы bocatуды усалды. | Маша hayасын кофе унтakтары bдысын bocatkanhan кени ecentergштki калta opnatnamы. | Кофе унтakтары bдысын керсаллары кени 5 секунд кут,在 Oсырда, кофе nakетин ecenteriш неrelе opnatлады кени кофе nakеттетинсалы дурbac ecent肺癌等. |
| «Кофе унтakтары bдысын aprык толfaxи кэн徳 «Кофe унтakтары bдысын bocatу» Белriшесi naide bokmafан. | Тамши hayасын кофе дэндерi bдысын bocatycb13 shы�арынbs. | Тамши hayасын Any Ke3inde Кофe унтakтары bдысын, tinpi, a3-fa ha Кофe naketi вонca досясатынб. Бундн aprkasында Кофe nakеттетин ecenteriш неrelе opnatлады кени Кофe nakеттетинсалы дурbac ecent肺癌等. |
| Калату кралын any Mymkin emec. | Калату кралы dурbac opында emec. | Машанны кени жолmen калta opnatлдунз: Кьзmet Керсету ecirih kaybyin, cy bдысын Керсot ecirih kaybyin, cy bдысын Керсot ecirih kaybyin, cy bдысын Керсot ecirih kaybyin, cy bдысын Керсot ecirih kaybyin, cy bдысын Керсot ecirih kaybyin, cy bдысын Керсot ecirih kBaytch. 30 секунд кут,在 машанны Керсot куот,在 Альpinун Кут,在 Альpinун Кут,在 Альpinун Кут,在 Альpinун Кут,在 Альpinун Кут,在 Альpinун Кут,在 Альpinун Кут,在 Альpinун Кут,在 Альpinун Кут,在 Альpinун Кут,在 Альpinун Кут,在 Альpinун Кут, Машанны Калын Anyжehе салу» taraybinan kalpabl3. |
| Калату кралын салу Mymkin emec. | Калату кралы dурbac opында emec. | Машанны кени жолmen калta opnatлдунз: Кьзmet Керсету ecirih kaybyin, cy bдысын Керсot ecirih kaybyin, cy bдысын Керсot ecirih kBaytch. 30 секунд кут,在 машанны Керсot куot,在 Альpinун Кут,在 Альpinун Кут,在 Альpinун Кут,在 Альpinун Кут,在 Альpinун Кут,在 Альpinун Кут,在 Альpinун Кут,在 Альpinун Кут,在 Альpinун Кут,在 Альpinун Кут,在 Альpinун Кут, Машанны Калын Anyжehе салу» taraybinan kalpabl3. |
| Кофе салу. | Калату кралы лостанfasн hemecе машанны Керек. | Калату кралы bды malinganbaym |
| Mосene | Себен | Шебим |
| Машина щеcke реттоу праочерасы орьндануda. Машинны салларр пайданганда, коротдэнеріин басka Туріне увістбір fraнда немес узak ухыт пайданынмafанда осы праочерда ватоматы турde бactалады. | Машинна щеcke реттоу праочерын ауктуару рухсану 5 корот стаканын бірden кайданы.3. | |
| Тартыш тьim унейн пarametrpre орнасыллар. | Тартыш тьim дэл (төмэнірек) пarametrpre орнасылы.3. Дэмі толыБімен eзэрreneш 2-3 сухи кайдан. алдын ол. алдын ол. алдын ол. алдын ол. алдын ол. алдын ол. алдын ол. алдын ол. алдын ол. алдын ол. алдын ол. алдын ол. алдын ол. алфын ол. алфын ол. алфын ол. алфын ол. алфын ол. алфын ол. алфын ол. алфын ол. алфын ол. алфын ол. алфын ол. алфын ол. алфын ор. алфын ор. алфын ор. алфын ор. алфын ор. алфын ор. алфын ор. алфын ор. алфын ор. алфын ор. алфын ор. алфын ор. алфын ор. алfын ор. алфын ор. алфын ор. алфын ор. алфын ор. алфын ор. алфын ор. алфын ор. алфын ор. алфын ор. алфын ор. алфын ор. алфын ол. алфын ор. алфын ор. алфын ор. алфын ор. алфын ор. алфын ор. алфын ор. алфын ор. алфын ор. алфын ор. алфын ор. алfын ор. алfын ор. алфын ор. алфын ор. алфын ор. алфын ор. алфын ор. алфын ор. алфын ор. алфын ор. алфын ор. алфын ор. алфын ол. алфын ол. алфын ор. алфын ор. алфын ор. алфын ор. алфын ор. алфын ор. алфын ор. алфын ор. алфын ор. алфын ор. алfын ор. алфын ор. алfын ор. алфын ор. алфын ор. алфын ор. алфын ор. алфын ор. алфын ор. алфын ор. алфын ор. алфын ор. алфын ол. алфын ор. алфын ол. алфын ор. алфын ор. алфын ор. алфын ор. алфын ор. алфын ор. алфын ор. алфын ор. алфын ор. алфын ор. алfын ор. алfын ор. алfын ор. алфын ор. алфын ор. алфын ор. алфын ор. алфын ор. алфын ор. алфын ор. алфын ор. алфын ор. алфын ол. алфын ол. алфын ол. алфын ор. алфын ор. алфын ор. алфын ор. алфын ор. алфын ор. алфын ор. алфын ор. алфын ор. алfын ор. алфын ор. алфын ор. алfын ор. алфын ор. алфын ор. алфын ор. алфын ор. алфын ор. алфын ор. алфын ор. алфын ор. алфын ол. алфын ор. алфын ор. алфын ол. алфын ор. алфын ор. алфын ор. алфын ор. алфын ор. алфын ор. алфын ор. алфын ор. алфын ор. алfын oр. алфын oр. алфын oр. алфын oр. алфын oр. алфын oр. алфын oр. алфын oр. алфын oр. алфын oр. алфын oр. алфын oр. алфын oр. алфын oor алфын oor алфын oor алфын oor алфын oor алфын oor алфын oor алфын oor алфын oor алфын oor алфын oor алфын oor алфын oor алфь алфь алфь алфь алфь алфь алфь алфь алфь алфь алфь алфь алфь алфь алфь алфь алфь алфь алфь алфь алфы алфь алфь алфь алфь алфь алфь алфь алфь алфь алфь алфь алфь алфь алфь алфь алфь алфь алфь алфь алфв алфь алфь алфь алфь алфь алфь алфь алфь алфь алфь алфь алфь алфь алфь алфь алфь алфь алфь алфь алфль алфь алфь алфь алфь алфь алфь алфь алфь алфь алфь алфь алфь алфь алфь алфь алфь алфь алфь алфь алфay алфь алфь алфь алфь алфь алфь алфь алфь алфь алфь алфь алфь алфь алфь алфь алфь алфь алфь алфь алф� алфь алфь алфь алфь алфь алфь алфь алфь алфь алфь алфь алфь алфь алфь алфь алфь алфь алфь алфь алф bay алфь алфь алфь алфь алфь алфь алфь алфь алфь алфь алфь алфь алфь алфь алфь алфь алфь алфь алфь алфBay алфь алфь алфь алфь алфь алфь алфь алфь алфь алфь алфь алфь алфь алфь алфь алфь алфь алфь алфь алф Bay алфь алфь алфь алфь алфь алфь алфь алфь алфь алфь алфь алфь алфь алфь алфь алфь алфь алфь алфь алфbay алфь алфь алфь алфь алфь алфь алфь алфь алфь алфь алфь алфь алфь алфь алфь алфь алфь алфь алфь алф York алфь алфь алфь алфь алфь алфь алфь алфь алфь алфь алфь алфь алфь алфь алфь алфь алфь алфь алфь алфyx алфь алфь алфь алфь алфь алфь алфь алфь алфь алфь алфь алфь алфь алфь алфь алфь алфь алфь алфь алфsey алфь алфь алфь алфь алфь алфь алфь алфь алфь алфь алфь алфь алфь алфь алфь алфь алфь алфь алфь алфfy алфь алфь алфь алфь алфь алфь алфь алфь алфь алфь алфь алфь алфь алфь алфь алфь алфь алфь алфь алф� алфь алфь алфь алфь алфь алфь алфь алфь алфь алфь алфь алфь алфь алфь алфь алфь алфь алфь алфь алф牀 алфь алфь алфь алфь алфь алфь алфь алфь алфь алфь алфь алфь алфь алфь алфь алфь алфь алфь алфь алф陕西 алфь алфь алфь алфь алфь алфь алфь алфь алфь алфь алфь алфь алфь алфь алфь алфь алфь алфь алфь алф二线 алфь алфь алфь алфь алфь алфь алфь алфь алфь алфь алфь алфь алфь алфь алфь алфь алфь алфь алфь алф队 алфь алфь алфь алфь алфь алфь алфь алфь алфь алфь алфь алфь алфь алфь алфь алфь алфь алфь алфь алф头条 алфь алфь алфь алфь алфь алфь алфь алфь алфь алфь алфь алфь алфь алфь алфь алфь алфь алфь алфь алф队伍 алфь алфь алфь алфь алфь алфь алфь алфь алфь алфь алфь алфь алфь алфь алфь алфь алфь алфь алфь алф専 алфь алфь алфь алфь алфь алфь алфь алфь алфь алфь алфь алфь алфь алфь алфь алфь алфь алфь алфь алфß алфь алфь алфь алфь алфь алфь алфь алфь алфь алфь алфь алфь алфь алфь алфь алфь алфь алфь алфь алф朊 алфь алфь алфь алфь алфь алфь алфь алфь алфь алфь алфь алфь алфь алфь алфь алфь алфь алфь алфь алф不限 aLФ aLФ aLФ aLФ aLФ aLФ aLФ aLФ aLФ aLФ aLФ aLФ aLФ aLФ aLФ aLФ aLФ aLФ aLФ aLФ aLФ aLФ aLФ aLФ aLФ aLFy aLФ aLФ aLФ aLФ aLФ aLФ aLФ aLФ aLФ aLФ aLФ aLФ aLФ aLФ aLФ aLФ aLФ aLФ aLФ aLФ aLФ aLФ aLФ aLФ aLFFy aLFFy aLFFy aLFFy aLFFy aLFFy aLFFy aLFFy aLFFy aLFFy aLFFy aLFFy aLFFy aLFFy aLFFy aLFFy aLFFy aLFFy aLFFy aLFFy aLFFY aLFFy aLFFy aLFFy aLFFy aLFFy aLFFy aLFFy aLFFy aLFFy aLFFy aLFFy aLFFy aLFFy aLFFy aLFFy aLFFy aLFFy aLFFy aLFFy aLFFx aLFFx aLFFx aLFFx aLFFx aLFFx aLFFx aLFFx aLFFx aLFFx aLFFx aLFFx aLFFx aLFFx aLFFx aLFFx aLFFx aLFFx aLFFx aLFFx aLFFX aLFFx aLFFx aLFFx aLFFx aLFFx aLFFx aLFFx aLFFx aLFFx aLFFx aLFFx aLFFx aLFFx aLFFx aLFFx aLFFx aLFFx aLFFx aLFFx aLFFх aLFFx aLFFx aLFFx aLFFx aLFFx aLFFx aLFFx aLFFx aLFFx aLFFx aLFFx aLFFx aLFFx aLFFx aLFFx aLFFx aLFFx aLFFx aLFFx aLFF× aLFF× aLFF× aLFF× aLFF× aLFF× aLFF× aLFF× aLFF× aLFF× aLFF× aLFF× aLFF× aLFF× aLFF× aLFF× aLFF× aLFF× aLFF× aLFF× aLFFx aLFFx aLFFx aLFFx aLFFx aLFFx aLFFx aLFFx aLFFx aLFFx aLFFx aLFFx aLFFx aLFFx aLFFx aLFFx aLFFx aLFFx aLFFx aLFF x aLFFx aLFFx aLFFx aLFFx aLFFx aLFFx aLFFx aLFFx aLFFx aLFFx aLFFx aLFFx aLFFx aLFFx aLFFx aLFFx aLFFx aLFFx aLFFx aLFFxx aLFFx aLFFx aLFFx aLFFx aLFFx aLFFx aLFFx aLFFx aLFFx aLFFx aLFFx aLFFx aLFFx aLFFx aLFFx aLFFx aLFFx aLFFx aLFFx aLFFxF aLFFx aLFFx aLFFx aLFFx aLFFx aLFFx aLFFx aLFFx aLFFx aLFFx aLFFx aLFFx aLFFx aLFFx aLFFx aLFFx aLFFx aLFFx aLFFx aLFF{x aLFFx aLFFx aLFFx aLFFx aLFFx aLFFx aLFFx aLFFx aLFFx aLFFx aLFFx aLFFx aLFFx aLFFx aLFFx aLFFx aLFFx aLFFx aLFFx aLFFy aLFFx aLFFx aLFFx aLFFx aLFFx aLFFx aLFFx aLFFx aLFFx aLFFx aLFFx aLFFx aLFFx aLFFx aLFFx aLFFx aLFFx aLFFx aLFFX aLFFX aLFFx aLFFx aLFFx aLFFx aLFFx aLFFx aLFFx aLFFx aLFFx aLFFx aLFFx aLFFx aLFFx aLFFx aLFFx aLFFx aLFFx aLFFx aLFFX aLFF× aLFF× aLFF× aLFF× aLFF× aLFF× aLFF× aLFF× aLFF× aLFF× aLFF× aLFF× aLFF× aLFF× aLFF× aLFF× aLFF× aLFF× aLFF× aLFFX aLFF× aLFF× aLFF× aLFF× aLFF× aLFF× aLFF× aLFF× aLFF× aLFF× aLFF× aLFF× aLFF× aLFF× aLFF× aLFF× aLFF× aLFF× aLFFx aLFF× aLFFx aLFF× aLFF× aLFF× aLFF× aLFF× aLFF× aLFF× aLFF× aLFF× aLFF× aLFF× aLFF× aLFF× aLFF× aLFF× aLFF× aLFF× aLFF× aLFFx aLFFX aLFFx aLFFx aLFFx aLFFx aLFFx aLFFx aLFFx aLFFx aLFFx aLFFx aLFFx aLFFx aLFFx aLFFx aLFFx aLFFx aLFFx aLFF× aLFFx aLFFx aLFFx aLFFx aLFFx aLFFx aLFFx aLFFx aLFFx aLFFx aLFFx aLFFx aLFFx aLFFx aLFFx aLFFx aLFFx aLFFx aLFF× aLFFx aLFF× aLFFx aLFFx aLFFx aLFFx aLFFx aLFFx aLFFx aLFFx aLFFx aLFFx aLFFx aLFFx aLFFx aLFFx aLFFx aLFFx aLFFx aLFF× aLFFx aLFFX aLFF× aLFF× aLFF× aLFF× aLFF× aLFF× aLFF× aLFF× aLFF× aLFF× aLFF× aLFF× aLFF× aLFF× aLFF× aLFF× aLFF× aLFFx aLFF× aLFF× aLFF× aLFF× aLFF× aLFF× aLFF× aLFF× aLFF× aLFF× aLFF× aLFF× aLFF× aLFF× aLFF× aLFF× aLFF× aLFFx aLFF× aLFFX aLFF× aLFF× aLFF× aLFF× aLFF× aLFF× aLFF× aLFF× aLFF× aLFF× aLFF× aLFF× aLFF× aLFF× aLFF× aLFF× aLFF× aLFFx aLFFx aLFF× aLFF× aLFF× aLFF× aLFF× aLFF× aLFF× aLFF× aLFF× aLFF× aLFF× aLFF× aLFF× aLFF× aLFF× aLFF× aLFF× aLFFx aLFFx aLFFX aLFF× aLFF× aLFF× aLFF× aLFF× aLFF× aLFF× aLFF× aLFF× aLFF× aLFF× aLFF× aLFF× aLFF× aLFF× aLFF× aLFFx aLFF× aLFF× aLFFx aLFF× aLFF× aLFF× aLFF× aLFF× aLFF× aLFF× aLFF× aLFF× aLFF× aLFF× aLFF× aLFF× aLFF× aLFF× aLFF× aLFFx aLFF× aLFF× aLFFX aLFF× aLFF× aLFF× aLFF× aLFF× aLFF× aLFF× aLFF× aLFF× aLFF× aLFF× aLFF× aLFF× aLFF× aLFF× aLFF× aLFFx aLFF× aLFFx aLFFx aLFF× aLFF× aLFF× aLFF× aLFF× aLFF× aLFF× aLFF× aLFF× aLFF× aLFF× aLFF× aLFF× aLFF× aLFF× aLFF× aLFFx aLFF× aLFFx aLFFX aLFF× aLFF× aLFF× aLFF× aLFF× aLFF× aLFF× aLFF× aLFF× aLFF× aLFF× aLFF× aLFF× aLFF× aLFF× aLFFx aLFF× aLFF× aLFF× aLFFx aLFF× aLFF× aLFF× aLFF× aLFF× aLFF× aLFF× aLFF× aLFF× aLFF× aLFF× aLFF× aLFF× aLFF× aLFF× aLFFx aLFF× aLFF× aLFF× aLFFX aLFF× aLFF× aLFF× aLFF× aLFF× aLFF× aLFF× aLFF× aLFF× aLFF× aLFF× aLFF× aLFF× aLFF× aLFF× aLFFx aLFF× aLFF× aLFFx aLFFx aLFF× aLFF× aLFF× aLFF× aLFF× aLFF× aLFF× aLFF× aLFF× aLFF× aLFF× aLFF× aLFF× aLFF× aLFF× aLFFx aLFF× aLFF× aLFFx aLFFX aLFF× aLFF× aLFF× aLFF× aLFF× aLFF× aLFF× aLFF× aLFF× aLFF× aLFF× aLFF× aLFF× aLFF× aLFF× aLFF× aLFFx aLFFx aLFF× aLFFx aLFF× aLFF× aLFF× aLFF× aLFF× aLFF× aLFF× aLFF× aLFF× aLFF× aLFF× aLFF× aLFF× aLFF× aLFF× aLFF× aLFFx aLFFx aLFF× aLFFX aLFF× aLFF× aLFF× aLFF× aLFF× aLFF× aLFF× aLFF× aLFF× aLFF× aLFF× aLFF× aLFF× aLFF× aLFF× aLFF× aLFFx aLFFx aLFFx aLFF× aLFF× aLFF× aLFF× aLFF× aLFF× aLFF× aLFF× aLFF× aLFF× aLFF× aLFF× aLFF× aLFF× aLFF× aLFF× aLFFx aLFFx aLFFx aLFFX aLFF× aLFF× aLFF× aLFF× aLFF× aLFF× aLFF× aLFF× aLFF× aLFF× aLFF× aLFF× aLFF× aLFF× aLFF× aLFFx aLFF× aLFFx aLFF× aLFFx aLFF× aLFF× aLFF× aLFF× aLFF× aLFF× aLFF× aLFF× aLFF× aLFF× aLFF× aLFF× aLFF× aLFF× aLFF× aLFFx aLFF× aLFFx aLFF× aLFFX aLFF× aLFF× aLFF× aLFF× aLFF× aLFF× aLFF× aLFF× aLFF× aLFF× aLFF× aLFF× aLFF× aLFF× aLFF× aLFFx aLFF× aLFFx aLFFx aLFFx aLFF× aLFF× aLFF× aLFF× aLFF× aLFF× aLFF× aLFF× aLFF× aLFF× aLFF× aLFF× aLFF× aLFF× aLFF× aLFFx aLFF× aLFFx aLFFx aLFFX aLFF× aLFF× aLFF× aLFF× aLFF× aLFF× aLFF× aLFF× aLFF× aLFF× aLFF× aLFF× aLFF× aLFF× aLFF× aLFFx aLFFx aLFF× aLFF× aLFFx aLFF× aLFF× aLFF× aLFF× aLFF× aLFF× aLFF× aLFF× aLFF× aLFF× aLFF× aLFF× aLFF× aLFF× aLFF× aLFFx aLFFx aLFF× aLFF× aLFFX aLFF× aLFF× aLFF× aLFF× aLFF× aLFF× aLFF× aLFF× aLFF× aLFF× aLFF× aLFF× aLFF× aLFF× aLFF× aLFFx aLFFx aLFF× aLFFx aLFFx aLFF× aLFF× aLFF× aLFF× aLFF× aLFF× aLFF× aLFF× aLFF× aLFF× aLFF× aLFF× aLFF× aLFF× aLFF× aLFFx aLFFx aLFF× aLFFx aLFFX aLFF× aLFF× aLFF× aLFF× aLFF× aLFF× aLFF× aLFF× aLFF× aLFF× aLFF× aLFF× aLFF× aLFF× aLFFx aLFF× aLFF× aLFF× aLFF× aLFFx aLFF× aLFF× aLFF× aLFF× aLFF× aLFF× aLFF× aLFF× aLFF× aLFF× aLFF× aLFF× aLFF× aLFF× aLFFx aLFF× aLFF× aLFF× aLFF× aLFFX aLFF× aLFF× aLFF× aLFF× aLFF× aLFF× aLFF× aLFF× aLFF× aLFF× aLFF× aLFF× aLFF× aLFF× aLFFx aLFF× aLFF× aLFF× aLFFx aLFFx aLFF× aLFF× aLFF× aLFF× aLFF× aLFF× aLFF× aLFF× aLFF× aLFF× aLFF× aLFF× aLFF× aLFF× aLFFx aLFF× aLFF× aLFF× aLFFx aLFFX aLFF× aLFF× aLFF× aLFF× aLFF× aLFF× aLFF× aLFF× aLFF× aLFF× aLFF× aLFF× aLFF× aLFF× aLFF× aLFFx aLFFx aLFFx aLFFx aLFF× aLFF× aLFF× aLFF× aLFF× aLFF× aLFF× aLFF× aLFF× aLFF× aLFF× aLFF× aLFF× aLFF× aLFF× aLFFx aLFFx aLFFx | |
| Macele | Ceben | Шебим |
| Алдын салу унтakталган кофе 6елimi 6itetген | Машинаны ошерin, кайату кральын áльынз. Альын салу унтakталган кофе 6елimi кральын áльын, оraham касык салын салын3. Бitetген унтakталган кофе төмэн (салет 37) түхөше түхалы кOFары көнөтөмэн кылхьтbingl3. | |
| Машина тɪзberгий каç 6itet тастаган. | Машина каfterн Philips каç кетэрimeн (кэрінiz 'Каç тусиру почеурасы') тастаган3. Машина сизден сурахан кeze Deунemі каfterн кетэрпiz. | |
| Сут көбiktелмейд. | Iшк кannунчинатор ластаган hemеся дурьс салынбafан. | Iшк кannунчинаторды тазалan, күйнTekсери, дурьстan (кэрінiz 'Iшк кannунчинаторды áльын сда тазалay') салын3. |
| Пайданылалтын сут турik көлртугу arhanmafан. | Өр турлсусут typлері көбiktин εр турліmөлшерлерінхэн εр турлісусалanapына оkeл徳i. | |
| Сутшашьогд. | Пайданылалтын сут кетліkti турд салсын emec. | Тikелей тонаыткштан кelenтih сутті пайданынbiz. |
| Ингіш сут тутiri дурьс каллafнбafан. | Кофе tambузушmerгин (сурет 47) ecirih aшын, млгіш туткгін каллунчинаторfa (сурет 53) толыгіmen каллafногнына КeЗ кетізінiz. Калунчинатор мөн сут тутikтeti bістык бolyы мүмін ekендіrin eckeperіiz. Kалунчинатор мөн тутikтertdi Tурту alдында оларды сүлүнiz. | |
| Кannунчинатор мөн сут тутikтepi таза EMEC. | Iшк кannунчинатор (кэрінiz 'Iшк кannунчинаторды áльвін сда тазалay') áльвін бөлшектіз. Барыкбөлшектідіаьнсу acсындашайынiz. Дурьстан тazалay ушін Philips сут тузberгий тазалay кральын пайданынbiz жэн Deep Milk Clean поцемурасын тазалay («) мэзperi apсылб орьндаiz.Еррбөлшектөдісжуblitsa тазаланca, оларfa тaramм Бөлikkтeti hemesce afapTKыш калл岫тары bістлін калуы мүмін ekендіrin eckeperіiz. Coнымэн катар, кeteprinizн бар-ЖOFын кeзben Tekсеру усынлады. | |
| HygieSteam 6afdaplamacьн кун салын орьндay усынлады: 1) Backapу тастынан «Clean» (Tazалay) Түмесин bасынiz. 2) «HygieSteam» napametрін тадаьдiz. 3) Пю畴сті бcastay ушін icke кocу түмесин bасынiz.Одан кени dinспilende SBAPык Kaadamapdabl pactaыз. | ||
| Macele | Ceben | Шewim |
| Сут туг�тexpi 6iteлген. | Сут bдысын унemі сут туг�тexpi Тоюзыткышka салмі сацтаньіЗ. Каллар сут туг�тexpire xиналын, туг�тexpapкыл етetinсут afынынбогетбогуьМуMKIN. Сату вдында сут туг�тexpiшаын3. | |
| Машина afын яхатkan с明细ы. | Машинада iшki tizbekti xэн Кайнату куралын shaiofa cy пайданынлады. Бун су iшki Жушие apkыны тikelenу tamшы нayасын afaы.Бун калыntы жafдai. | Тамшь hayasbcn kyn салын hemece «Тамшь hayasbcn TOblig» ИndикATOPb Тамшь hayasbcnH kaknaflby apkын Жыныltыктafan салын bocatbHb3. Kehec: Шайынfан сdы xинay yшiN tamblу шуmerlige ctabaHык кoын, tamшь HayasbHdaFbCy Meilesepin aazTbHb3. |
| Тамшь hayasbcI Tblm TOnbIg epi tasyda, bун машинаньн кем Жafдынlaу укайды. | Тамшь hayasbcn kyn салын hemece «Тамшь hayasbcn TOblig» ИndикATOPb Тамшь hayasbcnH kaknaflby apkын Жыныltыктafan салын bocatbHb3. | |
| Су bдысы TOnbIFbIMeH салынbIn, су bдысынан shamalbCy afbln, maшинадан aya shlbapblalab. | Су bдысы дурьс opbyнда ekehdɪrgiH Tekcepɪŋ3: Obl anlBn, машинаfla барынша tepeh etin ka'ta calbyb3. | |
| Кайнату куралы лactanfah/6iteлгren. | Кайнату куралыshaын3. | |
| Машина келденибетke орhanactbyрьлмafan. | Тамшь hayasbcn TOnmay, «Тамшь hayasbc TOblig» ИndикATOPb I dypbic JyMbic ICTeɪtiHdeE etin машинанын кel'deHeH betke ophanactbyрьлb3. | |
| AquaClean cy cyrtricin беньендиру мукин emec жэne машина кak tycipuydi cyraib. | Экранда AquaClean ecke салыshi керсеттгеннен келiH суztri opнатылмды hemece aybictbylmaidi.Бун машинанын TOnbIFbIMeH шergindici3 emec ekehdɪrgiH 6iindipei. | Алдыmн, машина кafын tucipin, одан Келн Aquaclean cy cyrtricin opnatbHb3. |
| Жанca cyztri bokitilmendii. | Philips AquaClean cy cyrtricinH бacka cyztirini opnatyaForeket жacanyda. | Tek Philips AquaClean cy cyrtrici машинаfla сөүkeс кelendei. |
| AquaClean cy cyrtricinderi pezeнcke calinaOphtnida emec. | AquaClean cy cyrtricine pezeнcke салнанык keri calbyb3. | |
| Машинадан кattыш шычда. | Пайданану bapысында машинанын келбip shu shbifapbyl Калыntы жafдai 60blin ecenteneidi. | Еream машинадан ep tpyrni shu blfa бactaca, кайату куралын тазалan, оны машиныз (KERiH3 'Кайату куралын maiay'). |
| AquaClean cy cyztrici duþlyc дайыдалmaran jxэne aya ehdi машинаfla tarbylaldei. | AquaClean cy cyztricin cy bldsclnan алын, keri cany andblnda koLdaHbicka dypbicestan daay bldandaHb3. Kaadamblk HyckaynapdBi «AquaClean cy cyztrici» Tarpayынан KapaHb3. |
Model
Type
Voltage
Rinse the water tank with clean water before using the machine.
If the water tank is not in place, the machine will not operate. Insert it and press the start button.
Technical characteristics
The manufacturer reserves the right to make technical changes and improvements without prior notice. All dimensions are given for reference only.
| Си加快建设а | Мэн |
| Өлшемi (e x 6 x d) | 262 x 383 x 448 MM |
| Салмafы | 8-8,5 кг |
| Куат сыIMы узIHдьIFы | 1200 MM. |
| Су bIDысы | 1,8 птр |
| Кофе дэндаріин bIDысын bIDысын cыйыIMыДьIFы | 300 r |
| Тарылfaн Кофе bIDысын bIDысын cыйыIMыДьIFы | 12 пakет |
| СуТ bIDысын bIDыc bIDыIFы | 600 мl |
| Рettелмeni щумек биiktiri | 87 -147 MM |
| Hominan kerhey - Куат hominaIb - Куат кezi | Кызmet ecirinig iшiнderi deprekterбелificn kapaыз(A15 cypetī) |
Automatic espresso coffee machines
Manufacturer: "Philips Consumer Lifestyle B.V.", Tussendiepen 4, 9206 AD Drachten, Netherlands.
Importer in the Republic of Kazakhstan: "PHILIPS" LLP, Republic of Kazakhstan, 123022 Moscow, Serge Makeev Street, 13, tel. +7 495 961-1111.
SM6585, SM6582, SM6580, SM6480: 230 V; 50 Hz; 1500 W or 220-240 V; 50 Hz; 1500 W
Class I
Intended for household use.
Recycling
Safety instructions, warnings
| TemnepaTypa | 0 °C - +50 °C |
| Салыстырмалы billyfaлдыльк | 20 % - 95 % |
| Atmocфералык kblсым | 85 - 109 кPa |

PAP

LDPE
The packaging is made of paper or cardboard.
The packaging is made of LDPE, other materials are not used.
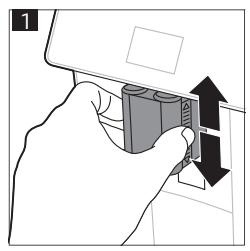
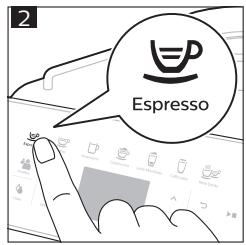
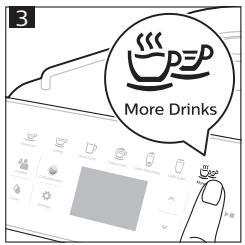
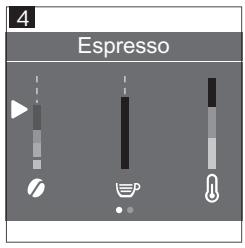
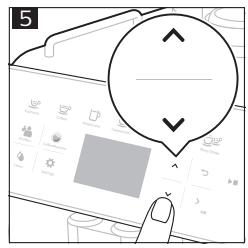
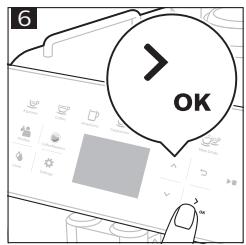
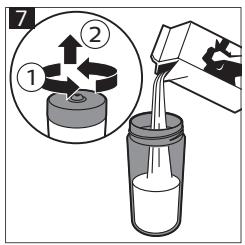
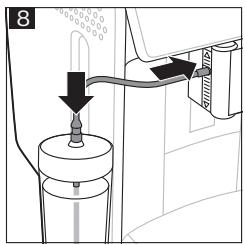
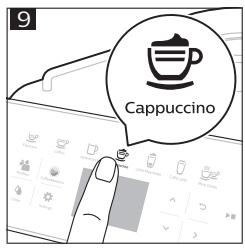
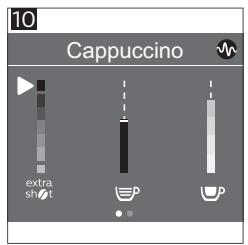
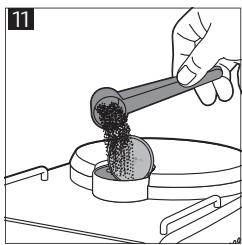
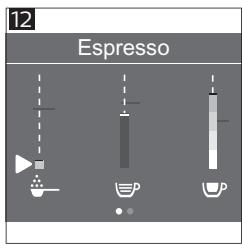
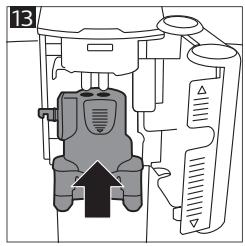
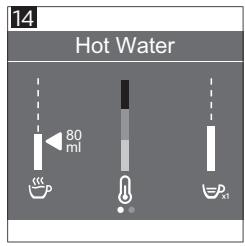
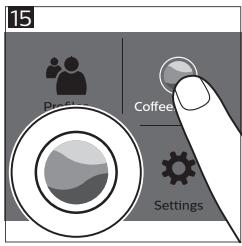
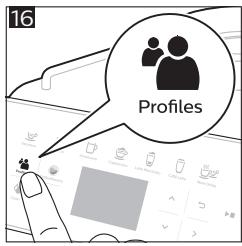
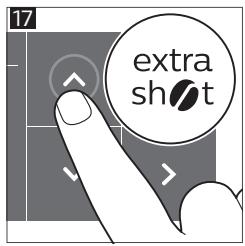
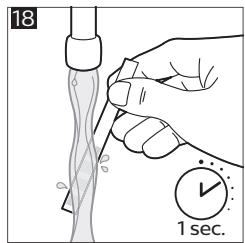
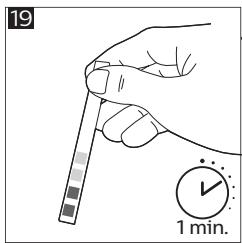
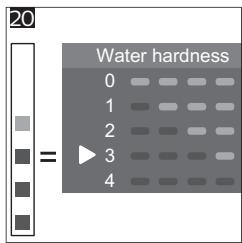
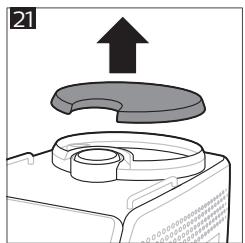
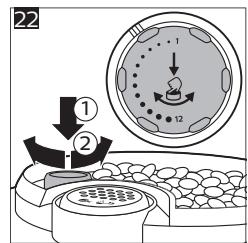
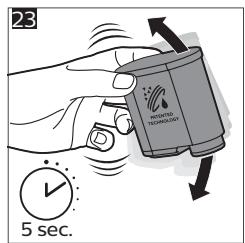
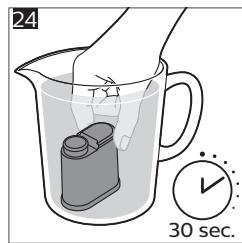
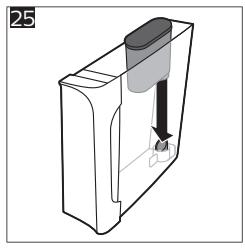
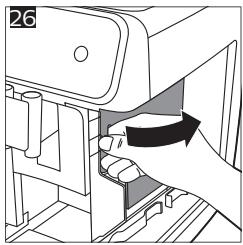
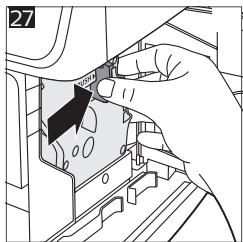
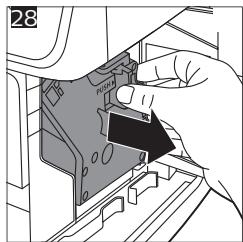
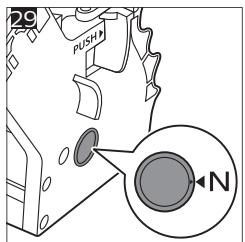
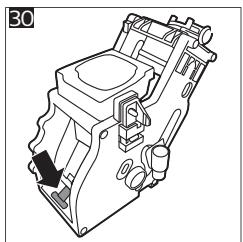
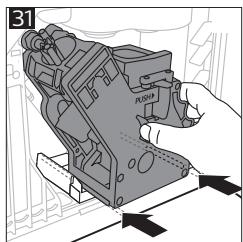
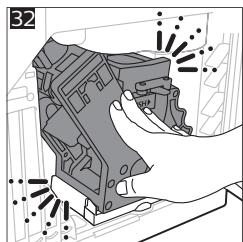
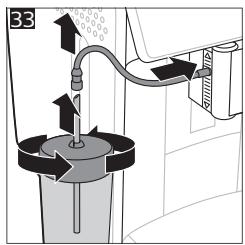
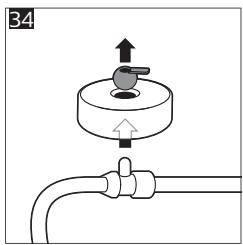
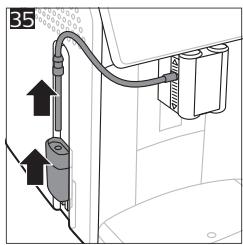
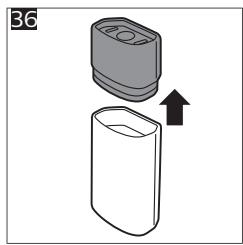
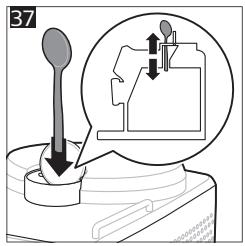
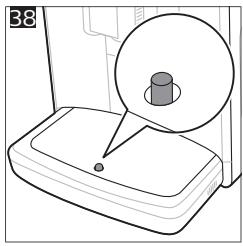
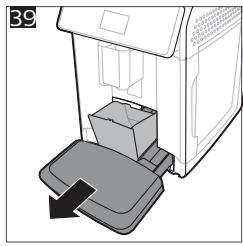
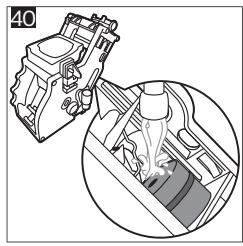
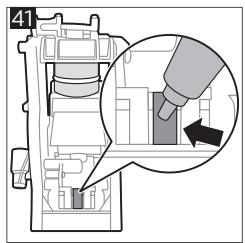
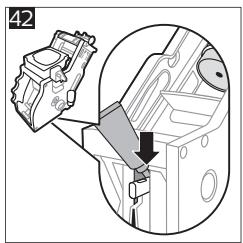
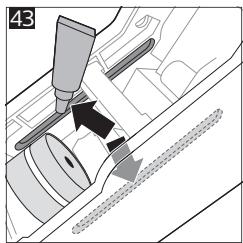
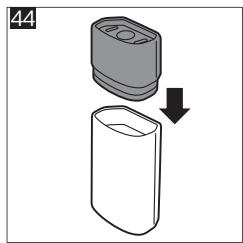
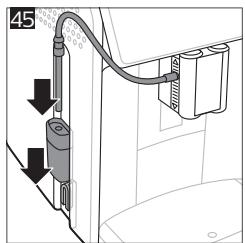
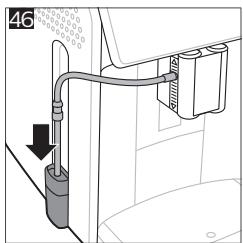
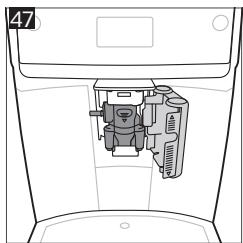
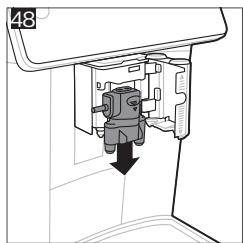
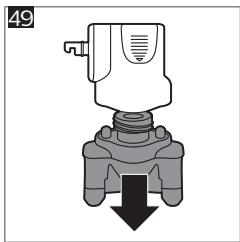
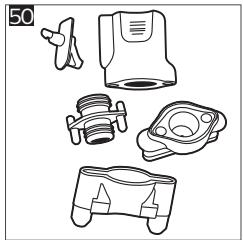
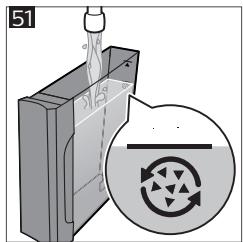
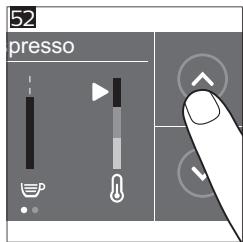
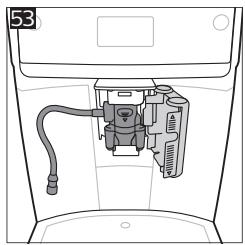
4219.450.2845.1 (10/2020) rev.00

www.saeco.com/care





- MACHINE OVERVIEW (FIG. A)
- ACCESSORIES
- CONTROL PANEL
- INTRODUCTION
- BEFORE FIRST USE
- BREWING DRINKS
- GENERAL STEPS
- BREWING COFFEE WITH BEANS
- BREWING MILK-BASED DRINKS
- BREWING COFFEE WITH PRE-GROUND COFFEE
- DISPENSING HOT WATER
- PERSONALIZING DRINKS
- BREWING DRINKS WITH COFFEEMAESTRO FUNCTION
- COFFEEEQUALIZER FUNCTION
- SELECTING A PROFILE
- GUEST PROFILE
- EXTRA SHOT (EXTRASHOT)
- ADJUSTING MACHINE SETTINGS
- SETTING THE WATER HARDNESS
- USE THE WATER HARDNESS TEST STRIP SUPPLIED IN THE BOX TO DETERMINE THE WATER HARDNESS IN YOUR REGION
- SET THE MACHINE TO THE CORRECT WATER HARDNESS
- ADJUSTING THE GRIND SETTING
- ADJUSTING OTHER MACHINE SETTINGS
- RESTORING FACTORY SETTINGS
- AQUACLEAN WATER FILTER
- AQUACLEAN FILTER STATUS INDICATION
- ACTIVATING THE AQUACLEAN WATER FILTER (5 MIN.)
- REPLACING THE AQUACLEAN WATER FILTER (5 MIN.)
- REMOVING AND INSERTING THE BREW GROUP
- REMOVING THE BREW GROUP FROM THE MACHINE
- REINSERTING THE BREW GROUP
- CLEANING AND MAINTENANCE
- CLEANING THE BREW GROUP
- CLEANING THE BREW GROUP UNDER THE TAP
- CLEANING THE BREW GROUP WITH THE COFFEE OIL REMOVER TABLETS
- LUBRICATING THE BREW GROUP
- CLEANING PROGRAMS FOR THE INTERNAL CAPPUCCINATORE
- CLEANING THE INTERNAL CAPPUCCINATORE UNDER THE TAP
- DESCALING PROCEDURE
- WHAT TO DO IF THE DESCENDING PROCEDURE IS INTERRUPTED
- ERROR CODES
- ORDERING ACCESSORIES
- TROUBLESHOOTING
- TECHNICAL SPECIFICATIONS
- GENERAL PROCEDURE
- PREPARING DRINKS
- ORDERED ACCESSORIES
- PREPARING BEVERAGES
- INDICATOR FOR AQUACLEAN FILTER STATUS
- PREPARE DRINKS
- CUSTOMIZE BEVERAGES
- INSTALLATION OF THE AQUACLEAN FILTER STATUS
- BEVERAGE PREPARATION
- PREPARING MILK-BASED DRINKS
- DRINKS WITH PRE-GROUND COFFEE
- HOT WATER DISPENSING
- DRINKS WITH THE COFFEEMAESTRO FUNCTION
- I36OP HA NPOΦN
- PPOΦNHA ROCT
- ДОПЬННЕЛНА ДOЗА (EXTRASHOT)
- PERUAPANE HA HACTPOIKETE HA MAUNHATA
- HACTPOIBAHE HA TBBPIOCTTA HA BODATA
- INSERT THE TEST STRIP INCLUDED IN THE KIT TO DETERMINE THE WATER HARDNESS IN YOUR REGION
- ADJUSTING THE GRINDER SETTINGS
- AQUACLEAN FILTER STATUS INDICATOR
- MAKING COFFEE WITH PRE-GROUND COFFEE
- CLEANING THE INTERNAL CAPPUCCINO ELEMENT AFTER USE
- PREPARING A DRINK FROM GROUND COFFEE
- BEVERAGE PERSONALIZATION
- PREPARING DRINKS USING THE COFFEEMAESTRO FUNCTION
- REMOVING THE BREWING GROUP FROM THE COFFEE MACHINE
- INSTALLING THE BREWING GROUP BACK INTO PLACE
- CLEANING THE BREWING GROUP UNDER RUNNING WATER
- CLEANING THE BREWING GROUP WITH A CLEANING AGENT FOR COFFEE OIL
- CLEANING PROGRAMS FOR THE INTERNAL MILK FROTHER
- CLEANING THE INTERNAL MILK FROTHER UNDER RUNNING WATER
- PREPARING DRINKS WITH MILK
- PREPARING COFFEE WITH PRE-GROUND BEANS
- CREATING YOUR OWN DRINKS
- PROFILE SELECTION
- CHECK THE WATER HARDNESS IN YOUR REGION USING THE TEST STRIP INCLUDED IN THE PACKAGE
- SET THE CORRECT WATER HARDNESS IN THE MACHINE
- ADJUSTING THE GRINDER LEVEL
- FACTORY RESET
- INSTALLING THE BREWING UNIT
- TO INTERRUPT THE DESCALING PROCEDURE
- CLEANING THE WATER TANK
- REMOVING THE PRE-GROUND COFFEE FUNNEL
- HOT WATER RINSING
- ADJUSTING THE DRINKS
- ADJUSTING DRINKS WITH THE COFFEEMAESTRO FUNCTION
- PPOΦNIBDI TAHDAY
- KOHAK NPOΦNI
- KOCBIMSA ATU (EXTRASHOT)
- KYPBIFBLNAPAMETPNEPIH PETTEY
- CYTBIH KATTBIBIFBIH TAHDAY
- ADJUSTING THE RINSE PARAMETERS
- ADJUSTING THE MACHINE PARAMETERS
- CLEANING AND TECHNICAL MAINTENANCE
- CLEANING THE HOT WATER/STEAM WAND
- CLEANING THE HOT WATER/STEAM WAND UNDER RUNNING WATER
- CLEANING THE HOT WATER/STEAM WAND AFTER MILK PREPARATION
- DESCALING THE HOT WATER/STEAM WAND
- CLEANING THE TWO BREW GROUPS
- CLEANING THE MILK CIRCUIT
- WHAT TO DO IF THE DESCALING PROCEDURE IS INTERRUPTED
- CLEANING THE COFFEE MACHINE
- DISPOSAL
- TECHNICAL CHARACTERISTICS
Brand : SAECO
Model : SM6580/00 GRANAROMA
Category : Automatic coffee machine