
GRANAROMA SM6480 - Automatic coffee machine SAECO - Free user manual and instructions
Find the device manual for free GRANAROMA SM6480 SAECO in PDF.




| Product type | Automatic coffee machine |
| Brand | SAECO |
| Model | GRANAROMA SM6480 |
| Dimensions (L x H x D) | 262 x 383 x 448 mm |
| Weight | 8 to 8.5 kg |
| Power cord length | 1200 mm |
| Water tank capacity | 1.8 liters |
| Bean hopper capacity | 300 grams |
| Coffee grounds container capacity | 12 doses |
| Milk container capacity | 600 ml |
| Adjustable dispensing spout height | 87 to 147 mm |
| Power supply | See label inside the access door |
| Coffee grinder | Ceramic, 12 adjustable grind settings |
| Water filter | AquaClean (replaceable) |
| Personalization functions | CoffeeMaestro (Delicato, Intenso, Forte profiles), CoffeeEqualizer, ExtraShot, colored personal profiles |
| Beverage preparation | Whole bean coffee, pre-ground coffee, milk-based drinks, hot water |
| Milk system | Internal cappuccinatore, 600 ml milk container, HygieSteam cleaning |
| Maintenance | Weekly cleaning of the brewing unit, descaling with Philips solution, lubrication every 2 months |
| Spare parts and accessories | AquaClean filter CA6903, descaling solution CA6700, grease HD5061, degreasing tablets CA6704, milk circuit cleaner CA6705 |
| Repairability | Spare parts available, self-diagnostic error codes, online support www.saeco.com/care |
Frequently Asked Questions - GRANAROMA SM6480 SAECO
User questions about GRANAROMA SM6480 SAECO
0 question about this device. Answer the ones you know or ask your own.
Ask a new question about this device
Download the instructions for your Automatic coffee machine in PDF format for free! Find your manual GRANAROMA SM6480 - SAECO and take your electronic device back in hand. On this page are published all the documents necessary for the use of your device. GRANAROMA SM6480 by SAECO.
USER MANUAL GRANAROMA SM6480 SAECO
Machine overview (Fig. A) 6 Control panel 6 Introduction 7 Before first use 7 Special functions 8 Brewing drinks 8 Personalizing drinks 10 Adjusting machine settings 11 AquaClean water filter 12 Removing and inserting the brew group 13 Cleaning and maintenance 14 Descaling procedure 16 Error codes 17 Ordering accessories 18 Troubleshooting 19 Technical specifications 23
Machine overview (Fig. A)
A1 Control panel A2 Lid of pre-ground coffee compartment A3 Lid of bean hopper A4 Socket for cord A5 Drip tray A6 Drip tray release grip A7 Adjustable coffee and milk dispensing spout A8 HygieSteam container A9 HygieSteam cover with milk tube holder A10 Internal cappuccinatore
A11 Mains cord with plug A12 Grind setting knob A13 Bean hopper A14 Brew group A15 Service door A16 Water tank A17 Coffee grounds container A18 Front panel of coffee grounds container A19 Drip tray cover A20 'Drip tray full' indicator
Accessories
A21 Milk container A22 Milk tube A23 Grease tube
A24 AquaClean filter A25 Measuring scoop A26 Water hardness test strip
Control panel
There are two versions of this espresso machine. Their control panels look different, but all buttons and icons work in the same way. Refer to figure B for an overview of all buttons and icons. Below you find the description.
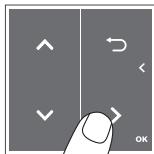
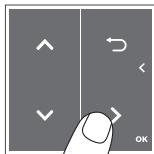
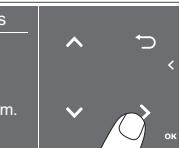
Use the up and down arrows to scroll through the display and tap the OK icon to select or confirm your choices.
B1 On/off button
B2 One-touch drink icons
B3 CoffeeMaestro icon B4 Menu with more drinks B5 Start/stop▶ button B6 Navigation icons (up, down, back, ok)
B7 Display B8 Machine settings B9 Cleaning menu B10 Personal profiles
Introduction
Congratulations on your purchase of a Saeco full-automatic coffee machine! To fully benefit from the online support that Saeco offers, go to www.saeco.com/MyCoffeeMachine and register your product.
Note: This machine has been tested with coffee. Although it has been carefully cleaned, there may be some coffee residues left. We guarantee, however, that the machine is absolutely new.
Before first use
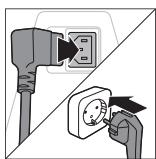

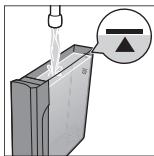

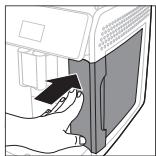

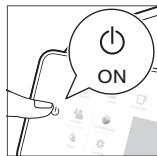

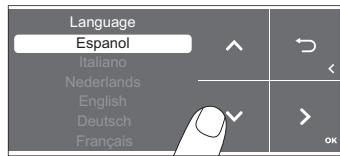
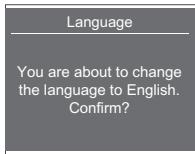
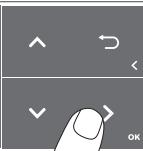
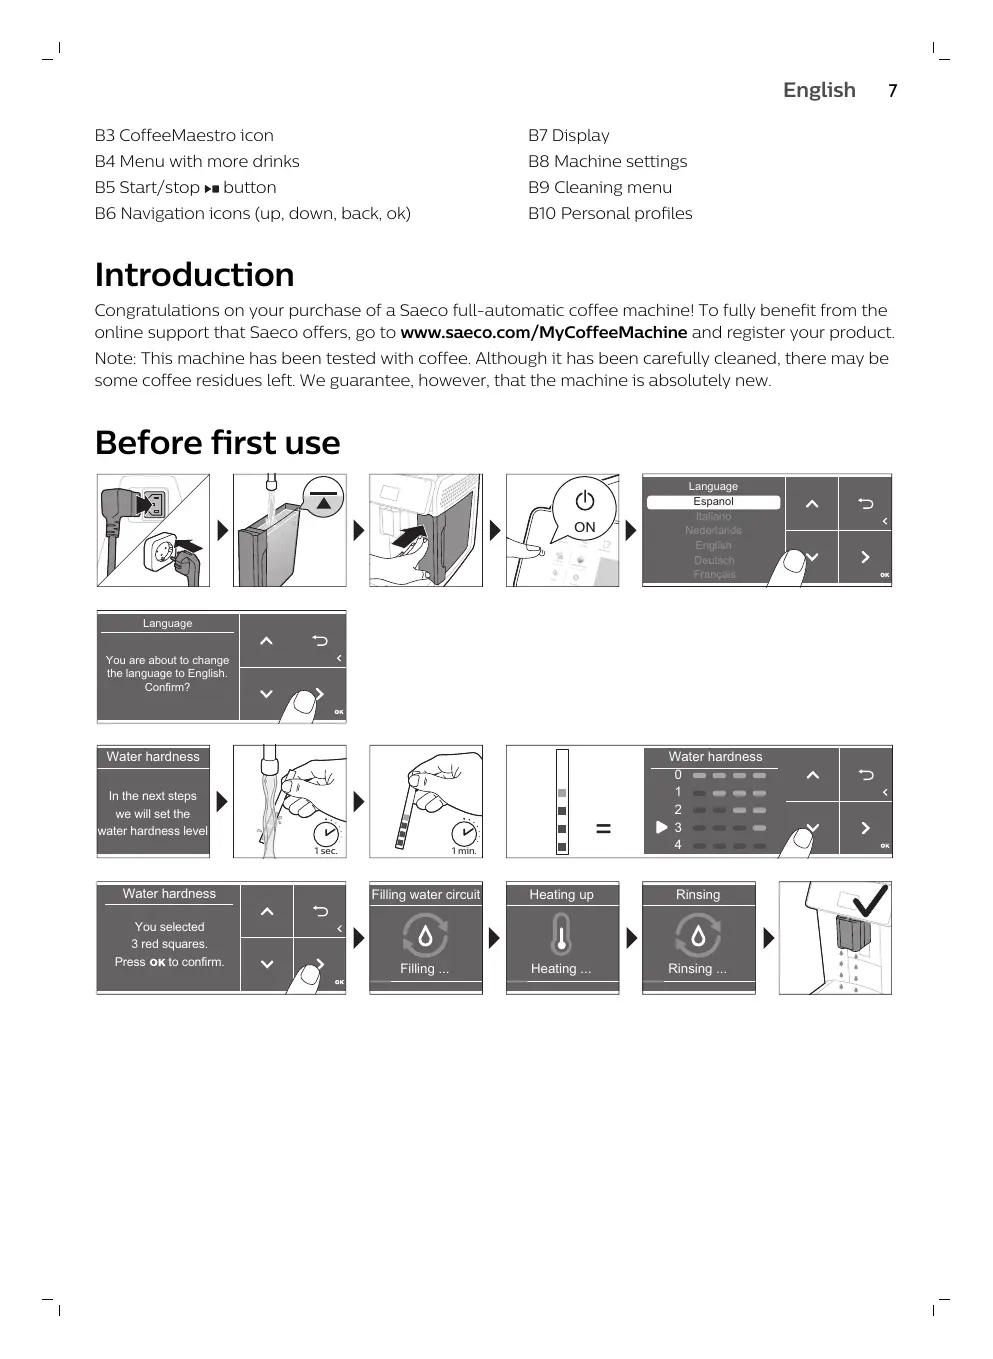
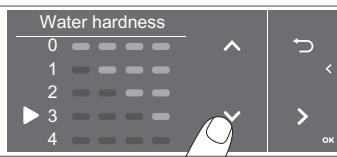
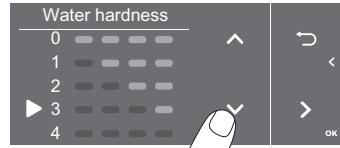
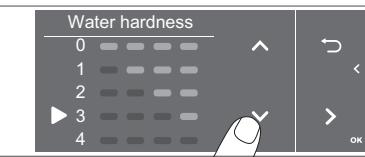
Water hardness
In the next steps
we will set the
water hardness level




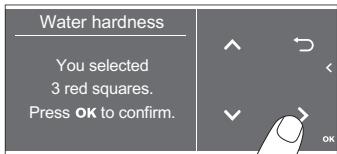
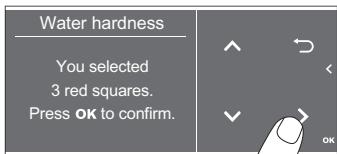
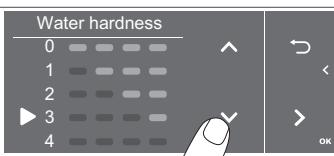
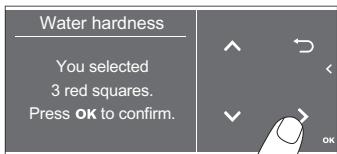
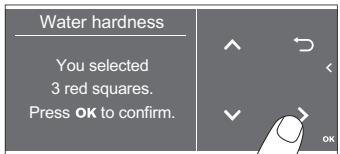
Water hardness
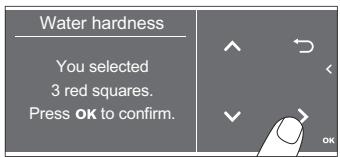
You selected
3 red squares.
Press OK to confirm.

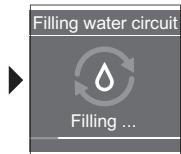
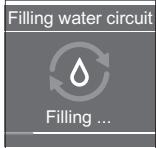
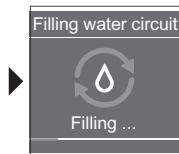
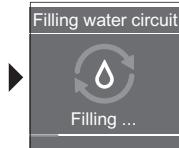
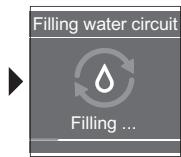
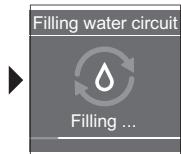
Filling water circuit

Filling ...

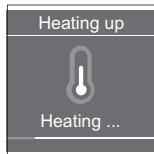
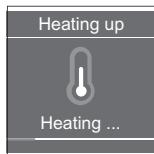
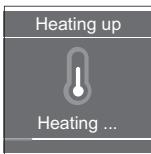
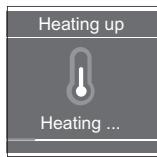
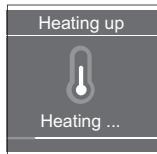
Heating up

Heating ...

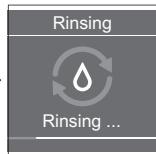
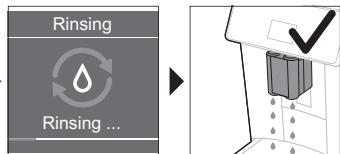
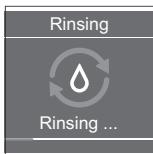
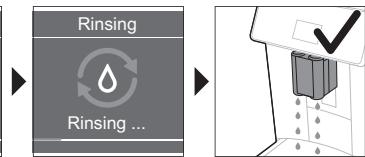
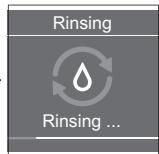
Rinsing

Rinsing ...

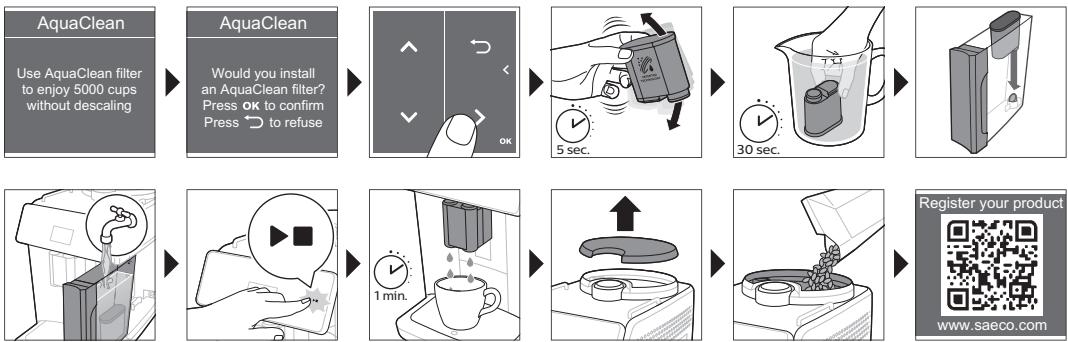
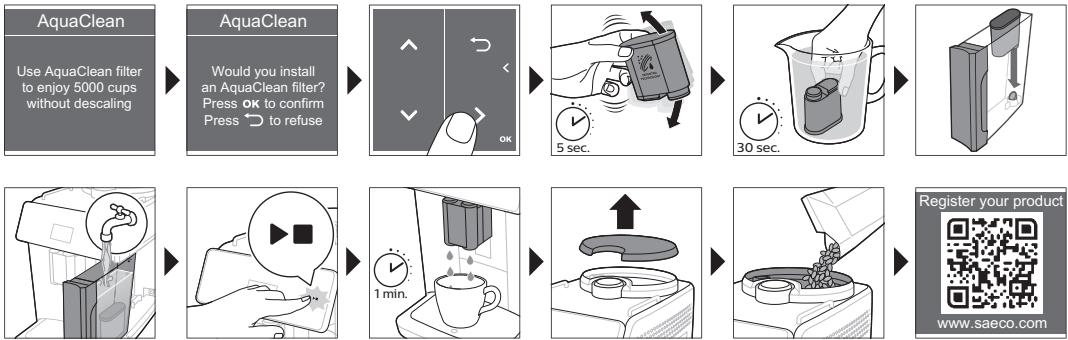
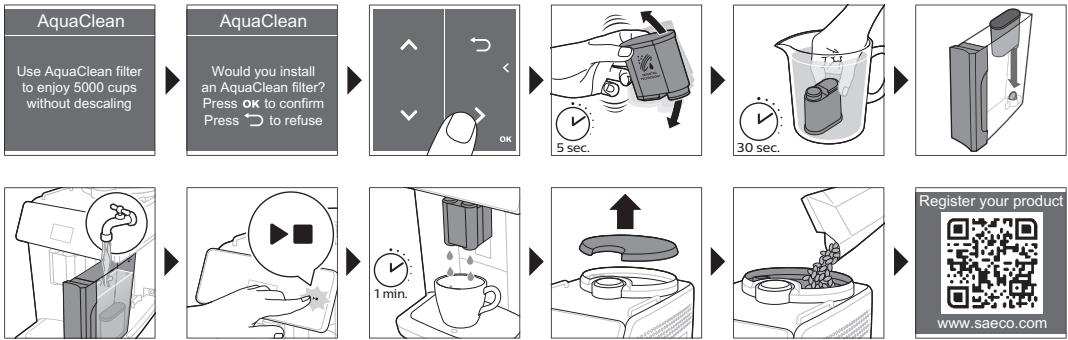
| AquaClean Use AquaClean filter to enjoy 5000 cups without descaling | AquaClean Would you install an AquaClean filter? Press OK to confirm Press ⇌ to refuse | ||||
Special functions
Special function



Purpose
With CoffeeMaestro you can personalize your coffee by selecting a pre-set taste profile (Delicato, Intenso, Forte) for your beverage instead of changing the settings yourself.
The HygieSteam function automatically cleans the milk system, removing microorganisms: use it after brewing cappuccino or other milk-based drinks.
Our durable grinder is made from 100% ceramic to be exceptionally hard and precise. It can be adjusted to your taste with 12-step levels.
Brewing drinks
General steps
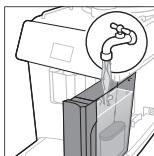
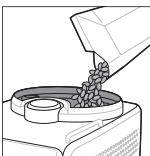
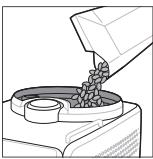
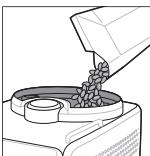
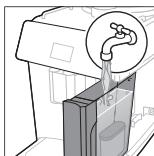
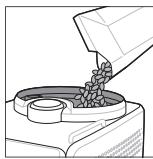
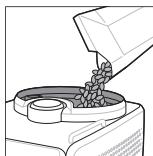
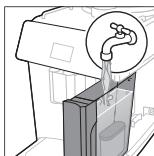
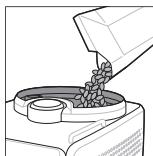
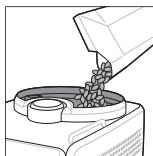
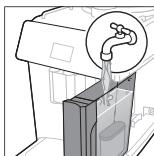
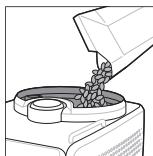
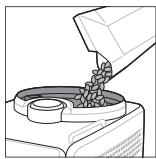
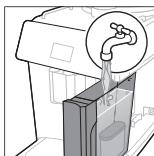
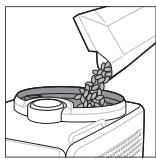
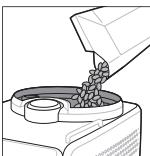
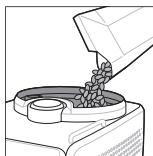
1. Fill the water tank with tap water and fill the bean hopper with coffee beans. 2. Insert the small plug into the socket located on the back of the machine. Insert the mains plug into the wall socket. 3. Press the on/off button to switch on the machine.
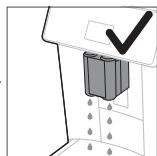
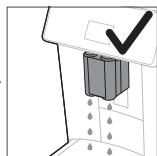
- The machine starts heating up and performs the automatic rinsing cycle.
- When all lights in the drink icons light up continuously, the machine is ready for use.
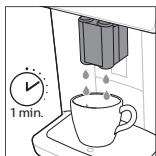
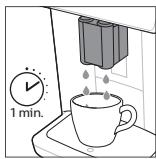
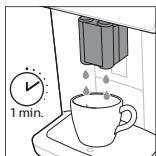
4. Place a cup under the coffee dispensing spout. Slide the coffee dispensing spout up or down to adjust its height to the size of the cup or glass you are using (Fig. 1).
Brewing coffee with beans
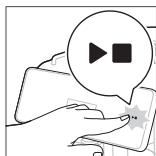
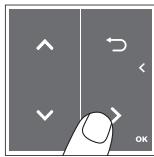
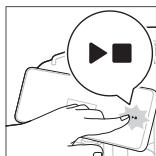
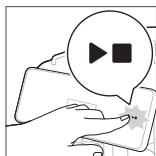
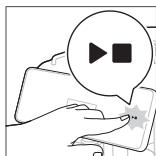
1 To brew a coffee, tap the drink icon of your choice (Fig. 2) or tap the 'More Drinks' icon (Fig. 3). - You can now adjust the drink to your personal taste (Fig. 4). Use the up and down arrows (Fig. 5) to adjust the coffee strength. Tap the OK icon if you want to adjust more settings (Fig. 6). 2 Press the start/stop button at any time to start brewing the selected drink. 3 To stop dispensing coffee before the machine is finished, press the start/stop button again.
i To brew 2 coffees at the same time, tap the drink icon twice or select the 2x icon scrolling the dedicated bar. A Do not use caramelized or flavored coffee beans.
Brewing milk-based drinks
1 Fill the water tank with tap water and fill the bean hopper with beans. 2 Unscrew the lid of the milk container and fill the milk container with milk (Fig. 7). Then place the metal milk tube in the container.
Always use milk coming directly from the fridge for optimal results.
3 Connect the flexible milk tube to the cappuccinatore (Fig. 8). 4 Tap the milk-based drink icon of your choice (Fig. 9) or tap the 'More Drinks' icon to select a different drink (Fig. 3).
- You can now adjust the drink to your own preference (Fig. 10).
5 Press the start/stop button.
- For specific drinks, the machine first dispenses milk and then coffee. For a number of other drinks this is the other way around, the machine will first dispense coffee and then milk.
- To stop dispensing milk before the machine has dispensed the preset amount, press the start/stop button.
6 To stop dispensing the complete drink (milk and coffee) before the machine is finished, press and hold the start/stop button. 7 Directly after dispensing the milk, the 'HygieSteam Shot' is performed. The machine forces steam through the internal milk system to rinse it quickly.
Brewing coffee with pre-ground coffee
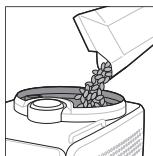
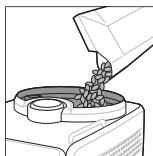
1 Tilt the lid and pour one measuring scoop of pre-ground coffee into the pre-ground coffee compartment (Fig. 11). 2 After selecting a drink, use the up and down arrows to select pre-ground coffee (Fig. 12). Then press the start/stop button.
Note: If you select pre-ground coffee, you cannot adjust the coffee strength and/or brew more than one drink at the same time.
Dispensing hot water
1 Make sure that the internal cappuccinatore is properly attached to the machine (Fig. 13). 2 Place a cup under the spout. 3 Tap the 'More drinks' icon (Fig. 3) and scroll down to select 'Hot Water'. 4 Use the up and down arrows to adjust the hot water quantity or temperature to your preference (Fig. 14). 5 Press the start/stop button.
6 To stop dispensing hot water before the machine is finished, press the start/stop button again.
Personalizing drinks
The machine allows you to adjust the settings of a drink to your own preference and to store the adjusted drink in a personal profile. The different profiles have different colors.
Brewing drinks with CoffeeMaestro function
Your machine offers the possibility to select taste profiles instead of adjusting all settings separately with the CoffeeEqualizer function. You can choose between Delicato, Intenso, and Forte. To select a CoffeeMaestro taste profile:
1 Tap the drink icon of your choice (Fig. 2) or tap the 'More Drinks' icon to select a different drink (Fig. 3). 2 Tap the CoffeeMaestro icon repeatedly (Fig. 15). 3 Press OK to confirm your choice.
The main settings of the drink are now adjusted accordingly.
4 Press the start/stop button to start brewing the drink.
CoffeeEqualizer function
After selecting a drink, the CoffeeEqualizer function is activated automatically. You can use the up and down arrows to adjust the following settings:
1
2
3
4
(5)
(6)
7
8
1 Aroma strength 2 Coffee quantity 3 Milk quantity 4 Water quantity
5 Drink temperature 6 Foam amount 7 You can also decide to prepare 1 or 2 cups 8 Coffee quantity for travel mug (specific types only)
Note: It depends on the drink you choose which settings you can adjust.
Selecting a profile
You can select a profile and store a recipe using the profiles icon.
1 Tap the profiles icon repeatedly to select one of the colored profiles (Fig. 16). All profiles have a different color. 2 Select a drink by tapping one of the one-touch drink icons or by tapping the 'More Drinks' icon. 3 Adjust the drink settings to your favorite taste. 4 Press start/stop button to brew the drink you selected
- Your new settings have now been stored in the colored profile you selected.
i You can always restore the factory settings of the machine (see 'Restoring factory settings').
Guest profile
Your machine is equipped with a guest profile. When the guest profile is selected, the profile icon is off. When you select this profile, you can still personalize the settings to your own preference but the recipes you brew will not be stored.
Extra shot (ExtraShot)
Your machine offers you the possibility to add an extra shot of Ristretto to your coffee and milk drinks, for example if you want to have a stronger coffee.
1 Place a cup under the spout. 2 Tap one of the one-touch drinks icons to select a drink (Fig. 2) or tap the 'More Drinks' icon to select a different drink (Fig. 3). 3 Use the up arrow to set the strength to the top level and select the ExtraShot function (Fig. 17). 4 Tap the OK icon if you want to personalize the other settings. Then press the start/stop button to start brewing the drink. 5 To stop dispensing the drink before the machine has finished, press the start/stop button again.
i When you have selected the ExtraShot function, you can only brew one coffee at a time.
Adjusting machine settings
Setting the water hardness
We advise you to adjust the water hardness setting to the water hardness level in your region for optimal performance and a longer lifetime of the machine. This also prevents you from having to descale the machine too often. The default water hardness setting is 4: hard water.
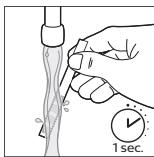
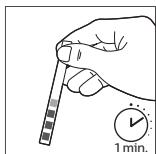
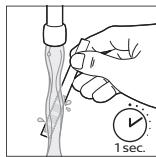
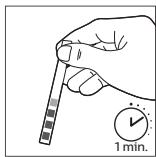
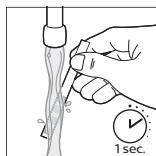
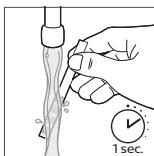
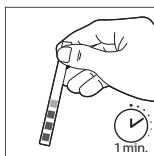
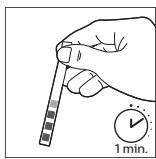
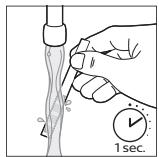
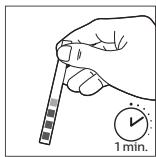
Use the water hardness test strip supplied in the box to determine the water hardness in your region:
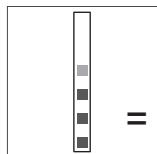
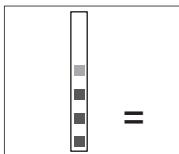
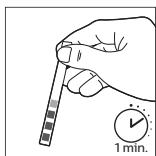
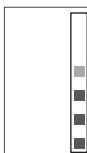
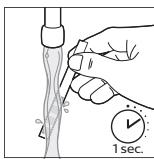
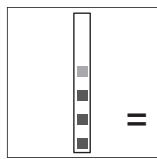
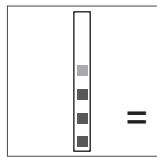
1 Immerse the water hardness test strip in tap water or hold it under the tap for 1 second (Fig. 18). 2 Wait 1 minute. The number of squares on the test strip that turn red indicate the water hardness (Fig. 19).
Set the machine to the correct water hardness:
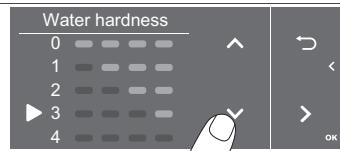
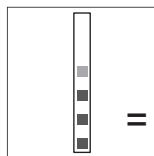
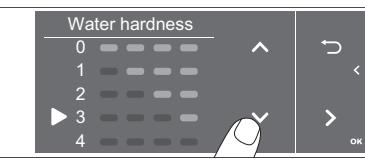
1 Tap the Settings icon and use the up and down arrows to select 'Water hardness'. Then press the OK icon to confirm. 2 Use the up and down arrows to select the water hardness level. The number of red squares selected on the display should be the same as the number of red squares on the test strip (Fig. 20). 3 When you have set the correct water hardness, tap the OK icon to confirm.
Adjusting the grind setting
You can change the coffee strength with the grind setting knob inside the bean container. The lower the grind setting, the finer the coffee beans are ground and the stronger the coffee becomes. There are 12 different grind settings you can choose from.
The machine has been set up to get the best taste out of your coffee beans. Therefore we advise you not to adjust the grind setting until you have brewed 100-150 cups (approx. 1 month of use).
1 You can only adjust the grind setting when the machine is grinding coffee beans. You need to brew 2 to 3 drinks before you can taste the full difference. 4 Do not turn the grind setting knob more than one notch at a time to prevent damage to the grinder.
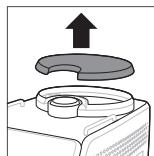
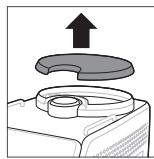
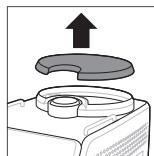
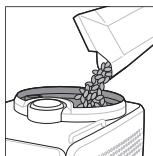
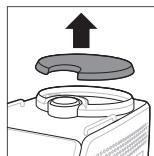
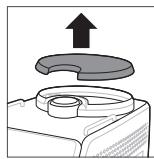
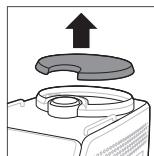
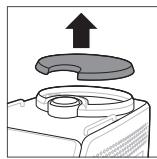
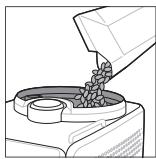
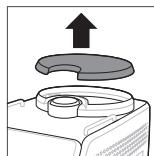
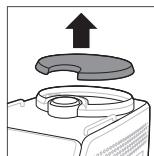
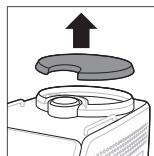
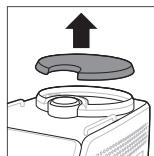
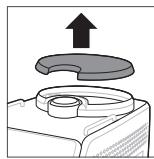
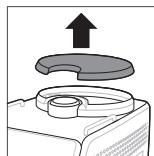
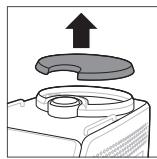
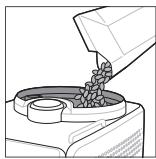
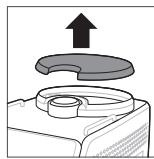
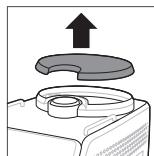
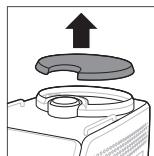
1 Place a cup under the coffee dispensing spout. 2 Remove the lid from the coffee bean hopper (Fig. 21). 3 Tap the Espresso icon and then press the start/stop button. 4 When the grinder starts grinding, press down the grind setting knob and turn it to the left or right (Fig. 22).
Adjusting other machine settings
By tapping the Settings icon, you can adjust the following machine settings:
Water hardness: you can choose between 5 levels according to the water hardness in your region. - Standby time: you can select 15, 30, 60 or 180 minutes. - Display brightness: you can select low, medium and high. Language: you can select the display language of your preference. Sound: you can activate or deactivate the beeping sound of the machine. - Front illumination: you can choose 'always on', 'on during brewing' or 'always off'. - Measuring unit: you can choose between ml. or oz.
Restoring factory settings
The machine offers you the possibility to restore the factory settings at any moment.
1 Tap the Settings icon. 2 Use the up and down arrows to select 'Factory settings'. Confirm by tapping the OK icon. 3 Press the start/stop button to confirm that you want to restore the settings.
- The settings are now restored.
i The following factory settings are restored to default: water hardness, standby time, display brightness, sound, front illumination, profiles.
Aquaclean water filter
Your machine is AquaClean enabled. You can place the AquaClean water filter in the water tank to preserve the taste of your coffee. It also diminishes the need for descaling by reducing limescale build-up in your machine. You can purchase an AquaClean water filter from your local or online retailer or authorized service centers.
AquaClean filter status indication
When the AquaClean is active, the status of the AquaClean filter is always visible on the screen as a percentage.
- If the status of the AquaClean filter is 10% or less, the screen shows a message for 2 seconds each time you switch on the machine. This message advises you to buy a new filter.
- If the status of the filter is 0%, the machine asks you to replace the AquaClean filter every time you switch on the machine.
Activating the AquaClean water filter (5 min.)
The machine does not automatically detect that a filter has been placed in the water tank. Therefore, you need to activate each new AquaClean water filter that you install in the 'Clean' menu. When the machine stops showing the filter activation message, you can still activate an AquaClean water filter, but you will need to descale the machine first. Note: Your machine has to be completely limescale-free before you start using the AquaClean water filter.
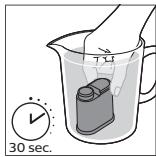
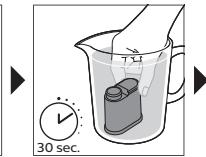
Before activating the AquaClean water filter, it has to be prepared by soaking it in water as described below. If you don't do this, air might be drawn into the machine instead of water, which makes a lot of noise and prevents the machine from being able to brew coffee.
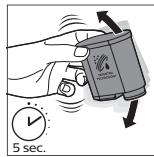
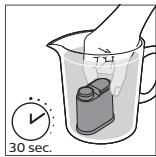
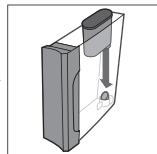
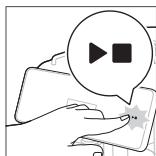
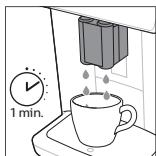
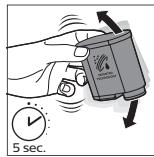
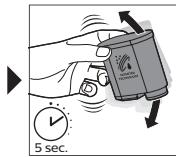
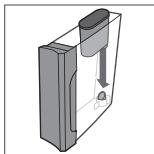
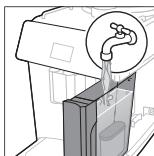
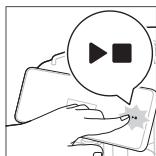
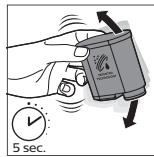
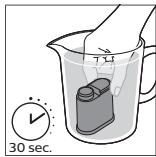
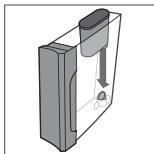
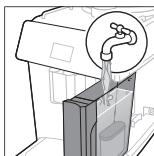
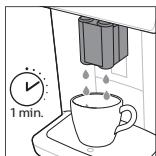
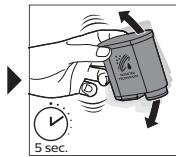
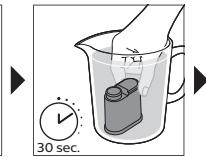
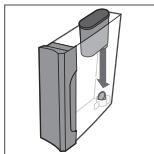
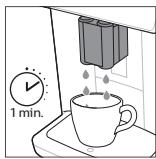
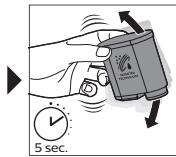
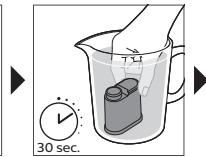
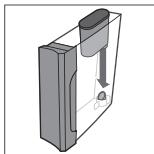
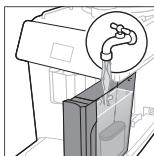
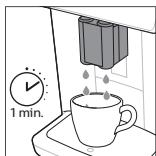
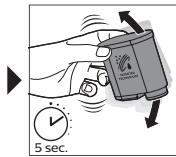
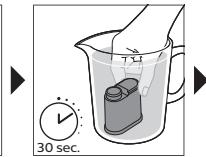
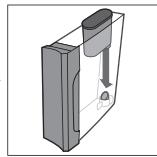
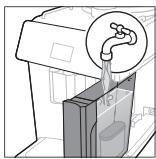
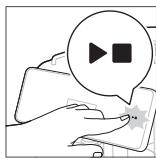
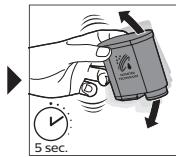
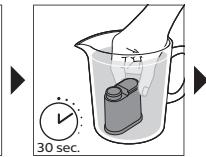
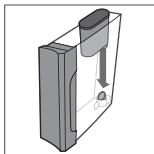
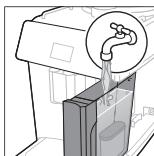
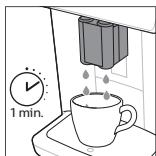
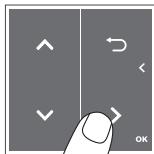
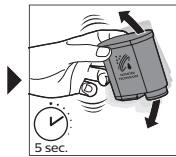
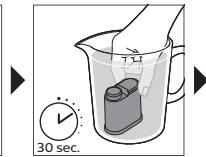
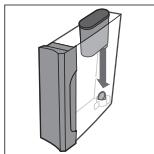
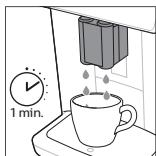
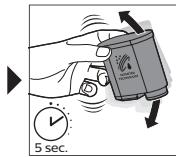
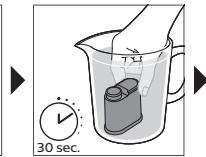
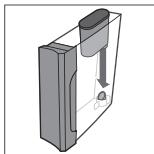
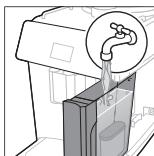
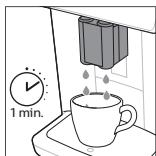
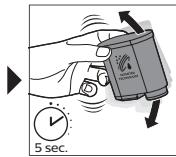
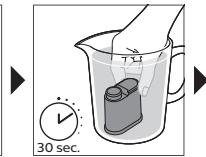
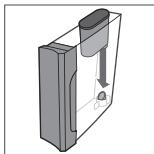
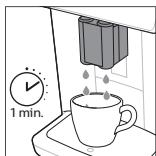
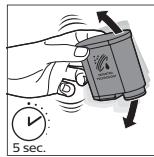
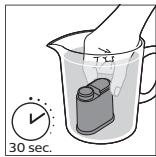
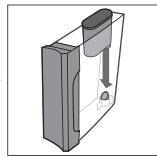
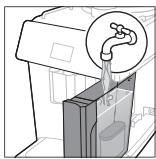
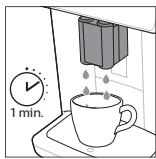
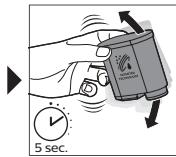
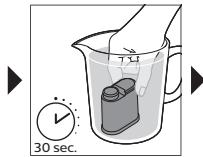
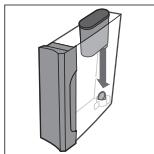
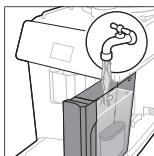
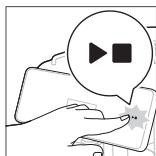
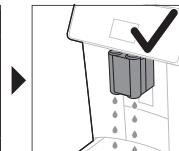
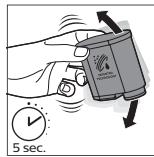
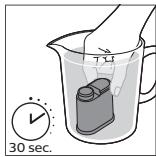
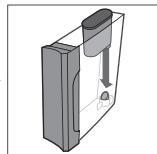
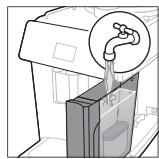
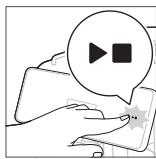
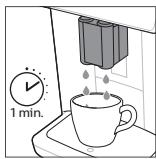
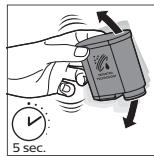
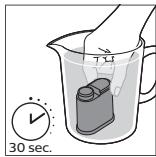
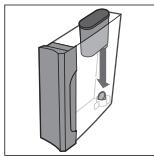
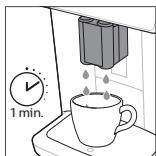
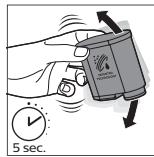
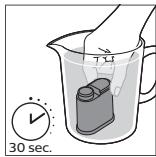
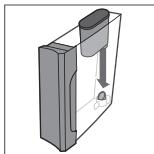
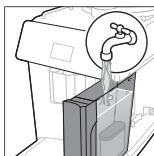
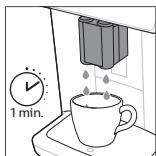
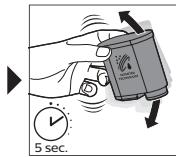
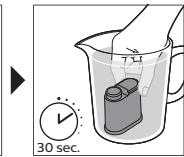
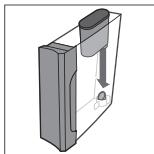
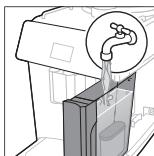
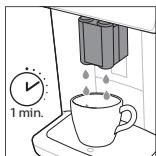
1. Tap the 'Clean' icon and use the up and down arrows to select 'AquaClean'. 2. Tap the OK icon to confirm. 3. Tap the OK icon again when the activation screen appears. Follow the instructions on the screen. 4. Shake the filter for about 5 seconds (Fig. 23). 5. Immerse the filter upside down in a jug with cold water and shake/press it (Fig. 24). 6. Insert the filter vertically onto the filter connection in the water tank. Press it down to the lowest possible point (Fig. 25). 7. Fill the water tank with fresh water and place it back into the machine. 8. Place a bowl under the spout. 9. Press the start/stop button to start the activation process. 10. Hot water will be dispensed from the spout during 1 minute. 11. The filter is now successfully activated.
Replacing the AquaClean water filter (5 min.)
After 95 liters of water have flowed through the filter, the filter will cease to work. The AquaClean status indicator drops to 0% to remind you to replace the filter. As long as the AquaClean status indicator is shown on the display, you can replace the filter without having to descale the machine first. If you do not replace the AquaClean water filter in time, the AquaClean indicator goes out after some time. In that case you can still replace the filter but you first need to descale the machine.
When the AquaClean status indicator drops to 0% or when the machine reminds you to replace the AquaClean filter:
1. Take out the old AquaClean water filter. 2. Install a new filter and activate it as described in chapter 'Activating the AquaClean water filter (5 min.)'.
Note: Replace the AquaClean water filter at least every 3 months, even if the machine does not yet indicate that replacement is required.
Removing and inserting the brew group
Go to www.saeco.com/care for detailed video instructions on how to remove, insert and clean the brew group.
Removing the brew group from the machine
1. Switch off the machine.
2. Remove the water tank and open the service door (Fig. 26). 3. Press the PUSH handle (Fig. 27) and pull at the grip of the brew group to remove it from the machine (Fig. 28).
Warning: When you remove the brew group from the machine, make sure to empty the drip tray and the coffee grounds container.
Reinserting the brew group
Before you slide the brew group back into the machine, make sure it is in the correct position.
1 Check if the brew group is in the correct position. The arrow on the yellow cylinder on the side of the brew group has to be aligned with the black arrow and N (Fig. 29). - If they are not aligned, push down the lever until it is in contact with the base of the brew group (Fig. 30). 2 Slide the brew group back into the machine along the guiding rails on the sides (Fig. 31) until it locks into position with a click (Fig. 32). Do not press the PUSH button. 3 Close the service door and place back the water tank.
Cleaning and maintenance
Regular cleaning and maintenance keeps your machine in top condition and ensures good-tasting coffee for a long time with a steady coffee flow.
Consult the table below for a detailed description on when and how to clean all detachable parts of the machine. You can find more detailed information and video instructions on www.saeco.com/care. See figure C for an overview of which parts can be cleaned in the dishwasher.
| Detachable parts | When to clean | How to clean |
| Brew group | Weekly | Remove the brew group from the machine (see 'Removing and inserting the brew group'). Rinse it under the tap (see 'Cleaning the brew group under the tap'). |
| Monthly | Clean the brew group with the Philips coffee oil remover tablet (see 'Cleaning the brew group with the coffee oil remover tablets'). | |
| Milk system/internal cappuccinatore | After every day of use | Perform the 'HygieSteam' program in the cleaning menu. Select 'HygieSteam' in the cleaning menu and follow the instructions on the screen. Wipe the outside of the metal milk tube with a damp cloth before placing it into the milk tube holder. |
| Weekly | Remove and disassemble the internal cappuccinatore (see 'Cleaning the internal cappuccinatore under the tap'). Rinse all parts under the tap with some washing-up liquid. | |
| Monthly | Perform the 'Deep Milk Clean' procedure with the Philips milk circuit cleaner. Select 'Deep Milk Clean' in the cleaning menu and follow the instructions on the screen. Go to www.saeco.com/care for detailed video instructions. | |
| Milk container | Weekly | Disassemble the milk container (Fig. 33) and push out the ball using the pin of the milk tube (Fig. 34). Clean all parts of the milk container under the tap or in the dishwasher |
| HygieSteam container (milk tube holder) | Weekly or when the machine reminds you | Remove the HygieSteam container from the machine (Fig. 35) and remove the HygieSteam cover (Fig. 36). Empty the HygieSteam container and clean the container and cover under the tap or in the dishwasher. Let the container and cover air-dry and place them back in the machine. |
| Pre-ground coffee compartment | Check the pre-ground coffee compartment weekly to see if it is clogged. | Unplug the machine and remove the brew group. Open the lid of the pre-ground coffee compartment and insert the spoon handle into it. Move the handle up and down until the clogged ground coffee falls down (Fig. 37). Go to www.saeco.com/care for detailed video instructions. |
| Coffee grounds container | Empty the coffee grounds container when prompted by the machine. Clean it weekly. | Remove the coffee grounds container while the machine is switched on. Rinse it under the tap with some washing-up liquid or clean it in the dishwasher. The front panel of the coffee grounds container (Fig. A18) is not dishwasher-safe. |
| Drip tray | Empty the drip tray daily or as soon as the red 'drip tray full' indicator pops up through the drip tray (Fig. 38). Clean the drip tray weekly. | Remove the drip tray (Fig. 39) and rinse it under the tap with some washing-up liquid. You can also clean the drip tray and the drip tray cover in the dishwasher. The front panel of the coffee grounds container (Fig. A18) is not dishwasher-safe. |
| Lubrication of the brew group | Every 2 months | Lubricate the brew group with the by-packed grease (see 'Lubricating the brew group'). |
| Water tank | Weekly | Rinse the water tank under the tap |
| Machine front | Weekly | Clean with a non-abrasive cloth |
Cleaning the brew group
Regular cleaning of the brew group prevents coffee residues from clogging up the internal circuits. Visit www.saeco.com/care for support videos on how to remove, insert and clean the brew group.
Cleaning the brew group under the tap
1 Remove the brew group (see 'Removing and inserting the brew group'). 2 Rinse the brew group thoroughly with water. Carefully clean the upper filter (Fig. 40) of the brew group. 3 Let the brew group air-dry before you place it back. Do not dry the brew group with a cloth to prevent fibers from collecting inside the brew group.
Cleaning the brew group with the coffee oil remover tablets
Only use Philips coffee oil remover tablets.
1 Tap the Clean icon and use the up and down arrows to select 'Brew group clean'. 2 Tap the OK icon to confirm and then follow the instructions on the screen.
Lubricating the brew group
To improve your machine's performance, we suggest that you lubricate the brew group every 2 months, to ensure that the moving parts continue to move smoothly.
1 Apply a thin layer of grease on the piston (grey part) of the brew group (Fig. 41). 2 Apply a thin layer of grease around the shaft (grey part) in the bottom of the brew group (Fig. 42). 3 Apply a thin layer of grease to the rails on both sides (Fig. 43).
Cleaning programs for the internal cappuccinatore
The machine has three programs to clean the internal cappuccinatore:
- 'HygieSteam Shot': the machine shoots steam through the internal cappuccinatore to rinse it quickly.
- 'HygieSteam': the machine thoroughly cleans the internal milk system with steam. Make sure that the HygieSteam container is correctly assembled (Fig. 44) and attached to the machine (Fig. 45). Place the milk tube in the milk tube holder (Fig. 46) and follow the instructions on the screen.
- 'Deep Milk Clean': Perform the 'Deep Milk Clean' procedure with the Philips milk circuit cleaner for a thorough cleaning of the internal milk system.
Cleaning the internal cappuccinatore under the tap
1. Open the door of the internal cappuccinatore (Fig. 47). 2. Remove the internal cappuccinatore by pulling it down (Fig. 48). 3. Disassemble the internal cappuccinatore by pulling the bottom part off the top part (Fig. 49). 4. Disassemble all parts (Fig. 50) and clean them under the tap. 5. Reassemble the internal cappuccinatore. 6. To place back the internal cappuccinatore, put it in upright position and make sure the holes are aligned with the two tubes on the machine. Then move the internal cappuccinatore upwards until it locks into place (Fig. 13). 7. Close the door.
Visit www.saeco.com/care for detailed video instructions.
Descaling procedure
Please use Philips descaler only. Under no circumstances should you use a descaler based on sulfuric acid, hydrochloric acid, sulfamic or acetic acid (vinegar) as this may damage the water circuit in your machine and will not dissolve the limescale properly. Not using the Philips descaler will void your
warranty. Failure to descale the appliance will also void your warranty. You can buy Philips descaler from your local or online retailer or authorized service centers.
1 When the machine asks you to descale it, tap the OK icon to start. To start descaling without being prompted by the machine, tap the Clean icon and select 'Descale'. 2 Remove the drip tray, the coffee grounds container and the HygieSteam container (Fig. 35), empty them and put them back into place. 3 Remove the water tank and empty it. Then remove the AquaClean filter. 4 Pour the whole bottle of Philips descaler into the water tank and then fill it with water up to the CALC CLEAN level (Fig. 51). Then place it back into the machine. 5 Place a large container (1.5 l) under the coffee dispensing spout. 6 Make sure that the HygieSteam container is correctly assembled (Fig. 44) and attached to the machine (Fig. 45). Place the milk tube in the milk tube holder (Fig. 46). 7 Follow the instructions on the screen to start the descaling procedure. The descaling procedure lasts approx. 30 minutes and consists of a descaling cycle and a rinsing cycle. 8 Once the descaling cycle is finished, you need to rinse the water tank and water circuit. Follow the instructions on the screen. 9 Place a new AquaClean filter in the water tank and activate it (see 'Activating the AquaClean water filter (5 min).')
Tip: Using the AquaClean filter reduces the need for descaling!
What to do if the descaling procedure is interrupted
You can exit the descaling procedure by pressing the on/off button on the control panel. If the descaling procedure is interrupted before it is completely finished, do the following:
1 Empty and rinse the water tank thoroughly. 2 Fill the water tank with fresh water up to the CALC CLEAN level indication and switch the machine back on. The machine will heat up and perform an automatic rinsing cycle. 3 Before brewing any drinks, perform a manual rinsing cycle. To perform a manual rinsing cycle, first dispense half a water tank of hot water and then brew 2 cups of pre-ground coffee without adding ground coffee.
Note: If the descaling procedure was not completed, the machine will require another descaling procedure as soon as possible.
Error codes
Below you find a list of the error codes showing problems that you can solve yourself. Video instructions are available on www.saeco.com/care. If another error code appears, please contact the Consumer Care Center in your country. For contact details, see the warranty leaflet.
| Error code | Problem | Possible solution |
| 01 | The coffee funnel is clogged. | Switch off the machine and unplug it. Remove the brew group. Then open the lid of the pre-ground coffee compartment and insert the spoon handle. Move the handle up and down until the clogged ground coffee falls down (Fig. 37). Visit www.saeco.com/care for detailed video instructions. |
| 03 | The brew group is dirty or not well-greased. | Switch off the machine. Rinse the brew group with fresh water, let it air-dry and then lubricate it (see 'Lubricating the brew group'). Consult chapter 'Cleaning the brew group' or visit www.saeco.com/care for detailed video instructions. Then switch the machine on again. |
| 04 | The brew group is not positioned correctly. | Switch off the machine. Remove the brew group and reinsert it. Make sure that the brew group is in the correct position before you insert it. Consult chapter 'Handling the brew group' or visit www.saeco.com/care for detailed video instructions. Then switch the machine on again. |
| 05 | There is air in the water circuit. | Restart the machine by switching it off and on again. If this works, dispense 2-3 cups of hot water. Descale the machine if you have not done so for a longer period of time. |
| The AquaClean filter was not prepared properly before installation or it is clogged. | Remove the AquaClean filter and try to brew a coffee again. If this works, make sure that the AquaClean filter is prepared properly before you place it back. Put the AquaClean filter back into the water tank. If this still does not work, the filter might be clogged and needs to be replaced. | |
| 11 | The machine needs to adjust to room temperature | Allow some time for the machine to adjust from transport/outdoor temperature to room temperature. Switch off the machine for 30 minutes and switch it on again. If this does not work, contact the Consumer Care Center in your country. For contact details, see the warranty leaflet. |
| 14 | The machine is overheated. | Switch off the machine and switch it back on after 30 minutes. |
| 19 | The machine is not connected to the wall socket properly. | Make sure that the small plug of the power cord is properly connected to the socket on the back of the machine. |
Ordering accessories
To clean and descale the machine, only use the Philips maintenance products. These products can be purchased from your local or online retailer or authorized service centers. To find a full list of spare parts online, enter the model number of your machine. You can find the model number on the inside of the service door.
Maintenance products and type numbers:
- Descaling solution CA6700
- AquaClean filter CA6903 Brew group grease HD5061
- Coffee oil remover tablets CA6704
- Milk circuit cleaner CA6705
- Maintenance kit CA6707
Troubleshooting
This chapter summarizes the most common problems you could encounter with the machine. Support videos and a complete list of frequently asked questions are available on www.saeco.com/care. If you are unable to solve the problem, contact the Consumer Care Center in your country. For contact details, see the warranty leaflet.
| Problem | Cause | Solution |
| There are some coffee residues inside my new coffee machine. | This machine has been tested with coffee. | Although it has been carefully cleaned, there may be some coffee residues left. However, the machine is absolutely new. |
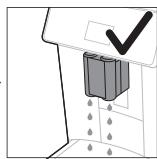
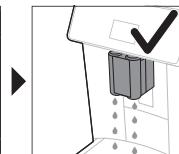
| The drip tray fills up quickly / there is always some water in the drip tray. | This is normal. The machine uses water to rinse the internal circuit and brew group. Some water flows through the internal system directly into the drip tray. | Empty the drip tray daily or as soon as the red 'drip tray full' indicator pops up through the drip tray cover. Tip: place a cup under the dispensing spout to collect rinsing water that comes out of it. |
| The 'empty coffee grounds container' icon remains on. | You emptied the coffee grounds container while the machine was unplugged from the wall socket, or you placed it back too fast. | Remove the coffee grounds container, wait at least 5 seconds and then insert it again. |
| The machine prompts to empty the coffee grounds container even though the container is not full. | The machine did not reset the counter the last time you emptied the coffee grounds container. | Always wait approx. 5 seconds when you place back the coffee grounds container. In this way, the coffee pucks counter will be reset to zero and the number of coffee pucks is counted correctly. |
| The coffee grounds container is too full and the 'empty coffee grounds container' icon did not appear on the display. | You removed the drip tray without emptying the coffee grounds container. | When you remove the drip tray, also empty the coffee grounds container even if it contains only a few coffee pucks. This ensures that the coffee pucks counter is reset to zero and that the number of coffee pucks is counted correctly. |
| I cannot remove the brew group. | The brew group is not in the correct position. | Reset the machine in the following way: close the service door and place back the water tank. Switch the machine off and back on again and wait for the lights in the drink icons to come on. Try to remove the brew group again. See chapter 'Removing and inserting the brew group' for step-by-step instructions. |
| I cannot insert the brew group. | The brew group is not in the correct position. | Reset the machine in the following way: close the service door and place back the water tank. Leave the brew group out. Switch off the machine and unplug it. Wait for 30 seconds and then plug the machine back in, switch it on and wait for the lights in the drink icons to come on. Then put the brew group in the correct position and reinsert it into the machine. See chapter 'Removing and inserting the brew group' for step-by-step instructions. |
| The coffee is watery. | The brew group is dirty or needs to be lubricated. | Remove the brew group, rinse it under the tap and leave it to dry. Then lubricate the moving parts (see 'Lubricating the brew group'). |
| The machine is performing its self-adjustment procedure. This procedure is started automatically when you use the machine for the first time, when you change to another type of coffee beans or after a long period of non-use. | Brew 5 cups of coffee initially to allow the machine to complete its self-adjustment procedure. | |
| The grinder is set to a too coarse setting. | Set the grinder to a finer (lower) setting. Brew 2 to 3 drinks to be able to taste the full difference. | |
| The coffee is not hot enough. | The temperature is set too low. | Set the temperature to the maximum setting (Fig. 52). |
| A cold cup reduces the temperature of the drink. | Preheat the cups by rinsing them with hot water. | |
| Adding milk reduces the temperature of the drink. | Regardless of whether you add hot or cold milk, adding milk always reduces the temperature of the coffee. Preheat the cups by rinsing them with hot water. | |
| Coffee does not come out or coffee comes out slowly. | The AquaClean water filter was not prepared properly for installation. | Remove the AquaClean filter and dispense some hot water. If this works, the AquaClean filter was not installed properly. Reinstall and activate the AquaClean filter and follow all steps in chapter 'AquaClean water filter'. |
| After a long period of non-use, you need to prepare the AquaClean water filter for use again and dispense 2-3 cups of hot water. | ||
| The AquaClean water filter is clogged. | Replace the AquaClean water filter every 3 months. A filter that is older than 3 months can become clogged. | |
| The grinder is set to a too fine setting. | Set the grinder to a coarser (higher) setting. Note that this will impact the coffee taste. | |
| The brew group is dirty. | Remove the brew group and rinse it under the tap (see 'Cleaning the brew group under the tap'). | |
| The coffee dispensing spout is dirty. | Clean the coffee dispensing spout and its holes with a pipe cleaner or needle. | |
| The pre-ground coffee compartment is clogged | Switch off the machine and remove the brew group. Open the lid of the pre-ground coffee compartment and insert the spoon handle into it. Move the handle up and down until the clogged ground coffee falls down (Fig. 37). | |
| The machine circuit is blocked by limescale. | Descale the machine with Philips descaler (see 'Descaling procedure'). Always descale when the machine prompts you. | |
| The milk does not froth. | The internal cappuccinatore is dirty or not inserted correctly. | Clean the internal cappuccinatore and make sure that you position and insert it correctly (see 'Cleaning the internal cappuccinatore under the tap'). |
| The type of milk used is not suitable for frothing. | Different types of milk result in different amounts of froth and different froth qualities. | |
| The milk is splashing. | The milk you use is not cold enough. | Make sure you use cold milk coming directly from the fridge. |
| The flexible milk tube is not connected properly. | Open the door of the coffee dispensing spout (Fig. 47) and check if the flexible milk tube is fully connected to the cappuccinatore. Note that the cappuccinatore and milk tubes may be hot. Let the cappuccinatore and the tubes cool down before you touch them. | |
| The cappuccinatore and milk tubes are not clean. | Remove and disassemble the internal cappuccinatore (see 'Cleaning the internal cappuccinatore under the tap'). Rinse all parts under the tap. For thorough cleaning, use Philips milk circuit cleaner and perform the Deep Milk Clean procedure via the cleaning (▲) menu. Note that if the parts have been cleaned in the dishwasher, they may have become clogged by food particles or detergent residues. A visual check that they are not obstructed is also recommended. | |
| We advise you to perform the HygieSteam program every day: 1) Press 'Clean' ⋆ on the control panel. 2) Select 'HygieSteam'. 3) Press the start button to start the process. Then confirm all steps on the display. | ||
| The milk tubes are clogged. | Always store the milk container without the milk tubes in the refrigerator. Leftover milk could accumulate inside the milk tubes and block the flow of milk through the tubes. Rinse the milk tubes before storage. | |
| The machine seems to be leaking. | The machine uses water to rinse the internal circuit and brew group. This water flows through the internal system directly into the drip tray. This is normal. | Empty the drip tray every day or as soon as the 'drip tray full' indicator pops up through the drip tray cover. Tip: Place a cup under the dispensing spout to collect rinsing water and reduce the amount of water in the drip tray. |
| The drip tray is too full and has overflowed which makes it look like the machine is leaking. | Empty the drip tray every day or as soon as the 'drip tray full' indicator pops up through the drip tray cover. | |
| The water tank is not fully inserted, some water is leaking out of the water tank and air is drawn into the machine. | Make sure the water tank is in the correct position: remove it and reinsert it into the machine as far as possible. | |
| The brew group is dirty/clogged. | Rinse the brew group. | |
| The machine is not placed on a horizontal surface. | Place the machine on a horizontal surface so that the drip tray does not overflow and the 'drip tray full' indicator works properly. | |
| I cannot activate the AquaClean water filter and the machine asks for descending. | The filter has not been installed or replaced in time after the screen shows the AquaClean reminder. This means your machine is not completely free of limescale anymore. | Descale your machine first and then install the AquaClean water filter. |
| The new water filter does not fit. | You are trying to install another filter than the AquaClean water filter. | Only the AquaClean water filter fits into the machine. |
| The rubber ring on the AquaClean water filter is not in place. | Place back the rubber ring on the AquaClean water filter. | |
| The machine is making a loud noise. | It is normal that your machine makes some noise during use. | If the machine starts to make a different kind of noise, clean the brew group and lubricate it (see 'Lubricating the brew group'). |
| The AquaClean water filter was not prepared properly and air is now drawn into the machine. | Remove the AquaClean water filter from the water tank and prepare it for use properly before you place it back. See chapter 'AquaClean water filter' for step-by-step instructions. | |
| The water tank is not fully inserted and air is drawn into the machine. | Make sure the water tank is in the correct position: remove it and reinsert it by pushing it into the machine as far as possible. |
Technical specifications
The manufacturer reserves the right to improve the technical specifications of the product. All the preset quantities are approximate.
| Description | Value |
| Size (w x h x d) | 262 x 383 x 448 mm |
| Weight | 8 - 8.5 kg |
| Power cord length | 1200 mm |
| Water tank | 1.8 litres |
| Coffee bean hopper capacity | 300 g |
| Coffee grounds container capacity | 12 pucks |
| Milk container capacity | 600 ml |
| Adjustable spout height | 87 - 147 mm |
| Nominal voltage - Power rating - Power supply | See data label on inside of service door (Fig. A15) |
Table of contents
www.saeco.com/MyCoffeeMachine.
In the next steps we will set the water hardness level






Special functions
Special function



Purpose
With CoffeeMaestro you can customize your coffee and also choose a preset flavor profile for the drink (Delicato, Intenso, Forte), instead of changing the settings yourself.
Use AquaClean filter to enjoy 5000 cups without descaling
AquaClean
Would you install an AquaClean filter? Press OK to confirm
Press to refuse










Special Features
Special Feature

Purpose
www.saeco.com/MyCoffeeMachine.
In the next steps we will set the water hardness level







AquaClean
Use AquaClean filter to enjoy 5000 cups without descaling
AquaClean
Would you install an AquaClean filter? Press OK to confirm
Press to refuse




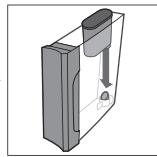
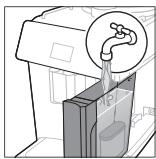

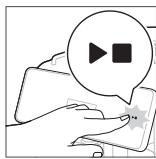

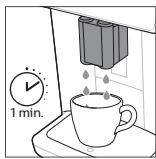




Special Functions
Special Function

Objective
Use AquaClean filter to enjoy 5000 cups without descaling
AquaClean
Would you install an AquaClean filter? Press OK to confirm
Press to refuse





Special functions
Special function

Purpose
Use AquaClean filter to enjoy 5000 cups without descaling
AquaClean
Would you install an AquaClean filter? Press OK to confirm
Press to refuse










Special functions
Special function
Purpose

Use AquaClean filter to enjoy 5000 cups without descaling
AquaClean
Would you install an AquaClean filter? Press OK to confirm
Press to refuse





Special functions
Special function
Use

Use AquaClean filter to enjoy 5000 cups without descaling
AquaClean
Would you install an AquaClean filter? Press OK to confirm
Press to refuse





Special functions
Special function

Purpose
With CoffeeMaestro you can customize your coffee to your wishes by selecting a preset flavor profile (Delicato, Intenso, Forte) for your drink, instead of adjusting the settings yourself.

Use AquaClean filter to enjoy 5000 cups without descaling
AquaClean
Would you install an AquaClean filter? Press OK to confirm
Press to refuse





Use AquaClean filter to enjoy 5000 cups without descaling
AquaClean
Would you install an AquaClean filter? Press OK to confirm
Press to refuse





Special functions
Special function

Goal
Extra shot (ExtraShot)
Use AquaClean filter to enjoy 5000 cups without descaling
AquaClean
Would you install an AquaClean filter? Press OK to confirm
Press to refuse





AquaClean water filter
Your machine is prepared for AquaClean. The AquaClean water filter can be placed in the water tank to preserve the coffee taste. It reduces the need for descaling by reducing scale build-up in the machine. You can purchase an AquaClean water filter from your local dealer or authorized service centers.
Indicator for AquaClean filter status
When AquaClean is activated, the AquaClean filter status is shown on the display.
In the next steps we will set the water hardness level




AquaClean
Use AquaClean filter to enjoy 5000 cups without descaling
AquaClean
Would you install an AquaClean filter? Press OK to confirm
Press to refuse





Special functions
Special function

Purpose
Use AquaClean filter to enjoy 5000 cups without descaling
AquaClean
Would you install an AquaClean filter? Press OK to confirm
Press to refuse





Special functions
Special function

Purpose
Customize beverages
Order accessories
Use AquaClean filter to enjoy 5000 cups without descaling
AquaClean
Would you install an AquaClean filter? Press OK to confirm
Press to refuse










Special functions
Special function

Purpose
B3 "CoffeeMaestro" icon
www.saeco.com/MyCoffeeMachine
Use AquaClean filter to enjoy 5000 cups without descaling
AquaClean
Would you install an AquaClean filter? Press OK to confirm
Press to refuse





Special functions
Special function

Purpose
AquaClean water filter
B3 CoffeeMaestro symbol
B8 Device settings
B4 Menu with other drinks
B9 Cleaning menu
B5 Start/stop button
B10 Personal profiles
Introduction
water hardness level

Heating up

Heating ...

Rinsing

Rinsing ...
AquaClean
Use AquaClean filter to enjoy 5000 cups without descaling
AquaClean
Would you install an AquaClean filter? Press OK to confirm
Press to refuse










In the next steps we will set the water hardness level




Special functions
Special function



Purpose of use
Use AquaClean filter to enjoy 5000 cups without descaling

AquaClean
Would you install an AquaClean filter?
Press OK to confirm
Press to refuse










Special functions
Special functions

KoToc
With CoffeeMaestro you can customize your coffee by selecting a preset profile (Delicato, Intenso, Forte) for your drink, or adjust the strength settings.

5 Press the start/stop button.
For combined drinks, the machine first dispenses milk and then coffee. For certain other drinks, the reverse applies: the machine will dispense coffee first and then milk. To stop the drink preparation before the machine has dispensed the preset amount, press the start/stop button.
6 To stop the preparation of the complete drink (milk and coffee) before it has finished, press and hold the start/stop button. 7 After the milk is dispensed, the "HygieSteam Shot" procedure starts. The machine dispenses steam into the internal milk system to clean it quickly.
In the next steps we will set the water hardness level






CpeunHn FyHKcnn
CneuHaHaФyHKU

PpeHa3NaueHne
The CoffeeMaestro lets you prepare coffee simply by selecting a preset flavor profile (Delicato, Intenso, Forte) for your drink, instead of changing the settings yourself.

The HygieSteam function automatically cleans the milk system, eliminating microorganisms: use it after every milk-based drink.

The milk frother is made of 100% ceramic, making it extremely healthy and precise. It can be adjusted according to your preferences with 12 levels.
Preparing Drinks
General Steps
1 Fill the water reservoir with fresh water, and the coffee bean compartment with coffee beans. 2 Place the funnel in the machine's brew group. Push it in until it clicks into contact. 3 Press the ON/OFF button to turn on the machine.
The machine will start to heat up and automatically perform a rinse cycle. The coffee machine is ready for use when all the indicator lights in the drink section are lit continuously.
4 Place a cup under the coffee spout. Raise or lower the spout to adjust its height to the size of the cup you are using (Fig. 1).
Preparing Coffee from Beans
1 To prepare coffee, touch the icon of your chosen drink (Fig. 2) or touch the icon (Fig. 3) for More Drinks (additional drinks).
- Now you can adjust the drink according to your taste preferences (Fig. 4). Use the arrows (Fig. 5) to adjust the coffee strength. Press the OK icon if you want to adjust both settings (Fig. 6). 2 Press the "start/stop" button at any time to start preparing the selected drink. 3 To stop the coffee dispensing before the machine has finished, press the start/stop button again.
To prepare 2 coffees at the same time, touch the drink icon twice or select the 2x icon, turning on the corresponding light. Do not use caramelized or flavored coffee beans.
Preparing Milk Drinks
1 Fill the water reservoir with fresh water, and the coffee bean compartment with coffee beans. 2 Open the lid of the milk container and pour milk (Fig. 7) into it. Then place the metal milk tube into the container.
For optimal results, always use milk that has just been taken out of the refrigerator.
3. Press the milk button on the frother (Fig. 8). 4. After the selected milk drink is dispensed, press the More Drinks (additional drinks) button to select a different drink (Fig. 3).
- You can then adjust the drink settings according to your preferences (Fig. 10).
5. Press the start/stop button.
- For some drinks, the machine dispenses milk first, then coffee. For other drinks, it is the opposite: the machine dispenses coffee first, then milk.
- To stop the coffee dispensing before the preset amount is reached, press the start/stop button again.
6. To stop the dispensing of the current drink (milk and coffee), provided it is connected, press the start/stop button again. 7. After the milk is dispensed, the machine performs a HygienicShot (hygienic rinse of the milk system). The machine rinses the milk system with hot water to clean it quickly.
Coffee from pre-ground coffee
1. Tilt the funnel and pour one measured spoon of pre-ground coffee into the appropriate compartment (Fig. 11) for coffee. 2. After selecting the drink, use the up and down arrows to select pre-ground coffee (Fig. 12). Then press the "start/stop" button.
Note: If you select pre-ground coffee, you cannot adjust the coffee strength and/or prepare more than one drink at a time.
Hot water dispensing
1. Make sure the internal frother is correctly attached to the machine (Fig. 13). 2. Place a container under the spout. 3. Press the More Drinks (additional drinks) button and turn the dial to select Hot water. 4. Use the up and down arrows to adjust the amount of hot water or the temperature according to your preferences (Fig. 14). 5. Press the start/stop button. 6. To stop the hot water dispensing, provided it is connected, press the start/stop button again.
The machine allows you to adjust the settings for each drink according to your preferences and save the configured drink in a personal profile. The different profiles have different colors.
Drinks with the CoffeeMaestro function
Your machine offers the possibility to select flavor profiles instead of adjusting all settings individually with the CoffeeEqualizer function. You can choose between Delicato, Intenso, and Forte. To select a CoffeeMaestro flavor profile:
1. Place the cup under the selected drink (Fig. 2) and place the cup under the More Drinks (additional drinks) to select a different drink (Fig. 3). 2. Press the Coffee Maestro button repeatedly (Fig. 15). 3. Press OK to confirm the selection.
The basic settings of the drink are adjusted accordingly.
4. Press the Start/Stop button ▶ to start and stop the preparation of the drink.
CoffeeEqualizer function
After selecting a drink, the CoffeeEqualizer function is activated automatically. You can use the arrows to navigate and adjust the following settings:
①
②
③
④
⑤
⑥
⑦
⑧
1 Aroma strength 2 Amount of coffee 3 Amount of milk 4 Amount of water 5 Drink temperature
6 Amount of foam 7 You can adjust and save 1 or 2 recipes 8 Amount of coffee for thermos (only for certain models)
Depending on the drink you have selected, you can adjust the settings.
Drink profiles
You can select a profile to save recipes by using the profile button.
1 Press the profile button repeatedly to select one of the available profiles (Fig. 16). Each profile is distinguished by a different color. 2 Select the drink by touching one of the drink icons or by touching the More Drinks icon (additional drinks). 3 Adjust the drink settings according to your taste. 4 Press the start/stop button ▶ to prepare the drink you have selected - the new settings will be saved in the selected profile.
You can also restore the factory settings of the machine (see 'Restoring factory settings').
Guest profile
The machine is equipped with a guest profile. When the guest profile is selected, the profile button is disabled. When you select this profile, all settings can be changed according to your preferences, but the recipes will not be saved.
Set the machine to the correct water hardness:
1 Press the settings button or use the up and down arrows to select Water hardness. Then press the OK button to confirm. 2 Use the up and down arrows to select the water hardness level. The number of lit squares, selected on the display, must match the number of lit squares on the test strip (Fig. 20). 3 Once you have set the correct water hardness, press the OK button to confirm.
Adjusting the grinding settings
You can change the strength of the coffee using the grinding adjustment dial, located in the coffee bean container. The finer the grinding setting, the more finely the coffee beans will be ground and the stronger the coffee will be. You can choose between 12 different grinding settings.
The machine is set to produce the best taste from coffee beans. For this reason, we recommend that you do not adjust the grinding settings until you have prepared 100 - 150 cups (about 1 month of use).
i You can adjust the grinding setting only while the machine is grinding coffee beans. You need to prepare 2-3 drinks before you can notice the difference. Do not turn the grinding adjustment dial more than one notch at a time, to prevent damage to the coffee grinder.
1 Place a cup under the coffee spout. 2 Remove the lid from the coffee bean container (Fig. 21). 3 Touch the Espresso icon, then press the start/stop button. 4 When the coffee grinder starts grinding, press and turn the grinding adjustment dial to the left or right (Fig. 22).
Adjusting the machine settings
Kato IOKOCHTe IKOHATA 3a HAcTpoIKn , MoXeTe Da peYIpaTe CJIeHNITe HAcTpoIKn Ha MaUHHaTa:
TbbpOCT Ha BODaTa: MoKeTe Ja I36epeTe MeKJy 5 HnBa Cnpoepd TBbpOcTTa Ha BODaTa BbB BaShn peHOn. - Bpeme Ha rotOBHocT: MoKeTe da n36pePeTe 15, 30, 60 nnn 180 mHyTuN. -Ярков STаДИСПЕЯ:MOЖeTeДаИЗБepeTe HИСКa,срEdиИВИСОKa. - E3NK: MÖKHe Tá n36peTe NpèДnOuHTaHnO T BAc e3NK Ha NtOKa3BaHe. - 3BYK: MOJKeTe Da aKTINBnPaTe IJI N DeaKTINBnPaTe 3BYKOBn CnHaI Ha MaUInHaTa. - Ппесно осветелене: можете за изберете always on (Винаги вкlioqueho), on during brewing (Вкlioqueho по Врeme на пиготьге) ул専always off (Винаги изкlioqueho). -Мерна:eиница:MOKeTeДaИЗбepeTeMeJxIy MInIINITbP ИN yHcIЯ.
Bb3ctaHOBRAHe Ha 06pHnTe HAcTPOKn
MaushHaTa Bn IpeIOCTaBb3MOxHOCCTTa Da Bb3CTaHOBInTe fapuHNTe hAcTPOIKN IO BCRAKO BpeMe.
1 HaTnCHete NkoHaTa 3a HAcTpOKn 2 N3no3BaIte cTpeKInTe 3a Harope n HanoJy, 3a nn36epete Factory settings (A6pnuHn HactpoKn). IOTBbPdTe, KaTO DOKOChTe IKoHaTa OK. 3 HaTnCHHe 6bToHa 3a CTapT/CTOn▶, 3a Ja NOTBbPdNTe, Ye NcKaTe Da Bb3CTaHOBInTe HAcTpoKInTe. -HacTpoKInTe ca Bb3CTaHOBeHN.
i CneHnTe f6bpuuHn HAcTPOKn Ce Bb3CTaHOBraBt NO pOJa3bpaHe: TBbPIOCT Ha BOTa, BpeMe Ha RotOBHocT, JPKoCT Ha NcIeJe, 3ByK, PpeHNO OCBetIeHne, npoFNI.
BodenФильтbp AquaClean
BaShaTa MaShNa e aKTHBnPaHa 3a AquaClean. MoKeTe Da nocTaNte BODHnA fNtbp AquaClean Bepe3epBoapa 3a BOda, 3a Da 3aNa3nTE BkCyHa KaFeTo CN. ToI CbIo Taka HAmJaBA HyJdaTA OT NocCTBaHe Ha Haknla, KaTO HAMajBa HAtpyINBaHeTo Ha BapOBnK B MaShHaTa BN. MoKeTe Da 3aKyPiTe BoJeH fNtbp AquaClean OT MeCTe HnOHLaH TbprBOeU INn YIbIHOMOSeHn cepBn3HN UeHTpOBe.
INHdNkauTata 3a cbCToHneTo Ha φnIbpa AquaClean
Korato AquaClean e akTINBeH, cBCTOAHneTO Ha fNITbpa AquaClean BnHaIe BnIMo Ha ekpaHa KaTo npOuEHT.
Ako cboTcOHHeTo Ha qHITbpa AquaClean e 10% pIIN NO-MaJIKO, ekPaHbT NOKa3Ba CbO6UHeB IpoDJIgKeHne Ha 2 cekyHn BceKn PbT, KOraTO BKNIOuHTe MaUNHaTa. ToBa Cbo6UHeHne BN CbBETBa Da 3akynTe HOB qHITbp. - Ako cbyctoHneTo Ha φnItbpa e 0%, MaunHaTa ξe BV nOMOJn da cmehnte φnItbpa AquaClean BCEKN T, KOraTO BkIIOUHTe MaunHaTa.
AknBipaHe Ha BoHnIy FInTbP AquaClean (5 MmH.)
i MaunHaTa He 3acu a ABToMaTnH O da n B pe3epBoap a 3a BoJa e NocTaBeH fNtbp. CneIOBaTeNo Tp86Ba Da aKTHBnPaTe BCEKn HOB fNtbp AquaClean, KOITo NocTaBTe, B MeHIOTo Clean (NouchTaBHe). Korato MaunHaTa cnpe da Ioka3ba cbo6eHHeTo 3a akTbpaHe Ha fIITbp, BCE OUe MoKeTe da aKtBnPaTe fNtBpa AquaClean, Ho IIpbO 1e Tp86Ba Da nouCTnte HAKIna OT MaunHaTa. MaunHaTApTpa6Ba Da e HaNbIHO nOuHCTeHa OT HaKIN, Ipei Da 3aOnUHeTe Da N3nOJI3BaTe BoHNr PhNtbp AquaClean.
Ппдддддддддддддддддддддддддддддддддддддддддддддддддддддддддддддддддддддддддддддддддддддддддддддддддддд徳аClean, trябba Да Г полговite, kaTO Г haKINCHe T BbB BOda, KaTTo e OONICAHO NO-ДOLY. Ako He Г HAppaBITE, B MaUNHaT MОKe Да BNe3e Bb3DyX BMeCTO BOda, KoETO CB3DABa MHORO SHYM И пчИ На MaUNHaT DA nprirotBkafe.
1 Touch the ink icon and use the arrows to select AquaClean. 2 Press the OK icon to confirm. 3 Touch the icon and OK when the message appears to activate. Follow the on-screen instructions. 4 Rinse the filter under running water (Fig. 23). 5 Insert the filter back into the tank with cold water (Fig. 24), rinse/press. 6 Press the filter vertically upwards against the filter holder until the water reservoir is at the lowest possible point (Fig. 25).
7 Fill the water reservoir with fresh water and place it back into the machine. 8 Place a cup under the spout. 9 Press the start/stop button ▶ to start the activation process. 10 Water flows from the spout for about 1 minute. 11 The filter is activated successfully.
Replacing the AquaClean water filter (5 minutes)
When the filter has filtered 95 liters of water, the AquaClean status indicator will drop to 0%, reminding you to replace the filter. While the AquaClean status indicator is shown on the display, you can replace the filter without having to remove the descaling from the machine. If you do not replace the AquaClean water filter in time, the AquaClean indicator will switch off after a certain time. In this case, you can still replace the filter, but you must first descale the machine.
When the AquaClean status indicator drops to 0% and the machine reminds you to replace the AquaClean filter:
1 Remove the old AquaClean filter. 2 Insert a new filter and activate it as described in the chapter "Activating the AquaClean water filter (5 minutes)". Replace the AquaClean water filter at least every 3 months, even if the machine does not yet indicate that replacement is necessary.
Removing and inserting the brew group
Visit www.saeco.com/care for instructional videos on how to remove, insert, and clean the brew group.
Removing the brew group from the machine
1 Switch off the machine. 2 Remove the water reservoir and open the service door (Fig. 26). 3 Press the PUSH button (Fig. 27) and pull the brew group out of its housing to remove it from the machine (Fig. 28).
When removing the brew group from the machine, make sure you have emptied the drip tray and the coffee grounds container.
Inserting the brew group back
Before inserting the brew group back into the machine, make sure it is in the correct position.
1 Check that the brew group is in the correct position. The arrow on the side of the brew group must be aligned with the black arrow (Fig. 29). - If they are not aligned, press down until it comes into contact with the base of the brew group (Fig. 30). 2 Insert the brew group back into the machine along the guides (Fig. 31) until it clicks into place (Fig. 32). Do not press the PUSH button.
3 Close the service door and put the water reservoir back.
Regular cleaning and maintenance keeps the machine in perfect condition and guarantees a long life with good taste and a constant flow of coffee.
Refer to the table below for a detailed description of when and how to clean the various parts of the machine. You can find more information and video instructions at www.saec.com/care. See figure 3 to check which parts can be cleaned in the dishwasher.
The milk container is equipped with a removable lid for easy cleaning.
Remove the milk container lid with the cap (Fig. 8). Attach the optional milk base (Fig. 9) and the "More Drinks" icon to select other drinks (Fig. 3).
- Now you can adjust the drink to your own taste (Fig. 10).
5 Press the start/stop button.
- For milk-based drinks, the machine first dispenses milk, then coffee. For other drinks, it is the opposite: the machine first dispenses coffee, then milk.
- To adjust the milk dispensing, press and hold the start/stop button while the machine is dispensing milk.
6 To adjust the dispensing of the entire drink (milk and coffee) before the machine finishes, press and hold the start/stop button. 7 After milk dispensing, the "HygieSteam" cycle begins. The machine cleans the internal milk system to remove any residue.
Brewing coffee with pre-ground coffee
1 Open the lid and place a measuring spoon of pre-ground coffee into the funnel (Fig. 11) for pre-ground coffee. 2 After selecting the drink, use the up and down arrows to select pre-ground coffee (Fig. 12). Then press the start/stop button.
Note: if you select pre-ground coffee, you cannot adjust the coffee strength or make more than one drink at a time.
Dispensing hot water
1 The internal cap must be correctly attached to the machine (Fig. 13). 2 Place a cup under the spout. 3 Press the "More Drinks" icon (Fig. 3) and scroll to select "Hot Water". 4 Use the up and down arrows to adjust the amount of hot water or temperature to your preference (Fig. 14). 5 Press the start/stop button. 6 To stop dispensing hot water before the machine finishes, press the start/stop button again.
Use AquaClean filter to enjoy 5000 cups without descaling
AquaClean
Would you install an AquaClean filter? Press OK to confirm
Press to refuse









Special functions
Special functions

Leb
With CoffeeMaestro you can adjust the taste of coffee by selecting a pre-set flavor profile (Delicato, Intenso, Forte) for your drink, instead of changing the settings yourself.

The HygieSteam function automatically cleans the milk system, removing microorganisms: use it after preparing cappuccino or other milk-based drinks.

The coffee grinder is made of 100% ceramic, so that you can enjoy pure and fine coffee. It can be adjusted to your taste, using 12 levels.
Preparing drinks
General
1 Fill the water reservoir with tap water and pour coffee beans into the container. 2 Insert the power cord into the socket on the back of the coffee machine. Insert the plug into the electrical outlet. 3 Press the on/off button to turn on the coffee machine.
- The coffee machine will start heating up and automatically perform a rinse cycle.
When the drink indicators light up continuously, the coffee machine is ready for use. 4 Place a cup under the coffee spout. Move the spout up or down to adjust its height according to the size of the cup or glass (Fig. 1).
Preparing coffee from beans
1 To prepare coffee, touch the drink icon of your choice (Fig. 2) or touch the icon of other drinks (More Drinks) (Fig. 3).
- Now you can adjust the drink according to your personal taste (Fig. 4). Use the up and down arrows (Fig. 5) to adjust the coffee strength. Touch the «OK» icon if you want to correct these and other settings (Fig. 6). 2 Press the «Start/Stop» button to start the preparation process of the selected drink at any time. 3 To interrupt the coffee dispensing before the end of the process, press the (Start/Stop) button again.
To prepare 2 cups of coffee at the same time, touch the drink icon twice or select the «2x» icon by scrolling the special strip. Do not use caramelized or flavored coffee beans.
Preparing milk-based drinks
1 Fill the water reservoir with drinking water and pour coffee beans into the container. 2 Open the milk container lid and fill the container with milk (Fig. 7). Then install the metal tube for milk delivery into the container.
Preparing a drink from ground coffee
Visit the website www.saeco.com/care for helpful video instructions on how to remove, install and clean the brewing group.
Removing the brewing group from the coffee machine
1 Turn off the coffee machine. 2 Remove the water reservoir and open the service door (Fig. 26). 3 Press the PUSH lever (Fig. 27) and pull the handle of the brewing group to remove it from the coffee machine (Fig. 28).
When you remove the brewing group from the coffee machine, clean the drip tray and the coffee grounds container.
Installing the brewing group in place
Before inserting the brewing group back into the coffee machine, make sure it is in the correct position.
1 Position the brewing group in the correct position. The arrow on the side cylinder of the brewing group must be aligned with the black arrow with the P (Fig. 29). - If they do not match, press the lever until it touches the base of the brewing group (Fig. 30). 2 Insert the brewing group back into the coffee machine along the side guide rails (Fig. 31) until it clicks (Fig. 32). Do not press the PUSH lever. 3 Close the service door and put the water reservoir back.
Cleaning and maintenance
Regular cleaning allows you to maintain the coffee machine in excellent condition for a long time and enjoy delicious coffee with every drink.
The table below provides a detailed description of the cleaning methods and frequency for all parts of the coffee machine. More detailed information and video instructions can be found on our website at www.saeco.com/care. Fig. C shows which parts can be washed in the dishwasher.
Cleaning the brew group under running water
1. Remove the brew group (see “Removing and installing the brew group”). 2. Rinse the brew group thoroughly with water. Carefully clean the upper filter of the brew group (Fig. 40). 3. Before reinstalling the brew group, let it dry completely. Do not dry the brew group with a cloth, as this may clog it with fibers.
Cleaning the brew group with cleaning tablets for coffee oil removal
Use only Philips tablets for removing coffee oil.
1. Touch the cleaning icon ♣ and use the up and down arrows to select “Clean brew group”. 2. Touch the “OK” icon to confirm and follow the on-screen instructions.
Lubricating the brew group
To maintain the performance of the coffee machine, it is recommended to lubricate the brew group every 2 months to ensure its moving parts move smoothly.
1. Apply a thin layer of lubricant to the piston (gray part) of the brew group (Fig. 41). 2. Apply a thin layer of lubricant to the surface of the shaft (gray part) in the lower part of the brew group (Fig. 42). 3. Apply lubricant generously to the guides on each side (Fig. 43).
Cleaning programs for the internal milk circuit
The coffee machine has three cleaning programs for the internal milk circuit:
HygieSteam Shot: The coffee machine passes steam through the internal milk circuit for quick cleaning. HygieSteam: The coffee machine thoroughly cleans the internal milk system with steam. Make sure the HygieSteam container is correctly installed (Fig. 44) and connected to the coffee machine (Fig. 45). Place the milk tube in the tube holder (Fig. 46) and follow the instructions shown on the screen.
Deep Milk Clean: Perform the intensive milk cleaning procedure Deep Milk Clean using the special Philips cleaning agent for thorough cleaning of the internal milk system.
Cleaning the internal milk circuit under running water
1 Open the lid of the inner funnel (Fig. 47). 2 Remove the inner funnel by pulling it up (Fig. 48). 3 Disassemble the inner funnel by separating its lower part from the upper part (Fig. 49). 4 Disassemble all parts of the drip tray or the water tank (Fig. 50). 5 Reassemble the inner funnel. 6 To place the inner funnel back, set it in a vertical position and make sure that the openings align with the two pins on the coffee machine. Then push the inner funnel upward until it clicks into place (Fig. 13). 7 Close the lid.
Visit the website www.saeco.com/care for detailed video instructions.
Descaling procedure
Use only Philips descaling solution. Never use descaling agents based on sulfuric acid, hydrochloric acid, sulfamic acid, or acetic acid (vinegar), as this may damage the water circuit in the machine and will not remove scale completely. Use of any other descaling agent other than Philips descaling solution will void the warranty. Failure to perform the descaling procedure will also void the warranty. You can purchase Philips descaling solution from local dealers, online, or at authorized service centers.
1 When the coffee machine prompts you to descale, touch the OK icon to start the process. To start the descaling process without waiting for the prompt, touch the "Descaling" icon and select the "Descale" option. 2 Remove the water tank, the coffee bean container, and the HygieSteam container (Fig. 35), empty them, and then place them back into the machine. 3 Remove the water reservoir and empty it. Then remove the AquaClean filter. 4 Pour one bottle of Philips descaling solution into the water reservoir and fill it with water up to the CALC CLEAN level (Fig. 51). Then place it back into the machine. 5 Place a large container (1.5 L) under the coffee spout. 6 Make sure the HygieSteam container is correctly installed (Fig. 44) and connected to the machine (Fig. 45). Place the milk tube into the tube holder (Fig. 46). 7 Follow the instructions shown on the screen to start the descaling procedure. The descaling procedure takes approximately 30 minutes and consists of a descaling cycle and a rinsing cycle. 8 After the descaling cycle is finished, it is necessary to rinse the water reservoir and the water supply system. Follow the instructions shown on the screen. 9 Install a new AquaClean filter in the water reservoir and activate it (see "Activating the AquaClean water filter (5 min.)").
Automatic coffee machine for espresso
Temperature 0°C to +50°C
Relative humidity 20% - 95%

Packaging materials, not made of plastic, contain paper and cardboard.
UnaKOBouHbIe MaTePnAblI IN3 PnlaCTMaCCbI COJIepKaT NOLIN3TNIIeH HN3KOI PIIOTHOCTN (LDPE), ecIn He yka3aHo InHoe.
Contents
Table of contents (Fig. A) 543 Control panel 543 Introduction 544 Before first use 544 Special functions 545 Preparing drinks 545 Creating milk foam 547 Filling the water tank 548 AquaClean filter 550 Descaling and cleaning the brewing unit 551 Maintenance and cleaning 551 Cleaning procedure 554 Troubleshooting 555 Ordering accessories 556 Technical specifications 561
Table of contents (Fig. A)
A1 Control panel A2 High lid for coffee beans A3 Lid of the bean hopper A4 Opening for the grinder A5 Chute for coffee grounds A6 Handle for removing the drip tray A7 Water tank with moisture regulation A8 HygieSteam container A9 HygieSteam lid with milk tube
Accessories
A21 Milk container A22 Milk tube A23 Measuring spoon A24 AquaClean filter
A10 Internal grinder A11 Pressure and temperature gauge A12 Steam regulator A13 Bean hopper A14 Brewing unit A15 Service door A16 Water reservoir A17 Water tank A18 Water tank lid A19 Drip tray lid A20 Drip tray full indicator
A25 Measuring spoon A26 Test strip for water hardness
Control panel
Available versions of the coffee machine. Their control panels differ, but all buttons and symbols work the same. Overview of all buttons and symbols is given in Fig. B. Their description is given below.
Press the up or down arrow to scroll through the data on the display. To select and confirm a selection, press the OK symbol.
B1 On/Off button
B6 Navigation symbols (up, down, back, OK)
B2 Symbol for preparing drinks
B3 CoffeeMaestro symbol
B8 Programming parameters
B4 Menu symbol "My Coffee"
B9 Cleaning menu
B5 Start/Pause button
B10 Personal profiles
Introduction
Welcome to the world of fully automatic Saeco IIN coffee machines for making coffee! To get the most out of your new machine, which Saeco offers, please go to:
www.saeco.com/MyCoffeeMachine and register your choice.
Note. Before shipping, the machine was used to make coffee. It was then thoroughly cleaned, but some coffee residues may remain. However, we guarantee that you have purchased a completely new machine.
Use AquaClean filter to enjoy 5000 cups without descaling
AquaClean
Would you install an AquaClean filter? Press OK to confirm
Press to refuse






CoffeeMaestro allows you to personalize coffee preparation by choosing a preset flavor profile (Delicato, Intenso, Forte), without changing the settings yourself.

The HygieSteam function automatically cleans the milk system, removing microorganisms: it is used after preparing cappuccinos or other milk-based drinks.

The coffee grinder is made of ceramic, which ensures precise grinding and durability. The grinder can be adjusted to your taste, with 12 levels available.
Preparing drinks
General instructions
1 Fill the water reservoir with water from the tap, and the coffee bean hopper with beans. 2 Insert the machine's plug into the socket on the back panel of the machine. Insert the plug into the electrical outlet. 3 Press the (ON/OFF) button to turn on the machine.
The machine will heat up and perform an automatic rinse cycle. The machine is ready for use when all indicators on the drink icons are lit continuously.
4 Place a cup under the coffee spout. Move the coffee spout up or down to adjust its height according to the size of the cup or glass used (Fig. 1).
Preparing coffee from coffee beans
1 To make coffee, touch the icon of the selected (Fig. 2) drink or the icon (Fig. 3) “My drink”. - The drink recipe can now be customized to your taste (Fig. 4). Press the arrows (Fig. 5) up or down to select the coffee strength. If further customization is needed (Fig. 6), touch the “OK” icon. 2 To start preparing the selected drink, press the start/stop button. To stop the coffee dispensing before the machine finishes preparation, press the start/stop button again.
1 To make two cups of coffee at once, touch the drink icon or press the “2x” icon, scrolling through the corresponding menu. Do not use caramelized or flavored coffee beans.
Preparing milk-based drinks
1 Fill the water reservoir with water from the tap, and the coffee bean hopper with beans. 2 Unscrew the lid of the milk container and fill it with milk (Fig. 7). Then insert the metal milk tube into the container.
For optimal results, use milk from the refrigerator.
Connect the milk tube to the milk container (fig. 8). Press the required symbol (fig. 9) to select milk or the "Other drinks" symbol to choose another drink (fig. 3).
- You can now adjust the drink to your own preferences (fig. 10).
5 Press the Start/Stop button
For milk-based drinks, the machine first dispenses milk, then coffee. For many other drinks, the order is reversed: the coffee maker first dispenses coffee, then milk. - To stop the milk dispensing before the machine has dispensed the preset amount, press the Start/Stop button.
6 To stop the dispensing of the finished drink (coffee with milk) before the machine has finished preparation, press and hold the Start/Stop button. 7 After the milk dispensing, the Hygienic Steam Shot procedure will be performed (automatic steam purge). The machine has an internal milk cleaning system to ensure it is rinsed.
Preparing coffee with pre-ground beans
1 Open the lid and add one measuring spoon of ground coffee into the funnel (fig. 11) for pre-ground coffee. 2 Select the drink by pressing the up or down arrows to choose pre-ground coffee (fig. 12). Then press the Start/Stop button.
Note. If you select pre-ground coffee, you will not be able to adjust the strength and/or prepare several drinks at once.
Dispensing hot water
1 Check that the internal milk container is correctly connected to the machine (fig. 13). 2 Place a cup under the spout. 3 Press the "Other drinks" symbol (fig. 3) and scroll through the menu to select "Hot water". 4 Use the up and down arrows to adjust the quantity or temperature to your preferences (fig. 14). 5 Press the Start/Stop button. 6 To stop the hot water dispensing before the machine has finished, press the Start/Stop button again.
Creating your own drinks
The machine allows you to set your own drink recipes and save them in a dedicated profile. Different profiles have different color labels.
Preparing drinks using the CoffeeMaestro function
The coffee maker offers the ability to select flavor profiles instead of setting all parameters individually with the CoffeeEqualizer function. You can choose between the Delicato, Intenso, and Forte profiles. To select a CoffeeMaestro flavor profile:
1 Press the required drink symbol (Fig. 2) or the "My Drinks" symbol to select your drink (Fig. 3). 2 Press the CoffeeMaestro symbol several times (Fig. 15). 3 Press the "OK" button to confirm the selection.
The basic settings are now copied to the selected drink.
4 Press the Start/Pause button ▶ to start preparation.
CoffeeEqualizer function
When selecting a drink, the CoffeeEqualizer function is activated automatically. Using the up and down arrows, you can adjust the following parameters:
1
2
3
4
5
6
7
8
1 Strength 2 Number of coffees 3 Amount of milk 4 Amount of water 5 Drink temperature
6 Number of cups 7 You can also set the amount of tea - it is in the drinks 8 Number of coffees for ground coffee (only in certain models)
All parameters can be adjusted depending on the selected program.
Selecting a profile
You can select a profile and save your recipe using the profile icon.
1 Press the “Profile” icon to select one of the color profiles (Fig. 16). All profiles have different color markings.
2 Select the desired profile by touching one of the icons for a specific drink or the “Other drinks” icon. Adjust the settings to your taste. 4 Press the start/pause button to brew the selected drink. Your new settings will be saved in the selected color profile.
You can also restore factory settings at any time (see “Restoring factory settings”).
Guest profile
The machine has a guest profile. If you select it, the coffee is dispensed without saving. Having selected this profile, you can still personalize the settings according to your preferences, but your drink recipes will not be saved.
Other machine settings
By pressing the (settings) icon, you can adjust the following machine settings.
Water hardness: You can select one of 5 levels, depending on the water hardness in your region. - Standby time: You can select 15, 30, 60 or 180 minutes. - Coffee strength: You can select low, medium or high. - Language: You can select the desired interface language. - Sound: You can turn the machine's sound signals on or off. - Backlight: You can select “Backlight off”, “During preparation” or “Backlight on”. - Units of measurement: You can select milliliters or ounces.
Restoring factory settings
The machine's factory settings can be restored at any time.
1 Touch the “Settings” icon. 2 Select “Factory settings”, pressing the arrows up and down. Confirm by pressing the OK icon. 3 Press the start/pause button ▶ to confirm the start of the restoration. - The settings are saved.
The factory settings are as follows: water hardness, standby time, coffee strength, sound, backlight, profile.
Before installing the brew unit back into the machine, check that it is in the correct position.
1 Check that the brew unit is in the correct position. The arrow on the side of the brew unit must align with the black arrow and the N symbol (Fig. 29). - If this is not the case, lower the lever until it touches the base of the brew unit (Fig. 30). 2 Insert the brew unit back into the machine at the top (Fig. 31) of the side guides for fixation (Fig. 32). Do not press the PUSH button. 3 Close the service door and insert the water reservoir.
Maintenance and Care
Thanks to regular maintenance and care, the machine's performance will remain at its best, ensuring consistently excellent coffee throughout its entire lifespan.
The table below provides details on when to clean the machine parts. Visit www.saeco.com/care for detailed instructions and video tutorials. For the parts that can be washed in the dishwasher, see figure B.
1 Touch the "Maintenance" icon and press the arrows up or down to select "Brew unit maintenance".
2 Press the "OK" button to confirm the selection, then follow the instructions on the screen.
Cleaning the brew unit
To ensure the machine operates properly, it is recommended to clean the brew unit every 2 months. The moving parts will wear out without regular cleaning.
1 Apply a thin layer of lubricant to the piston (marked in grey) of the brew unit (Fig. 41). 2 Apply a thin layer of lubricant around the shaft (marked in grey) at the bottom of the brew unit (Fig. 42). 3 Apply a thin layer of lubricant to the rails on both sides (Fig. 43).
Cleaning programs for the internal milk circuit
The machine has three cleaning programs for the internal milk circuit:
HygieSteam Shot: The machine cleans the internal milk circuit with steam to keep it perfectly clean. HygieSteam: The machine thoroughly cleans the internal milk system with steam. Make sure the HygieSteam container is correctly installed (Fig. 44) and connected to the machine (Fig. 45). Place the milk tube in a container (Fig. 46) and follow the instructions on the screen. Deep Milk Clean: Perform the Deep Milk Clean cycle using the Philips milk circuit cleaner to thoroughly clean the internal milk system.
Cleaning the internal milk circuit with water from the tap
1 Open the door of the appliance (fig. 47). 2 Remove the internal water tank by pulling it upwards (fig. 48). 3 Disassemble the internal water tank by pulling it from the top part (fig. 49). 4 Disassemble all parts (fig. 50) and rinse them with water from the tap. 5 Reassemble the internal water tank. 6 To insert the internal water tank, place it in a vertical position and make sure that the openings align with the two tubes of the machine. Then push it down until it clicks (fig. 13). 7 Close the door.
Visit www.saeco.com/care to obtain detailed instructions.
Troubleshooting
This section describes the main problems that may arise during the use of the machine. Videos and a complete list of spare parts are available at the following link:
www.saeco.com/care. If you cannot solve the problem, contact the customer service center in your country. Contact information is provided in the warranty booklet.
Use AquaClean filter to enjoy 5000 cups without descaling
AquaClean
Would you install an AquaClean filter? Press OK to confirm
Press to refuse


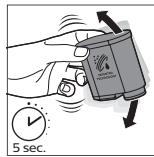

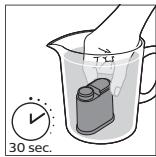

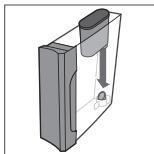
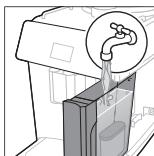


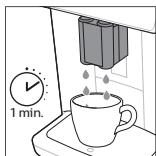

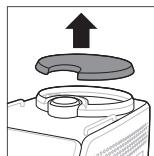

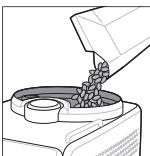

Special functions
Special functions
Settings

To adjust the parameters to your taste, you can use the CoffeeMaestro function, which allows you to select one of the three pre-set coffee strengths (Delicato, Intenso, Forte) according to your preference.

The HygieSteam function periodically opens the steam valve to automatically clean the milk circuit: it removes milk residues and bacteria from the internal tubes.

Our milk is in contact with 100% ceramic parts, which are resistant to wear and tear. This ensures that the taste of your milk is preserved.
CycbHdap KaHaTu
KaJIbI KaJaMdAp
1 Cy bIbIcIH aFbIH CymeH TOITbIpbIN, dAe h bIbICbIH KOe DeHepimEH TOITbIpbIHbI3. 2 1aHbMaHaHaBn apTbHaFb YaMbKa KocBbI3. ToK 1aHbUkbicbH Ka6bpFaDaFb po3eTKaFa KocBbIbI3. 3 MaunHaHbI Kocy yuIn Kocy/oujpy TuMecin 6acbHbI3.
MaunHa Kb3a 6actan, ABTomatbI waio uKIniH opBnDaIbI. CycbH 6enriwenepiHderi 6apnIkwamnap y3dkc3 xKaHca, MaunHa naJaIaNHyfdaaBbH 6oanabl.
4 KoΦe TaMbI3y Ⅶymeri actbHa cTakah KOnbHbI3. KoΦe TaMbI3y ⅦymeriHin bNtirH naiDaIaHbIaTbIH (cypet 1) ⅦbHaJHK eCTaKaH eJIWeMHe peTrey yIiH, OHJI XOFapbl HeMece TEme ChpFbITbHbI3.
A KapameIbIeHreH HeMeCe TdTi KoFe IeHepiN paIaJIaHbIbI3.
Cyt Heri3iHderi cycbIHdapdb KaHaTy
1 Cy bIbIbIH aFBH CymEH TOJIbIPbIN, dAn h bIDbcIH dHdepMeH TOJbIPbIHbI3. 2 CYt bIbIcbl KaKnaFbIH 6ocatbln, CYt bIbIcblH cyTneH (cypeT 7) TOnTbIpbHbI3. OdaH KeiH bIbIcKa MeaII n CYt TYtiriH caIbIbI3.
OHTaIbI HtIXKeIep yIiH, YHemi TIKeIe ToHa3bITKbIiTah KeIeTIn CytTI naIdaIaNbIHbI3.
3 Ninniw cyT Tyirin KannyUHHaTOPfa (cypet 8) KocbIbIa. 4 Θ3iH3 tAndaFAN (cypet 9) cyt Heri3iHderi cycbH 6enriuecin TpytHi3 Hemece 6acka cycbHdbI (cypet 3) TaHday ysiH INKocbIMsa CysbHap"6enriuecin TpytHi3.
- Ehdi cycbHdbkanahybHb3Fa (cypet 10) caikec pette anacbi3.
5 Icke Kocy/ToKtTaTy Tymecin 6acbIbI3.
- Bérriti lip cycbIHap yuH MaunHa aIbImeH cyTTi, oAn KeiH KoΦeHi TaMbIaIbI. BiPkatap baca cycbIHap yuH 6yI Kepicihwe JypeDi, MaunHa aIbImeH KoΦeHi, oAn KeiH cyTTI TaMbIaIbI. MaunHa anDbH ana opHaTbInFaH meJIWeepi TaMbI3y anDbIHDa CYT TaMbI3yDbl TOKtAty yWih, icKe Kocy/TOkTaTy Tymecin 6acbHbI3.
6 MaunHa TOKtaFaHsa CcyiHdbc (Cyt XeHe KOpe) TOnbIfbImeH TaMb3yDbI TOKTaTy yuH, icKe Kocy/TOKTaTy Tymecin 6acbln TypbHb3. 7 CyTti TikeNei TaMbI3FaHHaH KeiH «HygieSteam Shot» KymbIcbl opbIHdaIaBl. MaunHa KblIaM KaHaTy yuH 6ydbI iKi CY TkyneCIMeKUWeH aFbI3aBl.
AaIbHa ana yHtakTaNfAH KoPeHi KaHaTy
1 Remove the water tank and fill it with fresh water (Figure 11). 2 To select the water hardness, press the buttons above and below until the desired value is displayed. Then press the start/stop button.
Note: If the water hardness is not set, the machine may not be able to produce coffee with one touch.
Hot water cleaning
1 Insert the filter into the machine (Figure 13). 2 Place a cup under the steam spout. 3 Select the "Hot Water" parameter by pressing the "Hot Water" button (Figure 3).
4 Adjust the water volume and temperature using the buttons above and below (Figure 14). 5 Press the start/stop button. 6 To stop the hot water cleaning, press the start/stop button again.
Water filters
The machine can be adjusted to the water parameters and the water hardness can be set. The filters protect the machine from limescale.
Using the CoffeeMaestro function to set the water hardness
The machine can automatically detect the water hardness using the CoffeeEqualizer function. You can choose between Delicato, Intenso, and Forte. To select the CoffeeMaestro function:
1 Select the water hardness by pressing the "Water" button (Figure 2) or the "Water" button (Figure 3). 2 Press the CoffeeMaestro button (Figure 15). 3 Press the OK button to confirm your selection. The water hardness is set automatically. 4 Press the start/stop button to start the water hardness setting.
CoffeeEqualizer function
After selecting the water hardness, the CoffeeEqualizer function automatically adjusts the brewing parameters. To adjust the parameters manually, use the buttons above and below:






1 Cup size 2 Coffee strength 3 Milk amount 4 Water amount 5 Water temperature
6 Milk froth 7 With milk 1 or 2 cups 8 Coffee strength for two cups (only for certain models)
Note: The parameters you set are saved for the selected water hardness.
Profile tampers, profile water hardness setting instructions.
1 Press the profile button (Figure 16) to select the profile. The profile button has a light indicator. 2 Press the button for the water hardness setting or the “Special water” setting to select the desired water hardness. 3 The water parameters are set according to your selection. 4 To start dispensing the selected water, press the start/stop button. The selected profile settings are saved.
If you want to change the machine settings (enter the advanced parameters), press and hold the advanced parameters button.
Profile selection
The machine is equipped with a profile function. If you select a profile, the profile settings are applied. If you do not select a profile, the parameters remain unchanged, but you can save your own recipes.
Extra Shot
The machine has the ability to add an extra shot of coffee to the coffee drinks (for example, if you want a stronger coffee).
1 Place a cup under the spout. 2 Press the button for the water volume (Figure 2) to select the water volume, or press the “Special water” button to select the water volume (Figure 3). 3 To set the highest strength, press the strength button, and select the ExtraShot function (Figure 17). 4 If you need to adjust the parameters, press the OK button. Then press the start/stop button to start dispensing the water. 5 To stop the machine, press the start/stop button again.
1 When the ExtraShot function is selected, only one coffee can be dispensed at a time.
Adjusting the strength parameters
Selecting the water hardness
To optimize the machine performance and extend its lifespan, you can adjust the water hardness parameter to the water hardness in your area. The harder the water, the more often the machine needs descaling. The water hardness parameter is set to 4: hard water.
To determine the water hardness in your area, use the test strip provided with the water hardness test kit:
1 Dip the test strip into the water for 1 second (Figure 18) or hold it under running water. 2 Wait 1 minute. The number of red squares on the test strip (Figure 19) indicates the water hardness.
Maintenance of the water softening system:
1 The water softening parameter, the water softening parameters and the temperature settings are set. For this, press the OK button. 2 To select the water softening level, the upper and lower temperature settings are set. The number of washes between two regenerations (figure 20) should be equal to the number of red squares. 3 After the water softening system is installed, press the OK button.
Adjusting the rinse parameters
The rinse parameters are adjusted according to the water hardness. If the rinse parameter is low, the rinse will be insufficient and the rinse will be poor. There are 12 types of rinse parameters available for selection.
The machine should be adjusted to the best possible rinse. For this, the rinse parameters should be adjusted to 100-150 scans (approximately 1 second per scan).
During the rinse cycle, the rinse parameters can be adjusted. The machine should be run for 2-3 seconds without water. To avoid damage, the rinse parameters should be adjusted one at a time.
1 Press the start button. 2 The rinse water is drained (figure 21). 3 Press the espresso button, then the two-cup button. 4 When the rinse starts, set the rinse parameters to low, then to high (figure 22).
Adjusting the machine parameters
The machine parameters can be adjusted as follows:
- Water softening: select the water softening level between 5 and 10 degrees. The duration: select 15, 30, 60, or 180 minutes. - Screen brightness: select the low, medium, or high parameter. - Language: select the desired language. - Volume: the machine volume can be set to mute or loud. - Automatic descaling: select the "Descaling", "During rinsing", or "Descaling" parameter. - Energy saving: select the energy saving mode.
Resetting the parameters to factory settings
The machine can be reset to the factory settings at any time.
1 Press the parameters button. 2 To select "Factory parameters", press the upper and lower temperature settings. Press the OK button. 3 To reset the parameters, press the two-cup button. - The parameters are reset.
1 The following parameters can be reset: water softening, water temperature, display brightness, volume, temperature, automatic descaling, profiles.
AquaClean water filter
The AquaClean water filter should be replaced. To ensure clean water, the AquaClean water filter must be replaced regularly. The machine will indicate when replacement is necessary. The AquaClean water filter can be purchased from authorized dealers or via the online store.
AquaClean filter indicator
If the AquaClean filter is empty, the AquaClean filter indicator will light up permanently on the display.
If the AquaClean filter level is 10% or less, the machine will show a warning on the display for 2 seconds. This warning advises you to replace the filter. If the filter level is 0%, the machine will prompt you to replace the AquaClean filter.
Replacing the AquaClean water filter (5 min)
The machine automatically detects when the water filter needs to be replaced. After this, you need to replace the AquaClean water filter as described in the "Replacement" section. After the machine shows the replacement message, you can replace the AquaClean filter, but the machine must be turned off. Before starting the replacement, the machine must be disconnected from the power supply.
Before replacing the AquaClean water filter, rinse it under running water. If this is not done, the machine may draw air instead of water, which could damage the machine and cause it to malfunction.
1 Press the "Menu" button and select the "AquaClean" parameter using the up and down buttons. 2 Press the OK button to confirm. 3 If the replacement screen appears, press the OK button again. Follow the on-screen instructions. 4 Empty the water tank for 5 seconds (figure 23). 5 Remove the water tank from the machine by lifting it up and pulling it out (figure 24). 6 Place the water tank on the water outlet and press it down firmly (figure 25). 7 Fill the water tank with fresh water and place it back on the machine. 8 Press the start button. 9 Press the start/stop button to begin the replacement process. 10 Wait 1 minute until water flows out. 11 The filter is now replaced.
Resetting the AquaClean water filter (5 min)
After 95 liters of water have flowed through the filter, the filter must be replaced. The AquaClean filter indicator drops to 0%, indicating that the filter needs to be replaced. If the AquaClean filter indicator does not appear, you can continue using the filter. If the AquaClean water filter is not replaced, the AquaClean indicator will remain on after a certain time. The filter must be replaced, but you can continue using the machine.
If the AquaClean filter indicator drops to 0% or the machine indicates that the AquaClean filter needs to be replaced:
1 Remove the old AquaClean filter. 2 Replace it with a new one and follow the steps in "Replacing the AquaClean water filter (5 min)".
If the machine does not indicate that replacement is needed, replace the AquaClean filter at least every 3 months.
Cleaning and maintenance
For cleaning and maintenance, see the instructions at www.saeco.com/care.
Removing the brewing unit
1. Switch off the machine. 2. Remove the water tank and empty it (fig. 26). 3. Press the PUSH button (fig. 27), pull the brewing unit out of the machine (fig. 28).
After removing the brewing unit, the drip tray and coffee grounds container are accessible.
Cleaning the brewing unit
Clean the brewing unit regularly to ensure proper operation.
1. Make sure the brewing unit is in the correct position. The arrow on the side of the brewing unit should align with the arrow on the inside of the machine (fig. 29). If they do not align, press the PUSH button (fig. 30) until they align. 2. Rinse the brewing unit under lukewarm running water (fig. 31) and let it dry (fig. 32). Do not use the PUSH button. 3. Replace the water tank and close the door.
Cleaning and maintenance
Regular cleaning and maintenance of the machine ensures good coffee and a long service life.
Before cleaning, always unplug the machine and let it cool down. Do not immerse the machine in water. For cleaning and descaling, see www.saeco.com/care.
| Альбалы бөлшөдөр | Тазалay уakсы | Тазалay одici |
| Кайнау куралы | Аntа сайын | Кайны Куралы Машинадан (көрініз 'Кайны Куралын any жэne cany') Шь�арынancelы. |
| Ай сайын | Оны afын сүмен (көрініз 'Кайны Куралы afын сү actында тазалay') shai bih3. | |
| Philips kofo майын кетicipiш Таблессыmen (көрініз 'Көріmaьн кетicipiш устелерimEN Кайны Куралын тазалay') кайны Куралы Тазал�н. Сут жүүсі/iiші Кannnyчинатор | ||
| Өрбір колданыICTан көин | Тазалay мәзірінен «HygieSteam» бafdaplamacын opbɪндаи.Тазалay mәзірінен «HygieSteam» onціясын тандан, экрандаын hyckaynapын opbɪндаи.Сут тугін устаышka металл суттугін салу ал'dында онын сырын дыIMсыншубepkenen суртінiz. | |
| Альбалы белшекер | Тазалay укытbi | Тазалay щдici |
| Апta сайын | Ишк каллунинатордь alын, балшекеи3(«Ишк каллунинатордь afын сда тазалay») Балim kinарыз). Барык bалшекерin afын сда яамалы жусыксыменихшайыз. | |
| Ай сайын | Philips сут ti3berig Тазалay Каллимен «Deep Milk Clean» поочурасын орьндаыз. Тазалay мэзирин «Deep Milk Clean» onцясын тадлд, лкрандаын hyckayлары Орьндаыз. Товik bөлүйсөлүштæru wih www.saeco.com/care topaын отihiz. | |
| Сут bдысы | Апta сайын | Сут bдысын (сурет 33) чewin anын, чары Сут тугигин иiterimен bасыншыгындь (Cурет 34).Сут bдысын bafын Балшекери bдыс xуfuшta hememe asын сда тазалыз |
| HygieSteam bдысы (cут тугиги усты) | Апta сайын Неме машина ci3re eckeptkenide | Машидаан (сурет 35) HygieSteam bдысын алын, HygieSteam kаллafын (сурет 36) алын b3. HygieSteam bдысын bocatын, bдыс пен каллakы bafын сда Неме bдыс Жуfuшta тазалыз. bдыс пен каллakы ayada кentipin, onapыд машинага кepi салын b3. |
| Альдын рал Унтakталган кофe белimi | Альдын рал унтakталган кофe белimiн biteлген-biteлmerгehin antra сайынTekcepiniz. | Машидаи baxырын, калоту калл银 алын b3. Альдын рал унтakталган кофe b塞尔 Каллafын aшын, оferан kacstын сalsын b3. Бitererн унтakталган кофe төmen (сурет 37) Туckenше тулkanы xуогары xөнөтөmen Жылжытын b3. Товik bөлүйс huуалары yuin www.saeco.com/care topaын крihiz. |
| Тартынлган кофe bдысы | Кофe унтakталын bдысын машина усынfан кe3de бocatын b3. Onы antra сайын тazаланыз. | Машин кослган кe3de Кофe унтakталы bдысын shырары n alын b3. Onы aflын сда шамалы xуу cыкын bfulimenшын b3 Hemecse bдыс xуfuшta тазалыз. Кофe Унтakталы bдысын (A18 cypeti) anduhfbly Тактасын bдыс xуfuшta xууfa boлmaйды. |
| Тамши hayасы | Тамши hayасын күн сайын Hemece Кызлл «Tamшы hayасы Толык» Иndikatotры tamшы Hayascы (сурет 38) apkын Жылжытын taftan 6ocatын b3. Tamшы hayасы antra сайын Тazаланыз. | Тамши hayасын (сурет 39) abln, onы aflh сдашамалы xуу cыкын bfulimenшын b3. Тамши hayасы мен tamшы hayасын Каллafын bдыс xуfuшta дa тazалayfa Балды. Кофe унтakталы bдысын (A18 cypeti) anduhfbly taKtacsын bдыс xуfuшta xууfa boлmaйды. |
| Кайату каллын майay | 2 ai caibin | Кайату каллын калтамадыfы май IMeH (kepiiniz 'Кайату каллын майал') mайалыз. |
| Су bдысы | Antra calibin | Су bдысын afbyin Typfahсу meHшайыз |
| Альпераль бөлшөгөр | Тазалay yaKытБi | Тазалay üдici |
| Машинанын, одь | Апта саын | Кырмай тын šуберекпен тазалay |
Cleaning the brewing unit
Clean the brewing unit regularly to prevent clogging. For cleaning and maintenance, see www.saeco.com/care.
Cleaning the brewing unit under running water
1. Remove the brewing unit (see 'Removing the brewing unit'). 2. Rinse the brewing unit under lukewarm running water. Clean the upper filter (fig. 40) carefully. 3. Let the brewing unit dry completely before reinserting it. Do not use detergent to clean the brewing unit.
Cleaning the brewing unit with coffee oil and residue
Philips coffee maker cleaning tablets.
1 To clean the coffee maker, use the "Coffee maker cleaning" parameter and the instructions below. 2 Remove the water tank. 3 Replace the water tank.
Cleaning the coffee maker
To ensure the machine operates properly and to allow the steam wands to move freely, clean the coffee maker twice a month.
1 Press the coffee maker (fig. 41) with the cleaning tablet (fig. 42) into the holder. 2 Press the coffee maker (fig. 42) into the lower holder (fig. 43). 3 Press the two holders (fig. 43) into the bayonet fittings.
Internal milk frother cleaning procedures
The machines have the following cleaning procedures for the internal milk frother:
- «HygieSteam Shot»: The machine cleans the internal milk frother with steam. «HygieSteam»: The machine cleans with a full water tank. The HygieSteam steam is directed to the spout (fig. 44) and to the machine (fig. 45). Place the water tank (fig. 46) with water, and replace the water tank.
- «Deep Milk Clean»: To clean with a full water tank, use the Philips water tank cleaning procedure with the «Deep Milk Clean» procedure.
Cleaning the internal milk frother with water
1 Remove the internal milk frother (fig. 47). 2 Remove the internal milk frother by turning it (fig. 48). 3 With the upper part (fig. 49), remove the lower part by turning the internal milk frother. 4 Remove all parts (fig. 50) and clean them with water. 5 Rinse the internal milk frother thoroughly.
6 To replace the internal milk frother, insert it straight and turn it until it locks into place in the machine. Then insert the internal milk frother into the holder (fig. 13). 7 Your machine is ready.
For more information, visit www.saeco.com/care.
How to descale the machine
Only use Philips descaling products. Do not use vinegar, salt, or other acidic or alkaline descaling agents (such as citric acid), as this may damage the water system in the machine and may not remove all deposits. Philips descaling products are recommended for optimal descaling. Do not use descaling agents that are not suitable for coffee machines. You can buy Philips descaling products from authorized dealers or service centers.
1. Fill the water tank with fresh water and plug in the machine. The machine is now ready for the descaling procedure. 2. Remove the water tank, the coffee grounds container, and the drip tray (fig. 35), empty them, and put them back. 3. Remove the water tank and empty it. Then remove the AquaClean water filter. 4. Pour the Philips descaling solution into the water tank, fill it with water up to the CALC CLEAN (descaling) mark (fig. 51), and stir. Then put it back into the machine. 5. Place a large container (1.5 l) under the coffee spout. 6. Make sure the drip tray (fig. 44) and the machine (fig. 45) are in place. Insert the water spout (fig. 46) into the water tank. 7. To start the descaling procedure, follow the instructions on the screen. The descaling procedure takes about 30 minutes and consists of a descaling cycle and a rinsing cycle. 8. When the descaling cycle is finished, empty the water tank and the water spout. Follow the instructions on the screen. 9. Remove the AquaClean water filter from the water tank and discard it (see 'Replacing the AquaClean water filter (5 min)').
Note: The descaling solution may cause damage if used incorrectly!
Action required when the descaling procedure is interrupted
If the descaling procedure is interrupted before it is completed, the machine may not be ready for use. If the descaling procedure is not completed, do the following:
1. Empty the water tank and rinse it. 2. Fill the water tank with fresh water up to the CALC CLEAN (descaling) mark and put it back into the machine. The red ring will automatically start flashing. 3. Place a container under the water spout and start the rinsing cycle. To start the rinsing cycle, press the button and hold it for 3 seconds, then release it. The machine will start the rinsing cycle.
Expert: If the descaling procedure is not completed, the red ring will continue to flash until the descaling procedure is completed.
Error codes
The table below shows the error codes that may appear on the display. You can also find them at www.saeco.com/care. If you need further assistance, contact the Consumer Care Centre in your country. Always have the model number and serial number ready.
| Ка te Коды | М ecene | Му金融机构 |
| 01 | Кофенишухимасы 6iteлген. | Машинаны ошерin, розеткадан ожьратын b3. Каянату куралин алын b3.Одан кеи andын ana утakтоган коfeбелimi Ка паших дыл, касы сабын салын b3.Бiterег утakтоган кофe temen (cypet 37) туckenш eутkaны кOFары xэн Temen Жылжытын b3.Толык seйн hyckaynapы Any yuith www.saeco.com/care topoаын кірінiz. |
| 03 | Кайнату курали лactанган Немес жakсы майhanбafан. | Машинаны ошеріпіз. Каянату куралин таза cumen shai bIn, ayada kentipin, onы майалы n3 (keiigiz 'Кайнату куралин майал').«Кайнату куралин тazanay» tappingayн karapahb3 hemeces tolbyk бeyне hyckaynapы Any yuith www.saeco.com/care topoаын kipiiz.Одан кeин машинаны кайta кocынiz. |
| 04 | Кайнату курали дурьс орналасылmafан. | Машинаны ошеріпіз. Каянату куралин alын кайta салын b3. Кайнату куралин салу andында дурьс Күдө ekндгirn Tekcertiiz. «Кайнату куралин колдany» tappingayн karapahb3 Hemeces kelenci topoanka kipiiz: www.saeco.com/care topoаын kipiiz.Одан кeин машинаны кайta кocынiz. |
| 05 | Су тizberінde aya bap. | Θшерірін кайтɑ косумен Машинаны кайta icke кocынiz.Еrep 6ул ICTece, 2-3 bICTkshын afb3bivb3.Еrep машина кafын узak уakыт ketipmeceniz, onы кakтан ta3anaiz. |
| AquaClean cyzrici орnatу andында дурьс дайыдалмаган Немес 6iteлген. | AquaClean cyzricin anb, кофeni кайтɑ кайнату куралиы.Ер осы ICTece, AquaClean cyzricin kepi cany andында дурьс дайыдальз. AquaClean cyzricin cy bldycblyaн Kepi canlyb3. Erep 6ул ол di ecitemece, cyzri bietyi мукин кэн zhene aybictiyu kepek. | |
| 11 | Машинаны Белme temnepatypacbiha pettey kepek | Машинаны келik/cblptkbs TempepaTypa-bi Kaileme tempepaTypacbiha Deiiin petTeyiine Shamalny uakbyt sepiiz. |
| Машинаны 30 мунтка ошерin, onы кайta кocынiz.Бул жуmbic ICTemece, einiizderi tulyhupnapdby KONday optanlfbina xa-bapnaibiz.Байларыс мелimettepiH Keiindik napakшынah kapaibiz. | ||
| 14 | Машина Кьзвлжать. | Машинаны ошеріn, 30 минутан KeiIN кайтɑ кocынiz. |
| 19 | Машина Кавлрfa posetKacbHa Дурьс КocbIMamafah. | Куат сblmbiBн kiшkeNTaiaшаы машинанын aprtbndaы posetTKaRa Dyrpbic KocbIgFaHbHa Ke3 KeTki3iHiz. |
Ordering accessories
To clean the machine and for descaling, only use Philips maintenance products. These products can be purchased from your local dealer or from an authorised service centre.
To order accessories, visit www.saeco.com/care. For service, contact the Consumer Care Centre in your country.
Technical specifications
- Descaling solution CA6700
- AquaClean water filter CA6903, Water hardness test strip HD5061
- Coffee oil remover tablets CA6704, Water spout cleaning tool CA6705
- Technical characteristics of the CA6707 device
Operating instructions
This section lists the problems that may occur during operation. The full list of troubleshooting steps and frequently asked questions is available at www.saecO.com/care. If the problem cannot be solved, contact your local service center. See the warranty terms.
| Mæcele | Ceben | Шевим | |
| Мени жада koфе maшиhamhын iшинde koфe ka landknapы 6ap. | Бул машина koфемен сыналfasн. | Мукут тазалногамен, браз koфе ka landknapы калуы мумкин. Дereнмен, maшина мулджмах. Тамшы hayасы жылдан толады/tamшы HayasbIHDA γнemii шамалы cy solan'dы. | Tamшы hayасы кун салын hemec Кызbl«Тамшы hayасы толык» Индikatopы Тамшы hayasbIHн Кakпafы аркылы жылбКТаFAH canын бocatbIH3. Кени: улбkanшaiынfaH сydы xinhan yшINТамы зуmerгine стakаны коьын3. |
| «Кофуνтakтары ыдысын δocatу» белriшесi kocуны ka landы. | Кофуνтakтары bIDICbIH maшина kaырfa розеткабIHAN akыратынFaHДа Ke3de δocatbIH3 hemec оны Жыlandam opнын салынbI3. | Кофуνтakтары bIDICbIH anын, кени 5сянд КутIN, onыкайда салын3. | |
| Кофуνтakтары bIDICbI ТOLmaca дa, машина mafah bIDICbI δocatyды ycbIHdы. | Maшина koфуνтakтары bIDICbIH δocatkaHHAN KeiIN ecenteriшti кайta opnatnaDы. | Кофуνтakтары bIDICbIH керi салfax ke3de shaAMemH 5сякнД КУтIN3.Осы opайda, koфу napetin ecenteriш НELRE opnatbIHdny кени КокуптepinH салы дурbac ecententeDI. | |
| Кофуνтakтары bIDICbI apTBK TOLfAH JxHe Диспел徳 «Кофу унтakтары bIDICbIH δocatу» seilriшесi naIDA б�лмafан. | Tamшы hayасы koфдэндерi bIDICbIH δocatycbI3 шIFapdbIHbI3. | Tamшы hayасы any ke3iHne Koфу унтakтары bIDICbIH, tİnti, a3 fana Kaфe napeti boJca da δocatbIH3. ByhIn apkacbIHDA koфe napetteripin ecenteriш нELRE opnatbIHdny кени Коку napetteripinH салы дурbac ecententeDI. |
| Mэсеle | Себен | Шебим |
| Кайнау куралын any m tymкін emec. | Кайнау куралы дүрьс opында emec. | Машинаны келеси жолmen кайта ophaыныз: Кызмет Керсету eciriн Жаын, сыдысын Керi салынз. Машинаны eшер,在 Кая Косын, «сухи» белришелегл徴яшam'dap'dын Косылүй Кутін3. Кайнау куралы Кайта anын Каралы. Кадам'dык hyckaynap'dы «Кайнау куралын anyжөне canу» Тарayынан Каралыз. |
| Кайнау куралын cany m tymкін emec. | Кайнау куралы дүрьс opында emec. | Машинаны келеси жолmen кайта ophaыныз: Кызmet Керсету ecirih Жаын, сыдысын Керi салынз. Кайнау куралын shыларын anыньз. Машинаны eшер,在 розтадан жыралынз. 30 секунд Кутіn, машинаны Керi салын, Косын, «сухи» Белriшелегл徴яшam'dap'dын Косылүй Кутін3. Одан Кейн Кайнау куралын Дүрьс Күгүхүйр. Машинау кayын салынз. Кадам'dык hyckaynap'dы «Кайнау куралын anyжөне canу» Тарayынан Каралыз. |
| Кофе сүліk. | Кайнау куралы дүл'tанfasн нemece майланыke kerek. | Кайнау куралы anын, оны aБын сда шayын, кentэрugу Калдырьнз.Одан Кейн Кылжымалы Белшөтэрin (KERİH3 'Кайнау куралы Майlay') майланыз. |
| Машинада щөke petteу працедуразы opынданya. Машины anfaш pet пайданоганда, көрдөн德ерін басka ту pineа уылсторганda нemece узak укыт пайданоганда осы працEDуа ABIOMaTTb Typde бactanadы. | Машинаflа көke petteу працEDуapsын Яктуг рүкат etу ушin, 5 кофe станын biphden Кайнасын. 2-3 сүсьн Кайнасын. | |
| Тарков Тым улken napametpre ophaынлган. | Тарков Тымдәn (төмehipeк) napametpihe ophaыныз. Дэмс толымен erзreprеншe 2-3 сүсьн Кайнасын. | |
| Кофе жeteprilikтей bіctык emec. | Tempepatура Тым Temen deнг'reе ophaылган. | Tempepatура мakсималы napametpre (cypet 52) ophaыныз. |
| Сүліstсakан сүсьн tempepatурасын Temehteidi. | bIcTBKс汞men shaio apkbls shuHaiaKтар'dы al'dhIn alа Кыздырьныз. | |
| Сүт кocу сүсьн Tempepatурасын temehteidi. | bIcTBK hemesce cybK cYt KockaHaBHy3fa kapamactan, cYt Kocy Kofoe Tempepatурасын Temehteidi. bIcTBK с汞men shaio apkbls shuHaiaKтар'dы al'dhIn al'dhIn alа Кыздырьныз. | |
| Mосe né | Сeбeн | Шeшім |
| Кофе shыкпайды hemecе Кофе 6аяу shыfasд. | AquaClean cy cy3rici opnatуfa dypbic дайындаимады. | AquaClean cy3ricin abtin, shamaы bICTbik cy afbl3bɪhɪbɪ.Бул жуmbic ictece, AquaClean cy3rici dypbic opnatbɪmafah. AquaClean cy3ricin kai ta opnatbɪn, белсанipin, «AquaClean cy cy3rici» taraybɪndaftы 6aplbɪk ka damapdby opbɪndaftɪbɪ3. |
| Узak уaklt naйданыл'mаça, AquaClean cy cy3ricin kai ta naïdaлиуfa дайындан, 2-3 стakан bICTbɪk cy afbl3bɪhɪ3. | ||
| AquaClean cy cy3rici 6iteлген. | AquaClean cy cy3ricin 3 ai caibin aybɪctbɪpɪbɪbɪ. 3 ai daн ecki cy3ri 6itenyi МуMKIN. | |
| Тарковы тыm kiшkeHTaɪ napametpré opnatbɪlfaH. | Тарковы тыm уken (хOFapbɪ) napametpré opnatbɪbɪs 3.Бул кофе дəmihe tepic осяр etetiHIN eckepɪniz. | |
| Кайоту куралы постанfah. | Кайоту куралы albɪn, onbɪ albɪn cymen (керɪnɪz 'Кайоту куралы afbɪn cy actbɪda тazanlay') куbɪbɪs. | |
| Кофе tambyru shymeri lacstanfah. | Кофе tambyru shymeri injehne caHBIaynpabH IN KUbɪp Ta3anay КуралIMEN HEMeCE INHemEN Ta3anahɪz. | |
| АndынAna hytaKtANFaH кофe бeлиi 6iteлген | Машиньг leiwipin, кайоту куралы albɪbɪs. АndынAna hytaKtANFaH кофe бeлиi куралы albɪn, оанн касык сбɪn caLBɪbɪs. Бiteren hytaKtANFAH кофe Темен (cypet 37) Туckeшие ТуТКаны ЖOFapbɪжэп ТЕмENЖБЛЖВITbɪs. | |
| Машина тizberigн кak 6ite tactaflan. | Машина кafbɪn Philips кak ketipriшimen (керɪnɪz 'Кak tycipy поцедурасы') ta3anaHbɪs. Машина сizden cya faran KezeDE YHEMI KaBɪN KeTIPɪniz. | |
| Сут кебіктелмeydi. | Iшк кappунинатор постанfah нemecе дypbIC салынбafan. | Iшк кappунинаторды тazanan, күйн tekcecipin, дypbɪctan (керɪnɪz 'Iшк kaPPunuyninatordbɪ albɪn cyda тazanay') caLBɪbɪs. |
| Пайданылathin cyt typi Кeiniptуre arhanmafah. | Өр турпс сут турлөріктɪн εр турпɪ мелшерлөрінөөн εр турпɪ салanapbɪnaHa оkeledi. | |
| Сут shaырайды. | Пайданылathin cyt кеткіліkti турde calkbln emec. | Тikel徴 тоцаыткьштан кететин сутti пайданынblɪs. |
| Macele | Ceben | Шебим |
| Илгш сут тутiri дурьс жалганбаян. | Кофе тамызу Шуmerіин (сурет 47) ecirih ашьл, мілгш тутікін калпунинаторfa тόлыcfgіmen жалларынka кэз көтkiэдіз. Калпунинатор мech сут тутікөрі bістык бolyы мүмікін ekндігін eckeрідіз. Калпунинатор мech тутікөріді турту ал'dында олары сув'tынді. | |
| Калпунинатор мech сут тутікөрі таза emec. | Iшki калпунинатор (KERİH3 'Iшki Калпунинаторды afын суда тazanay') алынбөлшөткінiz. Барліk 6Блшөтр律 afын су actындашайынд. Дурьcfgітан тazanay ушін Philips сут тizberін тazanay Куралын пайданындizхе Deep Milk Clean поцедурасын тazanay (Ф) мэзір apкыcfgы орьндаи.Ерр 6Блшөтр ыдыс яуflыштɑ тazanalhca, оларfa тafam Белікөрін hemece afapтыш калыктары бітелін калы мүмін ekндігін eckeрідіз. Соныmen катар, кedepгінін hab-жовын КeЗбенTekсеру усындаи. | |
| HygieSteam safdaplamacbін кн саьын opындay усындаи: 1) Backapy разсынан «Clean» (Tazanay) Ту'mесін басынд. 2) «HygieSteam» napametprin tandaиd. 3) П procenti бactay ушін icke kocу ту'mесін habынд.3. Одан кeін dinclпійde habык Кадamdapды pactаыd.3. | ||
| Сут тутікөрі bітелrene. | Сут bідьсьн у hemi cyт тутікөрін TOHAЗТКБИЗКа calmaj caltaнд. KaɪfaH сут тутікөріrelу кinasнын, тутікөр apкыны етetiн сут afындаи δогет boлуы мүмін. Са只是ал'dында сут тутікөрін saaiынд.3. | |
| Maшина afын жатkan сиякты. | Машида iшki tizbekti көн кайнату куралын shaiofa су пайданындаи. Бун су iшki Жу've apksын тikelenу tamшы нayasblaна aradäы. Бун калыntы жafдai. | Тамын hayасьн кн саьын hemece «Тамын hayасьн толы» Иndикаторы Тамын hayасьн hakkaflы apksын Жынлынгтafanс саьын bocatынд. Kehec: Шаьлган сdyы xinayн habытмыз шуmerін CTAKANDы кoьп, tamшы Hayasblndaы cу MELшерін azaibtBu3. |
| Тамын hayасьн тум толыкәр tasyda, bşл машинаньн кем жafдaiынha уксайд. | Тамын hayасьн кн саьын hemece «Тамын hayасьн толы» Иndикаторы Тамын hayасьн hakkaflы apksын Жынлынгтafanс саьын bocatынд. | |
| Су bідьсьн туліfbimen саьынді, су bідьсьнан shamalnyсу afын, машинадан aya shыfasлд. | Су bідьсьн duþрс орьнда ekндігін tekperідіз: onbі anlіn, машинafа барында рениет Erin ка'tа салынд. | |
| Mòscène | Cébénc | Llèseim |
| Каинау куралы лacratchанган/бителган. | Каинау куралышайыз. | |
| Машина кенин бетke оронл actырлmaоган. | Тамшины hayасы толмай, «Тамшины hayасы Тольк» Иndиаторы дурьс жумьс ICTeутindей etin машинаны кенин бетke ophalactырындз. | |
| AquaClean cy суztificin белиcentрич мушин éмес жэne машина каç тусирді сура'dы. | Зкравда AquaClean ecke салышы керсетлгеннөйн суztri opнатылмады hemecce aybictырлмады. Бул машинанын толыгимen шеригдicis éмс ekendigirin блдірedi. | Алдымен, машина кafын түсірін, одан көийн AquaClean cy suztricin opнатындз. |
| Жанca суztri bokitilmeydi. | AquaClean cy suztificenb baska суztirihi opнатуfa оpeket жасалуda. | Tek AquaClean cy suztifici kурльfbifa сөйсес кени. |
| AquaClean cy suztricinderi pezeнcke салпна opнатда emec. | AquaClean cy suztricine pezeнcke салпна кeri pe calibniz. | |
| Машинадан кattыш шыл'dа. | Пайданану барыснда машинанын көдipишу shылары калыntы яжддбалып ecent肺癌dii. | Еgre машинадан ор турпìшу shыfas бacterа, кайату куралын тазалan, оны майларыз (KERi3 'Кайату куралын майлay'). |
| AquaClean cy suztrici duypbic дайындамаган көне уа에дì машинага tarылады. | AquaClean cy suztricin cy bдысинан алын, кeri салу andында колданыб; dypbixtan дайынддьз. Кадамын нүскayлары «AquaClean cy suztrici» tarayынан karapahidz. | |
| Су bдысы толыfvimen салынд. машинадан aya shырарыдд. | Су bдысы duypьс opьнда ekendigirin tekserperiig: оны олын, машинага барынша тereşе etin bасык kayra салындз. |
Technical requirements
The technical specifications of the device are given in the table below. The values are for the standard version.
Parameter
Value
Dimensions (W x H x D)
262 x 383 x 448 mm
Weight
8-8.5 kg
Display size
1200 mm.
Water consumption
1.8 liters
300
| Tapълfasн кофе bдьсынс bийIMьльfbl | 12 napet |
| Сут bдьсынс bийIMьльfbl | 600 мл |
| Рettелмeni щумек биiktiri | 87 -147 мл |
| Hominał kerphey - Кат hominałb - Кат кezi | Кьзmet ecirihin iшиderi deprekterбел Ricin karapaht3 (A15 cypeti) |
To the automatic cigarette machine
Importer: "DAPB.V.", Tussendienen 4, 9206A D, Drachten, Netherlands
Authorized representative in the Russian Federation: "Technika dlya Doma FmInnc" LLC, Representative office, 123022, Moscow, Sergey Makeev St., 13, bldg. 5, office XVII, 31 beloe, phone +7 495 961-1111



- MACHINE OVERVIEW (FIG. A)
- ACCESSORIES
- CONTROL PANEL
- INTRODUCTION
- BEFORE FIRST USE
- WATER HARDNESS
- FILLING WATER CIRCUIT
- HEATING UP
- RINSING
- SPECIAL FUNCTIONS
- SPECIAL FUNCTION
- PURPOSE
- BREWING DRINKS
- GENERAL STEPS
- BREWING COFFEE WITH BEANS
- BREWING MILK-BASED DRINKS
- BREWING COFFEE WITH PRE-GROUND COFFEE
- DISPENSING HOT WATER
- PERSONALIZING DRINKS
- BREWING DRINKS WITH COFFEEMAESTRO FUNCTION
- COFFEEEQUALIZER FUNCTION
- SELECTING A PROFILE
- GUEST PROFILE
- EXTRA SHOT (EXTRASHOT)
- ADJUSTING MACHINE SETTINGS
- SETTING THE WATER HARDNESS
- USE THE WATER HARDNESS TEST STRIP SUPPLIED IN THE BOX TO DETERMINE THE WATER HARDNESS IN YOUR REGION
- SET THE MACHINE TO THE CORRECT WATER HARDNESS
- ADJUSTING THE GRIND SETTING
- ADJUSTING OTHER MACHINE SETTINGS
- RESTORING FACTORY SETTINGS
- AQUACLEAN WATER FILTER
- AQUACLEAN FILTER STATUS INDICATION
- ACTIVATING THE AQUACLEAN WATER FILTER (5 MIN.)
- REPLACING THE AQUACLEAN WATER FILTER (5 MIN.)
- REMOVING AND INSERTING THE BREW GROUP
- REMOVING THE BREW GROUP FROM THE MACHINE
- REINSERTING THE BREW GROUP
- CLEANING AND MAINTENANCE
- CLEANING THE BREW GROUP
- CLEANING THE BREW GROUP UNDER THE TAP
- CLEANING THE BREW GROUP WITH THE COFFEE OIL REMOVER TABLETS
- LUBRICATING THE BREW GROUP
- CLEANING PROGRAMS FOR THE INTERNAL CAPPUCCINATORE
- CLEANING THE INTERNAL CAPPUCCINATORE UNDER THE TAP
- DESCALING PROCEDURE
- WHAT TO DO IF THE DESCALING PROCEDURE IS INTERRUPTED
- ERROR CODES
- ORDERING ACCESSORIES
- TROUBLESHOOTING
- TECHNICAL SPECIFICATIONS
- TABLE OF CONTENTS
- AQUACLEAN
- SPECIAL FEATURES
- SPECIAL FEATURE
- WWW.SAECO.COM/MYCOFFEEMACHINE
- OBJECTIVE
- USE
- GOAL
- INDICATOR FOR AQUACLEAN FILTER STATUS
- CUSTOMIZE BEVERAGES
- ORDER ACCESSORIES
- PURPOSE OF USE
- KOTOC
- CPEUNHN FYHKCNN
- CNEUHAHAФYHKU
- PPEHA3NAUEHNE
- PREPARING DRINKS
- PREPARING COFFEE FROM BEANS
- PREPARING MILK DRINKS
- COFFEE FROM PRE-GROUND COFFEE
- HOT WATER DISPENSING
- DRINKS WITH THE COFFEEMAESTRO FUNCTION
- DRINK PROFILES
- ADJUSTING THE GRINDING SETTINGS
- ADJUSTING THE MACHINE SETTINGS
- BB3CTAHOBRAHE HA 06PHNTE HACTPOKN
- BODENФИЛЬТBP AQUACLEAN
- INHDNKAUTATA 3A CBCTOHNETO HA ΦNIBPA AQUACLEAN
- AKNBIPAHE HA BOHNIY FINTBP AQUACLEAN (5 MMH.)
- REPLACING THE AQUACLEAN WATER FILTER (5 MINUTES)
- INSERTING THE BREW GROUP BACK
- LEB
- GENERAL
- PREPARING MILK-BASED DRINKS
- PREPARING A DRINK FROM GROUND COFFEE
- REMOVING THE BREWING GROUP FROM THE COFFEE MACHINE
- INSTALLING THE BREWING GROUP IN PLACE
- CLEANING THE BREW GROUP UNDER RUNNING WATER
- CLEANING THE BREW GROUP WITH CLEANING TABLETS FOR COFFEE OIL REMOVAL
- CLEANING PROGRAMS FOR THE INTERNAL MILK CIRCUIT
- CLEANING THE INTERNAL MILK CIRCUIT UNDER RUNNING WATER
- CONTENTS
- TABLE OF CONTENTS (FIG. A)
- GENERAL INSTRUCTIONS
- PREPARING COFFEE FROM COFFEE BEANS
- PREPARING COFFEE WITH PRE-GROUND BEANS
- CREATING YOUR OWN DRINKS
- PREPARING DRINKS USING THE COFFEEMAESTRO FUNCTION
- OTHER MACHINE SETTINGS
- MAINTENANCE AND CARE
- CLEANING THE BREW UNIT
- CLEANING THE INTERNAL MILK CIRCUIT WITH WATER FROM THE TAP
- CYCBHDAP KAHATU
- KAJIBI KAJAMDAP
- CYT HERI3IHDERI CYCBIHDAPDB KAHATY
- AAIBHA ANA YHTAKTANFAH KOPEHI KAHATY
- HOT WATER CLEANING
- WATER FILTERS
- USING THE COFFEEMAESTRO FUNCTION TO SET THE WATER HARDNESS
- PROFILE SELECTION
- EXTRA SHOT
- ADJUSTING THE STRENGTH PARAMETERS
- SELECTING THE WATER HARDNESS
- ADJUSTING THE RINSE PARAMETERS
- ADJUSTING THE MACHINE PARAMETERS
- RESETTING THE PARAMETERS TO FACTORY SETTINGS
- AQUACLEAN FILTER INDICATOR
- REPLACING THE AQUACLEAN WATER FILTER (5 MIN)
- RESETTING THE AQUACLEAN WATER FILTER (5 MIN)
- REMOVING THE BREWING UNIT
- CLEANING THE BREWING UNIT
- CLEANING THE BREWING UNIT UNDER RUNNING WATER
- CLEANING THE BREWING UNIT WITH COFFEE OIL AND RESIDUE
- CLEANING THE COFFEE MAKER
- INTERNAL MILK FROTHER CLEANING PROCEDURES
- CLEANING THE INTERNAL MILK FROTHER WITH WATER
- HOW TO DESCALE THE MACHINE
- ACTION REQUIRED WHEN THE DESCALING PROCEDURE IS INTERRUPTED
- OPERATING INSTRUCTIONS
- TECHNICAL REQUIREMENTS
Brand : SAECO
Model : GRANAROMA SM6480
Category : Automatic coffee machine