
VAPORMATE - Steam cleaner HOOVER - Free user manual and instructions
Find the device manual for free VAPORMATE HOOVER in PDF.
User questions about VAPORMATE HOOVER
0 question about this device. Answer the ones you know or ask your own.
Ask a new question about this device
Download the instructions for your Steam cleaner in PDF format for free! Find your manual VAPORMATE - HOOVER and take your electronic device back in hand. On this page are published all the documents necessary for the use of your device. VAPORMATE by HOOVER.
USER MANUAL VAPORMATE HOOVER
HOOVER VAPORMATE USER MANUAL:
Contents:
Important safety reminders 4
Getting to know your product 4
Do not 5
Environment 5
How to start 5
Using your Vapormate 6
Cleaner maintenance 6
Accessories 7
Important information 7
Troubleshooting guide 8
Guarantee statement 8
IMPORTANT SAFETY REMINDERS:
This cleaner should only be used for domestic cleaning as described in this user manual. Please ensure that this guide is fully understood before operating this appliance.
WARNING: Remember electricity can be dangerous this appliance must be earthed. This plug is fitted with a 13-amp fuse (UK only).
IMPORTANT: The wires in the mains lead are coloured in accordance with the following code:
BLUE - Neutral BROWN - Live GREEN/YELLOW - Earth
REMEMBER: After use, switch the cleaner off and remove the plug from the electricity supply.
Always switch off, remove the plug and wait for the appliance to cool down before cleaning the appliance or attempting any maintenance.
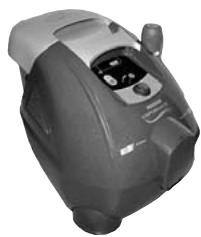
GETTING TO KNOW YOUR PRODUCT:
The following features and accessories are mentioned within this user manual and are shown in the pictures on page 1.
- Vacuum power indicator
- Water empty indicator
- On/off steam boiler
- Water heating indicator
- Steam ready indicator
- Steam regulation
- On/Off main switch
- Carry handle
- Hose connection with cover
- Tube parking
- Boiler safety cap
- Hydrofilt water container
- Washable HEPA exhaust filter
- Power cord
- Power cord connection with cover
- HEPA filter retaining clips
- Container handle
- Clean Max Water Level mark
- Hydrofit assembly
- Cover with integrated handle
- Washable pre-motor filter
- Micronet filter
- Hydrofil inlet
ACCESSIONS
Steam & Vacuum use
A) Flexible hose and multifunctional handle
(A1) Accessories connection
A2) Accessory lock/release button
A3) Steam emission control
A4) Steam trigger
A5) Suction control button
B) Hose connector
C) Extension tubes
D) Floor brush
D1) Bristled inserts
D2) Squeezee inserts
D3) Carpet inserts
E) Crevice tool with steam emission
E1) Steam Jet nozzle
E2) Round brushes
F) Universal nozzle
F1) Window insert
F2)Upholstery insert
F3) Cotton cloths
Vacuum only use
G) Crevice tool
H) Radiator brush
I) Upholstery nozzle
J) Dusting brush
Others
K) No spill bottle
L) Additional seals
M) Accessories bag
N) Hoover-Kaldefender vial
O) Hoover-Ecobreeze bottle
DO NOT:
Position the cleaner above you when cleaning stairs.
Put any liquids in the tank/boiler other than water and Hoover-Kaldefender.
- Submerge the product in any liquid.
- Touch the appliance with wet hands or feet with the cable plugged into the mains.
- Leave the appliance unattended whilst plugged into the mains.
- Attempt to disassemble the product.
- Use the product if it appears to be faulty.
- Direct steam towards people, animals or other appliances.
Spray with or pick up any flammable liquids, as this risks explosion.
- Stand on or wrap the power cord around legs or arms while in use.
- Press the steam trigger when the water tank is empty.
TO AVOID SAFETY HAZARDS, THE CLEANER MUST ONLY BE REPAIRED BY AN AUTHORISED HOOVER SERVICE ENGINEER.
ENVIRONMENT:
Hoover has made a long-term commitment, in all its activities, to safeguarding the environment. Our environmental policy states: "To adopt the best practicable environmental methods in design, production, packaging, use and disposal of products, whilst continuing to improve benefits to the consumer". The majority of materials used in this appliance are recyclable. Please use the best available disposal method to take advantage of this feature.
HOW TO START:
Opening the box
Remove the product from the packaging. The flexible hose and accessories are found at the bottom of the box, they are clearly visible once the product is removed.
Hose connection
Open the cover; fit the hose connector and push until you hear the click of the locking mechanism, then make sure it is well locked (Fig. 1).
To disconnect the hose push the button on the top of the connector and pull the hose from the appliance (Fig. 2).
Power cord connection
Open the cover and push on the power cord (Fig. 3). Plug the other end of the power cord into the wall socket. Ensure hands are dry and no moisture is present.
Accessories
Accessories can be connected directly to the multifunctional handle or to the extension tubes.
- Push desired accessory until the locking mechanism is engaged (Fig. 4).
- To disconnect accessory from the handle press the lock/release button and separate the 2 parts (Fig. 5).
- To disconnect accessory from tube press the retention clips. Note: for more information on accessories application and use refer to the specific "Accessory" section.
Reminder: while assembling or changing accessories during use stop the steam function by pressing from left to right the steam emission control.
Filling the Hydrofilt container
Remove the Hydrofilt container from the machine (Fig. 6), remove the filter assembly (Fig. 7) and fill with water up to the MAX mark printed on the container (Fig. 8). Please add 1 measured fill of Hoover Ecobreeze to the clean water, as described in the cleaner maintenance section.
What is the Hydrofit?
Hydrofilt is a water filter, specifically designed for an efficient wet & dry suction, which uses the natural purifying property of water.
It is in fact the flow of water into the container that efficiently captures the dirt avoiding its dispersion into the environment.
Filling the boiler
Unscrew the Boiler safety cap (Fig. 9) and fill with water using the no spill filler bottle supplied (Fig. 10), periodically add Kaldefender as described in the cleaner maintenance section.
Reminder: please read carefully chapter "Using your Vapormate" when re-filling the boiler during long periods of cleaning.
Press the on/off main switch. This will illuminate in red. The first level of the Vacuum Power indicator will flash in green.
You are now ready to use your Vapormate.
USING YOUR VAPORMATE:
Combined operations
For highest convenience while cleaning, you can choose from the below:
Vacuum only
Steam only
Steam + Vacuum combined
We recommend to vacuum surfaces prior to treat them with steam.
VACUUM CLEANING
- Press the suction control button on the multifunctional handle (Fig. 13): the motor will run at lowest power. The first level of the vacuum power indicator will stop flashing and remain constantly lit.
- To increase or decrease power, keep suction control button pressed. The indicator will inform about selected level.
- To switch off the vacuum unit, simply press and release once the suction control button. The unit will enter stand by mode.
STEAM CLEANING
- Press the On/Off steam boiler switch.
- The water heating indicator will light during the whole heating phase, until steam is ready.
- The steam ready indicator will light when steam is available and the water heating indicator will turn off.
- To release steam first press from right to left the steam emission control device, then press the steam trigger on handle.
- Steam quantity can be selected through the steam regulation knob on the control panel.
- Switch off the boiler by pressing the on/off steam boiler button when steam is no longer required.
Reminder: as the Vapormate is filled directly into the boiler these instructions must be followed to refill the boiler once the red boiler empty light illuminates on the control panel and the boiler empty alarm sounds:
- Switch off the machine by the boiler switch.
- Press the steam trigger on the handle to eliminate residual steam and pressure in the boiler.
- Disconnect the power supply cable from the mains.
- Unscrew the safety cap. Please note that the safety cap cannot be opened if there is even minimal steam pressure in the boiler. This guarantees maximum safety for the end user.
Wait for a few minutes to allow the generator tank to cool down. - To refill the boiler, simply refer to the preparations for use section to re-fill.
WARNING: When filling the water boiler when it is already hot, we strongly advise you to SLOWLY AND CAREFULLY add just a little water at a time to avoid steam blowback from the aperture.
CLEANER MAINTENANCE:
Emptying the Hydrofilt container
Suction is stopped automatically by the safety float once the water level in the filter container has reached the MAX mark. This is also noticed by a distinctive change in the noise of the product and lack of suction.
To empty the container please:
- Switch off the appliance with the ON/OFF main switch and unplug the power cable.
- Remove the Hydrofilit container from the appliance, holding it by the handle (Fig. 6).
- Remove the filter assembly (Fig. 7) and empty the dirty water and refill to continue cleaning.
Reassemble the filter cage and put it back inside the appliance.
Note: Make sure that the Hydrofilt inlet is correctly positioned, checking that the arrow on the nozzle is aligned with the notch on the bottom of the cage (Fig.13). If the filter needs replacing, always use an original Hoover filter.
Sanitizing the Hydrofilt container
Hoover recommends the use of Hoover Ecobreeze to sanitize the Hydrofilt container while using the suction function. It is a scented antibacterial product with natural-based anti-allergenic substances. Added regularly to the Hydrofilt container, it will prevent the proliferation of bacteria and microorganisms and inhibit the action of allergens. Moreover Hoover Ecobreeze eliminates odours, refreshing the air.
Directions of use:
Shake the bottle and remove the safety cap. Hold the bottle upright and press until the dispenser is full to the recommended amount. Release the bottle and pour the dose into the water filter container (Fig. 14).
One dose of Ecobreeze solution is recommended to be used on each fill of the filter container.
Reminder: Do not pour Ecobreeze into the boiler as this will damage the equipment.
Provisions against limescale build up in water boiler
Hoover recommends the use of Hoover-Kaldefender to avoid lime scale problems. Hoover-
Kaldefender is a natural-base decalcifier, which extends product life and ensures a better steam quality over time.
Direction of use:
Pour a Hoover-Kaldefender vial contents into a full boiler (Fig. 15).
Generally one vial is recommended to be used every two water refills, however, the right dose also depends on local hardness of water.
Please refer to authorised Hoover assistance centres for advice on doses and correct maintenance procedure with Kaldefender.
ACCESSORIES:
Steam and Vacuum use
Floor brush (D)
Use this tool over large surfaces using the following inserts:
- Bristled inserts (D1): suggested for hard floors dry vacuuming
- Squeegee inserts (D2): designed for hard floors liquid suction therefore suggested with steam cleaning.
- Carpet inserts (D3): suggested for carpets and moquette steam and vacuuming.
How to fit inserts:
Simply rotate the catch on the side of the nozzle clockwise to gain access to the inserts.
- Slide inserts in the nozzle slot as shown in Fig.16, then close the latch.
- When fitting the two bristled inserts (D1), position the grooved insert towards the front of the brush.
- When fitting the squeegee inserts (D2), ensure that both smooth surfaces face inwards.
Crevice tool with angled steam nozzle (E)
Ideal to steam clean and vacuum difficult to reach areas, it may also be used to:
Treat stains on carpets
- Clean corners, window frames etc.
- Clean taps, sinks and other sanitary fixtures etc;
- Cleaning shutters, venetian blinds, radiators, car interiors etc
Steaming houseplants.
The following accessories may be screwed onto the steam nozzle (Fig.17-18-19):
- Steam jet tool (E1), to reach awkward areas such as radiators, doorposts, sills, shutters and toilet bowls.
- Small coloured brushes (E2), to remove stubborn dirt from small surfaces such as hobs, shutters, rugs between tiles, sanitary fittings and so on. Different colours allow keeping same brush for specific use.
Universal nozzle (F)
Hoover advice is to use this accessory on windows, mirrors and smooth surfaces, or to clean upholstery, sofas, mattresses, etc., it may also be fitted with the following accessories:
- Windows insert (F1) for windows and glass surfaces (Fig. 12);
- Upholstery insert (F2) for carpets, stairs, car interiors, and upholstery.
- An additional cloth (F3) may also be applied to the universal nozzle to further aid wet dirt pick-up.
Fit the inserts and slide them onto the nozzle as shown in Fig. 20.
Best results over windows are achieved by:
- Steaming the glass evenly to dissolve and loosen any dirt.
Vacuum the residual liquid from the glass, to leave clean.
Vacuum only use
Crevicetool(G)
Advised for vacuuming corners, tile gaps, etc.
To vacuum corners, angles, rugs etc (Fig. 21)
Radiator brush (H)
To be fitted on the crevice tool. (Fig. 22)
Upholstery nozzle (I)
Advised for sofas, upholstery vacuuming.
To vacuum sofas, upholstery, car interiors etc (Fig. 23)
Dusting brush (J)
Advised for furniture vacuuming and dusting.
To vacuum furniture, book shelves, keyboards etc (Fig. 24)
General use
No spill filler bottle (K)
Special bottle permitting a fast and without spill refill of the boiler.
Additional seals (L)
Spare seals to be applied in steam tubes connections.
Consumables
- Hose with handle code D77 35600091
-
Floor brush code G70 35600092
-
Bristled inserts code AC9 35600095
- Squeegee inserts code AC7 35600093
- Carpet inserts code AC8 35600094
3 small coloured brushes code P12 35600096
Washable pre-motor filter code S71 35600088
Washable HEPA exhaust filter code T71 35600089
Seals package code C47 35600090
Kaldefender (14 phials) code A23 35600099
Ecobreeze "mountain pine" fragrance code A21 55600097
Ecobreeze "mediterranean" fragrance code A22 35600098
Flat nozzle for suction only code G71 35600100
These items can be purchased separately from Hoover
IMPORTANT INFORMATION:
GENUINE HOOVER SPARES AND CONSUMABLES
Always replace parts with genuine Hoover spares. These are available from your local Hoover dealer or direct from Hoover. When ordering parts, please always quote your model number.
HOOVER SERVICE
Should you require service at any time please call your local Hoover service office. uential losses and accidental damage to the product are not covered by the guarantee.
TROUBLESHOOTING GUIDE
| Problem | Cause | Solution |
| The suction fan will not start | No power supply | Check the cable, plug and socket. |
| The suction power drops | There is a blockage in the system | Clean the filter and remove any obstruction from the tubes and accessories. |
| The air outlet filter is blocked | Clean or replace the filter. | |
| The boiler filling pump can be heard working continuously | Air in the boiler circuit | Switch off the appliance and allow it to cool. |
| The appliance does not respond to commands | The circuit board has received electronic signals from an unrelated appliance | Disconnect the appliance from the mains for a few minutes and then try again. |
| Water is exhausted from the product | Float device is clogged | Clean the Hydrofilt assembly. |
| Appliance has stopped vacuuming | Float has interrupted suction | Switch the appliance off, empty the tank and restart cleaning. |
GUARANTEE STATEMENT:
Your cleaner is guaranteed for 12 months from the date of purchase for parts and labour. To qualify for the benefits under this guarantee, you must be able to provide proof of date of purchase, and the appliance must have been supplied, used and assembled in accordance with Hoover instructions. Consequential losses and accidental damage to the product are not covered by the guarantee.
This guarantee does not affect your statutory or common law rights.
Hoover cannot be responsible for the results of using this appliance for any purposes other than those described in this user manual.

HOOVER LTD Pentrebach
Merthyr Tydfil, Mid Glamorgan
CF48 4TU
GIAS Customer Service 08705 400600
Hoover Spares 01204 556111


MANUEL HOOVER VAPORMATE
Sommaire :
Como insertar as aplicacoes:
Anti-mors vulfles (K)
Gias Customer Service
HVAD DU IKKE MA GORE
ZAPOZNANIE SIE Z PRODUKTEM:
GIAS Customer Services
Tel 042-653 36 29
Fax 042-611 66 77

MHCTPYKLJNIO ΚKCNJLYATAUIN ΠbJINECOCA HOOVER VAPORMATE:
Copepkanhe:
Texnka 6e3onacnoctn 59
3HaKOMCTBO C nbIeCOCOM 59
UTo 3aPepaetcAeIaTb 60
3koJorna 60
Hauano 3Kcnpnyatau nn 60
3Kcnnyataa nblncoca. 61
Yxoid 3a nbJIeCOCOM 61
Akeccyapbl 62
Ponck u yctpaHene HeucnpaBHOCTe 62
PykoBODCTBO no HaxoJdeHIO uYcTpaHEnIO HeNCpabHOcteI 63
TapaHTy 63
TEXHUNKA 5E3OJNACHOCTN:
IopcoeHnHTe Ka6eJb nHTaHna
OtkpoIe KpbIuKy I BCTaBbTe Ka6eIb PnTahNra (pnc. 3). BCTaBbTe BnJIky Ha npyrom KOHcE Ka6eIb HacTeHHyo po3eKy. Ppi 3tOM pykn, Ka6eIb Nblneoc DoJxHbI 6bITb cyxMm.
Akceccyapbl
Hacaikn MoKHO IOdCoeINHrTb HEnOcpeDCTBeHHo K MHOrofoyHKUHOHaJIbHoI pyKoRTke IIM K ydInHInTeBbHbIM Tpy6KaM.
HaedeHbTe HuykHyu HacaKy TaK, YTO6bI cpa6oTaJ MExaHn3M FHKcaun (pnc. 4).
- Yto6bI OTcoeHNHTb HacaIKy OT pyKoTKn, HaxMNTe KhoNkY fNKcaUN/ocBO6OJHn HacaOK n pa3deNITe DBe DetaJI (pnc. 5).
- Дя отcoeINHeHЯ HacaIKN OT Tpy6bl, HaxMITEФИKCaTOpbl. ПчIMeayHne.ДоноIHHTeIbHyIOHΦopMaIIO OTHOCHTeIbHO Ha3HaueHЯ И NCNoIb3OBAHЯ HacaIOK CM.В pa3dene"Akceccyapbl".
3anomnhte: npu yctaHOBKe mnn CMeHe HacaOk BO Bpemr NcNoIb3ObaHn PblneCoca OCTaHOBHTe fHKUIO BblNycca napa, cDvHHyB CneBa HanpaBO peryIaTOp napa.
3anonHeHne KOHTeHepa Hydrofilt
BbHbTe KOHTeHep Hydroflit n3 nbIeCoca (pnc. 6), Chmnte fHnIbtpuOuN 6Iok (pnc. 7) n 3aONHInTe KOHTeHep BOoJ Do MetKn MAX, HaneceHNo HA KOHTeHpe (pnc. 8). IoxKaIyIcTa, Io6abBe B YnCTUo BODY 1 MepHnik cpeIcTba Hoover Ecobreeze KaK 3To OnPcAHO B pa3dene "YxOJ 3a nbIeCocOM".
4To takoe Hydrofilt?
Hydrofilt - 3TO BOJHOI ΦINbTp, pa3pa6oTAHHbI CnEuaJIbHO dIy y6OpKn cyXO I BnAIXHOI bIIn, IcNOJIb3yET eCTeTBHeHbI OUYUaIOUe CBOICTBa BObl.
IIO cyTN, OH YBnEeTcN IOTOKOM NocTynaIoUeB KOHTeHep BOdbl, KOtOpbI DeiCTBeHNO 3aXBaTbIBaET rpa3b, He DonyckA eepacNbJIeHnB OOKpyKaIoUyO cpeNy.
3anonHeHne 6oJnepa
OTBnHTIte 3aunTHyIO KpbIky BoIIepa (pnc. 9) n 3anONHITe pe3epByap BOIO, nCNoIb3yBxOJaCyIO B KOMPiKeT 6byIky-HeIpOniBaIKy (pnc. 10). IpeNOnUeCKn DoabIyTe cpeCTBO Kaldefender corNaCHO ONICAHIO B pa3dJe "YXo3 a nbIlecoCOM".
3anomnhte: npeed noonHHeHem 6oIepa BO Bpema dIHTeJbHO uNCTKN BHIMaTeJbHO npouHTaTe pa3den "IcnoIb3OBAHne nbIeCoca Vapormate".
Haxmte BbiknquateIb nitaHna. OH 3aropntc kpaChbIM CBetOM. INdkaTOp nepBoro ypOBH MaOuHOCTN Bakyyma 6ydt Mrratb 3eJeHbIM CBetOM.
Tenepb Bau nbinecoc Vapormate roTOB K pa6ote
3KcPnYATAUINIbJIECOCA VAPORMATE:
CobmecThoe nOJIb3OBaHne yHKn
Длг obecneueHЯ MaKcMaJIbHOrO yIobcTba npN BblONHeHn YIcTK N Bl MoXeTe Bbl6paTb cIeNyUoee:
ToIbKO BaKyyM
ToIbKO nap
IpeodotbpaueHne o6pa3oBaHnHaKnIn B 6oJnepe
KoMaHnHa Hoover peKOMeHnyet dIy npEoTbpaueHn ObaOaHn HaKnPi NcNoJIb3OaBt cpeCTBO Hoover-Kaldefender. CpeCTBo Hoover-Kaldefender YBaIeTcN deKaJIbUncIkaTOpom Ha npIpOJHO OCHObe, KOtopb I npOJIeBaET cPOK cIyXbI PbIeCocA n ObecneuHbAet LyuWee KaYeCTBa npapa B npOceCE icNoJIb3OaHn npIbopa.
HCTpyKnna no npImeHeHHo
Bneite codepKMOe pnaKoHa Hoover-Kaldefender B 3aONHeHbI BOoI 6oJIep (pnc. 15).
ObIyHNo peKOMeHdyetyTcN cIOnIb3OBaBb OINH ny3bIpeK Ha KaJdbie DBa 3aONJIHeHn BODo, OHaKO ToHoe KOJInuYeCTBO 3aBNCIT OT JXECTKoCTN IcONIb3yEMo BObl.
ObpaauiTeCb B AByOpn3OBAHnBie cHTpbl KOMPnHn Hoover, eCn y Bac Bo3NkIn BOIPOcbl nIO NOBOy IcnoJIb3OBAHn CpeDCTBa Kaldefender.
AKCECCYAPbl:
C6op nbln n uctka napom
UeTka dna noJa (D)
ДяобрабOTКI 6OЛьшИX NOВЕРХОСТЕ ИСПОЛБЗУITE 3ТУ HACAOKу CO CLENYUOUIM N CBEMHbIMN BKNaIbIshAMN
Bknabdiu co ueHnOo (D1): peKOMeHdyIOCTcIa cyXoBakyyMHO uCtKn TBepDoTO nOKpbITnna.
BknapbIbnIc6opBaBnIgN(D2):npedHa3NaYeHbIJnIyNCTkTNBepdbIXnoOB C nCnoJIb3OBAHHeM JnIDKoCTn,No3TOMy peKOMeHdyHOTcJnIyNCTknapOM.
BknapbIi nIy NCTKIOBPOB (D3):pekomeHdyUToC IINI NCIOJIb3OBAHnBpeXnme c60pa IIINI NcTKnI napOM IINI KOBPOB IOKOBpOIMHa.
YcTaHOBka CbEmHbIX BKJaDbIeJ:
GJOR DEG KJENT MED PRODUKTET:
VEDLIKEHOLD AV STØVSUGEREN
Tommme Hydrofilt-beholderen
Innsugingen stoppes automatisk av sikkerhetsflottoren nár vannivæt i filterbeholderen har nàdd MAX-merket. Dette merkes øgså med en distinkt endring i lyden fra produktet og dárlig sueevene.
For a tommbe beholderen: