
SmartWash+ FACSMCW20A - Steam cleaner HOOVER - Free user manual and instructions
Find the device manual for free SmartWash+ FACSMCW20A HOOVER in PDF.


| Product Type | Carpet Cleaner (Steam) |
| Model Number | FACSMCW20A |
| Brand | Hoover |
| Voltage | 220-240V ~50Hz |
| Power Consumption | 1200W |
| Clean Water Tank Capacity | 3.8 L |
| Dirty Water Tank Capacity | 2.1 L |
| Solution Tank Capacity | 450 mL |
| Cord Length | 9 m |
| Weight | 8.2 kg |
| IP Rating | IPX4 |
| Brush Type | FlexForce™ PowerBrushes (removable) |
| Included Accessories | SpinScrub Tool, 2-in-1 Accessory Tool, Hose, Mesh Tool Storage Bag, Cleaning Solution |
| Wash/Dry Technology | Automatic Wash/Dry with LED Display |
| Dry Only Mode | Yes |
| Triggerless Handle | Yes |
| Auto Shut-Off Float | Yes |
| Thermal Cut-Out Protection | Yes |
| Grounding Required | Yes (grounded outlet) |
| Warranty | Up to 3 years limited (subject to registration) |
| Intended Use | Household carpet and upholstery cleaning |
| Compatible Surfaces | Carpet only (not for hard floors) |
| Nozzle Feature | Removable for cleaning |
| Brush Roll Protection | Stall protection feature |
Frequently Asked Questions - SmartWash+ FACSMCW20A HOOVER
User questions about SmartWash+ FACSMCW20A HOOVER
0 question about this device. Answer the ones you know or ask your own.
Ask a new question about this device
Download the instructions for your Steam cleaner in PDF format for free! Find your manual SmartWash+ FACSMCW20A - HOOVER and take your electronic device back in hand. On this page are published all the documents necessary for the use of your device. SmartWash+ FACSMCW20A by HOOVER.
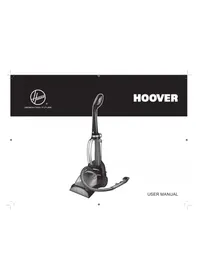
USER MANUAL SmartWash+ FACSMCW20A HOOVER
IMPORTANT: Read all instructions carefully before assembly and use. This product is intended for Household use only.
©2020 Techtronic Industries Australia Pty Ltd. All Rights Reserved. 31 Gilby Road, Mount Waverley, VIC 3149, Australia


IPX4
USER MANUAL

Welcome to HOOVER® ownership.
Make it official.
Register your carpet cleaner by:


Calling 1300 698 130 Visit Hoover.com.au
IT'S GUARANTEED.
Get cleaning confidence for up to 3 years with the HOOVER® limited warranty. See separate warranty card for complete details.
Table of Contents
Safety Instructions 4
Grounding Instructions ....5
What's in the Box....6
Product Guide....7
Tools and Accessories....8
Before You Begin Cleaning 9
Getting Started 10
How to Assemble Your SmartWash Carpet Cleaner ....10
Using your SmartWash Carpet Cleaner ....11
Maintenance....13
Troubleshooting 20
IMPORTANT SAFETY INSTRUCTIONS
SAVE THESE INSTRUCTIONS
READ ALL SAFETY WARNINGS AND INSTRUCTIONS BEFORE USING THIS
WARNING: When using an electrical product, basic precautions should always be followed to avoid electric shock, fire, and/or serious injury, including the following:
- Fully assemble product prior to use.
- Operate cleaner only at voltage specified on data plate on lower back of cleaner.
- Do not leave appliance when plugged in. Unplug from outlet when not in use and before cleaning or servicing.
- Use indoors only. Do not immerse in water. Use only on surfaces moistened by the cleaning process.
- To Reduce the Risk of Fire and Electric Shock due to internal component damage, use only Hoover® Cleaning Fluids intended for use with this appliance. See the Cleaning Fluid section (page 12) of this manual.
- This appliance is not intended for use by persons (including children) with reduced physical, sensory or mental capabilities, or lack of experience and knowledge, unless they have been given supervision or instruction concerning
use of the appliance by a person responsible for their safety. Children should be supervised to ensure that they do not play with the appliance.
- Use only as described in this manual. Use only manufacturer's recommended attachments and products.
- Do not use product with damaged cord or plug. If product is not working as it should, has been dropped, damaged, left outdoors, or dropped into water, call customer service at 1300 698 130 prior to continuing use.
- Do not pull or carry by cord, use cord as a handle, close a door on cord, or pull cord around sharp edges or corners. Do not place product on cord. Do not run appliance over cord. Keep cord away from heated surfaces.
- Do not unplug by pulling on cord. To unplug, grasp the plug, not the cord.
- Do not handle plug or appliance with wet hands.
- Do not put any object into openings. Do not use with any opening blocked; keep free of dust, lint, hair, and anything that may reduce air flow.
- Keep hair, loose clothing, fingers, and all parts
of body away from openings and moving parts.
- Turn off all controls before unplugging.
- Use extra care when cleaning on stairs. To avoid personal injury or damage, and to prevent the cleaner from falling, always place cleaner at bottom of stairs or on floor. Do not place cleaner on stairs or furniture, as it may result in injury or damage.
- Do not use to pick up flammable or combustible liquids, such as gasoline, or fine wood sandings, or use in areas where they may be present.
- Connect to a properly grounded outlet only. See Grounding Instructions.
- Do not pick up anything that is burning or smoking, such as cigarettes, matches, or hot ashes.
- Do not use without filters and tanks in place.
- Do not clean over floor electrical outlets.
CAUTION: TO REDUCE THE RISK OF DAMAGE:
- Avoid picking up hard, sharp objects with this product, as they may cause damage.
- Store appropriately indoors in a dry place. Do not expose machine to freezing temperatures.
- Do not use sharp objects to clean out hose as they can cause damage.
- To assist in reducing drying time, be certain the area is well ventilated when using detergents and other cleaners with this machine.
- To help prevent matting and resoiling, avoid contact with carpets until they are dry. Keep children and pets away from carpets until they are completely dry.
- Do not store extractor with solution in tanks.
- With brushes on, do not allow cleaner to sit in one location for an extended period of time, as damage to floor can result.
- DO NOT USE THIS EXTRACTOR ON HARD FLOORS. USING THIS PRODUCT ON HARD FLOORS MAY SCRATCH OR DAMAGE YOUR FLOOR.
- Water will drip from the brushes and underside of the product after use and may puddle. To avoid damage to wood and laminate flooring and to avoid potential slip hazard, after use (a) do not leave the product on wood and laminate surfaces and remove to a hard surface and (b) place unit on absorbent material (such as a towel) to soak up drips.
GROUNDING INSTRUCTIONS:
This appliance must be grounded. If it should malfunction or breakdown, grounding provides a path of least resistance for electric current to reduce the risk of electric shock. This appliance is equipped with a cord having an equipment-grounding conductor (C) and grounding plug (A). The plug must be inserted into an appropriate outlet (B) that is properly installed and grounded in accordance with all local codes.

WARNING:
Improper connection of the equipment-grounding conductor can result in the risk of electric shock. Check with a qualified electrician or service person if you are in doubt as to whether the outlet is properly grounded. Do not modify the plug provided with the appliance - if it will not fit the outlet, have a proper outlet installed by a qualified electrician.
The motor is equipped with a thermal cut-out. If for any reason the machine should overheat, the thermostat will automatically turn the machine off.
Should this occur, unplug the machine from the electrical outlet and turn off the switch. Allow the machine to cool for approximately one (1) hour before reusing.
Hoover recommends the use of a Residual Current Device rating of 30mA or less.
Use only Australian approved 10amp extension cords. Care should be taken to arrange the extension cord to prevent it being a trip hazard.
What's in the Box?
| Carpet Cleaner |  | Solution Tank |  | Upper Handle | Accessory Ho: | SpinScrub Tool |  |
 |  | ||||||
| 2-in-1 Accessory Tool |  | ||||||
| Clean Water Tank |  | Dirty Water Tank |  | FlexForceTM PowerBrushes |  | Mesh Tool Storage Bag |  |
| Bottle of Cleaning Solution | [WSHX] |
Getting to Know Your HOOVER® SmartWash
- Triggerless Handle Design
- Clean Water Tank
- Filter
- Dirty Water/Recovery Tank
- Hose Connection
- Removable Recovery Nozzle
- Automatic Wash/Dry LED Display
- Removable FlexForce™ PowerBrushes
- Solution Tank
- Carry Handle
- Cord Wrap
- Handle Release Pedal
- On/Off Pedal


Tools & Accessories:

CAUTION

Not to be used for grooming a pet.
2-in-1 Tool:
Accessory tool that helps prevent bacteria growth and odors allows you to choose between two inserts.
A. The rubber nub insert is for unpleasant stain removal and hygienic clean ups. B. The bristle insert is for tough scrubbing power.

A. B

SpinScrub Tool
For above-floor tasks, the cleaner comes with a hose and a stair/upholstery tool, and a SpinScrub hand tool with rotating brushes.

Before You Begin Cleaning: Pretreating:
Vacuum carpet and upholstery thoroughly before use.
Don't use the carpet cleaner as a traditional vacuum cleaner.
Check the label on your upholstery to make sure it is suitable for wet cleaning before using your HOOVER® carpet cleaner.
Test for colorfastness in a small, hidden area. Gently rub surface with a dampened white cloth. Wait ten minutes and check for color removal or bleed with a white paper towel.
Move furniture out of area to be cleaned. Place aluminum foil or wax paper under legs of furniture too heavy to move to prevent wood finishes from staining carpet. Pin up furniture skirts and drapes.
For best results, pretreat stains with a HOOVER® spot treatment (See HOOVER® Cleaning Solutions Guide) to help loosen and remove even the most stubborn stains.
Available at additional cost if not included with your model.
NOTE: To prevent staining, use plastic or aluminum foil to protect wood or metal surfaces from possible water spray.
NOTE: To avoid damage to wood floors underneath area rugs or carpet, place waterproof material (ex: plastic) underneath them before cleaning.
TECHNICAL SPECIFICATIONS
NAME HOOVER SMARTWASH AUTOMATIC CARPET CLEANER
MODEL FACSMCW20A
VOLTAGE 220-240V ~50Hz CLEAN TANK 3.8 LITRE
WATTAGE 1200W DIRTY TANK 2.1 LITRE
CORD 9M SOLUTION TANK
WEIGHT 8.2KG
IPX4


Subject to technical change without notice
450 ML
450 ML
450 ML
450 ML
450 ML
[Non-Text]
[Non-Text]
[Non-Text]
[Non-Text]
[Non-Text]
[Non-Text]
[Non-Text]
[Non-Text]
[Non-Text]
[Non-Text]
[Non-Text]
[Non-Text]
[Non-Text]
[Non-Text]
[Non-Text]
[Non-Text]
[Non-Text]
[Non-Text]
[Non-Text]
[Non-Text]
[Non-Text]
[Non-Text]
[Non-Text]
[Non-Text]
[Non-Text]
[Non-Text]
[Non-Text]
[Non-Text]
[Non-Text]
CAUTION
Do not clean over floor electrical outlets. Water will drip from the brushes and underside of the product after use and may puddle. To avoid damage to wood and laminate flooring and to avoid potential slip hazard, after use (a) do not leave the product on wood and laminate surfaces and move to a hard surface and (b) place cleaner on an absorbent material (such as a towel) to soak up drips.
IMPORTANT: For full suction, it is important that the Dirty Water Tank is properly secured before cleaning.
Continue using dry strokes until little water is visibly passing through the Nozzle.
For best results, HOOVER® recommends rinsing carpet with water only. This removes residual carpet cleaning solution. Remove Solution Tank and repeat. For heavily soiled areas, repeat. Avoid saturating carpet.
NOTE: Empty Dirty Water Tank when the motor sound becomes higher pitched and there is a loss in suction (see "Automatic shut-off"). You will also see the float rise and shut off suction at the same time.
IMPORTANT: Only use approved Hoover Carpet Washer solutions in your Hoover Smartwash machine to avoid invalidating the warranty. Using other detergents may invalidate the warranty.
Getting Started With Your SmartWash Carpet
Fully assemble before operating.
Assembly
1 Slide the handle into the base until you hear a "click".

2 Wrap the power cord around the cord hooks for convenient storage.

IMPORTANT:
Screw the solution tank cap tightly when refitting. Do not leave the solution stored in the tanks between uses. Unused solution can be poured back into the bottle.
Fill the Clean Water Tank
1 Lift up to remove the Clean Water Tank.

2 Remove the cap and add warm water to the top of the tank. Replace the cap.

3 Align the Clean Water Tank with the body of the cleaner and press FIRMLY into place.

Fill the Solution Tank
1 Remove the Solution Tank from the back of the cleaner.

2 Remove the cap and fill with HOOVER® Cleaning Solution to the top of the tank. Replace the cap.

3 Place the Solution Tank back into the cleaner and press FIRMLY into place.

Using Your SmartWash Carpet Cleaner

Not to be used for grooming a pet.
1 Unwrap the power cord and plug the cleaner into an electrical outlet.

3 Step on the On/Off Pedal to turn ON.

2 Step on the Handle Release Pedal to recline the cleaner to the cleaning position.

Using Your SmartWash Carpet Cleaner
4 Slowly move forward. The cleaner will automatically dispense the optimal amount of water and cleaning solution.

5 Slowly pull backward. The cleaner will automatically dry your carpets by extracting the water and cleaning solution.

6 When you finish cleaning but further drying is required, press the DRY ONLY BUTTON. The Dry Only mode will extract remaining water from your carpet. Continue in this mode until little water is visibly passing through the Nozzle.
7 For best results, HOOVER® recommends rinsing the carpet with clean water only. This will remove residual carpet cleaning solution from your carpets. To rinse with clean water only, remove the Solution Tank and then repeat steps 4 through 6.


CLEANING FLUID
SEE THE HOOVER'S SOLUTIONS GUIDE insert.
Maintenance
How to Empty
This product contains no serviceable parts.
If appliance is not working as it should, has been dropped, damaged, left outdoors, or dropped into water, call customer service at 1300 698 130
1 Turn the cleaner off and unplug from electrical outlet.

3 Place on a flat surface and unlatch Dirty Water Tank lid to remove top

Keeping the filter clean is critical to maintain strong suction performance.
2 Grab the Dirty Water Tank handle and pull up to release. Remove Tank from carpet cleaner base at an angle.

4 Empty tank, rinse, wipe filter clean and allow to air dry.

Auto Shut Off Float: Your carpet cleaner is equipped with a shut off float within your Dirty Water Tank. When the Dirty Water Tank becomes full, the float will rise, shutting off the air flow through the Nozzle. Once the air flow is shut off, empty the Dirty Water Tank.
Notices
IMPORTANT: Regarding the Dirty Water Tank: For full suction it is important that the Dirty Water Tank Lid is securely in place. If misplaced, poor or no suction will result.
IMPORTANT: For full suction, it is important that the Dirty Water Tank is properly secured before cleaning.
Continue using dry strokes until little water is visible passing through the Nozzle.
For best results, HOOVER® recommends rinsing carpet with water only. This removes residual carpet cleaning solution. Remove Solution Tank before rinsing carpet. For heavily soiled areas, repeat. Avoid saturating carpet.
NOTE: Empty Dirty Water Tank when the motor sound becomes higher pitched and there is a loss in suction (see "Automatic shut-off"). You will also see the float rise and shut off suction at the same time.
CAUTION
Do not clean over floor electrical outlets. Water will drip from the brushes and underside of the product after use and may puddle. To avoid damage to wood and laminate flooring and to avoid a potential slip hazard, after use (a) do not leave the product on wood and laminate surfaces and move to a hard surface and (b) place cleaner on an absorbent material (such as a towel) to soak up drips.
Maintenance
How to Remove and Clean Nozzle
1 To prevent possible leaking, remove and empty Clean Water Tank. Dirty Water Tank and

2 With handle in upright position, lift up on the Nozzle release then pull Nozzle forward to remove from carpet cleaner. CAUTION, pull Nozzle carefully outwards and not upwards.

WARNING
Risk of personal injury – Brush roll may suddenly restart – unplug before cleaning or servicing.
3 Rinse debris from Nozzle.
4 Position Nozzle onto foot, making sure to align the tabs at the top of the Nozzle with the notches inside the foot.


IMPORTANT
The nozzle must be in the proper position for the cleaner to have proper suction.
5. Slide the nozzle forward to snap it into position.

Maintenance
How to Change and Clean Brushes
HOW TO REMOVE / HOW TO REPLACE
1. To prevent possible leaking, remove the Clean Water Tank, Dirty Water Tank, and Solution Tank.

2. With the handle in the upright position, follow the "Nozzle: How to Remove and Clean" instructions (page 15).

STORAGE
Before storing: Empty the Clean Water Tank and let it air dry. Replace it on the cleaner. Empty the Dirty Water Tank, clean the filter of dirt/debris, rinse the tank and lid thoroughly with clean water, and let them air dry. Empty the Solution Tank, rinse it with clean water, and let it air dry. Allow the brushes and the underside of the carpet cleaner to air dry thoroughly before storing the carpet cleaner on a carpeted or wood surface.
16
CORD STORAGE
Wrap the power cord around the cord hooks for convenient storage. Attach the plug end to the cord.
WARNING
Risk of personal injury – Brush roll may suddenly restart – unplug before cleaning or servicing.
3. Grab Side A and pull up to remove. Repeat on the other brush.
4 The brushes can be cleaned under running water.


1 At an angle, align side B on the brush to the drive gear.
2 Press Tab A down until brush snaps in place.


LUBRICATION
The motor and brush rolls are equipped with bearings which contain sufficient lubrication for their lifetime. The addition of lubricant could cause damage. Do not add lubricant to motor bearings or brush rolls.
Tools and Accessories
HOW TO ATTACH HOSE HOW
1 Open Hose Connection Port. Insert hose end by inserting FIRMLY into Hose Solution Port.

CAUTION
Always turn off this product before connecting or disconnecting hose.
1 Press trigger on tool to ensure all fluid has discharged from the hose.
Press button on end of hose and pull to remove hose and solution connection from
2 Close the Hose Port Door back into place. Make sure to close door to ensure proper suction. Cleaner may lose suction if not closed properly.


Tools and Accessories
How to Attach Tools
1 To ensure maximum performance and to protect your carpet, be sure to place the handle in the upright position while using the hose. Placing the handle in the upright position shuts off the FlexForce™
2 Connect tool to hose by sliding it onto the connector until it securely locks into place.


CAUTION

Not to be used for grooming a pet.
3 Using your thumb, push forward and up on the latch to remove tool.

NOTE: Do not place cleaner at top of stairway. To avoid falling down stairs, place cleaner at bottom of stairs and work up.
Tools and Accessories vary per model.
Tools and Accessories

CAUTION

Use extra care when cleaning on stairs. To avoid personal injury or damage, and to prevent the cleaner from falling, always place cleaner at the bottom of stairs or on floor. Do not place cleaner on stairs or furniture, as it may result in injury or damage.
Cleaning Carpeted Stairs and Upholstery
1 Read "Before you Begin Cleaning" instruction on page 9. 2 Attach hose as instructed (page 18). 3 Place handle in upright position. FlexForce™ PowerBrushes will not rotate while handle is in upright position. 4 Fill Clean Water Tank according to instructions. 5 Fill Solution Tank with HOOVER® solution according to instructions on page 10. 6 Attach tool to end of hose. 7 Dry hands and plug cleaner into a properly grounded outlet.
8 Pre-spray the area by holding the tool about one inch above the carpet and push it forward while pressing the trigger. 9 Slightly press the tool into area cleaning. Press the trigger and pull the tool slowly over the carpet. Release trigger at end of stroke. 10 Lift tool, and position it against Nozzle. Pull tool slowly over carpet without pressing trigger. 11 Slightly overlap strokes to help prevent streaking. 12 It is best to alternate wet and dry strokes as described in


Tips
To avoid saturating carpet, do not use more than 4 wet strokes over any one area. Always end with dry strokes.
If additional cleaning is necessary, wait until the carpet is completely dry before using the tool again.
Empty the dirty water tank when the motor sound becomes higher pitched and there is a loss of suction. You will also see the float rise and shut off suction at the same time.
When finished cleaning, follow the "After Cleaning" and "After Using Tool" instructions.
Need Help?
If you need further assistance:
If your product needs servicing within the warranty period, please contact Customer Service at 1300 698 130; Mon-Fri 08:30am-5pm.
Always identify your carpet washer by the complete model number when requesting information or ordering parts. (The model number of the carpet washer is located on the data plate).
Troubleshooting:
This product contains no serviceable parts.
If the appliance is not working as it should, has been dropped, damaged, left outdoors, or dropped into water, call Customer Service at 1300 698 130 for further instruction before continuing use.
USE THE TROUBLESHOOTING GUIDE AS A FIRST STEP TO RESOLVE ANY PROBLEMS YOU MAY BE EXPERIENCING.
QUESTIONS OR CONCERNS?
Contact Us: 1300 698 130
If you have any questions, visit Hoover.com.au
See back of product for model number.
Troubleshooting:
| PROBLEM POSSIBLE CAUSE POSSIBLE SOLUTION | ||
| Cleaner won't run | 1. Not firmly plugged in2. No voltage in wall plug3. Blown fuse or tripped breaker4. Fuse in cleaner blown5. On/Off pedal not depressed | 1. Plug unit in firmly.2. Check fuse or breaker in home.3. Replace fuse or reset breaker in home.4. Take to service center.5. Press pedal. |
| Low suction | 1. Dirty Water Tank full/automatic shut off engaged2. Blockage in tool on end of hose3. Dirty Water Lid not on correctly4. Dirty Water Tank Debris Filter clogged5. Blockage in Nozzle6. Dirty Water Tank not properly secured7. Dirty Water Nozzle not on correctly8. Blockage in hose | 1. Remove and empty Dirty Water Tank. See "How to Empty" page 13.2. Remove tool and clear blockage.3. Make sure lid is on securely. See "How to Empty" page 13.4. See "How to Empty" page 13.5. See "How to Clean" page 15.6. Replace Dirty Water Tank and secure Dirty Water Tank latch.7. Remove and replace Dirty Water Nozzle. See "How to Clean & Remove Nozzle" page 15.8. Drop a coin through, clear with broom handle. |
| Hose Nozzle stops spraying liquid during use | 1. Clean Water Tank or Detergent Container is empty2. Loose connection to solution port on foot of cleaner | 1. Turn off Cleaner and fill Clean Water tank & Detergent Container.2. Check for secure connection to solution port on body of Cleaner. |
| Accessory Tool will not spray after filling the Clean Water Tank or Solution Tank | 1. Air is trapped in the hose & pump | 1. Turn on the Cleaner. If hose does not spray, prime the pump by lowering the hose down to the floor and hold the trigger for up to one minute.2. Aim downward & squeeze trigger. |
| Hose will not spray after priming pump | 1. Pump is defective2. Not connected properly | 1. Call for service: 1300 698 130.2. Check connection. |
| Clean water won't dispense | 1. Clean Water Tank or Solution Tank not firmly in place2. Clean Water Tank or Solution Tank empty | 1. Make sure tank is securely locked in position.2. Refill container according to cleaning instructions. |
| Solution won't dispense 1. Cleaner is not moving in forward direction 1. | Must be moving the machine forward to properly dispense water and solution. | |
| Brushes won't rotate during floor cleaning | 1. Brush roll stall protection activated2. Unit in upright position | 1. Turn the unit off and back on, then inspect and clean for jams.2. Brushes will not rotate in upright position. Step on handle release to start cleaning. |
| Water is leaking out of Carpet Cleaner 1. Clean Water Tank, Solution Tank or Dirty Water Tank not FIRMLY in place | 1. Make sure the tank is secure.2. Carpet Cleaner may drip residual moisture after use. Allow cleaner and brushes to dry before storing on hard floor surface. | |
| Cleaner leaking solution | 1. The solution tank cap may not be tightly fitted or may be incorrectly fitted. | 1. Remove the solution tank and screw the solution tank cap tightly before refitting the solution tank back into the machine. |

Hoover.com.au


- WELCOME TO HOOVER® OWNERSHIP
- TABLE OF CONTENTS
- IMPORTANT SAFETY INSTRUCTIONS
- CAUTION: TO REDUCE THE RISK OF DAMAGE
- GROUNDING INSTRUCTIONS
- WARNING
- GETTING TO KNOW YOUR HOOVER® SMARTWASH
- TOOLS & ACCESSORIES
- BEFORE YOU BEGIN CLEANING: PRETREATING
- TECHNICAL SPECIFICATIONS
- CAUTION
- GETTING STARTED WITH YOUR SMARTWASH CARPET
- ASSEMBLY
- IMPORTANT
- FILL THE CLEAN WATER TANK
- FILL THE SOLUTION TANK
- USING YOUR SMARTWASH CARPET CLEANER
- CLEANING FLUID
- MAINTENANCE
- HOW TO EMPTY
- NOTICES
- HOW TO REMOVE AND CLEAN NOZZLE
- HOW TO CHANGE AND CLEAN BRUSHES
- HOW TO REMOVE / HOW TO REPLACE
- STORAGE
- CORD STORAGE
- LUBRICATION
- TOOLS AND ACCESSORIES
- HOW TO ATTACH HOSE HOW
- HOW TO ATTACH TOOLS
- CLEANING CARPETED STAIRS AND UPHOLSTERY
- TIPS
- NEED HELP
- TROUBLESHOOTING
Brand : HOOVER
Model : SmartWash+ FACSMCW20A
Category : Steam cleaner