Power Espresso 20 Touch - Coffee machine CECOTEC - Free user manual and instructions
Find the device manual for free Power Espresso 20 Touch CECOTEC in PDF.

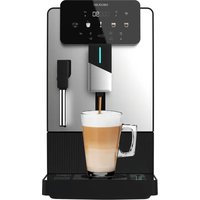
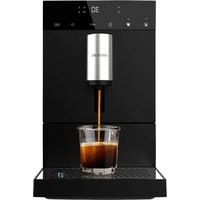
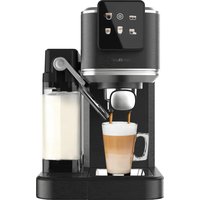
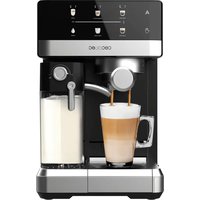
| Product type | Espresso coffee machine with milk frother |
| Brand | Cecotec |
| Model | Power Espresso 20 Touch |
| Power supply | 220-240 V ~ 50/60 Hz |
| Pump pressure | 20 bars |
| Functions | Single, double, lungo espresso; hot water; steam for cappuccino |
| Control panel | Touch icons |
| Cup warmer | Yes, on top of the machine |
| Automatic shut-off | Yes, after 25 minutes of inactivity |
| Descaling | Warning after 500 cycles; recommended regularly |
| Included accessories | Portafilter, single cup filter, double cup filter, dosing spoon |
| Maintenance | Regular cleaning of the water tank, drip tray, and accessories |
Frequently Asked Questions - Power Espresso 20 Touch CECOTEC
User questions about Power Espresso 20 Touch CECOTEC
0 question about this device. Answer the ones you know or ask your own.
Ask a new question about this device
Download the instructions for your Coffee machine in PDF format for free! Find your manual Power Espresso 20 Touch - CECOTEC and take your electronic device back in hand. On this page are published all the documents necessary for the use of your device. Power Espresso 20 Touch by CECOTEC.
USER MANUAL Power Espresso 20 Touch CECOTEC
Cafetera express compacta/ Compact espresso coffee machine
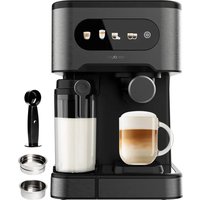
natural_image
Exterior view of a modern espresso machine with digital display and control buttons (no readable text or symbols)- Parts and components 19
- Before use 19
- Operation 22
- Cleaning and maintenance 24
- Troubleshooting 26
- Copyright 31
- Simplified EU Declaration of Conformity 31
SOMMAIRE
EN • The coding in this manual is generic and applies to all code variants of the appliance.
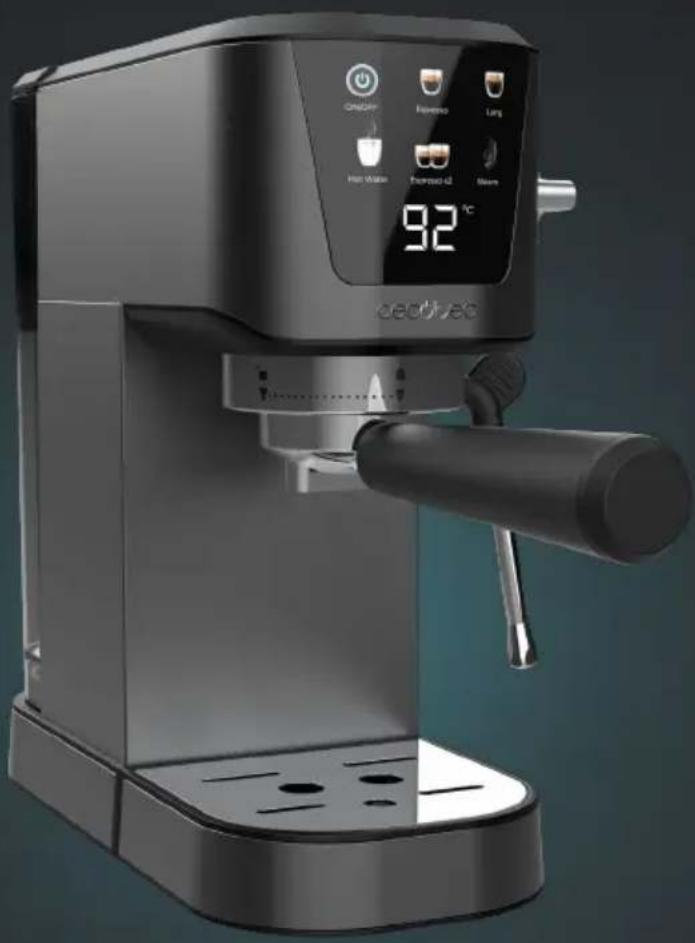
A. Control panel
B. Drip tray grid
C. Drip tray float
D. Drip tray
E. Cup warming tray
F. Steam / hot water control knob
G. Steam wand grip
H. Steam wand
1. Steam outlet
J. Water tank lid
K. Water tank grip
L. Water tank
M. Portafilter handle
N. Single and double filter
0. Portafilter
P. Tamper
Fig. 2
- Power ON/OFF button
- Single Espresso touch icon
- Long Espresso touch icon
- Hot water touch icon
- Double Espresso touch icon
- Steam touch icon
- Coffee extraction temperature indicator
NOTE:
The graphics in this manual are schematic representations and may not exactly match the product.
2. BEFORE USE
- This appliance comes in a packaging designed to protect it during transport. Take the appliance out of its box and remove all packaging materials. You can keep the original box and other packaging materials in a safe place to prevent damage to the appliance if you need to transport it in the future. If you wish to dispose of the original packaging, make sure all items are recycled properly.
ENGLISH
- Check that all parts and components are included and in good condition. If any of them are missing or damaged, please contact Cecotec's Official Technical Support Service immediately.
Box content
- Coffee machine
- Portafilter
- Double-cup filter
- Single-cup filter
- Measuring spoon
- Instruction manual
- Do not remove the product's serial number in order to keep proper traceability if technical assistance is required.
Cleaning the coffee machine before first use
Before the first use, clean the product to ensure that the first cup of coffee tastes excellent.
The steps are as follows:
- Make sure that all parts are intact.
- Remove the cap located at the bottom of the tank.
- Pour filtered water into the water tank, ensuring the water level does not exceed the "MAX" mark on the tank. Then close the water tank lid.
Note: you can fill the water tank with water first, and then place it in the appliance.
- Remove the stickers that hold the pieces together. Do not remove the warning stickers.
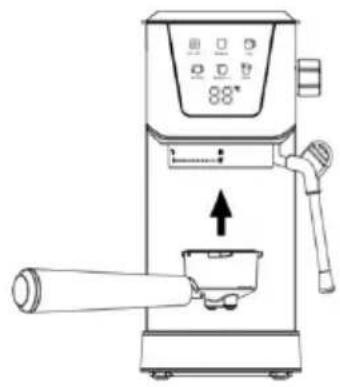
- Place the filter (1 cup or 2 cups, as needed) in the filter holder. (Fig. 3)
- Insert the filter holder in the space provided in the coffee machine. You can secure it firmly by turning it counterclockwise from the "UNLOCK" position to the "LOCK" position.
- Place a large cup under the coffee spout. Make sure that the steam / hot water control knob is in the horizontal position (OFF position).
Note: the appliance is not equipped with a carafe, please use your carafe or coffee cup.
-
Connect the appliance to the mains and press the ON/OFF button. This button will illuminate, and then the Espresso touch icons will flash until the coffee machine is fully heated.
-
When the touch icons for single 🎨, double 🎨 and long 🎨 Espresso are fixed, this indicates that preheating is finished. Press the touch icon for Single Espresso 🎨, Double Espresso 🎨, or Long Espresso 🎨, wait a moment and water will come out of the coffee spout.
Note: The first time you pump water you may hear a noise, this is normal, the device is releasing air inside. After about 20 seconds, the noise will disappear.
Note: It is recommended to start the machine for the first time without ground coffee. Make
sure that the filter is correctly positioned in the filter holder.
Warning: Make sure that the filter has cooled down before attempting to remove it from the portafilter.
Choice of suitable coffee
It is recommended to choose fresh coffee of medium to intense roast.
Filling the water tank
-
Fill up the water tank. You can use a jug to fill it directly or remove it from the coffee machine and fill it under the tap. Fill the tank with the desired amount of water below the "MAX" level of the tank. Never use hot water to fill the water tank, always use room temperature or cold water.
-
Close the water tank lid. If you removed the tank from the brewer to fill it with water, be sure to put it firmly back in place.
Coffee cup placement
a. Place the cup on the drip rack if you are making a single serve coffee.
b. Remove the removable drip tray and place a larger cup if you are making a cappuccino or milk beverage.
Machine preheating
To prepare a good hot espresso, it is necessary to preheat the coffee machine before preparing the coffee, including the filter holder, the filter and the cup, so that the taste of the coffee is not influenced by the cold parts.
- Pour filtered water into the water tank, ensuring the water level does not exceed the "MAX" mark on the tank. Then close the water tank lid.
Note: you can fill the water tank with water first and then place it in the coffee machine.
-
Place the filter (1 cup or 2 cups) in the filter holder.
-
Insert the filter holder in the space provided in the coffee machine. You can secure it firmly by turning it counterclockwise from the "UNLOCK" position to the "LOCK" position. (Fig. 4).
-
Place a cup in the cup warming tray.
-
Connect the appliance to the mains and press the ON/OFF button . This button will illuminate, and then the Espresso touch icons will flash until the coffee machine is fully heated.
-
When the touch icons for single 🎨, double 🎨 and long 🎨 Espresso are fixed, this indicates that preheating is finished. Press the touch icon for Single Espresso 🎨 Double Espresso 🎨, or Long Espresso 🎨, wait a moment and water will come out of the coffee spout.
-
When the water has finished flowing out, the coffee machine and the elements that intervene in the coffee flow will have preheated.
3. OPERATION
Preparation of a single, double or long espresso
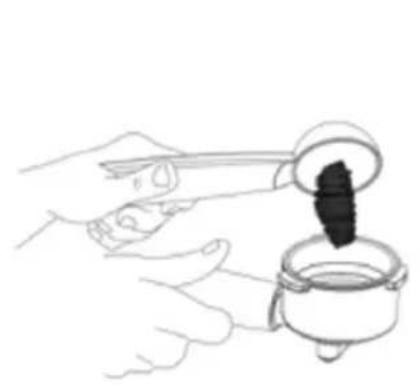
- Fill the filter with finely ground fresh coffee to about 2 mm from the edge (DO NOT overfill).
- Using the tamping part of the scoop, push the coffee grounds down as far as the tamp reaches to make the espresso grounds compact and uniform.
- Wipe any excess coffee from the rim to ensure a proper fit under the brew head. (Fig. 5)
- Insert the filter holder in the space provided in the coffee machine. You can secure it firmly by turning it counterclockwise from the "UNLOCK" position to the "LOCK" position. (Fig. 4).
- Place a cup in the cup warming tray.
- Press the touch icon for single 🎨, double 🎨 or long 🎨 Espresso according to your needs, wait a moment and the coffee will come out of the coffee spout.
- The coffee machine will stop automatically when the coffee preparation is finished, and then your coffee will be ready.
Note: It is necessary to fill the water tank with water before it becomes empty during coffee preparation. If your machine has run out of water during the coffee process, release the excess air through the steamer (fill the water tank with water beforehand).
Do not let the appliance run if the water tank is empty, otherwise the pump will cause abnormal noises.
- When you have finished brewing coffee, remove the filter holder by turning it clockwise from the "LOCK" position to the "UNLOCK" position.
Preparing hot water:
- When preheating is completed, turn the steam/hot water control knob to the hot water position, and hot water will then come out of the steamer. When the desired amount of hot water has been dispensed, turn off the coffee machine. Before preparing hot water, place a cup under the steamer.
Frothing milk/ Preparation of a Cappuccino:
To prepare a cappuccino it will be necessary to mix espresso and frothed milk using the frother.
- Press the Steam touch icon 🔔, and the icon will flash. When the steam touch icon lights up without flashing, preheating is finished.
- Next, prepare an espresso following the steps described in the section "Preparation of a single, double or long espresso" in a sufficiently large container.
- Fill a metal jug with approximately 100 ml of milk for each cappuccino you plan to prepare. It is recommended to use whole milk at refrigerator temperature (never hot!).
Note: When choosing the size of the jug, it is recommended that the diameter should not be less than 70 ± 5 mm, and take into account that milk increases in volume 2 times, make sure that the height of the jug is sufficient.
- Insert the steam wand into the milk about two centimeters, then turn the steam/hot water control knob to the steam position.
- Froth the milk by moving the container from top to bottom.
Warning: Be sure to operate with care as steam can cause burns to people.
- Once the desired target is reached, turn the steam/hot water control knob to the OFF position.
Note: Clean the steam outlet with a damp cloth immediately after steam stops being generated. Be very careful, the vaporizer will be hot.
- Pour the frothed milk into the prepared espresso, now the cappuccino is ready. Sweeten to taste and, if desired, dust the foam with a little cocoa powder.
Note: to increase the pressure of the frother when steaming milk, the filter holder must be mounted in position. Before frothing the milk, let steam escape for 10 seconds.
Warning: After steaming, turn the steam/hot water control knob to the OFF position. In order to prepare steam, the coffee machine increases the temperature, so if you want to prepare coffee again, it is necessary to lower the temperature of the coffee machine beforehand. To do this, turn the steam control knob to the hot water position, which will release water through the steamer. After several seconds releasing hot water, coffee can be brewed again.
Adjusting the amount of coffee dispensed
- Single Espresso touch icon dispensed amount
Press and hold the Single Espresso touch icon continuously for 3 seconds to enter the dispensing amount adjustment mode. Then press the single espresso touch icon again, coffee will start to be dispensed and the touch icon will flash at the same time. When the desired amount is obtained, to stop the extraction press the single Espresso touch icon again. At this point, the adjustment of the amount of coffee dispensed will be complete and will be saved for the next operation. The adjustable dispensing amount for Single Espresso ranges from 25 ml to 60 ml.
- Double Espresso touch icon dispensed amount
Press and hold the Double Espresso touch icon continuously for 3 seconds to enter the dispensing amount adjustment mode. Then press the double Espresso touch icon again, the coffee will start to be dispensed and the touch icon will flash at the same time. When the desired amount is obtained, to stop the extraction press the double Espresso touch icon again. At this point, the adjustment of the amount of coffee dispensed will be complete and will be saved for the next operation. The adjustable dispensing amount for Double Espresso ranges from 45 ml to 120 ml.
Simultaneously press and hold the touch icons for Single Espresso 🎨 and Double Espresso 🎨 for 3 seconds to restore the factory setting of the dispensed coffee quantities.
ENGLISH
Guide to the sleep/auto off function
- After pressing the on/off button, if no operation is performed within 25 minutes, the unit will automatically shut down.
- After pressing the on/off button, if no operation is performed after the pump pumps 200 ml of water in succession, the pump will stop automatically.
- After pressing the on/off button, if no operation is performed after the pump has been working generating steam for 180s in a row, the pump will stop automatically.
4. CLEANING AND MAINTENANCE
Unplug the coffee machine from the mains and allow it to cool down completely before cleaning. Regularly clean the housing of the coffee machine with a damp cloth and regularly rinse the water tank, drip tray and milk tank.
Note: Do not clean with alcohol or solvent cleaner. Do not immerse the coffee machine in water for cleaning.
Remove the portafilter by turning it clockwise, dispose of the coffee residues inside and rinse it with clean water.
Clean all accessories and dry them thoroughly.
Cleaning the brewing system, portafilter and filters
- Press the On/Off button to turn off the machine and unplug the coffee machine from the electrical outlet.
- Some of the metal parts may still be hot. Do not touch them until they have cooled completely.
- Remove the filter holder and discard the coffee grounds. Thoroughly wash the filter holder and filter with warm, soapy water. Be sure to rinse and dry them well.
- Clean the coffee outlet with a damp cloth to remove any coffee grounds that may remain.
- Replace the filter holder (without any filter) in the unit's extraction group and lock it in place.
- Place a large empty cup under the portafilter.
- Plug the power cord into the mains socket. Press the switch to turn on the machine
- Press the Single Espresso touch icon once and let the coffee machine brew until it stops automatically.
Cleaning the water tank
-
Eliminate excess water by removing the water tank. It is recommended to empty the water tank between uses.
-
Wash the water tank and lid thoroughly with warm, soapy water. Be sure to rinse and dry them well.
NOTE: Do not wash the water tank or its cover in the dishwasher.
CAUTION: Do not immerse the main body of the appliance, the power cord or the plug in water or any other liquid.
Cleaning the coffee machine
-
Clean the housing with a soft, damp cloth. Do not use abrasive cleaners or scouring pads as this will scratch the finish.
-
Do not store any of the filter holders in the extraction group. This may adversely affect the seal between the brew head and the filter holder while preparing espresso.
CAUTION: Do not immerse the main body of the appliance, the power cord or the plug in water or any other liquid.
Descaling
The build-up of mineral deposits in the machine will affect its operation. Your coffee machine should be descaled when you begin to notice an increase in the time required to prepare an Espresso, or when there is an excess of steam. In addition, you may observe an accumulation of white deposits on the surface of the extraction unit.
1. Descaling the water tank
-
Fill the water tank with white vinegar.
-
Let the filled tank sit overnight with the vinegar solution in the water tank.
-
Discard the vinegar.
-
Rinse the water tank thoroughly with tap water by filling it halfway and pouring it back into the sink, repeating this step until no vinegar remains in the tank.
2. Descaling of internal components
-
Be sure to descale the inside of the water tank first by following the descaling steps above.
-
Make sure the machine is switched off and the power cord is disconnected from the mains. Fill the tank with any product intended for descaling coffee machines. Follow the instructions of the manufacturer of the descaling product.
-
The descaling warning will be displayed when the coffee machine has performed 500 cycles, at that time, all touch icons will flash for 5 times, which means that the coffee machine needs to be descaled. Then, the coffee machine will return to its normal state. The descaling warning will be displayed every time you switch on the coffee machine.
ENGLISH
-
Insert the portafilter (with filter and without coffee) and place a large empty cup on top of the drip tray and under the portafilter.
-
Press the Double Espresso touch icon, then prepare about 100 ml of hot water following the steps in the "Preparing hot water" section. Then, switch off the appliance and leave the descaling solution in the coffee machine for 5 minutes.
-
Turn the unit on and repeat step 5 three times in succession.
-
Next, empty the tank if there is any remaining descaling product, and fill it with filtered water without exceeding the "MAX" level mark. Repeat step 5 three more times in a row (no need to wait 5 minutes).
-
After completion of descaling, it is necessary to cancel the descaling: Simultaneously press and hold the touch icons for Single Espresso 🎨, Double Espresso 🎨 and Steam 🔔 for 3 seconds.
5. TROUBLESHOOTING
| Problem | Possible cause | Possible solution |
| The tool does not work | The coffee machine is not properly plugged into a power socket. | Plug the machine properly into a wall socket. |
| Your espresso tastes acidic | The coffee machine has not been properly cleaned. Clean with cold filtered water to remove the descaling solution. | Make coffees after descaling to remove the descaling solution. |
| Coffee has been stored in a warm, humid place for an extended period. Coffee is spoiled. | Store unused coffee in a cool, dry place. | |
| Water leaks | There is too much water in the drip tray. | Clean the drip tray. |
| The machine malfunctions. | Contact Cecotec's Official Technical Support Service. | |
| When the water tank is removed after use, it is normal for water to remain on the table. | Since the water outlet is located at the bottom of the water tank and is a moving part. | |
| Sounds after switching on the machine and after dispensing coffee. | The sounds are caused by the water pump. | This is normal. |
| The machine makes watery coffee. | The size of the ground coffee is too thick. | Use finer ground coffee. |
| The quantity of ground coffee is inadequate. | Not enough ground coffee, use more ground coffee. | |
| Ground coffee too little pressure is applied. | Press the ground coffee harder. | |
| I cannot rotate the filter holder in the extraction group. | The silicone head gasket is new. | Keep using it. This gasket will settle during the first few uses and become easier to turn. |
| There is too much ground coffee in the portafilter. | Add less ground coffee in the filter holder | |
| The portafilter is loose or comes out during espresso extraction. | The filter holder is not correctly fixed. | Make sure that the three tabs of the filter holder are completely closed. inserted in the extraction group |
| The filter is not inserted in the filter holder. Insert the filter into the filter holder. | ||
| The silicone gasket on the brewing unit is damaged or worn out. | Contact Cecotec's Official Technical Support Service. | |
| Coffee drips from the side of the filter holder during extraction. | Too much ground coffee. | Dose less ground coffee. |
| Over-pressed ground coffee. | Apply less pressure to the ground coffee. | |
| The upper edge of the filter has not been cleaned of loose coffee beans. | Clean the edge of the filter before inserting it into the extraction head. | |
| The edge of the extraction head, the silicone gasket or the shower head is dirty. | Clean the parts with the cleaning brush and a damp cloth. | |
| The silicone gasket on the extraction head is damaged or worn. | Contact Cecotec's Official Technical Support Service. | |
| The filter holder is not installed correctly. | Reinstall it correctly. | |
| The two outlet holes of the portafilter are obstructed. | Clean the outlets. | |
| Filter orifices are obstructed. | Soak the filter in clean water for about half an hour. Then clean it Clean them with a brush. | |
| The coffee comes out cold | Coffee is stored in the refrigerator or freezer. | Place the coffee in a dark, cool cupboard. |
| The cup or glass was cold before pouring the espresso. | Pour hot water from the vaporizer in the cup before removing the Espresso, or place the cup on the cup warming tray. | |
| The extraction head or filter was not heated prior to use. | Hold the filter holder under the extraction head and press the coffee button. Let the hot water run. | |
| No coffee comes out | No water in the water tank. | Fill the water tank with cold filtered water. Purge the machine to remove excess air. Let the water run. |
| Too much coffee has been used. | Dose less ground coffee. | |
| Over-pressed ground coffee. | Apply less pressure to the ground coffee. | |
| A very short extraction volume has been set. | Adjust the extraction volume to the factory settings. | |
| Filter blocked. | Soak the filter in clean water for about half an hour. Then clean it Clean them with a brush. | |
| The extraction head is blocked. | Descaling is required. | |
| The extraction head is dirty. | Cleanliness required. | |
| Air inside blocking the water/steam outlet. | Press the Single Espresso or Double Espresso touch icon, wait a moment and water will come out of the coffee spout. You may hear a noise, this is normal, the appliance is releasing air inside. After about 20 seconds, the noise will disappear. | |
| Espresso drips | Too much coffee has been used. | Dose less ground coffee. |
| Over-pressed ground coffee. | Apply less pressure to the ground coffee. | |
| The coffee machine has lime scale dirt accumulated. | Descaling is required. | |
| Espresso does not has cream. | The coffee is stale. Use fresh medium or dark roasted coffee. | |
| Not enough ground coffee has been used. | Dose more ground coffee. | |
| The ground coffee has not been sufficiently pressed. | Apply more pressure to the ground coffee. | |
| Espresso volume too high or too low. | A very short or very long extraction volume has been set. | Adjust the extraction volume to the factory settings. |
| The coffee pod comes out very wet after extraction. | A little water remains on the coffee pods. | This is normal. If you add coarser ground coffee, the pellet will be less moist. |
| Not enough ground coffee has been used. | Dose more ground coffee. | |
| The ground coffee has not been pressed down sufficiently. | Press more ground coffee. | |
| The espresso is poured into the cup in an irregular pattern. | The ground coffee has been pressed unevenly. | Make sure that the ground coffee is pressed evenly |
| Blockage in the extraction head or filter holder. | Check that there is nothing obstructing the extraction head or the filter holder and clean them. | |
| The steam wand cannot froth. | The steam touch icon is not illuminated. | Only when the steam touch icon is illuminated can the steamer be used for frothing. |
| The container is too large or the shape does not fit. You have used skimmed milk. | Use a more suitable vessel in shape. Use whole or semi-skimmed milk. | |
| The Single Espresso or Double Espresso touch icon flashesimultaneously. | Thermoblock temperature is too high.The steam / hot water control knob is not turned to the OFF position.200 ml of hot water has been prepared and the steam / hot water control knob is not turned to the OFF position. | Prepare hot water to reduce the temperature.Turn the steam/hot water control knob to the OFF position. |
| The steam touch icon is flashing rapidly. | The steamer is used for 180 seconds and the steam/hot water control knob is not turned to the OFF position. | Turn the steam/hot water control knob to the OFF position. |
| The touch icon for single espresso , double espresso and steam flash simultaneously. | The steam / hot water control knob is not turned to the OFF position. | Turn the steam/hot water control knob to the OFF position. |
6. COPYRIGHT
The intellectual property rights over the texts in this manual belong to CECOTEC INNOVACIONES, S.L. All rights reserved. The content of this publication may not, either in part or in its entirety, be reproduced, stored in a retrieval system, transmitted or distributed by any means (electronic, mechanical, photocopying, recording or similar) without prior authorisation from CECOTEC INNOVACIONES, S.L.
7. SIMPLIFIED EU DECLARATION OF CONFORMITY
CE Cecotec Innovaciones hereby declares that this product complies with the essential requirements and other relevant provisions of the regulations applicable in the European Union. This product has been designed, manufactured and tested in compliance with the required safety and quality standards. The full text of the EU Declaration
ENGLISH
of Conformity can be found on the following website: https://cecotec.es/es/information/declaration-of-conformity
1. PIÈCES ET COMPOSANTS
Img. 1
-
ادَيْج رتَلْفُلَا وَقَوْقُلَا رتَلْف لِسْغَا. قَوْهُقُلَا يَاقَبٍ نَم صَلْخُتُ وَقَوْهُقُلَا رتَلْف عَزِنا إدَيْج امْفَيْفِجُتُ وَامْفَطُشٍ نَم دِكَأَتٍ. نَوبَاصُلَا وَيْفَادُلَا عَامْلَاب
-
قو therapeutic advice by a goal to be able to help me to seek questions about your ability to help you help you help you help you help you help you help you help you help you help you help you help you help you help you help you help you help you help you help you help you help you help you help you help you help you help you help you help you help you help you help you help you help you help you help you help you help you help you help you help you help you help you help you help you help you help you help you help you help you help you help your help you help your help you help your help you help your help you help your help you help your help you help your help you help your help you help your help you help your help you help your help you help your help you help your help you help your help you help your help you help your help you help your help you help your help you help your help you help your help you help your help you help your help you help your help you help your help you help your help you help yourself
Fig./Img./Abb./Afb./Rys.2
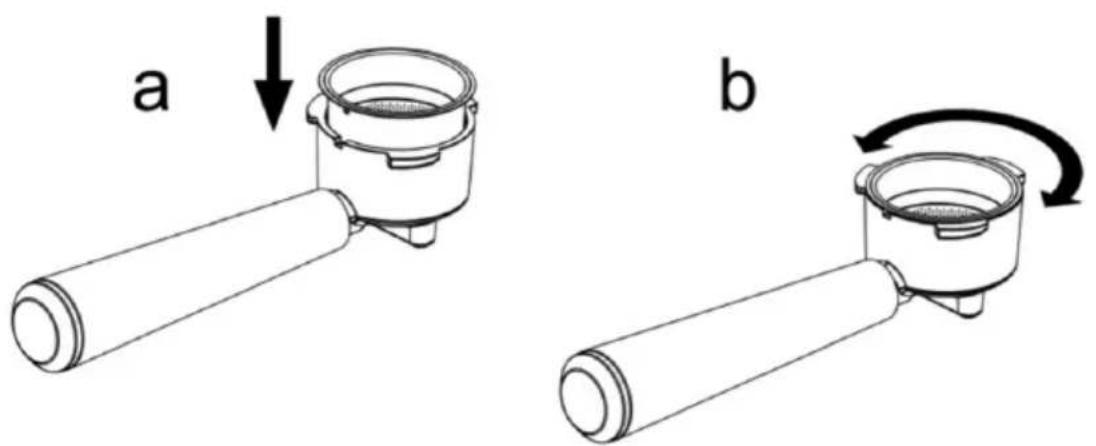
Fig./Img./Abb./Afb./Rys. 3
natural_image
Line drawing of a coffee maker with a hand mixer and control panel (no text or symbols)
natural_image
Line drawing of a coffee maker with handle and control knob, no text or symbols present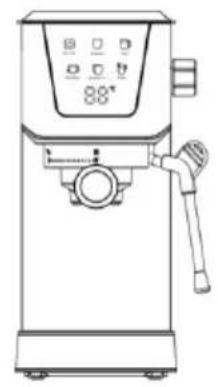
natural_image
Line drawing of a modern coffee maker with control panel and handle (no text or symbols)Fig./Img./Abb./Afb./Rys. 4
natural_image
Line drawing of hands pouring liquid from a container into a glass (no text or symbols)
natural_image
Illustration of a hand using a tool to press or install a mechanical component, with no visible text or symbols.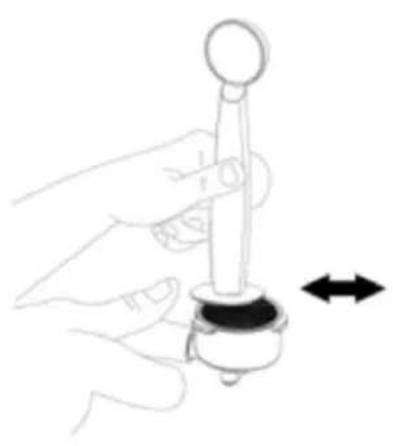
natural_image
Hand holding a mechanical component with a circular head and arrow indicator (no text or symbols)Fig./Img./Abb./Afb./Rys. 5
www.cecotec.es