
Power Espresso 20 ColdBrew Latte - Coffee machine CECOTEC - Free user manual and instructions
Find the device manual for free Power Espresso 20 ColdBrew Latte CECOTEC in PDF.

| Product type | Espresso coffee machine with milk frother and cold brew function |
| Brand | Cecotec |
| Model | Power Espresso 20 ColdBrew Latte |
| Power supply | 220-240 V ~ 50/60 Hz |
| Water tank | Removable, capacity with MAX mark |
| Milk tank | Integrated, removable, with MAX mark |
| Main functions | Single/double hot espresso, cold espresso, cappuccino, latte, milk frother |
| Control panel | Touch with icons: on/off, single/double espresso, cold espresso, cappuccino/latte, milk froth/cleaning |
| Included filters | 2 stainless steel filters (1 cup and 2 cups) |
| Filter holder | With handle, bayonet mount |
| Included accessories | Measuring spoon and tamper, instruction manual |
| Milk froth adjustment | Knob on the milk tank lid |
| Single espresso output capacity | Approximately 50 ml (+/-30%) |
| Double espresso output capacity | Approximately 80 ml (+/-30%) |
| Cappuccino output capacity | Approximately 120 ml (+/-30%) |
| Latte output capacity | Approximately 120 ml (+/-30%) |
| Cleaning and maintenance | Milk circuit cleaning function; automatic descaling after 300 cycles; regular cleaning of tank, filter and brew head |
| Safety | Automatic stop after 25 seconds in frother mode; cooling required before preparing cold espresso or after frothing |
| Spare parts and repairability | Filters, filter holder, water tank, milk container available from the official Cecotec technical service |
| General information | Compliant with EU standards; declaration of conformity available online |
Frequently Asked Questions - Power Espresso 20 ColdBrew Latte CECOTEC
User questions about Power Espresso 20 ColdBrew Latte CECOTEC
0 question about this device. Answer the ones you know or ask your own.
Ask a new question about this device
Download the instructions for your Coffee machine in PDF format for free! Find your manual Power Espresso 20 ColdBrew Latte - CECOTEC and take your electronic device back in hand. On this page are published all the documents necessary for the use of your device. Power Espresso 20 ColdBrew Latte by CECOTEC.
USER MANUAL Power Espresso 20 ColdBrew Latte CECOTEC
Semi-automatic coffee machine with Coldbrew system
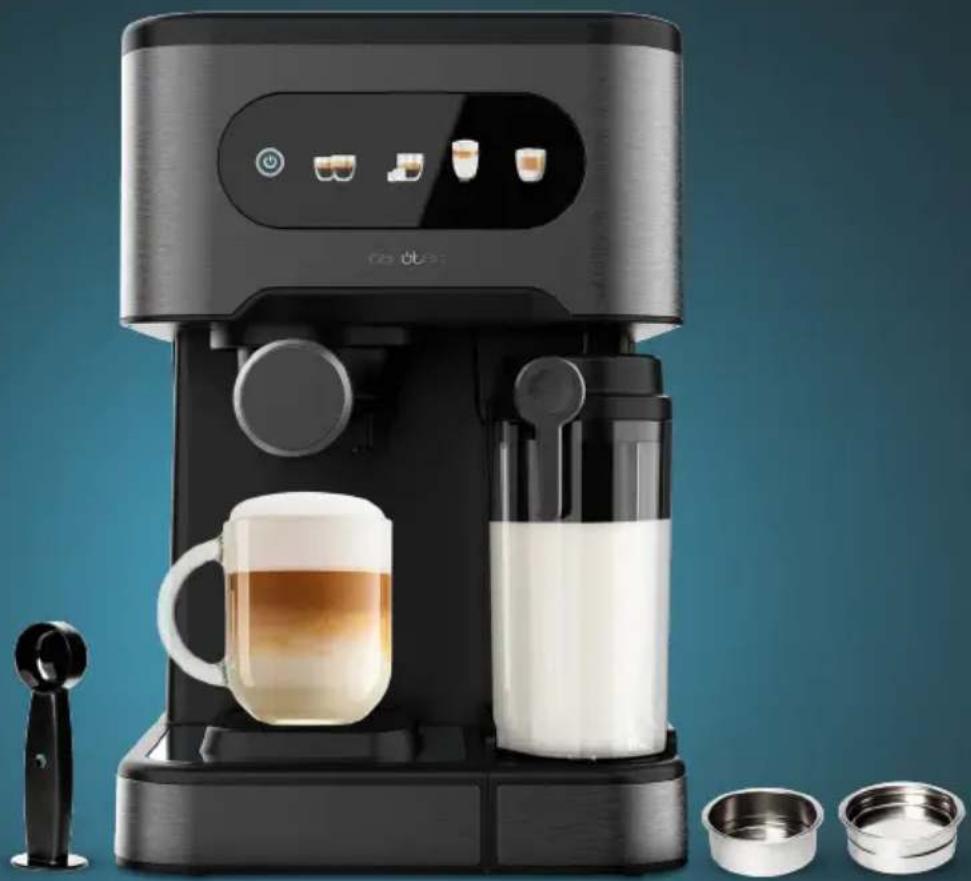
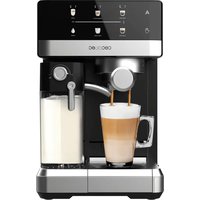
natural_image
Exterior view of a modern black-and-white coffee machine with glass mug and milk, accompanied by small bowls (no visible text or symbols)-
Parts and components 14
-
Before use 14
-
Operation 15
-
Cleaning and maintenance 17
-
Troubleshooting 20
-
Copyright 21
-
Simplified EU Declaration of Conformity 21
SOMMAIRE
EN • The coding in this manual is generic and applies to all code variants of the appliance.
- Water tank lid
- Water tank
- Milk froth adjustment knob
- Milk system rotating wand
- Top plate
- Control panel
- Cup tray
- Drip tray
- Single-coffee filter
- Double-coffee filter
- Portafilter
- Portafilter handle
- Measuring spoon and tamper
NOTE:
The graphics in this manual are schematic representations and may not exactly match the product.
2. BEFORE USE
- This appliance comes in a packaging designed to protect it during transport. Take the appliance out of its box and remove all packaging materials. You can keep the original box and other packaging materials in a safe place to prevent damage to the appliance if you need to transport it in the future. If you wish to dispose of the original packaging, make sure all items are recycled properly.
- Check that all parts and components are included and in good condition. If any of them are missing or damaged, please contact Cecotecs Official Technical Support Service immediately.
Box content
- Coffee machine
- Single-coffee stainless steel filter
- Double coffee stainless steel filter
- Instruction manual
- Do not remove the product's serial number in order to keep proper traceability if technical assistance is required.
3. OPERATION
Tips: Before each use or when refilling the water tank, purge air from the circuit to ensure proper operation and prevent issues when making coffee.
- Fill the water tank and switch on the coffee machine.
-
- Press and hold the Frothed Milk/Cleaning touch icon .
- Wait for water to flow from the milk container. (The aim is to purge air from the circuit. Fill the milk container with water first).
- Press the Frothed Milk/Cleaning touch icon again to stop the process.
- Press the coffee brewing touch icon to make coffee.
Control panel
Fig. 2
- Power on/off touch icon
- Single/Double Espresso touch icon
- Iced Espresso/Temperature decrease touch icon
- Cappuccino/Latte touch icon
-
Frothed Milk/Cleaning touch icon
-
Make sure the espresso machine is switched off and unplugged from the mains.
- Hold the water tank carrying handle and lift the water tank upwards.
- Fill the tank with clean, cold water. Do not exceed the
level mark. - Pour milk into the milk container. Milk must NOT exceed the MAX marks.
Filling the water tank
- Fill the tank with water. You can fill it directly using a glass or remove it from the coffee machine and fill it under the tap.
Note: If you have removed it from the machine to fill with water, ensure it is properly repositioned. - Fill the container with the desired amount of water, ensuring it does not exceed the MAX marks. Only fill with cold water in the water container.
- Close the water tank lid and replace it in the machine. Ensure it is properly positioned.
Filling the milk container
- If preparing a cappuccino or latte, remove the milk container from the machine, open the lid and pour in the required amount of cold milk. Ensure the milk does not exceed the MAX mark.
- Replace the milk container in the machine and ensure it is properly positioned.
Note: You may use whole milk and chilled milk. - Insert the filter into the portafilter and fill the brewing filter with ground espresso coffee
ENGLISHENGLISH
using the provided measuring spoon. Fig. 3
Note: The pressure applied to the ground coffee in the filter is as important as the coffee variety and grind size for a good espresso, along with the amount of coffee added to the filter. Always ensure the espresso filter is clean and free from coffee residue.
- If the grind is too fine, over-extraction will occur, resulting in more bitter coffee notes with irregular crema and spots on top.
- If the grind is too coarse, water will pass through too quickly, resulting in inadequate crema on top of the espresso.
- If the coffee is too watery, you will need to fill the filter with more ground coffee.
- Tamp the ground espresso coffee again with the tamper.
- Clean any excess coffee from the rim to ensure proper fit under the brewing head and prevent leakage.
- Tamping the ground espresso coffee is a crucial process in espresso preparation.
- If the ground espresso coffee is tamped too firmly, the espresso will flow slowly and there will be more crema.
-
If the ground espresso coffee is not tamped firmly enough, the espresso will flow faster and there will be less crema.
-
Secure portafilter to the brewing head and slide the handle to the left. Then rotate the portafilter handle to the right until it locks into place. Release the handle; the portafilter should be firmly seated in the brewing head and pointing forward at a 90° angle. Fig. 4
-
Remove the cup tray when using a larger cup for preparing a latte.
Note: When preparing cappuccino or latte, ensure the froth tube lever is adjusted so that the end of the frothed milk tube sits inside the cup. - After plugging in the coffee machine, press the power on/off touch icon ⏻. All light indicators will illuminate. This indicates the machine is preheated and ready for use.
- Iced Espresso(single-coffee filter): Place ice cubes in the water tank, press the Iced Espresso/Temperature decrease touch icon. Iced espresso. The output capacity is approximately 60 ml (+/-30%).
Tip: Always use iced water for best results. - Single Hot Espresso: Press the Single/Double Espresso touch Icon 🎨. The light will flash, indicating the machine is preheating. When the light stops flashing and remains steady, the machine is ready to brew and serve coffee. The output capacity is approximately 50 ml (+/- 30%).
- Double Hot Espresso: Press and hold the Single/Double Espresso touch icon 📄 for 3 seconds. The light will flash, indicating the machine is preheating. When the light stops flashing and remains steady, the machine is ready to brew and serve coffee. The output
- Single Hot Espresso: Press the Single/Double Espresso touch Icon 🎨. The light will flash, indicating the machine is preheating. When the light stops flashing and remains steady, the machine is ready to brew and serve coffee. The output capacity is approximately 50 ml (+/- 30%).
- Double Hot Espresso: Press and hold the Single/Double Espresso touch icon 📄 for 3 seconds. The light will flash, indicating the machine is preheating. When the light stops flashing and remains steady, the machine is ready to brew and serve coffee. The output
capacity is approximately 80 ml (+/-30%).
Tips:
- After brewing hot espresso, allow the machine to cool down completely before preparing iced espresso.
-
Press and hold the Iced Espresso/Temperature decrease touch icon for 3 seconds to release hot water and cool the appliance. After a while, press it again to stop. The coffee machine is ready to use again.
-
Latte (single-coffee filter): Before preparing your Latte, adjust the desired amount of frothed milk by sliding the rotating froth knob forward for more foam and backward for less foam. Press and hold the Cappuccino/Latte touch icon for 3 seconds to prepare a single latte. The machine begins preparing the Latte according to your selection. The output volume is approximately 150 ml (+/-30%). It will first dispense milk (approximately 120 ml), followed by an espresso shot (approximately 40 ml) directly into the cup. Only one cup can be prepared at a time.
Note: The amount of froth can be adjusted during the brewing cycle.
- Cappuccino (single-coffee filter): Before preparing your cappuccino, adjust the desired amount of frothed milk by sliding the container lids rotating froth knob forward for more foam and backward for less foam. Press the Cappuccino/Latte touch icon once to prepare a single cappuccino. The machine begins preparing the cappuccino according to your selection. The output volume is approximately 120 ml (+/- 30%), produced by dispensing milk (approximately 80 ml), followed by an espresso shot (approximately 40 ml).
Note: The amount of froth can be adjusted during the brewing cycle.
- Milk frother: You can also use the appliance to prepare frothed milk. Press the Frothed Milk/Cleaning touch icon once. You can add frothed milk to other beverages such as hot chocolate, chai latte or similar. It will automatically stop after approximately 25 seconds.
When you have finished preparing your milk-based beverage, you can store the milk container in the refrigerator or dispose of any remaining milk.
4. CLEANING AND MAINTENANCE
Cleaning the milk container and milk froth tube
Although the milk container with remaining milk can be stored in the refrigerator, it is important to clean both the container and milk froth tube regularly to prevent blockages and residue. To
ENGLISHENGLISH
clean the milk container, proceed as follows:
- Remove the milk container from the appliance.
- Remove the container lid.
- Empty any remaining milk. Thoroughly wash the milk container and its lid with warm soapy water. Rinse the parts with clean water and dry them well. Do not use abrasive cleaners or scouring pads that may scratch the surface.
- Place a large empty cup under the milk froth tube.
- Press and hold the Frothed Milk/Cleaning touch icon 📄 for 3 seconds. The machine will begin releasing steam through the milk froth tube. Let the machine run for a few seconds. Once complete, press the Frothed Milk/Cleaning touch icon 📄 again to stop the process. After cleaning the milk froth wand, allow the machine to run for a few seconds through the brewing head to clean it.
- Remove any remaining water from the milk container and reinsert it into the machine.
Cleaning the brewing head, portafilter and filters
- Switch off the coffee machine completely by pressing the power on/off touch icon. Then remove the plug from the mains socket.
- Wait for the machine's hot metal parts to cool down.
- Remove the portafilter and dispose of the used coffee grounds or coffee pod. Wash the portafilter and filter with warm soapy water and rinse the parts with clean water. Do not wash the portafilter or filters in the dishwasher.
- Clean the bottom of the machines brewing head with a damp cloth or kitchen paper to remove any ground coffee residue.
- Reattach the portafilter (without filters) to the machines brewing head.
- Place a large empty cup under the portafilter.
- Switch the machine back on, press the Single/Double Espresso touch icon once and let the machine run with water only until it stops automatically.
Cleaning the water tank
Dispose of any remaining water by removing the tank and emptying it into the sink. It is recommended to empty the tank between uses. Wash the water tank with soapy water, rinse thoroughly and dry.
Note: The water tank is not dishwasher-safe.
Cleaning the appliance surfaces
- Clean the housing with a soft, damp cloth. Do not use abrasive cleaners or scouring pads, as they may scratch the surface.
- Do not leave the portafilter attached to the brewing unit during long storage periods. This may affect the seal between the brewing head and the portafilter.
- Do not immerse the appliance in water.
Cooling function
You must allow the machine to cool down if you wish to make coffee again after the milk frothing process or if you want to make coffee immediately after frothing milk. Otherwise, the coffee will taste burnt and splatter. You may proceed with brewing new coffee once the machine has completed the cooling process.
Descaling/Cleaning
If the Single/Double Espresso touch icon 📄 flash simultaneously, the coffee machine needs descaling. Descale the appliance regularly, every 4 weeks. Regular descaling ensures consistent coffee quality, reduces energy consumption and extends the espresso machines lifespan.
After 300 coffee brewing cycles, the Single/Double Espresso® produced Espresso/Temperature decrease touch icons and flash simultaneously, accompanied by 5 beeps.
- The machine keeps track of the total number of coffee brewing cycles.
- Each cycle (including Single/Double Espresso, Iced Espresso/Temperature decrease, Cappuccino and Latte - each counted as one cycle) increases this count.
- When 300 cycles are reached:
- The machine will activate the descaling reminder immediately after each brewing cycle.
- The reminder consists of:
- The Single/Double Espresso and Iced Espresso/Temperature decrease touch icons lifting simultaneously 5 times.
- Accompanied by 5 audible beeps.
- After this sequence of 5 flashes/5 beeps:
- The machine enters standby mode.
- Users may immediately start another coffee brewing cycle if desired.
- This reminder (flashing icons + beeps) will persist after each cycle until the user successfully completes the descaling procedure.
-
Only after completing the descaling process will the machine automatically reset the cycle counter, clearing the reminder.
-
Fill the water tank with water and descaling solution for espresso machines up to the MAX mark, following the product package instructions.
- Place the portafilter with filter but without ground coffee in the machine.
- Place a collecting container of at least 1 litre under the brewing system and steam nozzle. Remove the drip tray if necessary.
- Insert the plug into the mains socket and switch on the appliance.
Phase 1: Descaling process
- Press the Single/Double Espresso 📋 bed Espresso/Temperature decrease touch icons 🌐 simultaneously for 5 seconds. The first icon will flash and the second will
ENGLISHENGLISH
remain static.
- The descaling solution will first pass through the brewing system for approximately two minutes.
- The remaining descaling solution will pass through the steam wand. This will take several minutes.
- Once the process is complete, the Iced Espresso/Temperature decrease touch icon will flash and the Single/Double Espress o still remain static. The initial phase of the descaling process has finished.
- Empty the collecting container. Replace the collecting container.
Phase 2: Rinsing
- The unit must now be rinsed with clean water to ensure no limescale remains. Rinse the water tank and fill it with clean water.
- During rinsing, the Iced Espresso/Temperature decrease touch icon will flash and the Single/Double Espresso will remain static.
- After a few minutes, the remaining water will be emitted through the steam wand. This will take several minutes.
- Descaling is complete once all water has passed through the system. You will hear a signal and all icons will illuminate on the display.
- Switch off the machine and empty the collecting container:
- Rinse the portafilter under the tap. Make sure it is completely dry before using it again.
5. TROUBLESHOOTING
| Problem Possible cause | Possible solution | |
| No coffee comes out | No water in the water tank. | Fill the tank with water, operate the appliance without the coffee filter to ensure it is fully primed. |
| The coffee is ground too fine or has been over-tampered. | Empty the filter and rinse it under water to clean it. Clean the filter with a cloth. Refill the filter with ground coffee and tampa it down. | |
| Water comes out of the outside of the filter. | 1. There is too much ground coffee in the filter.2. There is ground coffee on the edge of the filter.3. The temperature is too high after multiple continuous operations, causing water to vaporise. | 1. Switch off and let the machine cool down, clean and refill with the appropriate ground coffee.2. Switch off and let the machine cool down, clean the filter rim and the outlet sealing ring.3. Switch off and let the machine cool down. |
| There is ground coffee on the edge of the filter. | Clean it. | |
| Little milk froth. Use skim milk. Whole milk is the best. | ||
6. COPYRIGHT
The intellectual property rights over the texts in this manual belong to CECOTEC INNOVACIONES, S.L. All rights reserved. The content of this publication may not, either in part or in its entirety, be reproduced, stored in a retrieval system, transmitted or distributed by any means (electronic, mechanical, photocopying, recording or similar) without prior authorisation from CECOTEC INNOVACIONES S.L.
7. SIMPLIFIED EU DECLARATION OF CONFORMITY
CE Cecotec Innovaciones hereby declares that this product complies with the essential requirements and other relevant provisions of the regulations applicable in the European Union. This product has been designed, manufactured and tested in compliance with the required safety and quality standards. The full text of the EU Declaration of Conformity can be found on the following website: https://cecotec.es/es/information/declaration-of-conformity
FRANÇAISFRANÇAIS
1. PIÈCES ET COMPOSANTS
Image 1
- SOMMAIRE
- NOTE:
- BEFORE USE
- Box content
- OPERATION
- Control panel
- Fig. 2
- Filling the water tank
- Filling the milk container
- ENGLISHENGLISH
- CLEANING AND MAINTENANCE
- Cleaning the milk container and milk froth tube
- Cleaning the brewing head, portafilter and filters
- Cleaning the water tank
- Cleaning the appliance surfaces
- Cooling function
- Descaling/Cleaning
- Phase 2: Rinsing
- TROUBLESHOOTING
- COPYRIGHT
- SIMPLIFIED EU DECLARATION OF CONFORMITY
- FRANÇAISFRANÇAIS
- PIÈCES ET COMPOSANTS
Brand : CECOTEC
Model : Power Espresso 20 ColdBrew Latte
Category : Coffee machine