PMFMK A1 - Measuring equipment PARKSIDE - Free user manual and instructions
Find the device manual for free PMFMK A1 PARKSIDE in PDF.

User questions about PMFMK A1 PARKSIDE
0 question about this device. Answer the ones you know or ask your own.
Ask a new question about this device
Download the instructions for your Measuring equipment in PDF format for free! Find your manual PMFMK A1 - PARKSIDE and take your electronic device back in hand. On this page are published all the documents necessary for the use of your device. PMFMK A1 by PARKSIDE.
USER MANUAL PMFMK A1 PARKSIDE
GB/IE User manual Page 42
C
 |  | |
 | 0 - 53 % | 0 - 35 % |
 | 0,1 % | 0,1 % |
 0 - 5 %: 0 - 23,5 %: ± 2 % ± 2 % 0 - 30 %: ± 2 % >30 %: ± 4,2 % 0 - 5 %: 0 - 23,5 %: ± 2 % ± 2 % 0 - 30 %: ± 2 % >30 %: ± 4,2 % | ± 2 % | ± 2 % |
 | ||
 | 4 - 9,9 % | 4 - 9,9 % |
 | 10 - 18,9 % | 10 - 18 % |
 | ≥ 19 % | ≥ 19 % |
| 3,5% 0 | 5% | |
| 0,8% | 0,1 - 0,8% | |
| 0,9 - 2, | 8% 0,9 - 2,8% | |
| ≥ 2,9% | ≥ 2,9% |
Liste der
verwendeten
Piktogramme/
Intended use..... Page 46
Scope of delivery....Page 47
Parts list .... Page 47
Technical data ...... Page 48
General safety
instructions Page 49
Safety instructions for
batteries/rechargeable
batteries....Page 55
First set-up of the
product......Page 59
Unpacking the product.....Page 59
Batteries....Page 59
Calibration....Page 60
Operation...... Page 61
Switching on/off .... Page 61
Measuring mode/material
type ...... Page 61
Measuring .... Page 63
Hold function....Page 65
Temperature mode...... Page 66
MIN and MAX mode ..... Page 66
Backlight function.....Page 67
Cleaning Page 68
Storage Page 68
Disposal Page 69
Warranty Page 70
Warranty claim procedure...Page 72
Service Page 72
| List of pictograms used | |
 | Read the user manual. |
 | DANGER! - Designating a hazard with high risk, which will result in death or severe injury if not avoided (e.g. risk of suffocation) |
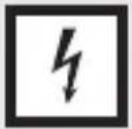
 | WARNING! - Designating a hazard with moderate risk, which can result in death or severe injury if not avoided (e.g. risk of electric shock) |
 | CAUTION! - Designating a hazard with low risk, which could result in minor or moderate injury if not avoided (e.g. risk of scalding) |
 | NOTICE! - Warns of possible damage to property/the product if not avoided (e.g. risk of short circuit) |
 | INFO: This symbol with the "Info" signal word offers additional useful information. |
 | Direct current/voltage |
 | Application around and removal from uninsulated live conductors is permitted. |
 | Use the product in dry indoor spaces only. |
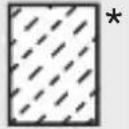 | Softwood |
 | Hardwood |
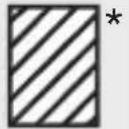
 | Plaster |
 | Cement screed |
 | Measuring range |
 | Resolution |
 | Error margin |
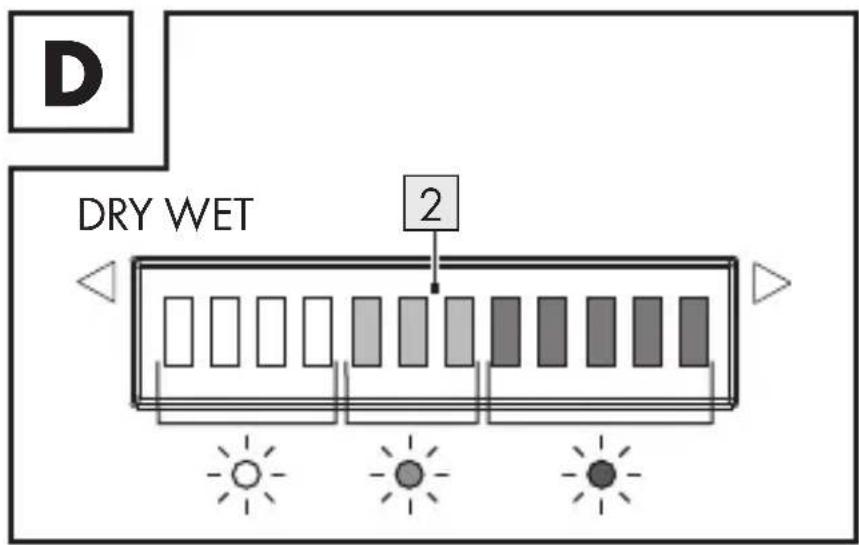
 | Test light for moisture |
 | Green light |
 | Yellow light |
 | Red light |
 | Moisture |
| [BBHG] | Safety informationInstructions for use |
 | CE mark indicates conformity with relevant EU directives applicable for this product. |
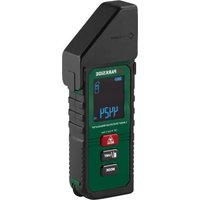
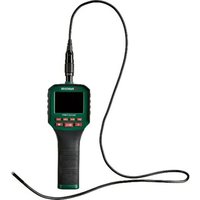
MOISTURE METER
Introduction
We congratulate you on the purchase of your new product. You have chosen a high quality product. The instructions for use are part of the product. They contain important information concerning safety, use and disposal. Before using the product, please familiarise yourself with all of the safety information and instructions for use. Only use the product as described and for the specified applications. If you pass the product on to anyone else, please ensure that you also pass on all the documentation with it.
Intended use
This product is designed to measure and monitor the moisture content in materials such as softwood, hardwood, plaster, and cement screed.
The product can be used to check whether the surface is ready for painting or coating. The product generates a signal tone if the moisture level exceeds a limit value.
The material moisture is calculated in % using the conductive moisture sensor 19 and internal material-dependent characteristic curves. The displayed value in % refers to the dry mass.
Example: 1 kg of material contains 500 g of water = 100 % relative material moisture.
The product may only be used as intended. Intended use includes correct use under correct ambient conditions. The operating safety is not guaranteed in the event of modifications or conversions.
■ Any other use or product modification shall be considered improper use and holds considerable safety hazards.
The manufacturer assumes no liability for damages due to improper use.
This product is only intended for private household use, not for commercial purposes.
This product is designed for use in dry indoor spaces only.
- Scope of delivery
1 Moisture meter
3 Battery (1.5 V ——, LRO3)
1 User manual
Parts list
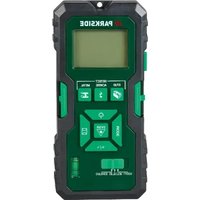
Fig. A
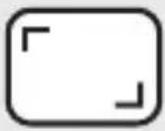
| 1 | Display with backlight |
| 2 | Moisture display(12-level LED display) |
| 3 | (On/off button) |
| 4 | (Backlight on/off button) |
| 5 | MODE/MAX/MIN |
| 6 | TEMP/HOLD |
Fig. B
| 7 | SOFTWOOD (Mode for softwood) |
| 8 | PLASTER (Mode for plaster) |
| 9 | HARDWOOD(Mode for hardwood) |
| 10 | CEMENT SCREED(Mode for cement screed) |
| 11 | °C (Temperature indicator) |
| 12 | % (Moisture percentage) |
| 13 | (low battery indicator) |
| 14 | |
| 15 | MIN (Minimum value) |
| 16 | MAX (Maximum value) |
| 17TEMP (Temperature) |
| 18HOLD (Hold function) |
Fig. C
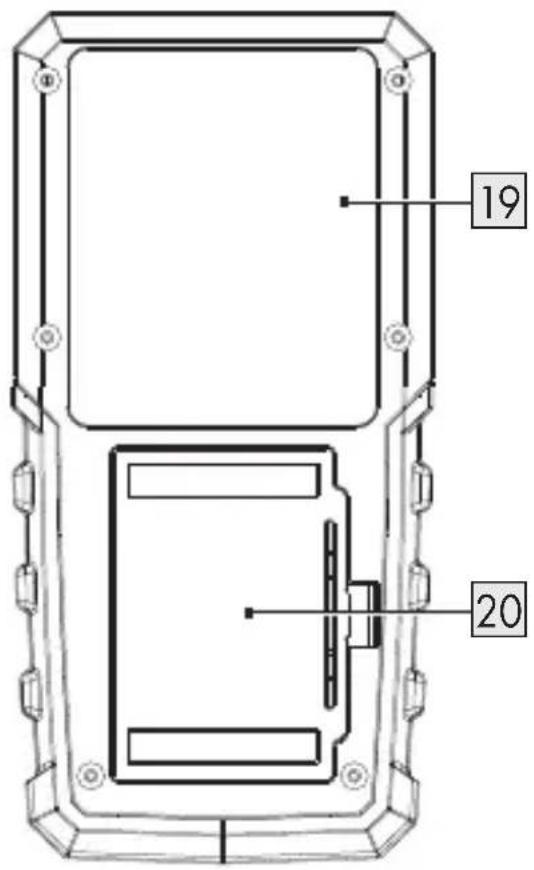
| 19 Moisture sensor |
| 20 Battery compartment cover |
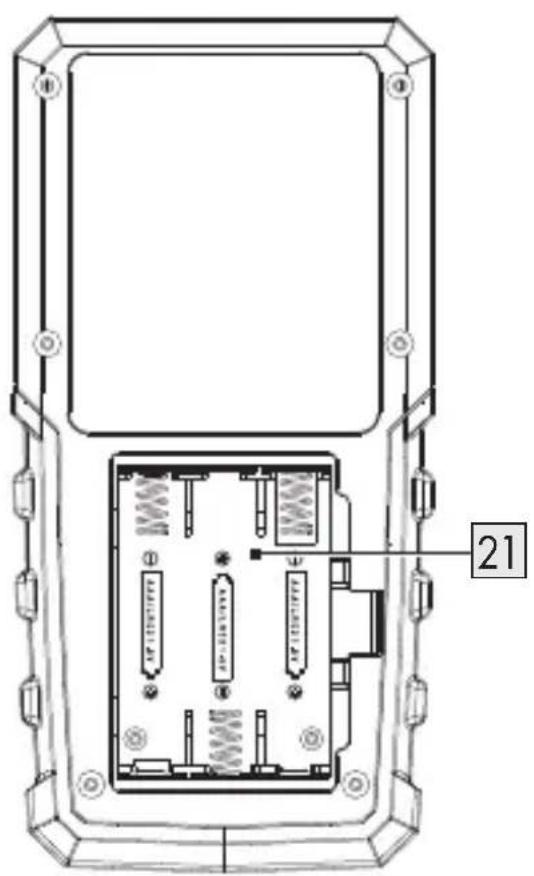
| 21 Battery compartment |

Technical data
| Rated voltage: 4.5 V (DC) | |
| Battery: 3×1.5 V ---, LR03 | |
| Dimensions: 137 mm × 67 mm × 31 mm | |
| Weight(with battery): approx. 168.5 g |
Temperature range
| Ambient temperature:- Operating environment: 0 to +60 °C- Storage environment: 0 to +60 °C | |
| Relative humidity:- Operating environment: < 80 %- Storage environment: < 95 % | |
| Error range:- 0 to +40 °C: ±1 %- Other: ±2 % |

General safety instructions
BEFORE USING THE PRODUCT, FAMILIARISE YOURSELF WITH ALL OF THE SAFETY INFORMATION AND INSTRUCTIONS FOR USE! WHEN PASSING THIS PRODUCT ON TO OTHERS, ALSO INCLUDE ALL THE DOCUMENTS!
In the case of damage resulting from non-compliance with these operating instructions the warranty claim becomes invalid! No liability is accepted for consequential damage! In the case of material damage or personal injury caused by incorrect handling or non-compliance with the safety instructions, no liability is accepted!
Children and persons with disabilities

WARNING! RISK OF LOSS OF LIFE OR ACCIDENT TO INFANTS AND CHILDREN!
Never leave children unsupervised with the packaging material.
The packaging material represents a danger of suffocation.
Children frequently under- estimate the dangers.
Always keep children away from the packaging material.
This product can not be used by children and persons with reduced physical, sensory or mental capabilities or lack of experience and knowledge.
■ Children shall not play with the product.
- Be careful when using the product around children and pets.
The product is not a toy. Keep the product out of the reach of children and pets.
⚠ WARNING! Risk of electric shock! Do not immerse the product's electrical components in water or other liquids. Never hold the product under running water.
⚠ WARNING! Risk of electric shock!
Do not use in the immediate vicinity of: - strong magnetic fields - electromagnetic fields - transmitting aerials - high frequency generators (HF generators)
■ Handle the product with care. The product can be damaged if crushed, struck or dropped, even from a low height.
The product is intended for dry indoor use only. Do not use the product outdoors. Avoid contact with moisture, e.g. in bathrooms.
- Do not let the product touch any electrically charged objects.
■ Protect the product from:
- extreme temperatures
-direct sunlight - strong vibrations
-high humidity - moisture
-flammable gases
-flammable vapours
-solvents
-dust
■ Do not subject the product to mechanical stress.
■ Switch the product off and remove the batteries before cleaning work and when not in use.
If the product is exposed to an extremely high electromagnetic field, its function may be affected.
■ Maintenance, modifications and repairs must only be carried out by qualified personnel.
Wireless data transmission
⚠ WARNING! Radio interference!
■ Switch the product off on airplanes, in hospitals, service rooms, or near medical electronic systems. The wireless signals transmitted could impact the functionality of sensitive electronics.
- Keep the product at least 20 cm from pacemakers or implantable cardioverter defibrillators, as the electromagnetic radiation may impair the functionality of pace makers. The radio waves transmitted could cause interference in hearing aids.
Do not place the product near flammable gases or potentially explosives areas (e.g. paint shops) with the wireless components on, as the radio waves emitted can cause explosions and fire. The range of the radio waves varies by environmental conditions.

Safety instructions for batteries/ rechargeable batteries
⚠️ DANGER TO LIFE! Keep batteries/rechargeable batteries out of reach of children. If accidentally swallowed seek immediate medical attention.
Swallowing may lead to burns, perforation of soft tissue, and death. Severe burns can occur within 2 hours of ingestion.
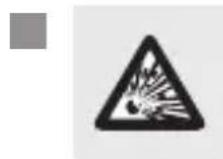
DANGER OF EXPLOSION!
Never recharge non-rechargeable batteries. Do not short-circuit batteries/rechargeable batteries and/or open them. Overheating, fire or bursting can be the result.
■ Never throw batteries/rechargeable batteries into fire or water.
■ Do not exert mechanical loads to batteries/rechargeable batteries.
- Do not short-circuit the terminals.
Risk of leakage of batteries/rechargeable batteries
- Avoid extreme environmental conditions and temperatures, which could affect batteries/rechargeable batteries, e.g. radiators/direct sunlight.
If batteries/rechargeable batteries have leaked, avoid contact with skin, eyes and mucous membranes with the chemicals!
Flush immediately the affected areas with fresh water and seek medical attention!

WEAR PROTECTIVE
GLOVES! Leaked or damaged batteries/ rechargeable batteries can cause burns on contact with the skin. Wear suitable protective gloves at all times if such an event occurs.
In the event of a leakage of batteries/rechargeable batteries, immediately remove them from the product to prevent damage.
Only use the same type of batteries/rechargeable batteries. Do not mix used and new batteries/rechargeable batteries.
■ Remove batteries/rechargeable batteries if the product will not be used for a longer period.
Risk of damage of the product
■ Only use the specified type of battery/rechargeable battery!
■ Insert batteries/rechargeable batteries according to polarity marks (+) and (−) on the battery/rechargeable battery and the product.
■ Use a dry, lint-free cloth to clean the contacts on the battery/rechargeable battery and in the battery compartment before inserting!
■ Remove exhausted batteries/rechargeable batteries from the product and safely dispose of.
■ Non-rechargeable batteries are not to be recharged.
● First set-up of the product
● Unpacking the product
- Take the product out of the packaging and remove all packaging materials and plastic wrappings.
- Check to make sure that all listed parts are included (see "Scope of delivery").
- Check whether the product and all parts are in good condition, if any damage or defect is detected, do not use the product, but follow the procedure described in chapter "Warranty".
Batteries
(Fig. C)
i INFO:
☐ If the batteries are low, 13 is shown. Replace the batteries.
☐ The test result may be falsified if the batteries are empty.
-
Open the battery compartment cover 20.
-
Insert 3 batteries into the battery compartment 21 . Pay attention to the correct polarity of the batteries.
- Close the battery compartment cover 20.
Calibration
i INFO:
☐ Recalibrate the product:
—Before first use
—After changing the environment of use
-If the calibration mode automatically shuts down without completing the calibration
-If the display 1 does not return to 0.0 % after switching on the product
- Remove the batteries from the battery compartment 21.
- Press and hold ⏻3. Insert the batteries into the battery compartment 21 until the display 1 shows
- SOFTWOOD 7
- PLASTER 8
- HARDWOOD 9
- CEMENT SCREED 10
Release ⏻ 3.
-
Hold the product on the bottom part. Keep your hands and fingers away from the moisture sensor 19. Do not place the product on any surface until the calibration is completed.
-
Completing the calibration:
Press MODE/MAX/MIN 5.
SOFTWOOD and 0.0% are shown.
Operation
- Switching on/off
i INFO:
☐ When switching on the product for the first time, all indicators are shown. The moisture display 2 is fully lit.
☐ The product switches on in SOFTWOOD mode by default.
☐ Memory function: The product remembers the last selected setting before switching off.
Example: If the last selected mode before switching off is PLASTER, the product switches on in PLASTER mode again.
☐ The product switches off automatically after 3 minutes without operation.
-
Switching on: Press ⏻ 3. The backlight 1 goes on. SOFTWOOD and 0.0% are shown.
-
Switching off: Press ⏻ 3. The display 1 goes off.
● Measuring mode/material type
i INFO: If no button is pressed for 20 seconds: The product returns from mode selection to measurement mode.
-
Switch on the product.
-
Press MODE/MAX/MIN 5 to enter the measuring mode SOFTWOOD.
-
Selecting the measuring mode:
Press 🙏▶ 4 repeatedly.
| Measuring mode | |
| Default | 7SOFTWOOD |
| 1× | 9HARDWOOD |
| 2× | 8PLASTER |
| 3× | 10CEMENT SCREED |
| 4× | 7SOFTWOOD |
- Confirming the selection: Press MODE/MAX/MIN 5.
| Measuring mode | Display 1 |
| 7 SOFTWOOD 01 flashes | |
| 9 HARDWOOD 01 flashes | |
| 8 PLASTER 0.0% | |
| 10 CEMENT SCREED 0.0% |
- Selecting the material type:
Press ▶ 4.
| Material |
| SOFTWOOD |
| 01 (Larch) |
| 02 (Douglas fir) |
| 03 (Pine) |
| 04 (Birch) |
| 05 (Cherry wood) |
| 06 (Spruce) |
| 07 (Maple) |
| HARDWOOD |
| 01 (Oak) |
| 02 (Merbau) |
| 03 (Walnut wood) |
| 04 (Ash) |
| 05 (Beech) |
| PLASTER |
| Plaster |
| CEMENT SCREED |
| Cement screed |
- Confirming the selection: Press MODE/MAX/MIN 5.
Measuring
i INFO:
☐ The displayed moisture level is an average value that is determined by the moisture on the outer surface and inside the material.
☐ If there is any visible surface moisture or water: Wipe the surface and allow it to dry for a few minutes before starting the measurement.
☐ Before measuring: Remove colour residues, dust etc. from the corresponding surface.
☐ The product is not suitable for measuring metal or other highly conductive materials. If metal (e.g. nails, screws, cables, pipes, etc.) is enclosed in the measuring range of the moisture sensor 19, the measured values increase considerably.
□ Maintain a minimum distance of 8 to 10 cm from other objects to avoid interference.
☐ Place the moisture sensor 19 on smooth surfaces. Rough surfaces lead to inaccurate measurement results.
☐ The measuring depth of the product is 30 mm for softwood/hardwood and 10 mm for plaster/cement screed. Depending on the density of the material, it may not be possible to measure the inner core. If the material has a thickness of less than the above mentioned measuring depth, the measured value of the moisture level may be inaccurate due to neighbouring material.
☐ The density of the measured material plays an important role in the measurement result. The measured value increases with the respective density.
☐ Before use: Put the product for at least 5 minutes in the same temperature environment with the measured object.
☐ Alarm function: When the moisture reaches the red area (8th to 12th light) on the moisture display 2 , the alarm sounds every 0.5 seconds. The alarm stops, when the 8th light goes out.
☐ During measurement: Keep the moisture sensor 19 in complete contact with the object under test. The entire moisture sensor must lie flat on the surface to be measured. If only part of the moisture sensor is in contact with the surface, incorrect values show on the display 1.
- Place the product with the moisture sensor 19 against the surface.
- The measured moisture content is shown on the display 1 and on the moisture display 2.
Hold function
i INFO: If no button is pressed for 3 minutes while the hold function is activated: The product switches off automatically.
- Lock the value during measurement: Press TEMP/HOLD 6. HOLD 18 is shown.
- Unlock the value during measurement: Press TEMP/HOLD 6.
- Temperature mode
i INFO:
☐ No moisture is measured in temperature mode.
☐ The product switches off automatically after 3 minutes without operation in temperature mode.
- Enter the temperature function:
Press TEMP/HOLD 6 for approx. 3 seconds.
| Temperature range Display | |
| < 0 °C | LO |
| >+60 °C | HI |
- Exit the temperature function:
Press TEMP/HOLD 6 for approx. 3 seconds.
MIN and MAX mode
i INFO:
☐ After measuring the material moisture, switch to this mode to display the measured minimum (MIN) and maximum (MAX) moisture values.
☐ Only the maximum and minimum values of the currently measured material will be retained. The values will be cleared if you switch to another mode or level, and after switching the product off and on again.
☐ If no button is pressed for 20 seconds while the MIN or MAX mode is selected: The product returns to measuring mode.
□ Display the measured maximum value and minimum value:
| MODE/MAX/MIN 5 | Description |
| Long press (3 s) | MAX |
| Short press (1 s) | MIN |
| Short press (1 s) | Back to the measuring mode |
☐ Clear all values: Long press MODE/MAX/MIN 5 for 3 seconds in MAX/MIN mode.
Backlight function
i INFO:
☐ The backlight 1 is switched on by default if the product is powered on.
☐ If there is no operation for 30 seconds: The backlight 1 switches off. The display 1 is still switched on.
□ Switching the backlight 1 on or off: Press ⚙▶ 4.
| Function | 4 |
| Switching off permanently | Press for approx. 3 seconds14 is shown |
| Switching on after permanently switching off | Press for approx. 3 seconds |
- Cleaning
WARNING!
Before cleaning: Remove the batteries from the battery compartment 21.
Do not immerse the electrical parts of the product in water or other liquids. Never hold the product under running water.
Do not allow water or other liquids to get inside the product.
Do not use abrasive, aggressive cleaning agents or hard brushes for cleaning.
i INFO: The product is maintenance-free. No components need to be maintained inside the product.
□ Clean the product with a lint-free, dry cloth.
Storage
☐ If the product is not used for a long time: Remove the batteries from the battery compartment 21.
☐ Store the product in a dry, dust-free place out of the reach of children.
● Disposal
The packaging is made entirely of recyclable materials, which you may dispose of at local recycling facilities.
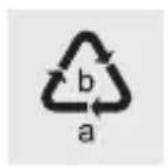
Observe the marking of the packaging materials for waste separation, which are marked with abbreviations (a) and numbers (b) with following meaning: 1-7: plastics/20-22: paper and fibreboard/80-98: composite materials.
Product:
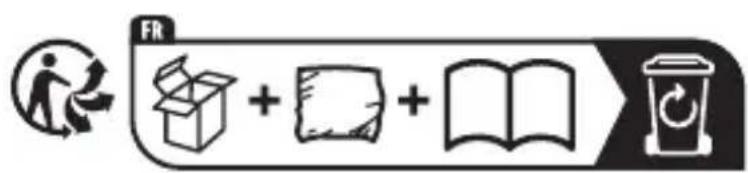

The product and packaging materials are recyclable and are subject to extended producer responsibility.
Dispose them separately, following the illustrated Info-tri (sorting information), for better waste treatment.
The Triman logo is valid in France only.
Contact your local refuse disposal authority for more details of how to dispose of your worn-out product.
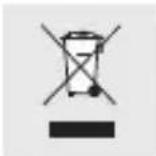
To help protect the environment, please dispose of the product properly when it has reached the end of its useful life and not in the household waste. Information on collection points and their opening hours can be obtained from your local authority.
Faulty or used batteries/rechargeable batteries must be recycled in accordance with Directive 2006/66/EC and its amendments. Please return the batteries/rechargeable batteries and/or the product to the available collection points.
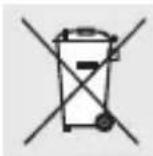
Environmental damage through incorrect disposal of the batteries/rechargeable batteries!
Batteries/rechargeable batteries may not be disposed of with the usual domestic waste. They may contain toxic heavy metals and are subject to hazardous waste treatment rules and regulations. The chemical symbols for heavy metals are as follows: Cd = cadmium, Hg = mercury, Pb = lead. That is why you should dispose of used batteries/rechargeable batteries at a local collection point.
Warranty
The product has been manufactured to strict quality guidelines and meticulously examined before delivery. In the event of material or
manufacturing defects you have legal rights against the retailer of this product. Your legal rights are not limited in any way by our warranty detailed below.
The warranty for this product is 3 years from the date of purchase. The warranty period begins on the date of purchase. Keep the original sales receipt in a safe location as this document is required as proof of purchase.
Any damage or defects already present at the time of purchase must be reported without delay after unpacking the product.
Should the product show any fault in materials or manufacture within 3 years from the date of purchase, we will repair or replace it – at our choice – free of charge to you. The warranty period is not extended as a result of a claim being granted. This also applies to replaced and repaired parts.
This warranty becomes void if the product has been damaged, or used or maintained improperly.
The warranty covers material or manufacturing defects. This warranty does not cover product parts subject to normal wear and tear, thus considered consumables (e.g. batteries, rechargeable batteries, tubes, cartridges), nor damage to fragile parts, e.g. switches or glass parts.
● Warranty claim procedure
To ensure quick processing of your claim, observe the following instructions:
Make sure to have the original sales receipt and the item number (IAN 465958_2310) available as proof of purchase.
You can find the item number on the rating plate, an engraving on the product, on the front page of the instruction manual (bottom left), or as a sticker on the rear or bottom of the product.
If functional or other defects occur, contact the service department listed below either by telephone or by e-mail.
Once the product has been recorded as defective you can return it free of charge to the service address that will be provided to you. Ensure to enclose the proof of purchase (sales receipt) and a short, written description outlining the details of the defect and when it occurred.
Service
GB Service Great Britain
Tel.: 0800 0569216
E-Mail: owim@lidl.co.uk
IE Service Ireland
Tel.: 1800 200736
E-Mail: owim@lidl.ie
CE
Liste des
pictogrammes/
rechargeables....Page 87
Gooi batterijen/accu's nooit in vuur of water.
NOSIĆ RĘKAWICE OCHRONNE!
NOSTE OCHRANNÉ RUKAVICE!
POUŽÍVAJTE OCHRANNÉ RUKAVICE!
- HARDWOOD 9
- CEMENT SCREED 10
- ■ ■ ■
Rilasciare ⏻ 3.