PLLM 10 A1 - Measuring equipment PARKSIDE - Free user manual and instructions
Find the device manual for free PLLM 10 A1 PARKSIDE in PDF.

| Product type | Laser level with tape measure |
| Power supply | 1.5 V AA battery (included) |
| Laser class | 2 |
| Laser wavelength | 630-650 nm |
| Laser power | < 1 mW |
| Laser line length (max) | 2 m |
| Leveling accuracy | ± 0.3° |
| Tape measure length | 1.5 m |
| Tape measure width | 6 mm |
| Tape measure accuracy class | II |
| Operating temperature | +5 °C to +40 °C |
| Storage temperature | -20 °C to +70 °C |
| Max humidity (operation/storage) | max. 90% |
| Max operating altitude | 2000 m |
| Package contents | Laser level, 3 gel pads, protective cover, base with 2 mounting rods, 1 AA battery, instruction manual |
| Main functions | Horizontal/vertical leveling, distance measurement, magnetic attachment, auto-off after 15 min |
| Care and cleaning | Clean with a dry cloth; do not immerse in water; wash the gel pad with clear water |
| Safety | Do not look directly into the laser beam; keep out of reach of children; avoid explosive atmospheres |
| Spare parts available | Gel pads (ref. 944445501, set of 5) |
| Warranty | 3 years |
Frequently Asked Questions - PLLM 10 A1 PARKSIDE
User questions about PLLM 10 A1 PARKSIDE
0 question about this device. Answer the ones you know or ask your own.
Ask a new question about this device
Download the instructions for your Measuring equipment in PDF format for free! Find your manual PLLM 10 A1 - PARKSIDE and take your electronic device back in hand. On this page are published all the documents necessary for the use of your device. PLLM 10 A1 by PARKSIDE.
USER MANUAL PLLM 10 A1 PARKSIDE
natural_image
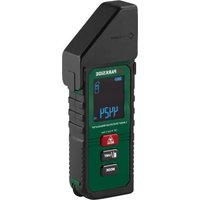
Black Parkside remote control device with visible sensor and drive slots (no text or symbols on the device itself)LASER-WASSERWAAGE MIT MASSBAND/ LASER LEVEL WITH TAPE MEASURE/NIVEAU À BULLE LASER AVEC MÈTRE RUBAN PLLM 10 A1
DE AT CH
LASER-WASSERWAAGE MITMASSBAND
Translation of the original instructions
NL BE
LASERWATERPAS METMEETLINT
natural_image
Technical line drawing of a circular mechanical component with concentric rings and a central hole (no text or symbols)Intended use ......Page 38
Description of parts ......Page 38
Scope of delivery......Page 39
Technical data ......Page 39
Safety notes......Page 40
Safety instructions for batteries/ rechargeable batteries......Page 43
Start-Up Page 45
Inserting/Changing battery ......Page 45
Switching on/off......Page 45
Extract/retract roller tape measure ......Page 46
Leveling a laser line....Page 52
After use Page 54
Maintenance and cleaning......Page 54
Cleaning the gel pad ......Page 55
Replacement parts/Accessories......Page 56
Storage......Page 57
Warranty claim procedure ......Page 60
Service......Page 60
| List of pictograms used | |
 | Please read the instructions for use. |
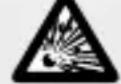
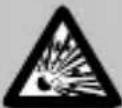 | Danger of explosion! |
 | Wear safety gloves! |
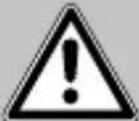 | Attention! |
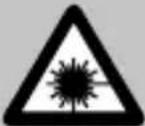 | Protect yourself from laser radiation! |
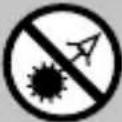 | Do not stare into the laser beam! |
 | Direct current/voltage |
 | Including batteries |
| [STYC] | Safety notesInstructions for use |
 | CE mark indicates conformity with relevant EU directives applicable for this product. |
  | Keep out of reach of children |
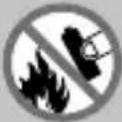 | Do not throw into fire! |
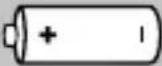
 | Do not insert the wrong way round - note the polarity (+/-)! |
 | Do not use force! |
 | Do not disassemble/open! |
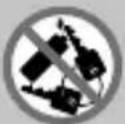
 | Do not mix different types or brands |
 | Never mix new and used batteries! |
 | Do not recharge |
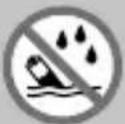 | Do not throw into water! |
 | Do not short-circuit! - Batteries may explode or leak. |
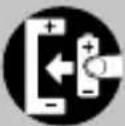 | Insert correctly! - Note the polarity (+/-) |
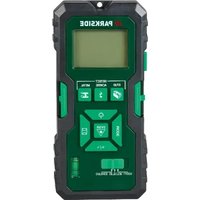
Laser level with tape measure
- Introduction

We congratulate you on the purchase of your new product. You have chosen a high quality product. The instructions for use are part of the product. They contain important information concerning safety, use and disposal. Before using the product, please familiarise yourself with all of the safety information and instructions for use. Only use the product as described and for the specified applications. If you pass the product on to anyone else, please ensure that you also pass on all the documentation with it.
Intended use
The product is suitable for determining and checking horizontal and vertical lines on vertical surfaces. On horizontal or inclined surfaces, the non-leveled laser line can be used as reference. The product is exclusively suitable for use in enclosed operating sites. Any other use or modification of the product shall be considered improper use and may result in serious accidents. The manufacturer assumes no liability for damages due to improper use. Not intended for commercial purposes.
• Description of parts
1 Light-up indicator
2 Product housing
3 Marking aid
| 4 | Mounting pin |
| 5 | Tape measure housing |
| 6 | Tape measure |
| 7 | ON/OFF button |
| 8 | Base unit |
| 9 | Metal ring (Base unit) |
| 10 | Storage holder (Mounting pins) |
| 11 | Recess (Mounting pins) |
| 12 | Laser beam outlet aperture |
| 13 | Protective cap (Gel pad) |
| 14 | Gel pad |
| 15 | Battery compartment cover |
| 16 | Battery compartment |
| 17 | Magnetic contacts |
| 18 | Latch of battery compartment cover |
| 19 | Head of mounting Pin |
- Scope of delivery
1 Laser level with tape measure
3 Gel pads
1 Protective cap for gel pad
1 Base unit with 2 mounting pins
1 1.5 V === Battery, Type AA
1 User manual
- Technical data
Battery: 1.5V AA ===
Laser class: 2
Wavelength λ: 630–650 nm
Laser power: < 1 mW
Laser line length: 2 m ^1)
Leveling accuracy
of visible laser line: ± 0.3^
Length of tape measure: 1.5 m
Tape measure accuracy class: II
Tape measure width: 6 mm
Operating temperature: +5 °C - +40 °C
Operating humidity: max. 90 %
Operating altitude: 2000 m
Storage temperature: -20 °C - +70 °C
Storage humidity: max. 90%
^1) The laser line length be reduced by unfavourable environmental conditions (e.g. direct sunlight).
Safety notes
■ DANGER OF SUFFOCATION! Packaging materials (e.g. films or polystyrene) can not be used as toys. Always keep children away from the packaging material. The packaging material is not a toy.
Do not work with the product in an environment where there is a danger of explosion, where there are flammable liquids, gasses or dusts. Sparks can be created in the product, which could ignite dust or fumes.
This product may be used by adults. Children under the age of 16 may not use the product except under supervision. Do not allow children to play with the product. Cleaning and user maintenance may not be carried out by children.
- Do not leave the switched-on product unattended and switch the product off after use. Others could be blinded by the laser beam. Risk of eye injury.
Do not expose the product to moisture or direct sunlight.
Do not expose the product to extremely high temperatures or temperature fluctuations. For example, do not leave it in your car for a long time. In the case of large temperature fluctuations, let the product acclimatise before using it. In extreme temperatures or temperature fluctuations, the precision of the product can be impaired.
Avoid strong impacts against the product. Damage to the product can impair its accuracy. After a strong impact compare the laser line with a known reference line to check it.
■ Turn the product off when you transport it.
■ Beware of sharp tip on both the mounting pins 4. Care should be taken while handling these mounting pins 4.
Do not bring the product near to heart pacemakers. The magnet inside the product creates a field that can impair the function of pacemakers.
- Keep the product away from magnetic data carriers and devices that are sensitive to magnetic influences. The effects of the magnet can lead to irreversible data losses.
■ Protect yourself ⚠️ WARNING! from laser radiation!
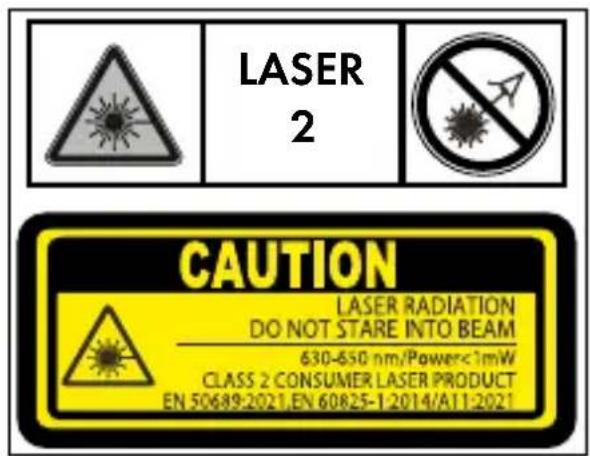
Do not look directly into the laser beam or the laser beam opening 12.
WARNING! Viewing the laser beam with optical instruments (e.g. loupe, magnifying glass etc.) is associated with risk injury to the eyes.
⚠️ CAUTION! If operating or adjusting product than other than those described here are used or other procedures are carried out, this can lead to dangerous radiation effects.
Never direct the laser beam at people, animals or reflective surfaces. Even looking briefly into the laser beam can cause damage to the eyes.
Do not use the product in explosive atmospheres which contain flammable liquids, gases, or dust. Sparks
may be produced inside the product, which can ignite dust or fumes.
Safety instructions for batteries/rechargeable batteries
■ DANGER TO LIFE! Keep batteries/rechargeable batteries out of reach of children. If accidentally swallowed seek immediate medical attention.
■ Swallowing may lead to burns, perforation of soft tissue, and death. Severe burns can occur within 2 hours of ingestion.
DANGER OF EXPLOSION!
Never recharge non-rechargeable batteries. Do not short-circuit batteries/rechargeable batteries and/or open them. Overheating, fire or bursting can be the result.
■ Never throw batteries/rechargeable batteries into fire or water.
Do not exert mechanical loads to batteries/rechargeable batteries.
Risk of leakage of batteries/rechargeable batteries
- Avoid extreme environmental conditions and temperatures, which could affect batteries/rechargeable batteries, e.g. radiators/direct sunlight.
If batteries/rechargeable batteries have leaked, avoid contact with skin, eyes and mucous membranes with the chemicals! Flush immediately the affected areas with fresh water and seek medical attention!

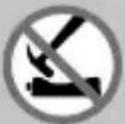
WEAR PROTECTIVE GLOVES!
Leaked or damaged batteries/rechargeable batteries can cause burns on contact with the skin. Wear suitable protective gloves at all times if such an event occurs.
In the event of a leakage of batteries/rechargeable batteries, immediately remove them from the product to prevent damage.
Only use the same type of batteries/rechargeable batteries. Do not mix used and new batteries/rechargeable batteries.
■ Remove batteries/rechargeable batteries if the product will not be used for a longer period.
Risk of damage of the product
■ Only use the specified type of battery/rechargeable battery!
Insert batteries/rechargeable batteries according to polarity marks (+) and (-) on the battery/rechargeable battery and the product.
Use a dry lint-free cloth or cotton swab to clean the contacts on the battery/rechargeable battery and in the battery compartment before inserting!
■ Remove exhausted batteries/rechargeable batteries from the product immediately.
- Start-Up
☐ Check that the delivery is complete and that there is no visible damage.
☐ Remove the packaging material from the product.
- Inserting/Changing battery (Fig. A)
Open the battery compartment cover 15 by gently pushing down the latch of battery compartment cover 18 in the arrow direction.
☐ Remove the used battery from the battery compartment 16, if necessary.
☐ Insert the (new) battery. Ensure the correct polarity as shown in inside the battery compartment 16.
☐ Replace the battery compartment cover 15.
Note: When the battery is low, the light-up indicator 1 will flash in yellow color for 3 times right after switched on (see "Switching on/off").
☐ Remove the battery from the product if it will not be in use for a prolonged period of time. In long periods of storage the battery can corrode and can run themselves down.
- Switching on/off
Do not direct the laser beam at persons or animals and do not stare into the laser beam yourself (even from a distance). Never leave the product unattended when switched on, and ensure the product is switched off after use.
Switch on:
□ Briefly press ON/OFF button 7. The light-up indicator 1 will flash 3 times in green color.
Note: If light-up indicator flashes 3 times in yellow color right after switched on, the battery is low. Replace the battery immediately (see "Inserting/Changing battery"). Laser line will also turn on.
Switch off:
Briefly press ON/OFF button 7 again to switch off the product. The light-up indicator 1 and laser line will also turn-off.
Auto power-off:
☐ If no button on the product is pressed for approx. 15 minutes or the housing is not rotated for the last approx. 15 minutes, the product will automatically switch off.
- Extract/retract roller tape measure
☐ Pull the tape measure housing 5 away from the product and mark additional points at the required distances at the height of the laser line.
It is to be noted that the zero point of the tape measure is situated in the center of the marking aid 3 and it can be marked directly on the substrate.
Note: Do not pull the tape measure out any further than up to the end of the imprinted scale. If necessary, you can double the work
area by placing product in the middle of the work surface and measure on two sides one after the other. The tape measure 6 will roll itself up again automatically.
Note: Do not let go of the unrolled tape measure 6. Uncontrolled retraction may damage the tape measure and its mechanism.
Attaching the product on a vertical substrate (Fig. B):
Attaching the product to base:
It is to be noted that product must always be attached to base unit 8 first before attaching the product on a vertical substrate using gel pad 14 or mounting pins 4. For attaching product to base unit 8, align the magnetic contacts 17 of the product with the metal ring 9 of the base unit 8.
Choosing between mounting pin 4 and gel pad 14:
Depending on the type of substrate, either the mounting pins 4 or gel pad 14 can be used. Gel pad 14 is suitable for smooth surfaces.
Examples of substrate for attaching with the gel pad 14:
· (Ceramic) tiles
- Smooth wooden surfaces
- Natural stone, marble, concrete
The mounting pins 4 is suitable for coarse or rough surfaces and wallpaper on drywalls.
Note: The mounting pins 4 cannot be attached to concrete (regardless of the surface).
Examples of substrate for attaching with mounting pins 4:
- Wallpaper (wood-chip, paper, and fleece)
- Plastered surfaces (up to a roughness of around 2 mm)
Attaching the product on a vertical substrate using gel pad 14:
WARNING!
■ The substrate must be dry and firm.
The gel pad 14 is not guaranteed to stick to damp, particularly dusty, sharp-edged or highly textured surfaces. If attached to an unsuitable surface, the product can fall off and become damaged or damage the substrate.
If the gel pad 14 becomes dirty or does not stick to smooth surfaces any more, it must be cleaned or replaced (see "Cleaning the gel pad").
Before every use, select an area, which is lower down on the desired surface to check whether the gel pad 14 will stick to that substrate, and that it can be safely removed without damaging the substrate.
■ Always remove the product once you have finished taking a measurement.
Positioning the product on a substrate:
- Remove gel pad protective cap 13 by rotating it in counter clockwise as shown in fig. C.
Note: This step can be skipped if gel pad protective cap 13 was already been removed.
- To attach gel pad 14 to base unit 8, align gel pad 14 with base unit 8 and rotate gel pad 14 clockwise as far as it will go (Fig. H).
- Gently press the gel pad 14 against the substrate until it is firmly affixed. Applying excessive pressure may damage the product or even substrate.
Note: For first time use of new gel pad 14, peel-off the protective foil from gel pad 14 surface with the help of a sharp tip or your nail.
Removing the product from substrate:
- Gently push away the product (together with gel pad 14) from the substrate with minimal required force (if necessary). Removing the product from a delicate surface too quickly (or forcefully) can damage the substrate.
- Put back the gel pad protective cap 13 to the gel pad 14. Align it well and rotate the protective cap 13 clockwise direction to lock it (Fig. G).
Note: The product should only ever be transported (or) stored with the protective cap attached. If the gel pad becomes dirty, it will lose its adhesive strength.
Attaching product vertical substrate using mounting pins 4:
WARNING! Beware of sharp tip on both the mounting pins 4. Care should be taken while handling mounting pins 4.
- Seek immediate medical help if accidentally get hurt while handling mounting pins 4.
- Keep mounting pins 4 away from children.
■ Always put back the mounting pin 4 to mounting pin storage holders 10 right after every use.
■ Make sure that the substrate is dry and firm.
Positioning the product on the substrate:
☐ Product should be attached to base unit 8 by aligning the magnetic contacts 17 of the product with the metal ring of base unit 9 (Fig. B).
Place the base unit 8 on the substrate and insert the mounting pins 4 into both the recesses for mounting pins 11. Ensure that both the mounting pins 4 are securely affixed to the substrate (Fig. F).
Removing the product from substrate:
□ Always remove the product from substrate once you finished using by removing both the mounting pins 4 from both the recesses for mounting pins 11. If necessary, use gentle force to remove mounting pins 4. Do not use excess force as it may damage the substrate and product as well.
☐ Put back the mounting pins 4 into mounting pin storage holders 10 for future use.
Important notes for attaching product with gel pad 14 or mounting pins 4:
While extracting tape measure by pulling out the tape measure housing 5, there is a possibility that mounting pin storage holder 10 together with mounting pin 4 could block the way. Also, laser line from Laser beam outlet aperture 12 could be blocked in the similar way as well. It is common based on this product design. To avoid such blocking, base unit 8 could be attached to substrate diagonally so that tape measure housing 5 and laser line are not blocked.
☐ If the laser line is intended to appear at a certain height on a wall/substrate, this height should be marked in advance. Then position the product on the wall/substrate so that the marked point is situated at the center of the marking aid 3.
While working on certain height of a vertical surface/substrate, always make sure that the product is firmly fixed on the substrate before start using the product. Otherwise, product may fall and get damaged or even may hurt anyone pass-by.
☐ Do not leave it unattended.
Removing mounting pins from mounting pins storage holders (Fig. E):
☐ Hold the mounting pins 4 in such a way that thumb finger is touching head of the mounting pin 19 and index finger is holding the body of mounting pin. Then, give gentle downward force with thumb finger in the direction of arrow until you feel that mounting pin 4 is loose inside the mounting pin storage holder 10. Then, take out the mounting pins 4 from mounting pin storage holder 10.
Note: It should be reverse order procedure for putting back the mounting pin 4 into mounting pin storage holder 10 for storage after use.
• Leveling a laser line (Fig. J)
☐ When attaching the product vertically on a wall/substrate, the laser line can either be leveled horizontally to the right (90°) or left (270°), or vertically upwards (0°) or downwards (180°).
☐ If the product is not aligned vertically, the laser line can only be used as a non-leveled reference line.
The leveling status is indicated by means of the light-up indicators 1:
| Light-up indicators | Levelling |
| Red The laser line | is not levelled.Turn the product housing 2in the required direction in order to level the laser line. |
| Yellow(only one corresponding light-up indicator 1displayed) | The laser line is close to being completely horizontal or vertical. To precisely adjust the laser line, slowly turn the product housing 2in the direction of the yellow color light-up indicator (Fig. J). |
| Green The laser line | line has been successfully levelled either horizontally or vertically. |
| Light-up indicators 1 off, laser line lights up | The laser line is no longer levelled because the product is tilted more than 10^ . You can attach the measuring tool to any substrate (example: wall or floor) and use the laser line as a non-levelled reference line. |
Using product on horizontal substrate:
☐ Attaching and Using product on a horizontal substrate is same way as mentioned for vertical
substrate. However, light-up indicators 1 will not turn-on and the laser line produced is not leveled while using product on horizontal surface.
- After use
☐ Product must be switched off right after use to preserve battery (see "Switch on/off").
● Maintenance and cleaning
WARNING! For repair purposes the product may only be opened by a professional.
- Have the product repaired by qualified professionals and only with original replacement parts. This ensures that the safety of the product is maintained.
The product requires no maintenance.
ATTENTION! Never submerge the product in water or other liquids. Do not allow water to enter into the product during cleaning.
Keep the product clean to ensure good, secure work.
☐ Use a dry cloth to clean the outside.
□ Clean the laser beam outlet aperture 12 with a soft and dry cloth. Do not exert any strong pressure!
- Cleaning the gel pad
WARNING! Only wash the gel pad 14 when it has been detached completely from the product.
Do not use any cleaning agents that contain alcohol or any other solvents for cleaning gel pad 14.
Clean the gel pad whenever it has become contaminated with dust or other particles, or if its adhesive strength has been reduced.
-
Remove gel pad protective cap 13 by rotating gel pad protective cap 13 in counter clock-wise as shown in fig. C.
-
Remove used gel pad 14 from base unit 8 by rotating the gel pad 14 counter clockwise as shown in fig. D.
-
Rinse the gel pad 14 with water. Wash it as necessary using a common household neutral soap or a detergent.
-
After washing, leave the gel pad 14 and gel cap protective cap 13 to dry completely. Gel pad 14 should be allowed to dry naturally and must not be warmed up (or) heated-up using other device such as heater or hot air blower.
-
Attach the gel pad 14 back to base unit 8 by aligning gel pad 14 with base unit 8 and then rotate gel pad 14 clockwise as far as it will go (Fig. H).
-
Put back the protective cap 13 to the gel pad 14. Align it well and rotate the gel pad protective cap 13 clockwise direction to lock it (Fig. G).
Note: The product should only ever be transported (or) stored with the gel pad protective cap 13 attached. If the gel pad 14 becomes dirty, it will lose its adhesive strength.
If the adhesive strength is still not sufficient even after the gel pad 14 has been cleaned, the gel pad 14 should be replaced with new gel pad 14.
3 pcs of gel pad 14 are included in the delivery content. If necessary, additional gel pad 14 can be ordered via service hotline. For more information see "Replacement part/Accessories".
● Replacement parts/Accessories
Compatible replacement parts for this product can be purchased at www.Optimex-Shop.com. If you are not sure where you can purchase compatible parts, contact the service centre via telephone (see "Service"). Have the model number mentioned below ready.
| Fig. | I |
| Part | 14 |
| Line drawing | 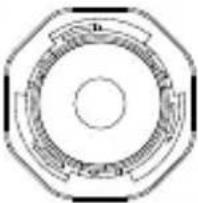 |
| Part name | Gel pad |
| Model number | 944445501 |
Note: Must be ordered as one pack. One pack contain 5 pieces of gel pads 14.
Storage
If you will not be using the product for a prolonged period of time, remove the battery and store it in a clean, dry place that is not exposed to direct sunlight.
●Disposal
The packaging is made entirely of recyclable materials, which you may dispose of at local recycling facilities.

Observe the marking of the packaging materials for waste separation, which are marked with abbreviations (a) and numbers (b) with following meaning: 1–7: plastics/20–22: paper and fibreboard/80–98: composite materials.

Contact your local refuse disposal authority for more details of how to dispose of your worn-out product.
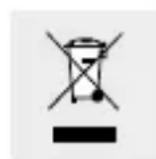
To help protect the environment, please dispose of the product properly when it has reached the end of its useful life and not in the household waste. Information on
collection points and their opening hours can be obtained from your local authority.
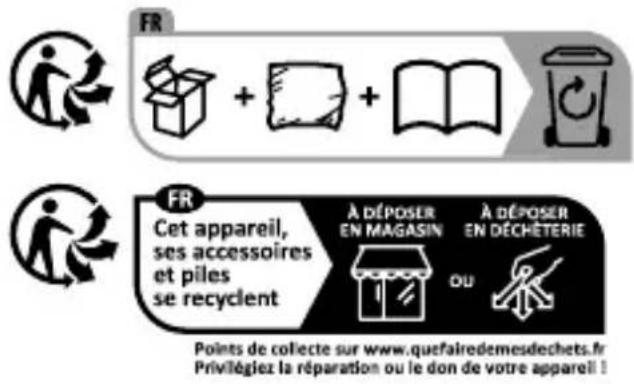
The product incl. accessories and packaging materials are recyclable and are subject to extended producer responsibility. Dispose them separately, following the illustrated Info-tri (sorting information), for better waste treatment. The Triman logo is valid in France only.
Faulty or used batteries/rechargeable batteries must be recycled in accordance with Directive 2006/66/EC and its amendments. Please return the batteries/rechargeable batteries and/or the product to the available collection points.
Environmental damage through incorrect disposal of the batteries/rechargeable batteries!
Batteries/rechargeable batteries may not be disposed of with the usual domestic waste. They may contain toxic heavy metals and are subject to hazardous waste treatment rules and regulations. The chemical symbols for heavy metals are as follows: Cd = cadmium, Hg = mercury, Pb = lead. That is
why you should dispose of used batteries/rechargeable batteries at a local collection point.
- Warranty
The product has been manufactured to strict quality guidelines and meticulously examined before delivery. In the event of material or manufacturing defects you have legal rights against the retailer of this product. Your legal rights are not limited in any way by our warranty detailed below.
The warranty for this product is 3 years from the date of purchase. The warranty period begins on the date of purchase. Keep the original sales receipt in a safe location as this document is required as proof of purchase.
Any damage or defects already present at the time of purchase must be reported without delay after unpacking the product.
Should the product show any fault in materials or manufacture within 3 years from the date of purchase, we will repair or replace it – at our choice – free of charge to you. The warranty period is not extended as a result of a claim being granted. This also applies to replaced and repaired parts.
This warranty becomes void if the product has been damaged, or used or maintained improperly.
The warranty covers material or manufacturing defects. This warranty does not cover product parts subject to normal wear and tear, thus considered consumables (e.g. batteries, rechargeable batteries, tubes, cartridges), nor damage to fragile parts, e.g. switches or glass parts.
- Warranty claim procedure
To ensure quick processing of your case, please observe the following instructions:
Please have the till receipt and the item number (IAN 444455_2304) available as proof of purchase.
You will find the item number on the rating plate, an engraving on the front page of the instructions for use (bottom left), or as a sticker on the rear or bottom of the product.
If functional or other defects occur, please contact the service department listed either by telephone or by e-mail.
You can return a defective product to us free of charge to the service address that will be provided to you. Ensure that you enclose the proof of purchase (till receipt) and information about what the defect is and when it occurred.
Service
GB Service Great Britain
Tel.: 08000569216
E-Mail: owim@lidl.co.uk
IE Service Ireland
Tel.:1800200736
E-Mail: owim@lidl.ie
CE
NOSTE OCHRANNÉ RUKA-
NOSTE OCHRANNÉ RUKA-