
LBT-515 - Turntable LENCO - Free user manual and instructions
Find the device manual for free LBT-515 LENCO in PDF.

| Product type | Audiophile vinyl turntable |
| Brand | Lenco |
| Model | LBT-515 |
| Dimensions (W × D × H) | 452 × 377 × 139 mm |
| Weight | 5.4 kg |
| Power supply | AC adapter 100-240 V ~50/60 Hz 0.4 A, output DC 12 V 0.6 A 7.2 W |
| Power consumption | 5 W (standby 0.3 W) |
| Motor | DC servo motor |
| Playback speeds | 33 and 45 rpm |
| Cartridge | Ortofon 2M Blue (elliptical stylus, tracking force 1.8 g) |
| Bluetooth | Version 5.3, range 10 m, frequency 2402-2480 MHz |
| Outputs | RCA (with preamp switch), ground terminal |
| Main features | Manual playback, counterweight, anti-skate, quartz lock, pitch ±10% / ±20%, 45 rpm adapter, dust cover |
| Maintenance and cleaning | Clean exterior with a soft damp cloth monthly; replace stylus every 1000 hours |
| Safety | Do not expose to water, do not open (no user-serviceable parts), keep out of reach of children, use only the supplied adapter |
| Spare parts and repairability | Interchangeable stylus (compatible with 2M Red, 2M Silver); warranty void if opened by unauthorized service |
| General information | Indoor use only; operating temperature 0-40°C |
Frequently Asked Questions - LBT-515 LENCO
User questions about LBT-515 LENCO
0 question about this device. Answer the ones you know or ask your own.
Ask a new question about this device
Download the instructions for your Turntable in PDF format for free! Find your manual LBT-515 - LENCO and take your electronic device back in hand. On this page are published all the documents necessary for the use of your device. LBT-515 by LENCO.
USER MANUAL LBT-515 LENCO
Audiophile turntable
With Ortofon 2M Blue cartridge
USER MANUAL
natural_image
Illustration of a vintage typewriter with a circular base and external stand, no text or symbols present.EN User manual 3
DE Betriebsanleitung 10
FR Manuel d'utilisation 19
NL Gebruikershandleiding 27
IT Manuale d'uso 35
ES Manual del usuario 43
PT Manual do utilizador 51
SV Användarmanual 60
FI Käyttäjän käsikirja 67
NO Brukerhåndbok 75
DA Brugervejledning 83
HU Felhasználói kézikönyv 91
PL Podręcznik użytkownika 99
EL Εγχειρίδιο χρήσης
SK Používatel'ská príručka 115
cs Uživatelská příručka 123
RO Manual de utilizare 131
107
Audiophile turntable
Aboutthisdocument
This document is the user manual and contains all the information for correct, efficient, and safe use of the product.
Ensure you have fully read and understood the instructions in this document before you install or use the product. Keep the packaging and this document for future reference.
Symbols used
| WARNING! | Signal word used to indicate a potentially hazardous situation which, if not avoided, could result in death or serious injury. |
| CAUTION! | Signal word used to indicate a potentially hazardous situation which, if not avoided, could result in minor or moderate injury. |
| NOTICE | Signal word used to address practices not related to physical injury. |
| i | Indicates important information that is not directly related to safety. |
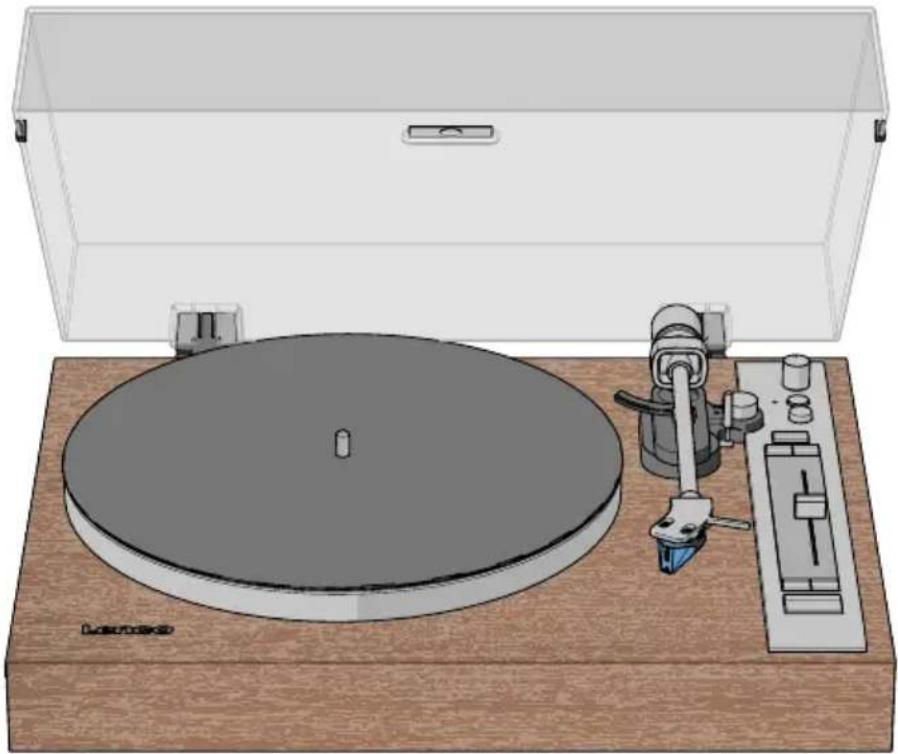
Productdescription
① Dust cover
②Dustcoverhinge
345RPMadapter
4Turntablemat
⑤Turntableplatter
6Turntablespindle
⑦Cartridge
8Pre-ampswitch
9RCAoutput
10 Groundterminal
11 Powerinput
12 Counterweight
13 Bluetooth®volumedial
14 Bluetooth®pairingbutton
15 Bluetooth®LEDindicator
16 Powerbutton
17 Anti-skatingdial
18 Quartzlockbutton
19 Speedrangebuttons(10%, 20%)
20 Cuelever
21 Tonearm
22 Pitchslider
23 QuartzLEDindicator
24 Speedbuttons(33,45rpm)
25 Start/Stopbutton
26 PowerAdaptor(withEUandUK plug)
27 RCAcable
Specifications
| Specifications Value / Description | |
| LBT-515 | |
| ProductAudiophileturntable | |
| Drivemotor DC servo motor | |
| Speedsettings 33, 45 RPM | |
| Standby power consumption 0.3W | |
| Bluetooth®version5.3 | |
| Bluetooth® frequency range 2402 - 2480 MHz | |
| Bluetooth® operating distance 10m | |
| Max. transmission power < 6 dBm | |
| Power Adapter Input AC 100 - 240 V ~50/60 Hz 0.4 A | |
| Power Adapter Output DC 12 V - 0.6 A, 7.2 W | |
| Powerconsumption5W | |
| Dimensions (I × w × h) | 452 × 377 × 139 mm |
| Weight | 5.4kg |
| Operatingconditions | 0 - 40°C |
| Ortofon 2M Blue | |
| Outputvoltage | 5.5 mV at 1 kHz, 5 cm/sec |
| Channelbalance | 1.5 dB at 1 kHz |
| Channelseparation 25 dB at 1 kHz, 15 dB at 15 kHz | |
| Frequencyrange | 20 Hz - 25,000 Hz (-3 dB) |
| Frequencyresponse | 20 Hz - 20,000 Hz (+2/-1 dB) |
| Trackingability | 80 μm at 315 Hz (recommended tracking force) |
| Dynamic compliance (Lateral) | 20μm/mN |
| Stylustype | Nudeelliptical |
| Stylus tip Radius | r/R 8/18 μm |
| Recommended tracking force | 1.8 g (18 mN) |
| Tracking force range | 1.6 - 2 g (16 - 20 mN) |
| Trackingangle | 20° |
| Internal impedance (DC resistance) | 1.3 kΩ |
| Internalinductance | 700mH |
| Recommended load resistance | 47 kΩ |
| Recommended load capacitance | 150 - 300 pF |
| Cartridgeweight | 7.2g |
| Styluscompatibility Interchangeable with 2M Red and 2M Silver | |
The technical specifications for the Ortofon 2M Blue cartridge have been sourced from the official Ortofon product page:
https://ortofon.com/products/2m-blue?utm source#specifications
Intended use
This product is intended as a fully manual turntable with an Ortofon 2M Blue cartridge, RCA output, and Bluetooth® functionality.
This product is intended for indoor use only.
Only use the product as described in this user manual.
This product is not intended for commercial use.
This device is not intended for use by persons (including children) with reduced physical, sensory or mental capabilities, or lack of experience and knowledge, unless they have been given supervision or instruction concerning use of the device by a person responsible for their safety, regarding the use of the device.
Safety instructions
Ensure you have fully read and understood the instructions in this document before you install or use the product. Keep the packaging and this document for future reference.
WARNING!
Chokinghazard:
- Do not let children play with packaging material. Packaging materials can lead to choking and suffocation. Always keep the packaging material out of reach of children.
Electricalhazard:
- Do not expose the product to water, rain, moisture, or high humidity.
- Do not use the product in damp environments, such as a bathroom or kitchen.
- Never insert any object into the ventilation opening of the product. The product contains electrical components.
- Only use the provided power adapter.
- Keep the product away from pets and other animals. Animals can bite through the power cable and suffer electrical shock.
- Do not open the product, there are no user serviceable parts inside.
- This product may only be serviced by a qualified technician for maintenance.
Firehazard:
- Do not use the product if a part is damaged or defective. Always replace a damaged or defective product immediately.
- Unplug the product from the power source and other equipment if problems occur.
- Do not cover the ventilation openings. Always leave at least 5 cm of space around the product.
- Do not place the product on top of other electrical equipment.
- Never use the product with a damaged power cable or adapter.
CAUTION!
Risk of hearing loss:
- Extended exposure to high volumes can cause hearing loss.
NOTICE
Risk of damaging the product:
- Keep the product away from heat sources, such as radiators, heaters, stoves, and naked flames.
- Keep the product away from strong magnetic objects.
• Always keep the power cable and the product away from usual walkways. - Do not disconnect the product by pulling on the cable. Always grasp the connector and pull.
- Avoid electrostatic discharge when handling the product. Electrostatic discharge can disturb the normal functioning of the product.
- Use the product only in moderate climates. Avoid extremely cold or hot environments. The recommended operating temperature is between 0°C and 35°C.
- Only use accessories provided by the manufacturer.
- Disconnect the product from the power outlet during lightning storms or before prolonged periods of disuse.
- Only use the product as described in this document.
- Do not drop the product and avoid bumping.
- Clean the outside of the product every month with a soft, damp cloth. Avoid abrasives that can damage the surface.
Installation
Check the contents of the package
Check that all parts are present and that no damage is visible on the parts. If parts are missing or damaged, contact the Lenco B.V. service desk via the website: www.lenco.com.
Installing the product
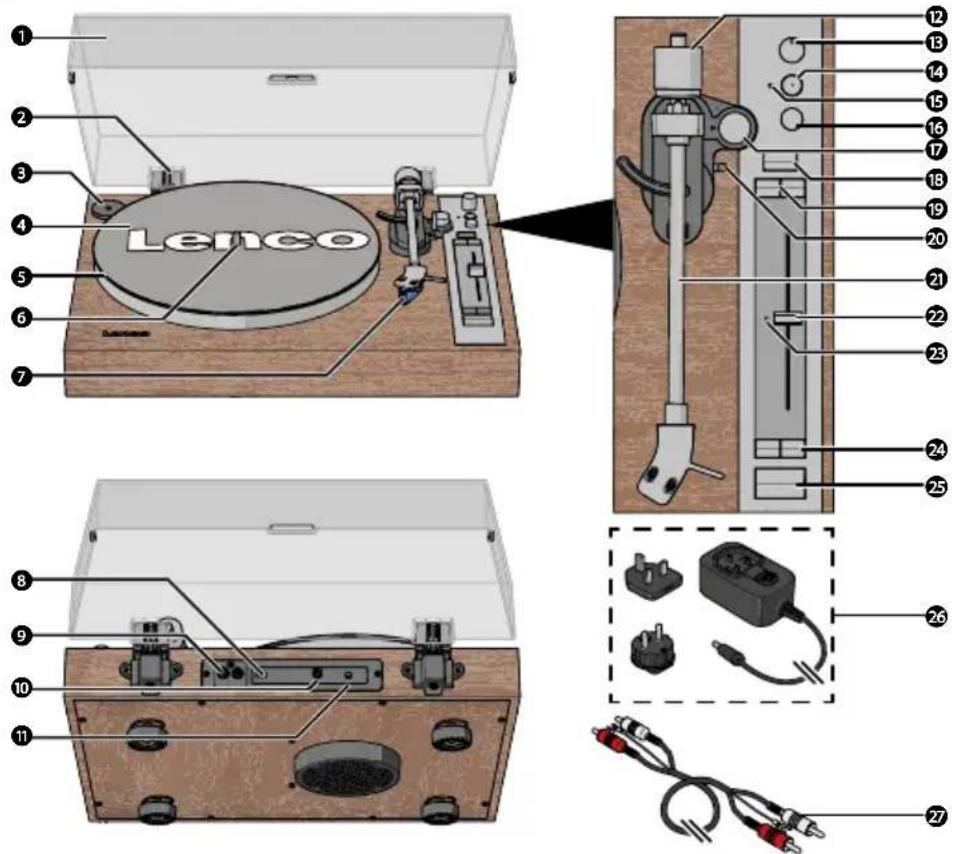
- Place the product on a flat and stable surface close to a power outlet.
- Press and slide the latch on the power adapter in the unlock direction.
- Insert the EU or UK plug attachment into the adapter.
- Press and slide the latch back in the opposite direction to lock the plug into place.
natural_image
Diagram showing a plug inserted into a socket with arrows indicating internal components (no text or symbols present)- Plug the power connector into the power input on the product.
- Plug the other end of the power adapter into a power outlet.
Installing the turntable platter and mat
-
Place the platter onto the spindle in the centre of the turntable.
-
Place the turntable mat on top of the platter.
When removing the platter, lift the mat first, then gently lift the platter straight up. This prevents damage during shipping or moving.
Attaching and adjusting the counterweight
-
Hold the counterweight with the number ring facing you and slide it onto the tonearm end.
-
Gently push the counterweight in until you hear a click.
-
Set the anti-skating dial to 0.
-
Push the cue lever backwards to lift the tonearm.
-
Carefully move the tonearm over the platter.
-
Adjust the counterweight until the tonearm is horizontal.
-
Hold the counterweight steady and rotate the number ring until the "0" lines up with the mark on the tonearm.
-
Hold both the counterweight and the number ring together and rotate them counter-clockwise until the recommended tracking force (1.8 grams) is set.
Installing the dust cover
- Insert the dust cover hinges into the hinge slots on the back panel of the turntable.
- Hold the dust cover and insert it into the hinges.
Use
Playing a vinyl record
- Open the dust cover.
- Press the power button to switch on the turntable.
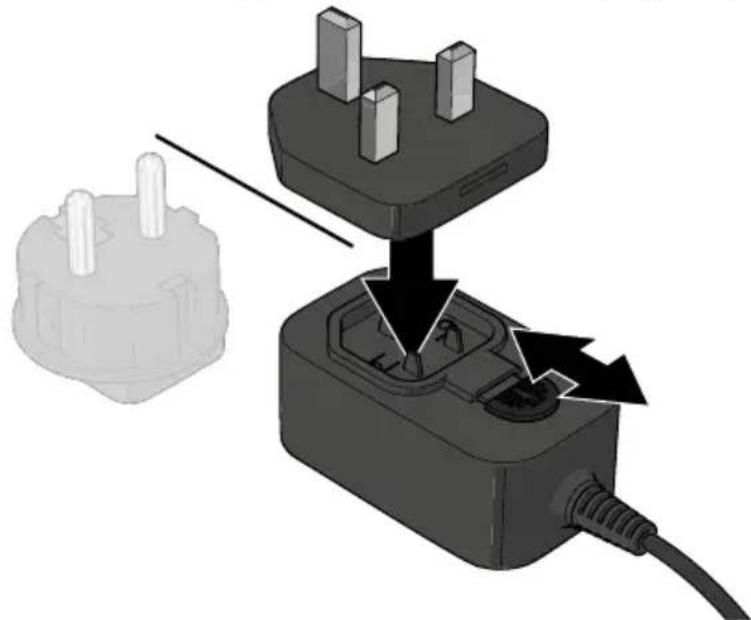
- Optionally: Place the 45 RPM adapter on the turntable shaft. Only needed for singles (45 RPM) and other vinyl records with a larger centre hole.
- Press on the speed button corresponding to the applicable speed of the vinyl record.
- Carefully remove the stylus guard.
- Carefully place a vinyl record on the turntable platter.
- Push the cue lever backwards to lift the tonearm.
- Carefully move the tonearm over the part you want play to on the vinyl record.
- Push the cue lever forward to lower the tonearm and start playing the vinyl record.

natural_image
Diagram of a vintage rotary disc with labeled parts, placed on a wooden base (no text or symbols present)- Adjust the volume with the volume dial.
See chapter adjusting quartz lock and pitch speed for more information about the pitch function.
Press the start/stop button to start playing the vinyl record.
The product automatically switches off if there is no audio or operation for 15 minutes. Press the power button and select the speed again.
Stop playing a vinyl record
- Press the start/stop button to stop playing the vinyl record.
- Push the cue lever backwards to lift the tonearm.
- Move the tonearm over to the rest position.
- Push the cue lever forward to rest the tonearm.
- Press the power button to switch off the turntable.
Pull the power adapter from the power outlet to disconnect the product from the main power.
Playing a vinyl record via external Bluetooth® speaker/headphones
The product can wirelessly connect to external Bluetooth® speakers or headphones (not included).
- Press the power button to switch on the turntable.
- Activate Bluetooth® pairing mode on your speaker or headphones.
Make sure your Bluetooth ^® speaker or headphones are within one metre from the turntable.
Make sure no other devices are in pairing mode.
Make sure the pre-amp switch is on the ONposition.
- Press the Bluetooth® pairing button.
The Bluetooth® LED indicator blinks blue.
Wait for the turntable to connect to your speaker or headphones.
The Bluetooth ^® LED indicator lights up blue when the connection is successful.
The Bluetooth ^® LED indicator lights up red if the pairing fails within 2 minutes. Repeat step 3.
- Follow steps 3. - 10. of Playing a vinyl record.
Connecting the turntable with the RCA cable
- Press the power button to switch on the turntable.
- Plug one end of the RCA cable into the RCA output.
Insert the R plug into the red RCA output jack. Insert the L plug into the white RCA output jack.
- Plug the other end of the cable into your device.
Insert the R plug into the right speaker. Insert the L plug into the left speaker.
- Turn the ground terminal counterclockwise enough to fit the U-shaped connector.
- Insert the U-shaped connector around the ground terminal screw.
- Turn the ground terminal clockwise.
- Set the pre-amp switch to:
• OFF if the connected device has PHONO input.
- ON if the connected device does not have PHONO input.
The volume dial does not adjust the volume of the connected device.
Adjusting the anti-skating control
NOTICE
Risk of damaging the product:
Do not adjust the tone arm or balance weight while changing anti-skating. This prevents damage to the stylus needle.
When a record plays, a small force pulls the tone arm toward the centre of the record. This is called skating. You can reduce this force by adjusting the anti-skating control.
Follow these steps to adjust anti-skating:
- Rotate the anti-skating dial to the minimum setting.
- If the tone arm skips or pulls inward near the centre of the record, increase anti-skating by one increment.
- Test the playback.
- If the problem continues, increase by one more increment.
- Repeat until the tone arm plays smoothly.
If a record cannot play tracks fully, reset anti-skating to 0.
Adjusting quartz lock and pitch speed
The quartz lock is active by default when the pitch slider is in the centre position. This keeps the turntable spinning at a stable speed. The quartz LED indicator lights up green to indicate the quartz lock is on.
To adjust speed manually:
- Move the pitch slider to the desired speed.
- Press the quartz button to turn off the quartz lock. The quartz LED indicator lights up red.
- Adjust the speed using the pitch slider. Use the speed buttons to choose either ±10% or ±20% speed adjustment.
- Press the quartz button again to switch the quartz Lock on or off.
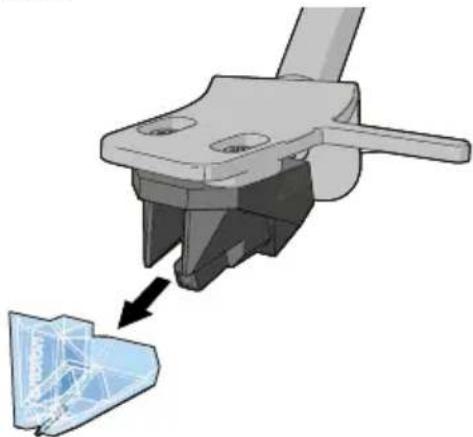
Maintenance
Replacing the needle
For the best listening experience the needle should be replaced every 1000 listening hours.
Replace the stylus with a compatible Ortofon 2M stylus.
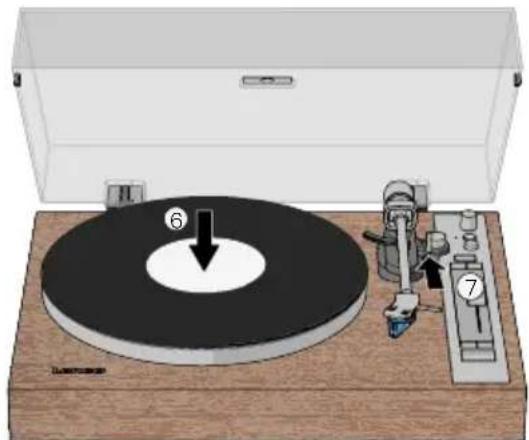
To replace the stylus:
- Switch off the product and disconnect the power adapter from the power outlet.
- Make sure the tonearm is in the resting position.
- Pull the stylus away from the tonearm.
natural_image
3D mechanical component diagram showing a tool interacting with a blue 3D model (no text or symbols visible)- Place the new stylus on the tonearm.
Cleaning
Clean the outside of the product every month with a soft, damp cloth. Avoid abrasives that can damage the surface.
Clean your vinyl records with anti-static cloth for the best listening experience. We recommend using the Lenco TTA-3-in-1, TTA-5-in-1 or TTA-6-in-1 cleaning kit (not included).
Troubleshooting
| ProblemPossiblecausePossiblesolution | ||
| The product does not switch on when the power button is pressed. | The product is not connected to the power supply. | Connect the product to the AC/DC power adapter. |
| No sound emitted from the Bluetooth® speakers. | The Bluetooth® volume dial is set to minimum. | Increase volume using the Bluetooth® volume dial. |
| The selected input does not match the source. | Select the correct source input. | |
| The sound is noisy. The product is placed too close to a television or another electrical appliance. | Switch off the television or other appliance, or move the product to another location. | |
| The product does not respond or cannot be reset. | Electrostatic discharge or other external factors have affected the product. | 1. Disconnect the power adapter and all connected devices.2. Wait one minute.3. Reconnect the power adapter. |
| Unable to pair with a Bluetooth® device. | The product is not in in pairing mode. | Press the Bluetooth® pairing button. |
| Your Bluetooth® amplifier device is switched off. | Switch on your Bluetooth® amplifier device. | |
| Your Bluetooth® device is too far from the product or there is an obstacle between the devices. | Move your Bluetooth® device closer to the product. | |
| Bluetooth® pairing was not successful. | 1. Switch off both the Bluetooth® device and the product.2. Switch them on and pair once more.If the problem persists, repair the product and device again. | |
| The sound is noisy when playing a record. | The stylus is not placed in the middle of the record. | Ensure the stylus is placed in the middle of the record. |
| The sound is noisy after a period of use. | The stylus is damaged. Replace with a new stylus. | |
Guarantee
Commaxx B.V. offers service and warranty in accordance with the European law, which means that in case of repairs (both during and after the warranty period) you should contact your local dealer.
- It is not possible to send products that need repairs to Commaxx B.V. directly.
- If this unit is opened or accessed by a non-official service centre in any way, the warranty expires.
- This device is not suitable for professional use. In case of professional use, all warranty obligations of the manufacturer will be voided.
Disclaimer
Updates to firmware and/or hardware components are made regularly. Therefore some of the instruction, specifications, and pictures in this documentation may differ slightly from your particular situation. All items described in this guide are for illustration purposes only and may not apply to your particular situation. No legal right or entitlements may be obtained from the description made in this manual.
Disposal

natural_image
Symbol of a trash bin crossed with no text or numbers, representing waste sorting or disposal (no text present)This symbol indicates that the relevant electrical product or battery should not be disposed of as general household waste in Europe. To ensure the correct waste treatment of the product and battery, please dispose them in accordance to any applicable local laws of requirement for disposal of electrical equipment or batteries. In doing so, you will help to conserve natural resources and improve standards of environmental protection in treatment and disposal of electrical waste (Waste Electrical and Electronic Equipment Directive).
DeclarationofConformity
We, Commaxx B.V. declare as manufacturer that the product LBT-515 from our brand Lenco®, produced in China, has been tested according to all relevant CE standards and regulations and that all tests have been passed successfully. This includes, but is not limited to the RED 2014/53/EU regulation.
The complete Declaration of Conformity (and the safety datasheet if applicable) can be found and downloaded via: https://commaxx-certificates.com/doc/lbt-515.doc.pdf
Service
For more information and helpdesk support, please visit www.lenco.com
Commaxx B.V. Wiebachstraat 37, 6466 NG, Kerkrade, The Netherlands.
https://ortofon.com/products/2m-blue?utm source#specifications
Anwendung
natural_image
Diagram showing a plug being inserted into a socket, with arrows indicating the process (no text or symbols present)natural_image
Diagram of a vintage rotary disc with labeled parts, placed on a wooden base (no text or symbols present)natural_image
3D mechanical assembly diagram showing a tool interacting with a component, with no visible text or symbolshttps://commaxx-certificates.com/doc/lbt-515 doc.pdf
Dienst
https://ortofon.com/products/2m-blue?utm source#specifications
Utilisation prévue
natural_image
Diagram showing a plug inserted into a socket with arrows indicating internal components (no text or symbols present)natural_image
Diagram of a vintage rotary disc with labeled parts, placed on a wooden base (no text or symbols present)natural_image
3D mechanical component diagram showing a tool interacting with a blue mesh structure (no text or symbols)natural_image
Symbol of a trash bin crossed out by two crossed lines, with a solid black rectangle below (no text or labels)https://commaxx-certificates.com/doc/lbt-515 doc.pdf
Service
https://ortofon.com/products/2m-blue?utm source#specifications
Bedoeld gebruik
natural_image
Diagram showing a plug being inserted into a socket, with arrows indicating the process (no text or symbols present)natural_image
Diagram of a vintage rotary disc with labeled parts, placed on a wooden base (no text or symbols present)natural_image
3D mechanical component diagram showing a tool interacting with a blue mesh structure (no text or symbols)https://commaxx-certificates.com/doc/lbt-515 doc.pdf
Service
https://ortofon.com/products/2m-blue?utm source#specifications
Uso previsto
natural_image
Diagram showing a plug being inserted into a socket, with arrows indicating the process (no text or symbols present)natural_image
Diagram of a vintage rotary disc with labeled parts, placed on a wooden base (no text or symbols present)natural_image
3D mechanical component diagram showing a tool interacting with a blue plastic sheet (no text or symbols)https://commaxx-certificates.com/doc/lbt-515 doc.pdf
Servizio
https://ortofon.com/products/2m-blue?utm source#specifications
natural_image
Diagram showing a plug being inserted into a socket, with arrows indicating the process (no text or symbols present)natural_image
Diagram of a vintage rotary disc with labeled parts, placed on a wooden base (no text or symbols present)natural_image
3D mechanical component diagram showing a tool interacting with a blue plastic sheet (no text or symbols)https://commaxx-certificates.com/doc/lbt-515 doc.pdf
Servicio
natural_image
Diagram showing a plug inserted into a socket with arrows indicating internal components (no text or symbols present)natural_image
3D mechanical component diagram showing a disassembled part with a highlighted section (no text or symbols)https://commaxx-certificates.com/doc/lbt-515 doc.pdf
Serviço
natural_image
Diagram showing a plug being inserted into a socket, with arrows indicating the process (no text or symbols present)natural_image
Diagram of a vintage rotary disc with labeled parts, placed on a wooden base (no text or symbols present)natural_image
3D mechanical component diagram showing a tool interacting with a blue plastic sheet (no text or symbols visible)https://commaxx-certificates.com/doc/lbt-515 doc.pdf
Service
natural_image
Diagram showing a plug being inserted into a socket, with arrows indicating the process (no text or symbols present)natural_image
Diagram of a vintage rotary disc with labeled parts, placed on a wooden base (no text or symbols present)natural_image
3D mechanical component diagram showing a tool interacting with a blue 3D model (no text or symbols visible)https://commaxx-certificates.com/doc/lbt-515 doc.pdf
Palvelu
https://ortofon.com/products/2m-blue?utm source#specifications
Tiltenkt bruk
Dette produktet er ment som en helt manuell tallerken med en Ortofon 2M Blue kassett, RCA-utgang og Bluetooth®-funksjonalitet.
natural_image
Diagram showing a plug being inserted into a socket, with arrows indicating the process (no text or symbols present)- Juster volumet med volumhjulet.
natural_image
3D mechanical component diagram showing a tool interacting with a blue mesh structure (no text or symbols)- Plasser den nye pickupstiften på tonearmen.
Rengjøring
https://commaxx-certificates.com/doc/lbt-515 doc.pdf
Service
natural_image
Diagram showing a plug being inserted into a socket, with arrows indicating the process (no text or symbols present)natural_image
Diagram of a vintage rotary disc with labeled parts, placed on a wooden base (no text or symbols present)- Juster lydstyrken med volumenknappen.
Følg disse trin for at justere anti-skating:
natural_image
3D mechanical component diagram showing a tool interacting with a blue mesh structure (no text or symbols)natural_image
Symbol of a trash bin crossed with no text or labels, accompanied by a horizontal line and a solid rectangle below (no text or symbols present)https://commaxx-certificates.com/doc/lbt-515 doc.pdf
Service
natural_image
Diagram showing a plug being inserted into a socket, with arrows indicating the process (no text or symbols present)natural_image
Diagram of a vintage rotary disc with labeled parts, placed on a wooden base (no text or symbols present)natural_image
3D mechanical component diagram showing a tool interacting with a blue mesh structure (no text or symbols)natural_image
Symbol of a trash bin crossed with a diagonal line and a horizontal bar below (no text or labels)natural_image
Diagram showing a plug inserted into a socket with arrows indicating internal components (no text or symbols present)natural_image
Diagram of a vintage rotary disc with labeled parts, placed on a wooden base inside a white box (no text or symbols present)natural_image
3D mechanical component diagram showing a clamping tool interacting with a transparent plastic housing (no text or symbols)natural_image
Diagram showing a plug being inserted into a socket, with arrows indicating the process (no text or symbols present)natural_image
Illustration of a vintage rotary disc with labeled parts, placed on a wooden base (no text or symbols present)natural_image
3D mechanical assembly diagram showing a component being processed into a blue 3D model (no text or symbols visible)natural_image
Symbol of a trash bin crossed with no visible text or labelshttps://commaxx-certificates.com/doc/lbt-515 doc.pdf
Υποστήριξη
natural_image
Diagram showing a plug being inserted into a socket, with arrows indicating the process (no text or symbols present)- Zapojte napájací konektor do napájacieho vstupu na výrobku.
- Druhý koniec napájacieho adaptéra zapojte do elektrickej zásuvky.
natural_image
Diagram of a vintage rotary disc with labeled parts, placed on a wooden base (no text or symbols present)- Nastavte hlasitost pomocou voliča hlasitosti.
natural_image
3D mechanical component diagram showing a tool interacting with a blue mesh structure (no text or symbols)- Umiestnite novú ihlu na ramenko.
Čistenie
natural_image
Symbol of a trash bin crossed with no text or numbers, representing waste sorting or disposal (no text present)natural_image
Diagram showing a plug being inserted into a socket, with arrows indicating the process (no text or symbols present)natural_image
Diagram of a vintage rotary disc with labeled parts, placed on a wooden base (no text or symbols present)natural_image
3D mechanical assembly diagram showing a component being processed into a blue wireframe structure (no text or symbols)https://ortofon.com/products/2m-blue?utm source#specifications