Baristeo Regina - Coffee machine CECOTEC - Free user manual and instructions
Find the device manual for free Baristeo Regina CECOTEC in PDF.

| Product Type | Professional espresso coffee machine |
| Brand | Cecotec |
| Model | Baristeo Regina |
| Dimensions (W x D x H) | 97.5 x 59.5 x 67.0 cm |
| Power Supply | 220-240 V, 50 Hz, 5200-6200 W |
| Pump Type | Rotary pump with adjustable DC motor, 9 bar |
| Heating System | 3 stainless steel boilers: 2 coffee boilers of 0.55 L each, 1 steam/water boiler of 10.5 L |
| Water Supply | Direct connection to water mains (inlet hose) |
| Number of Groups | 2 independent groups with touch screens |
| Steam Wands | 2 rotating steam wands with rubber handles |
| Coffee Functions | Single espresso, double, long, manual coffee, single and double short coffee |
| Steam Function | Milk frothing for cappuccino, latte macchiato |
| Hot Water Function | Hot water dispensing for tea or infusions |
| Display | Touch screen with settings for temperature, pressure, extraction time, pre-infusion |
| Programming | Setting of 4 customizable coffee profiles, manual mode, timer, energy saving |
| Included Accessories | 2 double spout portafilters, 1 bottomless single portafilter, single and double filters, cleaning brush, blind filter, tamper, inlet and outlet hoses, clamps, quick connectors |
| Maintenance and Cleaning | Manual cleaning after each use; descaling recommended every 2 months with descaling product |
| Safety | Automatic shut-off, frost protection, hot surfaces labeled, safety lock |
| Intended Use | Domestic and similar (store kitchens, offices, hotels, bed and breakfast) |
| Ambient Temperature | 1 °C to 40 °C |
| Warranty and After-Sales Service | Legal warranty; official Cecotec after-sales service at +34 9 63 21 07 28 |
| Manufacturing | Made in China, designed in Spain |
Frequently Asked Questions - Baristeo Regina CECOTEC
User questions about Baristeo Regina CECOTEC
0 question about this device. Answer the ones you know or ask your own.
Ask a new question about this device
Download the instructions for your Coffee machine in PDF format for free! Find your manual Baristeo Regina - CECOTEC and take your electronic device back in hand. On this page are published all the documents necessary for the use of your device. Baristeo Regina by CECOTEC.
USER MANUAL Baristeo Regina CECOTEC
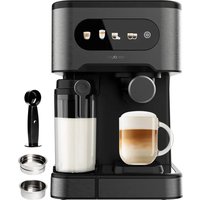
natural_image
Exterior view of a modern espresso machine with dual cups and control knobs (no visible text or symbols)Safety instructions 8
- Parts and components 64
- Before use 65
- Operation 66
- Cleaning and maintenance 73
- Troubleshooting 74
- Technical specifications 76
- Disposal of old electrical and electronic
appliances 77 - Technical support and warranty 77
- Copyright 77
- Simplified EU Declaration of Conformity 77
SOMMAIRE
EU01_100134_Baristeo Regina
EN · The coding in this manual is generic and applies to all code variants of the appliance.
Read these instructions thoroughly before using the appliance. Keep this instruction manual for future reference or new users.
- All safety instructions must be closely followed when using the appliance.
- This symbol means "Caution, hot surface". Accessible

surfaces are likely to heat up during use. Be careful not to burn yourself.
- Disconnection means must be incorporated into the fixed installation in accordance with the installation regulations.
- The insulation of fixed wiring must be protected, e.g. by
insulation with an appropriate rating.
- This appliance is intended for domestic and similar uses, such as:
- staff kitchen areas in shops, offices and other working environments;
o farms; - by customers in hotels, motels and other residential settings;
- bed and breakfast environments.
- This appliance can be used by people with reduced physical, sensory, or mental capabilities or lack of experience and knowledge if they have been given supervision or instruction concerning the use of the appliance in a safe way and understand the hazards involved.
- Children must not play with the appliance. Cleaning and user maintenance should not be carried out by unsupervised children.
- WARNING: the filling opening must not be opened during operation.
- WARNING: take precautions to avoid spillage of liquids on the cable.
- WARNING: incorrect or improper use can be dangerous for the user and damage the appliance. Use the appliance only for the purposes described in this manual. The surface of the heating element is subject to residual heat after use.
- Switch off and unplug the appliance before changing accessories or nearby parts that move during use.
- Ensure that the mains voltage matches the voltage specified on the device rating label and that the plug is earthed.
- Do not immerse the cable, plug, or any other non-removable part of the device in water or any other liquid or expose electrical connections to water. Make sure your hands are dry before handling the plug or switching on the device.
- Warning: if the appliance falls accidentally in water, unplug it immediately. Do not touch the water!
- Check the power cable regularly for visible damage. If the cable is damaged, it must be repaired by the official Cecotec Technical Support Service to avoid any type of danger.
- Warning: Do not use the appliance if its cable, plug, or housing are damaged, nor after it malfunctions or has been dropped or damaged in any way.
- Do not twist, bend, pull, or damage the power cable. Protect it from sharp edges and heat sources. Do not allow the cable to touch hot surfaces. Do not let the cable hang over the edge of the working surface or worktop.
- This appliance is not intended to be operated by means of an external timer or separate remote-control system.
- Turn off and unplug the appliance from the mains supply when not in use and before cleaning it. Pull from the plug, not the cable, to disconnect it from the outlet.
- Supervise children to prevent them from playing with the appliance. Close supervision is necessary when the appliance is being used by or near children.
- Place the appliance on a dry, stable, flat, heat-resistant surface.
-
Do not use the appliance under the following circumstances:
-
On or near a gas or electric hob, in heated ovens, or near open flames.
- On soft surfaces (such as carpets) or where it may tip over during use.
- Outdoors or in areas with high humidity levels.
- Do not cover the appliance during operation.
- Never leave the appliance unattended during use. Unplug it from the mains supply when you finish using it or when you leave the room.
- Do not try to repair the appliance by yourself. Contact the official Cecotec Technical Support Service for advice.
- Cleaning and maintenance must be carried out according to this instruction manual to make sure the appliance functions properly. Turn off and unplug the appliance before moving and cleaning it.
- Do not wash the appliance in dishwashers.
- No liability is accepted for any eventual damage or personal injuries derived from misuse or non-compliance with this instruction manual.
- This appliance can be used by children aged from 8 years and above if they have been given supervision or instruction concerning use of the appliance in a safe way and if they understand the hazards involved. Cleaning and maintenance of the appliance must not be carried out by children under 8 years of age or who are not being supervised. Keep this appliance and its power cable out of reach of children under the age of 8.
- Do not place the machine on a piece of furniture while it is in operation.
- The appliance must be disconnected from the power supply during maintenance and when parts are being replaced.
- Conditions of use: Room temperature: 1-40 °C.
- Unplug the appliance in such a way that the user can verify from any point that the plug has been removed.
- Remember to unplug the appliance and disconnect the water supply when the machine is not in use.
INSTRUCTIONS DE SÉCURITÉ
- Left coffee diffuser
- Left control panel
- Right coffee diffuser
- Right control panel
- Cup warming rack
- Side housing
- Lateral decorative panel
- Foot
- Right cup rack
- Drip tray
- Drain compartment
- Left cup rack
- Power cable
- Portafilter
- Left steamer
- Steamer rubber grip
- Hot water spout
- Steamer lever
FIGURE 2. MAIN SCREEN
- Double Espresso icon
- Single Espresso icon
- Manual extraction icon
- Lungo icon
- Double coffee icon
- Hot-water icon
- Settings
- Date
- Preparation time
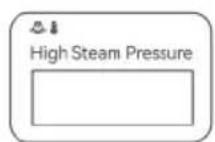
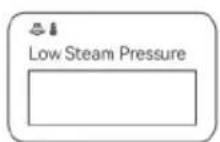
- Steam boiler pressure
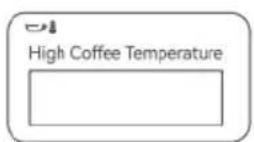
- Coffee temperature
- Fault logging
- Power icon
FIGURE 3. BOTTOM PART
- Power switch
- Power cable
-
Drain valve
-
Drain outlet hole
- Water inlet connector
NOTE:
The graphics in this manual are schematic representations and may not exactly match the device.
2. BEFORE USE
- This appliance is packaged in a way as to protect it during transport. Take the appliance out of its box and remove all packaging materials. You can keep the original box and other packaging elements in a safe place to prevent damage to the appliance if you need to transport it in the future. In case the original packaging is disposed of, make sure all packaging materials are recycled accordingly.
- Make sure all parts and components are included and in good conditions. If there is any piece missing or in bad conditions, contact the official Cecotec Technical Support Service immediately.
- Remove the silicone plug from the water tank, if the machine has one, to facilitate water drainage.
- Clean all detachable components.
Box content:
- Double spout portafilter x2
- Single spout bottomless portafilter
- Single filter
- Double filter
- Cleaning brush for brewing system
- Blind filter for internal cleaning
- Coffee tamper
- Water inlet pipe (ø6.3×ø9.5 mm/ PE / Ⅱ)
- Water outlet pipe (ø19×ø24 mm×2m/silicone)
- Clamp
- Quick connector for water inlet (x2)
Minimum requirements for proper operation:
- Room temperature: above 1 °C, below 40 °C
- Water quality: use natural mineral water or filtered water.
- Nominal water pressure (automatic water supply): 0.1-0.4 MPa
ENGLISH
3. OPERATION
3.1. Assembling the coffee machine
- The power cable, water inlet and water outlet can be seen at the bottom of the appliance. (Fig. 3)
- Remove the drip tray and grid.
- Connect the power cable to a grounded outlet, the cable must be connected properly, and it must meet the corresponding power requirements.
NOTE: the coffee machine does not have a plug to connect directly to the mains. It is recommended to connect it directly to the mains due to the high working current.
-
Connect the water outlet pipe to the drain using the stainless-steel drain pipe (do not bend it so that the water can drain without problems).
-
Connect the water inlet pipe to the water inlet connector.
NOTE: to ensure the service life of the coffee machine, use filter-treated water to prevent residues from accumulating in the appliance.
-
Place the water inlet pipe, the water outlet pipe and the power cable inside the cable duct if desired.
-
Replace the drip tray and grid.
3.2. Switching on the coffee machine
- Connect the coffee machine to the water supply.
- Press the power switch at the bottom.
- Press the power icon on the display, located at the bottom right, the appliance will pump water automatically.
- After finishing pumping water, the coffee machine will start preheating and the display will show the preheating temperature of the coffee boiler.
- Once the desired temperature is reached, the machine will stop preheating.
NOTE: for first use, you must wait 5 minutes for the coffee boiler to preheat, and 15 minutes for the steam boiler to preheat.
NOTE: even if the preheating is not finished, you can still use the appliance, but the temperature of the coffee or hot water will not be high enough. The steam valve, left coffee diffuser and right coffee diffuser can be opened or closed independently.
3.3 User menu
- Standby screen (FIG. 4)
- Press the Power icon to access the Main screen (FIG. 2).
- Press the Settings icon to access the Settings screen (FIG. 5-6-7).
- Press 1 on the right side to access the Settings screen 1 (FIG. 5).
- Press 2 on the right side to access the Settings screen 2 (FIG. 6).
- Press 3 on the right side to access the Settings screen 3 (FIG. 7).
- Press "About", present on all three Settings screens (FIG. 5-6-7), to access the About screen (FIG. 8). This interface allows you to check information such as the number of times faults have occurred, the number of times each icon has been pressed, the current time and the serial number of the coffee machine. Press "Back" to return to the Settings screen (FIG. 5-6-7), and press "Back" again to return to the Main screen (FIG. 2).
3.4 Internal parameters settings
Press the Settings icon on the Main screen to access the settings:
On the screen, you will see the first settings tab. You can move through the different settings tabs by pressing on the numbers on the right.
Settings screen 1 (FIG. 5):
- Settings of:
o Curve 1
o Curve 2
o Curve 3
o Curve 4
- Setting the coffee temperature. Default value is 93 °C. Values from 80 to 102 °C.
- Setting the hot water dispensing time. Default value is 10 s. Values from 1 to 10 seconds.
- Setting the steam and hot water boiler pressure. Default value is 1.5 bar. Values from 1 to 2 bar.
- Enable/disable the coffee function.
- Enable/disable the steam function.
Settings screen 2 (FIG. 6):
- Switching the coffee machine light on/off.
- Enable/disable the rating function.
- Resetting the module.
Settings screen 3 (FIG. 7):
- Enable/disable the screen saver function.
- Enable/disable the preset function.
ENGLISH
- Time for the display to enter the screen saver function (min).
- Time for the coffee machine to start automatically.
- Time for the coffee machine to switch off automatically.
- Current day and time.
NOTE: all tabs have the following options at the bottom of the screen:
- "About" (FIG. 8): to see how many faults have occurred and the number of repetitions of each preparation.
- Reset: to reset the settings of the coffee machine to factory settings.
- Save: to save the changes you have made.
NOTE: it is important that each time you make a change you press on "Save".
3.4.1 Coffee parameters settings
To adjust the coffee preparation settings, follow the steps below:
- Access the Settings screen.
- Press tab 1 on the right side of the screen (Settings screen 1).
-
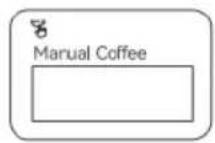
Press the name of one of the 5 coffee preparations (1, 2, 3, 4 and Manual Coffee).
This will give you access to your own settings menu (FIG. 9). Settings that can be modified: -
Coffee name
- Pre-infusion time (values from 0 to 10 s)
- Pre-infusion pressure (values from 0 to 9 bar)
- Waiting time after pre-infusion (values from 0 to 10 s)
- Coffee extraction time/quantity (values from 0 to 60 s/120 ml)
- Choosing between extraction time and extraction quantity
- Choosing between one or two cups of coffee
-
Extraction sequence (values from 0 to 40 s/ml and from 0 to 9 bar)
-
Phase 1: coffee extraction time/quantity + pressure
- Phase 2: coffee extraction time/quantity + pressure
- Phase 3: coffee extraction time/quantity + pressure
If you want to reset any of the 5 coffee preparations to factory settings, simply press "Restore".
Each has different preset values:
1 - FIG. 10
2 - FIG. 11
3 - FIG. 12
4 - FIG. 13
Manual mode - FIG. 14
3.5. Single Espresso and Double Espresso
To make a Single Espresso and/or a Double Espresso follow the instructions below:
- Take out the portafilter from the coffee machine. Put the desired filter in the portafilter (single or double) and add the ground coffee with the spoon. The amount will depend on whether you are going to use the single or double filter.
NOTE: to exchange the filters, use the filter that is not inside the portafilter to lever the one that is inside the portafilter in order to facilitate its removal. To fit the other filter, apply a little pressure with your palm on the filter so that it fits correctly.
NOTE: do not put more than 18 grams of ground coffee for the double filter and 12 grams of ground coffee in the single filter, as this may make it impossible to seal the portafilter in the coffee diffuser.
- Distribute and level the coffee with the aid of a coffee distribution tool (if you have one). Once levelled, press the coffee using the tamper and clean the excess ground coffee from the edge of the portafilter to avoid damaging the sealing ring of the brewing system.
NOTE: if too much ground coffee is left on the edge of the filter, it will easily cause a poor seal and water leakage.
-
Press the Single Espresso button to activate the water spout for a few seconds, this will help to remove residues from previous coffees and to preheat the brewing system for better extraction of the aromas. To release water again, press the button one more time after a few seconds.
-
Hold the top part of the machine with one hand and turn the portafilter counterclockwise with the other hand to lock it. It should be tight.
ATTENTION: do not place your hand on top of the coffee diffuser as it reaches high temperatures and could cause burns.
-
Place the cup(s) under the coffee spout.
-
Press the Single Espresso/Double Espresso/Manual extraction button to brew the coffee until the corresponding amount of brew coffee is dispensed.
-
Coffee will be ready and the appliance will go back to standby mode when it finishes.
NOTE: exercise close supervision, as the appliance sometimes requires manual operation.
- Once finished, remove the portafilter by turning it clockwise, discard the coffee grounds and clean the portafilter.
ENGLISH
NOTE: to avoid the accumulation of ground coffee residues in the brewing system, it is recommended to pull the coffee brewing lever upwards again to make water circulate a little and wash the coffee residues away. Use the cleaning brush to clean the coffee diffuser. Afterwards, cleaning can be complemented by wiping with a damp cloth.
ATTENTION: be careful, the area may be very hot.
3.6 How to make a good Espresso coffee
Making good coffee is based on many factors that should be taken into account. Each of them will be explained below in order to obtain a good espresso coffee:
- Coffee beans: coffee is the raw material for the whole process. Coffee should be stored in a cool, dry place away from moisture, heat, light and oxygen (air). Airtight bags that can be resealed to remove as much air as possible are recommended to prevent oxidation of the coffee.
- The recommended amount of coffee for the single filter is 9 to 12 gr, whereas for the double filter is 18 to 20 gr. These values depend on the type of coffee and its remaining moisture in the roast.
- Coffee grinding: this factor is one of the most important to take into account. The grinding level should be adjusted to prevent the ground coffee from undergoing the following processes:
Excessive and rapid washing: too coarse a coffee grind can cause the coffee to be washed out too quickly, resulting in a large amount of coffee without cream and flavour coming out of the portafilter.
Over-extraction: a very fine coffee grind can cause the coffee to take a long time to be extracted, the amount of coffee that will come out will be very small and the extraction pressure will be very high.
NOTE: the use of freshly ground coffee in a good precision grinder is strongly recommended. The use of commercially ground coffees can cause excessive and rapid washing due to the grinding level.
- Extraction pressure: this factor is closely linked to the grinding level used. It is recommended that the pressure during coffee extraction should be between 9 and 10 bar. Very coarse coffee grinds cause very low pressures, and very fine coffee grinds cause very high pressures.
- Pressing: when the ground coffee is in the portafilter, it should be distributed and levelled with the aid of a coffee distribution tool (if you have one). Then, press with a tamper of suitable diameter. This is an important step as it will greatly help to generate good extraction. Pressing with low force can result in low pressures and very fast extraction
of coffee, while pressing with high force can result in high pressures and over-extraction. Press the coffee lightly.
- Extraction ratio: the extraction ratio is explained as the proportion of ground coffee used to the liquid coffee in the cup. Currently, the most commonly used extraction ratios are 1:1, 1:2 and 1:3. That is, for one part of ground coffee, we should have the double or triple amount of liquid coffee.
- With extraction ratios of 1:1 we obtain much more intense and concentrated coffees, recommended for coffees with a longer roasting time.
- With extraction ratios of 1:2 we obtain more stable and balanced coffees, recommended for less developed speciality coffees.
- With extraction ratios of 1:3 we obtain more diluted and less intense coffees, recommended for certain coffees with lighter roasts.
- Extraction time: the extraction time is very important as it will determine the final result and will tell us whether all the above factors have been correctly adjusted. The extraction times should be set to 25 to 35 seconds.
NOTE: it is recommended to use a precision coffee scale to measure the weight of both the ground coffee and the extracted coffee.
- Extraction temperature: an extraction temperature of 90 to 94 °C is recommended.
NOTE: for each type of ground coffee, you will need to find the right balance between your coffee machine, the grinding level and the strength with which you press it. It is therefore normal if you have to prepare several espressos with each type of coffee until you find the balance between the above-mentioned factors.
- Cleaning: after each use, the coffee diffuser should be cleaned with hot water and the cleaning brush, as explained before. Pull the lever upwards so that water flows out of the coffee diffuser and, in the meantime, scrub it with the cleaning brush.
ATTENTION: be very careful not to burn your hand, as water comes out at a high temperature.
- Descaling: the accumulation of limescale deposits in the appliance can lead to an increase in the outlet pressure and a reduction in the amount of water that comes out for coffee extraction, resulting in malfunctioning of the coffee machine.
3.7. Steam function (milk frothing)
The steamer is used to froth and obtain a much creamier milk.
NOTE: always use cold whole milk for best results.
ENGLISH
- Use a stainless steel jug, pour cold milk up to 1/2 jug without exceeding the spout slit.
NOTE: the diameter of the jug must not be less than 70 ± 5 mm.
-
To produce steam, push the steamer lever forwards. By pushing the lever towards you, you can block the steam outlet and keep the steam flowing to froth the milk. If you push forward, you can manually hold the steam outlet to clean the steamer.
-
Place a jug under the steamer nozzle. The steamer nozzle should be placed a few centimetres below the milk level.
NOTE: release some steam before starting the process to remove any water from the steamer.
- Push the steamer lever towards you or forwards to automatically or manually release the steam respectively; allow the steamer nozzle to be inserted into the milk. To obtain a frothy and creamy milk, a swirl should be formed inside the jug and the steamer should not make a squeaking noise.
NOTE: it is highly advisable to control the temperature of the milk, which should not reach more than 60-65 °C to avoid the loss of certain properties.
- Move the steamer lever backwards to switch off the steam function when the desired temperature has been reached. If you want the coffee machine to release steam again, move the lever forward.
NOTE: clean the steam nozzle immediately after use to prevent the formation of deposits in the milk. Wipe the steamer with a damp cloth and dispense steam again to remove any milk residue that may have been left inside the steamer.
ATTENTION: caution with the high temperature of the hot water outlet when in use.
3.8. How to make a good Cappuccino
- First prepare the espresso with a cup large enough for the desired cappuccino size. Follow the instructions in section "3.5. "Single Espresso and Double Espresso".
- Use whole milk, fresh and cold from the refrigerator (4 °C-7 °C), and pour 1/3 of the milk into the stainless steel jug.
NOTE: use a stainless steel jug, whose diameter should not be less than 70 ± 5 mm, as the volume of the milk will increase after frothing.
- Follow section 3.7. "Steam function (milk frothing)" to produce frothy, creamy milk.
- Remove the jug when the desired milk froth and the required temperature have been reached. Then, move the steam lever backwards so that steam stops being produced. Next, pour the frothed milk into the prepared coffee. The cappuccino is now ready. You can add a little cinnamon or cocoa powder if you wish.
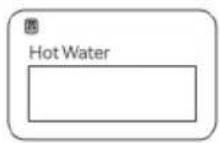
3.9. Hot water
To produce hot water, follow the steps below:
- Press the hot water icon to dispense hot water.
- When the hot water reaches the desired level, press the hot water icon to stop it, or wait until it reaches the setting to stop automatically.
ATTENTION: when you finish releasing hot water, do not touch the hot water spout right away to avoid burns.
3.10. Turning off the coffee machine
- Press the power switch to switch off the coffee machine.
- Remember to unplug the appliance and disconnect the water supply when the machine is not in use.
- If the machine needs to be transported or will not be used for a long time, drain the water from the boiler; the drain valve is located under the machine (Fig. 3).
ATTENTION: to avoid burns, please do not drain the water when the steam pressure is >0. Switch off the machine for two hours before draining.
NOTE: to unscrew the drain valve, use a No. 17 open-end spanner or an adjustable spanner.
4. CLEANING AND MAINTENANCE
Carry out the quick cleaning of the machine according to the instructions.
- The machine must be switched off and cooled down.
- Do not use abrasive sponges, alcohol or solvents. Do not immerse the machine in water.
- Clean the outlet and the sealing ring under the coffee diffuser with a professional brush after each use.
- Remove the filter and portafilter, remove the coffee grounds from inside and then clean them.
- Clean all removable accessories in water and dry them thoroughly.
- Clean the steamer with a damp cloth and re-dispense steam after each use to froth milk.
Cleaning mineral deposits
The appliance builds up limescale deposits over time and needs to be descaled every 2 months.
- Pour water and descaler into a container of about 10 l. Follow the instructions of the descaler manufacturer's proportions.
- Open the drain valve (Fig. 3) and drain the water, close it after draining.
ATTENTION: to avoid burns, please do not drain the water when the steam pressure is >0.
Switch off the machine for two hours before draining.
ENGLISH
- Connect the water inlet pipe of the coffee machine to the container where you have added the descaler. Switch on the machine, make coffee (without coffee) and dispense hot water and produce steam alternately until most of the water has been consumed. Then, let it stand for 5-10 minutes and switch off the machine.
NOTE: it is recommended to make 10 coffee cycles per coffee spout, 10 per water spout and 10 per steamer unit.
- Allow the machine to cool down and then open the drain valve (FIG. 3) to drain the water.
ATTENTION: to avoid burns, please do not drain the water when the steam pressure is >0. Switch off the machine for two hours before draining.
- Connect the water inlet. Perform 20 coffee cycles per coffee spout, 20 per water outlet and 20 per steamer unit. Repeat this process as many times as necessary to remove all traces of descaler from the machine before using it again.
Note: follow the above operation more times if the machine is still not clean enough.
Protection against freezing
WARNING: if the temperature of the coffee machine is below freezing point temperature, it will cause damage to the appliance. To prevent the coffee machine from freezing and cracking during transportation or storage, follow the steps explained above before switching off the coffee machine.
To protect the appliance against freezing, follow the steps below:
- Close the water inlet from the water inlet of your installation.
- Release 300 ml per coffee diffuser and 5 s of hot water.
- Press the power switch to switch off the coffee machine.
- Remember to unplug the appliance and disconnect the water supply when the machine is not in use.
- Before switching the machine on again, open the water inlet and then switch on the machine.
5. TROUBLESHOOTING
| PROBLEM POSSIBLE CAUSE SOLUTION | ||
| No water pumping and display shows E3 | Pump has not stopped running for 150 sec. | Switch off the machine for 10 minutes, restart the machine. |
| The water inlet pipe is blocked. | Check that the pipe is not kinked and/or clean the water inlet pipe. | |
| Machine malfunction. Please contact the official Cecotec Technical Support Service. | ||
| The pump won't stop running | The drain valve is empty. Close the drain valve. | |
| Machine malfunction. Please contact the official Cecotec Technical Support Service. | ||
| Water leakage | The water inlet pipe is blocked. | Check that the pipe is not kinked and/or clean the water inlet pipe. |
| The pipe connector is leaking. | Check connector and sealing gasket. | |
| Machine leaks water internally. | Please contact the official Cecotec Technical Support Service. | |
| Coffee leaks out of the coffee diffuser when making coffee. No hot water is released | There is too much coffee in the filter, resulting in high overpressure and extraction of the coffee where it should not be. | Reduce the amount of coffee in the filter. |
| In the structure in which the portafilter is placed, there are coffee residues that do not allow a good sealing of the portafilter. | Clean the bottom part of the structure to which the portafilter is attached. | |
| The gasket sealing the portafilter in the coffee machine is broken or defective. | Please contact the official Cecotec Technical Support Service. | |
| No coffee comes out | The coffee is ground to a very fine level, so that it is too compact after pressing and does not allow water to pass through. | Use coarser ground coffee. |
| Machine malfunction. Please contact the official Cecotec Technical Support Service. | ||
| No hot water is released | The machine is preheating and has not reached the right temperature. | Wait until the machine is ready. |
ENGLISH
| No steam is released | The machine is preheating and has not reached the right temperature. | Wait until the machine is ready. |
| Steam nozzle is blocked. When this happens, it is very important that you do not insist on releasing steam, as any steam that does not come out will return to the inside of the machine and the overpressure may cause a pipe to become dislodged. As soon as you detect the nozzle blockage, immerse the nozzle in degreasing liquid to try to clean it properly. Retest steam production | ||
| The display shows “E1” | The room temperature is below 1 °C or above 180 °C. | Check that the machine is not in this temperature range or has not overheated. |
| The temperature sensor of the coffee boiler is faulty. | Please contact the official Cecotec Technical Support Service. | |
| The display shows “E2” | The flow meter is not working properly. | Please contact the official Cecotec Technical Support Service. |
6. TECHNICAL SPECIFICATIONS
Product reference: EU01_100134
Product: Baristeo Regina
Voltage: 220-240 V
Frequency: 50 Hz
Power: 5200 - 6200 W
Size: 97.5 x 59.5 x 67.0 cm
Heating system:
- 1 x 10.5 l stainless steel boiler for steam and hot water.
- 1 x 0.55 l stainless steel boiler for the left coffee diffuser.
- 1 x 0.55 l stainless steel boiler for the right coffee diffuser.
Pump type: rotary pump with adjustable 9 bar DC motor.
Technical specifications may change without prior notification to improve product quality.
Made in China | Designed in Spain
7. DISPOSAL OF OLD ELECTRICAL AND ELECTRONIC APPLIANCES
This symbol indicates that, according to the applicable regulations, the product and/or batteries must be disposed of separately from household waste. When this product reaches the end of its shelf life, you should dispose of the cells/batteries/accumulators and take them to a collection point designated by the local authorities.
Consumers must contact their local authorities or retailer for information concerning the correct disposal of old appliances and/or their batteries.
Compliance with the above guidelines will help protecting the environment.
8. TECHNICAL SUPPORT AND WARRANTY
Cecotec shall be liable to the end user or consumer for any lack of conformity that exists at the time of delivery of the product under the terms, conditions and deadlines established by the applicable regulations.
Repairs should be carried out by qualified personnel.
If at any moment you detect any problem with your product or have any doubt, do not hesitate to contact the official Cecotec Technical Support Service at +34 963 210 728.
9. COPYRIGHT
The intellectual property rights over the texts in this manual belong to CECOTEC INNOVACIONES, S.L. All rights reserved. The contents of this publication may not, in whole or in part, be reproduced, stored in a retrieval system, transmitted, or distributed by any means (electronic, mechanical, photocopying, recording or similar) without the prior authorization of CECOTEC INNOVACIONES, S.L.
10. SIMPLIFIED EU DECLARATION OF CONFORMITY

Cecotec Innovaciones hereby declares that this appliance complies with the essential requirements and other relevant provisions of the regulations applicable in the European Union. This appliance has been designed, manufactured and tested to meet the required safety and quality standards. The full text of the EU Declaration of Conformity can be found on the
following website: https://cecotec.es/es/information/declaration-of-conformity
FRANÇAIS
1. PIÈCES ET COMPOSANTS
Image 1. PARTIES DE LA MACHINE À CAFÉ
Image 2. ÉCRAN PRINCIPAL
Dimensioni: 97,5x59,5x67,0 cm
FIGURA 2. ECRÃ PRINCIPAL
5. PROBLEEMOPLOSSING
RYSUNEK 2. EKRAN GŁÓWNY
https://cecotec.es/es/information/declaration-of-conformity
https://cecotec.es/es/information/declaration-of-conformity
CATALÀ
1. PECES I COMPONENTS
FIGURA 1. PARTS DE LA CAFETERA
Dimensions: 97,5 x 59,5 x 67,0 cm
Fig./Img./Abb./Afb./Rys./Obr.1
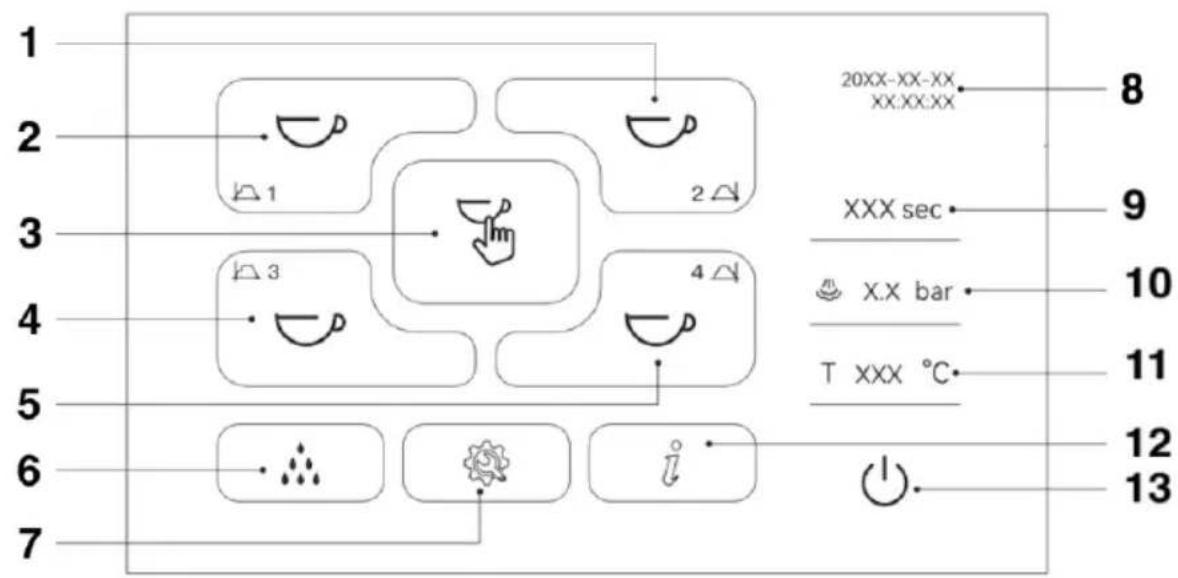
Fig./Img./Abb./Afb./Rys./Obr.2
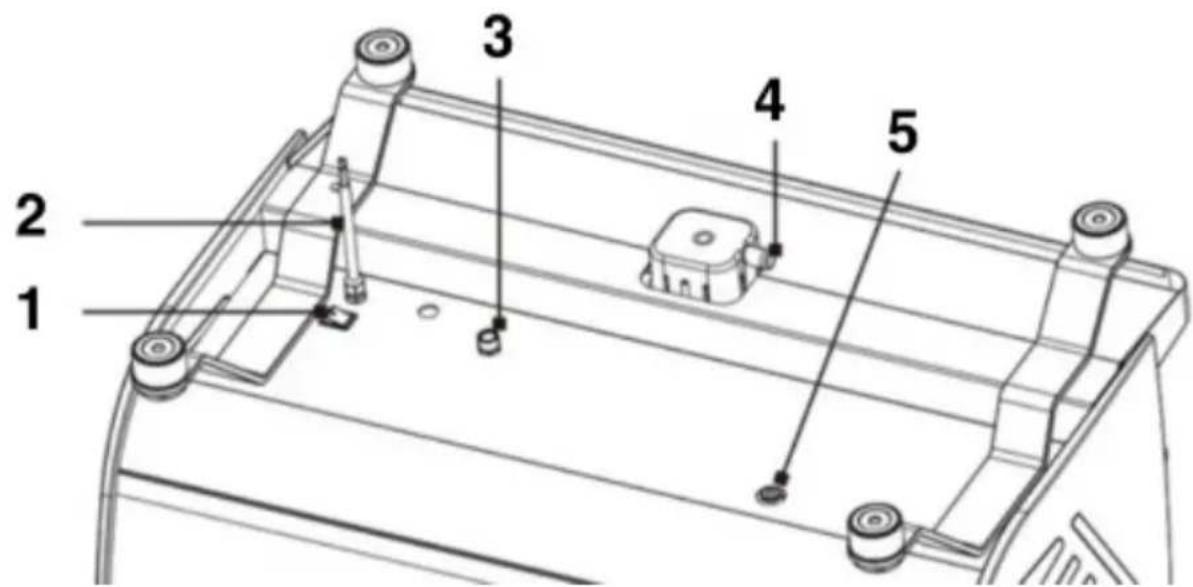
Fig./Img./Abb./Afb./Rys./Obr. 3

Fig./Img./Abb./Afb./Rys./Obr. 4
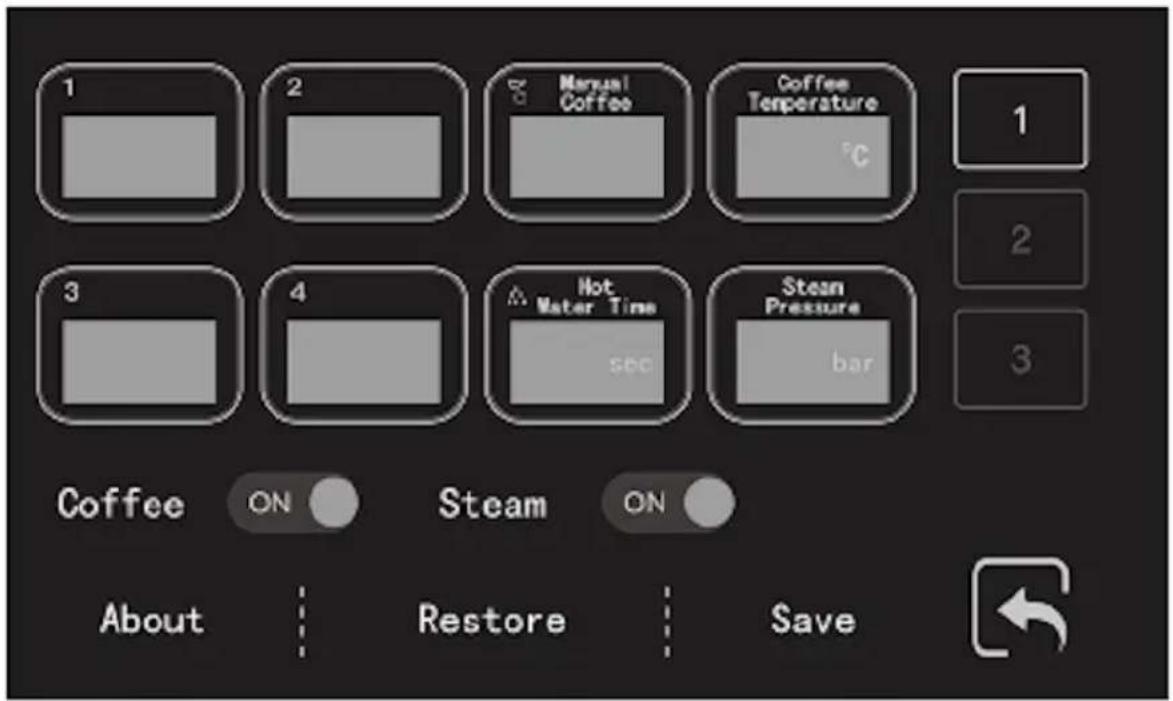
Fig./Img./Abb./Afb./Rys./Obr. 5
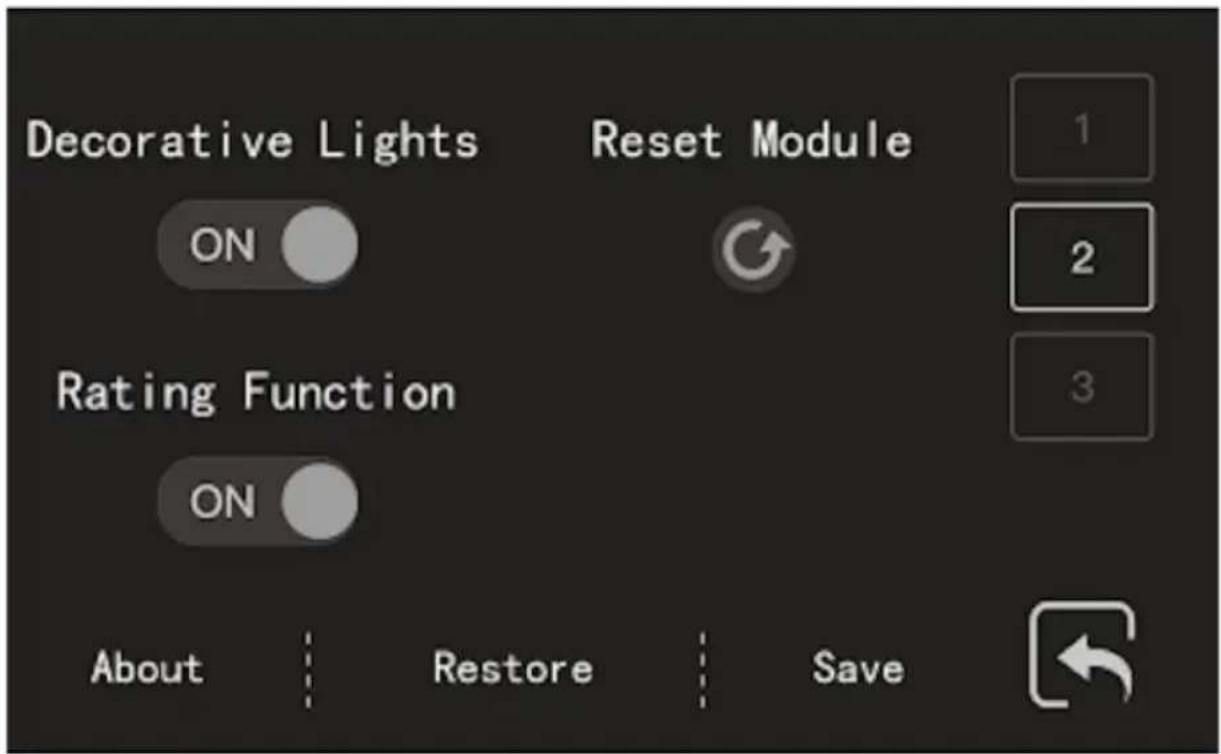
Fig./Img./Abb./Afb./Rys./Obr. 6
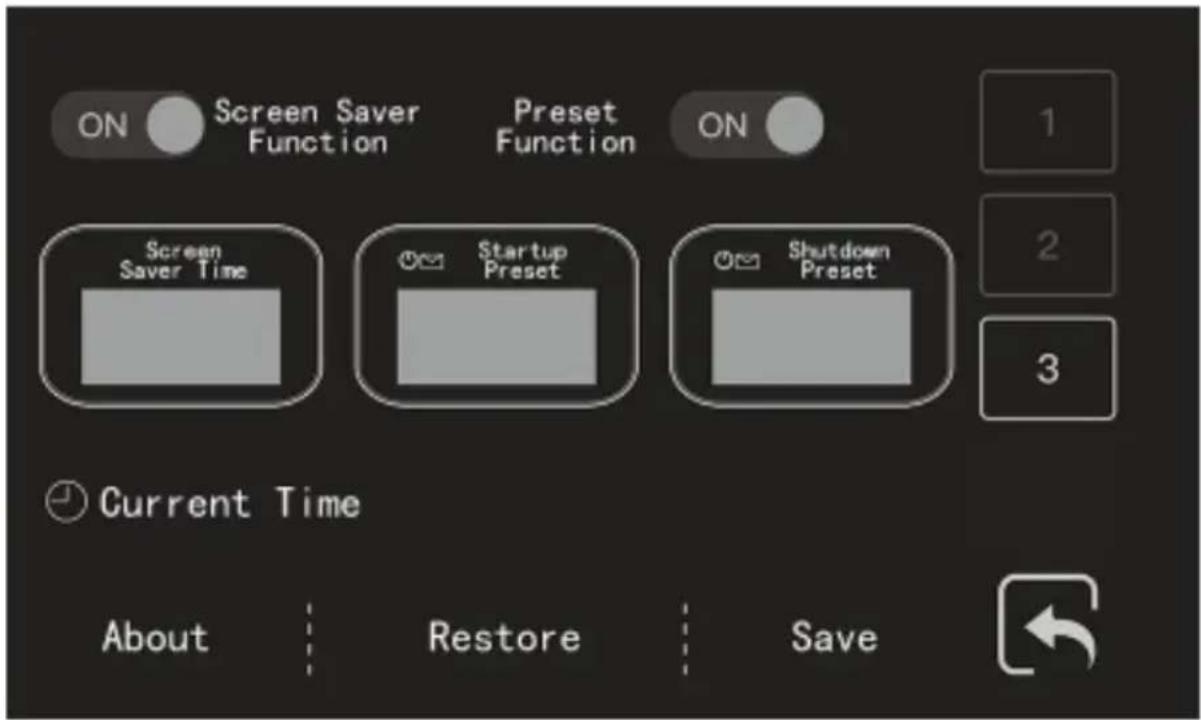
Fig./Img./Abb./Afb./Rys./Obr.7


Serial Number

Fig./Img./Abb./Afb./Rys./Obr. 8
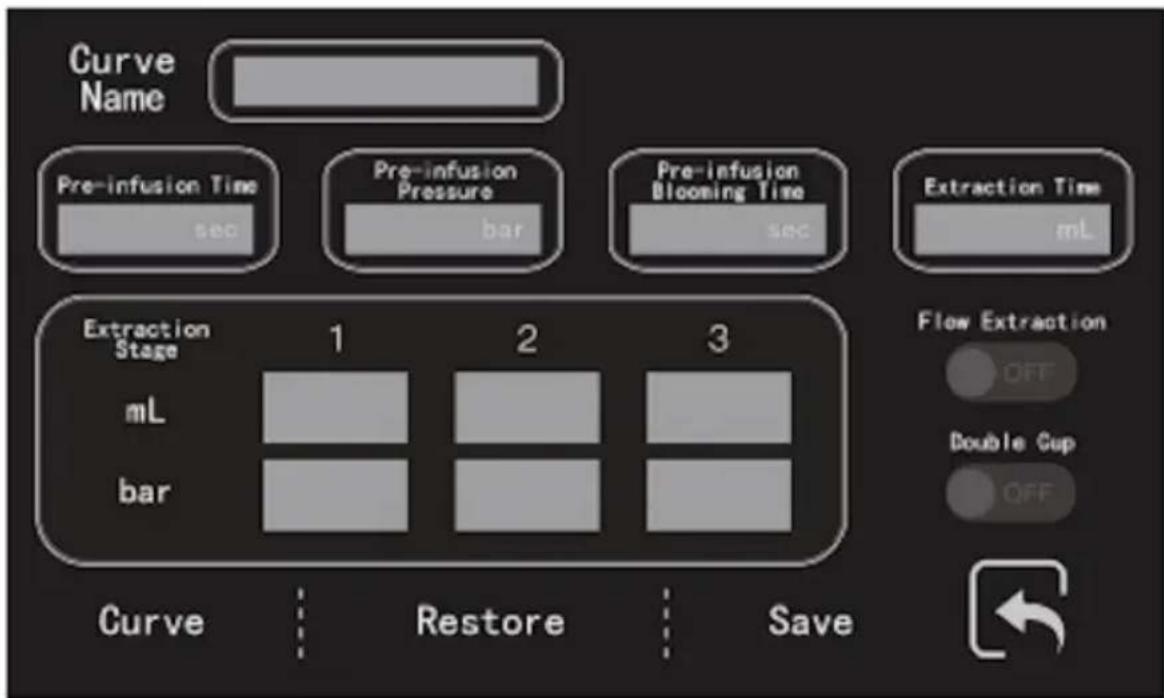
Fig./Img./Abb./Afb./Rys./Obr. 9
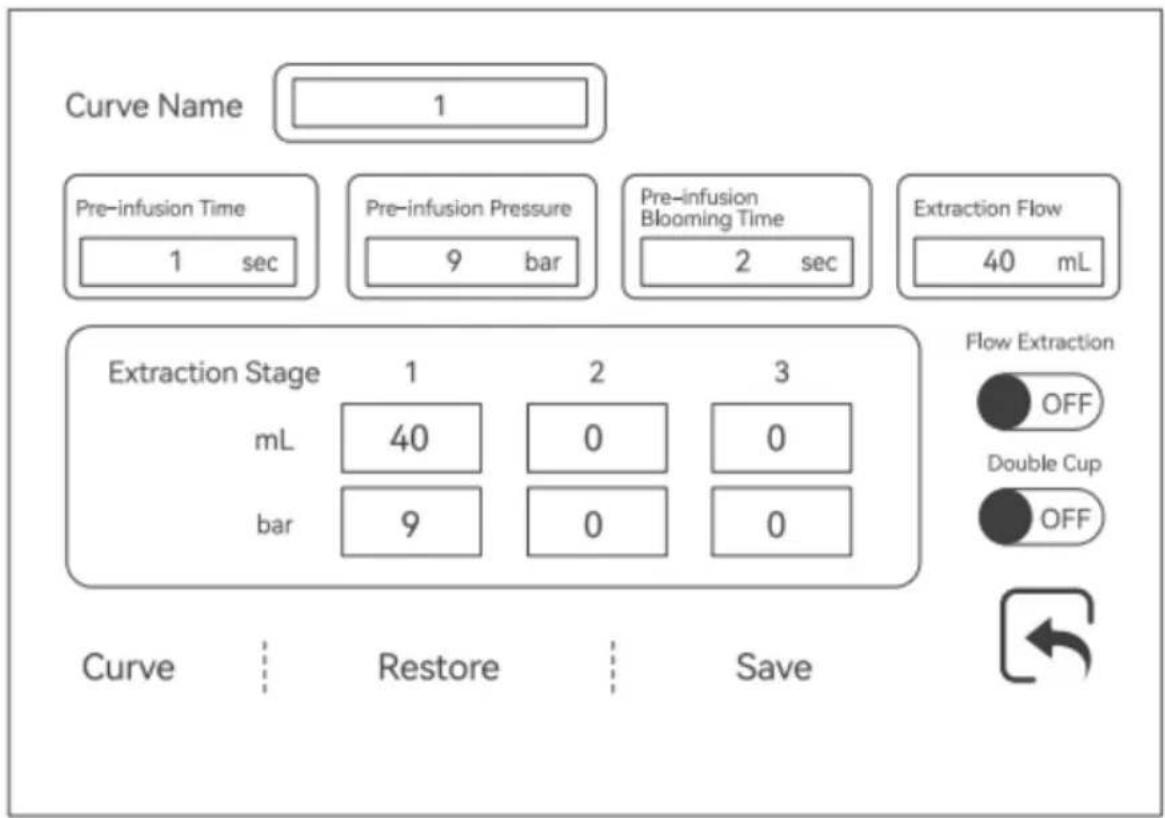
Fig./Img./Abb./Afb./Rys./Obr. 10

Fig./Img./Abb./Afb./Rys./Obr. 11
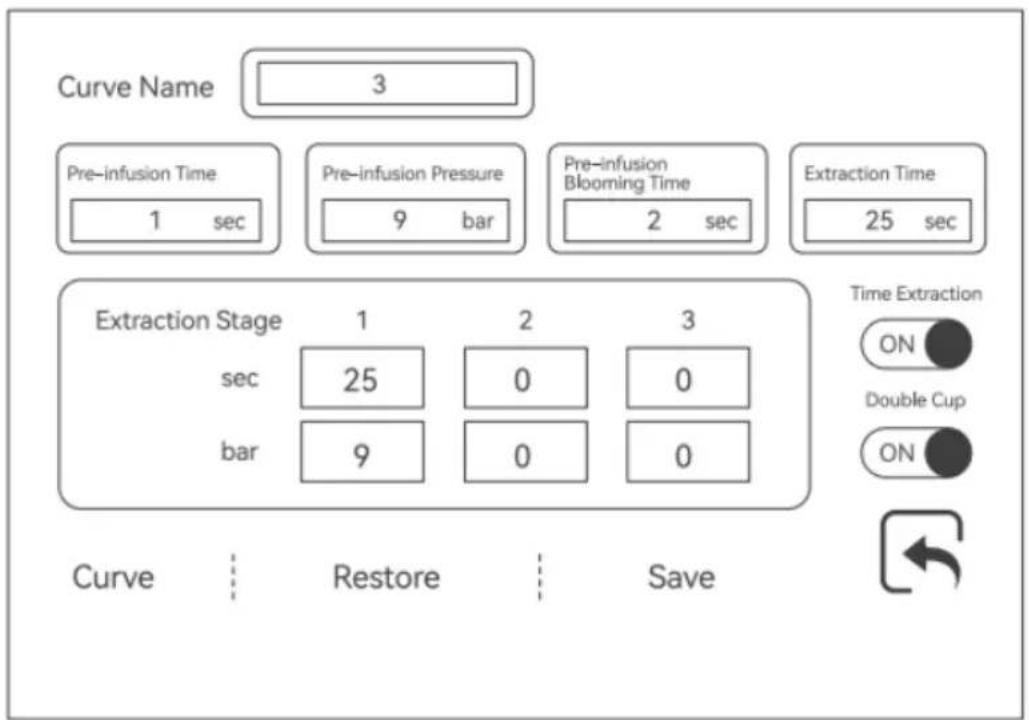
Fig./Img./Abb./Afb./Rys./Obr.12

Fig./Img./Abb./Afb./Rys./Obr. 13

Fig./Img./Abb./Afb./Rys./Obr.14
www.cecotec.es