
ClipsoMinut' Delice P48007 - Saucepan TEFAL - Free user manual and instructions
Find the device manual for free ClipsoMinut' Delice P48007 TEFAL in PDF.

| Product Type | Pressure Cooker |
| Brand | Tefal |
| Model | ClipsoMinut' Delice P48007 |
| Capacity | 6 liters |
| Bowl diameter | 24 cm |
| Bottom diameter | 17.5 cm |
| Bowl material | Aluminum with non-stick coating |
| Lid material | Stainless steel with plastic parts |
| Weight (approx.) | 3 kg (estimated) |
| Power source | Compatible heat sources: gas, electric (solid plate, radiant, halogen, induction), spiral resistance |
| Operating pressure | 65 kPa |
| Maximum safety pressure | 120 kPa |
| Cooking modes | Pressure cooking and Non-pressure stewpot |
| Built-in timer | Yes, removable, with CR2032 battery |
| Included accessories | Steamer basket, trivet, lid gasket, timer |
| Safety features | Lock on closing, open safety (safety rod), double overpressure safety (safety valve and gasket) |
| Maintenance and cleaning | Bowl and basket: dishwasher safe for stainless steel, hand wash for non-stick. Valve, gasket and timer: not dishwasher safe. Replace gasket yearly. |
| Spare parts and repairability | Original Tefal parts available: gasket, steamer basket, trivet, timer. Repairs exclusively by Tefal authorized center. |
| Warranty | Stainless steel bowl covered by 10-year warranty (structural defects), other parts: legal warranty. |
| General information | Manufactured by Tefal (Groupe SEB). Max safety pressure 120 kPa. Markings: brand, year/batch, reference, pressure on lid; capacity on external bottom. |
Frequently Asked Questions - ClipsoMinut' Delice P48007 TEFAL
User questions about ClipsoMinut' Delice P48007 TEFAL
0 question about this device. Answer the ones you know or ask your own.
Ask a new question about this device
Download the instructions for your Saucepan in PDF format for free! Find your manual ClipsoMinut' Delice P48007 - TEFAL and take your electronic device back in hand. On this page are published all the documents necessary for the use of your device. ClipsoMinut' Delice P48007 by TEFAL.
USER MANUAL ClipsoMinut' Delice P48007 TEFAL
January 2020-152019348: Medient : Escars Ginehue
Tefal®
ClipsoMinut®

natural_image
Simple line drawing of a steaming cup with an open book below, no text or symbols presentUser manual - Guide de l'utilisateur- Bedionungsanleitung - Gebruiksaanwijzing - Manuale d'uso - Guia del usuario - Manual do utilizador- Brugervejledning - Käyttöopas - Bruksanvisning - Bruksanvisning - Ръководство на потребателя - Uputstvo za upotrebu - Uživatelská príručka - Upute za korisnika - Használati utmutato - Instrukca obsługi - Għdul utilizatorului - Рукоюдство nomeавателя - Použivatelská príručka - Navodila za uporabnika - Uputstvo za upotrebu - Інструкція з експлуатації - Kullanım kulavuzu
www.tefal.com
EN
FR
NL
DE
IT
ES
PT
DA
FI
NO
SV
BG
BS
CS
HR
HU
PL
RO
RU
5K
SI
SD
UK
TD
"disponding on model - "se on modele - "se nach Model - "fathankelij van model - "a seconda del modelo - "begend al modelo - "conscante omodelo - "stheeng af modelon - "mail kantanan - "zhengjig symodel - "bordende på model - "tassenset om modelo - "forsen om modelo - "zakikonti na modelo - "vistene om model - "modellir "ligation - "salsnolde om modelo - "in functje de model - "a sarsenoveta om modelo - "avasisket od modelo - "adelsne od modelo - "tu asansesu od modelo - "sarsenoe uq varagen - "motere gure
IMPORTANT PRECAUTIONS
Before using your pressure cooker, please take the time to read all the instructions and always refer to the "User guide". Improper use may result in damage.
For your safety, this pressure cooker complies with the applicable standards and regulations:
- Pressure Equipment Directive
- Materials that come into contact with food products
- Environment
| BEFORE USE | MAKE SURE • Make sure that the steam release outlet (B) is not obstructed - fig 13. • that the bearing" or the piston" of the safety valve (E) is mobile - fig 17 or fig 17a. • that the lid gasket is placed under each notch of the lid - fig 14. • that the lid handles are properly fastened. The lid handles are safety components. Never remove them or replace them yourself. |
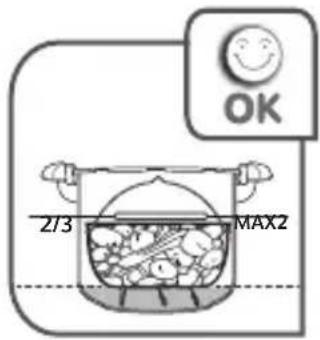
| ALWAYS RESPECT THE FOLLOWING FILLING QUANTITIES | • Never use your pressure cooker without liquid, as this could damage it. Make sure there's always enough liquid in the device when cooking. • Minimum quantity of liquid 250 ml/25 cl - fig 4. • Maximum quantity of food 2/3 of the height of the pan MAX 2 mark - fig 5. • When steaming food, the food in the steam basket" must not come into contact with the water and must not exceed the MAX 2 mark on the pan - fig 7. • Maximum 1/3 (mark MAX 1) of the height of the pan for foodstuffs that expand and/or foam during cooking, such as rice, pulses, dehydrated vegetables, stewed fruit pumpkin, courgettes, carrots, potatoes, fillets of fish, etc - fig 6. |
"depending on model
Pirinç
| SU IÇINDESepet o/madan. | SU MIKTARI | PIRİNÇ MIKTARI | PiŞIMMİSÜRESİ | |
| 2 klj | 400 ml / 2 bardak | 150 g / 1 bardak | 7 B dk | |
| 4 klj | 300 ml / 2,5 bardak | 250 g / 2 bardak | ||
| 6 klj | 700 ml / 3,5 bardak | 375 g / 3 bardak |
Et/ balık
| TAZE | DONDURULMUŞ | |
| Baldesim: 4 | 9 ILA 10 dk | 18 ILA 20 dk |
| Ordek (1,8 kg) | 45 ILA 47 dk | 50 ILA 55 dk |
| Piliş: 2 (1,3 kg) | 23 ILA 25 dk | 40 ILA 45 dk |
| Sormon biftegic 4 (0,8 kg) | 5 ILA 6 dk | 7 ILA 8 dk |
| Domuz eti bonifile: 2 aslet 350 g parça | 13 ILA 15 dk | 26 ILA 29 dk |
| Dana eti bonifile: 0,7 kg | 17 ILA 21 dk | 33 ILA 38 dk |
| Keler balığı fillets 1 kg Parça olarak 75 g | 5 ILA 6 dk | 7 ILA 8 dk |
| Tavjan (1,9 kg parça olarak) | 8 ILA 9 zk | 20 ILA 23 dk |
| Dana sarma: 4 | 10 ILA 12 dk | ¥ |
| Tavuk (1,35 kg) | 23 ILA 25 dk | 1 sa ILA 1 sa 10 |
| Sigir biftek (1 kg @ 8-11 cm) | 30 ILA 35 dk | 45 ILA 50 dk |
| Domuz biftek (0,8 kg @ 8-10 cm) | 30 ILA 35 dk | 1 sa 05 ILA 1 sa 15 |
| Dana biftek (0,8 kg @ 5-7 cm) | 17 ILA 19 dk | 37 ILA 40 dk |
| Kuzı bascale 2 (veya 0,95 kg) | 40 ILA 45 dk | 1 sa 05 ILA 1 sa 15 |
| Ton balığı biftek 4 (veya 0,7 kg) | 5 ILA 6 dk | 7 ILA 9 dk |
| BEFORE AND DURING COOKING | ■ Ensure close supervision if you are using the pressure cooker near children.■ The steam is very hot when it leaves the operating valve. Be careful of jets of steam.■ Your device cooks using pressure. Improper use may result in scalding injuries. Make sure the pressure cooker is properly closed before use. (See “Closing” section).■ During cooking, check that the valve murmurs regularly. If there is not enough steam being released, release the pressure and open the lid then check that there is sufficient liquid, and check that the steam release duct is not blocked. If there is still not enough steam being released, increase the heat source slightly.■ Do not cook food that could block the ducts of the safety components:- blueberries, cranberries- pearl barley, spelt, millet- oat flakes- split peas- noodles, macaroni, spaghetti- rhubarb- blackcurrants, redcurrants■ When cooking large pieces of meat and food with a surface skin layer (whole sausages, tongue, poultry, etc.) : we recommend that you prick the skin using a knife or fork before cooking. During cooking, boiling liquid could become trapped under the skin and create spatters.■ Never use your pressure cooker to cook milk-based recipes (such as rice pudding, semolina pudding...).■ Never use coarse salt in your pressure cooker, only use fine salt at the end of cooking. That way you will avoid the appearance of “pitting”, which could damage the base of your pressure cooker.■ Never use your pressure cooker to fry under pressure using oil.■ Do not leave your pressure cooker unsupervised when heating oil or fats. Continuing to heat a smoking oil will degrade it and may increase the temperature of the oil enough for flames to appear.■ Do not use your pressure cooker for any other purpose than the one it is meant for.■ Do not put your pressure cooker in a hot oven.■ Never use aluminium foil unsecured on a container in your pressure cooker. Always secure with string.■ Never use cling film in your pressure cooker.■ Alcohol vapours are flammable. Bring to the boil for approximately 2 minutes before putting the lid on. Check your pressure cooker on a regular basis when cooking alcohol-based recipes.■ Only use the compatible heat source(s) listed in the user guide. |
| AFTER COOKING | For models with a non-stick coating: do not use whisks or sharp utensils made of metal. Do not tap the rim of the pan to remove food from utensils, as it could damage it and cause leaks.Steadily turn the operating valve (A) to adjust the decompression speed, and finish opposite the pictogram mark - fig 10. If, when releasing steam, you notice any food or liquid starts to spurt out, return the operating valve (A) to the “Pressure Cooking” position, then carry out fast decompression in cold water - (refer to the “End of cooking in ‘Pressure Cooking’ mode” section).If the pressure indicator (D) does not go down, carry out fast decompression in cold water - (refer to the “End of cooking in ‘Pressure Cooking’ mode” section).Never interfere with the pressure indicator.For foodstuffs that expand and/or foam during cooking, such as rice, pulses, dehydrated vegetables, stewed fruit, pumpkin, courgettes, carrots, potatoes, fillets of fish, etc. Let your pressure cooker cool down for a few minutes, and then carry out fast decompression in cold water - (refer to the section 'End of cooking in pressure Cooker mode'). Methodically and gently shake the pressure cooker each time before opening, after having checked that the pressure indicator has gone down to the lowered position, to prevent bubbles of steam from overflowing and burning you. This operation is particularly important when steam is released quickly or after cooling down under tap water.Always be very careful when moving your pressure cooker under pressure. Do not touch hot surfaces. Use oven mitts when necessary. Lift using both of the handles.For soups, we recommend that you do a fast decompression in cold water (refer to the “End of cooking in ‘Pressure Cooking’ mode” section).Make sure the operating valve (A) is in the steam release position before opening the pressure cooker. The pressure indicator (D) should be in the lowered position.Never use force to open your pressure cooker. Make sure the internal pressure has been released. The pressure indicator (D) should be in the lowered position. (See “Safety” section). |
| CLEANING AND MAINTENANCE | ■ If you notice that a part of your pressure cooker is broken or cracked, do not attempt to open it under any circumstances. Wait for it to cool down completely before moving it. Do not use it again and take it to a TEFAL Approved Service Centre for repair.■ Do not tamper with the safety systems other than when following the cleaning and maintenance instructions.■ Only use the correct TEFAL original parts for your model.■ Do not leave food in the pressure cooker.■ Wash and rinse your pressure cooker immediately after each use.■ Never put the operating valve (A), the gasket (I), the cook control* (F), or the pan with non-stick coating in the dishwasher.■ Never place the cook control* (F) under water.■ Never use bleach or chlorine-based products, which could affect the quality of the stainless steel.■ Do not let the lid soak in water.■ Change the gasket every year, or immediately if it is split or broken.■ Make sure you get your pressure cooker checked in a TEFAL Approved Service Centre after 10 years of use.■ To store your pressure cooker: rest the lid upside down on the pan, to avoid premature wear of the lid's gasket. |
KEEP THESE INSTRUCTIONS
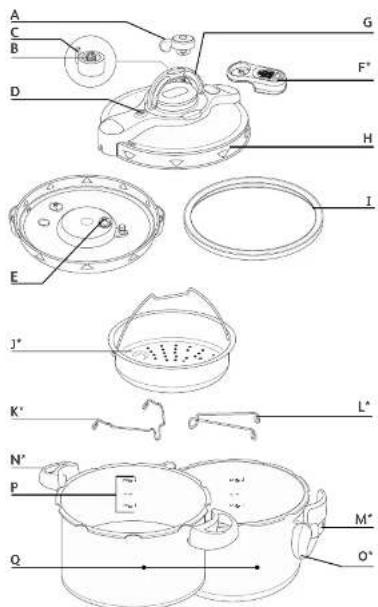
Description of diagram
A. Operating valve
B. Steam release outlet
C. Valve positioning mark
D. Pressure indicator (See section "Safety")
E. Safety valve
F. Removable timer*
G. Lid handle
H. Lid
I. Gasket
J. Steam basket*
K./ L. Trivet*
M. Buttons for folding the handles*
N. Fixed pan handle*
O. Folding pan handle*
P. Maximum filling marks (max 1 and max 2)
Q Pan
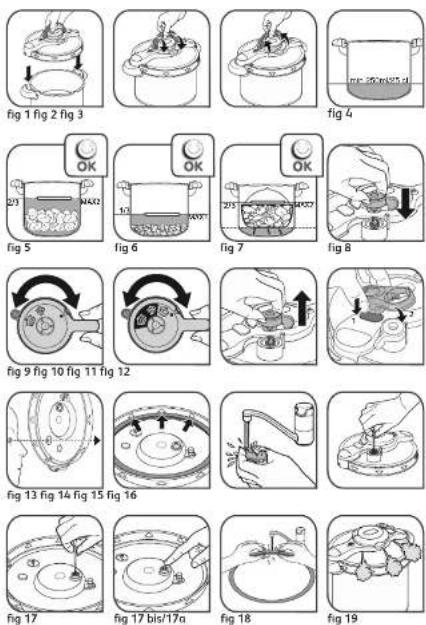
Compulsory checks before each use
Checking the operating valve (A)
flowchart
graph LR
    A["Patient with implant"] --> B["Anatomical diagram of laparoscopic implant"]
    B --> C["Anatomical diagram of vascular grafting"]
    C --> D["Anatomical diagram of implant with forceps"]
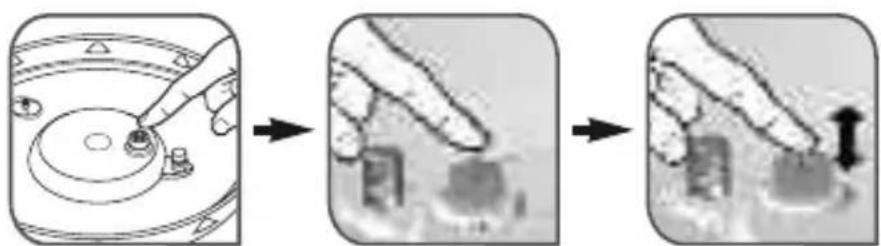
- Check that the draining hole of the operating valve is not obstructed (refer to the “Removing and replacing the operating valve” section).
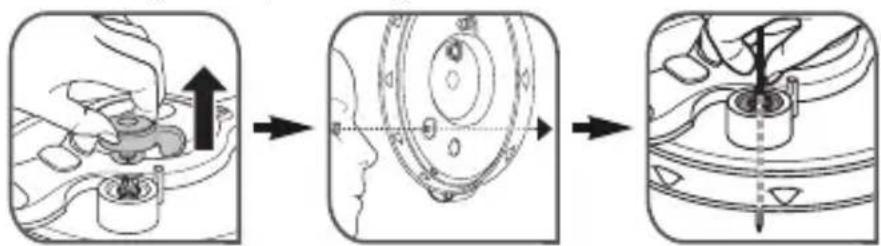
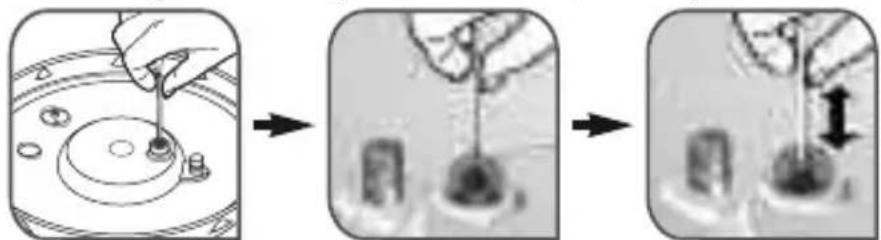
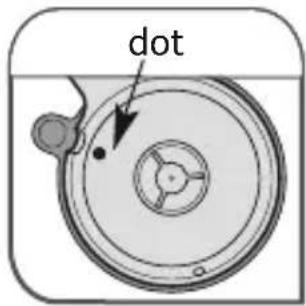
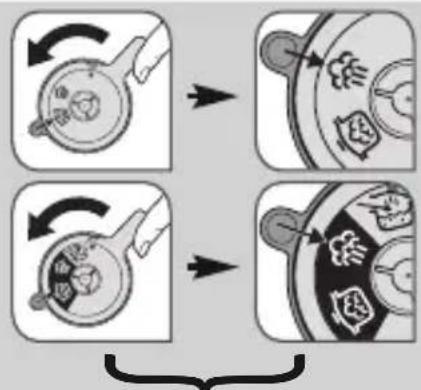
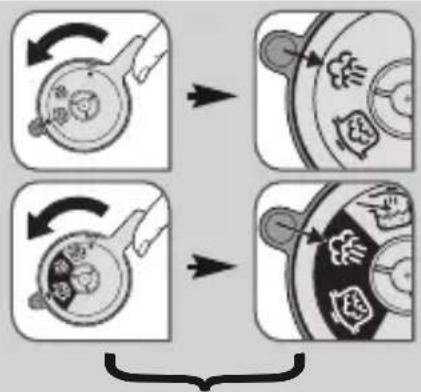
Checking the safety valve (E): depending on model
natural_image
Three-step diagram showing a hand pouring liquid into a bowl, then to a close-up of a small object with arrows indicating motion (no text or symbols)- Check that the bearing* of the safety valve is mobile (using a cotton bud, with the cotton wool tip removed).
natural_image
Three-step diagram showing a hand turning a circular component into a device, then to close the device with a directional arrow (no text or symbols)- Check that the piston* of the safety valve is mobile (press the piston several times with your finger)
Features
Your pressure cooker's base diameter - reference
| Capacity | Pot diameter | Base diameter | Fixed handle models* | Folding handle models* | Pot material |
| 3 L 22 cm | 15.5 cm P46205 - | Stainless steel | |||
| 18 cm P46605 - | |||||
| 4 L 22 cm | 14 cm P46042 - Coated aluminium | ||||
| 17.5 cm P47042 - Coated aluminium | |||||
| 4.5 L 22 cm 15.5 cm | P46206 - Stainless steel | ||||
| 5 L 24 cm | 14 cm P46051 - Coated aluminium | ||||
| 19.7 cm P47051 - Coated aluminium | |||||
| 5.2 L 24 cm 20 cm P46654 - Stainless steel | |||||
| 6 L | 22 cm 15.5 cm P46207 P49007 Stainless steel | ||||
| 24 cm 17.5 cm P48007 - Coated aluminium | |||||
| 7.5 L 24 cm 18 cm P46248 P49048 Stainless steel | |||||
| 9 L 24 cm 18 cm P46249 P49049 Stainless steel | |||||
| Set 5L7.5L | 24 cm18 cm P46248 - | Stainless steel | |||
Technical information:
Maximum operating pressure: 65kPa/9 psi/9 lbs Maximum safety pressure: 120 kPa/17.4 psi/17.4 lbs
Compatible heat sources
GAS
ELECTRIC (Solid plate)

ELECTRIC
(Radiant or halogen ceramic hobs)

ELECTRIC
(Ceramic induction hob)
ELECTRIC
(Spiral resistor)

- Your pressure cooker can be used on all heat sources including induction but excluding Aga hobs.
- On an electric, ceramic or induction hob, use a plate with a diameter equal to or less than that of your pressure cooker base.
■ On ceramic hobs, make sure that the base of the pot is clean and dry.
■ On gas, the flame should not extend beyond the diameter of the pot.
■ On all heat sources, make sure that your pressure cooker is well centred.
Use

Pressure cooking
Stewpot*

Steam release
Opening
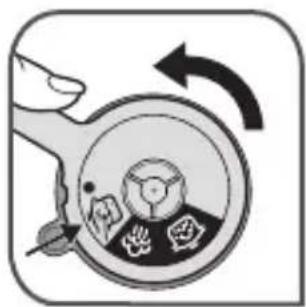
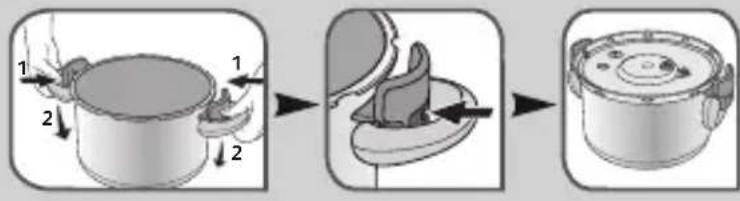
■ Switch the lid handle from a horizontal position to a vertical position - Fig. 3. The lid turns.
■ Lift the lid.
- In case of difficulties opening the lid; rinse the gasket under water and replace it in the lid without drying it - fig 18 and take care to insert it under each of the grooves on the lid - fig 14.
Closing
■ Ensure that the lid handle is in a vertical position.
- Place the lid on the pot as indicated in - Fig. 1 by lining up the plastic part with the pot handles.
■ Lower the lid handle back from a vertical position to a horizontal position - Fig. 2.
- It is normal that the lid turns on the pot. when the pressure cooker is closed but not in operation. This effect disappears when it is pressurised.
If you are unable to close the lid:
■ Check the correct positioning of the gasket.
- In case of difficulties closing the lid, rinse the gasket under water and replace it in the lid without drying it - fig 18 and take care to insert it under each of the grooves on the lid - fig 14.
Using for the first time
■ For models with a non-stick coating: wash and use cooking oil to lightly oil the entire interior surface.
Depending on the model:
- Put the trivet* (L) and the steam basket*(J) in the pan base.
- Clip the trivet* (K) to the steam basket* (J) as shown in the diagram opposite, then set the assembly in the pan base.
■ Fill the pot (Q) with water up to 2/3 (MAX 2) - fig 5.
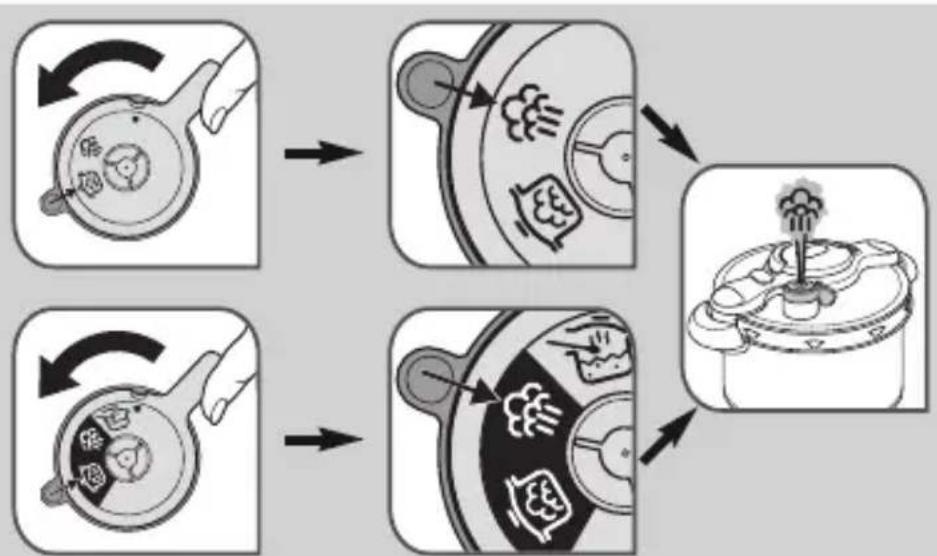
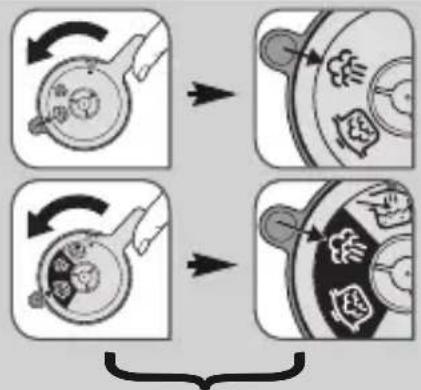
■ Close your pressure cooker. - Align the pictogram for the operating valve (A) with the valve positioning mark (C) - fig 10.
natural_image
Illustration of a hand holding a lid with arrows indicating a process or operation (no text or symbols present)
natural_image
Simple line drawing of a lid with a perforated lid and a small protrusion on top (no text or symbols)- Place your pressure cooker on a heat source then set to maximum power.
- When steam begins to exit the valve, turn down the heat source and set a timer to 20 min.
■ After 20 min., turn off your heat source.
■ Gradually turn the operating valve (A), adjusting the speed that pressure is released by how far you open the valve, to align the pictogram for the operating valve (A) with the valve positioning mark (C). - When the pressure indicator (D) drops down again, your pressure cooker is no longer under pressure.
■ Open your pressure cooker - Fig. 3.
■ Clean with washing-up liquid.
Minimum and maximum fill level
■ Minimum 250ml - Fig. 4.
■ Maximum 2/3 of the height of the pot, MAX 2 mark - Fig. 5.
- Never use coarse salt in your pressure cooker, only use fine salt at the end of cooking.
For some foods:
- For foodstuffs that expand and/or foam during cooking, such as rice, pulses, dehydrated vegetables, stewed fruit, pumpkin, courgettes, carrots, potatoes, fillets of fish, etc. do not fill your pressure cooker above 1/3 (MAX 1) of the depth of the pan.
At the end of cooking, let your pressure cooker cool down for a few minutes, and then cool by standing in cold water (refer to the “End of cooking in ‘Pressure Cooking’ mode - fast decompression” section).

Using the steam basket\*
■ Pour 750ml of water into the bottom of the pot (Q).
Depending on the model:
- Put the trivet* (L) and the steam basket* (J) in the pan base.
OR
- Clip the trivet* (K) to the steam basket* (J), then set the assembly in the pan base.
natural_image
Two-step diagram showing a hand pressing down on a perforated lid, with no text or symbols present.- When steam cooking, the food in the steam basket* must not be in contact with the water.
- In the 3L model, it is normal for the water level to cover a little of the bottom of the steam basket.
The food in the steam basket* must not touch the lid of the pressure cooker.
Fitting and removal of the
Operating valve (A)
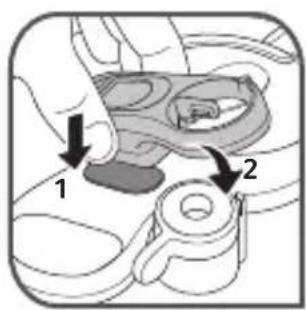
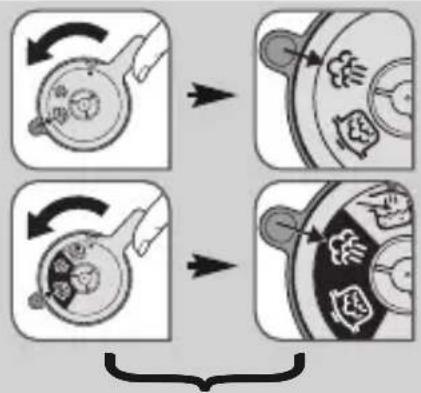
To remove the operating valve (A):
- Align the groove with the operating valve positioning mark (C) by pressing down on the ring of the operating valve (A).
■ Remove it - Fig. 11.
To fit the operating valve:
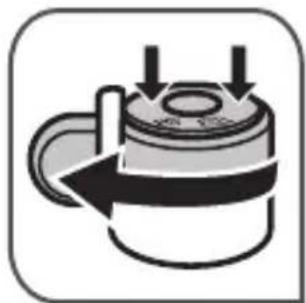
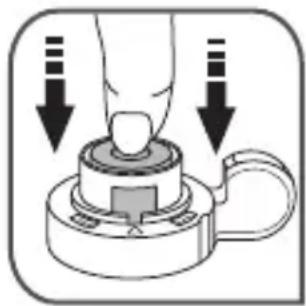
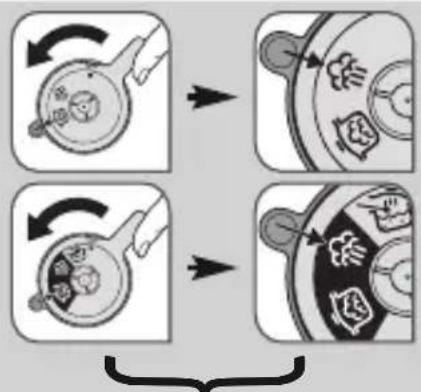
■ Fit the operating valve (A) - fig 8 by aligning the groove of the operating valve, marked with a dot, with the positioning mark (C) (see opposite).
■ Press the operating valve (A) so that it engages on the steam release outlet (B), then turn it to the pictogram symbol required.
■ Press on the operating valve pictograms (A) and turn.
natural_image
Diagram of a mechanical component with arrows indicating direction (no text or symbols)Using the cook control\*
The cook control cannot be used in the Stewpot mode.
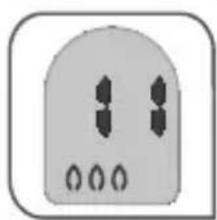
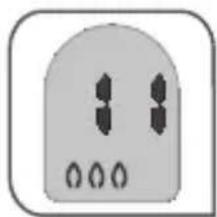
The cook control (F) has been designed to help you obtain the best cooking result by allowing you to optimise energy consumption. It automatically counts down the cooking time once the temperature required for “Pressure Cooking” is reached 📁
During cooking, check that the operating valve (A) murmurs regularly. If there is not enough steam, increase the heat source slightly; if there is too much steam, reduce the heat source.
1 To switch on the cook control: press the button.
2 Program the cooking time (in minutes).
■ If you made a mistake with the cooking time, wait for 4 seconds until the flame symbol does not flash any more, then hold the button down to reset.
3 Start with the heat source at maximum power.
4 As soon as your pressure cooker has reached the cooking temperature, the cook control rings and the countdown begins (numbers flash).
Reduce the power of the heat source.
If you wish, you can now remove the cook control from the pressure cooker and take it with you. The time will continue to count down.
5 At the end of the cooking time, the cook control rings.
■ To stop the cook control ringing, press the button.
■ Turn off the heat source.
Holding the button down resets and switches off the cook control.


natural_image
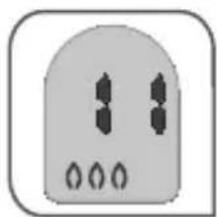
Simple icon of a device with three vertical slots and three base holes, no text or symbols present.
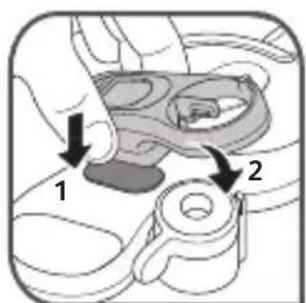
Fitting and removing the cook control\*
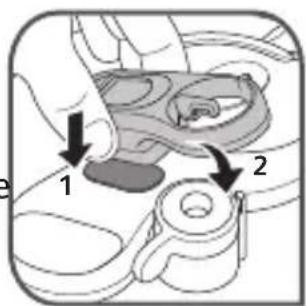
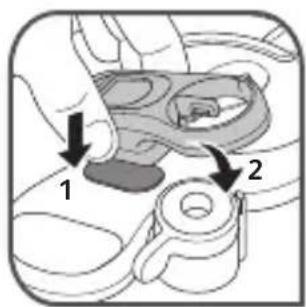
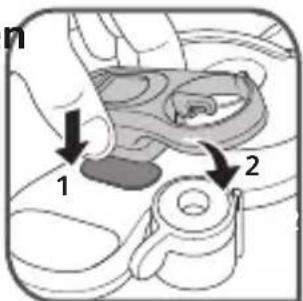
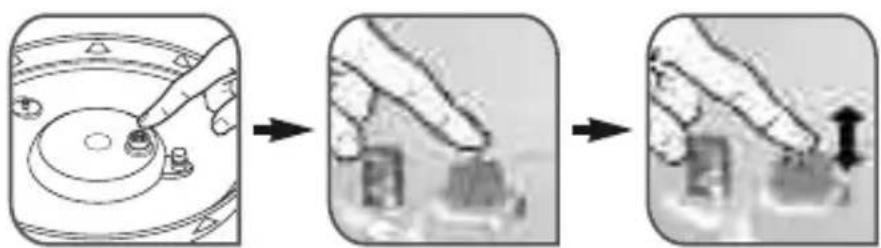
■ To fit the cook control (F) - Fig. 12, first insert the front part into the module and then press to clip the rear part.
■ To remove the cook control (F), lift it using the tab and remove it.
Changing the cook control\* battery
■ The cook control battery is a CR2032 button battery.
- If the symbol appears, or if you no longer have a display, change the battery.
■ The battery life depends on how often the cook control is used.
■ The cook control battery contains Dimethoxyethane no. CAS 110-71 - 4. It is in accordance with the European regulations. For your safety and environmental protection: do not open the battery, do not expose it to high temperatures, do not throw it away with household waste; Dispose of battery at a battery disposal point.
■ Non-rechargeable batteries should not be recharged.
■ Different types of batteries or new and used batteries should not be mixed.
■ Batteries must be inserted according to the correct polarity.
■ Used batteries must be removed from the pressure cooker and disposed of correctly.
- If the pressure cooker is to be stored without being used for a long period, you are advised to remove the batteries.
■ The power supply terminals must not be short circuited.
■ Proceed to a flat work surface.
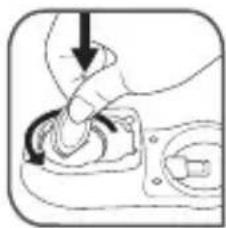
- To remove the battery from your cook control, place the cook control on a flat work surface. Open the battery cover with a coin, turning it anti-clockwise so that the 12 moon on the cover aligns with the 12 moon on the cook control (see illustration opposite).
■ Replace the battery.
■ Replace the battery sealing ring in its casing.
- To refit the battery cover, position the 12 moon of the battery cover facing the 12 moon of the cook control. Gently turn the battery cover clockwise, while pressing lightly, to align the 12 moon of the battery cover with the full
- Do not force the battery cover when you close it. Do not turn beyond the stops.
■ If you lose your cook control, you can purchase another from any of our TEFAL Approved Service Centres.
natural_image
Simple line drawing of a trash bin with crossed lines indicating no waste or discharge (no text or symbols)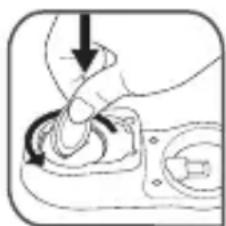
natural_image
Diagram of a hand pressing down on a mechanical component with arrows indicating motion (no text or symbols)
natural_image
Diagram of a mechanical device with internal components and a plus sign, no readable text or symbols present.
Never place the cook control* in water, nor in the dishwasher.
Never use the cook control* in "Stewpot" mode.
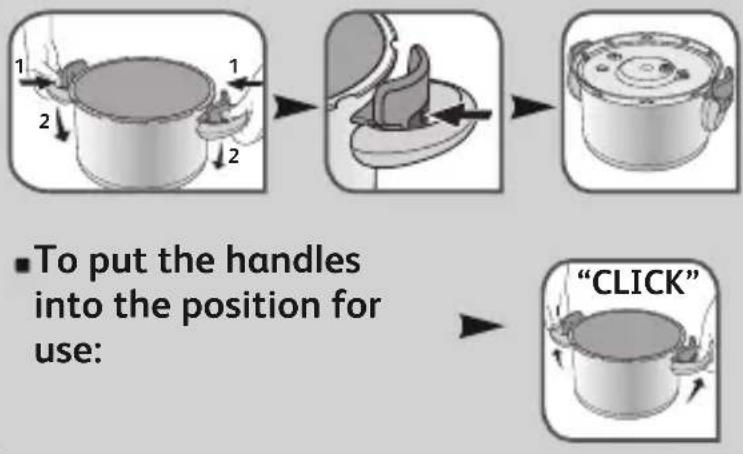
Folding handles\*
Before use, ensure that you remove any labels from each of the handles.
Do not try to fold the hand les without pressing the buttons (M).
Never remove the folding handles from the pan; only the TEFAL Approved Service Centre is qualified to do this.
■To fold the handles
flowchart
graph TD
    A["1: Top pot with arrows indicating hand placement"] --> B["2: Left side, right side, bottom side"]
    B --> C["3: Top pot with arrow indicating hand placement"]
    C --> D["4: Left side, right side, top side"]
    D --> E["5: Top pot with arrows indicating hand placement"]
    E --> F["6: Right side, bottom side, left side"]
    F --> G["7: Top pot with arrows indicating hand placement"]
    G --> H["8: Right side, bottom side, right side"]
    H --> I["9: Top pot with arrows indicating hand placement"]
    I --> J["10: Right side, bottom side, left side"]
    J --> K["11: Top pot with arrows indicating hand placement"]
    K --> L["12: Right side, bottom side, right side"]
    L --> M["13: Top pot with arrows indicating hand placement"]
    M --> N["14: Right side, bottom side, left side"]
    N --> O["15: Top pot with arrows indicating hand placement"]
    O --> P["16: Right side, bottom side, right side"]
    P --> Q["17: Top pot with arrows indicating hand placement"]
    Q --> R["18: Right side, bottom side, left side"]
    R --> S["19: Top pot with arrows indicating hand placement"]
    S --> T["20: Right side, bottom side, right side"]
    T --> U["21: Top pot with arrows indicating hand placement"]
    U --> V["22: Right side, bottom side, left side"]
    V --> W["23: Top pot with arrows indicating hand placement"]
    W --> X["24: Right side, bottom side, right side"]
    X --> Y["25: Top pot with arrows indicating hand placement"]
    Y --> Z["26: Right side, bottom side, left side"]
    Z --> AA["27: Top pot with arrows indicating hand placement"]
    AA --> AB["28: Right side, bottom side, right side"]
    AB --> AC["29: Top pot with arrows indicating hand placement"]
    AC --> AD["30: Right side, bottom side, left side"]
    AD --> AE["31: Top pot with arrows indicating hand placement"]
    AE --> AF["32: Right side, bottom side, right side"]
    AF --> AG["33: Top pot with arrows indicating hand placement"]
    AG --> AH["34: Right side, bottom side, left side"]
    AH --> AI["35: Top pot with arrows indicating hand placement"]
    AI --> AJ["36: Right side, bottom side, right side"]
    AJ --> AK["37: Top pot with arrows indicating hand placement"]
    AK --> AL["38: Right side, bottom side, left side"]
    AL --> AM["39: Top pot with arrows indicating hand placement"]
    AM --> AN["40: Right side, bottom side, right side"]
    AN --> AO["41: Top pot with arrows indicating hand placement"]
    AO --> AP["42: Right side, bottom side, left side"]
    AP --> AQ["43: Top pot with arrows indicating hand placement"]
    AQ --> AR["44: Right side, bottom side, right side"]
    AR --> AS["45: Top pot with arrows indicating hand placement"]
    AS --> AT["46: Right side, bottom side, left side"]
    AT --> AU["47: Top pot with arrows indicating hand placement"]
    AU --> AV["48: Right side, bottom side, right side"]
    AV --> AW["49: Top pot with arrows indicating hand placement"]
    AW --> AX["50: Right side, bottom side, left side"]
    AX --> AY["51: Top pot with arrows indicating hand placement"]
    AY --> AZ["52: Right side, bottom side, right side"]
    AZ --> BA["53: Top pot with arrows indicating hand placement"]
    BA --> BB["54: Right side, bottom side, left side"]
    BB --> BC["55: Top pot with arrows indicating hand placement"]
    BC --> BD["56: Right side, bottom side, right side"]
    BD --> BE["57: Top pot with arrows indicating hand placement"]
    BE --> BF["58: Right side, bottom side, left side"]
    BF --> BG["59: Top pot with arrows indicating hand placement"]
    BG --> BH["60: Right side, bottom side, right side"]
    BH --> BI["61: Top pot with arrows indicating hand placement"]
    BI --> BJ["62: Right side, bottom side, left side"]
    BJ --> BK["63: Top pot with arrows indicating hand placement"]
    BK --> BL["64: Right side, bottom side, right side"]
    BL --> BM["65: Top pot with arrows indicating hand placement"]
    BM --> BN["66: Right side, bottom side, left side"]
    BN --> BO["67: Top pot with arrows indicating hand placement"]
    BO --> BP["68: Right side, bottom side, right side"]
    BP --> BQ["69: Top pot with arrows indicating hand placement"]
    BQ --> BR["70: Right side, bottom side, left side"]
    BR --> BS["71: Top pot with arrows indicating hand placement"]
    BS --> BT["72: Right side, bottom side, right side"]
    BT --> BU["73: Top pot with arrows indicating hand placement"]
    BU --> BV["74: Right side, bottom side, left side"]
    BV --> BW["75: Top pot with arrows indicating hand placement"]
    BW --> BX["76: Right side, bottom side, right side"]
    BX --> BY["77: Top pot with arrows indicating hand placement"]
    BY --> BZ["78: Right side, bottom side, left side"]
    BZ --> CA["79: Top pot with arrows indicating hand placement"]
    CA --> CB["80: Right side, bottom side, right side"]
    CB --> CC["81: Top pot with arrows indicating hand placement"]
    CC --> CD["82: Right side, bottom side, left side"]
    CD --> CE["83: Top pot with arrows indicating hand placement"]
    CE --> CF["84: Right side, bottom side, right side"]
    CF --> CG["85: Top pot with arrows indicating hand placement"]
    CG --> CH["86: Right side, bottom side, left side"]
    CH --> CI["87: Top pot with arrows indicating hand placement"]
    CI --> CJ["88: Right side, bottom side, right side"]
    CJ --> CK["89: Top pot with arrows indicating hand placement"]
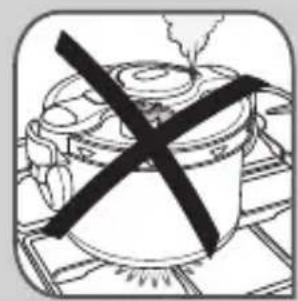
Never place your pressure cooker on a heat source with the handles down.
natural_image
Simple line drawing of a cooking pot with a crossed-out black X mark (no text or symbols)Before cooking
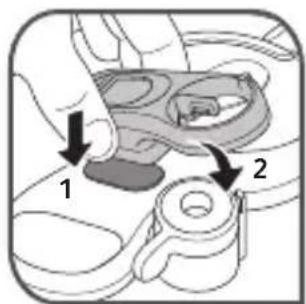
■ Before each use, remove the operating valve (A) - fig 11 and check the steam release outlet (B) is not blocked - fig 13.
- Check that the safety valve (E) is mobile (see the sections "Cleaning" and "Compulsory checks before each use") - fig 17 and fig 17a.
■ Add your ingredients and the liquid.
■ Close your pressure cooker - fig 2
- In case of difficulties closing the lid: rinse the gasket under water and replace it in the lid without drying it - fig 18 and take care to insert it under each of the grooves on the lid - fig 14.
■ Fit the operating valve (A) - fig 8.

Cooking with "Pressure Cooking"
- Turn the operating valve (A) to the cooking with "Pressure Cooking" position - fig 10. The pressure cooker operates at 65 kPa / 9 lbs (psi).
■ Make sure your pressure cooker is properly closed before use - Fig. 2.
■ Place your pressure cooker on a heat source then set to maximum power. - For models equipped with a cook control*: programme the cooking time indicated on the recipe (see section "Using the cook control").
■ A jangling noise and wisps of smoke emitted from the pressure cooker indicator are normal when bringing the Clipso Minut up to pressure, as the air escapes before cooking.
During "Pressure Cooking"
■ When the operating valve (A) is constantly emitting steam and making a regular sound (PSCHHHT), lower the heat source.
■ Then either begin timing the food manually or program the cook control* (depending on your model), for the cooking time indicated in the recipe.
■ During cooking, check that the valve murmurs regularly. If there is not enough steam being released, increase the heat source slightly. If there is too much steam, reduce it.
End of "Pressure Cooking"
To release the steam:
■ When the heat source has been turned off, you have two options:
• Gradual pressure release:
■ This is used for stews, vegetables, meat joints and fish dishes.
- Gradually turn the operating valve (A), adjusting the speed that the pressure is released by how far you open the valve, until the steam release symbol is opposite the positioning mark (C).
flowchart
graph TD
    A["Step 1: Cooking with food inside pot"] --> B["Step 2: Food being added to pot"]
    B --> C["Step 3: Heating with hot pot"]
    C --> D["Step 4: Heating with ingredients and products"]
If, when releasing steam, you notice any food or liquid start to spurt out, return the operating valve (A) to the "Pressure Cooking" position, then carry out fast deco mpression under cold water.
If the pressure indicator (D) does not go down, place your pressure cooker in a sink half-filled with cold tap water until the pressure indicator (D) comes down.
- Fast pressure release with cold water:
■ This is used for soups, rice, pasta, egg custards, cake and pudding mixes, recipes containing rice or pasta, and recipes with a high liquid content. - Place the base of your pressure cooker in a sink half-filled with cold tap water. When the pressure indicator (D) drops down, your pressure cooker is no longer under pressure. Turn the operating valve (A) to the position
natural_image
Illustration of a cooking pot with a lid and side dish (no text or symbols)Etape 1
flowchart
graph TD
    A["Step 1: Cooking with food icon"] --> B["Step 2: Food with meat icon"]
    B --> C["Step 3: Cooking with vegetable icon"]
    C --> D["End"]
Etape 2
- For foodstuffs that expand and/or foam during cooking, such as rice, pulses, dehydrated vegetables, stewed fruit, pumpkin, courgettes, carrots, potatoes, fillets of fish, etc. Let your pressure cooker cool down for a few minutes, and then place in sink half-filled with cold tap water. Methodically and gently shake the pressure cooker each time before opening, after having checked that the pressure indicator has gone down completely, to prevent bubbles of steam from overflowing and burning you. This operation is particularly important when steam is released quickly or after cooling down with tap water. For soups, we recommend that you do a fast pressure release with cold water (see Step 1 above).
■ You can open your pressure cooker - fig 3. - In case of difficulties opening the lid: rinse the gasket under water and replace it in the lid without drying it - fig 18 and take care to insert it under each of the grooves on the lid - fig 14.
Never interfere with the pressure indicator (D).
Cooking with the "Stewpot"\*
- Turn the operating valve (A) to the “Stewpot” position 📋. To do this, apply enough force to turn past the notch for the steam release position.
■ Make sure the pressure cooker is properly closed before use - fig. 2. - Place your pressure cooker on a heat source set at low or medium power.
■ Then start timing the food manually.
Note: The cook control cannot be used with Stewpot mode.
- During ‘stewpot’ cooking, you can open your pressure cooker at any time to stir, check whether the food is cooked or add ingredients.
- In case of difficulties opening the lid: rinse the gasket in water and replace it in the lid without drying it - fig 18 and take care to insert it under each of the grooves on the lid - fig 14
- If the heat source is too high, the pressure cooker may lock (the pressure indicator (D) rises and blocks the opening) and the lid handle may not work or may not allow opening of the pressure cooker. In this case, reduce or turn off the heat source. If you are using cast iron heating plates, remove the pressure cooker from the heat source.
■ For models with a non-stick coating: do not use whisks or sharp utensils made of metal. Do not tap the rim of the pan to remove food from utensils, as it could damage it and cause leaks.
■ Never let fat or oil burn until completely carbonised. The cooking fumes could be dangerous to animals with a particularly sensitive respiratory system, such as birds. Bird owners should keep them away from the kitchen.
Safety
Your pressure cooker is equipped with several safety devices:
- Closing safety:
- If the lid is not positioned correctly or if you forget to fold back the lid handle, steam will leak from the pressure indicator (D) of the pressure cooker and the pressure may not increase.
■ Opening safety:
- If your pressure cooker is under pressure, the pressure indicator (D) is up and the opening/closing lid handle (G) should not be used.
natural_image
Diagram of a hand holding a device with a circular dial and directional arrow, no text or symbols present.- Never try to forcibly open your pressure cooker.
- Above all do not touch the pressure indicator (D).
- Make sure that the interior pressure has fallen, checking that the pressure indicator (D) is in the lowered position before opening the pressure cooker.
- The lid handles are safety components. Never replace them yourself. Never use any other models of handles.
- If you moved the opening/closing lid handle (G) to a vertical position while the pressure cooker was still under pressure, you are not able to open it. This function is an additional safety measure. In this circumstance, move the lid handle back to a horizontal position and wait until the pressure indicator (D) is in the lowered position.
■Two safety devices against overpressure:
- First safety device: the safety valve (E) releases the pressure - fig 19.
- Second safety device: the gasket allows steam to escape from the lid - fig 19.
If one of the overpressure safety systems is triggered:
■Turn off the heat source.
- Allow the pressure cooker to cool completely without moving it.
Open.
- Check and clean the operating valve (A), the steam release outlet (B), the safety valve (E) and the gasket (I) - fig 15 - 16 - 17 and 17a. Refer to the sections "Cleaning" and "Compulsory checks before each use".
■ If, after these checks and cleaning, your product leaks or no longer works, take it to a TEFAL Approved Service Centre.
Cleaning
To ensure the correct operation of your pressure cooker, follow these cleaning and maintenance recommendations after each use.
The browning and marks which may appear following long use do not affect the operation of the pressure cooker.
Wear on the exterior coating (depending on model) caused by contact between the lid and the pan is normal.
For pressure cookers with non stick coating (according to model): the slight scratches and abrasions that may appear with use do not affect the coating's non stick performance.
- Wash your pressure cooker after each use using warm water with a little washing-up liquid. Follow the same procedure for the basket*.
■ Do not use bleach or chemicals containing chlorine.
■ Do not heat your pan when empty.
To clean the inside of the stainless steel pot:
■ Wash using a sponge and washing-up liquid.
- If the interior of the steel pot has an iridescent sheen or white marks (mineral deposits), clean using a sponge with a little white vinegar.
You can wash the stainless steel pan and basket in the dishwasher.
To clean the inside of the aluminium pot with a non stick coating:
- Wash the pan by hand only using hot water, washing-up liquid and a soft sponge.
■ Do not use scouring powder or abrasive sponges. - If you have burned some food, fill your pan with hot water and leave to soak. Then clean with washing-up liquid.
Do not put the pan with a non-stick coating (depending on model) in the dishwasher, because detergent tablets containsubstan ces that are very aggressive and corrosive for aluminium parts.
Pans with a non-stick interior coating (according to model), may slightly alter in cobur inside (yellowing or staining) after long term use. This is normal
To clean the outside of the pot:
■ Wash using a sponge and washing-up liquid.
To clean the lid:
■ Wash the lid using a damp sponge and washing-up liquid.
Drain the lid vertically to remove the remaining water between the metal and plastic parts of the lid.
After removing the operating valve (A), the gasket (I) and the cook control* (F), you can put the lid in the dishwasher.
To clean the gasket of the lid:
■ After each use, clean the gasket (I) and its housing.
■ To replace the gasket, refer to - Fig. 14 and ensure that the gasket is properly inserted beneath each of the grooves on the lid.
To clean the operating valve (A):
■ Remove the operating valve (A) - Fig. 11
■ Clean the operating valve (A) under cold tap water - Fig. 15.
- Check its mobility: see figure opposite.
Never put the operating valve (A), the gasket (I), the cook ntrol* (F), or the pan with non-stick coating in the dishwasher.
natural_image
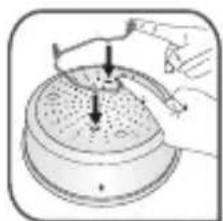
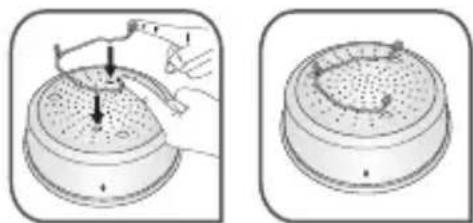
Diagram of a hand pressing down on a mechanical component with three downward arrows indicating force or movement (no text or symbols present)To clean the steam release outlet (B) located on the lid:
■ Remove the valve (A) - Fig. 11
- Check to make sure the steam release outlet is clear of debris and round - Fig. 13. If needed, clean it with a tooth pick - Fig. 16 and rinse it.
To clean the safety valve (E):
- Clean the part of the safety valve located inside the lid by washing under water.
- Check its proper functioning by pressing firmly on the bearing* (using a cotton bud, with the cotton wool tip removed), which must be mobile - fig 17 or by pressing the piston* several times with your finger (it must be mobile) - fig 17a. Refer to the section "Compulsory checks before each use".
To clean the cook control\* (F):
■ Use a clean dry cloth.
■ Do not use any solvents.
- Never place the cook control in water, nor in the dishwasher.
Maintenance
To change your pressure cooker's gasket:
- Change your pressure cooker's gasket every year or if split or damaged.
■ Always use an original TEFAL gasket corresponding to your model (see section "Accessories") - To replace the gasket, refer to - Fig 14 and ensure that the gasket is properly inserted beneath each of the grooves on the lid.
To store your pressure cooker:
■ Turn the lid over and store it upside down on the pan.
- The pressure cooker's opening and closing system does not require any specific maintenance apart from cleaning.
Make sure you get your pressure cooker checked in a TEFAL Approved Service Centre after 10 years of use.
TEFAL Accessories
■ Commercially available pressure cooker accessories are:
| Accessories References | ||
| Gasket | 3/4/4.5/6 L: outer diameter of gasket: 24 cm | X1010008 |
| 5/7.5/9 L: outer diameter of gasket: 27 cm | X1010007 | |
| Steam basket* | 3/4.5/4/6 L: for pot with 22 cm diameter | 792185 |
| 5/7.5/9 L: for pot with 24 cm diameter 792654 | ||
| Trivet* (L) | 792691 | |
| Trivet* (K) | X1030007 | |
| Cook control* | X1060007 | |
■ To replace other parts or for repairs, contact a TEFAL Approved Service Centre.
■ Only use the correct TEFAL original parts for your model.
Guarantee
- When used as recommended in the manual, the stainless steel pan of your new TEFAL pressure cooker is guaranteed for 10 years against:
- Any defect linked to the metallic structure of your pot,
- Any premature deterioration of the base metal
- All other pot materials and all other parts of your pressure cooker are guaranteed against defects in workmanship or materials, for the period of guarantee defined in valid legislation in force in the country where the product was purchased from the date of purchase.
- This contractual guarantee is established upon presentation of the receipt or invoice showing the date of purchase.
These guarantees exclude:
■ Scratches and discolouration resulting from ageing for pans with non stick coating.
■ Damage resulting from failure to comply with important precautions, or negligent use, particularly:
- Impacts, falls, use in the oven, etc.
■ Only TEFAL Approved Service Centres are authorised to provide this guarantee service.
- Please call our local rate number to find out the address of your nearest TEFAL Approved Service Centre.
Groupe SEB Canada
36 Newmill Gate, Unit 2, Scarborough, Ontario M1V 0E2
Call: 800-418-3325
Regulatory markings
| Labelling Location | |
| Trademark On the lid. | |
| Year and manufacturing batchModel referenceMaximum safety pressure (SP)Maximum operating pressure (OP) | On the lid. |
| Capacity On the outer base of the pot. | |
| Manufacturer's postal address On the outer base of the pot. |
- Think of the environment!

①Your appliance contains valuable materials which can be recovered or recycled.
Leave it at a local civic waste collection point.
Troubleshooting
| Problems Recommendations | |
| If opening and/or closing the lid becomes difficult: | Remove the gasket, and run it under water- fig 18.Put it back in the lid without wiping it, take care to insert it under each of the grooves on the lid - fig 15. |
| If you are unable to close the lid: | Check that the lid handle is in a vertical position.Check that the gasket is positioned correctly (see section “Cleaning and Maintenance”).Check that the lid is positioned as indicated in - fig 1.Rinse the gasket under water and replace it in the lid without drying it - fig 18 and take care to insert it under each of the grooves on the lid - fig 14. |
| If your pressure cooker has been heated under pressure without liquid inside: | Have your pressure cooker checked by a TEFAL Approved Service Centre. |
| If the safety valve emits clicking noises or wisps of steam: | This is normal during the first few minutes: it allows air to escape before cooking. |
| If the pressure indicator has not risen and nothing is escaping through the steam release outlet (B) during cooking: | This is normal during the first few minutes.If the phenomenon persists, check that:- The quantity of liquid in the pan is sufficient.- The heat source is strong enough, otherwise increase it.- The operating valve (A) is positioned on Your pressure cooker is properly closed.- There is no deterioration at the gasket or edge of the pan.- The gasket is correctly positioned. |
| If the pressure indicator has risen and nothing is escaping through the steam release outlet (B) during cooking: | This is normal during the first few minutes.If this persists, half fill your sink with cold water and submerge the bottom of your pressure cooker until the pressure indicator (D) comes down.Clean the operating valve (A) - fig 15 and the steam release outlet - fig 16 and check that the bearing* or piston* of the safety valve moves without difficulty - fig 17 or 17a. |
| Problems | Recommendations |
| If steam leaks from around the lid, check: | The correct closure of the lid.The position of the gasket in the lid.The condition of the gasket; replace if needed.The cleanliness of the lid, gasket and its housing in the lid.The condition of the edge of the pan. |
| If you are unable to open the lid: | Check that the pressure indicator (D) is in the lowered position. If not, depressurise by half filling your sink with cold water and submerge the bottom of your pressure cooker until the pressure indicator comes down. Never interfere with the pressure indicator (D).Turn the operating valve (A) to the position |
| If the food is not cooked or is burned, check: | The cooking time.The power of the heat source.The correct position of the operating valve (A).The quantity of liquid. |
| If food has burnt in your pressure cooker: | Fill the pot with water and soak for a while before washing.Never use bleach or chlorine-containing chemicals. |
| If one of the overpressure safety systems is triggered: | Turn off the heat source.Let your pressure cooker cool down without moving it.Wait for the pressure indicator to fall and open the pressure cooker.Check and clean the operating valve (A), the steam release outlet, the safety valve and the gasket.If the problem persists, have your pressure cooker checked by a TEFAL Approved Service Centre. |
| If you notice the appearance of oxidation marks on the exterior (stainless steel models only) | The use of high performance stainless steel does not prevent the appearance of oxidation in extreme cases.If you notice oxidation marks, remove them by rubbing with an abrasive sponge before using your pressure cooker again. |
| If you cannot put the folding handles * in the position for use: | Check that:■ The buttons (M)* are mobile.■ If the phenomenon persists, have your product checked by a TEFAL Approved Service Centre. |
| If you cannot fold the folding handles*: | ■ Do not force them.■ Make sure you press the buttons all the way down*(M).■ If the phenomenon persists, have your product checked by a TEFAL Approved Service Centre. |
Golden rules when pressure cooking (for UK Consumers)
For 5 Litre, 5.2 Litre and 6 Litre models only.
- The minimum quantity of liquid required for normal cooking is 250 ml (½ pint) for the first ¼ hour cooking. For each additional ¼ hour, or part of ¼ hour, add a further 150 ml (¼ pint) of liquid. For example, 45 minutes cooking requires 600 ml (1 pint) of liquid. Note: This is only a general guide. Certain foods, such as rice, pulses, steamed puddings and Christmas puddings may require extra water (see details below).
- When steaming foods in the basket use a minimum of 750 ml (1¼ pint) water in the cooker.
- Always use a liquid that gives off steam when boiled e.g. water stock, wine, beer, cider. Never use oil or fat. All pressure cooking requires some liquid.
- Whatever the size of pressure cooker, the maximum filling level when all the ingredients and liquid have been added are:
Solid foods e.g. vegetables, meat joints: no more than two-thirds full (MAX 2 mark)
Liquids and cereals e.g. soups, stews, cereal and pasta: no more than half full
Foods that swell during cooking e.g. rice, dried beans, dried peas, dried vegetables, stewed fruit (compotes), pumpkin, courgette and potatoes, etc: no more than one-third full (MAX 1 mark).
- When cooking pulses they swell up and tend to froth up. Use 1.2 litres (2 pints) water for every 450 g (1 lb) pre-soaked weight of pulses. Remember all dried peas and dried beans, must be soaked in boiling water for 1 hour before cooking. Drain, rinse thoroughly and cook in fresh water. Never eat uncooked beans or peas. Soaking is not necessary for red lentils. The high temperatures achieved in the pressure cooker ensure that any natural toxins in the pulses are destroyed. Canned beans and pulses can simply be drained and rinsed before adding to the pressure cooker.
- For steamed suet puddings, sponge puddings or Christmas puddings, a short pre-steaming time is best to enable the raising agent to activate and prevent a heavy, close texture. Extra liquid is required so use a minimum of 1½ pint/900 ml of boiling water for a combined steaming and cooking time of up to 1 hour. For each additional ¼ hour of cooking, or part of ¼ hour, add a further ¼ pint/150 ml of boiling water. Pre-steaming is done with the operating valve in the steam release position on a low heat for the required time. Then turn the operating valve to ,and increase the heat to bring to full pressure. Lower the heat and pressure cook for the required time.
• Pressure operates at 65 kPa (9psi/9lbs).
- Never cook dumplings with the lid tightly closed, as they could rise up and block the safety devices. Cook the stew and at the end of cooking, release the steam and cook gently for about 10 - 15 minutes without the lid on.
- Pressure cooking times vary according to the size of individual pieces or thickness of the food, not the weight.
- To prevent discolouration of the inside of the stainless steel pot, caused by mineral deposits in hard water areas, add a tablespoon of lemon juice or vinegar.
- Cooking containers must withstand temperatures of 130°C (250°F). Any covering on containers, e.g. foil, greaseproof paper, must be securely tied otherwise they could block the safety devices. Do not use plastic lids as they prevent steam from being in contact with the food. Also, they could distort and come off during cooking which could block the safety outlets.
- Accurate timing is essential when pressure cooking to prevent overcooking, especially with vegetables, fruit and fish.
- Never make milk-based recipes (such as rice pudding, semolina pudding..) when pressure cooking.
Australian – NZ warranty
COOKWARE, BAKEWARE AND PRESSURE COOKERS Limited Replacement Guarantee
Our goods come with guarantees that cannot be excluded under the Australian Consumer Law. You are entitled to a replacement or refund for a major failure and compensation for any other reasonably foreseeable loss or damage. You are also entitled to have the goods repaired or replaced if the goods fail to be of acceptable quality and the failure does not amount to a major failure. In addition to these statutory rights and any other rights and remedies you may have under the law, Groupe SEB Australia Pty Ltd (we or us) guarantees this Jamie Oliver by Tefal/T-fal/All-Clad/Moulinex product will be free of defects in material and craftsmanship including handles, body, knobs, lids and fixings for 12 months from the date of purchase. We also guarantee the non-stick coating of this Jamie Oliver by Tefal/T-fal/All-Clad/Moulinex product will be free of blistering or peeling for the life of the Jamie Oliver by Tefal/T-fal/All-Clad/Moulinex product. Should your Jamie Oliver by Tefal/T-fal/All-Clad/Moulinex product develop a defect during the guarantee period or the non-stick coating peel during the life of your Jamie Oliver by Tefal/T-fal/All-Clad/Moulinex product, you should return it, at your cost, to the retailer from which you purchased it from, together with your receipt as proof of purchase. The retailer will then forward your claim directly to us for processing. Alternatively, if the retailer is unable to help you, you may contact us directly at:
Groupe SEB Australia Pty Ltd, Customer Service Department, Unit 1, No 10 Hill Rd, Homebush NSW 2127 T: +61 2 9748 7944
If on receipt your Jamie Oliver by Tefal/T-fal/All-Clad/Moulinex product is found to be defective or the non-stick coating has peeled, we will, at our cost, replace or repair the product in our discretion. Only the defective part or accessory will be repaired or replaced. Packaging, instructions etc. will not be replaced unless faulty. This guarantee excludes defects caused by the Jamie Oliver by Tefal/T-fal/All-Clad/Moulinex product not being used in accordance with instructions, accidental damage (including overheating), misuse or being tampered with by unauthorised persons. It also does not apply if the Jamie Oliver by Tefal/T-fal/All-Clad/Moulinex product is used commercially and excludes consumable items (including accessories such as pressure regulators and safety devices), dishwasher effects and damages, stains, dents, discolouration, scratches or scuffs due to normal wear and tear, and your costs of claiming under the guarantee.
COOKING TABLE
Vegetable
VEGETABLES(FRESH)STEAMIngredients in the steam basket and 750 ml water in the bottom of the pressure cooker.  IMMERSIONIngredients in water and without the basket.PULSESIMMERSIONWithout the basket. IMMERSIONIngredients in water and without the basket.PULSESIMMERSIONWithout the basket. 1/3 1/3 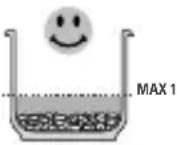 |  | |
| Artichokes, 2 whole, 600g each (immersion) 30 to 35 mins | ||
| Asparagus, white (Steam) 5 to 6 mins | ||
| Aubergines, peeled and sliced (3mm), 850g (Steam) | 10 to 12 mins | |
| Beetroot, red, cut into quarters (Immersion) | 20 to 25 mins(according to size) | |
| Broccoli florets 600 g (steam) 9 to 11 mins | ||
| Brussel sprouts (steam) 10 to 12 mins | ||
| Cabbage, sliced and green, 500 g (Immersion) 5 to 6 mins | ||
| Carrots cut into round slices (3 mm) 600 g (steam) | 17 to 19 mins | |
| Cauliflower florets 600 g (steam) 10 to 12 mins | ||
| Celeriac, sliced (immersion) 600 g 7 to 9 mins | ||
| Chard, sliced (2cm) 700 g (Steam) | 15 to 17 mins | |
| Courgettes in round slices (3 mm) 600 g (steam) | 12 to 15 mins | |
| Chicory cut in half (900 g) (steam) | 14 to 16 mins | |
| Fennel cut into strips (600 g) (steam) | 6 to 9 mins | |
| Fine green beans (600 g) (steam) | 10 to 12 mins | |
| Flageolet beans, dried 250 g (Immersion) | 35 to 40 mins | |
| Leek, whole and white 650 g (Steam) | 9 to 11 mins | |
| Lentils, green 250 g (Immersion) | 14 to 16 mins | |
| Mushrooms, sliced 800 g (Immersion) | 4 to 5 mins | |
| Peas (steam) | 6 to 8 mins | |
| Peppers cut in half (550 g) (steam) | 14 to 16 mins | |
| Pickling onions (steam) | 7 to 8 mins | |
| Potatoes cut in half (950 g) (steam) | 20 to 25 mins(according to size) | |
| Pumpkin, cut in pieces (3 to 5 cm) 600 g (steam) | 13 to 18 mins | |
| Spinach (steam) | 3 to 4 mins | |
| Split peas 250 g (immersion) 18 to 20 mins | ||
| Turnips, diced (500 g) (steam) | 14 to 16 mins | |
IMMERSIONWithout the basket. 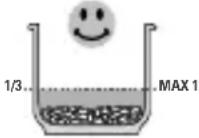 | QUANTITYOF WATER | QUANTITYOF RICE | COOKINGTIME | |
| 2 PEOPLE 400 ml / 2 glasses 150 g / 1 glass | 7 to 8 mins4 PEOPLE | |||
| 500 ml / 2.5 glasses | 250 g / 2 glasses | |||
| 6 PEOPLE | 700 ml / 3.5 glasses | 375 g / 3 glasses | ||
Meat/ fish
| FRESH FROZEN | ||
| Chicken (1.35 kg) 23 to 25 mins x | ||
| Duck (1.8 kg) 45 to 47 mins x | ||
| Lamb shanks: 2 (0.95 kg) 40 to 45 mins 1 h05 to 1 h15 | ||
| Monkfish fillets (1 kg) in pieces of 75 g | 5 to 6 mins | 7 to 8 mins |
| Pork fillet (tenderloin) 2 pieces of 350 g | 13 to 15 mins | 26 to 29 mins |
| Pork joint (0.8 kg, 8–10 cm diameter) | 30 to 35 mins | 1 h05 to 1h15 |
| Poussins: 2 (1.3 kg) | 23 to 25 mins | 40 to 45 mins |
| Quail: 4 | 9 to 10 mins | 18 to 20 mins |
| Roast beef (1 kg, 8–11 cm diameter) | 30 to 35 mins (medium) ** | 45 to 50 mins (medium)** |
| Salmon steaks: 4 (0.8 kg) | 5 to 6 mins | 7 to 8 mins |
| Tuna steaks: 4 (0.7 kg) | 5 to 6 mins | 7 to 9 mins |
| Veal fillets: 0.7 kg | 17 to 21 mins | 33 to 38 mins |
| Veal joint (0.8 kg, 5–7 cm diameter) | 17 to 19 mins | 37 to 40 mins |
** Cook for an additional 5 minutes for well done meat.
Note: For models 5 litres and below ensure that meat joints and poultry do not exceed the mark on the inside of the pot. Choose meat joints and poultry 8 cm or less in height.
PRÉCAUTIONS IMPORTANTES
FR
natural_image
Three-step diagram showing a hand pouring liquid into a container, then to a close-up of a small object with a handle, and finally to a final close-up of a container with a handle (no text or symbols)natural_image
Illustration of a hand holding a lid with a handle, showing liquid level and a small container (no text or symbols)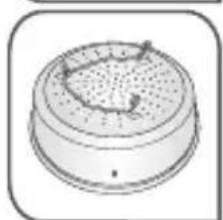
natural_image
Simple line drawing of a circular container with a lid and internal structure (no text or symbols)natural_image
Two-step diagram showing a hand holding a small object above a lid, with no visible text or symbols.natural_image
Diagram of a mechanical component with arrows indicating direction (no text or symbols)natural_image
Simple diagram of a cell or organ with three visible internal structures and three bottomed ones, enclosed in a rounded square frame (no text or labels)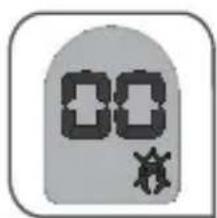
natural_image
Diagram of a hand turning a button with an arrow indicating the process (no text or symbols present)
natural_image
Diagram of a mechanical assembly with gears and a housing (no text or symbols)
flowchart
graph LR
    A["Step 1: Stopping with two cups"] --> B["Step 2: Stopping with one cup"]
    B --> C["Step 3: Stopping with one cup and another cup"]
natural_image
Simple line drawing of a cooking pot with a crossed-out black X mark (no text or symbols)Avant la cuisson
natural_image
Illustration of a cooking pot with a lid and side dish (no text or symbols)Etape 1
flowchart
graph TD
    A["Step 1: Cooking with ingredients"] --> B["Step 2: Food preparation with ingredients"]
    B --> C["Step 3: Preparation of ingredients"]
    C --> D["End"]
Etape 2
natural_image
Diagram of a hand holding a device with a circular component and directional arrow (no text or symbols)natural_image
Diagram of a mechanical device with downward arrows indicating force or movement (no text or symbols)36 Newmill Gate, Unit 2, Scarborough, Ontario M1V 0E2
flowchart
graph LR
    A["Initial laparoscopic implant"] --> B["Initial laparoscopic device placement"]
    B --> C["Endoscopic implant placement"]
natural_image
Three-step diagram showing a hand pouring liquid into a circular container, then to a close-up of a small object with a downward arrow (no text or symbols)natural_image
Three-step diagram showing a hand turning a button on a device, then adjusting the button (no text or symbols present)natural_image
Illustration of a hand holding a lid with arrows indicating a process or operation (no text or symbols present)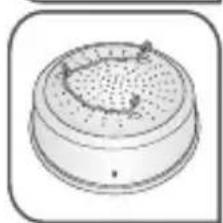
natural_image
Simple line drawing of a circular object with a textured top and side dots, enclosed in a rounded square frame (no text or symbols)natural_image
Two-step diagram showing a hand holding a lid with a pointed tip, before and after the same view (no text or symbols)natural_image
Diagram of a mechanical component with arrows indicating direction (no text or symbols)Timer\*
natural_image
Simple icon of a device with three vertical slots and three base holes, enclosed in a rounded square frame (no text or symbols)
natural_image
Illustration of a hand using a tool to adjust or install a component, with no visible text or symbols.
natural_image
Diagram of a camera lens assembly with no text or symbols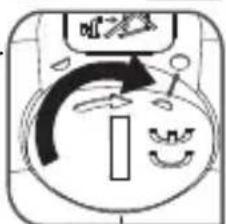
flowchart
graph LR
    A["Step 1: Stopping with lid"] --> B["Step 2: Stopping with lid"]
    B --> C["Step 3: Stopping with lid and blending step"]
natural_image
Simple line drawing of a cooking pot with a crossed-out black X mark, placed on a stove (no text or symbols)Voor het koken
natural_image
Illustration of a cooking pot with a side table and a side arm (no text or symbols)Stap 1
flowchart
graph TD
    A["Step 1: Cooking with a bowl, hand, and knife"] --> B["Step 2: Serving vegetables, filling with leaves, and holding a spoon"]
    B --> C["Step 3: Stopping with a bowl, food, and kitchen items"]
Stap 2
natural_image
Diagram of a hand holding a circular device with internal components and directional arrows (no text or symbols)Beveiliging
natural_image
Three-step diagram showing a hand using a spoon to clean a circular object, then holding a tool and finally inspecting a small object (no text or symbols present)natural_image
Illustration of a hand holding a small container with a handle, showing liquid level (no text or symbols)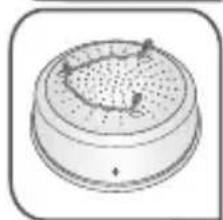
natural_image
Simple line drawing of a circular container with a perforated lid and internal structure (no text or symbols)natural_image
Illustration of a hand holding a tool interacting with a lid and a perforated surface (no text or symbols)
natural_image
Illustration of a circular container with internal granular structure (no text or symbols)natural_image
Diagram of a mechanical component with arrows indicating direction (no text or symbols)natural_image
Simple icon of a device with three vertical slots and three base holes, no text or symbols present.
natural_image
Simple line drawing of a hand pressing down on a mechanical component (no text or symbols)
natural_image
Diagram of a device with internal components and a label 'nd' (no readable text or symbols)
flowchart
graph LR
    A["Step 1: Initial pot with lid, labeled 1"] --> B["Step 2: Preparation of lid with lid"]
    B --> C["Step 3: Preparation of lid with lid"]
natural_image
Simple line drawing of a cooking pot with a crossed-out black X mark (no text or symbols)Vor dem Garen
flowchart
graph TD
    A["Step 1: Cooking pot with smoke"] --> B["Step 2: Heating with steam and condiment"]
    B --> C["Step 3: Heating with hot pot and steam"]
    C --> D["Step 4: Heating with condiment"]
natural_image
Illustration of a cooking pot with a lid and side dish (no text or symbols)Schritt 1:
flowchart
graph TD
    A["Step 1: Cooking with ingredients"] --> B["Step 2: Food preparation with ingredients"]
    B --> C["Step 3: Preparation of ingredients"]
    C --> D["Final step: Food and ingredients"]
Schritt 2:
natural_image
Diagram of a hand holding a circular device with internal components and an arrow indicating rotation (no text or symbols)natural_image
Diagram of a hand pressing down on a mechanical component with three downward arrows indicating force or movement (no text or symbols present)natural_image
Three-step diagram showing a hand pouring liquid into a circular container, then to a close-up of a small object with arrows indicating motion (no text or symbols)natural_image
Illustration of a hand holding a lid with a downward arrow indicating a drop or direction (no text or symbols present)
natural_image
Simple line drawing of a circular container with a lid and internal structure (no text or symbols)natural_image
Illustration of a hand holding a lid with a downward arrow indicating a drop or direction (no text or symbols present)
natural_image
Simple line drawing of a circular object with a perforated top and small protrusions, enclosed in a rounded square frame (no text or symbols)natural_image
Diagram of a mechanical component with arrows indicating direction (no text or symbols)natural_image
Gray-scale icon with two black '00' symbols inside an arch shape (no text or numbers)

natural_image
Simple diagram of a device with three vertical slots and three bottom holes, no text or symbols present.
natural_image
Diagram of a mechanical component with an arrow indicating a process (no text or symbols present)
natural_image
Diagram of a magnifying glass with internal components and a plus sign, no text or symbols present
natural_image
Simple line drawing of a cooking pot with a crossed-out black X mark, placed on a stove (no text or symbols)Prima della cottura
natural_image
Illustration of a cooking pot with a lid and side dish (no text or symbols)Fase 1

flowchart
graph TD
    A["Step 1: Cooking with ingredients"] --> B["Step 2: Storage with ingredients"]
    B --> C["Step 3: Food storage with ingredients"]
    C --> D["Final step: Storage with ingredients"]
Fase 2
natural_image
Diagram of a hand holding a circular device with internal components and directional arrows (no text or symbols)natural_image
Diagram of a hand pressing down on a mechanical component with three downward arrows indicating force or movement (no text or symbols present)flowchart
graph LR
    A["Initial laparoscopic implant"] --> B["Initial vascular insertion"]
    B --> C["Final vascular insertion with vascular placement"]
natural_image
Three-step diagram showing a hand using a tool to clean a circular object, then adding a plug into a device (no text or symbols present)natural_image
Three-step diagram showing a hand turning a button into a device, then adjusting the button (no text or symbols present)natural_image
Two-step illustration showing a hand holding a tool above a lid with a pointed tip, before and after (no text or symbols)natural_image
Illustration of a hand holding a tool interacting with a lid and granular material (no text or symbols)
natural_image
Illustration of a circular device with a perforated top and internal structure (no text or symbols)natural_image
Diagram of a mechanical component with arrows indicating direction (no text or symbols)natural_image
Simple icon of a clock face with two 80-degree digital displays (no text or symbols)

natural_image
Simple icon of a device with three vertical slots and three bottom ports, no text or symbols present.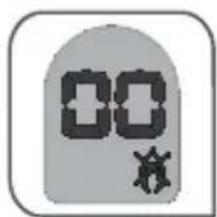
natural_image
Pure mechanical diagram showing a hand pressing a button with arrows indicating motion (no text or symbols)
natural_image
Diagram of a mechanical device with internal components and a plus sign, no text or symbols present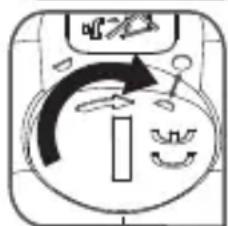
natural_image
Simple line drawing of a pot with a crossed black X mark, no text or symbols presentAntes de la cocción
flowchart
graph TD
    A["Step 1: Cooking with food items"] --> B["Step 2: Heating with food items"]
    B --> C["Step 3: Cooking with food items"]
    C --> D["Step 4: Heating with food items"]
natural_image
Illustration of a cooking pot with a lid and side dish (no text or symbols)Paso 1

flowchart
graph TD
    A["Step 1: Cooking with a bowl, hand, and knife"] --> B["Step 2: Serving vegetables, filling, and holding a spoon"]
    B --> C["Step 3: Stopping with a bowl, filling, and holding a spoon"]
    C --> D["Step 4: Cover with vegetables, filling, and holding a spoon"]
Paso 2
natural_image
Diagram of a hand holding a circular device with internal components and an arrow indicating rotation (no text or symbols)natural_image
Diagram of a mechanical device with downward arrows indicating force or movement (no text or symbols)flowchart
graph LR
    A["Initial Implant"] --> B["Injection"]
    B --> C["Final Injection"]
natural_image
Three-step diagram showing a hand holding a spoon above a circular object, followed by a close-up of a device with a handle and a directional arrow (no text or symbols)natural_image
Three-step diagram showing a hand turning a circular component, then adjusting a device with a lock and directional arrow (no text or symbols)natural_image
Illustration of a hand holding a small object over a steamer (no text or symbols)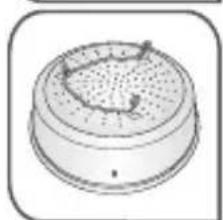
natural_image
Simple line drawing of a circular container with a lid and internal structure (no text or symbols)natural_image
Illustration of a hand holding a tool interacting with a lid and a perforated surface (no text or symbols)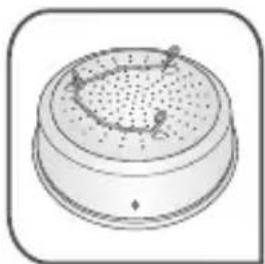
natural_image
Illustration of a circular device with a perforated lid and internal components (no text or symbols)natural_image
Diagram of a mechanical component with arrows indicating direction (no text or symbols)Temporizador\*
natural_image
Simple icon of a device with three vertical slots and three bottom holes, enclosed in a rounded square frame (no text or symbols)
natural_image
Diagram of a hand operating a mechanical device with a tool, no visible text or symbols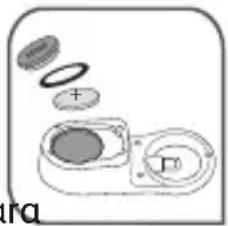
natural_image
Diagram of a camera lens assembly with no visible text or symbols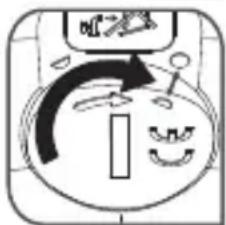
■ Para rebater as pegas
natural_image
Simple line drawing of a pot with a crossed black X mark, no text or symbols presentAntes da cozedura
natural_image
Illustration of a cooking pot with a side sink and a cylindrical tube (no text or symbols)Etapa 1
flowchart
graph TD
    A["Step 1: Cooking with a bowl, hand, knife"] --> B["Step 2: Feeding with meat, bread, sauce, and vegetable"]
    B --> C["Step 3: Preparation of food with meat, bread, sauce, and vegetable"]
Etapa 2
natural_image
Diagram of a hand holding a circular device with internal components and an arrow indicating rotation (no text or symbols)natural_image
Diagram of a hand pressing down on a mechanical component with three downward arrows indicating force or movement (no text or symbols present)PT
Nunca lave a válvula de funcionamento (A), a junta vedante (I), o temporizado r* (F), nem a cuba com revestimento ant iader ente na máquina de lavar loiça.
Para limpar a conduta de saída do vapor (B), situado na tampa:
natural_image
Three-step diagram showing a hand holding a small object into a circular basin, then to measure the interior with a tool (no text or symbols present)natural_image
Illustration of a hand holding a lid with arrows indicating motion or force (no text or symbols)
natural_image
Simple line drawing of a circular container with a lid and internal structure (no text or symbols)natural_image
Illustration of a hand holding a tool interacting with a perforated container (no text or symbols)
natural_image
Simple line drawing of a circular device with perforated lid and base (no text or symbols)natural_image
Diagram of a mechanical component with arrows indicating direction (no text or symbols)Brug af minutur \*
natural_image
Simple icon of a clock face with two 00+ units, no text or symbols present

natural_image
Simple icon of a device with three vertical slots and three flame-like symbols at the bottom (no text or labels)
natural_image
Symbol of a trash bin with crossed lines indicating no waste or discharge (no text or labels)DA
natural_image
Diagram of a hand turning a button with an arrow indicating motion (no text or symbols)
natural_image
Diagram of a mechanical assembly with gears and a housing (no text or symbols)
flowchart
graph LR
    A["Step 1: Pot with two handles"] --> B["Step 2: Stopping cup with one handle"]
    B --> C["Step 3: Stopping cup with one handle"]
natural_image
Simple line drawing of a cooking pot with a crossed-out black X mark, no text or symbols present.Inden tilberedning
natural_image
Illustration of a cooking pot with a side dish and a tube (no text or symbols)Trin 1

flowchart
graph TD
    A["Step 1: Internal component with arrows indicating rotation"] --> B["Step 2: Circular container with food items"]
    B --> C["Step 3: Circular container with food items and food icons"]
Trin 2
natural_image
Diagram of a hand holding a circular device with internal components and an arrow indicating rotation (no text or symbols)DA
natural_image
Diagram of a hand pressing down on a mechanical component with arrows indicating downward force (no text or symbols)Når driftsventilen (A), pakningen (I) og minuturet* (F) er taget af, kan låget vaskes i opvaskem askine.
flowchart
graph LR
    A["Initial laparoscopic implant"] --> B["Initial vascular insertion"]
    B --> C["Final vascular insertion with stent placement"]
natural_image
Three-step diagram showing a hand using a spoon to clean a circular object, then holding a tool, and finally adding a weight (no text or symbols present)natural_image
Three-step diagram showing a hand turning a circular component into a device, then to close the device with a black arrow indicating rotation (no text or symbols)natural_image
Illustration of a hand holding a lid with a tool, showing a drop in the lid area (no text or symbols)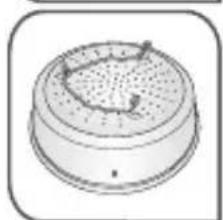
natural_image
Illustration of a circular container with a lid and internal structure, no text or symbols present.natural_image
Two-step illustration showing a hand holding a lid with a pointed tool, before and after the drop in the interior (no text or symbols)natural_image
Diagram of a mechanical component with arrows indicating direction (no text or symbols)Ajastin\*
natural_image
Simple icon of a clock face with two digital numerals (no text or symbols)

natural_image
Simple icon of a device with three vertical slots and three base holes, enclosed in a rounded square frame (no text or symbols)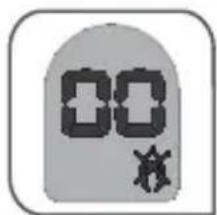
natural_image
Simple line drawing of a trash bin with crossed lines indicating no waste or discharge (no text or symbols)natural_image
Pure mechanical diagram showing a lever mechanism with no text or symbols
natural_image
Diagram of a mechanical device with circular components and a plus sign, no readable text or symbols present.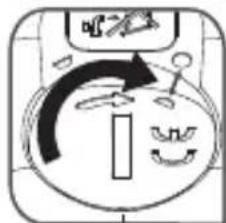
natural_image
Simple line drawing of a pot with a crossed-out black X mark, placed on a stove (no text or symbols)Ennen kypsennystä
natural_image
Illustration of a cooking pot with a side table and a side bowl (no text or symbols)Vaihe 1
flowchart
graph TD
    A["Step 1: Cooking with ingredients"] --> B["Step 2: Food preparation with ingredients"]
    B --> C["Step 3: Handling with ingredients"]
    C --> D["End"]
Vaihe 2
natural_image
Diagram of a mechanical or electrical component with directional arrows and internal components (no text or symbols)FI
Turvaominaisuudet
natural_image
Diagram of a hand pressing down on a mechanical component with three downward arrows indicating force or movement (no text or symbols present)flowchart
graph LR
    A["Initial laparoscopic implant"] --> B["Initial vascular insertion"]
    B --> C["Final vascular insertion with stent placement"]
natural_image
Three-step diagram showing a hand pouring liquid into a circular container, then to a close-up of a small object with arrows indicating motion (no text or symbols)■ Sjekk at kulelageret* i sikkerhetsventilen kan beveges (bruk en pinne).
natural_image
Three-step diagram showing a hand turning a circular component into a device, then to switch a button (no text or symbols present)natural_image
Illustration of a hand holding a lid with arrows indicating a process or operation (no text or symbols present)
natural_image
Simple line drawing of a circular container with a lid and internal structure (no text or symbols)natural_image
Two-step diagram showing a hand holding a tool above a perforated container, with no visible text or symbols.natural_image
Cross-sectional diagram of a mechanical component with arrows indicating direction (no text or symbols)Bruk av timeren\*
natural_image
Simple graphic of a clock face with two 80-degree symbols, no text or numbers present.


natural_image
Simple icon of a device with three vertical slots and three base holes, no text or symbols present.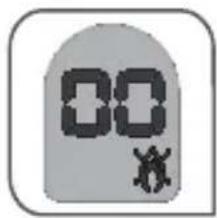

Skifte batteri i timeren\*
■ Batteriet i timeren er et knappbatteri av typen CR2032.
- Hvis symbolet vises, eller hvis ingenting vises på skjermen, må du skifte batteri.
■ Batteriets levetid avhenger av hvor ofte timeren brukes.
■ Batteriet i timeren inneholder dimetoksyetan nr. CAS 110-71-4.
natural_image
Simple line drawing of a trash bin with crossed x- and y-axes, no text or symbols present.natural_image
Diagram of a mechanical component with an arrow indicating force or direction (no text or symbols)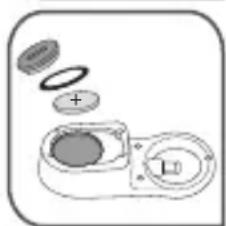
natural_image
Diagram of a mechanical device with gears and a labeled component (no text or symbols)
Timeren* må aldri holdes under vann eller vaskes i oppvaskmaskinen.
natural_image
Simple line drawing of a pot with a crossed black X mark, placed on a stove (no text or symbols)Før koking
natural_image
Illustration of a cooking pot with a lid and side dish (no text or symbols)Trinn 1
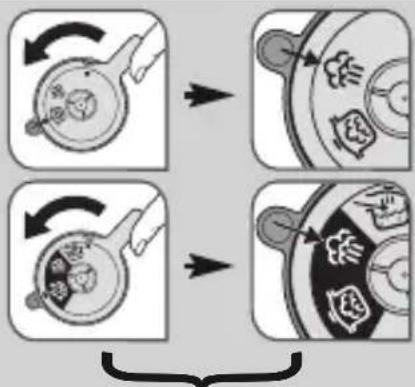
flowchart
graph TD
    A["Step 1: Cooking Pot"] --> B["Step 2: Bag"]
    B --> C["Step 3: Dish"]
    C --> D["End"]
Trinn 2
natural_image
Diagram of a hand holding a circular object with internal components and directional arrows (no text or symbols)Sikkerhet
natural_image
Diagram of a hand pressing down on a mechanical component with three downward arrows indicating force or movement (no text or symbols present)flowchart
graph LR
    A["Patient with laparoscopic implant"] --> B["Initial laparoscopic implant"]
    B --> C["Internal organ with circular component"]
    C --> D["Final vascular insertion with vascular insertion"]
natural_image
Three-step diagram showing a hand using a tool to clean a circular object, then adding a spring scale into a device (no text or symbols present)natural_image
Three-step diagram showing a hand turning a button on a device, then adjusting the button (no text or symbols present)natural_image
Illustration of a hand holding a lid with arrows indicating motion or force (no text or symbols)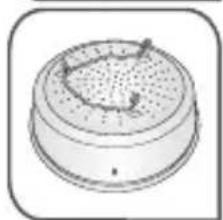
natural_image
Simple line drawing of a circular object with a textured top and central dot, enclosed in a rounded square frame (no text or symbols)natural_image
Two-step diagram showing a hand holding a tool above a perforated lid, with no text or symbols present.natural_image
Diagram of a mechanical component with arrows indicating direction (no text or symbols)natural_image
Simple diagram of a device with three vertical slots and three bottom holes, no text or symbols present.
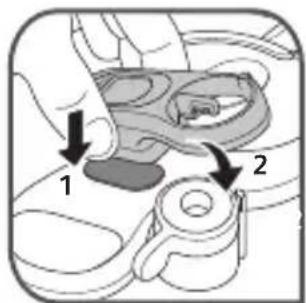
Byta batteri i timern\*
natural_image
Simple line drawing of a trash bin with crossed x-axes and no text or symbolsnatural_image
Diagram of a mechanical switch or knob with arrows indicating motion (no text or symbols)
natural_image
Diagram of a mechanical device with gears and a housing (no text or symbols)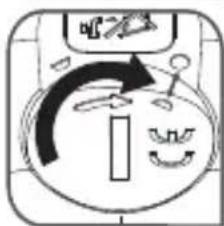
flowchart
graph LR
    A["Step 1: Initial pot with lid and side view"] --> B["Step 2: Side opening and lid with lid"]
    B --> C["Step 3: Close lid and lid with side view"]
natural_image
Simple line drawing of a pot with a crossed-out black X mark, placed on a stove (no text or symbols)Innan tillagningen
natural_image
Illustration of a cooking pot with a lid and side dish (no text or symbols)Steg 1
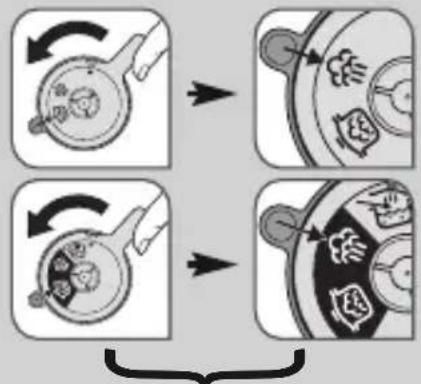
flowchart
graph TD
    A["Step 1: Cooking & Food"] --> B["Step 2: Cooking & Food"]
    B --> C["Step 3: Food & Dish & Hot Pot"]
    C --> D["Step 4: Cooking & Food"]
Steg 2
natural_image
Diagram of a hand holding a circular device with internal components and an arrow indicating rotation (no text or symbols)Säkerhet
natural_image
Diagram of a hand pressing down on a mechanical component with three downward arrows indicating force or movement (no text or symbols present)flowchart
graph LR
    A["Initial laparoscopic implant"] --> B["Anatomical view of the laparoscopic part"]
    B --> C["Anatomical view of the vascular grafting"]
    C --> D["Anatomical view of the vascular grafting with a central valve or capillary structure"]
natural_image
Three-step diagram showing a hand using a spoon to clean or store food items, with no visible text or symbols.natural_image
Three-step diagram showing a hand using a tool to adjust a circular component, then to close the surface with arrows indicating motion (no text or symbols)natural_image
Illustration of a hand holding a steamer with arrows indicating motion (no text or symbols)
natural_image
Simple line drawing of a circular container with a lid and side plate (no text or symbols)natural_image
Two-step diagram showing a hand holding a tool above a lid with a downward arrow, next to a close-up of the lid's contents (no text or symbols)natural_image
Diagram of a mechanical component with arrows indicating direction (no text or symbols)natural_image
Simple icon of a clock face with two 80+ digital numerals inside, no text or symbols present.

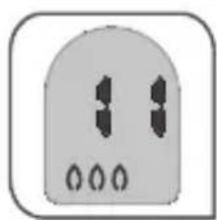
natural_image
Simple icon of a device with two vertical slots and three small ovals at the bottom (no text or symbols)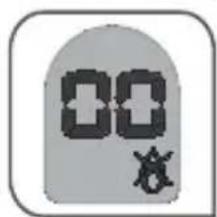
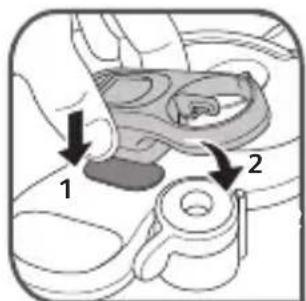
natural_image
Diagram of a mechanical component with arrows indicating motion or force direction (no text or symbols)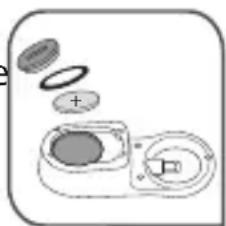
natural_image
Diagram of a device with circular components and a plus sign, no readable text or symbols present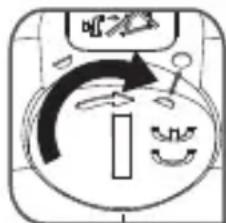
насреща).
flowchart
graph LR
    A["Step 1: Stopping with two cups"] --> B["Step 2: Stopping with one cup"]
    B --> C["Step 3: Stopping with one cup and another cup"]
natural_image
Simple line drawing of a cooking pot with a crossed-out black X mark, no text or symbols present.Преди готвене.
natural_image
Illustration of a cooking pot with lid and side dish (no text or symbols)Етап 1
flowchart
graph TD
    A["Step 1: Cooking with ingredients"] --> B["Step 2: Storage with ingredients"]
    B --> C["Step 3: Processing with ingredients"]
    C --> D["End"]
Етап 2
natural_image
Diagram of a hand pressing down on a circular mechanical component with directional arrows indicating motion (no text or symbols)natural_image
Diagram of a mechanical component with downward arrows indicating force or movement (no text or symbols)flowchart
graph LR
    A["Patient with implant"] --> B["Anatomical diagram: laparoscopic implant, vascular grafting"]
    B --> C["Anatomical diagram: circular device with internal components, vascular grafting"]
    C --> D["Anatomical diagram: vascular grafting with central component, vascular grafting"]
- Pobrinite se da otvor za odvod na radnom ventilu nije začepljen (vidi odjeljak "Uklanjanje i postavljanje radnog ventila").
natural_image
Three-step diagram showing a hand pouring liquid into a circular container, then to a close-up of a mechanical component (no text or symbols)■ Provjerite je likuglica* sigurnosnog ventila pokretna (koristite štapić).

natural_image
Three-step diagram showing a hand turning a circular component into a device, then adjusting the device with a lock and directional arrow (no text or symbols)natural_image
Illustration of a hand holding a lid with a lid being inserted, showing liquid level (no text or symbols)
natural_image
Simple line drawing of a circular container with a lid and internal structure (no text or symbols)■ Stavite svoj ekspres lonac na izvor toplote te ga maksimalno pojačajte.
- Kad para počne izlaziti kroz ventil, smanjite jačinu izvora toplote i podesite na 20 min.
■ Kada protekne 20 min, ugasite izvor toplote.
■ Poravnajte slikovnu oznaku ⚙ radnog ventila (A) s oznakom položaja ventila (C).
■ Kada se sigurnosni štapić (D) ponovno spusti, vaš ekspres lonac više nije pod pritiskom.
■ Otvorite ekspres lonac - sl. 3.
■ Očistite ga sa deterdžentom.
Minimalna i maksimalna napunjenost
■ Minimalno 25 cl (2 čaše) - sl. 4.
■ Maksimalno 2/3 visine posude, oznaka MAX 2 - sl. 5.
■ U ekspres loncu nemojte koristiti grubu sol već dodajte sitnu sol na kraju kuhanja.
Za neke vrste hrane:
- Za kašaste namirnice koje se šire i/ili koje se pjene tokom kuhanja, kao što su riža, mahunarke, sušeno povrće, kompoti, bundeve, tikvice, mrkve, krompir, riblji fileti, itd., nemojte napuniti ekspres lonac iznad 1/3 (MAX 1) kapaciteta.
Kada kuhanje završi, ostavite ekspres lonac da se ohladi nekoliko minuta i zatim ga ohladite pod hladnom vodom (pogledajte odlomak 'Kraj kuhanja u režimu "Ekspres lonac" - brza dekompresija').
natural_image
Cross-sectional diagram of a mechanical component with arrows indicating direction (no text or symbols)natural_image
Gray-scale icon with two black '00' symbols inside an arch, enclosed in a rounded square border (no text or numbers)

natural_image
Simple icon of a device with three vertical slots and three flame-like symbols at the bottom (no text or labels)
*ovisno o modelu
natural_image
Simple line drawing of a trash bin with crossed x-axes and no text or symbolsnatural_image
Diagram of a hand pressing down on a mechanical component with a downward arrow (no text or symbols)
natural_image
Simple line drawing of a device with coins and a battery, no text or symbols present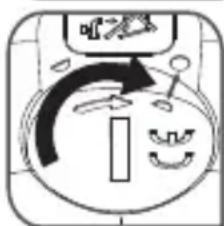
Preklopne drške\*
Prije upotrebe obavezno uklonite naljepnice sa svake drške.
■ Za stavljanje drški u položaj za upotrebu:
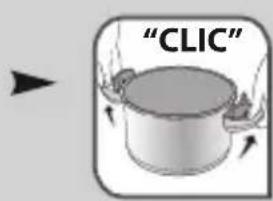
Preklopljene drške nikada ne stavljajte na izvor topline.

natural_image
Simple line drawing of a cooking pot with a crossed-out black X mark (no text or symbols)Prije kuhanja
- Prije svake upotrebe skinite radni ventil (A) - sl. 11 i vizuelno provjerite na dnevnom svjetlu da cjevčica za odvod pare (B) nije začepljena - sl. 13.
■ Provjerite je li sigurnosni ventil (E) mobilan (vidi odjeljak "Čišćenje" i "Obavezne kontrole prije svake upotrebe") - sl. 17 i fig 17bis.
■ Stavite sastojke i tekućinu.
■ Zatvorite ekspres lonac - sl. 2 - U slučaju poteškoća sa zatvaranjem proizvoda: stavite gumicu pod vodu pa je stavite natrag na lonac bez brisanja - sl. 18 i pazite da je dobro postavite u ureze poklopca - sl. 14.
- Namještanje radnog ventila (A) - sl. 8.

natural_image
Illustration of a cooking pot with a lid and side dish, no text or symbols present- korak

flowchart
graph TD
    A["Step 1: Cooking pot with food icon"] --> B["Step 2: Bag with food icon"]
    B --> C["Step 3: Dish with food icon"]
- korak
- Za kašaste namirnice koje se šire ili koje se pjene tokom kuhanja, kao što su riža, mahunarke, sušeno povrće, kompoti, bundeve, tikvice, mrkve, krompir, riblji fileti, itd... ostavite ekspres lonac nekoliko minuta da se ohladi, a potom ga ohladite pod hladnom vodom. Ekspres lonac lagano i ujednačeno protresite nakon što provjerite da li se sigurnosni štapić spustio kako biste spriječili prskanje mjehurića pare koji bi vas mogli opeći. To je posebno važno pri brzom ispuštanju pare ili nakon hlađenja pod hladnom vodom. Kod pripremanja supa, savjetujemo da obavite brzu dekompresiju u hladnoj vodi (vidi sliku iz 1. koraka iznad).
natural_image
Diagram of a hand holding a circular device with internal components and an arrow indicating rotation (no text or symbols)■ Sigurnost pri otvaranju:
- Ako je vaš ekspres lonac bez pritiska, sigurnosni štapić (D) nalazi se u podignutom položaju, a drške poklopca za otvaranje/zatvaranje (G) ne bi se trebale dirati.
natural_image
Diagram of a mechanical presser with downward arrows indicating force or movement (no text or symbols present)U mašini za pranje posuđa nikad nemojte prati radni ventil (A), gumicu (I), indikator vremena* (F), ni posudu s neprijanjajućim slojem.
TYTO POKYNY SI USCHOVEJTE
flowchart
graph LR
    A["Initial laparoscopic implant"] --> B["Initial vascular insertion"]
    B --> C["Final vascular insertion with stent placement"]
natural_image
Three-step diagram showing a hand pouring liquid into a circular container, then to a close-up of a small object with arrows indicating motion (no text or symbols)natural_image
Illustration of a hand holding a lid with a small object inside, no text or symbols present
natural_image
Simple line drawing of a circular container with a lid and internal structure (no text or symbols)natural_image
Diagram of a mechanical component with arrows indicating direction (no text or symbols)Časovač\*
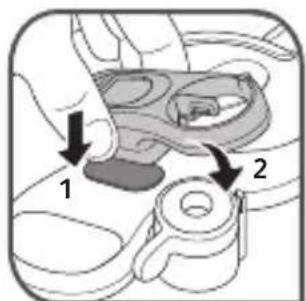
natural_image
Simple line drawing of a trash bin with crossed x-axes and no text or symbolsnatural_image
Diagram of a hand operating a mechanical component with an arrow indicating motion (no text or symbols present)
natural_image
Diagram of a mechanical device with gears and a base plate, no text or symbols present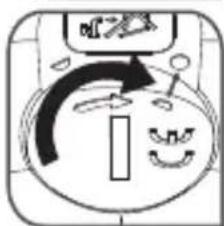
natural_image
Simple line drawing of a pot with a crossed-out black X mark, placed on a stove (no text or symbols)Před vařením
natural_image
Illustration of a cooking pot with a side dish and a cylindrical container (no text or symbols)Krok 1
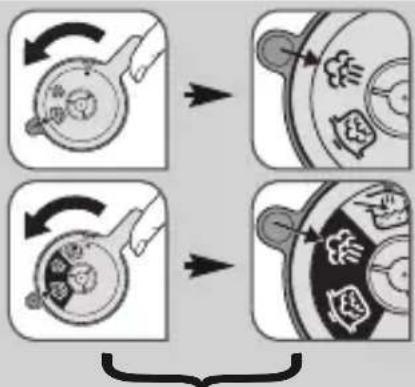
flowchart
graph TD
    A["Step 1: Cooking & Bag"] --> B["Step 2: Bag & Dish"]
    B --> C["Step 3: Food & Bag & Dish"]
Krok 2
natural_image
Diagram of a hand holding a circular device with internal components and an arrow indicating rotation (no text or symbols)Bezpečnostní prvky
natural_image
Diagram of a mechanical presser with downward arrows indicating force or movement (no text or symbols present)flowchart
graph LR
    A["Anatomical Inplant"] --> B["Anatomical Head with Distant Schematic"]
    B --> C["Anatomical Transitions: Anatomical Insertion, Anatomical Stimulation, Anatomical Stimulation"]
    C --> D["Anatomical Transitions: Anatomical Stimulation, Anatomical Stimulation"]
■ Provjerite da je ispusni otvor radnog ventila slobodan (pogledajte odlomak „Skidanje i postavljanje radnog ventila”).
natural_image
Three-step diagram showing a hand using a tool to clean a circular object, then holding a device with a downward arrow (no text or symbols)■ Provjerite je likuglica* sigurnosnog ventila pokretna (pomoću štapića).
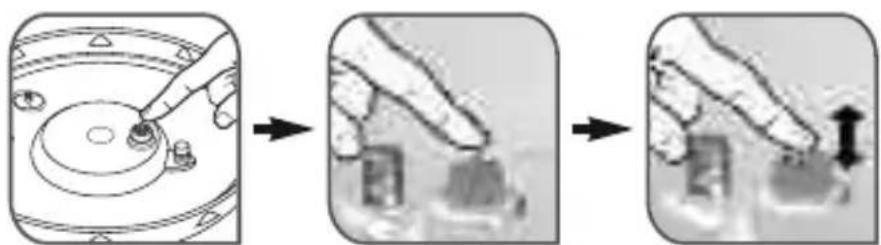
natural_image
Illustration of a hand holding a lid with arrows indicating a process or operation (no text or symbols present)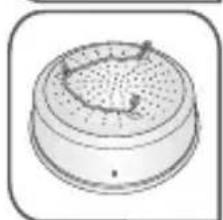
natural_image
Simple line drawing of a circular container with a lid and side plate (no text or symbols)■ Stavite ekspres lonac na izvor topline koji zatim podesite na najveću jačinu.
■ Kada para počne izlaziti iz ventila smanjite jačinu izvora topline i podesite na 20 min.
■ Kada protekne 20 min, ugasite izvor topline.
■ Poravnajte slikovni prikaz ⚙ radnog ventila (A) s indikatorom položaja ventila (C).
- Kad se sigurnosni štapić (D) ponovno spusti, Vaš ekspres lonac više nije pod pritiskom.
■ Otvorite ekspres lonac - sl. 3
■ Očistite ga sredstvom za pranje posuđa.
Minimalno i maksimalno punjenje
■ Najmanje 25 cl (2 čaše) - sl. 4.
- Najviše 2/3 visine posude, oznaka MAX 2 - sl. 5.
■ Ne stavljajte krupnu sol u ekspres lonac već dodajte sitnu sol na kraju kuhanja.
Za određene namirnice:
- Za kašaste namirnice koje se šire i/ili pjene tijekom kuhanja kao što su riža, mahunarke, sušeno povrće, kompoti, bundeve, tikvice, mrkva, krumpir, riblji fileti itd. nemojte puniti ekspresni lonac iznad 1/3 (MAX 1) njegove zapremnine.
Po završetku kuhanja ostavite da se ekspres lonac nekoliko minuta hladi, a zatim ga ohladite u hladnoj vodi (pogledajte odlomak 'Završetak kuhanja na način „Ekspres lonac“ - brza dekompresija').
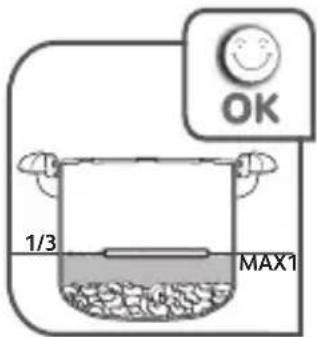
Uporaba košarice za kuhanje na pari\*
■ Natočite 75 cl vode u dno posude (Q).
Ovisno o modelu:
■ Postavite tronožac*(L) i košaru*(J) na dno posude.
- Pričvrstite tronožac*(K) za košaru*(J), zatim sve stavite na dno posude.
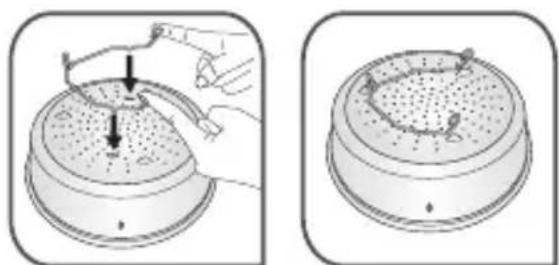
natural_image
Two-step illustration showing a hand holding a tool above a perforated lid, with no text or symbols present.natural_image
Cross-sectional diagram of a mechanical component with arrows indicating direction (no text or symbols)Uporaba tajmera\*
natural_image
Gray-scale icon with a stylized '00' symbol inside an arched frame (no text or numbers)
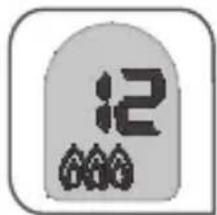
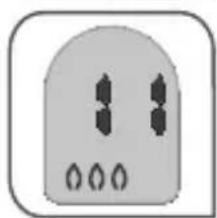
natural_image
Simple icon of a device with three vertical slots and three flame-like symbols at the bottom (no text or labels)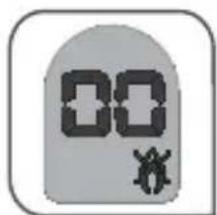
Dugi pritisak na tipku postavlja tajmer na nulu i gasi ga.
Postavljanje i uklanjanje tajmera\*
- Kako biste tajmer (F) postavili na mjesto - sl. 12, prvo umetnite dio „strana s tipkom" na modulu, a zatim pritisnite kako biste prikopčali suprotnu stranu.
■ Kako biste uklonili tajmer (F), podignite ga i izvadite.
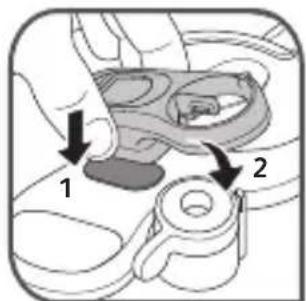
natural_image
Symbol of a trash bin crossed with two crossed lines, no text or labels present■ Baterije koje su punjive se ne smiju miješati s baterijama koje nisu punjive.
■ Nepunjive baterije ne smiju se ponovo puniti.
■ Različite vrste baterije ili nove i korištene baterije ne smiju se miješati.
■ Ispražnjene baterije trebaju se izvaditi iz uređaja i sigurno zbrinuti.
- Ako se uređaj treba spremiti tijekom dužeg razdoblja i neće se upotrebljavati, trebate izvaditi baterije.
■ Strujni priključci ne smiju se kratko spajati.
■ Stavite uređaj na ravnu podlogu.
- Da biste izvadili bateriju iz tajmera, otvorite poklopac baterije novčićem okrećući ga u smjeru suprotnom od kazaljke na satu tako da polumjesec poklopca poravnate s polumjesecom tajmera (pogledajte nacrt na suprotnoj strani).
■ Zamijenite bateriju.
■ Vratite brtvu na mjesto u ležište.
- Da biste vratili poklopac baterije, okrenite polumjesec poklopca baterije da bude okrenut prema polumjesecu tajmera. Polako okrečite poklopac baterije u smjeru kazaljke na satu, dok lagano pritišćete kako biste poravnali polumjesec poklopca baterije s punim mjesecom tajmera
■ Nemojte pokušavati silom zatvoriti poklopac baterije.
■ Nemojte prelaziti graničnike.
■ U slučaju gubitka, drugi tajmer možete nabaviti u svim našim ovlaštenim servisnim centrima TEFAL.
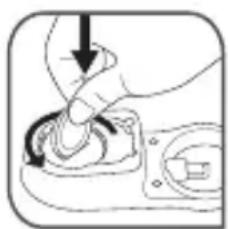
natural_image
Diagram of a hand pressing down on a mechanical component with arrows indicating motion (no text or symbols)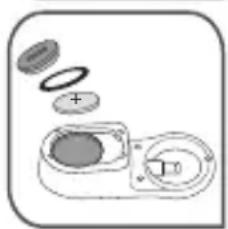
natural_image
Diagram of a camera lens assembly with no text or symbols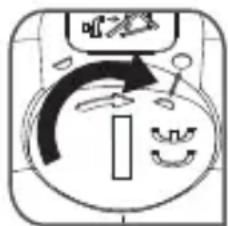
Nikada ne stavljajte tajmer u vodu ni u perilicu posuđa.
flowchart
graph LR
    A["Step 1: Initial pot with lid and lid"] --> B["Step 2: preparation step"]
    B --> C["Step 3: preparation step with lid and lid"]
■ Za stavljanje ručki u položaj za uporabu:
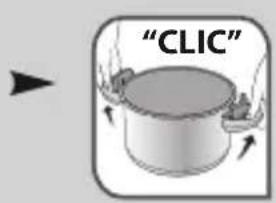
natural_image
Simple line drawing of a steaming pot with a black X mark, no text or symbols presentPrije kuhanja
- Prije svake uporabe, izvadite radni ventil (A) - sl. 11 i vizualno na danjem svjetlu provjerite je li odvod za ispuštanje pare (B) prohodan - sl. 13.
■ Provjerite može li se sigurnosni ventil (E) micati (vidjeti odjeljke „Čišćenje” i „Obvezne provjere prije svake uporabe“)- sl. 17 i sl. 17bis.
■ Dodajte svoje sastojke i tekućinu.
■ Zatvorite ekspres lonac - sl. 2 - U slučaju problema sa zatvaranjem proizvoda: stavite brtvu pod mlaz vode i ponovo je vratite na poklopac bez brisanja - slika 18 te pripazite da je dobro postavite u utore poklopca - slika 14.
■ Postavite radni ventil na njegovo mjesto (A) - sl. 8.

Kuhanje na način „Ekspres Ionac”
- Okrenite radni ventil (A) u položaj kuhanja na način „Ekspres lonac” 📋 - sl.
- Budite sigurni da je ekspres lonac odgovarajuće zatvoren prije stavljanja u rad - sl. 2
■ Stavite ekspres lonac na izvor topline koji zatim podesite na najveću jačinu.
■ Za modele koji imaju tajmer* : postavite vrijeme kuhanja navedeno u receptu (vidjeti odjeljak „Uporaba tajmera“).
■ Zveckanje i parni oblačići koje proizvodi sigurnosni štapić su normalni, oni omogućavaju ispuštanje zraka prije kuhanja.
flowchart
graph TD
    A["Step 1: Cooking with food items"] --> B["Step 2: Cooking with food items"]
    B --> C["Step 3: Cooking with food items"]
    C --> D["Step 4: Cooking with food items"]
    D --> E["End of pot"]
natural_image
Illustration of a vintage portable stove with a coiled tube and a cylindrical tank (no text or symbols)Faza 1
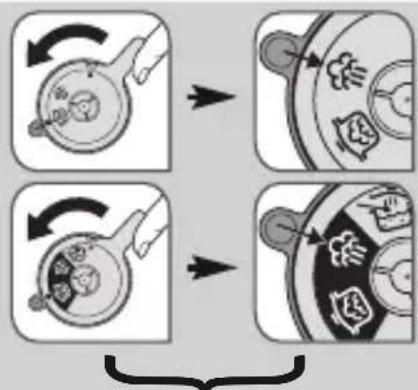
flowchart
graph TD
    A["Step 1: Cooking Pot"] --> B["Step 2: Storage Bowl"]
    B --> C["Step 3: Dish & Oven"]
    C --> D["Final Storage Bowl"]
Faza 2
- Za kašaste namirnice koje se šire ili pjene tijekom kuhanja kao što su riža, mahunarke, sušeno povrće, kompoti, bundeve, tikvice, mrkva, krumpir, riblji fileti... Pustite ekspresni lonac nekoliko minuta da se ohladi, a zatim ga ohladite u hladnoj vodi. Ravnomjerno i lagano protresite ekspresni lonac prije svakog otvaranja, nakon što ste provjerili da se sigurnosni štapić spustio, kako biste izbjegli izlaženje mjehurića pare koji bi vas mogli opeći. Ta je radnja osobito važna pri brzom ispuštanju pare ili nakon hlađenja u hladnoj vodi. Kada se radi o juhama, savjetujemo vam da obavljate brzu dekompresiju u hladnoj vodi (pogledajte iznad sliku Faze 1).
natural_image
Diagram of a mechanical component with arrows indicating rotation and movement (no text or symbols)Sigurnost
natural_image
Diagram of a finger pressing a button on a mechanical device (no text or symbols)Nikad ne perite radni ventil (A), brt vu (I), tajmer* (F), ni posudu s neprijanjajućim slojem u perilici za posuđe.
flowchart
graph LR
    A["Initial laparoscopic implant"] --> B["Anatomical close-up"]
    B --> C["Internal organ with central valve"]
    C --> D["Internal vascular insertion"]
    D --> E["Final vascular insertion"]
natural_image
Three-step diagram showing a hand using a tool to clean a circular object, then adding a plug into a container, and finally adding a plug into a final container (no text or symbols present)natural_image
Three-step diagram showing a hand turning a circular component, then applying a close-up of the components (no text or symbols)natural_image
Illustration of a hand holding a lid with a lid being inserted, showing liquid level (no text or symbols)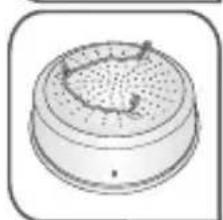
natural_image
Simple line drawing of a steamer with lid and perforated base (no text or symbols)natural_image
Two-step illustration showing a hand holding a tool above a lid with a droplet inside, before and after (no text or symbols)natural_image
Diagram of a mechanical component with arrows indicating direction (no text or symbols)Időzítő\*
natural_image
Simple icon of a device with three vertical slots and three bottom holes, no text or symbols present.
natural_image
Symbol of a trash bin crossed with two crossed lines, no text or labels presentnatural_image
Diagram of a mechanical assembly with arrows indicating motion or force direction (no text or symbols)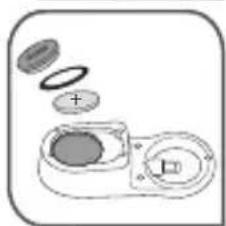
natural_image
Diagram of a mechanical device with internal components and a plus symbol (no text or labels)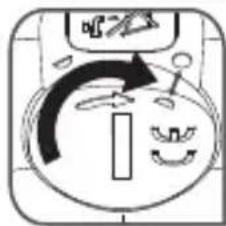
rajzot).
natural_image
Illustration of a cooking pot with a crossed black X mark, no text or symbols presentFőzés előtt
flowchart
graph TD
    A["Step 1: Hand cooling pot with steam stove icon"] --> B["Step 2: Stamped steaming box with steam stove icon"]
    B --> C["Step 3: Stamped steaming pot with steam stove icon"]
    C --> D["Step 4: Stamped steaming pot with steam stove icon"]
    D --> E["End: Oven with steam stove icon"]
natural_image
Illustration of a vintage cooktop with a side table and a pipe (no text or symbols)- szakasz
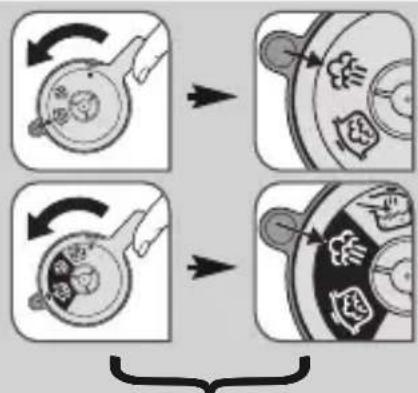
flowchart
graph TD
    A["Step 1: Cooking pot with lid"] --> B["Step 2: Bag with lid and food bag"]
    B --> C["Step 3: Storage tank with food bag and dish"]
- szakasz
natural_image
Diagram of a hand holding a circular device with internal components and an arrow indicating rotation (no text or symbols)Biztonság
natural_image
Diagram of a hand pressing down on a mechanical component with three downward arrows indicating force or movement (no text or symbols present)flowchart
graph LR
    A["Initial laparoscopic implant"] --> B["Initial vascular grafting"]
    B --> C["Final vascular grafting with stent placement"]
natural_image
Three-step diagram showing a hand using a tool to clean a circular object, then adding a plug into a container, and finally adding a plug into a battery (no text or symbols present)natural_image
Three-step diagram showing a hand turning a circular component into a device, then to press or adjust a button (no text or symbols present)natural_image
Illustration of a hand holding a lid with a spoon, showing liquid level (no text or symbols)
natural_image
Simple line drawing of a circular container with a lid and internal structure (no text or symbols)natural_image
Two-step illustration showing a hand holding a tool above a lid with a downward arrow, next to a close-up of the lid's contents (no text or symbols)natural_image
Cross-sectional diagram of a mechanical component with arrows indicating direction (no text or symbols)Obsługa minutnika\*
natural_image
Gray-scale icon of a clock face with '00' displayed (no text or symbols beyond the number)


natural_image
Simple icon of a device with three vertical slots and three base holes, enclosed in a rounded square frame (no text or symbols)
natural_image
Simple line drawing of a trash bin with crossed x- and y-axes, no text or symbols present.natural_image
Diagram of a mechanical component with an arrow indicating motion or force (no text or symbols present)
natural_image
Diagram of a camera lens assembly with no text or symbols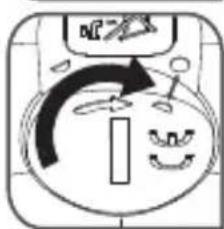
natural_image
Simple line drawing of a cooking pot with a crossed-out black X mark (no text or symbols)Przed gotowaniem
natural_image
Illustration of a cooking pot with a lid and side dish (no text or symbols)Etap 1

flowchart
graph TD
    A["Step 1: Cooking with ingredients"] --> B["Step 2: Food preparation with ingredients"]
    B --> C["Step 3: Handling with ingredients"]
    C --> D["End: Storage with ingredients"]
Etap 2
natural_image
Diagram of a hand holding a circular device with internal components and an arrow indicating rotation (no text or symbols)Zabezpieczenia
natural_image
Diagram of a mechanical device with downward arrows indicating force or movement (no text or symbols)natural_image
Three-step diagram showing a hand using a tool to clean a circular object, then adding a plug into a device (no text or symbols present)natural_image
Illustration of a hand holding a lid with arrows indicating motion or force (no text or symbols)
natural_image
Simple line drawing of a circular container with a lid and internal structure (no text or symbols)natural_image
Two-step diagram showing a hand holding a lid above a perforated lid, with no text or symbols present.natural_image
Diagram of a mechanical component with arrows indicating direction (no text or symbols)Cronometrul\*
natural_image
Simple icon of a device with three vertical slots and three base holes, no text or symbols present.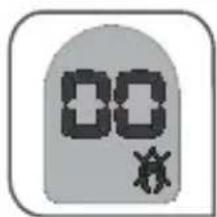
natural_image
Simple line drawing of a trash bin with crossed lines indicating no waste or plastic (no text or symbols)natural_image
Diagram of a mechanical assembly with arrows indicating motion or force direction (no text or symbols)
natural_image
Diagram of a camera lens assembly with no text or symbols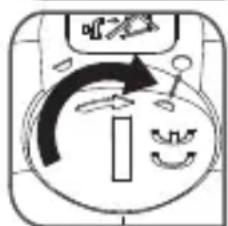
figura alăturată)
flowchart
graph LR
    A["Step 1: Stopping with lid"] --> B["Step 2: Stopping with lid"]
    B --> C["Step 3: Stopping with lid and blending step"]
natural_image
Simple line drawing of a crossed-out box over a tray with food items (no text or symbols)Înainte de gătire
natural_image
Illustration of a vintage rotary dial with a cylindrical tube and base (no text or symbols)Pasul 1
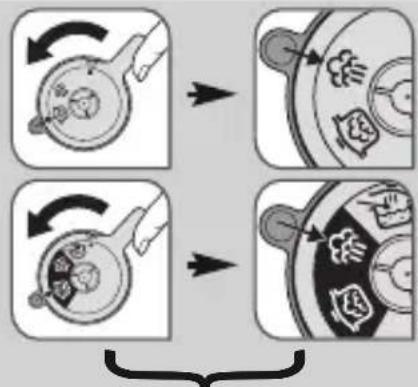
flowchart
graph TD
    A["Step 1: Cooking & Storage"] --> B["Step 2: Food & Ingredients & Processing"]
    B --> C["Step 3: Storage & Packaging & Inventory"]
    C --> D["End"]
Pasul 2
natural_image
Diagram of a hand holding a circular device with internal components and an arrow indicating rotation (no text or symbols)Siguranța
natural_image
Diagram of a mechanical device with downward arrows indicating force or movement (no text or symbols)IMPULSURI INTRODUCERE ÎN APĂ
INTRODUCEREÎN APĂFără coș. 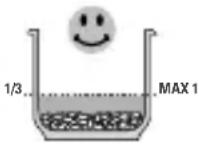 | CANTITATEADE APĂ | CANTITATEA DEOREZ | TIMPUL DEPREPARARE | |
| 2 PERSOANE | 400 ml / 2 pahare 15 | 0 g / 1 pahar | 7 -8 min4 PE | |
| 500 ml / 2,5 pahare | 250 g / 2 pahare | |||
| 6 PERSOANE | 700 ml / 3,5 pahare | 375 g / 3 pahare |
Carne/peşte
flowchart
graph LR
    A["Initial setup with hand and nut assembly"] --> B["Eye alignment: eye aligned"]
    B --> C["Close-up of circular component with internal parts"]
    C --> D["Final installation: plant growth in container with directional arrows"]
natural_image
Three-step diagram showing a hand pouring liquid into a circular container, then to a close-up of a mechanical component (no text or symbols)natural_image
Illustration of a hand holding a lid with a downward arrow indicating a drop or motion (no text or symbols)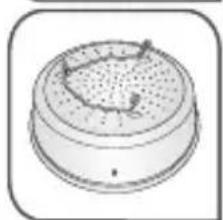
natural_image
Simple line drawing of a lid with a textured top and base, no text or symbols present.natural_image
Two-step diagram showing a hand holding a small object above a perforated lid, with no visible text or symbols.natural_image
Cross-sectional diagram of a mechanical component with arrows indicating direction (no text or symbols)natural_image
Simple icon of a clock face with two digital numerals (no text or symbols)


natural_image
Simple icon of a device with three vertical slots and three flame-like symbols at the bottom (no text or labels)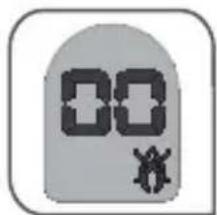
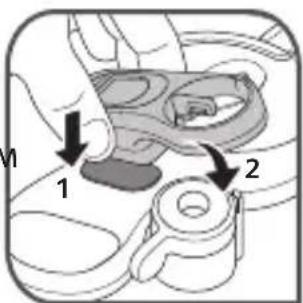
natural_image
Simple line drawing of a trash bin with crossed lines indicating no waste or discharge (no text or symbols)natural_image
Diagram of a hand turning a button with arrows indicating motion (no text or symbols)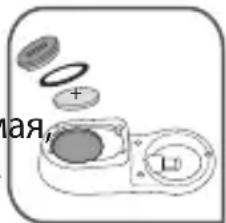
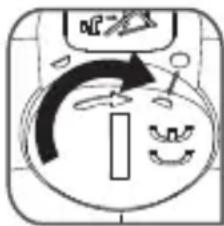
flowchart
graph LR
    A["Step 1: Stopping a pot with two handles"] --> B["Step 2: Stopping a pot with one handle"]
    B --> C["Step 3: Stopping a pot with one handle"]
natural_image
Simple line drawing of a pot with a crossed-out black X mark, placed on a stove (no text or symbols)natural_image
Illustration of a mechanical device with a cylindrical component and connecting rod (no text or symbols)Этап 1
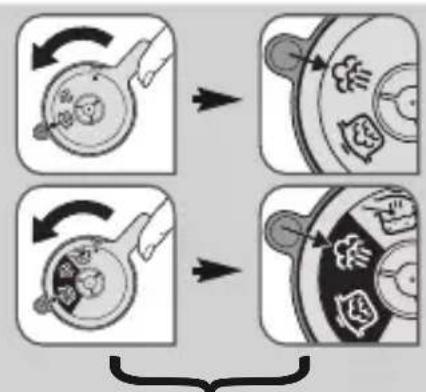
flowchart
graph TD
    A["Step 1: Cooking with ingredients"] --> B["Step 2: Storage with ingredients"]
    B --> C["Step 3: Processing with ingredients"]
    C --> D["End"]
Этап 2
natural_image
Diagram showing a hand pressing a circular component with arrows indicating rotation (no text or symbols)natural_image
Diagram of a mechanical presser with downward arrows indicating force or movement (no text or symbols present)TENTO NÁVOD SI USCHOVAJTE
natural_image
Three-step diagram showing a hand using a tool to clean a circular object, then holding a device with a downward arrow (no text or symbols)natural_image
Three-step diagram showing a hand turning a circular component into a device, then to close the device with a directional arrow (no text or symbols)- Skontrolujte, či jepiest* bezpečnostného ventilu pohyblivý (zatlačte niekol'kokrát na piest prstom)
Používanie
natural_image
Illustration of a hand holding a lid with arrows indicating a process or operation (no text or symbols present)
natural_image
Simple line drawing of a circular container with a lid and internal structure (no text or symbols)natural_image
Two-step diagram showing a hand holding a lid above a perforated lid, with no text or symbols present.natural_image
Diagram of a mechanical component with arrows indicating direction (no text or symbols)Počítadlo minút\*
natural_image
Simple icon of a device with three vertical slots and three flame-like symbols at the bottom (no text or labels)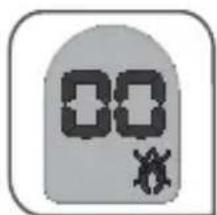
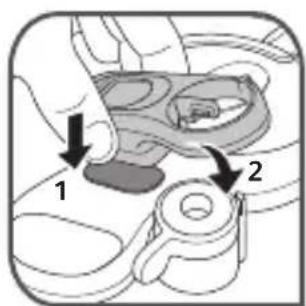
natural_image
Simple line drawing of a trash bin with crossed lines indicating no waste or discharge (no text or symbols)natural_image
Diagram of a mechanical component with arrows indicating motion or force direction (no text or symbols)
natural_image
Diagram of a mechanical device with circular components and a plus sign, no readable text or symbols present.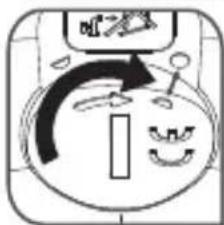
naproti)
■ Netlačte silno na kryt batérie, ked'ho zatvárate.
flowchart
graph LR
    A["Step 1: Stopping a pot with two handles"] --> B["Step 2: Stopping a pot with one handle"]
    B --> C["Step 3: Stopping a pot with one handle"]
■ Umiestnenie rúčok do pracovnej polohy:
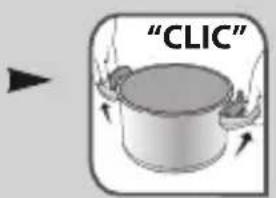
natural_image
Simple line drawing of a cooking pot with a crossed black X mark, placed on a table (no text or symbols)Pred varením
natural_image
Illustration of a cooking pot with a side arm and water nearby (no text or symbols)Fáza 1
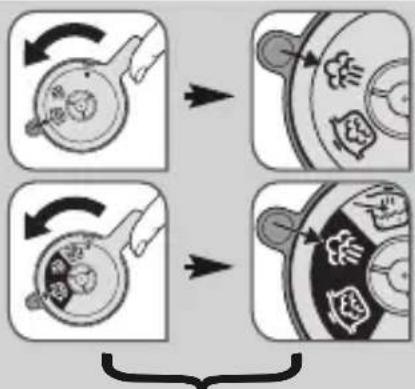
flowchart
graph TD
    A["Step 1: Stopping a pot with food inside"] --> B["Step 2: Stopping a pan with food inside"]
    B --> C["Step 3: Stopping a dish inside with food inside"]
Fáza 2
natural_image
Diagram of a mechanical component with arrows indicating rotation and movement (no text or symbols)Bezpečnost'
natural_image
Diagram of a mechanical device with downward arrows indicating force or movement (no text or symbols)flowchart
graph LR
    A["Initial setup: hand holding a component with arrows indicating upward motion"] --> B["Eye alignment: eye aligned horizontally"]
    B --> C["Close-up of circular lens with internal components"]
    C --> D["Plant growth: plant with visible leaves and a pointed tip on the container"]
natural_image
Three-step diagram showing a hand using a spoon to clean or store food items, with no visible text or symbols.■ Preverite, ali jeležaj* varnostnega ventila premičen (uporabite palico).
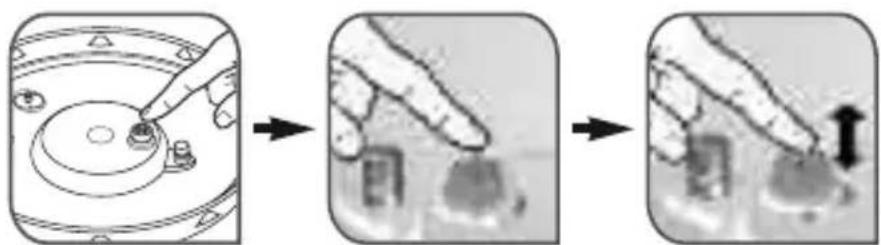
natural_image
Illustration of a hand holding a lid with a handle, showing liquid level and arrows indicating flow (no text or symbols)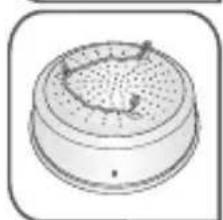
natural_image
Simple line drawing of a circular container with a lid and internal structure (no text or symbols)natural_image
Two-step diagram showing a hand holding a lid above a perforated dish, with no text or symbols present.- Živila v košari za paro* pri kuhanju na paro ne smejo biti v stiku z vodo.
■ V 3-litrskem modelu je običajno, da voda pokriva nekaj dna košare za paro.
natural_image
Diagram of a mechanical component with arrows indicating direction (no text or symbols)Minutni števec\*
natural_image
Simple icon of a device with three vertical slots and three base holes, enclosed in a rounded square frame (no text or symbols)
* odvisno od modela
natural_image
Symbol of a trash bin crossed with diagonal lines, no text or labels present
natural_image
Mechanical assembly diagram showing a lever mechanism with no visible text or symbols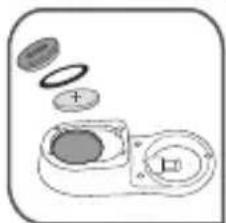
natural_image
Diagram of a camera lens assembly with no text or symbols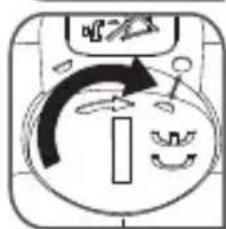
Števca* nikoli ne čistite pod vodo ali v pomivalnem stroju.
natural_image
Simple line drawing of a pot with a crossed black X mark, placed on a stove (no text or symbols)Pred kuhanjem
flowchart
graph TD
    A["Step 1: Cooking pot with food inside"] --> B["Step 2: Condiment with smoke and steam"]
    B --> C["Step 3: Fire extinguisher with smoke and steam"]
    C --> D["Step 4: Cooking pot with condiment and steam"]
natural_image
Illustration of a vintage rotary pot with a side sink and water tap (no text or symbols)Korak 1
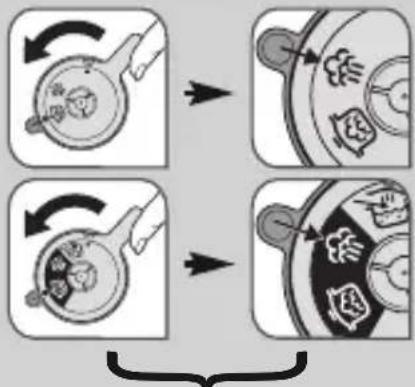
flowchart
graph TD
    A["Step 1: Cooking pot with food inside"] --> B["Step 2: Bag with food inside"]
    B --> C["Step 3: Storage tank with food inside"]
    C --> D["End"]
Korak 2
natural_image
Diagram showing a hand pressing a circular component with arrows indicating rotation (no text or symbols)Varnost
natural_image
Diagram of a mechanical presser with downward arrows indicating force or movement (no text or symbols)Obratoval nega ventila (A), tesnila (I), časovnika* (F), niti posode s prevleko proti prijem anju nikoli ne perite v pomivalnem stroju.
natural_image
Three-step diagram showing a hand pouring liquid into a circular container, then to a close-up of a mechanical component (no text or symbols)natural_image
Illustration of a hand holding a tool interacting with a lid and a perforated lid (no text or symbols)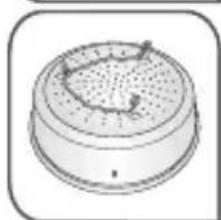
natural_image
Simple line drawing of a circular object with a perforated top and side holes (no text or symbols)■ Stavite ekspres lonac na izvor toplote podešen na maksimalnu jačinu.
- Kada para počne da izlazi kroz ventil, smanjite jačinu izvora toplote i ostavite ga 20 minuta.
■ Nakon 20 minuta, isključite izvor toplote.
- Izravnajte piktogram nadnog ventila (A) sa pokazateljem položaja ventila (C).
■ Kada se sigurnosna cev (D) spusti, lonac više nije pod pritiskom.
■ Otvorite ekspres lonac - sl. 3
■ Operite ga deterdžentom za pranje sudova.
Minimalno i maksimalno punjenje
■ Minimalna količina je 25 cl (2 čaše) - sl. 4.
■ Maksimum 2/3 visine posude, oznaka za punjenje MAX 2 - sl. 5.
- Nemojte koristiti krupnu so u svom ekspres loncu, dodajte sitnu so na kraju kuvanja.
Za određene namirnice:
natural_image
Two-step diagram showing a hand holding a tool above a lid with a downward arrow, next to a circular container with a lid and a handle (no text or symbols)natural_image
Diagram of a mechanical component with arrows indicating direction (no text or symbols)Tajmer za kuvanje\*
Nemojte nikada da koristite tajmer u režimu rada "Lonac".
natural_image
Simple diagram of a device with three vertical slots and three bottom holes, enclosed in a rounded rectangle (no text or symbols)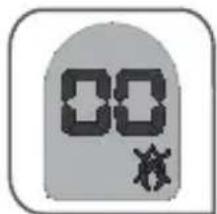
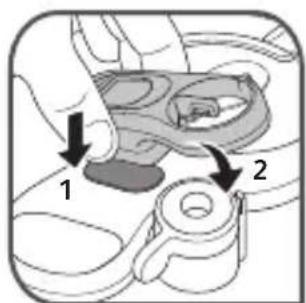
Zamena baterije na tajmeru\*
natural_image
Symbol of a trash bin with crossed x- and y-axes, no text or labels present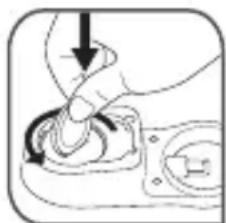
natural_image
Diagram of a hand holding a small object with arrows indicating motion or force (no text or symbols)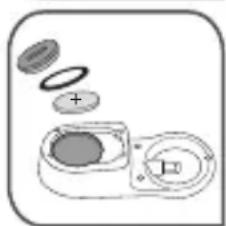
natural_image
Diagram of a mechanical device with internal components and a plus sign, no text or symbols present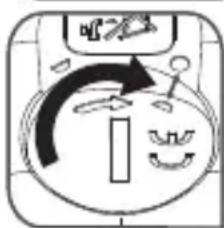
SR
■ Da biste stavili ručke u položaj za upotrebu:
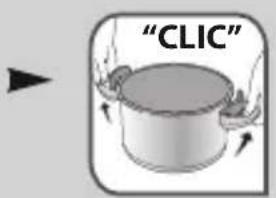
natural_image
Simple line drawing of a pot with a crossed-out black X mark, placed on a stove (no text or symbols)Pre kuvanja
■ Pre svake upotrebe, skinite radni ventil (A) - sl. 11 i pogledajte na dnevnom svetlu da cev za odvod pare (B) nije zapušena - sl. 13.
■ Proverite da li je besbednosni ventil (E) mobilan pogledajte odeljak "Čišćenje" i "Obavezne provere pre svake upotrebe") - sl. 17 i sl. 17bis.
■ Dodajte sastojke i tečnost.
■ Zatvorite ekspres lonac - sl. 2
- Ako ne možete da zatvorite proizvod, operite dihtung pod mlazom vode a zatim ga ponovo vratite na poklopac bez prethodnog brisanja - sl. 18 i uverite se da je ispravno postavljen ispod zareza na poklopcu - sl. 14.
■ Postavljanje radnog ventila (A) - sl 8.

natural_image
Illustration of a mechanical device with a lid and tubing (no text or symbols)- korak
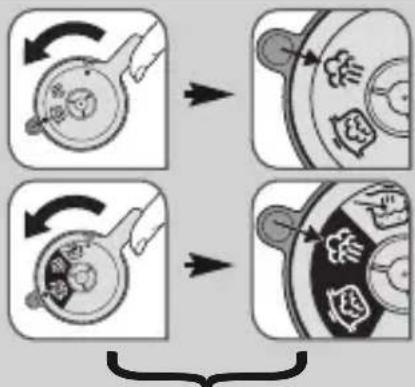
flowchart
graph TD
    A["Step 1: Cooking with ingredients"] --> B["Step 2: Food preparation with ingredients"]
    B --> C["Step 3: Handling with ingredients"]
    C --> D["End"]
- korak
- Za namirnice koje dobijaju na zapremini ili stvaraju penu tokom kuvanja, kao što su pirinač, mahunarke, sušeno povrće, kompoti, bundeva, tikvice, šargarepa, krompiri, riblji fileti, itd, ostavite ekspres lonac nekoliko minuta da se ohladi, a zatim ga ohladite pod hladnom vodom. Pre svakog otvaranja lagano protresite ekspres lonac nakon što proverite da li se bezbednosna cev spustila kako biste izbegli udar pare koji može dovesti do opekotina. Ova procedura je posebno važna prilikom brzog otpuštanja pare ili nakon rashlađivanja lonca pod hladnom vodom. Kada se radi o supama, savetujemo vam da obavljate brzu dekompresiju u hladnoj vodi (pogledajte iznad sliku 1. koraka).
natural_image
Diagram of a hand holding a circular device with internal components and an arrow indicating rotation (no text or symbols)Bezbednost
natural_image
Diagram of a hand pressing down on a mechanical component with arrows indicating downward force (no text or symbols)Nikada ne perite radni ventil (A), dihtung (I), t ajmer *(F), ili posudu u mašini za sudove.
flowchart
graph LR
    A["Plant Care"] --> B["Eye Examination"]
    B --> C["Spract Infection"]
    C --> D["Seedling Application"]
natural_image
Three-step diagram showing a hand using a tool to clean a circular object, then adding a plug into a container, and finally adding a plug into a final container (no text or symbols present)natural_image
Three-step diagram showing a device with a tool interacting with a circular component, before and after close-ups of a device (no text or symbols)natural_image
Illustration of a hand holding a lid with a downward arrow indicating a drop or direction (no text or symbols)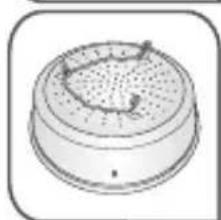
natural_image
Simple line drawing of a circular container with a lid and side port (no text or symbols)natural_image
Illustration of a hand holding a tool interacting with a perforated container (no text or symbols)
natural_image
Simple line drawing of a circular container with internal granular pattern (no text or symbols)natural_image
Cross-sectional diagram of a mechanical component with arrows indicating direction (no text or symbols)Таймер\*
natural_image
Simple icon of a device with three vertical slots and three base holes, enclosed in a rounded square frame (no text or symbols)
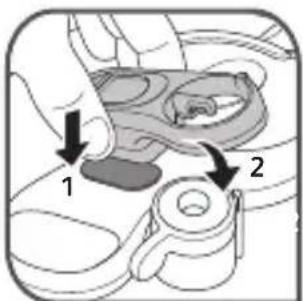
natural_image
Diagram of a mechanical assembly with arrows indicating motion or force direction (no text or symbols)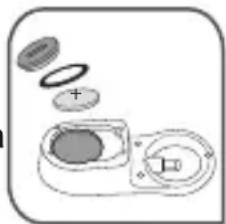
natural_image
Diagram of a mechanical assembly with circular components and a plus sign, no text or symbols present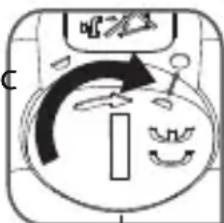
natural_image
Simple line drawing of a pot with a crossed black X mark, no text or symbols presentПеред приготуванням
natural_image
Illustration of a cooking pot with a side dish and a cylindrical container (no text or symbols)Etan 1
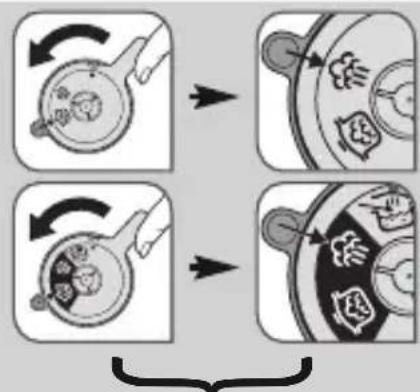
flowchart
graph TD
    A["Step 1: Cooking & Stir-Fried Dish"] --> B["Step 2: Stabilizing Hot Pot"]
    B --> C["Step 3: Transport to Hot Pot"]
    C --> D["End"]
Etan 2
natural_image
Diagram showing a hand holding a circular device with a knob and three flower-like symbols inside, indicating rotation or action (no text or labels)Системи безпеки
natural_image
Diagram of a mechanical device with downward arrows indicating force or movement (no text or symbols)natural_image
Three-step diagram showing a hand using a tool to clean a circular object, then adding a plug into a container, and finally adding a plug into a final container (no text or symbols present)natural_image
Illustration of a hand holding a lid with arrows indicating a process or operation (no text or symbols present)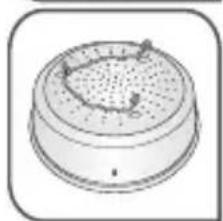
natural_image
Simple line drawing of a circular object with a perforated top and internal structure (no text or symbols)natural_image
Two-step illustration showing a hand holding a tool above a lid with a pointed tip, before and after (no text or symbols)natural_image
Cross-sectional diagram of a mechanical component with arrows indicating direction (no text or symbols)natural_image
Simple icon of a stylized human head with three small windows and three feet, enclosed in a rounded square frame (no text or symbols)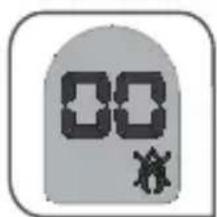
natural_image
Simple icon of a clock face with two digital displays and a small cross symbol (no text or numbers)natural_image
Symbol of a trash bin crossed with diagonal lines, no text or labels present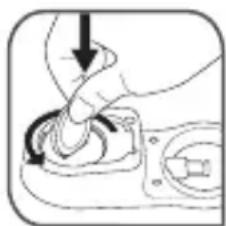
natural_image
Diagram of a mechanical assembly with arrows indicating motion or force direction (no text or symbols)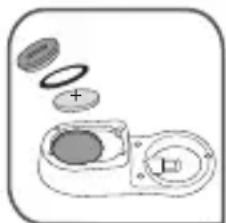
natural_image
Diagram of a mechanical device with internal components and a plus sign, no text or symbols present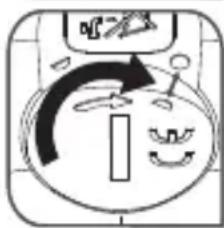
natural_image
Simple line drawing of a pot with a crossed X mark, placed on a stove (no text or symbols)natural_image
Illustration of a cooking pot with a stove and a side table (no text or symbols)Aşama 1

flowchart
graph TD
    A["Step 1: Cooking with ingredients"] --> B["Step 2: Storage with ingredients"]
    B --> C["Step 3: Processing with ingredients"]
    C --> D["End"]
Aşama 2
natural_image
Diagram of a hand holding a circular device with internal components and directional arrow (no text or symbols)TR